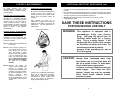
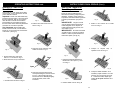
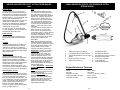
1
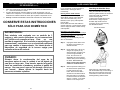
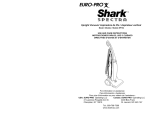
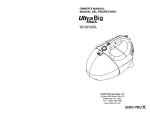
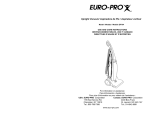
OWNER’S MANUAL
MANUAL DEL PROPIETARIO
Model/Modelo EP903
EURO-PRO Operating LLC
94 Main Mill Street, Door 16
Plattsburgh, NY 12901
Tel.: 800-798-7398
www.sharkcompany.com
IMPORTANT SAFETY INSTRUCTIONS
When using your EURO-PRO Ultra Steam Shark, basic safety precautions
should always be observed, including the following:
1.
Read all instructions before using your
Ultra Steam Shark
2. Use the system only for its intended use.
3. To protect against a risk of electric shock,
do not immerse any part of the system in
water or other liquids.
4. Never yank cord to disconnect from
outlet; instead, grasp plug and pull to
disconnect.
5. Do not allow cord to touch hot surfaces.
Let the system cool completely before
putting away or opening water tank
(removing the safety cap). Wrap cord
loosely around system when storing.
6. Always disconnect system from electrical
outlet when filling with water or emptying
and when not in use. Always turn the
safety cap slowly when opening the water
tank . This will allow any remaining steam
to escape gradually.
7. Do not operate the system with a damaged
cord or plug, or if the appliance or any other
part of the system has been dropped or
damaged. To avoid the risk of electric
shock, do not disassemble or attempt to
repair the Ultra Steam Shark. Return the
system to EURO-PRO Operating LLC (see
warranty) for examination and repair.
Incorrect re-assembly or repair can cause a
risk of electrical shock or injury to persons
when the Ultra Steam Shark is used.
8. Close supervision is necessary for any
appliance being used by or near children.
Do not leave the system unattended while
connected.
9. Burns can occur from touching hot metal
parts, hot water or steam. Use caution
when draining unit after use as there may
be hot water in the unit. Never direct steam
at any person. The steam is very hot and
can cause burns.
10. Do not operate in the presence of
explosive and/or flammable fumes.
11. This appliance is intended only for
household use. Follow all user instructions
in this manual.
12. Never use any chemicals or substance
other than tap water in the machine. Use of
chemicals may damage the machine. Use
of chemicals will automatically void your
warranty.
To reduce the risk of fire, electric shock, or
injury:
• Do not leave the Ultra Steam Shark plugged
in when unattended. Unplug the electrical
cord when not in use and before servicing or
refilling water tank.
• Do not allow to be used as a toy. Close
attention is necessary when used by or near
children, pets or plants.
• Use only as described in this manual. Use
only manufacturer’s recommended
accessories.
• Do not pull cord, use cord as a handle, close
a door on cord, or pull cord around sharp
edges or corners. Keep cord away from
heated surfaces.
• Do not use extension cords or outlets with
inadequate current carrying capacity.
• Turn off all controls as applicable before
unplugging from electrical outlet.
• Do not unplug by pulling on cord. To unplug,
grasp the plug, not the cord.
• Do not handle plug or steam cleaner with wet
hands or operate without shoes.
• Do not put any objects into openings. Do not
use with any opening blocked.
• Store your appliance indoors in a cool, dry
area.
• Keep your work area well lit.
• When in use, never turn the appliance over
or on its side. Never direct steam towards
people, animals or plants.
• Do not immerse the steam cleaner into water
or other liquids. Always unplug the power
cord from the electrical socket when filling the
steam cleaner.
• Do NOT add cleaning solutions, scented
perfumes, oils or any other chemicals to
the water used in this appliance as this
may damage the unit or make it unsafe for
use. Use tap water or distilled/purified
water if the tap water in your area is very hard.
Modelo EP903
GARANTÍA LIMITADA DE 1 AÑO
EURO-PRO Operating LLC garantiza este artefacto contra defectos de materiales y de fabricación
por un (1) año a partir de su fecha de compra cuando se le da uso doméstico normal por el
comprador original únicamente. La tarjeta de registro de propiedad que se adjunta, debe llenarse
y devolverse por correo dentro de los 10 días de la compra. Esto es esencial para que la garantía
entre en efecto en caso que se presentase algún problema con este artefacto.
Si este artefacto presentase algún defecto cubierto bajo los términos de esta garantía durante el
periodo de un año, EURO-PRO Operating LLC, a su criterio, reparará o reemplazará cualquier
pieza defectuosa si el comprador original lo devuelve con flete prepagado a EURO-PRO
Operating LLC, 94 Main Mill Street, Door 16, Plattsburgh, NY 12901. El cliente debe incluir el
documento que pruebe la fecha de compra y un cheque por $9.95 para cubrir el costo de
manipuleo, reembalaje y flete de retorno al cliente*.
La responsabilidad de EURO-PRO Operating LLC se limita únicamente al costo de las piezas que
se cambien o al cambio del artefacto completo, a criterio de EURO-PRO. LOS COSTOS DE
MANO DE OBRA NO ESTÁN INCLUIDOS.
Esta garantía no cubre piezas sujetas a desgaste normal por su uso y no se aplica a artefacto
alguno que haya sido alterado, intervenido físicamente o usado comercialmente. Esta garantía
tampoco cubre daños causados por maltrato, mal uso, manipulación negligente,
empaquetamiento defectuoso, manipulación en tránsito (por un transportista común).
Esta garantía se extiende al comprador original del artefacto y excluye toda otra garantía legal y/o
convencional. La responsabilidad de EURO-PRO Operating LLC, si alguna, se limita a las
obligaciones específicas expresamente asumidas bajo los términos de esta garantía limitada. En
ningún caso será EURO-PRO Operating LLC responsable por daños incidentales o
consecuenciales, o de ninguna otra naturaleza. Algunos Estados no permiten la exclusión o la
limitación de daños incidentales o consecuenciales, por lo que lo antedicho podría no aplicarse a
usted.
Esta garantía le otorga derechos específicos y también podría tener otros derechos que varían de
un Estado a otro.
Comprador:____________________________________________________________________
Fecha de Compra: ______________________________________________________________
Tienda o Almacén: ______________________________________________________________
*Importante: Empaque el artefacto cuidadosamente para evitar que se dañe durante el transporte.
Antes de empaquetar el artefacto, asegúrese de rotularlo con su nombre completo, dirección y
teléfono, y de incluir una nota con los datos de la compra, modelo, número de serie y una
explicación de lo que usted cree que sea el problema. Recomendamos asegurar el paquete
(porque los daños durante su transporte no están cubiertos por esta garantía). En el exterior del
paquete, además de la dirección arriba indicada, marque “ATTENTION CUSTOMER SERVICE”.
TARJETA DE REGISTRO DE PROPIEDAD
Para validar la Garantía Limitada precedente, por favor llene esta tarjeta de registro y remítala
por correo dentro de los diez (10) días siguientes a la compra. El registro nos permitirá
contactarlo en el poco probable caso de tener que enviarle una notificación de seguridad. Al
enviar esta tarjeta, usted está aceptando haber leído y entendido las instrucciones para el uso y
las advertencias en el instructivo que se acompaña.
REMITA A: EURO-PRO Operating LLC, 94 Main Mill Street, Door 16, Plattsburgh, NY 12901
Comprador: ………………………….……………………………………………………………………..
SAVE THESE INSTRUCTIONS
For Household Use Only
Dirección: …………………………………………………………………………………………………...
Ciudad: …………………………..
Estado/Prov.………………………………………………………...
Nombre y Dirección de la tienda o almacén donde se compró: …………………………….………
Fecha de Compra: …………………….………
1
Rev. 05/02A
Impreso en Italia
EP903
MODELO:..…………………………………………...
26
CUIDADO Y MANTENIMIENTO
Si
usted
siempre
usa
agua
desmineralizada o destilada, no es
necesario limpiar el tanque hervidor,
sólo enjuagarlo.
Enjuague Interior del Vaporizador;
Normalmente un enjuague interior
periódico del vaporizador eliminará
los residuos. Se recomienda hacerlo
una vez cada 10 a 15 veces que ha
usado el tanque completo. Llene el
tanque hervidor con agua y sacúdalo
vigorosamente. Voltee la unidad para
vaciar el agua y los residuos
desprendidos.
Instalación de la Correa para el Hombro
El uso de la correa desmontable para el
hombro provee mayor libertad de
movimiento cuando se necesita ambas
manos para las diversas tareas de
limpieza.
Para instalar la correa en el
vaporizador, simplemente conecte sus
ganchos en los anillos en el cuerpo del
vaporizador. Vea las ilustraciones a
continuación.
ADDITIONAL IMPORTANT SAFEGUARDS cont.
1. To avoid circuit overload, do not operate another appliance on the same socket
(circuit)
2. If an extension cord is absolutely necessary, a 15 ampere 14 gage cord should
be used. Cords rated for less amperage may overheat. Care should be taken to
arrange cord so that it cannot be pulled or tripped over.
3. Do not leave unattended when the system is connected to a power
supply/electrical outlet.
SAVE THESE INSTRUCTIONS
FOR HOUSEHOLD USE ONLY
Puntos de Enganche
Limpieza de Sarro del Vaporizador:
Si el agua potable en su zona
contiene un alto nivel de calcio, y la
ha usado en el vaporizador, debe
eliminarse el sarro acumulado una
vez cada 10 a 15 veces que ha usado
el tanque completo.
WARNING:
This appliance is equipped with a
grounded-type 3-wire cord (3-prong
plug). This plug will only fit into an
electrical outlet made for a 3-prong
plug. This is a safety feature. If the
plug should fail to fit the outlet, contact
an electrician to replace the outlet. Do
not attempt to defeat the safety
purpose of the grounding pin, part of
the 3-prong plug.
CAUTION:
Always drain condensed water from
hose before use or if unit has been left
idle for a period of time. To drain hose,
direct nozzle into an appropriate
container or sink and depress hand grip
steam trigger. Once hose has been
drained, normal use may be resumed.
Never direct nozzle towards people,
animals or plants.
Paso 1: Desenchufe el vaporizador de
la corriente.
Paso 2: Llene el tanque hervidor con
una solución de 473 ml (16
Onz.) de agua con 118 ml (4
Onz.) de vinagre y déjelo
reposar hasta el día siguiente
o por un mínimo Aprox. de 8
horas. No cierre la tapa. NO
use el vaporizador mientras
tiene la solución limpiadora
de sarro en el tanque
hervidor.
Paso 3: Después del tiempo de
remojo, voltee la unidad para
evacuar la solución del
tanque hervidor. Debido a que
quedará un pequeño residuo
de solución limpiadora en el
tanque
hervidor,
será
necesario enjuagarlo 2 o 3
veces con agua limpia. Ahora
el vaporizador está listo para
usarse.
Cuando use el vaporizador Ultra Steam
Shark con la correa para el hombro,
evite mecer o inclinar el vaporizador
excesivamente porque podría hacer
que el agua entre a la manguera y
salga por la boquilla de vapor.
25
2
GETTING TO KNOW YOUR ULTRA STEAM SHARK
USOS SUGERIDOS PARA EL VAPORIZADOR
ULTRA STEAM SHARK (Cont.)
Consejos
El vaporizador Ultra Steam Shark tiene
muchos usos que no se han
mencionado. Ellos se han indicado
sólo para dar una idea general de lo
que se puede hacer con esta unidad;
pero las formas en que se pueden
emplear los accesorios y escobillas, en
muchos casos son universales.
Siempre es de gran ayuda tener
disponible una toalla de felpa o de
papel lista para recoger la humedad y
los residuos. Las toallas de 100%
algodón son las que trabajan mejor.
Zonas Exteriores
Para limpiar el interior de su automóvil use
la escobilla para pisos forrada con una
toalla de felpa par limpiar los tapices y el
interior de la misma forma que dentro de la
casa. No deben usarse las cerdas de la
escobilla en cuero, deben estar forradas
con una toalla. Para limpiar los detalles de
las ruedas use la boquilla concentradora de
vapor y la escobilla para detalles. Las
ventanas exteriores se limpian mejor
aplicando vapor con la boquilla
concentradora y luego pasando una toalla
de papel.
13
Usted puede limpiar las escobillas con
el vaporizador. Para limpiar la
escobilla para pisos, sosténgala de un
extremo y use la boquilla
concentradora para soplar la suciedad
hacia un contenedor de basura. Para
limpiar la escobilla para detalles,
sosténgala con un alicate y sople la
suciedad como se indicó arriba, o
colóquela sobre el lavadero de vajilla.
Use la escobilla para detalles para limpiar
bicicletas y dependiendo del tamaño de las
superficies, también para equipos
Plantas Artificiales
Use la boquilla concentradora sin escobilla
para soplar el polvo y la suciedad.
1.
2.
3.
4.
5.
6.
Hand Grip Steam Trigger
Power “On” Light (Amber)
Safety / Filler Cap
Hand Grip
Flexible Steam Hose
Extension Tubes (2)
7.
8.
9.
10.
11.
12.
13.
Floor Brush
Detail Brush
Glass & Tile Squeegee
Concentrator Nozzle
Shoulder Strap
Angle Adapter
Filling Funnel
Technical Specifications
Voltage:
Power:
Water Capacity:
Max. Steam Temperature:
Steam Generator:
120V., 60Hz.
1450 Watts
27 US Fl. Oz. (798 ml.)
240°F
Stainless Steel
3
Ropa
Un vaporizador es excelente para eliminar
arrugas de las telas. Simplemente vaporice
las superficies desde una distancia de 30 a
45 cm (12” a 18”). El vapor seco elimina las
arrugas sin dejar la ropa mojada como los
vaporizadores comunes de ropa.
Nota: Frote las áreas limpiadas
inmediatamente antes que se sequen.
Cuando se limpie el horno, use la
escobilla para detalles alrededor de
los elementos calentadores y para las
bandejas de recojo de goteos.
También úsela para limpiar las ranuras
y lugares de acceso difícil.
Nicotina y Alquitrán
La nicotina y el alquitrán se disuelven con
temperaturas altas y se convierten en una
película de aceite levemente amarilla con
la consistencia del aceite para máquina
de cocer. Cuando un paño de felpa
envuelto alrededor de la escobilla toca la
película de nicotina y alquitrán, ésta se
disuelve inmediatamente y la toalla la
absorbe. Puede sacarla de las superficies
planas tan pronto usted pase la escobilla
por la superficie.
Refrigerador:
Use la boquilla concentradora para
limpiar la suciedad de la máquina de
hacer hielo y de los sellos de las
puertas. El vapor no resecará ni rajará
los sellos como los químicos lo hacen
frecuentemente. Así también se
pueden limpiar los hornos de
microondas y todos los recovecos de
los abrelatas, de otros artefactos
menores de cocina y las manchas
alrededor de los sellos de las puertas.
Nota: Siempre desenchufe los
artefactos eléctricos antes de
limpiarlos.
Para limpiar los tableros de los
mostradores, use la escobilla para
pisos envuelta con una toalla de felpa.
Para las zonas excesivamente sucias,
primero afloje la suciedad con la
escobilla sin toalla, luego pase la
escobilla envuelta en la toalla de felpa.
Remoción de Cera, Alquitrán, Etc.
Muchas manchas sólo están pegadas a la
superficie de los materiales y salen fácil y
rápidamente, “soplando” el exceso de
material de la superficie desde un costado
con la boquilla concentradora de vapor.
Sostenga la toalla de felpa hacia un
costado para atrapar los residuos que la
boquilla sopla. Nota: Siempre aspire los
residuos sueltos de la superficie antes de
aplicar el vapor.
24
USOS SUGERIDOS PARA EL VAPORIZADOR
ULTRA STEAM SHARK (Cont.)
Ventanas, Vidrios y Espejos
Muebles de Jardín
Use el escurridor para ventanas de doble
borde. Trabaje con el chorro de vapor
hacia abajo, pasando el vaporizador de
arriba hacia abajo. Para sacar el agua del
vidrio, pase el escurridor con el
vaporizador apagado. Para no dejar rayas
verticales, haga movimientos laterales
sobre la superficie al hacer los pases
verticales.
Use cualquiera de las escobillas
dependiendo del tamaño de la
superficie. Al limpiar muebles de
resina plástica, haga pasadas
rápidas.
FEATURES OF ULTRA STEAM SHARK
1. No more detergents or
chemicals. Just add water.
4. Heavy-duty crush-proof
4-ft hose.
2. Lightweight & Portable
5. Versatile, quick-change
accessories
Persianas
Use la escobilla para detalles
moviéndola sobre la superficie a una
velocidad que permita que el vapor
penetre. En las persianas de PVC
haga pasadas rápidas. En las
persianas de tela, primero haga una
prueba para determinar la firmeza de
los colores.
Superficies de Fibra de Vidrio o de
Acero Inoxidable
Use el escurridor para ventanas de doble
borde. Trabaje con el chorro de vapor
hacia abajo, pasando el vaporizador de
arriba hacia abajo. Para no dejar rayas
verticales, haga movimientos laterales
sobre la superficie al hacer los pases
verticales.
Baños
En las áreas de las bañeras o duchas,
use la escobilla para detalles, para
limpiar la mugre acumulada en las
ranuras entre las losetas, carriles de
la puerta de la bañera, de los lugares
de difícil acceso y zonas demasiado
sucias. El escurridor para ventanas y
losetas de doble borde es el
instrumento más eficiente para limpiar
el resto de las superficies. Deje
bastante tiempo para que el vapor
penetre la superficie. Esto es
especialmente útil en las superficies
del baño donde hay azulejos con
ranuras de cemento.
Consejo: Una vieja idea para pulir acero
después de limpiarlo en la forma indicada,
consiste en frotarlo con agua
efervescente.
Mugre de Jabón
La capa de suciedad dejada por el jabón
se disuelve casi inmediatamente con una
combinación de calor y humedad.
Enjuague la superficie con una pequeña
cantidad de agua después, o repase una
vez más con una toalla de felpa limpia.
6. Indoor and Outdoor Use:
Bathrooms, kitchens, living
areas, pet areas and
appliances.
Automotive, patio and
windows.
3. Stainless Steel Boiler:
Non-corroding, stainless
steel boiler. Welded
construction.
La eliminación de la mugre de jabón
acumulada en los azulejos y entre sus
ranuras así como en las puertas de la
ducha es más fácil con el vaporizador
Ultra Steam Shark.
Notas: Algunas veces la mugre del jabón
se convierte en una capa dura por los
minerales del agua. Si este fuese el caso,
primero ablande la superficie pasando el
vaporizador con la escobilla para detalles,
rociando la superficie o frotándola con
limón, lima, agua gaseosa o vinagre.
Para limpiar los sanitarios, use la
boquilla concentradora con o sin la
escobilla para detalles. Limpie el
exceso de humedad y los residuos
con una toalla de tela o de papel.
Si el movimiento es demasiado lento, la
mugre de jabón se puede secar y formar
gránulos en la superficie. La superficie se
volverá arenosa. Si esto sucede, vuelva a
aplicar vapor a la superficie con la
escobilla para detalles y a limpiar.
También use la escobilla para detalles
para limpiar lavaderos, lavamanos y
grifería.
23
4
OPERATING INSTRUCTIONS
Components
Step 5: Allow approximately 4-6
minutes for vapor to reach its
working temperature and
pressure.
Step 6: Connect desired attachments
onto the Flexible Steam Hose.
Step 7: Upon initial use, some water will
come out from the nozzle of
the attachment. This is unvaporized
water in the hose and is normal.
Power “On” Light (amber): This light
will illuminate when the unit is plugged
into the 120V~ wall outlet and will
remain on until the unit is unplugged.
CAUTION: Read the instructions for
“Filling the Water Tank” before opening
the Safety Cap. Always depress hand
grip steam trigger until all pressure/
steam has been vented from boiler.
CAUTION: Always unplug before
filling.
IMPORTANT: Do NOT add cleaning
solutions, scented perfumes, oils or any
other chemicals to the water used in this
appliance. Use tap water or
distilled/purified water if the tap water
in your area is very hard.
Filling Your Ultra Steam
Shark With Water
IMPORTANT: Always insure that the unit
is “UNPLUGGED” from the wall receptacle
prior to initial filling or re-filling the water
tank. Never attempt to fill this unit under
a water tap, always use the filling funnel
provided. Failure to follow these steps will
cause the water tank to overfill and may
pose an electrical safety hazard.
IMPORTANT: When the Ultra Steam
Shark has run out of water, steam
output will cease.
WARNING: Always drain
condensate from hose before use or
if unit has been left idle for a period
of time. To drain hose, direct nozzle
into an appropriate container or sink
and depress hand grip steam trigger.
Once hose has been drained, normal
use may be resumed. Never direct
nozzle towards people, animals or
plants.
USOS SUGERIDOS PARA EL VAPORIZADOR ULTRA
STEAM SHARK
Pisos de Madera, Vinilo y Mármol
Limpieza de Manchas (Alfombras)
Use la escobilla para el piso con una
toalla. Mueva la escobilla por el piso
como si estuviese trapeando. Cuando el
paño esté sucio, puede darle la vuelta o
cambiarlo. Si está limpiando una
superficie muy sucia, puede pasar la
escobilla varias veces en forma lenta. Si
fuese un piso de madera, haga pasadas
rápidas para evitar que el calor y la
humedad se acumulen en la madera.
Limpiando con un paño sobre la escobilla
no afectará el brillo del piso.
Use la boquilla concentradora con o sin
la escobilla para detalles. Mueva
lentamente sobre la suciedad para
permitir que el vapor penetre. Absorba
la humedad de la mancha con una toalla
seca (no la frote). Repita tantas veces
como sea necesario para sacar la
mancha. Aspire la alfombra únicamente
después que se haya secado
completamente.
Antes de comenzar, siempre haga una
prueba de firmeza de los colores en una
zona que pase desapercibida.
Para Sacar la Cera:
Use la escobilla para el piso sin toalla en
las superficies grandes y la escobilla
pequeña para las esquinas y espacios
estrechos haciendo pasadas lentas.
Limpie un área pequeña a la vez. Retire
la cera emulsionada del piso. Cuando se
haya sacado toda la cera, limpie el piso y
las escobillas inmediatamente con agua
para evitar que se endurezcan. Repase la
superficie con la escobilla envuelta en una
toalla para sacar cualquier residuo de
cera antes de volver a encerar.
Si el vaporizador Ultra Stream Shark no
sacase las manchas rebeldes, se
recomienda usar un champú para
alfombras disponible en el comercio.
NO eche soluciones limpiadoras,
perfumes, esencias aromáticas, aceites
ni otros químicos al agua que use en
esta unidad, porque podrían dañarla o
hacerla insegura al usarla.
Tapicería
Use la escobilla para detalles envuelta
con una toalla de felpa blanca limpia
conectada directamente al mango.
Frote con pasadas rápidas sin
presionar fuertemente para evitar que
el tapiz se moje. Sea paciente con las
manchas rebeldes, frótelas
suavemente por no más de un minuto a
la vez, luego espere cinco minutos para
que se seque y repita el proceso. Frote
circularmente, de adelante hacia atrás
o de un costado a otro hasta cubrir toda
la superficie. Termine pasando la
escobilla en una dirección para darle
apariencia uniforme a la tela.
Para Limpiar Pisos Encerados:
Envuelva la escobilla para pisos con una
toalla y haga pasadas rápidas para sacar
la suciedad, pero no la cera.
Step 1: Before filling the Steam Shark,
make sure that the unit is NOT
plugged in.
Pisos de Vinilo:
No permita la acumulación de calor en
ningún tipo de piso de vinilo porque se
ablandará lo suficiente para afectar su
textura. Haga pasadas rápidas sobre el
vinilo.
Step 2: Turn Safety/Filler Cap counter
clockwise until removed. (See
caution above.)
Step 3: While supporting the unit at a
45 degree angle (see illustration)
Place Water Filling Funnel in
tank filling opening and add
27 US Fl. Oz. (798 ml) of water.
Do not overfill.Replace the
Safety Filler Cap.
Heating time is approximately
4-6 minutes with cold water.
WARNING: Allow unit to cool for 5
minutes before refilling. When
refilling the machine while it is still hot,
the first drops of water might bubble up.
Use caution when opening the
Safety/Filler Cap as cap may become
hot during use and escaping steam
can cause scalding.
Step 4: Plug the unit into a standard
(120 volt, grounded) wall
receptacle. The power light will
now illuminate.
5
Pisos de Losetas:
Tenga la escobilla para pisos envuelta
con una toalla; pero comience limpiando
las gruñas entre las losetas con la
escobilla para detalles conectada a un
tubo de extensión. Luego reemplace la
escobilla para detalles con la escobilla
para pisos y pásela sobre las losetas para
quitar el exceso de humedad y los
residuos. Para superficies de losetas
demasiado sucias, quite la toalla y frótelas
con la escobilla. Limpie la superficie
frotándola antes que se seque.
CUIDADO: Siempre pruebe si el color de
la tela no se va a desteñir, especialmente
los tonos rojos y azules. Para ello
primero pruebe frotando un paño caliente
húmedo en una pequeña superficie del
mueble, como en la parte posterior del
espaldar u otro lugar que no esté
fácilmente a la vista. Si el color se
transfiere a la toalla, puede ser necesario
lavar la pieza en seco.
22
INSTRUCCIONES PARA OPERAR (Cont.)
Conexión de los Accesorios
a la Manguera Flexible del
Vaporizador
Escurridor de Doble Borde para
Vidrios y Losetas
Este accesorio es muy útil para limpiar
ventanas grandes, materiales plásticos
y superficies de losetas, azulejos o
mármol.
Para usar: Conecte el escurridor
al mango o, para superficies
difíciles de alcanzar,
a un tubo de extensión.
Aplique abundante vapor, frote con el
borde esponjoso y después quite el
exceso de agua y la suciedad con el
borde escurridor.
CUIDADO: Cuando lave ventanas
siempre evite los cambios súbitos de
temperatura para evitar que el vidrio se
raje o rompa.
Boquilla Concentradora
Este accesorio es muy útil para limpiar
superficies difíciles de alcanzar. Es
ideal para radiadores, jambas de
puertas y ventanas, persianas y
sanitarios.
La boquilla concentradora
encaja directamente en
el mango o puede usarse
con los tubos de extensión.
Escobilla para Detalles
Es lo mejor para limpiar la mugre
de las gruñas entre las losetas
de cerámica o mármol.
Para Usar: Inserte la escobilla en el
extremo de la boquilla concentradora
presionándola. A su vez, la boquilla
puede instalarse directamente en el
mango o en los tubos de extensión.
Consejos para Usar el
Vaporizador
Agua
• Use agua potable para todas las
aplicaciones.
• Si en su zona, el agua potable fuese
demasiado dura, use agua
desmineralizada o destilada cuando
aplique vapor a telas de colores
claros para evitar que las durezas
del agua las manchen.
IMPORTANTE: NO le eche soluciones
limpiadoras, perfumes, esencias
aromáticas, aceites ni otros químicos al
agua que use en esta unidad. Si en su
zona el agua potable fuese muy
dura, use agua destilada o
purificada.
Temperatura
• La temperatura del vapor en la punta
de la boquilla es de 104 a 115°C
(220 a 240 °F).
• A 15cm (6”) de distancia de la
boquilla, la temperatura del vapor
cae a 38°C (100 °F).
ADVERTENCIA: La toalla envuelta
alrededor de la escobilla puede
calentarse lo suficiente para quemar.
Asegúrese que la toalla se enfríe antes
de agarrarla.
Uso de Toallas
• Para mejores resultados use toallas
blancas 100% de algodón.
• Use toallas del tamaño correcto 20 x
43cm (8”x17”) para que la toalla
envuelva las cerdas de la escobilla y
entre bajo las pinzas sujetadoras.
• El propósito de usar una toalla es
para que absorba la humedad y la
suciedad que se extrae. Siempre use
toallas secas. Las toallas mojadas
embarrarán la suciedad.
• Lave las toallas con detergente y
blanqueador.
• Cuando use ablandadores
perfumados para telas al lavar las
toallas, el olor se despedirá al aire al
usarlas en el vaporizador.
Limpieza Eficiente
•
Para limpiar superficies
verticales, siempre frote de arriba
hacia abajo para que el agua no
ensucie las partes ya limpias.
•
Evite cambiar brochas
repetidamente durante la
limpieza.
•
Comience con la escobilla más
pequeña para primero limpiar las
manchas y esquinas.
•
Limpie la suciedad tan pronto
como sea posible, de lo contrario
se secará y se volverá a pegar a
la superficie.
21
OPERATING INSTRUCTIONS cont.
Refilling Your Ultra Steam
Shark With Water
Using Your Ultra Steam
Shark with Floor Brush
Step 1: Connect one of the extension
tubes to the hand grip on the
flexible steam hose. To
Step 2: Depress and hold the hand grip steam
attach the extension tubes
trigger to ensure that any remaining
one onto the other or
pressure in the boiler has been
onto the hand grip, press the
released.
locking button ensuring that it
fits into the hole. (See
Step 3: Carefully loosen the safety/filler cap
illustrations.) To disconnect,
by turning counter clockwise. Any
repeat the operation by
residual steam will be released below
pressing the locking button
the safety/filler cap if the tank has not
and pulling the two sections
been completely vented. When the
apart.
hissing stops and the last of the
Locking
steam has been released, remove
Button
the filler cap. Allow unit to cool down.
Step 1: Disconnect Electrical Power Cord
from wall outlet.
CAUTION: Allow unit to cool for 5 minutes
before refilling. If the Ultra Steam Shark is
still hot, there is a risk that water will be
squirted back during filling and cause
scalding. Extreme care should be taken
when refilling the unit. Use caution when
opening the Safety/Filler Cap as cap may
become hot during use and escaping steam
can cause scalding
Hand Grip
Locking
Button
Step 4: Allow the vapor steam cleaner to
cool for 5 minutes before re-filling
with water.
Step 5: Refill water tank with water using the
filling funnel.
Extension Tubes
NOTE: Fit floor brush with the angle
Step 6: Firmly screw the safety/filler cap
back onto the unit by turning
clockwise.
Step 7: Connect power cord to the wall
outlet.
adapter on to the extension
tube.
Step 2: If the angle adapter is not attached
to the floor brush, hold the brush
with its bristles up in your left hand.
With the angle adapter pointing
downward, insert it into the
hole in the back of the brush, then
turn the angle adapter 180°.
Step 3: Insert the electrical power cord into
the wall outlet. Heating time is
approximately 3-5 minutes with cold
water. Filling the steam generator
with hot water will shorten heat up
time.
6
OPERATING INSTRUCTIONS cont.
INSTRUCCIONES PARA OPERAR (Cont.)
Attaching a Towel to the
Floor Brush
Uso de una Toalla en la
Escobilla para Pisos
100% white terry cloth towel can be fitted
on this brush, so as to absorb the dirt and
protect delicate surfaces.
Important: Please note that bristles may
break through thin towels. We recommend
that two (2) towels, laid one on top of the
other be used. This will ensure that the
brush bristles do not break through and
that the towels will be sufficiently absorbent
and retain as much dirt as possible.
Puede colocarse una toalla de felpa
blanca en esta escobilla para que
absorba la suciedad y proteja los pisos
delicados. También puede usarse en
superficies verticales lavables siguiendo
el mismo procedimiento que para el
piso.
Fig. C
4. Fold the other side of the towel as
shown in Fig. C.
Very Important: When installing the
towels to the floor brush, ensure that the
towels do not cover the front and the back
of the brush. (See fig. E)
IMPORTANTE: Tenga en cuenta
que las cerdas podrían atravesar las
toallas delgadas. Si no dispone de
toallas suficientemente gruesas, use
dos toallas a la vez..
Fig. C
4. Doble el otro extremo de la toalla
como en la Fig. C.
IMPORTANTE: Al instalar las toallas
al capillo de piso, confirme que dichas
toallas no cubran la parte delantera ni
trasera del capillo. (Vea fig. E.)
Fig. D
Fig. D
5. Place the corner under the cloth
holder as shown in Fig. D.
Fig. A
5. Coloque la esquina bajo
sujetador como en la Fig. D.
el
Fig. A
1. Prepare white terry cloth towel:
size 8” x 17” as shown in Fig. A.
2. Place the brush on top of the towel.
Open
1. Prepare la toalla de felpa blanca
tamaño 20 x 43cm (8”x17”), como
en la Fig. A.
2. Ponga la escobilla sobre la toalla.
Open
Fig. E
6. Place the towel around the brush,
and repeat folding the towel as shown
in Fig. E. When folding the towel,
leave some slack. Do not pull tightly
around the brush, leave some
looseness.
Fig. B
3. Fold the towel as shown in Fig. B
Fig. E
Fig. B
6. Coloque la toalla alrededor de la
escobilla y repita el doblez en el otro
extremo como se muestra en la Fig.
E. Al doblar la toalla, déjela algo
suelta. No la ajuste alrededor de la
escobilla.
3. Doble la toalla como en la Fig. B
20
7
INSTRUCCIONES PARA OPERAR (Cont.)
OPERATING INSTRUCTIONS cont.
Uso del Vaporizador con Escobilla
para Pisos
Relleno de Agua del Vaporizador
Paso 1: Desenchufe el cordón del
tomacorriente de la pared.
Paso 2: Apriete y mantenga
presionado el gatillo del
mango para asegurarse de
drenar todo el vapor y la
presión remanentes.
Paso 3: Afloje cuidadosamente la
tapa de seguridad de la
toma de agua girándola
contra el sentido del reloj.
Si el tanque no se hubiese
drenado completamente,
cualquier residuo de vapor
saldrá por abajo de la tapa.
Cuando el silbido y el
residuo de vapor cesen,
quite la tapa y permita que
la unidad se enfríe.
Paso 1: Conecte uno de los tubos de
extensión a la manguera
flexible, y ésta al mango.
Para conectar los tubos
entre sí, o directamente al
mango, presione el botón de
seguro para cerciorarse que
encaje en el orificio. (Vea la
ilustraciones). Para
desconectar, repita la
operación presionando el
botón de seguro y tirando de
las dos secciones de tubo.
Attaching the Accessories
to the Flexible Steam Hose
IMPORTANT: Do NOT add cleaning
solutions, scented perfumes, oils or any
other chemicals to the water used in
this appliance. Use tap water or
distilled/purified water if the tap
water in your area is very hard.
Dual Edge Glass & Tile Squeegee
This attachment is very useful for
cleaning large windows, plastic material,
ceramic, tiled or marble surfaces.
Temperature
• The vapor temperature at the tip of
the nozzles is between 220°F and
240 °F.
• The temperature of the vapor falls to
100 °F at a distance of 6 inches
from the nozzle.
To use: Connect the tile
squeegee to the hand
grip or use with
extension tube for
hard to reach surfaces.
Apply steam abundantly, rub with the
soft spongy edge, then remove excess
water and dirt with the glass wiping
edge.
WARNING: A towel wrapped around
the brush can become hot enough to
burn. Make sure that you let the towel
cool off before touching it.
CAUTION: When cleaning windows,
always avoid any sudden changes in
temperature to prevent glass breakage
or cracks.
Botón de
Seguro
CUIDADO: Permita que la unidad se
enfríe por unos 5 minutos antes de
rellenar agua. Si se rellena mientras
aún está caliente, existe el riesgo
que escupa agua caliente durante
el relleno de agua y cause
quemaduras. Se debe tener
extremo cuidado al rellenar la
unidad. Tenga cuidado al abrir la
tapa de seguridad porque podría
haberse calentado durante el uso y
el vapor que fugue puede causar
quemaduras.
Mango
Botón de
Seguro
Paso 4: Permita que el vaporizador
se enfríe por 5 minutos antes
de rellenar agua.
Paso 5: Use el embudo para rellenar
el agua..
Paso 6: Cierre y ajuste la tapa
firmemente girándola en el
sentido del reloj.
Paso 7: Enchufe el cordón al
tomacorriente de la pared.
19
Tubos de Extensión
NOTA: Conecte la escobilla para
pisos al codo adaptador, y
éste al tubo. (Vea el Paso
2 en la Pág. 7)
Paso 2: Si el codo adaptador no está
conectado a la escobilla para
pisos, sostenga la escobilla con
las cerdas hacia arriba, en la
mano izquierda. Luego, con el
codo adaptador apuntando
hacia abajo, insértelo en el
orificio en la parte de atrás de
la escobilla y gire el codo
adaptador en 180°.
Paso 3: Enchufe el cordón en el
tomacorriente de la pared. El
tiempo para que el agua fría se
caliente es de Aprox. 3 a 5
minutos. El tiempo es menor si
se rellena con agua caliente.
Concentrator Nozzle
This attachment is very useful for
cleaning surfaces that are difficult to
reach. It is ideal for radiators, door and
window jambs, shutters and
sanitary fixtures. The
concentrator nozzle will
fit directly onto the
handgrip or may be
used with extension tubes
Detail Brush
It is best for cleaning grout in-between
the tiles, ceramic and marble.
To use: Push the detail
brush on the end of the
concentrator nozzle, which may be used
directly on the hand grip or with extension
tubes
Using Towels
• For best results use 100% cotton
white terry cloth towels.
• Use correct size (8” x 17”) of towel to
allow you to wrap the towel around
the brushes and clip it under the
spring loaded cloth holder.
• The purpose of using a towel is to
absorb moisture and dirt being
removed. Always use dry towels.
A wet towel will smear the dirt.
• Wash towels with strong detergent
and bleach.
• Using scented fabric softener while
washing the towels will cause the
scent to be released into the air
when using the towels with your
steam system.
Efficient Work
• For vertical surfaces, wipe always
from the top down, in this way the
dirty water will not soil surfaces
already cleaned.
• Avoid changing brushes back and
forth while cleaning.
• Start with the smallest brush to
clean tight spots and corners first.
• Wipe dirt as soon as possible,
otherwise it will dry and re-adhere
to the surface.
Tips On How To Use Your
System
Water
• Use tap water for all your cleaning
needs.
• However, if you live in an area with
hard water, use
demineralized/distilled water when
steaming light colored fabrics to
eliminate the possibility of hard
water stains.
8
USAGE SUGGESTIONS FOR ULTRA STEAM SHARK
Wood, Vinyl and Marble Floors
Spot Cleaning (Carpets)
Use the floor brush with a terry cloth
attached. Move the brush across the floor
as if you are mopping. When the towel is
soiled, you can turn the towel over or
replace it with a clean towel. If you are
working on a very dirty area, you can
move the brush over the area slowly,
several times. If it is a wood floor, move
fast to avoid heat or moisture buildup in
the wood. By cleaning with the towel over
the brush, you will not affect the shine on
the floor.
Use the concentrator nozzle with or
without the detail brush. Move slowly
over the soiled area, allowing the steam
to penetrate. Agitate with detail brush or
clean towel. Dab the spot with the towel
(do not rub). Repeat as necessary to
remove stain. Vacuum only after the
carpet has completely dried.
Always test color fastness of carpet in an
inconspicuous area before cleaning.
If your Ultra Steam Shark fails to remove
stubborn stains a commercially available
carpet shampoo may be required.
Do NOT add cleaning solutions, scented
perfumes, oils or any other chemicals to
the water used in this appliance as this
may damage the unit or make it unsafe
for use.
Upholstery
To Strip Wax: Use floor brush for open
areas; detail brush for corners or tight
areas - no towel, slow strokes. Work a
small area at a time - remove the
emulsified wax from the floor. When all of
the wax has been stripped, immediately
clean the floor and brushes with water
before residue has a chance to harden on
them. Go back over the stripped area with
the floor brush with a towel to remove any
remaining residue before waxing.
Use the floor brush attached directly to
the hand grip with a clean white terry
cloth towel. Use fast, light strokes,
avoid getting the fabric wet. Be patient
with stubborn spots; work on a spot
gently for no more than a minute at a
time, then wait five minutes for the area
to dry and repeat. Use circular
movements or back-and-forth and sideto-side movements to get all sides of
surface fibers. Finish with a brushing in
one direction that will give the fabric a
uniform appearance.
To Clean Waxed Floors: Wrap clean
towel around the floor brush, brush
quickly. This will cause the dirt to be
removed but not the wax.
Vinyl Floors: Do not allow heat to buildup
in any kind of vinyl, since it can soften it
enough to affect its texture. Work fast on
vinyl.
CAUTION: Always determine the
color-fastness of any fabric-especially
with reds or blues - by taking a clean,
moist, warm towel and gently rubbing
a small area as far down on the back
or other out of the way place on the
furniture as possible. If color comes
off on the towel, you may need to
have the piece dry cleaned.
Tile Floors: Use the detail attachment
with the detail brush attached to an
extension. Have the floor brush with cloth
attached ready as well. Clean the grout
between the tiles with the detail brush.
Remove the detail brush and attach the
floor brush, move the brush across the
floor to clean the tile and remove excess
moisture and residue. For areas of tile that
are very dirty, remove the towel and
agitate with the brush. Do not let the area
dry before you wipe it up.
9
INSTRUCCIONES IMPORTANTES PARA LLENAR AGUA
Componentes
Luz (ámbar) Indicadora de Corriente:
Esta luz se enciende cuando la unidad está
enchufada a un tomacorriente de 120V~ y
permanecerá encendida hasta que se
desenchufe.
CUIDADO: Antes de abrir la tapa de
seguridad, lea las instrucciones para
“relleno de agua”. Siempre mantenga el
gatillo del mango presionado hasta
evacuar toda la presión del tanque
hervidor.
CUIDADO: Siempre desenchufe antes de
rellenar el agua.
IMPORTANTE: NO le eche soluciones
limpiadoras, perfumes, esencias
aromáticas, aceites ni otros químicos al
agua que use en esta unidad. Use agua
potable, y si ésta fuese muy dura en su
zona, use agua destilada o purificada.
Paso 5: Espere 4 a 6 minutos para que
el vapor alcance su temperatura
y presión de trabajo.
Paso 6: Conecte los accesorios
deseados a la manguera
flexible.
Paso 7: Al iniciar el uso, algo de agua
saldrá por la boquilla del
accesorio. Esto es normal
porque es el agua en la
manguera que no se vaporizó.
IMPORTANTE: El vapor dejará de salir
del vaporizador Ultra Steam Shark cuando
el agua se acabe.
Advertencia: Siempre que deje
descansar la unidad durante el
trabajo, drene el condensado de agua
en la manguera antes de reiniciar el
trabajo. Para drenar la manguera,
apunte la boquilla a un contenedor
apropiado o al lavadero y presione el
gatillo para el vapor que está en el
asa. Nunca apunte la boquilla a las
personas, animales o plantas.
Llenado de Agua del Vaporizador
Ultra Steam Shark
IMPORTANTE: Siempre asegúrese que
la unidad esté “DESENCHUFADA” del
tomacorriente de la pared antes de
empezar a llenar el tanque con agua.
Nunca intente llenar directamente de la
llave de agua, siempre use el embudo
llenador provisto. Si no se siguen estas
instrucciones, el tanque se puede rebalsar
y puede presentar un riesgo eléctrico a la
seguridad.
Paso 1: Antes de llenar el vaporizador
Ultra Steam Shark, cerciórese
que NO esté enchufado al
tomacorriente.
Paso 2: Gire la tapa de seguridad de la
toma de agua en el sentido del
reloj hasta que salga. (Lea la
precaución anterior)
Paso 3: Mientras sujeta la unidad en
ángulo de 45 grados (vea la
ilustración) coloque el embudo
llenador en la toma de agua y
eche 798 ml (27 Onz. Líq. US)
de agua. No sobrellene.
Vuelva a instalar la tapa de
seguridad. El tiempo de
calentamiento es de Aprox. 4 a 6
minutos cuando el agua está fría.
Paso 4: Enchufe la unidad a un
tomacorriente de pared estándar
(120 voltios con conexión a
tierra). Ahora la luz indicadora
se encenderá.
Advertencia: Permita que la
unidad se enfríe por 5 minutos
antes de rellenar el agua porque la
unidad todavía estará caliente. Las
primeras gotas de agua podrían
burbujear. Tenga cuidado al abrir la
tapa de seguridad porque podría
haberse calentado durante el uso y
el escape de vapor podría causar
escaldaduras.
18
CARACTERÍSTICAS DEL VAPORIZADOR ULTRA
STEAM SHARK
4. Manguera de 1,2m (4’)
reforzada, resistente a
los aplastamientos.
1. No más detergentes ni
químicos, sólo agua.
USAGE SUGGESTIONS FOR ULTRA STEAM SHARK cont.
Window, Glass Surfaces and Mirrors
Garden Furniture
Use the dual edge glass and tile squeegee.
Work with the vapor jet on using the top to
bottom movements. Use the squeegee with
the vapor off to clear the water from the
glass. To do this without leaving streaks,
use lateral movements from the top to the
bottom of the surface.
Use any of the brushes depending on the
surface area. Work quickly when cleaning
resin outdoor furniture.
Fiberglass or Stainless Steel Surfaces
2. Liviano y Portátil
5. Versátil, cambio rápido
de accesorios.
Use the floor brush or detail brush. Slowly
move the brush over the surface to be
cleaned. The vapor will emulsify the dirt and
grease on the surface. Follow behind with a
terry cloth towel over the brush to remove
excess moisture and residue.
Tip: An old idea for polishing stainless steel
is to wipe it down with seltzer soda water
after it is cleaned.
Soap Scum
Soap scum dissolves almost immediately
under a combination of heat and moisture.
Rinse the surface with a small amount of
water afterwards or go back over it once
more with a clean terry cloth towel.
6. Para uso en Interiores
y Exteriores:
3. Tanque Hervidor de Acero
Inoxidable
Baños, cocinas, salas,
áreas de mascotas y
artefactos.
Automóviles, patios y
ventanas.
Tanque hervidor no corrosivo de
acero inoxidable fabricado con
soldadura.
17
Note: Soap scum sometimes will develop a
hard surface from waterborne minerals. If
this is the case, use the floor brush with no
towel first to break up this surface - or spray
or wipe first with lemon, vinegar or seltzer
soda water to soften the minerals.
Moving too slowly can dry out the soap scum
and cause it to granulate on the surface.
The surface will have a gritty feel. If this
happens, apply vapor to the surface with the
open brush again and re-clean.
10
Blinds
Use the detail brush to clean blinds.
Move the brush over the surface, allowing
enough time for the vapor to penetrate.
Work quickly on PVC blinds. Test for
color fastness on fabric blinds before
using.
Bathroom Areas
To clean the bathtub or shower area, use
the detail brush for grout, shower door
tracks, hard to get areas and heavily
soiled areas. The dual edge window/tile
squeegee will be the most efficient way to
clean the rest of the area. Allow plenty of
time for the heat to penetrate the surface.
This is especially helpful in the shower
area if there is tile or grout.
Removal of soap scum on tile, grout, and
shower doors is also easier with the Ultra
Steam Shark.
To clean sanitary fixtures, use
concentrator nozzle with or without detail
brush. Use a terry cloth towel or paper
towel to wipe up excess moisture and
residue.
To clean the sink and faucets, use detail
brush.
USAGE SUGGESTIONS FOR ULTRA STEAM SHARK
cont.
Exterior Areas
Hints
To clean inside your car, use the floor
brush with a terry cloth towel attached to
clean upholstery and interior areas just as
in the home. You should not expose the
bristles to leather - use only the brush with
the terry cloth towel attached. For
detailing the wheels, use the concentrator
nozzle and the detail brush. Exterior
windows are cleaned best by applying the
vapor with the concentrator nozzle and
following with a paper towel.
To clean bicycles, use the detail brush.
To clean equipment, use the detail brush,
depending on the surface area.
The Ultra Steam Shark has many
uses that have not been mentioned.
This was meant only to give you a
general idea of what can be achieved
with the unit. However, the ways in
which to use the attachments and
brushes are in most cases universal.
It is most helpful to always have a
terry cloth towel or paper towel ready
to use for removal of moisture and
residue. 100% white cotton towels
work best.
You can clean the brushes with your
steam cleaner. To clean the floor
brush, hold at one end and use the
concentrator nozzle to simply blow off
dirt into the garbage can. When
cleaning the detail brush, use a pair of
pliers to hold and blow dirt as above
or place in the basket of your
dishwasher.
Artificial Plants
Use the concentrator nozzle without a
brush attached to blow off the dust and
dirt.
FAMILIARIZACIÓN CON EL VAPORIZADOR ULTRA
STEAM SHARK
13
Note: Wipe immediately before the
cleaned area dries. When cleaning
the oven, use the detail brush to clean
around the elements and drip trays.
Use the detail brush for cracks,
crevices, and hard to reach areas.
Clothing
A vapor cleaning system is excellent for
removing wrinkles from fabrics. Simply
“vaporize” the surface from a distance
(12”-18”) The dry vapor removes wrinkles
without leaving the fabric wet like ordinary
fabric steamers do.
Refrigerator - Use the concentrator
nozzle to blow away dirt in the ice
machine and on door seals. The
vapor will not dry out or crack the
seals as chemicals often do. Can
openers and other kitchen equipment
can be easily cleaned with the detail
brush on the nozzle to get into all the
nooks and crannies. Mold stains
around door gaskets can be removed
with the detail brush.
To clean microwaves or other small
appliances use the detail brush for
small areas.
Note: When cleaning small electrical
appliances always unplug them from
outlet before cleaning.
To clean counter tops, use the floor
brush with a terry cloth towel
attached. For heavily soiled areas,
use the brush without the terry cloth
towel first in order to loosen the
debris, then follow with a terry cloth
towel attached to finish.
Nicotine and Tar
Nicotine and tar dissolves at high
temperatures and becomes a light yellow
oil that has the consistency of sewing
machine oil. When the nicotine/tar film is
touched by a hot terry cloth towel clipped
over the floor brush, it immediately
dissolves and flows into the towel. You
can remove it from flat surfaces as fast as
you can move the brush over the surface.
Removing Wax, Tar, Etc.
Many stains are only stuck on the surface
of materials and can be easily and quickly
removed by “blowing” excess material
away from the surface from the side. This
is accomplished by using the concentrator
nozzle. Hold the terry cloth towel to the
side to catch the loose residue as it is
blown by the nozzle. Note: Always
vacuum any loose residue off the surface
before you apply vapor to it.
11
1.
2.
3.
4.
5.
6.
Gatillo para Vapor en el Mango
Luz (ámbar) Indicadora de Corriente
Tapa de Seguridad de Toma de Agua
Mango
Manguera Flexible de Vapor
Tubos de Extensión (2)
7.
8.
9.
10.
11.
12.
13.
Escobilla para Pisos
Escobilla para Detalles
Escurridor para Vidrios y Losetas
Boquilla Concentradora
Correa para el Hombro
Codo Adaptador
Embudo para Rellenar
Especificaciones Técnicas
Voltaje:
Potencia:
Capacidad de Agua:
Temperatura Máx. del Vapor:
Generador de Vapor:
120V., 60Hz.
1450 Wats
27 Onz. Líq. EE.UU. (798 ml.)
116°C / 240°F
Acero Inoxidable
16
PRECAUCIONES ADICIONALES IMPORTANTES
DE SEGURIDAD (Cont.)
1.
2.
3.
Para evitar sobrecargar el circuito, no opere otro artefacto simultáneamente en
el
mismo tomacorriente o circuito.
Si fuese absolutamente necesario utilizar un cordón de extensión, use uno
calibre 14 de 15 amperios. Los cordones de menor capacidad se recalentarán.
Debe tenerse cuidado al tender el cordón para no jalarlo ni tropezarse con él.
No deje el artefacto desatendido cuando esté enchufado a un tomacorriente.
CONSERVE ESTAS INSTRUCCIONES
SÓLO PARA USO DOMÉSTICO
ADVERTENCIA:
Este artefacto está equipado con un enchufe de 3
espigas y sólo puede enchufarse en un tomacorriente
de 3 orificios con conexión a tierra. Esta
es
una
medida de seguridad. Si el enchufe no encaja bien en el
tomacorriente, contáctese con un electricista calificado
para que cambie el tomacorriente. No intente burlar el
dispositivo de seguridad de la tercera espiga para
conexión a tierra del enchufe.
CARE & MAINTENANCE
If you consistently use demineralized or
distilled water, cleaning the tank is
unnecessary.
Rinsing out the steam cleaner:
Normally, a periodic rinse of your Ultra
Steam Shark will free it from deposits.
This is recommended every 10-15
tankfulls, to free up any scale deposits
from the tank.
Fill the boiler with water and shake the
cleaner vigorously. Tilt the cleaner upside
down to empty the boiler of water and any
scale deposits.
15
Using the detachable shoulder strap
allows for greater freedom of movement
when both hands are needed for
various cleaning tasks.
To attach the shoulder strap to the
steam cleaner, simply snap the
shoulder strap hooks onto the
connecting rings on the unit body.
See illustrations below.
Connection Points
Descaling your steam cleaner:
If the tap water in you area contains a high
level of calcium deposits and you have
been using tap water to do your steam
cleaning, your should descale your unit
after 10-15 tankfulls.
Step 1:
Unplug the steam cleaner from
the power source before you
descale the boiler.
Step 2:
Fill the boiler with 1 part (4 oz.)
vinegar and 4 parts (16 oz.)
water and leave overnight or for
a period of approximately 8
hours. Do not screw the
safety/filler cap onto the steam
cleaner while you are descaling
the boiler. Do not use the
steam cleaner while descaling
solution is inside the boiler.
Step 3:
After the period of soaking, turn
the steam cleaner upside down
to empty solution from the
boiler. Due to the fact that a
small amount of solution will be
left in the boiler, it is necessary
to rinse the boiler out with clean
water 2 or 3 times. Your steam
cleaner is now ready for use.
CUIDADO:
Siempre drene la condensación del agua de la
manguera antes de usar la unidad si se ha dejado de
usar por un largo rato. Para hacerlo, apunte la boquilla
hacia un contenedor o lavadero y presione el gatillo del
mango. Una vez que el agua se ha drenado, reinicie su
uso normal.
Nunca apunte la boquilla hacia las
personas, animales o plantas.
Attaching the Shoulder Strap
When using the Ultra Steam Shark
with the shoulder strap, avoid rocking or
tilting the unit excessively as this may
cause water to enter the hose and be
discharged along with the steam.
12
Model EP903
INSTRUCCIONES IMPORTANTES DE SEGURIDAD
1 YEAR LIMITED WARRANTY
EURO-PRO Operating LLC warrants this product to be free from defects in material and workmanship for
a period of one (1) year from the date of purchase when utilized for normal household use by the original
purchaser only. The attached Warranty Registration Card must be filled out and returned within 10 days
of purchase. This is essential for your Warranty to be effective should any problem arise with this
product.
Should any defect covered by the terms of the limited warranty be discovered within one year, EUROPRO Operating LLC will repair or replace any defective part provided the unit is returned by the original
purchaser, freight prepaid, to EURO-PRO Operating LLC, 94 Main Mill Street, Door 16, Plattsburgh, NY
12901. Proof of purchase date and $9.95 for handling and return packing/shipping charges must be
included.*
The liability of EURO-PRO Operating LLC is limited solely to the cost of the replacement parts or the
complete unit at our option. LABOUR CHARGES ARE NOT INCLUDED.
This warranty does not cover normal wear of parts and does not apply to any unit that has been
tampered with or used for commercial purposes. This Limited Warranty does not cover damage caused
by misuse, negligent handling, or damage due to faulty packaging or mishandling in transit (by any
common carrier).
This warranty is extended to the original purchaser of the unit and excludes all other legal and/or
conventional warranties. The responsibility of EURO-PRO Operating LLC , if any, is limited to the specific
obligations expressly assumed by it under the terms of the limited warranty. In no event is EURO-PRO
Operating LLC liable for incidental or consequential damages of any nature whatsoever. Some States do
not permit the exclusion or limitation of incidental or consequential damages, so the above may not apply
to you.
This warranty gives you specific legal rights which vary from state to state.
PURCHASER___________________________________________________________
DATE OF PURCHASE ___________________________________________________
DEALER ______________________________________________________________
*important: Carefully pack item to avoid damage in shipping. Be sure to attach tag to item before packing
with your name, complete address and phone number with note giving purchase information, model
number and what you believe is the problem with item. We recommend you insure the package (as
damage in shipping is not covered by your warranty). Mark the outside of your package “ATTENTION
CUSTOMER SERVICE”.
OWNERSHIP REGISTRATION CARD
Please complete and return within ten (10) days of purchase. The registration will enable us to
contact you in the event a product defect is discovered. By returning this card you
acknowledge to have read and understood the instructions for use, and warnings set forth in
the accompanying instructions.
RETURN TO: EURO-PRO Operating LLC, 94 Main Mill Street, Door 16, Plattsburgh, NY 12901
PURCHASER: ……………………………………..…………………………………………………
ADDRESS: ………………………………………...……………………………………………….
CITY: ………………………………..
STATE/PROV:………………………………………….
DATE OF PURCHASE: ………………………
EP903
MODEL:..…………………………………….
NAME AND ADDRESS OF DEALER: …………………………………………………………..
Printed in Italy
13
Cuando se usa el vaporizador EURO-PRO Ultra Steam Shark siempre se deben tomar
precauciones básicas de seguridad, incluyendo las siguientes.
1. Lea todas las instrucciones antes de usar el
Para evitar riesgos de incendio, choque
vaporizador Ultra Steam Shark.
eléctrico o lesiones:
2. Use el vaporizador sólo para lo que está
• No deje el vaporizador limpiador
diseñado.
enchufado cuando no esté en uso ni
3. Para evitar choques eléctricos, no sumerja
cuando se rellene el tanque de agua.
parte alguna de este artefacto en agua u
• No permita que se use como juguete.
otros líquidos.
Ponga atención cuando lo usen los niños o
4. No desenchufe el vaporizador jalando el
se use cerca de ellos, de mascotas o de
cordón, hágalo jalando del enchufe.
plantas.
5. No permita que el cordón haga contacto con
• Use sólo como se indica en este manual.
superficies calientes. Deje que el
Sólo use los accesorios recomendados por
vaporizador se enfríe completamente antes
el fabricante
de guardarlo o de abrir el tanque de agua
• No jale el cordón ni lo use como asa para
(sacando la tapa de seguridad). Para
cargar el vaporizador limpiador, no le
guardar el vaporizador, envuélvale el cordón
cierre la puerta encima, no jale el cordón
alrededor en forma suelta.
sobre bordes o esquinas filosas. Mantenga
6. Siempre desenchufe el vaporizador de la
el cordón alejado de superficies calientes.
corriente antes de rellenar o de quitarle el
• No use cordones de extensión ni enchufe
agua y cuando no esté en uso. Al abrir el
a
toma
corrientes
de
capacidad
tanque de agua siempre gire la tapa de
inadecuada.
seguridad lentamente para que el vapor
• Antes de enchufar o desenchufar el
acumulado escape gradualmente.
vaporizador del tomacorriente, siempre
7. No opere el vaporizador si el cordón o el
apáguelo poniendo el interruptor en “OFF”.
enchufe están dañados; tampoco cuando el
• No jale del cordón para desenchufar,
vaporizador o cualquiera de sus
hágalo del enchufe.
componentes se ha caído o dañado. Para
• No manipule el enchufe o la unidad con
evitar el riesgo de choque eléctrico, no
las manos mojadas, ni opere con los pies
desarme ni intente reparar el vaporizador
descalzos.
Ultra Steam Shark. Devuélvalo a EURO• No introduzca objetos en las aberturas
PRO Operating LLC para su revisión y
del artefacto, ni lo haga funcionar si alguna
reparación (refiérase a la garantía). El
abertura está obstruida
reensamblaje o reparación inadecuados
• Guarde el artefacto en un área interior
puede causar choque eléctrico o lesiones a
fresca y seca.
las personas cuando se use.
• Mantenga el área de trabajo bien
8. Se requiere supervisión estrecha cuando los
iluminada.
niños usan cualquier artefacto o cuando se
• Nunca voltee la unidad ni la incline
opere cerca de ellos. No deje el vaporizador
hacia un lado cuando se esté usando el
desatendido cuando esté enchufado.
vapor.
Nunca dirija el vapor hacia
9. Pueden producirse quemaduras cuando se
personas, animales o plantas.
toquen las partes metálicas calientes, el
• No sumerja el artefacto en agua u otros
agua caliente o el vapor. Tenga cuidado al
líquidos y siempre desenchúfelo antes de
drenar el vaporizador después de usarlo
rellenar con agua.
porque puede contener agua caliente.
• NO le eche soluciones limpiadoras,
Nunca dirija el vapor hacia las personas. El
perfumes, esencias aromáticas, aceites
vapor es muy caliente y puede causar
ni otros químicos al agua que use en
quemaduras.
esta unidad, porque podrían dañarla o
10. No opere el vaporizador en presencia de
hacerla insegura para usar. Use agua
vapores explosivos o inflamables.
potable, y si ésta fuese muy dura en su
11. Este artefacto está diseñado sólo para uso
zona, use agua destilada o purificada.
doméstico. Siga todas las instrucciones en
este manual.
12. Solamente eche agua potable en este
vaporizador. Nunca eche sustancias
químicas o de otra naturaleza porque
pueden dañarlo. El uso de sustancias
químicas anula automáticamente la garantía.
CONSERVE ESTAS INSTRUCCIONES
Sólo para uso doméstico
14
Rev. 05/02A