1
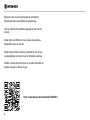
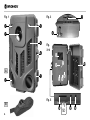
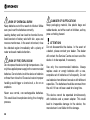
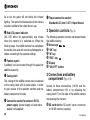
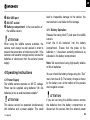
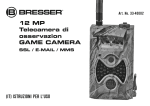
Ga
G
a
me
C
am
a
m1
20°
GameCam
ame
eC
Ca
120
120°
Wild- und Überwachungskamera
Wildlife and surveillance camera
GB
Instruction manual
Art. No. 33-30000
Besuchen Sie unsere Internetseite für verfügbare
Sprachversionen dieser Bedienungsanleitung.
Visit our website for available language versions of this
manual.
Visitez notre site Web pour les versions linguistiques
disponibles dans ce manuel.
Visite nuestro sitio en Internet para obtener las versiones disponibles de este manual en diferentes idiomas.
Visitate il nostro sito Internet per le versioni disponibili di
questo manuale in diverse lingue.
http://www.bresser.de/download/3330000
2
Instruction manual........................................ 25
3
Fig. 1
F
B
J
Fig. 2
D
I
E
Fig.
3+4
G
1$
1)
1!
+ -+-
A
C
1%
1@ 1#
h
+ -+-
Fig. 5
B
1^ SD
4
1& 1*
1(
Fig. 6
Fig. 9
Fig. 7
Fig. 10
Fig. 12
Fig. 13
Fig. 8
Fig. 11
2%
2^
2&
5
GB
General Information
These operating instructions are to be considered
a component of the device. Please read the
safety instructions and the operating instructions
carefully before use.
Keep these instructions for renewed use at a later
date. When the device is sold or given to someone
else, the instruction manual must be provided to
the new owner/user of the product.
DANGER!
You will find this symbol in front of every section
of text which deals with the risk of severe injury or
even death in the event of improper use.
ATTENTION!
You will find this symbol in front of every section
of text which deals with the risk of damage to
property or the environment.
Intended Use
This product is intended only for private use.
General Warnings
RISK OF ELECTRIC SHOCK!
This device contains electronic components which
operate via a power source (power supply and/
or batteries). Children should only use the device
under adult supervision. Only use the device as
described in the manual, or you run the risk of an
electric shock.
Never bend, pinch or pull the power and
connecting cables, extensions and adapters.
Protect the cables from sharp edges and heat.
Before operating, check the device, cables and
connections for damage. Never use a damaged
unit or a unit with damaged power cables.
Damaged parts must be exchanged immediately
by an authorised service centre.
25
RISK OF CHEMICAL BURN!
Keep batteries out of the reach of children! Make
sure you insert the batteries correctly.
Leaking battery acid can lead to chemical burns.
Avoid contact of battery acid with skin, eyes and
mucous membranes. In the event of contact, rinse
the affected region immediately with a plenty of
water and seek medical attention.
RISK OF FIRE/EXPLOSION!
Do not expose the device to high temperatures. Use
only the supplied power supply or the recommended
batteries. Do not short-circuit the device or batteries
or throw them into a fire! Excessive heat or improper
handling could trigger a short-circuit, a fire or an
explosion.
Never use normal, non-rechargeable batteries.
This could lead to explosion during the charging
process.
26
DANGER OF SUFFOCATION!
Keep packaging material, like plastic bags and
rubber bands, out of the reach of children, as they
pose a choking hazard.
ATTENTION!
Do not disassemble the device. In the event of
a defect, please contact your dealer. The dealer
will contact the Service Centre and can send the
device in to be repaired, if necessary.
Use only the recommended batteries. Always
replace weak or empty batteries with a new,
complete set of batteries at full capacity. Do not
use batteries from different brands or with different
capacities. The batteries should be removed from
the unit if it has not been used for a long time.
This device cannot be operated simultaneously
with batteries and a power adapter. This could
lead to irreparable damage to the device; the
manufacturer is not liable for this damage.
GB
The manufacturer is not liable for voltage damage
due to improperly inserted batteries or through the
use of an improper power adapter.
Do not interrupt an on-going data connection to a
computer before all data has been transferred. This
could lead to data loss for which the manufacturer
is not liable.
Scope of delivery
Wildlife camera (A), mounting strap (B), instruction
manual
1 External Components (Fig. 1 + 2)
B Objective lens
The wildlife camera’s images / video are recorded
through the lens. Ensure that this area of the camera
is always kept clean.
C Motion Sensor
The motion sensors are attached to the front of the
camera, such that any movements in front of the
camera within an angle of 120° can be recorded.
When setting up the wildlife camera, it should be
positioned such that this angle is not obscured
by branches or similar, in order to guarantee the
operation of the camera. The motion sensors have
a range of approximately 10 metres.
D Light sensor for the infrared lighting function
This sensor determines the exposure values for the
shot. Hence, in order to guarantee the optimum
images, this sensor should not be covered.
E Infrared Lighting
The infrared diodes, arranged in arrays, allow
images and videos to be taken at night (black and
white images). Hence, if night-time operation is
envisaged, the wildlife camera should be positioned
such that these are not obscured by branches or
similar when setting up the camera. When setting
up the camera, it should be ensured that no
objects are positioned too close to the camera,
as the reflection created at short distances by the
infrared lighting can cause overexposure.
27
As a rule, the game will not notice the infrared
lighting. The spots illuminated around the camera
are also invisible to the naked human eye.
J Tripod connection socket;
F Red LED power indicator
This LED blinks for approximately one minute
when the camera is in switched on. When the
blinking stops, the wildlife camera has completed
its standby time and will now take photographs or
videos according to the camera settings.
2 Operator controls (Fig. 3)
G Padlock eyelet
A padlock* can be inserted through this eyelet for
additional security.
H Casing latch
The casing of the wildlife camera can be opened
at the casing latch with its metal staple, in order
to gain access to the operator controls and the
battery compartment inside.
I Connection socket for external 6V DC
power supply (power supply unit and mains
adapter not supplied)
28
Standard 6.35 mm (0.25”) tripod thread
The following operator controls are located inside
the wildlife camera:
1) Arrow keys
1! “OK” key
1@ “M” key
1# “ESC” key
1$ Display
1% “ON/OFF” button
3 Connections and battery
compartment (Fig. 4+5)
Access to these connections (16-18) and the
battery compartment (19) is by releasing the
casing latch (7) on the side of the wildlife camera
and opening the camera.
1^ SD card slot (for SD cards* up to a maximum
of 16 GB memory capacity)
*not supplied
GB
1& Mini USB port
1* AV OUT socket
1( Battery compartment
lead to irreparable damage to the device; the
manufacturer is not liable for this damage.
in the rear section of
the wildlife camera
ATTENTION!
When using the wildlife camera outdoors, the
camera must always be well sealed in order to
prevent the penetration of moisture and dirt. If the
camera is not used for a longer period, remove the
batteries or disconnect from the external power
supply.
4 Operating Instructions
4.1 Power Supply
The wildlife camera operates on 6V DC voltage.
Power can be supplied using batteries* (8 x AA
batteries) or via an external power adapter*.
ATTENTION!
This device cannot be operated simultaneously
with batteries and a power adapter. This could
*not supplied
4.1.1 Battery Operation
Release the casing latch (7) and open the wildlife
camera.
Insert the 8 AA batteries* into the battery
compartment. Ensure that the poles of the
batteries (+/-) have been correctly positioned, as
indicated in the battery compartment.
Note: We recommend using high-quality alkaline
or lithium batteries.
You can check the battery charge using the “Test”
menu item (see 6.5). The battery charge is shown
by the battery icon at the bottom of the preview
and navigation screen.
ATTENTION!
If you are not using the wildlife camera, remove
the batteries from the battery compartment or
disconnect the camera from the external power
29
supply. Remove run-down batteries from the
wildlife camera immediately.
4.1.2 Operation via a Power Adapter*
Use only the correct adapter with a suitable jack
and the correct operating voltage for the external
power supply. When used in outdoor areas,
this should be weatherproof. When setting up
the wildlife camera, take particular care with an
external power supply that the connection points
also do not come into contact with water while
in operation. When not in use, disconnect the
camera from the power supply.
ATTENTION!
The manufacturer accepts no liability or guarantee
for damage caused by improperly used adapters
or the use of the incorrect operating voltage.
4.1.3 Using an SD memory card*
You will require an SD memory card* of up to 16
GB, in order to be able to save images or videos.
30
Insert the SD memory card into the SD card slot
(16) as shown in Fig. 5 until it snaps into place with
a faint click.
To remove the SD card, press once briefly on the
card in the slot. The card will spring out of the slot
with a faint click and can be taken out.
5 Activation
5.1 Switching on and Basic Setup
After connecting the power supply (using batteries
or a mains adapter) and inserting an SD memory
card*, the wildlife camera is operational. Switch
on using the “ON/OFF” button (15), which is
accessible when the camera casing is open.
The password prompt (Fig. 6) is displayed once
the camera has been switched on. You can skip
the password on the first activation by pressing
the “OK” key, as no personal password has been
entered (the factory-set password is 000000).
“ENTER SYSTEM” and “SET PASSWORD” then
appear in the display (Fig. 7). Select “ENTER
*not supplied
GB
SYSTEM” to view the main menu of the camera
without setting a password.
Note: To set a password, see Section 5.2, “Setting
a Password”.
The menu navigation of the wildlife camera as
delivered has been set to the English language.
Consequently, you should first set the navigation to
a useful language. To do this, select the “Settings”
menu item using the arrow keys (10) and confirm
with the “OK” key (11). Then, using the and
arrow keys, move to the “Language” item in the
submenu and confirm this with “OK”. Using the
and
arrow keys, you can then select your
desired language. After you have confirmed this
with “OK”, the menu navigation will have changed
to the particular language. Then, proceed as
described in this guide.
Using the arrow keys, select the “Photo” menu
item in the main menu (see 6.3) for the photograph
mode, or “Video” (see 6.4) for the video mode.
After you have confirmed this with “OK”, the screen
(14) will fade and the LED (5) will begin to blink.
Over time, the LED blinks faster. When the LED
goes out completely, the camera is operational.
Note: In order to maintain this operating mode, do
not switch the camera off.
5.2 Setting a Password
The password can only be set after switching the
camera on.
After you have confirmed the pre-set password
“000000” (Fig. 6) with “OK” (11), “ENTER SYSTEM”
and “SET PASSWORD” (Fig. 7) appear in the display.
At this point, change to the “SET PASSWORD” item
(which is then highlighted in blue) using the arrow
keys (10) and confirm with “OK”.
“INPUT PASSWORD” appears on the screen.
“000000” is shown below this (Fig. 8). Using the
or arrow keys, enter the desired numeral for each
position. You can move to the next position using
the arrow key. After entering the final numeral,
confirm the password entry by pressing the “OK”
31
key. Next, “INPUT AGAIN” appears on the display
(Fig. 9). Here, enter exactly the same numerals
in the same manner as before, under “INPUT
PASSWORD”, and confirm your entry with “OK”.
If the repeated entry is not correct, “NO MATCH”
(Fig. 10) appears and the camera goes back to the
first entry. After successfully entering the correct
numerals, “SET OK WAITING” (Fig. 11) appears in
the display. The view then changes automatically
to the main menu (see 6.1).
With this, your wildlife camera is now password
protected.
Now, you must enter your 6-digit password before
confirming it with “OK” each time you switch the
camera on.
You can change the password at any time using
this method.
Note: Select a series of numbers that you can
easily remember, but which cannot be deciphered
by unauthorised persons (e.g. not 123456 or
111111).
32
ATTENTION!
Memorise your password carefully! If you forget
the password set, you will no longer be able to
access the functions of the wildlife camera.
6 Camera Menu Navigation
6.1 Main Menu (Fig. 12)
Various menu items are displayed as icons on the
main screen:
2) Photo
2! Video
2@ Test
2# Settings
2$ View)
You can change between the menu items by
navigating with the arrow keys. Using “OK”, you
open the respective menu item. You also use the
“OK” key to confirm your input within these menu
items. In this way, you arrive at the respective
submenu item. If you are already in a submenu
GB
item, pressing the “OK” key saves your current
setting and you are taken to the next higher level
in the menu (not when setting the date or time).
key to return to the main screen (not
Press the
when setting the date or time). By pressing the
“M” key, you are taken from any display to the
setup menu (except for the password prompt and
the image preview).
To be able to use the Photo / Video functions, an
SD memory card must be inserted beforehand.
6.2 “Settings” Menu Item
The most important parameters for the camera
can be entered under “Settings”. The respective
selected menu item or submenu item is indicated by
blue highlighting. Exit the “Settings” menu by using
the
key.
The following menu items are available:
6.2.1 Operating Range (Work)
Here, you can choose between the following
operating modes: 24 hours, Day, Night
6.2.2 Delay
Here, you can set activation intervals between
direct recording after the first movement and the
next activation.
1, 3, 5, 10, 15, 30 minutes
6.2.3 Multi-shot
Here, you can select the number of shots to be
taken in succession in photo mode, without the
motion sensors having to detect a movement
again:
1, 2, 3, 4, 5 or 6 successive images
6.2.4 Video length
Here, you can set the length of the video to be
recorded: 10, 20, 30 sec.
6.2.5 Video resolution
Select the resolution of the video in video mode here:
QVGA (320 x 240 pixels [30 FPS])
VGA (640 x 480 pixels [15 FPS])
33
6.2.6 Language
Select the Menu Language:
English, French, German
6.2.7 Date
Set the date. Here, you do not go to a submenu
but the values can be changed directly in the
“Settings” menu (see 6.2). The values to be
changed are highlighted in blue. Use the and
arrow keys (10) for this. Confirm your entry and
go to the next input field by pressing the “OK” key
(11). When the entry has been completed, you
are taken back to the “Settings” menu. The date
format is MM/DD/YY
6.2.8 Time
Set the time and proceed as described under
“Date” (see 6.2.7). The time format is HH/MM/
SS (24-hour).
6.2.9 Stamp
Set whether the time and date values should
34
not just be recorded in the image data, but also
displayed in each shot: YES, NO
6.2.10 Quality
Set the image quality for photographs: 9M, 5M, 3M
(Camera resolution: interpolated 9 MP; effective 5 MP)
6.2.11 Default settings
ATTENTION!
If the camera is reset to the factory settings using
“OK”, all settings that you have set to date are lost.
Reset the camera to the factory settings: OK, Cancel
6.3 “Photo” Menu Item
When you select this menu item, the camera will
start in photo mode. Changes to the resolution,
timestamp, multi-shot settings, etc., as set in the
“Settings” menu (see 6.2), are applied. After this
mode has been set, the screen (14) will fade and
the LED (5) will begin to blink. Over time, the LED
GB
blinks faster. When the LED goes out completely,
the camera is operational.
Note: In order to maintain this operating mode, do
not switch the camera off.
6.4 “Video” Menu Item
When you select this menu item, the camera will
start in video mode. Changes to the resolution,
timestamp, video length, etc., as set in the
“Settings” menu (see 6.2), are applied. After this
mode has been set, the screen (14) will fade and
the LED (5) will begin to blink. Over time, the LED
blinks faster. When the LED goes out completely,
the camera is operational.
Note: In order to maintain this operating mode, do
not switch the camera off.
6.5 “Test” Menu Item
When you select this function, you will see the
camera image section on the screen (14). The
battery charge (bottom right), whether a memory
card* has been inserted (top right), the capacity
(number of photos) available on the memory card
(top), the phase of the moon (centre left), the
operating range set (directly below; see 5.2. 1.)
and an exposure value (EV) are displayed. The
higher the EV, the darker it is at the light sensor on
the wildlife camera (camera sensor).
To activate the camera without the delay, press
the “OK” key (11). A test image will appear after a
couple of seconds.
6.6 “View” Menu Item
This is the preview function of the wildlife camera. It
is only active if a memory card* has been inserted.
Otherwise, “Insert Memory Card” appears on the
display in white lettering on a blue background.
The images are displayed chronologically and the
preview function starts with the most recently taken
photo or video. You can scroll through the images
on the memory card by pressing the arrow keys, <
or > (10). The images are displayed in the order in
35
which they were saved on the memory card.
or
arrow keys, you can magnify
Using the
the image in order to be able to view a section in
more detail. By pressing the “OK” key (11), the
enlarged area is retained, whereby the image
section displayed can be changed by using the
or arrow keys. Exit the magnification mode
completely by using the
key (13); by using the
“OK” key, you will retain the image section and you
can change the magnification factor using the or
arrow keys, as described above.
move on to the next saved object (photo or video)
in chronological order.
The preview screen also provides the following
information:
• battery charge display (bottom right)
• inserted SD card (top right)
• quality of the images displayed (below)
★ = 3 MP / ★★ = 5 MP / ★★★ = 9 MP
• number of the image displayed (bottom, centre).
If you come across a video when viewing images,
PLAY?
YES
NO
When there is no more memory space available on
the memory card, the message, “Memory Full” is
shown on the display. Delete files no longer required
or format the memory card.
is shown on the display. Your selection is highlighted
in green. Change the selection using the or
arrow keys and then confirm with “OK”.
Pressing the “M” key (12) while viewing images
without the zoom function opens a menu with the
following settings options:
The image can be paused during video playback
by pressing the “OK” key or playback can be
stopped by pressing the arrow key and you can
6.6.1 View Date/Time
Pressing “OK” (11) displays the date and time
(View Date/Time) and, below this, the date and the
36
GB
time of the photo (if this has been set as described
under 6.2.7 and 6.2.8). Pressing the “OK” key
again returns you to the next menu above this. The
date is displayed in the MM/DD/YY format; the
time in the HH/MM/SS format.
Here, you can set whether you would like to
delete all images and videos on the memory card*
permanently. Using the or (10) arrow keys,
select “YES” or “NO” and confirm with “OK”.
(Does not apply to protected images / videos.)
6.6.2 Protect
Pressing “OK” (11) opens the “Protect” menu.
Here, you can set whether you would like to write
protect an image. Using the or (10) arrow keys,
select “YES” or “NO” and confirm with “OK”.
6.6.5 Format
6.6.3 Erase one
Pressing “OK” (11) opens the “Erase one” menu.
Here, you can set whether you would like to
delete the currently displayed image permanently.
Using the or (10) arrow keys, select “YES” or
“NO” and confirm with “OK”. (Does not apply to
protected images / videos.)
6.6.4 Erase all
Pressing “OK” (11) opens the “Erase all” menu.
ATTENTION!
Formatting deletes all saved images and videos
irrevocably. This also applies to previously
protected shots.
Pressing “OK” (11) opens the “Format” menu. Here,
you can set whether you would like to format the
memory card. Using the or (10) arrow keys,
select “YES” or “NO” and confirm with “OK”.
6.6.6 Exit
Pressing “OK” (11), you exit the menu and return
to viewing the images.
37
7 Mounting the wildlife camera
ATTENTION!
Mount the wildlife camera in a suitable location.
Ensure that the camera is sealed tightly, in order
to prevent the penetration of moisture. No liability
is accepted for damage (even due to moisture)
resulting from improper positioning.
7.1 Using a mounting strap (Fig. 13)
Two mounting attachments (25) for the mounting
strap (26) are located on the rear of the camera
casing, with the aid of which the wildlife camera
can be mounted.
For this purpose, place the mounting strap around
a tree or stake and thread the end without the
buckle through the mounting attachments on the
wildlife camera. Then, thread this end through the
buckle (27) at the other end and pull it firmly.
7.2 Using a tripod*
The wildlife camera has a ¼” threaded tripod
38
socket on the underside of the casing. This can
be used to mount the wildlife camera on a tripod.
8 Connecting to a computer
ATTENTION!
Do not interrupt an on-going data connection to a
computer before all data has been transferred. This
could lead to data loss for which the manufacturer
is not liable.
Using the Mini USB connection, the wildlife
camera can be connected to a computer via a
Mini USB cable*, in order to transfer images or
videos to computer or to use this as an enhanced
image preview screen. Normally, the computer will
recognise the camera as an external memory and
will allow access to the data on the SD card* in the
camera. While a USB cable* is connected to the
camera and to the computer, the preview screen of
the wildlife camera displays a blue image and the
text, “USB”. Once the wildlife camera has been
successfully connected to the computer, follow
the defaults of the operating system to access
the data. This function is also available without a
separate power supply for the wildlife camera.
Weight
approx. 550g (without batteries)
Dimensions (WxHxD)
approx. 18.5 x 15 x 8 cm
Tripod connection socket
6.35 mm (¼”) photo thread
SD card slot
For SD memory cards* up to 16 GB, max.
9 Technical Data
Power supply
8 x AA batteries*;
or 6V DC external power supply* (DC plug
with 5.5 mm external diameter and 2.1
mm internal diameter), internal + pole
Connections
Mini USB; AV out; connection socket for
6V DC external power supply (see above)
Type
120° Wildlife Camera
Camera
5 MP (3, 5, 9MP programmable)
By day: Colour photography
By night: Black and white photography
Video recording with audio 320x240 pixels; 30 fps
640x480 pixels; 15 fps
Motion sensors
2 sensors; 1-30 minute interval time
(programmable)
Infrared diodes
4 arrays
Multi-shot
1-6 images in succession (programmable)
Video length
10-30 seconds (programmable)
Operating range
Day and night; 24 hrs
Preview screen
5.1 cm (2”) LCD display
Password prompt
6 characters, numerical
Temperature range
-20° C to +60° C
-4° F to +140° F
*not supplied
10 Troubleshooting
10.1 USB device is not recognized by the
computer
This circumstance occasionally occurs in some
OEM versions of Windows. It is not caused by a
defect device. An update of the USB drivers on
the notebook or PC in most cases solves the
problem.
In case an update of the driver does not result
in a satisfactorily solution it is recommended to
39
proceed as described below (the manufacturer
takes no liability for any loss or damage caused by
running this process!1):
Windows will search for this unit. This delays
detection of USB devices as well as the launch of
Windows itself and is responsible for the failure to
recognize the USB port!
Therefore, you may ‘clear up’ your system
environment and remove unused devices. To do
this, right-klick on ‘My Computer’ or ‘Computer’
and open the ‘Properties’ item in the context menu.
Then klick in the window on the tab ‘ADVANCED
/ADVANCED SYSTEM SETTINGS’ and klick on
‘ENVIRONMENT VARIABLES’. Now select the
lower part (NEW ENVIRONMENT VARIABLE). At
‘NAME OF VARIABLES’ enter the following text:
devmgr_show_nonpresent_devices
Delete the so-called ‘Ghost Devices’ (devices that
are not currently connected to the computer).
Background information: Windows generates
an entry in its system preferences for each new
USB device (e.g. USB stick) for each USB drive
it is plugged into. At every start of the computer
40
Enter the value ‘1’ in ‘Value of Variables’
Confirm the entry with ‘OK’ and restart the
computer. After rebooting open the Device
Manager. Select the menu item VIEW and activate
the option ‘Show Hidden Devices’. The ‘Ghost
Devices’ previously hidden are now displayed in
grey. Check for entries in the different categories
such as USB, storage volumes, etc. Only delete
the entries of devices you no longer use from the
‘Device Manager’.1
1
Source: Microsoft knowledge base
http://support.microsoft.com/kb/315539/en
Notes on cleaning
• Before cleaning the device, disconnect it from
the power supply (Remove the plug or remove
batteries)!
• Clean the lenses only with a soft, lint-free cloth.
Do not apply excess pressure to the cloth to
avoid scratching the lenses.
• To remove more stubborn dirt, moisten the
cleaning cloth with an eyeglass-cleaning solution
and wipe the lenses gently.
• Protect the device from dust and moisture! The
batteries should be removed from the unit if it has
not been used for a long time.
• Clean inside the casing using a dry cloth. In order
to avoid damage to the electronics, do not use
cleaning fluid.
41
EC Declaration of Conformity
Meade Instruments Europe GmbH & Co. KG has
issued a "Declaration of Conformity" in accordance
with applicable guidelines and corresponding
standards. This can be viewed any time upon
request.
Disposal
Dispose of the packaging materials properly,
according to their type, such as paper or
cardboard. Contact your local waste-disposal
service or environmental authority for information
on the proper disposal.
Do not dispose of electronic devices in the
household garbage!
As per Directive 2002/96/EC of the European
Parliament on waste electrical and electronic
equipment and its adaptation into German law,
42
used electronic devices must be collected
separately and recycled in an environmentally
friendly manner.
Empty, old batteries must be disposed of at
battery collection points by the consumer. You
can find out more information about the disposal
of devices or batteries produced after 6 January
2006 from your local waste-disposal service or
environmental authority.
43
ANL3330000DEGB1112BRESSER
Irrtümer und technische Änderungen vorbehalten.
Errors and technical changes reserved.
Meade Instruments Europe
GmbH & Co. KG
Gutenbergstr. 2 · DE-46414 Rhede
Germany
www.bresser.de · [email protected]