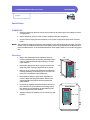
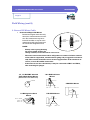
1
ZENITH PUMPS
Date: 03/2006
ZeDrive DC Motor Drive
User Manual
Setup System Easily
Zenith® Pumps
ZeDrive
SET
SPEED
TACH
7
8
9
4
5
6
1
2
3
--
0
.
CLEAR
ENTER
Run
Jog
Preset
Limit Alarm
Dev Alarm
CODE
1
2
3
4
5
6
10
11
12
13
14
15
CONTROL PARAMETERS
DESCRIPTION CODE DESCRIPTION
PRI. SETPT 1
16
ACCEL RATE
PRI. SETPT 2
17
DECEL RATE
SEC. SETPT 1
61
CTRL: PRI
SEC. SETPT 2
62
CTRL: SEC
JOG SETPOINT 63
DISPLAY: PRI
OUTPUT SETPT. 64
DISPLAY: SEC
MIN. LIMIT
65
GAIN
MAX. LIMIT
66
RESET
LOW ALARM
67
RATE
HIGH ALARM
68
TRIM ATHOR
LOW ALARM
69
RATE THRSLD
HIGH ALARM
74
0 SPD LGC
MONITOR VARIABLES
CODE DESCRIPTION
40
TACH
41
EXTERNAL REF.
42
AUX. INPUT
43
FEEDBACK
44
DEVIATION
45
SCALED REF.
46
RAMPED REF.
47
OUTPUT
48
TRIM OUTPUT
50
ACTIVE MODE
51
ENTRY ERRORS
52
ALARM STATUS
•
Typical Application Examples
•
Detailed Explanation and Instructions
•
Assistance for Calculation, Configuration and Wiring
TO GET ASSISTANCE, CALL: 919-774-7667
ZENITH PUMPS
Page 2
Table of Content
Introduction............................................................................................... 4
ZeDrive Standard Specification ............................................................... 5
Standalone ZeDrive Wiring Diagram...................................................... 6
Installation ................................................................................................ 7
Wiring Instructions................................................................................... 8
Control Cabinet Wiring ............................................................................ 9
Fielding Wiring........................................................................................10
Connect Input Power ...........................................................................................10
Connect DC Motor Cable.....................................................................................11
Connect Feedback Signal Cable..........................................................................13
Keypad & Display ...................................................................................14
Keypad Operations..................................................................................15
Standard Programming ...........................................................................16
Typical Applications & Solutions ...........................................................17
Quick Test for ZeDrive .........................................................................................18
Connect Run/Stop Buttons....................................................................................20
Set and Display as Pump RPM ..............................................................................21
Set and Display as “cc/min” ................................................................................22
Set and Display as Other Units .............................................................................23
Monitor Operation Status .....................................................................................24
Use 4-20 (mA) as Setpoint ....................................................................................25
Use 0-10 (VDC) as Setpoint ..................................................................................26
Feedback Control by Using a Flowmeter with Frequency Signal .........................27
Feedback Control by Using a Flowmeter with 4-20 (mA) Signal...........................29
Feedback Control by Using a Flowmeter with 0-10 (VDC) Signal ........................30
Master/Follower System ......................................................................................31
Adjust Current Output Limit .................................................................................34
Calibrate Analog Input ........................................................................................35
Calibrate Analog Output......................................................................................36
Trouble-shooting & Fault Information ...................................................37
Good Sensor or Bad Sensor..................................................................................38
No Feedback Signal.............................................................................................38
System Always Runs at Full Speed .......................................................................39
System Can Not Run Below 30 RPM or 40 RPM .....................................................39
System Never Runs ..............................................................................................39
System Can Not Run up to Max. Speed.................................................................39
System Can Not Run Slow Enough........................................................................39
System Speed Does Not Match Set Speed ............................................................39
System Needs Help to Start to Rotate....................................................................40
System Turns at Wrong Direction.........................................................................40
It Takes Very Long Time to Ramp Up ...................................................................40
It Takes Very Long Time to Slow Down or Stop ....................................................40
Simple Way to Verify Feedback Signal ................................................................40
Tach Reads Incorrectly ........................................................................................40
TO GET ASSISTANCE, CALL: 919-774-7667
ZENITH PUMPS
Page 3
Table of Content
Trouble-shooting & Fault Information (cont’d)
Replaced Feedback Sensor Fits the Existing ZeDrive Or Not ...............................41
Display Shows “---1”, “---2” or “---3”...................................................................41
Restore Back to Factory Defaults ..........................................................................41
Can Not Operate from Keypad.............................................................................42
The Display Would Not Light Up ..........................................................................42
How Do I Use ZeDrive for 230 (VAC) Power.........................................................42
Fault Code List .........................................................................................43
Complete Code List .................................................................................44
System Drawings .....................................................................................58
TO GET ASSISTANCE, CALL: 919-774-7667
ZENITH PUMPS
Page 4
Introduction
This manual contains information required to complete installation, wiring, and startup operation for ZeDrive DC Motor Drive.
Be sure to follow all WARNINGS, CAUTIONS, and NOTES prior to proceeding with a particular task.
Customer is required to make field wiring connections and adjust some of the protection codes
NOTE: dependent on specific applications.
Customer should become familiar with this manual to avoid electromagnetic interference (EMI)
noise pickup, damage to equipment, and personal injury.
The standard ZeDrive DC Motor Drive consists of a ZeDrive, mounted in a
NEMA 12 control cabinet. All internal cabinet wiring is complete and prewired to a terminal strip for customer terminations.
The unit is also pre-programmed according to customer specifications
(except some protection codes dependent on specific applications).
The standard ZeDrive DC Motor Drive supports 1-phase 115/230VAC,
50/60Hz power input, which is selectable by a selection switch inside of the
drive. It enables ZeDrive to drive DC motors from 1/4 to 2 HP.
Zenith® Pumps
SET
SPEED
TACH
7
8
4
5
6
1
2
3
-
0
.
CLEAR
9
ENTER
Run
Jog
Preset
Limit Alarm
Dev Alarm
Control cabinet size can be found in “ZeDrive NEMA 12 Standard Products”. Depending on the requirements of customer’s application, the control cabinet can also be changed.
Standalone version of ZeDrive DC Motor drive is available. An optional Analog IO card can be used for either 0~20mA or 0~10VDC analog signals, handling setpoints, feedback, or
reference signal inputs, and output the value of any variable or parameter in the drive.
ZeDrive can receive three frequency inputs, supporting magnetic pickup (zero-crossing) or open collector type sensor. It comes standard with a RS-485 as well as a RS-422 computer interface, allowing to
monitor or alter variables, parameters, as well as some command functions, such as run, stop.
In the event the drive assembly has to be located in a hazardous location, an optional intrinsically safe
barrier is available to install in ZeDrive DC Motor drive cabinet to limit sensor current to safe levels.
Refer to “ZeDrive Standard Specification” on next page for additional features and specifications.
WARNINGS:
•
Do not mount ZeDrive near heat-radiating elements or in direct sunlight.
•
Do not install ZeDrive in a place subjected to high temperature, high humidity, excessive
vibration, corrosive gasses or liquids, or airborne dust or metallic particles.
•
Mount ZeDrive vertically and do not restrict the air flow to the drive.
•
Allow sufficient space around the unit for heat dissipation. Approximately 6 inches should be
allowed above and below the drive and 2 inches on each side.
ZENITH PUMPS
TO GET ASSISTANCE, CALL: 919-774-7667
Page 5
ZeDrive Standard Specification
Voltage Class
Unit
115 VAC Class
Rated Input Voltage
VAC
115 (104 ~ 132), 1 Phase
Rated Input Frequency
Hz
Horse Power Rating
HP
Rated Output Current
A
Rated Output Voltage
VDC
Operating Temperature
˚C
230 VAC Class
230 (207 ~ 264), 1 Phase
60/50
1/4 ~ 1
1/2 ~ 2
4 ~ 16 (Default: 15 Amp)
0 ~ 90 Armature (100V Field)
0 ~ 180 Armature (200V Field)
0˚C ~ 55˚C
0% ~ 90%, Non-condensing
Relative Humidity
Natural, air cooled
Cooling
NEMA Ratings
Standalone: NEMA 4, Enclosure: NEMA 12
Classifications:
UL
Master Format: 0.01% Set Speed; Follower Format: Zero accumulative error
Closed Loop Accuracy
Gain, Reset and Rate
Tuning
Master, Follower, Offset, Direct
Scaling Format
Set Speed, Tach Display, Numeric Keys, Up/Down Buttons
Keypad Controls
RS-422, Full parameter access & control
Serial Communication
1 Amp internal fuse for control protection,
15 Amp internal fuse for armature protection
Protection
0 ~ 10 VDC, or, 4 ~ 20 mA
Analog Inputs
Analog Outputs
Setpoints
Control Inputs
Frequency Input
Status Outputs
VDC
0 ~ 10 VDC, or, 4 ~ 20 mA
6 Setpoints (4 Master/Follower, 1 Direct, 1 Jog)
Run, R-Stop, F-Stop, Jog, Closed/ Open-Loop,
Primary/Secondary Mode, Primary Setpoint Select,
Secondary Setpoint Select,
Ramp Disable, Keypad Lockout, Local/Computer
Zero Crossing(Magnetic Pickup),
0 ~ 10KHz for Feedback, External Reference, and Offset,
or
Open-collector (Encoder/Proximity),
0~30KHz for Feedback & External Reference,
0 ~ 10KHz for Offset
Hi Alarm, Lo Alarm
Ramped Error, Scaled Error
Zero Speed
ZENITH PUMPS
TO GET ASSISTANCE, CALL: 919-774-7667
Page 6
Standalone ZeDrive Wiring Diagram
Set By Switch! 115/230VAC
L1
Neutral L2
Chassis Gnd
Feedback
Sensor
Red
White
Black
R-STOP
RUN
F-STOP
Ext. Ref.
Sensor
Red
White
Black
JOG
Offset
Sensor
Spare
Closed
Open Loop
Keypad
Lockout
Primary
Secondary
Ramp
Disable
Primary Setpt 2
Primary Setpt 1
Red
White
Black
5
6
7
J2
1
5
6
7
11
12
13
14
15
J3
J2
J1
2
3
4
16
8
9
10
11
12
13
14
J4
17
18
J1
1
2
3
4
5
6
7
J4
10
11
12
8
9
10
4
5
6
1
2
3
4
DC Motor
A1
A2
+
R
R
R
R
R
7
8
9
50V Max.
-
Analog Signal Output
Analog Common
+12V
+
TxD
+
RxD
COM (OPT)
J4
1
2
3
External
DC
Power
Supply
Zero Speed
High Alarm
Low Alarm
Dev Alarm 1
Dev Alarm 2
Secondary Setpt 3
Secondary Setpt 4
Local
Computer
13
14
15
Remote. Scroll Up
16
17
Analog Signal Input
Analog Common
Remote. Scroll Down
Sensors
Ch A+
Ch A -
Ch B+
Ch B -
Common
Power
Magnetic Pickup
WHT or GRN
——-
——-
——-
BLK & Shield
——
Hall Effect
WHT or GRN
——-
——-
——-
BLK & Shield
RED
WHT
——-
——-
——-
BLK & Shield
RED
Encoder
ZENITH PUMPS
TO GET ASSISTANCE, CALL: 919-774-7667
Page 7
Installation
WARNINGS:
•
Danger of electrical shock or severe injury. Remove all jewelry prior to working on electrical equipment
•
Ensure electrical power is “OFF” before working inside the equipment
•
Do not remove circuit protective devices, or any other components until power is turned
“OFF”.
NOTE: The installation of this motor control must conform to area and local electrical codes. For information, refer to the National Electrical Code (NEC) Article 430 published by the National Fire
Protection Association, or the Canadian Electrical Code (CEC). Refer to local codes as applicable.
Mounting:
•
•
•
Ensure the mounting location meets the environmental conditions such as humidity and temperature
(refer to “ZeDrive Standard Specification” on Page
2) for ZeDrive
Determine appropriate door or panel location and
make the panel cutout per figure shown at the left
Zenith® Pumps
7.2”
SET
SPEED
7
Remove (2 ea.) locking cam fasteners from ZeDrive
housing assembly, by removing (2 ea.) screws, one
from each cam fastener (top and bottom)
•
Insert ZeDrive from the panel front and slide it in
until it is flush with the panel surface. Ensure that
supplied gasket is between the drive bezel and
panel surface.
•
Re-install the locking cam fasteners from the rear of
the controller on top and bottom of housing assembly. Rotate the cam fasteners so that ZeDrive pulls
securely against the panel surface.
•
3.6”
Tighten locking cam fastener (2 ea.) screws (top and
bottom)
TACH
8
9
4
5
6
1
2
3
-
0
.
CLEAR
7.5”
ENTER
Run
Jog
Preset
Limit Alarm
Dev Alarm
5.7”
3.9”
Panel Cutout
Zenith® Pumps
SET
SPEED
TACH
7
8
4
5
6
1
2
3
-
0
.
CLEAR
9
ENTER
Run
Jog
Preset
Limit Alarm
Dev Alarm
3.65”± .03
7.25”± .03
TO GET ASSISTANCE, CALL: 919-774-7667
ZENITH PUMPS
Page 8
Wiring Instructions
ZeDrive will arrive with all internal wiring of NEMA 12 cabinet complete, for most customer requirements. Customers will be required to wire to the terminal strip mounted inside the cabinet. If customers
desire to use some available functions of ZeDrive that are considered non-routine, customers may have
to wire to ZeDrive, too.
If ZeDrive is ordered as a NEMA 4 standalone drive, customers are required to make all connections to
the drive.
CAUTION: TO PREVENT PERSONNEL ELECTROCUTION OR DAMAGE TO THE EQUIPMENT,
MAKE SURE ALL POWER TO ZEDRIVE IS REMOVED BEFORE MAKING ANY WIRING CONNECTIONS OR CHANGES.
Wiring practices must conform to applicable local electric codes and the National Electric Code (NEC).
If installed in a country outside the USA, wiring practices should conform to the electric codes of the
country ZeDrive is installed in.
•
Input power to the control cabinet must be supplied through an appropriately sized circuit
breaker or fused disconnect that is within easy reach of the cabinet. In high noise environments, install an isolation transformer on the input AC power
•
The control cabinet ground must be a single point termination and be at a resistance of less
than 1 ohm with relation to true earth. All grounds within the control cabinet must be connected to the single point ground termination.
•
Use arc suppressors across the coil of all AC relays and contactors
•
High voltage wiring (> 50 V) must be run in separate conduit from low voltage (<50 V) or
signal wiring. If run parallel to each other, high voltage wiring should be separated from low
voltage and signal wiring by 12 inches or as much as physically possible. If they must cross
each other, they should cross perpendicularly. Do not route 115 VAC control wiring and low
level signal wiring in the same conduit. Do not route feedback wiring along the motor case.
Motor armature and field leads must be run separate from shielded signal cable to avoid
signal EMI noise in feedback
•
Shielded cable should be used for signal wiring to prevent electrical noise contamination.
The shield should be terminated at ZeDrive only. (NOTE: Terminating the shield at both
ends causes ground loops and defeats the purpose of using shielded cable).
•
Low voltage wiring making long runs outside a control cabinet should use shielded cable
also. Shield termination should be at the end of the equipment requiring the most noise protection. (NOTE: In some cases, this may be the PC or PLC, rather than ZeDrive).
•
Field wiring entails connecting power input, motor armature and feedback signal wiring
NOTE: NEMA 12 enclosure is not provided with any pre-punched conduit holes. Customers are required to punch holes in the enclosure to facilitate field wire entrance. Customers should ensure that the entrance holes and conduit conform to local wiring codes.
TO GET ASSISTANCE, CALL: 919-774-7667
Page 9
Control Cabinet Wiring
ZENITH PUMPS
TO GET ASSISTANCE, CALL: 919-774-7667
ZENITH PUMPS
Page 10
Field Wiring
1. Connect Input Power
Customer supplies input AC power
NOTE: Make sure to set power selection
switch to correct power voltage configuration
−
−
−
−
115/230 VAC, -10%, +15%
1-Phase
50/60 Hz
3 Wire
L1
L2/Neutral
Ground
ZENITH PUMPS
TO GET ASSISTANCE, CALL: 919-774-7667
Page 11
Field Wiring (cont’d)
2. Connect DC Motor Cable
•
Permanent Magnet DC Motors
Permanent magnet motor has only
two motor connections for its armature. The connections may be labeled A1 and A2, or may be color
coded. Select the right motor from
the connection diagrams below.
Motor
Thermostat
Wires
Motor A2
Motor A1
NOTE:
−
Always refer to pump drawing
for correct pump rotation. To
change rotation, reverse A1 and A2 connections
−
The motor connections shown above will produce a counter-clockwise rotation
at the reducer output shaft, viewed from the pump end (as opposed to the motor
end). This rotation should be correct for most applications. If the rotation is incorrect, reverse A1 and A2 connections
−
If the motor in use has a thermostat, it may be connected to TB2-5 and TB2-6,
after removing the jumper
1/4, 1/2 HP TENV & Sealed
Tight (Wash Down) Motors
(Motor End Cover Removed)
1 & 2 HP Wash Down
Motors
To Ground
2 HP TEFC Motors
A1 A2
Red — A1
1/2 HP Explosion Proof
Motors
Black — A2
1 HP TEFC Motors
A1
Green — Ground
Black — A2
White — A1
Both Red — Thermostat Wires
Black/White
— A1
Black — A2
A2
ZENITH PUMPS
TO GET ASSISTANCE, CALL: 919-774-7667
Page 12
Field Wiring (cont’d)
2. Connect DC Motor Cable (cont’d)
•
Field Wound DC Motors
Field wound motor has connections
for its armature and field. Its armature
connections will be labeled A1 and
A2. Its field will have 4 wires.
Motor
Thermostat
Wires
Select your motor from the connection
diagrams below.
Motor A2
Motor A1
Motor F1
Motor F2
NOTE:
−
Always refer to pump drawing
for correct pump rotation. To change rotation, reverse A1 and A2 connections
−
The motor connections shown above will produce a counter-clockwise rotation
at the reducer output shaft, viewed from the pump end (as opposed to the motor
end). This rotation should be correct for most applications. If the rotation is incorrect, reverse A1 and A2 connections
−
If the motor in use has a thermostat, it may be connected to TB2-5 and TB2-6,
after removing the jumper
2 HP Explosion Proof Motors
(Reliance)
1 HP Explosion Proof Motors
(Baldor)
Wire Label
Connect With
Wire Label
Connect With
A1
TB1-5 (A1)
A1
TB1-5 (A1)
A2
TB1-4 (A2)
A2
TB1-4 (A2)
F1
TB1-6 (F1)
F1
TB1-6 (F1)
F2
Short with F11
F2
Short with F3
F11
Short with F2
F3
Short with F2
F22
TB1-7 (F2)
F4
TB1-7 (F2)
P1 Thermostat
TB2-5 (Thermostat)
J Thermostat
TB2-5 (Thermostat)
P2 Thermostat
TB2-6 (Thermostat)
J Thermostat
TB2-6 (Thermostat)
ZENITH PUMPS
TO GET ASSISTANCE, CALL: 919-774-7667
Page 13
Field Wiring (cont’d)
3. Connect Feedback Signal Cable
Magnetic pickup or hall effect sensor is usually located between motor and reducer.
Encoder is usually located at the rear of motor.
+12VDC
Feedback Signal
Common
Ground
Hall Effect Sensor
Wire Color
Explosion Proof
Magnetic Pickup
Function
Connect To
Wire Color
Function
Connect To
Red
+12VDC
TB2-1
White
Feedback Signal
TB2-2
White/Clear
Feedback Signal
TB2-2
Black
Common
TB2-3
Black
Common
TB2-3
Green
Shielding
TB2-4
Bare
Shielding
TB2-4
Encoders
Non-Explosion Proof
Magnetic Pickup
Wire Color
Function
Connect To
Wire Color
Function
Connect To
Red
+12VDC
TB2-1
White/Clear
Feedback Signal
TB2-2
White/Clear
Feedback Signal
TB2-2
Black
Common
TB2-3
Black
Common
TB2-3
Bare
Shielding
TB2-4
Bare
Shielding
TB2-4
NOTE:
WHEN USING A HALL EFFECT SENSOR OR
ENCODER IN A HAZARDOUS ATMOSPHERE, THE OPTIONAL INTRINSICALLY
SAFE BARRIER MUST BE USED.
Optional Safety Barrier
+12VDC
Feedback Signal
Common
Ground
ZENITH PUMPS
TO GET ASSISTANCE, CALL: 919-774-7667
Page 14
Keypad & Display
LED Display
Zenith® Pumps
Control Keys
SET
SPEED
Numeric Keys
TACH
7
8
9
4
5
6
1
2
3
--
0
.
CLEAR
Status LEDs
Run
Jog
Preset
Limit Alarm
Dev Alarm
ENTER
Code Select Key
&
Display
CODE
SELECT
•
LED Display:
To display values for parameters
•
Numeric Keys:
To input values for parameters, or to input code number when “CODE SELECT” button
being pressed
•
Status LEDs:
To display operation status and alarms
•
Control Buttons:
SET SPEED: To enter new set speed values in engineering unit
TACH:
To show the actual feedback signal in engineering unit
Scroll Buttons: To increase/decrease the value showing in LED display
CLEAR:
To erase value in LED display, or code number under code select mode
ENTER:
To enter new value of a code, or to show the value of a code
Code Select Key & Display:
CODE SELECT:
To view or change values for any code
Code Display: To display code number
ZENITH PUMPS
TO GET ASSISTANCE, CALL: 919-774-7667
Page 15
Keypad Operations
Set New Speed Value
Previous Display
SET
SPEED
Current Set Speed
6
.
0
Ö
1
ENTER
New Set Speed
Ö
Enter New Set Speed
Ö
Or,
Ö
Tach Display
Previous Display
TACH
Actual Speed
Ö
Select Code & View Its Value
Previous Displays
CODE
SELECT
Ö
Current Code & Value
3
1
Ö
Modify Value
Previous Value
6
Ö
0
ENTER
Ö
ENTER
Ö
Value for Code 31
ZENITH PUMPS
TO GET ASSISTANCE, CALL: 919-774-7667
Page 16
Standard Programming
NOTE: The codes below should meet the needs of most users for normal pump operations. If other
functions are desired from ZeDrive, consult “Complete Code List”.
Code
01
10
11
12
13
16
17
20
22
31
34
61
63
84
Description
Primary Setpoint 1
Minimum Limit
Maximum Limit
Low Alarm
High Alarm
Acceleration Time
Deceleration Time
Primary Setpoint Maximum
Primary Display Maximum
PPR—Feedback Input
Max. RPM Feedback - Primary
Primary Output Format
Primary Display Format
Analog Input Function Select
Value/Calculation
User Defined
0
1800
0
1800
10
5
1800/Gear Ratio
1800/Gear Ratio
120
1800
1
1
0
Meaning
Pump speed setpoint (in Pump RPM)
Minimum motor speed for operation
Maximum motor speed for operation
Motor speed level which Low Alarm output is energized
Motor speed level which High Alarm output is energized
Seconds for motor to increase from 0 RPM to 1800 RPM
Seconds for motor to decrease from 1800 RPM to 0 RPM
Unit of primary setpoint is in Pump RPM
Unit of primary display is in Pump RPM
The resolution of the feedback sensor used in the system
Full-scale speed of motor
Master Mode
Master Mode
Analog input not used
TO GET ASSISTANCE, CALL: 919-774-7667
Page 17
Typical Applications & Solutions
ZENITH PUMPS
ZENITH PUMPS
TO GET ASSISTANCE, CALL: 919-774-7667
Page 18
Quick Test for ZeDrive
1. Prepare the ZeDrive:
•
Back Panel of ZeDrive
Place jumpers on J3 connector between
Pin 11 - Pin 12
Pin 13 - Pin 12
Pin 14 - Pin 15
•
Connect power wires to J2 connector Pin L1, Neutral and
Chassis GND (Do NOT turn on power at this time)
To
Feedback
Sensor
2. Prepare the Sensor:
•
Screw the sensor into the thread hole located on the
gear reducer, until it hits the inside pickup gear, and
back up about 1/8 of a turn (45 degrees)
•
If it is a 2-wire sensor, connect
White wire - J3 Pin 5
Black wire - J3 Pin 6
Bare wire - J3 Pin 7
•
If it is a 3-wire sensor, connect
Red wire - J3 Pin 1
White wire - J3 Pin 5
Black wire - J3 Pin 6
Bare wire - J3 Pin 7
Jumpers
To Motor
•
Turn the 120 VAC power on for the ZeDrive
•
If the power is 230 VAC, please refer to “Troubleshooting” section
Wht
Blk
Bare
A2
A1
L1
N
G
To AC
Power
3. Connect Power to the Drive:
Red
1
2
3
4
5
6
7
8
9
10
11
12
13
14
15
16
4. Configure ZeDrive:
A 5.091:1 reducer and 120 teeth pickup gear is used for the following example.
Change values for codes 20, 22 and 31 based on the system.
Code
Description
Formula
Default
Operation
20
Primary Setpoint
Eng. Unit
1800/Gear Ratio
(i.e., 5.091:1)
353.6
CODE
SELECT
2
0
ENTER
3
5
3
22
Primary Display
Eng. Unit
1800/Gear Ratio
(i.e., 5.091:1)
353.6
CODE
SELECT
2
2
ENTER
3
5
3
31
No. of Teeth of
Feedback Gear
120
120
CODE
SELECT
3
1
ENTER
1
2
0
34
Primary RPM Max
Feedback
1800
1800
CODE
SELECT
3
4
ENTER
1
8
0
61
Primary Scaling
Format
1
1
CODE
SELECT
6
1
ENTER
1
ENTER
63
Primary Display
Format
1
1
CODE
SELECT
6
3
ENTER
1
ENTER
.
.
6
ENTER
6
ENTER
ENTER
0
ENTER
ZENITH PUMPS
TO GET ASSISTANCE, CALL: 919-774-7667
Page 19
Quick Test for ZeDrive (cont’d)
5. Verify Feedback Signal Manually:
Zenith® Pumps
•
Click
•
Turn the reducer shaft by a wrench
•
Non-zero number should be shown on the top display, whenever the shaft turns
•
TACH
SET
SPEED
If there always is “0” on the top display, something is wrong
related to feedback. Please refer to “Trouble-shooting” section
6. Run the System:
Let reducer’s shaft run at 60 rpm, click
SET
SPEED
6
0
7
8
9
4
5
6
1
2
3
--
0
.
•
If the system can not run, please refer to “Trouble-shooting”
section
•
If the system does not run at right speed, please refer to
“Trouble-shooting” section
CLEAR
•
If the motor runs away at max. speed, something is wrong
related to feedback. Please refer to “Trouble-shooting” section
Run
Jog
Preset
Limit Alarm
•
If the system runs at right speed, stop the system and disconnect the power. The system is ready for normal operation
TACH
ENTER
Dev Alarm
CODE
1
2
3
4
5
6
10
11
12
13
14
15
CONTROL PARAMETERS
DESCRIPTION CODE DESCRIPTION
PRI. SETPT 1
16
ACCEL RATE
PRI. SETPT 2
17
DECEL RATE
SEC. SETPT 1
61
CTRL: PRI
SEC. SETPT 2
62
CTRL: SEC
JOG SETPOINT 63
DISPLAY: PRI
OUTPUT SETPT. 64
DISPLAY: SEC
MIN. LIMIT
65
GAIN
MAX. LIMIT
66
RESET
LOW ALARM
67
RATE
HIGH ALARM
68
TRIM ATHOR
LOW ALARM
69
RATE THRSLD
HIGH ALARM
74
0 SPD LGC
MONITOR VARIABLES
CODE DESCRIPTION
40
TACH
41
EXTERNAL REF.
42
AUX. INPUT
43
FEEDBACK
44
DEVIATION
45
SCALED REF.
46
RAMPED REF.
47
OUTPUT
48
TRIM OUTPUT
50
ACTIVE MODE
51
ENTRY ERRORS
52
ALARM STATUS
TO GET ASSISTANCE, CALL: 919-774-7667
ZENITH PUMPS
Page 20
Connect Run/Stop Buttons
1. Run Button:
•
Use a momentary button
•
Connect the button to J3 connector Pin 12 and Pin 13
•
When closed, ZeDrive will ramp up based on Acceleration Time defined in Code 16
12
13
J3
11
12
J3
14
15
J3
2. Stop Button:
•
Use a momentary button
•
Connect the button to J3 connector Pin 11 and Pin 12
•
When opened, ZeDrive will ramp down to zero speed
based on Deceleration Time defined in Code 17
3. Emergency Stop Button:
•
Use a momentary button
•
Connect the button to J3 connector Pin 14 and Pin 15
•
When opened, ZeDrive will stop immediately
TO GET ASSISTANCE, CALL: 919-774-7667
ZENITH PUMPS
Page 21
Set and Display as Pump RPM
1. Preliminary Action:
•
Reducer Gear Ratio — R. If the pump is directly coupled with the motor, the gear ratio R=1
•
Motor maximum speed — VM (RPM)
2. Calculation:
None
3. Coding:
Check and change the following codes
Code 10 = 0
Code 11 = VM
Code 20 = VM / R
Code 22 = VM / R
Code 34 = VM
Code 37 = VM
4. Wiring:
No wiring changes for this application
5. Result:
•
The units of the setpoint and Tach on the drive’s panel will be in Pump’s RPM
TO GET ASSISTANCE, CALL: 919-774-7667
ZENITH PUMPS
Page 22
Set and Display as “cc/min”
1. Preliminary Action:
•
Reducer Gear Ratio — R. If the pump is directly coupled with the motor, the gear ratio R=1
•
Motor maximum speed — VM (RPM)
•
Pump Capacity — CP (cc/rev)
2. Calculation:
None
3. Coding:
Check and change the following codes
Code 10 = 0
Code 11 = VM
Code 20 = VM / R × CP
Code 22 = VM / R × CP
Code 34 = VM
Code 37 = VM
4. Wiring:
No wiring changes for this application
5. Result:
•
The units of the setpoint and Tach on the drive’s panel will be in (cc/min)
TO GET ASSISTANCE, CALL: 919-774-7667
ZENITH PUMPS
Page 23
Set and Display as Other Units
1. Preliminary Action:
•
Reducer Gear Ratio — R. If the pump is directly coupled with the motor, the gear ratio R=1
•
Motor maximum speed — VM (RPM)
•
Pump Capacity — CP (cc/rev)
•
Coefficient between other unit and “cc/min” — KU
•
NOTE: It supports the customer’s unit only in (volume/time) format
2. Calculation:
2.1 Coefficient between other unit and “cc/min” — KU:
•
Find out 1 new volume unit is equal to V (cc)
•
Find out 1 new time unit is equal to T (min)
•
1 (volume/time) = V (cc) / T (min) = V/T (cc/min)
KU = V/T
Example:
If the preferred unit is (gallon/hour),
1 (gallon) = 3785 (cc)
1 (hour) = 60 (min)
1 (gallon/hour) = 3785 (cc) / 60 (min) = 63.08 (cc/min)
Therefore, KU = 63.08
3. Coding:
Check and change the following codes
Code 10 = 0
Code 11 = VM
Code 20 = VM / R × CP / KU
Code 22 = VM / R × CP / KU
Code 34 = VM
Code 37 = VM
4. Wiring:
No wiring changes for this application
5. Result:
•
The units of the setpoint and Tach on the drive’s panel will be in customer’s unit (volume/
time)
TO GET ASSISTANCE, CALL: 919-774-7667
ZENITH PUMPS
Page 24
Remote Monitoring Operation
1. Preliminary Action:
•
•
To monitor system variables and control parameters,
you need a monitoring device, accepting either 4-20
(mA) or 0-10 (VDC) analog signal
Analog Select Jumper Location
Feedback
(Not this jumper)
Analog Select Jumper
Locate Analog Select Jumpers on “Control Board”:
Transformer
1. Loosen up 6 screws on the back panel, and 2
screws located on the heat sink of ZeDrive
2. Remove the back panel, place ZeDrive as shown
at left. The top board is the “Control Board”, and
the bottom one is “Drive Board”
3. Locate Analog Select Jumper as shown at left
4. Depend on the signal, change the jumper setting as shown at the left
Heat Sink
4-20 mA:
0-10 VDC:
(Default)
(disregard)
Left
Left
2. Calculation:
None
3. Coding:
Check and change the following codes
•
Code 80 = ?? (input corresponding code number for monitoring that specific variable)
Example: Code 80 = 40, it will monitor TACH, which is defined by Code 40
•
Code 81 = ?? (defines the analog output range, usually the maximum value of the variable)
Example: Code 81 = 1800, when TACH = 1800 (RPM), it outputs 10VDC or 20mA
4. Wiring:
•
Connect the wires of the monitoring device with the ZeDrive as shown at the left
5. Result:
•
Provide an analog signal indicating the status of ZeDrive
variables and control parameters
•
Support either 4-20 (mA) or 0-10 (VDC) analog signal
To Device
Shield
Common
Signal
7
J1
17
18
J4
ZENITH PUMPS
TO GET ASSISTANCE, CALL: 919-774-7667
Page 25
Use 4-20 (mA) as Setpoint
1. Preliminary Action:
•
•
External device which supplies 4-20 (mA) speed setpoint signal to ZeDrive
Analog Select Jumper Location
Feedback
(Not this jumper)
Analog Select Jumper
Locate Analog Select Jumpers on “Control Board”:
1. Loosen up 6 screws on the back panel, and 2
screws located on the heat sink of ZeDrive
Transformer
2. Remove the back panel, place ZeDrive as shown
at left. The top board is the “Control Board”, and
the bottom one is “Drive Board”
3. Locate Analog Select Jumper as shown at left
4. Depend on the signal, change the jumper setting as shown at the left
Heat Sink
4-20 mA:
Left
0-10 VDC:
(Default)
disregard
•
Pump Capacity — CP (cc/rev)
•
Reducer Gear Ratio — R. If the pump is directly coupled with the motor, the gear ratio R=1
•
Motor maximum speed — VM (RPM), 1800 (RPM) for most of systems supplied by Zenith
•
No. of Teeth of Feedback Gear — N, 120 for most of systems supplied by Zenith
2. Calculation:
•
To set the motor speed to be V (RPM) ( 0 ≤ V ≤ VM ), the pump to be V (RPM) ( 0/R ≤ V ≤
VM /R ), or the output to be V (cc/min) ( 0/R×CP ≤ V ≤ VM /R×CP ), the corresponding formula for the mA current value CmA is:
CmA = (20 - 4) / (VM - 0) × V + 4 (mA)
CmA = (20 - 4) / (VM /R - 0/R ) × V + 4 (mA)
CmA = (20 - 4) / (VM /R×CP - 0/R×CP ) × V + 4 (mA)
3. Coding:
Check and change the following codes
Code 20 = Max. Setpoint in Engineering Unit (refer to sections “Set and Display as …”)
Code 22 = Max. Display in Engineering Unit (refer to sections “Set and Display as …”)
Code 31 = N
Code 34 = VM
Code 61 = 1
Code 63 = 1
From Device
Code 84 = 4
10 J3
Shield
4. Wiring:
16
Signal
• Connect the wires of the 4-20 (mA) speed control signal
J4
Common
17
with the ZeDrive as shown at the left
5. Result:
•
4-20 (mA) signal can be used to control the speed of ZeDrive
ZENITH PUMPS
TO GET ASSISTANCE, CALL: 919-774-7667
Page 26
Use 0-10 (VDC) as Setpoint
1. Preliminary Action:
•
•
External device which supplies 0-10 (VDC) speed setpoint signal to ZeDrive
Analog Select Jumper Location
Feedback
(Not this jumper)
Analog Select Jumper
Locate Analog Select Jumpers on “Control Board”:
1. Loosen up 6 screws on the back panel, and 2
screws located on the heat sink of ZeDrive
Transformer
2. Remove the back panel, place ZeDrive as shown
at left. The top board is the “Control Board”, and
the bottom one is “Drive Board”
3. Locate Analog Select Jumper as shown at left
4. Depend on the signal, change the jumper setting as shown at the left
Heat Sink
4-20 mA:
Left
0-10 VDC:
(Default)
disregard
•
Pump Capacity — CP (cc/rev)
•
Reducer Gear Ratio — R. If the pump is directly coupled with the motor, the gear ratio R=1
•
Motor maximum speed — VM (RPM), 1800 (RPM) for most of systems supplied by Zenith
•
No. of Teeth of Feedback Gear — N, 120 for most of systems supplied by Zenith
2. Calculation:
•
To set the motor speed to be V (RPM) ( 0 ≤ V ≤ VM ), the pump to be V (RPM) ( 0/R ≤ V ≤
VM /R ), or the output to be V (cc/min) ( 0/R×CP ≤ V ≤ VM /R×CP ), the corresponding formula for the control voltage CVDC is:
CVDC = (10 - 0) / (VM - 0) × V (VDC)
CVDC = (10 - 0)/ (VM /R - 0/R ) × V (VDC)
CVDC = (10 - 0)/ (VM /R×CP - 0/R×CP ) × V (VDC)
3. Coding:
Check and change the following codes
Code 20 = Max. Setpoint in Engineering Unit (refer to sections “Set and Display as …”)
Code 22 = Max. Display in Engineering Unit (refer to sections “Set and Display as …”)
Code 31 = N
Code 34 = VM
Code 61 = 1
Code 63 = 1
Code 84 = 4
From Device
10 J3
Shield
4. Wiring:
16
• Connect the wires of the 0-10 (VDC) speed control signal Signal
J4
Common
17
with the ZeDrive as shown at the left
5. Result:
•
0-10 (VDC) signal can be used to control the speed of ZeDrive
ZENITH PUMPS
TO GET ASSISTANCE, CALL: 919-774-7667
Page 27
Feedback Control by Using a Flowmeter with Frequency Signal
1. Preliminary Action:
•
A flowmeter which can send frequency flow signal to ZeDrive
•
Max. Flowrate — Fm (cc/min) (or, in other units. Find out from the flowmeter)
•
Max. Frequency Output — Qm (Hz) (Find out from the flowmeter)
•
Pump Capacity — CP (cc/rev)
2. Calculation:
2.1 Equivalent Pulses Per Revolution of Motor — Np (pulses/rev)
Therefore, Np = Qm / 30 (pulses/rev)
Feedback Jumper Location
Analog I/O Board
(Not this jumper)
3. Coding:
Check and change the following codes
Code 08 = Hall Effect (for ZeDrive 2000 ONLY)
Code 10 = 0
Code 11 = 1800
Code 20 = Fm
Code 22 = Fm
Code 31 = Qm /30
Code 34 = 1800
Code 61 = 1
Code 63 = 1
Code 84 = 0
Jumper 1
(Feedback)
Transformer
Heat Sink
3-wire Sensor (default):
Left
4. Wiring:
•
For ZeDrive 2000, please proceed to the next step. For a
regular ZeDrive, check and change the jumper settings on the “Control Board”:
1. Loosen up 6 screws on the back panel, and 2 screws located on the heat sink of ZeDrive
2. Remove the back panel. Face the back of ZeDrive and place ZeDrive so that the heat
sink points down. The top board is the “Control Board”, and the bottom one is
“Drive Board”
3. Locate Feedback Jumper as shown at left
4. Please check the jumper settings as shown at the left, and make changes as necessary
•
Disconnect the original feedback sensor
•
Connect the wires from the flowmeter as follow:
Frequency signal wire - J3 Pin 5
Signal common wire - J3 Pin 6
Shield wire
- J3 Pin 7
•
Leave anything else unchanged as before
TO GET ASSISTANCE, CALL: 919-774-7667
ZENITH PUMPS
Page 28
Feedback Control by Using a Flowmeter with Frequency Signal
(cont’d)
5. Result:
•
The output from the pump will be controlled by the flowmeter
•
The units of the setpoint and the Tach are same as the unit of Fm
6. IMPORTANT NOTE:
•
The unit of the setpoint is in (cc/min), and no longer in (RPM)
•
The pump speed may vary at very wide range. Do not to exceed the factory suggested
speed limit
•
Any restriction at the discharge side of the pump can rapidly increase the speed of
pump. This is the major causation making the pump over-speed. Check any down-stream
restrictions before the operation.
•
Always test the system without any down-stream restrictions. Gradually increase the
restrictions, and monitor the speed of the pump closely, to make sure not to over-run
the pump
•
The operation can make the pump runs at very high speed. You should test your system for safety under all potential conditions. Failure to do so can result in damage to
the equipment and/or serious injury to personnel
ZENITH PUMPS
TO GET ASSISTANCE, CALL: 919-774-7667
Page 29
Feedback Control by Using a Flowmeter with 4-20 (mA) Signal
1. Preliminary Action:
•
A flowmeter which can send 4-20 (mA) flow signal to ZeDrive
•
Max. Flowrate — Fm (cc/min) (or in other units. Find out from the flowmeter)
2. Calculation:
None
Analog Select Jumper Location
Feedback
(Not this jumper)
Analog Select Jumper
3. Coding:
Check and change the following codes
Code 20 = Fm
Code 22 = Fm
Code 61 = 1
Code 63 = 1
Code 84 = 2
4. Wiring:
•
Locate Analog Select Jumpers on “Control Board”:
Transformer
Heat Sink
4-20 mA:
Left
1. Loosen up 6 screws on the back panel, and 2
screws located on the heat sink of ZeDrive
Disregard
2. Remove the back panel. Face the back of ZeDrive and place ZeDrive so that the heat sink points down. The top board is the
“Control Board”, and the bottom one is “Drive Board”
3. Locate Feedback Jumper as shown at left
4. Please check the jumper settings as shown at the
left, and make changes as necessary
•
Connect the wires from the flowmeter as shown at left
•
Leave anything else unchanged as before
From Device
Shield
Signal
Common
10
J3
16
17
J4
5. Result:
•
The output from the pump will be controlled by the flowmeter
•
The units of the setpoint and the Tach are same as the unit of Fm
6. IMPORTANT NOTE:
•
The unit is no longer in (RPM). It is in the engineering unit, same as Fm
•
The pump speed may vary widely. Do not to exceed the factory suggested speed limit
•
Any restriction at the discharge side of the pump can rapidly increase the pump speed.
Check any down-stream restrictions before the operation
•
Always test the system without any down-stream restrictions. Gradually increase the
restrictions, and monitor the pump speed closely, make sure not to over-run the pump
•
You should test your system for safety under all potential conditions. Failure to do so
can result in damage to the equipment and/or serious injury to personnel
ZENITH PUMPS
TO GET ASSISTANCE, CALL: 919-774-7667
Page 30
Feedback Control by Using a Flowmeter with 0-10 (VDC) Signal
1. Preliminary Action:
•
A flowmeter which can send 0-10 (VDC) flow signal to ZeDrive
•
Max. Flowrate — Fm (cc/min) (or in other units. Find out from the flowmeter)
2. Calculation:
None
Analog Select Jumper Location
Feedback
(Not this jumper)
Analog Select Jumper
3. Coding:
Check and change the following codes
Code 20 = Fm
Code 22 = Fm
Code 61 = 1
Code 63 = 1
Code 84 = 2
Transformer
Heat Sink
4. Wiring:
•
Locate Analog Select Jumpers on “Control Board”:
1. Loosen up 6 screws on the back panel, and 2
screws located on the heat sink of ZeDrive
0-10 VDC:
(Default)
disregard
Left
2. Remove the back panel. Face the back of ZeDrive and place ZeDrive so that the heat sink points down. The top board is the
“Control Board”, and the bottom one is “Drive Board”
3. Locate Feedback Jumper as shown at left
4. Please check the jumper settings as shown at the
left, and make changes as necessary
•
Connect the wires from the flowmeter as shown at left:
•
Leave anything else unchanged as before
From Device
Shield
Signal
Common
10
J3
16
17
J4
5. Result:
•
The output from the pump will be controlled by the flowmeter
•
The units of the setpoint and the Tach are same as the unit of Fm
6. IMPORTANT NOTE:
•
The unit is no longer in (RPM). It is in the engineering unit, same as Fm
•
The pump speed may vary widely. Do not to exceed the factory suggested speed limit
•
Any restriction at the discharge side of the pump can rapidly increase the pump speed.
Check any down-stream restrictions before the operation
•
Always test the system without any down-stream restrictions. Gradually increase the
restrictions, and monitor the pump speed closely, make sure not to over-run the pump
•
You should test your system for safety under all potential conditions. Failure to do so
can result in damage to the equipment and/or serious injury to personnel
ZENITH PUMPS
TO GET ASSISTANCE, CALL: 919-774-7667
Page 31
Master/Follower System
1. Preliminary Action:
Feedback Jumper Location
•
Two individual ZeDrive systems are needed for forming
a master/follower system
•
The following is only one example. For more detailed
system integration and configuration, please refer to
Chapter 5 in “ZeDrive and ZeTrol Manual”
•
Master Reducer Gear Ratio — Rm. If the pump is directly
coupled with the motor, the gear ratio Rm=1
•
Follower Reducer Gear Ratio — Rf. If the pump is directly coupled with the motor, the gear ratio Rf=1
•
Motor maximum speed — VM (RPM), usually, 1800
(RPM)
•
Master Pump Capacity — Cm (cc/rev)
•
Follower Pump Capacity — Cf (cc/rev)
•
Master Feedback Sensor Resolution — Fm (No. of Teeth)
•
Follower Feedback Sensor Resolution — Ff (No. of Teeth)
Analog I/O Board
(Not this jumper)
Jumper 1
(Feedback)
Transformer
Heat Sink
3-wire Sensor (default):
Left
2-wire Sensor:
Left
2. Calculation:
2.1 Master Primary Setpoint — Pm (cc/min)
Pm (cc/min) = VM (RPM) / Rm × Cm (cc/rev)
2.2 Maximum Percent between Follower and Master — Pf (%)
Pf (%) = Follower Max. Flowrate (cc/min) / Master Max. Flowrate (cc/min)
= [ VM (RPM) / Rf × Cf (cc/rev) ] / [ VM (RPM) / Rm × Cm (cc/rev) ]
= [ Rm / Rf ] × [ Cf / Cm ]
3. Coding:
Check and change the following codes
For Master
Primary Setpoint, Eng. Unit
Code 20 = Pm
Primary Display, Eng. Unit
Code 22 = Pm
External Ref. Resolution, PPR
Feedback Resolution, PPR
Code 31 = Fm
Primary Max. External Ref. Speed, RPM
Primary Max. Feedback Speed, RPM Code 34 = VM
Primary Scaling Format
Code 61 = 1 (Master)
Primary Display Format
Code 63 = 1 (Master)
For Follower
Code 20 = Pf
Code 22 = Pf
Code 30 = Fm
Code 31 = Ff
Code 33 = VM
Code 34 = VM
Code 61 = 2 (Follower)
Code 63 = 2 (Follower)
ZENITH PUMPS
TO GET ASSISTANCE, CALL: 919-774-7667
Page 32
Master/Follower System (cont’d)
4. Wiring:
•
Make sure the feedback jumper settings are correct and matched to the feedback sensors of
master and follower systems
Master
Follower
Jumper Settings
3-wire
3-wire
left
3-wire
2-wire
left
2-wire
2-wire
left
2-wire
3-wire
left
NOTE: Do not count bare wire (shield wire)
•
Connect wires like the following illustration to form a master/follower system (for detailed
connection, please refer to page G-4 in “ZeDrive and ZeTrol Manual”
Master ZeDrive
To
Feedback
Sensor
Jumpers
To Master Motor
To AC
Power
A2
A1
L1
N
G
Follower ZeDrive
1
2
3
4
5
6
7
8
9
10
11
12
13
14
15
16
Red (for 3-wire)
Wht To Master
Feedback
Blk Sensor
To
Feedback
Sensor
Bare (Shield)
Jumpers
To Follower Motor
To AC
Power
1
2
3
4
5
6
7
8
9
10
11
12
13
14
15
16
Red (for 3-wire)
2
3
Wht
Blk
To Follower
Feedback
Sensor
Bare (Shield)
TO GET ASSISTANCE, CALL: 919-774-7667
ZENITH PUMPS
Page 33
Master/Follower System (cont’d)
5. Result:
•
Turn on the AC power for both systems
•
Input Follower Primary Setpoint 1 (Code 01), i.e., 75 (%)
•
Input Master Primary Setpoint 1 (Code 01), i.e., 20 (cc/min)
•
The master system should run, and the follower system should run and deliver 75% the
flowrate the master system delivers
•
Stop the master system, the follower will also stop
6. IMPORTANT NOTE:
•
The above master/follower system is only a simplest example. For more detailed system integration and configuration, please refer to Chapter 5 in “ZeDrive and ZeTrol
Manual”
ZENITH PUMPS
TO GET ASSISTANCE, CALL: 919-774-7667
Page 34
Adjust Current Output Limit
NOTE:
The current limit level on ZeDrive is adjustable from approximately 4 to 16 amps.
The current limit is not operable when ZeDrive is in Direct Scaling Mode (Code 61 = 0).
1. Preliminary Action:
•
An AC Ammeter
•
A Screw Driver
2. Procedures:
2.1 Place the AC ammeter in series (or clamp on)
with one of the VAC power input lines L1 or
L2/Neutral
2.2 Turn the current limit potentiometer at the
rear of ZeDrive fully clockwise.
J3
J1
Current Limit
Potentiometer
2.3 With ZeDrive in the RUN state, gradually increase the load until the AC ammeter reaches
the desired limit level
2.4 Turn the current limit potentiometer counterclockwise until ZeDrive begins to current
limit. This is exhibited by the following
conditions:
•
A Slight reduction in motor RPM
•
The front panel “LIMIT ALARM” LED
illuminates
•
Code 52 indicates a value of 7
J2
J4
2.5 Increase the motor load gradually. The load current should not increase and the motor RPM
should decrease
TO GET ASSISTANCE, CALL: 919-774-7667
ZENITH PUMPS
Page 35
Calibrate Analog Input
NOTE:
In most instances, ZeDrive™ 2000 will come to you prepackaged in a control cabinet. The controller will be mounted and all internal cabinet wiring will be complete.
The unit will also be programmed according to your specifications. The analog inputs and output
will have been calibrated for 4-20mA, unless otherwise specified. If re-calibration is desired for
some reason, such as using 0-10V signals, instead of 4-20mA, follow the appropriate procedure
below.
1. Preliminary Action:
•
•
External device which supplies 0-10 (VDC) or 4-20
(mA) calibration signal to ZeDrive
Analog Select Jumper Location
Feedback
(Not this jumper)
Analog Select Jumper
Locate Analog Select Jumpers on “Control Board”:
1. Loosen up 6 screws on the back panel, and 2
screws located on the heat sink of ZeDrive
Transformer
2. Remove the back panel, place ZeDrive as
shown at left. The top board is the “Control
Board”, and the bottom one is “Drive Board”
3. Locate Analog Select Jumper as shown at left
4. Depend on the signal, change the jumper setting as shown at the left
2. Procedures:
Heat Sink
4-20 mA:
0-10 VDC:
(Default)
2.1 Connect the analog calibration input source to J4-16(+) and J4-17 (-)
2.2 Select code C-85
2.3 Inject a “zero” signal (4mA or 0V)
2.4 Press the “.” button
2.5 Select code C-86
2.6 Inject a “span” signal (20mA or 10V)
2.7 Press the “.” button
Left
disregard
TO GET ASSISTANCE, CALL: 919-774-7667
ZENITH PUMPS
Page 36
Calibrate Analog Output
NOTE:
In most instances, ZeDrive™ 2000 will come to you prepackaged in a control cabinet. The controller will be mounted and all internal cabinet wiring will be complete.
The unit will also be programmed according to your specifications. The analog inputs and output
will have been calibrated for 4-20mA, unless otherwise specified. If re-calibration is desired for
some reason, such as using 0-10V signals, instead of 4-20mA, follow the appropriate procedure
below.
Analog Select Jumper Location
1. Preliminary Action:
•
External device which can measure 0-10 (VDC) or 4-20
(mA) analog signal, i.e., a multi-meter
•
Locate Analog Select Jumpers on “Control Board”:
Feedback
(Not this jumper)
Transformer
1. Loosen up 6 screws on the back panel, and 2
screws located on the heat sink of ZeDrive
2. Remove the back panel, place ZeDrive as shown
at left. The top board is the “Control Board”, and
the bottom one is “Drive Board”
3. Locate Analog Select Jumper as shown at left
4. Depend on the signal, change the jumper setting as shown at the left
Analog Select Jumper
Heat Sink
4-20 mA:
0-10 VDC:
(Default)
(disregard)
Left
Left
2. Procedures:
2.1 Connect the analog calibration measuring device to J4-18(+) and J4-17 (-)
2.2 Select code C-82
2.3 Change the value in code C-82 until the measuring device reads “zero” (4mA or 0V)
2.4 Select code C-83
2.5 Change the value in code C-83 until the measuring device reads “span” (20mA or 10V)
TO GET ASSISTANCE, CALL: 919-774-7667
Page 37
Trouble-shooting & Fault Information
ZENITH PUMPS
TO GET ASSISTANCE, CALL: 919-774-7667
ZENITH PUMPS
Page 38
Trouble-shooting & Common Questions
1. Good Sensor or Bad Sensor:
It is a good practice to always perform this step before proceed to any trouble-shooting.
•
Use a voltmeter to measure DC voltage between VP and DCM on PG-02 card of ZeDrive
drive.
•
If a Hall Effect sensor is used, make sure TSW2 switch points to 12V location (up location).
The reading should be about 12 (VDC). If the reading is small or it is always 0V, it may indicate a defected PG-02 card. Replace another card to verify again. If the reading is correct,
proceed the following steps.
•
Disconnect the power, and connect the sensor wires to PG-02 card (or, use a separate
12VDC power supply), and turn the power back on
•
Measure DC voltage between A (signal wire) and DCM on PG-02 card inside of ZeDrive
drive
•
Slowly turn the motor shaft (or reducer shaft) by using a wrench, the voltage should vary
between 0 (VDC) and 12 (VDC). If the shaft is turned fast, the voltage may stay at about 6
(VDC) level.
•
If the voltage always stay at 0 (VDC), or any value below 1 (VDC), please check the sensor
wiring. If the wiring is correct, it may be a defected sensor. Please contact Zenith for a replaced one
•
If the voltage is always above 12 (VDC), when the shaft is turning, please check the sensor
wiring. If the wiring is correct, it may be a defected sensor. Please contact Zenith for a replaced one
•
If the voltage varies between 0 (VDC) and 12 (VDC), or it stays at 6 (VDC), it indicates that
the sensor is good. Please proceed to the proper section for further trouble-shooting
2. No Feedback Signal:
Please follow Step 5 of “Quick Test for ZeDrive” to manually verify the feedback signal.
•
The gap between the feedback sensor and the pickup gear inside of reducer should be
0.005”, without any interference. To do this, the simplest method is:
Screw the sensor into the thread hole located on the gear reducer, until it hits the inside
pickup gear, and back up about 1/8 of a turn (45 degrees)
•
The wiring for the sensor is incorrect
If it is a 2-wire sensor, connect
White wire - J3 Pin 5
Black wire - J3 Pin 6
Bare wire - J3 Pin 7
If it is a 3-wire sensor, connect
Red wire - J3 Pin 1
White wire - J3 Pin 5
Black wire - J3 Pin 6
Bare wire - J3 Pin 7
ZENITH PUMPS
TO GET ASSISTANCE, CALL: 919-774-7667
Page 39
Trouble-shooting & Common Questions
•
•
12 VDC power is not correct when a 3-wire sensor is
used. Measure J3 connector Pin 1 to Pin 12 by a multimeter, make sure it is 12 VDC
Feedback jumper settings on “Control Board” do not
match the feedback sensor you have on hand. Check
and change the jumper settings on the “Control
Board”:
Feedback Jumper Location
Analog I/O Board
(Not this jumper)
Jumper 1
(Feedback)
Transformer
1. Loosen up 6 screws on the back panel, and 2
screws located on the heat sink of ZeDrive
2. Remove the back panel. Face the back of ZeDrive and place ZeDrive so that the heat sink
points down
3. There are 2 boards inside of ZeDrive. When
you place ZeDrive as shown in step 2, the top
board is the “Control Board”, and the bottom
one is “Drive Board”
Heat Sink
3-wire Sensor (default):
Left
2-wire Sensor:
Left
4. Locate Feedback Jumper as shown at left
5. Depend the type of sensor you have, please check the feedback jumper settings as
shown at the left
3. System Always Runs at Full Speed:
Refer to 2—”No Feedback Signal”
4. System Can Not Run Below 30 RPM or 40 RPM:
Refer to 2—”No Feedback Signal”
5. System Never Runs:
•
Check the jumpers on J3 connector
Pin 11 - Pin 12
Pin 13 - Pin 12
Pin 14 - Pin 15
•
The 2 power fuses located on the “Drive Board” are blown out. To locate “Drive Board”,
please refer to 1—”No Feedback Signal”
6. System Can Not Run up to Max. Speed:
•
Check Code 11 for the max. speed limit of the motor (typically 1800 rpm)
7. System Can Not Run Slow Enough:
•
Check Code 10 for the min. speed limit of the motor (typically 0 rpm)
8. System Speed Does Not Match Set Speed:
•
Verify the values for the following codes:
Code 61 = 1
Code 20 = 1800 / Gear Ratio
(“Primary Active Output Format” set to “Master”)
(Maximum Reducer Speed in RPM)
TO GET ASSISTANCE, CALL: 919-774-7667
ZENITH PUMPS
Page 40
Trouble-shooting & Common Questions (cont’d)
Code 31 = No. of Teeth of the Pickup Gear
(Feedback Reference Resolution)
Code 34 = 1800
(Maximum Motor Speed, typically 1800 RPM)
•
After the above step, the unit of the set point should be in RPM of the reducer shaft
•
Run the system, and verify the speed of the reducer shaft
•
If the actual speed of the reducer shaft does not match the set point, please verify, calculate
and change the values of the above codes
9. System Needs Help to Start to Rotate:
•
Connect only A1 and A2 terminals on DC motor to ZeDrive A1 and A2 terminals, respectively. Leave F1 and F2 terminals unconnected
•
If a shunt motor is used, check the wiring diagram
10. System Turns at Wrong Direction:
•
Swap A1 and A2 wires should change the direction
11. It Takes Very Long Time to Ramp Up:
•
Check Code 16 for acceleration time
•
Smaller the value, lesser the time for the motor to ramp up. However, it may increase the
chance to damage the pump, due to the quick pressure build-up caused by the restriction
down the stream of the pump
12. It Takes Very Long Time to Slow Down or Stop:
•
Check Code 17 for deceleration time
•
Smaller the value, lesser the time for the motor to stop.
13. Simple Way to Verify Feedback Signal:
•
Power up ZeDrive
•
Click
•
Turn the reducer shaft by a wrench
•
Non-zero number should be shown on the top display, whenever the shaft turns
TACH
button
If there always is “0” on the top display, something is wrong related to feedback. Please refer to
“Trouble-shooting” section
14. Tach Reads Incorrectly:
•
Verify the values for the following codes:
Code 61 = 1
(“Primary Active Output Format” set to “Master”)
Code 20 = 1800 / Gear Ratio (Maximum Reducer Speed in RPM)
Code 22 = 1800 / Gear Ratio (Maximum Reducer Speed Display in RPM)
Code 31 = No. of Teeth of the Pickup Gear
(Feedback Reference Resolution)
Code 34 = 1800
(Maximum Motor Speed, typically 1800 RPM)
ZENITH PUMPS
TO GET ASSISTANCE, CALL: 919-774-7667
Page 41
Trouble-shooting & Common Questions (cont’d)
15. Replaced Feedback Sensor Fits the Existing ZeDrive Or Not:
Feedback jumper settings on “Control Board” should
match the sensor you have on hand. Check and change
the jumper settings on the “Control Board”:
1. Loosen up 6 screws on the back panel, and 2
screws located on the heat sink of ZeDrive
Feedback Jumper Location
Analog I/O Board
(Not this jumper)
Jumper 1
(Feedback)
2. Remove the back panel. Face the back of ZeDrive and place ZeDrive so that the heat sink
points down
3. When you place ZeDrive as shown in step 2,
the top board is the “Control Board”, and the
bottom one is “Drive Board”
4. Locate Feedback Jumper as shown at left
5. Check the feedback jumper settings as shown
at the left
Transformer
Heat Sink
3-wire Sensor (default):
Left
2-wire Sensor:
Left
16. Display Shows “- - - 1”, “- - - 2”or “- - - 3”:
•
If the AC power setting of ZeDrive sets to 230 VAC ( refer to 12 of this section), it may indicate that the actual AC power is 120 VAC
•
It may also indicate an environment problem, such as electrical noise severe enough to disrupt the microprocessor. Generally,
“- - - 1” indicates incompatible AC power
“- - - 2” indicates electrical noise problem
“- - - 3” indicates parameter storage area has been corrupted
•
If “- - - 2” or “- - - 3” appears, the programming control parameters should be verified and
restoration back to factory settings may be performed (refer to 16 of this section)
17. Restore Back to Factory Defaults:
•
Make sure copy down the original settings, especially the values for the following codes:
Code 1 - Primary Setpoint 1
Code 8 - Feedback Input Select
Code 10 - Minimum Limit
Code 11 - Maximum Limit
Code 12 - Low Alarm
Code 13 - High Alarm
Code 16 - Acceleration Time
Code 17 - Deceleration Time
Code 20 - Maximum Primary Setpoint
Code 21 - Maximum Secondary Setpoint
Code 22 - Maximum Primary Display
Code 23 - Maximum Secondary Display
Code 31 - No. of Teeth of the Feedback Pickup Gear
Code 34 - Maximum Motor Speed (Primary)
Code 37 - Maximum Motor Speed (Secondary)
Code 61 - Primary Active Output Format Selection
Code 62 - Secondary Active Output Format Selection
Code 63 - Primary Active Display Format Selection
Code 64 - Secondary Active Display Format Selection
Code 84 - Analog Input Function Selection
Code 85 - Analog Input Zero
TO GET ASSISTANCE, CALL: 919-774-7667
ZENITH PUMPS
Page 42
Trouble-shooting & Common Questions (cont’d)
•
Turn off the AC power for ZeDrive
•
Press down “CLEAR” button and “7” button at same time, and hold
•
Apply AC power to ZeDrive
•
Release the above 2 buttons, until ZeDrive powers up
•
Restore the values for above codes
NOTE: Make sure to back up the original settings for your system. Once you perform this
step, all settings will be restore to factory default values. The defaults may NOT match the
actual system you have.
18. Can Not Operate from Keypad:
•
ZeDrive could be set for Analog Remote Control mode
•
To use keypad on ZeDrive to control the system, set the value of
Code 84 to 0
19. The Display Would Not Light Up:
•
Turn off the AC power of ZeDrive
•
Check the fuse located below J2 connector on the back panel,
and replace it as necessary
20. How Do I Use ZeDrive for 230 (VAC) Power:
•
Locate the “Drive Board” inside of ZeDrive. Please refer to section “No Feedback Signal”
•
There is a “Power Selection Switch” on the “Drive Board”. Flip the switch so that it shows
“230 VAC” (by default, ZeDrive sets to “120 VAC”)
TO GET ASSISTANCE, CALL: 919-774-7667
ZENITH PUMPS
Page 43
Fault Code List
Code
Fault Description
Corrective Actions
LIMIT alarm LED lights up
This parameter establishes the minimum level of motor
RPM during operation. It is allowable to program a setpoint which is below this value, however the controller
will enforce this minimum speed (measured at the motor
shaft)
11
LIMIT alarm LED lights up
This parameter establishes the maximum level of motor
RPM during operation. It is allowable to program a setpoint which is above this value, however the controller
will enforce this maximum speed (measured at the motor
shaft)
12
LIMIT alarm LED lights up
This parameter establishes the point at which the LOALARM output is turned on
13
LIMIT alarm LED lights up
This parameter establishes the point at which the HIALARM output is turned on
Deviation alarm LED lights
up
Ramped Error Alarm establishes the error band (defined
as ramped motor speed minus actual motor speed) at
which DEV ALARM output is turned on. If the difference
between actual motor speed and ramped desired motor
speed is greater than or equal to C-14, the alarm is
turned on.
Deviation alarm LED lights
up
Scaled Error Alarm establishes the error band (defined
as final motor speed minus actual motor speed) at which
DEV ALARM output is turned on. If the difference between actual motor speed and final desired motor speed
is greater than or equal to C-15, the alarm is turned on
10
14
15
TO GET ASSISTANCE, CALL: 919-774-7667
Page 44
Complete Code List
ZENITH PUMPS
TO GET ASSISTANCE, CALL: 919-774-7667
ZENITH PUMPS
Page 45
01
Primary Setpoint 1
Default:
0
02
Primary Setpoint 2
Default:
0
03
Secondary Setpoint 1
Default:
0
04
Secondary Setpoint 2
Units: eng
Range: 0.000~9999
These codes have differing meanings, depending on the
output format selected. They are always in Engineering
Units.
The back-panel switch inputs or remote serial interface
will select one of the four setpoints.
• Direct output format: C01 through C04 are not used
• Master output format: Absolute setpoint
• Follower output format: Multiplier ratio
• Offset output format: Multiplier ratio
Default:
0
05
Jog Setpoint
Units: Motor RPM
Range: 0~9999
This parameter establishes the speed at which the motor
rotates during a JOG operation. It is always measured at
the drive motor shaft.
Default:
50
06
Output Setpoint
Units: % (of Armature Voltage)
Range: 0~100
This parameter controls the power level applied to motor
only when Direct Output Format is selected. Units are in
percent and refer to the percent of input waveform that
is rectified and applied to the motor (100% means the
full rectified AC line voltage is applied to motor).
Note: The percent of input power required to drive a
motor at a given speed varies according to load and that
full motor speed is achieved at a setpoint of much less
than 100%.
Default:
0
10
Minimum Limit
Units: Motor RPM
Range: 0~9999
This parameter establishes the minimum level of motor
RPM during operation. It is allowable to program a
setpoint which is below this value, however the
controller will enforce this minimum speed (measured at
the motor shaft), except when attempting to recover
position error.
Default:
0
TO GET ASSISTANCE, CALL: 919-774-7667
ZENITH PUMPS
Page 46
11
Maximum Limit
Units: Motor RPM
Range: 0~9999
This parameter establishes the maximum level of motor
RPM during operation. It is allowable to program a
setpoint which is above this value, however the
controller will enforce this maximum speed (measured
at the motor shaft), except when attempting to recover
position error.
Default:
1800
12
Low Alarm
Units: Motor RPM
Range: 0~9999
This parameter establishes the level of motor RPM
during operation below which the LO-ALARM output is
turned on.
Default:
0
13
High Alarm
Units: Motor RPM
Range: 0~9999
This parameter establishes the level of motor RPM
during operation above which the HI-ALARM output is
turned on.
Default:
1800
14
Ramped Error Alarm
Units: Motor RPM
Range: 0~9999
This parameter establishes the error band (defined as
Ramped Speed minus actual speed) at which DEVALARM output is turned on. If the difference between
actual speed and ramped desired speed is greater than
or equal to C14, the alarm is turned on.
Default:
1800
15
Scaled Error Alarm
Units: Motor RPM
Range: 0~9999
This parameter establishes the error band (defined as
Final Speed minus actual speed) at which DEV ALARM
output is turned on. If the difference between actual
speed and final desired speed is greater than or equal to
C15, the alarm is turned on.
Default:
1800
TO GET ASSISTANCE, CALL: 919-774-7667
ZENITH PUMPS
Page 47
16
Acceleration Time
Default:
600.0
17
Deceleration Time
Units: Seconds
Range: 0.0~600.0
These parameters control the rate at which the desired
speed is ramped up/down. It is the number of seconds
required to change the motor speed by 1800 RPM.
Default value of 600 seconds assures proper lubrication
of a new pump. After the initial startup period, operating
values can be much lower.
Acc. Time below 0.5 second are not recommended
Default:
600.0
18
Lag Pulse Limit
Units: Number of Pulses
Range: 0~9999
It sets a maximum pulse error count for the difference
between idealized feedback pulses minus the Feedback
pulses. It may not always be desirable to recover all the
position error lag. Set this paramter to the desired lag
pulse limit.
Default:
0
19
Lead Pulse Limit
Units: Number of Pulses
Range: 0~9999
It sets a maximum pulse error count when the Feedback
pulses exceed the idealized feedback pulse count. Set
this parameter to the desired lead pulse limit.
Default:
0
20
Primary Setpoint Maximum
Units: eng
Range: 0~9999
This parameter establishes full-scale speed when one of
the primary setpoints is active. It is in the same units as
C01 and C02. The format of the number entered here
(number of digits to the right of decimal point)
establishes the setpoint format. When the controlled
process is at this speed, the Motor Shaft Speed will be at
C34 (Max RPM Feedback - Primary)
Default:
1800
21
Secondary Setpoint Maximum
Units: eng
Range: 0~9999
This parameter establishes full-scale speed when one of
the secondary setpoints is active. It is in the same units
as C03 and C04. The format of the number entered here
(number of digits to the right of decimal point)
establishes the setpoint format. When the controlled
process is at this speed, the Motor Shaft Speed will be at
C37 (Max RPM Feedback - Secondary)
Default:
1800
TO GET ASSISTANCE, CALL: 919-774-7667
ZENITH PUMPS
Page 48
22
Primary Display Maximum
Units: eng
Range: 0~9999
This parameter is similar to C20, but will be used for
display, thus allowing a scale factor to be introduced
between the controlled process and the display. The
format of the number entered here (number of digits to
the right of decimal point) will be used for the speed
display. This parameter is used when one of the primary
setpoints is active.
Default:
1800
23
Secondary Display Maximum
Units: eng
Range: 0~9999
This parameter is similar to C22, but will be used for
display, thus allowing a scale factor to be introduced
between the controlled process and the display. The
format of the number entered here (number of digits to
the right of decimal point) will be used for the speed
display. This parameter is used when one of the
secondary setpoints is active.
Default:
1800
29
Recovery Multiplier
Units:
Range: 0.0~100.0
It determines the rate at which the pulse error is reduced
to zero. This parameter multiplied by the pulse error
count is the number by which the speed setpoint is
adjusted every 100 milliseconds.
Default:
0.0
30
External Reference PPR
Units: PPR (Number of Pulses Per Revolution)
Range: 0~3270
It is the number of pulses generated by the device
attached to External Reference Input for each revolution
of its shaft.
Default:
120
31
Feedback Reference PPR
Units: PPR (Number of Pulses Per Revolution)
Range: 0~3270
It is the number of pulses per revolution generated by
the device attached to Motor Shaft.
Default:
120
32
Auxiliary Input PPR
Units: PPR (Number of Pulses Per Revolution)
Range: 0~3270
It is the number of pulses generated by the device
attached to Auxiliary/Offset Frequency Input for each
revolution of its shaft.
Default:
120
TO GET ASSISTANCE, CALL: 919-774-7667
ZENITH PUMPS
Page 49
33
Max RPM External Reference - Primary
Units: PPR (Number of Pulses Per Revolution)
Range: 0~3270
It sets the full-scale speed of the device driving External
Reference, and is used in Follower or Offset formats
when the primary data set is selected.
Default:
1800
34
Max RPM Feedback - Primary
Units: PPR (Number of Pulses Per Revolution)
Range: 0~3270
It sets the full-scale speed of the motor. When the motor
is turning at this speed with a primary setpoint selected,
the controlled process will be at C20 (Primary Setpoint
Maximum).
Default:
1800
35
Max RPM Aux / Offset - Primary
Units: PPR (Number of Pulses Per Revolution)
Range: 0~3270
It sets the full-scale speed of the device driving the
Auxiliary / Offset frequency input, and is used in the
Offset format when the primary data set is selected.
Default:
1800
36
Max RPM External Reference - Secondary
Units: PPR (Number of Pulses Per Revolution)
Range: 0~3270
It sets the full-scale speed of the device driving External
Reference, and is used in Follower or Offset formats
when the secondary data set is selected.
Default:
1800
37
Max RPM Feedback - Secondary
Units: PPR (Number of Pulses Per Revolution)
Range: 0~3270
It sets the full-scale speed of the motor. When the motor
is turning at this speed with a secondary setpoint
selected, the controlled process will be at C21
(Secondary Setpoint Maximum).
Default:
1800
38
Max RPM Aux / Offset - Secondary
Units: PPR (Number of Pulses Per Revolution)
Range: 0~3270
It sets the full-scale speed of the device driving the
Auxiliary / Offset frequency input, and is used in the
Offset format when the secondary data set is selected.
Default:
1800
TO GET ASSISTANCE, CALL: 919-774-7667
ZENITH PUMPS
Page 50
M40
Tachometer
Units: eng
Range:
It is the feedback displayed in scaled Engineering Units.
The feedback input is read by ZeDrive every 10
milliseconds. The readings are summed and averaged
for one second before displaying
Read Only
M41
External Reference Input
Units: Hz
Range:
It displays the frequency of External Reference Input in
hertz (pulses per second). The number displayed is not
averaged. It represents the frequency calculation from
the prior 10 milliseconds before the display update.
Because it is not averaged over the display update
period, it appears less stable than Tachometer display
due to sensor irregularities or other system dynamic
errors.
It may contain numbers larger than 9999. When this
occurs, the value is displayed differently. For example, a
"10.00." display indicates 10,000 Hz.
Read Only
M42
Auxiliary / Offset Frequency Input
Units: Hz
Range:
It displays the frequency of Auxiliary/Offset Frequency
Input in hertz (pulses per second). The number
displayed is not averaged. It represents the frequency
calculation from the prior 10 milliseconds before the
display update. Because it is not averaged over the
display update period, it appears less stable than
Tachometer display due to sensor irregularities or other
system dynamic errors.
It may contain numbers larger than 9999. When this
occurs, the value is displayed differently. For example, a
"10.00." display indicates 10,000 Hz.
Read Only
TO GET ASSISTANCE, CALL: 919-774-7667
ZENITH PUMPS
Page 51
M43
Feedback Frequency Input
Units: Hz
Range:
It displays the frequency of Feedback Frequency Input
in hertz (pulses per second). The number displayed is
not averaged. It represents the frequency calculation
from the prior 10 milliseconds before the display update.
Because it is not averaged over the display update
period, it appears less stable than Tachometer display
due to sensor irregularities or other system dynamic
errors.
It may contain numbers larger than 9999. When this
occurs, the value is displayed differently. For example, a
"10.00." display indicates 10,000 Hz.
Read Only
M44
Deviation (Error)
Units: Hz
Range:
It shows the difference between the desired speed and
actual speed of the machine.
Read Only
M45
Scaled Reference
Units: Hz
Range:
It is the desired speed of the controlled machine,
expressed in Hz (assumed to be measured at the
Feedback Frequency input). It is not altered by ramp-up
or ramp-down. (In other words, this is the final
destination, in terms of speed).
Read Only
M46
Ramped Reference
Units: Hz
Range:
It is the desired speed of the controlled machine,
expressed in Hz (assumed to be measured at the
Feedback Frequency input). It is altered by ramp-up or
ramp-down. (In other words, this is the scaled reference
adjusted for acceleration or deceleration as
appropriate).
Read Only
M50
Active Format
Units:
Range:
0
1
2
3
Read Only
Direct Format
Master Format
Follower Format
Offset Format
It is status indicator of the active scaling format
TO GET ASSISTANCE, CALL: 919-774-7667
ZENITH PUMPS
Page 52
M51
Entry Error
Units:
Range:
Read Only
0
1
2
3
4
5
M52
M53
Alarm Status
Units:
Range:
1
2
3
4
5
6
7
Read Only
Low Limit
High Limit
Low Alarm
High Alarm
Error Alarm 1
Error Alarm 2
Current Limit
It shows the status of limits and alarms in the controller.
Control State
Units:
Range:
1
32
64
128
M54
No Error
Invalid Code
Above Maximum Value
Below Minimum Value
Keypad Lockout
Entry Timeout
It shows the last error encountered on a keypad entry. If
any entry is not accepted by the controller, the reason
shows up here.
Control Mode
Units:
Range:
Bit 7
Bit 6
Bit 5
Bit 4
Bit 3
Bit 2
Bit 1
Bit 0
Read Only
JOG
RUN
Ramped Stop
Fast Stop
It shows the status of control state of the controller.
Read Only
Primary (1) / Secondary (0) Data Set
Not used (was the forward /reverse flag on ZeTrol)
Closed-Loop (1) / Open-Loop (0)
Primary Setpoint 1 (1) / Primary Setpoint 2 (0)
Secondary Setpoint 3 (1) / Secondary Setpoint 4 (0)
Local (1) / Remote Serial (0) Control
Keypad Enable (1) / Disable (0)
Ramp Enable (1) / Disable (0)
It indicates the status of the optional switch inputs to the
controller. It is a single-byte with meanings assigned to
individual bits. This code, along with Code 53, is
intended for use by computer interface.
TO GET ASSISTANCE, CALL: 919-774-7667
ZENITH PUMPS
Page 53
M55
Analog Input 1 Raw Signal
Units: mA / VDC
Range:
It is Analog Input 1 signal unadjusted for Zero and Span.
Read Only
M56
Analog Input 1 Adjusted Signal
Units: bits
Range:
It is Analog Input 1 signal adjusted for Zero and Span.
Read Only
M57
Power Fail Count
Units: count
Range:
It represents the number of times that a power brownout
condition was detected.
It is one of few monitoring codes which can be altered
from keypad. When displayed, this number can be
zeroed by pressing CLEAR key on keypad.
Read Only
M58
Read Only
Serial Communications Error
Units:
Range:
0 No Error
Bit 5 Data was out of minimum/maximum range
Bit 4 Invalid Parameter Code, Check Sum or Decial Point Error
Bit 3 Receive Buffer filled before ETX received or Message Format Error
Bit 2 Parity Error
Bit 1 Controller in Local Mode, Not in Computer Mode
It shows the status of the most recent data received from
serial communications port.
60
Current Limit Response
Units:
Range: 0~50
It defines how aggressively the software algorithm
address the condition of current limit (i.e. how quickly
the phase-angle firing is adjusted to reduce current).
Default:
20
61
Primary Scaling Format
Default:
1
Secondary Scaling Format
Units:
Range:
0 Direct
1 Master
2 Follower
3 Offset
These parameters select Output Format when primary
and secondary data sets are selected, respectively.
Default:
1
62
TO GET ASSISTANCE, CALL: 919-774-7667
ZENITH PUMPS
Page 54
64
Secondary Display Format
Units:
Range:
1 Master
2 Follower
These parameters are used to select Display Format
used when primary and secondary data sets are
selected, respectively.
Default:
1
65
Gain
Default:
5000
Reset
Default:
500
Rate
Default:
9000
Trim Authority
Units: %
Range: 0~100
This parameter scales the contribution of PID loop in
setting the motor speed command (the remainder being
supplied by the feed-forward term). This is an integer
number between 0 and 100 (assumed to be percent),
with 0 essentially keeping the PID from affecting
anything.
Default:
100
Units:
Range: 0~9999
This parameter sets Gain in PID control loop. This is the
proportional part (P) of the equation. It is an integer
number between 0 and 9999, with 0 being the special
case of no Gain, but all other numbers being interpreted
as follows: Larger numbers mean less Gain, smaller
numbers mean more Gain.
66
Units:
Range: 0~9999
This parameter sets Reset in PID control loop. This is the
integral part (I) of the equation. It is an integer number
between 0 and 9999, with 0 being the special case of no
Reset, but all other numbers being interpreted as
follows: Larger numbers mean less Reset, smaller
numbers mean more Reset.
67
Units:
Range: 0~9999
This parameter sets Rate in PID control loop. This is the
derivative part (D) of the equation. It is an integer
number between 0 and 9999, with 0 being the special
case of no Rate, but all other numbers being interpreted
as follows: Larger numbers mean less Rate, smaller
numbers mean more Rate.
68
TO GET ASSISTANCE, CALL: 919-774-7667
ZENITH PUMPS
Page 55
69
Rate Threshold
Units: Hz
Range: 0~100
This parameter sets a threshold, below which the Rate
term (derivative term) has no affect on PID control loop.
In many cases, Rate is not needed, or is needed only
when large, sudden errors in speed occur, and Rate
Threshold allows a sort of selective use of the Rate term,
if desired.
Default:
5
70
Device Address
Units:
Range: 1~32
It establishes the address for multi-drop
communications. It is a number between 1 and 32.
Each message transmitted from the remote serial device
to the controller will contain an address field; only the
addressed unit will respond to that message.
Default:
1
71
Baud Rate
Units:
Range:
Default:
1
1
2
3
4
5
6
300 bps
600 bps
1200 bps
2400 bps
4800 bps
9600 bps
It sets the link speed for remote serial communcations.
72
Character Format
Units:
Range:
1 7 Data Bits, No Parity, One Stop Bit (7-N-1)
2 7 Data Bits, Even Parity, One Stop Bit (7-E-1)
3 8 Data Bits, No Parity, One Stop Bit (8-N-1)
Default:
3
73
Serial Control Mask
Units:
Range:
Bit 7 Primary (1) / Secondary (0) Control Mode
Bit 6
Bit 5 Closed (1) / Open (0) Loop
Bit 4 Primary Setpoint Select (1)
Bit 3 Secondary Setpoint Select (1)
Bit 2 Run (1) / Stop (0)
Bit 1
Bit 0 Ramp Enable (1) / Disable (0)
It controls what functions are available to remote serial
interface.
Default:
0
TO GET ASSISTANCE, CALL: 919-774-7667
ZENITH PUMPS
Page 56
74
Zero Speed Logic
Units:
Range: 0~1
It dictates the operation of Zero-speed alarm output. If
set to 0, the output is controlled only by the ramped
reference (M-46); if set to 1, the output is controlled by
both the ramped reference (M-46) and the feedback (M43).
In other words,
If C74 = 0, ZERO SPEED output is HIGH whenever
Ramped Reference (instantaneous desired speed) is
zero and the output is LOW at all other times.
IF C74 = 1, ZERO SPEED output is LOW whenever
Ramped Reference is non-zero, but does not go HIGH
until both Ramped Reference and Feedback are BOTH
zero.
Default:
0
75
Primary Positive Offset
Default:
0
Primary Negative Offset
Default:
0
77
Secondary Positive Offset
Default:
0
78
Secondary Negative Offset
Units: Hz
Range: 0~9999
These are positive and negative offset numbers for
primary and secondary data sets. These allow the
feedback to contain a bias. Only one (positive or
negative) number can be non-zero at any given time.
Default:
0
79
Setpoint Mask
Units:
Range:
0 None setpoints disabled;
1 All setpoints disabled
2 Setpoint 2 and 4 disabled;
It determines which setpoints are disabled when keypad
is locked out (J4, pins 1 and 2 shorted).
Default:
2
80
Analog Output Function
Units:
Range: 0~99
It assigns one M (Monitoring) or C (Control) code to the
Analog Output signal. That variable will be routed (via
firmware) to the digital-to-analog converter DAC and
will thus show up on the Analog Output pins.
Default:
0
76
TO GET ASSISTANCE, CALL: 919-774-7667
ZENITH PUMPS
Page 57
81
Analog Output Range
Units:
Range:
It establishes the value at which the analog output is
10VDC or 20 mA.
Default:
4095
82
Analog Output ZERO
Units:
Range: 0~2048
It allows user to zero-adjust the analog output, as part of
the calibration process.
Default:
1024
83
Analog Output SPAN
Units:
Range: 2048~4096
It allows user to span-adjust the analog output, as part of
the calibration process.
Default:
4095
84
Analog Input Function Select
Units:
Range:
0 Ananlog Input Not Used
1 Replace External Reference Frequency
2 Replace Feedback Frequency
3 Replace Offset Frequency
4 Replace Setpoint 1
5 Replace Setpoint 2
6 Replace Setpoint 3
7 Replace Setpoint 4
It allocates the Analog Input to the desired function.
Default:
0
85
Analog Input ZERO
Units:
Range: 0~2048
It allows user to zero-adjust the analog input as part of
the calibration process.
Default:
0
86
Analog Input SPAN
Units:
Range: 2048~4096
It allows user to span-adjust the analog input, as part of
the calibration process.
Default:
3900
TO GET ASSISTANCE, CALL: 919-774-7667
Page 58
System Drawings
ZENITH PUMPS
INTERLOCK
OPTIONAL
INTRINSICALLY
SAFE BARRIER
TB2
1
2
3
4
5
6
7
8
9
10
11
12
1
2
3
4
5
6
7
TB1
A2
A1
F1
F2
L1
L2/Neut
INPUT POWER
Motor Field Leads
Motor Armature Leads
Chassis Ground
115 / 230 VAC, 1 PHASE, 50/60 Hz
12.00
12.75
10.00
8.00
MOTOR ARMATURE AND FIELD LEADS
MUST BE RUN SEPERATE FROM
SHIELDED SIGNAL CABLES TO AVOID
SIGNAL NOISE IN FEEDBACK.
ANALOG
OUTPUT
ANALOG
INPUT
+12 VDC
SIGNAL +
COMMON
SHIELD
ROMOVE
JUMPER
INPUT +
COMMON
OUTPUT +
SHIELD
1. FOR INTERCONNECT WIRING BETWEEN ZeDRIVE
AND TERMINAL STRIPS, REFER TO NEXT PAGE. INTERCONNECT WIRING TO BE INSULATED COPPER
CONDUCTOR, RATED AT 600V, 90 DEGREES CENTIGRADE.
2. COMMON AND GROUND CONNECTIONS ON THE
ZeDRIVE ARE OF DIFFERENT POTENTIAL. KEEP
SEPARATE.
3. TERMINAL STRIPS ARE IEC TYPE.
4. NEMA 12 CABINET, 12"H X 10"W X 8"D.
Equipment
Ground
2.00
FEEDBACK
SIGNAL
NOTES:
J4
J3
Ø0.31
NOTES:
Door
Gasket
PANEL CUTOUT
7.25" ± .03"
X
3.65" ± .03"
J2
J1
2.00
Equipment Ground
TO GET ASSISTANCE, CALL: 919-774-7667
ZENITH PUMPS
Page 59
TO MOTOR ARMATURE AND
FIELD CONNECTIONS.
(SEE SHEET 3 FOR DETAILS)
NOTE: IF AN INTERLOCK, SUCH AS
E-STOP OR MOTOR THERMOSTAT IS
DESIRED, REMOVE THE JUMPER
BETWEEN TB2, TERMINALS 5 & 6,
AND INSTALL THE INTERLOCK IN
ITS PLACE.
OPTIONAL
INTRINSICALLY
SAFE
BARRIER
1. ALL EXTERNAL WIRING, TERMINATING ON ONE OF ZeDRIVE LOGIC
TERMINALS (J1, J3, OR J4), MUST BE IN SHIELDED CABLE. THE SHIELD
MUST BE TERMINATED AT A ZeDRIVE GROUND ONLY (THE OPPOSITE
END OF THE SHIELD IS NOT CONNECTED).
2. ROUTE SHIELDED CABLE SEPARATELY FROM POWER WIRING. DO
NOT ROUTE 115VAC CONTROL WIRING AND LOW LEVEL SIGNAL
WIRING IN THE SAME CONDUIT. DO NOT ROUTE FEEDBACK WIRING
ALONG THE MOTOR CASE.
3. ALL GROUND CONNECTIONS MUST BE TRACEABLE TO A SINGLE
TRUE EARTH GROUND.
4. USE ARC SUPPRESSORS ACROSS THE COILS OF ALL AC RELAYS AND
CONTACTORS.
5. IN HIGH NOISE ENVIRONMENTS, INSTALL AN ISOLATION TRANSFORMER ON THE INPUT AC POWER.
6. WHEN USING A HALL EFFECT SENSOR OR ENCODER IN A HAZARDOUS ATMOSPHERE, THE OPTIONAL INTRINSICALLY SAFE BARRIER
MUST BE USED.
7. REQUIRES OPTIONAL ANALOG I/O CARD, PART NO. 68-16818-0091-1.
INSTALLATION NOTES:
CUSTOMER
SUPPLIED INPUT
POWER 115 OR 230
VAC: -10%, +15%,
1PHASE,
50/60HZ, 3 WIRE
CONNECT
AT SENSOR
CONNECT
AT SENSOR
25FT LEADS
1. ALL FEEDBACK SENSORS ARE SUPPLIED WITH 25FT OF 2 OR 3 CONDUCTOR SHIELDED CABLE, AS APPROPRIATE (SHIPPED LOOSE).
2. ALL FEEDBACK SENSORS ARE LOCATED BETWEEN THE REDUCER
AND THE MOTOR EXCEPT FOR THE
ENCODER, WHICH IS LOCATED AT
THE REAR OF THE MOTOR.
NOTES:
TO HALL
EFFECT
FEEDBACK
SENSOR
CONNECT
AT SENSOR
FEEDBACK SENSOR WIRING CUSTOMER'S RESPONSIBILITY
TO GET ASSISTANCE, CALL: 919-774-7667
ZENITH PUMPS
Page 60
TO TB1-5
CASE GROUND
TO TB1-3
CONNECT
TO TB1-4
CONNECT
TO TB1-5
CONNECT
TO TB1-3
TO TB1-4
TO TB1-5
PERMANENT MAGNET MOTORS
TO TB1-4
2 HP TEFC MOTOR
TO TB1-5
1 HP TEFC MOTOR
TO TB1-5
TO TB1-4
1 & 2 HP WASH DOWN MOTORS
FIELD WOUND MOTORS
1 & 2 HP EXPLOSION PROOF MOTORS
1. THE MOTOR CONNECTIONS SHOWN WILL PRODUCE A COUNTERCLOCKWISE ROTATION OF THE REDUCER OUTPUT SHAFT, VIEWED FROM THE
PUMP END (AS OPPOSED TO THE MOTOR END). THIS ROTATION SHOULD BE
CORRECT FOR MOST APPLICATIONS. IF ROTATION IS INCORRECT, REVERSE
THE A1 AND A2 CONNECTIONS.
2. IF THE MOTOR IN USE HAS A THERMOSTAT, IT MAY BE CONNECTED TO TB2-5
AND TB2-6, AFTER REMOVING THE JUMPER.
NOTES:
1/2 HP EXPLOSION PROOF MOTOR
TO TB1-4
MOTOR END
W/ COVER
REMOVED
1/4 & 1/2 HP TENV & SEALED
TIGHT (WASH DOWN) MOTORS
MOTOR ARMATURE AND FIELD WIRING - CUSTOMER'S RESPONSIBILITY
TO GET ASSISTANCE, CALL: 919-774-7667
ZENITH PUMPS
Page 61
Zenith Pumps
ZENITH PUMPS
Zenith Pumps
5910 Elwin Buchanan Drive
Sanford, NC 27330
Phone: 800-277-8968
Fax: 919-774-5952
E-mail: [email protected]