1
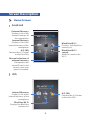
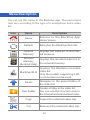
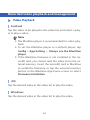
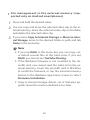
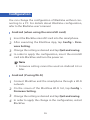
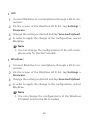
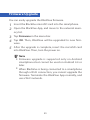
Car Dashcam Table of Contents Description of the BlackVue App 3 Features3 Supported Devices Screen Description 4 5 Connection of BlackVue to a Wi-Fi connection 9 Menu Description 12 Recorded video playback and management14 Video Playback 14 Video management 15 Sharing the Video on YouTube 17 Configuration19 Firmware Upgrade 21 2 Description of the BlackVue App The BlackVue is easily used by inserting a microSD card into a smartphone or a tablet PC or by connecting BlackVue to a WiFi connection. The BlackVue App is supported by Android and iOS. The BlackVue App can be used with Android 2.3 or later, iOS 5.0 or later, and Windows 8.0 or later. Features yy Recorded video playback (VOD) & real-time live view function With the built-in Wi-Fi function, video can be easily played on a smartphone anywhere, anytime. (only for Wi-Fi models) yy Firmware Upgrade The BlackVue Firmware can be updated by using your smartphone. (only for Android) yy BlackVue Configuration Changing the configuration with your smartphone means you don't have to connect the BlackVue to a PC. yy Sharing videos on YouTube Uploading videos to YouTube to share with other people (iOS support coming soon) yy File Management You can copy, move and delete recorded videos. 3 Supported Devices The BlackVue App can be used with Android 2.3 or later, iOS 5.0 or later, and Windows 8.0 or later. yy Android Smartphone: DR500W-HD, DR500GW-HD, DR530W-2CH, DR550GW-2CH yy iOS Smartphone: DR500W-HD, DR500GW-HD, DR530W2CH, DR550GW-2CH yy Windows PC/Tablet: DR500GW-HD, DR530W-2CH, DR550GW-2CH Note yy Some functions may not be supported depending on the smartphone, the BlackVue models or the Android version. yy Not all smartphones support full HD video playback. For a list of smartphones that support full HD video playback, refer to the BlackVue website (www.blackvue.com). yy Tablet PCs support the same resolution as smartphones. 4 Screen Description Home Screen Android External Memory Displays a list of the external memory of the smartphone Internal Memory Displays a list of the internal memory of the smartphone BlackVue Wi-Fi A/S FAQ BlackVue Wi-Fi search Displays the BlackVue memory list Connect the A/S Center or View the FAQ BlackVue searches for Wi-Fi Manual selection of external memory If the path to the microSD card is not found, a user may select its location. iOS Internal Memory A/S FAQ Displays a list of the internal memory of the smartphone Connect the A/S Center or View the FAQ BlackVue Wi-Fi Displays the BlackVue memory list 5 Windows Internal Memory Displays a list of the internal memory of the PC/Tablet BlackVue Wi-Fi Displays the BlackVue memory list 6 Video List Screen You can view the recorded video list in the internal memory, the external memory, and the BlackVue when connected to a Wi-Fi connection. Android Menu Bar Select by dragging to the left and right File path File type selection Displays only desired video types Recorded Video FIle List iOS Menu Bar Select by dragging to the left and right File path File type selection Displays only desired video types Recorded Video FIle List 7 Windows File type selection Displays only desired video types Menu Bar File path Recorded Video File List 8 Connection of BlackVue to a Wi-Fi connection You can connect BlackVue to your smartphone through a WiFi connection. You can change SSID and your password. Note yy You can connect only models that support Wi-Fi, to the Wi-Fi network. yy To change the Wi-FI SSID and the password, tap BlackVue Wi-Fi > Settings > Firmware Setting > Login Setting. yy The initial password is blackvue, but the user can change it. yy For the Live View function, Wi-Fi can be used within a 10m range, although the range may vary in some circumstances. yy For playback of recorded videos using Wi-Fi, reception may vary according to the data transfer rate. yy If the Live View or VOD playback & copy function is used while it is connected via Wi-Fi and recording Full HD (1920x1080)@30fps, the recording frame is reduced to 20 fps. yy To upgrade the firmware or share your video on YouTube, connect to a data network. This may incur data charges. When not using functions such as live view, VODs, or when searching for BlackVue video list, please use a Wi-Fi network. 9 Android 1 2 3 Turn your smartphone Wi-Fi on. 4 Tap the OK button to store the Wi-Fi connection information. When the connection is completed, the recorded video list will appear. After changing the configuration, click Save & Close. The Wi-Fi SSID is 'DR500GW-last 6-digit number of MAC Address' and MAC address printed on the sticker attached to the product box. (e.g. DR500GW-A682DE). Select the device you want to connect, and enter the password. Tap the OK button to connect the selected device to a Wi-Fi connection. Note yy You can store the Wi-Fi information for connecting to the Android smartphone. Then, tap BlackVue Wi-Fi to automatically connect your smartphone to a Wi-FI connection. 10 iOS 1 2 3 Turn your smartphone Wi-Fi on. The Wi-Fi SSID is 'DR500GW-last 6-digit number of MAC Address' and MAC address printed on the sticker attached to the product box. (e.g. DR500GW-A682DE). Select the device you want to connect, and enter the password. Tap the OK button to connect the selected device to a Wi-Fi connection. After opening the BlackVue App, tap BlackVue Wi-Fi. Then the recorded video list will appear. Windows 1 2 3 Turn your PC/Tablet Wi-Fi on. The Wi-Fi SSID is 'DR500GW-last 6-digit number of MAC Address' and MAC address printed on the sticker attached to the product box. (e.g. DR500GW-A682DE). Select the device you want to connect, and enter the password. Tap the OK button to connect the selected device to a Wi-Fi connection. After opening the BlackVue App, tap BlackVue Wi-Fi. Then the recorded video list will appear. 11 Menu Description You can use this menu in the BlackVue App. The menu items may vary according to the type of a smartphone and a video list. Icon Name Home Description Returns to the BlackVue App Home Screen. Refresh Refreshes the BlackVue Wi-Fi list. Internal Memory External Memory (Android Only) Displays the video list in the internal memory. Displays the recorded video list in the external memory. Displays the BlackVue recorded video list. BlackVue Wi-Fi Only the models supporting a WiFi connection can be used. Navigates to the parent folder of Parent the video list. Creates a folder in the video list. New Folder You can use this function only in the internal and external memories. Copy Cut Copies the selected video clip. Removes the selected video clip. 12 Icon Name Paste Delete Description Pastes the copied or cut video clip. Deletes the selected video clip. Multiple Use this to copy, cut and delete the selected video clips. You can select several video clips at the same time. You can use this function only in the internal and external memories. Settings Configures BlackVue. Live View Firmware YouTube Information For viewing the video being recorded in real time. This function may be used only by using the models supporting a Wi-Fi connection. Upgrades BlackVue to the latest version of the firmware. Shares the selected video clip on YouTube. You can use this function only in the internal and external memories. Displays the BlackVue App information. 13 Recorded video playback and management Video Playback Android Tap the video to be played in the video list, and select a player to play a video. Note yy The BlackVue player is recommended for video playback. yy To set the BlackVue player as a default player, tap Config > App Setting > Always use the BlackVue player. yy If the BlackVue firmware is not installed in the microSD card, you cannot read the video list in the external memory. Insert the microSD card in BlackVue to install the firmware, or tap the external memory button in the BlackVue App home screen to select Firmware Installation. iOS Tap the desired video in the video list to play the video. Windows Tap the desired video in the video list to play the video. 14 Video management You can copy, move and delete the desired video clip. Management of the Video in the BlackVue Wi-Fi list 1 2 Press and hold the desired video. If you select Copy to Internal Storage. the video clip will be copied to the internal memory. Note yy You cannot delete the video clip in the BlackVue WiFi list. Management of the video in the internal memory 1 2 Press and hold the desired video. 3 If you have selected Copy or Cut, move to the desired folder or path and tap Paste in the menu bar. You can copy, cut, share on YouTube, and delete the selected video clip. Note yy If you tap Multi in the menu bar, you can copy, cut, or delete several files at the same time. If you use Multi, you cannot use YouTube Sharing. yy You can not copy or move the video clips in the internal memory to the external memory. yy Only delete can be used with Windows 8.0 or later. 15 File management in the external memory (supported only on Android smartphones) 1 2 Press and hold the desired video. 3 If you select Copy to Internal Storage or Move to Internal Storage, move to the desired folder or path, and tab Paste in the menu bar. You can copy and move the selected video clip to the internal memory, share the selected video clip on YouTube, and delete the selected video clip. Note yy If you tap Multi in the menu bar, you can copy, cut, or delete several files at the same time. If you use Multi, you cannot use YouTube Sharing. yy If the BlackVue firmware is not installed in the microSD card, you cannot read the video list in the external memory. Insert the microSD card in BlackVue to install the firmware, or tap the external memory button in the BlackVue App home screen to select Firmware Installation. yy Copy to internal storage, delete, cut or firmware upgrade cannot be used on Android 4.4 or later. 16 Sharing the Video on YouTube You can share the video captured by using BlackVue on YouTube. You need a YouTube account to share the video on YouTube. 1 After pressing and holding the video, select YouTube Sharing, or press YouTube in the menu bar and select the video. 2 In order to store your YouTube account information, select Remember Login ID/PASSWORD, and then, tap the OK button. 3 Enter your YouTube username and password. Then, tap the OK button. 4 Enter information about the video to be shared on YouTube. Then, tap the OK button. The video will start uploading. The uploading time may vary with the size of the video. Note yy It may take up to 10 minutes for your video to be visible on Youtube after uploading the video. 17 5 When the upload is complete, you can identify the video on YouTube or share the URL by using SMS and Emails. Note yy If BlackVue is connected to a smartphone through a Wi-Fi connection, you cannot share the video on YouTube. Terminate the BlackVue App normally and then, use a Wi-FI connection. 18 Configuration You can change the configuration of BlackVue without connecting to a PC. For details about BlackVue configuration, refer to the BlackVue user's manual. Android (when using the microSD card) 1 2 Insert the BlackVue microSD card into the smartphone. 3 4 Change the setting as desired and tap Quit and saving. After executing the BlackVue App, tap Config > Firmware Setting. In order to apply the configuration, insert the microSD card into BlackVue and turn the power on. Note yy Firmware setting cannot be used on Android 4.4 or later. Android (if using Wi-Fi) 1 Connect BlackVue and the smartphone through a Wi-Fi network. 2 On the screen of the BlackVue Wi-Fi list, tap Config > Firmware Setting. 3 4 Change the setting as desired and tap Quit and saving. In order to apply the change in the configuration, restart BlackVue. 19 iOS 1 Connect BlackVue to a smartphtone through a Wi-Fi connection. 2 On the screen of the BlackVue Wi-Fi list, tap Settings > Firmware. 3 4 Change the setting as desired and tap Save and Upload. In order to apply the change in the configuration, restart BlackVue. Note yy You can change the configurations of the iOS smartphone only for the Wi-Fi models. Windows 1 Connect BlackVue to a smartphone through a Wi-Fi con nection. 2 On the screen of the BlackVue Wi-Fi list, tap Settings > Firmware. 3 4 Change the setting as desired and tap Save and Upload. In order to apply the change in the configuration, restart BlackVue. Note yy You can change the configurations of the Windows PC/tablet only for the Wi-Fi models. 20 Firmware Upgrade You can easily upgrade the BlackVue firmware. 1 2 Insert the BlackVue microSD card into the smartphone. 3 4 Tap Firmware in the menu bar. 5 After the upgrade is complete, insert the microSD card into BlackVue. Then, turn the power on. Open the BlackVue App, and move to the external memory list. Tap OK. Then, BlackVue will be upgraded to new firmware. Note yy Firmware upgrade is supported only on Android smartphones but cannot be used on Android 4.4 or later. yy When BlackVue is being connected to a smartphone through a Wi-Fi connection, you cannot upgrade the firmware. Terminate the BlackVue App normally, and use a Wi-Fi network. 21