1
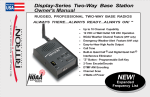
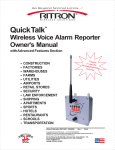
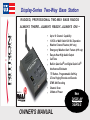
Display-Series Two-Way Base Station
RUGGED, PROFESSIONAL TWO-WAY BASE RADIOS
ALWAYS THERE...ALWAYS READY...ALWAYS ON!
Built-in
SM
Up to 10 Channel Capability
12 VDC or Wall Outlet 120 VAC Operation
Weather Channel Feature (VHF only)
Emergency Weather Alert Feature (VHF only)
Easy-to-Hear High Audio Output
Call Tone
Built-in Quiet Call® and Digital Quiet Call®
Interference Eliminator
"Z" Button - Programmable Soft Key
2-Tone Paging Encode and Decode
DTMF ANI Encoding
Channel Scan
2 Watts of Power
Feature
OWNER'S MANUAL
New
DISPLAY
SERIES
Have questions? Call 800-USA-1-USA (800-872-1872) or visit our website at www.ritron.com
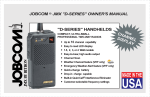
ACCESSORIES
OPTIONAL / REPLACEMENT ACCESSORIES:
TO ORDER CALL 800-USA-1-USA
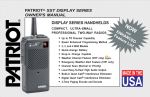
AFB-1545 .... Molded Flex, Dual-band Replacement Antenna
RAM-1545 ... Magnet-mounted, Dual-band Antenna w/ BNC
JBSK-12
12-Volt Adapter Kit
JBS-MMK
Mobile Mounting Kit
RHD-6X
Behind-the-ear Earset
RAM-1545
Magnet-mounted, Dual-band Antenna
RPS-1A ....... Replacement 110 VAC Power Supply
CCL-M ......... 12 VDC, Cigarette Lighter Adaptor
JBSK-12 ...... 12 VDC, Adaptor Kit
REP-2 .......... Low Profile Earphone
RHD-1X ....... Single Ear Headset
RHD-4X ....... Dual Ear Headset
RHD-5X ....... Lightweight Over-the-ear Earset /w In-line PTT
RHD-6X ....... Lightweight Behind-the-head Earset w/ In-line PTT
RSM-3X ...... Remote Speaker Microphone
RM-7 ........... Hand Microphone & Hang-up Bracket
RSP-5 ......... External Speaker w/5 Watt Audio Capability
JBS-MMK ... Mobile Mounting Kit
(Does not include screws to mount bracket to wall or vehicle)
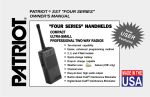
RSP-5
5-Watt External Speaker
RM-7
Hand Microphone
Call RITRON for a complete listing.
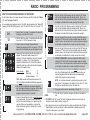
The NEW Display Series model base radio contains updated programming features, and programs differently than other Ritron
Base Stations. These radios provide more channels, allow you to change channel programming contents individually, and also
allow you to delete one or more channels, and add it back in, if needed.
ii
Have questions? Call 800-USA-1-USA (800-872-1872) or visit our website at www.ritron.com
TABLE OF CONTENTS
DESCRIPTION
PAGE
ACCESSORIES
Optional Accessories ................................................. ii
INTRODUCTION
"Display Series" Model Numbers .............................. 1
Basic Features ........................................................... 1
CONTROL & OPERATION ............................................ 2
FIG-1: Radio Controls and Connectors .................... 2
OPERATION
FIG-2: Volume Level Indicator .................................. 3
On-off/ Volume Adjust ............................................... 3
Channel Selection ...................................................... 3
Receive ...................................................................... 3
QC and DQC Tone Codes
(Interference Eliminator Codes) ................................ 3
Transmit ...................................................................... 4
FIG-3: Transmit / Busy Lamp .................................... 4
Radio Alert Tones ...................................................... 4
Optional Alert Tones .................................................. 4
Channel Scan Operation ........................................... 5
2-Tone Paging Decode Operation ............................. 5
FIG-4: 2-Tone Call Alert ............................................ 6
"Z" Button - Programmable Soft Key ........................ 6
DESCRIPTION
PAGE
NOAA WEATHER RADIO
How to Preset Your Radio for Local NOAA
Weather Broadcasts ................................................. 7
FIG-5: Presetting Your Local NOAA Weather
Broadcasts ................................................................. 8
FIG-6: NOAA Frequencies ....................................... 8
NOAA Weather Channel ............................................ 8
Weather Alert ............................................................. 8
Using The "Z" Button For Weather Channel ............. 8
RADIO PROGRAMMING
FIG-7: How To Place the Radio in Program /
Readout Mode ............................................................ 9
How to Readout Field Programmed Frequency &
Tone Codes ................................................................ 9
How to Field Program Frequency and Tone Codes 10
Table 1: Programmable Frequency Codes ............ 11
Table 2: Programmable QC Tone Codes ................ 12
Table 3: Programmable DQC Codes ........................ 12
How to Field Program Radio Options ...................... 12
Table 4: Radio Option Codes .................................. 12
How to Delete a Channel ......................................... 12
PC Programmable Features ..................................... 12
!! CAUTIONS ALL RADIOS !!
Observe Caution in the Following Environments to
Maximize the Life of Your Radio Equipment ........... 13
Exposure to Radio Frequency Energy ................... 13
TROUBLESHOOTING .................................................. 14
DESCRIPTION
PAGE
FCC LICENSE REQUIRED
FCC Regulations ...................................................... 15
Service ..................................................................... 15
How to Obtain an FCC Radio License .................... 15
LIMITED WARRANTY ................................................. 16
RITRON WIRELESS SOLUTIONS ........... BACK COVER
FIGURES:
1. Radio Controls and Connectors .......................... 2
2. Volume Level indicator ........................................ 3
3. Transmit / Busy Lamp .......................................... 4
4. 2-Tone Call Alert ................................................... 6
5. Presetting Your Local NOAA Weather
Broadcasts .......................................................... 7
6. NOAA Frequencies ............................................. 7
7. How To Place the Radio in Program / Readout
Mode ..................................................................... 9
INSPECTION
Make sure the package includes:
"Display Series" base radio
Antenna
RPS-1A Wall Mounted Power Supply
Owner's Manual
Examine the equipment immediately after
delivery and report any damage to your
shipping company.
Have questions? Call 800-USA-1-USA (800-872-1872) or visit our website at www.ritron.com
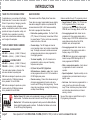
INTRODUCTION
THANK YOU FOR CHOOSING RITRON
BASIC FEATURES
Congratulations on your purchase of the Display
Series base radio. Your new radio is the result of
Ritron's 25 years history of designing, manufacturing, and supplying reliable, professional
wireless communication products. Ritron wireless
products will improve the operation, safety, and
profitability of any organization by providing
instant voice communications between employees throughout the workplace.
This manual covers Ritron "Display Series" base radios.
"DISPLAY SERIES" MODEL NUMBERS
VHF MODELS: JOBCOM & PATRIOT
JBS-146D ...... (Jobcom) ... (2-Watt, 10 Channel)
PBS-146D ...... (Patriot) ..... (2-Watt, 10 Channel)
UHF MODELS: JOBCOM & PATRIOT
JBS-446D ...... (Jobcom) ... (2-Watt, 10 Channel)
PBS-446D ...... (Patriot) ..... (2-Watt, 10 Channel)
The model number located on the back of the
radio case indicates its operating band.
VHF radios are designed to operate on up to ten
channels within the 12 MHz band between
factory standard 150 and 162 MHz.
UHF radios are designed to operate on up to ten
channels within the 20 MHz band between
factory standard 450 and 470 MHz.
Feature
page 13
page
These radios are rugged, programmable two-way desktop
base stations designed to operate in a professional FM
communications band (VHF or UHF business available).
Each radio is equipped with these features:
Special Feature "Z' button. The "Z" button can
be PC programmed soft key for many unique
functions such as Scan, Weather Channel, send
DTMF ANI, send 2-tone page, Monitor, or Call Tone.
Push-button operating controls. The Push-To-Talk
(PTT), Channel, On/ Volume Up, Volume Down/ Off and
the special feature "Z" button controls are conveniently
located on the face of the radio.
2-tone paging decode. Each channel can be
programmed for 2-tone paging decode within a
frequency range of 300-1500 Hz. Additional 2-tone
paging features include Group Call, All Call,
automatic reset, and transpond alert.
Channel display. The LED display will show the
current operating channel, and contains a transmit/busy
lamp. The display is also used to indicate volume level
and paging decode status on radios programmed for
2-tone paging operation.
10-channel capability. Up to 10 channels can be
programmed to contain a unique set of operating
frequencies and options.
QC (Quiet Call) and DQC (Digital Quiet
Call)intereference eliminator codes. Each channel
can be programmed from a list of 51 QC sub-audible or
83 DQC digital privacy codes.
Channel scanning. Channel Scan allows scanning of
all channels programmed into the radio, and can be
turned On and Off through Field programming. The scan
channel has many features, including Priority Scanning
and Busy Channel Blocking.
Weather Channel. VHF models can be programmed to receive your local NOAA weather
radio broadcast. The Weather channel can be turned On and Off through Field programming.
Built-in
Features available through PC programming include:
2-tone paging encode. Each channel can be
programmed for 2-tone paging encode within a
frequency range of 300-1500 Hz.
DTMF ANI. Each channel can be programmed to
transmit a unique DTMF ANI string with the "Z"
button programmed for DTMF ANI.
Wide or narrow band operation. Each channel
is programmable for wide or narrow band
operation.
Squelch adjustment. Squelch sensitivity can be
programmed on a per channel basis to meet your
specific needs.
Alert tones. Each channel is programmable for a
variety of alert tones that include RX courtesy
beep, TX clear to talk beep, busy channel lockout
alert, last active channel marker, and channel
scanning indicator.
See your Ritron dealer or contact Ritron directly for
PC programming of these option.
Weather Alert. VHF models can be programmed to alert you when the National Weather
Service detects threatening weather conditions. The Weather Alert feature can be turned
On and Off through Field programming.
RITRON,
INC.
1-800-USA-1-USA
(1-800-872-1872)
Have
questions?
Call 800-USA-1-USA
(800-872-1872) or visit our website at www.ritron.com
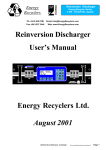
CONTROL & OPERATION
1
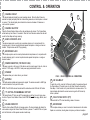
CHANNEL DISPLAY
5
The channel display will indicate the current operating channel. When the Scan Channel is
selected the display will rapidly flash the channels being scanned, and will stop when a channel
is received. The channel display also indicates the volume level between 0-9 whenever a
volume control is pressed.
2
AUDIO ACCESSORY JACK
The audio accessory jack is used to plug in earphone options, and, in conjunction with the
microphone jack, to connect an optional remote speaker/ microphone or a single- or dual-ear
headset. This jack is also used for PC programming.
4
6
CHANNEL SELECTOR
Press the Channel Selector button and the radio will advance the channel. The Channel Beep
will be heard any time Channel 1 is selected. When the Scan Channel is selected the radio will
sound the Scan Beep and begin scanning.
3
7
MICROPHONE JACK
The microphone jack is used to connect optional external microphones and, in conjunction with
the audio accessory jack, to connect an optional remote speaker/ microphone or a single- or
dual-ear headset.
5
POWER CONNECTOR (TOP END OF CASE)
6
SPEAKER
8
1
9
2
10
3
11
4
12
The power connector on the top end of the radio is used to connect power to the unit, either an
external 12 VDC supply or the RPS-1A cube power supply included with the radio.
The speaker allows you to hear calls on your channel.
7
ANTENNA
The flexible antenna radiates and receives radio signals. The antenna connects to a BNC type
connector located on the top end of the radio.
NOTE: The AFB-1545 antenna furnished with the radio will work with VHF and UHF radios.
8
"Z" BUTTON - PROGRAMMABLE SOFT KEY
The Special Feature "Z" button can be PC programmed as a soft key for one of many unique
functions. They are Scan, Weather Channel, send DTMF ANI, send 2-tone page, Monitor, send
Call Tone.
9
VOLUME DOWN/ OFF
Press the Volume Down/ Off button to decrease volume. The channel display will indicate the
volume level as long as the Volume Down/ Off button is pressed. To switch Off the unit, press
and hold this button until the speaker sounds a double beep.
FIG-1:
10
RADIO CONTROLS & CONNECTORS
ON/ VOLUME UP
To switch the unit On, press the On/ Volume Up button; the speaker will sound
the Channel Beep. If the radio turns on to the Scan Channel it will sound the
Scan Beep. Once the radio is On, press this button to increase volume. The
channel display will indicate the volume level as long as the On/ Volume Up
button is pressed.
11
PUSH-TO-TALK SWITCH (PTT)
Press and hold the PTT when transmitting; release it to receive.
12
MICROPHONE
The microphone allows your voice to be heard in transmissions to other radios.
Speak in a normal tone; shouting does not improve your listener's reception.
Have questions? Call 800-USA-1-USA (800-872-1872) or visit our website at www.ritron.com
page 2
OPERATION
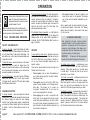
As long as the Volume Up button is held
down the volume will increase and the
display will indicate the volume level as a
number between 0 and 9.
When the Volume Down button is held down the
volume will decrease and the display will indicate the
volume level as a number between 9 and 0.
FIG-2:
VOLUME LEVEL INDICATOR
ON-OFF / VOLUME ADJUST
To turn on the radio - press the On/Volume Up button.
The radio will sound the Channel Beep. If the radio turns
on to the Scan Channel it will emit the Scan Beep. The
radio will turn on to the channel that was selected when
it was last turned off.
To adjust the volume - press the volume up or the volume
down button until you reach the desired level. The
display will show the volume level on a 0-9 scale as long
as the volume button is pressed, and you will hear any
received broadcasts on the channel.
To turn off the radio - press and hold the Off/Volume
Down button until a two tone "turn-off" beep is heard.
For instant turn-off, press the PTT button while holding
the Off/Volume Down button.
If the Scan Channel is selected - the radio will sound the
Scan Beep and the Channel Display will rapidly flash the
channel numbers as they are scanned. If a signal is
received the channel display will indicate the channel
number, and when the received signal is removed the
radio will wait briefly, sound the Scan Beep, then
scanning will resume as normal.
If the Weather Channel is selected - on a VHF radio the
display will light a single segment of the display that
indicates which of the seven NOAA frequencies is
monitored. See the "NOAA Weather Radio" section on
page 7 for details.
RECEIVE
To hear calls from other users - adjust the volume as
desired. The radio can receive broadcasts as long as
the Push-To-Talk button is not pressed. Whether or
not you hear these broadcasts depends upon the
squelch settings.
There are four squelch modes that can be used in the
"Display Series" base radio.
CHANNEL SELECTION
To change channels - press and release the Channel
Selector button. The radio will increment the channel, and
the Channel Display will show the new operating
channel. If the highest channel number is selected and
you press the Channel Selector button, the radio resets
to channel 1 and the Channel Beep is heard on the
speaker.
page 33
page
Carrier squelch lets you hear all broadcasts on
your channel strong enough for the radio to detect,
and silences noise.
Tone squelch uses one of the QC or DQC tone
squelch formats available on the "Display Series"
base radio. This allows you to screen out
on-channel broadcasts that do not carry the
correct code programmed for the radio.
2-tone paging can be used in conjunction with
either carrier or tone squelch to block out all calls
except those sent specifically to your radio. When
the unique 2-tone sequence programmed into the
radio is decoded, the radio will emit a series of ring
tones similar to a telephone.
No squelch disables all squelch operation and
noise will be heard on the speaker. This allows
you to hear even the weakest broadcasts on your
channel.
Once a squelch type has been selected by the user,
all channels will operate in that mode. The "Display
Series" radio will operate in tone squelch mode when
it is 1st turned on.
QC AND DQC TONE CODES
Tone codes filter out static, noise and reduce
unwanted "chatter" on radio channels. When you
operate on a frequency with a tone code, you
screen out most interference. This allows you to
communicate with less interference and to hear
only those users in your radio group.
IMPORTANT!
All radios in the talk group must
operate on the same frequency and tone code.
To activate carrier squelch - simultaneously press
both of the volume buttons and hold briefly before
releasing. When carrier squelch is on, the radio emits
a double beep. The radio will now let you hear all
broadcasts on your channel.
To activate tone squelch - simultaneously press both
volume buttons and hold briefly before releasing.
When tone squelch is turned on, the radio sounds one
beep. You will only hear broadcasts that carry the
same QC or DQC code programmed into your radio.
To activate no squelch - simultaneously press both of
the volume buttons and continue to hold them down.
About 3 seconds after the beep (or double beep), the
radio will start beeping repeatedly. This means that
squelch is turned off. Release the buttons. To restore
squelch, press and hold both of the volume buttons
until the radio sounds a beep or double beep.
RITRON,
INC.
1-800-USA-1-USA
(1-800-872-1872)
Have
questions?
Call 800-USA-1-USA
(800-872-1872) or visit our website at www.ritron.com
OPERATION
If you are unable to activate carrier or no squelch the
radio has been optionally programming for Monitor
Lockout. See your Ritron dealer or contact Ritron
directly to disable this option.
To activate 2-tone paging - simultaneously press both
of the volume buttons and hold briefly before
releasing. When 2-tone paging is turned on, the radio
sounds a "triple beep". You will only hear broadcasts
that first send your two unique paging tones. If you
are unable to set the radio, you have selected a
channel that is not programmed for 2-tone paging
decode.
To monitor the channel - place the radio in carrier
squelch mode.
Using the "Z" button for squelch - The "Display Series"
base radio "Z" button can be programmed to set the
squelch mode.
To use the "Z" button for Monitor see "How
To Field Program Radio Options" on page 12.
Note:
The beginning of a call might be missed if the
radio is scanning or has been set for battery saver
mode. If this happens, ask the caller to repeat the
message.
TRANSMIT
Normally, you should monitor the channel before
transmitting and talk only when the channel is clear.
To transmit - hold down the Push-To-Talk button and,
with the radio at least 6 inches away, talk into the
microphone. Speak in a normal tone, since talking
louder will not improve the listeners reception.
Keep talk times as short and infrequent as possible to
allow others to use the channel.
A Transmit / Busy Lamp in the lower
right corner of the Channel Display
lights whenever the transmitter is
activated and blinks when the channel
is busy.
FIG-3:
TRANSMIT/BUSY LAMP
RADIO ALERT TONES
The radio responds to certain instructions by sounding
a beep or series of tones. These tones can tell you
that the radio is working as you expect.
Power On/Self Check OK
When it is first turned on, the radio runs a quick self
test to confirm basic functions. When complete the
radio will emit the Channel Beep and the Channel Display will show the operating channel. The radio is then
ready to use.
Error Tones
However, if the self test detects a diagnostic error,
an error tone sounds. The error tone indicates the
radio frequency synthesizer is malfunctioning. Turn
off the radio and try again. The error tone will also
sound if a channel has been programmed for an
invalid frequency.
A long, low-pitched tone means the battery voltage is
too low to operate the radio. If you cannot correct the
begin scanning.
Transmitter Time Out
A low tone followed by a higher-pitched tone sounds
and the transmitter automatically shuts off if you hold
down the PTT button longer than 60 seconds.
Battery Alert Tone
In battery powered installations: Once the battery
voltage drops below the required "operating voltage"
the radio emits a long, low tone and turns itself off.
OPTIONAL ALERT TONES
The "Display Series" base radio can be programmed
using the RITRON PC Programmer for optional alert
tones. See your Ritron dealer or contact Ritron
directly for programming of these options.
Courtesy Beep
A short tone sounds at the end of each received
transmission to indicate that the channel is clear and
you may transmit.
Busy Channel TX Inhibit
If a user is transmitting on your radio frequency without your tone, you will not be allowed to
transmit.
The radio will beep a series of long, low tones while
the PTT is held down (like a busy signal).
Transmit Clear To Talk Beep
A short tone sounds after the PTT has been pressed
to indicate that the radio is ready for you to begin talking.
Squelch Mode
When you press and hold both Volume buttons at the
same time, a single beep will sound to indicate that
tone squelch is on. A double beep means that carrier
squelch is on. If the channel is programmed for 2-tone
paging, a "triple beep" indicate that the pager has been
reset.
Have questions? Call 800-USA-1-USA (800-872-1872) or visit our website at www.ritron.com
page 4
OPERATION
CHANNEL SCAN OPERATION
Last Channel Scanned Alert Tone
With Priority Scan enabled:
Channel scanning allows you to listen to broadcasts
on your radio channels. The "Display-Series" base
radio will scan all channels programmed into the radio
except the NOAA Weather Channel.
When changing channels with the Channel Selector
button, an alert tone will sound to indicate the last
channel that received a message when the radio was
scanning. This will identify the channel on which the
last message was received, and allow uninterrupted
transmission on that channel without the constraints
of scanning. You can then press the Channel Selector
button to return to the scan channel.
The first channel in the scan list is the Priority
Channel.
Using The "Z" Button For Scan
The radio can be programmed to sound a Priority
Channel Beep whenever the radio receives on the
Priority Channel when scanning.
How Scanning Works
Using the Channel Selector button, select the Scan
channel. The radio sounds the Scan Beep, and then
repeatedly checks each channel in the scan list. The
channel display will show the channel numbers as
they are scanned.
When receiving a call on a channel being scanned, the
radio will stop scanning to let you hear
communications on that channel. After the
transmission has ended the radio will pause before it
resumes scanning to allow you time to respond.
When transmitting from the Scan channel, the radio
will go to the last channel on which a signal was
received, then transmit. After you release the PTT the
radio will pause to allow time for a response, and then
resume scanning.
Temporary Busy Channel Blocking
If one of the channels in the scan list is so busy that
you want to temporarily block it out, press the
Channel Selector button while the radio is stopped on
the channel to be blocked and hold it until scanning
resumes. The blocked channel will now be skipped in
the scan list.
The blocked channel will be returned to the scan list if
the radio is turned off and then back on again, or
when the radio channel is changed using the Channel
Selector button. The 1st channel in the scan list cannot
be blocked.
To turn Channel Scan on / off see "How To
Field Program Radio Options" on page 12.
page 53
page
The special feature "Z" button can be programmed to
initiate scanning. PBS-446D and JBS-446D UHF base
radios are programmed for "Z" button Scan channel
operation from the factory.
To select the Scan Channel, press the "Z" button. The
radio sounds the Scan Beep, and scanning operation
is initiated. The Scan channel will not be accessible
with the Channel Selector button when the radio is
programmed for "Z" button Scan channel operation.
To return to normal channel operation, press the
Channel Selector button and the radio will return to
channel 1.
To temporarily block a busy channel while scanning,
press the "Z" button while the radio is stopped on the
channel to be blocked and hold it until scanning
resumes. The blocked channel will now be skipped in
the scan list.
Priority Scanning (Optional)
The "Display Series" base radio can be optionally
programmed for priority scanning. Priority Scan allows
you to periodically monitor a Priority Channel, even if
the radio has stopped on another channel. This will
prevent missed calls on the primary operating channel
when in scan mode.
The radio checks the Priority Channel every two
seconds to check for activity. This time is
programmable and can be set for 1 - 8 seconds.
The radio can be programmed to transmit only on
the Priority Channel when scanning.
See your Ritron dealer or contact Ritron directly for PC
programming of this option.
2-TONE PAGING DECODE OPERATION
To use 2-tone paging decode the "Display
Series" base radio must be PC programmed for
this option, the radio does not operate with 2-tone
decoding as it is received from the factory. See your
Ritron dealer or contact Ritron directly for PC
programming of this option.
To activate 2-tone paging you must first select a radio
channel that has been PC programmed for 2-tone
paging decode. The radio is normally programmed to
automatically activate 2-tone decode any time the
paging channel is selected. If not, simultaneously
press both of the volume buttons and hold briefly
before releasing. The radio sounds three beeps when
2-tone paging is turned on.
If you are unable to set the radio, you have selected a
channel that is not programmed for 2-tone paging
decode.
RITRON,
INC.
1-800-USA-1-USA
(1-800-872-1872)
Have
questions?
Call 800-USA-1-USA
(800-872-1872) or visit our website at www.ritron.com
OPERATION
When receiving a 2-tone page the radio will emit a
"ring" tone similar to a telephone and the display will
show a "C" to indicate that a call has been received.
You can now proceed with normal two way
communication until 2-tone paging has been reset. The
"ring" tone will sound every time a 2-tone page is
decoded.
"Z" BUTTON - PROGRAMMABLE SOFT KEY
The "Display-Series" base radio "Z" button can be
programmed for any one of the following options to
provide unique operation. Refer to the PC programmer
HELP file for specific "Z" button programming
instructions.
To field program the "Z" button for the Scan,
Weather, Monitor, or Call Tone option see
"How To Field Program Radio Options" on
page 12.
The display will show a "C" to indicate that
a 2-tone call has been received.
FIG-4:
2-TONE CALL ALERT
To reset 2-tone paging after receiving a call,
simultaneously press both of the volume buttons and
hold briefly before releasing. The radio sounds three
beeps when 2-tone paging is reset and the display will
show the channel number. The radio can be optionally
programmed to automatically reset if a call is not
answered within 15 seconds.
SCAN
Both the PBS-446D and JBS-446D UHF base radios
are programmed for "Z" button Channel Scan
operation from the factory.
See "Using The "Z" Button For Scan" on
page 5.
2-tone paging channels can be programmed to:
Automatically set the radio for 2-tone paging mode
whenever the channel is selected.
Automatically reset if a 2-tone page is not
answered within 15 seconds.
Automatically place the receiver into carrier squelch
"monitor" mode whenever a 2-tone page has been
decoded.
Transmit a transpond tone to let the paging station
know that the page has been received.
Decode an All Call tone.
Decode a Group Call if the 1st tone is sent for an
extended period of time.
WEATHER
Both the PBS-146D and JBS-146D VHF base radios
are programmed for "Z" button Weather channel
operation from the factory. This option is only
available on VHF band radios.
.
See "Using The "Z" Button For Weather
Channel" on page 8.
Tone squelch is enabled when the radio sounds one
beep. You will only hear broadcasts that carry the
same QC or DQC code programmed into your radio.
2-tone paging is enabled when the radio sounds a
"triple beep". You will only hear broadcasts that first
send your two unique paging tone. If you are unable to
set the radio for the "triple beep", you have selected a
channel that is not programmed for 2-tone paging
decode.
No squelch is enabled by pressing the "Z" button and
continuing to hold it down until the radio starts beeping
repeatedly. This means that squelch is turned off.
Release the button.
If you are unable to activate carrier or no squelch the
radio has been optionally programming for Monitor
Lockout. See your Ritron dealer or contact Ritron
directly to disable this option.
CALL TONE
Pressing the "Z" button causes the radio to transmit a
Call tone on the channel currently selected. If you
continue to hold the "Z" button down, the transmitter
will remain active and voice communications will be
possible after the Call tone has been sent.
This is used when the receiving radio is in a high noise
environment and may not hear a voice transmission.
DTMF ANI ON TRANSMIT
MONITOR
The "Z" button places the radio into one of the four
squelch modes when pressed.
Carrier squelch is enabled when the radio emits a
double beep. The radio will now let you hear all
broadcasts on your channel.
Pressing the "Z" button causes the radio to transmits a
unique DTMF ANI string that can be programmed
seperately for each channel. The DTMF string will be
heard on the speaker, and if you continue to hold the
"Z" button down, the transmitter will remain active and
voice communications will be possible after the DTMF
ANI string has been sent.
Have questions? Call 800-USA-1-USA (800-872-1872) or visit our website at www.ritron.com
page 6
OPERATION
NOAA WEATHER RADIO
Use the PTT button to transmit messages without
the DTMF ANI.
If a channel is not programmed with a DTMF ANI
string the "Z" button will function as a PTT button.
2-TONE PAGING ENCODE
Pressing the "Z" button causes the radio to
transmits a unique 2-tone page that can be
programmed seperately for each channel. The 2tone page will be heard on the speaker, and if you
continue to hold the "Z" button down, the
transmitter will remain active and voice
communications will be possible after the 2-tone
page has been sent.
Use the PTT button to transmit messages without
the 2-tone page.
If a channel is not programmed to encode a 2-tone
paging signal the "Z" button will function as a PTT
button.
HOW TO PRESET YOUR RADIO FOR LOCAL NOAA
WEATHER BROADCASTS
Built-in
(VHF MODELS ONLY)
Feature
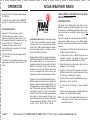
NOAA Weather Radio (NWR) is a nationwide network
of radio stations broadcasting continuous weather
information direct from a nearby National Weather
Service office. NWR broadcasts National Weather
Service warnings, watches, forecasts and other
hazard information 24 hours a day.
Working with the Federal Communication Commissions
(FCC) Emergency Alert System, NWR is an all hazards
radio network, making it your single source for
comprehensive weather and emergency information.
NWR also broadcasts warning and post-event
information for all types of hazardsboth natural
(such as earthquakes and volcano activity) and
environmetal (such as chemical releases or oil spills).
Known as the Voice of the National Weather Service,
NWR is provided as a public service by the National
Oceanic & Atmospheric Administration (NOAA), part
of the Department of Commerce. NWR includes more
than 750 transmitters, covering all 50 states, adjacent
coastal waters, Puerto Rico, the U.S. Virgin Islands,
and the U.S. Pacific Territories. NWR requires a special
radio receiver or scanner capable of picking up the
signal. Broadcasts are found in the public service band
at these seven frequencies (MHz): 162.400, 162.425,
162.450, 162.475, 162.500, 162.525, 162.550.
page 73
page
VHF models of the "Display Series" base radio can hear
weather forecasts from the National Weather Service which
are broadcast on one of the seven NOAA weather frequencies. In some areas you may be able to receive more than one
broadcast.
The radio is shipped from the factory without a NOAA frequency selected. Before using any of the NOAA weather
features on your VHF radio you must first select the local NOAA
frequency.
1.
Follow the steps in FIG-5 at right to place the radio into the
Weather Frequency Select mode.
2.
The radio will scan to the 1st NOAA frequency where a
broadcast is present. The display will light a single
segment to indicate the NOAA frequency per FIG-6.
3.
Monitor the channel for a few minutes to be sure it is the
broadcast for your local area.
4.
Press the "Z" button to scan for the presence of any other
NOAA broadcasts, monitoring each broadcast and noting
the frequency as indicated by the display.
5.
Using the "Z" button, select the local NOAA frequency you
would like your radio to operate on.
6.
Turn the radio off by pressing the Volume Down/Off
button.
7.
When the radio is turned back on all weather features will
operate on the selected NOAA frequency.
NOTE: If you move to another location within your area, or to
another state, you must "re-train" your radio with the
local NOAA frequency.
RITRON,
INC.
1-800-USA-1-USA
(1-800-872-1872)
Have
questions?
Call 800-USA-1-USA
(800-872-1872) or visit our website at www.ritron.com
NOAA WEATHER RADIO
NOAA WEATHER CHANNEL
1. PRESS & HOLD UNTIL
THE "RADIO OFF"
TONES ARE HEARD,
THEN RELEASE.
3. PRESS & RELEASE THE RADIO WILL
START BEEPING.
Once a NOAA weather frequency has been selected on
your VHF model radio, a channel is created for listening
to National Weather Service broadcasts.
Press the Channel button to step through your radio
channels. The NOAA Weather Channel will be after your
last channel, and the display will light the segment
representing the selected NOAA frequency.
If you do not desire a NOAA Weather Channel, it can be
turned off through Field Programming.
To turn Weather Channel on / off see "How
To Field Program Radio Options" on page 12.
4. CONTINUE HOLDING THE "Z"
BUTTON UNTIL THE BEEPING
STOPS, THEN RELEASE IT &
LISTEN.
5. TO FIND THE NEXT ACTIVE
WEATHER CHANNEL, PRESS &
RELEASE THE "Z" BUTTON.
2. PRESS & HOLD
THE "Z"
BUTTON.
FIG-5:
PRESETTING YOUR LOCAL NOAA
WEATHER BROADCASTS
3
162.450 MHz
162.475 MHz
162.425 MHz
162.400 MHz
162.500 MHz
162.550 MHz
162.525 MHz
FIG-6:
NOAA FREQUENCIES
USING THE "Z" BUTTON FOR WEATHER
CHANNEL
Both the PBS-146D and JBS-146D VHF base radios are
programmed for "Z" button Weather Channel operation
from the factory. This option is only available on VHF
band radios.
To select the Weather channel, press the "Z" button.
The radio will scan to the 1st NOAA frequency where
a broadcast is present. The display will light a single
segment to indicate the NOAA frequency per FIG-6 on
page 7. If the radio has been pre-set for your local
NOAA weather frequency, the radio will go directly to
that frequency when the "Z" button is 1st pressed.
With any subsequent press of the "Z" button the radio
will scan to the next active NOAA frequency.
WEATHER ALERT
Once a NOAA weather frequency has been selected on
your VHF model radio it will listen for emergency
broadcasts from the National Weather Service,
regardless of which channel you are on.
An alert tone will sound in the speaker, the
display will show an "A" (as shown), and
the National Weather Service emergency
broadcast will be heard - advising you of
threatening weather conditions. Pressing
the Channel button will return you to your
normal operating channel.
The Weather channel will not be accessible with the
Channel Selector button when the radio is
programmed for "Z" button Weather channel operation.
To return to normal channel operation, press the
Channel Selector button and the radio will return to the
channel that was selected when the Weather channel
was accessed with the "Z" button.
If you do not desire Weather Alert, it can be turned off
through Field Programming.
To turn Weather Alert on / off see "How To
Field Program Radio Options" on page 12.
Have questions? Call 800-USA-1-USA (800-872-1872) or visit our website at www.ritron.com
page 8
RADIO PROGRAMMING
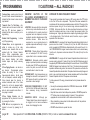
HOW TO READOUT FIELD PROGRAMMABLE FREQUENCY & TONE CODES
To talk to other users in your group, all
radios must be set to the same frequency
and Interference Eliminator codes.
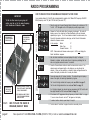
3. PRESS & RELEASE THE RADIO WILL
START BEEPING
RAPIDLY.
1. Place the radio into Program/ Readout Mode by following the instructions in FIG7 at left. A "P" will appear on the LED display as you enter program mode.
2. PRESS & HOLD
THE PUSH-TOTALK BUTTON.
4. CONTINUE HOLDING THE PUSH-TOTALK BUTTON UNTIL THE BEEPING
STOPS, THEN RELEASE IT.
5. THE RADIO WILL EMIT A TRIPLE
TONE: IT IS NOW IN PROGRAM/
READOUT MODE.
FIG-7:
page 93
page
HOW TO PLACE THE RADIO IN
PROGRAM/READOUT MODE
FREQUENCY &
TONE CODES
CHANNEL
1. PRESS & HOLD UNTIL
THE "RADIO OFF"
TONES ARE HEARD,
THEN RELEASE.
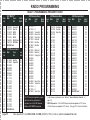
In our example channel 3 of a UHF radio is programmed to operate on the "Brown Dot" frequency of 464.500
MHz (Frequency code "04") with 100.0 Hz tone (Tone code "12").
RADIO IDENTIFICATION
IMPORTANT
2. Release the Push-to-talk button after the beeping has stopped. The radio will
display a series of six characters for Radio Identification, with each character
separated by a hyphen. The 1st two characters indicate the model number, the
3rd and 4th characters indicate the radio type, and the 5th and 6th characters
indicate the firmware revision.
In this example:
Model:
Radio Type:
Firmware Revision:
27
16
01
NOTE: Radio models wih firmware revisions prior to 16.01 do not display the
Radio Identification sequence.
3. After the Radio Identification has been displayed the digit 1 will appear,
followed by a hyphen, and the radio will emit a triple beep indicating that the
radio is in program mode and channel 1 is selected.
4. Press the Channel Selector button to select the channel to be read out. The
channel number will appear briefly on the display as you step through the
channels. When you have settled on a channel a hyphen will appear across the
center of the display to indicate that it is ready for readout..
5. Press and release the On/ Volume Up button. The radio will begin to display a
series of four digits; with each digit seperated by a hyphen.
The 1st and 2nd digits indicate the frequency code; see Table 1 on page 11.
The 3rd and 4th digits indicate the tone code; see Table 2 on page 12.
If a 5th digit is diplayed, the channel has been programmed for DQC and the last
three digits indicate the DQC code; see Table 3 on page 12.
6. If the channel is PC-programmed for any frequency not listed in Table 1 on page
11, an error tone will sound and an "E" will appear on the display.
7. To readout another channel, repeat steps 4 through 6.
8. Turn the radio OFF and then ON againthe radio is now ready to use.
RITRON,
INC.
1-800-USA-1-USA
(1-800-872-1872)
Have
questions?
Call 800-USA-1-USA
(800-872-1872) or visit our website at www.ritron.com
RADIO PROGRAMMING
In our example we will program channel 3 of a UHF radio to operate on the "Brown Dot"
frequency of 464.500 MHz (Frequency code "04") with 100.0 Hz tone (Tone code "12").
04
1. Refer to Table 1 on page 11 to determine the two digit
frequency code and write it down.
12
2. Refer to Table 2 on page 12 to determine the two digit
tone code for 100.0 Hz and write it down.
RADIO IDENTIFICATION
3. Place the radio into Program/ Readout Mode by
following the instructions in FIG-7 on page 9. A "P" will
appear on the LED display as you enter program mode.
4. Release the Push-to-talk button after the beeping has
stopped. The radio will display a series of six
characters for Radio Identification, with each character
separated by a hyphen. The 1st two characters
indicate the model number, the 3rd and 4th charaters
indicate the radio type, and the 5th and 6th characters
indicate the firmware revision.
In this example:
Model:
Radio Type:
Firmware Revision:
TONE CODE
To match other radios, the owner can select Frequency and Tone Codes from Tables
1, 2, and 3 on pages 11 and 12.
FREQUENCY CODE
HOW TO FIELD PROGRAM FREQUENCY & TONE CODES
SELECT CHANNEL
NOTE: Radio models with firmware revisions prior to
16.01 do not display the Radio Identification sequience.
6. Press the Channel Selector button to select the channel
to be programmed. The channel number will show
briefly on the channel display as you step through the
channels. When you have settled on a channel the
display will show a hyphen to indicate that it is ready
for programming.
Enter the 1st digit of the frequency code by clicking the PTT button
until the channel display shows the desired number. Pause - the
radio will sound a low tone and show a hyphen across the center of
the display to indicated that it is ready to accept the next digit.
8.
Enter the 2nd digit of the frequency code by clicking the PTT button
until the channel display shows the desired number. Pause - the
radio will sound a low tone and show a hyphen across the center of
the display to indicated that it is ready to accept the next digit.
9.
Enter the 1st digit of the tone code (or 1st digit of the DQC code) by
clicking the PTT button until the channel display shows the desired
number. Pause - the radio will sound a low tone and show a hyphen
on the display to indicated that it is ready to accept the next digit.
10. Enter the 2nd digit of the tone code (or 2nd digit of the DQC code) by
clicking the PTT button until the channel display shows the desired
number. Pause - the radio will sound a low tone and show a hyphen
on the display to indicated that it is ready to accept the next digit.
11. FOR DQC CODES ONLY - Enter the 3rd digit of the DQC code by
clicking the PTT button until the channel display shows the desired
number. Pause - the radio will sound a low tone and show a hyphen
on the display to indicate that it is ready to accept the next digit.
12. Press and release the On/ Volume Up to SAVE your programming
entry. The LED display will briefly show the channel number you
have just programmed and the radio will sound a triple beep to
indicate that programming was successful.
27
16
01
5. After the Radio Identification has been displayed the
digit 1 will appear, followed by a hyphen, and the radio
will emit a triple beep indicating that the radio is in
program mode and channel 1 is selected.
7.
NOTE: An error tone will sound if you attempt to save an incorrect
code and an "E" will appear on the display. Turn the radio OFF, check
the digits you are attempting to enter, then start over.
13. To program another channel, repeat steps 6 through 12.
NOTES:
14. Turn the radio OFF and then ON againthe radio is now ready to
use.
a. YOU MUST enter "44" to enter "No Code" interference eliminator to match radios not
having tone codes. Refer to Table 2 on page 12.
b. If the radio does not sound a confirming triple tone when you attempt to enter Program/
Readout Mode, the radio was factory or dealer customized to disable programming.
Consult the radio owner or your dealer.
Have questions? Call 800-USA-1-USA (800-872-1872) or visit our website at www.ritron.com
page 10
RADIO PROGRAMMING
TABLE 1: PROGRAMMABLE FREQUENCY CODES
Code
No.
01
02
19
20
21
22
23
00
Code
No.
03
04
05
06
07
08
09
10
11
12
13
14
15
16
17
18
24
25
26
00
VHF MURS **
MHz
Color
Dot
154.6000 Green Dot
154.5700 Blue Dot
151.8200 MURS
151.8800 MURS
151.9400 MURS
154.6000 MURS/Green
154.5700 MURS/Blue
DELETE Code*
VHF Business Band
MHz
Color
Dot
151.6250 Red Dot
151.9550 Purple Dot
151.9250
154.5400
154.5150
154.6550
151.6850
151.7150
151.7750
151.8050
151.8350
151.8950
154.4900
151.6550
151.7450
151.8650
151.7000
151.7600
152.7000
DELETE Code *
Band
Width
Code
No.
25
25
12.5
12.5
12.5
12.5
12.5
01
02
03
04
05
06
07
08
09
10
11
12
13
14
15
16
17
18
19
20
21
22
23
24
25
26
Band
Width
25
25
25
25
25
25
25
25
25
25
25
25
25
25
25
25
12.5
12.5
25
UHF Business Band
MHz
Color
Dot
467.7625
467.8125
464.5500
464.5000
467.8500
467.8750
467.9000
467.9250
469.2625
462.5750
462.6250
462.6750
464.3250
464.8250
469.5000
469.5500
463.2625
464.9125
464.6000
464.7000
462.7250
464.5000
464.5500
467.7625
467.8125
467.8500
J
K
Yellow Dot
Brown Dot
Silver Star
Gold Star
Red Star
Blue Star
White Dot
Black Dot
Orange Dot
Brown Dot
Yellow Dot
J
K
Silver Star
Band
Width
Code
No.
25
25
25
25
25
25
25
25
25
25
25
25
25
25
25
25
25
25
25
25
25
12.5
12.5
12.5
12.5
12.5
27
28
29
30
31
32
33
34
35
36
37
38
39
40
41
42
43
44
45
46
47
48
49
50
51
52
Per FCC rules and regulations, a given
radio must not be programmed to
contain a mix of both VHF Business
Band and VHF MURS frequencies.
*
UHF Business Band
MHz
Color
Dot
467.8750
467.9000
467.9250
461.0375
461.0625
461.0875
461.1125
461.1375
461.1625
461.1875
461.2125
461.2375
461.2625
461.2875
461.3125
461.3375
461.3625
462.7625
462.7875
462.8125
462.8375
462.8625
462.8875
462.9125
464.4875
464.5125
Gold Star
Red Star
Blue Star
Band
Width
Code
No.
12.5
12.5
12.5
12.5
12.5
12.5
12.5
12.5
12.5
12.5
12.5
12.5
12.5
12.5
12.5
12.5
12.5
12.5
12.5
12.5
12.5
12.5
12.5
12.5
12.5
12.5
53
54
55
56
57
58
59
60
61
62
63
64
65
66
67
68
69
70
71
72
73
74
75
76
77
00
UHF Business Band
MHz
Color
Dot
464.5375
464.5625
466.0375
466.0625
466.0875
466.1125
466.1375
466.1625
466.1875
466.2125
466.2375
466.2625
466.2875
466.3125
466.3375
466.3625
467.7875
467.8375
467.8625
467.8875
467.9125
469.4875
469.5125
469.5375
469.5625
DELETE Code *
Band
Width
12.5
12.5
12.5
12.5
12.5
12.5
12.5
12.5
12.5
12.5
12.5
12.5
12.5
12.5
12.5
12.5
12.5
12.5
12.5
12.5
12.5
12.5
12.5
12.5
12.5
2-digit Frequency placeholder code (Refer to "How to Delete a Channel" on
page 12)
** MURS frequencies - The 5 MURS frequencies do not require an FCC license.
All other frequencies require an FCC license. See page 15 for license information.
page 11
3 RITRON,
INC.
1-800-USA-1-USA
(1-800-872-1872)
Have
questions?
Call 800-USA-1-USA
(800-872-1872) or visit our website at www.ritron.com
page
RADIO PROGRAMMING
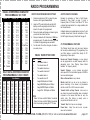
TABLE 2: INTERFERENCE ELIMINATOR
PROGRAMMABLE QC TONE
Code No. Hz
Code
No. Hz
Code No. Hz
CODES
01
02
03
04
05
06
07
08
09
10
11
12
13
14
15
16
17
00
67.0
71.9
74.4
77.0
79.7
82.5
85.4
88.5
91.5
94.8
97.4
100.0
103.5
107.2
110.9
114.8
118.8
Delete
18
19
20
21
22
23
24
25
26
27
28
29
30
31
32
33
34
123.0
127.3
131.8
136.5
141.3
146.2
151.4
156.7
162.2
167.9
173.8
179.9
186.2
192.8
203.5
210.7
218.1
35
225.7
36
233.6
37
241.8
38
250.3
39
69.4
40
159.8
41
165.5
42
171.3
43
177.3
44 No Tone
45
183.5
46
189.9
47
196.6
48
199.5
49
206.5
50
229.1
51
254.1
TABLE 3: DIGITAL INTERFERENCE ELIMINATOR
PROGRAMMABLE DQC CODES
Code Numbers
023
025
026
031
032
043
047
051
054
065
071
072
073
074
114
115
116
125
131
132
134
143
152
155
156
162
165
172
174
205
223
226
243
244
245
251
261
263
265
271
306
311
315
331
343
346
351
364
365
371
411
412
413
423
431
432
445
464
465
466
503
506
516
532
546
565
606
612
624
627
631
632
654
662
664
703
712
723
731
732
734
743
754
HOW TO FIELD PROGRAM RADIO OPTIONS
HOW TO DELETE A CHANNEL
1.
Follow the instructions in FIG-7 on page 9 to place
the radio in the Program/ Readout Mode.
2.
Using the PTT (push-to-talk) button and the LED
display, enter the single digit code from Table 4
below for the option to be programmed.
Pausethe display will change and show a hyphen,
you will also hear a short low tone.
Press and release the On/ Volume Up to SAVE your
programming entry. The radio will sound a triple beep
to indicate that programming was successful.
Turn the radio OFF and then ON againthe radio is
now ready to use.
Following the instructions in "How to Field Program
Frequency & Tone Codes" on page 10, enter a
Frequency Code of "00" and a Tone Code of "00". Once
a channel has been deleted it is no longer available with
the Channel Selector.
3.
4.
5.
TABLE 4: RADIO OPTION CODES
CODE
1
2
3
4
5
6
7
8
9
0
OPTION
Turn channel scan on
Turn channel scan off
Turn weather channel on
Turn weather channel off
Turn weather alert on
Turn weather alert off
Assign SCAN option to Z Button
Assign WEATHER option to Z Button
Assign MONITOR option to Z Button
Assign CALL TONE option to Z Button
NOTES:
1. Codes 1 & 2 have no effect if Option 7 is selected
2. Codes 3 & 4 have no effect if Option 8 is selected
3. Code 0 is entered by pressing the PTT 10 times
A deleted channel can be added back at any time. To add
a deleted channel back, follow the instructions in "How
to Field Program Frequency & Tone Codes" on page 10.
PC PROGRAMMABLE FEATURES
The "Display Series" base radio has many features
that are only available through PC programming. See
your Ritron dealer or contact Ritron directly for PC
programming of these option.
Receive and Transmit Frequency on any channel
can be programmed to any valid frequency within it's
designated band. (See "Display Series Model
Numbers" for frequency bands)
Squelch Tightener
on any channel can adjust
carrier squelch UP to block distant signals or DOWN to
hear more distant signals.
Wide or Narrow Band on any channel.
Monitor Lock Out can be set on any channel to
prevent monitoring of the channel, only broadcasts
with the correct QC or DQC code can be heard.
Transmit Inhibit on Busy Channel can be set on
any channel to prevent transmitting when a broadcast
is present on the receiver that does not carry the
correct code. This feature is usually used in
conjunction with Monitor Lock Out.
Transmit Time Out time can be changed.
Power Saver "sleep" time can be set, or power
saver can be disabled.
Have questions? Call 800-USA-1-USA (800-872-1872) or visit our website at www.ritron.com
page 12
PROGRAMMING
Courtesy Beep sounds a short tone at
the end of each received transmission to
indicate that the channel is clear and you
may transmit.
Transmit Clear To
channel can be set to
after the PTT has
indicate that the radio
begin talking.
Talk Beep
Any
sound a short tone
been pressed to
is ready for you to
Disable Field Programming
only PC programming.
to allow
Channel Scan can be programmed or
edited to include any of the radio
channels, even channels that are not
selected with the Channel Selector
button.
Other
programmable
scan
features include scan resume delay time,
busy channel blocking, last active
channel beeps, and priority scanning
options.
2-Tone Paging Decode can be set on
any channel.
Programmable options
include the setting of the 2 tone
frequencies and duration, all call, group
call, call transpond, automatic setting of
2-tone decode when the channel is
selected, automatic reset of the 2-tone
decode if a call is not answered within
15 seconds, and automatically set the
radio to carrier squelch mode after a 2tone page is received.
2-Tone
Paging
Encode
can
be
programmed on any channel to be sent
by pressing the Z button.
DTMF ANI can be programmed on any
channel to be sent by pressing the Z
button.
!! CAUTIONS ALL RADIOS !!
OBSERVE
CAUTION
IN
THE
FOLLOWING ENVIRONMENTS TO
MAXIMIZE THE LIFE OF YOUR RADIO
EQUIPMENT:
LOCATION: Be aware that this radio and/or
antenna may create interference with, or
be interfered with, by nearby electronic
equipment such as computers, monitors,
keyboards, electronic telephones and other
sensitive devices.
Either move the
equipment or use a remote antenna to
separate components sufficiently to stop or
reduce interference.
MOISTURE: "Display Series" base radios
are not waterproof. DO NOT directly
expose them to rain or excessive moisture.
CHEMICALS: Detergents, alcohol, aerosol
sprays or petroleum products can damage
the radio case. DO NOT use petroleum solvents of any kind; use a soft cloth moistened with water to clean the case.
EXTREME HEAT: High temperatures can
damage the radio and its components. DO
NOT expose the units to extreme heat or
leave them in direct sunlight.
EXCESSIVE TRANSMISSIONS: DO NOT
hold the Push-To-Talk switch down longer
than necessary during transmission
intervals.
VIBRATION/ SHOCK:
Although your
"Display Series" base radio is designed to
be rugged, it will not survive excessive
abuse. Avoid dropping the radio.
EXPOSURE TO RADIO FREQUENCY ENERGY:
These product generates radio frequency (RF) energy when the PTT button
on the front of the unit is depressed. The product has been evaluated for
compliance with the maximum permissible exposure limits for RF energy at the
maximum power rating of the unit when using antennas available from
RITRON. Antennas other than the those mentioned below have not been
tested for compliance and may or may not meet the exposure limits at the
distances given. Higher gain antennas are capable of generating higher fields
in the strongest part of their field and would, therefore, require a greater
separation from the antenna.
JBS-/PBS-146D: To comply with the General Population/Uncontrolled limits, all
persons must be at least 7.9 inches (20 cm) from the AFB-1545 antenna
which is supplied by RITRON to be attached directly to the rear of the unit. For
the RITRON RAM-1545 magnet mount antenna which can be located away
from the unit, all persons must remain at least 10.8 inches (28 cm) from the
antenna.
JBS-/PBS-446D: To comply with the General Population/Uncontrolled limits, all
persons must be at least 8.7 inches (22 cm) from the AFB-1545 antenna which
is supplied by RITRON to be attached directly to the rear of the unit. For the RITRON
RAM-1545 magnet mount antenna, at the 20 cm (7.9 inches) minimum expected
separation distance and greater, the maximum RF exposure is well below the
General Population/Uncontrolled limits. This product is not to be used by the general
public in an uncontrolled environment unless compliance with the Uncontrolled/
General Population limits for RF exposure can be assured.
To limit exposure to RF energy to levels below the limit, please observe the
following:
Use only the antenna(s) available from RITRON for these models. DO NOT
operate the radio without an antenna.
Keep talk times as short and infrequent as possible. DO NOT depress the
PTT button when not actually wishing to transmit. These radios are
equipped with an internal timer to limit continuous transmit times.
When transmitting, make certain that the distance limits for the particular
model in use are observed.
DO NOT allow children to operate the radio.
page 13
3 RITRON,
INC.
1-800-USA-1-USA
(1-800-872-1872)
page
Have
questions?
Call 800-USA-1-USA
(800-872-1872) or visit our website at www.ritron.com
TROUBLESHOOTING
NOTES
1. Reception can often be improved if you
relocate by a short distance. This effect is
more noticeable inside buildings.
The range of the "Display Series" base
radio is approximately two miles, line-ofsight.
2. If your radio does not detect calls from other
radios on the channel, turn off Quiet Call by
pressing and holding both volume buttons at the
same timea double beep indicates Quiet Call is
off.
3. Without use of a repeater: To hear a call, select a
channel programmed to receive the caller's
transmit frequency. To call another unit, select a
channel programmed to transmit the other radio's
receive frequency.
Using a repeater: A radio channel can hold two
separate operating frequencies, one for receive
and one for transmit. Your channel must work
with the repeater's transmit and receive
frequencies.
NOTE: A dealer must program the radio for
repeater operation.
4. An optional RM-7 Remote Speaker/
Microphone and headset, plus the CCL-M
12 VDC Adapter, allow operation in a
vehicle. See page ii for accessories.
5. To "talk" with each other, radios must be
programmed identically for Quiet Call code, as
well as frequency. Each code is unique; radios
respond only to the code programmed.
Press and hold both volume buttons at the same
time.
A single beep indicates Quiet Call squelch is on.
A double beep indicates Quiet Call squelch is off.
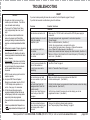
CHART
If you have trouble operating the base radio, review the Control & Operation, pages 2 through 7.
If you think the base radio is malfunctioning, check the list below.
Problem
Possible Solutions
The radio does not work at all.
Make sure the 120 VAC outlet is active and the RPS-1A power supply is
connected.
The radio has been dealer programmed for customized operation.
(Consult dealer.)
Move to a different location. (See Note 1.)
Confirm the proper antenna is connected to the radio.
Use an optional high-gain antenna. See page ii, Optional Accessories.
Turn off Quiet Call (coded) squelch. (See Note 2.)
Ensure radio receives the same frequency the caller transmits. (See Note 3.)
Make sure that your radio transmits on the receive frequency of the radio(s) you
want to call. (See Note 3.)
GENERAL
Operating features do not work
exactly as expected.
Reception is poor.
You cannot hear calls from
other radios.
Your calls cannot be heard in
other radios.
ERROR TONES
An error tone sounds when the
radio is first switched on.
An error tone occurs while
transmitting.
See "Error Tones" on page 4.
Refer to "Transmitter Time-Out," page 4.
QUIET CALL
You cannot screen out calls
from users outside of your Quiet
Call group.
You cannot hear Quiet Call
messages while in Quiet Call
(coded) squelch.
Others in your Quiet Call group
cannot hear your Quiet Call
messages.
Make sure that the channel is programmed with Quiet Call.
Activate coded squelch. (See Note 5.)
Confirm that the channel is programmed to detect the same code as the calling
radio(s) transmits. (See Note 5.)
Verify that you transmit the same code as the radio(s) you call are
programmed to detect. (See Note 5.)
SCAN
The radio constantly stops on
a busy channel, preventing you
from hearing calls on other
channels.
Skip over the interfering channel when scanning.
See "Temporary Busy Channel Blocking" on page 5.
Have questions? Call 800-USA-1-USA (800-872-1872) or visit our website at www.ritron.com
page 14
FCC LICENSE REQUIRED
FCC REGULATIONS
LICENSING
The FCC requires the owners of the radios to obtain a station license before using them.
The station licensee is responsible for ensuring that transmitter power, frequency and deviation are within
the limits specified by the station license. The station licensee is also responsible for proper operation and
maintenance of the radio equipment. This includes checking the transmitter frequency and deviation
periodically, using appropriate methods.
To get a FCC license for VHF or UHF frequencies, submit FCC application Form 600 as indicated in the
block at right. Your Ritron dealer can help you with this process.
SAFETY STANDARDS
The FCC (with its action in General Docket 79-144, March 13, 1985) has adopted a safety standard for
human exposure to radio frequency electromagnetic energy emitted by FCC regulated equipment. Ritron
observes these guidelines and recommends that you do also:
DO NOT hold the radio so that the antenna is very close to or touching exposed parts of the body,
especially the face or eyes, while transmitting. Keep the radio vertical, four inches away while
talking into the front panel.
DO NOT press the Push-To-Talk except when you intend to transmit.
DO NOT operate radio equipment near electrical blasting caps or in an explosive atmosphere.
DO NOT allow children to play with any radio equipment that contains a transmitting device.
Repair of Ritron products should be performed only by Ritron authorized personnel.
SERVICE
Federal law prohibits you from making any internal adjustments to the transmitter, and/ or from changing
transmit frequencies unless you are specifically designated by the licensee.
If your radio equipment fails to operate properly, or you wish to have the radio programmed, contact your
authorized dealer or Ritron.
RITRON, INC., Repair Department
505 West Carmel Drive
Carmel, IN 46032 USA
HOW TO OBTAIN AN FCC RADIO LICENSE
Federal Communications Commission (FCC)
Licensing Information
Because your Ritron radio operates on Private Land Mobile
frequencies, it is subject to the Rules and Regulations of the
FCC, which requires all operators of these frequencies to
obtain a station license before operating their equipment.
Make application for your FCC license on FCC Forms 600
and 159.
To have forms and instructions faxed to you by the FCC,
call the FCC Fax-On-Demand system at
202-418-0177 from your fax machine;
request Document 000600 & Form 159.
To have Document 000600 & Form 159 mailed to you,
call the FCC Forms Hotline at
800-418-FORM (800-418-3676).
For help with questions concerning the
license application, contact the FCC at
888-CALL-FCC (888-225-5322).
You must decide which radio frequency(ies) you
can operate on before filling out your application.
For help determining your frequencies, call Ritron at
800-USA-1-USA (800-872-1872).
Phone: 317-846-1201
FAX: 317-846-4978
page 15
3 RITRON,
INC.
1-800-USA-1-USA
(1-800-872-1872)
Have
questions?
Call 800-USA-1-USA
(800-872-1872) or visit our website at www.ritron.com
page
RITRON, INC. LIMITED WARRANTY
IMPORTANT
WHAT THIS WARRANTY COVERS
RITRON, INC. ("RITRON") provides the following warranty against defects in materials and/or
workmanship in RITRON Radios and Accessories under normal use and service during the applicable
warranty period (as stated below). "Accessories" means antennas, holsters, chargers, earphones, speaker/
microphones and items contained in the programming and programming/service kits.
WHAT IS COVERED
FOR HOW LONG
WHAT RITRON WILL DO
"Display Series" Base
Station Radios
1 year *
During the first year after date of purchase,
RITRON will repair or replace the defective
product, at RITRON's option, parts and
labor included at no charge.
Accessories
90 days *
* After date of purchase
WHAT THIS WARRANTY DOES NOT COVER:
Any technical information provided with the covered product or any other RITRON products;
Installation, maintenance or service of the product, unless this is covered by a separate written
agreement with RITRON;
Any products not furnished by RITRON which are attached or used with the covered product, or
defects or damage from the use of the covered product with equipment that is not covered (such as
defects or damage from the charging or use of batteries other than with covered product);
Defects or damage, including broken antennas, resulting from:
- misuse, abuse, improper maintenance, alteration, modification, neglect, accident or act of God,
- the use of covered products other than in normal and customary manner or,
- improper testing or installation;
Defects or damages from unauthorized disassembly, repair or modification, or where unauthorized
disassembly, repair or modification prevents inspection and testing necessary to validate warranty
claims;
Defects or damages in which the serial number has been removed, altered or defaced.
Batteries if any of the seals are not intact.
WHO IS COVERED BY THIS WARRANTY
This warranty is given only to the purchaser or lessee of covered products when acquired for use, not resale.
This warranty is not assignable or transferable.
This warranty sets forth the full extent of RITRONs express responsibilities regarding the covered products,
and is given in lieu of all other express warranties. What RITRON has agreed to do at left is your sole and
exclusive remedy. No person is authorized to make any other warranty to you on behalf of RITRON.
Warranties implied by state law, such as implied warranties of merchantability and fitness for a particular
purpose, are limited to the duration of this limited warranty as it applies to the covered product. Incidental
and consequential damages are not recoverable under this warranty (this includes loss of use or time,
inconvenience, business interruption, commercial loss, lost profits or savings). Some states do not allow
the exclusion or limitation of incidental or consequential damages, or limitation on how long an
implied warranty lasts, so the above limitations or exclusions may not apply to you. Because each
covered product system is unique, RITRON disclaims liability for range, coverage, or operation of
the system as a whole under this warranty.
HOW TO GET WARRANTY SERVICE
To receive warranty service, you MUST deliver or send the defective product, delivery costs and insurance
prepaid, within the applicable warranty period, to RITRON, INC., 505 West Carmel Drive, Carmel, Indiana
46032, Attention: Warranty Department.
Please point out the nature of the defect in as much detail as you can. You MUST retain your sales or lease
receipt (or other written evidence of the date of purchase) and deliver it along with the product. If
RITRON chooses to repair or replace a defective product, RITRON may replace the product or any part or
component with reconditioned product, parts or components. Replacements are covered for the balance of the
original applicable warranty period. All replaced covered products, parts or components become RITRONs
property.
RIGHTS TO SOFTWARE RETAINED
Title and all rights or licenses to patents, copyrights, trademarks and trade secrets in any RITRON software
contained in covered products are and shall remain in RITRON. RITRON nevertheless grants you a limited
non-exclusive, transferable right to use the RITRON software only in conjunction with covered products. No
other license or right to the RITRON software is granted or permitted.
YOUR RIGHTS UNDER STATE LAW
This warranty gives you specific legal rights, and you may also have other rights which vary from state to state.
WHERE THIS WARRANTY IS VALID
This warranty is valid only within the United States, the District of Columbia and Puerto Rico.
Have questions? Call 800-USA-1-USA (800-872-1872) or visit our website at www.ritron.com
page 16
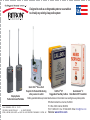
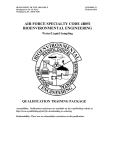
Designed to work as an integrated system or as an add-on
to virtually any existing 2-way radio system
Display-Series
Patriot & Jobcom Portables
Pub. 14500045
REV. A
Quick TalkTM Voice Alert
Reporter for Remote Monitoring
OutPost TM XT
Quick Assist ® II
of any sensor or switch
Ruggedized Two-Way Callbox Push-Button RF Transmitter
Battery-operated callboxes provide instant wireless communication over existing two-way radio systems
12-03
COPYRIGHT© 1999-2003 RITRON, INC.
ALL RIGHTS RESERVED
RITRON,
QUICK ASSIST,
and 1-800-USA-1-USA
QUIET CALL ARE REGISTERED (1-800-872-1872)
TRADEMARKS OF RITRON, INC.
page JOBCOM®,
3 RITRON,
INC.
505 West Carmel Drive Carmel, IN 46032
P. O. Box 1998 Carmel, IN 46032
Ph: 317-846-1201 Fax: 317-846-4978 Email: [email protected]
Website:
www.ritron.com
Have questions? Call 800-USA-1-USA (800-872-1872)
or visit
our website at www.ritron.com