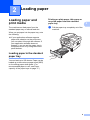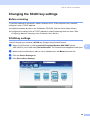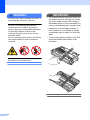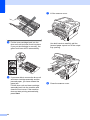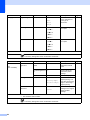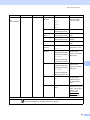
1
BASIC USER’S GUIDE DCP-7055 DCP-7055W DCP-7057 DCP-7057W DCP-7060D DCP-7065DN DCP-7070DW Not all models are available in all countries. Version D UK/IRE If you need to call Customer Service Please complete the following information for future reference: Model Number: DCP-7055 / DCP-7055W / DCP-7057 / DCP-7057W / DCP-7060D / DCP-7065DN / DCP-7070DW (Circle your model number) Serial Number: 1 Date of Purchase: Place of Purchase: 1 The serial number is on the back of the unit. Retain this User’s Guide with your sales receipt as a permanent record of your purchase, in the event of theft, fire or warranty service. Register your product on-line at http://www.brother.com/registration/ © 2010 Brother Industries, Ltd. User’s Guides and where do I find it? Which manual? What’s in it? Safety and Legal Read this Guide first. Please read the Safety Instructions before you set up your machine. See this Guide for trademarks and legal limitations. Quick Setup Guide Follow the instructions for setting up your machine and installing the drivers and software for the operating system and connection type you are using. Basic User's Guide Learn the basic Copy and Scan operations and how to replace consumables. See troubleshooting tips. Advanced User's Guide Learn more advanced operations: Copy, printing reports, and performing routine maintenance. Software User's Guide Follow these instructions for Printing and Scanning. Instructions are included for Network Scanning (For DCP-7055W / DCP-7057W / DCP-7065DN / DCP-7070DW) and using the Brother ControlCenter utility. Network Glossary This Guide provides basic information about advanced network features of Brother machines along with explanations about general networking and common terms. (For DCP-7055W / DCP-7057W / DCP-7065DN / DCP-7070DW) Network User's Guide (For DCP-7055W / DCP-7057W / DCP-7065DN / DCP-7070DW) Where is it? Printed / In the Box PDF file / Documentation CD-ROM / In the Box This Guide provides useful information about wired and wireless network settings and security settings using the Brother machine. You can also find supported protocol information for your machine and detailed troubleshooting tips. i Table of Contents (BASIC USER'S GUIDE) 1 General information 1 Using the documentation .......................................................................................1 Symbols and conventions used in the documentation ....................................1 Accessing the Advanced User’s Guide, Software User’s Guide and Network User’s Guide.........................................................................................2 Viewing Documentation ...................................................................................2 Accessing Brother Support (Windows®) ................................................................4 Accessing Brother Support (Macintosh) ................................................................5 Control panel overview ..........................................................................................6 Changing LCD language .......................................................................................8 2 Loading paper 9 Loading paper and print media ..............................................................................9 Loading paper in the standard paper tray........................................................9 Loading paper in the manual feed slot ..........................................................11 Unscannable and unprintable areas ..............................................................15 Paper settings......................................................................................................16 Paper Type ....................................................................................................16 Paper Size .....................................................................................................16 Acceptable paper and other print media..............................................................17 Recommended paper and print media ..........................................................17 Type and size of paper ..................................................................................17 Handling and using special paper .................................................................18 3 Loading documents 21 How to load documents .......................................................................................21 Using the automatic document feeder (ADF) (For DCP-7065DN).................21 Using the scanner glass ................................................................................22 4 Making copies 24 How to copy .........................................................................................................24 Stop copying ..................................................................................................24 Copy settings .................................................................................................24 5 How to print from a computer 25 Printing a document.............................................................................................25 6 How to scan to a computer 26 Scanning a document as PDF file using ControlCenter4 (Windows®) ................26 Changing the SCAN key settings ........................................................................29 Before scanning.............................................................................................29 SCAN key settings.........................................................................................29 Scanning using the SCAN key ......................................................................31 ii A Routine maintenance 32 Replacing the consumable items......................................................................... 32 Replacing the toner cartridge ........................................................................ 33 Replacing the drum unit................................................................................. 39 Cleaning the machine .......................................................................................... 44 Cleaning the outside of the machine ............................................................. 44 Cleaning the scanner glass ........................................................................... 45 Cleaning the corona wire............................................................................... 46 Cleaning the drum unit .................................................................................. 48 Cleaning the paper pick-up rollers................................................................. 52 B Troubleshooting 54 Error and maintenance messages....................................................................... 54 Document Jams................................................................................................... 57 Document is jammed in the top of the ADF unit (For DCP-7065DN) ............ 57 Document is jammed under the document cover (For DCP-7065DN) .......... 57 Removing small documents jammed in the ADF (For DCP-7065DN)........... 58 Document is jammed at the output tray (For DCP-7065DN) ......................... 58 Paper Jams.......................................................................................................... 59 Paper is jammed in the standard paper tray.................................................. 59 Paper is jammed at the back of the machine ................................................ 60 Paper is jammed inside the machine............................................................. 62 Paper is jammed in the Duplex Tray ............................................................. 66 If you are having difficulty with your machine ...................................................... 68 Improving the print quality.................................................................................... 73 Machine Information ............................................................................................ 83 Checking the Serial Number.......................................................................... 83 Reset functions.............................................................................................. 83 How to reset the machine.............................................................................. 83 C Menu and features 84 On-screen programming...................................................................................... 84 Menu table..................................................................................................... 84 How to access the menu mode ..................................................................... 84 Menu keys ........................................................................................................... 85 Menu table ........................................................................................................... 86 iii D Specifications 98 General ................................................................................................................98 Document Size ..................................................................................................101 Print media.........................................................................................................102 Copy ..................................................................................................................103 Scanner .............................................................................................................104 Printer ................................................................................................................105 Interfaces ...........................................................................................................106 Computer requirements .....................................................................................107 Consumable items .............................................................................................109 Network (DCP-7055W / DCP-7057W / DCP-7065DN / DCP-7070DW) ............110 E iv Index 111 Table of Contents (ADVANCED USER’S GUIDE) The Advanced User's Guide explains the following features and operations. You can view the Advanced User's Guide on the Documentation CD-ROM. 1 General Setup Memory Storage Ecology features Toner Settings LCD Contrast User Settings Report Network Configuration Report (For DCP-7055W / DCP-7057W / DCP-7065DN / DCP-7070DW) WLAN Report (For DCP-7055W / DCP-7057W / DCP-7070DW) Scanning using a scanner driver 2 Making copies Copy settings Duplex Copying (1-sided to 2-sided) (For DCP-7060D / DCP-7065DN / DCP-7070DW) A Routine maintenance Cleaning the machine Checking the machine Packing and shipping the machine B Glossary C Index v vi 1 General information Using the documentation 1 1 The following symbols and conventions are used throughout the documentation. Bold Bold style identifies keys on the machine control panel or computer screen. Italics Italicized style emphasizes an important point or refers you to a related topic. Courier New Courier New font identifies the messages shown on the LCD of the machine. WARNING WARNING indicates a potentially hazardous situation which, if not avoided, could result in death or serious injuries. Thank you for buying a Brother machine! Reading the documentation will help you make the most of your machine. Symbols and conventions used in the documentation 1 CAUTION 1 CAUTION indicates a potentially hazardous situation which, if not avoided, may result in minor or moderate injuries. IMPORTANT IMPORTANT indicates a potentially hazardous situation which, if not avoided, may result in damage to property or loss of product function. Electrical Hazard icons alert you to a possible electrical shock. Hot Surface icons warn you not to touch machine parts that are hot. Notes tell you how you should respond to a situation that may arise or give tips about how the current operation works with other features. 1 Chapter 1 Accessing the Advanced User’s Guide, Software User’s Guide and Network User’s Guide a Turn on your computer. Insert the Documentation CD-ROM into your CD-ROM drive. Note (Windows® users) If the screen does not appear automatically, go to My Computer (Computer), double-click the CD-ROM icon, and then double-click index.html. b 2 (Macintosh users) Double-click the Documentation CD-ROM icon, and then double-click index.html. Click your country. d Point to your language, point to View Guide, and then click the guide you want to read. 1 This Basic User's Guide does not contain all the information about the machine such as how to use the advanced features Copy, Printer, Scanner and Network (for DCP-7055W / DCP-7057W / DCP-7065DN / DCP-7070DW). When you are ready to learn detailed information about these operations, read the Advanced User's Guide, Software User's Guide, Network Glossary, and Network User's Guide (for DCP-7055W / DCP-7057W / DCP-7065DN / DCP-7070DW) that are on the Documentation CD-ROM. Viewing Documentation c 1 General information Presto! PageManager User’s Guide Note (Macintosh) • (Windows® users only) Your web browser may display a yellow bar at the top of the page that contains a security warning about Active X controls. For the page to display correctly you must click on Allow Blocked Content, then click Yes in the Security Warning dialog box. Presto! PageManager must be downloaded and installed before use. See Accessing Brother Support (Macintosh) on page 5 for further instructions. • (Windows® users only) 1 For faster access, you can copy all user documentation in PDF format to a local folder on your computer. Point to your language, then click Copy to local disk. 1 The complete Presto! PageManager User’s Guide can be viewed from the Help section in the Presto! PageManager application. How to find Network setup instructions (For DCP-7055W / DCP-7057W / DCP-7065DN / DCP-7070DW) Microsoft® Internet Explorer® 6.0 or greater. How to find Scanning instructions There are several ways you can scan documents. You can find the instructions as follows: Software User's Guide Scanning ControlCenter 1 Note 1 Your machine can be connected to a wireless or wired network. You can find basic setup instructions in the Quick Setup Guide. If your wireless access point or router supports Wi-Fi Protected Setup or AOSS™, you can also follow the steps in the Quick Setup Guide. For more information about network setup please see the Network User's Guide. Network Scanning (For DCP-7055W / DCP-7057W / DCP-7065DN / DCP-7070DW) ScanSoft™ PaperPort™12SE with OCR How-to-Guides (Windows®) The complete ScanSoft™ PaperPort™12SE with OCR How-toGuides can be viewed from the Help section in the ScanSoft™ PaperPort™12SE application. 3 Chapter 1 Accessing Brother Support (Windows®) You can find all the contacts you will need, such as Web support (Brother Solutions Center) on the Installation CD-ROM. Click Brother Support on the main menu. The following screen will appear: To access our website (http://www.brother.com/), click Brother Home Page. For the latest news and product support information (http://solutions.brother.com/), click Brother Solutions Center. To visit our website for original Brother Supplies (http://www.brother.com/original/), click Supplies Information. To access the Brother CreativeCenter (http://www.brother.com/creativecenter/) for FREE photo projects and printable downloads, click Brother CreativeCenter. To return to the main page, click Back or if you have finished, click Exit. 4 1 General information Accessing Brother Support (Macintosh) 1 1 You can find all the contacts you will need, such as Web support (Brother Solutions Center) on the Installation CD-ROM. Double-click the Brother Support icon. The following screen will appear: To download and install Presto! PageManager, click Presto! PageManager. To register your machine from the Brother Product Register Page (http://www.brother.com/registration/), click On-Line Registration. For the latest news and product support information (http://solutions.brother.com/), click Brother Solutions Center. To visit our website for original Brother Supplies (http://www.brother.com/original/), click Supplies Information. 5 Chapter 1 Control panel overview 1 DCP-7055 / DCP-7055W / DCP-7057 / DCP-7057W have the same keys and DCP-7060D / DCP-7065DN / DCP-7070DW have the same keys. 1 2 1 6 COPY keys: Options You can quickly and easily choose temporary settings for copying. These settings include: Quality Stack (choose number of copies) Sort (For DCP-7065DN when using the ADF) Brightness Contrast Enlarge/Reduce Page Layout Number of Copies (For DCP-7055 / DCP-7055W / DCP-7057 / DCP-7057W) Use this key to make multiple copies. Duplex (For DCP-7060D / DCP-7065DN / DCP-7070DW) You can choose Duplex to copy on both sides of the paper. 4 5 3 2 PRINT key: Job Cancel Cancels a print job and clears it from the machine’s memory. To cancel multiple print jobs, hold down this key until the LCD shows Job Cancel (All). 3 SCAN key Puts the machine in Scan mode. General information 1 1 2 4 5 4 3 6 7 LCD Displays messages to help you set up and use your machine. (For DCP-7055W / DCP-7057W / DCP-7070DW) A four level indicator shows the current wireless signal strength if you are using a wireless connection. 0 Max 5 Menu keys: Menu Lets you access the Menu to program your settings in this machine. Clear Deletes entered data or lets you cancel the current setting. a + or b Press to scroll through the menus and options. OK Lets you store your settings in the machine. 6 Stop/Exit Stops an operation or exits from a menu. 7 Start Lets you start making copies or scanning. 7 Chapter 1 Changing LCD language You can change the LCD language. a b Press Menu. Press a or b to choose 1.General Setup. Press OK. c Press a or b to choose 0.Local Language. Press OK. d Press a or b to choose your language. Press OK. e Press Stop/Exit. 8 1 2 Loading paper Loading paper and print media 2 2 Printing on plain paper, thin paper or recycled paper from the standard paper tray a The machine can feed paper from the standard paper tray or manual feed slot. 2 Pull the paper tray completely out of the machine. When you put paper into the paper tray, note the following: If your application software supports paper size selection on the print menu, you can select it through the software. If your application software does not support it, you can set the paper size in the printer driver or by using the control panel buttons. Loading paper in the standard paper tray 2 You can load up to 250 sheets. Paper can be loaded up to the maximum paper mark (b b b) on the sliding paper width guide. (For recommended paper to use, see Paper capacity of the paper trays on page 17.) 9 2 Chapter 2 b While pressing the green paper-guide release lever (1), slide the paper guides to fit the paper size you are loading in the tray. Make sure that the guides are firmly in the slots. d Put paper in the tray and make sure: The paper is below the maximum paper mark (b b b) (1). Overfilling the paper tray will cause paper jams. The side to be printed on must be face down. 1 The paper guides touch the sides of the paper so it will feed correctly. 1 1 e c 10 Fan the stack of paper well to avoid paper jams and misfeeds. Put the paper tray firmly back in the machine. Make sure that it is completely inserted into the machine. Loading paper f Printing on plain paper or recycled paper from the manual feed slot Unfold the support flap (1) to prevent paper from sliding off the face-down output tray. a 2 Unfold the support flap (1) to prevent paper from sliding off the face-down output tray, or remove each page as soon as it comes out of the machine. 2 1 1 1 Loading paper in the manual feed slot You can load envelopes and special print media one at a time into this slot. Use the manual feed slot to print or copy on labels, envelopes or thicker paper. 1 2 b (For DCP-7060D / DCP-7065DN / DCP-7070DW) Open the manual feed slot cover. Note The machine automatically turns on the Manual Feed mode when you put paper in the manual feed slot. 11 Chapter 2 c d Using both hands, slide the manual feed slot paper guides to the width of the paper that you are going to use. Using both hands, put one sheet of paper in the manual feed slot until the front edge of the paper or transparency touches the paper feed roller. When you feel the machine pull in the paper, let go. Printing on thick paper, bond paper, labels, and envelopes When the back output tray is pulled down, the machine has a straight paper path from the manual feed slot through to the back of the machine. Use this paper feed and output method when you want to print on thick paper, labels or envelopes. 12 Note Remove each printed sheet or envelope immediately to prevent a paper jam. 2 a Open the back cover (back output tray). b (For printing envelopes) Pull down the two green levers, one on the left-hand side and one on the righthand side, as shown in the illustration below. Loading paper c d (For DCP-7060D / DCP-7065DN / DCP-7070DW) Open the manual feed slot cover. e Using both hands, put one sheet of paper or one envelope in the manual feed slot until the front edge of the paper or envelope touches the paper feed roller. When you feel the machine pull in the paper, let go. Using both hands, slide the manual feed slot paper guides to the width of the paper that you are going to use. Note • Put the paper into the manual feed slot with the side to be printed face up. • Make sure that the print media is straight and in the correct position on the manual feed slot. If it is not, the paper may not be fed correctly, resulting in a skewed printout or a paper jam. • Do not put more than one sheet of paper in the manual feed slot at any one time, as it may cause a jam. 13 2 Chapter 2 • If you put any print media in the manual feed slot before the machine is in Ready mode, the print media may be ejected without being printed on. • To easily remove a small printout from the output tray, lift up the scanner cover by using both hands as shown in the illustration. • You can still use the machine while the scanner cover is up. To close the scanner cover, push it down with both hands. 14 Loading paper Unscannable and unprintable areas 2 The figures below show maximum unscannable and unprintable areas. The unscannable and unprintable areas may vary depending on the paper size or settings in the application you are using. Usage 2 Document Size Top (1) Left (2) Bottom (1) Right (2) Letter 3 mm 4 mm *a single copy A4 or a 1 in 1 copy 3 mm 3 mm Scan Letter 3 mm 3 mm A4 3 mm 3 mm 2 1 Copy 1 Print Letter 4 mm 6.35 mm A4 4 mm 6.35 mm 2 15 Chapter 2 Paper settings Paper Type 2 Set up the machine for the type of paper you are using. This will give you the best print quality. a b Press Menu. Press a or b to choose 1.General Setup. Press OK. c Press a or b to choose 1.Paper. Press OK. d Press a or b to choose 1.Paper Type. Press OK. e Press a or b to choose Thin, Plain, Thick, Thicker, Recycled Paper or Label. Press OK. f Press Stop/Exit. Paper Size You can use several different sizes of paper for printing copies: A4, Letter, Executive, A5, A5 L, A6, B5 or B6. When you change the size of paper in the tray, you will also need to change the setting for paper size at the same time so your machine can fit the document on the page. a b Press Menu. Press a or b to choose 1.General Setup. Press OK. c Press a or b to choose 1.Paper. Press OK. d Press a or b to choose 2.Paper Size. Press OK. 16 e Press a or b to choose A4, Letter, Executive, A5, A5 L, A6, B5 or B6. Press OK. f Press Stop/Exit. 2 2 Loading paper Acceptable paper and other print media Recommended paper and print media 2 2 Print quality may vary according to the type of paper you are using. You can use the following types of print media: thin paper, plain paper, thick paper, bond paper, recycled paper, labels or envelopes. For best results, follow the instructions below: DO NOT put different types of paper in the paper tray at the same time because it may cause paper jams or misfeeds. For correct printing, you must choose the same paper size from your software application as the paper in the tray. Avoid touching the printed surface of the paper immediately after printing. Before you buy a lot of paper, test a small quantity to make sure the paper is suitable. Paper Type Item Plain paper Xerox Premier TCF 80 g/m2 2 Xerox Business 80 g/m2 Recycled Paper Xerox Recycled Supreme 80 g/m2 Labels Avery laser label L7163 Envelope Antalis River series (DL) Type and size of paper 2 The machine loads paper from the installed standard paper tray or manual feed slot. The name for the paper trays in the printer driver and this Guide are as follows: Tray and optional unit Name Standard paper tray Tray 1 Manual feed slot Manual Paper capacity of the paper trays 2 2 Paper size Paper type No. of sheets Paper Tray (Tray 1) A4, Letter, B5, Executive, A5, A5 (Long Edge), A6, B6 Plain paper, Thin paper and Recycled paper up to 250 [80 g/m2] Manual feed slot (Manual) Width: 76.2 to 216 mm Plain paper, Thin paper, Thick paper, Length: 116 to 406.4 mm Thicker paper, Bond paper, Recycled paper, Envelopes and Labels Single sheet [80 g/m2] 17 Chapter 2 Recommended paper specifications 2 The following paper specifications are suitable for this machine. Basis weight 75-90 g/m2 Thickness 80-110 m Roughness Higher than 20 sec. Stiffness 90-150 cm3/100 Grain direction Long grain Volume resistivity 10e9-10e11 ohm Surface resistivity 10e9-10e12 ohm-cm Filler CaCO3 (Neutral) Ash content Below 23 wt% Brightness Higher than 80% Opacity Higher than 85% Use paper made for plain paper copying. Use paper that is 75 to 90 g/m2. Use long grain paper with a neutral Ph value, and a moisture content of approx. 5%. This machine can use recycled paper that meets DIN 19309 specifications. Handling and using special paper The machine is designed to work well with most types of xerographic and bond paper. However, some paper variables may have an effect on print quality or handling reliability. Always test samples of paper before purchasing to ensure desirable performance. Store paper in its original packaging and keep it sealed. Keep the paper flat and away from moisture, direct sunlight and heat. Some important guidelines when selecting paper are: DO NOT use inkjet paper because it may cause a paper jam or damage your machine. Preprinted paper must use ink that can withstand the temperature of the machine’s fusing process 392 degrees Fahrenheit (200 degrees centigrade). 18 2 If you use bond paper, paper that has a rough surface or paper that is wrinkled or creased, the paper may exhibit degraded performance. Types of paper to avoid IMPORTANT Some types of paper may not perform well or may cause damage to your machine. DO NOT use paper: • that is highly textured • that is extremely smooth or shiny 2 Loading paper Types of envelopes to avoid • that is curled or warped 2 IMPORTANT 1 DO NOT use envelopes: • that are damaged, curled, wrinkled or an unusual shape 1 • that are extremely shiny or textured 1 A curl of 2 mm or greater may cause jams to occur. • with clasps, staples, snaps or tie strings • that is coated or has a chemical finish • with self-adhesive closures • that is damaged, creased or folded • that are of a baggy construction • that exceeds the recommended weight specification in this guide • that are not sharply creased • that are embossed (have raised writing on them) • with tabs and staples • with letterheads using low temperature dyes or thermography • that were previously printed by a laser machine • that is multipart or carbonless • that are pre-printed on the inside • that is designed for inkjet printing • that cannot be arranged neatly when stacked If you use any of the types of paper listed, they may damage your machine. This damage is not covered under any Brother warranty or service agreement. Envelopes Most envelopes designed for laser printers will be suitable for your machine. However, some envelopes may have feed and printquality problems because of the way they have been made. A suitable envelope should have edges with straight, well-creased folds and the leading edge should not be thicker than two sheets of paper. The envelope should lie flat and not be of baggy or flimsy construction. You should buy quality envelopes from a supplier who understands that you will be using the envelopes in a laser machine. • that are made of paper that weighs more than the paper weight specifications for the machine • with edges that are not straight or consistently square 2 • with windows, holes, cut-outs or perforations • with glue on surface as shown in figure below Envelopes can be fed from manual feed slot one at a time. We recommend that you print a test envelope to make sure the print results are what you want before you print or purchase a large quantity of envelopes. 19 2 Chapter 2 • with double flaps as shown in figure below • with sealing flaps that are not folded down when purchased • with sealing flaps as shown in figure below Labels 2 The machine will print on most types of labels designed for use with a laser machine. Labels should have an adhesive that is acrylic-based since this material is more stable at the high temperatures in the fuser unit. Adhesives should not come in contact with any part of the machine, because the label stock may stick to the drum unit or rollers and cause jams and print quality problems. No adhesive should be exposed between the labels. Labels should be arranged so that they cover the entire length and width of the sheet. Using labels with spaces may result in labels peeling off and causing serious jams or print problems. All labels used in this machine must be able to withstand a temperature of 392 degrees Fahrenheit (200 degrees centigrade) for a period of 0.1 seconds. • with each side folded as shown in figure below Do not feed a label sheet through the machine more than one time. Types of labels to avoid Do not use labels that are damaged, curled, wrinkled or an unusual shape. If you use any of the types of envelopes listed above, they may damage your machine. This damage may not be covered under any Brother warranty or service agreement. IMPORTANT • DO NOT feed part used label sheets. The exposed carrier sheet will damage your machine. • Label sheets should not exceed the paper weight specifications described in this User’s Guide. Labels exceeding this specification may not feed or print correctly and may cause damage to your machine. • DO NOT insert labels that have previously been used, or have any labels missing from the sheet. 20 2 3 Loading documents How to load documents Note 3 You can make copies and scan from the ADF* (Automatic Document Feeder) (*For DCP-7065DN) and the scanner glass. Using the automatic document feeder (ADF) (For DCP-7065DN) • To scan documents that are not suitable for the ADF, see Using the scanner glass on page 22. Length: 147.3 to 355.6 mm Width: 147.3 to 215.9 mm Weight: 64 to 90 g/m2 How to load documents 3 • It is easier to use the ADF if you are loading a multiple page document. • Make sure documents with correction fluid or written with ink are completely dry. a 3 The ADF can hold up to 35 pages and feeds each sheet individually. Use standard 80 g/m2 paper and always fan the pages before putting them in the ADF. Document Sizes Supported 3 Lift up and unfold the ADF document output support flap (1). Unfold the ADF document support (2). (2) (1) 3 3 IMPORTANT • DO NOT leave thick documents on the scanner glass. If you do this, the ADF may jam. • DO NOT use paper that is curled, wrinkled, folded, ripped, stapled, paperclipped, pasted or taped. • DO NOT use cardboard, newspaper or fabric. b c Fan the pages well. Place your document face up top edge first, in the ADF until the LCD display message changes and you feel it touch the feed rollers. • To avoid damaging your machine while using the ADF, DO NOT pull on the document while it is feeding. 21 Chapter 3 d b Adjust the paper guides (1) to fit the width of your document. 1 IMPORTANT • To avoid damaging your machine while using the ADF, DO NOT pull on the document while it is feeding. • To scan non-standard documents, see Using the scanner glass on page 22. Using the scanner glass 3 You can use the scanner glass to copy or scan pages of a book one page at a time. Document Sizes Supported Length: Up to 297.0 mm Width: Up to 215.9 mm Weight: Up to 2.0 kg How to load documents Note To use the scanner glass, the ADF must be empty. a 22 Lift the document cover. 3 3 Using the document guidelines on the left and top, place the document face down in the upper left corner of the scanner glass. Loading documents c Close the document cover. IMPORTANT If the document is a book or is thick, do not slam or press on the cover. 3 23 4 Making copies How to copy 4 The following steps show the basic copy operation. For details about each option, see the Advanced User's Guide on the CD-ROM. Stack 100% a Copies:01 Auto Do one of the following to load your document: Quality Stack (up to 99 copies) Sort 1 Brightness Contrast Page Layout Duplex 2 (For DCP-7055 / DCP-7055W / DCP-7057 / DCP-7057W) Press Number of Copies to enter the number of copies (up to 99) and press Start. Press or hold a or b to increase or decrease the number of copies and press Start. 24 Press Menu, Options or Duplex and then press a or b to scroll through the copy settings. When the setting you want is displayed, press OK. Enlarge/Reduce If you make a single copy, press Start. If you make multiple copies, do one of the following: To stop copying, press Stop/Exit. You can change the following copy settings: You can change the following copy settings: Load your document face down on the scanner glass. (See Using the scanner glass on page 22.) Stop copying Copy settings For details about changing the copy settings, see Copy settings in Chapter 2 of the Advanced User's Guide. □□■□□ (For DCP-7065DN) Place the document face up in the ADF. (See Using the automatic document feeder (ADF) (For DCP-7065DN) on page 21.) b 4 4 1 For DCP-7065DN 2 For DCP-7060D, DCP-7065DN and DCP-7070DW 4 5 How to print from a computer Printing a document 5 5 The machine can receive data from your computer and print it. To print from a computer, install the printer driver. (See Printing for Windows® or Printing and Faxing for Macintosh in the Software User's Guide for the details about the print settings.) a Install the Brother printer driver on the Installation CD-ROM. (See the Quick Setup Guide.) b From your application, choose the Print command. c Choose the name of your machine in the Print dialog box and click Properties. d Choose the settings you want in the Properties dialog box. 5 Paper Size Orientation Copies Media Type Resolution Print Settings Multiple Page Duplex / Booklet 1 Paper Source 1 e For DCP-7060D / DCP-7065DN / DCP-7070DW Click OK to begin printing. 25 6 How to scan to a computer Scanning a document as PDF file using ControlCenter4 (Windows®) 6 6 (For Macintosh users) See Scanning in the Software User's Guide. Note The screens on your PC may vary depending on your model. ControlCenter4 is a software utility that lets you quickly and easily access the applications you use most often. Using ControlCenter4 eliminates the need to manually launch specific applications. You can use ControlCenter4 on your computer. a b Load your document. (See How to load documents on page 21.) Open ControlCenter4 by clicking start/All Programs/Brother/XXX-XXXX (where XXX-XXXX is your model name)/ControlCenter4. The ControlCenter4 application will open. c Choose Home Mode or Advanced Mode before you use ControlCenter4. d Make sure the machine you want to use is selected from the Model pull-down list. 26 How to scan to a computer e Set the file type for saving to a folder. Click Configuration, and then select Button settings, Scan and File. The configuration dialog box appears. You can change the default settings. 6 1 2 3 4 5 1 Choose PDF (*.pdf) from the File Type pull-down list. 2 You can enter the file name you want to use for the document. 3 You can save the file to the default folder, or choose your preferred folder by clicking the Browse button. 4 You can choose a scanning resolution from the Resolution pull-down list. 5 You can choose the document size from the pull-down list. f Click OK. 27 Chapter 6 g 28 Click File. The machine starts the scanning process. The folder where the scanned data is saved will open automatically. How to scan to a computer Changing the SCAN key settings Before scanning 6 6 To use the machine as a scanner, install a scanner driver. If the machine is on a network, configure it with a TCP/IP address. Install the scanner drivers on the Installation CD-ROM. (See the Quick Setup Guide.) Configure the machine with a TCP/IP address if network scanning does not work. (See Configuring Network Scanning in the Software User's Guide.) SCAN key settings 6 You can change your machine’s SCAN key settings using ControlCenter4. a Open ControlCenter4 by clicking start/All Programs/Brother/XXX-XXXX (where XXX-XXXX is your model name)/ControlCenter4. The ControlCenter4 application will open. b c d Make sure the machine you want to use is selected from the Model pull-down list. Click the Device Settings tab. Click Device Scan Settings. 29 6 Chapter 6 e Choose the File tab. You can change the default settings. 1 2 3 4 5 1 You can choose the file type from the pull-down list. 2 You can enter the file name you want to use for the document. 3 You can save the file to the default folder, or choose your preferred folder by clicking the Browse button. 4 You can choose a scanning resolution from the Resolution pull-down list. 5 You can choose the document size from the pull-down list. f 30 Click OK. How to scan to a computer Scanning using the SCAN key a b c Load your document. (See How to load documents on page 21.) Press (SCAN). Press a or b to choose Scan to PC. Press OK. d Press a or b to choose File. Press OK. e (For Network users) Press a or b to choose the destination computer you want to send to. Press OK. If the LCD prompts you to enter a PIN number, enter the 4-digit PIN number for the destination computer using the dial pad on the control panel. Press OK. f 6 6 Press Start. The machine starts the scanning process. Note Choose the scan mode you want. Scan to: • E-mail (Scan to PC) • Image (Scan to PC) • OCR (Scan to PC) • File (Scan to PC) 31 A Routine maintenance Replacing the consumable items A A The machine will indicate when it is time to replace the consumable items. (See Replacing the toner cartridge on page 33 and Replacing the drum unit on page 39.) To avoid any inconvenience, you may want to buy spare consumable items before the machine stops printing. Russian customers: Please refer to the Russian guide for information on your consumable items. Toner cartridge Drum unit See Replacing the toner cartridge on page 33. Model Name: (For DCP-7055 / DCP-7055W / DCP-7057) TN-2010, (For DCP-7060D / DCP-7065DN / DCP-7070DW) TN-2210, TN-2220 See Replacing the drum unit on page 39. Model Name: DR-2200 Note • If you choose not to return your used consumable, please discard the used consumable according to local regulations, keeping it separate from domestic waste. If you have questions, call your local waste disposal office. (See EU Directive 2002/96/EC and EN 50419 in the Safety and Legal booklet.) • We recommend placing used consumable items on a piece of paper to prevent accidentally spilling or scattering the material inside. • If you use paper that is not a direct equivalent for the recommended paper, the life of consumable items and machine parts may be reduced. • The projected life of the toner cartridges is based on ISO/IEC 19752. Frequency of replacement will vary depending on the complexity of printed pages, percentage of coverage and type of media used. 32 Routine maintenance Replacing the toner cartridge Model Name: For the model name of toner cartridges, see Replacing the consumable items on page 32. The Standard toner cartridge can print approximately 1,000 pages (TN-2010) or 1,200 pages (TN-2210) 1. The High Yield toner cartridge (For DCP-7060D / DCP-7065DN / DCP-7070DW) can print approximately 2,600 pages 1. Actual page count will vary depending on your average type of document. When a toner cartridge is running low, the LCD shows Toner Low. (For DCP-7065DN and DCP-7070DW) The toner cartridge that comes supplied with the machine is a Standard toner cartridge. (For DCP-7055 / DCP-7055W / DCP-7057 / DCP-7060D) The toner cartridge that comes supplied with the machine is a Starter toner cartridge that will need to be replaced after approximately 700 pages 1. 1 Approx. cartridge yield is declared in accordance with ISO/IEC 19752. A IMPORTANT Brother machines are designed to work with toner of a particular specification and will work to a level of optimum performance when used with genuine Brother Original toner cartridges. Brother cannot guarantee this optimum performance if toner or toner cartridges of other specifications are used. Brother does not therefore recommend the use of cartridges other than genuine Brother Original cartridges with this machine, or the refilling of empty cartridges with toner from other sources. If damage is caused to the drum unit or other part of this machine as a result of the use of toner or toner cartridges other than genuine Brother Original products due to the incompatibility or lack of suitability of those products with this machine, any repairs required as a result may not be covered by the warranty. Note • It is a good idea to keep a new toner cartridge ready for use when you see the Toner Low warning. • To ensure high quality printing, we recommend that you use only Brother Original toner cartridges. When you want to buy toner cartridges, please call your Brother dealer. • We recommend that you clean the machine when you replace the toner cartridge. See Cleaning the machine on page 44. • If you change the print density setting for lighter or darker printing, the amount of toner used will change. • Wait to unpack the toner cartridge until immediately before you put it into the machine. 33 A Toner Low A Toner Ended Toner Low Toner Ended If the LCD shows Toner Low, buy a new toner cartridge and have it ready before you get a Replace Toner message. Replace Toner The machine stops printing until you replace the toner cartridge with a new one. (See Replacing the toner cartridge on page 34.) A When the following message appears on the LCD, you need to replace the toner cartridge: Replace Toner The machine will stop printing until you replace the toner cartridge. A new and unused original Brother toner cartridge will reset the Replace Toner mode. Note To force the machine to continue printing after the LCD shows Replace Toner, set the machine to Continue mode (Press Menu, press a or b to choose 1.General Setup and press OK, press a or b to choose 4.Replace Toner, and press OK, press a or b to choose Continue and press OK. The machine will continue printing until the LCD shows Toner Ended. (For details about the Toner settings, see Toner Settings in Chapter 1 of the Advanced User's Guide.) 34 A Replacing the toner cartridge a Make sure that the machine is turned on. b Open the front cover and leave the machine turned on for 10 minutes to cool down. A Routine maintenance WARNING c Take out the drum unit and toner cartridge assembly. d Push down the green lock lever and take the toner cartridge out of the drum unit. HOT SURFACE After you have just used the machine, some internal parts of the machine will be extremely hot. When you open the front or back cover (back output tray) of the machine, DO NOT touch the shaded parts shown in the illustration. If you do this, you may burn yourself. A 35 WARNING DO NOT put a toner cartridge into a fire. It could explode, resulting in injuries. DO NOT use cleaning materials that contain ammonia, alcohol, any type of spray or any type of flammable substance to clean the inside or outside of the machine. Doing this may cause a fire or electrical shock. See To use the product safely in the Safety and Legal booklet for how to clean the machine. Be careful not to inhale toner. 36 IMPORTANT • We recommend that you place the drum unit and/or the toner cartridge on a clean, flat, level, stable surface with a sheet of disposable paper or cloth underneath it in case you accidentally spill or scatter toner. • Handle the toner cartridge carefully. If toner scatters on your hands or clothes, immediately wipe or wash it off with cold water. • To avoid print quality problems, DO NOT touch the shaded parts shown in the illustration. Routine maintenance Note f Pull off the protective cover. • Be sure to seal up the toner cartridge tightly in a suitable bag so that toner powder does not spill out of the cartridge. • If you choose not to return your used consumable, please discard the used consumable according to local regulations, keeping it separate from domestic waste. If you have questions, call your local waste disposal office. (See EU Directive 2002/96/EC and EN 50419 in the Safety and Legal booklet.) e Unpack the new toner cartridge. Hold the cartridge level with both hands and gently shake it from side to side several times to spread the toner evenly inside the cartridge. IMPORTANT Put the toner cartridge in the drum unit immediately after you have removed the protective cover. To prevent any degradation to the print quality, DO NOT touch the shaded parts shown in the illustrations. IMPORTANT Unpack the toner cartridge just before you put it in the machine. If a toner cartridge is left unpacked for a long time, the toner life will be shortened. 37 A g Put the new toner cartridge firmly into the drum unit so that it locks into place. If you put it in correctly, the green lock lever will lift automatically. h Clean the primary corona wire inside the drum unit by gently sliding the green tab from left to right and right to left several times. 1 Note Be sure to return the tab to the home position (a) (1). If you do not, printed pages may have a vertical stripe. i 38 Put the drum unit and toner cartridge assembly back into the machine. Close the front cover. Routine maintenance After replacement, reset the drum counter by following the instructions included with the new drum unit. Note After replacing the toner cartridge, DO NOT turn off the machine's power switch or open the front cover until the LCD returns to Ready mode. Drum Stop A Drum Stop Replacing the drum unit A We cannot guarantee the print quality. Please replace the drum unit with a new one. We recommend a genuine Brother Original drum unit be installed at this time. Model name: DR-2200 A new drum unit can print approximately 12,000 A4 or Letter size single-sided pages. After replacement, reset the drum counter by following the instructions included with the new drum unit. IMPORTANT For best performance, use only genuine Brother Original drum unit and genuine Brother Original toner cartridges. Printing with a third-party drum unit or toner cartridge may reduce not only the print quality but also the quality and life of the machine itself. Warranty coverage may not apply to problems caused by the use of a third-party drum or toner cartridge. Drum Error Replacing the drum unit A IMPORTANT • While removing the drum unit, handle it carefully because it may contain toner. If toner scatters on your hands or clothes, immediately wipe or wash it off with cold water. A Drum Error The corona wire has become dirty. Clean the corona wire in the drum unit. (See Cleaning the corona wire on page 46.) If you cleaned the corona wire and Drum Error was not cleared, replace the drum unit with a new one. Replace Drum A • Every time you replace the drum unit, clean the inside of the machine. (See Cleaning the machine on page 44.) a Make sure that the machine is turned on. b Open the front cover and leave the machine turned on for 10 minutes to cool down. A Replace Drum Please replace the drum unit with a new one. We recommend a genuine Brother Original drum unit be installed at this time. 39 WARNING c Take out the drum unit and toner cartridge assembly. d Push down the green lock lever and take the toner cartridge out of the drum unit. HOT SURFACE After you have just used the machine, some internal parts of the machine will be extremely hot. When you open the front or back cover (back output tray) of the machine, DO NOT touch the shaded parts shown in the illustration. If you do this, you may burn yourself. 40 Routine maintenance WARNING DO NOT put a toner cartridge into a fire. It could explode, resulting in injuries. DO NOT use cleaning materials that contain ammonia, alcohol, any type of spray, or any type of flammable substance to clean the outside or inside of the machine. Doing this may cause a fire or electrical shock. See To use the product safely in the Safety and Legal booklet for how to clean the machine. Be careful not to inhale toner. IMPORTANT • To prevent damage to the machine from static electricity, DO NOT touch the electrodes shown in the illustration. • Handle the toner cartridge carefully. If toner scatters on your hands or clothes, immediately wipe or wash it off with cold water. • We recommend that you place the drum unit and/or the toner cartridge on a clean, flat surface with a sheet of disposable paper or cloth underneath it in case you accidentally spill or scatter toner. • To avoid print quality problems, DO NOT touch the shaded parts shown in the illustrations. 41 A Note If you choose not to return your used consumable, please discard the used consumable according to local regulations, keeping it separate from domestic waste. If you have questions, call your local waste disposal office. (See EU Directive 2002/96/EC and EN 50419 in the Safety and Legal booklet.) e f Put the toner cartridge firmly into the new drum unit until you hear it lock into place. If you put the cartridge in correctly, the green lock lever will lift automatically. Unpack the new drum unit. IMPORTANT • To avoid print quality problems, DO NOT touch the shaded parts shown in the illustrations. • Unpack the drum unit just before you put it in the machine. Exposure to direct sunlight or room light may damage the drum unit. Note Make sure that you put in the toner cartridge correctly or it may separate from the drum unit. 42 Routine maintenance g Clean the corona wire of the drum unit by gently sliding the green tab from left to right and right to left several times. IMPORTANT Be sure to return the green tab to the home position (a) (1). If you do not, printed pages may have a vertical stripe. 1 A h Put the new drum unit and toner cartridge assembly in the machine. Resetting the drum counter A When you replace the drum unit with a new one, you need to reset the drum counter by completing the following steps: a Open the front cover and press Clear. To confirm you are installing a new drum, press a. b When the LCD shows Accepted, close the front cover. 43 Cleaning the machine Clean the outside and inside of the machine regularly with a dry, lint-free soft cloth. When you replace the toner cartridge or the drum unit, make sure that you clean the inside of the machine. WARNING A Cleaning the outside of the machine a Turn off the machine. Disconnect all cables, and then unplug the power cord from the electrical socket. b Pull the paper tray completely out of the machine. c Wipe the outside of the machine with a dry, lint-free soft cloth to remove dust. d Remove any paper that is in the paper tray. DO NOT use any flammable substances, spray or organic solvent/liquids containing alcohol/ammonia to clean the outside or inside of the machine. Doing this may cause a fire or electrical shock. See To use the product safely in the Safety and Legal booklet for how to clean the machine. Be careful not to inhale toner. IMPORTANT Use neutral detergents. Cleaning with volatile liquids such as thinner or benzine will damage the surface of the machine. 44 A Routine maintenance e Wipe the inside and the outside of the paper tray with a dry, lint-free soft cloth to remove dust. 1 2 3 f Re-load the paper and put the paper tray firmly back in the machine. g Plug the machine’s power cord back into the electrical socket first, connect all cables. Turn on the machine. Cleaning the scanner glass c (For DCP-7065DN) In the ADF unit, clean the white bar (1) and the scanner glass strip (2) underneath it with a soft lint-free cloth moistened with water. A a Turn off the machine. Disconnect all cables, and then unplug the power cord from the electrical socket. b Lift the document cover (1). Clean the white plastic surface (2) and scanner glass (3) underneath it with a soft lint-free cloth moistened with water. 1 2 45 A WARNING Note In addition to cleaning the scanner glass and glass strip with a soft lint-free cloth moistened with water, run your finger tip over the glass to see if you can feel anything on it. If you feel dirt or debris, clean the glass again concentrating on that area. You may need to repeat the cleaning process three or four times. To test, make a copy after each cleaning. d If you have print quality problems, clean the corona wire as follows: 46 After you have just used the machine, some internal parts of the machine will be extremely hot. Wait for the machine to cool down before you touch the internal parts of the machine. Plug the machine’s power cord back into the electrical socket first, connect all cables. Turn on the machine. Cleaning the corona wire a HOT SURFACE Open the front cover and leave the machine turned on for 10 minutes to cool down. A Routine maintenance b Slowly take out the drum unit and toner cartridge assembly. c Clean the corona wire inside the drum unit by gently sliding the green tab from right to left and left to right several times. 1 IMPORTANT • We recommend that you place the drum unit and toner cartridge assembly on a clean, flat surface with a sheet of disposable paper or cloth underneath it in case you accidentally spill or scatter toner. • Handle the toner cartridge carefully. If toner scatters on your hands or clothes, wipe or wash it off with cold water at once. • To prevent damage to the machine caused by static electricity, DO NOT touch the electrodes shown in the illustration. A Note Be sure to return the tab to the home position (a) (1). If you do not, printed pages may have a vertical stripe. d Put the drum unit and toner cartridge assembly back into the machine. Close the front cover. 47 Cleaning the drum unit If you have print quality problems, the drum may have foreign material, such as glue from a label stuck on the drum surface. Follow the steps below to solve the problem. a b Prepare blank A4 or Letter size paper. c Open the back cover (face-up output tray). d 48 A e Press Clear and Menu at the same time. The Drum Cleaning message will appear on the LCD. f Using both hands, slide the manual feed paper guides to the width of the paper that you are going to use. g Using both hands, put one piece of A4 or Letter size paper in the manual feed slot until the top edge of the paper touches the paper feed roller. When you feel the machine pull in the paper, let go. The machine will start the Drum Cleaning process. Make sure the machine is in Ready mode. (For DCP-7060D / DCP-7065DN / DCP-7070DW) Open the manual feed slot cover. Routine maintenance Note • The machine makes a mechanical noise during the Drum Cleaning process because the machine rotates the OPC drum in reverse. This noise is not due to a malfunction of the machine. If the problem is not solved yet, follow the steps below. a Open the front cover and leave the machine turned on for 10 minutes to cool down. • DO NOT put more than one sheet of paper in the manual feed slot at any one time, as it may cause a jam. • If the paper in the manual feed slot is other than A4 or Letter size, the machine will stop the Drum Cleaning process and eject the paper. • Make sure that the paper is straight and in the correct position in the manual feed slot. If it is not, it may not be fed correctly, resulting in a paper jam. • DO NOT close the back cover (face-up output tray) during the Drum Cleaning process. The machine will stop the Drum Cleaning process and eject the paper. It may cause a jam. WARNING HOT SURFACE After you have just used the machine, some internal parts of the machine will be extremely hot. Wait for the machine to cool down before you touch the internal parts of the machine. • If the machine receives a print job before you put one piece of paper in the manual feed slot, the machine stops the Drum Cleaning process and print the print job. h When the machine has finished cleaning, the machine returns to the Ready mode. i Repeat steps e to h two more times using a new blank sheet of paper each time. Upon completion please discard the used paper. 49 A b Slowly take out the drum unit and toner cartridge assembly. c Push down the green lock lever and take the toner cartridge out of the drum unit. IMPORTANT • We recommend that you put the drum unit and toner cartridge assembly on a clean, flat surface with a sheet of disposable paper or cloth underneath it in case you accidentally spill or scatter toner. • Handle the toner cartridge carefully. If toner scatters on your hands or clothes, wipe or wash it off with cold water at once. • To prevent damage to the machine caused by static electricity, DO NOT touch the electrodes shown in the illustration. 50 IMPORTANT • To avoid print quality problems, DO NOT touch the shaded parts shown in the illustrations below. Routine maintenance e • To prevent damage to the machine from static electricity, DO NOT touch the electrodes shown in the illustration. Turn the drum unit gear by hand while looking at the surface of the OPC drum (1). 1 A f d Put the print sample in front of the drum unit, and find the exact position of the poor print. When you have found the mark on the drum that matches the print sample, wipe the surface of the OPC drum with a dry cotton swab until the dust or glue on the surface comes off. IMPORTANT DO NOT clean the surface of the photosensitive drum with a sharp object or any liquids. 51 g h Put the toner cartridge back into the drum unit until you hear it lock into place. If you put the cartridge in correctly, the green lock lever will lift automatically. Cleaning the paper pick-up rollers If you have paper feed problems, clean the pick-up rollers as follows: a Turn off the machine. Unplug the power cord from the electrical socket. b Pull the paper tray completely out of the machine. c Tightly wring out a lint-free cloth soaked in lukewarm water, and then wipe the separator pad (1) of the paper tray with it to remove dust. Put the drum unit and toner cartridge assembly back in the machine. 1 i 52 Close the front cover. A Routine maintenance d Wipe the two pick-up rollers (1) inside of the machine to remove dust. A 1 e f Put the paper tray back in the machine. Plug the machine’s power cord back into the electrical socket. Turn on the machine. 53 B Troubleshooting Error and maintenance messages As with any sophisticated office product, errors may occur and consumable items may need to be replaced. If this happens, your machine identifies the error or required routine maintenance and shows the appropriate message. The most common error and maintenance messages are shown below. You can clear most errors and perform routine maintenance messages by yourself. If you need more help, the Brother Solutions Center offers the latest FAQs and troubleshooting tips: Visit us at http://solutions.brother.com/. Error Message Cause Action Cartridge Error The toner cartridge is not installed correctly. Pull out the drum unit and remove the toner cartridge, then re-install the toner cartridge in the drum unit. Cooling Down The temperature of the drum unit or toner cartridge is too hot. The machine will pause its current print job and go into cooling down mode. During the cooling down mode, you will hear the cooling fan running while the LCD shows Cooling Down, and Wait for a while. Make sure that you can hear the fan in the machine spinning and that the exhaust outlet is not blocked by something. Cover is Open The front cover is not completely closed. Close the front cover of the machine. Cover is Open The ADF cover is not completely closed. Close the ADF cover of the machine. The ADF is open while loading a document. Close the ADF cover of the machine, then press Stop/Exit. The fuser cover is not completely closed or paper was jammed in the back of the machine when you turned on the power. Close the fuser cover of the machine. The document was not inserted or fed correctly, or the document scanned from the ADF was too long. See Document is jammed in the top of the ADF unit (For DCP-7065DN) on page 57 or Using the automatic document feeder (ADF) (For DCP-7065DN) on page 21. Drum Error The corona wire on the drum unit needs to be cleaned. Clean the corona wire on the drum unit. (See Cleaning the corona wire on page 46.) Drum Stop It is time to replace the drum unit. Replace the drum unit. (See Replacing the drum unit on page 39.) Wait for a while (For DCP-7065DN) Cover is Open Document Jam (For DCP-7065DN) 54 If the fan is spinning, remove any obstacles that surround the exhaust outlet, and then leave the machine turned on but do not use it for several minutes. If the fan is not spinning, disconnect the machine from the power for several minutes then reconnect it. Make sure paper is not jammed inside the back of the machine, and then close the fuser cover and press Start. B B Troubleshooting Error Message Cause Action Duplex Disabled The duplex tray is removed or is not correctly installed. Carefully put the duplex tray into the machine until it clicks into place. The back of the machine is not closed completely. Close the back cover of the machine. EL Error The machine has a mechanical problem. Open the front cover and close it again. Fuser Error The temperature of the fuser unit does not rise to a specified temperature within the specified time. Turn the power switch off, wait a few seconds, and then turn it on again. Leave the machine for 15 minutes with the power turned on. The fuser unit is too hot. Init Unable XX The machine has a mechanical problem. Disconnect the machine from the power for several minutes and then reconnect it. If the problem continues, call your Brother dealer. Jam Duplex The paper is jammed in the duplex tray at the back of the machine. (See Paper is jammed in the Duplex Tray on page 66.) Jam Inside The paper is jammed inside the machine. (See Paper is jammed inside the machine on page 62.) Jam Rear The paper is jammed in the back of the machine. (See Paper is jammed at the back of the machine on page 60.) Jam Tray The paper is jammed in the paper tray of the machine. (See Paper is jammed in the standard paper tray on page 59.) No Paper The machine is out of paper or paper is not correctly loaded in the paper tray. Do one of the following: B Refill the paper in the paper tray and press Start. Remove the paper and load it again. Then press Start. If the problem is not resolved, the paper pick-up roller may need to be cleaned. Clean the paper pick-up roller. (See Cleaning the paper pick-up rollers on page 52.) Manual Feed Manual feed was selected as the paper source when there was no paper in the manual feed slot. Place a sheet of paper in the manual feed slot. (See Loading paper in the manual feed slot on page 11.) No Toner The toner cartridge is not installed correctly. Pull out the drum unit. Take out the toner cartridge and then put it back into the drum unit. 55 Error Message Cause Action Out of Memory The machine’s memory is full. Do one of the following: Press Start to copy the scanned pages. (Copy operation in progress) Press Stop/Exit and wait until the other operations in progress finish, and then try again. Reduce print resolution. (See the Basic tab in the Software User's Guide.) Print Unable XX The machine has a mechanical problem. Do one of the following: Disconnect the machine from the AC power outlet for several minutes, then reconnect it. If the problem continues, call your Brother dealer. Replace Drum It is time to replace the drum unit. Replace the drum unit. (See Replacing the drum unit on page 39.) Replace Toner The drum unit counter was not reset when a new drum was installed. Reset the drum unit counter. The machine will stop printing until you replace the toner cartridge. If you have set the Toner setting to Stop, replace the toner cartridge with a new and unused original Brother toner cartridge. This will reset the Replace Toner mode. (See Replacing the toner cartridge on page 33.) (See Resetting the drum counter on page 43.) If you have set the Toner setting to Continue, the machine will continue to print data until the LCD shows Toner Ended. For how to operate the machine in Continue mode, see Toner Settings in Chapter 1 of the Advanced User's Guide. Size Error DX The paper in the tray is not a suitable size for automatic duplex printing. Load A4 paper for automatic duplex printing, and then press Start. (See Print media on page 102.) Toner Ended It is time to replace the toner cartridge. Replace the toner cartridge with a new one. (See Replacing the toner cartridge on page 33.) Toner Low You will need to replace the toner cartridge soon. Buy a new toner cartridge before you get a Replace Toner message. 56 Troubleshooting Document Jams Document is jammed in the top of the ADF unit (For DCP-7065DN) a Take out any paper from the ADF that is not jammed. b c Open the ADF cover. B Document is jammed under the document cover (For DCP-7065DN) B a Take out any paper from the ADF that is not jammed. b c Lift the document cover. B Pull the jammed document out to the right. Pull the jammed document out to the left. B d e Close the ADF cover. Press Stop/Exit. d e Close the document cover. Press Stop/Exit. 57 Removing small documents jammed in the ADF (For DCP-7065DN) a b c d 58 B Document is jammed at the output tray (For DCP-7065DN) Lift the document cover. a Insert a piece of stiff paper, such as cardstock, into the ADF to push any small paper scraps through. Take out any paper from the ADF that is not jammed. b Pull the jammed document out to the right. c Press Stop/Exit. Close the document cover. Press Stop/Exit. B Troubleshooting Paper Jams Paper is jammed in the standard paper tray IMPORTANT B B If the paper cannot easily be removed in this direction, stop and follow the instructions for Paper is jammed inside the machine on page 62. If the LCD shows Jam Tray, follow these steps: a Pull the paper tray completely out of the machine. Note Pulling out the jammed paper downwards allows you to remove the paper more easily. c Make sure the paper is below the maximum paper mark (b b b) (1) of the paper tray. While pressing the green paper-guide release lever, slide the paper guides to fit the paper size. Make sure that the guides are firmly in the slots. (See Loading paper in the standard paper tray on page 9.) 1 b Use both hands to slowly pull out the jammed paper. d Put the paper tray firmly back in the machine. 59 B Paper is jammed at the back of the machine B If the LCD shows Jam Rear, a paper jam occurred behind the back cover. Follow these steps: a Open the front cover. Leave the machine turned on for 10 minutes to cool down. b WARNING HOT SURFACE After you have just used the machine, some internal parts of the machine will be extremely hot. When you open the front or back cover (back output tray) of the machine, DO NOT touch the shaded parts shown in the illustration. If you do this, you may burn yourself. 60 Slowly take out the drum unit and toner cartridge assembly. Troubleshooting IMPORTANT d Pull down the tabs at the left and right hand sides to open the fuser cover (1). • We recommend that you place the drum unit and the toner cartridges on a clean, flat surface with a sheet of disposable paper or cloth underneath it in case you accidentally spill or scatter toner. • To prevent damage to the machine caused by static electricity, DO NOT touch the electrodes shown in the illustration. c Open the back cover (face-up output tray). B 1 61 e Using both hands, gently pull the jammed paper out of the fuser unit. Paper is jammed inside the machine B If the LCD shows Jam Inside, follow these steps: f Close the fuser cover and the back cover (face-up output tray). g Put the drum unit and toner cartridge assembly back into the machine. h 62 Close the front cover. If the machine does not start printing automatically, press Start. a Leave the machine turned on for 10 minutes to cool down. b Open the front cover. WARNING HOT SURFACE After you have just used the machine, some internal parts of the machine will be extremely hot. When you open the front or back cover (back output tray) of the machine, DO NOT touch the shaded parts shown in the illustration. If you do this, you may burn yourself. Troubleshooting c Slowly take out the drum unit and toner cartridge assembly. The jammed paper may be pulled out with the drum unit and toner cartridge assembly, or this may release the paper so you can pull it out of the inside of the machine. If you cannot remove the drum unit and toner cartridge assembly easily, do not use extra force. Instead, go to step g. IMPORTANT • We recommend that you put the drum unit and toner cartridge assembly on a piece of disposable paper or cloth in case you accidentally spill or scatter toner. • To prevent damage to the machine from static electricity, DO NOT touch the electrodes shown in the illustration. d Push down the green lock lever and take the toner cartridge out of the drum unit. Clear the jammed paper if there is any inside the drum unit. IMPORTANT • Handle the toner cartridge carefully. If toner scatters on your hands or clothes, immediately wipe or wash it off with cold water. • To avoid print quality problems, DO NOT touch the shaded parts shown in the illustrations. 63 B g e Put the toner cartridge back into the drum unit until you hear it lock into place. If you put the cartridge in correctly, the green lock lever will lift automatically. f If you were able to remove the drum unit and toner cartridge assembly and the jammed paper, you have cleared the paper jam. Put the drum unit and toner cartridge assembly back into the machine and close the front cover. If the machine does not start printing automatically, press Start. 64 Lift the scanner cover. Use both hands to carefully pull the jammed paper up and out of the output tray opening. h Close the scanner cover. Troubleshooting i If you could not pull the jammed paper out of the output tray opening as shown in step g, take the paper tray completely out of the machine. k Put the paper tray back into the machine. If you have removed the jammed paper, you have cleared the paper jam. Note • If the LCD shows a Jam Inside message, check if there is a torn piece of paper inside the machine and drum unit by following the instructions in steps c to f. • If you turn off the machine while the LCD shows a Jam Inside message, the machine will print incomplete data from your computer. j Pull the jammed paper out of the paper tray opening. B 65 Paper is jammed in the Duplex Tray If the LCD shows Jam Duplex, follow these steps: a Leave the machine turned on for 10 minutes to cool down. WARNING HOT SURFACE After you have just used the machine, some internal parts of the machine will be extremely hot. When you open the front or back cover (back output tray) of the machine, DO NOT touch the shaded parts shown in the illustration. If you do this, you may burn yourself. 66 b B Pull the duplex tray completely out of the machine. Troubleshooting c Pull the jammed paper out of the machine or the duplex tray. d Make sure that no paper remains under the machine. e Put the duplex tray back in the machine. B 67 If you are having difficulty with your machine If you think there is a problem with your machine, check the chart below and follow the troubleshooting tips. Most problems can be easily resolved by yourself. If you need additional help, the Brother Solutions Center offers the latest FAQs and troubleshooting tips. Visit us at http://solutions.brother.com/. Check the chart below and follow the troubleshooting tips. Copy difficulties Difficulties Suggestions Vertical black line appears in copies. Black vertical lines on copies are typically caused by dirt or correction fluid on the glass strip, or the corona wire is dirty. (See Cleaning the scanner glass on page 45 and Cleaning the corona wire on page 46.) Copies are blank. Make sure you are loading the document correctly. (See Using the automatic document feeder (ADF) (For DCP-7065DN) on page 21 or Using the scanner glass on page 22.) Printing difficulties Difficulties Suggestions Poor print quality See Improving the print quality on page 73. No printout. Check that the machine is plugged in and the power switch is turned on. Check that the toner cartridge and drum unit are installed correctly. (See Replacing the drum unit on page 39.) Check the interface cable connection on both the machine and your computer. (See the Quick Setup Guide.) Check that the correct printer driver has been installed and chosen. Check to see if the LCD is showing an error message. (See Error and maintenance messages on page 54.) Check the machine is online: (Windows® 7 and Windows Server® 2008 R2) Click the Start button and Devices and Printers. Right-click Brother DCP-XXXX Printer. Make sure that Use Printer Offline is unchecked. (Windows Vista®) Click the Start button, Control Panel, Hardware and Sound, and then Printers. Right-click Brother DCP-XXXX Printer. Make sure that Use Printer Offline is unchecked. (Windows® XP and Windows Server® 2003/2008) Click the Start button and choose Printers and Faxes. Right-click Brother DCP-XXXX Printer. Make sure that Use Printer Offline is unchecked. (Windows® 2000) Click the Start button and choose Settings and then Printers. Right-click Brother DCP-XXXX Printer. Make sure that Use Printer Offline is unchecked. 68 B Troubleshooting Printing difficulties (continued) Difficulties The machine prints unexpectedly or it prints garbage. Suggestions Press Job Cancel to cancel print jobs. Check the settings in your application to make sure it is set up to work with your machine. Pull out the paper tray and wait until the machine stops printing. Then turn off the machine’s power switch and disconnect from the power for several minutes. The machine prints the first couple of pages correctly, then some pages have text missing. Check the settings in your application to make sure that it is set up to work with your machine. The headers or footers appear when the document displays on the screen but they do not show up when it is printed. There is an unprintable area on the top and bottom of the page. Adjust the top and bottom margins in your document to allow for this. (See Unscannable and unprintable areas on page 15.) The machine does not print on both sides of the paper even though the printer driver setting is Duplex. Check the paper size setting in the printer driver. You need to choose A4 [60 to The machine is not printing or has stopped printing. Press Job Cancel. Your computer is not recognising the machine’s input buffer’s full signal. Make sure that you connected the interface cable correctly. (See the Quick Setup Guide.) 105 g/m2]. As the machine cancels the job and clears it from the memory it may produce an incomplete printout. Scanning difficulties Difficulties Suggestions TWAIN errors appear while scanning. Make sure that the Brother TWAIN driver is chosen as the primary source. In PaperPort™ 12SE, click File, Scan or Get Photo and choose the Brother TWAIN driver. OCR does not work. Try increasing the scanning resolution. (Macintosh users) Presto! PageManager must be downloaded and installed before use. See Accessing Brother Support (Macintosh) on page 5 for further instructions. (For DCP-7055W / DCP-7057W / DCP-7065DN / DCP-7070DW) Network scanning does not work. See Network difficulties (For DCP-7055W / DCP-7057W / DCP-7065DN / DCP-7070DW) on page 71. Software difficulties Difficulties Suggestions Cannot install software or print. Run the Repair MFL-Pro Suite program on the CD-ROM. This program will repair and reinstall the software. Cannot perform ‘2 in 1’ or ‘4 in 1’ printing. Check that the paper size setting in the application and in the printer driver are the same. The machine does not print from Try to reduce the print resolution. (See Advanced tab in the Software User's Guide.) Adobe® Illustrator®. 69 B Paper handling difficulties Difficulties Suggestions The machine does not feed paper. If there is no paper, load a new stack of paper into the paper tray. The LCD shows No Paper or a Paper Jam message. If there is paper in the paper tray, make sure it is straight. If the paper is curled, you should straighten it. Sometimes it is helpful to remove the paper, turn the stack over and put it back into the paper tray. Reduce the amount of paper in the paper tray, and then try again. Make sure that manual feed mode is not chosen in the printer driver. Clean the paper pick-up roller. See Cleaning the paper pick-up rollers on page 52. If the LCD shows the Paper Jam message and you still have a problem, see Error and maintenance messages on page 54. How do I print on envelopes? You can load envelopes from the manual feed slot. Your application must be set up to print the envelope size you are using. This is usually done in the Page Setup or Document Setup menu of your application. What paper can I use? You can use thin paper, plain paper, thick paper, bond paper, recycled paper, envelopes and labels that are made for laser machines. (For details, see Acceptable paper and other print media on page 17.) You can load envelopes from the manual feed slot. There is a paper jam. Clear the jammed paper. (See Document Jams on page 57.) Print quality difficulties Difficulties Printed pages are curled. Suggestions Low quality thin or thick paper or not printing on the recommended side of the paper could cause this problem. Try turning over the stack of paper in the paper tray. Make sure that you choose the Paper Type that suits the print media type you are using. (See Acceptable paper and other print media on page 17.) Printed pages are smeared. Printouts are too light. The Paper Type setting may be incorrect for the type of print media you are using, or the print media may be too thick or have a rough surface. (See Acceptable paper and other print media on page 17 and Basic tab in the Software User's Guide.) If this problem occurs when making copies or printing, set Toner Save mode to Off in the machine menu settings. (See Toner Save in Chapter 1 of the Advanced User's Guide.) Set Toner Save mode to Off in the Advanced tab in the printer driver. (See Advanced tab in the Software User's Guide.) 70 Troubleshooting Network difficulties (For DCP-7055W / DCP-7057W / DCP-7065DN / DCP-7070DW) Difficulties Suggestions Cannot print over a wired Network. If you are having Network problems see the Network User's Guide for more information. Make sure your machine is powered on, is on-line and is in the Ready mode. Print the Network Configuration list to see your current Network settings. (See Network Configuration List in Chapter 1 of the Advanced User's Guide.) Reconnect the LAN cable to the hub to verify that the cable and network connections are good. If possible, try connecting the machine to a different port on your hub using a different cable. You can check the current wired network status from the Network control panel menu. The network scanning feature does not work. (Windows®) It is necessary to set the third-party Security/Firewall Software to allow Network scanning. To add port 54925 for Network scanning, enter the information below: In Name: Enter any description, for example Brother NetScan. In Port number: Enter 54925. In Protocol: UDP is selected. Please refer to the instruction manual that came with your third-party Security/Firewall Software or contact the software manufacturer. For more details, you can read FAQs and troubleshooting suggestions at http://solutions.brother.com/. B (Macintosh) The network scanning feature may be unable due to the firewall settings. Change or disable the firewall settings. If you are using a third-party personal Firewall software, see the User's Guide for your software or contact the software manufacturer. Re-select your machine in the Device Selector application located in Macintosh HD/Library/Printers/Brother/Utilities/Device Selector or from the model list in ControlCenter2. Your computer cannot find your machine. (Windows®) The firewall setting on your PC may be rejecting the necessary network connection. (For details, see the instructions above.) (Macintosh) The computer may be unable to detect the machine due to the firewall settings. Change or disable the firewall settings. If you are using a third-party personal Firewall software, see the User's Guide for your software or contact the software manufacturer. Re-select your machine in the Device Selector application located in Macintosh HD/Library/Printers/Brother/Utilities/Device Selector or from the model list in ControlCenter2. Cannot connect to wireless network. (For DCP-7055W / DCP-7057W / DCP-7070DW) Investigate the problem using the WLAN Report. Press Menu, press a or b to choose 5.Machine Info. (For DCP-7070DW) 4.Machine Info. (For DCP-7055W / DCP-7057W) and press OK, press a or b to choose 5.WLAN Report and press OK, and then press Start. For more details, see Quick Setup Guide. 71 Other Difficulties Suggestions The machine will not turn on. Adverse conditions on the power connection (such as lightning or a power surge) may have triggered the machine’s internal safety mechanisms. Turn the machine off and unplug the power cord. Wait for ten minutes, then plug in the power cord and turn the machine on. If the problem is not solved, turn off the machine. Plug the power cord into a different known working outlet and turn on the machine. 72 Troubleshooting Improving the print quality B If you have a print quality problem, make a copy first (put a document on the scanner glass and press Start). If the printout looks good, the problem is probably not the machine. Check the interface cable connections or try printing a different document. If the printout or test page printed from the machine has a quality problem, check the following steps first. And then, if you still have a print quality problem, check the chart below and follow the recommendations. Note Brother does not recommend the use of cartridges other than Brother Original cartridges or the refilling of used cartridges with toner from other sources. a To get the best print quality, we suggest using the recommended paper. Check that you use paper that meets our specifications. (See Acceptable paper and other print media on page 17.) b Check that the drum unit and toner cartridge assembly is installed correctly. Examples of poor print quality ABCDEFGH CDEF abcdefghijk defg ABCD abcde 01234 Faint Recommendation Take out the drum unit and toner cartridge assembly. Hold the assembly level with both hands and gently shake it from side to side several times to spread the toner evenly inside the cartridge. Check if the Toner Setting in Replace Toner is set to Continue (Continue mode). See Toner settings in Chapter 1 of the Advanced User's Guide. Check the machine’s environment. Conditions such as humidity, high temperatures, and so on, may cause this print fault. See the Safety and Legal booklet. If the whole page is too light, Toner Save mode may be on. Turn off Toner Save mode in the machine menu settings or Toner Save mode in the printer Properties of the driver. See Toner save in Chapter 1 of the Advanced User's Guide or Advanced tab in Chapter 2 of the Software User's Guide. Clean the corona wire of the drum unit. See Cleaning the corona wire on page 46. Put in a new toner cartridge. See Replacing the toner cartridge on page 33. Put in a new drum unit. See Replacing the drum unit on page 39. 73 B Examples of poor print quality Recommendation Make sure that you use paper that meets our specifications. See Acceptable paper and other print media on page 17. ABCDEFGH abcdefghijk ABCD abcde 01234 Check the machine’s environment. Conditions such as high temperatures and high humidity can increase the amount of background shading. See the Safety and Legal booklet. Put in a new toner cartridge. See Replacing the toner cartridge on page 33. Put in a new drum unit. See Replacing the drum unit on page 39. Grey background Make sure that you use paper that meets our specifications. Rough-surfaced paper or thick print media may cause this problem. See Acceptable paper and other print media on page 17. Make sure that you choose the correct media type in the printer driver or in the machine’s Paper Type menu setting. See Acceptable paper and other print media on page 17 and Basic tab in Chapter 2 of the Software User's Guide. Ghost Choose Reduce Ghosting mode in the printer driver. See Ghost Reduction Setting in Chapter 2 (for Windows®) or Chapter 8 (for Macintosh) of the Software User's Guide. Put in a new toner cartridge. See Replacing the toner cartridge on page 33. Put in a new drum unit. See Replacing the drum unit on page 39. The fuser unit may be contaminated. Call your Brother dealer. ABCDEFGH abcdefghijk ABCD abcde 01234 Toner specks 74 Make sure that you use paper that meets our specifications. Rough-surfaced paper may cause the problem. See Acceptable paper and other print media on page 17. Clean the corona wire and the drum unit. See Cleaning the corona wire on page 46 and Cleaning the drum unit on page 48. The drum unit may be damaged. Put in a new drum unit. See Replacing the drum unit on page 39. The fuser unit may be contaminated. Call your Brother dealer. Troubleshooting Examples of poor print quality Recommendation Make sure that you use paper that meets our specifications. See Acceptable paper and other print media on page 17. Choose Thick Paper mode in the printer driver, choose Thick in the machine’s Paper Type menu setting or use thinner paper than you are currently using. See Paper Type on page 16 and Basic tab in the Software User's Guide. Check the machine’s environment. Conditions such as high humidity can cause hollow print. See the Safety and Legal booklet. Hollow print The drum unit may be damaged. Put in a new drum unit. See Replacing the drum unit on page 39. Clean the corona wire inside the drum unit by sliding the green tab from left to right and right to left several times. Be sure to return the green tab to the home position (a). See Cleaning the corona wire on page 46. The drum unit may be damaged. Put in a new drum unit. See Replacing the drum unit on page 39. The fuser unit may be contaminated. Call your Brother dealer. B All black Make sure that you use paper that meets our specifications. A rough surfaced paper or thick print media can cause problems. ABCDEFGH abcdefghijk ABCD abcde 01234 White lines across the page Make sure that you choose the appropriate media type in the printer driver or in the machine’s Paper Type menu setting. See Acceptable paper and other print media on page 17 and Basic tab in the Software User's Guide. The problem may disappear by itself. Print multiple pages to clear this problem, especially if the machine has not been used for a long time. The drum unit may be damaged. Put in a new drum unit. See Replacing the drum unit on page 39. Clean the corona wire of the drum unit. See Cleaning the corona wire on page 46. ABCDEFGH abcdefghijk The drum unit may be damaged. Put in a new drum unit. See Replacing the drum unit on page 39. ABCD abcde 01234 Lines across the page 75 Examples of poor print quality Recommendation Check the machine's environment. Conditions such as high humidity and high temperatures may cause this print quality problem. If the problem is not solved after printing a few pages, put in a new drum unit. (See Replacing the drum unit on page 39.) White lines, bands or ribbing across the page 94 mm 94 mm Make ten copies of a blank, white sheet of paper. See How to copy on page 24. If the problem is not solved, the drum unit may have glue from a label stuck on the OPC drum surface. Clean the drum unit. See Cleaning the drum unit on page 48. The drum unit may be damaged. Put in a new drum unit. See Replacing the drum unit on page 39. White Spots on black text and graphics at 94 mm intervals 94 mm 94 mm Black Spots at 94 mm intervals Make sure that you use paper that meets our specifications. See Acceptable paper and other print media on page 17. ABCDEFGH abcdefghijk ABCD abcde 01234 Black toner marks across the page If you use label sheets for laser printers, the glue from the sheets may sometimes stick to the OPC drum surface. Clean the drum unit. See Cleaning the drum unit on page 48. Do not use paper that has clips or staples because they will scratch the surface of the drum. If the unpacked drum unit is in direct sunlight or room light, the unit may be damaged. The toner cartridge may be damaged. Put in a new toner cartridge. See Replacing the toner cartridge on page 33. The drum unit may be damaged. Put in a new drum unit. See Replacing the drum unit on page 39. 76 Troubleshooting Examples of poor print quality Recommendation Clean the corona wire inside the drum unit by sliding the green tab. See Cleaning the corona wire on page 46. ABCDEFGH abcdefghijk Make sure the green tab of the corona wire is at the home position (a). ABCD abcde 01234 The drum unit may be damaged. Put in a new drum unit. See Replacing the drum unit on page 39. Black lines down the page The toner cartridge may be damaged. Put in a new toner cartridge. See Replacing the toner cartridge on page 33. The fuser unit may be contaminated. Call your Brother dealer. Printed pages have toner stains down the page. The toner cartridge may be damaged. Put in a new toner cartridge. See Replacing the toner cartridge on page 33. ABCDEFGH abcdefghijk The drum unit may be damaged. Put in a new drum unit. See Replacing the drum unit on page 39. ABCD abcde 01234 Check if the Toner Setting in Replace Toner is set to Continue (Continue mode). See Toner settings in Chapter 1 of the Advanced User's Guide. White lines down the page FGH ABCDE hijk fg e d c ab B Make sure that a torn piece of paper is not stuck inside the machine blocking the scanner. Make sure that the paper or other print media is loaded correctly in the paper tray and that the guides are not too tight or too loose against the paper stack. Set the paper guides correctly. See Loading paper on page 9. ABCD abcde 01234 The paper tray may be too full. See Loading paper on page 9. Page skewed Check the paper type and quality. See Acceptable paper and other print media on page 17. If you are using the manual feed slot, see Loading paper in the manual feed slot on page 11. Check for loose objects such as torn paper inside the machine. Verify that the two green envelope levers inside the back cover are set to the same position. Verify that the two grey Anti-Curl Levers inside the back cover are set to the same position. If the problem only occurs during duplex printing, check for torn paper in the duplex tray, verify that the duplex tray is inserted completely, and verify that the back cover is closed completely. 77 Examples of poor print quality Recommendation Check the paper type and quality. High temperatures and high humidity will cause paper to curl. See Acceptable paper and other print media on page 17. If you do not use the machine often, the paper may have been in the paper tray too long. Turn over the stack of paper in the paper tray. Also, fan the paper stack and then rotate the paper 180 in the paper tray. Open the back cover (face-up output tray) for the machine to eject printed pages onto the face-up output tray. Curled or wavy Choose Reduce Paper Curl mode in the printer driver when you do not use our recommended paper. See Other Print Options (for Windows®) or Print Settings (For Macintosh) in the Software User's Guide. Make sure that the paper is loaded correctly. See Loading paper on page 9. B DEFGH abc efghijk A CD bcde 1 34 Wrinkles or creases 78 Check the paper type and quality. See Acceptable paper and other print media on page 17. Turn over the stack of paper in the tray or try rotating the paper 180 in the input tray. Troubleshooting Examples of poor print quality Recommendation Make sure that the two green envelope levers inside the back cover are pulled down when you print the envelope. Envelope creases B Note When you have finished printing, open the back cover and reset the two green levers back to their original position. 79 Examples of poor print quality ABCDEFGHIJKLMNOPQRSTUVWXYZ. 0123456789. abcdefghijklmnopqrstuvwxyz. ABCDEFGHIJKLMNOPQRSTUVWXYZ. 0123456789. abcdefghijklmnopqrstuvwxyz. ABCDEFGHIJKLMNOPQRSTUVWXYZ. 0123456789. abcdefghijklmnopqrstuvwxyz. ABCDEFGHIJKLMNOPQRSTUVWXYZ. 0123456789. abcdefghijklmnopqrstuvwxyz. Recommendation Open the back cover and make sure that the two green envelope levers on the left and right hand sides are in the up position. Poor fixing Choose Improve Toner Fixing mode in the printer driver. See Other Print Options (for Windows®) or Print Settings (For Macintosh) in the Software User's Guide. If this selection does not provide enough improvement, select Thicker Paper in Media Type settings. 80 Troubleshooting Examples of poor print quality Recommendation Choose Reduce Paper Curl mode in the printer driver when you do not use our recommended paper. See Other Print Options (for Windows®) or Print Settings (For Macintosh) in the Software User's Guide. Turn the paper over in the paper tray, and print again. (Excluding letterhead paper) If the problems remains, switch the Anti-Curl Levers as follows: Curled a b Open the back cover. Lift the lever (1) and slide the two grey levers (2) in the direction of the arrow. 1 2 B 2 1 2 81 Examples of poor print quality Recommendation Lift up the output tray support flap (1). Curled 1 82 Troubleshooting Machine Information Checking the Serial Number Note B B Unplug the interface cable before you choose Network or All Settings. You can see the machine’s Serial Number on the LCD. How to reset the machine a b a b Press Menu. (For DCP-7055 / DCP-7057 / DCP-7060D) Press a or b to choose 3.Machine Info.. Press OK. (For DCP-7055W / DCP-7057W / DCP-7065DN) Press a or b to choose 4.Machine Info.. Press OK. d Press a or b to choose 1.General Setup. Press OK. Press a or b to choose 5.Reset. Press OK. d Press a or b to choose the type of reset function you want to use. Press OK. e Do one of the following: To reset the settings, press a to choose Reset. Then go to step f. Press a or b to choose 1.Serial No.. Press OK. To exit without making changes, press b to choose Exit. Then go to step g. f Press Stop/Exit. Reset functions Press Menu. c (For DCP-7070DW) Press a or b to choose 5.Machine Info.. Press OK. c B To reboot the machine, press a to choose Yes. The machine will begin the reset. B To exit without rebooting, press b to choose No. Then go to step g. The following reset functions are available: 1 (For DCP-7055W / DCP-7057W / DCP-7065DN / DCP-7070DW) Network You will be asked if you want to reboot the machine. Do one of the following: g Press Stop/Exit. You can reset the internal print server back to its default factory settings such as the password and IP address information. 2 All Settings You can reset all the machine’s settings back to its default factory settings. Brother strongly recommends you perform this operation when you dispose of the machine. 83 B C Menu and features On-screen programming How to access the menu mode C Your machine has been designed to be easy to use. The LCD provides on-screen programming using the menu keys. a b Press Menu. We have created step by step on-screen instructions to help you program your machine. Simply follow the steps as they guide you through the menu selections and programming options. c Press OK when the option you want appears on the LCD. The LCD will then show the next menu level. d Press a or b to scroll to your next menu selection. e Press OK. When you have finished setting an option, the LCD will show Accepted. f Press Stop/Exit to exit Menu mode. Menu table You can program your machine by using the Menu table on page 86. These pages list the menu selections and options. Press Menu and then press a or b to access the menus and program your machine. For example, to set Copy Quality to Photo Quality a b Press Menu. c Press a or b to choose 1.Quality. Press OK. d Press a or b to choose Photo. Press OK. e Press Stop/Exit. 84 Press a or b to choose 2.Copy. Press OK. C Choose an option. You can scroll through each menu level by pressing a or b for the direction you want. C C Menu and features Menu keys C Access the menu. Go to the next menu level. Accept an option. Exit the menu by pressing repeatedly. Go back to the previous menu level. C Scroll through the current menu level. Exit the menu. 85 Menu table C The factory settings are shown in Bold with an asterisk. Choose & OK Choose & OK to accept to exit Level 1 Level 2 Level 3 Level 4 Options Descriptions 1.General Setup 1.Paper 1.Paper Type — Thin Sets the type of paper in the paper tray. 16 Sets the size of the paper in the paper tray. 16 Increases the page yield of the toner cartridge. See 1. Plain* Page Thick Thicker Recycled Paper Label 2.Paper Size — A4* Letter Executive A5 A5 L A6 B5 B6 2.Ecology 1 1.Toner Save — On Off* See Advanced User's Guide. The factory settings are shown in Bold with an asterisk. 86 Menu and features Level 1 Level 2 Level 3 Level 4 Options Descriptions Page 1.General Setup 2.Ecology 2.Sleep Time — Range varies depending on models. Conserves power. See 1. — — (Continued) (Continued) 003Min* 3.LCD Contrast -nnnno+ -nnnon+ Adjusts the contrast of the LCD. -nnonn+* -nonnn+ -onnnn+ 4.Replace Toner — 5.Reset 1.All Settings — 1.Network — (For DCP-7055/ DCP-7057/ DCP-7060D) 5.Reset (For DCP-7055W/ DCP-7057W/ DCP-7065DN/ DCP-7070DW) 0.Local Language 1 — Continue Stop* a Reset b Exit a Reset b Exit 2.All Settings — — (Choose your language) a Reset b Exit — The machine will stop printing until you replace the toner cartridge. Restores the machine's settings to the original factory default settings. 83 Restores the machine's network settings to the original factory default settings. C Restores all the machine's settings to the original factory default settings. Allows you to change the LCD language for your country. 8 See Advanced User's Guide. The factory settings are shown in Bold with an asterisk. 87 Level 1 Level 2 Level 3 Options Descriptions Page 2.Copy 1.Quality — Auto* You can choose the Copy resolution for your type of document. See 1. Text Photo Graph 2.Brightness — -nnnno+ -nnnon+ Adjust the brightness for copies. -nnonn+* -nonnn+ -onnnn+ 3.Contrast — -nnnno+ -nnnon+ Adjusts the contrast for copies. -nnonn+* -nonnn+ -onnnn+ 1 See Advanced User's Guide. The factory settings are shown in Bold with an asterisk. Level 1 Level 2 Level 3 Options Descriptions Page 3.Printer 1.Print Options 1.Internal Font — Prints a list of the machine’s internal fonts. See 2. 2.Configuratio n — Prints a list of the machine’s printer settings. 3.Test Print — Prints a test page. — Off* Enables or disables duplex printing. You can also choose long edge or short edge duplex printing. (For DCP-7070DW) 2.Duplex On(Long Edge) On(Short Edge) 3.Reset Printer — 1 See Advanced User's Guide. 2 See Software User's Guide. 1.Reset 2.Exit The factory settings are shown in Bold with an asterisk. 88 Restores the printer settings to the original factory default settings. Menu and features Level 1 Level 2 Level 3 Level 4 Options Descriptions 3.Network 1.TCP/IP 1.Boot Method — Auto* Chooses the Boot method that best suits your needs. (For DCP-7065DN) Static RARP BOOTP DHCP 2.IP Address — [000-255]. [000-255]. [000-255]. [000-255] Enter the IP address. 3.Subnet Mask — [000-255]. [000-255]. [000-255]. [000-255] Enter the Subnet mask. 4.Gateway — [000-255]. [000-255]. [000-255]. [000-255] Enter the Gateway address. 5.Node Name — BRNXXXXXXXXXXXX Enter the Node name. 6.WINS Config — Auto* Chooses the WINS configuration mode. Static See Network User's Guide. The factory settings are shown in Bold with an asterisk. C 89 Level 1 Level 2 Level 3 Level 4 Options Descriptions 3.Network 1.TCP/IP — Primary (For DCP-7065DN) (Continued) 7.WINS Server Specifies the IP address of the primary or secondary WINS server. [000-255]. [000-255]. [000-255]. [000-255] (Continued) Secondary [000-255]. [000-255]. [000-255]. [000-255] 8.DNS Server — Primary [000-255]. [000-255]. [000-255]. [000-255] Specifies the IP address of the primary or secondary DNS server. Secondary [000-255]. [000-255]. [000-255]. [000-255] 9.APIPA — On* Off 0.IPv6 — On Off* 2.Ethernet — — Auto* 100B-FD Automatically allocates the IP address from the link-local address range. Enable or Disable the IPv6 protocol. If you want to use the IPv6 protocol, visit http://solutions. brother.com/ for more information. Chooses the Ethernet link mode. 100B-HD 10B-FD 10B-HD 3.Status — — Active 100B-FD Active 100B-HD Shows the Ethernet link status. Active 10B-FD Active 10B-HD Inactive Wired OFF 4.MAC Address — — — Shows the MAC address of the machine. 0.Network Reset — a Reset Reboot OK? b Exit a Yes b No Restore all network settings to factory default. See Network User's Guide. The factory settings are shown in Bold with an asterisk. 90 Menu and features Level 1 Level 2 Level 3 Level 4 Options Descriptions 3.Network 1.TCP/IP 1.Boot Method — Auto* Chooses the Boot method that best suits your needs. (For DCP-7055W / DCP-7057W) Static RARP BOOTP DHCP 2.IP Address — [000-255]. [000-255]. [000-255]. [000-255] Enter the IP address. 3.Subnet Mask — [000-255]. [000-255]. [000-255]. [000-255] Enter the Subnet mask. 4.Gateway — [000-255]. [000-255]. [000-255]. [000-255] Enter the Gateway address. 5.Node Name — BRWXXXXXXXXXXXX Enter the Node name. 6.WINS Config — Auto* Chooses the WINS configuration mode. 7.WINS Server — Static Primary [000-255]. [000-255]. [000-255]. [000-255] Specifies the IP address of the primary or secondary WINS server. Secondary [000-255]. [000-255]. [000-255]. [000-255] 8.DNS Server — Primary [000-255]. [000-255]. [000-255]. [000-255] Specifies the IP address of the primary or secondary DNS server. Secondary [000-255]. [000-255]. [000-255]. [000-255] 9.APIPA — On* Off 0.IPv6 — On Off* Automatically allocates the IP address from the link-local address range. Enable or Disable the IPv6 protocol. If you want to use the IPv6 protocol, visit http://solutions.brother.com/ for more information. 2.Setup Wizard — — — You can configure your print server. 3.WPS/AOSS — — — You can easily configure your wireless network settings using the one-button push method. 4.WPS w/PIN Code — — — You can easily configure your wireless network settings using WPS with a PIN code. See Network User's Guide. The factory settings are shown in Bold with an asterisk. 91 C Level 1 Level 2 Level 3 Level 4 Options Descriptions 3.Network 5.WLAN Status 1.Status — Active(11b) You can see the current wireless network status. (For DCP-7055W / DCP-7057W) Active(11g) WLAN OFF (Continued) AOSS Active Connection Fail 2.Signal — Strong Medium You can see the current wireless network signal strength. Weak None 3.SSID — — You can see the current SSID. 4.Comm. Mode — Ad-hoc You can see the current Communication Mode. Infrastructure 6.MAC Address — — — Shows the MAC address of the machine. 7.WLAN Enable — — On Enable or disable the wireless LAN manually. 0.Network Reset — Off* — a Reset b Exit See Network User's Guide. The factory settings are shown in Bold with an asterisk. 92 Restores all network settings to factory default. Menu and features Level 1 Level 2 Level 3 Level 4 Options Descriptions 4.Network 1.Wired LAN 1.TCP/IP 1.Boot Method Auto* Chooses the Boot method that best suits your needs. (For DCP-7070DW) Static RARP BOOTP DHCP 2.IP Address [000-255]. [000-255]. [000-255]. [000-255] Enter the IP address. 3.Subnet Mask [000-255]. [000-255]. [000-255]. [000-255] Enter the Subnet mask. 4.Gateway [000-255]. [000-255]. [000-255]. [000-255] Enter the Gateway address. 5.Node Name BRNXXXXXXXXXXXX Enter the Node name. 6.WINS Config Auto* Chooses the WINS configuration mode. 7.WINS Server Primary Static [000-255]. [000-255]. [000-255]. [000-255] Specifies the IP address of the primary or secondary WINS server. Secondary [000-255]. [000-255]. [000-255]. [000-255] 8.DNS Server Primary [000-255]. [000-255]. [000-255]. [000-255] Specifies the IP address of the primary or secondary DNS server. Secondary [000-255]. [000-255]. [000-255]. [000-255] 9.APIPA On* Off 0.IPv6 On Off* Automatically allocates the IP address from the link-local address range. Enable or Disable the IPv6 protocol. If you want to use the IPv6 protocol, visit http://solutions. brother.com/ for more information. See Network User's Guide. The factory settings are shown in Bold with an asterisk. 93 C Chapter C Level 1 Level 2 Level 3 Level 4 Options Descriptions 4.Network 1.Wired LAN 2.Ethernet — Auto* (For DCP-7070DW) (Continued) Chooses the Ethernet link mode. 100B-FD 100B-HD (Continued) 10B-FD 10B-HD 3.Wired Status — Active 100B-FD Active 100B-HD You can see the current wired status. Active 10B-FD Active 10B-HD Inactive Wired OFF 2.WLAN 4.MAC Address — — Shows the MAC address of the machine. 5.Set to Default — 1.Reset Restore the wired network setting to factory default. 6.Wired Enable — 1.TCP/IP 1.Boot Method 2.Exit On* Off Auto* Static Enable or Disable the Wired LAN manually. Chooses the Boot method that best suits your needs. RARP BOOTP DHCP 2.IP Address [000-255]. [000-255]. [000-255]. [000-255] Enter the IP address. 3.Subnet Mask [000-255]. [000-255]. [000-255]. [000-255] Enter the Subnet mask. 4.Gateway [000-255]. [000-255]. [000-255]. [000-255] Enter the Gateway address. 5.Node Name BRWXXXXXXXXXXXX Enter the Node name. 6.WINS Config Auto* Chooses the WINS configuration mode. Static See Network User's Guide. The factory settings are shown in Bold with an asterisk. 94 Menu and features Level 1 Level 2 Level 3 Level 4 Options Descriptions 4.Network 2.WLAN 1.TCP/IP Primary (For DCP-7070DW) (Continued) (Continued) 7.WINS Server Specifies the IP address of the primary or secondary WINS server. (Continued) [000-255]. [000-255]. [000-255]. [000-255] Secondary [000-255]. [000-255]. [000-255]. [000-255] 8.DNS Server Primary [000-255]. [000-255]. [000-255]. [000-255] Specifies the IP address of the primary or secondary DNS server. Secondary [000-255]. [000-255]. [000-255]. [000-255] 9.APIPA On* Off 0.IPv6 On Off* Automatically allocates the IP address from the link-local address range. Enable or Disable the IPv6 protocol. If you want to use the IPv6 protocol, visit http://solutions. brother.com/ for more information. 2.Setup Wizard — — You can configure your print server. 3.WPS/AOSS — — You can easily configure your wireless network settings using the one-button push method. 4.WPS w/PIN Code — — You can easily configure your wireless network settings using WPS with a PIN code. See Network User's Guide. The factory settings are shown in Bold with an asterisk. 95 C Chapter C Level 1 Level 2 Level 3 Level 4 Options Descriptions 4.Network 2.WLAN 1.Status Active(11b) (For DCP-7070DW) (Continued) 5.WLAN Status You can see the current wireless network status. Active(11g) Wired LAN Active (Continued) WLAN OFF AOSS Active Connection Fail 2.Signal Strong Medium Weak You can see the current wireless network signal strength. None 3.SSID — You can see the current SSID. 4.Comm. Mode Ad-hoc You can see the current Communication Mode. Infrastructure 0.Network Reset 6.MAC Address — — Shows the MAC address of the machine. 7.Set to Default — 1.Reset Restore the wireless network settings to factory default. 8.WLAN Enable — — a Reset Reboot OK? b Exit a Yes b No 2.Exit On Off* See Network User's Guide. The factory settings are shown in Bold with an asterisk. 96 Enable or disable the wireless LAN manually. Restores all network settings to factory default. Menu and features Level 1 Level 2 Level 3 Options Descriptions 3.Machine Info. 1.Serial No. — — You can check the serial number of your machine. 83 (For DCP-7055, DCP-7057 and DCP-7060D) 2.Page Counter — Total You can check the number of total pages the machine has printed during its life. See 1. 4.Machine Info. List (For DCP-7055W / DCP-7057W / DCP-7065DN) Copy 5.Machine Info. (For DCP-7070DW) Print 3.User Settings — — 4.Network Config — — — — — — Page (For DCP-7055W / DCP-7057W / DCP-7065DN / DCP-7070DW) 5.WLAN Report (For DCP-7055W / DCP-7057W / DCP-7070DW) 4.Drum Life (For DCP-7055 / DCP-7057 / DCP-7060D You can check the percentage of a Drum life that remains available. C 5.Drum Life (For DCP-7065DN) 6.Drum Life (For DCP-7055W / DCP-7057W / DCP-7070DW) 1 See Advanced User's Guide. The factory settings are shown in Bold with an asterisk. 97 D Specifications D General D Note This chapter provides a summary of the machines’ specifications. For additional specifications visit http://www.brother.com/ for details. Printer Type Laser Print Method Electrophotography by semiconductor laser beam scanning Memory Capacity (For DCP-7055 / DCP-7057) 16 MB (For DCP-7055W / DCP-7057W / DCP-7060D / DCP-7065DN / DCP-7070DW) 32 MB LCD (liquid crystal display) 16 characters 2 lines Power Source 220 - 240 V AC 50/60Hz Power Consumption 1 Peak: 1080 W Copying: 2 Approx. 445 W at 25 C Ready: Approx. 55 W at 25 C For Wireless models (WLAN: On) Sleep: Approx. 2.8 W (WLAN: Off) Deep Sleep: (For DCP-7055W / DCP-7057W / DCP-7070DW) Approx. 1.0 W For non-Wireless models Deep Sleep: Approx. 0.9 W Note All figures stated above (except Peak) are average figures. 1 USB connection to PC 2 When making a copy from one sheet 98 Specifications Dimensions DCP-7065DN D 316 mm 398.5 mm 405 mm DCP-7055 / DCP-7055W / DCP-7057 / DCP-7057W / DCP-7060D / DCP-7070DW D 268 mm 405 mm Weight With Consumables: 398.5 mm (For DCP-7055 / DCP-7055W / DCP-7057 / DCP-7057W) 9.8 kg (For DCP-7060D) 10.1 kg (For DCP-7065DN) 11.4 kg (For DCP-7070DW) 10.3 kg D 99 Noise level Sound power 1 Operating: (For DCP-7055 / DCP-7055W / DCP-7057 / DCP-7057W) LWAd = 6.60 B (A) (For DCP-7060D / DCP-7065DN / DCP-7070DW) LWAd = 6.40 B (A) 2 Standby: (For DCP-7055 / DCP-7055W / DCP-7057 / DCP-7057W) LWAd = 4.30 B (A) (For DCP-7060D) LWAd = 4.27 B (A) (For DCP-7065DN / DCP-7070DW) LWAd = 4.22 B (A) Sound pressure Operating (Printing): LPAm = 53 dB (A) Standby: LPAm = 30 dB (A) 1 Measured in accordance with ISO 9296. 2 Office equipment with LWAd > 6.30 B (A) is not suitable for use in room where people do primarily intellectual work. Such equipment should be placed in separate rooms because of the noise emission. Temperature Humidity ADF (automatic document feeder) (For DCP-7065DN) 100 Operating: 10 to 32.5C Storage: 0 to 40C Operating: 20 to 80% (without condensation) Storage: 10 to 90% (without condensation) Up to 35 pages (Staggered) [80 g/m2] Specifications Document Size Document Size (Single-sided) D ADF Width: 147.3 to 215.9 mm (For DCP-7065DN) ADF Length: 147.3 to 355.6 mm (For DCP-7065DN) Scanner Glass Width: Max. 215.9 mm Scanner Glass Length: Max. 297 mm D 101 Print media Paper Input D Paper Tray Paper Type: Plain paper, Thin paper or Recycled paper Paper Size: Letter, A4, B5 (ISO/JIS), A5, A5 (Long Edge), B6 (ISO), A6, Executive Paper Weight: 60 to 105 g/m2 Maximum Paper Tray Capacity: Up to 250 sheets of 80 g/m2 Plain paper Manual Feed Slot (Manual) Paper Type: Envelopes, Labels 1, Thin paper, Thick paper, Thicker paper, Recycled paper, Bond paper or Plain paper Paper Size: Width: 76.2 to 216 mm Length: 116 to 406.4 mm Paper Weight: 60 to 163 g/m2 2 Maximum Paper Tray Capacity: One sheet at a time 80 g/m2 Plain paper Paper Output Face-Down Output Tray Face-Up Output Tray Duplex Printing Paper Size (Automatic Duplex): (For DCP-7060D / DCP-7065DN / DCP-7070DW) Paper Weight (Automatic Duplex): Paper Type (Automatic Duplex): Up to 100 sheets (face down print delivery to the Face down output paper tray) One sheet (face up print delivery to the Face up output paper tray) A4 60 to 105 g/m2 Plain paper or Recycled paper 1 For labels, we recommend removing printed pages from the output paper tray immediately after they exit the machine to avoid the possibility of smudging. 2 60 to 105 g/m2 for duplex print. 102 Specifications Copy D Color/Monochrome Monochrome Copy Width Max. 204 mm Multiple Copies Stacks or Sorts up to 99 pages Reduce/Enlarge 25% to 400% (in increments of 1%) Resolution Up to 600 600 dpi First Copy Out Time (For DCP-7055 / DCP-7055W / DCP-7057 / DCP-7057W) Less than 12 seconds (from the READY mode and standard tray) (For DCP-7060D / DCP-7065DN / DCP-7070DW) Less than 11 seconds (from the READY mode and standard tray) Ready At 25C D 103 Scanner D Colour/Black Yes/Yes TWAIN Compliant Yes (Windows® 2000 Professional/Windows® XP/ Windows® XP Professional x64 Edition/Windows Vista®/ Windows® 7) Mac OS X 10.4.11, 10.5.x, 10.6.x 1 WIA Compliant Yes (Windows® XP/Windows Vista®/Windows® 7) Colour Depth 48 bit internal / 24 bit external colour Resolution Up to 19200 19200 dpi (interpolated) 2 Up to 600 2400 dpi (optical) 2 (from Scanner Glass) Up to 600 600 dpi (optical) 2 (from ADF (For DCP-7065DN)) Scanning Width Max. 204 mm Greyscale 256 levels 1 For the latest driver updates for the Mac OS X you are using, visit us at http://solutions.brother.com/. 2 Maximum 1200 1200 dpi scanning with the WIA driver in Windows® XP, Windows Vista® and Windows® 7 (resolution up to 19200 19200 dpi can be chosen by using the scanner utility) 104 Specifications Printer Automatic 2-sided (Duplex) Print D Yes (For DCP-7060D / DCP-7065DN / DCP-7070DW) Emulations (For DCP-7070DW) PCL6 Resolution 600 dpi 600 dpi, HQ1200 (2400 600 dpi) quality Print Speed (Duplex) Up to 5 pages/minute (A4 size) 1 Print Speed (For DCP-7055 / DCP-7055W / DCP-7057 / DCP-7057W) Up to 20 pages/minute (A4 size) 1 (For DCP-7060D) Up to 24 pages/minute (A4 size) 1 (For DCP-7065DN / DCP-7070DW) Up to 26 pages/minute (A4 size) 1 First Print Out Time (For DCP-7055 / DCP-7055W / DCP-7057 / DCP-7057W) Less than 10.0 seconds (from the READY mode and standard tray) (For DCP-7060D / DCP-7065DN / DCP-7070DW) Less than 8.5 seconds (from the READY mode and standard tray) 1 D The print speed may vary depending on the type of document you print. 105 Interfaces D USB We recommend to use a USB cable (Type A/B) that is no more than 2 metres long. 1 2 Ethernet 3 Use an Ethernet UTP cable category 5 or greater. (DCP-7065DN / DCP-7070DW) Wireless LAN (DCP-7055W / DCP-7057W / DCP-7070DW) IEEE 802.11 b/g (Infrastructure / Ad-hoc Mode) 1 Your machine has a Hi-Speed USB 2.0 interface. The machine can also be connected to a computer that has a USB 1.1 interface. 2 Third-party USB ports are not supported. 3 See Network (DCP-7055W / DCP-7057W / DCP-7065DN / DCP-7070DW) on page 110 and the Network User's Guide for detailed network specifications. 106 Specifications Computer requirements D Minimum System Requirements and Supported PC Software Functions Computer Platform & Operating System Version Windows® Operating System 1 Processor Minimum Speed Minimum Recommended RAM RAM Windows® Intel® 2000 Pentium® II Professional 4 or equivalent 64 MB Windows® XP Home 2 5 Windows® XP Professional 2 5 128 MB 256 MB Windows® XP Professional x64 Edition 2 5 64-bit (Intel®64 or AMD64) supported CPU 256 MB 512 MB Windows Vista® 2 5 Intel® Pentium® 4 or equivalent 64-bit (Intel®64 or AMD64) supported CPU 512 MB 1 GB Windows® Intel® 725 Pentium® 4 or equivalent 64-bit (Intel®64 or AMD64) supported CPU 1 GB (32-bit) 2 GB (64-bit) Hard Disk Space to install For Drivers For Applications 150 MB 500 MB 500 MB 1.2 GB Supported Supported PC PC Software Interface 3 Functions Printing, Scanning USB, 10/100 Base Tx (Ethernet), Wireless 802.11 b/g D 1 GB (32-bit) 2 GB (64-bit) 650 MB 107 Minimum System Requirements and Supported PC Software Functions Computer Platform & Operating System Version Windows® Operating System 1 Processor Minimum Speed Minimum Recommended RAM RAM Windows Server® 2003 (print only via network) Intel® Pentium® III or equivalent 256 MB 512 MB Windows Server® 2003 x64 Edition (print only via network) 64-bit (Intel®64 or AMD64) supported CPU Windows Server® 2008 (print only via network) Intel® Pentium® 4 or equivalent 64-bit (Intel®64 or AMD64) supported CPU 512 MB 2 GB Windows Server® 2008 R2 (print only via network) 64-bit (Intel®64 or AMD64) supported CPU Macintosh Mac OS X Operating 10.4.11 System 10.5.x PowerPC G4/G5 Intel® Core™ Processor 512 MB 1 GB Mac OS X 10.6.x Intel® Core™ Processor 1 GB 2 GB Hard Disk Space to install For Drivers For Applications Supported Supported PC PC Software Interface 3 Functions 50 MB N/A Printing 10/100 Base Tx (Ethernet), Wireless 802.11 b/g 80 MB 400 MB Printing, Scanning USB, 10/100 Base Tx (Ethernet), Wireless 802.11 b/g 1 Internet Explorer® 6.0 or greater. 2 For WIA, 1200 x 1200 resolution. Brother Scanner Utility enables to enhance up to 19200 x 19200 dpi. 3 Third-party USB ports are not supported. 4 PaperPort™ 11SE supports Microsoft® SP4 or higher for Windows® 2000. 5 PaperPort™ 12SE supports Microsoft® SP3 or higher for Windows® XP and SP2 or higher for Windows Vista® and Windows® 7. For the latest driver updates, visit http://solutions.brother.com/. All trademarks, brand and product names are property of their respective companies. 108 Specifications Consumable items D Russian customers: Please refer to the Russian guide for information on your consumable items. Toner Cartridge Starter Toner Cartridge: Approx. 700 pages (A4) 1 (Except DCP-7065DN / DCP-7070DW) Standard Toner Cartridge: TN-2010 (For DCP-7055 / DCP-7055W / DCP-7057) Approx. 1,000 pages (A4) 1 TN-2210 (For DCP-7060D / DCP-7065DN / DCP-7070DW) Approx. 1,200 pages (A4) 1 High-Yield Toner Cartridge: Drum Unit TN-2220 (For DCP-7060D / DCP-7065DN / DCP-7070DW) Approx. 2,600 pages (A4) 1 DR-2200 Approx. 12,000 pages (A4) 2 1 Approx. cartridge yield is declared in accordance with ISO/IEC 19752. 2 Drum yield is approximate, and may vary by type of use. D 109 Network (DCP-7055W / DCP-7057W / DCP-7065DN / DCP-7070DW) Note For details about the full Network specifications, see the Network User's Guide. LAN You can connect your machine to a network for Network Printing and Network Scanning. Also included is Brother BRAdmin Light 1 Network Management software. Security Protocols Wired (DCP-7065DN / DCP-7070DW) 1 APOP, POP before SMTP, SMTP-AUTH Wireless (DCP-7055W / DCP-7057W / DCP-7070DW) APOP, POP before SMTP, SMTP-AUTH Wireless Network Security (DCP-7055W / DCP-7057W / DCP-7070DW) WEP 64/128 bit, WPA-PSK (TKIP/AES), WPA2-PSK (AES) Wireless Network Setup Support Utility (DCP-7055W / DCP-7057W / DCP-7070DW) AOSS™ Yes WPS Yes BRAdmin Professional and Web BRAdmin (not available for DCP-7055W / DCP-7057W) are available as a download from http://solutions.brother.com/. 110 D E Index A E ADF (automatic document feeder) using .....................................................21 Envelopes ....................................12, 17, 19 Error messages on LCD .......................... 54 Drum Error ........................................... 39 Drum Stop ............................................ 39 Duplex Disabled ................................... 55 Init Unable XX ...................................... 55 Jam Duplex .......................................... 55 No Paper .............................................. 55 Out of Memory ..................................... 56 Print Unable XX .................................... 56 Replace Drum ...................................... 39 Replace Toner ...................................... 34 Toner Ended ........................................ 34 Toner Low ............................................ 34 C Cleaning Cleaning:paper pick-up rollers ..............52 corona wire ...........................................46 drum unit ...............................................48 scanner .................................................45 Consumable items ...................................32 disposal .................................................37 replacing ...............................................54 Control panel overview ..............................6 Copy .........................................................24 keys ........................................................6 F D Folio ................................................... 16, 17 Document how to load .................................... 21, 22 jams ......................................................57 Drum unit cleaning ......................................... 46, 48 replacing ...............................................39 Duplex key ..........................................................6 paper jam ..............................................66 printing ................................................102 troubleshooting .............................. 55, 69 G Greyscale .............................................. 104 H HELP LCD messages ..................................... 84 Menu Table .......................................... 86 J Jams document ............................................. 57 paper .................................................... 59 L Labels ................................... 11, 12, 17, 20 LCD (liquid crystal display) .................. 7, 84 111 E M R Machine information how to reset the machine ......................83 reset functions .......................................83 serial number ........................................83 Maintenance, routine ...............................44 replacing drum unit ............................................39 toner cartridge ....................................33 Menu Table ..............................................86 Mode, entering copy ......................................................24 Replacing drum unit .............................................. 39 toner cartridge ...................................... 33 Resolution copy .................................................... 103 print .................................................... 105 scan .................................................... 104 S OPC drum ................................................76 Out of Memory message ..........................56 Safety Instructions .......................................i Scan .................................................... 6, 26 Scanner glass using ..................................................... 22 Serial number how to find ...............See inside front cover P T Paper .............................................. 17, 102 how to load ..............................................9 in manual feed slot .............................11 in paper tray .........................................9 jams ............................................... 55, 59 recommended ................................ 17, 18 size ................................................. 16, 17 tray capacity ..........................................17 type ................................................ 16, 17 Print difficulties ..............................................68 emulation ............................................105 quality ....................................................70 resolution ............................................105 specifications ......................................105 Print quality ..............................................73 Programming your machine .....................84 Toner cartridge replacing ............................................... 33 Troubleshooting ....................................... 54 document jam ................................. 57, 58 error messages on LCD ....................... 54 if you are having difficulty copy quality ....................................... 68 network .............................................. 71 paper handling .................................. 70 print quality ........................................ 70 printing .............................................. 68 scanning ............................................ 69 software ............................................. 69 maintenance messages on LCD .......... 54 paper jam .......................... 59, 60, 62, 66 O Q Quality printing ..................................................70 112 These machines are approved for use in the country of purchase only. Local Brother companies or their dealers will only support machines purchased in their own countries.