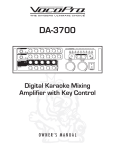
1
l
a
u
n
a
'
• Full-Function Remote Contr ol
m
120W Max x 6 @ 8 Ohms In Sur r ound Mode
150W Max x 2 @ 8 Ohms In Ster eo Mode
Built-In Dolby AC-3 EX and DTS-ES Digital Home Theater Decoders
24-bit DSP Pr ocessor for Digital Reverb, Echo and Key Contr ol Applications
Apply DSP Pr ocessing to Either the Sour ce Music or Vocal Signals
Both Analog and Digital Inputs for Sour ce Devices
4 V ideo Inputs, 3 V ideo Outputs
6 Audio Inputs, 3 Audio Outputs
Separate Bass and Tr eble Contr ols for Music and Micr ophones Channels
3 Micr ophone Inputs with Volume Contr ols
Digital Scr olling Graphic Display for All System Operations
DTX-9900K
r
DIGITAL HOME THEATER KARAOKE AMPLIFIER WITH KEY CONTROL AND DIGITAL REVERB
MUSIC VOLUME
n
e
MIC MASTER
VOLUME
MIC 2
DELAY
ECHO
REPEAT
EFFECT
MODE
CH.
MODE
DISPLAY
ON/OFF
INPUT
BASS
TREBLE
MUSIC
DSP
MEMORY
EQ
MODE
w
MIC 1
MEMORY
RECALL
MIC-IN
KARAOKE
L
L
b
MASTER MENU
#
MIC 1
MIC 2
MIC 3
POWER
D I G I TA L
PRO DIGITAL ECHO
DIGITAL KEY CONTROL
KARAOKE
ON
OFF
TEST
TONE
AUTO
DISPLAY
DOLBY
DOLBY
AUTO
DETECT
D I G I T A L
SURROUND¥EX
SURROUND
P R O
L O G I C
DTX-9900K
SURROUND
Digital Home Theater Karaoke Amplifier
with Key Control and Digital Reverb
o
•
•
•
•
•
•
•
•
•
•
•
s
Featur es:
Safety Instructions
CAUTION
RISK OF SHOCK
CAUTION: To reduce the risk of electric shock,
do not remove cover (or back). No userserviceable parts inside. Only refer servicing to
qualified service personnel.
Explanation of Graphical Symbols
The lightning flash & arrowhead
symbol, within an equilateral triangle,
is intended to alert you to the
presence of danger.
The exclamation point within an
equilateral triangle is intended to alert
you to the presence of important
operating and servicing instructions.
WARNING
To reduce the risk of fire or electric shock, do
not expose this unit to rain or moisture.
8. Ventilation - The appliance should be situated so its
location does not interfere with its proper ventilation. For
example, the appliance should not be situated on a bed,
sofa, rug, or similar surface that may block the
ventilation slots.
9. Heat - The appliance should be situated away from
heat sources such as radiators, heat registers,
stoves, or other appliances (including amplifiers)
that produce heat.
10. Power Sources - The appliance should be
connected to a power supply only of the type described
in the operating instructions or as marked on the
appliance.
11. Grounding or Polarization - Precautions should be
taken so that the grounding or polarization means of
an appliance is not defeated.
12. Power-Cord Protection - Power-supply cords
should be routed so that they are not likely to be walked
on or pinched by items placed upon or against them,
paying particular attention to cords at plugs,
convenience receptacles, and the point where they exit
from the appliance.
13. Cleaning - Unplug this unit from the wall outlet
before cleaning. Do not use liquid cleaners or
aerosol cleaners. Use a damp cloth for cleaning.
14. Power lines - An outdoor antenna should be
located away from power lines.
1. Read Instructions - All the safety and operating
instructions should be read before the appliance is
operated.
15. Nonuse Periods - The power cord of the appliance
should be unplugged from the outlet when left unused
for a long period of time.
2. Retain Instructions - The safety and operating
instructions should be retained for future reference.
16. Object and Liquid Entry - Care should be taken so
that objects do not fall and liquids are not spilled into the
enclosure through openings.
3. Heed Warnings - All warnings on the appliance and in
the operating instructions should be adhered to.
4. Follow Instructions - All operating and use
instructions should be followed.
5. Attachments - Do not use attachments not
recommended by the product manufacturer as they may
cause hazards.
6. Water and Moisture - Do not use this unit near water.
For example, near a bathtub or in a wet basement and
the like.
7. Carts and Stands - The appliance should be used
only with a cart or stand that is recommended by the
manufacturer.
7 A. An appliance and cart combination
should be moved with care. Quick stops,
excessive force, and uneven surfaces may
cause an overturn.
17. Damage Requiring Service - The appliance should
be serviced by qualified service personnel when:
A.
B.
C.
D.
The power supply cord or plug has been damaged; or
Objects have fallen into the appliance; or
The appliance has been exposed to rain; or
The appliance does not appear to operate normally
or exhibits a marked change in performance; or
E. The appliance has been dropped, or the enclosure
damaged.
18. Servicing - The user should not attempt to service
the appliance beyond that described in the operating
instructions. All other servicing should be referred to
qualified service personnel.
Note:
To CATV system installer's (U.S.A.): This reminder is
provided to call the CATV system installer's attention to
Article 820-40 of the NEC that provides guidelines for
proper grounding and, in particular, specifies that the
cable ground shall be connected as close to the point of
cable entry as practical.
1
Welcome...
And Thank you for purchasing the DTX-9900K from VocoPro, your ultimate choice in
Karaoke entertainment! With years of experience in the music entertainment business,
VocoPro is a leading manufacturer of Karaoke equipment, and has been providing
patrons of bars, churches, schools, clubs and individual consumers the opportunity to
sound like a star with full-scale club models, in-home systems and mobile units. All our
products offer solid performance and sound reliability, and to further strengthen our
commitment to customer satisfaction, we have customer service and technical support
professionals ready to assist you with your needs. We have provided some contact
information for you below.
VocoPro
1728 Curtiss Court
La Verne, CA 91750
Toll Free: 800-678-5348
TEL: 909-593-8893
FAX: 909-593-8890
VocoPro Company Email Directory
Customer Service & General Information
[email protected]
Tech Support
[email protected]
Remember Our Website
Be sure to visit the VocoPro website www.vocopro.com for the latest information on new
products, packages and promos. And while you're there don't forget to check out our
Club VocoPro for Karaoke news and events, chat rooms, club directories and even a
Service directory!
We look forward to hearing you sound like a PRO, with VocoPro, your ultimate choice in
Karaoke entertainment.
FOR YOUR RECORDS
Please record the model number and serial number below, for easy reference, in case of loss or theft. These numbers
are located on the rear panel of the unit. Space is also provided for other relevant information
Model Number
Serial Number
Date of Purchase
Place of Purchase
2
DTX-9900K
Digital Home Theater Karaoke Amplifier
with Key Control and Digital Reverb
Contents
Specifications
Introduction
Safety Instructions........................................... 1
Welcome……………………………….................... 2
Listening for a lifetime………………..................... 4
Description and Controls
Front Panel....................................................5,6
Rear Panel……………………………….................. 7
Remote Control........………………...................8-10
Installation
Speaker Installation......................................... 11
Speaker Connection………………………………...... 12
Audio Connections
Analog Source................................................ 13
Input Connections……………………………...…...... 13
Output Connections……………………………...…... 14
Loop Connections……………………………...…...... 14
External 5.1/6.1……………………………...…...... 15
Digital Source Connections………………………….. 15
Coaxial Input……………………………...…............. 16
Pre-Amp Output...…………………………...…........ 16
IVideo Connections……………………………...….... 16
Power Rating
20Hz - 20kHz 1% THD @ 4
Main Channel (Stereo Mode): 120W x 2 (RMS)
Main Channel (DSP Mode): 100W x 2 (RMS)
Front Center Channel: 100W x 2 (RMS)
Rear Channel: 50W x 2 (RMS)
Rear Center Channel: 100W x 1 (RMS)
Separation Degree of Stereo: 70dB
S/N Ratio (A Weight): > 90dB
Input Sensitivity/Impedance
Microphone: 0.5mV - 100mV/2K
Line In: 0.707V/51K
Audio: 0.707V/1K
Total Harmonic Distortion
All Channels: <1% 1kHz 10W 8
Freq. Response: 20Hz - 20kHz +/- 0.5
Other
Power: AC~110/240V 50/60Hz
Max. Power Consumption: 800W
Dimensions: 16" (W) x 6.7" (H) x 17.1" (L)
Net Weight: 23.1 Lbs.
Setup and Configuration
Configuring
Configuring
Configuring
Configuring
Configuring
Output Levels……………................... 18
Your Speakers ………………............. 18
Room Characteristics...................... 19
Channel Delays………...................... 19
General System Settings.............20,21
Operations
Input Selection...........……………................. 22,23
Surround Mode Selection………………................ 23
EQ Mode Selection..………................................ 24
DSP Mode Selection....……………...................... 25
Karaoke Operations
Karaoke Mode..............................................
Microphone Menu Settings....…………………....
Using Digital Key Control................................
DSP Vocal Enhancement Selection...................
26
26
27
27
Troubleshooting
Troubleshooting General Operation..................
Troubleshooting Karaoke Operation.......……....
Troubleshooting Surround Sound....................
28
29
30
3
Listening For A Lifetime
Selecting fine audio equipment such as the unit you've just purchased is only the start of your musical enjoyment. Now it's
time to consider how you can maximize the fun and excitement your equipment offers. VocoPro and the Electronic
Industries Association's Consumer Electronics Group want you to get the most out of your equipment by playing it at a
safe level. One that lets the sound come through loud and clear without annoying blaring or distortion and, most
importantly, without affecting your sensitive hearing.
Sound can be deceiving. Over time your hearing 'comfort level' adapts to a higher volume of sound. So what sounds
'normal' can actually be loud and harmful to your hearing. Guard against this by setting your equipment at a safe level
BEFORE your hearing adapts.
To establish a safe level:
• Start your volume control at a low setting.
• Slowly increase the sound until you can hear it comfortably and clearly, and without
distortion.
Once you have established a comfortable sound level:
• Set the dial and leave it there.
• Pay attention to the different levels in various recordings.
Taking a minute to do this now will help to prevent hearing damage or loss in the future. After all, we want you listening for
a lifetime.
Used wisely, your new sound equipment will provide a lifetime of fun and enjoyment. Since hearing damage from loud
noise is often undetectable until it is too late, this manufacturer and the Electronic Industries Association's Consumer
Electronics Group recommend you avoid prolonged exposure to excessive noise. This list of sound levels is included for
your protection.
Some common decibel ranges:
Level
30
40
50
60
70
80
Example
Quiet library, Soft whispers
Living room, Refrigerator, Bedroom away from traffic
Light traffic, Normal Conversation
Air Conditioner at 20 ft., Sewing machine
Vacuum cleaner, Hair dryer, Noisy Restaurant
Average city traffic, Garbage disposals, Alarm clock at 2 ft.
The following noises can be dangerous under constant exposure:
Level
90
100
120
140
180
Example
Subway, Motorcycle, Truck traffic, Lawn Mower
Garbage truck, Chainsaw, Pneumatics drill
Rock band concert in front of speakers
Gunshot blast, Jet plane
Rocket launching pad
-Information courtesy of the Deafness Research Foundation
4
Description and Controls
7. TEST TONE button - This button generates a TEST TONE that
cycles through all the connected speakers. This is used for balancing
speaker output levels. If you want to end a test tone cycle early,
simply press the TEST TONE a second time.
Front Panel
1. MIC MASTER VOLUME control - This controls the MIC MASTER
VOLUME for all microphone output. Also can be used to make
adjustments to any selected mic setting. Turn clockwise to increase
and counter-clockwise to decrease.
8. AUTO DISPLAY button - Use this button to toggle through the
GRAPHIC DISPLAY SPECTROMETER modes for visual leveling. There
are several modes available for those accustomed to a particular
spectrometer mode, such as floating bar, peak-hold bar, fly-away bar,
reverse bar, dual bar, transparent bar and more.
NOTE: Mic adjustments can only be made when
KARAOKE MODE is ENABLED.
9. AUTO DETECT button - When pressed this button automatically
searches all input channels for an INPUT SIGNAL, when one is found,
it automatically makes it the ACTIVE CHANNEL. If more than one
input channel has an active device connected, the AUTO DETECT
function will toggle between them each time it is pressed.
2. MIC 1/2 button - This button selects the MIC 1/2 channels for
making quick adjustments. This feature is designed to allow users
direct access to MIC 1/2's level control for situations that require
immediate adjustment. Once displayed in the graphic display, use
the
buttons on remote control or the MIC MASTER VOLUME
control to increase/decrease the selected MIC 1/2 SETTING
LEVELS.
NOTE: The AUTO DETECT process may take up to 5
seconds to complete and will display AUTO DECT in the
graphic display until complete.
NOTE: Mic 1 adjustments can only be made when
KARAOKE MODE is ENABLED.
Front Panel
1
2
3
MIC MASTER
VOLUME
15
13
14
DIGITAL HOME THEATER KARAOKE AMPLIFIER WITH KEY CONTROL AND DIGITAL REVERB
DTX-9900K
MUSIC VOLUME
12
MIC 1
MIC 2
DELAY
ECHO
REPEAT
EFFECT
MODE
CH.
MODE
DISPLAY
ON/OFF
INPUT
BASS
TREBLE
MUSIC
DSP
MEMORY
EQ
MODE
MEMORY
RECALL
MIC-IN
KARAOKE
b
L
L
4
MASTER MENU
#
MIC 1
MIC 2
MIC 3
POWER
D I G I TA L
PRO DIGITAL ECHO
DIGITAL KEY CONTROL
5
3. MIC 2 button - This button selects the MIC 3 CHANNEL for
making adjustments. This feature is designed to allow users direct
access to MIC 3's level control for situations that require immediate
adjustment. Once displayed in the graphic display, use the
buttons
or the MIC MASTER VOLUME control to increase/decrease the
selected MIC 3 LEVEL.
NOTE: Mic 3 adjustments can only be made when
KARAOKE MODE is ENABLED
4. POWER button - This button turns the DTX-9900K ON/OFF.
5. DIGITAL KEY CONTROL buttons - These buttons direct the
DIGITAL KEY CONTROLLER to either raise, lower or reset the musical
key of source audio from connected input devices.
# (UP) - Raises the musical key a half-step each time it is pressed.
(RESET) - Resets the musical key to it's original key.
d (DOWN) - Lowers the musical key a half-step each time it is
pressed.
NOTE: Digital key control adjustments can only be made
when KARAOKE MODE is ENABLED
6. KARAOKE ON/OFF button - Press this button to enable
KARAOKE MODE features such as DIGITAL KEY CONTROL, ECHO,
REPEAT, DELAY, CH. MODE and MICROPHONES.
NOTE: This must be set to ON to perform KARAOKE,
USE OF MICROPHONE, VOCAL EFFECTS and DIGITAL
KEY CONTROL.
KARAOKE
6
TEST
TONE
ON
OFF
7
AUTO
DISPLAY
8
DOLBY
DOLBY
D I G I T A L
AUTO
DETECT
SURROUND¥EX
9
10
SURROUND
P R O
L O G I C
SURROUND
11
10. MASTER MENU (
) buttons - These buttons navigate
through the available MASTER MENU settings. The
buttons
navigate back and forth through the MASTER MENU, while the
buttons adjust the levels within the MASTER MENU.
11. MIC INPUTS 1, 2, 3 - These inputs are for connecting
MICROPHONES with a ¼" plug.
12. MUSIC VOL. control - This control increases/decreases the
MUSIC VOLUME level. Turn clockwise to increase MUSIC VOLUME
and counter-clockwise to decrease the MUSIC VOLUME.
NOTE: This can also be used to adjust the levels in the
master menu settings window.
13. GRAPHIC DISPLAY panel - This panel displays all graphical
information regarding system operations, settings and performance.
14. MEMORY RECALL button - When pressed, this button loads
the last system configuration saved to MEMORY.
NOTE: If no configurations have saved to memory, this
button will not affect the system configuration.
15. EQ MODE button - This button cycles through the 8 available EQ
MODE presets.
(continued)
5
Description and Controls
(cont.)
23. EFFECT MODE button - This button cycles through the available
DSP effects for vocal and music enhancement. The available modes
are REVERB 1-5, ECHO, HALL, LIVE, JAZZ, DISCO and MUSIC.
Front Panel (cont.)
16. MEMORY button - When pressed, this button loads the current
system setting configuration to MEMORY.
NOTE: This feature is only available when KARAOKE
MODE is set to ON.
NOTE: Depending on the settings in place during a
MEMORY SAVE and a MEMORY CALL, there may be
some settings that are unavailable if there has been a
system configuration change. For example, if you have
MIC 1 channel set with a particular reverb application
during a MEMORY SAVE, and then disable KARAOKE
mode, when the MEMORY CALL is attempted, no MIC
output will be available since it requires KARAOKE mode
to be enabled.
24. REPEAT button - Use this button to adjust the REPEAT setting of
the ECHO effect. Once selected, use the
buttons to
increase/decrease the REPEAT level. As REPEAT adjusts the total
number of echo intervals prior to fade-out, the more REPEAT that is
applied, the more ECHO intervals will occur prior to fade-out. REPEAT
can be adjusted within a range of 0 to 99.
NOTE: This feature is only available when KARAOKE
MODE is set to ON.
17. MUSIC DSP button - This button toggles through the different
DSP MODES available: LIVE, THEATRE, STADIUM, JAZZ, CHURCH,
HALL, USER, MOVIE and MUSIC.
NOTE: Depending on the input source's connection
method, source disc encoding and DTX-9900K's audio
mode setting, some DSP settings will not be available.
Front Panel
26
MIC MASTER
VOLUME
MIC 1
22
23
24
25
DIGITAL HOME THEATER KARAOKE AMPLIFIER WITH KEY CONTROL AND DIGITAL REVERB
DTX-9900K
MUSIC VOLUME
MIC 2
DELAY
ECHO
REPEAT
EFFECT
MODE
CH.
MODE
DISPLAY
ON/OFF
INPUT
BASS
TREBLE
MUSIC
DSP
MEMORY
EQ
MODE
MEMORY
RECALL
MIC-IN
KARAOKE
MASTER MENU
L
b
L
#
MIC 1
MIC 2
MIC 3
POWER
D I G I TA L
PRO DIGITAL ECHO
DIGITAL KEY CONTROL
21
20
19
18. TREBLE button - This control increases/decreases the amount
of HIGH frequency response applied to the MASTER VOLUME output.
Once selected in the graphic display, use the
buttons to
increase/decrease the TREBLE level.
19. BASS button - This control increases/decreases the amount of
LOW frequency response applied to the MASTER VOLUME output.
Once selected in the graphic display, use the
buttons to
increase/decrease the BASS level.
20. INPUT button - This button toggles through all the INPUT
channels for available INPUT SOURCES.
21. DISPLAY ON/OFF button - This button toggles the GRAPHIC
DISPLAY ON/OFF.
22. CH. MODE button - This button is used to have the
MICROPHONE OUTPUT concentrated to particular sections of the
speaker matrix. Microphone output can be concentrated to the
FRONT L/R or CENTER speaker designations.
NOTE: This feature is only available when KARAOKE
MODE is set to ON. For optimal sound, the MAIN and
CENTER speakers should be connected and functioning
properly.
6
KARAOKE
18
17
ON
OFF
TEST
TONE
AUTO
DISPLAY
DOLBY
DOLBY
AUTO
DETECT
D I G I T A L
SURROUND¥EX
SURROUND
P R O
L O G I C
SURROUND
16
25. DELAY button - Use this button to adjust the DELAY setting of
the ECHO effect. Once selected in the graphic display, use the
buttons to increase/decrease the DELAY level. As DELAY adjusts
the total begin-to-end length of each echo interval, the more DELAY
that is applied, the longer each ECHO interval will take to complete.
DELAY can be adjusted within a range of 0 ms to 975 ms.
NOTE: This feature is only available when KARAOKE
MODE is set to ON.
26. ECHO control - Use this button to adjust the level of ECHO
applied to the MIC channels. Once selected in the graphic display,
use the
buttons to increase/decrease the ECHO level. ECHO can
be adjusted within a range of 0 to 40.
NOTE: This feature is only available when KARAOKE
MODE is set to ON.
Description and Controls
(cont.)
9. 6.1 CH. AUDIO INPUT jacks (RCA) - These jacks are for
connecting an external 6.1 CH. AUDIO source.
Rear Panel
1. VOLTAGE selector - This selector toggles between 110-120V
and 220-240V power settings. Please ensure this toggle is set to
the correct position, matching the receiving AC outlets power supply
before plugging it in an operating it. Doing so may cause severe
damage to the unit and void your product warranty.
NOTE: A 5.1 CH. audio source can also be connected
to these jacks. If connecting a 5.1 CH. audio source,
make all connections except for the SC-IN channel, and
select NONE in the DTX-9900K master menu for RC
SPK.
2. AC~IN terminal - Connect AC MAINS POWER CORD from the
wall outlet to this terminal.
10. EFFECT LOOP jacks (RCA) - Use these loop jacks to connect an
external device, such as an effects device, mixer or EQ. After
removing the LOOP-BARS, connect an RCA-type patch cable from the
OUTPUT jacks of your external device to the LOOP IN jacks. Connect
a second patch cable from the INPUT jacks of your external device to
the LOOP OUT jacks.
3. VIDEO OUT jack (RCA) - Connect an RCA-type patch cable from
this jack to the VIDEO INPUT jack of a TV or display device.
4. AUDIO OUT jacks (RCA) - Connect a paired RCA-ended patch
cable from these jacks to appropriate INPUT jacks on the external
audio/video device.
Rear Panel
Manufactured under license from Dolby laboratories.
"Dolby", "Prologic" and the double-D symbol are the
trademarks of Dobly laboratories. Confidential unpublished works.
2003 Dolby laboratories. All rights reserved.
CAUTION
RISK OF ELECTRICAL SHOCK
DO NOT OPEN
CAUTION:TO PREVENT ELECTRIC SHOCK,
DO NOT REMOVE COVER SCREWS
NO USER SERVICEABLE PARTS INSIDE.
REFER SERVICING TO QUALIFIED
PERSONNEL
ATENTION:
RISQUE DE CHOC ELECTRIQUE, NEPAS
ENLEVER LES VIS.
DTX-9900K
INPUT AC230V
115
Manufactured under license from Digital Theater Systems.
Inc.U.S.Pat.No.5,451,942 and other worldwide
patents issued and pending, "DTS" and "DTS DIgital Surround"
are trademarks of Digital Theater Systems, Inc.
2003 Digital Theater Systems,Inc.All rights reserved.
www.vocopro.com
6
INPUT AC110V
18
WARNING
DO NOT HOOK UP MORE THAN ONE
OUTPUT
SPEAKER PER SPEAKER JACK
CD-D
SPEAKERS OUTPUT
LOOP
AUX-D
SPEAKERS IMPEDANCE:4~16OHMS
INPUT
MULTI CH
INPUT
DVD-D
+
R-FRONT
+
RECOMMEND IMPEDANCE:8OHMS
F-CENTER
+
R-SURR
2
AUDIO
L
VIDEO
DIGITAL
IN
VCD-D
AUDIO
R
6.1CH INPUT
9
1
3
LA VERNE CALIFORNIA
U.S.A
5
NOTE: Do not discard the loop-bars. It is necessary for
the loop-bar to be in place when there are no external
effects units being used.
FL-IN
FR-IN
SL-IN
SR-IN
SC-IN
FC-IN
SW-IN
SW-OUT
11
VCD
DVD
AUX
24BIT DIGITAL SIGNAL PROCESS SYSTEM
8
CD
+
OUT
SUPER AUDIO VIDEO SYSTEM CONTER CENTER
7
4
5. VCD/DVD-D INPUT jacks (OPTICAL) - These DIGITAL INPUTS
are for connecting external audio/video input devices via OPTICAL
DIGITAL wires. Connect OPTICAL wires from these jacks to the
OPTICAL outputs on the external audio/video input device(s).
NOTE: These jacks are equipped with a protective cap
to keep debris from entering the jacks during periods of
non-use. It is recommended to keep these caps in a safe
place for future use.
10
L-FRONT
ENHANCED DOLBY DIGITAL DECODE SYSTEM AC-3EX
13
+
S-CENTER
+
L-SURR
ENHANCED DIGITAL CINEMA SYSTEM DTS-ES DECODE SYSTEM
12 14 15
16
17
11. SW-OUT jack (RCA) - This jack is for connecting a POWERED
SUBWOOFER to the DTX-9900K. Connect an RCA-type patch cable
from this jack to the LINE/LOW LEVEL INPUT on the powered
subwoofer.
12. L-FRONT SPEAKER jack - Connect the main LEFT SPEAKER to
this jack.
13. R-FRONT SPEAKER jack - Connect the main RIGHT SPEAKER to
this jack.
6. AUX/CD-D INPUT jacks (COAXIAL) - These DIGITAL INPUTS are
for connecting external audio/video input devices via COAXIAL
DIGITAL cables. Connect RCA-ended DIGITAL AUDIO CABLES from
these jacks to the COAXIAL outputs on the external audio/video
device(s).
14. F-CENTER SPEAKER jack - Connect the FRONT CENTER
SPEAKER to this jack.
7. VCD/DVD/AUX/CD AUDIO INPUT jacks (RCA) - These
ANALOG INPUTS are for connecting the L/R AUDIO channels of
INPUT SOURCES via RCA-type patch cables. Connect paired RCAended patch cables from these jacks to the AUDIO OUT jacks on the
INPUT DEVICES.
16. L-SURR SPEAKER jack - Connect the LEFT SURROUND
SPEAKER to this jack.
8. VIDEO INPUT jacks (RCA) - These VIDEO inputs are for
connecting VIDEO OUTPUT from INPUT SOURCES via RCA-type patch
cables. Connect RCA-ended patch cables from these jacks to the
VIDEO OUT jacks on the INPUT DEVICES.
18. 300W AC POWER outlets - Connect external device(s) AC
power plug(s) to these outlets for AC power connection.
15. S-CENTER SPEAKER jack - Connect the SURROUND CENTER
SPEAKER to this jack.
17. R-SURR SPEAKER jack - Connect the RIGHT SURROUND
SPEAKER to this jack.
NOTE: DO NOT CONNECT ANY DEVICE WITH A
POWER CONSUMPTION LEVEL HIGHER THAN 300W.
7
Description and Controls
(cont.)
Remote Control
4. VCD/OPT1 button - This button selects the VCD/OPT1 digital
channel for active playback.
Remote Control
5. DVD/OPT2 button - This button selects the DVD/OPT2 digital
channel for active playback.
1
4
MUTE
SLEEP
2
(5.1 CH)
6.1CH IN
VCD/OPT1
DVD/OPT2
3
6. AUTO DETECT/INPUT button - Use this button to either have the
DTX-9900K automatically scan all input channels for an ACTIVE
SIGNAL, or to toggle through all the available input channels
manually. To use the AUTO DETECT feature, press and hold this
button for two seconds. When it finds a source, it automatically
makes it active. If more than one active signal is found, pressing the
AUTO DETECT button again will make the next channel active.
INPUT
7
AUX /
COAX1
CD /
COAX2
5
AUTO
DETECT
9
DIGITAL KEY CONTROL
L
L
10
6
KARAOKE
ON/OFF
#
b
MIC 1
MIC 2
DELAY
REPEAT
ECHO
11
8
7. AUX/COA1 button - This button selects the AUX/COA1 digital
channel for active playback.
12
8. CD/COA2 button - This button selects the CD/COA2 digital
channel for active playback.
EFFECT
14
13
CH MODE
-
15
+
NOTE: The AUTO DETECT process may take up to 5
seconds to complete and will display AUTO DECT in the
graphic display until complete.
16
9. KARAOKE ON/OFF button - Press this button to enable
KARAOKE MODE features such as DIGITAL KEY CONTROL, ECHO,
REPEAT, DELAY, CH. MODE and MICROPHONES.
MUSIC VOLUME
17
+
-
TEST
TONE
DISPLAY
MODE
21
19
20
24
18
22
DSP
DTS
DTS/ES
EX
23
STEREO
26
DISPLAY
ON/OFF
MEMORY
28
27
KARAOKE
MODE
29
EQ
MODE
31
25
30
MEMORY
RECALL
32
NOTE: This must be set to ON to perform KARAOKE,
USE OF MICROPHONE, VOCAL EFFECTS and DIGITAL
KEY CONTROL
10. DIGITAL KEY CONTROL buttons - These buttons direct the
DIGITAL KEY CONTROLLER to either raise, lower or reset the musical
key of source audio from connected input devices.
# (UP) - Raises the musical key a half-step each time it is pressed.
(RESET) - Resets the musical key to it's original key.
d (DOWN) - Lowers the musical key a half-step each time it is
pressed.
NOTE: Digital key control can only be used when
KARAOKE mode is ENABLED.
11. MIC 1/2 button - This button selects the MIC 1/2 channel for
making quick adjustments. This feature is designed to allow users
direct access to MIC 1/2's level control for situations that require
immediate adjustment. Once displayed in the graphic display, use
the
buttons on remote control or the MIC MASTER VOLUME
control to increase/decrease the selected MIC 1/2 SETTING LEVEL.
NOTE: Mic 1/2 adjustments can only be made when
KARAOKE MODE is ENABLED.
1. MUTE button - Use this button once to silence all audio. Press
again to return all audio.
2. SLEEP button - Use this button to have the DTX-9900K
automatically turn off at a pre-determined time set by the user. 10,
20, 30, 40, 50, 60, 70, 80 and 90 minute timer settings are
available in that order for manual selection. To enter a SLEEP setting,
press the SLEEP button repeatedly until the timer setting you want is
established. To cancel a SLEEP setting, press the SLEEP button until
SLEEP OFF is displayed in the graphic panel.
3. (5.1 CH)/6.1 CH IN button - This button selects the 5.1/6.1
CH INPUTS for active playback. This button should only be used when
there is a device connected to the 5.1/6.1 CH INPUTS.
8
12. MIC 2 button - This button selects the MIC 3 CHANNEL for
making adjustments. This feature is designed to allow users direct
access to MIC 3's level control for situations that require immediate
adjustment. Once displayed in the graphic display, use the
buttons
or the MIC MASTER VOLUME control to increase/decrease the
selected MIC 3 LEVEL.
13. DELAY button - Use this button to adjust the DELAY setting of
the ECHO effect. Once selected in the graphic display, use the
buttons to increase/decrease the DELAY level. As DELAY adjusts
the total begin-to-end length of each echo interval, the more DELAY
that is applied, the longer each ECHO interval will take to complete.
DELAY can be adjusted within a range of 0 ms to 975 ms.
NOTE: Delay adjustments can only be made when
KARAOKE MODE is ENABLED.
Description and Controls
(cont.)
Remote Control (cont.)
14. REPEAT button - Use this button to adjust the REPEAT setting of
the ECHO effect. Once selected, use the
buttons to
increase/decrease the REPEAT level. As REPEAT adjusts the total
number of echo intervals prior to fade-out, the more REPEAT that is
applied, the more ECHO intervals will occur prior to fade-out. REPEAT
can be adjusted within a range of 0 ms to 99 ms.
NOTE: Repeat adjustments can only be made when
KARAOKE MODE is ENABLED.
15. ECHO button - Use this button to adjust the level of ECHO
applied to the MIC channels. Once selected in the graphic display,
use the
buttons to increase/decrease the ECHO level. ECHO can
be adjusted within a range of 0 ms to 40 ms.
NOTE: Echo adjustments can only be made when
KARAOKE MODE is ENABLED.
16. EFFECT button - This button cycles through the available DSP
effects for vocal and music enhancement. The available modes are
REVERB 1-5, ECHO, HALL, LIVE, JAZZ, DISCO and MUSIC.
NOTE: Effect adjustments can only be made when
KARAOKE MODE is ENABLED.
17. CH MODE button - This button selects the MICROPHONE
OUTPUT to be concentrated to different sections of the speaker
matrix. The output can be concentrated to the MAIN L/R, and
CENTER F/S speaker designations.
NOTE: Ch. mode adjustments are only available when
KARAOKE MODE is set to ON and the MAIN and
CENTER speakers jacks are being used.
18. KARAOKE MODE -/+ buttons - Use these buttons to
increase/decrease LEVEL SETTINGS in the KARAOKE MENU settings
window.
19. MUSIC VOLUME -/+ buttons - These buttons
increases/decreases the MUSIC VOLUME level. Press the + button
to increase MUSIC VOLUME and the - button to decrease the MUSIC
VOLUME.
20. DISPLAY MODE button - Use this button to toggle through the
GRAPHIC DISPLAY SPECTROMETER mode for visual leveling. There
are several modes available for those accustomed to a particular
spectrometer mode, such as floating bar, peak-hold bar, fly-away bar,
reverse bar, dual bar, transparent bar and more.
21. TEST TONE button - This button generates a TEST TONE that
cycles through all the connected speakers. This is used for balancing
speaker output levels. If you want to end a test tone cycle early,
simply press the TEST TONE a second time.
24. DTS/DTS-ES button - This button toggles the DTS and DTS-ES
surround modes ON/OFF. Press once to select DTS DIGITAL mode,
and twice to select DTS DIGITAL-ES mode.
NOTE: This button is only usable when the source media
is DTS or DTS-ES encoded.
25. DD/DD-EX button - This button toggles the DOLBY DIGITAL and
DOLBY DIGITAL EX surround modes ON/OFF. Press once to select
DOLBY DIGITAL mode, and twice to select DOLBY DIGITAL EX mode.
NOTE: This button is only usable when the source media
is DOLBY DIGITAL or DOLBY DIGITAL EX encoded.
26. STEREO button - This button selects the STEREO ANALOG/PCM
audio playback mode. Depending on external equipment and source
media, the PCM output can be 48kHz (44.1kHz) or 96kHz
(88.2kHz).
27. MEMORY button - When pressed, this button loads the current
system setting configuration to MEMORY.
NOTE: Depending on the settings in place during a
MEMORY SAVE and a MEMORY RECALL, there may be
some settings that are unavailable if there has been a
system configuration change. For example, if you have
MIC 1 channel set with a particular reverb application
during a MEMORY SAVE, and then disable KARAOKE
mode, when the MEMORY CALL is attempted, no MIC
output will be available since it requires KARAOKE mode
28. DISPLAY ON/OFF button - This button toggles the GRAPHIC
DISPLAY ON/OFF.
29. KARAOKE MENU
buttons - These buttons navigate
through the available KARAOKE MENU settings. The
buttons
navigate back and forth through the KARAOKE MENU, while
the
buttons adjust the levels within the KARAOKE MENU.
30. KARAOKE MODE button - Press this button to enable
KARAOKE MODE features such as DIGITAL KEY CONTROL, ECHO,
REPEAT, DELAY, CH. MODE and MICROPHONES.
NOTE: This must be set to ON to perform KARAOKE,
MICROPHONE USE, VOCAL EFFECTS and DIGITAL KEY
CONTROL.
31. EQ MODE button - This button cycles through the 8 available EQ
MODE presets.
32. MEMORY RECALL button - When pressed, this button loads
the last system configuration saved to MEMORY.
NOTE: If no configurations have saved to memory, this
button will not affect the system.
NOTE: Ensure the master volume level is not set too
high.
22. MASTER MENU
buttons - These buttons navigate
through the available MASTER MENU settings. The 34 buttons
navigate back and forth through the MASTER MENU, while
the
buttons adjust the levels within the MASTER MENU.
23. DSP button - This button toggles through the different DSP
MODES available for music and vocal enhancement. DSP modes
include LIVE, THEATRE, STADIUM, JAZZ, CHURCH, HALL, USER,
MOVIE and MUSIC.
NOTE: Depending on the input source's connection
method, source disc encoding and DTX-9900K's audio
mode setting, some DSP settings will not be available.
9
Description and Controls
(cont.)
Remote Control
When to replace the batteries
The maximum operational distance between the remote control and the sensor is approximately 23 ft. If this
distance decreases, it is time to replace the batteries.
NOTE:
• When operating the remote control, point the top of the remote
control toward the front panel.
• Keep the line of sight between the remote control and DTX-9900K
Installing the batteries
To install the batteries, first remove the battery compartment lid from the back of the remote control. Insert two
AAA batteries, ensuring that the polarities are aligned correctly.
Remote Control
Pull
10
Installation
Installation
Speakers
In order to maximize the performance of your sound system, it is important to determine the proper placement of
your speakers. Surround systems are usually composed of 5 speakers: L/R main speakers in the frontal viewing
area, L/R surround speakers aside or behind the viewing area and a center speaker in the front-center viewing
area. If you have an additional center surround speaker, that you have a 6.1 channel system. To complete a
surround system, a dedicated subwoofer usually exists to receive only the medium-low to low-end frequencies,
thus granting it the ".1" in 5.1 and 6.1 channel designations.
Speaker Placement
The center speaker should be placed either directly above, or directly below the television screen. (It is
recommended to check the specifications of your speakers for magnetic shielding prior to placing them near a
television).
The main speakers should then be placed to the left and right sides of the television at an equal distance. You
can try experimenting with slight angling of the main speakers towards the listening area, placing them closer
etc. until you feel have reached the best sound. One thing to avoid however, when placing main speakers, is
placing them so that the tweeters are significantly higher or lower than ear height.
The surround or "rear" speakers actually work best when they are placed to the sides of the listening area, or
slightly behind it along sidewalls. They can be placed in the rear of the listening area as well, but make sure they
are not too far above ear height as that compromises their overall effectiveness.
The subwoofer ideally should be placed so that it produces a good aural blend with the main speakers, producing
smooth and rich low-end output. In most cases, the subwoofer is placed in a room corner a few feet away from
door openings. If your subwoofer has a fixed crossover at around 150 to 200Hz, placing it in the front of the
room rather than a corner is recommended.
Speaker Placement
Subwoofer
Corner
Placement
Center Speaker
Top or Bottom
of TV
Side Speakers Directly to the Sides
or Slightly Behind
Center of Listening Area
(Where seating might be placed)
11
Installation (cont.)
Installation
Speaker Connection
Connect speakers with AWG-16, -14 or -12, two-conductor, standard copper wire. Whether or not the wire has
MDP plugs is a matter of taste, they are not required.
The DTX-9900K has a binding post for each speaker output that accepts bare wire and MDP plugs. The simplest
way to connect the speakers is with MDP plugs, however many people prefer the use of bare wire. If using bare
wire, first loosen the plastic nuts on each speaker output until you can access the through-holes in the metal
posts. Then strip approximately a 1 /2 " of insulation from the wire ends and twist the strands so that they can
easily slide through the holes.
Notice that the binding posts are color-coded: red for positive and black for negative or ground. The speakers
should have some very similar identification on their inputs. In order to maintain correct phasing between
speakers, it is very important that each speaker connection is made with the same polarity i.e. red to red, black
to black.
Lastly, for the powered subwoofer, connect its input to the DTX-9900K's subwoofer output using a shielded RCA
patch cable. It is recommended not to use an excessively long cable in order to prevent any line hum. If your
subwoofer does not have RCA-type plugs for connection, please refer to it's manual for further instructions.
Speaker Connection
SPEAKERS OUTPUT
RECOMMEND IMPEDANCE:8OHMS
+
R-FRONT
+
F-CENTER
+
R-SURR
+
L-FRONT
+
S-CENTER
+
L-SURR
Subwoofer
Connection
MULTI CH
INPUT
SPEAKERS IMPEDANCE:4~16OHMS
DVD-D
AUX-D
CD-D
MDP Plug
6.1CH INPUT
DIGITAL
IN
VCD-D
RCA Plug
FL-IN
FR-IN
12
SL-IN
SR-IN
SC-IN
FC-IN
SW-IN
SW-OUT
Audio Connections
Installation
Now that your speakers are connected, it is time to connect your audio input devices. Looking at the rear panel
of the DTX-9900K you will notice several jack groupings. Below we will cover which devices are suited for
connection, and how the connections are made.
Analog Source Connections
The analog input channels are located between the digital channels and the speaker outputs. Each analog input
channel has a L/R audio and a corresponding video jack. There are four analog input channels, one analog
output channel and one loop channel (no video) available for connection. Connections are to be made via RCA-type
patch cables, preferably shielded to minimize the possibility of cable noise.
AUDIO
R
AUDIO
L
VIDEO
LOOP
INPUT OUTPUT
Analog Source
VCD
RCA Connectors
DVD
AUX
CD
OUT
Analog Input Channels
Input Connections
To make an analog connection, connect the left and right AUDIO OUTPUT jacks of the external device, such as a
CD+G or VCD player, to the left and right AUDIO INPUT jacks of the receiving channel on the DTX-9900K. If
connecting video, connect the VIDEO OUTPUT jack of the external device to the yellow VIDEO INPUT jack on the
same channel you connected the audio to.
Audio Out
AUDIO
R
AUDIO
L
Video Out
VIDEO
External Device
(DVD Player for example)
LOOP
INPUT OUTPUT
Input Connections
VCD
DVD
AUX
CD
OUT
13
Audio Connections
(cont.)
Output Connections
Use the OUT jacks for feeding A/V to an external device such as a mixer, recording device, second amplifier
and/or television.
To make the connection, connect the left and right AUDIO INPUT jacks on the external device to the left and right
OUT jacks on the DTX-9900K. For VIDEO, connect the VIDEO INPUT jack on the external device to the VIDEO OUT
jack on the DTX-9900K.
Output Connections
VIDEO
LOOP
External Mixer,
Recording Device,
Second Amplifier
and/or Television.
AUDIO
R
AUDIO
L
Video Input
Audio Input
VCD
DVD
AUX
CD
OUT
Analog Output Channels
Loop Connections
An audio LOOP channel is designed to feed the audio signal out of a host device, into an external device, and back
into the host device prior to speaker output. Loop channels are typically used by mixing amplifiers to get external
effects processing applied, such as digital key control or equalization.
To connect an external device to the LOOP channel, first remove the metal LOOP BARS. It is important to store
the LOOP BARS in a safe place when they are not connected, as they are necessary for audio output when no
device is connected to the loop. After removing the LOOP BARS, connect an RCA-type patch cable from the
OUTPUT jacks of your external effects device to the LOOP IN jacks on the DTX-9900K. Connect a second RCAtype patch cable from the INPUT jacks of your external effects device to the LOOP OUT jacks on the DTX-9900K.
Input
Loop Connections
Remove
External Effects
Device
AUDIO
R
AUDIO
R
AUDIO
L
AUDIO
L
VIDEO
VIDEO
AMP
INPUT
LOOP
PRE AMP
OUTPUT
Output
VCD
14
DVD
AUX
CD
OUT
VCD
DVD
AUX
CD
OUT
Audio Connections
(cont.)
When you want to remove an external device from the LOOP, disconnect all INPUT and OUTPUT connections
between it and the DTX-9900K and re-insert the LOOP BARS, connecting the L/L with one bar and the R/R with
the other bar.
If no audio output is heard after reconnecting the LOOP BARS, they may
be inserted incorrectly and need to be reversed.
NOTE:
External 5.1/6.1 Channel Device Connection
In addition to the standard stereo audio inputs, the DTX-9900K also has a 5.1/6.1 channel analog input that is
designed for connecting the output from an external device with a built-in surround decoder. Because the DTX9900K's surround decoding is excellent, this input should not be favored over a straight digital connection, rather
used in the case of possible emerging technology formats or as a secondary input.
To make the connection, using 7 RCA-type patch cables, make the appropriate connections between jacks of the
same designation (as they may differ from device to device).
MULTI CH
INPUT
External 5.1/6.1
DVD-D
AUX-D
CD-D
DIGITAL
IN
VCD-D
5.1/6.1 - DTS/DTS-ES
Dolby Digital/Dolby Digital EX
Source
6.1CH INPUT
Digital Optical
FL-IN
FR-IN
SL-IN
SR-IN
SC-IN
FC-IN
Audio Input
SW-IN
SW-OUT
Analog Connection
Digital Source Connections
The DTX-9900K has two Toslink Optical Digital inputs and two Coaxial Digital inputs. These inputs are for
connecting external devices with digital output. To play and experience DTS/DTS-ES and Dolby Digital/Dolby
Digital EX soundtracks from a DVD player with the DTX-9900K's built-in decoders, the player must be connected
to one of these digital inputs or the 5.1/6.1 input listed above. Other devices such as CD players, satellite
receivers etc., can be connected to these digital inputs as well.
Whether the digital connection is an optical or coaxial connection is not important as long as the inputs and
outputs match; optical to optical or coaxial to coaxial.
To make a digital optical connection, you first need to remove the protective cap from the optical input on the
DTX-9900K. Make sure to save it for reuse when the optical input may not be in use. Some optical cables also
have a protective cap, so ensure to check both ends for removal. Connect the fiber optic cable from the DIGITAL
OUTPUT of the source device to the OPTICAL INPUT of your choice on the DTX-9900K.
15
Audio Connections
(cont.)
MULTI CH
INPUT
To make a digital coaxial connection, using a 75-ohm shielded audio cable suited for digital audio, connect the
DIGITAL OUTPUT of the source device to the COAXIAL INPUT of your choice on the DTX-9900K.
Coaxial Input
VCD-D
DVD-D
AUX-D
CD-D
To Source
Device
6.1CH INPUT
DIGITAL
IN
Coaxial
Inputs
PRE AMP
OUTPUT
Pre-amp Output Connection
The DTX-9900K's stereo pre-amp output carries the same audio signal that is fed to its internal amplifier for
speaker output. This output can feed anSL-IN
auxiliary audio device for system integration needs.
FL-IN
SC-IN SW-IN
FR-IN SR-IN
SW-OUT
FC-INpatch
To make a pre-amp connection, using an RCA-type
cable, connect the AUDIO INPUT jacks of your external
AMP
INPUT
device to the OUT jacks on the DTX-9900K.
AUDIO
R
AUDIO
L
VIDEO
Pre-Amp Output
VCD
DVD
AUX
CD
OUT
Pre-Amp
Output
To External
Device
Video Connections
The DTX-9900K has four input channels and one output channel with RCA-type video jacks. This means up to
four A/V devices can be connected to the DTX-9900K. The video output jack is used to feed a video signal to a
television or display device.
PRE AMP
OUTPUT
To make a video connection, using an RCA-type patch cable, connect the VIDEO INPUT jack of your television or
display device to the yellow VIDEO OUT jack on the DTX-9900K.
VIDEO
AMP
INPUT
Video Connection
AUDIO
R
AUDIO
L
Video
Output
16
VCD
DVD
AUX
CD
OUT
To TV
VIdeo
Input
Audio Connections
(cont.)
Microphone Connection
The DTX-9900K has 3 microphone inputs on the front panel for connecting microphones with ¼" plugs.
Remember that microphone output is only available when KARAOKE MODE is enabled.
To connect microphones, insert the ¼" microphone plugs into the microphone jacks till it fully inserted. For
microphones with 1/8" plugs, a 1/8" to ¼" adapter can be obtained to make the connection.
Microphone Connection
MIC-IN
MIC 1
MIC 2
MIC 3
Mic Inputs
AC Device Connections
The DTX-9900K has two AC power outlets on the rear panel to provide power for connecting devices. Please
note that devices with power consumption ratings over 300W should not be connected as they exceed the
allowable power feed.
AC Power Outlets
INPUT AC230V
AC Power Outlets
300W and Below
115
INPUT AC110V
17
Setup and Configuration
Setup and Configuration
Now that you have your speaker and external device connections made, it is time to configure the DTX-9900K for
standard operation. We will guide you through the main areas of system configuration that need to be set
correctly for standard operation. When completed, you will have navigated through all the MAIN MENU setup
screens. To get the most optimal performance and sound quality your system can deliver, please read and follow
theses instructions carefully.
Configuring Output Levels
Setting the output level of each channel is probably the most important, yet most sidestepped process in
attaining optimal surround performance. You need to adjust the CENTER and SURROUND channels so that a
given input level to any channel will produce the same output level from its speaker as that input level would
produce in any other speaker in the system when applied to its channel.
Incorrect balancing of the front LEFT and RIGHT speakers and the CENTER channel(s) usually causes you to lose
stereo spread or dialogue intelligibility. In addition, if the SURROUND speakers are too soft in comparison to your
FRONT speakers, you will not experience a realistically enveloping sound field. Conversely, if the SURROUND
speakers are too loud, the surround sounds may distractingly jump out at you.
To set the output levels, press the TEST button and move to the listening area. As the TEST TONE cycles around
the speaker array clockwise starting at the FRONT LEFT, pay close attention to the levels for variances. If any are
observed, using the MAIN MENU, navigate to the LEFT LEVEL (L-LEVEL) option and set it to 0dB. Continue
forward until you have set all speaker levels to 0dB and repeat the TEST TONE. If more variances are observed,
navigate to that speaker channels LEVEL setting and make the adjustments to get a uniform and even leveled
sound.
Configuring Your Speakers
In order for your DTX-9900K to properly adjust and distribute audio for output, it needs to know some things
about the speakers connected to it. Below we will explain the key adjustments necessary and how to make them.
Bass Management
Since it is fairly uncommon to have 5 to 6 large full-range speakers in one room, most all surround speaker
configurations employ small speakers for the surround and center channels. As this is true, it is also true that
getting high-level, deep bass from small speakers is impractical. This is especially bad for the center channel(s)
because it is often the main channel(s) in surround soundtracks that carry large amounts of low-frequency
energy.
Fortunately, because frequencies 100Hz and lower are non-directional to the ear, it is possible to move low
frequencies from channels whose speakers can't reproduce them, to channels whose speakers can.
This is accomplished by letting the DTX-9900K know the capabilities of each speaker connected to each channel.
A speaker can be designated as either small (unable to produce low frequencies) or large (able to produce low
frequencies). This designation tells the DTX-9900K which channels to feed (or not to feed) low frequencies to. If
there is a subwoofer present, that also needs to be known by the DTX-9900K so that it can let it handle the bulk
of the low frequencies.
NOTE: To help distinguish between a SMALL and LARGE speaker, no speaker
should be designated LARGE unless it is capable of extended low frequency
response at reasonably high levels without any signal distortion. Typically, only
subwoofers, floor-standing and large bookshelf designs with >12" drivers qualify.
18
Setup and Configuration
(cont.)
Channel/Speaker Designation
To set speaker size designations including the subwoofer, enter the MASTER MENU and navigate to the MAIN
(MAIN SPK) option first. Select from NONE, SMALL or LARGE to designate the main front speakers. If you
continue to navigate forward, the next channels to designate NONE, SMALL or LARGE are the CENTER (C SPK)
and SURROUND (S SPK) channels.
After designating those channels, next are the REAR CENTER (RC SPK) and SUBWOOFER (SW SPK) channels.
For these two channels, you only need to tell the DTX-9900 if they have speakers connected to them or not.
Select either NONE or EXIST to accomplish that and complete the channel/speaker designation process.
Configuring Room Characteristics
In order for your surround experience to be fully synchronized with the video playback of movies, the room
characteristics of the listening environment must be defined to the DTX-9900K. There are four settings total:
ROOM LENGTH, ROOM WIDTH, ROOM HEIGHT and ROOM ABSORPTION. Using a tape measure, obtain the room
dimensions, and briefly assess the ratio of hard, flat and dense versus soft, textured and thin surface area
(including furniture, floor covering etc.).
To set the ROOM CHARACTERISTICS, enter the MASTER MENU and navigate to the ROOM LENGTH option first.
Select a length between 2 - 9.9M.
Continuing forward in the menu, for ROOM WIDTH, select a width between 2 - 9.9M. For ROOM HEIGHT, select
a height between 1.8 - 3.1M.
Lastly, for the ROOM ABSORPTION setting, a range of 10 -90 can be entered.
A setting of 10 would imply that the listening environment has a firm majority of hard, flat and dense surfaces,
leading to extremely reflective sound activity. A settings of 90 would imply the opposite, leading to very nonreflective sound activity. In general, the more absorbing a listening environment is the smoother and warmer the
audio is. The reason being is that when soundwaves bounce off reflective surfaces, they can cause phase shift,
stereo positioning and DSP application problems. So ensure this setting is made for optimal sound quality.
Configuring Channel Delays
In order for your surround experience to be fully synchronized with the video playback of movies, the CHANNEL
DELAY settings must be set accurately to match your listening environment. The only channels that this applies
to are the CENTER and SURROUND channels.
To figure out the correct DELAY times for your listening environment, using a tape measure, measure the
following distances: front speakers to listening area, surround speakers to listening area and center speaker to
listening area. Also, note that sound travels 1 foot per millisecond.
After the above information is collected, this is how the DELAY times are deduced:
• CENTER DELAY time is the distance between the listening area and the CENTER speaker(s) subtracted from
the distance between the listening area and FRONT speakers. The number of feet is converted to milliseconds,
1 foot = 1 millisecond.
• SURROUND DELAY time is the distance between the listening area and the SURROUND speaker(s) subtracted
from the distance between the listening area and FRONT speakers. The number of feet is converted to
milliseconds, 1 foot = 1 millisecond.
Once you have the DELAY settings ready, enter the MAIN MENU and navigate to the CENTER DELAY (C. DEL)
option and enter the DELAY setting of milliseconds.
Continuing forward in the menu is the SURROUND DELAY (S. DEL) option, enter its DELAY setting in milliseconds.
Skip two menu options forward to the PRO-LOGIC II MOVIE SURROUND DELAY (PLII MOVIE S. DEL) option and
enter the same SURROUND DELAY setting as you did previously.
Continue forward to the PRO-LOGIC II MUSIC SURROUND DELAY (PLII MUSIC S. DEL) option and enter the same
SURROUND DELAY setting as you did previously.
19
Setup and Configuration
(cont.)
Configuring General System Settings
Now that the most important sections of setting up are complete, we will walk you through the remaining menu
settings to complete the system configuration.
BASS level - This setting controls the level of LOW FREQUENCY BASS signals in the MASTER MUSIC OUTPUT.
The range of BASS to select from is from -10dB to +10dB. NOTE: This setting does not affect the bass level for
microphone output.
TREBLE level - This setting controls the level of HIGH FREQUENCY TREBLE signals in the MASTER MUSIC
OUTPUT. The range of TREBLE to select from is from -10dB to +10dB.
NOTE:
This setting does not affect the treble level for microphone output.
D. RANGE level - This setting controls the range of DYNAMIC COMPRESSION used to normalize the master
volume output.
Many movie soundtracks have vastly differing speech, environmental and special effects audio levels. In fact, most
movie soundtracks have dramatic audio peaks designed to punctuate the action onscreen that can be 5 to 6
times louder in volume than speech. DYNAMIC COMPRESSION is used to balance this DYNAMIC RANGE between
the lower (speech) and higher (peaks) audio levels by slightly boosting and lowering particular portions of the
audio.
The DYNAMIC RANGE can be set to either MINIM (MINIMUM), STAND (STANDARD) or MAXIM (MAXIMUM). The
MINIMUM setting applies a compression level suitable for late night viewing, greatly reducing peak levels without
reducing speech and environmental audio. The STANDARD setting applies a compression level recommended by
most audio engineers for attaining an optimal sound while preventing any possible hearing damage if heard at
high output levels. The MAXIMUM setting bypasses compression altogether, allowing for the full dynamic range of
cinema.
D.D LFE level - This setting controls the level of LOW FREQUENCY BASS sent from the SUB OUT jack to a
5.1/6.1-channel subwoofer in DOLBY DIGITAL/DOLBY DIGITAL EX audio modes.
The range of BASS to select from is 00dB to -10dB.
This setting DOES NOT affect the subwoofer bass level for DTS, DTS-ES,
PRO-LOGIC I - II, STANDARD ANALOG and KARAOKE MODE audio output.
NOTE:
DTS LFE level - This setting controls the level of LOW FREQUENCY BASS sent from the SUB OUT jack to a
5.1/6.1-channel subwoofer in DTS/DTS ES audio modes.
The range of BASS to select from is 00dB to -10dB.
This setting DOES NOT affect the subwoofer bass level for DOLBY
DIGITAL/DOLBY DIGITAL EX, PRO-LOGIC I - II, STANDARD ANALOG and KARAOKE
MODE audio output.
NOTE:
20
Setup and Configuration
(cont.)
PLII PANORAMA level - This setting enables/disables the PRO-LOGIC II audio enhancement feature that extends
the front stereo image to include the rear speakers for a "wrap around" effect creating by added sidewalls
imaging.
Select ON to enable and OFF to disable.
NOTE:
This setting only works in PRO-LOGIC II audio mode.
PLII DIMENSION level - This setting allows for gradual adjustment of the soundfield towards either the FRONT or
REAR stereo image. This is used to achieve an optimal balance of speaker output within particular PRO-LOGIC II
encoded audio.
The range of selection is from -3dB to +3dB. Select towards the +3dB for an increased FRONTAL stereo image,
and select towards -3dB for an increased REAR stereo image. Leave at 00dB for an even soundfield. NOTE: This
setting only works in PRO-LOGIC II audio mode.
PLII CT WIDTH level - This setting allows variable adjustment of the CENTER audio image. This is used to create
an optimal F-LEFT-CENTER-F-RIGHT soundfield for increased stereo positioning.
The range of selection is from 00 to 07. To have the CENTER image adjusted so that it can only be heard from
the CENTER speaker, select 00. To have the CENTER image widened to also be heard from the FRONT L/R
speakers, select 3-5. To have the CENTER image widened so that it is heard from the FRONT L/R speakers only
(also known as phantom mode), select 07.
NOTE:
This setting only works in PRO-LOGIC II audio mode.
21
Operations
Input Selection
When the DTX-9900K has multiple device connections made, there are two ways to select an input channel,
manually and automatically.
To select an INPUT CHANNEL manually, using the FRONT PANEL controls, press the INPUT button repeatedly to
toggle through all the DTX-9900K's INPUT CHANNELS. When the channel your intended source device is
connected displays in the graphic display, you have selected your input channel.
Input Selection
INPUT
MIC MASTER
VOLUME
MIC 1
DIGITAL HOME THEATER KARAOKE AMPLIFIER WITH KEY CONTROL AND DIGITAL REVERB
DTX-9900K
MUSIC VOLUME
MIC 2
DELAY
ECHO
REPEAT
EFFECT
MODE
CH.
MODE
DISPLAY
ON/OFF
INPUT
BASS
TREBLE
MUSIC
MEMORY
DSP
EQ
MODE
MEMORY
RECALL
MIC-IN
KARAOKE
L
L
b
MASTER MENU
#
MIC 1
MIC 2
MIC 3
POWER
D I G I TA L
PRO DIGITAL ECHO
DIGITAL KEY CONTROL
KARAOKE
ON
OFF
TEST
TONE
AUTO
DISPLAY
DOLBY
DOLBY
AUTO
DETECT
D I G I T A L
SURROUND¥EX
SURROUND
P R O
L O G I C
SURROUND
To select an INPUT CHANNEL manually using the REMOTE CONTROL, you can use the DIRECT INPUT CHANNEL
buttons i.e. VCD/OPT1, CD/COA2 if the device has a DIGITAL CONNECTION. If not a digital connection, tap the
INPUT/AUTO DETECT button repeatedly to toggle through all the DTX-9900K's INPUT CHANNELS. When the
channel your intended source device is connected to displays in the graphic display, you are done.
Selecting Input Channel
Input/Auto Detect
Button
MUTE
SLEEP
(5.1 CH)
6.1CH IN
VCD/OPT1
DVD/OPT2
INPUT
Direct Select
Buttons
AUX /
COAX1
CD /
COAX2
AUTO
DETECT
22
Direct Select
Buttons
Operations
(cont.)
To select an INPUT CHANNEL using the AUTO-DETECT feature, either on the FRONT PANEL or REMOTE
CONTROL, press and hold the INPUT/AUTO-DETECT button until the graphic display reads AUTO DECT. When
the active channel is located, it is automatically displayed in the GRAPHIC DISPLAY and selected as the active
channel.
Auto-Detect
Press and Hold
MUTE
SLEEP
MIC MASTER
VOLUME
DIGITAL HOME THEATER KARAOKE AMPLIFIER WITH KEY CONTROL AND DIGITAL REVERB
VCD/OPT1
DTX-9900K
MUSIC VOLUME
(5.1 CH)
6.1CH IN
AUTO DECT
DVD/OPT2
MIC 1
MIC 2
DELAY
ECHO
REPEAT
EFFECT
MODE
CH.
MODE
DISPLAY
ON/OFF
INPUT
BASS
TREBLE
MUSIC
DSP
MEMORY
EQ
MODE
MEMORY
RECALL
INPUT
MIC-IN
KARAOKE
L
L
b
MASTER MENU
#
MIC 1
MIC 2
MIC 3
POWER
AUX /
COAX1
CD /
COAX2
AUTO
DETECT
D I G I TA L
PRO DIGITAL ECHO
DIGITAL KEY CONTROL
KARAOKE
TEST
TONE
ON
OFF
AUTO
DISPLAY
DOLBY
DOLBY
AUTO
DETECT
D I G I T A L
SURROU ND¥EX
SUR ROUND
P R O
L O G I C
SURROUND
Auto Detect Display
If more than one active channel is found, the AUTO DETECT feature may select another active channel instead of
the channel you are seeking. If this happens, pressing the AUTO DETECT button again will re-commence a search
for the next active channel. This process can be repeated as many times as necessary.
Surround Mode Selection
Surround mode selection for cinematic audio, 5.1/6.1-channel encoded audio CD's or HDCD's is automated by
the DTX-9900K. Although the DTX-9900K's built-in decoders support DTS, DTS-ES, Dolby Digital, Dolby DigitalEX, Pro-Logic I-II audio modes, only the modes available on the disc being played will be available to the DTX9900K. This is also true when it comers to how the input source player is connected to the DTX-9900K.
Remember, DTS/DTS-ES, Dolby Digital, Dolby Digital-EX surround modes require either a 5.1/6.1-channel or
digital connection from the player to the DTX-9900K.
For example, if you play a DVD that is encoded with Pro-Logic II Surround Sound only, trying to activate the DTSES mode on the DTX-9900K will not work, even if the player is connected via a digital connection. Alternatively,
let's say you have DVD player connected with both an analog and digital connections, and you have the output on
the player set to analog, if you play a DVD movie with a DTS encoded soundtrack, when you try to select the DTS
mode on the DTX-9900K, the graphic display will scroll the channel and mode it is currently on, i.e. DVD-A PLII
MUSIC, telling you that DTS mode is not available.
If you have the correct connection made (either digital or 5.1/6.1-channel), have the player correctly configured
(either digital or 5.1/6.1-channel output) and play a disc with any of the above mentioned surround modes, the
DTX-9900K will automatically display the surround mode it is being fed i.e. DVD-D DTS-ES. If it is does not
automatically engage, pressing the AUTO DETECT button usually resolves this.
23
Operations
(cont.)
EQ Mode Selection
To select and EQ mode, simply press the EQ MODE button on either the FRONT PANEL or REMOTE CONTROL
repeatedly until the EQ setting you desire is displayed in the GRAPHIC DISPLAY. There are eight available EQ
modes:
EQ Mode Selection
MIC MASTER
VOLUME
DIGITAL HOME THEATER KARAOKE AMPLIFIER WITH KEY CONTROL AND DIGITAL REVERB
DTX-9900K
MUSIC VOLUME
EQ
MODE
MIC 1
MIC 2
EFFECT
DELAY
ECHO
REPEAT
MODE
CH.
DISPLAY
MODE
ON/OFF
MUSIC
INPUT
BASS
TREBLE
DSP
MEMORY
EQ
MEMORY
MODE
RECALL
EQ Mode
Buttons
KARAOKE
MODE
EQ
MODE
MEMORY
RECALL
MIC-IN
KARAOKE
L
L
b
MASTER MENU
#
MIC 1
MIC 2
MIC 3
POWER
D I G I TA L
PRO DIGITAL ECHO
DIGITAL KEY CONTROL
KARAOKE
ON
OFF
TEST
TONE
AUTO
DISPLAY
DOLBY
DOLBY
AUTO
DETECT
D I G I T A L
SURROUND¥EX
SURROUND
P R O
L O G I C
SURROUND
Flat
Use this setting when no equalization is desired. This setting is ideal for assessing audio signals or providing an
unfiltered signal for external processing.
Low-end Boost
Use this setting to increase medium-low end bass response. This setting is ideal for audio with thin or "tinny"
bass response.
High-end Boost
Use this setting to increase medium-high end treble response. This setting is ideal for audio with reduced highend fidelity.
Mid-range Cut
Use this setting to reduce mid-range response. This setting is ideal for decreasing the "presence" of vocals or
similar instrument voice within audio.
Mid-range Boost
Use this setting to increase mid-range response. This setting is ideal for increasing the "presence" of vocals or
similar instrument voice within audio
Lower/Higher Mid-range Boost
Use this setting to increase medium-low and medium-high end response. This setting is ideal for "widening" an
audio signal for general frequency reinforcement.
Full-frequency Cut
Use this setting to reduce full-frequency response. This setting is ideal for controlling over-modulated audio and
reducing overall volume.
Full-frequency Boost
Use this setting to increase full-frequency response. This setting is ideal for boosting low-level recorded audio and
increasing overall volume.
24
Operations
(cont.)
DSP Mode Selection (Music)
DSP (Digital Signal Processor) modes on the DTX-9900K are used to enhance the experience of listening to
music. Standard two-channel audio can be spread to surround and center speakers for various environmental
and acoustical sound images.
When selecting a DSP mode for music enhancement, remember that the front, surround and center speakers
should be connected, configured and working properly in order to achieve optimal sound.
To select a music DSP mode, with music playing, press the DSP button on either the FRONT PANEL or REMOTE
CONTROL. Each time the DSP button is pressed, the DTX-9900K cycles to a different DSP setting. Finding the
right DSP mode for the occasion may take a few complete cycles through the DSP modes, so don't worry if that
happens.
Since DSPs traditionally work with ANALOG signals, employing AD (analog to digital) and DA (digital to analog)
conversion, there exist different DSP settings for DIGITAL and ANALOG music signals. Below is a list of the
available DSP modes for both:
ANALOG
Live, Stadium, Jazz, Church, Hall, User, Pro-Logic Defined, Pro-Logic Movie, Pro-Logic Music
DIGITAL
Live, Theater, Disco, Jazz, Church, Hall, User, Dolby Digital EX Define
25
Karaoke Operations
Karaoke Mode
Karaoke mode enables all of the DTX-9900K's Karaoke functions including Digital Key Control, Echo, Repeat,
Delay and microphone use. Without Karaoke mode enabled, none of the above mentioned functions will be
accessible. Enabling Karaoke mode requires one simple press of the Karaoke On/Off button on either the remote
control or front panel.
Microphone Menu Settings
When a microphone channel needs adjustment, you to first enable Karaoke mode (if that has not been done
already). Depending on the Mic channel you seek to adjust, press either the MIC 1 button for Mic channels 1 and
2 or the MIC 2 button for Mic channel 3. Once pressed, the MIC MENU for that Mic channel will be displayed in
the graphic display. Continue pressing the MIC 1 or MIC 2 button to toggle through all the available Mic settings
for that Mic channel. To adjust a Mic setting, simply use the MIC MASTER VOLUME knob to increase or
decrease the selected Mic setting.
Mic Level
This setting controls the Mic channels VOLUME output level. Use the MIC MASTER VOLUME knob to increase or
decrease the MIC LEVEL. MIC LEVEL settings can be adjusted from 0 to 36.
Mic Bass
This setting controls the Mic channels BASS output level. Use the MIC MASTER VOLUME knob to increase or
decrease the MIC BASS level. MIC BASS level settings can be adjusted from -10 to +10.
Mic Treble
This setting controls the Mic channels TREBLE output level. Use the MIC MASTER VOLUME knob to increase or
decrease the TREBLE level. MIC TREBLE level settings can be adjusted from -10 to +10.
Mic Echo
This setting controls the Mic channels ECHO application level. Use the MIC MASTER VOLUME knob to increase or
decrease the MIC ECHO application level. MIC ECHO can be adjusted within a range of 0 to 40.
Mic Delay
This setting controls the Mic channels DELAY setting. Use the MIC MASTER VOLUME knob to increase or
decrease the MIC DELAY setting. As DELAY adjusts the total begin-to-end length of each echo interval, the more
MIC DELAY that is applied, the longer each ECHO interval will take to complete. MIC DELAY can be adjusted
within a range of 0 ms to 975 ms.
Mic Repeat
This setting controls the Mic channels REPEAT setting. Use the MIC MASTER VOLUME knob to increase or
decrease the MIC REPEAT setting. As REPEAT adjusts the number of echo intervals that occur prior to volume
fade out, the more MIC REPEAT that is applied, the more ECHO intervals will occur prior to volume fade out. MIC
DELAY can be adjusted within a range of 0 ms to 975 ms.
26
Karaoke Operations
(cont.)
Using Digital Key Control
Digital Key Control allows vocalists the opportunity to manipulate a songs natural musical key to suit their own
personal vocal range and style. The Key Controller changes key values in half-step increments, and can go a total
of 6 steps up and 6 steps down.
# (UP) - Raises the musical key a half-step each time it is pressed.
(NEUTRAL) - Resets the musical key to it's original key.
d (DOWN) - Lowers the musical key a half-step each time it is pressed.
DSP Vocal Enhancement Selection
As with Music DSP modes, Vocal DSP modes are used to enhance the live vocals experience. Standard twochannel audio can be spread to surround and center speakers for various environmental and acoustical sound
images that greatly enhance a singers voice.
When selecting a DSP mode for vocal enhancement, remember that the front, surround and center speakers
should be connected for maximum enhancement.
To select a vocal DSP mode, with a microphone connected and turned on, press the EFFECT MODE button on
either the FRONT PANEL or REMOTE CONTROL. Each time the EFFECT MODE button is pressed, the DTX-9900K
cycles to a different DSP setting. Finding the right DSP mode for the occasion may take a few complete cycles
through the DSP modes, so don't worry if that happens. Vocal DSP settings includes: Reverb 1, Reverb 2,
Reverb 3, Reverb 4, Reverb 5, Echo, Hall, Live, Jazz, Disco, Music
27
Troubleshooting:General Operation
Symptom
Cause
Remedy
• No power to DTX-9900K
• Power cord is not inserted
correctly
• Check and reinsert cable at
both ends
• No sound from the
DTX-9900K
• Input source is connected
improperly
• Input source is not functioning
correctly
• Check and reconnect input source
cables
• Ensure input source is working
and is playing back. Replace if
necessary.
• Only get sound from one side
• Input source's L/R connection
is loose on one side (if analog)
• Check input source's L/R
connection and replace cable if
necessary
• Check speaker cable connection
and replace cable if necessary
• Speaker connection to one
side is loose or not connected
• Consistent "hum" with sound
• Speaker cables may be
defective
• AC power supply is
compromised
• Remote control is not
working
• Remote control batteries
need replacement
• Remote control line of sight
with remote sensor on front
panel is compromised
• Remote control is being
operated too far from
the DTX-9900K
• Check speaker cable connections
one at a time and replace if
necessary
• Ensure AC outlet or power strip is
not overloaded or malfunctioning
• Replace batteries with fresh
batteries
• Ensure no obstacles are in the way
of remote control and sensor
(including the remote control
transmitting eye being
excessively dirty
• Shorten distance between remote
control and DTX-9900K
• No input signal detected
• Input source is not connected
properly
• DTX-9900K is not aware of
the input signal
• Check input source connection and
replace cable if necessary
• Use the Auto-detect feature or
toggle the Input button to the
correct channel. If that doesn't
work reset the machines power.
• No graphic display output
• Display has been turned off
• Press the Display On/Off button
28
Troubleshooting:Karaoke Operation
Symptom
• No microphone output
Cause
• Karaoke mode is not enabled
• Microphone is not connected
properly
• Incorrect microphone type is
being used
• Microphone volume is turned
to zero
Remedy
• Press the Karaoke On/Off button
• Check microphone cable connection
and replace if necessary
• Ensure a dynamic microphone is
connected, or if a condenser
microphone is being used, it must
have a functioning battery
powered cartridge
• Turn selected microphone channel
volume up
• Microphone output is low or
distorted
• Microphone cable is defective
• If using a condenser
microphone with a battery
powered cartridge, the
battery needs replacement
• Replace microphone cable
• Replace the condenser microphone
cartridge's battery with a new one
• Only get microphone output
from center speaker
• Ch. Mode is set to Center
speaker
• Set the Ch. Mode to L/R channels
• Digital key control sounds
unnatural
• Chosen music cannot be
Digitally Key Controlled to the
chosen setting
• Reduce the Digital Key Control
setting until the music
sounds natural
• Digital echo interferes with
vocals
• Digital Echo, Repeat and
Delay setting are set too high
• Reduce the Digital Echo, Repeat
and Delay settings or disable
Digital Echo
• Excessive feedback from
microphones
• Microphone is too close to or
pointed directly at speakers
• Increase speakers to microphone
distance and refrain from pointing the
microphone directly at the speakers
• Reduce the Treble level for the
selected microphone channel
• Treble level for the selected
microphone channel is
set too high
• Digital Echo and DSP modes
being used simultaneously
need to be reduced
• Reduce the Digital Echo or change
DSP mode to a lesser effect mode
29
Troubleshooting:Surround Sound
Symptom
• Only 2-channel audio, no
surround sound
Cause
• Surround and Center
speakers are not connected
correctly
• Surround and Center
speakers are turned off or set
too low in the system menu
• No DSP mode has been
selected (if analog source audio)
• Input source player with
digital connection is not
configured for PCM-SP/DIF
RAW output
• No sound from particular
Rear or Center speakers
30
• A Pro-Logic surround mode
that by design cuts sound to
particular speakers is enabled
• Particular speakers are not
connected properly
Remedy
• Check and reconnect speaker
connections if necessary
• Turn up speaker volume levels in
the system setup menu
• Select a DSP mode for analog
playback to have surround
mode enabled
• Properly configure your Input
source player for PCM-SP/DIF
RAW output
• Disable or change the Pro-Logic
mode to a mode where the speaker
are audible
• Perform a Test Tone check. If
particular speakers are not present
in Test Tone rotation, check
speaker connection and replace
cable and speaker if necessary