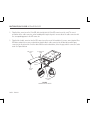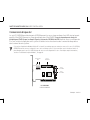
1
Installation Guide
MAXTOR SATA/300 PCI CARD
ENGLISH / FRANÇAIS / DEUTSCH
MAXTOR SATA/300 PCI CARD INSTALLATION GUIDE
Contents
Getting Started . . . . . . . . . . . . . . . . . . . . . . . . . . . . . . . . . . . . . . . . . . . . . . . . . . . 1
Handling Precautions . . . . . . . . . . . . . . . . . . . . . . . . . . . . . . . . . . . . . . . . . . . . 1
Included in this Kit . . . . . . . . . . . . . . . . . . . . . . . . . . . . . . . . . . . . . . . . . . . . . . 1
Back Up Your Data . . . . . . . . . . . . . . . . . . . . . . . . . . . . . . . . . . . . . . . . . . . . . . 2
About Serial ATA . . . . . . . . . . . . . . . . . . . . . . . . . . . . . . . . . . . . . . . . . . . . . . . . 2
Required Tools . . . . . . . . . . . . . . . . . . . . . . . . . . . . . . . . . . . . . . . . . . . . . . . . . 2
Remove System Cover . . . . . . . . . . . . . . . . . . . . . . . . . . . . . . . . . . . . . . . . . . . . . 3
Install SATA/300 PCI Card . . . . . . . . . . . . . . . . . . . . . . . . . . . . . . . . . . . . . . . . . . 4
Connect Hard Drive . . . . . . . . . . . . . . . . . . . . . . . . . . . . . . . . . . . . . . . . . . . . . . . . 5
Connecting a SATA Hard Drive. . . . . . . . . . . . . . . . . . . . . . . . . . . . . . . . . . . . . 6
Connecting an Ultra ATA Hard Drive . . . . . . . . . . . . . . . . . . . . . . . . . . . . . . . . 7
Check BIOS Message . . . . . . . . . . . . . . . . . . . . . . . . . . . . . . . . . . . . . . . . . . . . . . 9
Install Windows Driver . . . . . . . . . . . . . . . . . . . . . . . . . . . . . . . . . . . . . . . . . . . . 10
Existing Windows 2000 Installation . . . . . . . . . . . . . . . . . . . . . . . . . . . . . . . . 10
New Windows 2000 Installation . . . . . . . . . . . . . . . . . . . . . . . . . . . . . . . . . . . 12
Existing Windows XP Installation. . . . . . . . . . . . . . . . . . . . . . . . . . . . . . . . . . 13
New Windows XP Installation. . . . . . . . . . . . . . . . . . . . . . . . . . . . . . . . . . . . . 14
Limited Warranty Statement . . . . . . . . . . . . . . . . . . . . . . . . . . . . . . . . . . . . . . . 15
MAXTOR SATA/300 PCI CARD INSTALLATION GUIDE
FIGURE 1 INCLUDED IN THIS KIT
1. Maxtor SATA/300 PCI Card
2. SATA Interface Cable*
3. Driver CD or Diskette
4. SATA Power Adapter Cable*
* not included in all kits
Getting Started
Thank you for selecting a Maxtor SATA/300 PCI Card. This installation guide
will lead you through the installation of your new card.
If you encounter any difficulties with installation, please visit us online at
www.maxtor.com and click on Support.
Figure 1 shows the components included in the standalone SATA/300 PCI
Card kit. Cards included with Maxtor hard drive kits may not include all of
the components shown. To install the drive, you will need the tools shown in
Figure 2 on page 2, including a full version of your operating system.
Handling Precautions
Adapter cards are sensitive to electrostatic discharge (ESD) damage.
Handle the adapter card by its sides. Do not touch the printed circuit
board assembly.
Do not connect/disconnect any cables when the system power is on.
Max•Blast ™
Do not force or rock the adapter card connectors into or out of their
connection sockets.
ENGLISH - PAGE 1
MAXTOR SATA/300 PCI CARD INSTALLATION GUIDE
Back Up Your Data
Protect your data by backing up existing hard drives before
installing your new Maxtor SATA/300 PCI Card.
About Serial ATA
FIGURE 2 REQUIRED TOOLS
1. System User Manual
2. Operating System CD and Boot Disk
3. Philips Screwdriver
4. Small Needle-Nose Pliers
Serial ATA (SATA) technology offers you the following benefits:
System Man
ual
–
–
–
–
World’s fastest ATA interface
Ideal for high-performance RAID
Thin, easy-plug cable design for improved airflow
Simple, no-jumper installation
Unlike standard ATA drives, Serial ATA drives do not require
the use of jumpers to install the drive.
Visit www.maxtor.com and click on Support for the latest
SATA information and software updates.
PAGE 2 - ENGLISH
MAXTOR SATA/300 PCI CARD INSTALLATION GUIDE
Remove System Cover
1.
Turn your computer off.
2.
Unplug your system from the electrical outlet.
3.
Remove the cover from your system case.
Refer to your system user
manual for instructions on
removing the cover, or obtain
the services of a qualified
installation technician.
FIGURE 3
REMOVING THE SYSTEM COVER
4.
Attach a grounding strap or touch a metal portion of your computer case. This will
ground you to minimize the risk of exposing the hard drive to electrostatic discharge.
ENGLISH - PAGE 3
MAXTOR SATA/300 PCI CARD INSTALLATION GUIDE
Install SATA/300 PCI Card
The SATA/300 PCI Card fits any available 32-bit PCI slot. It also fits the 32-bit portion of a 64-bit PCI slot.
1.
Unscrew and remove the slot cover of an available PCI slot on the motherboard.
2.
Install the SATA/300 PCI Card into the open slot. Secure the controller card bracket to the system’s frame.
FIGURE 4
INSERTING THE SATA/300 PCI CARD
3.
(optional) Attach your system case’s 2- or 4-pin LED cable to the LED connector on the SATA/300 PCI Card (see
Figure 5). Make sure that pin 1 on the connector is aligned with pin 1 of the cable. Consult your system case manual
for more details on the LED connections for your case.
PAGE 4 - ENGLISH
MAXTOR SATA/300 PCI CARD INSTALLATION GUIDE
Connect Hard Drive
The SATA/300 PCI Card has two SATA/300 ports that each support one Serial ATA drive and one parallel Ultra ATA/133
port that supports two Ultra ATA/IDE hard drives. The card does not support ATAPI devices such as Zip drives or CD/
DVD drives. Before connecting a hard drive to the card, mount the drive in your system using the instructions provided
with the drive or your system manual.
If you have an existing installation of Windows 2000 or XP on a drive that you wish to connect to the SATA/300 PCI card, DO NOT
connect the drive to the card yet. Leave the drive attached to its current controller. You must install the Windows driver for the
SATA/300 PCI Card before connecting your hard drive to the card. See Install Windows Driver on page 10 for details.
LED
Connectors
Ultra ATA
Port 3
Serial ATA
Port 2
Serial ATA
Port 1
FIGURE 5
AVAILABLE PORTS
ENGLISH - PAGE 5
MAXTOR SATA/300 PCI CARD INSTALLATION GUIDE
Connecting a SATA Hard Drive
Each of the two SATA/300 ports on the SATA/300 PCI Card supports a single SATA hard drive. To connect a SATA drive
to the card:
1.
Attach one end of a SATA interface cable to one of the SATA connectors on the card. (See Figure 5 on page 5.)
2.
Attach the other end of the SATA interface cable to the SATA connector on the rear of the hard drive.
Power
Connector
NC
no connect
SATA
POWER
Note: The NC jumper pins have no
function. They are used only for
spare jumper storage.
SATA Interface
Connector
Force 150
transfer speeds
FIGURE 6
ATTACHING CABLES TO SATA DRIVE
PAGE 6 - ENGLISH
The Force 150 jumper should be in
the NC position when the drive is
connected directly to the Maxtor
SATA card.
MAXTOR SATA/300 PCI CARD INSTALLATION GUIDE
Connecting an Ultra ATA Hard Drive
The SATA/300 PCI Card has one Ultra ATA/133 port that supports up to two Ultra ATA/IDE hard drives on a single
80-conductor, 40-pin Ultra ATA cable (sold separately). The card does not support ATAPI devices such as Zip drives or
CD/DVD drives. For maximum compatibility and data integrity, Maxtor strongly recommends that you do not use older
40-conductor ATA/IDE cables with this card.
1.
Configure the jumpers of the Ultra ATA hard drive to the cable select setting. If you are connecting two Ultra ATA
drives, they should both be configured to the cable select (CS) setting. Consult the drive label, documentation, or
manufacturer for jumper configuration information. Jumper settings for popular Maxtor models are shown below
in Figure 7.
Style A1
Style A2
Style B
Style C
(Includes
DiamondMax 16)
(Includes DiamondMax
Plus 9, 10 or 11)
(Includes DiamondMax
Plus 8 and Fireball 3)
(Models D740X-6L
and D540X-4K)
Master
Slave
Master
Cylinder
Limitation
Jumper (CLJ)
(not for use
with this card)
Cable
Select
Slave
Cable
Select
FIGURE 7
JUMPER BLOCK POSITIONS
ENGLISH - PAGE 7
MAXTOR SATA/300 PCI CARD INSTALLATION GUIDE
2.
Plug the blue connector on the Ultra ATA cable straight into the Ultra ATA connector on the card. The correct
orientation of the cable connector can be found by matching the key notch on one side of the cable connector with
the corresponding groove in the ATA connector.
3.
Plug the black cable connector into the ATA connector on the rear of the hard drive. If you are connecting two Ultra
ATA drives and wish to use one as a boot drive, plug the black cable connector into the boot drive and the gray
connector into the other drive. If neither drive will be used as a boot drive, either the gray or black connector can be
used. See Figure 8 below.
ATA Interface
Cable
Secondary Drive
(Gray)
Boot Drive
(Black)
PCI Card
(Blue)
Power Supply
Cable
FIGURE 8
CONNECTING THE CABLES
PAGE 8 - ENGLISH
MAXTOR SATA/300 PCI CARD INSTALLATION GUIDE
Check BIOS Message
Power on your system and look for an on-screen BIOS message (see Figure 9) that refers to the Maxtor SATA/300 PCI
Card. This message indicates that the card has been properly detected by your motherboard. If you do not see this
message, turn off your system and make sure that the card is seated properly in the PCI slot.
The SATA/300 PCI Card is a PCI Plug-n-Play (PnP) device that automatically detects attached hard drives. In most cases, you will
not need to make changes in the motherboard BIOS Setup utility; however, on some newer systems, you may be able to set the
boot order of SATA devices in the motherboard’s BIOS Setup. For more information on BIOS Setup, consult your system manual
or the system manufacturer.
Maxtor SATA/300 PCI Card
BIOS v1.00.22.11
(c) 2005 Manufacturer Name.
All rights reserved.
Press F1 to continue,
F2 to enter setup.
FIGURE 9
SATA/300 PCI CARD BIOS MESSAGE
ENGLISH - PAGE 9
MAXTOR SATA/300 PCI CARD INSTALLATION GUIDE
Install Windows Driver
Existing Windows 2000 Installation
If you have an existing installation of Windows 2000 or XP on a SATA or Ultra ATA drive that you wish to connect to the SATA/300
PCI card, DO NOT connect the drive to the card yet. Leave the drive attached to its current controller. You must install the Windows
driver for the SATA/300 PCI Card before connecting your hard drive to the card.
The following section details the installation of SATA/300 PCI Card drivers on a system that has Windows 2000 already
installed and running.
1.
After installing the SATA/300 PCI Card and rebooting your system, Windows 2000 will detect a Mass Storage
Controller and display the Found New Hardware Wizard. Insert the driver diskette or CD. (If you inserted a CD,
close the language chooser that appears.)
2.
In the Found New Hardware Wizard window, click Next.
3.
Select “Search for a suitable driver for my device (recommended)” then click Next.
4.
Select the “Specify a location” checkbox, deselect the other checkboxes, and click Next.
5.
Click the Browse button.
6.
Browse to the I386 folder (Athlon 64, FX, Turion and Opteron users select the AMD64 folder) on the provided driver
diskette or CD, then click Open.
7.
Click OK.
8.
Windows will detect the driver for the Maxtor SATA/300 PCI Card. Click Next.
PAGE 10 - ENGLISH
MAXTOR SATA/300 PCI CARD INSTALLATION GUIDE
9.
When the wizard has finished installing the driver, remove any floppies or CDs then click Finish to restart your system.
10. After Windows has restarted, perform a regular shutdown. Connect the interface and power cables to any hard
drives you wish to attach to the card, then restart your system.
Upon restart with the new drive connected, Windows should notify you that it has found a new storage device and asks if you
would like to proceed with the format to use the drive in the system. Proceed with Windows format as necessary.
ENGLISH - PAGE 11
MAXTOR SATA/300 PCI CARD INSTALLATION GUIDE
New Windows 2000 Installation
If your system does not have a floppy drive, you may need to connect a 3.5-inch floppy drive temporarily to install the SATA driver
from a diskette. Windows 2000 and XP Setup typically do not allow browsing to a CD to install drivers.
The following details the installation of the SATA/300 PCI Card drivers while performing a new installation of Windows 2000.
1.
If you received a driver diskette with this card, continue to the next step. If you received a MaxBlast CD containing
drivers for this card, boot your system to the MaxBlast CD and select the option to create a SATA PCI card driver
diskette. If you downloaded the drivers from www.maxtor.com, load the drivers onto a floppy disk.
2.
Boot your system from the Windows 2000 installation CD.
3.
When prompted by the Windows installer to install a third-party SCSI or RAID driver, press F6.
4.
When the Windows 2000 Setup window is generated, press S to specify an Additional Device(s).
5.
Insert the SATA/300 PCI Card driver diskette into drive A: and press Enter.
6.
Choose Windows Maxtor SATA300 PCI Card from the list that appears on screen, and then press Enter.
7.
Press S to use the driver on the floppy disk and then press Enter to continue with installation.
8.
The Windows 2000 Setup screen will appear again saying “Setup will load support for the following mass storage
devices:” The list will include Windows Maxtor SATA300 PCI Card. If there are any additional devices to be installed,
specify them now then continue to the next step.
From the Windows 2000 Setup screen, press Enter. Setup will now load all device files and complete the
Windows 2000 installation.
PAGE 12 - ENGLISH
MAXTOR SATA/300 PCI CARD INSTALLATION GUIDE
Existing Windows XP Installation
If you have an existing installation of Windows 2000 or XP on a SATA or Ultra ATA drive that you wish to connect to the SATA/300 PCI
card, DO NOT connect the drive to the card yet. Leave the drive attached to its current controller. You must install the Windows
driver for the SATA/300 PCI Card before connecting your hard drive to the card.
The following section details the installation of SATA/300 PCI Card drivers on a system that has Windows XP already
installed and running.
1.
After installing the SATA/300 PCI Card and rebooting your system, Windows XP will detect a Mass Storage Controller
and display the Found New Hardware Wizard. Insert the driver diskette or CD. (If you inserted a CD, close the
language chooser that appears.)
2.
In the Found New Hardware Wizard window, select “Install from a list or specific location (Advanced)” and click Next.
Select “Search for the best driver in these locations,” then select the “Include this location in the search” checkbox and
click the Browse button.
3.
Browse to the I386 folder (Athlon 64, FX, Turion and Opteron users select the AMD64 folder) on the provided driver
diskette or CD, then click Next.
4.
When the New Hardware Wizard has finished installing the SATA/300 PCI Card driver, click Finish.
5.
Perform a normal shutdown and power the system off.
6.
Connect the interface and power cables to any hard drives you wish to attach to the card, then restart your system.
Upon restart with the new drive connected, Windows should notify you that it has found a new storage device and asks if you
would like to proceed with the format to use the drive in the system. Proceed with Windows format as necessary.
ENGLISH - PAGE 13
MAXTOR SATA/300 PCI CARD INSTALLATION GUIDE
New Windows XP Installation
If your system does not have a floppy drive, you may need to connect a 3.5-inch floppy drive temporarily to install the SATA driver
from a diskette. Windows 2000 and XP Setup typically do not allow browsing to a CD to install drivers.
The following details the installation of the driver while performing a new installation of Windows XP.
1.
If you received a driver diskette with this card, continue to the next step. If you received a MaxBlast CD containing
drivers for this card, boot your system to the MaxBlast CD and select the option to create a SATA PCI card driver
diskette. If you downloaded the drivers from www.maxtor.com, copy the drivers onto a floppy disk.
2.
Boot your system from the Windows XP installation CD.
3.
When prompted by the Windows installer to install a third-party SCSI or RAID driver, press F6.
4.
When the Windows XP Setup window is generated, press S to specify an Additional Device(s).
5.
Insert the driver diskette into drive A: and press Enter.
6.
Choose Windows Maxtor SATA300 PCI Card from the list that appears on screen, and then press Enter.
7.
Press S to use the driver on the floppy disk and then press Enter to continue with installation.
8.
The Windows XP Setup screen will appear again saying “Setup will load support for the following mass storage
devices:” The list will include Windows Maxtor SATA300 PCI Card. If there are any additional devices to be
installed, specify them now then continue to the next step.
9.
From the Windows XP Setup screen, press Enter. Setup will now load all the drivers and complete the
Windows XP installation.
PAGE 14 - ENGLISH
MAXTOR SATA/300 PCI CARD INSTALLATION GUIDE
Limited Warranty Statement
Warranty Services
Maxtor's warranty obligations are limited to the terms set forth below.
Please note that Maxtor reserves the right to update from time to time the warranty
terms provided for new purchases of Maxtor products, and to establish the effective
date of those updated warranty terms. Please refer to www.maxtor.com for the then
current form of Limited Warranty Statement for Maxtor brand products.
Please note that Maxtor products are distributed outside the United States and
Canada through local authorized distributors and resellers (“Resellers”). These
Resellers generally offer a consumer warranty, and associated warranty services, to
consumer purchasers. Maxtor recommends that consumers in these jurisdictions
first contact the Reseller from whom they purchased the Maxtor product for all
issues with regard to product defects and the applicable product warranty.
Maxtor warrants to the original consumer purchaser (“you”) that new Maxtor disk
drive products (“New Products”) will be free from defects in material and workmanship for the Standard Warranty Period for the relevant New Product. The Standard
Warranty Period for the various New Products marketed by Maxtor and for the
geographies in which they are sold is detailed on www.maxtor.com and, for retail
packaged products, is the Standard Warranty Period printed by Maxtor on the
outside of the retail box.
The warranty period on replacements for New Products is the remainder of the
warranty on the original New Product or 90 days from the date of shipment of the
replacement product, whichever is longer.
In addition to the New Products, Maxtor may from time to time sell refurbished disk
drive products which are not new and which have been reconditioned to Maxtor’s
standards for refurbished products (“Refurbished Products”). Unless a warranty
period (“Refurbished Warranty Period”) is designated by Maxtor for the specific
Refurbished Product either on www.maxtor.com or on the product packaging (as
applied by Maxtor), Refurbished Products are provided strictly on an “AS IS” basis
and Maxtor disclaims any and all warranties or conditions whatsoever for
Refurbished Products.
To the extent that Maxtor so designates a warranty period for the Refurbished
Product, Maxtor warrants to the original consumer purchaser that the Refurbished
Product will be free from defects in material and workmanship for the associated
Refurbished Warranty Period.
New Products and Refurbished Products are together referred to as “Products.”
The start of the Standard Warranty Period or Refurbished Warranty Period (together
referred to as the “Warranty Period”), as the case may be, is the documented date of
your purchase of the Product from Maxtor or Maxtor’s authorized reseller. In the
absence of a documented purchase date, the start of the Warranty Period will be
deemed the date of original shipment by Maxtor from its point of new or refurbish
manufacture, as the case may be, to Maxtor’s customer.
The Products are manufactured from parts and components that are new or
equivalent to new in accordance with industry standards.
If you discover a defect in material or workmanship during the Warranty Period, and
Maxtor agrees that the defect exists, Maxtor will, at its option, repair or replace the
Product at no charge to you, provided it is returned during the applicable Warranty
Period, with transportation charges prepaid, to the facility designated by Maxtor.
The Product must be properly packaged in Maxtor or Maxtor-approved packaging,
with the Return Material Authorization clearly displayed on the outside of the
packaging, to obtain warranty service. Products that fail within the first 30 days after
purchase will be replaced with a new Product. Maxtor may require proper proof of
purchase documentation prior to issuing the replacement Product.
If Maxtor elects to repair a Product, Maxtor owns all parts removed from the
repaired Product. Maxtor uses new and reconditioned parts made by various
manufacturers in conjunction with warranty repairs and replacement Products.
Repair parts or replacement Products may, at Maxtor's option, include an equal or
better model or features.
Maxtor has no responsibility whatsoever with regard to any content or data on
returned Products.
To request warranty service and before returning a Product to Maxtor, please
contact the Maxtor Service Center. Refer to the Maxtor Installation Guide or
www.maxtor.com for your online guide to find the appropriate telephone number for
obtaining customer assistance within your jurisdiction and the proper address for
shipping authorized returns. Once the Maxtor Service Center determines that a
repair is required, Maxtor will issue an RMA number. A copy of your receipt or bill of
sale bearing the name and location of Maxtor’s authorized reseller and the Maxtor
serial number and model number of the Product in which the defect has been
reported may be required as a proof of your purchase for warranty service. Note
that, as an alternative, Maxtor offers an on-line warranty return option for certain
Products through www.maxtor.com.
ENGLISH - PAGE 15
MAXTOR SATA/300 PCI CARD INSTALLATION GUIDE
You are responsible for saving or backing up data contained in any Product returned
to Maxtor in conjunction with warranty or any other services. Maxtor shall have no
responsibility for such data whatsoever and shall have no liability arising out of any
damage to, or loss or disclosure of, such data.
This limited warranty applies only to the Maxtor products that can be identified by
the original, unaltered Maxtor trademark, trade name or logo affixed to them.
Maxtor does not warrant any product that is not manufactured by, for, or with
permission from Maxtor, or which is not otherwise distributed by Maxtor under the
Maxtor brand.
This warranty does not cover any of the following conditions:
–
–
–
–
–
–
–
–
–
–
Abuse, unreasonable use, mistreatment, or neglect
Unusual physical or electrical stress or power fluctuations
Damage caused during installation of the Product
Damage or capacity/performance/operational resetting caused by the
equipment or system with which the Product is used
Damage caused by modification or repair not made or authorized by Maxtor
Products whose Maxtor Serial Number and/or Material Number label have
been removed, torn or defaced
Damage caused by use of non-Maxtor packaging
Damage caused by improper or improperly used packaging
Damage caused by lack of ESD protection
Products that are determined to be stolen.
Further, this limited warranty is void if the Product cover, or any label or seal on the
Product, is removed or damaged.
Maxtor owns all parts removed from the repaired Products. Maxtor uses new and
reconditioned parts in performing warranty repairs and building replacement
products.
FAILURE TO COMPLETE AND RETURN ANY MAXTOR PRODUCT REGISTRATION
FORM WILL NOT DIMINISH YOUR WARRANTY RIGHTS.
Certain Products include software or firmware as a component (“Software”). Maxtor or
its suppliers retain all rights of ownership in such Software and any use of the Software
is subject to the license agreement provided by Maxtor accompanying such Software. If
no license is provided by Maxtor, you are granted the limited right to use the Software as
required for the operation of the Product and no other rights are granted whatsoever.
Certain Software is licensed under the GNU General Public License Agreement (“GPL
Software”). EXCEPT AS OTHERWISE PROVIDED BY MAXTOR IN A WRITTEN LICENSE
PAGE 16 - ENGLISH
AGREEMENT, SOFTWARE IS OFFERED “AS IS” AND MAXTOR GRANTS NO
WARRANTIES OF ANY KIND, EXPRESS OR IMPLIED, BY STATUTE, COMMUNICATIONS
OR OTHERWISE WITH REGARD TO THE SOFTWARE. MAXTOR SPECIFICALLY
DISCLAIMS ANY IMPLIED WARRANTIES OF MERCHANTABILITY, FITNESS FOR A
PARTICULAR PURPOSE OR NONINFRINGEMENT WITH RESPECT TO THE SOFTWARE.
Please note that Maxtor makes the source code for the GPL software available through
www.maxtor.com.
TO THE MAXIMUM EXTENT PERMITTED BY LAW, THIS WARRANTY AND THE
REMEDIES SET FORTH ABOVE ARE EXCLUSIVE AND IN LIEU OF ALL OTHERS,
WHETHER ORAL OR WRITTEN, EXPRESSED, IMPLIED OR STATUTORY. OTHER THAN
AS EXPRESSLY SET FORTH HEREIN, MAXTOR SPECIFICALLY DISCLAIMS TO THE
MAXIMUM EXTENT PERMITTED BY LAW ANY AND ALL REPRESENTATIONS,
WARRANTIES AND CONDITIONS AS TO THE PRODUCTS, SERVICES, OR ANY OTHER
MATTER WHATSOEVER. IN PARTICULAR, BUT WITHOUT LIMITING THE GENERALITY
OF THE FOREGOING, MAXTOR SPECIFICALLY DISCLAIMS ANY AND ALL IMPLIED OR
DEEMED WARRANTIES AND CONDITIONS OF SATISFACTORY QUALITY,
MERCHANTABILITY, FITNESS FOR A PARTICULAR PURPOSE, PERFORMANCE IN A
SKILLFUL AND WORKMANLIKE MANNER, AND NONINFRINGEMENT OF THIRD
PARTY RIGHTS OR ANY OTHER WARRANTY ARISING FROM A COURSE OF DEALING
OR USAGE OF TRADE. THIS LIMITED WARRANTY DOES NOT APPLY TO, AND MAXTOR
MAKES NO WARRANTY TO YOU WITH REGARD TO, PRODUCTS ORIGINALLY SOLD AS
AN INTEGRATED COMPONENT OF A SYSTEM NOT SUPPLIED BY MAXTOR, OR
PRODUCTS PROVIDED UNDER A THIRD PARTY LEASING OR SERVICE
ARRANGEMENT. No Maxtor distributor, reseller, dealer, agent or employee is
authorized to make any modification, extension or addition to this warranty.
MAXTOR IS NOT RESPONSIBLE OR LIABLE FOR ANY INDIRECT, UNFORSEEABLE,
SPECIAL, INCIDENTAL OR CONSEQUENTIAL DAMAGES HOWEVER CAUSED AND
WHETHER OR NOT MAXTOR WAS ADVISED OF THE POSSIBILITY OF SUCH DAMAGES,
INCLUDING BUT NOT LIMITED TO, COSTS OF PROCUREMENT OF SUBSTITUTE
GOODS, LOSS OF DATA OR PROGRAMS, LOST PROFITS, DOWNTIME, GOODWILL,
DAMAGE OR REPLACEMENT OF EQUIPMENT AND PROPERTY, AND ANY COSTS OF
RECOVERING, PROGRAMMING OR REPRODUCING ANY PROGRAM OR DATA STORED
IN OR USED WITH MAXTOR PRODUCTS OR ANY OTHER DAMAGES ARISING OUT OF
THE PURCHASE, USE OR PERFORMANCE OF THE PRODUCT. Maxtor is not, and
cannot be, responsible for any losses or damages arising out of any loss of, or any
inability to access, data as a result from the failure of a Product, and accordingly you
bear this risk. The allocation of risk under this limitation of liability is reflected in the
purchase price of the Product. This limitation of liability, however, will not apply to
claims for death or personal injury caused by the negligence of Maxtor or its
associated companies, officers, representatives or agents.
MAXTOR SATA/300 PCI CARD INSTALLATION GUIDE
Some jurisdictions do not allow the exclusion or limitation of incidental or
consequential damages or exclusions of implied or deemed conditions or
warranties, so the above limitations or exclusions may not apply to you. This
warranty gives you specific legal rights, and you may also have other rights that vary
from jurisdiction to jurisdiction. By way of example, if a Product is purchased from
Maxtor or Maxtor's authorized reseller by you in Europe, Africa or the Middle East,
you may have additional warranty rights which are explained at www.maxtor.com.
Please note that you are expressly not permitted to use the Products in conjunction
with the operation of nuclear facilities, aircraft navigation, aircraft communication,
aircraft flight control, aircraft air traffic control systems, weapons devices or
systems, or in any devices or systems in which a malfunction (including, without
limitation, software related delay or failure) would result in foreseeable risk of
injury or death to the operator of the device or system, or to others.
This Statement of Limited Warranty shall be exclusively interpreted in accordance
with the English language with the meaning of its terms. Should any provisions of
this Limited Warranty be declared invalid by any court of competent jurisdiction,
the balance of this Limited Warranty will remain in full force and effect. In addition,
should a translation of this Limited Warranty deviate from the English language
version, only the English language version shall apply and be binding.
ENGLISH - PAGE 17
CARTE PCI MAXTOR SATA/300 GUIDE D’INSTALLATION
Sommaire
Mise en route . . . . . . . . . . . . . . . . . . . . . . . . . . . . . . . . . . . . . . . . . . . . . . . . . . . . 19
Précautions de manipulation . . . . . . . . . . . . . . . . . . . . . . . . . . . . . . . . . . . . . 19
Éléments compris dans le kit. . . . . . . . . . . . . . . . . . . . . . . . . . . . . . . . . . . . . 19
Sauvegarde des données . . . . . . . . . . . . . . . . . . . . . . . . . . . . . . . . . . . . . . . . 20
À propos de la technologie Serial ATA . . . . . . . . . . . . . . . . . . . . . . . . . . . . . 20
Outils requis. . . . . . . . . . . . . . . . . . . . . . . . . . . . . . . . . . . . . . . . . . . . . . . . . . . 20
Retrait du capot du système . . . . . . . . . . . . . . . . . . . . . . . . . . . . . . . . . . . . . . . . 21
Installation de la carte PCI Maxtor SATA/300 . . . . . . . . . . . . . . . . . . . . . . . . . 22
Connexion du disque dur . . . . . . . . . . . . . . . . . . . . . . . . . . . . . . . . . . . . . . . . . . 23
Connexion d’un disque dur SATA. . . . . . . . . . . . . . . . . . . . . . . . . . . . . . . . . . 24
Connexion d’un disque dur Ultra ATA . . . . . . . . . . . . . . . . . . . . . . . . . . . . . . 25
Vérification du message du BIOS . . . . . . . . . . . . . . . . . . . . . . . . . . . . . . . . . . . 27
Installation d’un pilote Windows. . . . . . . . . . . . . . . . . . . . . . . . . . . . . . . . . . . . 28
Système Windows 2000 existant . . . . . . . . . . . . . . . . . . . . . . . . . . . . . . . . . . 28
Nouveau système Windows 2000. . . . . . . . . . . . . . . . . . . . . . . . . . . . . . . . . . 29
Système Windows XP existant . . . . . . . . . . . . . . . . . . . . . . . . . . . . . . . . . . . . 30
Nouveau système Windows XP . . . . . . . . . . . . . . . . . . . . . . . . . . . . . . . . . . . 31
Déclaration de garantie limitée . . . . . . . . . . . . . . . . . . . . . . . . . . . . . . . . . . . . . 33
CARTE PCI MAXTOR SATA/300 GUIDE D’INSTALLATION
ILLUSTRATION 1 CONTENU DU KIT
1. Carte PCI Maxtor SATA/300
2. Câble d’interface SATA*
3. CD-ROM ou disquette de pilotes
4. Câble de transformateur SATA*
*fourni avec certains kits uniquement
Mise en route
Merci d’avoir choisi la carte PCI SATA/300 de Maxtor. Ce manuel
d’installation vous guidera tout au long de l’installation de cette
nouvelle carte.
Si vous rencontrez une quelconque difficulté au cours de la procédure
d’installation, visitez notre site Web à l’adresse www.maxtor.fr et cliquez
sur Support Produits.
L’illustration 1 présente les composants fournis dans le kit séparé de la
carte PCI SATA/300. Les cartes fournies dans les kits des disques durs de
Maxtor ne comportent pas nécessairement tous les composants illustrés.
Pour installer le disque, vous devez disposer de tous les outils présentés
sur l’illustration 2 page 20, notamment d’une version complète de votre
système d’exploitation.
Précautions de manipulation
Les cartes adaptateur sont sensibles aux décharges électrostatiques (ESD).
Tenez la carte adaptateur par les côtés. Ne touchez pas le circuit imprimé.
Max•Blast ™
Ne branchez/débranchez pas de câble lorsque le système est sous tension.
Ne forcez pas et ne faites pas levier sur les connecteurs de la carte adaptateur
pour les insérer ou les extraire de leurs prises de raccordement.
FRANÇAIS - PAGE 19
CARTE PCI MAXTOR SATA/300 GUIDE D’INSTALLATION
Sauvegarde des données
Pour protéger vos données, effectuez une sauvegarde du contenu
des disques durs existants avant d’installer votre nouvelle carte
PCI Maxtor SATA/300.
À propos de la technologie Serial ATA
ILLUSTRATION 2 OUTILS REQUIS
1. Manuel de l’utilisateur du système
2. CD-ROM du système d’exploitation et disquette
de démarrage
3. Tournevis cruciforme
4. Petite pince plate
La technologie Serial ATA (SATA) offre les avantages suivants :
System Man
ual
– Interface ATA la plus rapide qui soit
– Idéale pour des agrégats RAID haute performance
– Câbles fins, faciles à brancher, garantissant une meilleure
circulation de l’air
– Pas de cavalier à configurer, ce qui facilite l’installation
Contrairement aux disques ATA standard, les disques Serial ATA
ne nécessitent pas l’utilisation de cavaliers lors de l’installation.
Visitez notre site Web à l’adresse www.maxtor.fr pour connaître les
dernières informations relatives à la technologie SATA, ainsi que les mises
à jour logicielles disponibles.
PAGE 20 - FRANÇAIS
CARTE PCI MAXTOR SATA/300 GUIDE D’INSTALLATION
Retrait du capot du système Systemabdeckung
1.
Mettez le système hors tension.
2.
Débranchez le système à la prise électrique.
3.
Enlevez le capot de votre système.
Reportez-vous au manuel de
l’utilisateur du système pour
savoir comment retirer le
capot ou faites appel à un
technicien qualifié pour ce
type d’opération.
ILLUSTRATION 3
RETRAIT DU CAPOT DU SYSTÈME
4.
Portez un bracelet antistatique ou touchez une partie métallique du boîtier de l’ordinateur. Ce faisant, vous
vous déchargez de l’électricité statique que vous portez en vous et évitez ainsi d’exposer le disque dur à des
décharges électrostatiques.
FRANÇAIS - PAGE 21
CARTE PCI MAXTOR SATA/300 GUIDE D’INSTALLATION
Installation de la carte PCI Maxtor SATA/300
La carte PCI SATA/300 peut être insérée dans tout emplacement PCI 32 bits disponible. Elle peut également être
insérée dans la partie 32 bits d’un emplacement PCI 64 bits.
1.
Dévissez et enlevez le couvercle de l’un des emplacements PCI disponibles sur la carte mère.
2.
Installez la carte PCI SATA/300 dans l’emplacement ouvert. Fixez le support de la carte de contrôleur sur le boîtier
du système.
ILLUSTRATION 4
INSERTION DE LA CARTE PCI MAXTOR SATA/300
3.
(Facultatif) Reliez le câble de connexion à 2 ou 4 broches de la DEL du boîtier du système au connecteur de
DEL de la carte PCI SATA/300 (voir Illustration 5). Veillez à ce que la broche 1 du connecteur soit alignée avec la
broche 1 du câble. Consultez le manuel du boîtier du système pour plus d’informations sur les connexions de DEL.
PAGE 22 - FRANÇAIS
CARTE PCI MAXTOR SATA/300 GUIDE D’INSTALLATION
Connexion du disque dur
La carte PCI SATA/300 possède deux ports SATA/300 prenant chacun en charge un disque Serial ATA, ainsi qu’un port
parallèle Ultra ATA/133 prenant en charge deux disques durs Ultra ATA/IDE. La carte ne prend pas en charge les
périphériques ATAPI tels que les disques Zip ou les lecteurs de CD-ROM et de DVD. Avant de connecter un disque dur
à la carte, installez le disque dans votre système à l’aide des instructions fournies dans le manuel du disque dur ou
dans le manuel de votre système.
Si le système d’exploitation Windows 2000 ou XP est installé sur un disque que vous souhaitez connecter à la carte PCI SATA/300,
ATTENDEZ avant de connecter le disque à la carte. Laissez le disque connecté à son contrôleur actuel. Vous devez installer le
pilote Windows pour la carte PCI SATA/300 avant de connecter votre disque dur à la carte. Pour de plus amples informations,
consultez “Installation d’un pilote Windows”, à la page 28.
Connecteurs
DEL
Port 3
Ultra ATA
Port 2
Serial ATA
Port 1
Serial ATA
ILLUSTRATION 5
PORTS DISPONIBLES
FRANÇAIS - PAGE 23
CARTE PCI MAXTOR SATA/300 GUIDE D’INSTALLATION
Connexion d’un disque dur SATA
Chacun des deux ports SATA/300 de la carte PCI SATA/300 prend en charge un disque dur SATA. Pour connecter
un disque SATA à la carte :
4.
Connectez une extrémité d’un câble d’interface SATA à l’un des connecteurs SATA de la carte.
(Voir Illustration 5 page 23.)
5.
Connectez l’autre extrémité du câble d’interface SATA au connecteur SATA situé à l’arrière du disque dur.
Connecteur
d'alimentation
NC
pas de connexion
SATA
ALIMENTATION
Remarque : Les broches du cavalier NC
n'ont pas de fonction. Elles ne servent
que pour le stockage de cavaliers de rechange.
Connecteur d'interface
SATA
Force 150
vitesses de transfert
ILLUSTRATION 6
CONNEXION DES CÂBLES AU DISQUE SATA
PAGE 24 - FRANÇAIS
Le cavalier Force 150 doit être sur la position NC
lorsque le disque est branché directement à la
carte SATA Maxtor.
CARTE PCI MAXTOR SATA/300 GUIDE D’INSTALLATION
Connexion d’un disque dur Ultra ATA
La carte PCI SATA/300 possède un port Ultra ATA/133 qui peut prendre en charge jusqu’à deux disques durs Ultra ATA/
IDE en n’utilisant qu’un seul câble Ultra ATA à 80 conducteurs et 40 broches (vendu séparément). La carte ne prend
pas en charge les périphériques ATAPI tels que les disques Zip ou les lecteurs de CD-ROM et de DVD. Afin de garantir
une intégrité des données et une compatibilité maximales, Maxtor déconseille vivement d’utiliser des câbles ATA/IDE
plus anciens, à 40 conducteurs, avec cette carte.
1.
Configurez les cavaliers du disque dur Ultra ATA sur le paramètre Sélection de câble. Si vous connectez deux
disques Ultra ATA, ils doivent tous les deux être configurés sur le paramètre Sélection de câble (CS). Consultez
l’étiquette figurant sur le disque, la documentation fournie ou le fabricant du disque pour de plus amples
informations sur la configuration de cavaliers. Les paramètres de cavaliers des modèles Maxtor les plus courants
sont indiqués sur l’illustration 7 ci-dessous.
Style A1
Style A1
(Comprend notamment
(Includes
le modèle
DiamondMax
DiamondMax 16)
16)
Style B
Style
B
StyleA2
A2
Style
(Comprend notamment
(Includes
le
modèle DiamondMax
DiamondMax
or 11)
Plus 9, 10 ou
(Comprend notamment
(Includes
DiamondMax
les
modèles
DiamondMax
Plus
Fireball3)
3)
Plus88and
et Fireball
Maître
Master
Esclave
Slave
Style CC
Style
(Modèles D740X-6L
(Models
D740X-6L
et D540X-4K)
and D540X-4K)
Maître
Master
Cavalier
Cylinderde
limitation
du
Limitation
cylindre (CLJ) (non
Jumperà (CLJ)
destiné
être
(not for
usecette
utilisé
avec
with this card)
carte)
Esclave
Slave
Sélection
Cable
de
câble
Select
Sélection
Cable
de
câble
Select
ILLUSTRATION 7
POSITIONS DES BLOCS DE CAVALIERS
FRANÇAIS - PAGE 25
CARTE PCI MAXTOR SATA/300 GUIDE D’INSTALLATION
2.
Branchez directement le connecteur bleu du câble Ultra ATA dans le connecteur Ultra ATA de la carte. L’orientation
correcte du connecteur du câble peut être déterminée en faisant correspondre l’encoche figurant sur l’une des
extrémités du connecteur au sillon correspondant sur le connecteur ATA.
3.
Branchez le connecteur noir du câble dans le connecteur ATA situé à l’arrière du disque dur. Si vous connectez deux
disques Ultra ATA et que vous souhaitez utiliser l’un d’eux en tant que disque de démarrage, branchez le connecteur
noir du câble sur le disque de démarrage et le connecteur gris sur l’autre disque. Si aucun des deux disques ne doit
être utilisé comme disque de démarrage, les connecteurs gris et noir peuvent être branchés indifféremment. Voir
l’illustration 8 ci-dessous.
Câble
d'interface
ATA Interface
ATA
Cable
Disque secondaire
Secondary
Drive
(gris)
(Gray)
Disque
de
Boot Drive
(Black)
démarrage
(noir)
Carte PCI
PCI(bleu)
Card
(Blue)
Câble
Power
Supply
d'alimentation
Cable
ILLUSTRATION 8
CONNEXION DES CÂBLES
PAGE 26 - FRANÇAIS
CARTE PCI MAXTOR SATA/300 GUIDE D’INSTALLATION
Vérification du message du BIOS
Mettez votre système sous tension et attendez l’affichage d’un message du BIOS (voir Illustration 9) se rapportant à la
carte PCI Maxtor SATA/300. Ce message indique que la carte a été correctement détectée par votre carte mère. Si ce
message ne s’affiche pas, mettez votre système hors tension et vérifiez que la carte est correctement insérée dans
l’emplacement PCI.
La carte PCI SATA/300 est un périphérique PCI “Plug-n-Play” qui détecte automatiquement les disques durs connectés. Dans la
plupart des cas, il ne sera pas nécessaire d’effectuer des modifications dans l’utilitaire de configuration du BIOS de la carte mère.
Cependant, sur certains systèmes récents, vous pourrez éventuellement définir l’ordre de démarrage des périphériques SATA
dans le programme de configuration du BIOS de votre carte mère. Pour de plus amples informations sur la configuration du BIOS,
consultez le manuel fourni avec votre système ou le fabricant du système.
Maxtor SATA/300 PCI Card
BIOS v1.00.22.11
(c) 2005 Manufacturer Name.
All rights reserved.
Press F1 to continue,
F2 to enter setup.
ILLUSTRATION 9
MESSAGE DU BIOS RELATIF À LA CARTE PCI ATA/300
FRANÇAIS - PAGE 27
CARTE PCI MAXTOR SATA/300 GUIDE D’INSTALLATION
Installation d’un pilote Windows
Système Windows 2000 existant
Si le système d’exploitation Windows 2000 ou XP est installé sur un disque SATA ou Ultra ATA que vous souhaitez connecter à la
carte PCI SATA/300, ATTENDEZ avant de connecter le disque à la carte. Laissez le disque connecté à son contrôleur actuel. Vous
devez installer le pilote Windows pour la carte PCI SATA/300 avant de connecter votre disque dur à la carte.
La section suivante détaille la procédure d’installation de pilotes pour la carte PCI SATA/300 sur un système
fonctionnant déjà sous Windows 2000.
1.
Une fois que vous avez installé la carte PCI SATA/300 et redémarré votre système, Windows 2000 détecte
un contrôleur de stockage de masse et l’assistant Ajout de nouveau matériel apparaît. Insérez le CD-ROM
ou la disquette de pilotes. (Si vous insérez un CD-ROM, fermez le sélecteur de langue qui s’affiche.)
2.
Dans la fenêtre de l’assistant Ajout de nouveau matériel, cliquez sur Suivant.
3.
Sélectionnez Rechercher un pilote approprié pour mon périphérique (recommandé), puis cliquez sur Suivant.
4.
Cochez la case Définir un emplacement, désactivez les autres cases, puis cliquez sur Suivant.
5.
Cliquez sur le bouton Parcourir.
6.
Sélectionnez le dossier I386 (pour les utilisateurs d’Athlon 64, FX, Turion et Opteron, le dossier AMD64) sur la
disquette ou le CD-ROM de pilotes et cliquez sur Ouvrir.
7.
Cliquez sur OK.
8.
Windows détecte le pilote pour la carte PCI Maxtor SATA/300. Cliquez sur Suivant.
PAGE 28 - FRANÇAIS
CARTE PCI MAXTOR SATA/300 GUIDE D’INSTALLATION
9.
Une fois que l’assistant a terminé d’installer le pilote, retirez la disquette ou le CD-ROM du lecteur, puis cliquez sur
Terminer afin de redémarrer votre système.
10. Une fois que Windows a redémarré, arrêtez le système selon la procédure normale. Connectez les câbles
d’interface et d’alimentation à tous les disques durs que vous souhaitez connecter à la carte, puis redémarrez
votre système.
Lors du redémarrage suite à la connexion du nouveau disque, Windows vous informe qu’il a détecté un nouveau périphérique de
stockage et vous demande si vous souhaitez poursuivre le formatage afin d’utiliser le disque sur le système. Procédez au
formatage Windows selon vos besoins.
Nouveau système Windows 2000
Si votre système ne comporte pas de lecteur de disquette, vous devrez peut-être connecter temporairement un lecteur de
disquette de 3,5 pouces afin d’installer le pilote SATA depuis une disquette. En règle générale, le programme d’installation de
Windows 2000 et XP ne permet pas d’accéder à un CD-ROM afin d’installer des pilotes.
La section suivante détaille la procédure d’installation des pilotes de la carte PCI SATA/300 durant l’installation de
Windows 2000.
1.
Si cette carte vous a été fournie avec une disquette de pilotes, passez à l’étape suivante. Si elle vous a été fournie
avec un CD-ROM MaxBlast contenant les pilotes pour cette carte, démarrez votre système à partir du CD-ROM
MaxBlast et sélectionnez l’option permettant de créer une disquette de pilotes pour la carte PCI SATA. Si vous avez
téléchargé les pilotes à partir du site www.maxtor.fr, enregistrez-les sur une disquette.
2.
Démarrez votre système à partir du CD-ROM d’installation de Windows 2000.
FRANÇAIS - PAGE 29
CARTE PCI MAXTOR SATA/300 GUIDE D’INSTALLATION
3.
Lorsque le programme d’installation de Windows vous invite à installer un pilote SCSI ou RAID d’un fabricant tiers,
appuyez sur la touche F6.
4.
Lorsque la fenêtre du programme d’installation de Windows s’affiche, appuyez sur la touche S afin de spécifier
des périphériques supplémentaires.
5.
Insérez la disquette de pilotes de la carte PCI SATA/300 dans le lecteur A: et appuyez sur Entrée.
6.
Sélectionnez Windows Maxtor SATA300 PCI Card (Carte PCI Maxtor SATA/300 pour Windows) dans la liste s’affichant
à l’écran, puis appuyez sur la touche Entrée.
7.
Appuyez sur la touche S pour utiliser le pilote figurant sur la disquette, puis appuyez sur la touche Entrée afin
de poursuivre l’installation.
8.
L’écran du programme d’installation de Windows 2000 s’affiche de nouveau et comporte un message vous informant
que le programme d’installation va charger la prise en charge pour les périphériques de stockage de masse
figurant dans la liste qui s’affiche. Cette liste comprend Windows Maxtor SATA300 PCI Card. Si vous souhaitez
installer des périphériques supplémentaires, spécifiez-les maintenant, puis passez à l’étape suivante.
Dans l’écran du programme d’installation de Windows 2000, appuyez sur la touche Entrée. Le programme
d’installation charge alors tous les fichiers de périphériques et termine l’installation de Windows 2000.
Système Windows XP existant
Si le système d’exploitation Windows 2000 ou XP est installé sur un disque SATA ou Ultra ATA que vous souhaitez connecter à la
carte PCI SATA/300, ATTENDEZ avant de connecter le disque à la carte. Laissez le disque connecté à son contrôleur actuel. Vous
devez installer le pilote Windows pour la carte PCI SATA/300 avant de connecter votre disque dur à la carte.
La section suivante détaille la procédure d’installation de pilotes pour la carte PCI SATA/300 sur un système
fonctionnant déjà sous Windows XP.
PAGE 30 - FRANÇAIS
CARTE PCI MAXTOR SATA/300 GUIDE D’INSTALLATION
1.
Une fois que vous avez installé la carte PCI SATA/300 et redémarré votre système, Windows XP détecte un
contrôleur de stockage de masse et l’assistant Ajout de nouveau matériel apparaît. Insérez le CD-ROM ou la
disquette de pilotes. (Si vous insérez un CD-ROM, fermez le sélecteur de langue qui s’affiche.)
2.
Dans la fenêtre de l’assistant Ajout de nouveau matériel, sélectionnez Installer à partir d’une liste ou d’un
emplacement spécifié (utilisateurs expérimentés) et cliquez sur Suivant.
3.
Sélectionnez Rechercher le meilleur pilote dans ces emplacements, cochez la case Inclure cet emplacement
dans la recherche, puis cliquez sur le bouton Parcourir.
4.
Sélectionnez le dossier WinXP sur la disquette ou le CD-ROM de pilotes, puis cliquez sur Suivant.
5.
Lorsque l’assistant Ajout de nouveau matériel a fini d’installer le pilote de la carte PCI SATA/300, cliquez
sur Terminer.
6.
Arrêtez le système selon la procédure normale et mettez-le hors tension.
7.
Connectez les câbles d’interface et d’alimentation à tous les disques durs que vous souhaitez connecter à la carte,
puis redémarrez votre système.
Lors du redémarrage suite à la connexion du nouveau disque, Windows vous informe qu’il a détecté un nouveau périphérique de
stockage et vous demande si vous souhaitez poursuivre le formatage afin d’utiliser le disque dans le système. Procédez au
formatage Windows selon vos besoins.
Nouveau système Windows XP
Si votre système ne comporte pas de lecteur de disquette, vous devrez peut-être connecter temporairement un lecteur de
disquette de 3,5 pouces afin d’installer le pilote SATA depuis une disquette. En règle générale, le programme d’installation de
Windows 2000 et XP ne permet pas d’accéder à un CD-ROM afin d’installer des pilotes.
La section suivante détaille la procédure d’installation du pilote lors de l’installation de Windows XP.
FRANÇAIS - PAGE 31
CARTE PCI MAXTOR SATA/300 GUIDE D’INSTALLATION
1.
Si cette carte vous a été fournie avec une disquette de pilotes, passez à l’étape suivante. Si elle vous a été fournie
avec un CD-ROM MaxBlast contenant les pilotes pour cette carte, démarrez votre système à partir du CD-ROM
MaxBlast et sélectionnez l’option permettant de créer une disquette de pilotes pour la carte PCI SATA. Si vous avez
téléchargé les pilotes à partir du site www.maxtor.fr, enregistrez-les sur une disquette.
2.
Démarrez votre système à partir du CD-ROM d’installation de Windows XP.
3.
Sélectionnez le dossier I386 (pour les utilisateurs d’Athlon 64, FX, Turion et Opteron, le dossier AMD64) sur la
disquette ou le CD-ROM de pilotes et cliquez sur Suivant.
4.
Lorsque la fenêtre du programme d’installation de Windows XP s’affiche, appuyez sur la touche S afin de spécifier
des périphériques supplémentaires.
5.
Insérez la disquette de pilotes dans le lecteur A: et appuyez sur Entrée.
6.
Sélectionnez Windows Maxtor SATA300 PCI Card (Carte PCI Maxtor SATA300 pour Windows) dans la liste s’affichant
à l’écran, puis appuyez sur la touche Entrée.
7.
Appuyez sur la touche S pour utiliser le pilote figurant sur la disquette, puis appuyez sur la touche Entrée afin de
poursuivre l’installation.
8.
L’écran du programme d’installation de Windows XP s’affiche de nouveau et comporte un message vous informant
que le programme d’installation va charger la prise en charge pour les périphériques de stockage de masse
figurant dans la liste qui s’affiche. Cette liste comprend Windows Maxtor SATA300 PCI Card. Si vous souhaitez
installer des périphériques supplémentaires, spécifiez-les maintenant, puis passez à l’étape suivante.
9.
Dans l’écran du programme d’installation de Windows XP, appuyez sur la touche Entrée. Le programme
d’installation charge alors tous les pilotes et termine l’installation de Windows XP.
PAGE 32 - FRANÇAIS
CARTE PCI MAXTOR SATA/300 GUIDE D’INSTALLATION
Déclaration de garantie limitée
Services de garantie
Les obligations de la garantie Maxtor se limitent aux conditions établies ci-après.
Veuillez noter que Maxtor se réserve le droit de mettre à jour, de temps à autre,
les conditions de garantie offertes pour de nouveaux achats de produits Maxtor et
de déterminer la date d’entrée en vigueur de ces mises à jour. Reportez-vous au
site Internet www.maxtor.fr afin d’obtenir le formulaire actualisé de Déclaration
de garantie limitée des produits de marque Maxtor.
Veuillez noter que les produits Maxtor sont vendus par des distributeurs et
revendeurs locaux agréés en dehors des États-Unis et du Canada (“Revendeurs”).
Ces revendeurs offrent généralement aux acheteurs consommateurs une garantie
ainsi que les services associés. Dans ces juridictions, Maxtor recommande que les
consommateurs contactent en premier lieu le revendeur auprès duquel ils ont
acheté le produit Maxtor pour tous les problèmes concernant les défauts de ce
produit ainsi que la garantie applicable.
Maxtor garantit à l’acheteur consommateur d’origine (“vous”) que les nouveaux
disques durs Maxtor (“Produits”) sont exempts de défauts matériels et de maind’œuvre pour la période standard de garantie du Produit en question. La période
de garantie standard pour les différents produits commercialisés par Maxtor ainsi
que les zones géographiques dans lesquelles ils sont vendus sont détaillées sur
www.maxtor.fr. Pour les produits conditionnés pour la vente au détail, la période
de garantie standard est imprimée à l’extérieur de la boîte.
La période de garantie de remplacement des Nouveaux Produits correspond au
nombre de jours restants sur la garantie d’origine ou est de 90 jours à partir de la
date d’expédition du produit de remplacement, la garantie la plus longue
s’appliquant.
En plus des Nouveaux Produits, il se peut que Maxtor vende de temps à autre des
disques durs remis à neuf afin de correspondre aux normes Maxtor concernant les
produits remis à neuf (“Produits remis à neuf”). À moins qu’une période de
garantie (“Période de garantie des Produits remis à neuf”) soit désignée par
Maxtor pour les Produits remis à neuf, sur le site www.maxtor.fr ou sur
l’emballage du produit (comme appliqué par Maxtor), les Produits remis à neuf
sont fournis uniquement “TELS QUELS” et Maxtor rejette toute garantie ou
condition pour les Produits remis à neuf.
Dans la mesure où Maxtor désignerait une période de garantie pour les Produits
remis à neuf, Maxtor garantit à l’acheteur consommateur d’origine que les
Produits remis à neuf seront dépourvus de tout défaut matériel et de maind’œuvre pour la période de garantie des produits remis à neuf.
Les Nouveaux Produits et les Produits remis à neuf sont désignés par l’appellation
“Produits”. Le début de la période standard de garantie ou de la période de
garantie pour les produits remis à neuf (appelées toutes les deux “Période de
garantie”) est la date apparaissant sur le reçu ou ticket de caisse du Produit
acheté auprès de Maxtor ou d’un revendeur agréé Maxtor. En l’absence d’une
preuve attestant de cette date, le début de la période de garantie sera considéré
comme étant la date à laquelle Maxtor a expédié le produit (neuf ou remis à neuf)
depuis son point de fabrication jusqu’au client Maxtor.
Les Produits sont fabriqués à partir de pièces et composants neufs ou équivalents
au neuf conformément aux normes de l’industrie.
Si vous découvrez un défaut au niveau du matériel ou de la main-d’œuvre au cours
de la période de garantie et que Maxtor reconnaît l’existence de ce défaut, Maxtor
s’engage, à sa discrétion, à réparer ou remplacer le Produit sans frais pour vous, à
condition qu’il soit retourné pendant la période de garantie, à l’usine désignée par
Maxtor et avec frais de transport payés à l’avance. Afin de pouvoir bénéficier du
service prévu par la garantie, le Produit doit être correctement conditionné dans
un emballage Maxtor ou autorisé par Maxtor, avec l’autorisation de retour de
matériel (Return Material Authorization ou RMA) clairement apposée à l’extérieur
du paquet. Les produits tombant en panne dans les 30 premiers jours suivant
l’achat seront remplacés par un nouveau Produit. Maxtor peut exiger une preuve
d’achat adéquate avant de fournir le Produit de remplacement.
Si Maxtor choisit de réparer un Produit, toutes les pièces retirées du Produit réparé
appartiennent à Maxtor. Maxtor utilise des pièces neuves et remises à neuf
fabriquées par différents fabricants conjointement avec les Produits de
remplacement et les réparations dans le cadre de la garantie. Les pièces de
rechange ou les Produits de remplacement pourront, en fonction des disponibilités
de Maxtor, inclure un modèle ou des caractéristiques équivalents ou supérieurs.
FRANÇAIS - PAGE 33
CARTE PCI MAXTOR SATA/300 GUIDE D’INSTALLATION
Maxtor ne saurait en aucun cas être tenu responsable du contenu ou des données
présents sur les Produits retournés.
Pour solliciter le service prévu par la garantie et avant de renvoyer un Produit à
Maxtor, veuillez contacter le centre de services après-vente de Maxtor. Reportezvous au guide d’installation Maxtor ou au guide en ligne www.maxtor.fr pour
trouver le numéro de téléphone correspondant à l’assistance client dans votre
région, ainsi que l’adresse appropriée pour expédier les retours autorisés. Une
fois que le centre de services après-vente de Maxtor a établi qu’une réparation
était nécessaire, Maxtor émet un numéro d’autorisation de retour de matériel. Une
copie de votre reçu ou ticket de caisse portant le nom et le lieu du revendeur agréé
Maxtor, ainsi que le numéro de série et numéro de modèle de produit Maxtor pour
lequel le défaut a été signalé pourront être demandés comme preuve d’achat pour
le service de garantie. Notez que Maxtor propose également, pour certains
Produits, une option de retour en ligne dans le cadre de la garantie, via le site
Internet www.maxtor.fr.
Il est de votre responsabilité de faire une copie de sauvegarde ou de sauvegarder
les informations contenues dans tout Produit retourné à Maxtor dans le cadre de
la garantie ou de tout autre service. Maxtor n’est en aucun cas responsable de ces
données et ne saurait être tenu responsable de tout dommage, toute perte ou
divulgation survenant à ces données.
Cette garantie limitée ne s’applique qu’aux produits Maxtor identifiables par la
marque de fabrique, le nom de marque ou le logo Maxtor qui y sont apposés.
Maxtor ne garantit aucun produit qui n’est pas fabriqué par, pour ou avec la
permission de Maxtor, ou qui ne soit pas distribué par Maxtor sous la
marque Maxtor.
Cette garantie ne couvre aucune des conditions suivantes :
– les utilisations abusives, anormales, incorrectes ou la négligence ;
– les traitements inhabituels, les contraintes imposées au niveau électrique
ou les variations de tension ;
– les dommages causés pendant l’installation du produit ;
– les dommages ou la reconfiguration de capacité/de performance/
opérationnelle causés par l’équipement ou le système avec lequel le produit
est utilisé ;
– les dommages causés par une modification ou une réparation non effectuée ou non
autorisée par Maxtor ;
– les Produits dont le numéro de série Maxtor et/ou le numéro du matériel a
été effacé ou rendu illisible ;
– les dommages causés par l’utilisation d’un emballage non agréé par Maxtor ;
– les dommages causés par un emballage inadéquat ou utilisé de façon
inadéquate ;
– les dommages causés par un manque de protection électrostatique ;
– les Produits qui ont été volés.
En outre, cette garantie limitée est annulée si le couvercle du Produit, ou toute
étiquette ou cachet sur le Produit, est enlevé ou endommagé.
Toutes les pièces retirées des Produits réparés appartiennent à Maxtor. Maxtor
utilise des pièces neuves et remises à neuf pour les réparations et la fourniture
de produits de remplacement dans le cadre de la garantie.
LE MANQUEMENT AU REMPLISSAGE ET AU RETOUR DU FORMULAIRE
D’INSCRIPTION DE TOUT PRODUIT MAXTOR NE DIMINUERA PAS VOS DROITS À
LA GARANTIE.
Certains Produits comprennent des composants tels que des logiciels ou
micrologiciels (“Logiciels”). Maxtor et ses fournisseurs conservent tous les droits
de propriété et l’utilisation de ces logiciels est soumise à l’accord de la licence
fourni par Maxtor avec les logiciels. Si Maxtor ne fournit aucune licence, vous avez
l’autorisation limitée d’utiliser les logiciels selon les besoins du fonctionnement
du Produit, mais ne disposez toutefois d’aucun autre droit. Certains logiciels sont
cédés sous licence conformément à la licence GPL dans le cadre du projet GNU
(“Logiciel GPL”). LE LOGICIEL EST OFFERT “TEL QUEL” SAUF AUTREMENT
MENTIONNÉ PAR MAXTOR DANS UN ACCORD DE LICENCE ÉCRIT, ET MAXTOR
PAGE 34 - FRANÇAIS
CARTE PCI MAXTOR SATA/300 GUIDE D’INSTALLATION
N’OFFRE AUCUNE GARANTIE D’AUCUNE SORTE, EXPRESSÉMENT OU
IMPLICITEMENT, DÉFINIE PAR LES NORMES, LA CORRESPONDANCE OU
RELATIVEMENT AU LOGICIEL. MAXTOR REJETTE SPÉCIFIQUEMENT TOUTE
GARANTIE DE QUALITÉ MARCHANDE, D’APTITUDE À UN EMPLOI PARTICULIER
OU DE NON-CONTREFAÇON DU LOGICIEL. Veuillez prendre note que Maxtor met
à votre disposition le code source pour le logiciel GPL sur le site www.maxtor.fr.
DANS LES LIMITES PRÉVUES PAR LA LOI, CETTE GARANTIE ET LES RECOURS
ÉTABLIS CI-DESSUS SONT EXCLUSIFS ET REMPLACENT TOUT AUTRE RECOURS
OU GARANTIE ORAUX OU ÉCRITS, EXPRIMÉS, TACITES OU LÉGAUX. EN DEHORS
DE CE QUI EST EXPRESSÉMENT ÉTABLI, MAXTOR REJETTE SPÉCIFIQUEMENT ET
DANS LES LIMITES PRÉVUES PAR LA LOI TOUTE RESPONSABILITÉ, GARANTIE
OU CONDITION, EN CE QUI CONCERNE LES PRODUITS, LES SERVICES OU
QUELQU’AUTRE SUJET QUE CE SOIT. EN PARTICULIER, MAIS SANS SE LIMITER À
LA GÉNÉRALITÉ DE CE QUI PRÉCÈDE, MAXTOR REJETTE SPÉCIFIQUEMENT
TOUTE GARANTIE OU CONDITION IMPLICITE OU REPUTÉE DE QUALITÉ
SATISFAISANTE, DE QUALITÉ MARCHANDE, D’APTITUDE À UN EMPLOI
PARTICULIER, DE FONCTIONNEMENT SELON LES RÈGLES DE L’ART ET DE NONVIOLATION DES DROITS D’UN TIERS OU TOUTE AUTRE GARANTIE PROVENANT
D’UN EMPLOI OU D’UN USAGE COMMERCIAL. CETTE GARANTIE LIMITÉE NE
S’APPLIQUE PAS À DES PRODUITS VENDUS À L’ORIGINE COMME COMPOSANT
INTÉGRÉ D’UN SYSTÈME NON FOURNI PAR MAXTOR, NI À DES PRODUITS
FOURNIS PAR LE BIAIS D’UN ARRANGEMENT DE LOCATION OU DE SERVICE
TIERS ET MAXTOR NE VOUS PROPOSE AUCUNE GARANTIE À CE SUJET. Aucun
distributeur, revendeur, agent ou employé de Maxtor n’est autorisé à modifier,
allonger ou compléter cette garantie.
MAXTOR NE SAURAIT ÊTRE TENU RESPONSABLE DES DOMMAGES INDIRECTS,
IMPRÉVISIBLES, SPÉCIAUX, ACCESSOIRES OU CONSÉCUTIFS QUELLE QUE SOIT
LA MANIÈRE DONT ILS ONT ÉTÉ CAUSÉS, ET QUE MAXTOR AIT ÉTÉ PRÉVENU DE
LEUR POSSIBILITÉ D’OCCURRENCE OU NON, Y COMPRIS, MAIS SANS S’Y
LIMITER, LES COÛTS D’APPROVISIONNEMENT DES MARCHANDISES DE
REMPLACEMENT, LA PERTE DE DONNÉES OU DE PROGRAMMES, LA PERTE DE
BÉNÉFICES, LES PÉRIODES D’IMPRODUCTIVITÉ, LA DÉPRÉCIATION DE L’IMAGE,
LES DOMMAGES OU LE REMPLACEMENT D’ÉQUIPEMENT ET DE PROPRIÉTÉ,
AINSI QUE TOUS LES COÛTS DE RÉCUPÉRATION DE DONNÉES, DE
PROGRAMMATION OU DE REPRODUCTION DE TOUT PROGRAMME OU TOUTE
DONNÉE MÉMORISÉE DANS OU UTILISÉE AVEC LES PRODUITS MAXTOR OU TOUT
AUTRE DOMMAGE SURVENANT SUITE À L’ACHAT, L’UTILISATION OU LE
FONCTIONNEMENT DU PRODUIT. Maxtor n’est pas responsable, et ne saurait être
tenu responsable de toute perte de données ou de tout dommage survenu à des
données suite à une perte, ni de toute impossibilité à l’accès de ces données suite
à la défaillance d’un Produit, et il est entendu que vous supportez ce risque en
conséquence. L’affectation du risque dans le cadre de cette limite de garantie est
reflété dans le prix d’achat du Produit. Cette limite de responsabilité, toutefois, ne
s’appliquera pas à des demandes de remboursement pour décès ou préjudice
corporel causé par la négligence de Maxtor ou ses sociétés, son personnel, ses
commerciaux ou agents affiliés.
Certaines juridictions ne permettent pas l’exclusion ou la limitation de dommages
accidentels ou consécutifs ou les exclusions de conditions ou garanties implicites
ou réputées. Il est donc possible que les limitations ou exclusions ci-dessus ne
vous concernent pas. Cette garantie vous confère des droits spécifiques. Vous
pouvez également avoir d’autres droits, qui varient selon les juridictions. Par
exemple, si vous avez acheté un Produit auprès de Maxtor ou l’un de ses
revendeurs agréés en Europe, en Afrique ou au Moyen-Orient, vous pouvez
disposer de droits de garantie supplémentaires qui sont détaillés sur le site
Internet www.maxtor.fr.
Notez qu’il vous est expressément interdit d’utiliser les Produits Maxtor en
conjonction avec des installations nucléaires, de navigation aérienne, des
systèmes de communication aérienne, de contrôle des vols aériens, de contrôle du
trafic aérien, des dispositifs ou systèmes d’armement, ou tout dispositif ou
système dans lequel un dysfonctionnement (y compris, mais sans s’y limiter, un
retard ou une défaillance liée due au logiciel) pourrait causer un risque prévisible
de blessure ou d’accident mortel pour l’opérateur du dispositif ou du système,
ou pour un tiers.
Cette déclaration de garantie limitée sera exclusivement interprétée
conformément à la langue anglaise avec la signification de ses termes. Dans
l’éventualité où une cour de juridiction compétente déclarerait une (des) clause(s)
de cette garantie limitée invalide(s), le reste de la garantie limitée conserverait
toute son autorité et son plein effet. En outre, si une traduction de cette garantie
limitée introduisait une modification du sens, seule la version en anglais
s’appliquerait et engagerait Maxtor.
FRANÇAIS - PAGE 35
MAXTOR SATA/300 PCI-KARTE INSTALLATIONSANLEITUNG
Inhaltsverzeichnis
Einführung . . . . . . . . . . . . . . . . . . . . . . . . . . . . . . . . . . . . . . . . . . . . . . . . . . . . . .
Vorsichtsmaßnahmen für die Handhabung . . . . . . . . . . . . . . . . . . . . . . . . .
Inhalt dieses Kits. . . . . . . . . . . . . . . . . . . . . . . . . . . . . . . . . . . . . . . . . . . . . . .
Sichern Sie Ihre Daten . . . . . . . . . . . . . . . . . . . . . . . . . . . . . . . . . . . . . . . . . .
Über Serial ATA . . . . . . . . . . . . . . . . . . . . . . . . . . . . . . . . . . . . . . . . . . . . . . . .
Benötigte Werkzeuge . . . . . . . . . . . . . . . . . . . . . . . . . . . . . . . . . . . . . . . . . . .
Entfernen der Systemabdeckung . . . . . . . . . . . . . . . . . . . . . . . . . . . . . . . . . . .
Installation der SATA/300 PCI-Karte . . . . . . . . . . . . . . . . . . . . . . . . . . . . . . . .
Anschließen der Festplatte . . . . . . . . . . . . . . . . . . . . . . . . . . . . . . . . . . . . . . . .
Anschließen einer SATA-Festplatte . . . . . . . . . . . . . . . . . . . . . . . . . . . . . . .
Anschließen einer Ultra ATA-Festplatte . . . . . . . . . . . . . . . . . . . . . . . . . . . .
Überprüfen der BIOS-Anzeige . . . . . . . . . . . . . . . . . . . . . . . . . . . . . . . . . . . . .
Treiberinstallation (Windows) . . . . . . . . . . . . . . . . . . . . . . . . . . . . . . . . . . . . .
Existierende Windows 2000-Installation. . . . . . . . . . . . . . . . . . . . . . . . . . . .
Windows 2000 Neu-Installation . . . . . . . . . . . . . . . . . . . . . . . . . . . . . . . . . . .
Existierende Windows XP-Installation . . . . . . . . . . . . . . . . . . . . . . . . . . . . .
Windows XP Neu-Installation. . . . . . . . . . . . . . . . . . . . . . . . . . . . . . . . . . . . .
Garantieerklärung . . . . . . . . . . . . . . . . . . . . . . . . . . . . . . . . . . . . . . . . . . . . . . .
37
37
37
38
38
38
39
40
41
42
43
45
46
46
47
48
50
52
MAXTOR SATA/300 PCI-KARTE INSTALLATIONSANLEITUNG
ABBILDUNG 1 INHALT DIESES KITS
1. Maxtor SATA/300 PCI-Karte
2. SATA Schnittstellenkabel*
3. Treiber-CD-ROM oder Diskette
4. SATA Netzteilkabel*
* nicht in allen Kits enthalten
Einführung
Danke, dass Sie sich für die Maxtor SATA/300 PCI-Karte entschieden haben.
Diese Anleitung führt Sie durch den Installationsprozess Ihrer Adapterkarte.
Bitte besuchen Sie unsere Website www.maxtor.de und klicken Sie auf
Produkt-Support, falls Sie Schwierigkeiten bei der Installation haben sollten.
Abbildung 1 zeigt die Bestandteile des separat erhältlichen SATA/300 PCIKarten-Kits. Die in den Festplattenkits von Maxtor mitgelieferten Karten
enthalten u. U. nicht alle der abgebildeten Bestandteile. Zur Installation der
Festplatte benötigen Sie die in Abbildung 2 auf Seite 38 dargestellten
Werkzeuge sowie eine Vollversion Ihres Betriebssystems.
Vorsichtsmaßnahmen für die Handhabung
Adapterkarten sind für Schäden anfällig, die aufgrund von elektrostatischen
Entladungen (ESD) auftreten. Fassen Sie die Adapterkarte an den Seiten an.
Berühren Sie auf keinen Fall die Leiterplatten-Einheit.
Max•Blast ™
Stecken Sie nie ein Kabel ein oder aus, so lange die Stromzufuhr zum System
nicht unterbrochen wurde.
Versuchen Sie auf keinen Fall, die Stecker der Adapterkarte gewaltsam in die
Buchsen zu stecken oder herauszuziehen.
DEUTSCH - SEITE 37
MAXTOR SATA/300 PCI-KARTE INSTALLATIONSANLEITUNG
Sichern Sie Ihre Daten
Schützen Sie die Daten Ihrer anderen Festplatten, indem Sie vor der
Installation der neuen SATA/300 PCI-Karte von Maxtor Sicherungskopien
aller Daten anlegen.
ABBILDUNG 2 BENÖTIGTE WERKZEUGE
1.
2.
3.
4.
Systemhandbuch
Betriebssystem-CD-ROM und Boot-Diskette
Kreuzschlitz-Schraubendreher
Kleine Spitzzange
Über Serial ATA
Die Serial ATA (SATA)-Technologie bietet Ihnen folgende Vorteile:
– Schnellste ATA-Schnittstelle der Welt
– Ideal für Hochgeschwindigkeits-RAID
– µSchmale, einfach anzuschließende Kabel für verbesserte
Luftzirkulation
– Einfache Installation ohne Jumper
Anders als bei Standard-ATA-Festplatten werden zur Installation von
Serial ATA-Festplatten keine Jumper benötigt.
Aktuelle Informationen über SATA sowie Software-Updates finden Sie
auf www.maxtor.de unter Produkt-Support.
SEITE 38 - DEUTSCH
System Man
ual
MAXTOR SATA/300 PCI-KARTE INSTALLATIONSANLEITUNG
Entfernen der Systemabdeckung
1.
Schalten Sie Ihren Computer aus.
2.
Ziehen Sie den Netzstecker aus der Steckdose.
3.
Entfernen Sie die Systemabdeckung.
Informationen zum Entfernen
der Abdeckung finden Sie in
Ihrem Systemhandbuch. Sie
können sich aber auch an
einen qualifizierten
Installations-techniker
wenden.
ABBILDUNG 3
ENTFERNEN DER SYSTEMABDECKUNG
4.
Verwenden Sie ein Masseband oder berühren Sie ein Metallteil an Ihrem Computergehäuse. Dadurch werden
Sie geerdet und das Risiko, die Festplatte elektrostatischer Entladung auszusetzen, wird verringert.
DEUTSCH - SEITE 39
MAXTOR SATA/300 PCI-KARTE INSTALLATIONSANLEITUNG
Installation der SATA/300 PCI-Karte
Die SATA/300 PCI-Karte passt in jeden beliebigen freien 32-Bit PCI-Steckplatz, auch in den 32-Bit-Teil eines
64-Bit PCI-Steckplatzes.
1.
Entfernen Sie die Steckplatzabdeckung eines freien PCI-Steckplatzes auf dem Motherboard.
2.
Stecken Sie die SATA/300 PCI-Karte in den freien Steckplatz. Befestigen Sie die Halterung der Kontrollerkarte
am Gehäuse.
ABBILDUNG 4
EINSETZEN DER SATA/300 PCI-KARTE
3.
(Optional:) Schließen Sie das 2- oder 4-polige LED-Kabel Ihres Systemgehäuses an den LED-Anschluss der
SATA/300 PCI-Karte an (siehe Abbildung 5). Stift 1 des Steckers und Stift 1 des Kabels müssen auf einander
ausgerichtet sein. Weitere Informationen zu den LED-Anschlüssen Ihres Gehäuses finden Sie im Handbuch für
das Systemgehäuse.
SEITE 40 - DEUTSCH
MAXTOR SATA/300 PCI-KARTE INSTALLATIONSANLEITUNG
Anschließen der Festplatte
Die SATA/300 PCI-Karte verfügt über zwei SATA/300-Anschlüsse, die jeweils eine Serial ATA-Festplatte unterstützen
sowie über einen parallelen Ultra ATA/133-Anschluss, der zwei Ultra ATA/IDE-Festplatten unterstützt. Die Karte
unterstützt keine ATAPI-Geräte wie Zip- oder CD/DVD-Laufwerke. Bevor Sie die Festplatte an die Karte anschließen,
müssen Sie die Festplatte mithilfe des Systemhandbuchs oder der beiliegenden Anleitung in Ihr System einbauen.
Wenn auf der Festplatte, die Sie an die SATA/300 PCI-Karte anschließen wollen, bereits Windows 2000 oder XP vorinstalliert ist,
schließen Sie diese bitte noch NICHT an die Karte an. Belassen Sie die Festplatte an ihrem aktuellen Kontroller-Anschluss. Bevor
Sie die Festplatte an die Karte anschließen, müssen Sie den Windows-Treiber für die SATA/300 PCI-Karte installieren.
Einzelheiten hierzu finden Sie in Abschnitt „Treiberinstallation (Windows)“ auf Seite 46.
LEDAnschlüsse
Ultra ATAAnschluss 3
Serial ATAAnschluss 2
Serial ATAAnschluss 1
ABBILDUNG 5
VERFÜGBARE ANSCHLÜSSE
DEUTSCH - SEITE 41
MAXTOR SATA/300 PCI-KARTE INSTALLATIONSANLEITUNG
Anschließen einer SATA-Festplatte
Jeder der beiden SATA/300-Anschlüsse auf der SATA/300 PCI-Karte unterstützt eine einzelne SATA-Festplatte.
So schließen Sie eine SATA-Festplatte an die Karte an:
1.
Verbinden Sie ein Ende des SATA-Schnittstellenkabels mit einem der SATA-Steckplätze auf der Karte.
(Siehe Abbildung 5 auf Seite 41.)
2.
Schließen Sie das andere Ende des SATA-Schnittstellenkabels an den SATA-Steckplatz auf der Rückseite
der Festplatte an.
Netzanschluss
NC-Jumper
(kein Anschluss)
SATA
NETZKABEL
Hinweis: Die NC-Jumperstifte haben keine Funktion.
Sie dienen lediglich zur Aufbewahrung ungenutzter Jumper.
SA TA-Schnittstellenanschluss
Force 150-Jumper
(Transferrate: 150)
Wenn die Festplatte direkt an die Maxtor SATA-Karte
angeschlossen ist, sollte sich der Force 150-Jumper in
der NC-Position befinden.
ABBILDUNG 6
ANSCHLIEßEN DER KABEL AN DIE SATA-FESTPLATTE
SEITE 42 - DEUTSCH
MAXTOR SATA/300 PCI-KARTE INSTALLATIONSANLEITUNG
Anschließen einer Ultra ATA-Festplatte
Die SATA/300 PCI-Karte verfügt über einen Ultra ATA/133-Anschluss, der maximal zwei Ultra ATA/IDE-Festplatten
über ein einzelnes 80-Stecker/40-Stift Ultra ATA-Kabel unterstützt (separat erhältlich). Die Karte unterstützt keine
ATAPI-Geräte wie Zip- oder CD/DVD-Laufwerke. Maxtor rät von der Verwendung veralteter 40-Stecker ATA/IDE-Kabel
mit dieser Karte ab, damit ein Maximum an Kompatibilität und Datenintegrität gewährleistet ist.
1.
Setzen Sie die Jumper der Ultra ATA-Festplatte auf die Cable Select-Einstellung. Werden zwei Ultra ATA-Festplatten
angeschlossen, sollten beide als Cable Select (CS) konfiguriert sein. Für weitere Informationen zur
Jumperkonfiguration sehen Sie sich bitte die Abbildung auf dem Festplattenetikett an, lesen Sie im Handbuch nach
oder wenden Sie sich an den Hersteller. Jumpereinstellungen für die am häufigsten genutzten Maxtor-Modelle sind
in Abbildung 7 dargestellt.
Methode A1
Methode A2
Methode B
Methode C
(einschließlich
(Includes 16)
DiamondMax
(einschließlich DiamondMax
(Includes
Plus 9,DiamondMax
10 oder 11)
(einschließlich DiamondMax
(Includes
DiamondMax
Plus
8 und
Fireball 3)
(Modelle D740X-6L
(Models
D740X-6L
und D540X-4K)
Style A1
DiamondMax 16)
Style A2
Plus 9, 10 or 11)
Style B
Plus 8 and Fireball 3)
Master
Slave
Style C
and D540X-4K)
Master
Cylinder
Limitation
Jumper
Jumper (CLJ)
(CLJ)
(Nicht
dieser
(not formit
use
Karte
with this card)
zu verwenden)
Cable
Select
Slave
Cable
Select
ABBILDUNG 7
JUMPERBLOCK-POSITIONEN
DEUTSCH - SEITE 43
MAXTOR SATA/300 PCI-KARTE INSTALLATIONSANLEITUNG
2.
Schließen Sie den blauen Stecker des Ultra ATA-Kabels direkt an den Ultra-ATA-Anschluss der Karte an. Der
korrekte Anschluss des Kabels wird durch eine Ausbuchtung auf einer Seite des Steckers ermöglicht, welcher
nur in eine Richtung in die Einkerbung am ATA-Anschluss platziert werden kann.
3.
Schließen Sie den schwarzen Anschluss des Kabels auf der Rückseite der Festplatte an den ATA-Anschluss an.
Wenn zwei Ultra ATA-Festplatten angeschlossen werden sollen, wobei eine als Bootlaufwerk dienen soll, verbinden
Sie den schwarzen Anschluss des Kabels mit dem Bootlaufwerk und den grauen Anschluss des Kabels mit der
zweiten Festplatte. Wird keine der Festplatten als Bootlaufwerk genutzt, kann der graue oder der schwarze
Anschluss verwendet werden. Siehe Abbildung 8.
ATAATA Interface
Cable
Schnittstellen
Zweite Drive
Secondary
(Gray)
Festplatte
BootBoot Drive
(Black)
Laufwerk
PCI Card
PCI(Blue)
Karte
Power Supply
Netzkabel
Cable
ABBILDUNG 8
ANSCHLIEßEN DER KABEL
SEITE 44 - DEUTSCH
MAXTOR SATA/300 PCI-KARTE INSTALLATIONSANLEITUNG
Überprüfen der BIOS-Anzeige
Fahren Sie Ihr System hoch. Auf dem Bildschirm erscheint eine BIOS-Anzeige (siehe Abbildung 9), die sich auf die
Maxtor SATA/300 PCI-Karte bezieht. Damit wird bestätigt, dass die Karte einwandfrei durch das Motherboard erkannt
wurde. Erscheint diese Anzeige nicht, so fahren Sie Ihr System herunter und vergewissern Sie sich, dass die Karte
ordnungsgemäß am PCI-Steckplatz eingesetzt ist.
Die SATA/300 PCI-Karte ist eine PCI Plug-n-Play (PnP)-Vorrichtung, die angeschlossene Festplatten automatisch erkennt. In den
meisten Fällen ist keine Änderung im BIOS-Setup-Programm des Motherboards nötig. Bei einigen neueren Systemen können Sie
die Bootreihenfolge für SATA-Geräte im BIOS-Setup-Programm des Motherboards festlegen. Für weitere Informationen zum
BIOS-Setup lesen Sie bitte in Ihrem Systemhandbuch nach oder wenden Sie sich an den Systemhersteller.
Maxtor SATA/300 PCI Card
BIOS v1.00.22.11
(c) 2005 Manufacturer Name.
All rights reserved.
Press F1 to continue,
F2 to enter setup.
ABBILDUNG 9
SATA/300 PCI-KARTE BIOS-ANZEIGE
DEUTSCH - SEITE 45
MAXTOR SATA/300 PCI-KARTE INSTALLATIONSANLEITUNG
Treiberinstallation (Windows)
Existierende Windows 2000-Installation
Schließen Sie die Festplatte NICHT an die Karte an, wenn auf der SATA- oder Ultra ATA-Festplatte, die Sie an die SATA/300
PCI-Karte anschließen möchten, Windows 2000 oder Windows XP installiert ist. Belassen Sie die Festplatte an ihrem aktuellen
Kontroller-Anschluss. Bevor Sie die Festplatte an die Karte anschließen, müssen Sie den Windows-Treiber für die SATA/300
PCI-Karte installieren.
Dieser Abschnitt beschreibt die Installation von SATA/300 PCI-Karten-Treibern in ein System, bei dem Windows 2000
bereits installiert ist.
1.
Ist die SATA/300 PCI-Karte installiert und das System neu gestartet, erkennt Windows 2000 einen MassenspeicherKontroller und zeigt den Assistenten „Neue Hardware gefunden“ an. Legen Sie die Treiberdiskette oder -CD-ROM
ein. (Wenn Sie eine CD-ROM einlegen, schließen Sie das angezeigte Fenster zur Sprachauswahl.)
2.
Im Assistenten „Neue Hardware gefunden“ klicken Sie auf „Weiter“.
3.
Wählen Sie „Nach einem passenden Treiber für das Gerät suchen (empfohlen)“ und klicken Sie auf „Weiter“.
4.
Markieren Sie das Kontrollkästchen „Andere Quelle angeben“, deaktivieren Sie die anderen Kontrollkästchen
und klicken Sie auf „Weiter“.
5.
Klicken Sie auf die Schaltfläche „Durchsuchen“.
6.
Wählen Sie den Ordner „I386“ (Athlon 64-, FX-, Turion- und Opteron-Nutzer wählen den Ordner „AMD64“) auf der
Treiberdiskette bzw. -CD-ROM und klicken Sie auf „Öffnen“.
7.
Klicken Sie auf OK.
8.
Windows erkennt den Treiber für die Maxtor SATA/300 PCI-Karte. Klicken Sie auf „Weiter“.
SEITE 46 - DEUTSCH
MAXTOR SATA/300 PCI-KARTE INSTALLATIONSANLEITUNG
9.
Wenn der Assistent die Treiberinstallation beendet hat, entnehmen Sie alle Disketten bzw. CD-ROMs aus den
Laufwerken und klicken Sie auf „Fertig stellen“, um das System neu zu starten.
10. Nachdem Windows neu gestartet wurde, fahren Sie den Computer normal herunter. Schließen Sie die
Schnittstellen- und Stromkabel der an die Karte anzuschließenden Festplatten an und starten Sie anschließend
das System neu.
Beim Neustart mit der neuen Festplatte meldet Windows, dass ein neues Speichermedium gefunden wurde und fragt, ob Sie
dieses formatieren möchten. Formatieren Sie die Festplatte wie vorgeschlagen.
Windows 2000 Neu-Installation
Wenn Ihr System nicht über ein Diskettenlaufwerk verfügt, sollten Sie für die Dauer der Installation ein 3,5-ZollDiskettenlaufwerk anschließen, um den SATA-Treiber von einer Diskette installieren zu können. Es ist ein typisches Merkmal des
Windows 2000- und XP-Setup, dass es keine Möglichkeit gibt, während der Treiberinstallation auf ein CD-ROM-Laufwerk
zuzugreifen.
Dieser Abschnitt beschreibt die Installation von SATA/300 PCI-Karten-Treibern, wenn gleichzeitig Windows 2000
installiert wird.
1.
Wenn im Lieferumfang dieser Karte eine Treiberdiskette enthalten ist, können Sie mit dem nächsten Schritt
fortfahren. Wenn im Lieferumfang dieser Karte eine MaxBlast-CD-ROM mit Treibern enthalten ist, booten Sie
das System über die MaxBlast-CD-ROM und wählen die Option „SATA PCI-Karten-Treiber-Diskette erstellen“ aus.
Falls Sie die Treiber von www.maxtor.de heruntergeladen haben, speichern Sie diese auf einer Diskette.
2.
Booten Sie das System von der Windows 2000-Installations-CD-ROM.
3.
Drücken Sie die Taste F6, wenn Sie das Windows-Installationsprogramm zur Angabe eines Treibers eines
Drittanbieters auffordert (z. B. SCSI oder RAID).
DEUTSCH - SEITE 47
MAXTOR SATA/300 PCI-KARTE INSTALLATIONSANLEITUNG
4.
Wenn das Fenster „Windows 2000 einrichten“ angezeigt wird, drücken Sie die S-Taste, um zusätzliche
Geräte anzugeben.
5.
Legen Sie die Diskette mit dem Treiber der SATA/300 PCI-Karte in das Diskettenlaufwerk A ein und drücken
Sie die Eingabetaste.
6.
Eine Liste wird auf dem Bildschirm eingeblendet. Wählen Sie den Eintrag „Windows Maxtor SATA300 PCI Card“
aus und drücken Sie die Eingabetaste.
7.
Drücken Sie die S-Taste, um den Treiber auf der Diskette zu verwenden, und drücken Sie die Eingabetaste, um
die Installation fortzusetzen.
8.
Das Fenster „Windows 2000 einrichten“ mit der Nachricht „Setup lädt Support für folgende Massenspeichergeräte“ wird eingeblendet. Die Liste enthält den Eintrag „Windows Maxtor SATA300 PCI Card“. Sollen noch andere
Geräte installiert werden, geben Sie diese jetzt an und fahren anschließend mit dem nächsten Schritt fort.
Drücken Sie die Eingabetaste im Fenster „Windows 2000 einrichten“. Das Setup-Programm lädt nun alle
Gerätedateien und beendet die Installation von Windows 2000.
Existierende Windows XP-Installation
Schließen Sie die Festplatte NICHT an die Karte an, wenn auf der SATA- oder Ultra ATA-Festplatte, die Sie an die SATA/300
PCI-Karte anschließen möchten, Windows 2000 oder Windows XP installiert ist. Belassen Sie die Festplatte an ihrem aktuellen
Kontroller-Anschluss. Bevor Sie die Festplatte an die Karte anschließen, müssen Sie den Windows-Treiber für die SATA/300
PCI-Karte installieren.
Dieser Abschnitt beschreibt die Installation von SATA/300 PCI-Karten-Treibern in ein System, das bereits mit
Windows XP läuft.
SEITE 48 - DEUTSCH
MAXTOR SATA/300 PCI-KARTE INSTALLATIONSANLEITUNG
9.
Ist die SATA/300 PCI-Karte installiert und das System neu gestartet, erkennt Windows XP einen MassenspeicherKontroller und zeigt den Assistenten „Neue Hardware gefunden“ an. Legen Sie die Treiberdiskette oder -CD-ROM
ein. (Wenn Sie eine CD-ROM einlegen, schließen Sie die daraufhin eingeblendete Sprachauswahl.)
10. Im Assistenten „Neue Hardware gefunden“ wählen Sie den Eintrag „Von einer Liste oder angegebenen Position
installieren (erweitert)“ und klicken Sie auf „Weiter“.
11. Wählen Sie die Option „Nach dem besten Treiber für das Gerät suchen“, markieren Sie anschließend das
Kontrollkästchen „Diese Position in die Suche miteinbeziehen“ und klicken Sie auf die Schaltfläche „Durchsuchen“.
12. Wählen Sie den Ordner „I386“ (Athlon 64-, FX-, Turion- und Opteron-Nutzer wählen den Ordner „AMD64“) auf der
Treiberdiskette bzw. -CD-ROM und klicken Sie auf „Weiter“.
13. Wenn der Assistent „Neue Hardware hinzufügen“ die Installation des SATA/300 PCI-Karten-Treibers beendet hat,
klicken Sie auf „Fertig stellen“.
14. Fahren Sie den Computer normal herunter und schalten Sie das System ab.
15. Schließen Sie die Schnittstellen- und Stromkabel der an die Karte anzuschließenden Festplatten an und starten
Sie anschließend das System neu.
Beim Neustart mit der neuen Festplatte meldet Windows, dass ein neues Speichermedium gefunden wurde und fragt, ob Sie
dieses formatieren möchten. Formatieren Sie die Festplatte wie vorgeschlagen.
DEUTSCH - SEITE 49
MAXTOR SATA/300 PCI-KARTE INSTALLATIONSANLEITUNG
Windows XP Neu-Installation
Wenn Ihr System nicht über ein Diskettenlaufwerk verfügt, sollten Sie für die Dauer der Installation ein 3,5-ZollDiskettenlaufwerk anschließen, um den SATA-Treiber von einer Diskette installieren zu können. Es ist ein typisches Merkmal
des Windows 2000- und XP-Setup, dass es keine Möglichkeit gibt, während der Treiberinstallation auf ein CD-ROM-Laufwerk
zuzugreifen.
Dieser Abschnitt beschreibt die Installation des SATA/300 PCI-Karten-Treibers, wenn gleichzeitig Windows XP
installiert wird.
1.
Wenn im Lieferumfang dieser Karte eine Treiberdiskette enthalten ist, können Sie mit dem nächsten Schritt
fortfahren. Wenn im Lieferumfang dieser Karte eine MaxBlast-CD-ROM mit Treibern enthalten ist, booten Sie
das System über die MaxBlast-CD-ROM und wählen die Option „SATA PCI-Karten-Treiberdiskette erstellen“ aus.
Falls Sie die Treiber von www.maxtor.de heruntergeladen haben, speichern Sie diese auf einer Diskette.
2.
Booten Sie das System von der Windows XP-Installations-CD-ROM.
3.
Drücken Sie die Taste F6, wenn Sie das Windows-Installationsprogramm zur Angabe eines Treibers eines
Drittanbieters auffordert (z. B. SCSI oder RAID).
4.
Wenn das Fenster „Windows XP einrichten“ angezeigt wird, drücken Sie die S-Taste, um zusätzliche
Geräte anzugeben.
5.
Legen Sie die Treiberdiskette in das Diskettenlaufwerk A: ein und drücken Sie die Eingabetaste.
6.
Eine Auflistung erscheint auf dem Bildschirm. Wählen Sie den Eintrag „Windows Maxtor SATA300 PCI Card“ aus
und drücken Sie die Eingabetaste.
7.
Drücken Sie die S-Taste, um den Treiber auf der Diskette zu verwenden, und drücken Sie die Eingabetaste,
um die Installation fortzusetzen.
SEITE 50 - DEUTSCH
MAXTOR SATA/300 PCI-KARTE INSTALLATIONSANLEITUNG
8.
Das Fenster „Windows XP einrichten“ erscheint. „Setup lädt Support für folgende Massenspeichergeräte“
wird angezeigt. Die Liste enthält den Eintrag „Windows Maxtor SATA300 PCI Card“. Sollen noch andere Geräte
installiert werden, geben Sie diese jetzt an und fahren anschließend mit dem nächsten Schritt fort.
9.
Wenn das Fenster „Windows XP einrichten“ angezeigt wird, drücken Sie die Eingabetaste. Das Setup-Programm
lädt nun alle Treiber und schließt die Installation von Windows XP ab.
DEUTSCH - SEITE 51
MAXTOR SATA/300 PCI-KARTE INSTALLATIONSANLEITUNG
Garantieerklärung
Garantieservice
Die Garantieverpflichtungen von Maxtor beschränken sich auf folgende Bedingungen:
Beachten Sie bitte, dass sich Maxtor das Recht vorbehält, die Garantiebedingungen für Neukäufe von Maxtor-Produkten von Zeit zu Zeit zu ändern und
den Tag des Inkrafttretens dieser aktualisierten Garantiebedingungen festzulegen.
Die jeweils aktuelle Form der Erklärung über beschränkte Garantiepflicht für
Markenprodukte von Maxtor finden Sie unter www.maxtor.de.
Bitte beachten Sie, dass Maxtor-Produkte außerhalb der USA und Kanada über
autorisierte Vertriebspartner und Vertragshändler vor Ort (nachstehend
bezeichnet als „Vertragshändler“) vertrieben werden. Diese Vertragshändler
gewähren den Endkunden/Käufern für gewöhnlich eine Kundengarantie sowie
zugehörige Garantieleistungen. Für sämtliche Belange mit Hinblick auf
Produktfehler und die jeweilige Produktgarantie empfiehlt Maxtor den Kunden in
diesen Ländern, sich zunächst an den Vertragshändler zu wenden, über den Sie
das Maxtor-Produkt bezogen haben.
Maxtor garantiert dem ursprünglichen Endkunden/Käufer („Ihnen“), dass neue
Festplatten von Maxtor („neue Produkte“) während der Standard-Garantiedauer
des betreffenden Produkts frei von Material- und Verarbeitungsfehlern sind. Die
standardmäßigen Garantiefristen für die verschiedenen, von Maxtor vermarkteten
neuen Produkte und für die geografischen Regionen, in denen sie verkauft werden,
sind im Einzelnen unter www.maxtor.de aufgeführt. Für Produkte in
Einzelhandels-verpackung gelten die standardmäßigen Garantiefristen, die auf
der Verpackung von Maxtor angegeben sind.
Der Garantiezeitraum für die als Ersatz für neue Produkte gelieferten Festplatten
entspricht dem verbleibenden Zeitraum der Garantie auf das Originalprodukt oder
90 Tagen ab dem Versanddatum des Ersatzprodukts, je nachdem, welcher
Zeitraum länger ist.
Zusätzlich zu neuen Produkten verkauft Maxtor von Zeit zu Zeit überholte
Festplattenprodukte, die nicht neu sind, aber so aufgearbeitet wurden, dass
sie Maxtors Standards für überholte Produkte („überholte Produkte“) erfüllen.
SEITE 52 - DEUTSCH
Falls Maxtor nicht entweder auf www.maxtor.de oder auf der Produktver-packung
(nur die von Maxtor verwendete) ausdrücklich eine Garantiedauer für ein
bestimmtes überholtes Produkt („Garantiedauer für überholte Produkte“) angibt,
werden überholte Produkte grundsätzlich „WIE BESEHEN“ geliefert und Maxtor
lehnt jegliche Garantie, Bedingung oder sonstige Vertragsbestimmungen für
überholte Produkte ab.
Für den Fall, dass Maxtor eine Garantiedauer für das überholte Produkt angibt,
garantiert Maxtor dem ursprünglichen Endkunden/Käufer, dass das überholte
Produkt für die angegebene Garantiedauer für überholte Produkte frei von
Material- und Verarbeitungsfehlern ist.
Neue Produkte und überholte Produkte werden in der Bezeichnung „Produkte“
zusammengefasst. Die Standard-Garantiedauer beziehungsweise die
Garantiedauer für überholte Produkte (zusammengefasst in der Bezeichnung
„Garantiedauer“) beginnt mit dem dokumentierten Erwerb Ihres Produkts von
Maxtor oder einem autorisierten Maxtor-Vertragshändler. Sollte das Kaufdatum
nicht belegt werden können, tritt die Garantiedauer ab dem Tag in Kraft, an dem
Maxtor das Produkt vom Ort seiner ursprünglichen Produktion beziehungsweise
Überholung an den Maxtor-Kunden ausgeliefert hat.
Die Produkte werden aus Teilen und Komponenten gefertigt, die nach branchenüblichen Normen als neu oder neuwertig gelten.
Wenn Sie während der Garantiefrist einen Material- oder Verarbeitungsfehler
feststellen und Maxtor diesen Fehler bestätigt, wird Maxtor nach eigenem
Ermessen das Produkt für Sie kostenfrei reparieren oder ersetzen, vorausgesetzt,
es wird während der zutreffenden Garantiefrist unter Zahlung der Transportkosten
an die von Maxtor angegebene Adresse zurückgesendet. Das Produkt muss in der
Originalverpackung von Maxtor oder einer gleichwertigen, von Maxtor akzeptierten
Verpackung zurückgesendet werden; die Rückgabenummer (Return Material
Authorization oder RMA) muss deutlich sichtbar auf der Verpackung angebracht
sein, um die Garantieleistung in Anspruch nehmen zu können. Produkte, die
während der ersten 30 Tage nach dem Kauf ausfallen, werden durch ein Neuprodukt
ausgetauscht. Maxtor kann vor der Herausgabe des Austauschprodukts einen
ordnungsgemäßen Kaufbeleg verlangen.
Wenn Maxtor sich für die Reparatur eines Produkts entscheidet, gehen alle aus
dem reparierten Produkt entfernten Teile in das Eigentum von Maxtor über.
MAXTOR SATA/300 PCI-KARTE INSTALLATIONSANLEITUNG
Maxtor verwendet in Zusammenhang mit Garantiereparaturen und
Austauschprodukten neue und überholte, von verschiedenen Herstellern
produzierte Teile. Reparaturteile oder Austauschprodukte können nach Ermessen
von Maxtor gleiche oder bessere Modelle oder Leistungsmerkmale beinhalten.
Maxtor ist in keiner Weise für irgendwelche Inhalte oder Daten auf den
zurückgesendeten Produkten verantwortlich.
Wenden Sie sich vor Inanspruchnahme von Garantieleistungen und vor Rücksendung
eines Produkts an Maxtor an das Maxtor Service Center. Die Telefonnummer für den
Kundendienst für Ihr Land sowie die Adresse für genehmigte Rücksendungen finden
Sie entweder in der Installationsanleitung von Maxtor oder online unter
www.maxtor.de. Sobald das Maxtor Service Center bestätigt, dass eine Reparatur
erforderlich ist, stellt Maxtor eine RMA-Nummer aus. Bei Inanspruchnahme von
Garantieleistungen ist als Kaufbeleg eine Quittung oder Rechnung mit dem Namen
und der Anschrift des Maxtor-Vertragshändlers und der Maxtor-Seriennummer sowie
der Modellnummer des Produkts erforderlich, bei dem der Fehler festgestellt wurde.
Beachten Sie bitte, dass Maxtor für bestimmte Produkte unter www.maxtor.de
alternativ eine Online-Garantierückgabeoption anbietet.
Sie allein sind für das Speichern oder Sichern von in einem Produkt enthaltenen
Daten verantwortlich, das wegen einer Inanspruchnahme der Garantie- oder
sonstigen Dienstleistungen an Maxtor zurückgesendet wird. Maxtor übernimmt
keinerlei Verantwortung oder Haftung für Schäden, den Verlust oder die
Offenlegung von diesen Daten.
Diese eingeschränkte Garantie gilt nur für Produkte von Maxtor, die anhand des
unversehrten Maxtor-Originalwarenzeichens, Handelsnamens oder Logos als
Produkte von Maxtor identifiziert werden können. Maxtor leistet keine Garantie für
Produkte, die nicht von Maxtor oder mit Erlaubnis von Maxtor hergestellt wurden,
oder nicht von Maxtor unter der Maxtor-Marke vertrieben werden.
Diese Garantie schließt Folgendes aus:
– Missbrauch, unsachgemäßer Gebrauch, falsche Handhabung oder
Fahrlässigkeit
– Außergewöhnliche physische oder elektrische Beanspruchungen sowie
Stromschwankungen
– Beschädigung beim Einbau des Produkts
– Beschädigung oder Rücksetzung von Kapazität/Leistung/Betrieb durch
die Ausstattung oder das System, mit dem das Produkt genutzt wird
– Beschädigung durch Änderungen oder Reparaturen, die nicht von Maxtor
durchgeführt oder genehmigt wurden
– Produkte, deren Maxtor-Seriennummern- und/oder
Materialnummernschild entfernt, zerrissen oder verunstaltet wurde
– Beschädigung durch Verwendung einer Verpackung, die nicht von
Maxtor stammt
– Beschädigung durch ungeeignete Verpackung oder deren unsachgemäße
Verwendung
– Beschädigung durch mangelhaften Schutz gegen elektrostatische Entladung
– Produkte, die als gestohlen gemeldet wurden
Darüber hinaus verfällt diese eingeschränkte Garantie, wenn die Produktabdeckung oder das Kennzeichen bzw. das Siegel auf dem Produkt entfernt
oder beschädigt ist.
Das Eigentumsrecht für alle aus reparierten Produkten ausgebauten Teile geht
auf Maxtor über. Maxtor verwendet bei Garantiereparaturen und bei der Fertigung
von Ersatzprodukten neue sowie aufgearbeitete Teile.
UNTERLASSEN DER RÜCKSENDUNG DES AUSGEFÜLLTEN FORMULARS ZUR
REGISTRIERUNG EINES MAXTOR-PRODUKTS HAT KEINE AUSWIRKUNGEN AUF
IHRE GARANTIEANSPRÜCHE.
Bestimmte Produkte enthalten Software oder Firmware als eine Komponente
(„Software“). Maxtor oder seine Lieferanten behalten alle Eigentumsrechte an einer
solchen Software und jegliche Nutzung der Software unterliegt den Bedingungen
der zutreffenden Lizenzvereinbarung, die Maxtor der Software beigefügt hat. Wenn
Maxtor keine Lizenzvereinbarung beigefügt hat, erhalten Sie das eingeschränkte
Recht zur Nutzung der Software wie zum Betrieb des Produkts erforderlich. Es
werden keine anderen Rechte jeglicher Art erteilt. In bestimmten Fällen unterliegt
Software der Allgemeinen Öffentlichen GNU-Lizenz (GPL-Software). AUSSER VON
MAXTOR ANDERS IN EINER SCHRIFT-LICHEN LIZENZVEREINBARUNG
ANGEGEBEN, WIRD DIE SOFTWARE „WIE BESEHEN“ ZUR VERFÜGUNG GESTELLT
UND MAXTOR ÜBERNIMMT KEINERLEI GARANTIEN, WEDER AUSDRÜCKLICHER
NOCH STILLSCHWEI-GENDER ODER GESETZLICHER ART ODER IRGENDEINER
ANDEREN ART FÜR DIESE SOFTWARE. INSBESONDERE SCHLIESST MAXTOR
JEGLICHE INDIREKTE GARANTIE FÜR MARKTGÄNGIGKEIT UND EIGNUNG FÜR
DEUTSCH - SEITE 53
MAXTOR SATA/300 PCI-KARTE INSTALLATIONSANLEITUNG
EINEN BESTIMMTEN ZWECK ODER NICHTVERLETZUNG VON RECHTEN IN BEZUG
AUF DIE SOFTWARE AUS. Bitte beachten Sie, dass Maxtor den Quelltext für die GPLSoftware unter www.maxtor.de zur Verfügung stellt.
SOWEIT GESETZLICH ZULÄSSIG, GELTEN DIE OBEN AUFGEFÜHRTE GARANTIE
UND DIE DARAUS RESULTIERENDEN ANSPRÜCHE AUSSCHLIESS-LICH UND
ANSTELLE ALLER ANDEREN GARANTIEN, DIE ENTWEDER MÜNDLICH ODER
SCHRIFTLICH, AUSDRÜCKLICH ODER STILLSCHWEIGEND VEREINBART WURDEN
ODER DIE GESETZLICH VORGESCHRIEBEN SIND. MAXTOR SCHLIESST, SOWEIT
GESETZLICH ZULÄSSIG, INSBESONDERE ALLE ZUSICHERUNGEN, GARANTIEN
UND BEDINGUNGEN FÜR PRODUKTE, DIENSTLEISTUNGEN ODER ANDERE
ANGELEGENHEITEN JEDWEDER ART AUS. INSBESONDERE SCHLIESST MAXTOR,
OHNE DIE ALLGEMEINGÜLTIG-KEIT DES VORSTEHENDEN DAMIT
EINZUSCHRÄNKEN, JEGLICHE INDIREKTE ODER ANGENOMMENE GARANTIE
ODER ZUSICHERUNG FÜR ZUFRIEDEN-STELLENDE QUALITÄT,
MARKTGÄNGIGKEIT, EIGNUNG FÜR EINEN BE-STIMMTEN ZWECK,
FACHMÄNNISCHE LEISTUNG UND NICHTVERLETZUNG DER RECHTE DRITTER
SOWIE ANDERE GARANTIEN AUS, DIE SICH AUS EINEM GESCHÄFT ODER HANDEL
ERGEBEN. DIESE EINGESCHRÄNKTE GARANTIE VON MAXTOR FINDET UNTER
KEINEN UMSTÄNDEN ANWENDUNG AUF PRODUKTE, DIE URSPRÜNGLICH ALS
INTEGRIERTE BAUTEILE EINES SYSTEMS VERKAUFT WURDEN, DAS NICHT VON
MAXTOR BEIGESTELLT WURDE, ODER AUF PRODUKTE, DIE VON DRITTEN ÜBER
EIN LEASING- ODER DIENSTLEISTUNGSABKOMMEN BEREITGESTELLT WURDEN.
Kein Vertriebspartner, Zwischen- und Einzelhändler, Vertreter oder Mitarbeiter von
Maxtor ist berechtigt, irgendwelche Änderungen, Erweiterungen oder Zusätze an
dieser Garantie vorzunehmen.
MAXTOR KANN NICHT FÜR INDIREKTE, UNVORHERSEHBARE, SPEZIELLE,
ZUFÄLLIGE SCHÄDEN ODER FOLGESCHÄDEN SCHADENERSATZPFLICHTIG
GEMACHT WERDEN, UNABHÄNGIG DAVON, WIE DIESE EINGETRETEN SIND UND OB
MAXTOR AUF DIE MÖGLICHKEIT SOLCHER SCHÄDEN HINGEWIESEN WURDE,
EINSCHLIESSLICH - ABER NICHT BESCHRÄNKT AUF - BESCHAF-FUNGSKOSTEN
FÜR ERSATZWAREN, VERLUST VON DATEN ODER PROGRAMMEN,
GEWINNAUSFALL, AUSFALLZEIT, VERLUST VON ANSEHEN, SCHÄDEN ODER
AUSTAUSCH VON AUSRÜSTUNG ODER EIGENTUM SOWIE SONSTIGE KOSTEN FÜR
DIE WIEDERHERSTELLUNG, PROGRAMMIERUNG ODER NEUERSTELLUNG EINES
PROGRAMMS ODER VON DATEN, DIE AUF MAXTOR-PRODUKTEN GESPEICHERT
ODER IN VERBINDUNG MIT DIESEN PRODUKTEN GENUTZT WERDEN. GLEICHES
GILT FÜR JEDWEDE SCHÄDEN, DIE AUFGRUND ODER IN FOLGE DES ERWERBS,
SEITE 54 - DEUTSCH
DER VERWENDUNG ODER DER LEISTUNG DES PRODUKTS ENTSTEHEN. Maxtor
kann im Falle eines Versagens des Produkts unter keinen Umständen haftbar
gemacht werden für den Verlust und Schaden von Daten noch für die Unfähigkeit, auf
Daten zugreifen zu können. Hierfür tragen einzig und allein Sie die Verantwortung. Die
Risikozu-weisung entsprechend dem vorliegenden Haftungsausschluss spiegelt sich
im Einkaufspreis des Produkts wider. Dieser Haftungsausschluss gilt nicht für
Ansprüche, die mit Todesfällen und Personenschäden zusammenhängen, die durch
Fahrlässigkeit von Maxtor oder die durch mit Maxtor verbundene Unter-nehmen,
leitende Mitarbeiter, Vertreter oder Handelsvertreter verursacht wurden.
In einigen Staaten oder Gerichtsbezirken ist der Ausschluss oder die Beschränkung
von Schadenersatz für beiläufig entstandene Schäden oder Folgeschäden bzw. der
Ausschluss angenommener Bedingungen oder stillschweigender Garantien nicht
zulässig. Daher treffen die oben genannten Beschränkungen und Ausschlüsse auf
Sie möglicherweise nicht zu. Diese Garantie verleiht Ihnen spezifische gesetzlich
festgelegte Rechte, und Sie haben möglicherweise weitere Rechte, die je nach der
geltenden Gesetzgebung variieren können. Wenn zum Beispiel ein Produkt von
Maxtor direkt oder einem autorisierten Maxtor-Vertragshändler in Europa, Afrika
oder dem Nahen Osten erworben wurde, können Sie unter Umständen zusätzliche
Garantieansprüche geltend machen. Weitere Informationen finden Sie unter
www.maxtor.de.
Beachten Sie bitte, dass es Ihnen ausdrücklich untersagt ist, die Produkte im
Zusammenhang mit dem Betrieb kerntechnischer Anlagen, der Flugzeugnavigation und -kommunikation oder der Flugleitung zu verwenden, sowie mit
Anlagen zur Luftverkehrskontrolle, mit Waffen oder Waffensystemen, oder in
jedweden Geräten oder Systemen, in denen eine Fehlfunktion (einschließlich und
ohne Einschränkung auf Software-bedingte Verzögerung oder Fehlfunktion) ein
absehbares Risiko der Verletzung oder des Todes des Betreibers des Geräts
bzw. des Systems oder anderer Personen zur Folge hätte.
Der Umfang dieser Garantiebeschränkung und die Bedeutung ihrer einzelnen
Begriffe richten sich ausschließlich nach der Originalfassung in englischer
Sprache. Für den Fall, dass eine Bestimmung dieser Erklärung über beschränkte
Garantiepflicht von einem zuständigen Gericht als rechtswidrig angesehen wird,
bleiben die verbleibenden Bestimmungen dieser Erklärung über beschränkte
Garantiepflicht in vollem Umfang wirksam. Sollte eine Übersetzung dieser
Erklärung über beschränkte Garantiepflicht von der englischen Fassung
abweichen, soll nur die englische Sprachversion zutreffen und bindend sein.
© 2005 Maxtor Corporation. All rights reserved. Changes are periodically made to the information herein which will be incorporated in revised editions of this publication. Maxtor may
make changes or improvements to the product(s) described in this publication at any time and without notice. MaxBlast is a trademark and Maxtor is a registered trademark of Maxtor
Corporation. All other brands or products are trademarks or registered trademarks of their respective holders. Maxtor Corporation, 500 McCarthy Blvd., Milpitas, California 95035 USA.
© 2005 Maxtor Corporation. Tous droits réservés. Des modifications sont régulièrement apportées aux informations ci-incluses, elles seront intégrées dans les rééditions de cette publication.
Maxtor est en droit de réaliser des modifications ou des améliorations sur les produits décrits dans cette publication à tout moment et sans avis préalable. MaxBlast, Maxtor et le logo
stylisé Maxtor sont des marques déposées de Maxtor Corporation. Les autres marques ou produits sont des marques commerciales ou des marques déposées de leurs propriétaires
respectifs. Maxtor Corporation, 500 McCarthy Blvd., Milpitas, California, 95035, Etats-Unis.
© 2005 Maxtor Corporation. Alle Rechte vorbehalten. Die hier gegebenen Informationen unterliegen regelmäßigen Änderungen, die in überarbeiteten Ausgaben dieser Veröffentlichung
enthalten sein werden. Maxtor kann die in dieser Veröffentlichung beschriebenen Produkte jederzeit und ohne vorherige Ankündigung verändern oder verbessern. MaxBlast, Maxtor und
das stilisierte Logo von Maxtor sind eingetragene Warenzeichen der Maxtor Corporation. Sonstige Produkt- oder Firmennamen sind Warenzeichen oder eingetragene Warenzeichen ihrer
jeweiligen Eigentümer. Maxtor Corporation, 500 McCarthy Blvd., Milpitas, CA 95035, USA.
PN: 20318100