1
I
:.
,
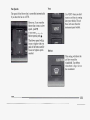
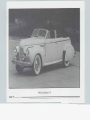
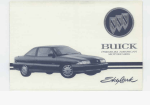
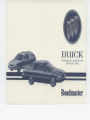
The 1994 Buick Roadmaster
Owner's Manual
Litho inU.S.A.
Part No. 25609689 B First Edition
'Copyright General Motors Corporation 1993
All Rights Reserved.
1
I
7
i
‘4
WE SUPPQRT
.VOLUNTARY TECHNICIAN
~GERT1FlCATION THROUGH
Nallonal lnslttule for
i-1
.?<.
>
‘,Thismanual hcludes the latest information at the time
IF?$
;”<
wasprinted. We reserve the right to make, changes in the
]pko&ct afterthat.timewithout further’notice.For ..: . :
’.:
.
3
-
1
AUTOMOTIVE
SERVICE
EXGELLENCE
3
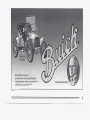
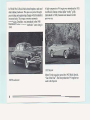
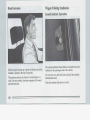
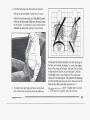
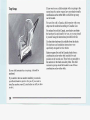
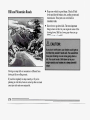
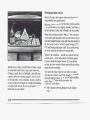
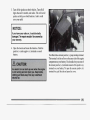
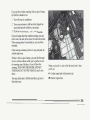
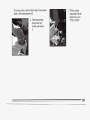
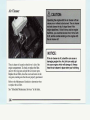
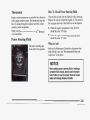
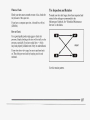
Walter Marr and Thomas Buick
Buick’s chief engineer, WalterL. Man (left), and
of founder David Dunbar Buick,
Thomas D. Buick, son
drove the first Flint Buick in a successful Flint-Detroit
round trip in July 1904.
David Buick was building gasoline engines by 1899,
auto to
and Marr, his engineer, apparently built the first
be called a Buickin 1900. However, Buick traditionally
dates its beginnings to 1903. That was the year the
company was reorganized, refinanced and moved from
Detroit to Flint. Buick has always been a product
innovator. Buick engineers developed the
4
Durant also created a racing team that
won 500 racing
trophies in 1909 and 19 10, including successes at
Indianapolis two years beforethe Indy 500 began.
The success of Buick engines was visible not only on
the race track, but in
endurance tests across the country
to
and around the world. Buick was the only car
complete a 1,000-mile Chicago-to-New York race in
1906. And a h i c k was the first car to travel across
South America, driven from Buenos Aires, Argentina,
over the Andes to Santiago, Chile in 19 14.
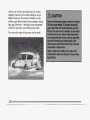
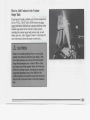
I 9 I I Model 21 Touring Car on Buick’s TestHill
Buick drew plentyof attention because it could
climb
hills and run throughmud like no other car. Buick’s
endurance and .reliability were world famous.
During World War I, Buick built Liberty aircraftengines
as well as Red Cross ambulancesso successful thatone
Buick ambulance was awarded the Croixde Guewe by
the French government.
As a builderof premier automobiles, Buickwas hard hit
by the Great Depression. However, new General
M%nager, HarlowH. Curtice created popular new
models including-theSpecial andthe Roadmaster. Buick
sales soon flourished.
I
First Buick Factory
3
In World War II, Buick built aircraft engines, tanks and
othermilitaryhardware.Thispost-warperiodbrought
great styling and engineering changes which resulted in
increased
sales.
The
torque
converter
automatic
post-war
era.
transmission, Dynaflow, was introduced in the 1948
Roadmaster. Buick’s famous “portholes” came along in
1949.
I949 Roadmaster
A high-compression V-8 engine was introduced in 1953.
AndBuick’sfamousverticalpillar “toothy” grille,
(introduced in 1942), became more massive in the
1953 Skylark
Motor Trend magazine
namedthe 1962 Buick $pecial,
“Car of the Year”. The first production V-6 engine was
used in the Special.
1962 Buick Special
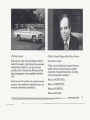
Ed Mertz, General Manager, Buick Motor Division
Built insidethe walls of the old buildingsin Buick’s
former Flint complex, which formed the cornerstoneof
General Motors, Buick City, is a state-of-the-art
assembly facility with more than200 robots and other
high-tech equipment. It was completed in the fallof
1985.
Our mission is simple:
Buicks are, and will continueto be, premium American
motorcars with smooth power,high performance, rich
detail andcomfortable accommodation.
-
“Buick will provide Premium American Motorcars
backed withservices,that exceed our customers’
expectations, throughout the purchase,
ownership,
service andrepurchase experience.”
Buicks are SUBSTANTIAL.
Buicks are DISTINCTIVE.
Buicks arePOWERFUL.
Buicks are MATURE.
7
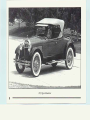
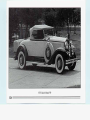
1923 Sport Roadster
8
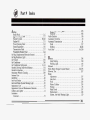
Table of Contents
~
~~
.................................................................
Seats and Restraint Systems .............................................................
This part tells you how to use your seats and safety belts properly. It also explains the“SRS” system.
FeaturesandControls ..................................................................
This part explains how to start and operateyour Buick.
Comfort Controls and Audio Systems .....................................................
How to Use this Manual
10
This part tells you how to use your manual and includes safety and vehicle damage warnings and symbols.
13
63
127
This part tells you how to adjust the ventilation and comfort controlsand how to operate your
sound system.
..............................................................
..................................................................
153
ServiceandAppearanceCare ............................................................
223
..................................................................
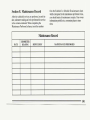
Customer Assistance Information ........................................................
281
YourDrivingandtheRoad
Here you’ll find helpful information and tips aboutthe road and how to drive under different conditions.
ProblemsontheRoad
187
This part tells you what to do if you have a problem while driving, such as a flat tire or engine
overheating, etc.
Here the manual tellsyou how to keep your Buick running properly and looking good.
Maintenanceschedule
This part tells you when to perform vehicle maintenanceand what fluids and lubricants to use.
303
This part tells you how to contact Buick for assistance andhow to get service publications. It also
gives you information on “Reporting Safety Defects”on page 305.
Index
................................................................................
311
Here’s an alphabetical listingof almost every subjectin this manual. You can use it to quickly find
something you want to read.
9
How to Use This Manual
.Many people read their owner’s manual from beginning
to end’ when they
first receive theirnew vehicle. This
will help you learn aboutthe features and controls for
your vehicle.In this manual, you’ll find that pictures
and words work together to explain things quickly.
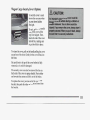
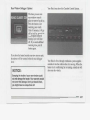
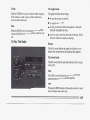
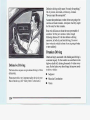
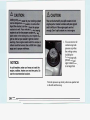
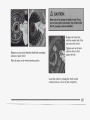
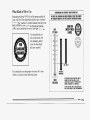
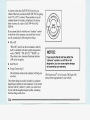
Safety Warnings and Symbols
You will find a number of safety cautionsin this book.
We use a box with gray background and the word
CAUTION to tell you about things that could hurt you
if
you were to ignore the warning.
’
’
I
I
k
In the gray cautionarea, we tell you what the hazard is.
Then we tell you what to do to help avoid or reduce the
you don’t, you or
hazard. Pleaseread these cautions. ‘If
otherscould be hurt.
You w~illalso find a circle witha slash through itin this
book.
This safety symbol means
“D.on’t,” “Don’tdo this,” or
,“Don’tlet this happen.”
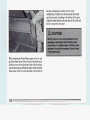
Vehicle Damage Warnings
Also, in this book you will find these notices:
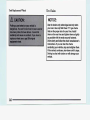
NOTICE:
In the notice area, we tell you about something that can
damage your vehicle. Many times, this damage would
not be covered by your warranty, and
it could be costly.
But the notice will tell you what to
do to help avoid the
damage.
When you read other manuals, you might see
CAUTION and NOTICE warnings in dif€erent colors or
in different words.
You’ll also see warning labels on your vehicle. They
use
yellow for cautions, blue for notices and the words
CAUTION or NOTICE.
11
These symbols
are used on
warning and
indicator lights:
Vehicle Symbols
These are some of the symbolsyou may find on your vehicle.
For example,
these symbols
are used on an
original battery:
CAUTION
POSSIBLE
INJURY
A
These symbols
are important
for you and
your passengers
whenever your
vehicle is
driven:
DOOR LOCK
UNUICK
PROTECT
EYES BY
SHIELDING
FASTEN
CAUSTIC
BATTERY
ACID COULD
CAUSE
BURNS
POWER
WINDOW
12
These symbols
are on some of
your controls:
ENGINE
COOLANT
TEMP
Q7
WIPER.
TURN
SIGNALS
DEFROSTER
HAZARD
WARNING
FLASHER
HIGH BEAM
OR
,\I/,
FOG LAMPS
BATTERYCHARGING
'SYSTEM
-Fe
I-1
FUSE -%-
"y
"
RADIO
SELECTOR
>
.)
RADIO
VOLUME
a )#t
WINDSHIELDw
SEAT
BELTS
AVOID
SPARKS OR
FLAMES
SPARK OR
FLAME
COULD
EXPLODE
BATTERY
4
These symbols
have to do with
your lights:
Here are some
other symbols
you may see:
A
WINDOW
DEFOGGER
=o
=
$0
VENTILATING
FAN
AIR
CONDITIONING
RADIATOR
COOLANT
TRUNK
RUEASE
FUEL
ENGINE OIL
PRESSURE
TEMP
OIL
ANTILOCK
BRAKE
e,
/y
LIGHTER
n
&
(@)
b
SPEAKER
~
Part 1 Seats and Restraint Systems
Here you’ll findinformation about the seats in yourBuick and how to use your safety belts properly
. You can also
do with safety belts .
learn about some things you should
Part 1 includes:
SeatsandSeatControls .............................................................
HeadRestraints . . . . . . . . . . . . . . . . . . . . . . . . . . . . . . . . . . . . . . . . . . . . . . . . . . . . . . . . . . . . . . . . . . .
Raising and Lowering Wagon Rear Seats ................................................
SafetyBelts ......................................................................
How to Wear Safety Belts Properly ....................................................
Lap-ShoulderBelt ............................................................
Supplemental Restraint System (Air bag) ...............................................
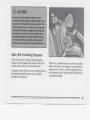
Safety Belt Use During Pregnancy.....................................................
Children .........................................................................
Smaller Children and Babies ....................................................
Child Restraints ............................................ :. . . . . . . . . . . . . . . . .
LargerChildren . . . . . . . . . . . . . . . . . . . . . . . . . . . . . . . . . . . . . . . . . . . . . . . . . . . . . . . . . . . . . . .
SafetyBeltExtender ................................................................
Replacing Safety Belts Aftera Crash ...................................................
Checking Your Restraint System . . . . . . . . . . . . . . . . . . . . . . . . . . . . . . . . . . . . . . . . . . . . . . . . . . . . . .
14
18
18
20
27
28
35
41
46
47
48
58
61
61
61
13
Seats and Seat Controls
,Fb+~This
section tellsyou about the seats -- how to adjust,
.%them, and also about reclining front seatbacks, raising
1 !and lowering wagon rear seats,and head restraints.
Manual Seat
Move the lever underthe front sea.t tcI unlock it. Slide
the seat to where
you want it. Then release the lever and
try to move the seat with your body,
to make sure the
seat is locked into place.
14
Reclining Front 'Seatback(§)
To adjust the seatback,1ift.tlielever on the outer side of
the seat and move the seatbackto where you want it.
Releastxihe leverto lock the seatback. Pull.up on the
kver and the seat will go to an upright position.,
'
.
,
If you have the power
recliner option, the switch
eat. This alIiows 'you to
"adjust the
seatback.
I
.
".
I
I
~
i
To raise the seat, lift the seatback until
it locks in theup
position. Push and pullon the seatback to make sure it’s
locked into place.
.
. .
, .
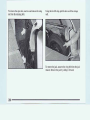
Third Seatback Operation
. . ~ ,
Pull up on the seat release
handle. The handle is
located in the lower right
corner of the storage
compartment.
The third seat is folded flat in the tailgate area
of your
station wagon.
To raise the seat,lift the
storage compartment lid
and foldit back.
The seatback will popup when you pull the handle.
Push the seatbackall the way up untilit locks in place.
Push and pull on the seatback to make sure the seatback
is locked into place.
19
After more than25 years of safety belts in vehicles,the
facts are clear. In most crashes buckling
up does matter
... a lot!
This figure lights up as a reminderto buckle up. (See
“Safety BeltReminder Light’’ in the Index.)
In many states and Canadian provinces, the law saysto
wear safety belts. Here’s why: They work.
You never knowif you’ll bein a crash.If you do have a
crash, you don’tknow if it will be a bad one.
A few crashes are mild,and some crashes can be so
serious that even buckled
up a person wouldn’t survive.
But most crashesare in between. In many of them,
people who buckle upcan survive and sometimes walk
away. Without belts they could have been badly hurt or
killed.
Why Safety Belts Work
When you ride in or on anything, you go as fast as it
goes.
For example, if the bike is going 10 mph (16 km/h), SO
is the child.
22
I
Take the simplest “car.”Suppose it’s just a seat on
wheels.
.Put someone on it.
23
Here Are Questions Many PeopleAsk
About Safety Belts-- and the Answers
Won’t I betrapped in the vehicle after an
accident’if I’m wearing a safety belt?
A:
F
You could be -- whether you’re wearing a safety
belt or not. But you can easily unbuckle a safety
belt, evenif you’re upside’down.And your chance
of being conscious duringan6 after an accident, so
you can unbuckle and get out, is much greater
if
you are belted.
&:
Why don’t they just put in air bags so people
won’t have to wear safety belts?
A:
Air bags, or Supplemental Restraint Systems,
are in
some vehicles today and will
be in moreof them in
the future. But they are supplemental systems only
-- so they work with safety belts, not instead
of
them. Every air bag system ever offered for sale
has required the use
of safety belts. Evenif you’re
in a vehicle that hasair bags, you still haveto
buckle up to get the most protection. That’s true not
only in frontal collisions, but especially in side and
other collisions.
26
1
&:
If I’m a good driver, and I never drive far from
borne, why should I wear safety belts?
A:
You may be an excellent driver, butif you’re inan
accident -- even one that isn’t your fault-- you and
your passengers ‘can be hurt. Being a good driver
doesn’t protect you from things beyond your
control, such as bad drivers.
Most accidents occur within25 miles (40 km) of
home. And the greatest number
of serious injuries
and deaths occur at speeds
of less than 40 mph
(65 b h ) .
Safety belts arefor everyone.
Safety Belt Reminder Light
How To Wear Safety Belts Properly
Adults
This section is only for
people of adult size.
Be aware that there are special things to know about
safety belts and children.And there are different rules
for smaller children and babies.
If a child willbe riding
in your Buick,see the section after this one, called
“Children.” Follow those rules
for everyone’s
protection.
First, you’ll want to know which restraint
systems your
vehicle has.
When the key-is turned to “Run” or “Start,” a chime will
come onfor about eight seconds to remind people to
fasten their safety belts, unless
the driver’s safety belt is
already buckled.The safety belt light will also
come on
and stay on until the driver’s belt is buckled.
We’ll start with the driver position.
27’
Driver Position
Lap-Shoulder Belt
This section describes the driver’s restraint system.
The driver has a lap-shoulder belt. Here’show to wear it
properly.
1. Close and lock the door.
2. Adjust the seat (to see how, see “Seats” in the Index)
so you can sit up straight.
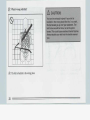
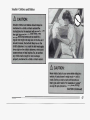
@
What’s wrong with this?
A:
The shoulder belt is too loose. It won’t give nearly
as much protectionthis way.
31
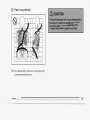
L
@
What's wrong with this?
A:
The shoulder belt is worn under the arm.It should
be worn over the shoulderat all times.
33
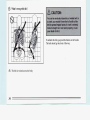
@ what's wrong with this?
To unlatch the belt,just push the buttonon the buckle.
The belt shouldgo back out of the way.
I
A:
34
I
I
I
1
I
I
I
I
The belt is twisted across the body.
I
I
I
!
I
36
Air Bag Readiness Light
How The Air Bag System Works
There is ‘anair bag readiness lighton the instrument
panel, which shows “AIR BAG”. The .system chekks for
electrical malfunctions, andthe light tells you if there is
a problem.
AIR
BAG
You will see this light flash fora few sec,ondswhen you
turn your ignition to“Run” or “Start.” Then the light
should go out, which means the systemis ready.
Remember, if theair bag readiness light doesn’t come
on when you start yourvehicle,’or stays on, or comes on
when you are driving, yourair bag system may not work
properly. Have your vehicle serviced right away.
37
threshold level.When impacting straight intoa wall that
does not moveor deform, the threshold level for most
GM vehicles is between9 and 15 mph (14 and 23
km/h). However, this velocity thresholddepends on the
vehicle design and may be several miles-per-hour faster
or slower. In addition, this threshold velocity will be
considerably higherif the vehicle strikes an object
such
as a parked car which will move
and deform on impact.
The air bag is also not designed to inflate in rollovers,
side impacts,or rear impacts wherethe inflation would
provide no occupant protection benefit.
It is possible that in a crash,
only one of the two air
bags in your Roadmaster will deploy.
This is rare, but
can happen in a crashjust severe enough to make an air
bag inflate.
/.:.
.i
...
’
Where is the air bag?
The driver’s air bagis in the middleof the steering
wheel. The right-front passenger’s air bag is located in
the instrument panel on the passenger’s side.
When is an air bag expected to inflate?
The air bag is designedto inflate in moderate to severe
frontal or near-frontal crashes.The air bag will only
inflate if the velocity of the impact isabove the designed
38
In any particular crash, the determination
of whether the
air bag should have inflated cannot
be based solely on
the levelof damage onthe.vehicle(s). Inflation is
determined by the angle
of the impact and the vehicle’s
deceleration, of which vehicle damage is only
one
indication. Repair cost is not a good indicator
of
whether an air bag should
have deployed.
What makes an air bag inflate?
What will you see after an air bag inflation?
In a frontal or near-frontalimpact of sufficient severity,
the air bag sensing system detects that the vehicle is
suddenly stoppingas a result of a crash.The sensing
system triggers achemical reaction of the sodium azide
sealed inthe inflator. The reaction produces nitrogen
gas, which inflates a cloth bag.
The inflator, cloth bag,
and related hardware are all partof the air bag inflator
modules packed insidethe steering wheel and inthe
instrument panel in frontof the passenger.
How does an air bag restrain?
In moderate to severe frontal or near-frontal collisions,
even belted occupants can contact the steering wheel or
the instrument panel. The air bag supplements the
protection provided by safety belts. Air bags distribute
the forceof the impact moreevenly over the occupant’s
upper body, stopping the occupant more gradually. But
air bags would not provide protectionin many types of
collisions, including rollovers and rear and side impacts,
primarily because an occupant’s motion is not toward the
as anything
air bag. Air bags should never be regarded
in
more than a supplement to safety belt protection
moderate to severe frontal and near-frontal collisions.
After the air bag has inflated, it will then quickly
de,flgte..This occursso quickly that some people may
not even realize that the air bag inflated.
Some
components of the air bag module in the steering wheel
hub for the driver’s,airbag or-the instrument panel for
the passenger’s bag may be
hat for a short time,but the
you will
portion of the bag that comes into contact with
not be hot to the touch.There will be small amountsof
smoke and dust coming from vents in the deflated air
bags. The air bag willnot impede the driver’s visionor
ability to steer the vehicle, nor will
it hinder the
occupants from exitingthe vehicle.
In many crashes severe enough to inflate an air bag,
windshields are broken by vehicle deformation.
Additional windshield breakage may occur
in vehicles
with passenger air bags because the windshield actsaas
reaction surface forthe inflating air bag.
0 The air bagsare designed to inflate only once. After
they inflate, you’ll needsome new parts for your air
bag system.If you don’t getthem, the air bag system
won’t be there to help protect you
in another crash.
A new system will include air bag modules and
possibly other parts.The service manual has
information about the need to replace other parts.
39
Right Front Passenger Position
Center Passenger Position And Any
Station Wagon Third Seat Passenger
Position
The right front passenger’s safety belt works the same
way as the driver’s safety belt. See “Driver Position,’’
earlier in this part.
U
I
42
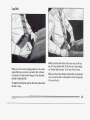
Lap Belt
3
When you sitin a center seating position, orin a station
wagon third seat,you have a lap safety belt, which has
no retractor. To make the belt longer, tilt the latch plate
and pull it along the belt.
Buckle, position and release
it the same way as the lap
part of a lap-shoulder belt.If the belt isn’t long enough,
see “Safety Belt Extender”at the end of this section.
Make sure the release button
on the buckleis positioned
so you would beable to unbuckle the safety belt quickly
if you ever had to.
To make the belt shorter, pull its
free end as shown until
the belt is snug.
f
43
Rear Seat Passengers
It’s very important forrear seat passengers to buckleup!
Accident statistics show that unbelted people
in the rear
seat arehurt mare often in crashesthan those who are
wearing safety. belts.
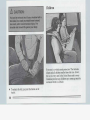
Lap-Shoulder Belt
The positionsnext to the windows have lap-shoulder
belts.
Here’s
wear
how
to
one properly.
:,
....,
;
Rear passengerswho aren’t safety belted canbe thr.own
out of the vehiclein a crash.And they.can strike others
in the vehiclewho are wearbg safety belts.
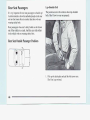
Rear Seat Outside Passenger Positions
1. Pick up the latch plate and pull the belt across you.
Don’t let it get twisted.
44
2. Push the latch plate into the buckle until itclicks,
Pull up on the latch plate to make sure it is secure.
I
I
I
I
I
I
If the belt is not long enough,
see3afety Belt'Extender"'
at the end of this section. Make sure the release button
on the buckle is positioned so you would be able to
unbuckle the safety belt quicklyif you ever had to.
3. To make the lap part tight, pull down on the buckle
end of the belt as you pull up on.the shoulder part.
45
Smaller Children and Babies
47
Child Restraints
Be sure to follow the- instructions
for the restraint. You
may find these instructions on the restraint itself
or in a
in
booklet, or both. These restraints use the belt system
your vehicle, but the child
also has to be secured within
the restraint to help reduce the chance
of personal injury.
The instructions that come with the infant or child
restraint will showyou how to do that.
Where to Put the Restraint
Accident statistics show that children
are safer if they
We at
are restrained in the rear rather than the front seat.
General Motors therefore recommend that
you put your
child restraintin the rear seat.NEVER put a rear-facing
why:
child restraintin the front passenger seat. Here’s
L
48
..,.,., ..
. .. .
Top Strap
If your child restraint has top
a strap, it should be
anchored.
If you needto have an anchor installed, you can ask
your Buick dealerto put it in for you. If you want to
install an anchor yourself, your dealer can tell how
you
to do it.
50
Securing a Child Restraint in a Rear
Outside Position
You’ll be using the lap-shoulder belt.See the earlier
section aboutthe top strap if the child restraint has one.
You’ll need a safety,lockingclip to properly securea
child restraintin this position.You can geta locking clip
where child restraintsare sold, or from your Buick
dealer (GM Part Number94844571). The locking clip
must be thesame as the one shown here.
Until you have this clip, secure
a child restraint only ina
a way to anchora
seat that hasa separate lap belt (and
top strap, if the child restraint has one). See the
a child restraint ina
following section about securing
center position. Onceyou have the clip, follow these
instructions:
I: Put the restrainton the seat. Follow the instructions
for the child restraint.
2. Secure the childin the child restraint as the
instructions say.
51
~
3. Pick up the latch plate, and run the lap and shoulder
portions of the vehicle’s safety belt through or
around the restraint. The child restraint instructions
will show you how.
If the shoulder belt goes in front
of the child’s faceor
neck, put it behind the child restraint.
4. Buckle the belt. Make sure the release button
is
positioned so you would be ableto unbuckle the
safety belt quicklyif you ever had to.
i
5. Then thread both thelap and shoulder belt portions
through the locking clip.
6. Push and pull the child.restraint in different
directions to be sureit is secure.
To remove the childrestraint, just unbuckle the vehicle’s
safety belt and removethe locking clip. Let the safety
beltgoback all the way. The safety belt will move When
you secure a child restraint in a center seating
freely again and be ready to work,for an adult or larger position, you’ll be using the
lap belt.
child passenger.
53
1. Make'the belt as long as possibleby tilting the latch
plate and pullingit along the belt.
See the earlier section about the top
strap if the child
restraint has one.
2. Put the restrainton the seat. Follow the instructions
for the child restraint.
3. Secure the childin the child restraint as the
instructions say.
54
how.
4. Run the vehicle’s safety belt through oraround the
restraint. The child restraint instructions will show
you
.. .
7. Push and pullthe child restraint in different
directions tobe sure it is secure.If the child restraint
isn’t secure, turnthe latch plate over and buckle
it
again. Thensee if it is secure. If it isn’t, securethe
restraint ina different place in. the vehicle
and
contact the child restraint maker for their
advice
about how to attach the child restraint properly.
To remove the child restraint,
just unbuckle the vehicle’s
safety belt. It willbe ready to workfor an adult or larger
child passenger.
Securing a Child Restraint in the Right
Front Seat
5. Buckle the belt. Make surethe release button is
positioned so you would be able to unbuckle the
safety belt quicklyif you everhad to.
6. To tighten the belt, pull itsfree end while you push
down on the child restraint.
U
Your vehicle hasa right-front passenger’s air bag.
NEVER put a rear-facing child restraint in this seat.
Here’s why:
55
I
5. Buckle the belt.
Make sure the release button is positionedso you
would beable to unbuckle the safety beltquickly if
you ever had to.
To remove the child restraint,just unbuckle the vehicle's
6 . To tighten the belt, pull up on the shoulder belt while safety belt and let
it go back all the way.
you
push
down
on
the childrestraint.
The safetybeltwillmovefreelyagainand
be ready to
work for an adult or larger child passenger.
57
-LargerChildren
Accident statisticsshow that children are safer
if they
But they need touse the
are restrained in the rear seat.
safety belts properly.
0
Children who aren’t buckled up canbe thrown out in
.
a crash.
0
Children who aren’t buckled up can strike other
people who are.
the child.sits, the lap portionof the belt
:‘{should be worn low and snug
on the hips, just touching
.. %he child’s thighs.
This applies ,belt force to the child’s
!pelvic bones in a crash.
..-..’
60
Safety Belt Extender
Replacing Safety Belts After a Crash
If the vehicle’s safety belt will fasten
around you, you
should useit.
If you’ve
. .
had a crash, do you need new belts?
But if a safety belt isn’t long enough
to fasten, your
go
dealer will orderyou an extender. It’s free. When you
in to order it, take the heaviestcoat you will wear,so the
extender will be tongenough for you. The extender will
be just for you, andjust for the seat in your vehicle that
you choose. Don’t let someone
else use it, and use it
only for the seat it is made tofit. To wear it, just attach it
to the regular safety belt.
After a very minor collision, nothing may
be necessary.
But if the belts were stretched,as they would be if worn
during a moresevere crash, then you need new belts.
If you ever see a label onthe driver’s or the right-fkont.
passenger’s safety belt that
says to replacethe belt, be
sure todo so. Then the new belt will bethere to help
protect you inan accident. You would see this label on
the belt nearthe door opening.
,
Checking Your Restraint Systems
Now and then, make sureall your belts, buckles, latch
plates, retractors, anchorages and reminder systems are
working properly. Look for any loose parts ordamage.
If you see anything that mightkeep a restraint system
from doing its job, have it repaired.
r
..-
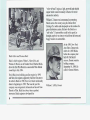
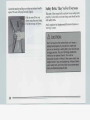
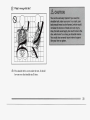
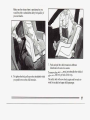
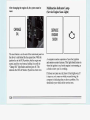
Q: What’s wrong with this?
I
A: The belt is torn.
If belts are cut or damaged, replace them. Collision
damage also may mean you will need to have safety belt Torn or frayed beltsmay not protect you in a crash.
They canrip apart under impact forces.If a belt is tom
or seat parts repaired or replaced.
New parts and repairs
or frayed, get anew one right away.
may be necessary evenif the belt wasn’t beingused at
the timeof the collision.
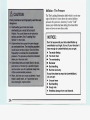
Part 2 Features and Controls
Here you can learn about
the many standardand optional featureson your Buick. and information on starting. shifting
and braking . Also explained are the instrument panel and the warning systems that tell you if everything is working
properly .
.aryd what to do if you have a problem.
Part 2 includes:
Keys ............................................................................
DoorLocks .......................................................................
NewVehicleBreak-In ...............................................................
StartingtheEngine . . . . . . . . . . . . . . . . . . . . . . . . . . . . . . . . . . . . . . . . . . . . . . . . . . . . . . . . . . . . . . . . . .
Shifting the Transmission ..........................................................
Windows ..........................................................................
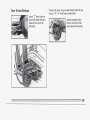
TiltSteeringWheel .................................................................
Turn Signal/Headlight Beam Lever .....................................................
Headlight High-Low Beam Changer . . . . . . . . . . . . . . . . . . . . . . . . . . . . . . . . . . . . . . . . . . . . . .
Windshield Wipermasher ......................................................
CruiseControl . . . . . . . . . . . . . . . . . . . . . . . . . . . . . . . . . . . . . . . . . . . . . . . . . . . . . . . . . . . . . . . .
Headlights . . . . . . . . . . . . . . . . . . . . . . . . . . . . . . . . . . . . . . . . . . . . . . . . . . . . . . . . . . . . . . . . . . . . . . . .
Mirrors . . . . . . . . . . . . . . . . . . . . . . . . . . . . . . . . . . . . . . . . . . . . . . . . . . . . . . . . . . . . . . . . . . . . . . . . . .
Instrumentpanel . . . . . . . . . . . . . . . . . . . . . . . . . . . . . . . . . . . . . . . . . . . . . . . . . . . . . . . . . . . . . . . . . . .
Speedometer and Odometer ......................................................
Warning Lights, Indicators and Gages . . . . . . . . . . . . . . . . . . . . . . . . . . . . . . . . . . . . . . . . . . . . .
64
65
77
78
81
91
92
92
94
95
97
102
106
116
117
117
63
1
I
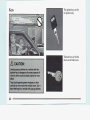
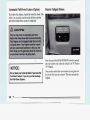
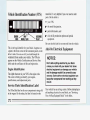
Keys
The ignition keys are for
the ignition only.
The door keys are for the
doors and all other locks.
64
When a newRoadmaster is delivered, the dealer
removes the plugs from the keys,‘and gives them to the
. . . ., - .
owner.
first
I .
,
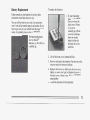
Door Locks
.
Each plug hasa code on it that tells your dealeror a
qualified locksmith how to make extra keys. Keep the
plugs in a safe place. If you lose your keys, you’ll be
able tohave n w ones made easily using these plugs.
NOTICE:
Your Buick has a number
of new features that
can help prevent theft. But you can have aoflot
trouble getting into your vehicle
if you ever lock
your keys inside. You may even have to damage
your vehicle to get in.So be sure you have extra
keys.
65
There are several waysto lock and unlockyour vehicle:
From the outside:Use your
door key.
From the inside:To lock
the door, move the lock
control down.
e
To unlock the door, mov
the lock control up.
66
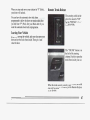
Power Door Locks
Push the powerdoor lock
switch to lock or unlock all
the doors at once.
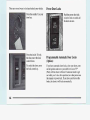
Programmable Automatic Door Locks
(Option)
If you have automatic door locks, close your doors, turn
“P”
on the ignition and move your shift leverofout
(Park). All the doors will lock.
If someone needs to get
a drive position, have that person use
out while you’re in
If you have your foot on the
the manual or power lock.
brake, the door(s) will lock automatically.
When you stop and move your selector into
“P” (Park),
your doors will unlock.
You can have the automatic door lock feature . . ... :, ., .
programmed to allowthe doors to remain locked after
you shift into‘‘I?’’ (Park). See your Buick dealer if you
want the automatic door locks reprogrammed.
,
Remote Trunk Release
, ,..;
<’,
’
The security switch in the
glove box must be“ON’
for the “TRUNK” release
button to work.
Leaving Your Vehicle
If you areyeaving the vehicle,take your keys, open your
door and set the locks from inside. Then get outand
close the door.
The “TRUNK” button is to
the left of the steering
column. Pushit to open the
trunk from inside yourcar.
When the trunk security switch is turnedOFF, the trunk
can only be opened withthe key orthe Remote Keyless
Entry System.
67
Remote Tailgate Release
Automatic Pull-Down Feature (Option)
If you have this feature,it pulls the trunk lid closed. This,
allows you to gently push the trunk lid down and
the
pull-down feature then secures it completely.
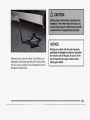
NOTICE:
Do not slam your trunklid down if you have the
Pull-Down feature. If youdo, you may damage
the Pull-Down System.
68
I
Press the top of the REAR WINDOW switch to unlock
the rear window only when the vehicle is“F”’
in Park or
“ N ’ Neutral.
You can also unlock the rear window
by using the oval
key in the lock near the window.This also unlocks the
tailgate.
Tailgate Operation
.The tailgate is lockedand unlocked by using the power
.. .
door lock controls, the oval keyin the.lock or the
Remote Keyless Entry System if you have it.
T-
.
'
'
It can be opened like
a regular .door,or like a drop-gate.
The symbols on the handlesindicate their function.
The tailgate and tailgate
window must first be
unlocked. If the tailgate has
already been unlocked,yau
can unlatch the tailgate
window by pushing the key
cylinder buttonall the way
in. Then, raisethe window.
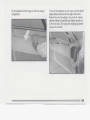
To open the tailgate likea regular door, pullup on the
of the tailgate.
handle that is near the right end
LQ
To open it like a drop-gate, just reach inside and pull up
on the handle-thatis located near the centerof the
tailgate. Lower the tailgate all the way down.
To close the window, pull it down against the tailgate
.
until it latches.
70
Wagon Locked Storage Compartment
This compartment is on the inside panel the
at rear left
of the car. Usethe oval-head keyto.lock and unl.o.ck this
door.
Turn the key to the right (clpckwise)to unlock. The key
cannot be removed in this position.
Remote Keyless Entry System
(Option)
If your Buick has this option, you can
lock and unlock
your doors or unlock your trunk or tailgate from up to
30 feet (9 m) using the key chain transmitter supplied
with your vehicle.
To close and lock, liftup and push in on the door. Turn
Your Remote Keyless Entry System operates on
a radio
the key to left, back to the original position and remove. frequency subject to Federal Communications
Commission (FCC) Rules.
This device complies with Part
15 of the FCC Rules.
Operation is subjectto the following two conditions:
(1) This device maynot cause harmful interference, and
(2) This device must accept any interference received,
including interference that may cause undesired
.
'.;$
..~'.~
operation.. .. ..
.&>...: . r .
,;
9
. .--
.LI
:;,-,7,-.:,"
,
Operation
The driver's door will unlock when
UNLOCK is
pressed. Pressit again quickly and all the doors will
unlock. The door courtesy lights will also come on.
All doors will lock when DOOR is pressed.
.
Should inteiference tothis .system occur, try this:
Check to determine if battery replacement is
necessary. See the instructions on battery
replacement.
Check the distance.You may be too far from your
vehicle. This product has a maximum range.
0
Check the location. Other vehiclesor objects may be
blocking the signal.
0
See your Buick dealer or a qualified technician for
service.
Changes or modificationsto this systemby other thanan
authorized service facility could void authorization to
use this equipment.
The trunk or tailgate will unlock when the opened trunk
symbol is pressed, but only when the transmission is in
PARK.
Matching Transmitter(s)To Your Vehicle
Each key chain transmitter'
is coded to prevent another
If a transmitter
transmitter from unlocking your vehicle.
is lost or stolen, a replacement can be purchased through
your dealer. Rememberto bring the remaining
transmitters with you when you go
to your dealer. When
the dealer matches the replacement transmitter
to your
vehicle, the remaining transmitters must also be
matched. Once the new transmitter is coded, the lost
transmitter will not unlock your vehicle.
You can match a transmitter to as many different vehicles
as you own, provided theyare equipped with exactly the
same model system. (General Motors offers several
different modelsof these systems on their vehicles.) Each
vehicle can have only two transmitters matched it.
to
See your dealer to match transmitters to another vehicle.
To replace the batteries:
Battery Replacement
Under normal use, the batteries in your key chain
transmitter should lastabout two years.
You can tell the batteries are weak if the transmitter
won’t work at the normalrange in any location.If you
have to get close to your vehicle before the transmitter
works, it’s probably time to
change the batteries.
For battery replacement,
use two Duracell@
batteries, type DL-2016,or
a similar type.
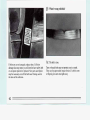
1. If your transmitter
has a screw, remove
the screw from the
back cover.If there
is no screw,
carefully pryoff the
cover by inserting a
dime (or similar
object) in the slot
between the covers
and twist.
2. Lift off the front cover, bottom half first.
3. Remove and replace the batteries.Put them in as the
direction under the batteries indicate.
4. Replace the front cover. Make sure the cover is on
tightly, so water won’t get in.Replace the screw in
If there is no screw,
the back cover, if there is one.
snap together.
5, Check the operation of the transmitter.
73
Rear Door Security Lock
Your Buick is equipped with rear door security, locks
that help prevent passengers from opening the doors
rear
of your car from the inside.
To use one of these locks:
1. Move the lever all the
way down.
The rear doorsof your vehicle cannot be opened from
If you want to open a
inside when this feature is in use.
rear door when the security lock
is on:
1. Unlock the door from the inside.
2. Then open the door fromthe outside.
If you don’t
cancel
the
security
lock
feature,
adults
or
older childrenwho ride in the rear won’t be able to open
2. Close the door.
the rear doorfrom the inside.You should let adults and
3. Do the same thing to the
older children know how these security locks work, and
otherrear door lock.howtocancelthelocks.
To cancel the rear door lock:
1. Unlock the door fromthe inside and open the door
from the outside.
2. Move the lever all the way up.
3. Do the same for the other rear door.
The rear door locks will now work normally.
Theft
Parking Lots
Vehicle theft is big business, especially in some cities.
Although your Buick has a number
of theft deterrent
features, we know that nothingwe put on it can make it
impossible to steal. However, there are ways you can
help.
If you park in a lot where someone will be watching
your vehicle, it’s best
to lock it up and take your keys.
if
But what if youhave to leave your ignition key? What
you have to leavesomething valuable in your vehicle?
0
Key in the Ignition
If you walk away from your vehicle with the keys
inside, it’san easy targetfor joy riders or professional
thieves .-- so don’t do it.
0
0
0
Put your valuables in a ‘storage area, like your trunk,
glove box, or inthe wagon storagecompartment;
Lock the glove box.
Lockallthe doors except thedriver’s.
.
.
Then take thedoor key with you.
,
When you park your Buickand open the driver’s door,
you’ll heara‘chime reminding you to remove your key
from the ignition and takeit with you. Alwaysdo this.
so will your
Your steering wheel will be locked, and
ignition and transmission.And remember to lockthe
doors.
Parking at Night
Park in a lighted spot, closeall windows and lock your
vehicle. Remember to keep your valuables out
of sight.
Put them in astorage area, or take them with you.
75
PASS-Key@II
Your vehicle is
equipped with the
PASS-Key%
(Personalized
Automotive Security
System) theft deterrent
system. PASS-Key%
is a passive theft
deterrent system.This
means you don’t have
to do anything different
to ann or disarm the
system.
The ignition key must be clean and dry before it’s
inserted in the ignition or
the engine may not start. If the
engine does notstart and the PASS KEY light comes on,
off.
the keymay be dirty or wet. Turn the ignition
It works when you insert or remove the key from
the
ignition. PASS-Key% uses a resistor pellet in the
ignition key that matches a decoder in your vehicle.
Clean and dry the key. Wait
about three minutes and try
again. ThePASS KEY light may remain on during this
time. If the starter still won’t work, and the key appears
to be clean and dry, wait about three minutes and try the
other ignitionkey. At this time,you may also want to
check the fuse (see “Fuses and Circuit Breakers” in the
Index). If the starter won’t work with the
otherkey, your
vehicle needs service.If your vehicle does start, the first
ignition keymay be faulty. See your Buick dealer or a
locksmith who can service the PASS-Key%.
If you accidentally use a key that hasa damaged or
missing resistor pellet, the starter won’t work and the
PASS KEY light will come on. But you don’t have to wait
three minutes before trying one of the other ignition keys.
When the PASS-Key% system senses that someone is
using the wrong key, it shuts down the vehicle’s starter and
fuel systems. For about three minutes, the starter won’t
work and fuel won’t go to the engine.If someone tries to
start your vehicle again or uses another key during this
time, the vehicle will not start.This discourages someone
fiom randomly trying different keys with different resistor
pellets in an attempt to makea match.
See your h i c k dealer or a locksmith who can service the
PASS-Key% to have a new key made.
If you’re ever driving and and the PASS KEY light
comes on and stays on, you will beable to restartyour
engine if you turn it off. Your PASS-Key% system,
however, is not working properly and must be serviced
by your Buick dealer. Your vehicle is not protected by the
PASS-Key% system.
If you lose or damage a PASS-Key@IIignition key, see
your Buick dealer ora locksmith who can service
PASS-Key%tohave
a newkeymade.
.”!., ;.-”‘LC;..
.
* .:*
.,
;
I
.a
:
,
Ignition Key Positions
Your square-headed key
operates your ignition lock.
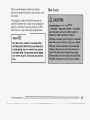
New Vehicle ‘‘Break-in''
NOTICE:
Your modern Buick doesh’t need an elaborate
“break-in.” But it will perform better in the long
run if youfollow these guidelines:
0 Keep your speed at55 mph (88.km/h)’or
less for the first 500 miles (804 km).
0 Don’t drive at any one speed
fast or slow
for the first 500 miles (804 km). Don’t
make full-throttle starts.
Avoid making hard stops for the first 200
miles (322km) or so. During this time your
new brakelinings aren’t. yetbroken in. Hard
stops with new linings can mean premature
wear and earlier replacement.Follow-this
“breaking-in” guideline every time you get
new brake linings.
--
--
,
77
(C) Off This position letsyou turn off the engine but
still turn the steering wheel. It doesn’t lock the steering
wheel like “Lock.” Use“Off’ if you must have your car
in motion while theengine is off.
(D) Run: This is the positionfor driving.
(E) Start: This key position starts your engine.
A
E
With. the ignition key
in the ignition switch, you
can turn
the switch tofive different positions:
(A) Accessory: This position lets you use things like
the
off.is
radio and the windshield wipers when the engine
To use, push in the key and
turn it toward you.Your
steering wheel will remain locked,
just as it was before
you inserted the key.
(B) Lock: Before you put the key in, your ignition will
be in the Lock position.This.position locks your
ignition, steering wheel and transmission. It’s a theft
deterrent feature.
If your key seemsstuck in “Loclc” and you can’t
turn it, besure it isall the way in. If it is, thenturn
the steering wheelleft and right while you turn
the key hard.But turn the keyonly with your
hand. Using a tool to force it could break the key
or the ignition switch. If none ofthis works, then
your vehicle needs service.
Starting Your Engine
Move yours,hiftlever to “P” (Park) or“ N ’ (Neutrai).
Your engine won’t startin any other position-- that’s a
safety feature.To restart when you’re already moving,
use “N” (Neutral) only.
NOTICE:
Don’t try to shift to “P” (Park)
if your Buick is
moving. If you do, you could damage the
transmission. Shiftto “PYy
(Park) only whenyour
vehic.leis stopped.
To start your 5.7 Liter LT1 engine:
1. Without pushing the accelerator pedal, turn the
ignition keyto “Start.” When the engine starts, letgo
of the key. The idle speed willgo down as your
engine gets warm.
NOTICE:
Holding your keyin “Start” for longer than15
seconds at a time
will cause your batteryto be
drained much sooner. And the excessive heat
can damage your starter motor.
2. If it doesn’t start within 10 seconds, push the
accelerator pedalall the way to the floor, while you
hold the ignition keyin “Start.” When theengine
starts, letgo of the key and let up on the accelerator
pedal. Wait about 15 seconds between each try to
help avoid drainingyour battery:
When starting yourengine in very cold weather (below
‘ 0°F or -18”C), do this:
1. With your foot off the accelerator pedal, turnthe
ignition key to “Start”and hold it there. When the
engine starts, let go of the key. Use the accelerator
pedal to maintainengine speed, if you have to, until
your engine has runfor a while.
2. If your engine still won’t start (or starts but then
stops), it could be flooded with too much gasoline.
Try pushing your accelerator pedal all way
the to the
floor and holding it there
as you hold the key in
“Start” for about three seconds.If the car starts
briefly but then stops again,
do the same thing, but
this time keep the pedal down forfive or six seconds.
This clears the extra gasolinefrom the engine.
79
NOTICE:
Your engine is designed to work with the
electronics in your vehicle. If you add electrical
parts or accessories, you could change the way
the fuel injection system operates. Beforeadding
electrical equipment, checkwith your dealer. If
you don’t, your enginemight not perform
properly.
If you ever haveto have your vehicle towed, see
the part ofthis manual thattells how to do it
without damaging your vehicle. See “Towing
Your Car” in the Index.
Driving Through Deep Standing
Water
NOTICE:
If you drive too quickly through deep puddles or
standing water, water can comein through your
engine’s air intake and badly damage your
engine. If you can’t avoid deep puddles or
standing water, drive through them very slowly.
80
Engine Coolant Warmer
(Engine Block Heater) (Canada Only)
In very cold weather,
0 “F (- 18 O C) or colder, the engine
coolant warmer can help. You’ll get easier starting and
better fuel economyduring engine warm-up. Usually,
the coolant warmer should
be plugged in a minimumof
four hours priorto starting your vehicle.
To use the coolant warmer:
1. Turn off the engine.
2. Open the hood and unwrapthe electrical cord.
3. Plug it into a normal, grounded 110-volt outlet.
Automatic Transmission
NOTICE:
There are several different
positions for your shift
lever.
After you’ve used the coolant warmer,
be sure to
store the cordas it was before to keepit away
from moving engine parts. If you don’t,could
it
damaged.
be
,
I
.
..
How long shouldyol-1keep the coolant warmer plugged
of oil
in? The answer depends on the weather, the kind
you have, and some other things. Instead of trying to list
everything here, we ask that you contact
a Buick dealer
in the area where you’ll be parking your vehicle.
The
dealer can giveyou the best advice for that particular
area.
P (Park)
This locks your rear wheels. It’s the best position to
use when you start your engine because your vehicle
can’t move easily.
81
- Going about 35 mph (56 km/h) or more, push the
accelerator all the way down.
.
. .
Y~u’1.lshift down to the next gear and have more
power.
3 (Third Gear)
This is like @, but you never go-intoOverdrive.
Here are some times you might choose “3” instead of
0:
- When driving on hilly, winding roads
NOTICE:
Damage to your transmission caused by shifting
out of “P” (Park) or “N” (Neutral) with the engine
rac’ing isn’t covered by your warranty.
Automatic Overdrive
This position is for normal driving. If you need more
power for passing, and you’re:
- Going less than about 35 mph (56 kmh),push
your acceleratorpedal about halfway down.
@)
- When towing a trailer, so there is less shifting
between gears
- When going down a steep hill
2 (Second Gear)
This position gives youmore power and lower fuel
economy. You can use “2” on hills. It can help
control yourspeed as you go down steep mountain
roads, but then you would also want to use your
brakes off and on.
83
NOTICE:
Don’t drive in “2” (Second Gear) for more than5
miles (8 km), or at speeds over55 mph (88 km/h),
or you can damage your transmission. Use @ or
“3”as much as possible.
Don’t shift into“2” unless you are going slower
than 65 mph (105 km/h), or you can damage your
engine.
6
If your rear wheels can’t rotate, don’t
try todrive.
This might happen if you were stuck in very deep
sand or mud or wereup against asolid object.
You could damage your transmission.
Also, if you stop when going uphill, don’t hold
your vehicle there with only the accelerator
pedal. This could overheat and damage the
transmission. Use your brakesor shift into“PYy
Park to holdyour vehicle in position on a hill.
1 (First Gear)
This position gives you even more power (but lower
fuel economy) than“2.” You can use it on very steep Limited-Slip Rear Axle
hills, or indeep snow or mud. If the selector lever is
If you have this feature, your rear
axle can give you
put in “1,” the transmission won’t shift into first gear additional traction on snow, mud, ice, sand or gravel. It
until the vehicle is going slowly enough.
works like a standardaxle most of the time, but when
one of the rear wheels has no traction and the other
does, the limited-slip feature will allow the wheel with
traction to move the vehicle.
‘I
I
NOTICE:
84
Parking Brake
To set, the parking brake:
Hold the regular brake
pedal down with your right
foot. Push down the
parking brake pedal with
your left foot.If the
ignition is on, the brake
system’warning’lightwill
come on.
~
~
Driving with the parking brake on can cause your
rear brakes to overheat. You may have to replace
them, and you could also damage other parts
,of
vehicle.
your
. ,
,
I
-
,
.
,
.
~
If you are towinga.trailerand are parking on any
hill: See “Towinga Trailer” in the Index. That section
explains what to do first to keep the trailer from moving.
To release the parking
brake: Hold the regular
brake.peda1 down. Pull the
brake release lever.
85
Shifting Into 64P9 9 (Park)
1. Hold the brake pedal down withyour right foot and
set the parking brake.
86
i
I
Torque Lock
Shifting Out of LCP99
(Park)
If you are parking on a hill and you don’t shift
your
transaxle intoT“ (Park) properly, the weight
of the
vehicle may put too much force on the parking in
pawl
the transmission.You may find it difficult to pull the
shift lever outof “P” (Park). This is called “torque
lock.” To prevent torque lock,.set the parking brake and
then shift into7‘“ (Park) properly beforeyou leave the
.driver’s seat.To find outhow, see “Shifting Into ‘P’
(Park)” in the Index.
Your Buick has a brake-transmission shift interlock.
You
have to fullyapply your regular brakebefore you can
“Run”
shift from“P” (Park) when the ignition is in the
position. See “Automatic Transmission”
in the Index.
When you are ready to drive, move
the shift lever outof
“P’, (Park) BEFORE you release the parking brake.
If you cannot shift outof “P”(Park), ease pressure on
the shift lever-- push the shift lever allthe way into “P”
the
(Park) as you maintain brake application. Then move
shift lever into the gear
you want. If you ever holdthe
brake pedal down butstill can’t’shiftout of “P” (Park),
try this:
1. Turn the key to “Off.”
If “torque lock” does occur,
you may need to have
2. Apply and hold the brake until the end
of Step ‘4.
another vehicle push yours a little uphill to take some
of
the pressure from the transaxle,
so you can pull the shift 3. Shift to “N” (Neutral).
lever outof T“ (Park).
4. Start the vehicle and then shift to the drive gear
you
want.
5. Have the vehicle fixedas soon as you can.
I
. ..,..
..
I
Parking Over Things That Burn
.
.
.
::
Engine Exhaust
on
Running Your Engine While You’re
Parked
It’s better not to park with
the engine running. Butif you
ever haveto,.here are some things tob o w .
Follow the groper steps to be sure your vehicle won’t
move. See “ShiftingInto ‘P’ (Park)” in the Index.
If you are parking ona hill and if you’re pullinga
trailer, also see “Towing
a Trailer’’ in the Index.
90
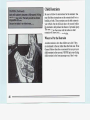
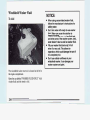
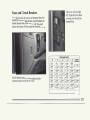
Power Windows
from opening and closingthe windows. The driver can
still control all windows with the switch in the locked
'position. PushUNLOCK to restore normal operation to
,allpassenger .window switches.
Wagon Rear Vent Windows
In th& rear
area, there is a
vent windowon each side
of the car.
Your power windows controlsare on the armrest.
The switch for the driver's window hasan
express-down feature. Pullthe switch backall the way.
Once engaged, releaseit and the window will lower all
the way. To stop the window from lowering, push the
switch forward.To raise the windo$, push the switch
forward.
To open, lift the latchand push out.To close, pullin and
back on the latch.
You also have a lockout switch. PushLOCK disable the
power window switches. This will prevent passengers
91
The lever on theleft side of the steering column
includes your:
Turn Signal and Lane Change Indicator
Headlight High-Low Beam & Passing Signal
0
WindshieldWipers
WindshieldWasher
Cruise Control (Option)
Turn Signal and Lane Change. Indicator
The turn signal has two upward (for right) and
two
downward (forleft) positions. These positions allow you
to signala turn ora lane change.
To signal a turn, movethe lever all theway up or down.
When the turn is finished, the lever will return
automatically.
A green arrow on the
instrument panel will flash
in the direction of the turn
or lane change.
To signal a lanechange, just raise orlower the lever
until the greenarrow starts to flash. Hold it there until
you complete your lane change.The lever will returnby
itself whenyou release it.
93
I
As you signal a turn or a lane change,
if the arrows don’t
flash butjust stay on, a signal
bulb may be burned out
and other drivers won’t see your turn signal.
For example, some jurisdictions
may require thatyou
operate your fog lamps only when your lower beam
on
headlights are also on, or that headlights be turned
whenever you must use your windshield wipers.
In
If a bulb is burned out, replaceit to helpavoid an
addition, most jurisdictions prohibit driving solely
with
accident. If the greenarrows don’t go on at all when you
is
signal a turn,check the fuse (see “Fuses” in the Index) parking lights, especiallyat dawn or dusk. It
recommended thatyou check with your own state or
and for burned-out bulbs.
provincial highway authority for applicable lighting
If you havea trailer towing option with added wiring for regulations.
the trailer lights, a different turn signal flasher is used.
With this flasher installed,the signal indicator will flash Headlight High-Low Beam
even if a turn signal bulb is burned out. Check the front
To change the headlights
and rear turn signal lights regularly to make sure they
from low beam to high ‘or
are working.
high to low, pull the turn
signal levera11 the way
Turn Signal Reminder
toward you. Then release it.
A chime will sound if your turn signal remains on afier
When the high beamsare
having driven 1/2 mile, to remind you to turnoff your
on, this blue light on
the
signal.
instrument panel also will
be on.
Operation of Lights
,
Although your vehicle’s lighting system (headlights,
parking lights, fog lamps, side marker lights and
taillights) meetsall applicable federal lighting
requiremeilts, certain states and. provinces may apply
their own lighting regulations that may require special
attention before you operate these lights.
94
-
. .
Wagon Rear WindowWashedwiper
Cruise Control (Option)
When you apply your brakes, the Cruise Control shuts
Push the top of the switch to turn on the rear wipers.
Push the bottom of the switch to turnit off.
To spray windshield washer fluid on
the rear window,
push the topof the switch until therear wiper turns on.
Then pushthe top of the switch further. Washer fluid
will startto spray after a couple of seconds and continue
as long as you hold the switch. When you release
the
switch, the wiper will remainon until you turn it off by
pushing the bottom of the switch.
The rear window washer fluidcomes from the
windshield washer reservoir.
Off.
Note: On the Estate Wagon, if the tailgate window is not
completely closed the cruiseco&ol will not work.
97
2. Get up to the speedyou want.
3. Push in the button at the
end of the leverand
To Set Cruise Control
1. Move the Cruise
Control switch to“ON.”
release it.
(The “CRUISE’ light on
the instrument panel will
come on.)
You’ll go right backup to
your chosen speed and stay
there.
CRUISE
4. Take your foot offthe accelerator pedal.
To Resume a Set Speed
Suppose you set your Cruise Control at a desired speed
and then youapply the brake. This,of course, shutsoff
the Cruise Control. But you don’t needto reset it. Once
you’re going about 25 mph (40 km/h) or more,you can
fiom “ON’ to
move the Cruise Control switch
“Resume/Accelerate”for about half a second.
Remember if you hold the switch at
“Resume/Accelerate” longer than half
a second, the
vehicle will keep going faster until you release
the
switch or apply the brake.
You could be startled and
even lose control.So unless you want to go faster, don’t
hold the switchat “Resume/Accelerate.”
To Increase Speed While Using Cruise
Control
”
There are two ways to
go .to a higher speed. Here’sthe
first:
1. Use the accelerator pedalto get to the higher speed,
2. Push the button at
the endof the lever,
then release the
button and the
accelerator pedal.
You’ll now cruiseat
the higher speed.
Here’s the second way to go
to a higher speed:
1. Move the Cruise
switch from“ON” to
“Resume/Accelerate.”
Hold it there until
you get up to the
speed you want, and
then release the
switch.
2. To increase your speed invery small amounts, move
the switchto “Resume/Accelerate” for less than half
a second and then release
it. Each time youdo this,
faster.
your vehicle will go about1 mph (1.6 h/h)
The accelerate featl. .vi11only work after you have
settheCruise
Cr
sd by pushingthe “SET”
button.
To Reduce Speed While Using Cruise
Control
There are two ways to reduce your speed while using
cruise control:
Push in the button at the
end of the lever until
you reach the lower
speed you want,then
release it.
Using Cruise Control on Hills
How well your Cruise Control will work on hills
depends upon your speed, load, andthe steepness of the
hills. When goingup steep hills, you mayhave to step
on the accelerator pedalto maintain your speed. When
going downhill, you mayhave to brake or shift to a
lower gear to keep your speed down.Of course,
applying the brake takesyou out of Cruise Control.
Many drivers find this to be too much trouble and don’t
use CruiseControl on steep hills.
To Get Out of Cruise Control
There are two ways to turn off the Cruise Control:
1. Step lightly on the
brake pedal,OR
2. To slow down in very smallamounts, push the
button for less than half a second. Each
time you do
slower.
this, you’ll go 1 mph (1.6 h/h)
Passing Another Vehicle While Using
Cruise Control
Use the accelerator pedal to increase your speed. ,When
off the pedal, your vehicle will slow
you take your foot
down to the CruiseControl speed youset earlier.
101
Lights
light systems:
These switches control these
Headlights
0
Taillights
To Erase Speed Memory
When you turn off the Cruise Control or the ignition,
your Cruise Control set speed memory is erased.
102
0
Parking Lights
0
LicenseLights
0
'SidemarkerLights
0
Instrument Panel Lights
.
Interior Courtesy Li.ghts
Twilight Sentinel (Option)
The Twilight Sentinel controlat the bottom of your
off
lights switch area turns your headlights on and
automatically by sensinghow dark it is outside.
To operate it, leavethe LIGHTS switchoff and move
the Twilight Sentinel control
to any position butOFF.
(The OFF position is when the white ‘dot’ on the switch
is rotated all the way to the left.)
Pull the knob toward you,to the first setting to turn on
the parking lights. Pullthe knob toward you, to the
second setting toturn on the headlights.
By rotating theknob you can make the instrument panel
lights bright or dimand turn the courtesy lights on or
off.
If you movethe control all the way to the right, your
lights will remain on for three minutes after
you turn off
your engine.If you move the control towardthe left, the
off your engine.
lights willgo off quickly when you turn
You can change this delaytime from only a few seconds
to three minutes. Whenthe Twilight Sentinel is turned
off, use your lights switch to operate the headlights.
Headlight “On” Warning
If the light switchis left on you’ll hear a warning tone
when you turnoff the igniti,on.
103
Your Twilight Sentinel.,and
Daytime Running Lights
(Canada Only)work with
the light sensoron top of
your instrument panel.
Don’t coverit up, if youdo,
it will read ‘‘dark” and your
lights willcome on.
Daytime Running Lights (Canada Only)
The Canadian Federal Government has decided that
“Daytime Running Lights” (DRL)
are a usehl feature,
in that DRL can make your vehicle more visible to
pedestrians and other drivers during daylight hours.
DRL are required on new vehicles sold in Canada.
Your DRL work with a light sensor on top of the
it up.
instrument panel. Don’t cover
The low beam headlights will come on
at reduced
brightness in daylight when:
The ignition is on
The headlight switch’isoff, and
The parking brake is released.
At dusk, the exterior lights will
come on automatically
and the low beams will changeto full brightness. At
go out and the low beams
dawn, the exterior lights will
will changeto the reduced bdghtness of DRL (if the
headlight switch isoff).
Of course, you may still turn on the headlights any time
you need to.
I
104
To idle your vehicle with theDRL off, set the parking
brake while the ignition is the
in “Off” or “Lock’’
position. Then start the vehicle.
The DRL will stay off
until you release the parking brake.
Rear Seat Reading Lights
These lights go on when
you open the doors.
To turn on the reading
lights when the doorsare
closed, pressthe switch.
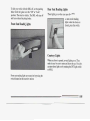
Front Seat Reading Lights
Courtesy Lights
When any ‘dooris opened, several lights go on. They
make it easy foryou to enter andleave the car. You also
,can turn these lightson by rotating theINT light switch
to MAX.
Front seat reading lights are turned by
onpressing the
switch locatedon the rearviewmirror.
105
I
.
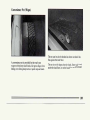
Wagon Rear Compartment.Light and Assist
Handles
There are courtesy lights and assist handles
in the rear
of the tailgate
compartment located on each side
window.
Push the switch on each light to turn them onoff.
and
Delayed Illuminated Entry
When you open the door, the interior lights will go on.
off automaticallyafterabout
Theselightswillgo
seconds, or when the ignition is turned on.
106
40
Mirrors
Inside Mirror
When youare sitting in a comfortable driving position,
adjust the mirrorso you can see clearly behind your car.
The day-night adjustment allows you
to adjust the
mirror to avoid glare from the lights behind
you.
Automatic Mirror (Option)
Automatidoff Switch
There is an automatic and an off position. Whenthe
button on the bottomof the mirror is pressedup and has
a green halo, the mirror is on automatic.
Press again to
turn off.
Time Delay
The mirror delays before changing from the night to the
day position.This delay prevents rapid changing
of the
mirror as ,you drive under lights and through traffic.
Reverse Gear Day Mode
Your Buick mayhave an automatic inside mirror.
The automatic mirror adjusts.for the glareof headlights
behind you.It detects changes in light, and then adjusts
for day or night operation.
During the day the mirror reflects allthe light fkom
behind your car. At night, when the glare
is too high, it
changes to the night mode.Then, it reflects only part of
the light from behind you. Whenthe mirror changes to
is
the night mode,it holds that position until glare no
longer present.
The reverse mode is another important feature
of the
automatic mirror. Whenthe shift lever is placed in “R”
(Reverse), the mirror shiftsto the day mode.This gives
you a bright imagein the mirroras you back up.
Front Reading Lights
There are two reading lights located on
the rearview
mirror. Pushthe switch closestto the light toturn it on
or off.
Cleaning Photocells
Use a cottonswab and glass cleaner to clean the two
photocells that make the mirror work.
107
I
OutsideMirrors
Heated Outside Rearview Mirror (Option)
!
Manual
The left outside mirror is heated
when you activate the
rear window defogger.
~
To adjust the left outside mirror, rotate
the knob located
on the driver’s door.
The right outside mirror must be
adjusted manually. Adjusteach mirror so you canjust
see the sideof your vehicle.
Convex Outside Mirror
Your right side mirroris convex.
A convex mirror’s surfaceis curved so you can see more
from the driver’s seat.
Power (Option)
If your Buick has optional
power mirrors, the mirror
control is located on the
driver’s door. Move the
center switchto choose the
right or left mirror. Press
any of the four arrows to
move the mirror inthe
desired direction.
I
1
Adjust each mirror so you can just see the sideof your
car and the area behind your car.
Lighted Visor Vanity Mirror (Option)
The lighted visor vanity mirror lights
up when the
mirror cover is opened. Closing the mirror cover turns
off the lights.
10s
I
Convenience Net (Wagon)
r
The net can bealso be hooked as shownso that it lies
flat against the load floor.
A convenience net is provided
for the rearof your
wagon to,help keep small loads,like grocery bags,from
falling over during sharp turns or quick
stops and starts.
The net is not for larger, heavier loads. Store such loads
under the load floor, or on the load floor
faras
forward
109
as you can. Keep the rear load floor flat when youme . . :
the net.
Convenience Net (Sedan)
Your car has a convenience net.
You’ll see it just inside
the back wallof the trunk.
Put small loads, like grocery bags, behind the Itnet.
can
help keep them from falling over during sharp turns or
quick starts and stops.
The net isn’t for larger, heavier loads. Store them in the
trunk as far forward as you can.
You can unhook thenet so that it will lie flat when
you’re not using it.
110
Wagon Cargo Security Cover (Option)
w%T<y&;
The security coveris used
to coverthe rear area when
you
want
itemshidden
from sight.
To use it, pull on~thehandle
and pullthe' cover all the
way to the tailgate. Then,
insert each endof the cover
into the slots, making sure
to get them fully in place.
To return the cover, pullon the handle, pulling the cover
up and out of the slots. Gently let the cover roll back to
.the front.
Be careful not to let go of the cover beforeit is fully
retracted, as it could be damaged.
The security cover can
also be removed from the car.
Each end of the cover is spring-loaded. Push in either
end towards the center and lift
it out of the bracket.
To replace the cover, put one end
of the cover in the
in and insertit into
bracket, then push the other spring
the bracket.
111
Wagon Luggage Carrier
You have a luggage carrier
and can load thingson’topof
your vehicle. The luggage carrier has slats and side rails
to use
attached to the roof, sliding crossrails and places
for tying things down.These let you load some things
on topof your vehicle,so long as they are not wider or
longer than theluggage carrier.
I
!
112
NOTICE:
Adjusting the Crossbar
Loading cargo that weighsmore than 200.
pounds (90 kg) on the luggage carrier may
damage your vehicle.,
When you carry cargo on the luggage carrierof a
proper size and weight,put it on the slats,as far
forward as you can, and distribute the load
evenly along the slats. Thenslide the cross rail
up against the rear of the load,to help keep it
from moving. You can then tie it down.
L
Don’t exceed the maximum vehicle capacity when
loading your Buick. Formore information on vehicle
capacity and loading,see Index under “Loading Your
Vehicle.”
To prevent damage or loss of cargo as you’re driving,
check now and then to make sure
the luggage carrier
and cargo are still securely fastened.
1. Loosen the knob at each end of the crossbar.
2. Position the crossbarby sliding it on the track.
3. Attach commercial carriers as recommended by their
manufacturer.
4. Tighten the knob to secure the crossbar in place.
113
Ashtrays
The front center ashtray may be lifted out for cleaning.
To remove the rear ashtray
for cleaning, press down on
the snuffer as you puU.the
ashtray down and out.
NOTICE:
Don’t put papers or other flammable things into
your ashtrays. Hot cigarettes or other smoking
materials could ignite them, causing
a damaging
fire.
Cigarette Lighter
by
It’s near the ashtray. To use the cigarette lighter, pushit
in all the way and let go. When it’s ready, it will
pop
back
itself.
Storage Armrest (Option)
..k.
!*
.
r
NOTICE:
I
If you h’old a cigarette lighter
in with your hand
while it is heating, it won’tbeable to back away
from the heating element when it’s ready. That
can makeit overheat, damagling the lighter. and
.
the heating element.
The armrest between thefront seats opens intoa storage
area.
Assist Handles
A folding handle over each door can used
be to get in
and out of your vehicle.
116
The Instrument Panel:Y0u.r
Enformation System
Your instrument panel is designed to you
let know at a
glance how your car isrunning. You’ll know how fast
you’re going, how much fuel you’re using, and many
other things you’ll need to know
to drive safely and
economically.
Speedometer and Odometer
Trip Odometer
Your speedometer lets you see your speed in both miles
:YQW-~
per hour (mph) and kilometers per. hour..(km/h),
odometer shows how far your vehicle has been driven,
in either miles (used in
the U.S.) or kilometers (used in
Canada).
:’
.
-
’
A trip odometer can tell
you how may milesyou
have driven since youlast
set it to zero. To reset it,
push the button.
Your Buick has a “tamper-resistant odometer.” If you
can see very noticeable bright silver lines between the
numbers, probably someone has tried to turnit back.
The numbers may not be accurate.
’
You may ‘wonder what
happens if a car hasto have a
new odometer installed. The new one should beset to
the same reading as the old one.If that is not possible,
a label on thedriver’s door must
then .it’s set at zero, and
show the old readingand when the new one was
installed.
Warning Lights, Gages and
Indicators
This section describesthe warning lights and gages that
may be on your vehicle.The pictures will help you
locate them.
Warning lights and gages can signal that
something is
wrong beforeit becomes serious enough to cause
an
expensive repair or replacement. Paying attention to
your warning lights and gages could
also save you or
others from injury.
117
Warning lights go on when there may be or is a problemFuel
with one of your vehicle’s functions.As you will see in
the details on the next few pages,
some warning lights
come on brieflywhen you turn the ignition.keyjust to
let you know they’re working. If you
are familiar with
this section, you should not be alarmedwhen this
happens.
j
Gages can indicate when there may be or is a problem
with one of your vehicle’s functions. Often gages and
warning lights work together to let you know when
there’saproblemwithyourvehicle.
Gage
Your fuel gage shows how
much fuel isin your tank. It
works only when the
engine is on. When the
indicator nears“E,” you
still have a little fuel left.
You need to get more right
away.
When one of the warning lights comes on and stays on
when youare driving, or whenone of the gages shows
you
there may bea problem, check the section that tells
had about the
what todo about it. Please follow the manual’s advice. Here are four concerns some owners have
fuel gage. All these situations
are normal and indicate
Waiting todo repairs can be costly-and even
nothing wrong with the fuel gage.
dangerous. So please get to know your warning lights
At the gas station, the gas pump shuts
off before the
and gages. They’re a big help.
gage reads“F”.
0
118
It takes more (or less) gas to
fill up than the gage
indicated. For example, the gage
may have indicated
1/2 full, but it took more
-or less-than half of
the tank’s capacity to fill it.
I
harder to push. Or,
the pedal may go closer to thefloor.
It may take longer to stop.
If the lightis.still on, havethe
vehicle towedfor service. (See “Towing Your Car” in-..
the Index.)
Anti-Lock Brake System Warning Light
(@I
ANTIL0.CK
The brake system warninglight will also come on when.
you set your parking brake, and it will stay on
if
your
parking brake doesn’t release fully.
If it stays on after
your parking brake is fully released,
it means you havea
brake problem.
120
With anti-lock, this
light will come on
when you start your
engine and may stay on
for several seconds.
That’s normal. If the
. light doesn’t come on,
have it fixedso it will
be ready to warn you if
there is a problem.
If the light stays on, turn the ignition
off:Or, if the light
comes on when you’re driving,stop as soon as possible
and turn the ignitionoff. Then start the engine again to
reset the system.If the light still stays on, or comes on
again while you’re driving, your Buick needs service.
If
the regular brake system warning light isn’t on, still
you
have brakes, butyou don’t have anti-lock brakes. the
If
on, you don’t
regular brake system warning light is also
have anti-lock brakes and there’s a problem with your
regular brakes.See “Brake System Warning Light”
earlier in this part.
The anti-lock brake system warning light may
also
come on when you are driving witha compact spare tire.
If this happens, the light means you won’t have
anti-lock until you replace the compactspare with a
-full-sizetire. If the warning light stays ‘on
after you
replace thecompact spare with a full-size tire, or if it
comes on again when you’redriving, your Buick needs
service.
Engine Coolant Temperature Warning
Light
-F-
k
HOT
This light tells you that.
your engine coolant has
overheated. If you have
been operating your
vehicle under ,normal
driving conditions, you
should pulloff the road,
stop your vehicle and
turn the engineoff as
soon as possible.
The chapter “Problems on the Road,” in this manual
shows what todo. See “Engine Overheating” in the
Index.
Engine Coolant Temperature Gage
TEMP
c \\‘
\
This gage shows the
engine coolant
temperature. If the gage
pointer moves into the
red area, your engineis
too hot! That reading
means thesame thing as
the warning light.
-Fd
ucy
’ ’*
I
0
It means that your engine coolant has overheated:
If you
have been operating your vehicle under normal driving
conditions, you should pulloff the road, stop your
vehicle and turnoff the engineas soon as possible.The
chapter “Problems on the Road,”in this manual shows
what to do. See “Engine Overheating”in the Index.
Low Coolant Warning Light
If you have this light
and it comes on, your
system is low on
coolant and the engine
may overheat.
LOW
C 00,LANT
LEVEL
I
121
OIL
Low Oil Level Light
LOW
01.L
LEV
Change Oil Indicator
The “Low OilLevel” light
should come on briefly
while you are starting your
engine. If the light doesn’t
come on, have your vehicle
serviced, so it will be ready
to warn you if there’s a
problem..
When the “LOW OIL LEV” light comes on you should
check your engine oil leveland fill if necessary. See
Engine Oil in the Index.
The “Change Oil” light is activated by the
Engine Oil
Life Monitor System. The engine oil life monitor system
determines the conditionof the engine oil and letsyou
know when the oil shouldbe changed. See “Engine Oil”
in the Index.
It does this by electronically receiving data from the
Powertrain Control Module.The data it receives
contains information about engine speed (revolutions
per minute), coolanttemperature and vehicle speed.The
oil life monitor uses this data to
determine how much
the oil hasdegraded.
When to change your oil depends on driving habits and
conditions because these directly affectengine speed,
coolant temperature and vehicle speed. Becauseof this,
the “Change Oil” light manycome on as earlyas 2,000
miles or lessfor harsh conditions.
If the light stays on, yourengine oil level shouldbe
change the
checked. Check your oil level (be sure your vehicle is on If the “Change Oil” light is on continuously,
oil.
a level surface),and bring the engine oil up to the proper
level, if necessary. See “Engine Oil” in the Index.
123
After changing the engineoil, the systemmust be
reset.
Malfunction Indicator ‘Lamp
(Service Engine Soon Light)
1
SERVICE
ENGINE
SOON
The reset button is on the end of the instrument panel on
the driver’s side behind the fuse paneldoor. With the
RUN position, but the engine not
ignition key in the
started, push the reset button, holding
it in until the
off. This
“Change Oil” light flashes and then goes
indicates the Oil Life Monitor System has been reset.
A computer monitors operationof your fuel, ignition
and emission control systems.
This light shouldcome on
when the ignition is on, but the
engine is not running,as
a check to show
you it is working.
If it does not come on
at all, have it fixed right away.If
it stays on, or it comes on while
you are driving, the
computer is indicating that
you have a problem.You
soon.
should take your vehicle in for service
NOTICE:
If you keep driving your vehicle with this light on,
after a while the emission controls won’t work as
well, your fuel economy won’t be as good and
your engine may not run as smoothly. This could
lead to costly repairsnot covered by your
warranty.
If the light stays on,you need service, and you should
take your Buick to the dealer
at once. To save your
battery until you get there, turn
off all accessories. and
set your air system to“OFF.”
Gate Ajar Light
66Battery99
Light
When you turn the key to
“Run,” this light will come
on briefly, to show that
your alternator and battery
charging systemsare
working.
VOLTS
GATE
AJAR
L
Your wagon hasa Gate
Ajar warning light.It
should come on when the
tailgate is opened as a door.
It will stay on until the
tailgate has been fully
closed. It does not come on
when the tailgate has been
opened asa gate.
1931 Buick Model 90
126
Part 3 includes:
Your Buick Comfort Control System
Air Outlets
This part tells you howto make your air system work
for you.
Fresh air from outside your vehicle flows through your
Buick when the caris moving. When the vehicle is not
moving, you can get outsideair to flow through by
selecting anyair choice (exceptthe rear window
HI fan speed,.
defogger) and. the
The automatic system will recirculate the
air inside the
vehicle for maximum air conditioning performanceif
the inside of the vehicle is hot.The automatic system
will return to circulating outside air once the vehicle
interior has cooled down.
The manual system will recirculate the
air for maximum
air conditioning performance whenRECIRC is selected.
128
, .
If your Buick has the Electronic Climate Control option, The following information tells you how it works:
it looks like this:
Temp
To choose the temperature
you want maintained inside
the vehicle, push TEMP A
or v. The blue down arrow
decreases the temperature
and the redup arrow
inci-eases the temperature.
Pushing theTEMJ? button
only once withthe exterior
temperature displayed will
not,change the set
temperature.
You can choose from60°F (16°C) to 90°F (33°C). It
is not necessary to choose the extremetemperature,to
or cool at the maximum.The
get the system to heat
system does it automatically.
129
From the AUTO mode, pushingthe temperature to
90°F will automatically allow the system to select the
high blower and floor mode.
From AUTO mode,pushing the temperatureto 60°F
will automatically allowthe system to select high
blower, MIDDLE mode and recirculate air.
Off
When the system isoff, the '
ventilation allowsair to
flow 'throughthe heater
ducts while the vehicle is
moving.
Auto
When the system is set for
automatic, air will come
from the floor outlets, the
instrument panel. outlets or
both. Fan speed will 'vary
HI
(unless a blower LO or
button has been pushed)
as
the system gets to and
maintains thetemperature
setting you have selected.
"
The display will show the selected
temperature and
blower speed.
In cold weatherthe system willdelay turning onthe
blower, to avoid blowing cold air. The length of the
delay dependson engine coolant temperature, outside
temperature and time since the
engine was last started.
'
The exterior temperature willshow in the display area.
Pushing a LO orHI blower button will override this.
delay, andturn on the blower.
Vent
Fan Speeds
The speed of the blower fan is controlled automatically
, .
youif
AUTO.
have
onfan
the
Use VENT when you don't
want to coolthe air coming
into your vehicle.The air
flow will come from the
instrument panel outlets.
However, if you wantthe
blower fan to runat a lower
speed, push
v.
If you want to raise the
blower speed, pushA .
The blower speed willgo
lower or higher with every
push of the button untilthe
1ow.est
or highest
speed
is
reached.
Defrost
This setting will directthe
air flow toward the
windshield. Use defrost
when there isfog or ice on
the windshield.
'1 2 1
I
Defrost will work better if
any ice and snowis cleared
from the hood and theair inlet area between the hood
and the windshield.
Blower speed will be controlled automatically, or you
Ir, FAN
can choose another speed by pushing
v.
Defog
outlets.
Middle
Pushing the middle button directs the air through the
instrument panel outlets.
Blend
The BLEND setting directs the
air flow to the
instrument panel outlets and the floor outlets;
Floor
Pushing theFLOOR setting directsall air flow tothe
_ .
floor
e . ,
I
..~
,
,(
- '
:3
,
.
<q
.~
%
."
This setting directs the air flow
to the windshieldand
floor areas.
Rear Window Defogger (Option)
J
Blend
The BLEND setting directs the air flow
to the
instrument panel outlets and the floor outlets.
Floor
Pushing the FLOOR setting directs all air flow to the
floor outlets.
Defog
This setting directs the air flow
to the windshield and
floor areas.
B
Venti1atio.n
For mild outside temperatures, when
little heating or
A/C button to deactivate the
cooling is needed, press the
air'conditioner. RECIR, DEFOG andDEFROST must
also be off. Air will flow through the instrument panel
outlets near the floor. Use
the air outlets to turn on,
adjust and turnoff the air flow. Adjust the cool/warm
lever to control the temperature..
134
Heating
When outsidetemperatures are cold, slidingthe lever to
Warm will send heatedair through the heater outlets,
and some through the defroster vents.
Rear Window Defogger (Option)
The lines you see on the
rear window warmthe
glass. Press the button to
start warming your
window. After 10 minutes,
it will go off by itself or
pressing the button again
during the heating cycle
will shut it off.If you need
additional warming time,
push the button again.
Defrosting
The Defrost setting directs mostof the air through the
defroster vents,and some through the heater outlets. Use
defrost when you want to remove
fog or icefrom the
windshield.
I NOTICE:
Scraping the insideof your rear window could
cut and damage the heater. Your warranty would
not cover this damage. Don’t put decals there,
you might have to scrape them
off.
135
Y
Audio Systems
AM Stereo
Your Delco’ audio system has been designed to operate
easily and give yearsof listening pleasure.But you will
get the most enjoyment outof your system if you
acquaint yourself with it first. Find out what your
Delco@system cando and how to operateall its
controls,-tobe sure you’re getting
the most out of the
advanced engineering that went into it.
This means the Delco’ system can receive C-QUAM@
stereo broadcasts. ManyAM stations aroundthe country
use C-QUAM@ to produce stereo, though some
do not.
(C-QUAM@ is a registered trademark
of Motorola, hc.)
If your Delco’ system can getC-QUAM’, your
“STEREO” light will come on when you’re receiving it.
FM Stereo
FM stereo will give you the best sound.
But FM signals
will reach onlyabout 10 to 40 miles (16 to65 km). And,
tall buildingsor hills can interfere with FM signals,
causing the soundto come and go.
AM
The range for most AM stations is greater than for
FM,
especially at night. The longer range, however, can
cause stations to interfere with each other.
AM can pick
up noise from things like storms and power lines. Try
reducing the trebleto reduce this noise.
’
136
Be aware that hearing damage
from loud noise is almost
undetectable until it is too late.
Your hearing can adapt to
higher volumes of sound. Sound that seems normal can
be loud and harmful to your hearing. Take precautions by
adjusting the volume control on your radio to a safe
sound level before your hearing adapts to it.
.TOhelp avoid hearing lossor damage:
0
Adjust the volume control to the lowest setting.
0
Increase volume slowly untilyou hear comfortably
and clearly.
How To Operate Your Audio System
NOTICE:
Before you add anysound equipment to your
vehicle like a tape player, CB radio, mobile
telephone or two-way radio be sure you can
add whatyou want. Ifyou can, it’s very important
to do it properly. Addedsound equipment may
interfere w’ith the
operation of your vehicle’s
engine, Delco@ radio or
other systems, and even
damage them. And,your vehicle’s systemsmay
interfere with the operation of sound equipment
that hasbeen added improperly.
So, before adding sound equipment, checkwith
your dealer and besure to check Federalrules
covering mobile radio and telephone units.
--
To Play This Radio
--
The Upper Knob
The upper knob does these things:
It turns the system on and off.
It controls the volume. The volume knob increases
volume when rotated clockwise.
It will display the time when pushed.
137
Balance
0
Tune in the desired station.
The BAL control behind the upper
knob allows you to
balance the sound betweenthe right and left speakers.
0
Press the SET pushbutton. (SET appears in the
display).
The Lower'Kndb
0
Within 5 seconds, push one of the four pushbuttons
to store the station. Whenever
you press that button
again, the preset station will return.
Turn the lowerknob to tune in radio stations. Push it to
get AM or FM.
Fade
The FADE control behindthe .lowerknob moves the
sound bgtween your front and rear speakers.
In addition to the4 stations setas above, up to three
additional stations maybe preset on each band
by
pressing two adjoining buttons at the same time.
Tune in the desired station.
0 Press the SET pushbutton. (SET appears in the
Seek
display).
Pressing the SEEK button will cause the receiver to seek 0 Within 5 seconds, press any two adjoining
the next higher stationand stop.
pushbuttons at the same time.The station will return
....
,;'y.&g&-.-r:T..
when the same two pushbuttons are pressed again.
Scan
Clock
When you pressSCAN, the radio will go to the next
station and pause and will
keep scanning untilyou press
To set the clock:
scan again.
Press the SET pushbutton.
Pushbuttons
0 Within. 5 seconds, press and holdSCAN until the
The four pushbuttons let you return to favorite stations.
co,nect hour appears on the display.
You can set the pushbuttons for
up to fourteen favorite
0 Press and holdSEEK until the correct minute
stations (7 AM and 7 FM).
appears on the display.
Tf
,$-+Le.,-.
j.
d;-
I .
.,
J
138
Treble
The Upper Knob
Slide the TREB lever up to increase the treble response.
If the station is weakor noisy, slide the treble lever
down toreduce the noise.
The upper knob does these things:
It turns the system on and off.
It controls the volume.
Bass
Slide the BASS lever up to increase the bass response.
Adjust the BASS lever to give a pleasing sound to your
ear.
To Play This Radio
It tells you the time (When the ignition is off, push
the knob to displaythe time.)
It allows you to hear the other sideof the tape. (Press
the knob while the cassette is playing).
Balance
The BAL control behind the upper knob
allows you to
balance the sound between the right and left speakers.
The Lower Knob
Turn the lower knob to tune radio stations. Push it to get
AM or FM.
Fade
The FADE control behindthe lower knob moves the
sound between your front and rear speakers.
Seek
Pressing the.SEEK button willcause the receiver to seek
the next higher station and stop.
139
Scan
When you press SCAN, the radio will
go to the next
station and pause and keep doing that until
you press
SCAN again. SCAN appears in the graphic display.
Pushbuttons
The four pushbuttons let you return to stations.
You can
set the pushbuttons forup to fourteen stations(7 AM
and 7 FM).
0 Tune in the desired station.
~
Clock
To set the clock:
0 Press the SET button.
0 Within 5 seconds, press and holdSCAN until the
correct hour appears on
the display.
0 Press and hold SEEK until the correct minute
appears on the display.
Treble
Slide the TREB leverup to increase the treble response.
0 Press the SET pushbutton. (SET appears in the display).
If the station is weak or noisy, slide
the TREB lever
d
o
h
to
reduce
the
noise.
0 Within 5 seconds, push one,of the four pushbuttons.
Whenever you press that button, the preset station will Bass
return.
Slide the BASS lever upto increase the bass response.
Up to three additional stations on each band may be
Adjust the BASSlever'to give a pleasing sound
to ,your
preset, by pressing two adjoining pushbuttons at the
ear.
same time.
DNR@
0 Tune in the desired station.
This is the Dynamic Noise Reduction button,
DNR'
0 Press SET pushbutton.
helps remove backgraundhiss from the.radio or tape
0 Within the 5 seconds, press any two adjoining
player. You may want toleave it pushed in all the time.
pushbuttons at the same time.
The station will return
when the same two pushbuttons are pressed again.
To Play a Cassette
Your tape player is built to work best with tapes that are
30 to 45 minutes long on eachside. Tapes longer than
this player.
that are so thin they may not work well in
With the radio on, pressa tape into the slot marked
AUTO REVERSE (tape side goes in first).
Stop-Eject
To remove or stop thetape and switch toradio, press the
STOP-EJECT button.
To Play This Radio
Once the.tape is playing, use the upper and lower knobs
for volume, balance andfade just as you didfor radio.
The arrows indicate which side of the tape is being
played.
Forward
To advance the tape, press and the tape will advance
rapidly'until you press the STOP-EJECT button lightly.
Reverse
To reverse the tape, press 4 and the tape will reverse
rapidly until you press the STOP-EJECT button lightly.
Program
To go from one side of the tape to the other, press the
upper knob (RCL-PROG).
Power
To turn on the radio, press the
PWR button.
141
The Upper Knob
The upper knob does these things:
It controls the volume.The volume increases and
decreases when the knobis held slightly rotated
against the spring load.
0
It allows you to mutethe radio or the tape player.
to listen. 'Du,ring mute,
Press to mute; press again
only volume up will work.
Balance
The control behindthe upper knob allows youto
balance the sound between
the right and left speakers.
The Lower Knob
Turn the lower knobto tune radio stations. Turn the
knob to tune slowly,
if you holdit for more than3
seconds it will tune rapidly. Pushit toget AM or FM.
Fade
The FADE control behind the lower knob moves the
sound between your front and rear speakers.
Recall
It tells you the time and the radio frequency. When the
ignition is off, pushRCL to display the time. With the
142
radio on, and the time displayed, push it to display the
frequency.
Seek
Pressing the SEEK 4 or button will cause the
receiver to seek the next higher or lower station
and
stop.
Scan
When you press SCAN, the radio will
go to the next
station and pause and keep doing that until
you press
SCAN again.
Pushbuttons
The five pushbuttons let you return
to favorite stations.
You can set the pushbuttons for up
to ten stations(5 AM
and 5 FM).
0 Tune in the desired station.
0 Press the SET pushbutton. (The display will show
SET for about5 seconds.)
0 Within 5 seconds, push one of the five pushbuttons.
SET will disappear from the display when the station
is set.
0 Whenever you press that button, the preset station
will return.
Clock
To Play a Cassette
To set the clock:
Your tape player is builtto work best with tapes thatare
30 to 45 minutes long oneach side. Tapes longer than
in this player.
that are so thin they may not work well
0
Press the SET button.
0
Within 5 seconds, press and hold SCAN until the
correct hour appears. on the display.
0
Press and hold SEEK 4 or until
appears on the display.
the correct minute
To Adjust the Tone
Use the levers next tothe display to set the bass,
midrange, ,and treble until you getthe sound you want.
The 60 and 250 levers adjust the bass; 1K is midrange;
and 3.5K and 1OK control the treble.
We suggest you start with the center lever
(1K) in the
midpoint position. Then move, the others up or
down
until you get theamount of bass and treble you like.
With the radio on, press a tape into the slot marked
AUTO REVERSE (tape side goes in first).
Once the tape is playing, adjust the upper
and lower
knobs for volume, balance, and fade
just as you did for
the radio.The arrow in the graphic displayabove the
word TAPE indicates which sideof the tape is being
played.
Program
To go from one sideof the tape to the other, press
the
PROG button.
CrO2
This button sets the tape bias. When playing high bias
chrome or metal tapes, press the button to turn on the
Cr02. When playing standard bias tapes, press again to
turn off the Cr02.
143
Reverse
To reverse the tape, press
REV and the tape will rapidly
reverse to the beginning
of the tape or until
you press
the REV button lightly.
Forward
To advance the tape, pressFWD and the tape will
rapidly go-forwardto the end of the tape or untilyou
press theFWD button lightly.
Stop-Play
To immediately switch from tape to radio, press the
ST-PL button and the radio will resume playing the
station that was tuned in
when you inserted a tape.
Pressing ST-PL again will allow the tape to resume
where it stopped.
To Play This Radio
Previous
To hear a passage on
the tape that hasjust played, press
PREV andthe tape will back up and stop at either the
first 4-second quiet spot in the tape when
or you press
PREV again.
Next
To go immediately tothe next selection on the tape,
press NEXT. A 4-second quiet interval must be present
for the tape to stop.
Eject
To remove or stop the tape and switch to radio, press the
Power
EJECT button.
To turn on the radio,pr:sS the PWR button.
144
The Upper Knob
Recall
The upper knob does these things:
It tells youthe time andthe radio frequency. When the
ignition isoff, push RCL to display the time. With the
radio on, andthe time displayed, pushRCL to display
the frequency.
0
It controls the volume. The volume increases or
decreases volume whenthe knob is held slightly
rotated againstthe spring load.
It allows you to mute the radio or tape player. Press
to mute; press again to listen. During mute, only
volume up will work.
Balance
The control behindthe upper knob allows you to
balance the sound between the right and leftspeakers.,
The Lower Knob
Turn the lower knob to tune radiostations..The tune
knob increases and decreases stationfrequency when it
Turn the
is held slightly rotated against the spring load.
knob to tune slowly, you
if hold it for more than 3
seconds it will tune rapidly. Push it to get AM or FM.
Fade
The FADE control behindthe lower knob moves. the
sound between your front and rear speakers.
Seek
Pressing the SEEK 4 or button will cause the
receiver to seekthe next higher or lower station and
stop.
Scan
When you press SCAN, the radio will
go to the next
station and pause and keep doing that until you press
SCAN again.
Pushbuttons
The five pushbuttons let you return to favorite stations.
(5 AM
You can set the pushbuttons for up to ten stations
and 5 FM).
0 Tune in the desired station.
Press the SET pushbutton. (The display will show
SET for about 5 seconds).
145
~~~
.
.._
~~~
-~~
~
~
~~~
~
,
~
~~
t
Within 5 seconds, push one of the five pushbuttons.
To Play a Compact Disc
SET will disappear from the display when the station
Before you begin, please note:DO NOT use mini-discs
is set.
Use full-size
that are called singles. They won’t eject.
Whenever you press that‘button, the preset station will
compact discs only.
return.
If the disc player is very hot,iforyou’re driving on a
very rough road,a disc: may come outor just not play. If
Clock
you see the word HOT on the display, the disc player is
To set the clock:
too hotto play the disc. PressRCL to make the word
HOT disappear from the display.
0 Press the SET pushbutton.
0
~
~
’
~
i
1
0
Within 5 seconds, press and hold SCAN until the
correct hour appearson the display.
As soon as things get back to normal, disc
the should
play again.
0
Press and hold SEEK 4 or until the correct minute
appears on the display.
Press PWR to turn the system on.
To Adjust the Tone
Use the levers next to the display to set the bass,
midrange and treble until you get the sound
you want.
The 60 and 250 levers adjust the bass;1K is midrange;
and 3.5K and 10K control the treble.
We suggest you start with the center lever (1K) in the
midpoint position. Then move the others
up until you
get the amountof bass and treble you like.
Insert adisc partway into the slot, labelside up. The
player will pull it in.
Wait a few seconds and the disc
should play.
If the.disc comes back out, checkto see if
0
The disc is upside down.
0
It is dirty, scratched, or wet.
0
There’s too much moisture in the air. (If there is,
wait about an hour and try again.)
Recall
Previous
Press RCL to see what track is playing. Press it again
within 5 seconds to see how long theCD has been
playing.
If you hold this
Press PREV to hear the previous track.
button, or press it more than once, the disc will return to
previous tracks.
The track numberalso appears when you changethe
volume or when anew track startsto play.
Next
Press NEXT to hear the next track instead
of waiting
If you hold this
until the present track is finished.
button, or press it more than once, disc
the will advance
further.
Compression
Pressing the COMP button makes softand loud passages
nearly equal in volume.
Random
The RDM button means randomand when it is pressed,
it will play the tracks in random order rather
than
sequential 1,2,3...order.
Reverse
Press and hold REV to return rapidly
to a favorite
passage. Release it to play the passage.
Forward
Press and holdFWD to advance quickly within a track.
Release it to resume playing. Watch the graphic display
to stop at a specific passage.
Stop/Play
Press ST/PL andthe disc willstop and the radio will
play. Press ST/PL again to restart the disc at the point
where it stopped.
Press thePWR button or turn the ignition key off to stop
the disc player.The disc stays in the player and will
resume playingat the point where it stopped.
Eject
Press EJCT andthe disc will ejectand the radio will
play. The disc will start at track1 when you reinsert it.
147
Anti-Theft Feature
0
Press SET and “000” will appear on the display.
Delco-Loc I1 is a security feature for the compact disc
player. It can be used or ignored.
If ignored, the system
plays normally.If it is activated your player won’t be
it won’t turn on.
usable if it’s ever stolen, because
Press SEEK and holdit until the first digit of your
code appears..
The instructions below tellyou how to enter your
personal secret code into the system.
If your vehicle
looses battery powerfor any reason, you must unlock
the system with your secretcode before the system will
turn on.
Press the AM-FM knob and “000” will appear. Now
of your
you are readyto enter the second three digits
code by repeating Steps6 and 7.
Rotate the TUNE knob right or left to make the last
two numbers agree with your code.
Be sure to read through the entire procedure and become
familiar with the appropriate buttons and knobs before
starting.
0 Write down any 6-digit number and keep it insafe
a
place.
Turn the ignition to the ACCESSORY or RUN
position.
0
Press PWR to turn the radio off.
0
Press preset buttons 1 and 4 together. Hold them
until “---,,shows on the display.
0
You are now ready to enter your secret code,If you
pause more than15 seconds between stepsyou may
have to start0ve.r.
1 AQ
Press the AM-FM’knob.The display will show
”rEP” for 5 seconds, and then“OOO” will appear
indicating that some steps are to be repeated for
verification.
Repeat steps 6 through 8.
Press the AM-FM knob. It the display shows“SEC”,
the verification process was successful and the
system is secure.If the display shows“---”,the
verification steps were not successful and the entire
sequence mustbe repeated.
To Unlock the System Aftera Power Loss
When battery power is reapplied to a secured radio,
the
radio won’t turn on and “LOC” will appear on the
display.
Enter your secretcode as follows, pauseno more than
15 seconds between steps.
Turn the ignition ON and the radio OFF.
Press the SET button. The display will show “000”.
Enter the six numbers of the code following steps
6-9 of the preceding paragraphs.The display will
show the numberas entered.
Press the AM-FM button andthe time appears indicating thatthe disabling sequence was
successful. If the display indicates“SEC,” the
numbers did not matchand the unitis still secured.
Disabling the Theft System
Press preset buttons 1 and 4, for 5 seconds with the
ignition ON and radio powerOFF. The display will
show “SEC”, indicating the unit is inthe secure
mode.
Press the SET button. The display will show “000”.
Enter the first three digits of the code following steps
6 and 7 of the preceding paragraphs. The display will
show the numbersas entered.
Press the AM-FM button. The radio will display
Enter the second three digitsof the code. The display
shows the numbers as entered.
Press the AM-FM button.If the display shows “---”,
the disabling sequence was successful. (The numbers
matched the user-selected code or the factory
back-up code) and the unitis in the UNSECURED
mode. If the displayshows “SEC“’, the disabling
sequence was unsuccessful and the numbers did not
match eitherof the codes and the unit will remain in
the SECURED mode.
Care of Your Cass’ette Tape Player
A tape player thatis not cleaned regularlycan cause
reduced sound quality, ruined cassettes, or a damaged
mechanism. Cassette tapes should
be stored in their
cases away from contaminants, direct sunlight, and
extreme heat. If they aren’t,they may not operate
properly or cause failureof the tape player.
Your tape player shouldbe cleaned regularly, each
month or after every15 hours of use. If you notice a
reduction in sound quality, try a known good cassette to
If this other
see if the tape or the tape player is at fault.
cassette has no improvement in sound quality, clean the
tape player.
~4000”.
149
Clean yourtape player with .a wiping-action,
Care of Your Compact Discs
non-abrasive cleaning cassette, and follow the directions
Handle discs carefully. Store them in their original cases
provided with it.
or other protective cases and away from direct sunlight
Cassettes are subject to wear and the sound quality may and dust.If the surfaceof a discis soiled, dampen a
degrade over time, Always make sure that the cassette clean, soft cloth in a mild, neutral detergent solution and
tape is in good condition before
you have your tape
clean'it, wiping from the center to the edge.
player serviced.
. Be sure never to touch the signal surface when handling
discs. Pick up discs
by grasping the outer edges or the
edge of the hole and the outer edge.
Fixed Mast Antenna
The fixed mast antenna can withstand most car washes
without being damaged.If the mast should ever become
it out by hand. If the
slightly bent, you can straighten
mast is badly bent, as
it might be by vandals, you should
replace it.
Check every oncein a whileto be sure the mast is still
tightened to the fender.
Power Antenna
Mast
Care
Your power antenna will look its best and work well if
it’s cleanedfrom time to time.
4. Wipe
with
clean
dry
cloth
before
retracting.
5. Make the antenna go up and down by turning the
radio or ignition onand off.
To Clean the Antenna Mast:
6. Then repeat if necessary.
1. Turn on the ignition
and radio to raise
the antenna to. full
mast extension.
NOTICE:
Don’t lubricate the power antenna.Lubrication
could damage it.
NOTICE:
2. Dampen a clean cloth withmineral spirits or
equivalent solvent.
3. Wipe cloth overthe mast sections, removing any
dirt.
Before entering an automatic carwash, turn off
your radio to make the power antenna go down.
This will prevent the mast from possibly getting
damaged. If the antenna doesnot go down when
you turn the radio off, it may be damagedor need
to be cleaned.In either case, lower the antenna
by hand by carefully pressing the antenna down.
If the mast hortionof your antenna is damaged, you can
easily replace it. See your dealer
for a replacement kit
the kit.
and follow the instructions in
151
1940 Buick Model 51G
152
. . . . . .
. . . .
Part 4 Your Driving and the Road
..
.
. II
Here you’ll find information about driving on different kinds
of ’roadsand in varying weather conditions
. We’ve also
included.many other useful tipson driving .
Part 4 includes:
DefensiveDriving. .............................
. . . . . . .............................
DrunkenDriving . . . . . . . . . . . . . . . . . . . . . . . . . . . . . . . . . . . . . . . . . . . . . . . . . . . . . . . . . . . . . . . . . .
ControlofaVehicle . . . . . . . . . . . . . . . . . . . . . . . . . . . . . . . . . . . . . . . . . . . . . . . . . . . . . . . . . . . . . . . .
Braking . . . . . . . . . . . . . . . . . . . . . . . . . . . . . . . . . . . . . . . . . . . . . . . . . . . . . . . . . . . . . . . . . . . . .
Steering . . . . . . . . . . . . . . . . . . . . . . . . . . . . . . . . . . . . . . . . . . . . . . . . . . . . . . . . . . . . . . . . . . . . . .
Passing . . . . . . . . . . . . . . . . . . . . . . . . . . . . . . . . . . . . . . . . . . . . . . . . . . . . . . . . . . . . . . . . . . . . .
LossofControl .....................................................................
Drivingat.Night . . . . . . . . . . . . . . . . . . . . . . . . . . . . . . . . . . . . . . . . . . . . . . . . . . . . . . . . . . . . . . . . . . .
DrivingintheRain . . . . . . . . . . . . . . . . . . . . . . . . . . . . . . . . . . . . . . . . . . . . . . . . . . . . . . . . . . . . . . . . .
CityDriving . . . . . . . . . . . . . . . . . . . . . . . . . . . . . . . . . . . . . . . . . . . . . . . . . . . . . . . . . . . . . . . . . . . . . .
FreewayDriving . . . . . . . . . . . . . . . . . . . . . . . . . . . . . . . . . . . . . . . . . . . . . . . . . . . . . . . . . . . . . . . . . . .
Hill-andMountainRoads . . . . . . . . . . . . . . . . . . . . . . . . . . . . . . . . . . . . . . . . . . . . . . . . . . . . . . . . . . . .
WinterDriving . . . . . . . . . . . . . . . . . . . . . . . . . . . . . . . . . . . . . . . . . . . . . . . . . . . . . . . . . . . . . . . . . . . .
TowingaTrailer . . . . . . . . . . . . . . . . . . . . . . . . . . . . . . . . . . . . . . . . . . . . . . . . . . . . . . . . . . . . . . . . . . .
154
154
157
158
160
163
164
166
167
170
171
174
175
179
153
__
Defensive driving really means “be ready for anything.”
On city streets, rural roads, or freeways, it means
“always expect the unexpected.”
Assume that pedestrians or other drivers
are going tobe
careless and make mistakes. Anticipate what they might
do. Be ready for their mistakes.
*
Rear-end collisions are about the most preventable
of
accidents. Yet they are common. Allow enough
following distance. It’s the best defensive driving
maneuver, in both city and rural driving.
You never
know when the vehicle in front of you
is going to brake
or turn suddenly.
Drunken Driving
Death and injury associated with drinking and driving is
a national tragedy. It’s the number
one contributor to the
highway death toll, claiming thousandsof victims every
Defensive Driving
year. Alcohol takes away three things that anyone needs
The best advice anyone can give about driving is: Drive to drive a vehicle:
Judgment
defensively.
Please start with a very important safety device in your
Buick: Buckle up. (See “Safety Belts” in the Index.)
154
MuscularCoordination
Vision
Police records show that almost half
of all motor
vehicle-related deaths involve alcohol -a driver, a
passenger or someone else, suchas a-pedestrian,had
been drinking.In most cases,these deaths are the result
of someone who was drinking and driving. About
20,000 motor vehicle-related deaths occur each year
because of alcohol, and thousandsof people are injured.
Just how much alcoholis too much if a person plans to
drive? Ideally,no one should drink alcohol and then
drive. Butif one does, then what’s“too ‘much”?It can be
a lot less than many might think. Although it depends
on
each personand situation, here is some general
information onthe problem.
The Blood Alcohol Content (BAC)of someone who is
drinking depends upon four things:
How much alcohol is in the drink.
0
The drinker’s body weight.
The amount of food that is consumed before and
during drinking.
0
The lengthof time it has taken the drinkerto
consume the alcohol.
a
According to the American Medical Association,
180-pound (82 kg) person who drinks three 12-ounce
(355 ml) bottlesof beer in an hour will end up with a
BAC of about0.06 percent. The person would reach the
same BAC by drinking three 4-ounce( 120 ml) glasses
of wine or three mixed drinksif each had 1- 1/2 ounces
(45 ml) of a liquor like whiskey, gin
or vodka.
1 cc
It's the amount of alcohol that counts. For example,
if
(3 ounces
the same person drank three double martinis
or 90 ml of liquor each) within an hour, the person's
BAC would be close to0.12 percent. A person who
consumes foodjust before or during drinking will havea
slightly lowerBAC level.
'
HOURS
!
HOURS
NUMBER
OF DRINKS
(as in picture)
HOUR
100
120
140
160
180
200
220
240
BODY WEIGHT IN POUNDS
The law in most U.S. states sets the legal limit aatBAC
of 0.10 percent. In Canada the limit is0.08 percent, and
c
Braking
Avoid needless heavy braking. Some people drive in
spurts -- heavy acceleration followedby heavy braking
-- rather than keeping pace with traffic. This is a
mistake. Your brakes may not have time to cool between
hard stops. Your brakes will wear out much faster
if you
do a lotof heavy braking. If you keep pace with the
traffic and allow realistic following distances,
you will
eliminate a lotof unnecessary braking. That means
better braking and longer brake life.
If your engine ever stops while you’re driving, brake
If you do, the
normally but don’t pump your brakes.
pedal may get harder to
push,down. If your engine
stops, you will still have some power brake assist. But
you will use it when you brake. Once the power assist is
used up, it may take longerto stop andthe brake pedal
will be harder to push.
..:
158
I
Anti-Lock Brakes (ABS)
Your Buick hasan advanced electronic braking system
that willhelp prevent skidding.
This light on the
instrument panel will
go on when you start
your vehicle.
$:
ANTILOCK
When you start your vehicleand begin to drive away,
you may hear a momentary motor or clicking noise.
And
you may even notice that your brake pedal moves a little
while thisis going on.This is the ABS system testing
itself. If there’s a problem with’ the anti-lock brake
system, the anti-lock brake system warning light will
stay on.
See “Anti-lock Brake System Warning Light” in the
Index.
Here’s how anti-lock works. Let’s say the road
is wet.
You’re driving safely. Suddenlyan animal jumps out in
front of you.
You slam on the brakes. Here’s what happens with ABS.
A computer senses that wheels
are slowing down.If one
of the wheels is about tostop rolling, the computer will
separately workthe brakes at each front wheel and
at the
rear wheels.
159
The anti-lock system can change the brake pressure
faster than any driver could. The computer
is
programmed to make the mostof available tire and road
conditions.
Remember: Anti-lock doesn’t change the time you need
to get your foot upto the brake pedal.If you get too
close to the vehicle in front
of you, you won’t have time
to apply your brakesif that vehicle suddenly slows or
to stop, even
stops. Always leave enough room up ahead
though you have anti-lock brakes.
To Use Anti-Lock
Don’t pump the brakes. Just hold the brake pedal down
and let anti-lock work for; you.
You may hear the
anti-lock pump or motor operate, and
feel the brake
pedal pulsate, but thisis normal.
Braking in Emergencies
Use your anti-lock braking system when you need to.
.With anti-lock, you can steer and brakeat the same
time. In many emergencies, steering can help you more
than eventhe very best braking.
Y
Steering
Power Steering
You can steer around the obstacle while braking hard.
If you lose power steering assist because
the engine
the
system
is
not
functioning,
you
can steer but
stops
or
As you brake, your computer keeps receiving updates on
wheel speed and controls braking pressure accordingly. it will take much more effort.
Steering Tips
Driving on Curves
What should youdo if this everhappens? Ease up on the
you want-it
accelerator pedal, steer th:e vehicle the way
to go, and slow down.
It’s importan; to take curves at a reasonable speed.
Speed limit signs nearcurves warn that you should
adjust
your speed.Of course, the posted speeds are
A lot of the “driver lost control” accidents mentioned on
based on good weatherand road conditions. Under less
the news happen on curves. Here’s why:
favorable conditions you’ll wantto go slower.
If you need toreduce your speed as you approach a
curve, do it before you enter the curve, while your front
wheels are straight ahead.
Try to adjust your speedso you can “drive” through the
curve. Maintaina reasonable, steady speed.Wait to
accelerate until youare out .of the curve, and then
accelerate gently into the straightaway.
Steering in Emergencies
Suppose you’re steering througha sharp curve. Then
you suddenly accelerate. Both control systems-steering and acceleration-- have to do their work where
the tires meetthe road. Adding the sudden acceleration
can demandtoo much of those places.You can lose
control.
There are times when steering can be more effective
than braking. Forexample, you come overa hill and
find a truck stopped in your lane, or
a car suddenly pulls
out from nowhere, ora child darts out from between
of you. You can
parked cars and stops right in front
-- if you can stopin
avoid these problems by braking
time. But sometimes you can’t; there isn’t room. That’s
-- steering around the
the time for evasive action
problem.
161
Your Buick can perform very wellin emergencies like
these. Firstapply your brakes.It is better to remove
as
much speedas you can from a possible collision. Then
steer around the problem, to the left or rightdepending
on thespace available.
An emergency like this requires close attentionand a
quick decision.If you are holding the steering wheel at
the recommended9 and 3 o'clock positions, you can
turn it a full180 degrees very quickly without removing
either hand. But you have to act
fast, steer quickly,and
just as quickly straightenthe wheel once you have
avoided the object.
The fact thatsuch emergency situations arealways
possible is a good reason to practice defensive driving at
all times and wear safety belts properly.
162
Off-Road Recovery
Passing
You may find sometime that your right wheelshave
dropped off the edge of a roadonto the shoulder while
you’re driving.
The driver of a vehicleabout to pass another on a
two-lane highway waitsfor just the right moment,
accelerates, moves around the vehicle ahead, then goes
back into the right lane again.A simple maneuver?
If the levelof the shoulder is only slightly below the
pavement, recovery should be fairly easy. Ease off the
accelerator and then,if there is nothing inthe way, steer
so that your vehicle straddles theedge of the pavement.
You can turn the steering wheelup to 1/4 turn until the
right front tire contactsthe pavement edge. Then turn
your steering wheel togo straight down the roadway.
Not necessarily! Passing another vehicle on a two-lane
highway is a potentiallydangerous move, sincethe
passing vehicleoccupies the same lane as oncoming
traffic for several seconds.A miscalculation, an error in
judgment, or a brief surrender to frustration or anger can
suddenly put the passing driver faceface
to with the
worst of all traffic accidents-- the head-on collision.
So here are some tips for passing:
OFF ROAD RECOVERY
0
“Drive ahead.’’ Look downthe road, to the sides, and
to crossroads for situations that might affect your
passing patterns.If you have any doubt whatsoever
about making a successful pass, wait for a better time.
0
Watch for traffic signs, pavement markings, and lines.
If you can see a sign up ahead that might indicatea
A broken
turn or an intersection, delay your pass.
center line usually indicates it’s all right to pass
(providing the road aheadis clear). Never cross a solid
line on your sideof the lane ora double solid line,
even if the road seems empty of approaching traffic.
LEFT APPROX.
QUARTER TURN
&.
163
0
0
0
0
Do not get too closeto the vehicleyou want to pass
while you’re awaiting an opportunity. For
one thing,
following too closely reduces your areaof vision,
especially if you’re following a larger vehicle. Also,
you won’t haveadequate space if the vehicle ahead
suddenly slows or stops. Keep back
a reasonable
distance.
When it lookslike a chance to pass is coming up,
lane and don’t
start to accelerate but stay in the right
get too close. Time your moveso you will be
increasing speedas,the time comes to move into the
other lane.If the way is clear to pass, you will have a
“running start” that morethan makes up for the
distance you wouldlose by dropping back. And if
something happens tocause you to cancel your pass,
you need only slow downand drop back again and
wait for another opportunity.
ahead of the passed vehicleto see its frontin your
inside mirror, activate your right lane change signal
and move back into the right lane. (Remember that
your right outside mirror is convex.
The vehicle you
just passed may seem to be farther away from you
than it really is.)
0
Try not to pass more than
one vehicle at a time on
two-lane roads. Reconsider before passing the next
vehicle.
0
Don’t overtake a slowly moving vehicle too rapidly.
Even thoughthe brake lightsare not flashing,it may
be slowing down or starting to turn.
0
If you’re being passed, make it easy the
for
of you. Perhaps you
following driver to get ahead
can ease a little tothe right.
Loss of Control
If other carsare lined up to pass a slow vehicle, wait
your turn. But takecare that someone isn’t tryingto
pass youas you pull outto pass the slow vehicle.
Remember to glance over your shoulder and check
the blind spot.
Let’s review what driving experts say
about what
happens when the three control systems (brakes, steering
and acceleration) don’thave enough friction where the
tires meet the roadto do what the driver has asked.
Check your mirrors,glance over your shoulder,and
start yourleft lane change signal before moving out
of the right lane to pass. When you
are far enough
In any emergency, don’t give up. Keep trying to steer
and constantly seekan escape route or areaof less
danger.
164
!
Skidding
In a skid, a drivercan lose controlof the vehicle.
Defensive drivers avoid most skidsby taking reasonable
care suited to existing conditions,and by not
“overdriving” those conditions. But skids
are always
possible.
The three typesof skids correspond to your Buick’s
three control systems. In the braking skid your wheels’
aren’t rolling. Inthe steering or cornering skid,too
muchspeed or steering in acurve causes tires toslip and
lose cornering force.And in the acceleration skidtoo
much throttle causes the driving wheels to spin.
A cornering skid andan acceleration skidare best
handled by easing your footoff the accelerator pedal.
If your vehicle starts to slide, ease your foot
off the
accelerator pedal and quickly steer the way
you want the
vehicle togo. If you start steering quicklyenough, your
vehicle may straighten out. Always be ready for a
second skidif it occurs.
165
Driving at Night
0
Adjust your inside rearview mirror
to reduce the
glare from headlights behind you.
0
Since you can’t seeas well, you may needto slow
down and keep more space between you and other
vehicles.
0
Slow down, especially on higher speed roads.
Your
headlights can lightup only so much road ahead.
0
In remote areas, watch for animals.
0
If you’re tired, pull off the road in a safe place and
rest.
Night Vision
No one cansee as well at night as in the daytime. But
as
we get older these differences increase. A 50-year-old
driver may requireat least twiceas much lightto see the
same thingat night as a 20-year-old.
Night driving is more dangerous than day driving. One
reason is that some drivers are likely to be impaired -by alcohol or drugs, with night vision problems, or
by
fatigue.
Here are some tips on night driving.
0 Drivedefensively.
Don’t drink and drive.
166
What you do in the daytime canalso affect your night
vision. For example,if you spend the day in bright
sunshine you are wise to wear sunglasses.Your eyes will
have less trouble adjustingto night. But if you’re
driving, don’t wear sunglassesat night. They may cut
down on glare Erom headlights, but theyalso make a lot
of things invisible.
Driving inthe Rain
Rain andwet roads can mean driving trouble.On a wet
road you can’t stop, accelerate or turn
as well because
your tire-to-road traction isn’tas good as on dry roads.
And, if your tires don’t have much tread left, you’ll get
even less traction. It’salways wise togo slower andbe
cautious if rain startsto fall while youare driving. The
surface may get wet suddenly when your reflexes are
tuned for driving on dry pavement.
167
The heavier the rain, the harder it is to see. Evenif your
windshield wiper blades arein good shape, a heavy rain
can make it harder to see road signsand traffic signals,
pavement markings, the edge of the road, and even
people walking.
It’s wise to keep your wipingequipment in goodshape
and keep your windshield washer tank filled.
Replace
your windshield wiper inserts when
they show signs of
streaking or missing areas on the windshield, or when
strips of rubber start to separate fromthe inserts.
168
Driving too fast through large water puddles or even
going throughsome car washes cancause problems, too.
The water may affect your brakes. Try
to avoid puddles.
But if you can’t, try to slow down before you hit them.
Hydroplaning
Some Other Rainy Weather Tips
Hydroplaning is dangerous. So much water can buildup
Turnonyourlow-beamheadlights
-- not just your
parking lights-- to help make you more visible to others.
under your tires that theycan actually ride on the water.
This can happenif the road is wet enough and you’re
Besidesslowingdown,allowsomeextrafollowing
going fastenough. When your vehicle is hydroplaning,
distance.Andbeespeciallycarefulwhenyoupass
it haslittle or no contact with the road.
another vehicle. Allow yourself more clear room ahead,
if your tires
Hydroplaning doesn’t happen often. But it can
haven’t much tread or if the pressurein one or more is
low. It can happen ifa lot of water is standing on the road. e Havegoodtireswithpropertreaddepth.
. ‘’
If you can see reflections from trees, telephone poles, or
(See “Tires” in the Index.)
other vehicles, and raindrops “dimple” the water’s surface,
there could be hydroplaning.
Hydroplaning usually happens at higher speeds.
There
just isn’t a hard and fast rule
about hydroplaning. The
best advice is to slow down when it is raining.
169
City Driving
Here are ways to increase your safetyin city driving:
0
Know the best wayto get to where youare going.
Get a city map and plan your trip into an unknown
part of the cityjust as you would for a cross-country
trip.
Try to use the freeways that rim and crisscross most
large cities.You’ll save time and energy. (See the
next section, “Freeway Driving.”)
0
One of the biggest problems with city streets is the
amount of traffic on them.You’ll want to watch out for
what the other driversare doing and pay attentionto
traffic signals.
170
Treat a green lightas a warning signal.A traffic light
is there because the corner is busy enough to need it.
When a light turns green, and
just before you start to
move, check both ways for vehicles that have not
cleared the intersection or may be running the red
light.
Freeway Driving
The most important advice on freeway driving is: Keep
up with traffic and keep to the right. Drive
at the same
speed mostof the other driversare driving. Too-fast or
flow. Treat the
too-slow driving breaks a smooth traffic
left lane on freeway
a
.as a passing lane.
At the entrance thereis usuallv a ramp that leads
to the
freeway. If you have a clear viewof the freeway as you,
drive along the entrance ramp, you should beginto
check traffic.Try to determine where you expect to
blend with the flow. Try to merge intothe gap at close to
the prevailing speed.Switch on your turn signal, check
your mirrors and glance over your shoulder
as often as
necessary. Try to blend smoothly with the traffic flow.
.
I
Mile for rnile, freeways (also called thruways, parkways,
expressways, turnpikes, or superhighways) are the safest
of all roads. But they have their own special rules.
L
Once you are on the freeway, adjust your speed to the
posted limit or to the prevailing rate
if it’s slower. Stay
in the right lane unless you want to pass.
Before changing lanes, check your mirrors. Then use
your turn signal.
171
Once youare moving on thefreeyay, make certainyou
allow a reasonablefollowing distance. Expect to move
slightly slowerat night.
When you want to leavethe freeway, move tothe proper
lane well in advance. If you miss your exitdo not, under
any circumstances, stop and back
up. Drive on tothe
next exit.
The exit ramp canbe curved, sometimes quite sharply.
The exit speed is usually posted.
Reduce your speedaccording to your speedometer, not
to your senseof motion. After driving for any distance
at higher speeds,you may tend to think you
are going
slower than you actually are.
Before Leaving on a LongTrip
Make sure you’re ready. Tryto be well rested.If you
must start when you’re not
fresh -- such as after a day’s
work -- don’t plan to make too many miles that first part
of the journey. Wear comfortable clothing and shoes you
can easily drivein.
Is yaw vehicle ready fora long trip? If you keep it
serviced and maintained, it’s
ready to go.If it needs
service, have it done before starting out.Of course,
you’ll findexperienced and able service expertsin
Buick dealershipsall across North America. They’ll be
ready and willing to
help if you need it.
/
Here are some things youcan check before a trip:
-0
Windshield Washer Fluid: Is the reservoir full? Are
all windows clean inside and outside?
Wiper Blades: Are they in good shape?
Fuel. Engine Oil. Other Fluids: Have you checked all
levels?
172
0
Lights: Are they all working? Are the lenses clean?
Highway Hypnosis
0
Tires: They are vitally important to a safe,
trouble-free trip. Is the tread goodenough for
long-distance driving? Are the tires all inflated the
to
recommended pressure?
Is there actually sucha condition as “highway hypnosis”?
Or is itjust plain falling asleep at the wheel? Call it
highway hypnosis, lackof awareness, or whatever.
There is something aboutan easy stretchof road with the
same scenery, along- with the hum
of the tires on the road,
the droneof the engine, and the rush
of the wind against
the vehicle that can make you sleepy. Don’t let it happen
to you! If it does, your vehicle can leave the road in
than a second, andyou could crash and be injured.
What can youdo about highway hypnosis? First,be
aware that it can happen.
Then hereare some tips:
0 Make sure your vehicleis well ventilated, with a
comfortably cool interior.
Keep your eyes moving. Scan the road ahead and to
the sides. Check your rearview mirrors and your
instruments frequently.
If you get sleepy, pulloff the road into a rest, service,
or parking areaand take a nap, getsome exercise, or
both. For safety, treatdrowsiness on the highwayas
an emergency.
Weather Forecasts: What’s the weatheroutlook along
your route? Should youdelay your trip a shorttime
to avoid a major storm system?
0
Maps: Do you have up-to-date maps?
173
Hill and Mountain Roads
Keep your vehiclein good shape. Checkall fluid
levels and also the brakes,tires, cooling system and
transmission. These parts can work hard on
mountain roads.
Know how togo down hills. The most important
thing to know is this: let yourengine do some of the
slowing down. Shiftto a lower gear when yougo
down a steep orlong hill.
Driving on steep hills or mountains is different from
driving in flat or rolling terrain.
If you drive regularly insteep country, or ifyou’re
planning to visit there, hereare some tips thatcan make
your tripssafer and more enjoyable.
Include an ice scraper,a small brush or broom,a supply
of windshield washer fluid,a rag, some winter outer
clothing, a small shovel,a flashlight, a red cloth, anda
couple of reflective warning triangles. And,if you will
be driving under severe conditions, include
a small bag
of sand, a piece of old carpet ora couple of burlap bags
to help provide traction. Be sure you properly secure
these items in your vehicle.
176
~
0
Watch for slippery spots. The road might be fine until you
If You’re Caught in a Blizzard
On an otherwise dear
hit a spot that’s covered with ice.
in shaded areas where the
road, ice patches may appear
sun can’t reach: around clumps
of trees, behind buildings,
or an
or under bridges. Sometimes the surface of a curve
overpass may remain icy when
the surrounding roads are
clear. If you seea patch of ice ahead of you, brake before
you are on it. Tryto not
brake while you’re actually on the
ice, and avoid sudden steering maneuvers.
If you are stopped by heavy snow, you could be in a
serious situation.You should probably stay withyour
vehicle unlessyou know for sure that you
are.near help
and you can hikethrough the snow. Hereare some
things todo to summon helpand.keep yourself and your
passengers safe: Turn on your hazard flashers. Tie a red
177
cloth to your vehicleto alert police that you’ve been
a
stopped by the snow. Put on extra clothing or wrap
blanket around you.If you have no blanketsor extra
clothing, make body insulatorsfrom newspapers, burlap
bags, rags, floor mats -- anything you can wrap around
yourself or tuck under your clothingto keep warm.
You can run the engine to keepwarm, but be careful.
:.
s:1
-,I
Run your engine only as longas you must. This saves
fuel. When you run the engine,,make it go a little faster
than just idle. That is, push the accelerator slightly. This
uses lessfuel for the heat thatyou get andit keeps the
battery charged.You will needa well-charged battery to
restart the vehicle, and possibly
for signaling later on
for awhile.
with your headlights. Let the heater run
Towing a Trailer
Then, shut theengine off and close the window almost
all the way to preservethe heat. Start the engine again
and repeatthis only when youfeel really uncomfortable
from the cold. Butdo it aslittle as possible. Preserve the
can. To help keep warm,you can get
fuel as long as you
out of the vehicle and dosome fairly vigorous exercises
every half houror so until help comes.
NOTICE:
Pulling a trailer improperly can damage your
vehicle and result in costly repairs not covered
by your warranty.To pull a trailer correctly, follow
the advice in this section, and see your B4uick
dealer for important information about towing a
trailer with your vehicle.
179
your rig will be legal, not only where you live but
also where you’llbe driving. A good sourcefor this
information can be state or provincial police.
0
Consider using a sway control
if your trailer will
weigh 2,000 pounds (900 kg) or less.You should
always use a sway controlif your trailer will weigh
more than,2,000 pounds (900 kg).
You can ask a hitch dealerabout sway controls.
0
Don’t tow a trailerat all during the first 1,000 miles
(1600 km) your new vehicle is driven.Your engine,
axle or other parts could be
damaged.
0
Then, during the first 500 miles (800 km) thatyou
tow a trailer,don’t‘driveover 50 mph (80 km/h) and
don’t make startsat full throttle.This helps your
engine and other partsof your vehicle wearin at the
heavier loads.
Obey speed limit restrictions when towing a trailer.
Don’t drive faster than the maximum posted speed
55 mph (90 h/h)
to
for trailers (or no more than
save wear on your vehicle’s parts.
0
Three important considerations have to do with weight:
180
i
Weight of the Trailer
How heavy can a trailer safely be?
It should never weigh more than
2,000 pounds (900 kg),
unless you have the optional5,000 pounds (2,250 kg)
trailer towing package. But even that can be too heavy.
load from your vehicle’s capacity weight because your
vehicle will be carrying that weight, too. See “Loading
Your Vehicle” inthe Index formore information about
your vehicle’s maximum load capacity.
It depends on how you plan
to use your rig. For
example, speed, altitude, road grades, outside
temperature and how much your vehicle
is used to pull a
trailer are all important. And,it can also depend on any
special equipment that you
have on your vehicle.
You can ask your dealer for our trailering information or
advice, or you can writeus at Buick Motor Division,
Customer Assistance Center,902 E. Hamilton Avenue,
Flint, MI, 48550.
In Canada, writeto General Motorsof Canada Limited,
Customer Assistance Center,1908 Colonel Sam Drive,.
Oshawa, Ontario L1H8P7.
Weight of the TrailerTongue
If you’re using a “dead-weight” hitch, the trailer tongue
(A) should weigh 10%of the total loaded trailer weight
(B). If you have a “weight-distributing” hitch, the trailer
tongue (A) should weigh 12%of the total loaded trailer
weight (B).
The tongue load (A) of any trailer is an important
weight to measure because it affects
the total capacity
the trailer and
weight of your vehicle.The capacity weight includes the After you’ve loaded your trailer, weigh
then the tongue, separately, to
see if the weights are
curb weight of the vehicle, any cargoyou may carry in
able to get them right
it, and the people who will be riding in the vehicle. And proper. If they aren’t, you may be
simply by moving some items around in the trailer.
if you will towa trailer, you must subtract the tongue
181
Total Weight on Your Vehicle’s Tires
Be sure your vehicle’s tiresare inflated tothe limit for
cold tires. You’ll find these numbers on
the Certification
label atthe rear edge of the driver’sdoor or see
“Loading Your Vehicle” in the Index. Then be sure you
don’t go over theGVW limit for your vehicle.
Hitches
It’s important to have the correct hitch
equipment.
Crosswinds, large trucks going
by, and rough roadsare a
few reasons why you’ll need the right hitch. Here
are
some rules to.follow:
If you’ll be pulling a trailer that, when loaded, will
weigh more than2,000 pounds (900 kg), be sure to
use a properly mounted, weight-distributing hitch
and sway controlof the proper size.This equipment
is very important for proper vehicle loading and
good handling when you’re driving.
Will you haveto make any holesin the body of your
vehicle when you install a trailer hitch?
If you do,
then be sureto seal the holes later when you remove
the hitch.If you don’t seal them,deadly carbon
monoxide (CO) from your exhaust can get into your
vehicle (see “Carbon Monoxide” in the Index). Dirt
and water can, too.
182
The bumpers on your vehicle are not intendedfor
hitches. Do not attach rental hitches or other
bumper-type hitches to them. Use only a
frame-mounted hitch that does not attach to the
bumper.
Safety Chains
You should always attach chains between your vehicle
and your trailer. Cross the safety chains under the
tongue of the trailerso that the tongue will not drop to
the road if it becomes separated from the hitch.
Instructions about safety chainsmay be provided by the
hitch manufacturer orby the trailer manufacturer.
Follow the manufacturer’s recommendation for
attaching safety chains. Always leave
just enough slack
so you can turn with your rig.. And, never allow safety
chains to drag on the ground.
Trailer Brakes
If your trailer weighs more than
1,000 pounds (450 kg)
-and they mustbe
loaded, then it needs its own brakes
adequate. Be sure to read and follow the instructions for
the trailer brakesso you’ll beable to install, adjust and
maintain them properly. Because you have anti-lock ,
brakes, do not try to tap into your vehicle’s brake
system. If you do, both brake systems won’t work well,
or atall.
Driving with a Trailer
Passing
Towing atrailer requires a certain amount of experience.
Before setting outfor the open road, you’ll wantto get
to know your rig.Acquaint yourself with thefeel of
handling and braking with the added weightof the
trailer. And always keep in mind that the vehicle you are
driving is now a gooddeal longer and not nearlyso
responsive as your vehicle is by itself.
You’ll need more passing distance up ahead when
you’re towing a trailer. And,because you’re a good deal
longer, you’ll need togo much farther beyond the
passed vehicle beforeyou can return to your lane.
Before you start,check the trailer hitchand platform,
safety chains, electrical connector,lights, tires and
mirror adjustment.If the trailer has electric brakes, start
your vehicleand trailer movingand then apply the
trailer brake controller by handto be sure thebrakes are
working. This lets you check your electrical connection
at the same time.
During your trip, check occasionally to be sure that the
load is secure,and that the lights and any trailerbrakes
are still working.
Following Distance
Stay at least twice as far behind the vehicle aheadas you
would when driving your vehicle without a trailer.
This
can help youavoid situations that require heavy braking
and sudden turns.
Backing Up
Hold the bottom of the steering wheel withone hand.
Then, to movethe trailer to the left,just move that hand
right, move your
to the left.To move the trailer to the
hand to the right. Alwaysback up slowly and, if
possible, havesomeone guide you.
Making Turns
When you’re turning with a trailer, make wider turns
than normal. Do thisso your trailer won’tstrike soft
shoulders, curbs, roadsigns, trees, or other objects.
Avoid jerky or sudden maneuvers. Signal wellin
advance.
Tbrn Signals When Towinga Trailer
When you tow a trailer, your vehicle hashave
to a
different turn signal flasherand extra wiring.The green
arrows on your instrument panel will flash whenever
you signal a turn or lane change.
Properly hooked up,
183
the trailer lights willalso flash, telling other drivers
you’re about to turn, change lanes or stop.
When towing a trailer, thegreen arrows on your
instrument panel will flash for turns even if the bulbs on
the trailer are burned out.Thus, you may think drivers
behind you are seeing your signal when they
are not. It%
important to check occasionallyto be sure the trailer
bulbs are still working.
Driving On Grades
Reduce speed and shift to alower gear before you start
down a long or steepdowngrade. If you don’t shift
down, you might have to use your brakesso much that
they would get hotand no longer work well.
On a long uphill grade, shiftdown and reduce your
to reduce the
speed to aronnd 45 mph (70 h/h)
possibility of engine, transmission, and rearaxle
overheating,
Parking on Hills
You really should not park your vehicle, with a trailer
attached, on a hill.If something goes wrong, your rig
could start to move.People can be injured, and both
your vehicle andthe trailer can be damaged.
rig on a hill, here’s
But,if you ever have to park your
how to do it:
1. Apply your regular brakes, but don’t shift into“F)”
(Park) yet.
2. Have someone placechocks under the trailer wheels.
3. When the wheel chocks are in place, release the
regular brakes until thechocks absorb the load.
4. Reapply the regular brakes.Then apply your parking
“P” (Park).
brake, and then shift to
5. Release the regular brakes.
When You Are Readyto Leave After
Parking ona Hill
Trailer Hitching Procedure Usinga Weight
Distributing (Equalizing) Hitch
1. Apply your regularbrakes and hold the pedal down
while you:
(Recommendedfor loaded trailers weighing 3,000 lbs.
to 7,000 lbs.)
Your vehicle is equipped withan Electronic Level
Control (ELC) feature.. When hookingup a trailer using
a weight distributing hitch,always use the following
procedure:
0 Place the vehicle on a level surface without the
trailer hitched. With the ignition
off and all doors
closed, allow the vehicle to level automatically.
0 Disable the ElectronicLevel Control (ELC)by
pulling MAXI@fuse LEVEL CNTRL (30 amp) from
the underhood electrical center located in the
engine
compartment.
0 Attach the trailer to the vehicle. The trailer tongue
should weigh 12% of the total loaded. trailer weight.
0 Level the vehicle with the load leveling spring bars
(equalizers).
0 Leave thefuse out whiletowing your trailer.
0
Startyourengine;
0
Shift into a gear; and
0
Release the parking brake.
2. Let up on the brake pedal.
3. Drive slowly until the trailer is clearof the chocks.
4. Stop and have someone pick up and store the chocks.
Maintenance When Trailer Towing
Your vehicle will need service more often when you’re
pulling a trailer.See the Maintenance Schedule for more
on this. Things that are especially important in trailer
operation are automatic transmission fluid (don’t
overfill), engine oil, axle lubricant, belts, cooling
system, and brake adjustment.Each of these is covered
in this manual, and the Index will help you find them
quickly. If you’re trailering, it’s a good idea
to review
these sections before you start your trip.
Check periodically to see that all hitch
nuts and bolts are
tight.
185
I NOTICE:
Adjusting an equalizing hitch with the
Electronic LevelControl (ELC) system engaged
will defeat thefunction of the load equalizing
hitch and may cause unsatisfactory handling.
1 NOTICE:
Do not use swaycontrol devices on trailers
equipped with surge brakes,Le, boat trailers.
Surge brakesdo not function properly when
used with most sway control devices.
Once you have completed towing your trailer, be sure to
;reinstall the Electronic Control (ELC) fuse.
Trailer brakes of adequate size are recommended on
trailers over 1,000 lbs. loaded weight.
i In Addition
If a trailer is over5,000 lbs. (2 270 kg), adjust
35 psi. (cold tire
vehicle rear tire pressure to
pressure).
Use two friction sway controls YOU
if trailer is over
5,000 lbs. (2 270 kg) loaded weight, and/or is over
24' long.
j
Use at least one friction sway controlif your trailer
is over 2,000 lbs. (908 kg) loaded weight, and
consider usingone for trailers under2,000 lbs.
(908 kg).
Part 5 Problems on the Road
I
rn
187
Hazard Warning Flashers
Your hazard warning flasherslet you warn others. They
also let police know you have a problem.
Your front and
off.
rear turn signal lights will flash on and
188
,
;.
3. Turn off the ignition on both vehicles. Turnoff all
lights that aren’t needed, and radios. This will avoid
sparks and helpsave.bothbatteries. And it could
save your radio!
I NOTICE:
If you leave your radio on,it could be badly
damaged. The repairs wouldn’t be covered by
your warranty.
4. Open the hoods and locate the batteries. Find the
positive (+) and negative(-) terminals on each
battery.
Your Buick hasa remote positive(+)jump starting terminal.
The terminal is in the red box on the same
of the side
engine
compartment as your battery.
You should always use one
of
the remote positive(+) terminals insteadof the positive(+)
terminal on your battery. To open the remote positive (+)
terminal box, pull the tab and open the cover.
191
5.
end
7. Don’t let the other
touch metal. Connect it
to the positive(+)
terminal of the good
battery. Use a remote
positive (+) terminal if
the vehicle has one.
6. Connect the red positive (+) cable to the positive (+)
terminal of the vehicle with the dead battery. Use
a
remote positive (+) terminal if the vehicle has one.
193
8. Now connect
the
black
negative (-) cable to the
good battery’s negative
(-) terminal.
Don’t let the other end touch anything until the next
step. The other end of the negative cabledoesn’t go to
the dead battery. It goes to a heavy unpainted metal part
on the engine of the vehicle with the dead battery.
9. Attach the cable at least 18 inches (45 cm) away
from the .dead battery, but not near
engine parts that
move. The electrical connection isjust as good there,
but the chanceof sparks getting back to the battery is
much less.
10.Now start the vehicle with the good battery and run
the engine for a while.
11. Try to start the vehicle with
the dead battery.
If it won't startafter a few tries, it probably needs
service.
U
GOOD BATTERY
12. Remove the cables in reverse order to prevent
electrical shorting. Take care that they
don't touch
each other or any other metal.
DEAD BATTERY
Remove cables in this order.
Towing Your Car
Try to hav.ea GM dealer ora professional towing
service tow your Buick.The usual towing equipment is
a sling-type (A) or a wheel-lift(B) or car carrier(C) tow
truck.
If your vehicle has been changed
or modified since it
was factory-new by adding aftermarket items like fog
lamps, aero skirting, or special tires and wheels, these
instructions and illustrations may not be correct.
Before you do anything, turnon the hazard warning
flashers.
When you call, tellthe towing service:
That your vehicle has rear-wheel drive.
The make, model, and yearof your vehicle.
0
Whether you can still move the shift lever.
If there was an accident, what was damaged.
When the towing service arrives, let the tow operator
know that this manual contains detailed towing
instructions and illustrations.The operator may want to
see them.
C.
196
I
1
' ,
When your vehicleis being towed, have the ignition key
off. The steering wheel should be clamped
in a
straight-ahead position, witha clamping device
designed for towing service. Do not use the vehicle’s
steering column lockfor this. The transmission should
be in Neutraland the parking brake released.
Don’t have your vehicle towed on the
rear wheels,
unless you must.If the vehicle must be towed on the
rear wheels, don’tgo more than 35 mph (57 kph) or .
farther than50 miles (80 km) or your transmissionwill
be damaged.If these limits must be exceeded, then the
rear wheels haveto be supported ona dolly.
197
Front Towing Hookups
~
t
Position the sling crossbar
just behind the rear edgeof
the front fascia. A4” x 4” wood beam isnot needed.
Attach “T” hook chains
behind the front wheels into
the side of the frame rails
on both sides.
Attach a separate safety
chain around the outboard
end of each lower control
arm.
I
198
Rear Towing Hookups
Position the lower sling crossbar directly under the rear
fascia. A 4” x 4” wood beam isnot needed.
Attach a separate safety
chain to each side of the
axle inboard of the spring.
199
,
Engine Overheating
You will find a coolant temperature gage and the
warning light about a hotengine on your instrument
:panel. You will also find a low coolant warning light on
instrument
:your
panel
If Steam Is Coming FromYour Engine
NOTICE:
If yourenginecatchesfirebecauseyoukeep
driving with no coolant, your vehicle can be
not
repairs
damaged.
would
costly
badly
The
covered by your warranty.
be
If No .SteamIs Coming FromYour Engine
If you get the overheat warning but see or hear no
steam, the problem may not be too serious. Sometimes
the engine can geta little too hot whenyou:
Climb a long hill on a hot day.
Stop after high speed driving.
Idle for long periodsin traffic.
Tow a trailer.
200
If you getthe overheat warning withno sign of steam,
try this for a minute
or so:
1. Turn off your air conditioner.
2. Turn on your heaterto full hot at the highest fan
speed and openthe window as necessary.
3. If you’re in a trafficjam, shift to “ N ’ (Neutral).
If you no longerhave the overheat warning, you can
drive. Just to besafe, drive slower for about ten minutes.
If the warning doesn’tcome back’on,you can drive
normally.
If the warning continues, pull over, stop, and park your
vehicle right away.
If there’s stillno sign of steam, you canidle the engine
for two or three minutes while you’re parked,
to see if
the warning stops. But then,
if you still havethe
warning, TURNOFF THE ENGINE AND GET
EVERYONE OUT OF THE VEHICLE until it cools
down.
You may decide not to lift the hood but to get service
help right away.
Wheri you decide it’s safe to lift the hood, here’s what
you’ll see:
0
Coolant surge tank with pressure cap
Electric engine fans
201
heater hoses, radiator, waterpump or somewhereelse in
the cooling system.
.
If the coolant inside the coolant surge
tank is bailing,
don’t do.anything else until it cools down.
,.
c
-
. ,
-
.-
*
k
I NOTICE:
I
The coolantlevel should be ator above “FULL COLD.”
If it isn’t, you may havea leak in the radiator hoses,
202
Engine damage from running your engine
without coolantisn’t covered by your warranty.
If there seemsto be no leak, check to see
if the electric
engine fansare running. If the engineis overheating,
both fans should be running.If they aren’t, your vehicle
needs service.
i
NOTICE:
In cold weather, water can freeze and crack the
engine, radiator, heater core and other parts..So
use the recommended coolant.
1. You can remove the
coolant surge tank
pressure capwhen
the cooling system,
including the
coolant surge tank
pressure capand
upper radiator hose,
is no longer hot.
I
Turn the pressurecap slowly about one-quarterturn
to the left and then stop.
204
If you hear ahiss, wait for thatto stop. A hiss means
there is still somepressure left.
. .
.
,.
2. Then keep turning
the pressure cap
slowly, and remove
it.
3. Fill the coolant
surge tank with the
proper mix, up to
“FULLCOLD.”
pressure cap. Be
sure the pressure
cap is tight.
I
4. With the coolant surge tank pressure cap off, start the
you can feel the upper
engine and let it run until
radiator hose getting hot. Watch out the
for engine
fans.
By this time, the coolant level inside the coolant
is lower, add
surge tank may be lower. If the level
more of the proper mix to the coolant surge tank
until the level reaches“FULL COLD.”
206
If a Tire Goes.Flat
Changing a Flat Tire
It’s unusual for a tire to “blow out” while you’redriving,
especially if you maintain yourtires properly. If air goes
out of a tire, it’s much morelikely to leak out slowly.
But if you should ever havea “blowout,” hereare a few
tips about what to expect and what to do:
If a tire goes flat, avoid furthertire and wheel damage
by driving slowly toa level place. Turn on your hazard
warning flashers.
If a front tire fails, the flat tire will createa drag that
pulls the vehicle toward that side. Take your off
footthe
accelerator pedaland grip the steering wheel firmly.
Steer to maintain lane position, then gently brake
to a
stop well outof the traffic lane.
A rear blowout, particularlyon a curve, acts muchlike a
skid and may require thesame correction you’d usein a
skid. In any rear blowout, remove your foot from the
accelerator pedal. Get the vehicle under control by
steering theway you want the vehicleto go. It may be
very bumpy and noisy, but you can
still steer. Gently
brake to a stop, well off the roadif possible.
If a tire goes flat, the next section showshow to use
your jacking equipment to changea flat tire safely.
207
The equipment you’ll need is in the trunk.
, .
The following stepswill tell you how to use thejack and
change a tire.
208
To remove the spare tire, unscrew and remove the wing Using the tire lift strap, pull the tire out of the storage
nut from the retaining bolt.
well.
To remove thejack, unscrew the wing bolt from the
jack
retainer. Remove thejack by sliding it forward.
Your Buick has a wheelcover that must be removed to
access the wheel nuts. Refer tothe instructions for the
correct wheelcover removal.
If your vehiclehas
either of the two
following wheel
covers, they must be
removed by carefully
prying at the outside
edge with the flat end
of the wheel wrench.
211
Remove this wheel coverby carefully_ _prying
off the
_
end of the wheel
center of the cover with the- flat
wrench.
212
If your vehicle has wire wheel covers, remove the center
of the wheel coverby using the wire wheel key wrench.
Put the flat end into the notch and carefully pry off the
small cover.
Remove the lock nut by inserting the key wrench into
the hole inthe center of the wheel cover and turnit
counterclockwiseto loosen the lock nut completely.The
wheel cover 'can be removed by hand-- do not pry it off.
Now you are ready tostart using thejack and wheel
wrench to raise your vehicle.
,. I
Position the jack under the vehicle. Your Buick hasan
indentation on the frame near each of the wheels. Raise
the jack so the jack head fits into the indentation nearest
the wheel withthe Bat tire.
.
r
Raising your vehicle with the jack improperly
positioned will damage the vehicle ormay allow
thme vehicle to fall off the jack. Be sure to fit the
jack lift head into the proper location before
raising your vehicle.
215
Raise the vehicle by rotating the wheel wrench
off the g r o p d
clockwise. Raise the vehicle far enough
so there is enough room
for the spare tire to fit.
Remove all the wheel nuts and take
off the flat tire.
1
216
Replace the wheel nuts
with therounded end of the
nuts toward the wheel.
Remove any rust ordirt from the wheel bolts, mounting
surfaces or spare wheel.
Tighten each nut by hand
until the wheel is held
against the hub.
Place the spare onthe wheel mounting surface.
Lower the vehicleby rotating the wheel wrench
counterclockwise. Lower thejack completely.
217
I NOTICE:
Wheel covers won't fit
on your compact spare.If
you try to put a wheel cover on your compact
spare, you could damage the cover or the spare.
COMPACT SPARE
Now put all the equipment back in the trunk
or wagon
stowage area.
TIRE LIFT
I
JACK
Y
WING NUT
' "
'DISC
BOLT SCREW
FLOOR BRACKET
L
219
the glass, adjusting the position fit
to over the
floor track
weatherstrip. Push the cover down into the
and into the track of molding
at the bottomof the glass.
Align the slotted button
at the rear edgeof the cover and
turn it to secure the trim panel
When replacing theEstate Wagon spare tire cover, put
the lower front corner
of the cover into the floor track.
Slide the cover toward the
€i-ont ofthe vehicle making
sure the front tabs go behind the edge. Insert the upper
front cornerof the coverinto the track at the bottom of
I
I
n
Part 6 Service and Appearance Care
Here you will find information about the care of your Buick. This part begins with service and fuel information. and
. There is also technical informationabout your
then it shows how to chec.kimportant fluid and lubricant levels
vehicle. and a sectiondevoted to itsappearance care.
Part 6 includes:
..
Service ..........................................................................
224
225
Fuel . . . . . . . . . . . . . . . . . . . . . . . . . . . . . . . . . . . . . . . . . . . . . . . . . . . . . . . . . . . . . . . . . . . . . . . . . . . . .
229
Hood Release .....................................................................
Engineoil . . . . . . . . . . . . . . . . . . . . . . . . . . . . . . . . . . . . . . . . . . . . . . . . . . . . . . . . . . . . . . . . . . . . . . .
231
236
Aircleaner .......................................................................
237
Automatic Transmission Fluid ........................................................
240
Enginecoolant ....................................................................
243
Power Steering Fluid ...............................................................
244
Windshield Washer Fluid . . . . . . . . . . . . . . . . . . . . . . . . . . . . . . . . . . . . . . . . . . . . . . . . . . . . . . . . . . . .
245
Brakes ............................................................................
248
Battery ..........................................................................
249,279
BulbReplacement .............................................................
253
LoadingYourVehicle . . . . . . . . . . . . . . . . . . . . . . . . . . . . . . . . . . . . . . . . . . . . . . . . . . . . . . . . . . . . . . .
255
Tires ............................................................................
263
Appearance Care ..................................................................
272
Vehicle Identification Number (VIN) ..................................................
. FusesandCircuitBreakers ...........................................................
273
280
Capacities and Specifications . . . . . . . . . . . . . . . . . . . . . . . . . . . . . . . . . . . . . . . . . . . . . . . . . . . . . . . . .
..
I
223
Service
Doing Your Own Service Wofk
. . I
:Your Buick dealerknows -your vehicle best
and warits
yau to be happy with it.We hope you’ll go to your
dealer for all your service needs, You’ll get
genuine GM
parts and GM-trained and supported service people.
We hope you’ll want tokeep your GM vehicle all GM.
Genuine GM parts haveone of these marks:
If you wantto do some of your own iervice work, you’ll
want to get the proper Buick Servick.Manua1. It tells you
much moreabout how to serviceyow, Buick than this
see
manual can. To order the proper service manual,
“Service Publications”in the Index.
I.
Your vehicle has an air bag system. Before attempting to
do your own service work,see “Servicing Your Air
Bag-Equipped Buick” in the Index.”,.
You should keep a record with all parts receipts and list
the mileage and the date.
of any servicework you
perform. See “Maintenance Record” in the Index.
224
MTBE is “methyl tertiary-butyl ether.” Fuel that is no
more than 15%MTBE is fine for your vehicle.
Ethanol is ethyl or grain alcohol. Properly-blended fuel
that is no more than10%ethanol isfine for your
vehicle.
Methanol is methyl or wood alcohol.
I NOTICE:
Fuel that is more than
5% methanol is bad for
your vehicle. Don’t use it.It can corrode metal
parts in your fuel system andalso damage
plastic and rubber parts. That damage wouldn’t
be covered under your warranty. And even5%
at
or less, there must be “cosolvents” and
corrosion preventers in this fuel to help avoid
these problems.
Gasolines for Cleaner Air
Your use of gasoline with deposit control additives will
help prevent deposits from forming
in your engine and
fuel system. That helps keep your
engine in tune and
your emission control system working properly. It’s
good for your vehicle, and you’ll be doing your for
part
cleaner air.
Many gasolines are now blended with oxygenates.
General Motors recommends that
you use,gasolineswith
these blending materials, such
as MTBE and ethanol.By
doing so, you can help clean the air, especially in those
parts of the countrythat have high carbon monoxide
levels.
In addition, some gasoline suppliers are
now producing
reformulated gasolines. These gasolines are specially
designed to reduce vehicle emissions. General Motors
recommends that you use reformulated gasoline.
By
doing so, you can help clean the air, especially in those
parts’ofthe country that have high ozone levels.
You should ask your service station, operators
if their
gasolines contain deposit control additives and
oxygenates, andif they have been reformulated to
reduce vehicle emissions.
Fuels in Foreign Countries
Filling Your Tank
If you plan on driving inanother country outside the
U.S. or Canada, unleaded fuel may be hard to find.Do
not use leaded gasoline. If you use even one tankful,
your emission controls won’t work well orat all. With
continuous use, spark plugs can get fouled,the exhaust
system can corrode, and your engine oil can deteriorate
quickly. Your vehicle’s oxygen sensor will bedamaged.
All of that means costly repairs that wouldn’t be covered
by your warranty.
To check on fuel availability,ask an auto club, or
contact a major oil company thatdoes business inthe
country where you’ll be driving.
You can also write usat the following address for
advice. Just tellus where you’re going and give your
Vehicle Identification Number(VIN).
General Motors Overseas Distribution
Corporation,
North AmericanExport Sales (-NAES)
1908 Colonel Sam Drive
Oshawa, Ontario
L1H 8P7
The wagon gas cap is behind a hinged door on the left
side of your vehicle.
227
..
~
~
The sedan gas capis behind the rear license plate.
To take off the cap, turnit slowly to the left
(counterclockwise).
While refueling, hang the cap inside the wagon fuel
door. Place the cap on the inner most edge and turn
it to
the right as necessary to secure.
228
I
Checking Things Under theHood
;Hood Release
Be careful1 notto spill gasoline. Clean gasolinefrom
painted surfaces as soonas possible. See “Cleaning the
Outside of Your Buick” in the Index.
When you put thecap back on, turnit tothe right until
YOU hear at least three clicks.
To open the hood,first pull the handle inside the vehicle.
It is located on the lowerleft side of the instrument
panel, next to the parking brake.
I NOTICE:
If you need a new cap,
De sure to get the right
If you get
type. Your dealer can get one for you.
the wrong type,it may not fitor have proper
venting,’andyour fuel tank and emissions
system might be damaged.
229
I
Then go to the frontof the vehicle and release the
secondary hood release.
230
Lift the hood.
Engine Oil
LOW
OIL
LEV
If the “LOW OIL LEV”
light on the instrument
panel comes on, it means ”.
you needto check your
engine oil level right away.
Before closingthe b o d , be sure all the filler .caps are on
properly. Then just pull the hood down and close it
fil-dy.
For more information, see “LOW OIL LEV” lightin the
Index. You should check your engine oil level regularly;
this is an added reminder.
It’s a good idea tocheck your engine oil everytime you
get fuel.In order to get an accurate reading, theoil must
be warm and the vehicle mustbe on level ground.
231
~~
,
From the front of the
engine, the engine oil
dipstick is to the leftof the
air cleaner.
Turn off the engine and
give the oila few minutes
to drain back into the oil
pan. If you don’t, the oil
dipstick might not show
the
actual level.
To Check EngineOil
Pull out the dipstick
slightly. Pinch the end
of the dipstick tubeas
you remove the
dipstick to wipe the oil
from it. Then push it all
the way back in. Now
remove it without
pinching the.tube,
keeping the tip lower.
When to Add Oil
If the oilis at or below theADD line, then you’ll need
to addsome oil. But you must usethe right kind. This
section explains what kind
of oil to use. For crankcase
capacity, see “Capacities and Specifications” in the
Index.
NOTICE:
Don’t add too much oil.
If your engine hasso
much oil that the oil level gets above the
cross-hatched area that shows the proper
operating range, your engine could be damaged.
Just fill it enough to put the level somewhere in the
proper operating range. Push the dipstick all the way
back in when you’re through.
What Kind of Oil to Use
Beginning midyear 1993, oils of the proper quality for
your vehicle willbe identified with thisnew “starburst”
symbol. The “starburst” symbol indicates that the oil has
been certified by the American
Petroleum Institute
(API), and is preferredfor use in your gasoline engine.
You should look for
‘thison the front of the
oil container,and use
only oils that display
this new symbol.
RECOMMENDED SAE VISCOSITY GRADE ENGINE OILS
FOR BEST FUEL ECONOMY AND COLD STARTING, SELECT THE LOWEST
SAE VISCOSITY GRADE OIL FOR THE EXPECTED TEMPERATURE RANGE.
LOOK FOR
ONE OF THESE
LABELS.
HOT
WEATHER
“F
~
100
+ 80
+ 60
+ 40
“
I
+ 20
0
\E 1OW-30
You should also use the proper viscosity oil for your
vehicle, as shown in the following chart:
SAE 5W-30
PREFERRED
~
COLD
WEATHER
IF NEITHER SAE 5W-30 NORSAE 1OW-30
GRADE OILS AREAVAILABLE,SAE 30
GRADE MAY BE USED AT TEMFERATURES
ABOVE 40 DEGREES F (4 DEGREES C).
DO NOT USE SAE 1OW-40, SAE 2OW-50 OR
ANYOTHERGRADE OIL NOT RECOMMENDED
233
As shown in the chart, SAE 5W-30 is best for your
vehicle. However, you can useSAE 1OW-30 if it’s going
to be0 O F (- 18 C) or above; These numbers on an oil
Do not use
container show its viscosity, or thickness.
other,viscosityoils, suchas SAE 1OW-40 or SAE
2OW-50.
O
If you cannot find oils with the new “starburst” symbol
on the frontof the container, you should look for and
use oils containing the following three things:
a SH or SG
“SH or SG” must beon the oil ,container, either
by
I
itself or combined with other quality designations,
such as “SH/CD,” “SH, SG, CD,” “SG/SD,” etc.
I
NOTICE:
These letters show American Petroleum Institute
If you use oils that do not have either the
(API) levels of quality.
“starburst” symbol or anAPI SH or SG
designation, you can cause engine damage
a S A E 5W-30
not covered by your warranty.
a Energy ConservingI1
Oils with these words on the container will help you GM Goodwrench@ oil
(in Canada, GM Engine Oil)
save fuel.
meets all the requirements for your vehicle.
These three thingsare usually included in a doughnut
If you cannot
shaped logo (symbol) on most containers.
find oils with the “starburst” symbol,
you should look
for oils with the doughnut shaped symbol, containing
the three things noted above.
I
234
Engine Oil
.Coolant
Additives
Engine
Don’t add anything toyour oil. Your Buickdealeris
ready to advise if you think something should be added.
When to Change Engine Oil
See if any one of these
is
true for you:
Coolant
Warmer”
in
,
Warmer
(Engine Block Heater)
An engine coolant warmer can be a big help if you have
to park outside in very cold weather,
0 O F (- 18O C) or
colder. If your vehicle’hasthis option, see “Engine
the Index.
0
Most trips are less than 4 miles (6 km).
What to Do with Used Oil
0
It’s below freezing outside.and most trips are less
than 10 miles (16 km).
Did you know that usedengine oil contains certain
elements that may be unhealthyfor your skin and could
even cause cancer? Don’t let usedoil stay on yourskin
for very long. Clean your skin and nails with
soap and
water, or a good hand cleaner.
Wash or properly throw
away clothing or rags containing used
engine oil. (See
the manufacturer’s warningsabout the use and disposal
of oil products.)
The engine is at low speedmost of the time (asin
door-to-door delivery, or instop-and-go traffic).
You tow a trailer often.
@
Most trips are through dusty places.
If any one of these is true for your vehicle,then’you
need to change your oil and filterevery 3,000 miles
‘ ( 5000 km) or 3 months -- whichever comes first..
(See “Change Oil Indicator” inthe Index.)
If none of them is true,change the oil every 7,500 miles
(12 500 km) or 12 months -- whichever comes first.
Change the filter at the first oil change and at every
other oil change after that.
(See “Change Oil Indicator’’ inthe Index.)
Used oil canbe a real threat tothe environment. If you
change your own oil, be sure to drain all free-flowing
oil from the filter before disposal., Don’t ever dispose
of
oil by putting it inthe trash, pouring it onthe ground,
into sewers, or into streams or bodies
of water. Instead,
If
recycle it by taking itto a place that collects used oil.
you have a problem properly disposing
of your used oil,
ask your dealer, a service station or
a local recycling
center for help.
Air Cleaner
NOTICE:
The air cleaneris located on the driver’s sideof the
engine compartment. To check or replace the filter,
unscrew the wing nuts and pullthe air cleaner open.
Replace theair filter, close thecover.and screw on the
tabs are properly positioned.
wing nuts, making sure the
Refer to the Maintenance Schedule to determine when
to replacethe air filter.
See “Scheduled Maintenance Services”in the Index.
236
If the air cleaneris off, a backfire can cause a
damaging engine fire. And, dirt can easily get
into your engine, which will damage it. Always
have the air cleaner
in place when you’re driving.
Automatic Transmission Fluid
When to Check and Change
A good time to check yourautomatic transmission fluid
level is when the engine oil is changed. Refer to the
Maintenance Schedule to determine when to change
your fluid. See “Scheduled Maintenance Services” in
the Index.
How to Check
Because this operation can be little
a difficult, you may
choose to have this done at a Buick dealership Service
Department.
If you do it yourself, be sure to
follow all the
instructions here, or you could getfalse
a reading on the
dipstick.
Wait at least 30 minutes before checking the
transmission fluid level if you
have been driving:
0
When outside temperatures are above 90°F (32°C).
0
At high speed for quitea while.
0
In heavy traffic -- especially in hot weather.
0
While pulling a trailer.
To get the right reading, the fluid should be
at normal
operating temperature, which is180°F to 200°F (82°C
to 93°C).
To check transmission fluidhot: Get the vehicle warmed
up by driving about 15 miles (24 km)when outside
temperatures are above 50°F (10°C). If it’s colder than
50 OF (10” C), drivethe vehicle in“D’ .(3rd Gear) until
the engine temperature gage moves and then
remains
steady for ten minutes.Then follow the hot check
procedures.
NOTICE:
Too much or toolittle fluid can damageyour
transmission. Too much can mean that some
of
the fluid could come out and fall on hot engine
parts or exhaust system, startinga fire. Be sure
to get an accurate readingif you check your
transmission fluid.
237
To check transmission fluid cold:
A cold check is made
after the vehicle has been sitting for eight hours or moresteps:
with the engine off and is used onlyas a reference. Let
the engine run at idlefor five minutes if outside
temperatures are50°F (10°C) or more. If it’s colder
engine
than 50°F ( lO”C), you may have to idle the
longer. Should the fluid level be low during a cold
check, you must perform a hot check beforeadding
fluid. This will give youa more accurate readingof the
fluid level.
1. Flip up the dipstick
and then pull out
the dipstick and
wipe it with a clean
rag or paper towel.
To check the fluid hotor cold
0 Park your vehicle on a level place. Keep the engine
running.
0 With the parking brake. applied, place the shift lever
in “ P ’ (Park).
2. Push it back in all the way, wait three seconds and
0 With your foot on the brake pedal, move the shift
then pull it back out again.
lever through eachgear,range, pausing forabout
three seconds in each range. Then, position the shift
lever in “P” (Park).
Let the engine run at idle for three minutes or more.
238
3. Check both sides of
the dipstick,and
re%3 ’the?lower’
level. The fluid
level mustbe in the
COLD area for a
cold check or inthe
HOT area or
cross-hatched area
for a hot check.
’
4. If the fluid level is inthe acceptable range, push the
dipstick back in allthe way.
How to Add Fluid
Refer to the Maintenance Schedule to determine what
kind of transmission fluid to use.See “Recommended
Fluids andLubricants” in the Index.
If the fluid level .is low,
add only enoughof the proper
fluid to bring the level
up to the COLD areafor a cold
It doesn’t take
check orthe HOT area for a hot check.
Don’t overfill.
much fluid, generally less than a pint.
We recommend you use only fluid labeled
DEXRON@-111or DEXRON@-IIE,because fluids with
that labelare made especially for you
automatic
transmission. Damage caused by fluid other than
DEXRON@IIEis not covered by your new vehicle
warranty.
0
After adding fluid, recheck the fluid levelas
described under “How to Check.”
When the correct fluid level is obtained, push the
dipstick back in all the way.
Rear Axle
Engine Coolant
The following explains your cooling system and
how to
add coolant whenit is low. If you have a problem with
Refer to the Maintenance Schedule to determine how engine overheating, see “Engine Overheating” the
in
often to check the lubricant and when to change it. See Index.
“Periodic Maintenance Inspections” in the Index.
The proper coolant for your Buick will:
When to Check and Change Lubricant
How to Check Lubricant
Give freezing protection downto -34°F (-37°C)
If the level is below the bottom
of the filler plug hole,
Give boiling protectionup to 262OF ( 128O C) .
you’ll need to add
some lubricant. Add enough lubricant
to raise the level tothe bottom of the filler plug hole.
What to Use
Standard Differential
Use Axle Lubricant (GM Part
No. 1052271) or SAE
8OW-90 GL-5 gear lubricant.
1
Limited-Slip Differential
To add lubricant when the level is low,
use Axle
Lubricant (GM Part No. 1052271) or S A E 8OW-90 GL-5
gear lubricant.To completely refill after draining, add
4 ounces (118 ml) of Limited-Slip Differential Lubricant
Additive (GM PartNo. 1052358). Then fillto the bottom
of the filler plug holewith Axle Lubricant (GMPart No.
1052271) or SAE8OW-90 GL-5 gear lubricant.
240
.
Protect against rust and corrosion.
0
Help keep the properengine temperature.
Let the warning lights workas they should.
What to Use
Use a mixtureof one-half clean water (preferably
distilled) and one-half antifreeze that meets “GM
Specification 1825-M,” which won’t damage aluminum
parts. You can also use a recycled coolant conforming to
GM Specification 1825-M with a complete coolant flush
and refill.If you use this mixture,you don’t needto add
anything else.
1
Adding Coolant
I
If you use an improper coolant mix, your engine'
could overheat andbe badly damaged. The
repair cost wouldn't be covered by your
warranty. Too much water in the'mix can freeze
and crack the engine, radiator, heater core and
other parts.
The surgetank is located at the left of the engine
compartment, directly behind the battery.
241
To Check Coolant
When your engine is cold, the coolant level should be at
the “FULL COLD.”
If thklight comes on it
I
means you’relow on
engine coolant.
3
.
.
‘.i.
When replacing thepressure’cap,make sure it is tight.
..
Surge Tank Pressure Cap
I
NOTICE:
To Add Coolant
If you need more coolant,add the proper mixat the
s m , but only when the engine is cool.
Your radiator cap is a 15 psi (105 kPa)
pressure-type cap and must be tightly installed
to prevent coolantloss and possible engine
damage from overheating.
When you replace your radiator pressure cap, an
AC*
cap is recommended.
How To Check Power SteeringFluid
Thermostat
Engine coolanttemperature is controlled by a thermbstat Unscrew the cap and wipe the dipstick with a clean rag.
Replace the cap and completely tighten it. Thenremove
in the engine coolant system.The thermostat stops the
the cap again and look at the fluid level on the dipstick.
flow of coolant through the radiator until the coolant
reaches a preset temperature.
0 When the engine compartment is hot, the level
should beat the “H” mark.
When you replace your thermostat,an AC@thermostat
is recommended.
0. When the engine compartment is cool, the level
should beat the “C” mark.
Power SteeringFluid
The power steering cap is
to the left of the engine fan.
.What to Add
Refer tothe Maintenance Schedule to determine what
kind of fluid to use.See “Recommended Fluids and
I
Lubricants”
in
the Index.
NOTICE:
When adding power steering fluid or making a
complete fluid change, always use the proper
fluid. Failure to use the proper fluid can cause
leaks and damage hoses and seals.
243
Windshield Washer Fluid
To Add
NOTICE:
0
0
0
0
The windshield washer reservoiris located at the left
of
the engine compartment.
Open the cap labeled “WASHERFLUID ONLY.” Add
washer fluid until the bottleis full.
244
When using concentrated washer fluid,
follow the manufacturer’sinstructions for
adding water.
Don’t mix water with ready-to-use washer
fluid. Water can cause thesolution to
freeze and damage your washer
fluid tank
and other parts of the’washer system.
Also,
water doesn’t clean as well as washer fluid.
Fill your washerfluid tank only 3/4 full
when it’s very cold. Thisallows for
expansion, which could damage the tankif
it is completely full.
Don’t use radiator antifreeze
in your
windshield washer. It can damage your
washer system and paint.
Brakes
Brake Master Cylinder
Your brake master cylinder is here.It is filled with
DOT-3 brake fluid,
,
There are only two reasons why the brake fluid level in
your master cylinder might go down. The first is that the
brake fluid goes down to an acceptable level during
normal brake lining wear. When new liningsare put in,
the fluid level goes back up. The other reason is that
fluid is leaking outof the brake system. If it is, you
should have yourbrake system fixed, sincea leak means
that sooner or later your brakes won’t work well,or
won’t work at all. So, it isn’t a good ideato “top off”
your brake fluid. Addingbrake fluid won’t correct a
are worn, then
leak. If you add fluid when your linings
you’ll have too much fluid when you get newbrake
linings. You should add (or remove) brake fluid, as
necessky, only when work is done on the brake
hydraulic system.
Refer to the Maintenance Schedule to determine when
to check your brake fluid, See “periodic Maintenance
hspections,~ in the Index.
245
1
To Check B.rakeFluid
1
l
You can check the brake fluid without taking
off the cap.
Just look at the windows on the brake fluid reservoir.
The fluid levels shouldbe above ‘“IN.’’ If they aren’t,
have your brake system checked
to see if there is a leak.
After ‘work is
done on the brake hydraulic system, make
sure the levels areabove “MIN” and below the topof
each window.
I
What to Add
When you do need brake fluid, useonly’DOT-3brake
fluid -- such as Delco Supreme 11 (GM Part
No.1052535). Use new brake fluidfrom a sealed
container only, and always clean the
brake fluid
reservoir cap before removingit.
@
I NOTICE:
0
.
:fi’
1.-
<
1
,
,
.
I.
~~
’=&
.
j ,
,I
-
.
Don’t let someone put inthe wrongkind of
fluid. For example,just a few drops of
mineral-based oil, such as engine oil,in
your brake system can damage brake
system parts so badly thatthey’ll have
to :s$c 7 :.
t
. ..
e d..-;-.F.c~.&~ - -- ~:...:, ~.p .~
~. ~ ~ ~ ~ ~ ~ ~
be r e p l. a .,c+. ,ck.kJ.-~
....,,,.~,,. ,,..’“..”
Brake fluid can damage paint,so be careful
not to spillbrake fluid on your vehicle. If
you do, wash it off immediately. See
“Appearance Care” in the Index.
;
,
.
~
,
~
~
~
~‘
,
~
,,
_’
~
.
~
’.-
.
~,..4+;7; ~
~ ~..
~
.~
,
’e
w:’i!?;.,;c.T
’,
--.-.
% i 4
4 ,
~
~
~
-
~
-
,
If your brake pedal goes down farther than
normal, your
Battery
rear drum brakes may need adjustment. Adjust them by
Every new Buick has a Delco
Freedom@battery. You
backing up and firmlyapplying the brakes a few times.
never have to add water one
to of these. When it’stime
for a new battery, we recommend a Delco
Freedom@
Replacing Brake System Parts
battery. Get one that has the catalog number shown on
The braking system on a modern vehicle is complex. Its the original battery’s label.
many parts have to
be of top qualityand work well
together if the vehicleis to have really good braking.
Vehicle Storage
Vehicles wedesign and test have top-quality GM brake
If you’re not going to drive your vehicle 25
fordays or
parts in them, as your Buick does when it new.
is When
(-) cable from the
more, takeoff the black, ,negative
you replace partsof your braking system-- for example,
battery.
This
will
help
keep
your
battery from running
when your brake linings wear down and you have to
down.
have new ones put in-- be sure you getnew genuine
GM replacement parts. Ifyou don’t, your brakes may no
longer work properly.For example, if someone putsin
brake linings thatare wrong for your vehicle, the
balance between your frontand rear brakes can change,
for the worse. The braking performance you’vecome to
if someone puts
expect can change in many other ways
in the wrong replacement brake parts.
Contact your dealer to learn how to prepare your vehicle
for longer storage periods.
248
Halogen Bulbs
Headlamp Bulb Replacement
2. Turn each of the access cover retainers1/4 turn and
lift the cover off.
t:
249
3. Pull the bulb/socket straight out from theaccessarea.
4., Remove wire connector from bulb by lifting the lock
tab and pulling it away from the plastic base.
5.
connector (A) to tlie
plastic base -- making
sure the lock .tab (B) is
over the' lock(C).
A
B
Install the bulb by putting the small
tab (D) into the
small notch in thelamp (E). Put the retainer onand
turn it 1/4 turn clockwise (to the right) to lock it into
place.
Remove-thetwo Phillips@ headScrews.
For the right-side taillight, remove the housing that
covers the spare tire. For
the left-side taillight, open the
locking rear storage compartment.
251
Unscrew the wingnut. From outside the vehicle,
carefully pullthe taillight assembly away from the
body.
Press the bulb housing release lever and turn housing
the
1/4 turn counter-clockwise (to theleft) to remove it.
To remove the bulb, push itin and rotateit
counterclockwise (to the left).
Reverse all the steps to reassemble the taillight housing.
Center High Mounted Stop Light
Replacement
Lift up the tailgate window. Unscrew the
two screws.
Bring down the bulb assembly. Pull abulb out of its
retainer and replace. Reverse the steps to reassemble.
Loading Your Vehicle
TIRE-LOADING INFORMA,TION
OCCUPANTS
VEHICLE CAP. WT.
CTR.
FRT.
RR.
TOTAL KG
LBS.
MAX; LOADING & GVWR SAME AS VEHICLE
CAPACITY
WEIGHT
XXX
COLD
TIRE
PRESSURE
SPEED
TIRE SIZE
RTG
PSVKPa
FRT.
RR.
SPA.
IFTIRES ARE HOT, ADD 4PSV28KPa
SEE OWNER‘S MANUAL FOR ADDITIONAL
INFORMATION
l l ] ~ l ~ :j$:*
: l
Two lahels on your vehicle show how much weight it
may properly carry.The Tire-Loading Information label
found on the rear edge of the driver’sdoor tells you the
proper size, speed rating and recommended inflation
pressures for the tires on your vehicle.It also gives you
important information about the numberof people that
can be in your vehicle
and the total weight that you can
carry. This weight is called the VehicleCapacity Weight
and includes the weight of all occupants, cargo, and all
nonfactory-installed options.
.
,
r
7
MFD BY GENERAL MOTORS CORP
DATE
GVWR
GAWR
FRT
GAWR
RR
THIS VEHICLE CONFORMS TO ALL APPLICABLE U.S. FEDERAL MOTOR VEHICLE
SAFETY, BUMPER, AND THEFT PREVENTION
STANDARDS IN EFFECT ON THE DATE OF
MANUFACTURE SHOWN ABOVE.
rne other label is the Certification label,
found on the
rear edge of the driver’s door. It tells you the gross
weight capacityof your vehicle, calledthe-GVWR
(Gross Vehicle Weight Rating).The GVWR includesthe
weight of the vehicle,all occupants, fueland cargo.
Never exceedthe GVWR for your vehicle, or theGross
Axle Weight Rating (GAWR) for either thefront or
rear axle.
253
Station wagons can carry more weight than regular
passenger cars. You’ll find the heading “Maximum
Loading at GVWR” on the Tire-Loading Information
up to the limit
label. You can load your station wagon
shown there, but onlyif you take the following steps:
1. Fold the second and third seats down.
2. Balance your load fromside to side and position it so
that mostof the weightis forward of the rear axle.
You can help protect the load floor area and avoid
damage to the foldingseats by placing plywoodor
similar protection under your load.
3. Make sure thereare either three people in the front
or
seat a total of,450lbs. (205 kg).
4. 1f.loadedto the maximum weight, or near it, weigh
the wagon andits load to find the exact weight and
help decide how to position the load.
You can go to a
vehicle weigh station todo this.
Tires
We don’t make tires.Your new vehicle comes with high
quality tires made by a leading tire manufacturer. These
tires are warranted by thetire manufacturers and their
warranties are delivered withevery new Buick.If your
you
spare tire is a different brand than your road tires,
will have a tire warranty folderfrom each of these
manufacturers.
255
~
-
Inflation Tire Pressure
The Tire-Loading Information labelwhich is on the rear
edge of the driver’s door shows the correct inflation
pressuresfor your tires, when they’re cold. “Cold”
means your vehicle has been sitting
for at least three
hours or drivenno more thana mile.
NOTICE:
Don’t let anyone tell you that underinflation
overinflation is all right. It’s not. If your tires don’t
have enough air (underinflation)
you can get:
0 Too much flexing
Too much heat
Tire overloading
Badwear
Bad handling
Bad fuel economy.
If your tires have too much air (overinflation),
you can get:
0 Unusual wear
0 Bad handling
Rough ride
0 Needless damagefrom road hazards.
When to Check
Tire Inspection and Rotation
Check your tires once a month or more. Also, check the To make your tires last longer, have them inspected and
tire pressure of the spare tire.
rotated at the mileages recommendedin the
Maintenance Schedule. See “Scheduled Maintenance
If you have a compactspare tire, it should be at 60 psi
Services” in the Index.
(420 kPa).
How to Check
Use a good quality pocket-type gage to check tire
pressure. Simply looking at the tires will not tell you the
pressure, especiallyif you have radial tires-- which
may look properly inflatedeven if they’re underinflated.
FRONT
If your tires have valve caps,
be sure to put them back
on. They help prevent leaks by keeping out dirt and
moisture.
Use this rotation pattern.
257
After. the tires have been rotated, adjust
front
theand
rear inflation pressure as shown on the Tire-Loading
Infomation label. Make certain that
all wheel nuts are
properly tightened. See “Wheel Nut Torque” in the
Index.
When It’s Time for New Tires
One way to tell when it’s
is to
time for new tires
check the treadwear
indicators, which .will
appear when your tires
have only 2/32 inch
(1.6 mm) or less of
tread remaining.
You need a new tireif:
You can see the indicatorsat three or more places
around the tire.
You can see cord or fabric showing through the tire’s
rubber.
The tread or sidewall is cracked, cut or snagged deep
enough to show cord or fabric.
The tire hasa bump, bulge or split.
258
The tire has a puncture, cut, or other damage that
can’t be repaired well because
of the size or location
of the damage.
Buying New Tires
To find out what kind and size
of tires you need, lookat
the Tire-Loading Information label.
The tires installedon your vehicle whenit was new had
a Tire Performance Criteria Specification (TPC
Spec)
number on each tire’s sidewall:When you get newtires,
get ones with thatsame TPC Spec number. Thatway,
your vehicle will continue
to have tires that are designed
to give proper endurance, handling, speed rating,
traction, ride and other things during normal service
on
your vehicle. If your tires have an all-season tread
design, the TPC number will be followed
by a “MS”
(for mudand snow).
If you ever replace your tires with those not having
a
TPC Spec number,make sure theyare the same size,
load range, speedrating and construction type (bias,
bias-belted or radial) as your original tires.
Uniform Tire Quality Grading
The following information relates to the system
developed by the United States National Highway
Traffic Safety Administration which grades tiresby
treadwear, traction and temperature performance. (This
applies only to vehicles sold
in the United States.)
Treadwear
The treadwear grade is
a comparative rating based on
the wear rateof the tire when tested under controlled
conditions on a specified government test course. For
example, a tire graded 150 would wear one anda half
J
The grade C corresponds to a levelof performance
which all passenger car tires must meet under the
Federal Motor Vehicle Safety StandardNo. 109. Grades
B and A represent higher levelsof performance on the
laboratory test wheelthan the minimum required by law.
Warning: The temperature gradefor this tire is
established for a tire that is properly inflated and not
overloaded. Excessive speed, underinflation, or
excessive loading, either separately or
in combination,
can cause heat buildup and possible tire failure.
of passenger
These grades are molded on the sidewalls
car tires.
While the tires available ,as standard or optional
equipment on General Motors vehicles
may vary with
respect to these grades,
all such tires meet General
Motors performance standardsand have been approved
for use on General Motors vehicles. All passenger type
(P Metric) tires must conform to Federal safety
requirements in addition to these grades.
Used ReplacementWheels
Tire Chains
NOTICE:
Use tire chains only where legal andonly when
you must. Useonly SAE Class ?S”type chains
that arethe proper sizefor your tires. Install
them on the reartires and tighten them astightly
as possible with the ends securely.fastened.
.Driveslowly and follow the chain manufacturer’s
instructions. If you can hear thechains
contacting your vehicle,stop and retightenthem.
Ifthe contact continues, slow down until it stops.
Driving too’fast with chains on will damage your
vehicle.
262
PaintThinner
Appearance Care
Remember, cleaning productscan be hazardous. Some
are toxic. Others can burstinto flame if you strike a
match or get them on a hot partof the vehicle. Someare
dangerous if you breathe theirfumes in a closed space.
When you use anythingfrom a container to clean your
Buick, be sure to follow the manufacturer's warnings
and instructions. And always open your doors or
windows whenyou're cleaning the inside.
Never usethese to clean your vehicle:
Gasoline
Benzene
Naphtha
0
CarbonTetrachloride
0
Acetone
'0
Turpentine
LacquerThinner
0
Nail Polish Remover
They can all be hazardous-- some more than others-and they canall damage your vehicle, too.
NOTICE:
Don't use anyof these unless this manual says
you can. In many uses, these will damage your
vehicle:
Alcohol
0 LaundrySoap
Bleach
ReducingAgents
I
263
Cleaning theInside of Your Buick
Using Foam-Type Cleaner on Fabric
Use a vacuum cleaner often to get of
riddust and loose
dirt. Wipe vinyl or leather with a clean, damp cloth.
0
Your Buick dealer hastwo GM cleaners, a solvent-type
spot lifter and foam-type
a
powdered cleaner. They will
Do not use
clean normal spots and stains very well.
them on vinyl or leather.
Here are some cleaning tips:
'
0
0
0
0
0
Always read the instructions on the cleaner label.
0
0
Clean up stains as soon as you can -- before they set.
0
0
Use a clean cloth orsponge, and change to a clean
area often.A soft brush may be used if stains are
stubborn.
0
0
0
Use solvent-type cleaners in a well-ventilated area
only. If you usethem, don't saturate the stained area.
0
0
If a ring forms after spot cleaning, clean
the entire
area immediatelyor it will set.
Vacuum and brush the area to remove any loose dirt.
Always clean a whole trim panel or section. Mask
surrounding trim along stitch or welt lines.
Mix Multi-Purpose PowderedCleaner following the
directions on the container label.
Use suds only and apply witha clean sponge.
Don't saturate the material.
Don't rub it roughly.
As soon asyou've cleaned the section, usea sponge
to remove the suds.
Rinse the section with a clean, wet sponge.
Wipe off what's left with a slightly damp' paper towel ,
'or cloth.
Then dry it immediately with a blow dryer or a heat
lamp.
NOTICE:
Be careful with a hair dryer
or heat lamp.You
could scorch the fabric.
0
I
264
Wipe with a clean cloth.
Using Solvent-Type Cleaneron Fabric
First, see if you haveto use solvent-type cleanerat all.
Some spots and stains will cleanoff better withjust
water and mild soap.
If you need to use a solvent:
Follow the solvent-type instructions described
earlier.
Shoe polish, wax crayon, tar and asphalt will stainif
left on a vehicle seat fabric. They should be removed
as soon as possible. Be careful, becausethe cleaner
will dissolve them and may
cause them to spread.
Gently scrape excess soil from the trim material with
a clean, dull knife or scraper. Use very little cleaner, Non-Greasy Stains
light pressureand clean cloths (preferably
Such as catsup, coffee (black),
egg, fruit, fruit juice,
cheesecloth). Cleaning should startat the outside or
milk, soft drinks, wine, vomit, urine and blood.
the stain, “feathering” toward the center. Keep
0 Carefully scrapeoff excess stain, thensponge the
changing to a clean sectionof the cloth.
soiled area with cool water.
When you clean a stain from fabric, immediately dry
0 If a stain remains,follow the foam-type instructions
the area withan air hose, hair dryer, or heat
lamp to
described earlier.
help prevent a cleaning ring.
(See the previous
NOTICE.)
0 If an odor lingers after cleaning vomit or urine, treat
the area with awaterbaking soda solution: 1
Special Cleaning Problems
teaspoon (5 ml) of baking soda to1 cup (250 ml) of
lukewarm water.
Greasy or Oily Stains
0 If needed, clean lightly with solvent-type cleaner.
Such as grease,oil, butter, margarine, shoe polish,
coffee withcream, chewing gum, cosmetic creams,
vegetable oils, wax crayon, tar and asphalt.
0
0
Carefully scrape off excess stain.
Combination Stains
Such as candy, ice cream, mayonnaise, chili sauce and
unknown stains.
Carefully scrapeoff excess stain, then clean with
cool water and allow to dry.
@ If a stain remains, clean it with solvent-type cleaner.
Cleaning Viiyl
.~
Use warm water and a clean cloth.
?I!
,Rub with a clean, damp clothto remove dirt. You
:may have to do
it more than once.
Cleaning Leather
Use a soft cloth with lukewarm water and a mild soap or
saddle soap.
For stubborn stains, use a mild solutionof 10%
90% water.
isopropyl alcohol (rubbing alcohol) and
0
Never use oils, varnishes, solvent-based or abrasive
cleaners, furniture polish or
shoe polish on leather.
Soiled leather shouldbe cleaned immediately. If dirt
is allowedto work into finish, it canh a m the
leather.
Cleaning theTop of the Instrument Panel
.Things like-tar,asphalt and shoe polish will stainif
off quickly. Use a clean cloth and Use only mild soap and water to clean the top surfaces
you don’t get them
or
of the instrument panel. Sprays containing silicones
a solvent-type vinyl cleaner.
waxes may cause annoying reflections in the windshield
and even make it difficult see
to through the windshield
under certain conditions.
Cleaning the Outsideof Your Buick
Finish Care
Occasional waxing or mild polishing
of your Buick may
be necessary to remove residue from the paint finish.
You can getGM approved cleaning products from your
Washing Your Vehicle
dealer. (See “Appearance Care and Materials” in the
The best way to preserve your vehicle’s finish is to keep Index.)
it cleanby washing it often with lukewatm or cold
Your Buick has a “basecoat/clearcoat” paint finish.
The
water.
clearcoat gives moredepth and gloss to the colored
basecoat. Always use waxes and polishes that are
Don’t wash your vehicle in
the direct raysof the sun.
non-abrasive and made for a basecoat/clearcoat paint
Don’t use strongsoaps or chemical detergents. Use
.
,
.
liquid hand, dish or car washing (mild detergent) soaps. finish.
. &*L.
Don’t use cleaning agents that contain acid or abrasives.
be flushed promptly and not
All cleaning agents should
NOTICE:
or they could stain. Dry
allowed to dry on the surface,
Machine compounding or aggressive polishing
the finish with a soft, clean chamois or100%
a cotton
on
a basecoatlclearcoat paint finish .may dull the
towel to avoid surface scratches and water spotting.
The paint finish on your vehicle provides beauty,
depth
of color, gloss retentionand durability.
’ .
I
High pressure car washes
may cause water to enter your
vehicle.
finish or leave swirl marks.
Aluminum Wheels (If So Equipped)
Your aluminum wheels have a protective coating similar
to the painted surface of your car. Don’t use strong
soaps, chemicals, chrome polish, abrasive cleaners or
abrasive cleaningbrushes on thembecause you could
damage this coating. After rinsing thoroughly,
a wax
may be applied.
application may be required.(See “Recommended
Fluids & Lubricants” in the Index.)
Sheet Metal Damage
If your vehicleis damaged and requires sheet metal
repair or replacement, make sure the body repair
shop
applies anti-corrosion materialto the parts repaired or
replaced to restore corrosion protection.
Material
Foreign
!0
I
If you have aluminum wheels, don’t use .an
automatic vehicle wash that has hard silicon
carbide cleaning brushes. These brushes can
take off the protective coating.
Calciumchlorideandothersalts,ice
melting agents,
road oil andtar, tree sap, bird droppings,chemicals from
industrial chimneys, and other foreign matter can
damage your vehicle’s finishif they remain on painted
surfaces. Use cleaners thatare marked safe for painted
surfaces to remove foreign matter.
i
White Sidewall-Tires
Finish Damage
Your Buick dealer hasa GM White Sidewall Tire
Cleaner. You can use a stiff brush withthe cleaner.
Weatherstrips
Any stone chips, fractures ordeep scratches in the finish
should be repaired right away. Bare metal will
corrode
quickly and maydevelop into a major repair expense.
Silicone grease on weatherstrips will make them last
longer, seal better,and not stick or squeak. Apply
silicone grease witha clean cloth at least every six
months. During very cold,damp weather more frequent
Minor chips and scratches can be repaired with touch-up
materials availablefrom your dealer or other service
outlets. Larger areas of finish damage can be corrected
in your dealer’s body and paint shop.
1I
269
1
Underbody Maintenance
Chemicals used forice and snow removal and dust
1 control can collect on the underbody.If these are not
1 removed, accelerated corrosion (rust) can occur on the
underbody parts such as fuel lines, frame, floor pan, and
exhaust system even though they have corrosion
protection.
1
1
i
!
i
1
I
I
I
i
Chemical Paint Spotting
Some weather and atmospheric conditions can create
a
chemical fallout. Airborne pollutants can fall upon and
attack painted surfaceson your vehicle. This damage
can take two forms: blotchy, ringlet-shaped
discolorations, and small irregular dark spots etched into
the paint surface.
At least every spring, flush these materials from the
job causes this, Buick
Although no defect in the paint
underbody with plainwater. Clean any areas where mud will repair, at no chargeto the owner, the surfaces
of
and other debris can collect. Dirt packed in closed areasnew vehicles damagedby this fallout condition within
of the frame should be loosened before being flushed. 12 months or 12,000 miles (20 000 km) of purchase,
whichever comes first.
Your dealer or an underbody vehicle washing system
can do this for you.
Appearance Care and Maintenance Materials
I
dealer.
Buick
yourfrom
these get
You can
271
Vehicle Identification Number(VIN)
trunk lid. It’s very helpful
if you ever need to order
~ a r t sOn
. this label is:
yourVIN,
-
the model designation,
ENGINE A
4
CODE
PLANTYEAR
MODEL
f \ ASSEMBLY
paint information, and
a list of all production options and special
equipment.
Be sure that this label is not removed from the vehicle.
This is the legal identifierfor your Buick. It appears on
a plate in the front corner
of the instrument panel, on the
driver’s side.You can see it if you look throughthe
windshield from outside your vehicle.
The VIN also
appears on the Vehicle Certification and Service Parts
labels and the certificatesof title and registration.
Engine Identification
The eighth character in your VIN is the
engine code.
This code will helpyou identify your engine,
specifications, and replacement parts.
Add-on Electrical Equipment
NOT,ICE:
Don’t add anything electrical to your Buick
unless you. check with your dealer first. Some
electrical equipment can damage your vehicle
and the damage wouldn’t be covered.by your
warranty. Some add-on electrical equipment can
keep other components from workingas they
should.
Service Parts Identification Label
You’ll find this label on the rear compartment storage lid Your vehicle has an air bag system. Before attempting to
add anything electrical to your Buick, see “Servicing
on the
in the wagon. On the sedan, the label is located
Your Air Bag-Equipped Buick” in the Index.
373
Fuses and Circuit Breakers
The wiring circuits in your car are protected from short
circuits by a combination of fuses, circuit breakers, and
fusible thermal links in the wiring itself. This greatly
reduces the chanceof fires caused by electrical problems.
The cover will pull right
off. To put the cover back
on make sure the tabs
are
inserted fist.
You'll find the fuse paneldoor on the end of the
instrument panelon the driver's side.
273
[[[I
Fuse Usage
Amp
43.
10
44.
10
10
Description
OperaLamps, License Lamp,MarkerLamps,
Taillamps, Tail/Turn Stoplamps,
Heater Power Mirrors
11
12
13
Circuit Breakers
2.
30
3.
30
4.
30
Master PowerWindow Switch, PowerWindow
Lockout Switch, Power Window Control Module
DoorLockRelay,Power
Seat Switch, Recline
Switch, Passenger Seat Lumbar Controls
RearWindowDefog Switch, RearWindowDefog
Relay
JC/D(EI
Underhood Electrical Center
Fuse
Amp
Description
1.
2.
25
15
3.
4.
20
10
5.
10
10
10
10
6.
7.
8.
9.
10
Auto Level Control Air Compressor
Fuel Pump Relay, Fuel Pump Switch and Engine
Oil Pressure Sensor, PCM
Air Pump Relay, Underhood Lamp
Mass Air Flow Sensor, Air Pump Relay, EGR
Solenoid, Evaporative Emission Solenoid, Oxygen
Sensor
PCM, Ignition Coil, Automatic Transmission
Fuel Injector Cylinders One, Four, Six, Seven
Primary Cooling Fan, A/C Compressor Relay
Generator, Secondary Cooling Fan
Fuel Injector Cylinders Two, Three, Five, Eight
275
Windshield Wipers
'I
h,
The windshield wiper motor is protected
'by a circuit
breaker and a fuse.If the motor overheatsdue to heavy
snow, etc., the wiper will stop until the motor cools. If
the overload is causedby some electrical problem and
not snow, etc., be sure to get it fixed.
Power Windows and Other Power Options
Look at the silver-colored band inside the fuse.
If the
band is broken or melted, replace the fuse: Be sure you Circuit breakers in the fuse panel protect the power
windows and other power accessories. When the current
replace abad fuse with a new oneof the identical size
load is too heavy, the circuit breaker opens and closes,
and rating.
is fixed orgoes
protecting the circuit until the problem
away.
Headlights
The headlight wiring is protected
by a circuit breaker in
the light switch.Anelectrical overload will cause the
lights to go on andoff, or insome cases to remainoff.
If this happens, have your headlight wiring checked
right away.
Lumbar Power Seat Controls.
If you have the lumbar controls for
the power seat, there
is a 10 amp fuse under each seat wrapped in tape.
Should your seat not work, this fuse should be checked.
Estate Wagon Dimensions
Inches Unless Otherwise Noted
Overall:
Length ...........................
217.5
Width . . . . . . . . . . . . . . . . . . . . . . . . . . . . . 79.9
Height ............................
60.3
Wheelbase . . . . . . . . . . . . . . . . . . . . . . . . 115.9
Front Tread ........................
62.1
64.1
Rear Tread .........................
Interior Rear:
LegRoom ..........................
HeadRoom ........................
Shoulder Room .....................
HipRoom .........................
38.3
39.4
63.5
57.1
Cargo Capacity- Cu . Ft . . . . . . . . . . . . . . 92.4
Interior Front:
LegRoom . . . . . . . . . . . . . . . . . . . . . . . . .
HeadRoom . . . . . . . . . . . . . . . . . . . . . . . .
Shoulder Room . . . . . . . . . . . . . . . . . . . . .
Hip Room ..........................
42.1
39.6
63.4
56.9
Passengers:
Front ..............................
Rear ...............................
ThirdSeat ..........................
3
3
2
Base Curb Weight .
Lbs. . . . . . . . . . . . . . 4508
277
Roadmaster Sedan Dimensions
Inches Unless Otherwise Noted
Overall:
Length .........................
215.8
Width .............................
78.1
Height . . . . . . . . . . . . . . . . 1 . . . . . . . . . . . 55.9
Wheelbase ........................
115.9
61.7
Front Tread ........................
60.7
Rear Tread .........................
Interior Rear:
LegRoom .........................
HeadRoom ........................
ShoulderRoom .....................
Hip Room .........................
38.9
38.6
63.3
56.9
Cargo Capacity .
Cu. Ft . . . . . . . . . . . . . . 21.0
Interior Front:
. Leg Room .........................
HeadRoom ........................
Shoulder Room .....................
HipRoom .........................
278
. .
.
42.1
39.2
63.3.
56.9
Passengers:
Front ..............................
Rear ................................
3
3
Base Curb Weight .
Lbs. . . . . . . . . . . . . . 4097
Replaceable Light Bulbs
Application
Number
Exterior
Cornering ...........................
2057
9004
Headlight ............................
2057NA
Park/Turn .........................
Side Marker ...........................
194
561
Underhood ............................
Rear
Backup .............................
2057
High Mounted Stop (Sedan) . . . . . . . . . . . . . 1141
High Mounted Stop (Wagon) . . . . . . . . . . . . . 577
License ..............................
168 .
Side Marker(Wagon) . . . . . . . . . . . . . . . . . . . 194
Tail(Sedan) . . . . . . . . . . . . . . . . . . . . . . . . . . . 194
Tail/Stop/Turn . . . . . . . . . . . . . . . . . . . . . . . . 2057
Application
Numbe
Interior
Ashtray ...............................
194
168
Courtesy' .............................
DoorCourtesy . . . . . . . . . . . . . . . . . . . . . . . . . . 87
194
Glovebox .............................
194
InstrumentPanel ........................
LuggageCompartment . . . . . . . . . . . . . . . . . . 920
192
Reading ..............................
Rear Body Pillar Assist Handle . . . . . . . . . . . 194
192
Roof Rail Courtesy .....................
Visor Vanity Mirror . . . . . . . . . . . . . . TS-14VlCP
279
Capacities and Specifications
Engine CodeP ( LTl) V8 MFI (5.7L)
Belt TensionsAutomatically controlledby a self-tensioning
idler pulley. Tensionadjustments should never
be necessary.
Cooling System Capacity Without HD Radiator: 14.3quarts/l3.5 liters
With HD Radiator: 14.6quarts/l3.8 liters
Air Conditioning- (R-134A) 3.1 lb. (1.4 kilograms)
Not all air conditioning refrigerants are the same.
If the air conditioning system in your vehicle
needs refrigerant, be sure the proper refrigerant
is used. If you’re not sure ask your Buick dealer.
For additional information, see your “Warranty
and Owner Assistance Information’’ booklet.
Fuel Tank Capacity 22 gallons (wagon)
23 gallons (sedan)
Crankcase Capacity(With Filter)5.0 quarts/4.7 liters
Rear Axle Lubricant Capacity
4.3 pints/2.03 liters
Transmission Drain and Refill- 10.0 pints/4.7 liters
Overhaul - 22.4 pints/l0.6 liters
Maintenance Item Part Numbers Air Cleaner-AC 1096C
Fuel Filter- GF580
Oil Filter-PF5 1
PCV Valve -CV895C
PCV Filter -FB59
Spark Plug-AC 906, GAP0.050”
Part 7 MaintenanceSchedule
This part covers the maintenance required for your Buick
. Your vehicle needs these services to retain its safety.
.
dependability and emission control performance
Part 7 includes:
Introduction . . . . . . . . . . . . . . . . . . . . . . . . . . . . . . . . . . . . . . . . . . . . . . . . . . . . . . . . . . . . . . . . . . . . . .
A Word About Maintenance . . . . . . . . . . . . . . . . . . . . . . . . . . . . . . . . . . . . . . . . . . . . . . . . . . . . .
Your Vehicle and the Environment . . . . . . . . . . . . . . . . . . . . . . . . . . . . . . . . . . . . . . . . . . . . . . . .
How This Part is Organized . . . . . . . . . . . . . . . . . . . . . . . . . . . . . . . . . . . . . . . . . . . . . . . . . . . . .
Section A: Scheduled Maintenance Services . . . . . . . . . . . . . . . . . . . . . . . . . . . . . . . . . . . . . . . . . . . . .
Using Your Maintenance Schedules . . . . . . . . . . . . . . . . . . . . . . . . . . . . . . . . . . . . . . . . . . . . . . .
Selecting the Right Schedule . . . . . . . . . . . . . . . . . . . . . . . . . . . . . . . . . . . . . . . . . . . . . . . . . . . .
Schedule1 . . . . . . . . . . . . . . . . . . . . . . . . . . . . . . . . . . . . . . . . . . . . . . . . . . . . . . . . . . . . . . . . . . .
Schedule11 . . . . . . . . . . . . . . . . . . . . . . . . . . . . . . . . . . . . . . . . . . . . . . . . . . . . . . . . . . . . . . . . . .
Explanation of Scheduled Maintenance Services . . . . . . . . . . . . . . . . . . . . . . . . . . . . . . . . . . . . .
Section B: Owner Checks and Services . . . . . . . . . . . . . . . . . . . . . . . . . . . . . . . . . . . . . . . . . . . . . . . . .
AtEachFuelFill . . . . . . . . . . . . . . . . . . . . . . . . . . . . . . . . . . . . . . . . . . . . . . . . . . . . . . . . . . . . . .
AtLeastOnceaMonth . . . . . . . . . . . . . . . . . . . . . . . . . . . . . . . . . . . . . . . . . . . . . . . . . . . . . . . . .
AtLeastOnceaYear . . . . . . . . . . . . . . . . . . . . . . . . . . . . . . . . . . . . . . . . . . . . . . . . . . . . . . . . . .
Section C: Periodic Maintenance Inspections . . . . . . . . . . . . . . . . . . . . . . . . . . . . . . . . . . . . . . . . . . . .
Section D: Recommended Fluids and Lubricants . . . . . . . . . . . . . . . . . . . . . . . . . . . . . . . . . . . . . . . . .
Section E: Maintenance Record . . . . . . . . . . . . . . . . . . . . . . . . . . . . . . . . . . . . . . . . . . . . . . . . . . . . . . .
282
282
283
283
285
285
285
286
288
290
293
293
294
294
297
299
301
281
Introduction
A Word About Maintenance
We at General Motors wantto help you keep your
vehicle in good working condition. But we don't know
exactly how you'll drive it.You may drive very short
distances only a few times a week. Or you may drive
long distances all the time in very hot, dusty weather.
You may use your vehicle in making deliveries. Or you
may drive it to work,to do errands or in many other
ways.
I
m m m m
I
Have you purchased the GM Protection Plan? The
Plan supplements your new vehicle warranties.See
your Buick c der for details.
i
282
Because of all the different ways people use their GM
vehicles, maintenance needs,
vary. You may even need
more frequent checks and replacements than you will
So please read this part
find in the schedules in this part.
and note howyou drive. If you have any questions on
how to keep your vehiclein good condition, see your
Buick dealer,the place many GM owners choose
to
have their maintenance work done.
Your dealer can be
relied upon to use proper parts
and practices.
,
Your Vehicle and the Environment
Proper vehicle maintenance not only helps to keep your
vehicle in good working condition, butalso helps the
environment. All recommended maintenance procedures
are important. Improper vehicle maintenance or the
removal of important components cansignificantly
affect the quality of the air we breathe. Improper fluid
levels or even the wrong tireinflation can increase the
level of emissions from your vehicle.To help protect
our environment, andto help keep your vehicle in good
condition, please maintain your vehicle properly.
How This Partis Organized
The remainder of this partis divided into five sections:
“Section A Scheduled MaintenanceServices” shows
what to have done and how often. Some
of these
services can be complex,so unless you are technically
qualified and have the necessary equipment,
you should
let your dealer’s service department or another qualified
jobs.
service center do these
If you are skilled enoughto do some work onyour
vehicle, you will probably want to get the service
information GM publishes. You will finda list of
publications andhow to get them in this manual. See
“Service Publications”in the Index.
283
Section A: Scheduled Maintenance
Services
Using Your Maintenance Schedules
This section tells you the maintenance services you
should have’done and.
when you shouldschedule.them.
Your Buick dealerknows~your vehicle best and wants
you to be happy with, it.
If you go to your dealerfor your
service needs, you’ll know that
GM-trained and
supported service people will perform the work using
genuine GM parts.
These schedules are for vehicles that:
carry passengers and cargo within recommended
limits. You will find these limitson your vehicle’s
Tire-Loading Information label. See “Loading Your
Vehicle” in the Index.
0
are driven on reasonable road surfaces within legal
driving limits.
use the recommended unleaded fuel. See. “Fuel’’in
the Index.
Selecting the Right Schedule
First you’ll need todecide which of the two schedules is
right for your vehicle. Here’s how
to decide which
schedule to follow:
Schedule I
Is ‘any one
of these true for your vehicle?
0 Most trips are less than 4 miles (6 km).
Most trips are less than 10 miles (16 km) when
outside temperatures are below freezing.
0
The engine is at low speed mostof the time (as in
door-to-door delivery, or in stop-and-go traffic).
0,
You operate your vehicle in dusty areas.
0
You tow a trailer.
If any one (or more) of these is true for your driving,
follow Schedule I.
Schedule 11
Follow Schedule 11.only if none of the above conditions
is true.
Scheduled Maintenance Services ScheduleI
_
_
_
~
~
~~
~~~
~
Follow' ScheduleI if your car isMAINLY driven underone ormore of the following conditions:
0 When most trips are less than 4 miles (6 kilometers).
When most trips are less than 10 miles (16 kilometers) and outside temperatures remain below freezing.
0 When most trips include extended idling and/or frequent low-speed operationas in stop-and-go traffic.
Towing a trailer.*?
0 When operating in dusty areas.
Schedule I should also be followed if the car is used for delivery service, police, taxi or other commercial applications.
TO BE SERVICED
(See Explanation of
Scheduled Maintenance
Services Following
Schedules I and 11)
WHEN TO PERFORM
Miles
(kilometers)
or
Months, Whichever
Occurs First
Item No.
1. Engine Oil & Filter
Change"
Every 3 000 mi. (5000 km)
or 3 months.
2. Chassis Lubrication
Every other oil change
3. Tire & Wheel Inspection &
Rotation
At 6 000 mi. (10 000 km) and
then every 15 000 mi. (25 000
km) or as necessary
4. Engine Accessory Drive
Belt(s) Inspection*
5. Cooling System Service*
286
Every 30 000 mi.
(50 000 km)or 24 months.
MILES (000)
3
6
.
l
m
l o I+ I.
I 1.1
a
Io
KILOMETERS (000)
65 70 75
0
.
0
0
80
0
0
I
*
The services shownin this schedule upto 48 000 miles (80 000 km) should be performed after
48 000 miles at the same intervals.
An Emission Control Service.
the emission warranty or limitrecall
The U.S. Environmental Protection Agency or the California Air Resources Board has determined that the failure to perform thismaintenance item will not nullify
liability prior to the completion of vehicle useful life. General Motors, however, urges that all recommended maintenance services be performed at the indicated intervals and the maintenance be
recorded in "Section EMaintenance Record".
287
Scheduled Maintenance Services ScheduleI1
I Follow
Schedule
I1 ONLY
none
driving
the
of
if conditions
specified
Schedule
in
TO BE SERVICED
WHEN TO PERFORM
Miles (kilometers) or
Months, Whichever
Occurs First
(See Explanation of
Scheduled Maintenance
Services Following
Schedules I and II)
I
I apply.
Item No.
I
MILES (000)
I
KILOMETERS (000)
12.5
I 25 I 37.5 I
50
I 62.5 I 75
1. Engine Oil Change*
Oil Filter Change*
2. Chassis Lubrication
3. Tire & Wheel Inspection & Rotation
4.Engine Accessory Drive Belt(s) Inspection*
Every 30 000 mi. (50 000 km) or 24 mos.
5. Cooling System Service*
6. Front Wheel Bearing Repack
288
30
Every
000 mi. (50 000 km)
I
I
TO BE SERVICED
(See Explanation of
Scheduled Maintenance
Services Following
Schedules I and 11)
r
WHEN TO PERFORM
Miles (kilometers) or
Months, Whichever
Occurs First
I
MILES (000)
I
KILOMETERS (000)
Item No.
7. Transmission Service
8. Spark Plug Replacement*
9. Spark Plug Wire Inspection"?
10.Air Cleaner Filter Replacement*
11. Fuel Tank, Cap & Lines Inspection*?'
12. Rear Axle Fluid Change(For Vehicles with
Limited Slip Differenials)
I
*
The services shown in this schedule up to
45 000 miles (75 000 km) should be performed after45 000
miles at the same intervals.
An Emission Control Service.
Protection Agencyor the California Air Resources Board has determinedthethat
failure to perform this maintenance item will not nullify the emission warranty
or limit recall
liability prior to the completion of vehicle useful life. General Motors, however, urges that all recommended maintenance services be performed at the indicated intervalsthe
and
maintenance be
recorded in "Section EMaintenance Record".
? The U.S. Environmental
289
Explanation of Scheduled Maintenance
The system won’t detect dust in the
oil. So, if you
drive in a dusty area, be sure
to change your oil very
3,000 miles (5 000 km) or soonerif the “ChangeOil
Soon” light comes on. Remember to reset the Oil
Life Monitor when the oil has been changed. For
more information, see “Engine Oil Life Monitor” in
the Index.
2. Chassis Lubrication -- Lubricate suspension and
steering linkage. Lubricate the transmission shift
linkage, and parking brake cable guides, underbody
contact points and linkage.
3. Tire and Wheel Rotation andInspection -- For
proper wear and maximum tire life, rotate your tires
following the instructions in this manual. See “Tires,
Inspection & Rotation” in the Index. Check the tires
or
for uneven wear or damage. If you see irregular
premature wear, check the wheel alignment. Check
for damaged wheels also.
4. Engine Accessory Drive Belt(s) Inspection-Inspect the belt(s) for cracks, fraying, wear and
proper tension. Replaceas needed. (Belts can have
many small cracks in individual ribs without
affecting performance.)
5. Cooling System Service*-- Drain, flush and refill
the system with new or approved recycled coolant
conforming to GM Specification 1825M. Keep
coolant at the proper mixtureas specified. See
“Coolant” in the Index.This provides proper freeze
and boil protection, corrosion inhibitor level
and
maintains properengine operating temperature.
Inspect hoses and replace if they
are cracked,
swollen or deteriorated. Tightenscrew-type hose
clamps. Clean the outside of the radiator andair
conditioning condenser.Wash the pressure cap
and neck.
To help ensure proper operation,we recommend a
pressure testof both the cooling system and the
pressure cap.
6. Front Wheel Bearing Repack -- When your
vehicle is used in such service as police work,as a
taxi or indoor-to-door delivery, cleanand repack the
front wheel bearings ateach brake relining or15,000
miles (25 000 km), whichever comesfirst. If you
don’t use your vehicle in such service, clean and
repack the bearings ateach brake relining or30,000
miles (50000 km) whichever comes first.
7. Transmission Service-- Change both the fluid and
filter every 15,000 miles (25000 km) if the vehicle
is mainly driven under
one or more of these
conditions:
In heavy city traffic where the outside
temperature regularly reaches90°F (32°C) or
higher.
In hilly or mountainous terrain.
When doing frequent trailer towing.
Uses such as found in taxi, police car or delivery
service.
If you do not use your vehicle under any
of these
conditions, change both the fluid and filter
every
100.000 miles (160 000 kml
8. Spark Plug Replacement* -- Replace spark plugs
with the proper type. See “SpecificationsChart” in
the Index.
9. Spark Plug Wire inspection*^ -- Inspect for burns,
cracks or other damage. Check the boot fit at the
distributor and atthespark plugs. Replace wires as
needed.
10.Air Cleaner FilterReplacement* -- Replace every
30,000 rniles (50 000 km) or more often under dusty
conditions. Ask your dealerfor the proper
replacement intervalsfor your driving conditions.
11. Fuel Tank, Capand Lines Inspection*? -- Inspect
fuel tank, cap and lines (including injection
assembly) for damage or leaks. Inspect fuel cap
O-ring for any damage. Replace parts as needed.
Periodic replacementof the fuel filter is
not required.
12. Rear Axle Fluid Change -- If your vehicle is used
to pull a trailer, have the rear axle gear lubricant
changed every 7,500 miles (12 500 km). If your
vehicle is not used to pull a trailer, but has a
limited-slip differential, have the rear axle gear
7,500 miles
lubricant changed once, after the first
(12 500 km).
* An Emission Control Service.
t The U.S. Environmental Protection Agencyor the California Air ResourcesBoard has determined that thefailure to performthis maintenance item will not nullify the
that
recommended maintenanceservices be
emission warrantyor limit recall liability priorto the completionof vehicle useful life. General Motors, however, urgesall
performed at the indicated intervals andthe maintenance be recorded in “Section E:Maintenance Record”.
292
Section B: Owner Checks and
Services
Listed below are owner checks and services which
should be performed at the intervals specified to help
ensure the safety, dependabilityand emission control
performance of your vehicle.
At Each Fuel Fill (It is important for you or
a service station attendantto perform these
underhood checks at each fuelfill.)
I cE;2 I
WHAT TO DO
Engine Oil Level Check the engine oil level and add the
properoil if necessary.See“Engine
Oil” in the Index for further details.
Be sureany necessary repairs are completed at once.
Whenever anyfluids or lubricants are added to your
vehicle, makesure they are the proper ones, as shown in
Section D.
EngineCoolantChecktheengitnecoolantlevel
inthe
the
Level
coolant
add
recovery
and
tank
propercoolant mix if necessary.See
“Coolant” intheIndexforfurther
details.
I
Windshield
Washer Fluid
Level
Checkthewindshieldwasherfluid
level in the windshield washer tank and
add the proper fluid if necessary. See
“Windshield
Washer
Fluid”
in
the
Index for further details.
293
Bod$ Lubrication'
'
'I
.-
I
CHECK OR
SERVICE
WHAT TODO
Parking Brake/and
Automatic
Transmission “P,’
(Park) Mechanism
Check
I cE
c
;F I
Underbody
Flushing
WHAT TO DO
At least every spring, use plain water
to
flush any corrosive materials from the
care
clean
to
underbody. Take
thoroughly any areas where mud and
other debris can collect.
.
Park on afairlysteephill,withthe
vehicle facing downhill. Keeping your
the
footontheregularbrake,set
parking brake.
0
To check the parking brake: With the
engine running and transmission in
“ N ’ (Neutral), slowly remove foot
pressure from theregularbrake
pedal. Do thisuntilthevehicle
is
held by the parking brake only.
0
To check the “P” (Park) mechanism’s
holding ability: Shift to “P” (Park).
Then release all brakes.
Section C: Periodic Maintenance
Inspections
Listed below are inspections and services which should
be performed at leasttwice a year (for instance, each
spring and fall). You should let yourGM dealer’s
do
service department or other qualified service center
these jobs.Make sureany necessary repairs are
completed at once.
INSPECTION
OR SERVICE
Restraint System
INSPECTION
OR SERVICE
Steering and
Suspension
Inspection
Exhaust System
tnspection
WHAT SHOULD BE DONE
Now and then, make sure all your belts,
buckles,
latch
plates,
retractors,
anchorages and reminder systems are
working properly. Look for any loose
parts or damage. If you see anything
that might keep a restraint system from
doing itsjob, have it repaired.
Throttle Linkage
Inspection
WHAT SHOULD BE DONE
Inspect the front and rear suspension and
steering system for damaged, loose or
missing parts, signs of wear, or lack of
lubrication. Inspect the power steering
linesandhosesforproperhookup,
binding, leaks, cracks, chafing, etc.
Inspect the complete exhaust system.
Inspectthebodyneartheexhaust
system.Lookforbroken,damaged,
missing or out-of-position parts as well
seams,
open
holes,
loose
as
connections, or other conditionswhich-#
could cause a heat build-upin the floor
pan or could let exhaust fumes into the
vehicle. See “Engine Exhaust” in the
Index.
Inspect
throttle
the linkage
for
interference
binding,
or and
for
damagedormissingparts.Replace
parts as needed.
~~
INSPECTION
WHAT SHOULD BE DONE
OR SERVICE
Rear Axle Service Check the gear lubricant level in the
rear axle and add if needed. See “Rear
Axle” in the Index. A fluid loss in this
system may indicate a problem. Check
the system and repair it if needed. If
your vehicle is used to pull a trailer,
havetherearaxlegearlubricant
changed eOery 7,500 miles (12 500
km).
I
INSPECTION
OR SERVICE
Brake System
Inspection
WHAT SHOULD BE DONE
Inspectthe,completesystem.Inspect
brake
lines
and
hoses
for
proper
hookup,
binding,
leaks,
cracks,
chafing, etc. Inspect disc brake pads
for
wear and rotors for surface condition.
Alsoinspectdrumbrakelinings
for
wear and cracks. Inspect other brake
parts,
including
drums,
wheel
cylinders, calipers, parking brake, etc.
Check parking brake adjustment. You
may needto have your brakes inspected
moreoften if yourdrivinghabitsor
conditions result in frequent braking.
NOTE: Alowbrakefluidlevelcan
indicate worn disc brake pads which
may need to be serviced, Also, if the
brake system warning light stays on or
comeson,something may bewrong
See “Brake
withthebrakesystem.
System Warning Light” in the Index. If
youranti-lockbrakesystemwarning
lightstays on, comesonorflashes,
somethingmaybewrongwiththe
anti-lock brake system. See “Anti-Lock
Brake System Warning Light” in the
Index.
298
I
Section D: Recommended Fluids and
Lubricants
NOTE: Fluids and lubricants identified below by name,
part number or specification may be obtained from your
GM dealer.
FLUID/LUBRICANT
API
service
SG
SH
Energy
or
Conserving II oils
the
of
proper
viscosity. The“SH’ or “SG’designation
may be shown alone or in combination
with
others,
such
as
“SH/,D,”
or
“SH,SG,CD,”
or
“SG/CD’ etc.
To
determinethepreferredviscosityfor
your vehicle’s engine, see “Engine Oil”
in the Index.
50/50 mixture of water(preferably
distilled)andgoodqualityethylene
glycolbaseantifreeze(GMPartNo.
1052753 or equivalent) conforming to
GM Specification 1825M or approved
recycledcoolantconformingtoGM
Specification 1825M.
USAGE
Parking Brake
Guides
FLUID/LUBRICANT
Chassis
lubricant
(GM
Part
No.
1052497orequivalent)orlubricant
meeting requirements of NLGI Grade
2, CategoryLB or GC-LB.
Power Steering
System
GM HydraulicPowerSteeringFluid
(GM Part No. 1052884or equivalent).
Automatic
Transmission
DEXRONa-111 or DEXRON@ -1IE
Automatic Transmission Fluid.
Key Lock
Cylinders
Lubricate with Multi-Purpose
Lubricant (GM Part No. 12345120)’
or synthetic S A E 5W-30 engine oil.
.
Chassis
lubricant
(GM
Part
No.
Automatic
Transmission Shift 1052497 or equivalent)orlubricant
meeting requirements of NLGI Grade
Linkage
2, Category LB or GC-LB.
Chassis .
Lubrication
(GM Part
No.
Chassis
lubricant
12346003orequivalent)orlubricant
meeting requirements of NLGI Grade
2, Category LB or GC-LB.
Delco Supreme 11s Brake Fluid (GM
Part
No.
1052535)
equivalent
or
DOT-3 brake fluid.
299
I’
USAGE
Front Wheel
Bearings
FLUID/LUBRICANT
Wheel
bearing
lubricant
meeting
requirements of NLGI
Grade
2,
Category GC or GC-LB (GM PartNo.
105 1344 or equivalent).
USAGE
FLUID/LUBRICANT
Hood Latch
Grease, High Temperature- Water
Assembly, Pivots, Resistant Spray (GM Part.No.
Spring Anchor and -12345996or equivalent.
Release- Pawl
Rear Axle
(Standard
Differential)
Axle Lubricant (GM‘Part
No. 1052271)
or SAE 80W-90 GL-5 Gear Lubricant.
Hood and Door
Hinges
Engine oil or Lubriplate Lubricant (GM
Part No. 1050109).
Weatherstrips
DielectricSiliconeGrease(GMPart
No. 12345579 or equivalent).
Rear Axle
(Limited-Slip
Differential)
Windshield
Washer Solvent
Axle Lubricant(GM PartNo. 105227 1)
or SAE 80W-90 GL-5 Gear Lubricant,
Limited-Slip
and
Differential
See “SpecificationsChart” in the Index for
No.
Lubricant
Additive
(GM
Part
recommended replacement filters, valves and spark
1052358) or equivalent where required. plugs.
See “Rear Axle”in the Index.
GM Optikleena Washer Solvent (GM
Part No. 105 15 15) or equivalent.
Section E: Maintenance Record
After the scheduled services areperformed, record the
date, odometer reading and who performed the service
in the columns indicated. When completing the
Maintenance Performed column, insert the numbers
from the Schedule I or Schedule I1 maintenance charts
which correspond to themaintenance performed. Also,
you should retain all maintenance receipts. Your owner
information portfolio is aconvenient place to store
them.
Maintenance 'Record
ODOMETER
SERVICED
READING
DATE
BY
MAINTENANCE
PERFORMED
301
Maintenance Record
ODOMETER
SERVICED
READING
DATE
BY
.
.
MAINTENANCE
PERFORMED
~
.
I
302
-
Part 8 Customer Assistance Information
I
Here you will find out how to contact Buick if you need assistance.
This Part also tellsyou how to obtain service
publications andhow to report any safety defects.
Part 8 includes:
CustomerSatisfaction . . . . . . . . . . . . . . . . . . . . . . . . . . . . . . . . . . . . . . . . . . . . . . . . . . . . . . . . . . . . . .
Customer Assistance for Hearing/Speech Impaired. . . . . . . . . . . . . . . . . . . . . . . . . . . . . . . . . . . . . . . .
Reporting SafetyDefects . . . . . . . . . . . . . . . . . . . . . . . . . . . . . . . . . . . . . . . . . . . . . . . . . . . . . . . . . . . .
CourtesyTransportation . . . . . . . . . . . . . . . . . . . . . . . . . . . . . . . . . . . . . . . . . . . . . . . . . . . . . . . . . . . . .
RoadsideAssistance . . . . . . . . . . . . . . . . . . . . . . . . . . . . . . . . . . . . . . . . . . . . . . . . . . . . . . . . . . . . . . . .
ServicePublications . . . . . . . . . . . . . . . . . . . . . . . . . . . . . . . . . . . . . . . . . . . . . . . . . . . . . . . . . . . . . . . .
303
304
305
306
306
307
Customer Satisfaction Procedure
Your satisfaction andgoodwill are important to your
dealer and Buick. Normally, anyconcern with the sales
transaction or the operationof your vehicle will be
resolved by your dealer’s Sales or Service Departments.
Sometimes, however, despite the best intentions
of all
concerned, misunderstandings can occur.If your
concern has not been resolved to your satisfaction, the
following steps should be taken:
STEP ONE -- Discuss your concern witha member of
dealership management. Normally concerns can often
be
quickly resolved atthat level. If the matter has already
been reviewed withthe Sales, Service, or Parts Manager,
contact the ownerof the dealership or the General
Manager.
303
0
Your name, address, home and business telephone
numbers
0
Vehicle Identification Number(This is available
from the vehicle registration or title, or the plate
at
the left topof the instrument panel and visible
through the windshield.)
0
Dealership name and location
0
Vehicle delivery dateand present mileage
0
Nature of concern
304
REPORTING SAFETY DEFECTS
TO THE UNITED STATES
GOVERNMENT
REPORTING SAFETY DEFECTS
TO THE CANADIAN.
GOVERNMENT
If you believe that your vehicle hasa defect which could
cause a crash or couldcause injury or death, you should
immediately informthe National Highway Traffic
Safety Administration(NHTSA), in addition to
notifying General Motors.
If you live in Canada, andyou believe that your vehicle
has a safety defect, you should immediately notify
Transport Canada, in addition to notifying General
Motors of Canada Limited. You may write to:
Transport Canadaat Box 8880
Ottawa, Ontario K l G 352.
If NHTSA receives similar complaints, it may open an
investigation, and if it finds that a safety defect exists in
a group of vehicles, it may order a recall and remedy
campaign. However, NHTSAcannot become involved
in individual problems between you, yourdealer, or
General Motors.
To contact NHTSA, you may either call the Auto Safety
Hotline toll-free at 1-800-424-9393 (or 366-0123 in the
Washington, D.C. area) or write to:
NHTSA, U.S. Department of Transportation
Washington, D.C.20590
You can also obtain other information about motor
vehicle safety from the Hotline.
.
REPORTING SAFETY DEFECTS
TO GENERAL MOTORS
In addition to notifying NHTSA (or TransportCanada)
in a situation like this, we certainly hope you’ll notify
us. Please call us at 1-800-521-7300 ,or write:
Buick Motor Division
Customer Assistance Center
902 E. Hamilton Avenue
Flint, MI 48550.
In Canada, please call us at 1-800-263-3777 (English)
or 1-800-263-7854 (French). Or, write:
General Motors of Canada Limited
Customer Assistance Center
1908 Colonel Sam Drive
Oshawa, Ontario LlH 8P7
Courtesy Transportation
Roadside Assistance
To Buick Motor Division, Quality Means Service-- and
service means “keepingyou on the road.”
Buick Motor Division is proud to offer Buick Roadside
Assistance to customers for vehicles covered under the
new car warrantyduring the 36 month/36,000 mile
Included with your 1994 Buick new car warranty, (36
months, or 36,000 miles), is Courtesy Transportation, a (whichever comes first).
program which willprovide Buick retail customers with: Our commitment to Buick owners has always included
superior service through our network
of 3,000 Buick
- Reimbursement toward a loaner vehicle, courtesyof
dealers. Buick Roadside Assistance provides
an extra
Buick Motor Division,for up to five daysfor
measure
of
convenience
and
security.
vehicles requiring overnight warranty repairs. Also,
reimbursement up to $30 a day ( 5 days maximum)
may be available for the cost
of a rental car, bus or
even a cab.
A free one-way shuttle rideup to 10 miles from the
dealership is available for customers whose vehicles
require same-day warranty repairs.
Courtesy Transportationis Buick’s wayof extending the
Premium Serviceyou’ve come to expect for Buick and
it’s 3,000 dealers. Please reviewthe Courtesy
Transportation glove-box card contained in your
vehicle, or consult your Buick dealer for details.
In Canada, please consult yourGM Dealer for
in€Qgmation oncourtesy transportation.
Buick Roadside Assistance:
- Provides owners with accessto minor repairs or
towing for disabled vehicles.
- Takes the anxiety outof uncertain situationsby
providing easy access to service .professionals trained
to work with Buick owners, 24-hour a day,
365 days
a year, including weekends and holidays.
For detailsof Buick Roadside Assistance,please
consult your Buick Roadside Assistance owner booklet
included with your owner’s manual. For needed
assistance, call the Buick Roadside Assistance toll-free
hotline: 1-800-252-1112.
Canada Roadside Assistance
Vehicles purchased in Canada
have an extensive
Roadside Assistance program accessible from anywhere
in Canada or the United States. Please referto the
separate brochure provided by the dealer or call
1-800-268-6800 for emergency services.
‘ServicePublications
Information on how to obtain Product Service
Publications, Subscriptions andIndexes as described
below is applicable only in
the fifty U.S. states (and the
District of Columbia) and only forears and light trucks
with GVWR lessthan 10,000 pounds (4 536 kg).
In Canada, information pertaining to Product Service
Bulletins andIndexes can be obtained by writing to:
General Motors of Canada Limited
Service PublicationsDepartment
1908 Colonel Sam Dr.
Oshawa, Ontario L1H 8P7
Buick regularlysends its dealers useful service bulletins
about Buick products. Buickmonitors product
performance in thefield. We then prepare bulletins for
servicing our products better.Now, you can get these
bulletins too.
Bulletins cover various subjects. Some pertain to the
proper use and careof your vehicle.Some describe
costly repairs. Others describeinexpensive repairs
which, if done on time with the latest parts, mayavoid
future costly repairs.Some bulletins tell a technician
how to repairaneworunexpectedcondition.Others
describe a quickerway to fix your vehicle.They can
help a technicianservice.your vehicle better.
Most bulletins apply to conditions affecting a small
number of cars or trucks.Your Buick dealer or a
qualified technician mayhave to determine if,a specific
bulletin appliesto your vehicle.
You can subscribe to all Buick bulletins. This way you’ll
get them as they come out. You can waita while and get
an index to.the bulletins. You can also get individual
bulleths. However, you’ll need the index to identify them.
Subscriptions
You can subscribe to all GM Product Service
Publications (PSP’s). This will include bulletins for all
cars sold by GM and will not be limited to PSP’s
applicable to any particular model. When
you buy a
subscription, you will receive the PSP’s in periodic
A subscription
mailings, shortly after they come out.
entitles you to all PSP’s publishedby GM during the
made1 year. You can purchase a subscriptionand get
pricing informationby calling HELM at 1-800-782-4356.
307
I
Individual PSP’s
If you don’t want to buy all the PSP’s issued
by GM for
buy individual
all models in the model year, you can
PSP’s, such as those which may pertain to a particular
model. To do this, you will first need to see our index
of
PSP’s. It provides a varietyof information. Here’s what
you’ll find in the index and how
you can get one:
What You’ll Find in the Index:
A list of all PSP’s published by Buick in a model
year (1990 or later). PSP’s covering all models
of
Buick cars are listed in the same index.
Ordering information so you can buy the specific
PSP’s you may want.
Price information for the PSP’s you may want to
buy.
How You Can Get an Index:
I
Indexes are published periodically. Mostof the PSP’s
GM
which could potentially apply to the most recent
models willbe listed in the most recent publication for
that model year. This means you may want to wait until
the end of the model year before ordering an index, if
you are interested in buying PSP’s pertaining to a
current model year car or truck.
Some PSP’s pertaining to a particular model year
vehicle may be published in later years, and these would
be listed in the later year’s index. When
you order an
index for a model year that is not over yet, we’ll send
you the most recently published issue. Check the
ordering form for indexes for earlier model years.
Cut out the ordering form,fill it out, and mail it in.
We
will then see to it that an index is mailed to you. There is
no charge for indexes for the 19901994 model years.
Copies at Participating Dealers
Copies of Indexes and individual PSP’s are at your
participating Buick dealer. You can ask to see them. .
A VERY IMPORTANT REMINDER: These PSP’sare
meant for technicians. They are not meant for the
“do-it-yourselfer.” Technicians have the equipment,
tools, safety instructions, and know-how do
to a job
quickly and safely.
Buick Service Publications
You can get theseby using the orderform:
w
Gn
W
UJd
z n
a n
z a
5C
I
n
1-
t
I
z
3
I
3
Y
B.
r
r
-
I
I
I
Part 9 Index
Adding
BrakeFluid .................................. 245
272
ElectricalEquipment ..........................
200. 240
Engine Coolant ...........................
231
Engineoil ...................................
243
Power Steering Fluid ..........................
136
Sound Equipment .............................
237
Transmission Fluid ............................
244
Windshield Washer Fluid .......................
Air Bag (Supplemental Restraint System) . . . . . . . . . . . . . . 35
Air Bag Readiness Light ...........................
37
236
Aircleaner .....................................
280
Airconditioner . . . . . . . . . . . . . . . . . . . . . . . . . . . . . . . . .
130. 134
Air Conditioner Refrigerant ....................
Alcohol. Driving Under the Influence . . . . . . . . . . . . . . . . 154
Alcohol in .Gasoline .............................. 225
Aluminum Wheels. Cleaning .......................
269
150
Antenna Care ...................................
240
Antifreeze . . . . . . . . . . . . . . . . . . . . . . . . . . . . . . . . . . . . . .
159
Anti-lockBrakes ................................
Anti-lock Brake System Warning Light . . . . . . . . . . . . . . 120
Appearance Care ................................ 263
Appearance Care and Maintenance Materials . . . . . . . . . . 271
114
Ashtrays and Lighter .............................
Assistance
Customer . . . . . . . . . . . . . . . . . . . . . . . . . . . . . . . . . . . . 303
Hearing/Speech Impaired .......................
305
306
Roadside ....................................
Audio Systems . . . . . . . . . . . . . . . . . . . . . . . . . . . . . . . . .136
83
Automatic Overdrive ..............................
81
AutomaticTransmission ...........................
Fluid . . ...................................... 237
Shifting . . . . . . . . . . . . . . . . . . . . . . . . . . . . . . . . . . .
86,88
Axle. Rear ..................................
84, 240
~
248
Battery . . . . . . . . . . . . . . . . . . . . . . . . . . . . . . . . . . . . . . .
190
JumpStarting ................................
125
Warning Light ................................
Blizzard . . . . . . . . . . . . . . . . . . . . . . . . . . . . . . . . . . . . . . .
177
Block Heater (Engine Coolant Heater) . . . . . . . . . . . . 80.235
Blowout. Tire ...................................
207
Brake
247
Adjustment ..................................
Anti-lock . . . . . . . . . . . . . . . . . . . . . . . . . . . . . . . . . . . . 159
245
Fluid .......................................
245
MasterCylinder ...............................
Parking . . . . . . . . . . . . . . . . . . . . . . . . . . . . . . . . . . . . . . 85
PedalTravel . . . . . . . . . . . . . . . . . . . . . . . . . . . . . . . . . 247
Replacement .................................
248
System. Anti-lock Warning Light . . . . . . . . . . . . . . . . . 120
311
CourtesyLights . . . . . . . . . . . . . . . . . . . . . . . . . . . . . . . . .
Courtesy Transportation ...........................
CruiseControl ...................................
CustomerAssistance .............................
Hearing/Speech Impaired .......................
SatisfactionProcedure .........................
105
306
97
303
304
303
Daytime Running Lights . . . . . . . . . . . . . . . . . . . . . . . . .
104
154
DefensiveDriving . . . . . . . . . . . . . . . . . . . . . . . . . . . . . . .
132. 135
Defogger.RearWindow ......................
131.135
Defrost ....................................
277. 278
Dimensions Chart . . . . . . . . . . . . . . . . . . . . . . . . . . . .
235
Disposal of Used Oil . . . . . . . . . . . . . . . . . . . . . . . . . . . . .
Door Locks . . . . . . . . . . . . . . . . . . . . . . . . . . . . . . . . . . . . . . 65
Downshifting . . . . . . . . . . . . . . . . . . . . . . . . . . . . . . . . . . . . 84
Driving
170
City . . . . . . . . . . . . . . . . . . . . . . . . . . . . . . . . . . . . . . . .
Curves . . . . . . . . . . . . . . . . . . . . . . . . . . . . . . . . . . . . . .
161
154
Defensive . . . . . . . . . . . . . . . . . . . . . . . . . . . . . . . . . . .
154
Drunken . . . . . . . . . . . . . . . . . . . . . . . . . . . . . . . . . . . .
Freeway . . . . . . . . . . . . . . . . . . . . . . . . . . . . . . . . . . . . .
171
Foreign Country . . . . . . . . . . . . . . . . . . . . . . . . . . . . . .
227
174
Hill and Mountain . . . . . . . . . . . . . . . . . . . . . . . . . . . . .
172
Long Distance . . . : . . . . . . . . . . . . . . . . . . . . . . . . . . . .
166
Night . . . . . . . . . . . . . . . . . . . . . . . . . . . . . . . . . . . . . . .
Rain . . . . . . . . . . . . . . . . . . . . . . . . . . . . . . . . . . . . . . . .
167
80
Through Deep Standing Water ....................
Winter . . . . . . . . . . . . . . . . . . . . . . . . . . . . . . . . . . . . . .
175
Electrical Equipment. Adding .....................
272
Emergency
160
Braking .....................................
190
Starting .....................................
161
Steering . . . . . . . . . . . . . . . . . . . . . . . . . . . . . . . . . . . . .
196
Towing . . . . . . . . . . . . . . . . . . . . . . . . . . . . . . . . . . . . .
Engine
Block Heater (Coolant Heater) . . . . . . . . . . . . . . . . 80.235
240
Coolant .....................................
Coolant Temperature Light/Gage . . . . . . . . . . . . . . . . . 121
Exhaust . . . . . . . . . . . . . . . . . . . . . . . . . . . . . . . . . . . . . . 89
Identification(VIN) ...........................
272
Oil . . . . . . . . . . . . . . . . . . . . . . . . . . . . . . . . . . . . . . . . . 231
Oil Additives . . . . . . . . . . . . . . . . . . . . . . . . . . . . . . . . . . 235
122
Oil Pressure Warning Light .....................
200
Overheating ..................................
Starting . . . . . . . . . . . . . . . . . . . . . . . . . . . . . . . . . . . . . . . 78
Ethanol In Gasoline ..............................
225
Expectant Mothers. Use of Safety Belts . . . . . . . . . . . . . . . 41
Extender. Safety Belt .............................. 61
Fabric Cleaning . . . . . . . . . . . . . . . . . . . . . . . . . . . . . . . .
FeaturesandControls .............................
Filling the Fuel Tank . . . . . . . . . . . . . . . . . . . . . . . . . . . . .
Filter.Oil . . . . . . . . . . . . . . . . . . . . . . . . . . . . . . . . . . . . . .
Finish Care . . . . . . . . . . . . . . . . . . . . . . . . . . . . . . . . . . . . .
Finish Damage . . . . . . . . . . . . . . . . . . . . . . . . . . . . . . . . . .
First Gear . . . . . . . . . . . . . . . . . . . . . . . . . . . . . . . . . . . . . . .
Flashers.HazardWarning .........................
FlatTire . . . . . . . . . . . . . . . . . . . . . . . . . . . . . . . . . . . . . . .
FloodedEngine . . . . . . . . . . . . . . . . . . . . . . . . . . . . . . . . . .
264
63
227
235
268
269
84
188
207
79
313
Fluid
245
Brake .......................................
280
Capacities ...................................
243
Power Steering ...............................
Transmission .................................
237
244
Windshield Washer ............................
Fluids and Lubricants Recommended . . . . . . . . . . . . . . . . 299
18
Folding Rear Seats ................................
ForeignOperation ................................
227
2
Francais. Guide en .................................
17 1
Freeway Driving ................................
2
French Language Manual ...........................
225
Fuel ..........................................
280
Capacity .....................................
227
Filling Your Tank .............................
.Gage .......................................
118
In Foreign Countries ...........................
227
119
Low Light ....................................
273
Fuses and Circuit Breakers ........................
Fuse Usage Chart ............................
274, 275
Gage
Battery (Voltage Indicator) ......................
Engine Coolant Temperature ....................
Engine Oil Pressure ...........................
Fuel ........................................
Gasoline .......................................
Gasoline Tank Filling .............................
Gate Ajar Light ..................................
GearPositions ...................................
Glass Cleaning ..................................
314
125
121
122
118
225
227
125
81
267
249
Halogen Bulbs .................................
188
lazard Warning Flasher ...........................
leadlamp Bulb Replacement .......................
249
leadlights . . . . . . . . . . . . . . . . . . . . . . . . . . . . . . . . . . . . . 102
94
High-Low Beam Changer .......................
“On” Warning . . . . . . . . . . . . . . . . . . . . . . . . . . . . . . . . 103
18
lead Restraints ..................................
304
learing Impaired Assistance .......................
leater .....................................
129.135
leater. Engine Block (Engine Coolant Heater). . . . . . . . . . 80
gighway Hypnosis ...............................
173
174
gill and Mountain Roads ..........................
182
litches. Trailer ..................................
229
3ood Release ...................................
3orn ...........................................
92
3ot Coolant Warning Light ........................
121
200
lot Engine Safety Warnings .......................
169
3ydroplaning ...................................
Identification Label. Service Parts . . . . . . . . . . . . . . . . . . 272
Identification Number. Vehicle (VIN) ................ 272
87
Idling Your Engine ................................
Ignition
Key .........................................
64
KeyPositions .................................
77
Indicators. Warning Lights and Gages .................117
47
Infant Restraint ...................................
Inflation. Tire ...................................
256
116
InstrumentPanel ................................
*I
Jack. Tire .....................................
Jump Starting ...................................
Keyless Entry System. Remote .....................
Keys ...........................................
208
190
Long Distance Driving ............................
172
164
Loss of Control .................................
Lubricants and Fluids Recommended . . . . . . . . . . . . . . . . .299
112
Luggage Carrier .................................
71
64
Label, Service Parts Identification . . . . . . . . . . . . . . . . . 272
Lane Change Indicator .............................
93
43
LapBelt ........................................
Lap-Shoulder Safety Belt
Front ........................................
28
Rear ......................................... 44
Leather Cleaning ................................ 266
82, 87
Leaving Your Vehicle ...........................
115
Lighter, Cigarette ................................
Lights
37
Air Bag Readiness .............................
105
Courtesy ....................................
Daytime Running .............................
104
102
Headlights ...................................
106
Interior Lights Delay ...........................
103
“0n”Warning ................................
94
Operation ....................................
Reading .....................................
105
Removing & Replacing Bulbs . . . . . . . . . . . . . . . . . . . 249
Replacement .Bulbs . . . . . . . . . . . . . . . . . ; . . . . . . . . . . 279
103
Twilight Sentinel ..............................
Warning .....................................
117
Limited-Slip Rear Axle .............................
84
253
Loading Your Vehicle ............................
65
Locks ..........................................
.
.
.
Inspections ..................................
ZY‘/
Materials ....................................
271
Record ......................................
301
Schedule .................................... 281
Underbody ..................................
270
Malfunction Indicator Lamp (Service Engine Soon). . . . . 124
14
Manualseat .....................................
Master Cylinder, Brake ...........................
245
Mirrors ........................................ 106
Mountain Driving ................................
174
N e t . Convenience ...........................
109. 110
82
Neutral Gear Position ..............................
__
New Vehicle Break-In............................. .77
NightDriving ...................................
166
0
ctane Requirements ...........................
Odometer ......................................
Off-Road Recovery . . . . . i .........................
Oil. Engine
Change ......................................
Quality . . . . . . . . . . . . . . . . . . . . . . . . . . . . . . . . . . . . .
Warning Light . . . . . . . . . . . . . . . . . . . . . . . . . . . . . . . .
225
117
163
123
233
123
315
Overdrive.Automatic .............................
Overheated Engine ...............................
83
200
-;
P a i n t Spotting . ................................
270
81
ParkPosition ....................................
86
Park. Shifting Into ................................
Parking
85. 245
Brake .....................................
89
Over Things that Burn ..........................
184
With a Trailer ................................
With the Engine Running . . . . . . . . . . . . . . . . . . . . 87. 90
163
Passing ........................................
268
Polishing and Waxing ............................
Power
Antenna ..................................... 151
DoorLocks ...................................
66
107
Mirrors .....................................
15
Seats ........................................
Steering .....................................
160
243
Steering Fluid ................................
91
Windows ......................................
41
Pregnancy, Safety Belts Use ........................
187
Problems on the Road ............................
Publications.Service .............................
307
Radiator Overheating ............................
200
Radiator Pressure Cap (Surge Tank) . . . . . . . . . . . . . . . . .242
Radio .........................................
136
Reading Lights ...................................
105
Rear Axle ......................................
240
84. 240
Rear Axle. Limited-Slip .......................
Rear Vent Windows. Wagon ........................
91
18
Rear Seats. Folding ................................
Rear Window Defogger .......................
132. 135
97
Rear Window Washermiper ........................
16
Reclining Seatbacks ...............................
Recommended Fluids and Lubricants . . . . . . . . . . . . . . . .299
71
Remote Keyless Entry System.......................
67
Remote Trunk/Tailgate Release ......................
Replacing
248
Brake System Parts . . . . . . . : ....................
249
Light Bulbs ..................................
Safety Belts ................................... 61
Tires ....................................... 258
Wheels ......................................
261
Reporting Safety Defects ..........................
305
Restraint System. Supplemental (Air Bag) . . . . . . . . . . . . . 35
Restraint Systems .................................
20
46
Restraints Child ..................................
18
Restraints. Head ...................................
82
Reverse Gear Position .............................
Roads. Hill and Mountain .........................
174
306
Roadside Assistance ..............................
Rocking Your Vehicle ............................ 222
257
Rotation. Tire ...................................
Running Your Engine While Parked . . . . . . . . . . . . . . . . . . 87
Tailgate
Ajar Warning Light . . . . . . . . . . . . . . . . . . . . . . . . . . . .125
69
Operation ....................................
Release ......................................
68
Taillamp Bulb Replacement ........................
251
Tape Player Care ................................
149
Temperature Warning Light ........................
121
Theft ...........................................
75
242
Thermostat .....................................
83
Third Gear Position ...............................
92
Tilt Steering.Whee1 ...............................
Time (Setting the Clock) . . . . . . . . . . . . . . . . . . . 138.140. 143
255
Tire ...........................................
261
Balance .......................................
262
Chains ......................................
207
Flat ........................................
Inflation .....................................
256
Inspection and Rotation ........................
257
Loading Information ...........................
253
Pressure .......................................
256
259
QualityGrading ..............................
Replacement .................................
258
221
Spare .......................................
258
Wear Indicators ...............................
269
White Sidewall ...............................
88
TorqueLock .....................................
Towing Your Buick ..............................
196
Towing Hookups ..................................
198
Trailer Towing ...................................
179
68
Tailgate Remote Release ...........................
81
Transmission. Automatic ...........................
Transmission Fluid ................................237
TripOdometer ..................................
117
Turn Signalmeadlight Beam Lever . . . . . . . . . . . . . . . . . . .92
93
Indicator .....................................
Reminder .....................................
94
Turnsignal ........................................
Trunk Pull-Down Feature ..........................
68
TrunkRelease ................................... 67
103
TwilightSentinel ................................
Underbody Maintenance .........................
Unleaded Gasoline ...............................
Upholstery Care .................................
Used Oil Disposal ...............................
270
225
264
235
.vehicle Identification Number (VIN . . . . . . . . . . . . . . . . 272
-253
VehicleLoading .............................
Vehicle Storage . . . . . . . . . . . . . . . . . . . . . . . . . . . . . . . 248
Vent Windows. Wagon ............................. 91
Ventilation .....................................
131
Vinyl. Cleaning ................................. 266
Voltage Indicator (Battery Light) ....................
125
. . .
Fuel Mileage Chart
MILES PER GALLON
10
11
12
13
14 1915
181716
5
50
55
60 75
70
65
80
6
60102
96
108
90
114
84
120
78
126
72
132
66
7
70
84
77
8
80
104
96
88
112
120
128
136
144
152
160
168
176
184
192
9
90
99
10
100 110 120
130
140
150 160
170
11
110 121
132
143
154
165
12
120
132
144
156
168
180 192
204
216
228
240
252
13
I30 143
156
169
182
195
208
221
234
247
260
273
286
299
14
140
154
168
182
196
210
15
150 165 180 195 210 225
240
255
270
285
300
16
160
176
192
208
17
170
187
18
180 198
216
19
190
209
228
247
266
285
304
323
342
361
380
399
41
20
!OO 220
240
260
280 300
320
340
360
380
400
420
440
460
480
500
520
540
560
21
!IO
294 315
22 !20
242
-
320
20 2221
85 100
95
90
23
24 29
25
282726
105 110 115 130
125
120
135 145
140
138 144
150
91
98
105 112 119
126
133
30 3231
156 162
168
174
140 I47 154
161
168
175
182
189
196
203
150 175
170
165
160
155
180 186
192
198
240 248
256
264
272
180 189
198
207
216
225
234
243
252
261
270
279
288
297
306
180 190
200
210
36
180
204
210
216
210
217
224
231
238
245
252
200 208
216
224
232
108 I I 7 126 135 144 153 162
171
353433
280 288
315 324
220
230
240
250
260
270
280
290
300
310
320
330
340
350
360
176
187
198
209
220
231
242
253
264 275
286
297
308
319
330
341
352
363
374
385
396
3 12
324
336
348
360
264
276
288
300
3 12
325
338
372
384
396
408
420
432
351 364
377
390
403
416
429
442
455
468
504
224 238
252
266
280
294
308
322
336
350
364
378
392
406
420
434
448
462
476
490
224
240
31 5
330
345
360
375
390
405
420
435
450
465
480
495
256
272
288
304
320
336
352
368
384
400
41
5 10 525
540
6 432
448
464
480
496
512
528
544
560
576
204 221
238
255
272
289
306
323
340
357
374
391
408
425
442
459
476
493
5 I O 527
544
561
578
595
612
234
252
270
288
306
324
342
360
378
396
414
432
450
468
486
504
522
540
558
576
594
612
630
648
23 1 252
273
264
286
308
8 437
456
475
494
580 600
620
640
660
680
700
720
336
357
378
399
420
441
462
483
504
525
546
567
330 352
374
396
41
51 3 532 55 1 570
589
608
627
646
665
684
8 440
462
484
506
528
550
572
594
616
638
660
682
704
726
748
770
792
588 609 630 65 1 672
693
714
735
756
THIS MANUAL IS PRINTED ON RECYCLED PAPER USING
MINIMUM50% WASTEPAPER, 10% POST CONSUMER WASTE