1
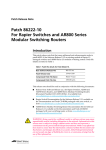
How To
Set up your AT-AR440S ADSL Router for Typical Network Scenarios
Introduction
This guide has been written to help you get your AT-AR440S ADSL router up and running as quickly
as possible. It describes a basic Internet access and Firewall protection configuration, and references
other advanced solutions.
This guide complements the other documentation available for the AT-AR400 router series.
For example:
•
•
The AR400 Series Router Quick Install Guide
The AR400 Series Router Documentation and Tools CD-ROM, which includes the complete
AR400 Series Document Set and utilities
Note: The latest documentation can always be downloaded from www.alliedtelesyn.com.
The AT-AR440S ADSL Router
This guide will help you with:
•
•
•
•
•
gathering your connection information
setting up Windows based PCs’ for GUI connection
connecting to your router’s graphical user interface
using the GUI to configure your router
saving your configuration
Gathering your connection information
Gather the information you require to configure the ADSL connection. There are several
configuration parameters whose values you must ascertain from the ADSL service provider. The
values for these parameters will depend on the particular implementation of ADSL being used by
your network provider.
The two Web pages reproduced below, show the ADSL parameter information provided on the
Web sites of two different service providers in two different countries:
•
•
izR Solutions, an English ISP and telecommunications provider
xtra, an ISP owned by Telecom, New Zealand's largest Telco
Set up your AT-AR440S ADSL Router for Typical Network Scenarios
2
Determining your ADSL connection parameters
The table below is provided for you to fill in the connection parameters for your ADSL Service
Provider and ISP. Typically, the provider will specify the parameters on the printed material that they
give you when you sign up for their service. But if you have not been given any such material, you
should contact your providers technical support help desks or Websites to determine their
requirements.
Table 1: ADSL technical requirements
Connection Parameters
AT-AR440S Default Values
(for country=none)
Encapsulation
llc
VPI
0
VCI
35
Connection type
PPPoA
Required values for your
ADSL Service provider
(e.g. PPPoE0A, PPPoA or RFC 1483 routed)
Authentication
Login name and password
(if applicable)
Your static public IP address
(if applicable, otherwise you will have a
dynamically assigned address)
DNS Server IP addresses
Primary server
(Some ISP’s use PPP dynamic assignment to
automatically assign these addresses)
Secondary server
Note: Your router also has the typical connection settings for different countries pre-defined.
You can try setting the country using the router's Graphical User Interface (GUI), and then
verify if the ATM settings are correct for your service provider. If not, then the connection
settings can still be altered through the GUI. Details on using the GUI are shown later in this
document.
Set up your AT-AR440S ADSL Router for Typical Network Scenarios
3
Setting up a Windows based PC for initial GUI
configuration connection
Introduction
AR400 Series routers can be configured via the Command Line Interface (CLI) or Graphical User
Interface (GUI). We recommend starting to configure the router using the GUI. You can then use
the CLI if necessary to complete your configuration.
This section describes how to access the GUI via a switch VLAN port on the router. The GUI
requires a PC and Web browser. The minimum requirements for supported browsers are Internet
Explorer version 5.0 or later, or Netscape 6.2.2 or later, with Java Script enabled.
Browser pop-ups
If you are using a toolbar or plug-in on your browser to block pop-ups, disable it while using the
GUI. The GUI displays detailed configuration options and information in pop-up windows, so make
sure site pop-ups are allowed.
Obtaining an IP address
If another device on your network already uses the router's default IP address, 192.168.1.1, do not
connect your router to the network until you have changed the IP address by using the command
line.
Connect your LAN hub or PC to a VLAN port on the AR440S. The DHCP server has been preenabled on your router, so you can let it allocate an IP address to your PC automatically. By default
most PC operating systems are set such that the network card obtains the IP address automatically.
If you cannot access the GUI, see the troubleshooting section in the document, How to configure
some advanced features on your AT-AR440S ADSL router.
This document is located at:
http://www.alliedtelesyn.co.nz/solutions/examples/pdf/c613-16041-00-A.pdf
Once your PC has obtained an IP address, you can connect to your router's GUI at 192.168.1.1 by
using your Web browser, for example, Internet Explorer or Netscape Navigator.
Set up your AT-AR440S ADSL Router for Typical Network Scenarios
4
By-passing or disabling any Web proxy settings
To access this local GUI server, you might need to define a proxy bypass setting or temporarily
disable any Web proxy settings you may have defined in your Web browser.
To do this with Internet Explorer, click on:
Tools >Internet Options >Connections >LAN Settings
The Local Area Network window will open.
You can either ensure "bypass proxy server for local addresses" is set, or temporarily remove the
proxy definitions you have. These are found in two possible areas:
•
•
the "automatic configuration" fields, or
the manual "proxy sever" fields.
If you find that your proxy definitions are locked down, as shown in the picture above, you probably
need to speak to your company's IS department.
Note: Remember to re-enable your normal proxy settings afterwards, to restore normal
Internet browsing
Now, let’s get started.
Set up your AT-AR440S ADSL Router for Typical Network Scenarios
5
Getting started
1.
Open your Web browser and type in the router’s address.
2.
Enter a username and password.
When you have accessed 192.168.1.1, you will be prompted for a username and password for
logging into the router.
Here is the factory default username and password for management and configuration access, for
Telnet, GUI, and console port access:
User Name: manager
Password: friend
3.
Click OK
For security reasons you need to change your username and password to something unique to you
during your first session. The password can be redefined using the GUI’s Management tools:
Set up your AT-AR440S ADSL Router for Typical Network Scenarios
6
Changing your password
In the router’s GUI menu select:
1.
Management > Users
2.
In the right hand pane, select the Users radio button, then click Modify
3.
Make your modifications and click Apply.
Set up your AT-AR440S ADSL Router for Typical Network Scenarios
7
Using the GUI to configure the router
On first use of the GUI only, you will be taken directly to the Quick Start ADSL setup page.
Here you can quickly configure your ADSL basics. You should start by selecting your country
setting. This will automatically change the connection protocol and ATM profile for your country's
pre-configured default. Some countries offer many different connection types, so you still need to
check to see if these settings are correct for your ADSL Provider’s requirements. Refer to the
details you collected in Table 1 on page 3.
Remember - If you are using a toolbar or plug-in on your browser to block pop-ups, disable
it while using the GUI. The GUI displays detailed configuration options and information in
pop-up windows.
Set up your AT-AR440S ADSL Router for Typical Network Scenarios
8
ATM settings
If the ATM settings are not correct for your ADSL Provider, you can correct them using the VPI,
VCI and Encapsulation fields at the bottom of the page.
In our example below, you can see the default VPI and Encapsulation settings for the UK are zero
and 38 respectively.
If applicable you should also add your PPP username and password, or your static IP address. You
will notice that when selecting PPPoA or PPPoE that the IP address fields are "greyed out", because
dynamic allocation is assumed. If you still need static IP addresses, this can be accessed via the GUI’s
Configuration > IP menu.
Ensure Enable Firewall is ticked as this will provide a stateful inspection firewall, and NAT
solution.
Set up your AT-AR440S ADSL Router for Typical Network Scenarios
9
After completion click the Apply button. Then the following summary screen will be displayed.
At this point, the router should be able to connect successfully to your ISP, using the basic
configuration items you defined plus the default firewall and NAT configuration. If you need to alter
your ADSL configuration in the future, you can do so by accessing the page invoked from clicking
on: Configuration>Layer 2>ADSL.
Testing basic Internet connectivity
To test basic Internet connectivity you should take the following steps:
1.
Go to the GUI’s Diagnostics Command Line.
2.
Enter ‘show adsl=0’ - it should indicate connected.
3.
Enter ‘show ppp’ (for PPPoA or PPPoE) - it should indicate PPP0 is open.
4.
Enter ‘show ip interface’ (for PPPoA or PPPoE) - you should see an IP address has been
automatically assigned to the PPP.
5.
Connect a PC to a VLAN port on your AR440 Series router. Provided the PC is configured for
automatic address assignment (DHCP Client), then an address will be allocated automatically
from the router when you connect. DNS details are also automatically assigned - referring to
your router's DNS Relay facility. You can check this from the command window, Start > Run >
cmd, by entering this command:
ipconfig /all (Win2K and XP)
or
winipcfg (Win98 and ME)
6.
Surf to an Internet address, using your Internet browser, for example, Internet Explorer.
7.
If you find this is not working. Refer to the troubleshooting section on the document “How to
configure some advanced features on your AT-AR440S ADSL router”.
http://www.alliedtelesyn.co.nz/solutions/examples/pdf/c613-16041-00-A.pdf
Set up your AT-AR440S ADSL Router for Typical Network Scenarios
10
Saving your configuration
At this point it would be a good idea to save your configuration work. To do this, select Save from
the GUI menu.
To save your configuration:
1.
Select the New radio button and type adsl in the space provided
2.
Tick the box next to Use this config at bootup
3.
Click Continue
The router will now go through a few stages and save the configuration. This can take
approximately 30 seconds.
The router setup is now complete.
© 2004 Allied Telesyn International Corp. All rights reserved. Information in this document is subject to change without notice.
All company names, logos and product designs that are trademarks or registered trademarks are the property of their respective owners.
www.alliedtelesyn.com
C613-16038-00 REV A