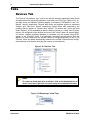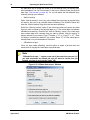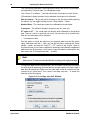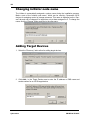
1
Operator’s
M
A
N
U
A
L
miSAN-V-Series
D2D2T Backup with removable
AIT Tape Drive
UM-MV-86
Rev. B1-0801
UM-MV-86-B1-0801
Cybernetics
2
Guide to conventions
Throughout the miSAN-V-Series manual, you will find caution and note boxes similar to
those below. Please read the contents of the cautions and notes carefully.
This icon indicates the existence of a potential hazard that could
result in personal injury, damage to your equipment or loss of data if
the safety instruction is not observed.
This icon indicates useful tips on getting the most from your
miSAN-V-Series.
FCC Notice
This equipment is tested to comply with the limits for a Class A digital device pursuant to
Part 15 of FCC Rules. These limits are designed to provide reasonable protection against
harmful interference when the equipment is operated in a commercial environment. This
equipment generates, uses, and can radiate radio frequency energy and, if not installed
and used in accordance with the instruction manual, may cause harmful interference to
radio communications. Operation of this equipment in a residential area is likely to cause
harmful interference, in which case the user will be required to correct the interference at
his own expense.
Cybernetics
UM-MV-86-B1-0801
3
Table of Contents
Guide to conventions . . . . . . . . . . . . . . . . . . . . . . . . . . . . . . . . . . . . . . . . . . . . . . . . 2
FCC Notice . . . . . . . . . . . . . . . . . . . . . . . . . . . . . . . . . . . . . . . . . . . . . . . . . . . . . . 2
Chapter 1 Introduction to the miSAN
11
miSAN-V-Series Overview . . . . . . . . . . . . . . . . . . . . . . . . . . . . . . . . . . . . . . . . . . . . 11
Options . . . . . . . . . . . . . . . . . . . . . . . . . . . . . . . . . . . . . . . . . . . . . . . . . . . . . . . . . . . 11
Features . . . . . . . . . . . . . . . . . . . . . . . . . . . . . . . . . . . . . . . . . . . . . . . . . . . . . . . . . . 12
Hardware . . . . . . . . . . . . . . . . . . . . . . . . . . . . . . . . . . . . . . . . . . . . . . . . . . . . . . . 12
Software. . . . . . . . . . . . . . . . . . . . . . . . . . . . . . . . . . . . . . . . . . . . . . . . . . . . . . . . 12
Functionality. . . . . . . . . . . . . . . . . . . . . . . . . . . . . . . . . . . . . . . . . . . . . . . . . . . . . . . 13
Network Connection . . . . . . . . . . . . . . . . . . . . . . . . . . . . . . . . . . . . . . . . . . . . . . 13
Parallel SCSI Connection . . . . . . . . . . . . . . . . . . . . . . . . . . . . . . . . . . . . . . . . . . 13
High-Speed Archiving . . . . . . . . . . . . . . . . . . . . . . . . . . . . . . . . . . . . . . . . . . . . . 13
Multiple Host Access . . . . . . . . . . . . . . . . . . . . . . . . . . . . . . . . . . . . . . . . . . . . . . 13
Selective Device Visibility . . . . . . . . . . . . . . . . . . . . . . . . . . . . . . . . . . . . . . . . . . 13
Web Control Panel . . . . . . . . . . . . . . . . . . . . . . . . . . . . . . . . . . . . . . . . . . . . . . . . . . 14
Telnet Menu System. . . . . . . . . . . . . . . . . . . . . . . . . . . . . . . . . . . . . . . . . . . . . . . . . 14
Network Traffic. . . . . . . . . . . . . . . . . . . . . . . . . . . . . . . . . . . . . . . . . . . . . . . . . . . 14
Information available without password. . . . . . . . . . . . . . . . . . . . . . . . . . . . . . . . 14
Uninterruptable Power Supply (UPS) . . . . . . . . . . . . . . . . . . . . . . . . . . . . . . . . . 14
Introduction . . . . . . . . . . . . . . . . . . . . . . . . . . . . . . . . . . . . . . . . . . . . . . . . . . . . . 15
Java™ Installation . . . . . . . . . . . . . . . . . . . . . . . . . . . . . . . . . . . . . . . . . . . . . . . . 15
Telnet Installation . . . . . . . . . . . . . . . . . . . . . . . . . . . . . . . . . . . . . . . . . . . . . . . . . 15
iSCSI Initiator Driver Installation . . . . . . . . . . . . . . . . . . . . . . . . . . . . . . . . . . . . . 15
Chapter 2 Setting Up the miSAN
17
Installation Requirements . . . . . . . . . . . . . . . . . . . . . . . . . . . . . . . . . . . . . . . . . . . . 17
Installing the Hardware Components. . . . . . . . . . . . . . . . . . . . . . . . . . . . . . . . . . . 18
Rackmount Installation . . . . . . . . . . . . . . . . . . . . . . . . . . . . . . . . . . . . . . . . . . . . 18
Parallel SCSI. . . . . . . . . . . . . . . . . . . . . . . . . . . . . . . . . . . . . . . . . . . . . . . . . 18
Connecting the Cables . . . . . . . . . . . . . . . . . . . . . . . . . . . . . . . . . . . . . . . . . . . . . . 18
Parallel SCSI . . . . . . . . . . . . . . . . . . . . . . . . . . . . . . . . . . . . . . . . . . . . . . . . . . . . 18
Network . . . . . . . . . . . . . . . . . . . . . . . . . . . . . . . . . . . . . . . . . . . . . . . . . . . . . . . . 19
Management LAN Port (ETH0) . . . . . . . . . . . . . . . . . . . . . . . . . . . . . . . . . . . 19
iSCSI Network Ports (ETH1, ETH2) . . . . . . . . . . . . . . . . . . . . . . . . . . . . . . . 19
Power . . . . . . . . . . . . . . . . . . . . . . . . . . . . . . . . . . . . . . . . . . . . . . . . . . . . . . . . . 19
Connecting Power to an Uninterruptible Power Supply (UPS) . . . . . . . . . . . 19
Power Button . . . . . . . . . . . . . . . . . . . . . . . . . . . . . . . . . . . . . . . . . . . . . . . . . . . . 20
Configuring the Network and iSCSI Settings . . . . . . . . . . . . . . . . . . . . . . . . . . . . 21
Prerequisites . . . . . . . . . . . . . . . . . . . . . . . . . . . . . . . . . . . . . . . . . . . . . . . . . . . . 21
Network Setup Preparation . . . . . . . . . . . . . . . . . . . . . . . . . . . . . . . . . . . . . . . . . 21
Network Setup . . . . . . . . . . . . . . . . . . . . . . . . . . . . . . . . . . . . . . . . . . . . . . . . . . . 22
iSCSI Communication . . . . . . . . . . . . . . . . . . . . . . . . . . . . . . . . . . . . . . . . . . . . . 22
Remote iSCSI Target Device Setup . . . . . . . . . . . . . . . . . . . . . . . . . . . . . . . 23
miSAN-V-Series iSCSI Features. . . . . . . . . . . . . . . . . . . . . . . . . . . . . . . . . . 24
Host iSCSI Setup . . . . . . . . . . . . . . . . . . . . . . . . . . . . . . . . . . . . . . . . . . . . . 24
User Types . . . . . . . . . . . . . . . . . . . . . . . . . . . . . . . . . . . . . . . . . . . . . . . . . . . . . . . . 24
The Administrator . . . . . . . . . . . . . . . . . . . . . . . . . . . . . . . . . . . . . . . . . . . . . . . . . . 25
The User . . . . . . . . . . . . . . . . . . . . . . . . . . . . . . . . . . . . . . . . . . . . . . . . . . . . . . . . . . 25
The Security Officer . . . . . . . . . . . . . . . . . . . . . . . . . . . . . . . . . . . . . . . . . . . . . . . . . 26
Setting Up the miSAN-V-Series Virtual Components . . . . . . . . . . . . . . . . . . . . . . 26
Initial Setup Guide . . . . . . . . . . . . . . . . . . . . . . . . . . . . . . . . . . . . . . . . . . . . . . . . 26
Cybernetics
UM-MV-12-B1-0801
4
Creating Virtual Components. . . . . . . . . . . . . . . . . . . . . . . . . . . . . . . . . . . . . . . . 26
Deciding How Many Virtual Tapes to Create. . . . . . . . . . . . . . . . . . . . . . . . . 27
Deciding What Kind of Virtual Tape Drives to Create . . . . . . . . . . . . . . . . . . 27
Virtual Standalone Drives . . . . . . . . . . . . . . . . . . . . . . . . . . . . . . . . . . . . 28
Virtual Stacker Drives . . . . . . . . . . . . . . . . . . . . . . . . . . . . . . . . . . . . . . . 28
Deciding How to Assign Virtual Tapes . . . . . . . . . . . . . . . . . . . . . . . . . . . . . 28
Creating Virtual Tapes . . . . . . . . . . . . . . . . . . . . . . . . . . . . . . . . . . . . . . . . . . 28
Creating Virtual Devices . . . . . . . . . . . . . . . . . . . . . . . . . . . . . . . . . . . . . . . . 29
Assigning Virtual Tapes to Virtual Devices . . . . . . . . . . . . . . . . . . . . . . . . . . 30
Configuring a Physical Stacker . . . . . . . . . . . . . . . . . . . . . . . . . . . . . . . . . . . 30
Testing the Installation . . . . . . . . . . . . . . . . . . . . . . . . . . . . . . . . . . . . . . . . . . . . . . 31
Shut Down . . . . . . . . . . . . . . . . . . . . . . . . . . . . . . . . . . . . . . . . . . . . . . . . . . . . . . . . 31
Chapter 3 Operating the Web Control Panel
33
Interface Layout . . . . . . . . . . . . . . . . . . . . . . . . . . . . . . . . . . . . . . . . . . . . . . . . . . . . 33
Introduction . . . . . . . . . . . . . . . . . . . . . . . . . . . . . . . . . . . . . . . . . . . . . . . . . . . . . 33
Main Menu Bar Introduction . . . . . . . . . . . . . . . . . . . . . . . . . . . . . . . . . . . . . . . . 33
Tools . . . . . . . . . . . . . . . . . . . . . . . . . . . . . . . . . . . . . . . . . . . . . . . . . . . . . . . 34
HSTC Options . . . . . . . . . . . . . . . . . . . . . . . . . . . . . . . . . . . . . . . . . . . . . . . . 34
Information . . . . . . . . . . . . . . . . . . . . . . . . . . . . . . . . . . . . . . . . . . . . . . . . . . 34
Browser links. . . . . . . . . . . . . . . . . . . . . . . . . . . . . . . . . . . . . . . . . . . . . . . . . 35
Help. . . . . . . . . . . . . . . . . . . . . . . . . . . . . . . . . . . . . . . . . . . . . . . . . . . . . . . . 35
Tabs introduction . . . . . . . . . . . . . . . . . . . . . . . . . . . . . . . . . . . . . . . . . . . . . . . . . 35
Devices Tab. . . . . . . . . . . . . . . . . . . . . . . . . . . . . . . . . . . . . . . . . . . . . . . . . . 35
Virtual tape Tab . . . . . . . . . . . . . . . . . . . . . . . . . . . . . . . . . . . . . . . . . . . . . . . 36
Physical tapes Tab . . . . . . . . . . . . . . . . . . . . . . . . . . . . . . . . . . . . . . . . . . . . 36
Jobs. . . . . . . . . . . . . . . . . . . . . . . . . . . . . . . . . . . . . . . . . . . . . . . . . . . . . . . . 36
Messages . . . . . . . . . . . . . . . . . . . . . . . . . . . . . . . . . . . . . . . . . . . . . . . . . . . 36
Main Menu. . . . . . . . . . . . . . . . . . . . . . . . . . . . . . . . . . . . . . . . . . . . . . . . . . . . . . . . . 36
Tools . . . . . . . . . . . . . . . . . . . . . . . . . . . . . . . . . . . . . . . . . . . . . . . . . . . . . . . . . . 36
Disk Storage . . . . . . . . . . . . . . . . . . . . . . . . . . . . . . . . . . . . . . . . . . . . . . . . . 37
Create Virtual Tapes . . . . . . . . . . . . . . . . . . . . . . . . . . . . . . . . . . . . . . . . . . . 38
Basic Tab . . . . . . . . . . . . . . . . . . . . . . . . . . . . . . . . . . . . . . . . . . . . . . . . 39
Advanced Tab . . . . . . . . . . . . . . . . . . . . . . . . . . . . . . . . . . . . . . . . . . . . . 40
Format Disks Tab . . . . . . . . . . . . . . . . . . . . . . . . . . . . . . . . . . . . . . . . . . . . . 40
Configure Virtual Devices . . . . . . . . . . . . . . . . . . . . . . . . . . . . . . . . . . . . . . . 41
Assign Virtual Tapes . . . . . . . . . . . . . . . . . . . . . . . . . . . . . . . . . . . . . . . . . . . 42
Physical Stacker Copy Profiles . . . . . . . . . . . . . . . . . . . . . . . . . . . . . . . . . . . 43
Configure Auto-archive . . . . . . . . . . . . . . . . . . . . . . . . . . . . . . . . . . . . . . . . . 44
Set Date and Time . . . . . . . . . . . . . . . . . . . . . . . . . . . . . . . . . . . . . . . . . . . . 45
Update License . . . . . . . . . . . . . . . . . . . . . . . . . . . . . . . . . . . . . . . . . . . . . . . 46
Export or Import Configuration . . . . . . . . . . . . . . . . . . . . . . . . . . . . . . . . . . . 46
Rescan Physical Devices . . . . . . . . . . . . . . . . . . . . . . . . . . . . . . . . . . . . . . . 46
Shut Down the HSTC . . . . . . . . . . . . . . . . . . . . . . . . . . . . . . . . . . . . . . . . . . 47
HSTC Options . . . . . . . . . . . . . . . . . . . . . . . . . . . . . . . . . . . . . . . . . . . . . . . . . . . 49
Configuration. . . . . . . . . . . . . . . . . . . . . . . . . . . . . . . . . . . . . . . . . . . . . . . . . 49
Device ID order. . . . . . . . . . . . . . . . . . . . . . . . . . . . . . . . . . . . . . . . . . . . 49
Host vs. job I/O policy . . . . . . . . . . . . . . . . . . . . . . . . . . . . . . . . . . . . . . . 50
Host I/O idle minutes . . . . . . . . . . . . . . . . . . . . . . . . . . . . . . . . . . . . . . . 51
Overwrite non-committed . . . . . . . . . . . . . . . . . . . . . . . . . . . . . . . . . . . . 51
Drive compression for copying . . . . . . . . . . . . . . . . . . . . . . . . . . . . . . . . 52
Copy volume tags . . . . . . . . . . . . . . . . . . . . . . . . . . . . . . . . . . . . . . . . . . 52
Virtual Device Emulations. . . . . . . . . . . . . . . . . . . . . . . . . . . . . . . . . . . . 52
Receive SNMP messages from UPS . . . . . . . . . . . . . . . . . . . . . . . . . . . 53
Configuring a Tripp Lite® SmartPro®/SmartOnline™ model UPS with
Cybernetics
UM-MV-12-B1-0801
5
SNMPWEBCARD . . . . . . . . . . . . . . . . . . . . . . . . . . . . . . . . . . . . . . . . . . . . . . . . . . . . . . . . . . . . . 54
Data Compression . . . . . . . . . . . . . . . . . . . . . . . . . . . . . . . . . . . . . . . . . . . . . . . . . . 55
SCSI Configuration . . . . . . . . . . . . . . . . . . . . . . . . . . . . . . . . . . . . . . . . . . . . . . . 56
SCSI HBA Ports . . . . . . . . . . . . . . . . . . . . . . . . . . . . . . . . . . . . . . . . . . . . . . 56
HBA X direction . . . . . . . . . . . . . . . . . . . . . . . . . . . . . . . . . . . . . . . . . . . 56
HBA X base SCSI ID . . . . . . . . . . . . . . . . . . . . . . . . . . . . . . . . . . . . . . . 56
HBA X speed . . . . . . . . . . . . . . . . . . . . . . . . . . . . . . . . . . . . . . . . . . . . . 57
Incoming iSCSI Connections from Hosts . . . . . . . . . . . . . . . . . . . . . . . . . . . 57
iSCSI login control . . . . . . . . . . . . . . . . . . . . . . . . . . . . . . . . . . . . . . . . . 57
iSCSI access password . . . . . . . . . . . . . . . . . . . . . . . . . . . . . . . . . . . . . 57
iSCSI host username . . . . . . . . . . . . . . . . . . . . . . . . . . . . . . . . . . . . . . . 57
iSCSI host password . . . . . . . . . . . . . . . . . . . . . . . . . . . . . . . . . . . . . . . 58
Outgoing iSCSI Connections to Devices. . . . . . . . . . . . . . . . . . . . . . . . . . . . 58
Remote iSCSI device X . . . . . . . . . . . . . . . . . . . . . . . . . . . . . . . . . . . . . 58
Device X DNS Name or IP address . . . . . . . . . . . . . . . . . . . . . . . . . . . . 58
Device X iSCSI Username . . . . . . . . . . . . . . . . . . . . . . . . . . . . . . . . . . . 58
Device X iSCSI password. . . . . . . . . . . . . . . . . . . . . . . . . . . . . . . . . . . . 58
Setup for using an external iSCSI device for additional Virtual Tape storage58
Network Configuration. . . . . . . . . . . . . . . . . . . . . . . . . . . . . . . . . . . . . . . . . . 62
Hostname . . . . . . . . . . . . . . . . . . . . . . . . . . . . . . . . . . . . . . . . . . . . . . . . 62
Default gateway . . . . . . . . . . . . . . . . . . . . . . . . . . . . . . . . . . . . . . . . . . . 62
Nameserver . . . . . . . . . . . . . . . . . . . . . . . . . . . . . . . . . . . . . . . . . . . . . . 62
ethX ( 1000 Mbps) . . . . . . . . . . . . . . . . . . . . . . . . . . . . . . . . . . . . . . . . . 62
ethX IP bonding . . . . . . . . . . . . . . . . . . . . . . . . . . . . . . . . . . . . . . . . . . . 64
ethX IP address . . . . . . . . . . . . . . . . . . . . . . . . . . . . . . . . . . . . . . . . . . . 64
ethX subnet mask . . . . . . . . . . . . . . . . . . . . . . . . . . . . . . . . . . . . . . . . . . 64
ethX MTU . . . . . . . . . . . . . . . . . . . . . . . . . . . . . . . . . . . . . . . . . . . . . . . . 64
bondX . . . . . . . . . . . . . . . . . . . . . . . . . . . . . . . . . . . . . . . . . . . . . . . . . . . 65
bondX IP address . . . . . . . . . . . . . . . . . . . . . . . . . . . . . . . . . . . . . . . . . . 65
bondX subnet mask . . . . . . . . . . . . . . . . . . . . . . . . . . . . . . . . . . . . . . . . 65
bondX MTU. . . . . . . . . . . . . . . . . . . . . . . . . . . . . . . . . . . . . . . . . . . . . . . 65
Message Delivery . . . . . . . . . . . . . . . . . . . . . . . . . . . . . . . . . . . . . . . . . . . . . 65
Send messages by email . . . . . . . . . . . . . . . . . . . . . . . . . . . . . . . . . . . . 66
SMTP server. . . . . . . . . . . . . . . . . . . . . . . . . . . . . . . . . . . . . . . . . . . . . . 66
SMTP username. . . . . . . . . . . . . . . . . . . . . . . . . . . . . . . . . . . . . . . . . . . 66
SMTP password . . . . . . . . . . . . . . . . . . . . . . . . . . . . . . . . . . . . . . . . . . . 66
Email address(es). . . . . . . . . . . . . . . . . . . . . . . . . . . . . . . . . . . . . . . . . . 66
Accounts . . . . . . . . . . . . . . . . . . . . . . . . . . . . . . . . . . . . . . . . . . . . . . . . . . . . 67
Admin . . . . . . . . . . . . . . . . . . . . . . . . . . . . . . . . . . . . . . . . . . . . . . . . . . . 67
User . . . . . . . . . . . . . . . . . . . . . . . . . . . . . . . . . . . . . . . . . . . . . . . . . . . . 67
Advanced Options. . . . . . . . . . . . . . . . . . . . . . . . . . . . . . . . . . . . . . . . . . . . . 68
Advanced Menu(s) . . . . . . . . . . . . . . . . . . . . . . . . . . . . . . . . . . . . . . . . . 68
Define Emulations. . . . . . . . . . . . . . . . . . . . . . . . . . . . . . . . . . . . . . . . . . 68
Debugging . . . . . . . . . . . . . . . . . . . . . . . . . . . . . . . . . . . . . . . . . . . . . . . 69
Host iSCSI Debug Messages . . . . . . . . . . . . . . . . . . . . . . . . . . . . . . . . . 69
Information. . . . . . . . . . . . . . . . . . . . . . . . . . . . . . . . . . . . . . . . . . . . . . . . . . . . . . 69
Product Information. . . . . . . . . . . . . . . . . . . . . . . . . . . . . . . . . . . . . . . . . . . . 69
Physical Devices . . . . . . . . . . . . . . . . . . . . . . . . . . . . . . . . . . . . . . . . . . . . . . 70
Virtual Devices . . . . . . . . . . . . . . . . . . . . . . . . . . . . . . . . . . . . . . . . . . . . . . . 70
Virtual device assignments . . . . . . . . . . . . . . . . . . . . . . . . . . . . . . . . . . . . . . 70
Credits and Licenses. . . . . . . . . . . . . . . . . . . . . . . . . . . . . . . . . . . . . . . . . . . 70
Browser links . . . . . . . . . . . . . . . . . . . . . . . . . . . . . . . . . . . . . . . . . . . . . . . . . . . . 70
Tabs . . . . . . . . . . . . . . . . . . . . . . . . . . . . . . . . . . . . . . . . . . . . . . . . . . . . . . . . . . . . . .71
Devices Tab . . . . . . . . . . . . . . . . . . . . . . . . . . . . . . . . . . . . . . . . . . . . . . . . . . . . . 71
Virtual Tape Drive Device Panel . . . . . . . . . . . . . . . . . . . . . . . . . . . . . . . . . . 72
Cybernetics
UM-MV-12-B1-0801
6
Mounted Medium listbox. . . . . . . . . . . . . . . . . . . . . . . . . . . . . . . . . . . . . 72
Autoload checkbox . . . . . . . . . . . . . . . . . . . . . . . . . . . . . . . . . . . . . . . . . 72
Virtual Stacker Device Panel . . . . . . . . . . . . . . . . . . . . . . . . . . . . . . . . . 72
Physical Tape Drive Device Panel . . . . . . . . . . . . . . . . . . . . . . . . . . . . . 75
Menu Button . . . . . . . . . . . . . . . . . . . . . . . . . . . . . . . . . . . . . . . . . . . . . . 76
Host access . . . . . . . . . . . . . . . . . . . . . . . . . . . . . . . . . . . . . . . . . . . . . . 81
Job control . . . . . . . . . . . . . . . . . . . . . . . . . . . . . . . . . . . . . . . . . . . . . . . 81
Physical Stacker Device Panel . . . . . . . . . . . . . . . . . . . . . . . . . . . . . . . . 82
Inventory tab . . . . . . . . . . . . . . . . . . . . . . . . . . . . . . . . . . . . . . . . . . . . . . 82
Properties tab . . . . . . . . . . . . . . . . . . . . . . . . . . . . . . . . . . . . . . . . . . . . . 91
Optical Drive Device Panel . . . . . . . . . . . . . . . . . . . . . . . . . . . . . . . . . . . 91
Virtual Tapes Tab . . . . . . . . . . . . . . . . . . . . . . . . . . . . . . . . . . . . . . . . . . . . . . . . . 93
Status Fields . . . . . . . . . . . . . . . . . . . . . . . . . . . . . . . . . . . . . . . . . . . . . . . . . 93
Virtual Tape Popup Menu . . . . . . . . . . . . . . . . . . . . . . . . . . . . . . . . . . . . . . . 94
Bar code:. . . . . . . . . . . . . . . . . . . . . . . . . . . . . . . . . . . . . . . . . . . . . . . . . . . . 96
Physical Tapes Tab . . . . . . . . . . . . . . . . . . . . . . . . . . . . . . . . . . . . . . . . . . . . 97
Status Fields . . . . . . . . . . . . . . . . . . . . . . . . . . . . . . . . . . . . . . . . . . . . . . 98
Jobs Tab . . . . . . . . . . . . . . . . . . . . . . . . . . . . . . . . . . . . . . . . . . . . . . . . . . . . 99
Jobs Table. . . . . . . . . . . . . . . . . . . . . . . . . . . . . . . . . . . . . . . . . . . . . . . . 99
Job Log . . . . . . . . . . . . . . . . . . . . . . . . . . . . . . . . . . . . . . . . . . . . . . . . . 100
Activity Monitor . . . . . . . . . . . . . . . . . . . . . . . . . . . . . . . . . . . . . . . . . . . 101
Messages Tab . . . . . . . . . . . . . . . . . . . . . . . . . . . . . . . . . . . . . . . . . . . . . . . 102
USB offload. . . . . . . . . . . . . . . . . . . . . . . . . . . . . . . . . . . . . . . . . . . . . . . . . . . . . . . 102
. . . . . . . . . . . . . . . . . . . . . . . . . . . . . . . . . . . . . . . . . . . . . . . . . . . . . . . . . . . . . . . . . 103
Chapter 4 Telnet Menu System
105
Telnet Menu System. . . . . . . . . . . . . . . . . . . . . . . . . . . . . . . . . . . . . . . . . . . . . . . . 105
miSAN-V-Series Messages . . . . . . . . . . . . . . . . . . . . . . . . . . . . . . . . . . . . . . . . 106
Menu Operation . . . . . . . . . . . . . . . . . . . . . . . . . . . . . . . . . . . . . . . . . . . . . . . . . 106
SCSI configuration. . . . . . . . . . . . . . . . . . . . . . . . . . . . . . . . . . . . . . . . . . . . . . . 107
Configure iSCSI hosts . . . . . . . . . . . . . . . . . . . . . . . . . . . . . . . . . . . . . . . . . 107
Assign virtual devices to hosts . . . . . . . . . . . . . . . . . . . . . . . . . . . . . . . . . . 107
Swap SCSI HBA ports . . . . . . . . . . . . . . . . . . . . . . . . . . . . . . . . . . . . . . . . 108
Offline Maintenance. . . . . . . . . . . . . . . . . . . . . . . . . . . . . . . . . . . . . . . . . . . . . . 108
Display debug output . . . . . . . . . . . . . . . . . . . . . . . . . . . . . . . . . . . . . . . . . 108
Rescan SCSI buses . . . . . . . . . . . . . . . . . . . . . . . . . . . . . . . . . . . . . . . . . . 108
Reset options to defaults. . . . . . . . . . . . . . . . . . . . . . . . . . . . . . . . . . . . . . . 109
Test system memory . . . . . . . . . . . . . . . . . . . . . . . . . . . . . . . . . . . . . . . . . . 109
Shut Down. . . . . . . . . . . . . . . . . . . . . . . . . . . . . . . . . . . . . . . . . . . . . . . . . . 109
. . . . . . . . . . . . . . . . . . . . . . . . . . . . . . . . . . . . . . . . . . . . . . . . . . . . . . . . . . . . . . . . . 109
Chapter 5 Using the 3ware Disk Manager®
111
Browser Requirements . . . . . . . . . . . . . . . . . . . . . . . . . . . . . . . . . . . . . . . . . . . . . 111
Accessing From a Browser. . . . . . . . . . . . . . . . . . . . . . . . . . . . . . . . . . . . . . . . . . 111
Logging In . . . . . . . . . . . . . . . . . . . . . . . . . . . . . . . . . . . . . . . . . . . . . . . . . . . . . 112
Working with the 3DM Screens. . . . . . . . . . . . . . . . . . . . . . . . . . . . . . . . . . . . . . . 112
3DM Menus . . . . . . . . . . . . . . . . . . . . . . . . . . . . . . . . . . . . . . . . . . . . . . . . . . . . 113
Refreshing the Screen . . . . . . . . . . . . . . . . . . . . . . . . . . . . . . . . . . . . . . . . . . . . 113
3DM Screens and What They're Used For . . . . . . . . . . . . . . . . . . . . . . . . . . . . 114
Setting Up 3DM Preferences . . . . . . . . . . . . . . . . . . . . . . . . . . . . . . . . . . . . . . . . . 115
Setting and Changing 3DM Passwords . . . . . . . . . . . . . . . . . . . . . . . . . . . . . . . 115
Managing E-mail Event Notification. . . . . . . . . . . . . . . . . . . . . . . . . . . . . . . . . . 115
Caution About Disabling Remote Access . . . . . . . . . . . . . . . . . . . . . . . . . . . . . 116
Caution About Changing Incoming Port # . . . . . . . . . . . . . . . . . . . . . . . . . . . . . 116
Setting the Frequency of Page Refreshes. . . . . . . . . . . . . . . . . . . . . . . . . . . . . 116
Cybernetics
UM-MV-12-B1-0801
7
3DM2 Reference . . . . . . . . . . . . . . . . . . . . . . . . . . . . . . . . . . . . . . . . . . . . . . . . . . . 117
Controller Summary Page . . . . . . . . . . . . . . . . . . . . . . . . . . . . . . . . . . . . . . . . . 118
Controller Details Page . . . . . . . . . . . . . . . . . . . . . . . . . . . . . . . . . . . . . . . . . . . 119
Unit Information Page . . . . . . . . . . . . . . . . . . . . . . . . . . . . . . . . . . . . . . . . . . . . 120
Unit Details Page . . . . . . . . . . . . . . . . . . . . . . . . . . . . . . . . . . . . . . . . . . . . . . . . 121
Drive Information Page . . . . . . . . . . . . . . . . . . . . . . . . . . . . . . . . . . . . . . . . . . . 122
SMART Details About Drive at Particular Port Page . . . . . . . . . . . . . . . . . . . . . 123
Controller Settings Page . . . . . . . . . . . . . . . . . . . . . . . . . . . . . . . . . . . . . . . . . . 124
Background Task Rate . . . . . . . . . . . . . . . . . . . . . . . . . . . . . . . . . . . . . . . . 125
Unit Policies . . . . . . . . . . . . . . . . . . . . . . . . . . . . . . . . . . . . . . . . . . . . . . . . 125
Unit Names . . . . . . . . . . . . . . . . . . . . . . . . . . . . . . . . . . . . . . . . . . . . . . . . . 126
Other Controller Settings. . . . . . . . . . . . . . . . . . . . . . . . . . . . . . . . . . . . . . . 126
Scheduling Page . . . . . . . . . . . . . . . . . . . . . . . . . . . . . . . . . . . . . . . . . . . . . . . . 127
About Task Schedules. . . . . . . . . . . . . . . . . . . . . . . . . . . . . . . . . . . . . . . . . 128
About Self-tests . . . . . . . . . . . . . . . . . . . . . . . . . . . . . . . . . . . . . . . . . . . . . . 128
Maintenance Page. . . . . . . . . . . . . . . . . . . . . . . . . . . . . . . . . . . . . . . . . . . . . . . 129
Rescan Controller . . . . . . . . . . . . . . . . . . . . . . . . . . . . . . . . . . . . . . . . . . . . 129
Unit Maintenance . . . . . . . . . . . . . . . . . . . . . . . . . . . . . . . . . . . . . . . . . 130
Unit Information . . . . . . . . . . . . . . . . . . . . . . . . . . . . . . . . . . . . . . . . . . 130
Drive Information . . . . . . . . . . . . . . . . . . . . . . . . . . . . . . . . . . . . . . . . . 130
Maintenance Task Buttons . . . . . . . . . . . . . . . . . . . . . . . . . . . . . . . . . . 131
Available Drives (to Create Units). . . . . . . . . . . . . . . . . . . . . . . . . . . . . 132
Alarms Page . . . . . . . . . . . . . . . . . . . . . . . . . . . . . . . . . . . . . . . . . . . . . . . . . . . 133
3DM Settings Page . . . . . . . . . . . . . . . . . . . . . . . . . . . . . . . . . . . . . . . . . . . . . . 134
E-mail Notification . . . . . . . . . . . . . . . . . . . . . . . . . . . . . . . . . . . . . . . . . . . . 135
Password . . . . . . . . . . . . . . . . . . . . . . . . . . . . . . . . . . . . . . . . . . . . . . . . . . 135
Page Refresh . . . . . . . . . . . . . . . . . . . . . . . . . . . . . . . . . . . . . . . . . . . . . . . 135
Remote Access . . . . . . . . . . . . . . . . . . . . . . . . . . . . . . . . . . . . . . . . . . . . . . 136
Incoming Port # . . . . . . . . . . . . . . . . . . . . . . . . . . . . . . . . . . . . . . . . . . . . . . 136
Configuring Units . . . . . . . . . . . . . . . . . . . . . . . . . . . . . . . . . . . . . . . . . . . . . . . . 136
Creating a New Unit . . . . . . . . . . . . . . . . . . . . . . . . . . . . . . . . . . . . . . . . . . 136
Drives to Be Included in the Unit . . . . . . . . . . . . . . . . . . . . . . . . . . . . . 136
Type of RAID Configuration . . . . . . . . . . . . . . . . . . . . . . . . . . . . . . . . . 137
Rebuilding a Unit. . . . . . . . . . . . . . . . . . . . . . . . . . . . . . . . . . . . . . . . . . . . . 137
Configuring Drives . . . . . . . . . . . . . . . . . . . . . . . . . . . . . . . . . . . . . . . . . . . . . . . 138
Creating a Hot Spare. . . . . . . . . . . . . . . . . . . . . . . . . . . . . . . . . . . . . . . . . . 138
Adding a Drive. . . . . . . . . . . . . . . . . . . . . . . . . . . . . . . . . . . . . . . . . . . . . . . 138
Removing a Drive . . . . . . . . . . . . . . . . . . . . . . . . . . . . . . . . . . . . . . . . . . . . 138
Chapter 6 Packing and Shipping Instructions
141
Removing the miSAN-V-Series from its Installation Environment . . . . . . . . . . 141
Using the Proper Packing Materials. . . . . . . . . . . . . . . . . . . . . . . . . . . . . . . . . . . 142
Chapter 7 Product Specifications
147
Supported iSCSI Initiators . . . . . . . . . . . . . . . . . . . . . . . . . . . . . . . . . . . . . . . . . 147
Drive Interface Compatibility . . . . . . . . . . . . . . . . . . . . . . . . . . . . . . . . . . . . . . . 147
Ethernet Interfaces . . . . . . . . . . . . . . . . . . . . . . . . . . . . . . . . . . . . . . . . . . . . . . 147
Management LAN Port (ETH0) . . . . . . . . . . . . . . . . . . . . . . . . . . . . . . . . . . 147
iSCSI Network Ports (ETH1, ETH2) . . . . . . . . . . . . . . . . . . . . . . . . . . . . . . 148
SCSI Parallel Interfaces . . . . . . . . . . . . . . . . . . . . . . . . . . . . . . . . . . . . . . . . . . 148
Low Voltage Differential (LVD) . . . . . . . . . . . . . . . . . . . . . . . . . . . . . . . . . . 148
Physical Dimensions . . . . . . . . . . . . . . . . . . . . . . . . . . . . . . . . . . . . . . . . . . . . . 148
Power Supply . . . . . . . . . . . . . . . . . . . . . . . . . . . . . . . . . . . . . . . . . . . . . . . . . . 148
Humidity and Temperature . . . . . . . . . . . . . . . . . . . . . . . . . . . . . . . . . . . . . . . . 148
Non-operating . . . . . . . . . . . . . . . . . . . . . . . . . . . . . . . . . . . . . . . . . . . . . . . 148
Cybernetics
UM-MV-12-B1-0801
8
Operating . . . . . . . . . . . . . . . . . . . . . . . . . . . . . . . . . . . . . . . . . . . . . . . . . . 148
Appendix A Microsoft® iSCSI Initiator Software Client
A-149
Downloading the Setup Program . . . . . . . . . . . . . . . . . . . . . . . . . . . . . . . . . . . . . 149
Installing the Software . . . . . . . . . . . . . . . . . . . . . . . . . . . . . . . . . . . . . . . . . . . . . . 151
Configuring the iSCSI Initiator . . . . . . . . . . . . . . . . . . . . . . . . . . . . . . . . . . . . . . . 154
Changing initiator node name . . . . . . . . . . . . . . . . . . . . . . . . . . . . . . . . . . . . . . 155
Adding Target Devices. . . . . . . . . . . . . . . . . . . . . . . . . . . . . . . . . . . . . . . . . . . . 155
Creating System Dependencies . . . . . . . . . . . . . . . . . . . . . . . . . . . . . . . . . . . . . . 158
Using iSCSI Disk Devices with the iSCSI Initiator . . . . . . . . . . . . . . . . . . . . . . . 158
Using Backup Software with the iSCSI Initiator . . . . . . . . . . . . . . . . . . . . . . . . . 160
Logging Off. . . . . . . . . . . . . . . . . . . . . . . . . . . . . . . . . . . . . . . . . . . . . . . . . . . . . . . 161
Appendix B Linux iSCSI Initiator
B-163
Introduction . . . . . . . . . . . . . . . . . . . . . . . . . . . . . . . . . . . . . . . . . . . . . . . . . . . . . . 163
Installation . . . . . . . . . . . . . . . . . . . . . . . . . . . . . . . . . . . . . . . . . . . . . . . . . . . . . . . 163
Linux Kernel 2.6 Notes . . . . . . . . . . . . . . . . . . . . . . . . . . . . . . . . . . . . . . . . . . . 163
Core-iSCSI Setup . . . . . . . . . . . . . . . . . . . . . . . . . . . . . . . . . . . . . . . . . . . . . . . 164
Debian lk 2.6 . . . . . . . . . . . . . . . . . . . . . . . . . . . . . . . . . . . . . . . . . . . . . . . . . . . 164
Red Hat 9 & Enterprise Linux 3 . . . . . . . . . . . . . . . . . . . . . . . . . . . . . . . . . . . . . 165
SuSE Linux Pro 9.1 . . . . . . . . . . . . . . . . . . . . . . . . . . . . . . . . . . . . . . . . . . . . . . 165
Source Compilation. . . . . . . . . . . . . . . . . . . . . . . . . . . . . . . . . . . . . . . . . . . 165
Setup. . . . . . . . . . . . . . . . . . . . . . . . . . . . . . . . . . . . . . . . . . . . . . . . . . . . . . 165
Test the setup . . . . . . . . . . . . . . . . . . . . . . . . . . . . . . . . . . . . . . . . . . . . . . . 165
Appendix C Glossary
C-167
Appendix D Common Questions
D-175
Appendix E Return Policies
E-179
Shipping Damage. . . . . . . . . . . . . . . . . . . . . . . . . . . . . . . . . . . . . . . . . . . . . . . . . . 179
Hardware Products . . . . . . . . . . . . . . . . . . . . . . . . . . . . . . . . . . . . . . . . . . . . . . 179
Software Products . . . . . . . . . . . . . . . . . . . . . . . . . . . . . . . . . . . . . . . . . . . . . . . 180
Tape Media Products . . . . . . . . . . . . . . . . . . . . . . . . . . . . . . . . . . . . . . . . . . . . . 180
Promotional Items . . . . . . . . . . . . . . . . . . . . . . . . . . . . . . . . . . . . . . . . . . . . . . . 180
Maintenance Contracts . . . . . . . . . . . . . . . . . . . . . . . . . . . . . . . . . . . . . . . . . . . 180
Exceptions to Cybernetics’ 30-day Hardware Return Policy: . . . . . . . . . . . . . . 180
Return Procedure. . . . . . . . . . . . . . . . . . . . . . . . . . . . . . . . . . . . . . . . . . . . . . . . . . 180
Appendix F Technical Support
F-183
Appendix G Cybernetics miSAN-V-Series Notices
G-i
UM-MV-12-B1-0801
Cybernetics
9
List of Figures
Figure 2-1 miSAN-V-Series Rear Components. . . . . . . . . . . . . . . . . . . . . . . . . 18
Figure 2-2 miSAN-V-Series Front Components . . . . . . . . . . . . . . . . . . . . . . . . 20
Figure 2-3 “Confirm shutdown method” Window. . . . . . . . . . . . . . . . . . . . . . . . 32
Figure 3-1 Main Menu Bar . . . . . . . . . . . . . . . . . . . . . . . . . . . . . . . . . . . . . . . . 33
Figure 3-2 “Tools” Menu . . . . . . . . . . . . . . . . . . . . . . . . . . . . . . . . . . . . . . . . . . 34
Figure 3-3 “HSTC Options” Menu . . . . . . . . . . . . . . . . . . . . . . . . . . . . . . . . . . . 34
Figure 3-4 Information. . . . . . . . . . . . . . . . . . . . . . . . . . . . . . . . . . . . . . . . . . . . 35
Figure 3-5 Information. . . . . . . . . . . . . . . . . . . . . . . . . . . . . . . . . . . . . . . . . . . . 35
Figure 3-6 “Browser links” Menu . . . . . . . . . . . . . . . . . . . . . . . . . . . . . . . . . . . . 35
Figure 3-7 “Help” Menu . . . . . . . . . . . . . . . . . . . . . . . . . . . . . . . . . . . . . . . . . . . 35
Figure 3-8 “Tools” Menu . . . . . . . . . . . . . . . . . . . . . . . . . . . . . . . . . . . . . . . . . . 37
Figure 3-9 Virtual Tape Disk Space Allocation . . . . . . . . . . . . . . . . . . . . . . . . . 38
Figure 3-10 Create Virtual Tapes Basic Tab . . . . . . . . . . . . . . . . . . . . . . . . . . . 40
Figure 3-11 Create Virtual Tapes “Advanced” Tab . . . . . . . . . . . . . . . . . . . . . . 40
Figure 3-12 Create Virtual Tapes “Format disks” Tab . . . . . . . . . . . . . . . . . . . . 41
Figure 3-13 “Configure virtual devices” Window . . . . . . . . . . . . . . . . . . . . . . . . 42
Figure 3-14 “Virtual tape assignments” Window . . . . . . . . . . . . . . . . . . . . . . . . 42
Figure 3-15 “Physical stacker copy profiles” Window . . . . . . . . . . . . . . . . . . . . 43
Figure 3-16 “Auto-archive configuration” Window. . . . . . . . . . . . . . . . . . . . . . . 44
Figure 3-17 “Set date and time” Window . . . . . . . . . . . . . . . . . . . . . . . . . . . . . 46
Figure 3-18 “Update License” Window . . . . . . . . . . . . . . . . . . . . . . . . . . . . . . . 46
Figure 3-19 “Rescan physical devices” Window . . . . . . . . . . . . . . . . . . . . . . . . 47
Figure 3-20 “Confirm shutdown method” Window. . . . . . . . . . . . . . . . . . . . . . . 48
Figure 3-21 Configuration . . . . . . . . . . . . . . . . . . . . . . . . . . . . . . . . . . . . . . . . . 49
Figure 3-22 “Devices” Tab. . . . . . . . . . . . . . . . . . . . . . . . . . . . . . . . . . . . . . . . . 71
Figure 3-23 Renaming a Virtual Tape Drive . . . . . . . . . . . . . . . . . . . . . . . . . . . 71
Figure 3-24 Virtual Tape Drive Device Panel . . . . . . . . . . . . . . . . . . . . . . . . . . 72
Figure 3-25 Virtual Stacker Device Panel . . . . . . . . . . . . . . . . . . . . . . . . . . . . . 73
Figure 3-26 “Move to slot” Popup Menu . . . . . . . . . . . . . . . . . . . . . . . . . . . . . . 74
Figure 3-27 “Move to drive” Popup Menu . . . . . . . . . . . . . . . . . . . . . . . . . . . . . 74
Figure 3-28 Physical Tape Drive Device Panel . . . . . . . . . . . . . . . . . . . . . . . . . 75
Figure 3-29 “Setup offload” Window . . . . . . . . . . . . . . . . . . . . . . . . . . . . . . . . . 77
Figure 3-30 “Select virtual tape” Window . . . . . . . . . . . . . . . . . . . . . . . . . . . . . 77
Figure 3-31 “Clear VT for offloading” Option. . . . . . . . . . . . . . . . . . . . . . . . . . . 78
Figure 3-32 “Offload disk to tape” Window . . . . . . . . . . . . . . . . . . . . . . . . . . . . 79
Figure 3-33 “Load tape onto disk” Window . . . . . . . . . . . . . . . . . . . . . . . . . . . . 80
Figure 3-34 Physical Stacker Device Panel . . . . . . . . . . . . . . . . . . . . . . . . . . . 83
Figure 3-35 “Setup offload” Window . . . . . . . . . . . . . . . . . . . . . . . . . . . . . . . . . 84
Figure 3-36 Assigning a Virtual Tape to a Physical Tape . . . . . . . . . . . . . . . . . 84
Figure 3-37 “Wait for backup” Option . . . . . . . . . . . . . . . . . . . . . . . . . . . . . . . . 86
Figure 3-38 “Clear VT for offloading” Option. . . . . . . . . . . . . . . . . . . . . . . . . . . 86
Figure 3-39 “Copy selections” Tab . . . . . . . . . . . . . . . . . . . . . . . . . . . . . . . . . . 87
Figure 3-40 “Copy profiles” Frame . . . . . . . . . . . . . . . . . . . . . . . . . . . . . . . . . . 87
Figure 3-41 “Copy options” Tab. . . . . . . . . . . . . . . . . . . . . . . . . . . . . . . . . . . . . 87
Figure 3-42 “Load tapes onto disk” Window . . . . . . . . . . . . . . . . . . . . . . . . . . . 89
Figure 3-43 Assigning Physical Tapes To Copy . . . . . . . . . . . . . . . . . . . . . . . . 89
Figure 3-44 Physical Stacker “Properties” Tab . . . . . . . . . . . . . . . . . . . . . . . . . 91
Figure 3-45 Optical Drive Device Panel . . . . . . . . . . . . . . . . . . . . . . . . . . . . . . 92
Figure 3-46 “Select virtual tape to backup” Window . . . . . . . . . . . . . . . . . . . . . 93
Figure 3-47 “Virtual tapes” Tab . . . . . . . . . . . . . . . . . . . . . . . . . . . . . . . . . . . . . 93
Figure 3-48 Virtual Tape Popup Menu . . . . . . . . . . . . . . . . . . . . . . . . . . . . . . . 94
Figure 3-49 “Rename virtual tapes” Window. . . . . . . . . . . . . . . . . . . . . . . . . . . 94
Figure 3-50 “Select copy destination” Window . . . . . . . . . . . . . . . . . . . . . . . . . 95
Cybernetics
UM-MV-86-B1-0801
10
Figure 3-51 “Confirm data overwrite” Window . . . . . . . . . . . . . . . . . . . . . . . . . 95
Figure 3-52 “Manage volume tags” Window . . . . . . . . . . . . . . . . . . . . . . . . . . . 96
Figure 3-53 “Copy profiles” Frame . . . . . . . . . . . . . . . . . . . . . . . . . . . . . . . . . . 96
Figure 3-54 “Edit” Tab for Volume Tags. . . . . . . . . . . . . . . . . . . . . . . . . . . . . . . 97
Figure 3-55 Virtual Tape Properties Windows. . . . . . . . . . . . . . . . . . . . . . . . . . 97
Figure 3-56 “Physical tapes” Tab . . . . . . . . . . . . . . . . . . . . . . . . . . . . . . . . . . . 98
Figure 3-57 “Jobs” Tab . . . . . . . . . . . . . . . . . . . . . . . . . . . . . . . . . . . . . . . . . . . 99
Figure 3-58 Exporting the “Job log”. . . . . . . . . . . . . . . . . . . . . . . . . . . . . . . . . . 101
Figure 3-59 “Activity monitor” Tab . . . . . . . . . . . . . . . . . . . . . . . . . . . . . . . . . . . 101
Figure 3-60 “Messages” Tab . . . . . . . . . . . . . . . . . . . . . . . . . . . . . . . . . . . . . . . 102
Figure 3-61 New Message Indicator . . . . . . . . . . . . . . . . . . . . . . . . . . . . . . . . . 102
Figure 5-1 3DM Main Screen . . . . . . . . . . . . . . . . . . . . . . . . . . . . . . . . . . . . . . 112
Figure 5-2 3DM Menu Bar. . . . . . . . . . . . . . . . . . . . . . . . . . . . . . . . . . . . . . . . . 113
Figure 5-3 Controller Summary Page . . . . . . . . . . . . . . . . . . . . . . . . . . . . . . . . 118
Figure 5-4 Controller Details Page . . . . . . . . . . . . . . . . . . . . . . . . . . . . . . . . . . 119
Figure 5-5 Unit Information Page . . . . . . . . . . . . . . . . . . . . . . . . . . . . . . . . . . . 120
Figure 5-6 Unit Details Page . . . . . . . . . . . . . . . . . . . . . . . . . . . . . . . . . . . . . . . 121
Figure 5-7 Drive Information Page . . . . . . . . . . . . . . . . . . . . . . . . . . . . . . . . . . 122
Figure 5-8 S.M.A.R.T Data Page . . . . . . . . . . . . . . . . . . . . . . . . . . . . . . . . . . . 123
Figure 5-9 Controller Settings Page . . . . . . . . . . . . . . . . . . . . . . . . . . . . . . . . . 124
Figure 5-10 Scheduling Page . . . . . . . . . . . . . . . . . . . . . . . . . . . . . . . . . . . . . . 127
Figure 5-11 Maintenance Page . . . . . . . . . . . . . . . . . . . . . . . . . . . . . . . . . . . . . 129
Figure 5-12 3DM Settings Page . . . . . . . . . . . . . . . . . . . . . . . . . . . . . . . . . . . . 134
Figure 5-13 Removing a Drive in 3DM . . . . . . . . . . . . . . . . . . . . . . . . . . . . . . . 139
Figure 5-14 Result of Removing Drive from Unit in 3DM . . . . . . . . . . . . . . . . . 140
Figure A-1 Advanced Settings . . . . . . . . . . . . . . . . . . . . . . . . . . . . . . . . . . . . . 156
Cybernetics
UM-MV-86-B1-0801
11
Introduction to the miSAN
Chapter 1
Introduction to the miSAN
miSAN-V-Series Overview
The Cybernetics miSAN-V-Series is a disk-based storage appliance that runs Cybernetics’ CY-HSTC (High Speed Tape Cache) tape virtualization engine. Using the HSTC
engine, the miSAN-V-Series emulates conventional tape drives and tape cartridges. Host
applications use miSAN-V-Series virtual tapes and drives as conventional backup
resources. Virtual drives appear to hosts as physically-attached, parallel SCSI devices.
Virtual tapes appear as tape cartridge images written in their native format. The miSANV-Series stores virtual tapes securely on disk drives and allows for copying to physical
tape cartridges.
miSAN-V-Series virtual drives write and read data using virtual tapes at speeds unreachable with physical devices.
miSAN-V-Series resources are administered remotely over the network using a web
browser or telnet terminal. Using the iSCSI protocol, the miSAN-V-Series can function as
a network backup solution, by offering tape backup and archiving services to multiple
hosts. Virtual tape backups can be automatically duplicated to tape cartridges, assuring
data integrity by maintaining redundant tape backups.
The miSAN-V-Series increases the functionality and extends the usefulness of a current
parallel SCSI backup solution. iSCSI provides network accessibility for peripheral backup
devices. With virtual tape drive autoloading, the miSAN-V-Series handles tapes like a
library changer. The internally mounted AIT tape drive allows for integrated tape offload.
Attached tape drives and tape libraries, connected remotely via iSCSI, can also be made
available for direct host access.
Options
The miSAN-V-Series models use internal hot-swap disk drives for the virtual tape cache.
The total storage capacity for the virtual tape cache is based on the number and configuration of the disk drives. For example, the miSAN-V-Series, with six internal disk drives of
nearly 750 GB capacity each, will have about 4.5 TB of raw capacity available for the virtual tape cache. However, in a RAID 5 configuration, the usable capacity would be
approximately 3.75TB. In the most secure, and recommended configuration of RAID 5
plus Hot Spare, usable capacity would be about 3.0TB.
Cybernetics
UM-MV-86-B1-0801
12
Introduction to the miSAN
Standard miSAN-V-Series models include software support for virtual tapes, drives and libraries.
Hardware support is offered for data backup and restoration using the integrated SCSI tape drive or
via network with the iSCSI interface.
The LVD parallel SCSI interface can allow the miSAN-V-Series to connect directly to a host system,
either instead of or in addition to the iSCSI interface, allowing for off-network backup and data restoration.
All miSAN-V-Series models come with an integrated Tape Drive. A new feature for miSAN-V-Series
is a removable AIT Tape Drive. If your model comes equipped with this feature, please note that the
drive must not be installed or removed while the miSAN-V-Series is powered on. For more details on
this feature, please see the Removeable AIT manual that was included in your product documentation CD.
Caution
Although the miSAN-V-Series uses a removable AIT drive, the tape
drive is NOT able to be hot swapped in the miSAN-V6. In order to
remove or install the tape drive you must power down the miSAN first.
Not doing so can cause damage that will make the miSAN inoperable.
Features
Hardware
•
Two iSCSI interface ports for data transfer (Gigabit Ethernet, 10/100/1000Base-T)
•
One Ethernet interface port for remote administration (Gigabit Ethernet, 10/100/1000Base-T)
(Web Control Panel and Telnet Menu System)
•
Two 68-pin VHDCI LVD ports (“Host”: Ultra160, “Reserved”: Ultra320)
•
Removable AIT Tape drive
•
Up to 6 Hot Swap SATA Disk Drives
Software
•
CY-HSTC (High Speed Tape Cache) tape virtualization engine
•
Web browser-based control panel
•
Telnet menu system control
•
iSCSI interface for multiple-host access
•
optional Tape Library Control support
Cybernetics
UM-MV-86-B1-0801
13
Introduction to the miSAN
Functionality
Network Connection
The miSAN-V-Series includes two Gigabit Ethernet network interfaces (10/100/1000Base-T capable)
for iSCSI data transfer. Each interface provides a connection for hosts to access and use the
miSAN-V-Series virtual devices like directly-connected SCSI devices. A third Gigabit Ethernet interface (10/100/1000Base-T capable) provides a connection for hosts to configure and operate the
miSAN-V-Series via the Web Control Panel and Telnet Menu Interface.
Parallel SCSI Connection
The two installed Ultra 3 Wide LVD parallel SCSI ports are available to provide the option for a direct
host connection. With a single parallel SCSI interface, the miSAN-V-Series offers a direct SCSI path
to a tape drive or library for archiving virtual tapes to physical tapes. As an option, the miSAN-VSeries can also be connected to a host, so that the directly-connected host can use the miSAN-VSeries, without reducing network bandwidth, while allowing iSCSI remote backups over the network.
High-Speed Archiving
With disk-speed virtual tape access, and gigabit-capable data transfers for iSCSI, the miSAN-VSeries reaches backup speeds that exceed even the fastest SCSI tape drive. miSAN-V-Series hardware and software are tuned to generate the widest possible data pipe for increased archiving
speed. Multiple Ethernet interfaces can be aggregated (“bonded”) for increased data transfer bandwidth. The RAID-based disk storage provides enhanced data integrity and security. The miSAN-VSeries makes efficient use of storage space and network bandwidth. It transfers stored data in raw
block format without the overhead of traditional file systems. This can dramatically narrow the time
required for even the most extensive backup schedule. Limited and broad scale restores from virtual
tapes are accelerated as well.
Multiple Host Access
The Web Control Panel allows the ability to administer the miSAN-V-Series, using a web browser,
from any point on the network. The iSCSI interface allows any iSCSI-capable host system to write
data to the miSAN-V-Series.
The miSAN-V-Series can maintain concurrent host connections. This allows multiple hosts to operate and view the status of the miSAN-V-Series simultaneously. The gigabit bandwidth combined with
disk-to-disk transfer rates enables the miSAN-V-Series to support and maintain high backup speeds
from multiple host systems to multiple virtual tape drives. This level of multitasking greatly decreases
the necessary backup time window.
Selective Device Visibility
The miSAN-V-Series allows you to make individual virtual or physical devices available only to
selected host systems via iSCSI or a direct parallel SCSI connection. This allows multiple simultaneous backups. Each host system sees only its designated tape device(s) and writes only to its designated tapes at disk-to-disk speeds.
Cybernetics
UM-MV-86-B1-0801
14
Introduction to the miSAN
Web Control Panel
The miSAN-V-Series offers a universally compatible Web Control Panel accessible
through a network connection. The Web Control Panel is used for configuring, operating
and viewing the status of the miSAN-V-Series in real-time. Multiple clients can access the
interface using any Java™-enabled web browser. Chapter 3 “Operation” describes the
Web Control Panel layout and functions.
Telnet Menu System
The miSAN-V-Series provides an extensive text-based menu system for remote configuration via telnet over a network connection. Used primarily for device and network setup
or offline maintenance, the telnet menu system allows a client to view and make changes
to the miSAN-V-Series configuration. Chapter 3 “Operation” describes the Telnet Menu
System context-sensitive menus and functions.
Network Traffic
Some network traffic is encrypted for security purposes, and some network traffic isn't
encrypted.
Encrypted:
•
Control link between miSAN and Java applet
•
Web browser session to 3ware 3DM2 utility
•
iSCSI passwords during login
Not encrypted:
•
iSCSI data during backup or restore
•
Telnet session to miSAN
It would normally be safe to access the Java applet or 3ware 3DM2 utility over an
untrusted network, but iSCSI and telnet should be used only over trusted networks
Information available without password
The miSAN makes the following information available without asking for a password:
1) The debug log
2) The menu settings page (passwords are not shown)
3) The hardware info page
4) The Java applet can be downloaded but not used without a password
Uninterruptable Power Supply (UPS)
The miSAN has the ability to receive SNMP messages from a UPS to shut down cleanly
before power fails. This feature is turned off by default as a security measure because the
SNMP messages don't include passwords for authentication. If you enable this feature,
Cybernetics
UM-MV-86-B1-0801
Introduction to the miSAN
15
an illegitimate device on the network could perform a denial-of-service attack on the
miSAN by sending it a SNMP message to shut down.
Open Ports
The miSAN has the following open ports:
23 Telnet
80 HTTP
162 SNMP-trap
888 3ware 3DM2
3260 iSCSI
18083 Java applet control
Client and Host Software
Introduction
The miSAN-V-Series is accessed and controlled over a TCP/IP network connection. Two
methods are available: a Java™-based graphical interface and text-only telnet menus.
Since some configuration items are available exclusively via either the Java-based Web
Control Panel or the Telnet Menu System, both interfaces should be available.
Java™ Installation
The miSAN-V-Series requires at least one host system installed with a web browser and
the Java™ plug-in (version 1.4.2 or later) be available on the local network. The Java
plug-in is included with most installations of the Java Runtime Environment™ (JRE) or
Java Virtual Machine™ (JVM).
Refer to the Sun Microsystems Java website (http://www.java.sun.com) for a list of compatible operating systems and download locations. The miSAN-V-Series’s Java-based
Web Control Panel will not be available until the unit is connected to the network and configured, as described later in this chapter.
Telnet Installation
The miSAN-V-Series requires at least one host system installed with telnet client software
for access to the text-only Telnet Menu System. The menu system will not be available
until the unit is connected to the network and configured. For convenience, it is recommended that the same host system be used for both the Java™ Web Control Panel and
the Telnet Menu System, although this is not required.
iSCSI Initiator Driver Installation
Internet SCSI (iSCSI) refers to a method of transmitting SCSI commands, data and status
across Ethernet-based transmission control protocol/Internet protocol (TCP/IP) networks.
This allows SCSI devices, such as tape drives, and SCSI-aware software, such as
backup applications, to communicate remotely via existing IP networks. To do this, iSCSI
uses an interface for both the host system, the initiator, and the miSAN-V-Series, the target, to encapsulate SCSI within TCP/IP packets.
On a host system (the initiator), the iSCSI interface will typically include a TCP/IP network
interface card (NIC) and iSCSI initiator software (driver or daemon) that presents a virtual
UM-MV-86-B1-0801
Cybernetics
16
Introduction to the miSAN
SCSI host bus adapter (HBA) to the operating system and application software. To the
host system, this appears to be a physical HBA, but all traffic for the iSCSI HBA is encapsulated for delivery via the network to the remote iSCSI target.
Host systems that will transmit commands and data via iSCSI should have iSCSI initiator
software installed and configured. iSCSI initiator drivers are available for many operating
systems. For host systems running the Windows® operating system, Microsoft® offers an
iSCSI initiator driver. See Appendix A, “Microsoft® iSCSI Initiator Software Client”, for
information on downloading, installing and configuring the driver. Linux users should see
Appendix B “Linux iSCSI Initiator setup..
Host systems for which iSCSI initiator drivers are not available cannot access iSCSI
devices directly. For these systems, the Cybernetics iClient device is available, which
enables hosts to access remote iSCSI devices as if they were directly connected to the
host system. The iClient connects to the SCSI bus on the host system and relays SCSI
commands and responses between the host system and the iSCSI target devices via the
network.
Cybernetics
UM-MV-86-B1-0801
17
Setting Up the miSAN
Chapter 2
Setting Up the miSAN
This chapter provide requirements and instructions for unpacking and installing the
miSAN-V-Series:
•
Installation Requirements
•
Installing the Hardware and Software Components
•
Connecting the Cables
•
Configuring the Network and iSCSI Settings
•
Setting Up the miSAN-V-Series Virtual Components
•
Testing the Installation
To ensure correct installation and proper operation, make sure all the items listed in
“Installation Requirements” are available before beginning.
Installation Requirements
Make sure the following are available before beginning the installation:
•
Level surface (or 2U rackmount space) near a readily accessible power outlet
•
Cybernetics miSAN-V-Series unit
•
Rackmount hardware kit and tools for rackmount installations
•
Standard, 3-prong AC power cord (IEC320 C13 to NEMA 5-15P) for each power
supply (2 cords)
•
Ethernet cable (CAT 5e or 6 unshielded twisted pair with RJ-45 connector) for each
standard network interface (3)
•
Parallel SCSI cable with male, 68-pin connector for each SCSI device. Depending on
case configuration, the required connector may be either VHDCI 68-pin or High
Density
68-pin socket (Ultra Wide SCSI-3).
•
Either the Microsoft® Internet Explorer 6.0 or Mozilla™ Firefox® 1.0 Web browser
with the Java™ plug-in version 1.4.2 or later, and telnet client software, on a network
accessible host system for configuration and operation of the miSAN-V-Series
Cybernetics
UM-MV-86-B1-0801
18
Setting Up the miSAN
Installing the Hardware Components
Rackmount Installation
The rackmount installation requires a 2U space in your rack. Follow the instructions
included in the rackmount kit.
Parallel SCSI
Host systems that will transmit commands and data via a directly-connected SCSI interface to the miSAN-V-Series should have the host SCSI bus adapter installed and configured.
Connecting the Cables
Parallel SCSI
The miSAN-V-Series includes two installed VHDCI 68-pin LVD ports. Each parallel SCSI
port is terminated internally. The port marked “host” is an Ultra160 LVD which is factoryset to connect to an initiator (host system). The port marked “Reserved” or “Unused” is
used for the internal tape drive and should not be connected to by the user. The miSANV-Series may not function properly if any device is attached to the reserved port..
When attaching SCSI cables to the miSAN-V-Series, make sure the
host is connected to the appropriately labeled SCSI port.
Figure 2-1 shows the rear view of a typical miSAN-V-Series.
Figure 2-1 miSAN-V-Series Rear Components
Network Reset Button Hole
SCSI Ports (VHDCI
HOST
RESERVED
ETH1
ETH0
ETH2
AC Power
Receptacles
Cybernetics
iSCSI Network Ports
(RJ-45 Ethernet)
Management LAN Port
(RJ-45 Ethernet)
UM-MV-86-B1-0801
19
Setting Up the miSAN
Network
Management LAN Port (ETH0)
Using the Management LAN port, connect the miSAN-V-Series to your LAN using a CAT
5e or CAT 6 Ethernet cable. Please note that in some configurations the ETH0 port may
be located in a different position than shown in the above illustration. Each port is clearly
labeled.
iSCSI Network Ports (ETH1, ETH2)
Using one or both iSCSI network ports, connect the miSAN-V-Series to your LAN, Gigabit
Ethernet switch or backup server using a CAT 5e or CAT 6 Ethernet cable. Please note
that in some configurations the ETH1 and ETH2 ports may be located in a different position than shown in the above illustration. Each port is clearly labeled.
Power
Using the AC socket on both power supplies, connect the miSAN-V-Series to a readily
accessible AC power source using a standard 3-prong power cord for each socket.
Connecting Power to an Uninterruptible Power
Supply (UPS)
You should use an Uninterruptible Power Supply (UPS) rated to at least 460 watts with
the miSAN-V-Series. This will ensure data buffered in the RAM cache will get written to
disk during a power outage. Use both power supplies when connecting the miSAN-V-
Cybernetics
UM-MV-86-B1-0801
20
Setting Up the miSAN
Series to a UPS. If you do not use a UPS, each power supply should be connected to a
separate power main.
Both power supplies must be connected to an AC power source, preferably
separate power mains. The miSAN-V-Series uses both power suppl
simultaneously to provide immediate failover in case one power supply fails
If you use an APC® Smart-UPS® model UPS with a Network Managem
Card or a Tripp Lite® SmartPro®/SmartOnline™ model UPS with
SNMPWEBCARD, you can configure the UPS to send messages to the HS
when the power fails, enabling the HSTC to automatically shut itself do
cleanly.
Power Button
The miSAN-V-Series is powered on using the power button on the front panel (See Figure 2-2). Figure 2-2 shows the front view of a typical miSAN-V-Series.
Figure 2-2 miSAN-V-Series Front Components
Hot Swap
SATA Disk Drive
Cybernetics
Power
Button
UM-MV-86-B1-0801
21
Setting Up the miSAN
Configuring the Network and iSCSI
Settings
The following sections include procedures for configuring the miSAN-V-Series network
and iSCSI settings. You must complete the Network and iSCSI device configuration prior
to initially using the miSAN-V-Series.
Prerequisites
Make sure to have the following available to allow for accessing the miSAN-V-Series on a
private network:
•
Desktop or laptop computer with a JavaScript™-enabled Web browser.
•
Standard, 3-prong AC power cord (IEC320 C13 to NEMA 5-15P) for each power
supply (2)
•
CAT-5 Ethernet cable with RJ-45 connectors, to establish a direct-cable TCP/IP
connection
•
Network parameters specific to your network: IP Address, Netmask, Gateway
(“Default Route”) and Nameserver
Network Setup Preparation
1. Make sure the computer is powered on and ready for use.
2. Connect a CAT 5e or CAT 6 ethernet cable between the Administrative LAN interface
port (ETH ) on the rear of the miSAN-V-Series and the network interface port on the
rear of the computer.
3. Power on the miSAN-V-Series using the momentary power switch on the front panel
(See Figure 2-2). Wait for the miSAN-V-Series to complete initialization before
continuing, after about three minutes.
4. Configure the computer to communicate with the miSAN-V-Series To do so, change
the computer’s IP address to an address in the 192.168.1.X subnet (but not
192.168.1.1), for example 192.168.1.10, and change the subnet mask to
255.255.255.0.)
Note
Before changing the IP Address and Netmask, make sure to write down
their current settings to be used when resetting them later.
Note
When any network parameters are changed, and the changes are
committed by clicking OK, the changes will take effect almost
immediately.
Cybernetics
UM-MV-86-B1-0801
22
Setting Up the miSAN
Network Setup
Certain network parameters must be changed to make the miSAN-V-Series visible on
your network.
1. Open the web browser on the computer to the default Management LAN port (“ETH
0”) IP address at http://192.168.1.1. A dialog box may appear asking for your
approval to load the Web Control Panel Java applet.
2. Approve the Java applet, and wait for it to load before proceeding further.
3. Select “Network Configuration” from “HSTC Options” on the main menu bar. On the
“Network Configuration” window, change the network parameters to those that
provide access over your network. The default values are shown in the figure to the
bottom right.
•
To configure the iSCSI Network ports, change the parameters for “ETH1”
“ETH2”
•
To configure the Management LAN port, change the parameters for “ETH0”
and
4. Restore the previous network settings for the computer used to configure the miSANV-Series to allow the computer to see and communicate with the miSAN-V-Series on
your network.
5. Remove the ethernet cable between the Administrative LAN interface port (ETH 0) on
the rear of the miSAN-V-Series and the network interface port on the rear of the
computer. Replace with a cable that is attached to the network.
6. Reload the Web Control Panel in the browser at the new miSAN-V-Series IP address
for the Management LAN port (“ETH0”) to verify the new configuration. After the Web
Control Panel loads, you may change the other miSAN-V-Series settings as desired,
as well as create virtual tapes and configure virtual devices. If necessary, the Web
Control panel may also be reached through the iSCSI ports.
iSCSI Communication
The iSCSI architecture is based on the client-server model, such that host computers are
clients, as initiators, and iSCSI devices are servers, as targets. Each iSCSI device, initiator or target, must have a functioning network interface, with an IP address that is accessible to other iSCSI devices.
A target device should be set up first, so it will be able to respond when an initiator
attempts to discover the available iSCSI target devices.
Cybernetics
UM-MV-86-B1-0801
23
Setting Up the miSAN
The initiator and target are identified to each other by iSCSI Names. The iSCSI Names
must be unique within the operational domain (networks encompassing the initiator and
target), and are designed to be unique worldwide. The iSCSI Name may be permanently
assigned to a hardware iSCSI device, or it may be constructed automatically as part of
the process of installing an iSCSI software driver. If the target includes multiple devices
(tape drives, libraries, etc.), each one has a unique iSCSI Name.
Examples of iSCSI Names are:
eui.1122334455667788
iqn.2003-07.com.cybernetics:example.name.tape.1
Once connected, iSCSI target devices are able to identify iSCSI initiators by iSCSI Name,
or alias (hostname), or IP address. The principal means of identification, however, is the
iSCSI Name.
The miSAN-V-Series is a remote iSCSI target device for iSCSI hosts, which are initiators.
If another iSCSI tape device is also on the network, you can configure the miSAN-VSeries to use the device (See below). Before configuring the miSAN-V-Series to use
remote iSCSI tape devices, it must first be set up on the network (See earlier, “Network
Setup” on page 22). This makes the miSAN-V-Series visible to host iSCSI initiators on the
network, and thus available as an initiator for other iSCSI devices. Once configured for
network access, you can then configure the miSAN-V-Series to discover and use, as targets, other iSCSI tape devices.
To enable iSCSI communication on the miSAN-V Series, select SCSI configuration >
Outgoing iSCSI connections to devices from the HSTC Options menu.
By default, iSCSI is disabled. You can choose to protect
iSCSI by password or “Open to everyone”
Remote iSCSI Target Device
Setup
The miSAN-V-Series can be configured to use remote
iSCSI tape devices as targets over the network. To configure the miSAN-V-Series to use remote iSCSI tape
devices, connect to the miSAN-V-Series from a client
using a web browser at the factory default IP address
Cybernetics
UM-MV-86-B1-0801
24
Setting Up the miSAN
192.168.1.1. Once the Web Control Panel has loaded, select Remote iSCSI Devices from miSANV-Series Options on the main menu bar. On the Remote iSCSI Devices window, set the following
parameters:
Remote iSCSI Devices
Remote iSCSI device XSet this to Enabled to make the remote
device visible to iSCSI host initiators.
Device X IP addressSet this to match the IP address of the
remote iSCSI target tape device.
Device X iSCSI passwordSet this to match the iSCSI access password
of the remote iSCSI target tape device.
miSAN-V-Series iSCSI Features
The miSAN-V-Series is capable of using CHAP authentication, either uni or bi-directional, in order to
restrict communication between specific targets and specific initiators. This is explained in the “Security Configuration” on page 95.
The miSAN-V-Series can also be set to restrict device visibility to specific initiators. For example, a
local/remote iSCSI target with two tape drives can be configured so that one of the tape drives is visible only to a specific iSCSI initiator (host system) and the other tape drive is visible only to a different
iSCSI initiator, allowing simultaneous backups from both host systems without the possibility of interference. This is explained in the “Offline Maintenance” on page 108.
Host iSCSI Setup
Once the miSAN-V-Series is available on the network, as an iSCSI device, it will then be listening on
the default iSCSI TCP port 3260. iSCSI hosts can discover, then access and use the device. Test the
miSAN-V-Series network connection by pinging it from a prospective iSCSI host. Once found, the
host iSCSI initiator software will allow the host to discover, access and then use the miSAN-V-Series
virtual devices as peripheral SCSI devices.
Caution
If more than one iSCSI initiator (i.e., multiple hosts) is to use the miSAN,
conflicts may occur if multiple host systems try to issue commands to
the same tape device. Ensure hosts do not try to use connected tape
devices simultaneously.
User Types
The HSTC/miSAN-V Series has three user types:
1. Security Officer (only available on units with encryption)
•
Configures encryption.
•
Manages tokens and keys.
•
Performs offloads with encryption disabled.
Cybernetics
UM-MV-86-B1-0801
25
Setting Up the miSAN
2. Administrator
•
Can do anything except change encryption settings.
•
Configures menu settings, networking, iSCSI, virtual devices, etc.
•
Creates, deletes, and modifies VTs.
•
Configures the user account.
•
Can access SSH and telnet.
3. User
•
Limited set of abilities defined by the administrator.
Only the administrator account is enabled by default. You may optionally enable the other
two accounts. If you do not enable the security officer account, then all the privileges of
the security officer are granted to the administrator instead.
The Administrator
The administrator account may be protected by a password (there is no password by
default). You may set or change the administrator password in the menu "HSTC Options
-> Accounts -> Administrator Account". The administrator password is used for the following purposes:
•
Java applet login as administrator.
•
SSH and telnet login as "menu".
•
Viewing the debug messages web page.
•
Viewing the menu settings web page.
•
Viewing the hardware information web page.
•
Performing a firmware upgrade.
If the Web Browser prompts the Administrator for a username and
password to view a web page on the unit, leave the username blank and
enter the administrator password.
The User
The user account is disabled by default. To enable the user account, go to the menu
"HSTC Options -> Accounts -> User Account". This menu allows the administrator to
enable or disable the user account, set the user password, and grant certain optional privileges to the user. Note that only the administrator can set the user password; the user
cannot set his own password.
When logged in as the user, many functions and menu options will be missing or highlighted in gray.
Cybernetics
UM-MV-86-B1-0801
26
Setting Up the miSAN
The Security Officer
The security officer account is disabled by default. While the security officer account is disabled, the
administrator has all the capabilities of the security officer. Enabling the security officer account
takes away encryption-related capabilities from the administrator and reassigns them to the security
officer. The administrator can enable the security officer account, but only the security officer can disable it. To enable the security officer account, go to the menu "HSTC Options -> Accounts -> Security Officer Account".
Once the security officer account is enabled, only the security officer can perform the following tasks:
•
Disabling or reconfiguring the security officer account.
•
Using most of the functions of the Encryption tab (although other users may still plug in
tokens and enter their PINs).
•
Initializing a token.
•
Changing a token's PIN.
•
Creating a key on a token.
•
Enabling, disabling, or revoking an encryption or signing key.
•
Deleting tokens or keys.
•
Starting an offload with encryption disabled.
•
Accessing the "Encryption Configuration" menu.
Setting Up the miSAN-V-Series Virtual
Components
This section explains the basic setup operations for configuring the miSAN-V-Series virtual components. The “Initial Setup Guide” section includes a series of short instructions for setting up the
miSAN-V-Series before its first use or a complete reconfiguration. The “Configuring Virtual Components” section is a companion guide explaining the initial setup instructions in further detail.
Initial Setup Guide
The instructions below should be used for setting up the miSAN-V-Series before its first use or
before a complete reconfiguration; follow them sequentially to ensure that miSAN-V-Series components are configured in their proper order:
1. Create virtual tapes
2. Create virtual devices (tape drives and/or stackers)
3. Assign virtual tapes to virtual devices
4. Configure physical stacker
Creating Virtual Components
The miSAN-V-Series virtual components include virtual tapes, drives and stackers. Each component
must be configured during initial miSAN-V-Series setup. Since the devices are virtual, their configurations may be changed later if desired. However, take care with the virtual tapes, since changing
Cybernetics
UM-MV-86-B1-0801
27
Setting Up the miSAN
the number of virtual tapes will destroy all data currently stored on them. Changing the numbers and
types of virtual devices may result in the need to reassign virtual tapes to the drives or stackers.
Changing the virtual device configuration does not affect the data currently stored on the virtual
tapes.
Deciding How Many Virtual Tapes to Create
Choosing the number of virtual tapes to create involves deciding how to allocate the available
miSAN-V-Series storage space. Factors to consider are the size of each physical tape, number
of disk drives used by the miSAN-V-Series, total miSAN-V-Series disk storage capacity, tape cartridge capacity, and historical/estimated compression ratio for backup data. For archiving efficiency, the virtual tapes should closely match tape cartridges in capacity, and the number of
virtual tapes should completely use the miSAN-V-Series disk cache, as virtual tapes do not span
disk drives.
Deciding What Kind of Virtual Tape Drives to Create
Deciding the number of virtual tape drives and stackers to create involves considering the
amount of data to be backed up, the intended backup schedule (e.g., incremental vs. full backups), the time length of the backup window, and the number of backup host systems that can
send data. The miSAN-V-Series can be configured to create multiple virtual tape drives and
stackers, up to the purchased limit, and can support multiple simultaneous backup and restore
operations using the independent virtual devices.
Note
The miSAN-V-Series emulates the IBM® 3580 LTO Ultrium tape drive for
virtual drives and the Overland™ NEO Series tape library for virtual
stackers. The IBM 3580 and Overland NEO are supported by nearly all
backup applications. Thus, virtual drives and stackers should be
recognized correctly by host backup software.
Caution
Do not allow more than one backup host to access a virtual device at
the same time. Virtual tapes can become corrupted and data lost if
backup software on more than one host is allowed to access a virtual
device simultaneously. To prevent this, create a virtual device for each
host, and then configure “Device Visibility” so each host only sees its
own device.
Note
If the miSAN-V-Series is not configured with Tape Library Control
support, an external tape library will appear to the miSAN as a physical
standalone tape drive, rather than a physical stacker. Thus, a physical
library will be accessible by using a virtual standalone tape drive.
Cybernetics
UM-MV-86-B1-0801
28
Setting Up the miSAN
Virtual Standalone Drives
Standalone drives are useful in cases where tapes are not assigned for different
uses (e.g., when backups are typically large scale, spanning multiple tapes). For a
virtual standalone drive, the miSAN-V-Series can automatically change the
mounted tape, a method called autoloading, when using multiple tapes during a
backup or restore. The “Autoload” feature is user-selectable for each virtual drive .
IIf not set to “autoload” tapes, virtual tapes must be changed by a client using the
Web Control Panel.
Virtual Stacker Drives
Stacker drives are more appropriate when tapes are designated for specific uses
(e.g., when tapes are grouped into “full” and “incremental” media pools or are designated for backing up specific host systems). Virtual tapes assigned to the
stacker appear to a host as conventional slotted tapes. Virtual stackers behave in
random access mode. Thus, stacker virtual tapes can be used independently.
Since a host can see all the available tapes and slots, a virtual stacker drive is
effective for performing different backup operations initiated by one or more hosts.
For miSAN-V-Series models configured with Tape Library Control support, a virtual stacker is required for direct host access to an external tape library (physical
stacker). When setting the number of virtual stacker drives, consider the number
of physical drives in the external tape library. You should create the same number
of virtual drives as there are physical drives, so that if you enable direct host
access, each physical drive will have a corresponding virtual drive.
You can enable host access with the physical stacker’s popup menu . Access
from a virtual stacker pairs the physical stacker slots and drives with the virtual
stacker slots and drives. A host can access the physical stacker directly by proxy
using the virtual stacker.
Deciding How to Assign Virtual Tapes
Whenever virtual components are configured, virtual tapes must be assigned to the
virtual devices afterward. Tapes are assigned to a virtual device individually or in contiguous groups or can be left unassigned. Unassigned tapes are inaccessible to a
host system. When assigning virtual tapes to a virtual standalone drive, the operation
is similar to stacking a portion of the available tapes next to each tape drive. For a virtual stacker, the operation is similar to loading the stacker slots with a portion of the
available tapes. The result is, the virtual devices have exclusive use of their tapes.
Creating Virtual Tapes
The miSAN-V-Series can be configured to provide up to the maximum number of virtual tapes based on the miSAN-V-Series model.
1. Connect to the miSAN-V-Series using the Web Control Panel in a web browser.
2. Select the “Tools” option from the main menu bar, once the Web Control Panel
has loaded.
Cybernetics
UM-MV-86-B1-0801
29
Setting Up the miSAN
3. Select the “Create virtual tapes…” option.
A window will appear showing the current number of virtual tapes and their disk
space allocation over the total storage capacity.
Caution
Make sure to format the disks before creating virtual tapes for the first
time. Use the Format disks tab to do so. Failure to initially format the
disks may cause errors when creating virtual tapes. After creating
virtual tapes, remember that formatting the disks will erase the data
stored on all disks used for the virtual tape cache.
4. Choose either the Basic or Advanced tab to use for creating the virtual tapes.
(See “Create Virtual Tapes” on page 41 for explanations of each tab.)
5. Enter a “Number of virtual tapes.”
6. For the Advanced tab, choose to “Use all available space” or “Specify the tape
size,” and then select the free space on the disk to add the tapes to.
7. Click Set/Add to allocate the disk space. The “Item” column for the affected
disk(s) will be updated to show how the miSAN-V-Series will allocate the tapes.
8. Once the desired virtual tapes have been added, click the Apply changes button
to execute the changes to the tape cache. A confirmation box will appear; click
Yes to continue. A box will appear while the miSAN-V-Series commits the
changes to the disk(s). The “Create virtual tapes” window will close when finished.
Creating Virtual Devices
The miSAN-V-Series can be configured to emulate up to the purchased maximum
number of virtual tape drives, whether standalone or assigned to a virtual stacker,
based on the miSAN-V-Series model.
1. Connect to the miSAN-V-Series using the Web Control Panel in a web browser.
2. Select the “Tools” option from the main menu bar, once the Web Control Panel
has loaded.
3. Select the “Configure virtual devices…” option.
A window will appear showing the current number of virtual devices.
4. Enter the desired number of standalone tape drives.
5. Enter the desired number of stackers.
6. Enter the desired number of tape drives and slots for each stacker.
Cybernetics
UM-MV-86-B1-0801
30
Setting Up the miSAN
7. Click OK to save changes.
The device tree on the “Devices” tab will refresh to update the configuration
changes.
Note
Anytime the number of virtual devices is changed, the virtual tapes
should be reassigned to the virtual devices.
Assigning Virtual Tapes to Virtual Devices
The virtual tapes can be assigned to a virtual device in either a random manner (e.g.,
VT 1.1, VT 1.3, VT 1.5, and VT 1.9) or a contiguous group (e.g., VT 1.1, VT 1.2, VT
1.3 and VT 1.4). Thus, when selecting tapes to assign to a device, the tapes can be
selected individually or in a contiguous range. Virtual tapes appear in the “Unassigned Tapes” box until assigned to a virtual device, and can be left unassigned if
desired.
The following steps are used to assign virtual tapes to a virtual device:
1. Connect to the miSAN-V-Series using the Web Control Panel in a web browser.
2. Select the “Tools” option from the main menu bar, once the Web Control Panel
has loaded.
3. Select the “Assign virtual tapes…” option.
A window will appear showing the current virtual tape assignments.
4. Select the desired unassigned virtual tapes to assign to the desired virtual device.
To select a range, click the first tape in the range, hold down SHIFT, and then click
the last tape in the range.
5. Click Assign to assign the selected virtual tapes to the desired virtual device.
6. Click OK when finished assigning virtual tapes.
Configuring a Physical Stacker
Note
The physical stacker features discussed below will only be available if
the miSAN-V-Series is configured to operate an external tape library.
The HSTC license specifies limits on the number of slots and drives that
are supported. If your physical stacker has more slots or drives than
allowed by the license, the extra slots will not show up and the extra
drives will be treated like standalone drives.
When configured with the optional Tape Library Control support, the miSAN-V-Series
can operate an external tape library (physical stacker). An external tape library can be
set to inventory tapes, offload virtual tapes to physical tapes, load physical tapes onto
Cybernetics
UM-MV-86-B1-0801
31
Setting Up the miSAN
virtual tapes, and access the physical stacker directly using the virtual stacker. To
configure a physical stacker, see “Physical Stacker Device Panel” on page 84.)
Testing the Installation
Once configured for use by iSCSI initiator software on a host system, as explained earlier
in, in general, the miSAN-V-Series can be treated as any other tape device.
Virtual tape drives are normally seen by a host as IBM® 3580 LTO Ultrium tape drives,
and virtual libraries are seen as Overland™ NEO Series tape libraries. These emulations
provide for maximum compatibility with existing operating systems and backup software
applications. Using the IBM 3580 may require device drivers to be installed, which are
available from the IBM FTP site (ftp://ftp.software.ibm.com/storage/devdrvr/). Drivers for
the Overland NEO are not needed, although they are included with many backup applications. For host systems not compatible with the IBM 3580 and Overland NEO, other tape
drives and libraries can be emulated. Contact Cybernetics Technical Support
(See Appendix E “Technical Support and Repair Procedures”) regarding tape device
emulation.
After installing and configuring the miSAN-V-Series and creating virtual tapes and
devices, make sure to verify data and tape path integrity by performing a test backup and
restore over the iSCSI network. Some backup software packages include a VERIFY feature that will check to ensure the data on disk and the data on tape are identical. If the
backup software package does not include a VERIFY capability, make sure to perform a
test backup and restore operation to check the integrity of the entire data path from the
iSCSI host initiator to the miSAN-V-Series, with connected SCSI devices, and back. The
data and tape path verification process should be repeated periodically throughout the life
of the miSAN-V-Series.
Shut Down
Do not power off the miSAN-V-Series without first logging off the iSCSI initiator if applicable, and shutting down the device using the Web Control Panel shut down menu.
Use this item for safely shutting down or rebooting the miSAN-V-Series. Shutting down
the HSTC engine before powering off the unit helps insure the integrity of data in the virtual tape cache.
Caution
To prevent data loss before shutting down the miSAN-V-Series, make
sure all current and queued jobs have completed. To ensure no jobs are
left in the queue, wait a minimum of 30 seconds while all tape drives are
idle. Never power off the miSAN unit without first shutting down the
HSTC engine.
Cybernetics
UM-MV-86-B1-0801
32
Setting Up the miSAN
Note
If the Host machine is connected to the miSAN-V-Series via Microsoft
iSCSI Initiator software, it is necessary to log off the iSCSI connections
before shutting down in order to avoid possible data loss. Failure to log
off the iSCSI connections will cause Microsoft Windows to send
“Unsafe Device Removal” messages. Instructions for this procedure are
found in Appendix A “Microsoft iSCSI Initiator Client.
When Shutdown is selected, a window will appear confirming the HSTC engine shutdown (See Figure 2-3). Once confirmed, the HSTC engine will complete current operations. When the HSTC has finished shutting down, another window will appear saying the
miSAN-V-Series is then ready to be powered off. In most cases, shutting down the
miSAN-V-Series, also powers off the machine. If the device is still running after 30 seconds, then press and hold the power button on the front panel until it powers off. Failure
to log off the iSCSI initiator before shutting down the miSAN-V-Series will result in error
messages
When Reboot is selected, the shutdown routine explained above will occur, and the
miSAN-V-Series will restart and be ready for use again after about 90 seconds.
Figure 2-3 “Confirm shutdown method” Window
Cybernetics
UM-MV-86-B1-0801
33
Operating the Web Control Panel
Chapter 3
Operating the Web Control Panel
Interface Layout
Introduction
The miSAN-V-Series presents the Web Control Panel Java applet in an 800×600 pixel
frame (See Figure 3-1). You may have to adjust the screen size to accommodate the
frame dimensions. After the applet is authenticated and fully loaded, the interface will
appear. The interface features a main menu bar and several tabs for displaying the status
of devices, labeled “Devices,” and virtual tapes, labeled “Virtual tapes.” If the miSAN-VSeries is configured with the Tape Library Control support option, another tab labeled
“Physical tapes” will show the status of physical tapes in an external tape library.
Note
Not all menu and tab items will appear or be displayed in every context.
The appearance of an item is based on the miSAN-V-Series model
configuration and its current state of operation.
Main Menu Bar Introduction
The Web Control Panel main menu bar appears at the top of the interface. The menu bar
offers five selections: Tools, HSTC Options, Information, Browser links and Help (See
Figure 3-1). The “Menu Descriptions” section, later in this chapter, includes detailed
explanations for menu selections and item options.
Figure 3-1 Main Menu Bar
Cybernetics
UM-MV-86-B1-0801
34
Operating the Web Control Panel
Tools
The Tools selection contains menu items that allow clients to configure the HSTC virtual components. The menu offers the following items, which are explained in the
“Menu Descriptions” section: Disk storage, Create virtual tapes, Configure virtual
devices, Assign virtual tapes, Physical stacker copy profiles, Configure auto-archive,
Set date and time, Update license, Export or import configuration, Rescan physical
devices, Logout admin, and Shut down the HSTC (See Figure 3-2). For detailed information see “Tools” on page 36
.
Figure 3-2 “Tools” Menu
HSTC Options
The HSTC Options selection contains menu items that allow you to configure the
optional HSTC engine components. The menu offers the following items, which are
explained in the “Menu Descriptions” section: Configuration, SCSI configuration, Network Configuration, Message Delivery, Accounts and Advanced Options. See “HSTC
Options” on page 49 for more detailed information..
Figure 3-3 “HSTC Options” Menu
Information
The Information selection contains menu items that allow you to view information
about the miSAN-V-Series hardware components. The menu offers the following
Cybernetics
UM-MV-86-B1-0801
35
Operating the Web Control Panel
items, which are explained in the “Menu Descriptions” section: Product Information,
SCSI Device List, Local iSCSI Initiator Name, Local iSCSI Target List and Credits and
Licenses (See Figure 3-4). For further details see “Information” on page 69.
Figure 3-4 Information
Browser links
The Browser links selection contains menu items that allow you to view information about the
current miSAN-V-Series operating status, menu settings and hardware configurations. The
menu offers the following items, which are explained in the “Menu Descriptions” section:
View debug messages, View list of menu settings and View hardware information. See
“Browser links” on page 70.
Figure 3-6 “Browser links” Menu
Help
The Help selection contains the Applet Acknowledgements (See Figure 3-7). The applet
acknowledgements text is reproduced in the “Notices” under “Apache Software License.”
Figure 3-7 “Help” Menu
Tabs introduction
Devices Tab
The “Devices” tab shows a “tree” view on the left with an entry representing each virtual and physical device (physically attached or connected via iSCSI). See “Devices
Tab” on page 71 for more information.
Cybernetics
UM-MV-86-B1-0801
36
Operating the Web Control Panel
Virtual tape Tab
The “Virtual tapes” tab shows the current status of each miSAN-V-Series virtual tape.
See “Virtual Tapes Tab” on page 93 for more information.
Physical tapes Tab
The “Physical tapes” tab shows the current status of tape cartridges in a physical
library. The HSTC remembers the contents for physical tapes containing copies of virtual tapes, displaying the status information on the “Physical tapes” tab. The tab
shows the “Contents” of the tape cartridges and whether the contents are identical to
their copied virtual tapes. When a backup of a virtual tape begins, its associated physical tapes will be used. See “Physical Tapes Tab” on page 97 for more information.
Jobs
The HSTC uses jobs to do its own internal work such as offloading virtual tapes to
physical tapes. These jobs are similar in concept but separate from the jobs that your
backup software may use to do backups and restores.
The HSTC performs the following types of jobs:
•
Copy from virtual tape to physical tape
•
Copy from physical tape to virtual tape
•
Copy from virtual tape to virtual tape
•
Auto-archive
•
Inventory a physical tape in a stacker
•
Enable host access to a physical tape in a stacker using a standalone virtual tape
drive
•
Erase a virtual tape
Jobs of different types are created in different ways, but once created, all jobs can be
managed using the “Jobs” tab. The job database view is split into three parts: the
“Jobs” table showing summary information for all the jobs, the “Job log”, and the
“Activity monitor”. See “Jobs Tab” on page 99 for more information.
Messages
The “Messages” tab reports disk “Messages Tab” on page 102
Main Menu
Tools
The Tools selection contains menu items that allow clients to configure the HSTC virtual components. The menu offers the following items, which are explained in the “Menu Descriptions” section: Disk storage, Create virtual tapes, Configure virtual devices, Assign virtual tapes, Physical
stacker copy profiles, Configure auto-archive, Set date and time, Update license, Export or import
Cybernetics
UM-MV-86-B1-0801
37
Operating the Web Control Panel
configuration, Rescan physical devices, Logout admin, and Shut down the HSTC (See Figure 32)
.
Figure 3-8 “Tools” Menu
Note
The “Physical stacker copy profiles” menu item only appears when the
HSTC is configured to operate an external tape library using Tape
Library Control support.
Disk Storage
This item provides menu options for managing the miSAN-V-Series disk drives:
•
Manage disk storage: Opens a web-based GUI interface called the 3ware Disk
Manager 2 (3DM® 2) that manages the integrated 3ware® Escalade® 9500S-8
SATA RAID controller. See Chapter 4 “Using the 3ware Disk Manager®” on
page 109 for further instructions.
•
Disks online for normal usage / Disks offline for management: Only one of
these options can be selected at a time; they toggle the disks online and offline.
When the disks are online, hosts can access the virtual tapes, and the miSAN-VSeries operates normally. When the disks are offline, the host can create, delete
and reconfigure the RAID arrays via the 3DM® 2 (See above). When you take the
disks offline by selecting Disks offline for management, the miSAN-V-Series will
first prompt you to make sure that the virtual tapes are not in use before going
offline. If you continue, the virtual tapes will disappear from the Web Control
Cybernetics
UM-MV-86-B1-0801
38
Operating the Web Control Panel
Panel. Actions such as creating virtual tapes will give an error message while the
disks are offline. Tools >Disk Storage
Create Virtual Tapes
This item allows for creating virtual tapes from the disk storage space available to the
miSAN-V-Series. When selected, a window will appear showing the total number of
virtual tapes and their disk space allocation over the total storage capacity (See Figure 3-9). Each disk partition seen by the miSAN-V-Series is presented in the “Item”
column: The numbered disk is immediately followed by the names of the virtual tapes
it contains. The total capacity, in gigabytes, for each disk and virtual tape is shown in
the “Size” column. The “Free Space” for each disk is also listed.
Figure 3-9 Virtual Tape Disk Space Allocation
The “Create virtual tapes” window presents the following three tabbed panels for managing the disks used for the virtual tape cache: Basic, Advanced and Format disks.
The miSAN-V-Series allows for creating virtual tapes using either the Basic or
Advanced tab. The Format disks tab is used before creating virtual tapes to erase the
disks used for the virtual tape cache.
Cybernetics
UM-MV-86-B1-0801
39
Operating the Web Control Panel
To create a number of virtual tapes use either the Basic or Advanced tab:
1. Enter a “Number of virtual tapes.”
2. For the Advanced tab, choose to “Use all available space” or “Specify the tape
size,” and then select the free space on the disk to add the tapes to..
3. Click Set/Add to allocate the disk space. The “Item” column for the affected
disk(s) will be updated to show how the miSAN-V-Series will allocate the tapes.
Note
To remove a virtual tape from the disk cache. Right-click the selected
tape, and then a popup menu will appear with a command to “Remove.”
Caution
Removing a virtual tape from the disk cache will destroy all its contents
4. Once the desired virtual tapes have been configured, click the Apply changes
button to execute the changes to the tape cache. While the miSAN-V-Series
creates the virtual tapes, the “Create virtual tapes” window will be greyed-out and
unavailable; it will close when finished.
Basic Tab
The Basic tab is used for setting a number of virtual tapes to be created as equally
sized out of the total capacity for all disks. The miSAN-V-Series will decide how to use
Cybernetics
UM-MV-86-B1-0801
40
Operating the Web Control Panel
the total storage capacity for all disks to create equally sized virtual tapes (See Figure
3-10).
Figure 3-10 Create Virtual Tapes Basic Tab
Advanced Tab
The Advanced tab is used for specifying a disk to use for creating virtual tapes (See
Figure 3-11). Choose “Use all available space” to create equally sized virtual tapes
from all the selected free space. By choosing to “Specify the tape size,” you can create groups of virtual tapes having different sizes.
Figure 3-11 Create Virtual Tapes “Advanced” Tab
Format Disks Tab
The Format disks tab is used for formatting (erasing) the disks used for the miSANV-Series virtual tape cache. The tab indicates if any number of disks need to be formatted, which is necessary before initially using the disk storage space (See Figure 312).
Note
The RAID disks must be formatted after any change to the disk
configuration, such as after adding/removing a disk drive or changing
the RAID-level configuration.
Cybernetics
UM-MV-86-B1-0801
41
Operating the Web Control Panel
.
Figure 3-12 Create Virtual Tapes “Format disks” Tab
Caution
Make sure to format the disks before creating virtual tapes for the first
time. Failure to do so may cause errors when creating the virtual tapes.
After creating tapes, remember that formatting the disks will erase the
data stored on all disks used for the virtual tape cache.
To begin formatting the disks, click Format all disks. The miSAN-V-Series will then
erase the data stored on all disks used for the virtual tape cache. The message box
on the tab will change to show that the miSAN-V-Series is formatting the disks. Wait
for the formatting to complete, and then proceed to create virtual tapes (See “Creating
Virtual Tapes” on page 29).
Configure Virtual Devices
This item allows for setting the number of standalone tape drives and stackers. The
maximum number of virtual tape drives allowed, whether standalone or stacker, is
based on the model configuration. When selected, a window will appear showing the
current number of virtual devices (See Figure 3-13). To set the number of standalone
tape drives or stackers, enter the desired quantity for the device, and then click OK.
When configuring a stacker, the number of tape drives and slots must also be set. The
device tree on the “Devices” tab will reset to update the configuration changes (See
“Deciding What Kind of Virtual Tape Drives to Create” on page 27).
Cybernetics
UM-MV-86-B1-0801
42
Operating the Web Control Panel
Figure 3-13 “Configure virtual devices” Window
Assign Virtual Tapes
This item allows for viewing and changing the assignments of the virtual tapes to the
virtual devices. When this menu item is selected, a window will appear showing the
current virtual tape assignments and any unassigned virtual tapes (See Figure 3-14).
The listbox on the left shows the currently “Unassigned tapes.” Listboxes corresponding to the virtual devices appear to the right of the unassigned tapes listbox. The
tapes in the unassigned listbox can be selected individually or in a contiguous range.
To select a range, click the first tape in the range, hold down SHIFT, and then click the
last tape in the range. To assign the selected virtual tapes, click Assign for the desired
virtual device. Click OK after making the assignments to commit the changes and
update the Web Control Panels for all connected clients
.
Figure 3-14 “Virtual tape assignments” Window
Cybernetics
UM-MV-86-B1-0801
43
Operating the Web Control Panel
Physical Stacker Copy Profiles
Note
This option only appears when the miSAN-V-Series is configured with
optional Tape Library Control support and a tape library is connected.
This item allows you to create copy profiles to use when enabling the Offload disk to
tapes mode for a physical stacker. Copy profiles are saved physical stacker slot
associations. They make it easier to set up copying virtual tapes to physical tapes
when offloading disk to tapes. Using copy profiles saves from manually having to
select virtual tapes to copy each time Offload disk to tapes is enabled (See “Offload
disk to tapes...” on page 86).
When this menu item is selected, a window will appear showing all the virtual tapes
and all the physical stacker slots. The “Profiles” frame shows all the existing copy profiles. When a copy profile is selected, its saved slot associations are shown in the “Virtual tape” column in the “Slot associations” table
.
Figure 3-15 “Physical stacker copy profiles” Window
To create a copy profile, click New. To rename the copy profile, select it, enter the
new “Profile name,” and then click Set. To associate a virtual tape to a physical
stacker slot, first, select the virtual tape in the “Virtual tapes listbox. Then, select the
row for the desired physical stacker slot in the “Slot associations” table. Finish by
Cybernetics
UM-MV-86-B1-0801
44
Operating the Web Control Panel
clicking the -> button, which assigns the virtual tape name to the “Virtual tape” cell for
that slot (See Figure 3-15). Once all the desired virtual tapes have been assigned,
click Save changes to save the copy profile.
The Help button provides an explanation of how to set up the associations.
Configure Auto-archive
Note
This setting will only be available if a physical standalone tape drive is
connected to the miSAN-V-Series.
The “Auto-archive” feature allows you to automating the process of creating and
maintaining tape cartridge duplicates of virtual tape backups. Each physical tape drive
may be assigned a group of virtual tapes to maintain backups for.
When this menu item is selected, a window will appear showing a frame for each
physical standalone tape drive. The “Unassigned tapes” frame lists the virtual tapes
not assigned to a physical drive (See Figure 3-16).
Figure 3-16 “Auto-archive configuration” Window
To assign virtual tapes to a physical tape drive, to be used for automatic backups, first
enable “Auto archive” for the desired physical tape drive by selecting the option.
Next, select the desired virtual tapes from the “Unassigned tapes” listbox. Tapes may
be selected individually or in a contiguous range. To select a range, click the first tape
Cybernetics
UM-MV-86-B1-0801
45
Operating the Web Control Panel
in the range, hold down SHIFT, and then click the last tape in the range. To assign the
selected virtual tapes, click Add for the desired physical tape drive.
Finally, choose the desired backup source:
“All backups” allows the miSAN-V-Series to create and maintain tape cartridge duplicates of all the virtual tapes assigned to the drive. When a tape cartridge is inserted
into the drive, “All backups” mode will cause the miSAN-V-Series to automatically
duplicate each virtual tape, ejecting the tape cartridge after each successful copy. If
more than one virtual tape awaits copying, each will be copied in order. Since the virtual tapes are write-protected while auto-archiving occurs, the “All backups” mode is
effective for taking a “snapshot” of the current state of the entire miSAN-V-Series virtual tape cache.
“Most recent backup only” allows the miSAN-V-Series to create an immediate
backup of only the most recent virtual tape backup. When a tape cartridge is inserted
into the drive, the “Most recent backup” mode will cause the miSAN-V-Series to automatically duplicate only the most recent virtual tape backup, regardless of how long
ago the backup was made. The miSAN-V-Series will not eject the tape after a successful copy, so the tape cartridge will be available for duplicating another backup.
Thus, with the “Most recent backup” mode selected, a user is assured a physical copy
will always be made automatically after a backup to virtual tape. If after a successful
copy a user wants to keep the tape cartridge backup, the user must eject the tape,
else it will be overwritten after the next backup to a virtual tape.
Note
To keep track of which virtual tapes have been successfully written to
physical tape and which still need copying, use the Web Control Panel.
The “Copies” column on the “Virtual tapes” tab shows the number of
successful copies made.
Set Date and Time
This item allows you to set the miSAN-V-Series date, time and timezone using the
local information on the client running the Web Control Panel (See Figure 3-17). The
time information is used for setting the “Last modified” attribute for virtual tapes (See
“Virtual Tape Popup Menu” on page 94) and giving a valid timestamp to messages on
Cybernetics
UM-MV-86-B1-0801
46
Operating the Web Control Panel
the “Messages” tab and for email messages sent from the miSAN-V-Series (See
“Message Delivery” on page 65).
Figure 3-17 “Set date and time” Window
Update License
This item allows for entering license text provided by Cybernetics for changing the
miSAN-V-Series model configuration. When selected, a window will appear showing
a text box into which license text can be pasted (See Figure 3-18). Once pasted, the
OK button is used to initialize changes to the miSAN-V-Series configuration.
Figure 3-18 “Update License” Window
Export or Import Configuration
Clicking on this option will open a new web page. Additional instructions are given; as
well as the ability to View Configuration, Export Configuration to a File, and Import
Configuration from a File.
Rescan Physical Devices
This item forces the miSAN-V-Series to rescan the parallel SCSI buses for connected
devices. If a previously undetected SCSI device is found, the Web Control Panel will
update to reflect the new hardware configuration. For a detected tape device, either a
Cybernetics
UM-MV-86-B1-0801
47
Operating the Web Control Panel
standalone tape drive or tape library, the “Devices” folder on the “Devices” tab will
refresh to allow for accessing and using the new device.
Caution
Since multiple clients can access and view the control panel
simultaneously, users must not rescan for physical devices while other
users are connected. Doing so may interrupt current operations,
disconnect other clients or cause other browser control panels to
display incorrect information. If the miSAN-V-Series must be
reconfigured while other users may be accessing the control panel,
wait until all current and queued jobs have completed. To ensure no
jobs are left in the queue, wait a minimum of 30 seconds while all tape
drives are idle before rescanning for physical devices.
When this menu item is selected, a window will appear asking for confirmation before
bringing the miSAN-V-Series temporarily offline to scan for devices (See Figure 3-19).
Figure 3-19 “Rescan physical devices” Window
Shut Down the HSTC
Use this item for safely shutting down or rebooting the miSAN-V-Series. Shutting
down the HSTC engine before powering off the unit helps insure the integrity of data
in the virtual tape cache.
Caution
To prevent data loss before shutting down the miSAN-V-Series, make
sure all current and queued jobs have completed. To ensure no jobs are
left in the queue, wait a minimum of 30 seconds while all tape drives are
idle. Never power off the miSAN-V-series unit without first shutting
down the miSAN.
Cybernetics
UM-MV-86-B1-0801
48
Operating the Web Control Panel
Note
If the Host machine is connected to the miSAN-V-Series via Microsoft
iSCSI Initiator software, it is necessary to log off the iSCSI connections
before shutting down in order to avoid possible data loss. Failure to log
off the iSCSI connections will cause Microsoft Windows to send
“Unsafe Device Removal” messages. Instructions for this procedure are
found in Appendix A “Microsoft iSCSI Initiator Client.
When Shutdown is selected, a window will appear confirming the HSTC engine shutdown (See Figure 3-20). Once confirmed, the HSTC engine will complete current
operations. When the HSTC has finished shutting down, another window will appear
saying the miSAN-V-Series is then ready to be powered off. In most cases, shutting
down the miSAN-V-Series, also powers off the machine. If the device is still running
after 30 seconds, then press and hold the power button on the front panel until it powers off. Failure to log off the iSCSI initiator before shutting down the miSAN-V-Series
will result in error messages
When Reboot is selected, the shutdown routine explained above will occur, and the
miSAN-V-Series will restart and be ready for use again after about 90 seconds.
Figure 3-20 “Confirm shutdown method” Window
Cybernetics
UM-MV-86-B1-0801
49
Operating the Web Control Panel
HSTC Options
Configuration.
Figure 3-21 Configuration
Note
Some of the options shown in the above menu will only be present if
Compression or Encryption options are installed.
Device ID order
This option is only displayed when the miSAN-V-Series is configured for a virtual
stacker.
This item controls whether the base SCSI ID is assigned to the virtual stacker
(“Stacker then drives”) or to a virtual standalone drive (“Drives then stacker”). If there
is more than one virtual stacker, each stacker and its virtual tape drives will be
assigned SCSI IDs as a set.
Examples: A miSAN-V-Series with two virtual standalone drives, and with Base SCSI
ID set to 2, will use SCSI ID 2 for the first tape drive and SCSI ID 3 for the second
tape drive.
Cybernetics
UM-MV-86-B1-0801
50
Operating the Web Control Panel
An miSAN-V-Series with two standalone drives and one changer, Base SCSI ID set to
2, and Device ID Order set to “Stacker then drives,” will use SCSI IDs as follows:
ID
Device
2
Stacker
3
Master (first) standalone drive
4
Slave (second) standalone drive
An miSAN-V-Series with two virtual stackers, each with two virtual tape drives, with
Base SCSI ID set to 0, and Device ID Order set to “Drives then stacker,” will use SCSI
IDs as follows:
ID
Device
0
Master tape drive, first stacker
1
Slave tape drive, first stacker
2
First stacker
3
Master tape drive, second stacker
4
Slave tape drive, second stacker
5
Second stacker
Host vs. job I/O policy
When host backup and restore jobs use the HSTC’s disk input/output (I/O)
resources, these disk I/O resources are called “host I/O” resources. When the
HSTC’s disk I/O resources are used for jobs such as offloading disk to tape, these
disk I/O resources are called “job I/O” resources.
The “Host vs. job I/O policy” setting is used to control the priority given to job I/O
resources relative to host I/O resources. The option you choose for this setting
determines the policy the HSTC will use when allocating I/O resources.
The options are as follows:
•
Concurrent – Host I/O and job I/O may proceed concurrently
• Host disk write exclusive – Job I/O is disabled only on disks the host is
writing to
• Host disk exclusive – Job I/O is disabled only on disks the host is reading
from or writing to
• Host write exclusive – All job I/O is disabled when a host is writing to any
disk
• Host exclusive – All job I/O is disabled when a host is reading from or writing
to any disk
When one of the policy options other than Concurrent is selected and a host
begins using disk I/O resources, any running job I/O on the disk(s) affected by the
Cybernetics
UM-MV-86-B1-0801
51
Operating the Web Control Panel
policy will pause and remain in the running state but will not access the disk(s)
until the host I/O finishes.
Individual jobs can be configured to either use or ignore this setting’s policy. Jobs
that ignore the policy run immediately without concern for the impact on the host’s
available I/O bandwidth.
You can make a job use or ignore this setting’s policy at any time by first selecting
the “Jobs” tab, then right-clicking the job, and then from the pop-up menu, selecting the desired option from the I/O scheduling submenu.
Host I/O idle minutes
“Host I/O idle minutes” specifies the amount of time the HSTC will wait from when
the host I/O stops before restarting job I/O. This option does not apply when Concurrent is selected for “Host vs. job I/O policy”.
Overwrite non-committed
Note
If the miSAN-V-Series is configured with a virtual or physical stacker,
this setting will be unavailable and set to Enabled by default. This is to
allow host software to manage virtual tape protection, which would
otherwise interfere with protection controlled by the miSAN-V-Series.
This setting will also be unavailable if the miSAN-V-Series is not
configured to use a physical tape drive.
The “Overwrite non-committed” setting determines whether a virtual tape
becomes write-protected after a backup. Write-protecting a virtual tape after a
backup ensures it will remain unchanged until a successful tape cartridge backup
has been committed (successfully copied). This secures against unintentional or
unauthorized virtual tape modification before a tape cartridge copy has been
made, since a host can neither append to nor erase a write-protected virtual tape.
Regardless of host write-protect status, a virtual tape can always be erased via
the “Virtual tapes” tab on the Web Control Panel.
If Enabled, a virtual tape will remain unprotected after a backup, making it available for appending or overwriting by another backup. Enabling the overwrite feature ensures a virtual tape is available for writing, even if its contents have not
been committed to tape. This is useful in cases where tape cartridge duplicates
are not always written for each virtual tape backup.
If Disabled, a virtual tape will be write-protected until it is committed to a tape cartridge. To keep track of which virtual tapes are write-protected, use the Web Control Panel. The “Copies” column on the “Virtual tapes” tab shows the number of
successful copies made. A virtual tape backup is write-protected if it has not been
successfully copied to a tape cartridge (‘0’ copies). Disabling the overwrite feature
ensures a tape cartridge duplicate will be made before a virtual tape can be modified, such as before an append or erase. This is useful in cases where a tape cartridge duplicate is always written for each virtual tape backup.
Cybernetics
UM-MV-86-B1-0801
52
Operating the Web Control Panel
Drive compression for copying
This option enables or disables internal tape drive data compression for connected tape devices (e.g., physical standalone or library tape drives).
Note
This feature can toggle drive data compression only if the tape drive is
physically set
to allow
host-controlled compression. See
documentation for connected tape devices for information about drive
compression settings.
If Enabled, all physical tape drives connected to the miSAN-V-Series will write
data using their internal compression algorithm.
If Disabled, all physical tape drives connected to the miSAN-V-Series will write
data in their native block size format.
Copy volume tags
This option allows the miSAN-V-Series to associate virtual tape volume tags (See
“Virtual Tapes Tab” on page 93) with the barcodes on their physical tape copies.
If Enabled, the miSAN-V-Series will automatically copy the barcodes read from
physical tapes in an external library to the volume tags of their associated virtual
tapes. The volume tag is updated with the barcode after a virtual tape is written to
a physical tape cartridge.
If Disabled, the virtual tape volume tags will remain unchanged after a copy to
barcoded physical tapes. See “Virtual Tape Popup Menu” on page 94 for information about adding volume tags to virtual tapes.
Virtual Device Emulations
Note
This option only applies to models configured with multiple emulation
support. For miSAN-V-Series models configured with only the default
emulations this option will show a message box saying there is nothing
to configure.
If the miSAN-V-Series is configured with multiple emulation support (See “Define
Emulations” on page 68), this option will display a window that allows for selecting
a different emulation for each virtual device. The window shows all the configured
virtual devices with a drop-down listbox for each. The listboxes contain the names
of the emulations configured in the “Define Emulations” menu, under the
Cybernetics
UM-MV-86-B1-0801
53
Operating the Web Control Panel
“Advanced Options” menu. For each virtual device, select a tape device emulation
for backup hosts to see and use.
Note
Device emulation may require a driver to be installed on the host
computer system.
Receive SNMP messages from UPS
This menu option allows you to enable the HSTC to receive SNMP messages
from an APC® Smart-UPS® model UPS that has a Network Management Card or
a Tripp Lite® SmartPro®/SmartOnline™ model UPS that has an
SNMPWEBCARD. You can configure the UPS to send messages to the HSTC
when the power fails, enabling the HSTC to automatically shut itself down cleanly.
By enabling this option, you allow the miSAN-V-Series to take the following
actions in response to the UPS power events:
Event
Action
AC power failed; UPS on battery
The miSAN-V-Series remains operational
but prepared for shutting down quickly.
AC power restored before UPS battery is drainedThe miSAN-V-Series returns to
normal operation.
UPS battery is low
ensuring the safety of saved data.
The miSAN-V-Series shuts down cleanly,
Caution
The miSAN-V-Series does not authenticate the UPS, so enabling this
option enables anyone capable of sending SNMP messages on your
network to shut down the miSAN remotely.
Configuring an APC® Smart-UPS® model UPS with Network Management Card
You must configure the Network Management Card’s network parameters so the
Smart-UPS can communicate with the miSAN-V-Series. Under “Network” >
“SNMP”, set “Access” to “Enabled”. Under “Events” > “Recipients > “Trap Receivers”, enter the following information:
public
Community Name
Receiver NMS IP/Domain Name
[IP address of miSAN-V-Series]
Enabled
Generation
Authentication Traps
Cybernetics
Disabled
UM-MV-86-B1-0801
54
Operating the Web Control Panel
Note
From the miSAN-V-Series’s Web Control Panel, make sure “Receive
SNMP messages from UPS” is set to Enabled.
To test the configuration, pull the AC power plug on the UPS. The “Messages” tab on the
Web Control Panel should give a message that the UPS is on battery power. Wait a few
seconds, then plug the UPS AC power back in. The “Messages” tab on the Web Control
Panel should give a message that power has been restored.
Note
The APC Smart-UPS model does not send SNMP power failure
messages when using the diagnostics function for simulating a power
failure, so you cannot use this diagnostic to test the communication
with the miSAN-V-Series.
Configuring a Tripp Lite® SmartPro®/SmartOnline™ model UPS with
SNMPWEBCARD
You must configure the SNMPWEBCARD’s network parameters so the SmartPro®/
SmartOnline™ can communicate with the HSTC. Under “Settings” > “Contacts” >
“SNMP” > “New”, enter the following information:
IP Address
Name
Community
Trap Port
[IP address of HSTC]
[A descriptive name (e.g., miSAN-V-Series)]
public
162
Under “Settings” > “Events”, check “SNMP Notification” for “On Battery”, “Battery Low”,
and “Battery Capacity Below Warning Level”. When you check “SNMP Notification”, a
window will pop up with more configuration options. Under “Message Settings”, set the
two time values to 0. Under “IP Addresses”, highlight the HSTC’s IP address so the HSTC
is notified of the event. Also, make sure the “Shutdown” action for the “On Battery” event
is not checked, since this could cause a loss of output power without an SNMP warning
message.
Under “Settings” > “Device” > “Low Battery Warning”, enter the percentage of the battery
charge that you want to trigger the HSTC shutdown. Note that a loss of output power can
occur before 0% is reached, so do not use a value that is too low. Cybernetics recommends a minimum value of 30 or more, depending on the load.
Cybernetics
UM-MV-86-B1-0801
55
Operating the Web Control Panel
You do not have to configure “Settings” > “Network” > “SNMP”, because the HSTC does
not send SNMP messages to the UPS; it only receives them.
Note
From the HSTC’s Web Control Panel, make sure “Receive SNMP
messages from UPS” is set to Enabled.
To test the configuration, pull the AC power plug on the UPS. The “Messages” tab on the
Web Control Panel should give a message that the UPS is on battery power. Wait a few
seconds, then plug the UPS AC power back in. The “Messages” tab on the Web Control
Panel should give a message that power has been restored.
Data Compression
Rule: you can't compress encrypted data, but you can encrypt compressed data. If you
want to use data compression and encryption together, you must compress first and then
encrypt.
Most tape drives have the capability of compressing the data they receive during a
backup and decompressing the data they read from the tape during a restore. Tape
drives handle data compression transparently in hardware; the application software
doesn't have to do anything except tell the tape drive to enable it. Unfortunately, a tape
drive's internal compression is useless for encrypted PTs, since the tape drive receives
the data only after encryption (see the rule above). The HSTC always disables the tape
drive's internal compression when creating encrypted tapes.
The HSTC itself also has the capability of compressing data. The HSTC supports using
its own compression for both VTs and PTs. The HSTC's compression may be used with
encrypted or non-encrypted VTs and encrypted PTs, but not with non-encrypted (plain)
PTs. For non-encrypted PTs, the HSTC lets the tape drive compress the data instead.
There are two menu options that control when the HSTC uses its own compression:
* Compress VTs: Disabled/Enabled
* Compress encrypted VTs and PTs: Disabled/Enabled
Cybernetics
UM-MV-86-B1-0801
56
Operating the Web Control Panel
SCSI Configuration
SCSI HBA Ports
Depending on the miSAN-V series configuration, there will be HBA 1 and HBA2, or
HBA 1a, HBA1b, HBA2a, and HBA2b. HBA 2 will normally be connected to a host,
though it may be configured to connect to a target.
HBA X direction
Choose betwen Connects to host and Connects to devices.
HBA X base SCSI ID
This item controls the SCSI IDs for virtual devices which are presented to host systems, and has no connection with the actual SCSI ID settings for any attached physical devices. This setting and the “Device ID Order” setting below have no effect and
will not be displayed on an iSCSI-only system.
Note
When selecting the Base SCSI ID, make sure not to inadvertently create
a conflict with the host controller SCSI ID, which is normally set to 7.
This item sets the base (lowest numbered) SCSI ID that the unit uses. Default is 2.
These are the SCSI IDs that will be seen by the host computer system. Available
selections are 0 through 15. The miSAN-V-Series will use one SCSI ID for each
installed device (tape drive or changer), assigning SCSI IDs consecutively beginning
with the Base SCSI ID.
Cybernetics
UM-MV-86-B1-0801
57
Operating the Web Control Panel
HBA X speed
The “SCSI bus speed” setting defaults to “Auto.” The “Auto” setting provides the
optimal bus speed for most configurations. To set a fixed, limiting bus speed,
select from the wide and narrow speeds in the drop-down menu..
Note
The actual SCSI bus speed negotiated between the miSAN-V-Series and
the attached host system depends on the host hardware configuration
and the bus termination.
Incoming iSCSI Connections from Hosts
iSCSI login control
There are three choices for iSCSI login control: iSCSI disabled (default), Protected by password, and Open to everyone (insecure)..
iSCSI access password
The iSCSI protocol supports optional authentication in either or both directions
(host-to-target, or target-to-host). The “iSCSI access passwd” is used to prevent
unauthorized hosts from gaining access to the miSAN-V-Series. This requires
host systems to be authenticated by the miSAN-V-Series. Default is no password.
When a password has been set, host systems must be configured to use CHAP
authentication with the same password set in order to connect to the iSCSI target
devices.
To set, change or remove the “iSCSI access passwd,” follow the same procedures as for the “Menu password.”
iSCSI host username
This menu item is used together with the “iSCSI host password” (See “iSCSI host
password”) to permit the miSAN-V-Series to identify itself as a legitimate device to
iSCSI host systems. Default is none (no “iSCSI host username” is set). An iSCSI
host system that is configured to use bi-directional authentication will check the
“iSCSI host username” and the “iSCSI host password” setting using CHAP
authentication. Both must match the entries that are set on the host system itself.
If the host system is set to use bi-directional authentication and these entries do
not match those on the host system, CHAP authentication will fail. If the host sys-
Cybernetics
UM-MV-86-B1-0801
58
Operating the Web Control Panel
tem is not set to use bi-directional authentication, these entries will not be checked
by the host system and will have no effect.
Since the miSAN-V-Series only maintains a single “iSCSI host username” and
“iSCSI host password,” all hosts that are intended to connect to the miSAN-VSeries must use the same host username and password for CHAP authentication
with this miSAN-V-Series.
To set, change or remove the “iSCSI host username,” follow the same procedures
as for the “Menu password.”
iSCSI host password
This is the password that goes with the “iSCSI host username” above.
To set, change or remove the “iSCSI host password,” follow the same procedures
as for the “Menu password.”
Outgoing iSCSI Connections to Devices
You can configure the miSAN-V-Series to use up to four remote iSCSI target devices.
There are three submenu items for each numbered device: “Remote iSCSI device X,”
“Device X IP address” and “Device X iSCSI password.”
Remote iSCSI device X
Choices are “Enabled” and “Disabled” for each remote iSCSI device.
Device X DNS Name or IP address
Set this to match the DNS Name or IP address of the remote iSCSI device (tape
drive, library, and/or iSCSI storage device (i.e. miSAN-D Series) with which the
miSAN-V-Series is to communicate.
Device X iSCSI Username
Default is CyberneticsASP. This can be changed if necessary.
Device X iSCSI password
Set this to match the iSCSI Access Password of the remote iSCSI device with
which the miSAN-V-Series is to communicate.
Setup for using an external iSCSI device for
additional Virtual Tape storage
The following steps show how to connect the miSAN-V Series to a iSCSI device for
additional Virtual Tape storage.
1. Select SCSI configuration > Outgoing iSCSI connections to devices from the
HSTC Options drop-down menu.
Cybernetics
UM-MV-86-B1-0801
59
Operating the Web Control Panel
2. Enable Remote iSCSI device 1.
3. Enter the IP address iSCSI device.
4. Enter iSCSI username (default iSCSI username is CyberneticsASP)..
5. Click on iSCSI password.
Cybernetics
UM-MV-86-B1-0801
60
Operating the Web Control Panel
6. Enter new password. (Password must match the password on the iSCSI device
and is recommended to be 14 characters long). Press OK.
7. A dialog box will pop up. Wait for it to disappear.
8. Select Rescan physical devices... form the Tools drop-down menu.
9. Select Yes.
Cybernetics
UM-MV-86-B1-0801
61
Operating the Web Control Panel
10. Select Create virtual tapes... from the Tools drop-down menu.
11. Open the Format disks tab. Select either Format disks that need formatting, or
Format all disks. After formatting the disks, press the Apply changes.
12. Use either the Basic or Advanced tabs to set up the new virtual tapes.
Cybernetics
UM-MV-86-B1-0801
62
Operating the Web Control Panel
Network Configuration
This submenu is used to configure the network interface(s). Based on the configuration, the unit may have three or more interfaces, which are used for either configuration and remote display only or for data transfer (iSCSI) as well. Each network
interface may be configured individually. All network interfaces use the industry standard TCP/IP protocol.
When any network parameters are changed, and the changes are committed, the
changes will take effect immediately. In the case of a change to the IP Address, the
miSAN-V-Series connection will be dropped as soon as the new IP Address takes
effect, since the unit will no longer respond at the old IP Address. Re-establish a connection to the miSAN-V-Series to verify the new configuration.
Caution
Be careful when making changes to network parameters. Make sure
network settings will not render the unit unreachable on the network. If
the miSAN-V-Series becomes unreachable on the network, you can
reset the network parameters to their default values using the network
reset button on the rear panel. To perform the reset, while the miSAN is
powered-on, first, insert a #0 Phillips screwdriver or paper clip into the
network reset button hole on the rear panel (See Figure 2-1). Then,
press and hold down the reset button for 5 seconds. The miSAN will
then restart. Afterward, you may change the network parameters from
their default values according to instructions in “Network” on page 16.
The first three submenu items below (“Hostname,” “Default gateway”
and “Nameserver”) apply to all network interfaces. The remaining items
are grouped by the interface involved: “eth0”, “eth1”, “bond0”, etc.
Hostname
Set the TCP/IP hostname. This may be either a hostname or a fully qualified
domain name (FQDN; see Appendix C, “Glossary”).
Default gateway
The default gateway IP address (default is 127.0.0.1) is set with this option.
Nameserver
A single nameserver IP address (default is 127.0.0.1) may be set in the same
manner as the miSAN-V-Series default gateway IP address.
ethX ( 1000 Mbps)
Choices are “Enabled”, “Disabled”, and “Bonded” for each interface.
The primary Ethernet interface is “eth0”. Depending on the configuration, there will
usually be either three or five Ethernet interfaces installed. They will be named in
sequence (“eth0”, “eth1”, etc.). Default for each interface is Enabled. For each
Cybernetics
UM-MV-86-B1-0801
63
Operating the Web Control Panel
interface, menu options are to enable the interface, and to set “IP address”, “subnet mask”, and “MTU”.
At least one network interface (“bond0”, “eth0”, “eth1”) must be Enabled. If all network interfaces are set to Disabled, attempting to save changes will give an error
message.
The menu item set (Enabled, “IP address”, “subnet mask”, “MTU”) will be
repeated for each interface. Settings below for “IP address”, “subnet mask” and
“MTU” will be shown only if the corresponding Ethernet interface is Enabled.
If more than one interface is enabled, the network addresses must be disjoint (i.e.,
the combination of “IP address” and “subnet mask” must resolve to separate interfaces). The following examples include valid and invalid configurations to further
explain this requirement:
eth0
192.168.1.1/255.255.255.0
eth1
192.168.2.1/255.255.255.0
This is a valid combination. IP addresses looking like 192.168.1.X are routed to “eth0”, and addresses looking like 192.168.2.X are routed to “eth1”.
eth0
192.168.1.1/255.255.0.0
eth1
137.157.1.8/255.255.0.0
This is a valid combination. IP addresses looking like 192.168.X.X are routed to “eth0”, and
addresses looking like 137.157.X.X are routed to “eth1”.
eth0
192.168.1.1/255.255.255.0
eth1
192.168.1.1/255.255.255.0
This is an invalid combination. Both interfaces have the same network parameters.
eth0
192.168.1.1/255.255.255.0
eth1
192.168.1.2/255.255.255.0
This is an invalid combination. The miSAN-V-Series cannot route outgoing IP requests without
additional configuration information.
eth0
192.168.1.1/255.255.0.0
eth1
192.168.2.1/255.255.255.0
This is an invalid combination. Because of the different subnet masks, the network addresses
overlap, so the miSAN-V-Series cannot route IP requests without additional configuration
information.
Cybernetics
UM-MV-86-B1-0801
64
Operating the Web Control Panel
If the user tries to save an invalid configuration, the miSAN-V-Series will display
an error message. Return to the “Network Configuration” menu so that the conflict
can be corrected or the changes cancelled.
Two or more interfaces may be “bonded” together to transfer data as a single
Ethernet interface “bondX”. This combines the available bandwidth for the multiple
interfaces into the “bondX” Ethernet interface. See Appendix C, “Glossary” for a
further explanation of bonding, including requirements.
To do this, set “eth0” and “eth1” to Bonded, and then set the network parameters
for the “bondX” interface.
ethX IP bonding
Note
This menu item only appears if the Ethernet interface is set to “Bonded”.
This menu option sets the “bondX” interface that the Ethernet interface is part of.
Default value is bond0.
ethX IP address
All network interfaces must be assigned static IP addresses. The miSAN-V-Series
does not support DHCP (Dynamic Host Configuration Protocol), since it is
intended that the network interface(s) will be up indefinitely, and lease renegotiation might interrupt a backup operation in progress.
The default “IP address” for the first Ethernet interface is 192.168.1.1. Default “IP
addresses” for subsequent interfaces are 192.168.2.1, 192.168.3.1, etc. The
static IP address is set with this option.
ethX subnet mask
The default “subnet mask” is 255.255.255.0. Change the subnet mask in the
same manner as for the “IP address”.
ethX MTU
Note
This menu item only appears if the Ethernet interface supports “jumbo”
packets. Otherwise, this item is hidden, and the MTU is set to 1500 by
default.
This sets the Maximum Transmission Unit (MTU) size. Default value is 1500.
Choices are 1500 and 9000. The 9000 setting is for use only with Gigabit Ethernet
networks that are “jumbo” packet capable (See Appendix C, “Glossary”).
Cybernetics
UM-MV-86-B1-0801
65
Operating the Web Control Panel
bondX
Note
This menu item only appears when two or more Ethernet interfaces are
set to “Bonded”.
Settings for “bondX IP address”, “bondX subnet mask” and “bondX MTU” will be
shown only if Bonding is set to Enabled.
However, settings for the “eth” interfaces will be displayed only if “Bonding” is set
to Disabled.
bondX IP address
The default “bond0 IP address” is 192.168.1.1. A static IP address is set with this
option.
bondX subnet mask
The default “bond0 subnet mask” is 255.255.255.0. This may be changed in the
same manner as for the “IP address”.
bondX MTU
Note
This menu item only appears if the Ethernet interface supports Jumbo
frames. Otherwise, this item is hidden, and the MTU is set to 1500 by
default.
This sets the Maximum Transmission Unit (MTU) size. Default value is 1500.
Choices are 1500 and 9000. The 9000 setting is for use only with Gigabit Ethernet
networks that are “jumbo” packet capable (See Appendix C, “Glossary”).
Message Delivery
The miSAN-V-Series can be configured to send email messages to notify selected
recipients when any of the following events occur:
•
A copy from virtual to physical tape completes, which also reports whether the
copy was successful
•
A disk error occurs, which may require replacing the disk
•
The miSAN-V-Series goes offline unexpectedly due to a fatal error
To set up email messaging, the miSAN-V-Series must have access to a Simple Mail
Transfer Protocol (SMTP) server on the network.
Email messages sent by the miSAN-V-Series contain the following information fields:
Cybernetics
UM-MV-86-B1-0801
66
Operating the Web Control Panel
•
“From” line: Given as the miSAN-V-Series “Hostname,” as set in the “Network
Configuration” menu (See “Network Configuration” on page 62) with the email
address “[email protected].”
•
“Reply-To”
line:
Given
as,
“Cybernetics
Technical
Support
The Cybernetics Technical Support email
address is supplied for miSAN-V-Series email recipients who need assistance
after receiving a message reporting an error.
<[email protected]>.”
•
Message body: Contains information also shown on the “Messages” tab of the
Web Control Panel, and for fatal errors, a web link (URL) to the debug log for the
miSAN-V-Series, which is available for viewing in a web browser.
The following menu items are used to enable/disable messaging, configure the server
location and login information and enter the email addresses for the recipients:
Send messages by email
Choices are “Enabled” and “Disabled” for the miSAN-V-Series email messaging
feature. Immediately after saving this setting as Enabled, the miSAN-V-Series will
send an email message to all addresses configured in the “Email address(es)”
setting to test and verify the configured SMTP server settings.
SMTP server
Set this menu item to the IP address and port of the SMTP server on the network.
Enter the IP address, (or DNS name if a “Nameserver” has been set under the
“Network Configuration” menu), followed by a colon (‘:’) and the SMTP port number. If a port is not specified, the miSAN-V-Series will use the standard SMTP
submission port 587, (however, many SMTP servers use port 25). For example:
137.157.1.8:587
SMTP username
If the SMTP server requires authentication for sending messages, enter a username for the miSAN-V-Series to provide when logging in to the server.
SMTP password
This is the password that goes with the “SMTP username” above.
Email address(es)
This menu item is used for entering the list of recipients who will receive email
messages from the miSAN-V-Series. When entering multiple email addresses,
Cybernetics
UM-MV-86-B1-0801
67
Operating the Web Control Panel
separate each with a semi-colon (‘;’) followed by a space. For example:
[email protected]; webmaster@domain,com; [email protected]
Accounts
This sub-menu sets a password for restricting access to the Java Web Control Panel
and the Telnet Menu System. For the Web Control Panel, this password is used to
load the Java applet. For the Telnet Menu System, this password is specifically used
for the “menu” username. For both interfaces, the default password is no password,
which allows anyone at any client system that can connect to the miSAN-V-Series to
load the Web Control Panel and/or enter the Telnet Menu System and make configuration changes.
Admin
To set a password, or to change an existing password, Click on the No password
set button (The button may also be labeled Changed or Not changed). Enter the
desired (new) password, and then save the change.
To disable password authentication (remove an existing password), clear the current entry without entering a new password, and then save the change.
Once a new password is entered, the user is logged off and a login screen
appears. Choose Admin or User and enter the proper password.
Note
For password protection to be effective, both Admin and User accounts
must have passwords.
User
The user account may be Enabled (default is Disabled). To set a password, or to
change an existing password, enter the desired (new) password, and then save
the change.
Cybernetics
UM-MV-86-B1-0801
68
Operating the Web Control Panel
To disable password authentication (remove an existing password), clear the current entry without entering a new password, and then save the change.
The following options apply to the user account:
•
User may offload to PTs (Disabled or Enabled).
•
User may offload to removable VTs (Disabled or Enabled).
•
User may mount VTs (Disabled or Enabled).
•
User may write to primary VTs (Disabled or Enabled).
•
User may restor from PT (Disabled or Enabled).
All the above options are disabled by default.
Advanced Options
Advanced Menu(s)
These menu selections present a set of submenus named “Advanced Menu 0,”
“Advanced Menu 1,” etc. These are preset. Do not change these settings unless
directed by Cybernetics Technical Support.
Define Emulations
Note
This menu item only appears if the miSAN-V-Series is configured with
multiple emulation support and will not appear on most units.
This menu selection allows for configuring the miSAN-V-Series to support different emulations for tape drives and stackers, up to four each. Each configurable
tape or stacker emulation allows for entering a descriptive name for the emulation
and selecting a specific manufacturer model, represented by a number.
Cybernetics
UM-MV-86-B1-0801
69
Operating the Web Control Panel
The configured emulations can be selected for use by virtual devices using the
“Virtual Device Emulations” menu (See “Virtual Device Emulations” on page 52).
Note
Enabling support for each emulation requires a passcode. Contact
Cybernetics Technical Support to identify numbered emulations and
obtain passcodes for specific manufacturer models.
Debugging
This menu selection presents a set of menu items used for enabling specific types
of debugging messages. Do not change these settings unless directed by Cybernetics Technical Support.
Note
The “Speed test mode” setting is used to test the data transfer rate
between the host computer and the miSAN-V-Series independently of
the connected SCSI tape devices. When Enabled, the miSAN-V-Series
will discard all data from host write commands. For host read
commands, the miSAN will return random data.
Host iSCSI Debug Messages
This menu selection presents a set of menu items used for enabling specific types
of debugging messages. Do not change these settings unless directed by Cybernetics Technical Support.
Information
This menu displays information about the installed miSAN-V-Series code and devices.
Nothing can be changed through this menu.
Product Information
This menu item displays the installed CY-HSTC engine code version (“Version”), unit
serial number (“EUI serial #”), HASP security device ID number (“ID #), host bus mask
(“Host bus mask”), miSAN-V-Series flags (“Flags”), Ethernet interface(s) (numbered
as “eth”), and MAC address(es) (“HWaddr”). “Host bus mask” is a number indicating
which SCSI ports are assigned as targets for host systems.
“Host bus mask” is a number indicating which SCSI ports are assigned as targets for
host systems.
Cybernetics
UM-MV-86-B1-0801
70
Operating the Web Control Panel
“Flags” are installed con figuration options, such as “ASP”, “iSCSI-HOST” and “iSCSI
DEVICE.” If no options are installed, this line will simply display “Flags:”
Note
The network settings (IP address/subnet mask) and MAC address will
be shown for each installed network interface. If bonding is enabled, the
network settings and MAC address will be identical for all interfaces.
Physical Devices
This menu item displays a list of all SCSI devices (tape drives and/or libraries) connected to the miSAN-V-Series, with manufacturer, model number, and firmware version.
Virtual Devices
This menu item displays a list of all iSCSI devices (tape drives and/or libraries) connected to the miSAN-V-Series, with manufacturer, model number, and firmware version.
Virtual device assignments
This menu item displays a list of Virtual device assigments.
Credits and Licenses
This menu item acknowledges the proprietary software code copyrighted by Cybernetics and various 3rd-party programs copyrighted by others; the usage licenses for
those programs are included as well. The text is reproduced in the “Notices” section of
this manual.
Browser links
This item provides web browser clients with access to additional web pages on the
miSAN-V-Series. Each web page opens in a new browser window. The following
menu items are useful for troubleshooting and viewing settings and hardware configurations:
•
View debug messages: Shows the miSAN-V-Series message log, which can be
updated by refreshing the browser window. If trouble occurs with the miSAN-VSeries, this page may be saved and emailed to Cybernetics Technical Support
([email protected]) for further assistance.
•
View list of menu settings: Shows a complete list of miSAN-V-Series menu
settings, virtual device configurations and virtual tape assignments. Before
loading new firmware code into the miSAN-V-Series, save this page. After the
code installs, refer back to this saved page when reconfiguring the miSAN-VSeries settings.
•
View hardware information: Shows information about the miSAN-V-Series
network interfaces, IP routing table and attached SCSI devices.
Cybernetics
UM-MV-86-B1-0801
71
Operating the Web Control Panel
Tabs
Devices Tab
The “Devices” tab shows a “tree” view on the left with an entry representing each virtual
and physical device (physically attached or connected via iSCSI) (See Figure 3-22). Virtual tape drives and stackers (libraries) appear as numbered “VirtTapeDrive” and “VirtStacker” objects, respectively. Physical tape drives and stackers appear as numbered
“Stacker” and “Tape drive” objects, respectively. Optical drives, also supported by the
miSAN-V-Series, appear as “Optical drive” objects. The device tree, under the head
folder “Devices”, is fully expanded by default, showing a folder for “Virtual” and “Physical”
devices. All configured virtual devices are found in the “Virtual” folder. All external physical devices, whether physically attached or connected over the network using iSCSI,
appear in the “Physical” folder. If an externally connected physical device does not
appear in a folder, make sure the miSAN-V-Series is configured properly to use it. The
“Devices” folder will update automatically whenever the miSAN-V-Series device configuration changes, such as after changing the number of virtual devices.
Figure 3-22 “Devices” Tab
Note
To rename a virtual tape drive or stacker, click on the desired device to
select it, and then right-click it to show a pop-up command to Rename
Figure 3-23 Renaming a Virtual Tape
Cybernetics
UM-MV-86-B1-0801
72
Operating the Web Control Panel
Virtual Tape Drive Device Panel
When selected in the device tree, a virtual standalone tape drive will expand to reveal
a device panel in the frame on the “Devices” tab (See Figure 3-24). The device panel
presents a “Mounted medium” drop-down listbox where the assigned virtual tapes can
be mounted. Along the right side of the “Mounted medium” box is a checkbox for
enabling the “Autoload” feature. Right-click on VirtTapeDrive X to rename..
Figure 3-24 Virtual Tape Drive Device Panel
Mounted Medium listbox
The “Mounted medium” listbox displays the currently mounted tape. The listbox
lists all the virtual tapes assigned to the drive and an option for “None”. The
“None” option ejects a virtual tape and leaves the drive empty. Although possible,
a virtual tape should not be copied while mounted, since a host could possibly use
it. Thus, selecting “None” allows all virtual tapes assigned to the drive to be copied
to tape cartridges.
Autoload checkbox
The “Autoload” checkbox controls the virtual tape autoloading feature. If enabled,
the miSAN-V-Series will automatically mount the next virtual tape listed in the
“Mounted medium” listbox when a host issues an “eject” command. This is useful
during backups, such as when the currently mounted tape is full, and during
restores, such as when searching through tapes. When “Autoload” is enabled,
tapes are changed sequentially, allowing a virtual standalone drive to behave like
an autoloading tape media changer. When the last virtual tape is ejected, the
miSAN-V-Series will remount the initial tape in the sequence in a “round-robin”
manner. Autoloading can be temporarily disabled during a backup or restore by
selecting “None” from the “Mounted medium” listbox. To resume, select a virtual
tape to continue with in the sequence.
Virtual Stacker Device Panel
When selected in the device tree, a virtual stacker will reveal a device panel in the
frame on the “Devices” tab (See Figure 3-25). The “Access mode” field shows
which tapes the miSAN-V-Series presents to a host accessing the virtual stacker.
The following modes may be shown:
Cybernetics
•
“virtual tapes”: Virtual tapes assigned to the virtual stacker
•
“physical tape drive X”: Physical tape in the tape drive
•
“physical stacker X”: Physical tape(s) in the stacker
UM-MV-86-B1-0801
73
Operating the Web Control Panel
•
Stacker slots are presented as a table with columns for the following fields:
•
Element: Numbered virtual stacker slots and tape drive(s)
•
Tape: Tapes presented in the virtual stacker slots and drive(s)
• The “Tape” column shows the tapes a virtual stacker presents to a host
system. A virtual stacker presents its tapes by populating the slots from the top of
the column, beginning at Slot 1.
If the miSAN-V-Series is configured with a physical tape drive and/or library, a
host can access the physical tape drive/library by proxy using the virtual stacker.
Direct host access for a physical tape drive pairs the physical tape in the drive with
the first slot in the virtual stacker. To access the physical tape, move the tape from
Slot 1 to the virtual stacker drive. You can enable direct host access to a physical
tape drive from the physical tape drive’s Menu button (See “Physical Stacker
Device Panel” on page 82).
Direct host access for a physical stacker pairs the physical stacker slots with the
virtual stacker slots, beginning at Slot 1. You can enable direct host access to a
physical stacker with the physical stacker’s popup menu (See “Physical Stacker
Device Panel” on page 82). When direct host access to a physical stacker is
enabled, the virtual stacker’s “Tape” column will show each physical tape by listing in each slot the corresponding physical stacker’s slot number along with the
physical tape’s name.
Figure 3-25 Virtual Stacker Device Panel
Tapes can be moved within the virtual stacker to other slots or drives using a
popup menu. This allows for moving tapes without having to use host backup software.
The “Move to” popup menu is accessed by first selecting the desired virtual tape
and then right-clicking it. The submenus allow for moving the selected tape to
Cybernetics
UM-MV-86-B1-0801
74
Operating the Web Control Panel
another slot (See Figure 3-26) or drive (See Figure 3-27). Unavailable slots and
drives are greyed out.
Figure 3-26 “Move to slot” Popup Menu
Figure 3-27 “Move to drive” Popup Menu
Cybernetics
UM-MV-86-B1-0801
75
Operating the Web Control Panel
Physical Tape Drive Device Panel
When selected in the device tree, a physical tape drive will reveal a device panel
in the frame on the “Devices” tab. The device panel presents the status information for the tape drive (See Figure 3-28).
Figure 3-28 Physical Tape Drive Device Panel
The physical tape drive status information is presented with the following fields:
•
Model: Tape drive model, as returned from the SCSI Inquiry command
• Firmware version: Tape drive firmware, as returned from the SCSI Inquiry
command
• Serial number: Tape drive serial number, as returned from the SCSI Inquiry
command
• Drive state: Current physical tape drive activity as one of the following: “Not in
use”, “Host access: virtual tape drive”, “Host access: virtual stacker”, or “Assigned
to a job”. Physical stacker tape drives will also report when reading/writing a
physical tape header or copying to a virtual tape.
• Drive status: Tape drive mechanism condition, which reports “OK”, unless the
drive is requesting that you load a cleaning tape (“NEEDS CLEANING”), the drive
is reporting a serious problem that prevents normal operation (“HARDWARE
ERROR”), or the drive is not responding to commands (“OFFLINE”); check power
and connections
•
Cybernetics
Tape name: Name of the currently-loaded physical tape
UM-MV-86-B1-0801
76
Operating the Web Control Panel
• Tape status: Tape cartridge load status, which reports “Loaded” when ready
for use. For a “Loaded” tape cartridge, “MEDIUM ERROR” will also appear if a
loaded tape has a problem that prevents the drive from reading or writing data,
and “Write-protected” if physically write-protected.
•
Tape capacity: Total tape capacity (gigabytes)
• Tape position: Current tape position as the space remaining until the end of
the tape (gigabytes)
Note
For a tape drive reporting the unused space (e.g., IBM Ultrium LTO
drive), rather than the current tape position, the status will show the
remaining space between EOD (End-of-Data) and the end of the tape.
The status field will show “Unused space” instead of “Tape position”.
•
Current RWR/ECC: Current WRITE/READ operation error rate percentage
•
Average RWR: Average WRITE operation error rate percentage
•
Average ECC: Average READ operation error rate percentage
•
Transfer rate: Current WRITE/READ data transfer rate
Menu Button
Pressing the Menu Button brings up a drop-down menu with the following options:
1) Inventory
• Identify tape... – This option lets you manually identify the currently-loaded
tape from a list of tapes in the database. Use this option after reinserting a tape
that you had previously loaded and ejected so the miSAN-V-Series can use the
same database entry for the tape as before. This option is usually not necessary
for AIT or LTO tapes, which the miSAN-V-Series can identify automatically by
their serial numbers. You may find it easier to identify tapes in the database if you
rename them from the “Physical tapes” tab when you initially load them (“Physical
Tapes Tab” on page 97).
2) Disk cache
•
Cybernetics
Setup offload...
UM-MV-86-B1-0801
77
Operating the Web Control Panel
This option allows for setting up offloading from a virtual tape to the physical tape
drive.
Figure 3-29 “Setup offload” Window
To specify which virtual tape to be offloaded to the physical tape:
1) Click Select VT to offload...
2) Select the virtual tape you want to copy to the physical tape.
Figure 3-30 “Select virtual tape” Window
3) Click Use selected VT.
Cybernetics
UM-MV-86-B1-0801
78
Operating the Web Control Panel
You can clear the association between a physical tape and the virtual tape for offloading from the “Physical tapes” tab.
Figure 3-31 “Clear VT for offloading” Option
•
Action
After you choose a virtual tape to be offloaded to a physical tape, you may select
one of the following actions to be performed to the virtual tape:
Do nothing to VT – Choose this if the virtual tape already contains a backup you
want to offload to the physical tape. This is useful in the following situations:
1. You performed a backup to virtual tape before associating the virtual tape with a
physical tape for offloading.
2. You had previously associated the virtual tape with a different physical tape that
had an error while offloading (e.g. a bad tape). You can choose this option to
associate the virtual tape with a different physical tape.
Erase VT – Choose this if the virtual tape contains data you no longer need, for
example if the virtual tape contains an older backup that has already been offloaded to physical tape. Your backup software will see the virtual tape as a new
blank tape.
Copy PT header -> VT – Choose this if the virtual tape contains data which you
no longer need, and the physical tape contains a backup that you want to purge
from your backup software’s database. The miSAN-V-Series will create a job to
copy the data header from the physical tape to the virtual tape. When your backup
software sees the data header on the virtual tape, it should purge the old backup
from its database when overwriting the virtual tape with a new backup.
Copy PT -> VT – Choose this if the virtual tape contains data you no longer need,
and the physical tape contains a backup you want to either restore or append.
Note
“Host access” is often an easier method for restoring from a physical tape.
Cybernetics
UM-MV-86-B1-0801
79
Operating the Web Control Panel
An alternative way to purge the record of an old backup from your backup software’s database is to use “Host access” to have your software erase the physical
tape (See “Host access” on page 81). Or, you can delete the old database entry
manually through your software.
•
Wait for backup
While “Wait for backup” is set, any job to offload the virtual tape to physical tape
will wait for the host to do a backup before offloading. The miSAN-V-Series will
clear the “Wait for backup” flag when the host does a backup.
Select the “Wait for backup” option if the virtual tape does not contain any data
that you want to offload to the physical tape (e.g., if the virtual tape was already
offloaded successfully). Deselect the “Wait for backup” option if the virtual tape
does contain data from a backup that you want to offload. “Wait for backup” is
always selected if you choose “Copy PT header -> VT” or “Copy PT -> VT”. “Wait
for backup” is selected by default if you choose “Erase VT” or if the virtual tape is
already blank, but you can deselect it if desired.
•
Offload disk to tape...
Once you have setup offloading, use this option to create a job that does the
actual work of copying the virtual tape to physical tape.
Note
“Offload disk to tape...” creates a new set of jobs each time you use it. If
you had suspended an offload job and you want to resume that job
instead, you can do so from the “Jobs” tab.
Figure 3-32 “Offload disk to tape” Window
Cybernetics
UM-MV-86-B1-0801
80
Operating the Web Control Panel
The “Source and Destination” frame shows the name of the source (“Virtual tape”)
and destination (“Physical tape”) for offloading the tape.
Click “Select VT to offload...”, and then choose the virtual tape to set the source.
“Offload status” shows the status for the selected virtual tape to be offloaded:
Wait for backup – The job will wait for a backup to the virtual tape before starting
the offload. You can toggle this flag from the “Setup offload...” option.
Needs offload – The virtual tape needs to be offloaded to physical tape.
In progress – The offload is already in progress; see the “Jobs” tab.
PT same as VT – The virtual tape has already been offloaded to the physical
tape. There is no work to be done now, but if you have the job run continuously
then any future backups will be offloaded.
•
Load tape onto disk...
Use this option to import the data from your physical tapes into the disk cache
using “Load tape onto disk...”. Note, you can also do this by selecting the “Setup
offload...” option, and then the “Copy PT -> VT” option for the “Action”, which is
the preferred way if you intend to append to the backup and offload the appended
data back to the physical tape. If you want to import the data for restoring from the
disk cache, then “Load tapes onto disk...” is easier.
Note
“Host access” is often an easier method for restoring from a physical tape.
To import the data from the physical tape, you will need to create one virtual tape
for each physical tape being imported that has enough capacity to hold the tape’s
data after decompression. Make sure the virtual tape is safe to overwrite and not
mounted in any virtual drive. Then, select “Load tape onto disk...” to create the
jobs that will do the copying.
Figure 3-33 “Load tape onto disk” Window
Cybernetics
UM-MV-86-B1-0801
81
Operating the Web Control Panel
Host access
Host access enables you to access the physical tape drive directly from your software, bypassing the disk cache. This is often useful for restoring directly from a
physical tape.
Enabling host access
Choose one of the virtual devices listed in the “Host access” submenu, and the
miSAN-V-Series will temporarily reconfigure the selected virtual device to map to
the physical tape drive.
Using host access
You may load and eject physical tapes at will. If you are using a virtual standalone
drive, the virtual drive simply mirrors the state of the physical drive. If you are
using a virtual stacker, the miSAN-V-Series simulates the operation of a stacker
with only one tape in its inventory. The miSAN-V-Series lets the software move
the single physical tape around in the virtual stacker, however the physical tape
just remains loaded in the tape drive. If you physically eject and replace the tape,
to your software it looks like you opened the stacker door, changed the tape in the
magazine slot, and then closed the stacker door.
Disabling host access – Go back to the “Host access” submenu and choose
“Disable”. The miSAN-V-Series will reconfigure the virtual device to access the
virtual tapes rather than the physical tape drive.
Job control
This menu enables you to suspend any jobs using the physical tape drive. This
can also be accomplished via the “Jobs” tab (See “Jobs Tab” on page 99).
If the tape drive is located in a stacker, then the Menu button offers only a “Help”
option that tells you to use the stacker’s Menu button; all control for the stacker’s
tape drive(s) is handled using the stacker’s Menu button (See “Physical Stacker
Device Panel” on page 82).
Cybernetics
UM-MV-86-B1-0801
82
Operating the Web Control Panel
Physical Stacker Device Panel
Note
This section only applies if the miSAN-V-Series is configured with Tape
Library Control support. The physical stacker device panel is only used
when the miSAN-V-Series is configured to operate an external tape
library.
Tapes can be moved within the physical stacker to other slots or drives using a
popup menu. The popup menu is used only when “Host access” is not enabled,
since the library is then inaccessible to hosts. This allows clients to move tapes
within the library without possibly interrupting host backup jobs.
The popup menu is accessed by first selecting the desired physical tape and then
right-clicking it. The submenus allow for moving the selected tape to another slot
or drive. Unavailable slots and drives are greyed out on the popup menu.
Status – Shows one of the following:
•
“Door open or not ready”
•
“Initializing”
• “Too many tapes loaded” – This happens if you have a tape in every magazine
slot plus an additional tape in the tape drive. Remove the the tape from the tape
drive, and try again.
•
“Ready”
•
“Moving tape”
•
“In use by another machine” – Some other machine is using the stacker
• “OFFLINE” – The stacker is not responding to commands. Check power and
SCSI connections.
Inventory tab
Physical tape library slots are presented as a table with columns for the following
fields:
•
Cybernetics
Element – Numbered physical library slots and tape drive(s)
UM-MV-86-B1-0801
83
Operating the Web Control Panel
•
Tape – Tapes inserted in the physical library slots and drive(s)
Figure 3-34 Physical Stacker Device Panel
All control and jobs for the physical stacker are initiated using commands available from a popup menu. To access the popup menu, right-click in the stacker
table. Some menu commands require you to select one or more physical tapes
before activating the menu; others work with no tapes selected.
The following menu commands are visible. Depending on the stacker’s current
state, some commands may be greyed-out and unavailable:
•
Inventory
•
Identify tapes...
This option lets you lets you manually identify the tapes currently present in the
stacker from a list of tapes in the database. Use this option after loading tapes that
you had used previously so the miSAN-V-Series can use the same database
entries for the tapes as before. You may find it easier to identify tapes in the database if you rename them from the “Physical tapes” tab when you initially load
them (“Physical Tapes Tab” on page 97).
To help you find the correct set of tapes from the database, the tapes are grouped
into sets that were all loaded at once, and then the groups are sorted chronologically.
You can choose from the following options to inventory the tapes:
•
Inventory unknown tapes
•
Inventory selected tapes
•
Inventory all tapes
The “Inventory tapes...” option you choose creates a job that sequentially loads
and reads the physical tapes in a physical stacker drive. This enables the miSANV-Series to determine the following information about a tape:
•
Cybernetics
Tape manufacturer and serial number (if available)
UM-MV-86-B1-0801
84
Operating the Web Control Panel
•
Tape capacity, used space, and free space
•
Write-protect status
If the tape has a serial number, then the “Inventory tapes...” option can be used to
identify the tape from the database of known tapes.
•
Disk cache
•
Setup offload...
This option allows for setting up offloading from virtual tapes to the physical tapes.
Use this option to specify a set of virtual tapes to offload to the physical tapes in
the physical stacker inventory.
Figure 3-35 “Setup offload” Window
To assign a virtual tape to a physical tape for automatic copying, first, select the
desired virtual tape in the “Virtual tapes” listbox. Then, select the row for the
desired physical tape cartridge in the “Physical tapes” table. Finish by clicking the
-> button, which assigns the virtual tape name, in the “Virtual tape” column, to the
physical tape. (The Help button provides an explanation of how to set up the
copy.)
Figure 3-36 Assigning a Virtual Tape to a Physical Tape
After you assign the virtual tapes to the physical tapes, for each assignment, you
may select one of the following actions to be performed to the virtual tape. To
Cybernetics
UM-MV-86-B1-0801
85
Operating the Web Control Panel
select one of the actions, right-click the row for the desired physical tape/virtual
tape assignment, and choose the “Set action” menu option.
Do nothing to VT – Choose this if the virtual tape already contains a backup you
want to offload to the physical tape. This is useful in the following situations:
1) You performed a backup to virtual tape before associating the virtual tape with a
physical tape for offloading.
2) You had previously associated the virtual tape with a different physical tape that had
an error while offloading (e.g. a bad tape). You can choose this option to associate the
virtual tape with a different physical tape.
Erase VT – Choose this if the virtual tape contains data you no longer need, for
example if the virtual tape contains an older backup that has already been offloaded to physical tape. Your software will see the virtual tape as a new blank
tape.
Copy PT header -> VT – Choose this if the virtual tape contains data which you
no longer need, and the physical tape contains a backup that you want to purge
from your software’s database. The miSAN-V-Series will create a job to copy the
data header from the physical tape to the virtual tape. When your software sees
the data header on the virtual tape, it should purge the old backup from its database when overwriting the virtual tape with a new backup.
Copy PT -> VT – Choose this if the virtual tape contains data you no longer need,
and the physical tape contains a backup you want to either restore or append.
Note
“Host access” is often an easier method for restoring from a physical
tape.
An alternative way to purge the record of an old backup from your backup software’s database is to use “Host access” to have your software erase the physical
tape (See “Host access” on page 81). Or, you can delete the old database entry
manually through your software.
•
Wait for backup
While “Wait for backup” is set, any job to offload the virtual tape to physical tape
will wait for the host to do a backup before offloading. The miSAN-V-Series will
clear the “Wait for backup” flag when the host does a backup.
Select the “Wait for backup” option if the virtual tape does not contain any data
that you want to offload to the physical tape (e.g., if the virtual tape was already
offloaded successfully). Deselect the “Wait for backup” option if the virtual tape
does contain data from a backup that you want to offload. “Wait for backup” is
always selected if you choose “Copy PT header -> VT” or “Copy PT -> VT”. “Wait
Cybernetics
UM-MV-86-B1-0801
86
Operating the Web Control Panel
for backup” is selected by default if you choose “Erase VT” or if the virtual tape is
already blank, but you can deselect it if desired
Figure 3-37 “Wait for backup” Option
You can clear the association between a physical tape and the virtual tape for offloading from the “Physical tapes” tab (See “Physical Tapes Tab” on page 97
Figure 3-38 “Clear VT for offloading” Option
•
Offload disk to tapes...
This option creates jobs that do the actual work of copying the virtual tapes to
physical tapes.
Note
“Offload disk to tapes...” creates a new set of jobs each time you use it.
If you had suspended an offload job and you want to resume that job
instead, you can do so from the “Jobs” tab.
(See “Jobs Tab” on page 99) for more information on Jobs.
Selecting “Offload disk to tapes...” will show the “Offload disk to tapes” window
with its two tabs: “Copy selections” and “Copy options”.
Cybernetics
UM-MV-86-B1-0801
87
Operating the Web Control Panel
The “Copy selections” tab is used to offload the set of virtual tapes specified using
the “Setup offload...”option to the physical tapes.
Figure 3-39 “Copy selections” Tab
The “Copy profiles” frame (See Figure 3-40) allows for selecting and using one of
the saved copy profiles to automatically assign virtual tapes to physical tapes
(See “Physical Stacker Copy Profiles” on page 43).
Figure 3-40 “Copy profiles” Frame
The “Copy options” tab is used for specifying when to initiate the copies. It presents two sets of buttons for setting the frequency of the copies and an option for
delaying their start (See Figure 3-41).
Figure 3-41 “Copy options” Tab
You can choose how many times the jobs will offload before stopping:
Offload each virtual tape only once – If you need to do the offload again, you
can start more jobs later.
Run jobs continuously, offloading after each backup to VT – To stop offloading, suspend the job or remove the physical tape.
Cybernetics
UM-MV-86-B1-0801
88
Operating the Web Control Panel
Continue running jobs even when tapes are changed (requires a copy profile) – This option lets you offload a specific set of virtual tapes to any physical
tapes that you load in specific slots in the stacker. The jobs will continue to run
even when you open the stacker door and change the physical tapes. To stop offloading, suspend the jobs.
The miSAN-V-Series remembers the details of the last offload to the physical
tape. If your backup software appends to the virtual tape after an offload, the next
offload will also append to the physical tape rather than doing a full copy. If the offload status is “PT is same as VT”, then the miSAN-V-Series will refuse to offload
until your backup software writes to the virtual tape again. You can force the
miSAN-V-Series to perform the full offload again by using the “Forget current contents” option from the “Physical tapes” tab (See “Physical Tapes Tab” on
page 97). You may find this useful for doing testing.
•
Load tape onto disk...
Use this option to import the data from your physical tapes into the miSAN-VSeries’s disk cache. This is useful for making multiple copies of a physical tape
cartridge by first staging the physical tape to virtual tape and then selecting to
“Offload disk to tapes” using multiple physical tapes.
Note, you can also do this by selecting the “Setup offload...” option, and then the
“Copy PT -> VT” option for the “Action”, which is the preferred way if you intend to
append to the backup and offload the appended data back to the physical tape. If
you want to import the data for restoring from the disk cache, then “Load tapes
onto disk...” is easier.
Caution
Before selecting to copy from physical tape, make sure the virtual tape
has enough capacity to hold all the decompressed data to be transferred
from the tape cartridge. If the virtual tape is not large enough, the data
copied from the tape cartridge will be cut short. In that case, the
miSAN-V- Series will copy until the virtual tape is full and then stop.
Do not try to access a virtual tape while it is being copied to/from a
physical tape (e.g., by mounting it in a virtual tape drive or copying it to a
different physical tape), else the virtual tape could become corrupted
To import the data from the physical tapes, you will need one virtual tape for each
physical tape being imported that has enough capacity to hold the tape’s data
after decompression. Make sure the virtual tapes are safe to overwrite and not
mounted in any virtual drive. Then, select “Load tape onto disk...” to create the
jobs that will do the copying.
Selecting the “Load tapes onto disk...” option to show the “Load tapes onto disk”
window with a list box, on the left, showing all the slots and physical tapes in the
Cybernetics
UM-MV-86-B1-0801
89
Operating the Web Control Panel
physical stacker and a table, on the right, with all the virtual tapes assigned to
devices (See Figure 3-42).
Figure 3-42 “Load tapes onto disk” Window
To assign a physical tape to a virtual tape for copying, first, select the desired
physical tape cartridge in the “Physical tapes” listbox. Then, select the row for the
desired virtual tape in the “Virtual tapes” table. Finish by clicking the -> button,
which assigns the physical tape name to the virtual tape “Copy source” (See Figure 3-43). (The Help button provides an explanation of how to set up the copy.)
Figure 3-43 Assigning Physical Tapes To Copy
Once all the desired physical tapes have been assigned, click Start. After clicking
Start, the copy job will begin immediately or will be queued until the physical
stacker tape drive becomes available. During the copy process, the physical
stacker tape drive device panel will show the “Drive state” as “Copying to virtual
tape name”.
•
Host access
Host access enables you to access the physical stacker directly from your host
backup software by proxy using a virtual tape drive or stacker. This is often useful
for restoring directly from a physical tape.
Cybernetics
UM-MV-86-B1-0801
90
Operating the Web Control Panel
Enabling host access
1) Choose the slot(s) in the physical stacker that you want to allow host access; you can
select slots individually or in a contiguous group:
To allow host access to the physical stacker using a virtual tape
drive, select only one slot.
Note
This icon indicates useful tips on getting the most from your unit.
• Selecting slots individually: To select more than one slot, hold down the CTRL
(PC) or Command (Mac) key, then and click each slot.
• Selecting slots in a contiguous group: To select a group of slots, click the first
slot in the group, hold down the SHIFT key, and then click the last slot in the group.
2) Choose one of the virtual devices listed in the “Host access” submenu, and the
miSAN-V-Series will temporarily reconfigure the selected virtual device to map to the
physical tape drive.
Using host access
You may load and eject physical tapes at will. If you are using a virtual standalone
drive, the virtual drive simply mirrors the state of the physical drive. If you are
using a virtual stacker, the miSAN-V-Series simulates the operation of a stacker
with only one tape in its inventory. The miSAN-V-Series lets your backup software
move the single physical tape around in the virtual stacker, however the physical
tape just remains loaded in the tape drive. If you physically eject and replace the
tape, to your backup software, it looks like you opened the stacker door, changed
the tape in the magazine slot, and then closed the stacker door.
• Disabling host access
Go back to the “Host access” submenu and choose “Disable”. The miSAN-VSeries will reconfigure the virtual device to access the virtual tapes rather than the
physical tape drive.
•
Job control
This menu enables you to suspend any jobs using the physical tape drive. This
can also be accomplished via the “Jobs” tab (See “Jobs Tab” on page 99).
•
Move to slot
This menu option enables you to move the selected tape to another slot. Unavailable slots are greyed out.
UM-MV-86-B1-0801
Cybernetics
Operating the Web Control Panel
91
Properties tab
The “Properties” tab gives the following information: the model, firmware version,
serial number, stacker type (“Normal stacker” or “Autoloader”), number of slots,
number of import/export slots, and number of tape drives.
Figure 3-44 Physical Stacker “Properties” Tab
The “Properties” tab gives the following information about the physical stacker:
•
Model, firmware version, and serial number of the stacker
•
Stacker type: “Normal” or “Autoloader”
•
Number of magazine slots, import/export slots, and tape drives
These number give the actual number of elements rather than the HSTC licenselimited numbers.
Optical Drive Device Panel
When selected in the device tree, an optical drive will reveal a device panel in the
frame on the “Devices” tab (See Figure 3-45). The optical drive device panel
shows the following:
Whether a disc is loaded
• Virtual tape: Name of the virtual tape stored on the optical disc, “None” or
“NEEDS FORMAT” (needs to be formatted; see Format button below)
UM-MV-86-B1-0801
Cybernetics
92
Operating the Web Control Panel
• VT->VT: Shows “Not copying” (idle), “Reading disc” (copying from optical disc
to virtual disk) or “Writing disc” (copying from virtual disk to optical disc).
Figure 3-45 Optical Drive Device Panel
The device panel presents three buttons for operating the optical drive (See Figure 3-45):
•
Eject: Ejects a disc inserted into the optical drive
Note: The optical drive’s Eject button is disabled by the miSAN-V-Series
• Format: Formats a disc inserted into the optical drive and creates a new
virtual tape called “VT optical disc”.
After formatting the disc, the miSAN-V-Series determines the available storage
capacity of the optical disc and then creates a single virtual tape of
that size.
Caution
Make sure to format the disc before writing to it for the first time.
Remember that formatting the disc will erase any data currently stored
on it.
•
Backup a VT: Allows for copying a virtual tape to optical disc.
Caution
The size of the virtual tape to be copied to the optical disc must not be
larger than the optical disc storage capacity, else the copied virtual tape
will be truncated and incomplete.
After clicking Backup a VT, a window will appear with a drop-down listbox that
includes all the virtual tapes.
To begin the copy, select the desired virtual tape from the listbox (See Figure 3-46),
and then click OK. The copy will begin immediately or be queued until the optical
drive becomes available. The miSAN-V-Series will automatically eject the disc after
the copy completes
Cybernetics
UM-MV-86-B1-0801
Operating the Web Control Panel
93
.
Figure 3-46 “Select virtual tape to backup” Window
Virtual Tapes Tab
The “Virtual tapes” tab shows the current status of each miSAN-V-Series virtual tape.
Status Fields
The virtual tape cache is presented as a table with rows for each virtual tape and columns for the following tape fields (See Figure 3-47):
•
Tape name: Virtual tape name (tape label), which can be renamed using the
Control Popup Menu
•
Status: Current tape activity as one of the following: “Idle,” “Mounted” or “Copying”
•
Capacity: Total tape size (gigabytes)
•
Used: Used tape capacity (gigabytes)
•
Free: Free tape capacity (gigabytes)
•
Use %: Tape use percentage
•
Copies: Number of copies committed to physical tape cartridge
Figure 3-47 “Virtual tapes” Tab
UM-MV-86-B1-0801
Cybernetics
94
Operating the Web Control Panel
Virtual Tape Popup Menu
Virtual tape control is handled using a popup menu (See Figure 3-48).
Figure 3-48 Virtual Tape Popup Menu
The virtual tape popup menu is accessed by first selecting the desired virtual tape and
then right-clicking it. The virtual tape popup menu offers the following controls:
•
Mount: Mounts the virtual tape in its assigned virtual tape drive
•
Rename: Allows for renaming (relabeling) the virtual tape. Selecting “Rename” will
bring up a window for changing the name of the selected virtual tape. After
entering the new name, click OK. To continue renaming virtual tapes in sequence,
click Next or Previous.
Figure 3-49 “Rename virtual tapes” Window
•
Set volume tag: Allows for adding a volume tag to the virtual tape.
A volume tag contains information used to physically identify a tape cartridge,
such as is presented by a barcode label on a tape cartridge. Thus, the “Set
volume tag” control allows a virtual tape to present a virtual barcode to a host.
Note
A virtual tape volume tag is only useful if the tape is assigned to a
virtual stacker, since a virtual standalone drive is incapable of reporting
a volume tag to a host.
•
Erase: Erases the virtual tape contents. After confirming the tape erase, the HSTC
will also ask whether to clear the volume tag (See the “Set volume tag” control).
Keeping the volume tag will present the same empty tape to the host. Clearing the
Cybernetics
UM-MV-86-B1-0801
Operating the Web Control Panel
95
volume tag will allow the virtual tape to appear as if it has been replaced by a new
empty tape in the virtual device.
Copy to another VT: Used to initiate a copy from the virtual tape to another virtual
tape. The destination virtual tape copy will be identical to the source virtual tape,
including the contents and properties, with the exception of the volume tag (the
volume tag will not be copied).
When selected, a box will appear prompting for the destination virtual tape:
Figure 3-50 “Select copy destination” Window
After selecting the desired virtual tape and clicking OK, a box will appear asking
for confirmation about overwriting the contents of the destination virtual tape;
click Yes to start the copy.
Figure 3-51 “Confirm data overwrite” Window
When the copy begins, the name of the destination virtual tape will be changed to show name
of the source virtual tape inside brackets (e.g., [ VT 1 ]). During the copy, the name of the
destination virtual tape will be followed by an asterisk to indicate the copy is in progress
(e.g., [ VT 1 ] *). The asterisk will disappear after the copy completes.
Note
If the copy is cancelled, the asterisk will be replaced by “incomplete”. In
this case, the destination virtual tape should be erased and renamed.
The “Jobs” tab will show the progress of the copy operation.
UM-MV-86-B1-0801
Cybernetics
96
Operating the Web Control Panel
Bar code:
Note
This tab can only be used when the miSAN-V-Series is configured with
Tape Library Control support and is configured to operate an external
tape library that reports barcodes.
Use the Physical tapes tab to select and assign a volume tag from the bar code labels
on the tapes in the physical stacker. This makes it easier later when offloading virtual
tapes to physical tapes (See “Setup offload...” on page 84).
Figure 3-52 “Manage volume tags” Window
To assign a physical tape barcode to a virtual tape volume tag, first, select the row
for the desired physical tape cartridge in the “Physical stacker” table. Then, look to the
upper-right; select the row for the desired virtual tape.
Finish by clicking the -> Assign -> button, which assigns the physical tape barcode to
the virtual tape “Volume Tag”.
The “Copy profiles” frame (see below) allows for selecting and using one of the
saved copy profiles to automatically assign physical tape barcodes to the virtual tape
volume tags (See “Physical Stacker Copy Profiles” on page 43).
Figure 3-53 “Copy profiles” Frame
•
Edit tab: Use this tab to enter the volume tag manually. The volume tag consists
of identification text (32 character maximum, 0-9, A-Z, and _) and a sequence
Cybernetics
UM-MV-86-B1-0801
Operating the Web Control Panel
97
number (0-65535). The OK button sets and the Clear button erases the volume
tag. Be sure not to assign the same volume tag to more than one virtual tape.
Figure 3-54 “Edit” Tab for Volume Tags
•
Properties: Brings up a properties box listing the following virtual tape information:
“Name” (tape label), “Location” (disk number the VT resides on), “Writable”
(whether it’s currently write-protected), “Volume tag” (ID text and sequence
number), “Capacity” (bytes), “Used space” (bytes), “Free space” (bytes), “Up-todate copies” (number of copies committed to physical tape cartridge) and “Last
modified” (month, day, year and time of last update; see “Set Date/Time”) (See
Figure 3-55).
Figure 3-55 Virtual Tape Properties Windows
Physical Tapes Tab
Note
This section only applies if the miSAN-V-Series is configured with Tape
Library Control support, and is configured to operate an external tape
library.
The “Physical tapes” tab shows the current status of tape cartridges in a physical
library. The HSTC remembers the contents for physical tapes containing copies of virtual tapes, displaying the status information on the “Physical tapes” tab. The tab
shows the “Contents” of the tape cartridges and whether the contents are identical to
UM-MV-86-B1-0801
Cybernetics
98
Operating the Web Control Panel
their copied virtual tapes. When a backup of a virtual tape begins, its associated physical tapes will be used.
Whenever the library door is opened and then closed, the tape status for all physical
tapes is automatically refreshed. During the refresh, the physical tape barcodes will
be read and their “Contents” remembered. Else, if a tape does not have a barcode, or
a barcode error occurs, the physical tape status will be reset. Thus, barcoded tapes
will retain the reference to their “Contents”. However, tapes not reporting a barcode
will not.
The “Contents” and status of an individual tape cartridge can be reset by invalidating
the physical tape status. Invalidating the tape status drops the reference to its “Contents” and refreshes the physical library slot.
To invalidate a tape cartridge and refresh the physical library slot, first select the tape
cartridge on the physical tapes tab. Right-click the selected tape, and then a popup
menu will appear with a command to “Invalidate this information”.
Status Fields
The physical tapes in the library are presented in a table with rows for each tape
cartridge and columns for the following tape fields (See Figure 3-56):
•
Name
• Location: Tape cartridge label or slot number. If the tape cartridge is not
labeled, the tape is identified by its slot number.
• Status: Tape cartridge condition as either “OK” or “Bad tape”. The “Status” will
report “Bad tape” if an error occurs when writing/reading or accessing the tape.
Along with the condition, “write protect” will also appear if physically writeprotected.
• VT for offloading: Virtual tape the contents were copied from, else
“(unknown)”. “Contents” also indicates the virtual tape to which the tape cartridge*
is referenced. (* or library slot, if the library does not report barcodes)
•
Offload Status.
Figure 3-56 “Physical tapes” Tab
Cybernetics
UM-MV-86-B1-0801
Operating the Web Control Panel
99
Jobs Tab
The HSTC uses jobs to do its own internal work such as offloading virtual tapes to
physical tapes. These jobs are similar in concept but separate from the jobs that your
backup software may use to do backups and restores.
The HSTC performs the following types of jobs:
•
Copy from virtual tape to physical tape
•
Copy from physical tape to virtual tape
•
Copy from virtual tape to virtual tape
•
Auto-archive
•
Inventory a physical tape in a stacker
•
Enable host access to a physical tape in a stacker using a standalone virtual tape
drive
•
Erase a virtual tape
Jobs of different types are created in different ways, but once created, all jobs can be
managed using the “Jobs” tab. The job database view is split into three parts: the
“Jobs” table showing summary information for all the jobs, the “Job log”, and the
“Activity monitor”.
Jobs Table
The jobs database is presented in a table with rows for each job and columns for
the following fields (See Figure 3-57):
•
ID: A unique, sequential, numeric identifier for each job
• Description: Indicates the type of job with the involved physical and virtual
elements
Figure 3-57 “Jobs” Tab
UM-MV-86-B1-0801
Cybernetics
100
Operating the Web Control Panel
•
State: Indicates one of the following states:
• “Running” – Either Actively doing work, waiting for some trigger condition, or
waiting for a required resource to become available
•
“Suspended” – Not doing any work until you manually resume it
• “Ended” – Finished its work and cannot be resumed or restarted (However,
you can start another job to do the same thing if needed).
• “Deleting” – Performing a cleanup action such as rewinding a physical tape.
Once the cleanup finishes, the job will disappear from the database.
•
Status: Indicates the progress of a job in the “Running” state.
For further details, see the “Activity monitor”.
You can suspend a job manually by selecting the job in the table, right-clicking for a
popup menu, and selecting “Suspend”. Some jobs may also suspend themselves
under certain circumstances. For example, if a copy from virtual tape to physical tape
encounters a problem with the physical tape, then the HSTC will automatically suspend the job until the user decides what to do. If you try to start a new job that suspends itself immediately, then you will get a popup message to notify you of the
problem.
You can resume a job by selecting the suspended job in the table, right-clicking for a
popup menu, and selecting “Resume”. The job may suspend itself again immediately
if there is a condition that prevents the job from being able to run. In this case, you
must clear the condition before resuming the job. For example, if a copy from virtual
tape to physical tape is suspended because of a problem with the physical tape, then
you must either use a different tape or go to the “Physical tapes” tab, select the physical tape, right-click for a popup menu, and then choose “Clear error flags”.
Job Log
The “Job log” and shows detailed information for the jobs selected in the “Jobs”
table.
Note
If you select multiple jobs from the “Jobs” table, the “Job log” will list
each job sequentially.
Cybernetics
UM-MV-86-B1-0801
Operating the Web Control Panel
101
You can copy the “Job log” contents to the clipboard by first right-clicking in the
“Job” log, from the popup menu, selecting “Copy to clipboard”, and then pasting
the text into a text editor.
Figure 3-58 Exporting the “Job log”
You can export the entire “Jobs” table by selecting all the jobs in the table, copying the text in the “Job log” to the clipboard, and then pasting the text into a text
editor.
Activity Monitor
The “Activity monitor” shows detailed information for the job selected in the “Jobs” table.
Only a job in the “Running” state will display any activity on the “Activity monitor”. .
Note
Multiple “Running” job statuses cannot be shown simultaneously on
the “Activity monitor”. Thus, when you select multiple jobs from the
“Jobs” table, the “Activity monitor” will be blank.
Figure 3-59 “Activity monitor” Tab
UM-MV-86-B1-0801
Cybernetics
102
Operating the Web Control Panel
Messages Tab
The “Messages” tab reports disk accessibility and reading/writing errors, which indicates possible disk drive failure.
This tab also reports the completion status of UM-MV-86 copy operations. After a
copy to a virtual or physical tape completes, the “Messages” tab will update with a
report indicating statistics such as tape usage, error rate and transfer rate information
(See Figure 3-60).
Figure 3-60 “Messages” Tab
An asterisk on the “Messages” tab label indicates a new message has been reported.
Figure 3-61 New Message Indicator
USB offload
Up to two USB disk drives may be plugged in simultaneously using the USB ports on the
front of the chassis. USB disk drives may be hotplugged while the unit is running; the firmware will detect the disk drive and start using it automatically. There is no need to power
down the unit or rescan for devices. USB disk drives may also be hot unplugged; however, to prevent data loss, the user should click the ‘Remove disk' button in the Java
applet first.
Offloading a Virtual Tape to a USB disk has a speed averaging about 28 MB/s. Restoring
from a USB disk drive must be done through the miSAN-V-Series; no other software
understands the format of the data on the disk.
Virtual Tapes on USB disk drives may be treated like any other virtual tapes as long as
the USB drive remains plugged in. You can assign a USB Virtual Tape to a virtual tape
drive or virtual stacker, mount it, do a backup or restore, or even offload from USB to
physical tape.
USB disks are intended for offloading Virtual Tapes rather than being used as primary
storage, so the HSTC treats USB disks slightly differently than other disks. A USB disk
will show up in the Java applet under the physical device tree with its own panel of information and controls, just like a physical tape drive would. The control panel shows the
Virtual Tapes that are on the USB disk and indicates if they are idle or busy. There are
three control buttons:
Cybernetics
UM-MV-86-B1-0801
Operating the Web Control Panel
103
1) "Create VTs" - this brings up the same window as "Tools->Create virtual tapes...",
except that it is specifically for the one USB disk only. You may create multiple VTs on
one USB disk, just like any other disk drive. Note that "Tools->Create virtual tapes..."
does not list USB disks.
2) "Backup a VT" - creates a VT->VT copy job to copy a VT to the USB drive. The destination VT must be created first using the "Create VTs" button.
3) "Remove disk" - prepares the USB drive for hot-unplug. Always press this button and
wait for the "Ready for removal" message before unplugging the USB drive to prevent
data loss.
UM-MV-86-B1-0801
Cybernetics
104
Cybernetics
Operating the Web Control Panel
UM-MV-86-B1-0801
105
Telnet Menu System
Chapter 4
Telnet Menu System
Telnet Menu System
This section describes the telnet menu system available used for configuration and operation of the miSAN-V-Series.
To use the telnet menu system, the unit must be powered on and fully initialized. To connect, open a standard telnet or terminal emulation program on a host system connected
to the local network. Point to the miSAN-V-Series Management LAN Ethernet interface
(“ETH0”) IP address (default is 192.168.1.1; see “Network Configuration” on page 60)
and the standard telnet port 23. The telnet client should be set to VT100 emulation, no
local echo, and 80×24 characters or more.
Telnet access must be made via the TCP/IP network connection. If the unit includes more
than one network interface, a telnet session may by opened on any of the interfaces.
Access via a serial port is not supported.
Only one telnet session at a time is supported. If a second telnet session is opened from
the same or another host, on any interface, only a blank screen will be displayed.
When the telnet session connects, it will immediately display the following screen:
Type the username menu and press ENTER. The username “menu” is required for access
to the menu system. This username cannot be changed. If a password has been set, the
miSAN-V-Series will prompt for the password. If a password has not been set (default is
no password), an initial screen will be displayed, similar to the following:
Cybernetics
UM-MV-86-B1-0801
106
Telnet Menu System
miSAN-V-Series Messages
The miSAN-V-Series may on occasion need to display a message to the user. Messages
are displayed during startup initialization or to announce completion of an offline operation or to request user confirmation of an action.
When the menu system is being accessed, all messages will be held by the miSAN-VSeries. Any pending messages will be displayed when the user exits from the menu system and returns to the initial screen.
Menu Operation
The telnet menu structure is described briefly in the next section. Not all menu items will
be available in all miSAN-V-Series configurations. Menu item appearance depends on
hardware configuration and installed options. The “Menu Descriptions” section, earlier in
this chapter, includes detailed explanations for menu selections and items options. This
section will focus on those menu items that are only found in the Telnet menu system as
opposed to the Web Control panel.
At the initial screen, typing m will bring up the “Main Menu.” Each menu item is numbered,
and pressing a number will bring up the corresponding submenu. Similarly, within each
submenu, pressing a number will bring up the corresponding numbered item.
The “Main Menu” will look similar to the following:
To change a setting, type the number or letter corresponding to the menu or submenu
item, and type the new information. Some items (generally, those that need the user to
type information, such as a hostname) require confirmation by pressing ENTER, though
most do not. An item is changed by typing a number to select from a list of choices.
Changes are not made effective until after leaving the menu system.
Cybernetics
UM-MV-86-B1-0801
Telnet Menu System
107
The “Main Menu” and each submenu include an item marked:
x) Exit
If if any changes are made to the information, the changes are not committed until after
leaving the menu system. The exit item will change to a pair of menu items:
s) Save changes and exit
x) Discard changes and exit
Type s or x as desired, to exit the menu with changes saved or not.
Example: to change the hostname for the unit:
1. At the initial screen, type m to bring up the “Main Menu.”
2. At the Main Menu, type 2 to bring up “Network Configuration.”
3. Type 1 to bring up the Hostname entry. This will display the current hostname (default
is “cyberasp”).
4. Enter the desired hostname, and press ENTER. This will change the hostname display,
and return to the “Network Configuration” menu.
5. Type s to save the change and exit from the menu. The message “Changes saved” will
be displayed briefly; then the initial screen will return.
SCSI configuration
This menu is used to set up SCSI and iSCSI connections. Items 1, 2, and 3 are set up as
described in “SCSI HBA Ports” on page 54.
Configure iSCSI hosts
Assign virtual devices to hosts
Use this sub-menu to control host access to virtual devices.
UM-MV-86-B1-0801
Cybernetics
108
Telnet Menu System
Swap SCSI HBA ports
Offline Maintenance
Note
This menu option and its submenu item are only available using the
Telnet Menu System.
This menu is used for maintenance such as uploading hardware code or debugging.
While the miSAN-V-Series is in this mode, all connected SCSI devices will be “offline”
and unavailable to a host computer system.
The miSAN-V-Series will enter this mode automatically if it detects an unrecoverable
error.
Do not enter this mode unless the miSAN-V-Series is idle. If possible, eject all tapes from
tape drives and stop host system device drivers that communicate with the miSAN-VSeries. A prompt will appear for confirmation to bring the unit offline before entering
“Offline Maintenance” mode, and again to bring the unit back online when through.
Display debug output
This menu item displays debugging information useful to Cybernetics Technical Support.
Rescan SCSI buses
This menu item forces the miSAN-V-Series to rescan for connected SCSI devices.
Cybernetics
UM-MV-86-B1-0801
Telnet Menu System
109
Load board code
This menu item loads firmware into the miSAN-V-Series from a connected physical
tape drive or via a TCP/IP network connection, for code upgrades as directed by
Cybernetics Technical Support.
Reset options to defaults
This menu item resets all settings to default values. Do not do this unless directed by
Cybernetics Technical Support.
Test system memory
This menu item will run a series of tests on the miSAN-V-Series system memory.
Total run-time is typically several minutes. If this item is selected, a confirmation dialog will be displayed. Pressing ENTER will start the testing, and the screen will display
the following:
This may take a while...
When testing is complete, the screen will display the test result, as though “Display
debug output” had been selected from the “Offline Maintenance” menu.
Shut Down
This menu item is used for safely shutting down or rebooting the miSAN-V-Series.
Shutting down the miSAN-V-Series engine before powering off the unit helps insure
the integrity of data in the virtual tape cache.
Caution
Never power off the unit without first shutting down the HSTC engine.
If the “Shutdown” option is selected, a confirmation dialog will be displayed with the
following:
Shut down the unit for the power-off?
Press Enter to continue or ‘x’ to cancel.
Pressing ENTER will cause the miSAN-V-Series to disconnect the telnet session and
then shut down. When the miSAN-V-Series has finished shutting down, the unit will
remain running until powered off using the power button on the rear panel
If the “Reboot” option is selected, the shutdown routine explained above will occur,
and the miSAN-V-Series will restart and be ready for use again after about 90 seconds.
UM-MV-86-B1-0801
Cybernetics
110
Cybernetics
Telnet Menu System
UM-MV-86-B1-0801
111
Using the 3ware Disk Manager®
Chapter 5
Using the 3ware Disk Manager®
The miSAN-V-Series integrates the 3ware® Escalade® 950S-X SATA RAID controller to
control the hot swappable SATA disk drives. The 3ware RAID controller offers a webbased GUI interface called the 3ware Disk Manager 2 (3DM® 2) that allows for viewing
the status of and managing the controller and associated disk drives remotely.
Note
3DM can be used while the drives are online, but changing the RAID
configuration will fail because the disks will be mounted.
See “Disk Storage” on page 40 for instructions on how to take the disk drives offline so
they can be reconfigured.
Browser Requirements
3DM 2 (3ware Disk Manager) displays information in a web browser. It requires the following:
•
Microsoft® Internet Explorer 5.5 and later or Mozilla 1.2 or later
•
JavaScript™ must be enabled
•
Cookies must be enabled
•
For best viewing, screen resolution should be 1024×768, with 16-bit color or more
Accessing From a Browser
The 3DM runs a web server on its default HTTPS (SSL Encrypted HTTP) port 888. To
access 3DM, point the web browser to the miSAN-V-Series hostname or IP address with
the port 888.
Examples include (using defaults):
https://cyberasp.domain.com:888
https://192.168.1.1:888
Cybernetics
UM-MV-86-B1-0801
112
Using the 3ware Disk Manager®
Logging In
When you first view 3DM in a browser, you must log in before you can view or change
any information.
Two levels of access are provided:
•
User can check the status of the controller, units, and drives attached to it.
•
Administrator can check status, configure, and maintain the equipment.
1. On the 3DM logon screen, select whether you are a User or Administrator.
2. Enter the password and click Login.
Note
The default password for both User and Administrator is blank. Thus,
leave the password field empty.
Working with the 3DM Screens
3DM’s features are organized on a series of pages you view in your browser.
After you log in to 3DM, the Summary page shows a list of controllers installed in the computer at the URL specified.
Figure 5-1 3DM Main Screen
Cybernetics
UM-MV-86-B1-0801
113
Using the 3ware Disk Manager®
The menu bar across the top of the screen gives you access to other pages in 3DM. You
can move between pages by using the menu bar, or by clicking a link on the page.
The main area of the page provides summary or detail information about your 3ware
RAID controller and the resources connected to it.
As you work in 3DM, the Messages area just below the menu bar displays information
about the results of commands you have selected.
3DM Menus
The 3DM menu bar groups access to a number of 3DM pages on menus, and provides
direct link access to others.
Figure 5-2 3DM Menu Bar
Status information is available from the Information menu. You can view controller, unit,
and drive information for a particular controller.
The Management menu gives you access to tasks used for managing controller-level
settings (background task rate, enabling of unit write cache, and policies that affect all
units managed by the controller), tasks that can be scheduled (rebuild, verify, and selftest), and maintenance of individual units. Unit configuration can also be done through
the Management > Maintenance page.
The Alarms page shows a list of alarms, including the specific alarm message, and the
exact date and time it occurred.
The 3DM Settings page lets you set preferences, including email notification for alarms,
passwords, page refresh frequency, whether remote access is permitted, and the incoming port which 3DM will use for listening.
Help lets you access information about using 3DM, and provides access to an electronic
copy of a user’s manual.
Refreshing the Screen
You can refresh the data on the screen at any time by clicking Refresh in the menu bar.
This causes 3DM to update the information shown with current information from the controller and associated drives.
Automatic refreshes can also be set. For details, see “Setting the Frequency of Page
Refreshes” on page 116.
Cybernetics
UM-MV-86-B1-0801
114
Using the 3ware Disk Manager®
3DM Screens and What They're Used For
3DM Page
Description
Controller Summary Provides basic information the 3ware RAID controller in the
miSAN-V-Series. To see this page, click Summary in the menu bar.
Controller Details Provides detailed information about the current controller.
To see this page, choose Information > Controller Details from the menu bar.
Unit Information Shows a list of the units on the current controller and provides summary information about each unit.
To see this page, choose Information > Unit Information from the menu bar or
click an ID number on the Controller Summary.
Drive Information Shows a list of drives on the current controller and provides summary
information about each drive.
To see this page, choose Information > Drive Information from the menu bar.
SMART Details About Shows the SMART data for a specific drive.
To see this page, click the Port # for a Drive at Specific Port drive on the Drive
Information page.
Controller Settings Allows for viewing and changing settings that affect the units on the
current controller.
To see this page, choose Management > Controller Settings from the menu
bar.
Scheduling
Allows for viewing and changing the schedule for tasks that affect
all units on the current controller.
To see this page, choose Management > Scheduling from the menu bar.
Maintenance
Allows for configuring new units and make changes to existing
units.
To view this page, choose Management > Maintenance from the menu bar.
Alarms Shows a list of alarms, including the specific alarm message, and the exact date
and time it occurred.
To view this page, click Alarms on the menu bar.
3DM Settings
Allows for setting preferences, including email notification for
alarms, passwords, page refresh frequency, whether remote access is permitted, and the
incoming port that 3DM will use for listening.
To view this page, click 3DM Settings on the menu bar.
Cybernetics
UM-MV-86-B1-0801
115
Using the 3ware Disk Manager®
Setting Up 3DM Preferences
The 3DM Settings page allows for defining preference settings that affect the overall
operation of 3DM. Most of these settings are factory-set during installation of 3DM.
Setting and Changing 3DM Passwords
3DM provides different access levels for users and administrators. The Administrator
access level allows the user to fully configure 3DM. The User access level allows the user
to view pages within 3DM. These passwords work independently of each other.
The default password for both the User and Administrator is blank (i.e., the field is empty).
Passwords are case sensitive.
Passwords can only be changed if logged in as Administrator. If the Administrator password is changed, you will be automatically logged out, and must log back in with the new
password.
To set or change the password:
1. Click 3DM Settings on the 3DM menu bar.
2. On the 3DM Settings page, in the Password section, select the type of password you
want to change: User or Administrator.
3. Type the current password in the Current Password field. If you are changing the
password for the first time, the factory-set default password is blank; leave the
Current Password field empty.
4. Enter the new password in the New Password field and again in the Confirm New
Password field.
5. Click the Change Password button to enact the change.
Managing E-mail Event Notification
3DM can notify you when the 3ware RAID controller requires attention, such as when a
disk unit becomes degraded and is no longer fault tolerant.
Event notification can only occur while 3DM is running, so it is recommended that 3DM be
left running on the system that contains the 3ware RAID controller.
When events occur, notification can be e-mailed to one or more recipients. You can specify the type of events for which notifications will be sent by selecting the severity:
•
Information will send e-mails for all alarms
•
Warning will send e-mail for alarms with severity of Warning and Error only.
•
Error will send e-mail for alarms with severity of Error only.
Event notification is initially set up during 3DM installation, but can be changed on the
3DM Settings page.
To set up event notification:
1. Click 3DM Settings on the menu bar.
Cybernetics
UM-MV-86-B1-0801
116
Using the 3ware Disk Manager®
2. In the E-mail notification section of the 3DM Settings page, enter or change the
settings you want.
•
Enable or Disable all notifications
•
Set the severity level of events for which e-mail notifications are sent
•
Specify the email address of the sender. This will appear in the “From” field of the
e-mail.
•
Enter the e-mail address(es) to which notifications are sent. (Separate multiple
addresses with a comma (,) or a semicolon (;)
•
Enter the SMTP server name or IP of your mail server.
•
Click Save E-mail Settings
To send a test message:
You can send a test message to make sure you’ve entered the e-mail notification settings
correctly. Click Send Test Message.
Caution About Disabling Remote Access
Caution
Do not disable Remote Access. If Remote Access is disabled, it will be
impossible to access the 3DM web browser interface. If remote access
must be enabled again, contact Cybernetics Technical Support. If
remote access is disabled and a user attempts to connect to 3DM
remotely,
they
will
see
the
following
error
message:
Remote Access to 3DM has been disabled. Please connect using the
local machine by entering “localhost” in the URL bar.
Caution About Changing Incoming Port #
Caution
Do not change the Incoming Port # from the default 888. If the Incoming
Port # default is changed from 888, the Web Control Panel will not be
able to open 3DM using the Manage disk storage option. (See “Disk
Storage” on page 67).
Setting the Frequency of Page Refreshes
Since the status of the drives attached to your 3ware RAID controller can change while
you are viewing information about them in 3DM, it’s important to refresh the page information regularly. That way you can be assured that the information you see in 3DM is
current.
You can manually refresh the information on a page by clicking Refresh Page in the
menu bar. But you can also have 3DM refresh the information on a regular basis.
Cybernetics
UM-MV-86-B1-0801
117
Using the 3ware Disk Manager®
To set the frequency of page refreshes:
1. Click 3DM Settings on the menu bar.
2. In the Page Refresh section of the 3DM Settings page, select how often you want
you want the page to be refreshed in the Minutes Between Refresh field.
Note
If you don’t want 3DM to refresh the screen automatically, select Never
in the Minutes Between Refresh field. You can then refresh manually by
clicking Refresh on your web browser.
3DM2 Reference
This section includes details about the fields and features available on the pages you
work with throughout 3DM 2.
It is organized by page, as the pages are organized on the 3DM menu bar.
•
Controller Summary Page
•
Controller Details Page
•
Unit Information Page
•
Unit Details Page
•
Drive Information Page
•
SMART Details About Drive at Particular Port Page
•
Controller Settings Page
•
Scheduling Page
•
Maintenance Page
•
Alarms Page
•
3DM Settings Page
Cybernetics
UM-MV-86-B1-0801
118
Using the 3ware Disk Manager®
Controller Summary Page
Figure 5-3 Controller Summary Page
The Summary page appears after you first logon to 3DM, and when you click the Summary link in the menu bar.
The Summary page provides basic information about each 3ware RAID controller in your
system. To see details about the units in a controller, click the link in the ID column.
•
ID: The ID that the operating system assigns to the controller.
•
Model: The model name of the controller. (The model number is also printed on a
sticker on the outside bracket of the controller.)
•
Serial #: The serial number of the controller. (The serial number is also printed on a
sticker on the outside bracket of the controller.)
•
Firmware: The firmware version running on the controller.
•
Driver: The driver version being used to interact with the controller.
•
Status: The overall status of the controller. Possible statuses include OK, Warning,
Error, and No Units. Warning indicates that a background task is currently being
performed (rebuilding, verifying, or initializing). Error indicates that a unit is degraded
or inoperable. If both Error and Warning conditions exist, the status will appear as
Error.
Cybernetics
UM-MV-86-B1-0801
119
Using the 3ware Disk Manager®
Controller Details Page
Figure 5-4 Controller Details Page
The Controller Details page appears when you choose Information > Controller Details
from the menu bar.
The Controller Details page provides detailed information about the controller specified in
the drop-down list on the menu bar.
You can also open or download an error log from this screen.
•
Model: The model name of the controller.
•
Serial #: The serial number of the controller.
•
Firmware: The firmware version running on the controller.
•
Driver: The driver version being used to interact with the controller.
•
BIOS: The BIOS version on the controller.
•
Boot Loader: Boot Loader version on the controller. This field appears only for 9000series controllers.
•
# of Units: The number of units on the controller. # of Ports. The number of total ports
on the controller, regardless of whether each currently has a drive connected.
•
# of Ports: The number of total ports on the controller, regardless of whether each
currently has a drive connected.
•
Error Log: Provides access to the firmware’s error log. When you click this link, a
dialog box gives you the option to save the log to your computer, or open it.
Cybernetics
UM-MV-86-B1-0801
120
Using the 3ware Disk Manager®
Unit Information Page
Figure 5-5 Unit Information Page
The Unit Information page appears when you choose Information > Unit Information
from the menu bar, and when you click an ID number on the Controller Summary page.
The Unit Information page shows a list of the units on the controller specified in the dropdown list on the menu bar and provides summary information about each unit.
To see details about a particular unit, click the link in the Unit # column.
•
Unit #: The unit number assigned to the unit by the firmware.
•
Type: The type of unit, specified during configuration: RAID 0, RAID 1, RAID 5, RAID
10, RAID 50, Single Disk, JBOD, or Spare. For details about each of the RAID levels,
see Appendix C, “Glossary”.
•
Capacity: The logical capacity (size) of the unit.
Note
3DM 2 displays the capacity (in MBytes or GBytes) the same way that
Microsoft Windows and Linux operating systems do:
as 1KB =
1024 bytes.
•
Status: The operational status of the unit: OK, Rebuilding, Initializing, Verifying,
Degraded, or Inoperable (missing drives). When a unit is Rebuilding, Initializing, or
Verifying, the percentage (%) complete is also shown.
Cybernetics
UM-MV-86-B1-0801
121
Using the 3ware Disk Manager®
Unit Details Page
Figure 5-6 Unit Details Page
The Unit Details page appears when you click an ID number on the Unit Information
page. Since it is a sub-page of Unit Information, the page title in the menu bar continues
to display “Unit Information” even when you view details of a unit. To return to the list of
units, click Unit Information in the menu bar.
The Unit Details page shows details about a particular unit. The specific information
shown depends on what type of unit it is. For example, details about a RAID 10 unit made
up of two subunits, each of which contains two drives, will include details about the unit
and each subunit. However, if the unit was a Single Disk, only information about one disk
would be shown.
Details on this page may include all or some of the following information described below.
To see details about a particular drive, click the Port #. You’ll see a list of all drives, with
the drive you selected highlighted.
•
Status: The operational status of the unit or subunit: OK, Rebuilding, Initializing,
Verifying, Degraded, or Inoperable (missing drives). When a unit is Rebuilding,
Initializing, or Verifying, the percentage (%) complete is also shown.
•
Capacity: The total capacity of the unit (capacities of subunits are not shown).
•
Type: The type of unit or subunit it is. RAID 0, RAID 1, RAID 5, RAID 10, RAID 50,
Single Disk, Spare, JBOD, or Disk
•
Stripe: The stripe size of the unit, if applicable.
Cybernetics
UM-MV-86-B1-0801
122
Using the 3ware Disk Manager®
•
Subunits: If the unit has subunits, details of the subunits are shown.
•
Port #: If the Type is Disk, Single Disk, JBOD, or Spare, the port to which the drive is
connected is shown. For multiple drive units, the port numbers are shown in the
subunits section. The port number is a link to the Drive Information page.
Drive Information Page
Figure 5-7 Drive Information Page
The Drive Information page appears when you choose Information > Drive Information
from the menu bar, or when you click a port # on the Unit Details page. If you arrive at this
page from the port # hyperlink on the Unit Information page, the line showing the port #
you clicked on is highlighted.
The Drive Information page shows a list of drives on the controller specified in the dropdown list on the menu bar, and a summary of each one.
To see the SMART data for a drive, click the link in the Port # column.
•
Port #: The port to which the drive is connected.
•
Model: The model of the drive.
•
Capacity: The physical capacity of the drive. (Note that the capacity as shown on
3DM screen is calculated as 1KB = 1024. This amount may differ from the capacity
that is printed on the disk drive, where it typically has been calculated as 1K = 1000.
Consequently, the capacity of the drive may appear smaller in the 3DM screens. No
storage capacity is actually lost; the size has simply been calculated differently for
consistency.
•
Serial #: The serial number of the drive.
Cybernetics
UM-MV-86-B1-0801
123
Using the 3ware Disk Manager®
•
Firmware: The firmware version of the drive.
•
Unit: The unit the drive belongs to, if applicable.
•
Status: The status of the drive: OK, Not Supported, Read Timeout, Read Failure,
Orphan, DCB Data Check, Unsupp DCB, Unconv DCB, Offline JBOD, or Not Present.
(In the event of a problem, the status shown for the drive can be useful to customer
support.)
Note
In most cases, the status of the drive will not correspond to the status of
the unit, shown on the Unit Information page.
SMART Details About Drive at Particular
Port Page
Figure 5-8 S.M.A.R.T Data Page
The SMART Details page appears when you click a Port # on the Drive Information page.
SMART data is displayed as hex values.
Consult your disk drive manufacturer for information on how to interpret the SMART data.
The SMART data meaning varies by disk drive manufacturer and model.
Cybernetics
UM-MV-86-B1-0801
124
Using the 3ware Disk Manager®
Controller Settings Page
Figure 5-9 Controller Settings Page
The Controller Settings page appears when you choose Management > Controller Settings from the menu bar.
The Controller Settings page lets you view and change settings that affect the units on
the controller specified in the drop-down list on the menu bar.
Cybernetics
UM-MV-86-B1-0801
125
Using the 3ware Disk Manager®
Background Task Rate
The Background Task Rate fields let you change the balance of background tasks and I/
O performed by the controller.
The 5 radio buttons let you set the ratio at which background tasks are performed in comparison to I/O. The furthest left buttons set the firmware to the fastest settings for background tasks settings. This means, maximum processing time will be given to
background tasks rather than I/O. The furthest right buttons set the firmware to the slowest background rates, giving maximum processing time to I/O.
Unit Policies
You can enable or disable two policies: Auto-verify and Continue on Source Error During
Rebuild. 3DM lists each unit on the controller specified in the drop-down list on the menu
bar, and shows you whether the policies are currently enabled or disabled for each unit.
•
Write Cache: You can enable or disable write cache for each unit. 3DM lists each unit
on the controller specified in the drop-down list on the menu bar, and shows you
whether the write cache is currently enabled or disabled for it. Write cache is a
combination of the physical hard drives’ write cache as well as the controller’s
memory, depending on what type of unit you are using.
Caution
Make sure Write Cache is enabled, and do not disable Write Cache for
any units. If Write Cache is disabled, the write/read performance for the
physical hard drives will be noticeably slower.
•
Auto-verify: The Auto-verify policy causes verify tasks to be performed automatically,
whenever the controller firmware algorithms determine that a verify task is needed.
This feature is designed to make verification of units easier. When you check this box,
the controller will run verify tasks as they are required.
If there is no schedule set up for verify tasks, then the controller firmware can initiate
a verify task at any time. If a verify time window is scheduled, then the controller will
not start a verify task for that unit outside the time window, and may or may not start a
verify task for that unit within the time window, depending on whether one is needed.
If Auto-verify is not set and there is no schedule, you must manually specify when you
want to run a verify, on the 3DM Management page.
•
Continue on Source Error During Rebuild: This policy applies only to units which
are redundant. (For units which are not redundant, a check box is not available.)
When this policy is set, ECC errors are ignored when they are encountered during a
rebuild. When this policy is not set, a rebuild will abort upon encountering an ECC
error and the unit will be set back to Degraded.
Since this option could result in the loss of some source data in the event of source
errors, select this option only if you want to ensure that a rebuild will complete
successfully without manually intervention. If the rebuild fails and Continue on
Source Error During Rebuild is not selected, then you have the option to start a rebuild
Cybernetics
UM-MV-86-B1-0801
126
Using the 3ware Disk Manager®
manually. It is recommended that a file system check be executed when the rebuild
completes.
Unit Names
Units can be assigned names. A name can be assigned when the unit is created and can
be changed from this screen.
Other Controller Settings
•
2TB Auto-Carving: Auto-carving can be enabled or disabled by selecting the
appropriate radio button. When this feature is enabled, any unit that is over 2TB will
be broken down into multiple volumes of 2TB each, plus a remainder volume. For
example, if the unit is 2.5 TB then it will contain two volumes, with the first volume
containing 2TB and the second volume containing 0.5 TB. If the unit is 5.0 TB then it
will contain 3 volumes, with the first two volumes containing 2TB each and the last
volume containing 1TB.
•
Number of Drives Per Spin-up: Number of drives that will spin up at the same time
when the controller is powered up.
•
Delay between Spin-ups: The delay between drive groups that spin up at one time
on this particular controller.
•
Export JBOD (Unconfigured) Disks: Indicates whether unconfigured disks (JBODs)
should be exported to the operating system. By default, this setting is disabled and
JBOD drives are not exported to the operating system.
•
Disable Write Cache on Unit Degrade: Indicates whether write cache will be
automatically disabled on a unit if it becomes degraded. After the unit is rebuilt, the
write cache will be re-enabled automatically.
Cybernetics
UM-MV-86-B1-0801
127
Using the 3ware Disk Manager®
Scheduling Page
Figure 5-10 Scheduling Page
The Scheduling page appears when you choose Management > Scheduling from the
menu bar.
The Scheduling page lets you view and change the schedule for background tasks that
affect all units on the controller specified in the drop-down list on the menu bar, including:
•
Rebuild tasks (also applies to initialization and migration tasks)
•
Verify tasks (also applies to media scans)
•
Self-tests
You select the type of task for which you want to set the schedule from the drop-down list
at the top of the page.
You can also enable or disable use of the schedule for the selected background tasks by
selecting either Follow Schedule or Ignore Schedule. When these schedules are set to be
ignored, these tasks can be performed at any time, and are not restricted to the scheduled times.
Cybernetics
UM-MV-86-B1-0801
128
Using the 3ware Disk Manager®
About Task Schedules
Each type of task may be scheduled for up to seven times per week. This limits active initializing, rebuilding, verifying, and testing of a unit to the times you specify, so that the
task does not interfere with peak I/O times.
If all seven schedule slots are filled, you must first remove one or more schedule times
before you can add another.
You may set schedule times whether scheduling is set to be followed or ignored. This is
useful if you want to temporarily disable the schedule.
If you remove all the schedule times for a particular background task, initializations and
rebuilds will run anytime, as they are needed. Verify will only run if started by the CLI or if
the Verify Unit button is clicked.
About Self-tests
Unlike scheduling of rebuilds and verifies, scheduling of self-tests is always followed. To
disable self-tests you either remove all schedule times, or uncheck the tests listed in the
Tasks column.
Two self-tests can be scheduled:
•
Upgrade UDMA mode: This test checks the speed at which data transfer to drives is
occurring, to see if the UDMA mode can be increased. (If you are already running at
the fastest UDMA mode, then this self-test has no effect.)
The UDMA mode can become downgraded in the event that cable CRC errors are
encountered, requiring multiple retries to read sectors. In severe cases, the UDMA
mode may be downgraded from ATA 150 to ATA 133, to ATA 100, to 66, to 33.
This check is also done every time the system is booted. UDMA mode does not apply
to SATA.
•
Check SMART Thresholds: This test checks to see whether SMART thresholds
have been exceeded.
The SMART thresholds indicate when a drive is likely to fail, based on the number of
errors that have been recorded through SMART (Self-Monitoring, Analysis and
Reporting Technology).
Cybernetics
UM-MV-86-B1-0801
129
Using the 3ware Disk Manager®
Maintenance Page
Figure 5-11 Maintenance Page
The Maintenance page appears when you choose Management > Maintenance from
the menu bar. The Maintenance page lets you perform maintenance tasks on existing
units on the current controller (shown in the drop-down list on the menu bar), and lets you
create new units by configuring available drives.
Rescan Controller
Use the Rescan Controller button to have 3DM scan the available drives in the controller
and update the list of available drives shown. This is useful in a variety of maintenance
tasks. For example, if you physically plug in a drive and want the controller to recognize
the newly plugged in drive.
Rescan checks empty ports for newly plugged in drives. If those drives were previously
part of a 3ware RAID configuration and they still have valid DCB (Disk Configuration
Block) information on them, the controller tries to piece them back together into a working
unit. If a working unit can be formed, it will appear in the Unit Maintenance list when the
scan is complete.
This process is known as importing drives.If new drives do not have any data indicating
they were previously part of a 3ware RAID configuration, they will appear in the Available
Drives list.
Cybernetics
UM-MV-86-B1-0801
130
Using the 3ware Disk Manager®
In addition, if there is a unit with the status Inoperable before a rescan (for example, a
RAID 5 unit missing two or more drives), and a rescan finds drives that complete the unit,
the inoperable unit will become a valid unit.
Unit Maintenance
The Unit Maintenance section of the page lists all existing units on the current controller,
and displays summary information about them.
The top row shows information about the unit, while subsequent rows show summary
information about each drive in the unit.
Unit Information
•
Unit Number: The unit number assigned to the unit by the firmware.
•
# Drives: Number of drives in the unit.
•
Type of Unit: Type of unit specified during configuration: RAID 0, RAID 1, RAID 5,
RAID 10, RAID 50, Single Disk, Spare, or JBOD.
•
Capacity: The usable capacity (size) of the unit.
•
Status: Operational status of the unit: Ok, Rebuilding, Initializing, Verifying,
Degraded, or Inoperable (missing drives). When Rebuilding, Initializing, or Verifying,
the percentage (%) complete is also shown. The % complete can be active or
paused. To see whether this task is currently active or paused, click on the unit
number to display the Unit Information page, which has that information.
Drive Information
•
Port: The port to which the drive is connected.
•
Model: The model of the drive.
•
Capacity: The capacity (size) of the drive.
•
Status: The status of the drive: OK, Not Supported, Not Present, and so forth. If you
need help regarding a status displayed here, please contact Technical Support.
•
Remove Drive: The Remove Drive link removes a drive from the controller so that
you can safely unplug it. In the Unit Maintenance section, this link is only provided for
drives that can be safely removed without creating an inoperable unit. (For example, a
RAID 5 missing two or more drives or a RAID 0 missing one or more drives would
become inoperable.) If you remove a drive from a redundant unit, the unit will become
degraded. Once a unit has become degraded, additional drives cannot be removed
without making it inoperable, so no Remove Drive link will display.
Caution
Removing or adding drives which are not in hotswap carriers can result
in a system hang or may even damage the system and the drive.
Cybernetics
UM-MV-86-B1-0801
131
Using the 3ware Disk Manager®
Maintenance Task Buttons
Below the list of units, a row of task buttons lets you preform maintenance and configuration tasks related to the unit. Before clicking one of these buttons, select the appropriate
unit:
•
Verify Unit: Puts the selected unit in verifying mode. If verify scheduling is enabled on
the Scheduling page, the unit will not start actively verifying until the scheduled time,
and the status will indicate “Verify-Paused.” (The Unit Details page will indicate
whether a unit is actively verifying.) If verify scheduling is not enabled, clicking Verify
Unit begins the verification process.
If the unit you selected to verify is a redundant unit, the redundancy of the unit will be
verified. For example it will check parity for a RAID 5 or check data consistency for a
RAID 1. If the unit you checked is not a redundant unit, verify will do a surface scan
of the media. During verification, I/O continues normally. For RAID 0, single disks,
JBODs, and spares, there is only a slight performance loss. For redundant units, you
can set the background task rate on the Controller Settings page to specify whether
more processing time should be given to verifying or to I/O.
While a unit is verifying, the status changes to Verifying and a Stop Verify link
appears in the right-most column of the Unit Maintenance table.
•
Rebuild Unit: Replaces a degraded drive in a degraded unit with an available drive
and begins rebuilding the RAID. When you select a degraded unit and click Rebuild
Unit, a dialog box listing available drives appears, so that you can select the drive you
want to use. If the degraded unit has more than one degraded drives (for example, a
RAID 10 where both mirrored pairs each have a degraded drive), you will repeat this
process a second time.
If rebuild scheduling is enabled on the Scheduling page, the unit will not start actively
rebuilding until the scheduled time, and the status will change to say “RebuildPaused.” (The Unit Details page indicates whether a unit is actively rebuilding.) If
rebuild scheduling is not enabled, the rebuild process will begin right away.
•
Remove Unit: Removes a selected unit and allows you to unplug the drives and
move the unit to another controller. the data on the unit remain intact.
When you click Remove Unit, you will be asked to confirm that you want to proceed.
When you confirm the removal, the unit number and information will be removed
from 3DM. (Units created in the future can reclaim this unit number.)
Information about the unit remains intact on the drives. This allows the drive or drives
to be reassembled into a unit again on this controller, or if moved to another
controller.
•
Delete Unit: Deletes the selected unit and allows you to use the drives to create
another unit. The drives appear in the list of Available Drives.
Caution
When a unit is deleted, the data will be permanently deleted: the drives
cannot be reassembled into the same unit. If you want to reassemble
the drives on another controller and access the existing data, use
Remove Unit instead of Delete Unit.
Cybernetics
UM-MV-86-B1-0801
132
Using the 3ware Disk Manager®
Available Drives (to Create Units)
This section lists the drives on the controller which are not currently configured as part of
a unit. The Port number, model, capacity, and status are all displayed, as they are for
drives in existing units.
•
Remove Drive: The Remove Drive link removes a drive from the controller so that
you can safely unplug it. Any drive in the Available Drives list can be removed.
Caution
When a unit is deleted, the data will be permanently deleted: the drives
cannot be reassembled into the same unit. If you want to reassemble
the drives on another controller and access the existing data, use
Remove Unit instead of Delete Unit.
•
Create Unit: Use the Create Unit button to create a unit for use on the current
controller. Begin by selecting the drives you want to use in the list of Available Drives,
and then click Create Unit. You will be prompted to select the unit Type, Stripe size (if
applicable), Write Cache, and Auto Verify settings.
•
Type: The drop-down list lists the possible RAID configurations for the drives selected
in the list of Available Drives. Available configurations may include RAID 0, RAID 1,
RAID 5, RAID 10, RAID 50, Single Disk, and Spare Disk. For information about these
configurations, see “Available RAID Configurations” on page 9.
When you are configuring a RAID 50 with twelve drives, an additional field appears,
in which you select the number of drives per subunit—3, 4, or 6.
•
Stripe: The drop-down list of stripe sizes lists the possible stripe sizes for the
configuration you selected in the RAID level drop-down.
The default stripe size of 64KB will give the best performance with applications that
have many sequentia reads and writes. A larger stripe size will give better
performance with applications that have a lot of random reads and writes. In general,
the smaller the stripe size, the better the sequential I/O and the worse the random I/O.
The larger the stripe size, the worse the sequential I/O and the better the random I/O.
Write Cache, Auto-Verify, and Continue on Source Error during Rebuild. These
check boxes let you set the policies for the unit. These policies can also be set and
changed on the Controller Settings page.
Note
If the configuration window disappears while you are selecting drives,
3DM 2 may have refreshed. Click Create Unit again. If desired, you can
reduce the frequency with which information refreshes in 3DM 2, or
disable refresh temporarily, on the 3DM Settings page.
Cybernetics
UM-MV-86-B1-0801
133
Using the 3ware Disk Manager®
Alarms Page
The Alarms page appears when you click Alarms on the menu bar.
This page displays a list of AENs (Asynchronous Event Notifications) received from the
controller displayed in the drop-down list in the menu bar.
Up to 1000 alarms can be listed. After the 1000-limit is reached, the oldest alarms are
deleted, as new ones occur.
You can sort the alarms by severity or time. To do so, just click the column header.
•
Clear Alarms: The Clear Alarms button removes all alarms shown in the list.
•
Sev: Shows the severity of the event. Three levels are provided:
•
Errors are shown next to a red box
•
Warnings are shown next to a yellow box
•
Information is shown next to a blue box
•
Time: The time shown for alarms generated by 9000-series controllers is the time
received by the driver from firmware.
•
Message: The specific text relating to the alarm condition.
Cybernetics
UM-MV-86-B1-0801
134
Using the 3ware Disk Manager®
3DM Settings Page
Figure 5-12 3DM Settings Page
The 3DM Settings page appears when you click 3DM Settings on the menu bar. Use this
page to set preferences, including email notification for alarms, passwords, page refresh
frequency, whether remote access is permitted, and the incoming port for 3DM to listen
for requests.
The initial settings for most of these preferences are specified during installation of 3DM.
Cybernetics
UM-MV-86-B1-0801
135
Using the 3ware Disk Manager®
E-mail Notification
Use the fields in this section to set up and manage notifications of events by e-mail.
•
Send E-mail: This field determines whether e-mail notification is Enabled or Disabled.
•
Send Severity and Above: Specifies the type of events for which notifications should
be sent. A severity of Information will send e-mails for all alarms, a severity of
Warning will send e-mail for alarms with severity of Warning and Error. A severity of
Error will send e-mail for alarms with severity of Error.
•
Sender: Enter the email address which will appear in the “From” field.
•
Recipient: The e-mail address to which notifications should be sent. You can enter
multiple addresses, separated by commas (,).
•
Server (name or IP): If the machine on which you are running 3DM has access to a
nameserver, you may enter the machine name of the mail server in the Server field.
Otherwise, use the IP address.
•
Save E-mail Settings button: Saves the e-mail notification settings.
•
Send Test Message button: Sends a test message using the saved e-mail settings.
Password
Use the fields in this section to set the passwords for the User and Administrator. When
3DM is first installed, the default password for both is 3ware.
Change Password For: Select the access level for which you are setting the password:
User or Administrator. Users can only view status information in 3DM, while Administrators can make changes and administer the controller and associated drives.
Current Password: Enter the current password.
New Password: Enter the new password.
Confirm New Password: Enter the new password a second time, to be sure you have
entered it correctly.
Change Password button: Saves password changes.
Page Refresh
Minutes Between Refresh: Displays how frequently pages in 3DM will be refreshed with
new data from the controller. To change this setting, select another option from the dropdown. If you prefer 3DM to only refresh when you click Refresh Page, select Never.
The Login, Help and Drive SMART data pages do not automatically refresh. All other
3DM pages do.
Cybernetics
UM-MV-86-B1-0801
136
Using the 3ware Disk Manager®
Remote Access
Caution
Do not disable Remote Access. If Remote Access is disabled, it will be
impossible to access the 3DM web browser interface. If remote access
must be enabled again, contact Cybernetics Technical Support (See
Appendix D).
Allow Remote Connections: This field enables or disables the ability for users and
administrators to access 3DM from a remote computer.
Incoming Port #
Caution
Do not change the Incoming Port # from the default 888. If the Incoming
Port # default is changed from 888, the Web Control Panel will not be
able to open 3DM using the Manage disk storage option (See “Disk
Storage” on page 67.
Listening Port: This field specifies the HTTP: port to be used by 3DM when listening for
communications. The default port setting is 888.
Change Port button: Saves a new port number.
Configuring Units
Note
Keep in mind, the term “unit” and “array” are used interchangeably in
this manual.
Creating a New Unit
When you create a new unit, you must specify the following:
•
Drives to be included in the unit
•
Type of configuration
•
Stripe size, if appropriate for the RAID level
Drives to Be Included in the Unit
You may include from one to eight, depending on the number available. However, you
may only include drives that are not already part of a unit. If you want to use drives that
are currently part of a different unit, you must delete a unit first to make the drives available. If the drives are listed under “Incomplete Drives and Others,” they must be deleted
UM-MV-86-B1-0801
Cybernetics
Using the 3ware Disk Manager®
137
before they can be used. If you want to add drives to be used in the unit, see “Adding a
Drive” on page 138.
Type of RAID Configuration
Available configuration types include RAID 0, RAID 1, RAID 5, RAID 10, RAID 50 and
Single Disk. For information about the different RAID levels Appendix C, “Glossary”.
Note
Creating a unit erases all data on all drives. Although creating a RAID 1
(mirror) creates a unit that will have a duplicate of data on both drives
after it is put in use, creating a RAID 1 cannot be used to make a backup
copy of data that currently exists on a single drive.
In general, smaller stripe sizes are better for sequential I/O such as video and larger strip
sizes are better for random I/O (such as databases).
Striping size is not applicable for RAID 1, because it is a mirrored array without striping.
Using the default stripe size of 64KB usually gives you the best performance for mixed I/
Os. If your application has some specific I/O pattern (purely sequential or purely random),
you might want to experiment with smaller or larger stripe size.
1. In 3DM, choose Management > Maintenance.
2. In the “Available Drives” list, select the drives you want to include in the unit by
marking the checkbox in front of the Port number for each one.
If you are creating single drive units, (single disks or hot spares), you can configure
multiple drives at once.
3. Click Create Unit.
4. In the dialog box that appears, select the RAID configuration you want.
5. If stripe size applies to the RAID type you select, select a Stripe Size.
6. Click OK.
The new unit will appear in the Unit Maintenance list at the top of the page and the
miSAN-V-Series will be notified of the new unit.
Rebuilding a Unit
When a drive on a unit degrades, you replace it with an available drive and then rebuild
the unit.
1. If necessary, add a new drive to be used to replace the failed drive. (For details, see
“Adding a Drive” on page 138.)
2. In 3DM, choose Management > Maintenance.
3. In the Unit Maintenance section, select the degraded unit and click Rebuild Unit.
4. When a dialog box displays available drives, select the drive you want to replace the
degraded drive with, and click OK.
UM-MV-86-B1-0801
Cybernetics
138
Using the 3ware Disk Manager®
Configuring Drives
Creating a Hot Spare
You can designate an available drive as a hot spare. If a unit degrades and a hot spare
the size of the degraded disk (or larger) is available, the hot spare will dynamically
replace the failed drive in the unit without user intervention. When this occurs, an event
notification is generated and appears in the list of alarms in 3DM.
It’s a good idea to select a hot spare after you create a redundant unit. In order to replace
a failed drive, a hot spare must have the same or larger storage capacity than the drives it
is replacing.
To specify a hot spare after the system is booted:
1. In the Available Drives section of the Maintenance page, select the drive by
checking the box next to it.
2. Click Create Unit.
3. In the dialog box that appears, select the configuration type Spare.
4. Click OK. You will see the spare appear at the top of the page, under Unit
Maintenance.
Adding a Drive
If you have a hot-swap carrier, you can add a drive to your system and make it available
through 3DM without powering down the system.
To add a drive through 3DM when you have hot-swap carriers:
1. Connect the drive physically to the controller.
2. In 3DM, choose Management > Maintenance.
3. Click Rescan Controller.
The drive will appear in the list of available drives. You can now use it in a new RAID
configuration, or as a replacement drive in the event that another drive degrades.
4. If you want to use this drive as a spare, see “Creating a Hot Spare” above.
Removing a Drive
If you have a hot-swap carrier and want to physically remove a drive from your system
without powering it down, you must first remove it through the 3ware software.
Cybernetics
UM-MV-86-B1-0801
Using the 3ware Disk Manager®
139
This is useful if you know that a drive is developing a problem and you want to replace it,
or to replace a drive which has already failed.
Caution
If you unplug a drive without first removing it through 3DM, Rescan will
not recognize it as gone. Always use the Remove Drive command to
remove a drive before unplugging it.
1. In 3DM, choose Management > Maintenance.
Remove Drive links appear next to all drives that can be removed from units, and next
to drives in the Available Drives list.
2. Locate the drive you want to remove and click the Remove Drive link.
(You can remove a drive that is part of a unit, or that is shown in the list of Available
Drives.)
Figure 5-13 Removing a Drive in 3DM
3. When 3DM asks you to confirm that you want to remove the drive, click OK.
UM-MV-86-B1-0801
Cybernetics
140
Using the 3ware Disk Manager®
You can now remove the drive from your system. If you removed a drive that was part
of a unit, the unit may become degraded.
Figure 5-14 Result of Removing Drive from Unit in 3DM
Cybernetics
UM-MV-86-B1-0801
141
Packing and Shipping Instructions
Chapter 6
Packing and Shipping Instructions
This chapter provides instructions for transporting the miSAN-V-Series or returning the
miSAN-V-Series to Cybernetics for service or repair. The packing and shipping process
involves first removing the miSAN-V-Series from the place where it is installed, enclosing
the unit in an anti-static bag, and then placing the miSAN-V-Series in the packing materials.
Caution
Failure to properly prepare the miSAN-V-Series for shipping can result
in shipping damage. Any damage to the miSAN incurred during
transport as a result of improper packaging will void the warranty.
Cybernetics’ warranty does not cover shipping damage.
Removing the miSAN-V-Series from its
Installation Environment
1. Make any attached SCSI devices (disk arrays, tape drives or libraries) ready for
removal from the SCSI bus, in accordance with the user manual for those devices.
2. Power down the miSAN-V-Series. Disconnect all cables (network, upstream and
downstream SCSI, power). Remove SCSI terminator(s) if installed.
3. If the miSAN-V-Series is rack-mounted, remove it from the rack, and remove the
slides from the sides of the unit. This will require a No. 2 Phillips screwdriver.
4. If the unit is a miSAN-V-Series-AIT, remove the dust cover from the removable tape drive
Cybernetics
UM-MV-86-B1-0801
142
Packing and Shipping Instructions
Using the Proper Packing Materials
You must use the original packing materials that came with the miSAN-V-Series from
Cybernetics. Replacement packing materials can be purchased by contacting Cybernetics’ Technical Support at (757) 833-9200.
Note
Styrofoam pellets or “peanuts” are not adequate for packing, since they
may shift and allow the miSAN-V-Series to move about in the shipping
box. Wadded newspaper, computer printouts, and such are not
adequate for the same reason.
•
Cybernetics box for the accessories and two filler boxes for spacing.
•
Anti-static bag for the chassis
•
Two cardboard and clear plastic shells.
(Front)
(Front)
BOTTOM
TOP
•
Cybernetics box
•
Packing Tape
Cybernetics
UM-MV-86-B1-0801
143
Packing and Shipping Instructions
To prepare the chassis for shipping, complete the following steps:
1. Enclose the unit in an anti-static bag to prevent ESD damage.
2. Place the Cybernetics box on a level surface.
3. Place one of the cardboard shellsl (identified in “Using the Proper Packing Materials” on
page 142) plastic-side up at the bottom of the Cybernetics box. Make sure it is settled in properly..
4. Place the chassis on the cardboard shell so it is centered on the plastic..
Cybernetics
UM-MV-86-B1-0801
144
Packing and Shipping Instructions
5. Place the second cardboard shell on top of the chassis.
6. Open the accessory box, place the accessories inside (e.g., cables, terminators, and AC power
cord), if requested by Cybernetics, and close the box.
7. Place the two filler boxes on top of the cardboard shell.
Cybernetics
UM-MV-86-B1-0801
Packing and Shipping Instructions
145
8. Place the accessory box on top of the cardboard shell and if you are returning the rackmount kit,
place it next to the accessory box as shown in the bottom right picture..
9. The figure below illustrates the previous steps.
10. Tape the box shut, and place the shipping label on the box.
11. If the box is being shipped to Cybernetics, make sure the Return Authorization Number (RAN)
received from Cybernetics Customer Support is prominently displayed on the outside of the box.
12. Since the box contains delicate electronic components, it should be shipped fully insured via an
airfreight carrier.
UM-MV-86-B1-0801
Cybernetics
146
Cybernetics
Packing and Shipping Instructions
UM-MV-86-B1-0801
147
Product Specifications
Chapter 7
Product Specifications
Supported iSCSI Initiators
Microsoft iSCSI Initiator 2.0 or higher
Windows XP/2000/2003 Server
http://www.microsoft.com/downloads/details.aspx?FamilyID=12cb3c1a-15d6-4585-b385Go
to
befd1319f825&displaylang=en
Cisco iSCSI Driver 3.x
Sun Solaris 7/8/9
Go to http://www.cisco.com/univercd/cc/td/doc/product/sn5000/sn5400/iscsidrv/index.htm
Sun Solaris 10
Go to
http://www.sunsolve.sun.com/search/document.do?assetkey=1-21-119090-20-1
QLogic SANblade iSCSI HBA QLA4010C
Windows 2000/2003 Server, Sun Solaris SPARC, Linux (32-bit and 64-bit)
Go to http://www.qlogic.com/support/product_resources.asp?id=341
Protocols and Standards
CHAP (RFC 1334)
IP (RFC 791, 894, 1092)
iSCSI (IETF draft version 20; RFC 3720)
SCSI-2 and SCSI-3
TCP (RFC 793)
Drive Interface Compatibility
Serial ATA (1.5 Gigabits/sec.)
Ethernet Interfaces
Management LAN Port (ETH0)
10/100/1000Base-T (1 Gigabit/sec.) TCP/IP
RJ-45 connector
Cybernetics
UM-MV-86-B1-0801
148
Product Specifications
iSCSI Network Ports (ETH1, ETH2)
10/100/1000Base-T (1 Gigabit/sec.) TCP/IP
RJ-45 connector
SCSI Parallel Interfaces
Low Voltage Differential (LVD)
VHDCI 68-pin, female socket
Ultra3 (Ultra160) Wide SCSI
Maximum synchronous data transfer rate of 160 megabytes/sec.
Auto-selectable between LVD and Single-Ended (SE) mode
Physical Dimensions
Height
Width, chassis
Depth
Weight
3.5 in. (8.9 cm) (2U)
16.9 in. (42.9 cm), front panel 18.9 in. (48.0 cm)
26.4 in. (67.1 cm)
48.8 lbs. (22.1 kg), with 6 disk drives
Power Supply
Power supply input voltage is auto-sensing:
Voltage
100–240 VAC, 47–63 Hz, 8–4 A
Consumption
460 W maximum, each power supply
BTU/HR
Idle
740.62
Typical Activity
851.65
Watts
Amps
Volts
Volt Amps
216.5 W
1.81 A
118.75 V 215.39 VA
249.0 W
2.09 A
118.0 V
246.33 VA
Humidity and Temperature
Non-operating
Humidity
Temperature
10–90%, non-condensing
-40–140°F (-40–60°C)
Operating
Humidity
Temperature
Cybernetics
20–80%, non-condensing
50–104°F (10–40°C)
UM-MV-86-B1-0801
149
Appendix A
Microsoft iSCSI Initiator Software
Client
®
Host systems running Microsoft® Windows® 2000, XP or 2003 can access Cybernetics
iSCSI devices using the Microsoft iSCSI Initiator software. The following sections provide
detailed steps for downloading and running the setup program and installing and configuring the driver. The following information is subject to change by Microsoft. The screen
shots that follow may be different than what will show on your computer, depending on
what software you are running, and whether you are updating or newly installing the
Microsoft® iSCSI Initiator Client.
Downloading the Setup Program
The iSCSI Initiator setup program can be downloaded from the Microsoft Web site by
doing the following:
1. Go to the Web site http://www.microsoft.com/downloads
2. Type Microsoft iSCSI Software Initiator in the “Keywords” box, and then click Go.
3. Click the link for the latest version of the driver that appears. As of 05/26/2006 the
latest version is 2.02 and can also be found by clicking the following link:
http://www.microsoft.com/downloads/details.aspx?FamilyID=12cb3c1a-15d6-4585-b385befd1319f825&DisplayLang=en
Cybernetics
UM-MV-86-B1-0801
150
4. Scroll down to the “Files in this Download” section, and then click the applicable “fre”
link for a 32-bit (“x86”) or 64-bit (“ia64”) system.
5. Click Save in the “File Download” dialog box.
Note
It is also recommended that you download and study the release notes
and user guide. They are shown above as relnotes.txt and uguide.doc
Cybernetics
UM-MV-86-B1-0801
151
6. Choose a location for the file in the Save As dialog box, and then click Save. The file
is then saved to the specified location.
Installing the Software
To install and set up the iSCSI Initiator software, complete the following steps:
Note
The information presented here is provided as a courtesy only and may
not reflect the current software version provided by Microsoft.
1. To install the driver, first, double-click the “.msi” file to run the setup program. The
Setup Wizard will then execute.
Cybernetics
UM-MV-86-B1-0801
152
2. Click Next to continue.
3. Read the license agreement in the “License Agreement” window,
select “I agree,” and then click Next.
Cybernetics
UM-MV-86-B1-0801
153
4. Choose a location to install the driver files in the “Select Installation Folder” window,
and then click Next to continue.
Note
The ability to select a location for the installation of the Microsoft iSCSI
Initiator is only available for new installations. If you are upgrading to a
newer version of the initiator, the options will be different than shown
here.
5. Click Next to continue in the “Confirm Installation” window.
Cybernetics
UM-MV-86-B1-0801
154
The Microsoft iSCSI Installation Program will execute once the setup
files have been copied.
6. Choose to “Install Complete iSCSI Initiator,” and then click OK.
Configuring the iSCSI Initiator
The iSCSI Initiator Properties window is used for configuring the driver and can be
accessed by launching the “iSCSI Initiator” from the Windows Control Panel.
Cybernetics
UM-MV-86-B1-0801
155
Changing initiator node name
The initiator is automatically assigned a unique name during the installation process.
Make a note of the “initiator node name,” which can be used by Cybernetics iSCSI
devices for assigning control of storage resources. This name is displayed on the “General” tab and can be changed if a target has not yet been assigned to it. To change the
name, click the “Change” button and type in the new name..
Adding Target Devices
1. Select the “Discovery” tab to allow for adding target devices.
2. Click Add... in the Target Portals area to enter the IP address or DNS name and
socket number for an iSCSI target device.
Cybernetics
UM-MV-86-B1-0801
156
3. Clicking Advanced... allows access to security settings, such as CHAP
authentication, which is supported by Cybernetics iSCSI devices. The CHAP
password must be between 12 and 16 characters.
Figure A-1 Advanced Settings
Cybernetics
UM-MV-86-B1-0801
157
Select the “Targets” tab to view the iSCSI targets discovered through the added target
portals. To log onto an iSCSI target, select it from the list, and then click Log On....
4. Select the option to “Automatically restore this connection when the system boots” to
make a target persistent, so the iSCSI Initiator will attempt to reconnect to it each time
the computer is rebooted. Click OK to log onto the target.
5. If you added a CHAP password in step 3, you will need to click on “Advanced...”. This
will bring up the menu shown in Advanced Settings. Enter the Target secret and
press “OK”. This will bring up the Log on to Target screen. Press “OK” to Log on.
Cybernetics
UM-MV-86-B1-0801
158
After the target has been logged onto, it will show as “Connected”
on the “Available Targets” tab.
6. Repeat this process to add additional target portals as desired.
Creating System Dependencies
Using iSCSI Disk Devices with the iSCSI
Initiator
When using an iSCSI disk device to create file shares (e.g., for network storage, backup
copies, e-mail), the iSCSI Initiator service needs to start before the Server service, which
creates file shares. This is because the Server service cannot create file shares for iSCSI
disk devices until the iSCSI Initiator service is initialized. If the services are not started in
the proper order, the file shares located on the iSCSI disk device may not be re-created
when you restart the iSCSI host computer that the shares are created on.
To start the services in the proper order, you can use system dependencies to make one
service start before another.
The following instructions explain how to set up the dependencies:
1. Run the Windows Registry Editor by opening regedt32.exe using Start > Run...
2. Go to HKEY_LOCAL_MACHINE\SYSTEM\CurrentControlSet\Services
Cybernetics
UM-MV-86-B1-0801
159
3. Select lanmanserver in the folder tree.
4. Select Edit > Add value... from the menu bar
5. Enter the Value Name DependOnService
6. Select REG_MULTI_SZ for the Data Type
7. Click OK
8. Make the value DependOnService set to the iSCSI Initiator service MSiSCSI.
9. After you are finished editing the registry, be sure to restart the computer to make
sure the settings will take effect.
Cybernetics
UM-MV-86-B1-0801
160
Using Backup Software with the iSCSI
Initiator
When using backup software with the Microsoft® iSCSI Initiator, the iSCSI Initiator service needs to start before the backup software services. This ensures the backup software will be able to detect the SCSI devices that the iSCSI Initiator logs into. This
requires starting the services in a specific sequence.
To do this, you can use system dependencies to make one service start before another.
By setting up the correct dependencies, you can create a chain reaction and thus start
the services in the correct sequence.
The following instructions explain how to set up the dependencies for a backup product:
1. Run the Windows Registry Editor by opening regedt32.exe using Start > Run...
2. Go to HKEY_LOCAL_MACHINE\SYSTEM\CurrentControlSet\Services
3. Make sure each backup software service has a DependOnService value. If the
DependOnService value does not exist for the service, you must create it:
A Select the service in the folder tree.
B Select Edit > Add value... from the menu bar
C Enter the Value Name DependOnService
D Select REG_MULTI_SZ for the Data Type
E Click OK
4. Make the value DependOnService set to the names of services you want started before
the service itself starts. For backup software services, make sure to include the iSCSI
Cybernetics
UM-MV-86-B1-0801
161
Initiator service MSiSCSI
LanmanWorkstation.
and the Workstation network and connection service
5. After you are finished editing the registry, be sure to restart the computer to make
sure the settings will take effect.
Logging Off
Caution
It is necessary to log off the iSCSI connections before shutting down a target in
order to avoid possible data loss. Failure to log off the iSCSI connections will
cause Microsoft Windows to send “Unsafe Device Removal” messages.
If it becomes necessary to shut down the miSAN-V-Series use the following steps to log
off the iSCSI connections between the host and the miSAN-V-Series.
1. Open the “Targets” Tab in iSCSI Initiator Properties.
UM-MV-86-B1-0801
Cybernetics
162
2. Highlight one of the targets and press “Details”
3. Click “Log off”.
4. Repeat the process for each target on the machine you are shutting down.
Cybernetics
UM-MV-86-B1-0801
163
Appendix B
Linux iSCSI Initiator
Introduction
There are many variations of Linux available. Your installation and configuration of Linux
may be different than those mentioned later in this Appendix. Cybernetics takes no
responsibility for any of the code recommendations or content of the links provided.
Before starting, determine the kernel version being used by typing uname -r
The project page for Linux iSCSI is: http://linux-iscsi.sourceforge.net/
The linux-iscsi driver began as an open source version of the Cisco iSCSI Initiator. Much
of the configuration of the 3.xx (for Linux Kernel 2.4) and 4.xx (for Linux Kernel 2.6) drivers is the same as it is for the Cisco driver on other platforms such as Solaris.
As of the 5.xx series, the linux-iscsi project is merging with the Open-iSCSI project. The
merged driver is still hosted on the linux-iscsi Sourceforge page with a parallel versioning
system on the Open-iSCSI webpage. As of now, this version is still experimental. Since it
is drastically different, it will not be covered in this appendix.
Installation
In all cases, you should get the latest packaged version of linux-iscsi from the Linux distro's package manager if a packaged version exists.
Linux Kernel 2.6 Notes
Version 4.02 only supports up to Linux kernel 2.6.9.
According to the linux-iscsi developers, you should use Open-iSCSI for lk 2.6.11 and
higher for now. There are No production releases of the Open-iSCSI driver yet though.
As an alternative, the Core-iSCSI project revived an earlier iSCSI initiator effort. It claims
to be the only production-level iSCSI initiator for > lk 2.6.9.
The Core-iSCSI project provides an iSCSI Initiator kernel driver for Linux along with a
separate package with user-land management utilities.
Since the linux-iscsi project has moved back into the development phase due to its
merger with Open-iSCSI in the 5.xx series, there were no production Linux iSCSI initiator
implementations available for lk 2.6.10 and up. Core-iSCSI was revived to fill this gap
until linux-iscsi/Open-iSCSI matures. The developers hope to make the user-land man-
Cybernetics
UM-MV-12-B1-0801
164
agement utilities pluggable with the kernel portion of Open-iSCSI or any futurue initiator
du-jour.
Core-iSCSI is based on GPLed portions of the commercial PyX Initiator from PyX Technologies (now owned by SBE, Inc.) The current maintainer is an employee of SBE, Inc.
The project does not have a web page. It has an active discussion board at http://
groups.google.com/group/core-iscsi
core-iscsi Initiator: http://www.kernel.org/pub/linux/kernel/people/nab/iscsi-initiator-core/
core-iscsi-tools: http://www.kernel.org/pub/linux/utils/storage/iscsi/
Core-iSCSI Setup
The configuration file is /etc/sysconfig/initiator, and the syntax is different from linuxiscsi's /etc/iscsi.conf. For an iTape/HSTC, you need a line like:
CHANNEL="0 1 eth0 192.168.1.1 3260 0 HeaderDigest=None;DataDigest=None"
Replace eth0 with the name of the network interface you are using for iSCSI. The parameters "HeaderDigest=None;DataDigest=None" are optional but increase performance by
turning off CRC checksums.
To login/logout, use:
/etc/init.d/initiator start
/etc/init.d/initiator stop
To login to multiple iSCSI targets at the same IP address (e.g. a HSTC with two virtual
devices), use something like the following in /etc/sysconfig/initiator:
CHANNEL="0 1 eth0 192.168.1.1 3260 0 HeaderDigest=None;DataDigest=None none
eui.000b560000004a41"
CHANNEL="1 1 eth0 192.168.1.1 3260 0 HeaderDigest=None;DataDigest=None none
eui.000b560000004a42"
In this example, "eui.000b560000004a41" and "eui.000b560000004a42" are the iSCSI
target names from an example HSTC. You need to substitute the actual target names
from the device you are using. You may get the iSCSI target names from a ASP, HSTC,
or miSAN-VX in the Information menu under "Local iSCSI Target List". Alternately, you
may leave off the target name initially, login, logout, get the target name list from "dmesg
| grep 'Discovered iSCSI Target'", edit the config file with the names, then log back in.
Debian lk 2.6
This applies for all Debian-based distros (Debian, Ubuntu, Knoppix, etc) with kernel 2.6.
There is no linux-iscsi package available via apt. You will need to compile from source.
First, resolve the dependencies if needed:
apt-get install libsysfs-dev
apt-get install udev
Cybernetics
UM-MV-12-B1-0801
165
Red Hat 9 & Enterprise Linux 3
To install an RPM:
Go to http://sourceforge.net/projects/linux-iscsi and download the latest Production RPM
for your distro version.
Install from the RPM - run `rpm -i rpmfile`
SuSE Linux Pro 9.1
The package name is linux-iscsi (version 4.0.1-83). This initiator works with cy-iscsi products (hstc, misan, itape). However, you must edit /etc/init.d/iscsi to point to the proper
location for the kernel driver. If you do not edit this file, the attempt to start iscsi will hang.
Edit /etc/init.d/iscsi as follows:
Find the line (in most cases line 207) that has the following:
EM=/lib/modules/'uname -r'/misc/iscsi.ko
Change it to EM=/lib/modules/'uname -r'/extra/iscsi.ko
Source Compilation
To install from source:
Go to http://sourceforge.net/projects/linux-iscsi and download the Production source file
for your kernel version. You will probably want to make a directory such as /usr/src/iscsi
to download to.
Read the README file and make sure that all dependencies are resolved.
Extract the source folder. `gunzip` the file and then `tar -xvf` the unzipped file
Change to the folder and run `make` to build the driver.
Then run `make install` to build the installation script and start the installation.
Setup
Edit the iSCSI configuration file at /etc/iscsi.conf using your favorite file editor. You will
add the remote iSCSI target IP address (iTape, HSTC, etc) as a DiscoveryAddress
(example: DiscoveryAddress=192.168.1.1). Save the file.
Stop & restart the iSCSI service. Change to the /etc/init.d directory and run `./iscsi stop`
followed by `./iscsi start`
Test the setup
Confirm that the OS sees the tape device(s). `cat /proc/scsi/scsi` will list all attached SCSI
devices (including iSCSI).
You should now have a device called "st0". Run `mt -f /dev/st0 status` to confirm this. If
there are mutiple remote iSCSI target tape drives, check the status of each (st1, st2, etc).
UM-MV-12-B1-0801
Cybernetics
166
Also, try a tar to write & read to the drive. `tar -cvf /dev/st0 /somedir` will backup the
"somedir" directory. `tar -tvf /dev/st0` will display the file listing on the drive. `tar -xvf /dev/
st0 /somedir` will restore to the "somedir" directory.
Cybernetics
UM-MV-12-B1-0801
167
Appendix C
Glossary
The following list of terms and definitions are used in the preceding chapters and should
be read and understood by administrators of the miSAN-V-Series.
3DM – 3ware Disk Manager 2 (3DM®) is a web-based interface used for viewing the status of and managing the 3ware® Escalade® 9500S-8 SATA RAID controller and associated disk drives remotely.
Array – One or more disk drives that appear to the operating system as a single unit.
Within 3ware software (3BM and 3DM) arrays are typically referred to as units.
Auto-archive – A feature used for automatically copying virtual tapes to physical tapes
after a backup to the virtual tapes. Auto-archive allows for automating the process of creating and maintaining tape cartridge duplicates of virtual tape backups.
Autoload – A feature used for automatically changing the virtual tape for a virtual tape
drive. When enabled, the miSAN-V-Series will mount the next virtual tape listed in the
“Mounted medium” listbox when a host issues an “eject” command.
Barcode label – A label affixed to a tape cartridge that shows a barcode.
Basic disk – A physical disk drive containing basic volumes, such as primary partitions
and logical drives.
CAT 5/5e/6 – Ethernet cable standards defined by the Electronic Industries Association
and Telecommunications Industry Association (EIA/TIA).
•
CAT 5 is the 5th generation of twisted pair Ethernet cabling and the most popular of
all twisted pair cables in use today. CAT 5 usually contains four pairs of copper wire,
although Fast Ethernet communications only utilize two pairs.
•
CAT 5 enhanced (5e) supports short-run Gigabit Ethernet
(1000 Mbps) networking by utilizing all four wire pairs and is backward-compatible
with ordinary CAT 5.
•
CAT 6 cable contains four pairs of copper wire and unlike CAT 5, utilizes all four pairs.
CAT 6 supports Gigabit Ethernet (1000 Mbps) and supports communications at more
than twice the speed of CAT 5e, the other popular standard for Gigabit Ethernet
cabling.
Cybernetics
UM-MV-86-B1-0801
168
CHAP – “Challenge-Handshake Authentication Protocol” (CHAP) is a scheme that uses a
3-way “handshake” (peer-response-authenticator) to periodically verify the identity of the
peer (iSCSI host initiator). Authentication begins after a network link is established and
the authenticator (iSCSI target; iSAN Vault) sends a “challenge” message to the peer.
The peer responds with a calculated value that embeds a “secret” (user password). The
authenticator checks the response value against its own expectation. If the value
matches, the peer is then authenticated (logged on to the iSAN Vault).
Compression – Compression reduces the amount of storage space required to store a
given amount of data. The miSAN-V-Series is incapable of compressing data while writing to virtual tapes. Data compression is only performed by a physical tape drive when
the miSAN-V-Series writes to physical tape. The “Drive compression for copying” menu
option toggles internal tape drive data compression for all attached tape devices.
Copy Profile – Copy profiles allow the user to define and save relationships between virtual tapes and physical tapes slotted inside the physical stacker. For example, the first virtual tape will always be copied to the first physical tape, the second virtual tape to the
second physical tape, the third virtual tape to the third physical tape and so forth. Using
copy profiles saves from manually having to select virtual tapes to copy each time
“Offload disk to tapes” is enabled.
D2D2T – Disk-to-Disk-to-Tape (D2D2T) is an approach to computer backup and
archiving in which data is initially copied to a disk storage device and then periodically
copied again to a tape storage device (or to an optical disc drive).
Daisy-chaining – Connecting multiple devices one to another in a series.
Distributed Parity – Parity works in combination with striping on RAID 5 and RAID 50.
Parity information is written to each of the striped drives, in rotation. Should a failure
occur, the data on the failed drive can be reconstructed from the data on the other drives.
ECC – Error-Correcting Code (ECC) is integrated into many tape drives for the purpose
of reconstructing data bits missing from the tape as a result of tape quality degradation.
The number of ECC occurrences since the last tape rewind is calculated as a percentage.
In general, error rates are the highest at the beginning of a tape since this part of the tape
is written to every time the tape unloads.
Host I/O – The HSTC’s disk drive input and output (disk I/O) resources used by hosts for
backup and restore jobs. Both host I/O resources and job I/O resources draw from the
same disk I/O resources. Thus, one impacts the other’s performance. You can use the
“Host vs. job I/O policy” setting to determine the priority of host I/O relative to job I/O.
Hot Swap – The process of swapping out a drive without having to shut down the system.
This is useful when you need to swap out a degraded drive, manually or automatically,
with a pre-designated spare.
HSTC – High Speed Tape Cache (HSTC) is a software engine that emulates conventional tape drives and tape cartridges. Host applications use HSTC virtual tapes and
drives as conventional backup resources.
iSCSI – Internet SCSI (iSCSI) is a method of transmitting SCSI commands, data and status across Ethernet-based standard TCP/IP networks. This allows SCSI devices and
SCSI-aware software (e.g., backup applications) to communicate remotely via existing
networks.
Cybernetics
UM-MV-86-B1-0801
169
iSCSI Initiator – A device that begins an iSCSI transaction by issuing a command to
another device (the iSCSI target) to perform a task. Typically an iSCSI host bus adapter
is the initiator, but targets may also become initiators, such as when the miSAN-V-Series
is configured to use remote iSCSI devices.
iSCSI Target – An iSCSI device that executes a command given by an iSCSI initiator to
perform a task. The
miSAN-V-Series is the target for an iSCSI host initiator.
Fault Tolerance – The ability of a system or component to continue normal operation
despite a hardware or software failure. This often involves some degree of redundancy.
For disk drives, complete redundancy is “Mirroring”, where every write operation is performed on two or more disk drives, so if one fails the other can take over.
JBOD – “Just a Bunch of Disks” (JBOD) is an acronym that refers to disk drives that have
not been configured in a RAID array (See “RAID”). With JBOD, each drive is either operated independently or drives may be seen as a single drive by combining the drives into
one larger logical disk. JBOD does not provide RAID aggregation, fault tolerance or
redundancy.
Job I/O – The HSTC’s disk drive input and output (disk I/O) resources used for the
HSTC’s jobs (e.g., offloading disk to tape). Both job I/O resources and host I/O resources
draw from the same disk I/O resources. Thus, one impacts the other’s performance. You
can use the “Host vs. job I/O policy” setting to determine the priority of host I/O relative to
job I/O.
Logical Disk – A number of areas on one or more disk drives that the computer system
considers as one filesystem. The areas of disk space are not necessarily contiguous but
are presented to the computer system as a single disk drive. In disk arrays, drives are
presented as individual logical disks (See “JBOD”) or are configured by a RAID controller
as logical disks spanning multiple disks (See “RAID”).
LVD – Low Voltage Differential (LVD) uses less power than the HVD bus, is less expensive and allows the higher speeds of Ultra 2/3 SCSI. LVD terminators run on 3.3 Volts
DC.
Media changer – A mechanical device within a tape library that moves tapes to an internal tape drive. A media changer allows the library to load tapes sequentially into a tape
drive during a write/read operation requiring multiple tapes. The media changer device
usually has its own SCSI ID and resides on LUN 0 of that ID.
MTU
Maximum Transmission Unit (MTU) is the maximum packet size, in bytes, that can be
transmitted across a link. Changing the default packet size from an MTU size of 1,500 to
9,000 (also called a “jumbo” packet) can significantly increase performance depending
upon the activity. For this to be effective, however, each point in the network must be configured to support jumbo packets. If much of the network is dedicated to 10/100 Mbps
Ethernet, the MTU packet size ought to be set to 1,500 to minimize layer-two fragmentation and reassembly.
Optical Ethernet – Ethernet consisting of optical fiber cabling. The miSAN-V-Series Optical Fiber interface requires a dual mode optical fiber cable having an SC duplex connector.
Cybernetics
UM-MV-86-B1-0801
170
Optical Disc – An optical disc is an electronic data storage medium that can be written to
and read using a low-powered laser beam (e.g., CD-R/W, Blu-ray, ProData).
Optical Disc Drive – For the miSAN-V-Series, a SCSI drive that records data on an optical disc.
Physical Device – A physical tape drive or physical tape library. This is the miSAN-VSeries
“back-end” as seen by the miSAN-V-Series. These devices are installed (internal),
attached (SCSI) or connected (iSCSI) to the miSAN-V-Series and are used for offloading
disk to tapes.
Physical Stacker – A physical tape library (these terms are used interchangeably). If the
miSAN-V-Series is not configured with optional Tape Library Control support, an external
tape library will appear to the miSAN-V-Series as a standalone tape drive. With optional
Tape Library Control support, the miSAN-V-Series can use an external tape library drive
and its slotted tapes.
Physical Tape – A data tape cartridge.
Physical Tape Drive – An installed (internal), attached (SCSI) or connected (iSCSI) tape
drive.
Physical Tape Library – An attached (SCSI) or connected (iSCSI) tape library. If the
miSAN-V-Series is not configured with optional Tape Library Control support, an external
tape library will appear to the miSAN-V-Series as a standalone tape drive. With optional
Tape Library Control support, the miSAN-V-Series can use an external tape library drive
and its slotted tapes.
RAID – “Redundant Array of Independent Disks” (RAID) is a grouping of disk drives (an
array) combined in such a way as to provide fault tolerance and increased write/read performance. Several disk grouping methods exist, called RAID levels, which are configured
by a disk array controller in the storage enclosure. Most storage enclosures implement
the RAID levels described below. Configuring the RAID storage enclosure for the appropriate use will make the most effective use of disk storage resources and provide the correct level of fault tolerance.
RAID 0 – This is the most basic implementation of the Striping technique. However,
because this type of array has no inherent fault tolerance (i.e., redundancy), RAID 0 is not
true RAID unless it is used in conjunction with other RAID levels (e.g., RAID 10 and RAID
50).
RAID 0 arrays can provide high write performance relative to true RAID levels because
there is none of the overhead associated with parity calculations or other data recovery
techniques. This same lack of provision for rebuilding lost data means RAID 0 arrays
should be restricted to storage of noncritical data and combined with a strict backup program.
In a RAID 0 array, which requires a minimum of two disks to be installed, storage capacity
for each disk is determined by the smallest disk in the array. For example, an array with a
100, 250 and 150 Gigabyte drive will show a total storage capacity of 300 Gigabytes (100
Gigabytes × 3).
RAID 0 is recommended for use with large, non-critical file applications, such as multimedia and scientific computing.
Cybernetics
UM-MV-86-B1-0801
171
RAID 1 – This is the simplest form of a fault-tolerant array. Based on the concept of mirroring, this array consists of multiple sets of data stored on two or more drives. Although
many RAID 1 implementations involve two sets of data (hence the term mirror), three or
more sets can be created if increased reliability is desired.
In a RAID 1 array, storage capacity is determined by the smaller of the two disks in the
array. This provides maximum fault tolerance with complete redundancy but minimum
data storage capacity, since a host system sees only the capacity of a single disk drive.
Writing the same data to the two disks in the array results in poor write speeds, but RAID
1 yields high performance for read-intensive operations.
If a drive failure occurs in a RAID 1 array, subsequent read and write operations are
directed to the surviving drive(s). A replacement drive is then rebuilt using data from the
surviving drive. This rebuilding process has some impact on the array’s I/O performance
because all data must be read and copied from the surviving drive(s) to the replacement
drive.
RAID 1 offers high data availability, because at least two complete sets of data are
stored. Connecting the primary drives and mirrored drives to separate drive controllers
can further enhance fault tolerance by eliminating the controller as a single point of failure.
RAID 1 has the highest storage cost of any non-hybrid RAID level, because it requires
sufficient drive capacity to store at least two complete sets of data.
RAID 1 arrays are recommended and better suited for small databases or other smallscale systems that emphasize reliability, such as in accounting or finance.
RAID 10 – This RAID level, originally called RAID 1+0, is implemented as a striped array
(RAID 0) whose segments are RAID 1 arrays. RAID 10 requires a minimum of four disks
installed and is basically several RAID 1 drives linked together with RAID 0. This yields
the speed benefits of RAID 0 with the redundancy benefits of RAID 1. The high I/O rates
are achieved by striping RAID 1 segments. This provides better transfer rate speeds than
RAID 1 alone, especially with write speeds, but not as high as pure RAID 0. This is recommended for database servers requiring high performance and fault tolerance.
RAID 5 – This widely used RAID type overcomes some of the drawbacks of other paritybased arrays. In essence, RAID 5 allows for parity information for the array’s data to be
distributed among all drives in the array, a minimum of three, instead of being stored on a
dedicated parity drive.
This distribution parity approach reduces the write bottleneck common to other RAID levels, because concurrent writes do not always require access to parity information on a
dedicated drive. However, overall write performance still suffers because of the overhead
cause by reading, recalculation and updating parity information.
To improve the read performance of an RAID 5 array, the data stripe size can be optimized for the particular application program using the array. Overall RAID 5 array performance is equivalent to that of a RAID 3 array except in the case of sequential reads,
which reduce the efficiency of the drives’ read-ahead algorithms because of the distributed parity information.
As in other parity-based arrays, data recovery in a RAID 5 array is accomplished by computing the XOR of information on the array’s remaining drives. Since parity information is
distributed among all the drives, loss of any drive reduces the availability of both data and
Cybernetics
UM-MV-86-B1-0801
172
parity information until the failed drive is regenerated. This can cause degradation in
application program performance for both reads and writes.
This is the most versatile RAID level, and thus recommended for application, database,
and file servers, and also ideal for email, news and WWW servers.
RAID 50 – This RAID level is a combination of RAID 5 and RAID 0, and requires a minimum of six disks installed, in order to provide striping to RAID 5 subarrays. This provides
better transfer rate speeds than RAID 5 alone, especially with write speeds, but not as
high as pure RAID 0. RAID 50 is recommended for critical small file applications requiring
higher transfer speeds.
RAID 5 + Hot Spare – The RAID 5 + Hot Spare configuration is a RAID 5 array with a
dedicated “Hot Spare” drive.
In essence, the RAID 5 array operates as described previously, however, there is an
additional Hot Spare drive that is set up as a standby drive for use as a global spare (i.e.,
immediately available for use by any RAID 5 array). The Hot Spare drive sits idle awaiting
a failure in the RAID 5 array. In the event of a failure, the Hot Spare drive will take over for
the failed drive automatically and the RAID 5 array will not suffer performance degradation.
The Hot Spare drive configuration is recommended for a critical RAID 5 array where a
drive failure in the array should not cause downtime.
SCSI Cable – For use with the miSAN-V-Series, a shielded cable having a VHDCI 68-pin
male connector for an LVD bus or an HD 68-pin male connector for an HVD bus.
SCSI Terminator – A device attached to the end-points of a bus network or daisy-chain.
The purpose of the terminator is to absorb signals so that they do not reflect back down
the line.
Striping – A data storage technique used in most RAID levels. Striping is a method of
mapping data across the physical drives in an array to create a large logical drive. The
data is subdivided equally into consecutive segments, or “stripes,” that are written
sequentially across the drives in the array. Each stripe has a defined size or depth in
blocks.
A striped array of drives can offer improved write/read performance compared to an
individual drive if the stripe size is matched to the type of application program
supported by the array:
•
In an I/O-intensive or transactional environment where multiple concurrent requests
for small data records occur, larger (block-level) stripes are preferable. If a stripe on
an individual drive is large enough to contain an entire record, the drives in the array
can respond independently to these simultaneous data requests.
•
In a data-intensive environment where large data records are stored, smaller (bytelevel) stripes are more appropriate. If a given data record extends across several
drives in the array, the contents of the record can be read in parallel, improving the
overall data transfer rate.
System Policy – The policy specified by the “Host vs. job I/O policy” setting, which determines the priority of
host I/O relative to job I/O.
UM-MV-86-B1-0801
Cybernetics
173
TCP/IP – The suite of communications protocols used to connect hosts on the Internet.
Unit – A logical unit of storage, which the operating system treats as a single drive. A unit
may consist of a single drive or several drives. Also known as an array.
Virtual Device – A virtual tape drive or virtual stacker. This is the miSAN-V-Series “frontend” as seen by iSCSI host initiators. Virtual devices appear to host computers as directly
attached SCSI devices. Thus, backup hosts must handle all the pros and cons thereof
(e.g., drivers, device configuration, media rotation, etc.).
Virtual Stacker – An emulated tape library recognized by iSCSI host initiators as having
a SCSI media changer.
Virtual Tape – An emulated tape cartridge, which allows for storing volume tag information as if a barcode label had been applied. This is the backup media used by the virtual
devices.
Virtual Tape Drive – An emulated tape drive recognized by iSCSI host initiators as a
SCSI tape drive.
Volume Tag – The information used to physically identify a tape cartridge, such as is presented by a barcode label on a tape cartridge. Notice, the volume tag will appear as a
barcode label in the backup software.
UM-MV-86-B1-0801
Cybernetics
174
Cybernetics
UM-MV-86-B1-0801
175
Appendix D
Common Questions
The following text explains possible answers and solutions to common miSAN-V-Series
questions and problems. If a solution to the problem you are experiencing is not found
below, contact Cybernetics Technical Support (See Appendix E, “ Technical Support”).
Question:What is the proper order for powering on all devices?
Answer:
1. Power on all tape drives and libraries first. Wait for all devices to finish their Power On
Self-Test (POST).
2. Power on the miSAN-V-Series. Wait for the miSAN-V-Series to respond to a ping
command.
3. Power on any iClients. Wait for the iClients to respond to a ping command.
4. Power on any servers that will directly access the miSAN-V-Series.
Question:What are the default IP addresses for the miSAN-V-Series?
Answer:
ETH0 - IP: 192.168.1.1, subnet mask: 255.255.255.0
ETH1 - IP: 192.168.2.1, subnet mask: 255.255.255.0
ETH2 - IP: 192.168.3.1, subnet mask: 255.255.255.0
Problem:The tape cartridges in my attached tape library have barcode labels. How do I
copy the label information
to the virtual tapes?
Note:The miSAN-V-Series will only be able to query for barcode information if the
external library reportsbarcodes (i.e., the library has a barcode reader).
Solution:From the Web Control Panel, select “HSTC Options” > “Configuration” > “Copy
volume tags” > Enabled. Enabling this option causes the virtual tape volume tag to be
automatically updated with the barcode label information after a virtual tape is written to a
physical tape cartridge (See “Copy volume tags” on page 52). Then, to transfer all the
barcode labels to virtual tapes, select the physical stacker from the “Devices” tab, and
then click
Offload disk to tapes. The Offload disk to tapes window is used for assigning virtual
tapes to physical tapes to be used in making the copy (See “Offload disk to tapes...” on
page 86). This process will overwrite all data on the physical tapes with the data on the
Cybernetics
UM-MV-86-B1-0801
176
virtual tapes. As explained earlier, the barcode labels will also be copied from physical
tape to virtual tape.
Problem:The miSAN-V-Series will not respond to a ping command.
Solution:
1. Make sure the miSAN-V-Series is powered on and fully initialized.
2. Make sure you are using a known good CAT 5e or 6 networking cable.
3. Confirm the IP address of the machine you are attempting to ping the miSAN-VSeries from is on the same subnet as the miSAN-V-Series.
Problem:The miSAN-V-Series does not detect a physical tape device that is directly
attached to the miSAN-V-Series.
Solution:
1. Verify the physical devices are powered on and have passed their Power On SelfTest (POST).
2. Confirm the physical tape devices are securely connected to the SCSI ports labeled
“DRIVE” on the rear panel of the miSAN-V-Series.
Note:Ports labeled “HOST” are configured for a direct-host connection and cannot be
used for a SCSI device. If the other port is labeled “Reserved”, then your miSAN-VSeries is not meant to connect directly to an external physical tape drive.
3. Check all cabling for damage and replace if necessary.
4. “Rescan physical devices” from the Web Control Panel
(See “Rescan SCSI buses” on page 103).
5. Save the Debug Log, accessible from the Web Control Panel: “Browser Links” >
“View debug messages”, and then contact Technical Support (See “ Technical
Support” on page 179).
Problem:The miSAN-V-Series does not detect any physical tape devices connected via
iSCSI.
Solution:
1. Verify you can successfully ping the IP address of the iSCSI physical tape devices. If
not successful, troubleshoot the network connections for both the miSAN-V-Series
and the iSCSI device.
2. Verify the “Remote iSCSI Devices” settings for the iSCSI devices are properly
configured (See “Remote iSCSI Devices” on page 91).
3. Verify the “Device Visibility” settings for the iSCSI devices are properly configured
(See “Device Visibility” on page 98).
4. Select “Tools” > “Rescan physical devices...” from the Web Control Panel (See
“Rescan SCSI buses” on page 103).
Problem:The miSAN-V-Series does not show any or all of the virtual tapes.
Solution:
1. Verify you have previously created the virtual tapes (See “Create Virtual Tapes” on
page 38).
Cybernetics
UM-MV-86-B1-0801
177
2. Confirm you have assigned the created virtual tapes to the desired virtual devices
from the Web Control Panel: “Tools” > “Assign virtual tapes...”.
3. Capture a Debug Log from “Browser Links”, and then contact Cybernetics Technical
Support (See “Browser links” on page 70)
Problem:The Web Control Panel appears as a blank gray box. (The Java applet failed to
load.)
Solution:
1. Clear the Web browser cache.
2. Download and install the latest version of the Java™ web browser plug-in from the
Sun Microsystems Java website at http://www.java.com.
Problem:The Web Control Panel displays a “Lost communication” box, saying “The unit
is not responding.”
Solution:Telnet to the miSAN-V-Series, and then login as menu. If the “Offline Maintenance” menu appears, try exiting the menu to bring the miSAN-V-Series back online,
which effectively restarts the unit. While restarting the miSAN-V-Series, read the startup
messages, and if the unit goes back to the “Offline Maintenance” menu, act accordingly to
fix the problem: for a SCSI bus problem, inspect the SCSI bus cabling. Else, if the problem persists, contact Technical Support for assistance (See Appendix E, “ Technical Support”).
Problem:One of the internal disk drives seems to have gone bad.
Solution:Log in to the 3ware Disk Manager 2 to see the status of the drive (See “Drive
Information Page” on page 122). If the disk drive is bad, follow instructions for removing
the drive in “Removing a Drive” on page 138and then instructions for adding a drive in
“Adding a Drive” on page 138. A good way to test the disk drive once it is removed from
the miSAN-V-Series is to install it in a PC and run a low-level (long) format. If the format
completes successfully, then the problem may be elsewhere. If the format fails, as
explained in “Product Warranty Statement” on page vi, contact Cybernetics Technical
Support (See Appendix E, “ Technical Support”) to initiate a service request. Customers
can opt to send the hard drive to Cybernetics to coordinate the service request through
the manufacturer or obtain service directly from the manufacturer.
Problem:The speeds on the miSAN-V-Series are slower than expected.
Solution:There are several possible causes for slower than expected speeds. Some of
the most common:
1. Slower than expected speeds to the miSAN-V-Series (i.e., writing/reading virtual
tapes)
a. Network Attached
• Make sure that ALL the networking hardware is capable of and connecting at
1000Base-T (1000 megabits per second).
Note:If the data travels through a single medium that is slower than 1000Base-T (e.g.,
100Base-T),then the data will travel at the slower speed throughout all the network.
• Make the data path as simple as possible, such that the number of network
hops is reduced if possible. Implement a dedicated 1000Base-T SAN
(subnetwork) for the miSAN-V-Series and connected data sources.
Cybernetics
UM-MV-86-B1-0801
178
• If using a managed network switch, verify the miSAN-V-Series is
synchronizing at 1000Base-T. If not, change the networking hardware.
•
Directly connect the miSAN-V-Series to the backup server.
• Disable all virus scanning software on the backup server and the data source
machines.
b. SCSI Attached
•
Isolate the miSAN-V-Series as the only device on the SCSI bus.
•
Check the SCSI cable for any bent or damaged pins/connectors.
• Verify you are using an Ultra 3 Wide SCSI (Ultra 160) or better SCSI HBA and
that the miSAN-V-Series is synchronizing at 160 MB/sec.
•
Verify that the manufacturer’s drivers are loaded for the SCSI HBA.
• Disable all virus scanning software on the backup server and the data source
machines.
2. Slower than expected speeds from the miSAN-V-Series (copying virtual to physical
tape).
a. Make sure “Drive compression for copying” is enabled before copying from
virtual to physical tape (See “Drive compression for copying” on page 52).
Selecting this feature enables the built-in data compression (if available) for
the physical tape drive.
b. Check the SCSI cable for any bent or damaged pins/connectors.
c. Clean the tape drive, and then retry normal operation with a new, neverbefore-used tape cartridge.
UM-MV-86-B1-0801
Cybernetics
179
Appendix E
Return Policies
Shipping Damage
You must immediately inspect your new Cybernetics equipment and notify Cybernetics
and the freight carrier within 2 business days of receipt, if the item arrives damaged.
Cybernetics cannot be responsible for shipping damage that is not immediately reported
Hardware Products
At Cybernetics, we take customer satisfaction very seriously, and we value our relationship with every customer. We go to great lengths to understand every aspect of your
requirements before we quote a solution, and we work closely with customers to make
sure the solution you receive will meet your expectations. Accordingly, our products are
backed by a 30-day functionality guarantee. If you experience any technical issues,
please contact our Technical Support group (see “Technical Support and Repair Procedures” appendix) for free telephone support within 30 days of receipt of your order. If we
determine that the hardware is incompatible, and fails to function in your environment, we
will issue a RAN (Return Authorization Number) for the equipment. Upon receipt of the
equipment in new condition, we will issue a credit or refund for the purchase price paid,
less shipping and handling. If the equipment is returned for any reason other than an
approved functionality issue, a 15% restocking fee will apply. In all cases, the hardware
must be returned via prepaid air freight.
To qualify as eligible for return (with or without restocking fee), the transaction must meet
the following requirements:
•
The product was purchased directly from Cybernetics
•
The product was originally shipped within the past 30 days
•
The customer made a good faith effort to cooperate with Cybernetics’ Technical
Support for troubleshooting
•
Cybernetics has issued a RAN for the product
•
The product is returned via an airfreight carrier
•
The product arrives in undamaged, like new condition within 5 days of RAN issue date
Cybernetics
UM-MV-86-B1-0801
180
Software Products
Software is not eligible for return.
Tape Media Products
Unopened tapes are eligible for return within 14 days of the original shipment date.
Opened tapes are not eligible for return.
Promotional Items
If a promotional item was provided as the result of a hardware purchase, the promotional
item must also be returned in like new condition in the event a return is approved for the
qualifying hardware purchase. Media Club promotional items are not eligible for return.
Maintenance Contracts
Extended service contracts and upgraded maintenance service fees are not eligible for
refund. Cybernetics may, at its own discretion, prorate and transfer any remaining service
period to a new hardware purchase.
Exceptions to Cybernetics’ 30-day
Hardware Return Policy:
•
Special order products and accessories are not eligible for return
•
Custom built products and configurations are not eligible for return
Return Procedure
To return products, you must first contact Cybernetics Technical Support or Customer
Service at (757) 833-9200 to request a Return Authorization Number (RAN) within the
return policy period applicable to the product you want to return. A refund or credit will not
be issued unless accompanied by a valid RAN.
Note
For a return, you must ship the product(s) to Cybernetics within five (5)
days of the date the RAN was issued.
You must:
1. All products returned to Cybernetics must be packed in the original shipping containers. If the original shipping containers were discarded, you can purchase replacements
through Customer Service or Technical Sales.
2. Return the products properly prepared for shipment, and in their original packaging
material, in new condition along with any media, documentation, and all other items that
UM-MV-86-B1-0801
Cybernetics
181
were included in the original shipment. For more information about preparing the equipment for shipping, please see your product manual.
3. Ship the product(s) at your expense, and and fully insured, via an airfreight carrier to
the following address:
Cybernetics (RAN XX-XXXX)
111 Cybernetics Way
Yorktown, VA 23693
Warning
The customer accepts full responsibility for any and all products that
are lost or damaged in transit when shipped without insurance or with
insufficient insurance.
Note
Before you ship the product(s) to us, make sure to back up the data on
the hard drive(s) and any other storage device(s) in the product(s).
Remove any confidential, proprietary or personal information,
removable media, such as floppy disks, CDs, or PC Cards. We are not
responsible for any of your confidential, proprietary or personal
information; lost or corrupted data; or damaged or lost removable
media.
Upon receipt of the complete, undamaged and like new returned purchase, Cybernetics
will issue a credit, replacement, or refund of the purchase price paid, less shipping, handling and applicable restocking fees.
UM-MV-86-B1-0801
Cybernetics
182
Cybernetics
UM-MV-86-B1-0801
183
Appendix F
Technical Support
If problems occur during installation or operation of the miSAN-V-Series, contact our
Technical Support staff at
(757) 833-9200 with the following information available:
•
Your company name, ZIP code, and phone number
•
The 8-digit serial number, located on the rear of the device case and on the Product
Documentation CD
•
The following information about your system and problem:
•
•
System Configuration
•
SCSI Daisy-Chaining/Termination Configuration
•
Drive-Switch Settings
•
Computer System Type
•
Operating System and Version Number
•
Backup Procedure and Software
Error Behavior
•
System Errors and Messages
•
Drive Errors and Messages
This information may instead be faxed to (757) 833-9300 or emailed to [email protected].
Send to “Attention: Technical Support.”
Cybernetics
UM-MV-86-B1-0801
184
Cybernetics
UM-MV-86-B1-0801
i
Appendix G
Cybernetics miSAN-V-Series
Notices
Notices
Copyright
© 2006 Cybernetics, Inc. All rights reserved. This manual and the information contained
herein are the property of Cybernetics. No part of this document may be reproduced,
transmitted, transcribed, stored in a retrieval system, or translated into any language or
computer language in any form or by any means - electronic, mechanical, magnetic, optical, chemical, manual, or otherwise - without prior written permission of Cybernetics, 111
Cybernetics Way,
Yorktown, VA 23693.
Chapter 4 “Using 3ware Disk Manager” contains portions excerpted from the AMCC Storage User Guide for the 3ware Serial ATA RAID Controller that supports the 9000 series
(PN 720-0114-01, March 2005) available online at
http://www.3ware.com/support/UserDocs/3ware9000UsrGuide.pdf.
Warranty
Cybernetics makes no representation or warranties with respect to the contents of this
document and specifically disclaims any implied warranties of merchantability or fitness
for any particular purpose. Further, Cybernetics reserves the right to revise this publication and to make changes in it from time to time without obligation to notify any person or
organization of such revision or changes.
Trademarks
CY-HSTC, CY-miSAN-V-Series, High Speed Tape Cache and miSAN are trademarks or
registered trademarks of
Cybernetics.
3BM, 3DM, 3ware and Escalade are all trademarks or registered trademarks of 3ware,
Inc.
Java, Java Runtime Environment, Java Virtual Machine and the Java Coffee Cup logo
are trademarks or registered trademarks of Sun Microsystems, Inc. in the United States
and other countries, and refer to Sun’s Java programming language and browser technologies. This user manual is not sponsored by or affiliated with Sun Microsystems, Inc.
Other names and products are trademarks or registered trademarks of their respective
holders.
Cybernetics
UM-MV-86-B1-0801
ii
FCC Notice
This equipment was tested and found to comply with the limits for a Class A digital device
pursuant to Part 15 of FCC Rules. These limits are designed to provide reasonable protection against harmful interference when the equipment is operated in a commercial
environment. This equipment generates, uses, and can radiate radio frequency energy
and, if not installed and used in accordance with the instruction manual, may cause harmful interference to radio communications. Operation of this equipment in a residential area
is likely to cause harmful interference, in which case the user will be required to correct
the interference at his own expense.
Shielded cables are required for this device to comply with FCC regulations. Use shielded
cables when connecting this device to others.
CSA Notice
Le présent appareil numérique n’émet pas de bruits radioélectriques dépassant les limites applicables aux appareils numériques de Classe A préscrites dans le reglement sur
le brouillage radioélectrique édicté par le Ministère des Communications du Canada.
English translation: This digital apparatus does not exceed the Class A limits for radio
noise emissions from digital apparatus as set out in the radio interference regulations of
the Canadian Department of Communications.
GNU GPL Notice
A portion of the software contained in this Cybernetics product is used under the GNU
General Public License. The GPL is published by the Free Software Foundation at http://
www.gnu.org/copyleft/gpl.html. The source code for the software used under that license
is available from Cybernetics. A full copy of the GNU General Public License is included
with the source code.
Apache Software License
This product includes software developed by the Apache Software Foundation (http://
www.apache.org/).
The full license for the Apache software is included below:
Apache License
Version 2.0, January 2004
http://www.apache.org/licenses/
TERMS AND CONDITIONS FOR USE, REPRODUCTION, AND DISTRIBUTION
1. Definitions.
“License” shall mean the terms and conditions for use, reproduction, and
distribution as defined by Sections 1 through 9 of this document.
“Licensor” shall mean the copyright owner or entity authorized by the copyright
owner that is granting the License.
“Legal Entity” shall mean the union of the acting entity and all other entities that
control, are controlled by, or are under common control with
that entity. For the purposes of this definition, “control” means (i) the power, direct
or indirect, to cause the direction or management of such
entity, whether by contract or otherwise, or (ii) ownership of fifty percent (50%) or
Cybernetics
UM-MV-86-B1-0801
iii
more of the outstanding shares, or (iii) beneficial ownership
of such entity.
“You” (or “Your”) shall mean an individual or Legal Entity exercising permissions
granted by this License.
“Source” form shall mean the preferred form for making modifications, including
but not limited to software source code, documentation
source, and configuration files.
“Object” form shall mean any form resulting from mechanical transformation or
translation of a Source form, including but not limited to
compiled object code, generated documentation, and conversions to other media
types.
“Work” shall mean the work of authorship, whether in Source or Object form, made
available under the License, as indicated by a copyright
notice that is included in or attached to the work (an example is provided in the
Appendix below).
“Derivative Works” shall mean any work, whether in Source or Object form, that is
based on (or derived from) the Work and for which the
editorial revisions, annotations, elaborations, or other modifications represent, as a
whole, an original work of authorship.
For the purposes of this License, Derivative Works shall not include works that
remain separable from, or merely link (or bind by name) to the
interfaces of, the Work and Derivative Works thereof.
“Contribution” shall mean any work of authorship, including the original version of
the Work and any modifications or additions to that Work or
Derivative Works thereof, that is intentionally submitted to Licensor for inclusion
in the Work by the copyright owner or by an individual or
Legal Entity authorized to submit on behalf of the copyright owner.
For the purposes of this definition, “submitted” means any form of electronic,
verbal, or written communication sent to the Licensor or its
representatives, including but not limited to communication on electronic mailing
lists, source code control systems, and issue
tracking systems that are managed by, or on behalf of, the Licensor for the purpose
of discussing and improving the Work, but excluding
communication that is conspicuously marked or otherwise designated in writing by
the copyright owner as “Not a Contribution.”
“Contributor” shall mean Licensor and any individual or Legal Entity on behalf of
whom a Contribution has been received by Licensor and
subsequently incorporated within the Work.
2. Grant of Copyright License. Subject to the terms and conditions of this License,
each Contributor hereby grants to You a perpetual, worldwide, non-exclusive, nocharge, royalty-free, irrevocable copyright license to reproduce, prepare Derivative
Works of, publicly display, publicly perform, sublicense, and distribute the Work and
such Derivative Works in Source or Object form.
3. Grant of Patent License. Subject to the terms and conditions of this License, each
Contributor hereby grants to You a perpetual, worldwide, non-exclusive, no-charge,
Cybernetics
UM-MV-86-B1-0801
iv
royalty-free, irrevocable (except as stated in this section) patent license to make, have
made, use, offer to sell, sell, import, and otherwise transfer the Work, where such
license applies only to those patent claims licensable by such Contributor that are
necessarily infringed by their Contribution(s) alone or by combination of their
Contribution(s) with the Work to which such Contribution(s) was submitted. If You
institute patent litigation against any entity (including a cross-claim or counterclaim in
a lawsuit) alleging that the Work or a Contribution incorporated within the Work
constitutes direct or contributory patent infringement, then any patent licenses granted
to You under this License for that Work shall terminate as of the date such litigation is
filed.
4. Redistribution. You may reproduce and distribute copies of the Work or Derivative
Works thereof in any medium, with or without
modifications, and in Source or Object form, provided that You meet the following
conditions:
(a) You must give any other recipients of the Work or Derivative Works a copy
of this License; and
(b) You must cause any modified files to carry prominent notices stating that
You changed the files; and
(c) You must retain, in the Source form of any Derivative Works that You
distribute, all copyright, patent, trademark, and attribution notices
from the Source form of the Work, excluding those notices that do not pertain
to any part of the Derivative Works; and
(d) If the Work includes a “NOTICE” text file as part of its distribution, then any
Derivative Works that You distribute must include a readable
copy of the attribution notices contained within such NOTICE file, excluding
those notices that do not pertain to any part of the
Derivative Works, in at least one of the following places: within a NOTICE
text file distributed as part of the Derivative Works; within the
Source form or documentation, if provided along with the Derivative Works;
or, within a display generated by the Derivative Works, if
and wherever such third-party notices normally appear. The contents of the
NOTICE file are for informational purposes only and do not
modify the License. You may add Your own attribution notices within
Derivative Works that You distribute, alongside or as an addendum
to the NOTICE text from the Work, provided that such additional attribution
notices cannot be construed as modifying the License.
You may add Your own copyright statement to Your modifications and may
provide additional or different license terms and conditions
for use, reproduction, or distribution of Your modifications, or for any such
Derivative Works as a whole, provided Your use,
reproduction, and distribution of the Work otherwise complies with the
conditions stated in this License.
5. Submission of Contributions. Unless You explicitly state otherwise, any
Contribution intentionally submitted for inclusion in the Work by You to
the Licensor shall be under the terms and conditions of this License, without any
additional terms or conditions.
Cybernetics
UM-MV-86-B1-0801
v
Notwithstanding the above, nothing herein shall supersede or modify the terms of any
separate license agreement you may have executed with Licensor regarding such
Contributions.
6. Trademarks. This License does not grant permission to use the trade names,
trademarks, service marks, or product names of the Licensor, except as required for
reasonable and customary use in describing the origin of the Work and reproducing
the content of the NOTICE file.
7. Disclaimer of Warranty. Unless required by applicable law or agreed to in writing,
Licensor provides the Work (and each Contributor provides
its Contributions) on an “AS IS” BASIS, WITHOUT WARRANTIES OR
CONDITIONS OF ANY KIND, either express or implied, including, without
limitation, any warranties or conditions of TITLE, NON-INFRINGEMENT,
MERCHANTABILITY, or FITNESS FOR A PARTICULAR PURPOSE. You are
solely responsible for determining the appropriateness of using or redistributing the
Work and assume any risks associated with Your exercise of permissions under this
License.
8. Limitation of Liability. In no event and under no legal theory, whether in tort
(including negligence), contract, or otherwise, unless required by applicable law (such
as deliberate and grossly negligent acts) or agreed to in writing, shall any Contributor
be liable to You for damages, including any direct, indirect, special, incidental, or
consequential damages of any character arising as a result of this License or out of the
use or inability to use the Work (including but not limited to damages for loss of
goodwill, work stoppage, computer failure or malfunction, or any and all other
commercial damages or losses), even if such Contributor has been advised of the
possibility of such damages.
9. Accepting Warranty or Additional Liability. While redistributing the Work or
Derivative Works thereof, You may choose to offer, and charge a fee for, acceptance
of support, warranty, indemnity, or other liability obligations and/or rights consistent
with this License. However, in accepting such obligations, You may act only on Your
own behalf and on Your sole responsibility, not on behalf of any other Contributor,
and only if You agree to indemnify, defend, and hold each Contributor harmless for
any liability incurred by, or claims asserted against, such Contributor by reason of
your accepting any such warranty or additional liability.
END OF TERMS AND CONDITIONS
gSOAP Software License
Part of the software embedded in this product is gSOAP software.
Portions created by gSOAP are Copyright © 2001-2004 Robert A. van Engelen, Genivia
inc. All Rights Reserved. The full license for the gSOAP software is included below:
THE SOFTWARE IN THIS PRODUCT WAS IN PART PROVIDED BY GENIVIA
INC AND ANY EXPRESS OR IMPLIED WARRANTIES, INCLUDING, BUT
NOT LIMITED TO, THE IMPLIED WARRANTIES OF MERCHANTABILITY
AND FITNESS FOR A PARTICULAR PURPOSE ARE DISCLAIMED. IN NO
EVENT SHALL THE AUTHOR BE LIABLE FOR ANY DIRECT, INDIRECT,
INCIDENTAL, SPECIAL, EXEMPLARY, OR CONSEQUENTIAL DAMAGES
(INCLUDING, BUT NOT LIMITED TO, PROCUREMENT OF SUBSTITUTE
GOODS OR SERVICES; LOSS OF USE, DATA, OR PROFITS; OR BUSINESS
UM-MV-86-B1-0801
Cybernetics
vi
I N T E R R U PTI O N ) H O W E V E R C AU S E D A N D O N A N Y T H E O RY O F
LIABILITY, WHETHER IN CONTRACT, STRICT LIABILITY, OR TORT
(INCLUDING NEGLIGENCE OR OTHERWISE) ARISING IN ANY WAY OUT
OF THE USE OF THIS SOFTWARE, EVEN IF ADVISED OF THE POSSIBILITY
OF SUCH DAMAGE.
Product Warranty Statement
The miSAN-V-Series is warranted to be free from defects in materials, parts and workmanship and will conform to the current product specification upon delivery. For specific
details of your warranty, contact Cybernetics.
The warranty for the miSAN-V-Series shall not apply to failures of any unit when any of
the following occur:
•
the miSAN-V-Series is repaired by anyone other than Cybernetics or authorized
service personnel
•
the miSAN-V-Series is physically abused or is used in a manner inconsistent with the
operating instructions or product specifications defined by Cybernetics
•
the miSAN-V-Series fails because of abuse, accident, acts of God, alteration,
excessive dirt/dust buildup, faulty installation, misapplication, mishandling, misuse,
modification, neglect, or service by anyone other than Cybernetics or authorized
service personnel
•
the miSAN-V-Series is damaged during transport because of improper packaging,
including using unauthorized packaging
For Cybernetics devices with integral hard disk drives (HDD) in their enclosures, each
HDD is covered by its manufacturer’s warranty. If a HDD malfunctions, contact Cybernetics Technical Support at (757) 833-9200 or
[email protected] to initiate a service request. Customers can opt to send
the HDD to Cybernetics to coordinate the service request through the manufacturer or
obtain service directly from the manufacturer.
Cybernetics
UM-MV-86-B1-0801