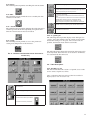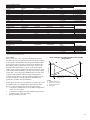
1
30XA/30XW
PRO-DIALOG Control
30XA
30XW
Operation and maintenance instructions
Contents
1 - SAFETY CONSIDERATIONS................................................................................................................................................ 3
1.1 - General....................................................................................................................................................................................... 3
1.2 - Avoid electrocution................................................................................................................................................................... 3
2 - GENERAL DESCRIPTION..................................................................................................................................................... 3
2.1 - General....................................................................................................................................................................................... 3
2.2 - Abbreviations used................................................................................................................................................................... 3
3 - HARDWARE DESCRIPTION................................................................................................................................................ 4
3.1 - General....................................................................................................................................................................................... 4
3.2 - Electrical supply to boards....................................................................................................................................................... 4
3.3 - Light emitting diodes on boards.............................................................................................................................................. 4
3.4 - The sensors................................................................................................................................................................................. 4
3.5 - The controls................................................................................................................................................................................ 5
3.6 - Connections at the user’s terminal block............................................................................................................................... 5
4 - Setting up the PRO-DIALOG control.................................................................................................................. 7
4.1 - User interface general features................................................................................................................................................ 7
4.2 - General navigation architecture.............................................................................................................................................. 8
4.3 - “Group Display” screens.......................................................................................................................................................... 9
4.4 - Description of the main menu................................................................................................................................................. 9
4.5 - Table description..................................................................................................................................................................... 11
4.6 - Time schedule table................................................................................................................................................................. 13
4.7 - Re-initialisation of the display............................................................................................................................................... 13
4.8 - Translation of the display and the control............................................................................................................................ 14
4.9 - Unit start/stop control............................................................................................................................................................ 14
5 - PRO-DIALOG CONTROL OPERATION......................................................................................................................... 15
5.1 - Start/stop control..................................................................................................................................................................... 15
5.2 - Unit stop function................................................................................................................................................................... 15
5.3 - Evaporator water pump control............................................................................................................................................ 15
5.4 - Water flow switch..................................................................................................................................................................... 16
5.5 - Heating/cooling selection....................................................................................................................................................... 16
5.6 - Control point........................................................................................................................................................................... 16
5.7 - Demand limit........................................................................................................................................................................... 18
5.8 - Current limitation................................................................................................................................................................... 18
5.9 - Night mode............................................................................................................................................................................... 18
5.10 - Capacity control.................................................................................................................................................................... 18
5.11 - Head pressure control.......................................................................................................................................................... 18
5.12 - Determining the lead circuit................................................................................................................................................ 18
5.13 - Circuit loading sequence...................................................................................................................................................... 19
5.14 - Master/slave assembly.......................................................................................................................................................... 19
5.15 - Optional heat reclaim module............................................................................................................................................. 19
5.16 - Water condenser pump control............................................................................................................................................ 20
5.17 - Energy management option . .............................................................................................................................................. 20
5.18 - Evaporator heater option..................................................................................................................................................... 20
5.19 - Free cooling option............................................................................................................................................................... 21
5.20 - Optional hydronic kit............................................................................................................................................................ 21
5.21 - Black box function................................................................................................................................................................ 21
5.22 - Option for high condensing temperatures ........................................................................................................................ 21
5.23 - Maximum condenser leaving water temperature = 45°C (option)................................................................................... 21
6 - DIAGNOSTICS - TROUBLESHOOTING.......................................................................................................................... 22
6.1 - General..................................................................................................................................................................................... 22
6.2 - Displaying alarms.................................................................................................................................................................... 22
6.3 - Resetting alarms...................................................................................................................................................................... 22
6.4 - Alarm codes............................................................................................................................................................................. 23
7 - CIRCUIT CAPACITY LOADING SEQUENCE............................................................................................................... 27
7.1 - Dual circuit - balanced capacity loading............................................................................................................................... 27
7.3 - Triple circuit - balanced capacity loading............................................................................................................................. 27
7.2 - Dual circuit - priority given to one circuit............................................................................................................................ 27
7.4 - Triple circuit - priority given to one circuit........................................................................................................................... 27
The cover graphics are solely for illustration and forms no part of any offer for sale or any sale contract. The
manufacturer reserves the right to change the design at any time without notice.
1 - SAFETY CONSIDERATIONS
2 - GENERAL DESCRIPTION
1.1 - General
2.1 - General
Installation, start-up and servicing of equipment can be
hazardous if certain factors particular to the installation are
not considered: operating pressures, presence of electrical
components and voltages and the installation site (elevated
plinths and built-up up structures). Only properly qualified
installation engineers and highly qualified installers and
technicians, fully trained for the product, are authorised to
install and start-up the equipment safely. During all servicing
operations all instructions and recommendations which
appear in the installation and service instructions for the
product, as well as on tags and labels fixed to the equipment
and components and accompanying parts supplied separately, must be read, understood and followed.
• Apply all standard safety codes and practices.
• Wear safety glasses and gloves.
• Use the proper tools to move heavy objects. Move units
carefully and set them down gently.
Pro-Dialog is a system for controlling dual- or triple circuit
30XA air-cooled liquid chillers or 30XW water-cooled
chillers. Pro-Dialog controls compressor start-up needed to
maintain the desired heat exchanger entering or leaving
water temperature. It controls the operation of the fans
(air-cooled units) to maintain the correct condensing
pressure in each circuit. Safety devices are constantly
monitored by Pro-Dialog to ensure their safe operation.
Pro-Dialog also gives access to a Quick Test program
covering all inputs and outputs.
1.2 - Avoid electrocution
Only personnel qualified in accordance with IEC (International Electrotechnical Commission) recommendations
may be permitted access to electrical components. It is
particularly recommended that all sources of electricity to
the unit be shut off before any work is begun. Shut off the
main power supply at the main circuit breaker or isolator.
IMPORTANT: This equipment uses and emits electromagnetic signals. Tests have shown that the equipment
conforms to all applicable codes with respect to electromagnetic compatibility.
RISK OF ELECTROCUTION: Even when the main
circuit breaker or isolator is switched off, certain circuits
may still be energised, since they may be connected to a
separate power source.
RISK OF BURNS: Electrical currents cause components
to get hot either temporarily or permanently. Handle
power cable, electrical cables and conduits, terminal box
covers and motor frames with great care.
All Pro-Dialog controls can work in accordance with three
independent modes:
• Local mode: the machine is controlled by commands
from the user interface.
• Remote mode: the machine is controlled by volt-free
contacts.
• CCN mode: the machine is controlled by commands
from the Carrier Comfort Network (CCN). In this
case, a data communication cable is used to connect
the unit to the CCN communication bus.
The operating mode must be chosen with the Start/Stop
button described in section 4.9.1. When the Pro-Dialog
system operates autonomously (Local or Remote mode) it
retains all of its own control capabilities but does not offer
any of the features of the CCN network.
2.2 - Abbreviations used
In this manual, the refrigeration circuits are called circuit
A, circuit B and circuit C.
The following abbreviations are used frequently:
CCN
: Carrier Comfort Network
CCN mode
: Operating type: CCN
EXV
: Electronic Expansion Valve
LED
: Light Emitting Diode
LEN
: Sensor Bus (internal communication bus
linking the basic board to the slave
boards)
Local-Off
: Operating type: Local Off
Local-On
: Operating type: Local On mode
Local-Schedule: Operating type: Local On following a
time schedule
Master mode : Operating type: master unit (master/
slave assembly)
Remote mode : Operating type: by remote contacts
SCT
: Saturated Condensing Temperature
SST
: Saturated Suction Temperature
3 - HARDWARE DESCRIPTION
3.3 - Light emitting diodes on boards
3.1 - General
All boards continuously check and indicate the proper
operation of their electronic circuits. A light emitting diode
(LED) lights on each board when it is operating properly.
• The red LED flashing for a 2 second period on the
NRCP-BASE board indicates correct operation. A
different rate indicates a board or a software failure.
• The green LED flashes continuously on all boards to
show that the board is communicating correctly over
its internal bus. If the LED is not flashing, this indicates
a LEN bus wiring problem.
• The orange LED of the master board flashes during
any communication via the CCN bus.
Control board
1
4
1
2 3
5
When the unit is energised, all boards must flash in a
synchronised way. If a board does not flash at the same
time as the others, verify its connection at the LEN bus.
3.4 - The sensors
7
6
Legend
1 CCN connector
2 Red LED, status of the board
3 Green LED, communication bus LEN
4 Orange LED, communication bus CCN
5 PD5 basic board
6 Remote customer control connection contacts
7 Master board customer connection relay outputs
Pressure sensors
Two types of electronic sensors are used to measure the
following pressures in each circuit:
• Discharge gas pressure (high pressure type)
• Suction pressure (low pressure type)
• Oil pressure (high pressure type)
• Economizer pressure (high pressure type)
The control system consists of a PD5-BASE board, TCPM
boards for compressor control, PD-AUX boards for fan
control or a three-way valve for water-cooled units, and an
NRCP2-BASE board for units equipped with energy
management option or heat reclaim option. All boards
communicate via an internal LEN bus. The PD5-BASE
boards continuously manage the information received
from the various pressure and temperature probes, and
incorporates the program that controls the unit.
These electronic sensors deliver 0 to 5 V d.c. The economizer
and oil pressure sensors are connected to the TCPM board
and, like the others, are measured by the basic board or
the auxiliary board for circuit C.
The user interface is a touch screen. It is connected to the
main basic board and gives access to a full array of control
parameters.
Oil pressure sensors
These sensors are located at the oil pressure port of each
compressor.
3.2 - Electrical supply to boards
Suction pressure sensors
They measure the low-pressure side of each circuit.
All boards are supplied from a common 24 V a.c. supply
referred to earth.
CAUTION: Maintain the correct polarity when connecting
the power supply to the boards, otherwise the boards may
be damaged.
In the event of a power supply interrupt, the unit restarts
automatically without the need for an external command.
However, any faults active when the supply is interrupted
are saved and may in certain cases prevent a circuit or unit
from restarting.
Discharge pressure sensors
These are on the high pressure side of each circuit. They
are used to control head pressure or high pressure load
shedding.
Economizer pressure sensors
These sensors measure the intermediate pressure between
high and low pressure. They are used to control the
economizer performance.
Heat reclaim condenser outlet pressure sensors
These optional sensors (for air-cooled units with heat
reclaim option) permit control of the load in the heat
reclaim mode.
Thermistors
These all have similar characteristics.
Evaporator entering and leaving water temperature sensor
The evaporator entering and leaving water temperature
sensors are installed in the entering and leaving side water
box.
Discharge gas sensor
This sensor is used to control the discharge gas temperature,
and permits control of the discharge superheat temperature.
It is located in the discharge line of each compressor.
Suction gas sensor
This sensor is used to control the suction gas temperature.
It is located in the suction line of each compressor.
Motor sensor
This is used to control the motor temperature of each
compressor.
Condenser entering/leaving water temperature sensor
These sensors measure the entering and leaving water
temperatures in water-cooled units or air-cooled units with
the heat reclaim option.
Temperature setpoint reset sensor
This is an optional 4-20 mA sensor (energy management
option) which can be installed remotely from the unit. It is
used to reset the setpoint on the unit.
Outdoor temperature sensor
Mounted on the control box of air-cooled units only. It is
used for start-up, setpoint temperature reset and frost
protection control.
Master/slave assembly temperature control
The optional water temperature sensor can be used for
master/slave assembly control.
3.5 - The controls
Evaporator pumps
The controller can regulate one or two evaporator pumps
and takes care of the automatic changeover between pumps.
Condenser pump
In water-cooled units the controller can regulate a condenser
pump.
Electronic expansion valve (EXV)
The EXV is used to adjust the refrigerant flow to changes
in the operating conditions of the machine. To adjust the
refrigerant flow, a piston moves constantly up or down to
vary the cross-section of the refrigerant path. This piston is
driven by an electronically controlled linear stepper motor.
The high degree of accuracy with which the piston is
positioned ensures that the flow of refrigerant is precisely
controlled.
The water flow switch configuration
This permits automatic control of the minimum water flow
setpoint of the water flow switch.
The oil heater
Air-cooled units have one oil heater for each circuit. They
are only controlled if the compressor is not operating and
in accordance with the outside temperature.
Evaporator heater
In air-cooled units this optional control protects the evaporator (and the pipe heater for units without pump) against
freezing if the unit is off. An optional board is required.
3.6 - Connections at the user’s terminal block
3.6.1 - General description
The contacts below are available at the user’s terminal
block on the PD5-BASE board (see figure of the control
board). Some of them can only be used if the unit operates
in remote operating type (Remote mode).
The following table summarises the connections at the
user’s terminal block.
COOLING ONLY UNITS
Description
Connector/channel
Board
Remarks
Evaporator pump 1 control
J2A / Ch19
Terminal
PD5-BASE
The control can regulate one or two evaporator pumps, and
automatically change over between the two pumps.
Evaporator pump 2 control
J2A / Ch20
PD5-BASE
The control can regulate one or two evaporator pumps, and
automatically change over between the two pumps.
Water flow switch configuration
control
J2B / Ch21
PD5-BASE
Permits configuration of the water flow switch. If the
configuration is not correct, an alarm is generated.
Oil heater control (air-cooled
units only)
J2C / Ch22-23 of the
PD5-BASE board or
Ch10 of the TCPM
board
PD5-BASE for units
without economizer,
TCPM for the others
Only controlled if the compressor is not operating. Depends on
the outside temperature.
Condenser pump control
(water-cooled units only)
J2C/Ch22
PD5-BASE
Allows control of the condenser pump of each circuit.
Alarm relay output
J3 / Ch24
PD5-BASE
Indicates alarms
Alert relay output
J3 / Ch25
PD5-BASE
Indicates alerts
Operation or ready-to-start
relay output
J3 / Ch26
PD5-BASE
Indicates if the unit is ready to start or operates.
Contact 1:
Start/stop
J4 / Ch11
32-33
PD5-BASE
This contact is used to control unit start/stop. It is only taken into
consideration, if the unit is in the remote operating mode
(Remote mode).
Contact 2:
Second setpoint selection
J4 / Ch12
65-66
PD5-BASE
This contact is only taken into consideration, if the unit is in the
remote operating mode (Remote mode).
Contact 3:
Demand limit selection 1
J4 / Ch13
63-64
PD5-BASE
See the description in section 3.6.4.
Contact 3 bis:
Demand limit selection 2
Ch9
NRCP2-BASE
This contact is only present if the energy management option is
used (see section 3.6.3).
User safety loop input
J4 / Ch10
only with energy
management option
NRCP2-BASE
This contact is used for user safety loops that require a unit shut
down if it is closed. This contact is only present, if the energy
management option is used.
Contact 4:
Heat reclaim option
Free cooling option
J4 / Ch14
PD5-BASE
Heat reclaim option: this contact is used to signal to the control
that the heat reclaim option is present.
Free cooling option: this contact is used to block the operation
of the free cooling option.
Contact 4:
Heating/cooling mode selection
(water-cooled Heat Machine
units only)
J4 / Ch14
PD5-BASE
This contact is not taken into consideration when the unit is in
Remote mode.
Contact 5:
Pump operation status
J5C / Ch18
PD5-BASE
If this contact is open, while the pump is controlled to On, an
alarm is tripped.
Contact 6:
Water flow switch
J5B / Ch17
PD5-BASE
If this contact is open when the unit is operating, an alarm is
tripped.
Connection to CCN
J12
PD5-BASE
An RS-485 bus is used for connection to the CCN.
- Pin 1: signal +
- Pin 2: ground
- Pin 3: signal -
3.6.2 - Volt-free setpoint selection
This volt-free contact permits selection of the second setpoint. The setpoints can be modified in the setpoint table.
Contact 2
Cooling
CSP 1
CSP2
Open
Closed
Heating
HSP1
Open
HSP2
Closed
3.6.3 - Volt-free demand limit contact with energy
management option
For units with the energy management option the demand
limit contact 3bis is located on the NRCP2-BASE board
and contact 3 is on the PD5-BASE board. Demand limit is
now multiplexed.
Contact 3
Contact 3 bis
Capacity
100%
Open
Open
lim_sp1
Closed
Open
lim_sp2
Open
Closed
lim_sp3
Closed
Closed
3.6.4 - Volt-free demand limit contact without energy
management option
For units without energy management option, contact 3 is
located on the PD5-BASE board.
Contact 3
Capacity
100%
Open
lim_sp1
Closed
4 - Setting up the PRO-DIALOG control
4.1 - User interface general features
It is recommended to use a pen for the navigation via the
touch screen. It prevents screen maintenance and allows
more precision during the selections.
The main interface is a touch screen interface. The menu or
action selection is made by pressing directly on the screen.
This allows display and modification of certain operating
parameters.
NOTE: All images shown for the interface in this document
are for illustration purposes. They show English texts that
can be translated into local languages. To select the
display language, see section 4.4.7.
DESCRIPTION OF THE MAIN NAVIGATION AND OPERATION BUTTONS
Returns to the previous screen
Displays the default screen (“Group Display” screen)
Displays the main screen
Displays the next screen
Displays the previous screen
Accepts the current action
Rejects the current action
Cancels the current action
Removes the data in the value modification dialog box
Adds a point to one of the “Group Display” screens
Removes a point from one of the “Group Display” screens
Reduces/increases the value
Displays the previous/following item
Displays the previous/following page
Forces a point
Cancels the forcing of a point
Displays the value modification dialog box for a point
Alarm indication light
Start/stop control button
4.2 - General navigation architecture
4.3 - “Group Display” screens
4.3.1 - Characteristics
The interface allows the user to personalise up to eight
“Group Display” schreens. Each screen contains up to nine
parameters. These parameters are selected from the unit
points and permit display of the name, value and description
of the point.
By default five screens are set up at the factory to permit
quick access to the unit parameters such as entering water
temperature, leaving water temperature, current unit capacity,
active setpoint, outside air temperature, discharge and
suction pressure etc.
Fig. 1 - Example of the first default “Group display”
(see note in section 4.1)
At start-up or after a long inactive period the interface
goes to the first “Group Display” screen.
Adding a point to the “Group Display”
In the main menu select one of the buttons Status, Setpoint,
Schedule or Maint.
Then select the table that contains the point to add. Select
the point to launch the dialogue box. In this box press the
add button:
Use the navigation buttons to select the “Group Display”
and then choose the position. To add the point and return
to the “Group Display” press the validation button:
Fig. 3 - Addition of a point in a “Group Display” (see
note in section 4.1)
Remove a point from the “Group Display”
In the dialogue box for the point press the button:
The navigation between the screens is via the buttons at
the bottom of the screen.
4.3.2 - Personalisation
The user can personalise these screens by adding or removing
points.
If a point is pressed, a dialogue box appears that contains
the buttons to remove or force the point.
4.4 - Description of the main menu
The button
gives access to the main menu.
Fig. 4 - Main menu
Fig. 2 - Dialogue box for a “Group Display” point
(see note in section 4.1)
4.4.1 - Description of the table sub-menus
The following buttons allow access to the status, service,
setpoint, maintenance and configuration tables. Simply
select the table you want to display.
4.4.1.1 - Status sub-menu
GENUNIT: This table contains the general unit operating parameters, such as the
operating status, the current alarms, the unit capacity or the setpoint.
CIRCA_AN, CIRCB_AN, CIRCC_AN: These tables contain the circuit parameters
with an analogue value, such as suction and discharge pressures, suction and
discharge motor temperatures or EXV position.
CIRCA_D, CIRCB_D, CIRCC_D: These tables contain the circuit variables with a
discrete input/output, for example fan output, compressor output or oil level.
STATEGEN: This table contains the general unit status parameters, for example
the water entering and leaving temperatures, the pump status and the alert or alarm
output status.
RECLAIM: This table contains the heat reclaim option parameters, for example the
heat reclaim condenser water entering and leaving temperatures.
MODES: This table permits the display of the operating modes that are activated.
STRTHOUR: This table permits the display of the number of operating hours and
the number start-ups for the compressors and pumps.
FANHOURS: This table permits the display of the number of operating hours for the
fans.
FREECOOL: This table contains the parameters for the free cooling option, for
example the estimated cooling capacity.
QCK_TST1 et QCK_TST2: These tables permit the manual test of different unit
parts, such as the various valves, the fans or the EXVs.
SERV_TST: This table permits the manual test of the unit; it is not used in Europe.
4.4.1.2 - Setpoint table
This table permits the modification of the setpoints, for
example the water temperature setpoints.
4.4.1.3 - Service sub-menu
The tables in this menu are protected by a service password
and may only be changed by a Carrier service technician.
FACTORY: This table contains the main unit configuration, such as the size and the
options. This configuration is entered at the factory.
FACTORY2: This table contains the detailed unit configuration. This configuration is
automatically generated in accordance with the values in the table FACTORY.
SERVICE1: This table contains the main unit operating parameters, for example the
medium used or the superheat or approach setpoints.
CP_UNABL: This table permits manual deactivation of one or several compressors.
UPDTHOUR: This table permits updating of the operating hours in the table
STRTHOURS when the software application of the main board is reloaded.
UPDHRFAN: This table permits updating of the operating hours in the table
FANHOURS when the software application of the main board is reloaded.
MAINTCFG: This table permits updating of the values in the preventive
maintenance table SERMAINT.
4.4.1.4 - Sub-menu Maint
The tables in this sub-menu are for the Carrier service
technicians.
LOADFACT: This table permits the display of the parameters associated with the
unit capacity control, for example the current values for 30% and 100%.
FANCTRL: This table permits the display of the of the parameters associated with
fan control, such as the saturated condensing temperature control point.
M_MSTSLV: This table permits the display of the of the parameters associated with
master/slave control.
DEFROSTM: This table permits the display of the parameters associated with the
defrost function.
LAST_POR: This table permits the display of the history of the last power cuts on
the control.
PRLIMIT: This table allows the user to find out the compressor operating limits, in
heating mode only.
BOARD_PN: This table allows the user to find out the serial numbers of the slave
boards and the configuration of the compressor boards.
SERMAINT: This table permits the display of the time remaining before the next
preventive maintenance operations.
EXV_CTRL: This table permits the display of the parameters associated with the
EXV control, such as suction and discharge overheat temperatures.
CUR_PHAS: This table permits the display of the current per phase of the three
compressors.
OCCDEFCM: This table and the associated sub-tables permit the display of the
unit occupation periods.
4.4.1.5 - Sub-menu Config.
The tables in this sub-menu are for the Carrier service
technicians.
CTRL_ID: This table allows the user to find out the software version for the unit.
DISPCONF: This table allows the selection of the language and the unit type for the
remote interface.
USER: This table allows control of the different user parameters such as the
compressor loading type or the validation of the pumps.
MST_SLV: This table permits unit configuration in master/slave mode.
CFG_TAB1-8: These tables permit manual configuration of the display groups.
Direct modification of these tables without going through the procedure described
section 4.3.2 is not recommended.
BRODEFS: This table permits the activation of the broadcast function and the
configuration of the summer/winter time function.
OCCDEFCS: This table and the associated sub-tables permit the configuration of
the time schedules, but it is recommended to use the schedule menu (section
4.4.2).
HOLIDAY: This table permits the configuration of the holiday periods.
ALARMDEF: This table permits the configuration of the network (POC) alarms.
4.4.2 - Schedule
The following button allows the display of the time schedule
tables.
OCC1PO1S: This time schedule table permits the configuration of the unit
operating and shut-down time schedules.
OCC2PO2S: This time schedule table permits the configuration of the time
schedules for the use of setpoints 1 and 2.
4.4.3 - Alarms
The following button permits the user to display the active
unit alarms.
ALARHIST: This table allows access to the history of all alarms.
ALARHIS2: This table allows access to the history of the process type alarms.
ALAM_CUR: This table allows access to the current alarms.
10
4.4.4 - Reset
The following button permits cancelling the current alarms.
Activates the backlighting mode.
Calibrates the touch screen. To carry out the calibration, press
the circle at the top left, then the circle at the bottom right. Thise
function is protected by the service password.
4.4.5. Time
The following button permits the user to modify the time
and date for the unit.
4.4.6 - Attach
The following button permits updating the tables, languages
and the type font in the unit. Updating is required each
time the control software has been loaded.
4.4.7 - Setup
The following button permits access to the parameter
setting and configuration of the interface.
Fig. 5 - Interface configuration menu (see note in
section 4.1)
Configures the customer and service passwords. All passwords
are made up of four digits.
The service password allows the user read/write access in all
tables.
The customer password allows the user read/write access in the
available tables, except the service configuration tables.
Read/write access is possible for the configuration of the
interface except for the password menu and for the CCN menu.
Displays the Ctrl-ID table that contains information such as the
software version, the operating mode and the interface mode.
Modifies the CCN data (address, communication speed) when
the interface is in CCN mode.
4.4.8. - Login/Logout
The following button permits display of the dialogue box
“Login”. After that simply enter the 4-digit password. The
button then changes to “Logout”. Two access levels are
possible, the limited mode and the total mode.
The following button allows disconnection and return to the
read only mode. If the interface is not used for 15 minutes,
it is automatically disconnected.
4.5 - Table description
4.5.1 - Reading a point
The buttons described in section 4.4.1 permit access to the
service status, setpoint etc. tables.
Once a sub-menu has been selected, the list of tables is
displayed (see note in section 4.1):
Set the parameter for the time and date format and the unit
type to be used.
Select the language and type font to be used.
Adjust the contrast of the LCD screen.
To increase the contrast, press button:
To reduce the contrast, press button:
11
The selection of the required table permits the display of
all points present in this table (see note in section 4.1):
The buttons
and
display of the previous or next points.
permit the
4.5.2 - Modification of a point
4.5.2.1 - Writing a point
The Setpoint, Service and Configuration tables are accessible
in write mode.
Example: Setpoint table (see note in section 4.1):
The following button permits access to the modification
dialogue box (see note in section 4.1):
To validate the selection use the button:
IMPORTANT: The new value of point csp 2 is only transmitted to the control after quitting the Setpoint table.
After one of the following quit buttons is pressed
the following dialogue box is displayed (see note in section
4.1):
ATTENTION: The new value of point csp2 (and any other
point modified in this table) is transmitted to the control
after this window has been validated.
4.5.2.2 - Forcing a point
This concerns the Status and Maintenance tables.
Example: Genunit table (see note in section 4.1):
When “Cooling setpoint 2” is selected (in English - see
note in section 4.1), the following dialogue box appears:
12
When the point “CCN chiller start/stop” is selected (see
note in section 4.1), the following window appears:
Each line represents a time schedule. The letters M-T-W...
S-S represent the days of the week and the H the holidays;
the tick indicated under the days shows that they are
selected. The time schedules on the right of the screen define
the selected time schedule range.
4.6.2 - Modification
When a line has been selected, after the password has been
entered, the following screen appears (see note in section
4.1):
The following button permits access to the Forcing
dialogue box (see note in section 4.1):
The days in the time schedule program are indicated at
the top of the screen and selectable by clicking the square
below.
The time schedules can be modified with the arrow buttons.
The arrow buttons on the left permit changing the hours,
those on the right permit changing the minutes.
To validate the program press the button:
To validate the selection use the button:
In this case the new point value is directly transmitted to
the control.
ATTENTION: As for the write mode of the points, the
modifications in the time schedule program are only
applied after quitting the table and validating a confirmation screen (see section 4.5.2.1).
4.6 - Time schedule table
4.7 - Re-initialisation of the display
4.6.1 - Description
The time schedule tables are accessible from the main
menu. Two tables are available (see section 4.4.2).
After one of these two tables has been selected, the
following screen appears (see note in section 4.1):
To re-initialise the display with the factory parameters
leave the finger pressed on the screen when it is switched
on. When the screens goes white, remove the finger from
the screen. The following dialogue box appears (see note
in section 4.1):
To confirm the modification touch the screen above for 10
seconds.
13
4.8 - Translation of the display and the control
After the selection an acceptance window is displayed.
The 30XA/30XW control allows the user two different
languages: English and an optional language loaded at the
factory in accordance with the destination country of the
unit.
Fig. 7 - Acceptance window (see note in section 4.1)
The language selection is made in the Setup => Language
menu. When the new language is selected, a new interface
update for the control is necessary as all texts are effectively
updated.
4.9 - Unit start/stop control
4.9.1 - Description
The main interface includes a start/stop button that allows:
• shutting down the machine,
• selecting an operation mode.
4.9.2 - Starting up and operation type selection
The unit is started up by pressing the start/stop button.
The window below appears.
Fig. 6 - Unit start-up screen (see note in section 4.1)
The unit start-up screen (Fig. 6) allows the selection of the
operation type.
Local on
Local start: The unit is in the local control mode and allowed
to start.
Local schedule
Clock-controlled local operation: the unit is in local control
mode. If the period is occupied, it is allowed to start. If the
unit run time schedule is in unoccupied mode, it is kept shut
down until the next occupied period.
CCN mode
CCN: The unit is controlled by CCN commands.
Remote mode
Remote: the unit is controlled by external contacts.
Master mode
Master unit: the unit operates as a master unit in a master/
slave assembly (only displayed if the unit is configured for
master/slave control).
14
4.9.3 - Shutting down the unit in local mode
Shut-down is confirmed by the following window.
Fig. 8 - Unit shut-down screen (see note in section 4.1)
5 - PRO-DIALOG CONTROL OPERATION
5.1 - Start/stop control
The table below summarises the unit control type and stop
or go status with regard to the following parameters.
• Operating type: this is selected using the start/stop
button on the front of the user interface.
• Remote start/stop contacts: these contacts are used when
the unit is in remote operating type (Remote mode).
• CHIL_S_S: this network command relates to the chiller
start/stop when the unit is in CCN control (CCN mode).
Variable forced to disable: the unit is halted. Variable
forced to Enable: the unit runs in accordance with
schedule 1.
Active operating type
Local- Local- Local- Remote CCN Master CHIL_S_S
Off
On
Schedule mode
mode mode
-
-
-
-
-
-
-
-
-
-
-
-
-
-
Active -
-
-
-
-
-
-
-
Active
-
-
-
-
-
-
-
Active
-
-
-
-
-
-
Active
-
-
-
-
-
-
-
Active -
Off
-
-
-
-
Active -
-
-
-
-
-
-
Active -
-
-
-
-
-
Active -
-
-
-
-
-
Active -
Active Off
-
-
-
-
-
Active -
-
Active -
-
-
-
-
-
-
Active
-
-
-
-
-
-
-
Active
-
-
-
-
-
-
-
Active -
On
-
-
-
-
-
Active -
-
-
-
-
-
Active -
-
-
-
-
-
Active On
•Start/Stop schedule: occupied or unoccupied status of
the unit as determined by the chiller start/stop program
(Schedule 1).
• Master control type. This parameter is used when the
unit is the master unit in a two chiller lead/lag arrangement. The master control type determines whether the
unit is to be controlled locally, remotely or through
CCN (this parameter is a Service configuration).
• CCN emergency shutdown: if this CCN command is
activated, it shuts the unit down whatever the active
operating type.
• General alarm: the unit is totally stopped due to failure.
Parameter status
Remote
Master unit Start/stop CCN
General
start/stop
control
schedule
emergency alarm
contact
type
mode
shut-down
-
-
-
Active
-
-
-
-
-
Yes
-
-
-
-
-
-
-
Unoccupied -
-
Off
-
-
-
-
-
-
Unoccupied -
-
-
-
-
-
-
-
-
Unoccupied -
-
-
Local
Unoccupied -
-
Off
Remote
-
-
-
-
Remote
Unoccupied -
-
-
CCN
-
-
-
-
CCN
Unoccupied -
-
-
-
-
Disabled
No
-
-
Occupied
Disabled
No
On -
Occupied
Disabled
No
-
-
Occupied
Disabled
No
-
Local
Occupied
Disabled
No
On Remote
Occupied
Disabled
No
-
CCN
Occupied
Disabled
No
5.2 - Unit stop function
This function controls the unit compressor capacity reduction.
If there is an alarm or a demand to stop it forces the compressors to the minimum capacity and waits for the slide
valve to position itself correctly. The waiting time depends
on the currents measured and on the compressor type.
This stop sequence is not followed, if a water heat exchanger
frost protection or low suction temperature alarm exists.
Once the circuit minimum capacity has been reached, a
pumpdown session is started to protect the evaporator
against frost, based on the outside temperature.
For units operating at a high outside temperature or without
the evaporator heater option, this pumpdown session is
not required. Once the circuit has stopped, the EXV waits
for the equalisation of the pressures or one minute, before
it closes completely.
5.3 - Evaporator water pump control
The unit can control one or two evaporator water pumps.
The pumps are turned on when this option is configured (see
User Config sub-menu) and when the unit is in one of the on
modes described above or in delay mode. Since the minimum
value for the delay at start-up is 1 minute (configurable
between 1 and 15 minutes), the pump will run for at least one
minute before the first compressor starts. The pump is kept
running for 20 seconds after the unit goes to stop mode.
Control
type
Unit
status
-
-
Local
Local
Remote
Remote
CCN
CCN
Local
Remote
Remote
CCN
CCN
Local
Local
Remote
CCN
Local
Remote
CCN
Off
Off
Off
Off
Off
Off
Off
Off
Off
Off
Off
Off
Off
On
On
On
On
On
On
On
It is turned off, if the unit is shut down due to an alarm,
unless the fault is a frost protection fault. The pump can be
started in particular operating conditions when the evaporator heater is active. See section 5.14 for the particular evaporator pump control for the follower unit (master/slave
assembly).
If two pumps are controlled and the reversing function has
been selected (see User 1 configuration), the control tries
to limit the pump run time delta to the configured pump
changeover delay. If this delay has elapsed, the pump
reversing function is activated, when the unit is running.
During the reversing function both pumps run together for
two seconds.
If a pump has failed and a secondary pump is available, the
unit is stopped and started again with this pump.
The control provides a means to automatically start the
pump each day at 14.00 hours for 2 seconds when the unit
is off. If the unit is fitted with two pumps, the first pump is
started on odd days and the second pump is started on
even days. Starting the pump periodically for few seconds
increases the life-time of the pump bearings and the
tightness of the pump seal.
15
5.4 - Water flow switch
5.5 - Heating/cooling selection
The new controller is configurable. The configuration
depends on the unit size and is made at the start-up. If the
measured flow rate in the water loop is lower than the
configured flow rate, an alarm condition shuts off the unit.
For water-cooled units configured in the Heat Machine mode,
heating/cooling selection can be controlled in various ways,
depending on the active operating type:
• locally at the unit using the HC_SEL item on default
screen 1,
• remotely via the heating/cooling selection contact, if
the unit is in the Remote mode operating type,
• via a CCN network command, if the unit is in the
CCN operating type.
Parameter status
On/off status
Control type
Off
-
On
Local
On
Local
On
Remote
On
Remote
On
CCN
On
CCN
Heating/cooling selection
in local mode
-
Cooling
Heating
-
-
-
-
5.6 - Control point
The control point represents the water temperature that
the unit must produce.
In cooling mode the evaporator outlet water is controlled
by default, but the evaporator inlet water can also be
controlled (requires a Service configuration modification).
In heating mode (water-cooled units only), the condenser
outlet water is controlled by default, but the condenser
inlet water can also be controlled (requires a Service
configuration modification).
Control point = active setpoint + reset
16
Heating/cooling contact
HC_SEL
in local mode
-
-
-
-
-
-
On cooling
-
On heating
-
-
Cooling
-
Heating
Operating
mode
Cooling
Cooling
Heating
Cooling
Heating
Cooling
Heating
5.6.1 - Active setpoint
Two setpoints can be selected. Usually, the second cooling
setpoint is used for unoccupied periods. Depending on the
current operation type, the active setpoint can be selected
by choosing the item in the table Status => Genunit, with
the volt-free user contacts, with network commands or
with the setpoint timer program (schedule 2).
The following tables summarise the possible selections
depending on the control types (local, remote or network)
and the following parameters:
•Setpoint select in local control: item “Setpoint select”
in the table Status => Genunit permits selection of the
active setpoint, if the unit is in local operating type.
• Control contacts 2: status of control contact 2.
•Schedule 2 status: schedule for setpoint selection.
LOCAL OPERATING MODE
Parameter status Heating/cooling
Local setpoint
Ice storage Ice storage Schedule 2
operating mode
selection
configuration*
contact status*
status
Cooling
csp 1
-
-
-
Cooling
csp 2
-
-
-
Cooling
auto
Activated
Open
Unoccupied
Cooling
auto
Activated
Closed
Unoccupied
Cooling
auto
-
-
Occupied
Cooling
auto
Deactivated
-
Unoccupied Heating
hsp 1
-
-
-
Heating
hsp 2
-
-
-
Heating
auto
-
-
Occupied
Heating
auto
-
-
Unoccupied
REMOTE OPERATING MODE
Parameter status
Heating/cooling Local setpoint
Ice storage Ice storage Control
operating mode selection
configuration*
contact status* contact 2
Cooling
csp control -
-
-
Cooling
-
-
-
csp 1 (open)
Cooling
-
-
-
csp 2 (closed)
Cooling
-
Activated
-
Open
Cooling
-
Activated
Open
Closed Cooling
-
Activated
Closed
Closed Heating
-
-
-
Open
Heating
-
-
-
Closed NETWORK OPERATING MODE
Parameter status
Heating/cooling
Ice storage Ice storage
Schedule 2
operating mode
configuration*
contact status* status
Cooling
-
-
-
Occupied
Cooling
-
-
-
Unoccupied
Cooling
-
Activated
Open
Unoccupied
Cooling
-
Activated
Closed
Unoccupied Heating
-
-
-
Occupied
Heating
-
-
-
Unoccupied
Active setpoint
Cooling setpoint 1
Cooling setpoint 2
Ice storage setpoint
Cooling setpoint 2
Cooling setpoint 1
Heating setpoint 2
Heating setpoint 1
Heating setpoint 2
Heating setpoint 1
Heating setpoint 2
Active setpoint
Control setpoint
Cooling setpoint 1
Cooling setpoint 2
Cooling setpoint 1
Ice storage setpoint
Cooling setpoint 2
Heating setpoint 1
Heating setpoint 2
Active setpoint
Cooling setpoint 1
Cooling setpoint 2
Ice storage setpoint
Cooling setpoint 2
Heating setpoint 1
Heating setpoint 2
* Only with energy management option
In the three cases the reset parameters, i.e. slope, source and
maximum value, are configurable in the Setpoint menu.
Reset is a linear function based on three parameters.
• A reference at which reset is zero (outdoor temperature
or ∆T - no reset value).
• A reference at which reset is maximum (outdoor temperature or ∆T - full reset value).
• The maximum reset value.
% Building load
Reset example in cooling mode for the outside
temperature
Reset value
5.6.2 - Reset
Reset means the active setpoint is modified so that less
machine capacity is required (in cooling mode the setpoint
is increased, in heating mode it is decreased). This modification is in general a reaction to a drop in the load. For the
Pro-Dialog control system, the reset source can be configured in the menu Status => User: it can be provided
either by the outdoor temperature (gives a measure of the
load trends for the building) or by the return water temperature (∆T - gives an average building load) or by the reset
setpoint (only available with the energy management
option). In response to a drop in outdoor temperature or
to a drop in ∆T, the cooling setpoint is normally reset
upwards to optimise unit performance:
Outdoor temperature (OAT)
Evaporator ΔT
Legend
A Maximum reset value
B OAT or ΔT for zero reset
C OAT or ΔT for full reset
D Building load
17
5.7 - Demand limit
5.10 - Capacity control
The demand limit is used to restrict the unit power consumption. The Pro-Dialog control system allows limitation of
the unit capacity, using one of two methods:
• by means of user-controlled volt-free contacts. The units
without energy management option only have one
contact (control contact 3). The units equipped with
energy management option permit three demand
limit levels (2 contacts). The unit capacity can never
exceed the limit setpoint activated by these contacts.
The limit setpoints can be modified in the Setpoint table.
• by means of a demand limit setpoint output on the
energy management board. The demand limit value in
night mode is selectable, if the value is below the
selected limit. A limit value of 100% means that the
unit can use all capacity stages.
This function adjusts the capacity using the compressor
slide valve to keep the heat exchanger water temperature at
its setpoint. The control system continuously takes account
of the temperature error with respect to the setpoint, as
well as the rate of change in this error and the difference
between entering and leaving water temperatures, in order
to determine the optimum moment at which to add or
withdraw capacity.
ATTENTION: In certain conditions, the power consumption of water-cooled units can exceed the demand limit
threshold to protect the compressors.
5.8 - Current limitation
This function is used via the demand limit function, if current
limitation is selected in the menu Config => User.
This function will be disabled if the unit operates in master/
slave mode, if it is controlled by a System Manager or if
the night mode is active.
Current limitation procedure:
If this function is active, the control calculates the sum of
the compressor currents to obtain the total compressor
current. If this value exceeds the defined limit, the control
commands a reduction of the compressor load, until it is
below the limit again. Before loading a capacity stage, the
control estimates the future compressor current total and
ensures that it does not exceed the limit.
The current limit is the product of the two parameters below:
• The current that corresponds to 100% capacity
(CURR_FUL in the menu Config => User).
• The active limit determined either by contact 3 or by
the CCN network (DEM_LIM), displayed in the table
GENUNIT.
The current limit is displayed in the table GENUNIT
(CURR_LIM).
5.9 - Night mode
The night period is defined (see menu Config => User) by
a start time and an end time that are the same for each day
of the week. During the night period the number of fans
operating can be reduced, if the current operating conditions
permit this. Moreover the unit capacity may be limited
(but a minimum capacity value can be configured).
18
In addition, the high pressure or low pressure unloading
functions can also affect the temperature control accuracy.
Compressors are started and stopped in a sequence designed
to equalise the number of start-ups (value weighted by
their operating time).
5.11 - Head pressure control
The head pressure is controlled by a maximum of ten fans.
As an option, a variable-speed controller can control between
one and four fans. The head pressure is independently
controlled by each circuit, based on the saturated condensing
temperature value. It is not necessary to re-enter the head
pressure setpoint, as the control constantly adjusts the
setpoint to ensure optimal performance and short-circuit
protection of the fans.
5.11.1 - Air-cooled units
The condensing pressure of each circuit is generated by ten
fans maximum. As an option, a speed variator can be used to
control between one and four fans. The condensing pressure
is independently controlled in each circuit, based on the
saturated condensing temperature. It is not necessary to
re-enter the condensing setpoint, as the control permanently
adjusts its setpoint to guarantee optimal performance and
anti-short-cycle protection of the fans.
5.11.2 – Water-cooled units
Condensing pressure control is assured, if the three-way
valve option is selected. The saturated condensing temperature is controlled based on a user configurable fixed
setpoint. The three-way valve control can be configurated
by the service department.
5.12 - Determining the lead circuit
This function controls the start/stop sequence of the three
refrigerant circuits called A, B and C. The circuit
authorised to start first is the lead circuit. Two methods can
be configured by the user in the menu Config => User.
• Auto mode: the control system determines the lead
circuit to equalise the operating time of each circuit
(value weighted by the number of start-ups of each
circuit). This way the circuit with the least operating
hours always starts first.
• Circuit A, B or C as lead circuit: the circuit selected is
always the leader. It is the first to start and the last to
stop.
5.13 - Circuit loading sequence
This function determines in which order the capacity in
each circuit must be modified. It is controlled by starting
and stopping the compressors and using the slide valve.
There are two sequence types that can be configured by
the user via CCN or via the user interface:
• Balanced circuit loading: the control tries to maintain
an identical loading value for all circuits, whether the
unit is loaded or unloaded.
• Loading with priority given to one circuit: the control
fully loads the lead circuit, before starting the other
circuits. If the load decreases, the lag circuits are
unloaded first.
Staged loading by circuit will be selected if one of these
configurations occurs:
• one circuit is shut down due to a breakdown,
• one circuit is in capacity override mode,
• the other circuits are shut down or fully charged.
To find out more about the capacity loading and unloading
sequence, see section 7 “Capacity loading sequence“.
5.14 - Master/slave assembly
Two Pro-Dialog units can be linked to produce a master/
slave assembly. The two machines are interconnected over
the CCN bus. All parameters required for the master/slave
function must be configured through the menu config =>
MST_SLV. If the heat exchanger leaving water temperature
is controlled, master/slave operation requires the connection
of a temperature probe on the common manifold.
This probe is not required, if the entering water temperature
is controlled, or if the installation is a series type system
(the water inlet is via the slave unit and the water outlet to
be controlled is that of the master unit).
The master/slave assembly can operate with constant or
variable flow. In the case of variable flow each machine
must control its own water pump and automatically shut
down the pump, if the cooling capacity is zero. For constant
flow operation the pumps for each unit are continuously
operating, if the system is operating. The master unit can
control a common pump that will be activated, when the
system is started. In this case the slave unit pump is not used.
All control commands to the master/slave assembly (start/
stop, setpoint, heating/cooling operation, load shedding, etc.)
are handled by the unit which is configured as the master,
and must therefore only be applied to the master unit. They
will be transmitted automatically to the slave unit. The master
unit can be controlled locally, remotely or by CCN commands. Therefore to start up the assembly, simply validate
the Master operating type (Master mode) on the master
unit. If the Master has been configured for remote control
then use the remote volt-free contacts for unit start/stop.
The slave unit must stay in CCN operating type continuously.
To stop the master/slave assembly, select Local Off (Localoff) on the master unit or use the remote volt-free contacts
if the unit has been configured for remote control.
One of the functions of the master unit (depending on its
configuration) may be the designation, whether the master
or slave is to be the lead machine or the follower. The roles
of lead machine and follower will be reversed when the
difference in running hours between the two units exceeds
a configurable value, ensuring that the running times of the
two units are automatically equalised. The changeover
between lead machine and follower may take place when the
assembly is started up, or even whilst running. The running
time balancing function is not active if it has not been configured: in this case the lead machine is always the master
unit.
The lead machine will always be started first. When the lead
machine is at its full available capacity, start-up delay (configurable) is initialised on the follower. When this delay has
expired, and if the error on the control point is greater than
1.7 K, the follower unit is authorised to start and the pump
is activated. The follower will automatically use the master
unit active setpoint. The lead machine will be held at its full
available capacity for as long as the active capacity on the
follower is not zero. When the follower unit receives a command to stop, its evaporator water pump is turned off with
20 seconds delay.
In the event of a communication fault between the two
units, each shall return to an autonomous operating mode
until the fault is cleared. If the master unit is halted due to
an alarm, the slave unit is authorised to start without prior
conditions.
5.15 - Optional heat reclaim module
For all air-cooled units equipped with water heat reclaim
condenser only, this option requires the installation of an
additional NRCP2 type board.
This board allows control of:
• A heat reclaim condenser pump,
• A heat reclaim condenser heater,
• Two motorised valves to shut off the air condenser
(one for each circuit),
• Two solenoid drain valves for the air condenser (one
for each circuit),
• Two motorised valves to shut off the water condenser
(one for each circuit),
• Two solenoid drain valves for the water condenser
(one for each circuit).
Selecting the heat reclaim mode can be done with either
the local interface or remotely with the (recl_sw) contact
or by CCN.
The heat reclaim function is active when: the heat reclaim
entering water temperature is lower than the heat reclaim
setpoint, minus half of the heat reclaim dead band.
The heat reclaim function is not active when: the heat
reclaim entering water temperature is higher than the heat
reclaim setpoint, plus half of the heat reclaim dead band.
In the dead band the function remains in its active mode.
The default value of the dead band is 4.4 K. This value can
be modified by Carrier Service.
19
Changeover procedure from cooling mode to heat reclaim
mode:
• Start-up of the condenser pump.
• Verification of the condenser flow switch control contact. If this remains open after one minute of condenser
pump operation, the circuit remains in cooling mode
and an alarm will be activated.
• As soon as the saturated condensing temperature
reaches 30°C, the pumpdown sequence is activated.
• Pumpdown: opening of the water condenser water
inlet valve and closing of the air condenser air valves
3 seconds later. (Attention: The motorised valves take
about 90 seconds to reach their stop.)
• After two minutes the heat reclaim function is effective.
5.16 - Water condenser pump control
This control only applies to air-cooled units units equipped
with the heat reclaim module option or to water-cooled
units.
5.16.1 - Air-cooled units equipped with heat reclaim option
Pump start-up procedure:
If heat reclaim has been selected, and the reclaim temperature corresponds to the demand, the delay between two
heat reclaim sessions has passed and the two circuits have
not failed during the last changeover in the heat reclaim
mode, the pump is started up after the compressor has
started.
5.16.2 - Water-cooled units
The condenser water pump is activated, if this item is configured and if the unit is in the on mode or start-up delay
mode. The pump switches off, if the unit has shut down due
to an alarm, except in the case of a frost protection fault.
5.17 - Energy management option
This option requires the installation of an additional
NRCP2 type board. This board permits access to the
following functions:
• Reset via 4-20 mA control: see section 5.6.2.
• Ice storage contact: if ice storage control has been
configured (menu Config => User), this contact permits
activation of the ice storage setpoint.
• User safety loop input: this contact is used for the
customer safety loops that require a unit shut-down if
it is closed.
• Occupation control override contact: if this contact is
closed, the unit enters the occupied mode.
• Demand limit setpoint contact and output: see sections
3.6.4 and 5.7.
This option also permits display of the following data:
• Current unit capacity via 0-10 V output
• Operating status, compressors A, B and C
• Unit ready to start
• Unit completely stopped
• Unit in operation
5.18 - Evaporator heater option
In air-cooled units only, this option requires an additional
8xDO type board. It permits control of four shut-off valves
(two per circuit) and an evaporator heater that allows
protection of the evaporator against frost, when the unit
has shut down. One or two thermistors permit control of
the correct heater operation.
NRCP2 board connections - energy management option
Description
Connector/
channel
Type
Remarks
Outside temperature
J6 / Ch02
Analogue input
Active setpoint reset via outside temperature control. See chapter 5.6.2.
4-20 mA setpoint control reset
J7A / Ch05
4-20 mA analogue input
Active setpoint reset. See chapter 5.6.2.
4-20 mA setpoint control reset
J7B / Ch06
4-20 mA analogue input
Active setpoint reset via unit capacity control. See chapter 5.6.2.
Occupation control override
J4 / Ch08
Numerical input
If the contact is closed, the unit goes into occupied mode
Demand limit
J4 / Ch09
Numerical input
See chapters 3.6.4. and 5.6.
User safety loop
J4 / Ch10
Numerical input
Permits immediate unit shut-down
Ice storage
J4 / Ch11
Numerical input
Unit capacity
J8 / Ch07
Analogue output
0-10 V output
Status compressor A
J2A / Ch17
Numerical output
Output set to “On” if compressor A is operating
Status compressor B
J2A / Ch18
Numerical output
Output set to “On” if compressor B is operating
Status compressor C
J2A / Ch19
Numerical output
Output set to “On” if compressor C is operating
Unit ready to start
J2B / Ch23
Numerical output
Output set to “On” if the unit ist ready to start
Unit completely stopped
J3 / Ch24
Numerical output
Output set to “On” if the unit has completely stopped due to an alarm
Unit in operation
J3 / Ch25
Numerical output
Output set to “On” if the unit is in operation
20
5.19 - Free cooling option
5.20 - Optional hydronic kit
In air-cooled units only, this option permits direct use of
the outside temperature to cool the water circuit without
using the compressors. This system works only, if the outside
temperature is lower than the water circuit temperature.
This option requires an additional 4xAI 8xDO board. It
permits replacing the pressure gauges by electronic pressure
sensors.
The direct-expansion free cooling system uses the principle
of the natural migration of the refrigerant from the evaporator to the condenser. The fans and a refrigerant pump
ensure the transfer of the liquid refrigerant from the condenser to the evaporator, which explains the very low power
consumption.
The free cooling option is only available on two-circuit
units. It requires an additional electronic expansion valve
(EXV) board controlling two free-cooling EXVs as well as
two AUX2 boards (8 DOs) that control the operation of
the motorised mechanical cooling-free cooling changeover
valves and the operation of the refrigerant pump.
If the evaporator heater option and the free cooling option
are combined, the free cooling option controls the valves of
the evaporator heater option directly. Moreover the evaporator heater is directly controlled by an AUX2 board of
the free cooling option. The AUX2 board of the evaporator
heater option is then no longer used.
The free cooling option permits automatic operation and
combined operation of mechanical cooling (compressor
operation) and free cooling. Each refrigerant circuit can
operate independently.
Possible combinations:
• two circuits in mechanical cooling,
• two circuits in free cooling,
• one circuit in mechanical cooling and one circuit in
free cooling.
Three criteria decide if free cooling is used or not:
• the temperature difference between the outside air
temperature and the controlled water temperature:
the threshold is configurable by user parameter
(USER table, item free_dt),
• the maximum operating time in free cooling, when the
water temperature setpoint is not reached (USER
table, item fc_tmout),
• contact 4, terminal J4 ch14 permits the customer to
keep the unit in mechanical cooling.
The hydronic kit allows access to the following functions:
• pressure before and after the evaporator
• pressure before and after the pump filter
• evaporator flow rate
• evaporator capacity
The flow rate is calculated from the pressure difference
between the evaporator inlet and outlet and the evaporator
pressure drop curves.
The capacity is calculated from the flow rate, from the water
constant and from the temperature difference between the
entering and leaving evaporator water temperature.
The flow rate and capacity calculations are not carried out,
if the unit is configured for brine.
These values are only given as guidelines and should not
be regarded as precise values.
If there is a risk of pump cavitation, an alert is activated.
5.21 - Black box function
The Pro-Dialog control registers the values of several
predefined variables every 5 seconds. If an operation alarm
appears, the control saves a data set of 80 registrations (75
preceding the alarm and 5 following it), for a duration of 7
minutes of unit operation.
Each registration is associated with a time schedule defined
in hours, minutes and seconds. The control can store a
maximum of six data sets in the memory. They can be
recovered by a Carrier service technichian, using a winDCT
tool that permits recovery and later removal of the data
sets from the unit.
5.22 - Option for high condensing temperatures
For water-cooled units only, this option allows an increase
of the maximum condensing threshold. This means that
the saturated condensing temperature can reach a maximum
of 68°C, compared with a maximum of 53°C for units that
are not equipped with this option.
5.23 - Maximum condenser leaving water temperature
= 45°C (option)
For water-cooled units only, this option allows the user to
limit the condenser leaving water temperature to 45°C.
When the condensing temperature reaches 44°C, the increase
in the compressor loading is stopped. When the temperature
exceeds 45°C, the compressor is unloaded.
21
6 - DIAGNOSTICS - TROUBLESHOOTING
6.1 - General
The Pro-Dialog control system has many fault tracing aid
functions. The local interface and its various menus give
access to all unit operating conditions. If an operating fault
is detected, an alarm is activated and an alarm description
is stored in the Alarm menu.
6.2 - Displaying alarms
The alarm LED on the interface (see section 4.1) gives an
immediate display of the unit status.
• A flashing LED shows that the unit is operating but
there is an alarm.
• A steady LED shows that the unit has been shut
down due to a fault.
The ALAM_CUR table in the Alarms menu (see section
4.4.3) on the main interface displays up to 10 fault codes
that are active on the unit (in case of a total disconnection
from the slave boards).
6.3 - Resetting alarms
When the cause of the alarm has been corrected the alarm
can be reset, depending on the type, either automatically on
return to normal, or manually when action has been taken
on the unit. Alarms can be reset even if the unit is running.
This means that an alarm can be reset without stopping the
machine. In the event of a power supply interrupt, the unit
restarts automatically without the need for an external
command. However, any faults active when the supply is
interrupted are saved and may in certain cases prevent a
circuit or a unit from restarting.
A manual reset must be carried out from the main interface
and requires pushing the Reset button in the main menu.
A confirmation must then be carried out. The alarm LED
then goes off and confirms the reset.
22
6.4 - Alarm codes
Alarm
No.
GENUNIT
code*
Description of the alarm text
1
th-01
Evaporator entering water thermistor fault
2
th-02
Evaporator leaving water thermistor fault
4
th-07
Condenser leaving water thermistor fault
THERMISTOR FAULTS
3
7
th-06
th-08
8
th-09
10
th-11
9
11
12
13
14
15
16
17
th-10
th-12
th-13
th-14
th-15
th-16
th-17
th-18
18
th-19
19
th-21
21
th-24
20
th-22
Condenser entering water thermistor fault
Heat reclaim condenser entering water thermistor
fault
Reset type
Action taken by the control
Probable cause
Automatic if the temperature
measured by the sensor
returns to normal
Unit shuts down
Defective thermistor
As above
As above
Unit shuts down
As above
As above
None
None
As above
As above
None
As above
Common water master/slave thermistor fault
Unit returns to stand-alone mode
As above
Outside temperature sensor fault
As above
Suction gas temperature sensor fault, circuit A
As above
Suction gas temperature sensor fault, circuit B
Suction gas temperature sensor fault, circuit C
Discharge gas temperature sensor fault, circuit A
Discharge gas temperature sensor fault, circuit B
Discharge gas temperature sensor fault, circuit C
Condenser subcooling temperature sensor fault,
circuit A
As above
As above
As above
As above
As above
As above
As above
Economizer gas temperature sensor fault, circuit A
As above
Deactivation of the economizer
function by closing the economizer
EXV
As above
Economizer gas temperature sensor fault, circuit C
As above
27
Pr-02
Discharge transducer fault, circuit B
29
Pr-04
Suction transducer fault, circuit A
33
34
35
36
37
38
39
40
Pr-08
Pr-10
Pr-11
Pr-12
Pr-13
Pr-14
Pr-15
Pr-16
41
Pr-17
42
Pr-18
43
Pr-19
46
Pr-24
47
Pr-25
48
Pr-26
51
Pr-29
49
*
Pr-27
As above
Liquid refrigerant temperature sensor fault, free
cooling option, circuit B
Discharge transducer fault, circuit A
Pr-07
As above
As above
Pr-01
32
As above
No action, simply warning
26
Pr-06
Unit returns to air-cooled mode
As above
As above
PRESSURE TRANSDUCERS
31
Circuit C shuts down
As above
As above
As above
Pr-05
Circuit B shuts down
As above
Evaporator heater status return thermistor fault
Liquid refrigerant temperature sensor fault, free
cooling option, circuit A
30
Circuit A shuts down
As above
Ambient temperature sensor fault
th-30
Pr-03
Circuit C shuts down
As above
As above
24
28
Circuit B shuts down
Unit returns to air-cooled mode
As above
th-31
Circuit A shuts down
As above
As above
Economizer gas temperature sensor fault, circuit B
25
Unit shuts down
Condenser subcooling temperature sensor fault,
circuit B
th-25
th-26
As above
Heat reclaim condenser leaving water thermistor fault As above
22
23
Unit returns to air-cooled mode
As above
Discharge transducer fault, circuit C
Suction transducer fault, circuit B
Suction transducer fault, circuit C
Heat reclaim pumpdown transducer, circuit A
Heat reclaim pumpdown transducer, circuit B
Oil pressure transducer, circuit A
Oil pressure transducer, circuit B
Oil pressure transducer, circuit C
Economizer pressure transducer, circuit A
Economizer pressure transducer, circuit B
Economizer pressure transducer, circuit C
Upstream pressure transducer, free cooling pump,
circuit A
Upstream pressure transducer, free cooling pump,
circuit B
No action, simply warning
As above
As above
As above
Deactivation of the free cooling
mode, circuit A
As above
As above
As above
Deactivation of the free cooling
mode, circuit B
As above
Automatic, if the voltage
transmitted by the sensor
returns to normal
Circuit A shuts down
Transducer fault or
installation fault
As above
As above
Circuit B shuts down
As above
As above
Circuit C shuts down
Circuit A shuts down
As above
As above
As above
As above
As above
As above
As above
As above
As above
Circuit B shuts down
Circuit C shuts down
Return to air-cooled mode
As above
Circuit A shuts down
Circuit B shuts down
Circuit C shuts down
As above
As above
As above
As above
Downstream pressure transducer, free cooling pump, As above
circuit A
Downstream pressure transducer, free cooling pump, As above
circuit B
Fault, water pressure transducer 1 (before the
evaporator)
Automatic
Fault, water pressure transducer 2 (after the
evaporator)
As above
Fault, water pressure transducer 4 (after the filter)
As above
As above
As above
As above
As above
As above
As above
As above
As above
As above
As above
Deactivation of the free cooling
mode, circuit A
As above
As above
Deactivation of the free cooling
mode, circuit B
As above
Deactivation of the free cooling
mode, circuit B
As above
Deactivation of the free cooling
mode, circuit A
As above
Alert - the values read by the
hydronic kit function are not
reliable.
Transducer defective
or installation fault
As above
As above
As above
Fault, water pressure transducer 3 (before the filter)
As above
As above
Low water pressure
Automatic
Alert - the unit continues to operate Water loop pressure
too low. Risk of
pump cavitation.
As above
As above
Alarm code in GENUNIT table
23
6.4 - Alarm codes (cont.)
Alarm
No.
GENUNIT
code*
Description of the alarm text
53
Co-a1
Communication loss with compressor A board
54
Co-b1
Communication loss with compressor B board
56
Co-e1
Communication loss with EXV A board
COMMUNICATION WITH SLAVE BOARDS
55
57
58
59
Co-c1
Co-e2
Co-e3
Co-f1
Communication loss with compressor C board
Communication loss with EXV B board
Communication loss with EXV C board
Communication loss with fan 1 board
Reset type
Action taken by the control
Probable cause
Automatic if the communication is
re-established
Compressor A shuts down
Bus installation fault or
defective slave board
As above
Compressor C shuts down
As above
Compressor B shuts down
As above
Circuit A shuts down
As above
As above
As above
60
Co-f2
Communication loss with fan 2 board
As above
62
Co-o1
Communication loss with free cooling 1 board
As above
61
63
64
65
66
Co-f3
Co-o2
Co-o3
Co-o4
Co-o5
PROCESS FAULTS
Communication loss with fan 3 board
Communication loss with free cooling 2 board
Communication loss with energy management
board
As above
As above
As above
Communication loss with heat reclaim board
As above
Communication loss with auxiliary board 6
Circuit B shuts down
Circuit C shuts down
Circuit A shuts down, if there are
more than 4 fans per circuit, if not
circuits B and C shut down
As above
As above
As above
As above
As above
As above
Circuit B shuts down
As above
Circuits A and B shut down
As above
Circuit C shuts down
Circuit C shuts down
Unit continues to operate, but the
functions linked to the board are
deactivated
As above
As above
As above
Return to air-cooled mode
As above
Automatic, if the same alarm has
not tripped during the last 24
hours, if not manual
Unit shuts down. Start-up of the
condenser pump, if the unit has
shut down.
Lack of water flow or
defective thermistor
As above
As above
Unit continues to operate, but the
functions linked to the board are
deactivated
As above
67
P-01
Evaporator frost protection
68
P-02
Condenser frost protection, circuit A
69
P-03
Condenser frost protection, circuit B
As above
As above
72
P-06
Low suction temperature, circuit B
As above
As above
As above
74
P-08
High superheat, circuit A
Manual
Circuit A shuts down
As above
71
73
75
76
77
78
79
80
P-05
P-07
P-09
P-10
P-11
P-12
P-13
P-14
Low suction temperature, circuit A
Low suction temperature, circuit C
High superheat, circuit B
High superheat, circuit C
Low superheat, circuit A
Low superheat, circuit B
Low superheat, circuit C
Customer safety loop fault
81
P-28
Control box thermostat or power supply phase
reversal
82
P-29
System Manager communication fault
83
P-30
Master/slave communication fault
85
P-68
87
P-70
84
86
88
89
90
91
92
93
94
95
*
24
P-67
P-69
P-71
P-72
P-84
P-85
P-86
P-75
P-76
P-77
Automatic, if the saturated
economizer temperature and the
saturated discharge temperature
are above 4.4°C
Automatic, if the temperature
returns to normal and the outside
temperature is below 10°C and if
the same alarm has not tripped
during the last 24 hours
As above
Manual
Manual
Manual
Manual
Manual
Circuit shuts down. Start-up of the
condenser pump, if the unit has
shut down.
Compressor capacity increase or
unloading stopped, depending on
the temperature value
As above
Circuit B shuts down
Circuit C shuts down
Circuit A shuts down
Circuit B shuts down
Circuit C shuts down
Automatic, if the same alarm has
Unit shuts down
not tripped during the last 24 hours
Automatic, when the contact
closes again
Unit shuts down
Automatic, when communication
is re-established
Unit returns to stand-alone mode
Manual
Circuit A shuts down
As above
-
Low oil pressure, circuit B
Manual
Circuit B shuts down
Maximum oil filter pressure differential, circuit A
Manual
Circuit A shuts down
Low oil pressure, circuit A
Low oil pressure, circuit C
Maximum oil filter pressure differential, circuit B
Maximum oil filter pressure differential, circuit C
High oil filter pressure drop, circuit A
High oil filter pressure drop, circuit B
High oil filter pressure drop, circuit C
Low oil level, circuit A
Low oil level, circuit B
Low oil level, circuit C
Alarm code in GENUNIT table
Manual
Manual
Manual
Manual
Manual
Manual
Manual
Manual
Manual
Circuit C shuts down
Circuit B shuts down
Circuit C shuts down
None
None
None
Circuit A shuts down
Circuit B shuts down
Circuit C shuts down
Discharge pressure
transducer defective,
refrigerant leak or low
condenser water
temperature
Pressure sensor, EXV
blocked or lack of
refrigerant
As above
As above
As above
As above
As above
As above
-
Control box poorly
ventilated or poor
electrical connection
CCN bus installation
defective
As above
Pressure sensor or
wiring defective or oil
filter badly installed
As above
As above
As above
As above
As above
As above
As above
As above
Oil level too low or oil
level detector defective
As above
As above
6.4 - Alarm codes (cont.)
Alarm
No.
GENUNIT
code*
Description of the alarm text
Reset type
Action taken by the control
Probable cause
96
MC-nn
Configuration error, master chiller 1 to nn
Automatic, when the master
configuration returns to normal
or when the unit is no longer in
master/slave mode
Unit cannot start in master/slave
mode
-
97
FC-n0
No factory configuration
Automatic, when the
configuration is entered
Unit cannot start
Manual
Unit cannot start
The unit size has not been
configured
98
FC-01 No.1
to nn
Illegal factory configuration
99
P-31
Unit CCN emergency stop
Manual
Unit shuts down
101
P-33
Evaporator 2 pump fault
As above
As above
103
P-34
Heat reclaim operation failure, circuit A
Manual
PROCESS FAULTS (cont.)
100
102
P-32
P-15
Evaporator 1 pump fault
Condenser flow fault
Manual
Automatic
104
P-35
Heat reclaim operation failure, circuit B
Manual
105
P-37
Automatic
106
P-38
Circuit A: condensing pressure outside
compressor range
107
P-39
108
P-40
109
P-41
110
P-43
112
P-73
114
P-78
115
117
116
Unit shut-down except if there is a
second pump that can take over
Unit shuts down
Circuit A returns to air-cooled
mode
The unit size has been
configured with an incorrect
value
Network command
Pump overheating or poor
pump connection
As above
Defective sensor
-
Circuit B returns to air-cooled
mode
-
Circuit A shuts down
Defective transducer
Circuit B: condensing pressure outside
compressor range
Automatic
Circuit B shuts down
As above
Circuit C: condensing pressure outside
compressor range
Automatic
Circuit C shuts down
As above
Low saturated suction temperature override
repetitions, circuit A
None
As above
Low saturated suction temperature override
repetitions, circuit B
Automatic, if no override has
occurred for 30 minutes
None
As above
Low saturated suction temperature override
repetitions, circuit C
Automatic, if no override has
occurred for 30 minutes
Automatic, if no override has
occurred for 30 minutes
None
As above
Manual
Unit shuts down
High discharge gas temperature, circuit A
Manual
Circuit A shuts down
Pump overheats or poor
pump connection
P-79
High discharge gas temperature, circuit B
Manual
Circuit B shuts down
P-81
Low economizer pressure or suction valve
closed, circuit A
Manual
Circuit A shuts down
P-80
118
P-82
119
P-83
120
P-87
121
122
Pump fault, condenser 1
High discharge gas temperature, circuit C
Manual
Circuit C shuts down
Defective transducer, max
condensing temperature
setpoint too low or
refrigerant charge too high
As above
As above
Defective transducer or
installation fault. In watercooled units without
economizer the suction
valve may be closed
Low economizer pressure or suction valve
closed, circuit B
Manual
Circuit B shuts down
Low economizer pressure or suction valve
closed, circuit C
Manual
Circuit C shuts down
As above
Slide valve not controllable, circuit A
Manual
None, simply warning
P-88
Slide valve not controllable, circuit B
Manual
None, simply warning
Defective or incorrectly
wired solenoid valves or
defective current
transformer
P-89
Slide valve not controllable, circuit C
Manual
None, simply warning
As above
123
P-90
Flow controller configuration fault
Manual
Unit is not allowed to restart
Defective or incorrectly
wired flow controller
124
P-91
Flow controller fault
Conditional if at least one
compressor operates,
otherwise automatic
Unit shuts down
Evaporator pump defect or
water flow switch defect
125
P-94
Fault during free cooling operation, circuit A
The three first times automatic, the 4th time manual
Deactivation of the free cooling
mode, circuit A
De-energising of the free
cooling pump
126
P-95
Fault during free cooling operation, circuit B
The three first times automatic, the 4th time manual
Deactivation of the free cooling
mode, circuit B
De-energising of the free
cooling pump
127
P-97
Water heat exchanger temperature sensor
reversed
Manual
Unit shuts down
Sensors of the evaporator
reversed in cooling mode
or of the water condenser
in heating mode
*
As above
As above
Alarm code in GENUNIT table
25
6.4 - Alarm codes (cont.)
Alarm No.
GENUNIT
code*
Description of the alarm text
Reset type
Action taken by
the control
Probable cause
128
Sr-nn
Service maintenance alert No. nn
Manual
-
Preventive maintenance date has passed
129
V0-xx
Fault, variable speed controller, circuit A
Manual or
automatic
Speed controller
fault or alert
The circuit continues to operate, the speed controller
slows down the motor. The circuit shuts down.
130
V1-xx
Fault, variable speed controller, circuit B
As above
As above
As above
131
V2-xx
Fault, variable speed controller, circuit C
As above
As above
As above
132-01
A1-01
Compressor A1 fault No. 1
See compressor alarm sub-code
132-nn
A1-nn
Compressor A1 fault No. nn
See compressor alarm sub-code
133-01
B1-01
Compressor B1 fault No. 1
See compressor alarm sub-code
133-nn
B1-nn
Compressor B1 fault No. nn
See compressor alarm sub-code
134-01
C1-01
Compressor C1 fault No. 1
See compressor alarm sub-code
134-nn
C1-nn
Compressor C1 fault No. nn
See compressor alarm sub-code
MAINTENANCE ALARM
COMPRESSOR FAULT
Pro-Dialog user
display alarm code
Alarm text and CCN message description
Reset type
Probable cause
XX-01*
Compressor XX: motor temperature too high
Manual
Motor/wiring fault
XX-03*
Compressor XX: high pressure switch protection XX
Manual
Coil fouled, lack of condenser flow, condenser valve
blocked, fan circuit fault, high entering air or condenser
water temperature
COMPRESSOR ALARM SUB-CODE
XX-02*
Compressor XX: motor temperature outside the range
Manual
XX-04*
Current consumption too high
Manual
XX-06*
Compressor XX: phase L1 lost
Manual
XX-08*
Compressor XX: phase L3 lost
Manual
XX-05*
XX-07*
XX-09*
XX-10*
XX-11*
XX-12*
XX-13*
XX-14*
XX-15*
Compressor XX: locked rotor
Compressor XX: phase L2 lost
Compressor XX: low current alarm
Current increase fault during the star-delta passage on
compressor XX
Manual
Manual
Manual
Manual
As above
As above
Defective contactor or capacity fault
Incorrect wiring or no power for the delta contactor
Compressor XX: phase reversal
Manual
-
Compressor XX: MTA configuration fault
Compressor XX: incorrect configuration switch
Manual
Manual
XX-18*
Compressor XX: critical software error (UL 1998)
Manual
26
Power supply wiring fault, verify the three phases
Incorrect wiring or defective contactor or TCPM board
Manual
Manual
* XX = A1, B1, C1
Mechanical compressor fault, motor fault or defective
compressor slide valve
Manual
Compressor XX: motor stop impossible
Compressor XX: switch modification detected
XX-19*
-
Compressor XX: contactor fault
XX-16*
XX-17*
Probe defective or incorrect wiring
Compressor XX: power supply cut during operation of
compressor XX
Automatic, saved in the
alarm history
Compressor XX: critical error on two current parameters Manual
(UL 1998)
Incorrect wiring or defective contactor
MTA configuration incorrect or defective TCPM board
Configuration switch S1 incorrect wiring or defective
TCPM board
As above
Verify that power supply cuts have occurred
Power network noise or defective TCPM board
Power network noise or defective TCPM board
7 - CIRCUIT CAPACITY LOADING SEQUENCE
7.1 - Dual circuit - balanced capacity loading
7.2 - Dual circuit - priority given to one circuit
Loading sequence (%) Lead circuit
Lag circuit 0
0
30
0
35
0
40
0
45
0
50
0
55
0
60
0
65
0
70
0
70
30
70
35
70
40
70
45
70
50
70
55
70
65
70
70
75
70
75
75
80
75
80
80
85
80
85
85
90
85
90
90
95
90
95
95
100
95
100
100
100
100
Loading sequence (%) Lead circuit
Lag circuit 0
0
30
0
35
0
40
0
45
0
50
0
55
0
60
0
65
0
70
0
75
0
80
0
85
0
90
0
95
0
100
0
100
30
100
35
100
40
100
45
100
50
100
55
100
60
100
65
100
70
100
75
100
80
100
85
100
90
100
95
100
100
Unloading sequence (%)
Lead circuit
Lag circuit
100
100
100
95
95
95
95
90
90
90
90
85
85
85
85
80
80
80
80
75
75
75
75
70
70
70
70
65
65
65
65
60
60
60
60
55
55
55
55
50
50
50
50
45
45
45
45
40
40
40
40
35
40
30
40
0
35
0
30
0
0
0
Unloading sequence (%)
Lead circuit
Lag circuit
100
100
100
95
100
90
100
85
100
80
100
75
100
70
100
65
100
60
100
55
100
50
100
45
100
40
100
35
100
30
95
30
90
30
85
30
80
30
75
30
70
30
70
0
65
0
60
0
55
0
50
0
45
0
40
0
35
0
30
0
0
0
7.3 - Triple circuit - balanced capacity loading
7.4 - Triple circuit - priority given to one circuit
Loading sequence (%) Lead circ. Lag circ. 1 Lag circ. 2 0
0
0
30 (15)
0
0
35
0
0
40
0
0
45
0
0
50
0
0
55
0
0
60
0
0
65
0
0
70
30 (15)
0
70
35
0
70
40
0
70
45
0
70
50
0
70
55
0
70
60
0
70
65
0
70
70
0
70
70
30 (15)
70
70
35
70
70
40
70
70
45
70
70
50
70
70
55
70
70
60
70
70
65
70
70
70
75
70
70
75
75
70
75
75
75
80
75
75
80
80
75
80
80
80
85
80
80
85
85
80
85
85
85
90
85
85
90
90
85
90
90
90
95
90
90
95
95
90
95
95
95
100
95
95
100
100
95
100
100
100
Loading sequence (%) Lead circ. Lag circ. 1 Lag circ. 2 0
0
0
30 (15)
0
0
35
0
0
40
0
0
45
0
0
50
0
0
55
0
0
60
0
0
65
0
0
70
0
0
75
0
0
80
0
0
85
0
0
90
0
0
100
0
0
100
30 (15)
0
100
35
0
100
40
0
100
45
0
100
50
0
100
55
0
100
60
0
100
65
0
100
70
0
100
75
0
100
80
0
100
85
0
100
90
0
100
100
0
100
100
30 (15)
100
100
35
100
100
40
100
100
45
100
100
50
100
100
55
100
100
60
100
100
65
100
100
70
100
100
75
100
100
80
100
100
85
100
100
90
100
100
95
100
100
100
Unloading sequence (%)
Lead circ. Lag circ.1 Lag circ. 2
100
100
100
100
100
95
100
95
95
95
95
95
95
95
90
95
90
90
90
90
90
90
90
85
90
85
85
85
85
85
85
85
80
85
80
80
80
80
80
80
80
75
80
75
75
75
75
75
75
75
70
75
70
70
70
70
70
70
70
65
70
65
65
65
65
65
65
65
60
65
60
60
60
60
60
60
60
55
60
55
55
55
55
55
55
55
50
55
50
50
50
50
50
50
50
45
50
45
45
45
45
45
45
45
40
45
40
40
40
40
40
40
40
35
40
40
30 (15)
40
40
0
40
35
0
40
30 (15)
0
35
0
0
30 (15)
0
0
0
0
0
Unloading sequence (%)
Lead circ. Lag circ.1 Lag circ. 2
100
100
100
100
100
95
100
100
90
100
100
85
100
100
80
100
100
75
100
100
70
100
100
65
100
100
60
100
100
55
100
100
50
100
100
45
100
100
40
100
100
35
100
100
30 (15)
100
95
30 (15)
100
90
30 (15)
100
85
30 (15)
100
80
30 (15)
100
75
30 (15)
100
70
30 (15)
100
65
0
100
60
0
100
55
0
100
50
0
100
45
0
100
40
0
100
35
0
100
30 (15)
0
95
30 (15)
0
90
30 (15)
0
85
30 (15)
0
80
30 (15)
0
75
30 (15)
0
70
30 (15)
0
65
0
0
60
0
0
55
0
0
50
0
0
45
0
0
40
0
0
35
0
0
30 (15)
0
0
0
0
0
(15)Minimum capacity for standard water-cooled units (without option for high
condensing temperature)
27
Order No. 13453-76, 09.2008. Supersedes order No.: 13453-76, 03.2008.
Manufacturer reserves the right to change any product specification without notice.
Manufactured by: Carrier SCS, Montluel, France.
Printed in the Netherlands.