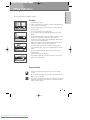
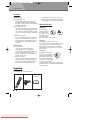
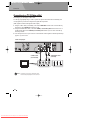
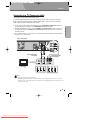
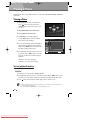
1
BDP-6003-English2008.12.56:19PM˘
` a
Blu-Ray Disc Player
BDP-6003
Instruction manual
Downloaded From Disc-Player.com Sherwood Manuals
BDP-6003-English2008.12.56:19PM˘
` 1
Safety Instructions
PRODUCT INFORMATION
Please keep the instruction manual in a safe place.
Precautions
• Read this booklet carefully.
• Make sure the rating of your household electricity supply matches that
shown on the back of your product.
• Read this page and chapter ‘Setup’ to help you set up and adjust your
product correctly.
• Do not put the product in a hot or humid place.
• Do not open the product. Get a qualified technician to carry out any
repairs.
• Do not connect the product to the power supply if you have just moved
it from a cold environment to a warm room. This can lead to
condensation inside the product, which can damage it. Wait for approx.
2 hrs for it to reach room temperature.
• Make sure the product is placed at least 10 cm apart from other home
appliances or obstacles to ensure sufficient ventilation.
• The product should not be exposed to dripping or splashing and no
objects filled with liquids, such as vases should be placed on top of the
product.
• Before a storm and/or lightning, unplug the product from the mains
supply and aerial.
• Put the product on a steady flat surface.
• Only clean the product with a soft, lint-free cloth. Do not use harsh or
alcohol- based cleaning agents.
For your own Safety
• There are no components in this product you can service or repair
yourself.
• Do not open the case of the product. Only allow a qualified engineer to
repair or service your product.
• This product is designed to work continuously. Switching it off (stand-by
mode) does not disconnect it from the mains. To disconnect it from the
mains you have to unplug it.
1
Downloaded From Disc-Player.com Sherwood Manuals
BDP-6003-English2008.12.56:19PM˘
` 2
Important Safeguards
CAUTION
RISK OF ELECTRIC SHOCK
DO NOT OPEN
CAUTION: TO REDUCE THE RISK OF ELECTRIC
SHOCK, DO NOT REMOVE COVER (OR
BACK). NO USER-SERVICEABLE
PARTS INSIDE. REFER SERVICING TO
QUALIFIED SERVICE PERSONNEL.
The lightning flash with arrowhead symbol,
within an equilateral triangle, is intended to
alert the user to the presence of uninsulated
‘dangerous voltage‘ within the product’s
enclosure that may be of sufficient magnitude
to constitute a risk of electric shock.
The exclamation point within an equilateral
triangle is intended to alert the user to the
presence of important operating and servicing
instructions in the literature accompanying the
appliance.
WARNING TO REDUCE THE RISK OF FIRE OR
CAUTION
CAUTION
ELECTRIC SHOCK, DO NOT EXPOSE
THIS APPLIANCE TO RAIN OR
MOISTURE.
TO PREVENT ELECTRIC SHOCK,
MATCH WIDE BLADE OF PLUG TO
WIDE SLOT, FULLY INSERT.
Any changes or modification in
construction of this device which
are not expressly approved by the
party responsible for compliance
could void the user’s authority to
operate the equipment.
• Make sure the unit should be placed at least
10 cm apart from the other home appliances
or the obstacles to get sufficient ventilation.
• This unit shall not be exposed to dripping or
splashing and no objects filled with liquids,
such as vases, shall be placed on this unit.
• Switching it off does not disconnect it from the
mains (stand-by). To disconnect it from the
mains, you have to unplug it.
2
Downloaded From Disc-Player.com Sherwood Manuals
IMPORTANT FOR LASER PRODUCTS
LASER
This Digital Video Disc Recorder
employs a Laser System. To ensure
proper use of this product please read
this owner’s manual carefully and
retain for future reference. Should the
unit require maintenance, contact an
authorised service location - see
service procedure.
Use of control adjustments or the
performance of procedures other than
those specified may result in
hazardous radiation exposure.
To prevent direct exposure to the laser
beam, do not try to open the enclosure.
Visible laser radiation when open and
interlocks defeated.
DO NOT STARE INTO THE BEAM.
DANGER Visible laser radiation when open and
interlock failed or defeated.
Avoid direct exposure to beam.
CLASS 1
LASER PRODUCT
CAUTION Do not open the top cover. There are
no user serviceable parts inside the
Unit; leave all servicing to qualified
service personnel.
✔ RoHS (Directive 2002/95/EC) Compliant
This environment-friendly product
does not contain the EU RoHS
restricted substances (Pb, Hg, Cd,
Cr6+, PBB, and PBDE).
BDP-6003-English2008.12.56:19PM˘
` 3
Important Safeguards
1
READ INSTRUCTIONS
All the safety and operating instructions should
be read before the unit is operated.
2
RETAIN INSTRUCTIONS
The safety and operating instructions should be
retained for future reference.
3
HEED WARNINGS
All warnings on the unit and in the operating
instructions should be adhered to.
4
FOLLOW INSTRUCTIONS
All operating and use instructions should be
followed.
5
CLEANING
Unplug this unit from the wall outlet before
cleaning. Do not use liquid cleaners or aerosol
cleaners. Use a damp cloth for cleaning.
6
ATTACHMENTS
Do not use attachments unless recommended by
the unit’s manufacturer as they may cause
hazards.
7
WATER AND MOISTURE
Do not use this unit near water- for example, near
a bath tub, wash bowl, kitchen sink or laundry
tub, in a wet basement, or near a swimming pool.
8
ACCESSORIES
Do not place this unit on an unstable, stand,
tripod, bracket, or table. The unit may fall,
causing serious injury to a child or adult as well
as serious damage to the unit. Use this unit only
with a cart, stand , tripod, bracket, or table
recommended by the manufacturer.
9
VENTILATION
Slots and openings in the case are provided for
ventilation to ensure reliable operation of the unit
and to protect it from overheating. These
openings must not be blocked or covered. These
openings must not be blocked by placing the unit
on a bed, sofa, rug, or other similar surface. This
unit should never be placed near or over a
radiator or heat radiator. This unit should not be
placed in a built-in installation such as a
bookcase or rack unless proper ventilation is
provided or the manufacturer’s instructions have
been adhered to.
10 POWER SOURCES
This unit should be operated only from the type of
power source indicated on the marking label. If
you are not sure of the type of power supply to
your home, consult your dealer or local power
company. For units intended to operate from
battery power, or other sources, refer to the
operating instructions.
11 POWER-CORD PROTECTION
Power-supply cords should be routed so that they
are not likely to be walked on or pinched by items
placed upon or against them, paying particular
attention to cords at plugs, mains sockets, and
the point where they exit from the unit. The
mains plug is used as the disconnect device, the
disconnect device shall remain readily operable.
12 LIGHTNING
For added protection for this unit during a
lightning storm, or when it is left unattended and
unused for long periods of time, unplug it from
the wall outlet and disconnect the antenna or
cable system. This will prevent damage to the
unit due to lightning and power line surges.
13 DISC TRAY
Keep your fingers well clear of the disc as it is
closing. It may cause serious personal injury.
14 OVERLOADING
Do not overload wall outlets of extension cords
as this can result in a risk of fire or electric shock.
15 OBJECT AND LIQUID ENTRY
Never push objects of any kind into this unit
through openings as they may touch dangerous
voltage points or ‘short-out’ parts that could
result in a fire or electric shock. Never spill liquid
of any kind on the unit.
16 BURDEN
Do not place a heavy object on or step on the
product. The object may fall, causing serious
personal injury and serious damage to the
product.
3
Downloaded From Disc-Player.com Sherwood Manuals
PRODUCT INFORMATION
This set has been designed and manufactured to
assure personal safety. Improper use can result in
electric shock or fire hazard. The safeguards
incorporated in this unit will protect you if you
observe the following procedures for installation, use
and servicing. This unit is fully transistorised and does
not contain any parts that can be repaired by the user.
BDP-6003-English2008.12.56:19PM˘
` 4
Important Safeguards
17 DISC
Do not use a cracked, deformed or repaired
disc. These discs are easily broken and may
cause serious personal injury and product
malfunction.
18 SERVICING
Do not attempt to service this unit yourself as
opening or removing covers may expose you to
dangerous voltage or other hazards. Refer all
servicing to qualified service personnel.
19 DAMAGE REQUIRING SERVICE
Unplug this unit from the wall outlet and refer
servicing to qualified service personnel under
the following conditions.
A. When the power-supply cord or plug is
damaged.
B. If liquid has been spilled, or objects have
fallen into the unit.
C. If the unit has been exposed to rain or
water.
D. If the unit does not operate normally by
following the operating instructions.
Adjust only those controls that are covered
by the operating instructions. Improper
adjustment of other controls may result in
damage and will often require extensive
work by a qualified technician to restore
the unit to its normal operation.
E. If the unit has been dropped or the cabinet
has been damaged.
F. When the unit exhibits a distinct change in
performance-this indicates a need for service.
20 REPLACEMENT PARTS
When replacement parts are required, have the
service technician verify that the replacements
he uses have the same safety characteristics as
the original parts. Use of replacements
specified by the unit manufacturer can prevent
fire, electric shock, or other hazards.
21 SAFETY CHECK
Upon completion of any service or repairs to
this unit, ask the service technician to perform
safety checks recommended by the
manufacturer to determine that the unit is in
safe operating condition.
22 WALL OR CEILING MOUNTING
The product should be mounted to a wall or
ceiling only as recommended by the
manufacturer.
4
Downloaded From Disc-Player.com Sherwood Manuals
23 HEAT
The product should be situated away from heat
sources such as radiators, heat registers,
stoves, or other products (including amplifiers)
that produce heat.
24 SAFE BATTERY USAGE
To prevent battery electrolyte leakage, which
may result in injury and damage to the unit or
other objects, observe the following
precautions;
A. All batteries must be installed with the
proper polarity.
B. Do not mix new with old or used batteries.
C. Only use batteries of the same type and
brand.
D. Remove the batteries when they are not to
be used for a long period time.
E. When the batteries have become
discharged, they must be disposed of in a
safe manner which complies with all
applicable laws.
25 WEEE (Waste of electrical and electronic
equipment)
The meaning of the symbol on
the product, its accessory or
packaging indicates that this
product shall not be treated as
household waste. Please,
dispose of this equipment at
your applicable collection point
for the recycling of electrical &
electronic equipments waste. In the European
Union and Other European countries which there
are separate collection systems for used electrical
and electronic product. By ensuring the correct
disposal of this product, you will help prevent
potential hazards to the environment and to
human health, which could otherwise be caused
by unsuitable waste handling of this product. The
recycling of materials will help conserve natural
resources. Please do not therefore dispose of your
old electrical and electronic equipment with your
household waste. For more detailed information
about recycling of this product, please contact
your local city office, your household waste
disposal service or the shop where you purchased
the product.
HOUSEHOLD USE ONLY.
BDP-6003-English2008.12.56:19PM˘
` 5
Table of Contents
PRODUCT INFORMATION
Product Information
Safety Instructions ....................................1
Important Safeguards ..............................2
Table of Contents ......................................5
Overview Features ...................................6
Identification of Controls...........................9
Front Panel ................................................................... 9
Operation Display Window ....................................... 10
Rear Panel.................................................................. 11
Remote Control .......................................................... 12
Connections
..............................................................14
Setup
On Screen Display Overview ..................23
Setup menu ............................................25
Setting up the Language options .............................. 25
Setting up the Video options ..................................... 26
Setting up the Audio options..................................... 28
Setting up the Media options.................................... 32
Setting up the General options ................................. 35
Playback
Playback functions .................................43
Playing a disc ............................................................. 43
Watching a Movie...................................45
Using the Display, Disc Menu & Pop Up Menu function 45
Various Playback functions........................................ 46
Listening to Music ...................................48
Playing an Audio CD (CD-DA) .................................... 48
Playing an MP3 file.................................................... 48
Various Playback functions........................................ 49
Viewing a Picture ...................................50
Viewing a Picture....................................................... 50
Various Playback functions........................................ 50
Appendix
Troubleshooting......................................52
Specification ...........................................54
5
Downloaded From Disc-Player.com Sherwood Manuals
BDP-6003-English2008.12.56:19PM˘
` 6
Overview Features
Overview
BD-ROM/DVD Playback
BD-ROM, DVD, MP3, JPEG, CD Stereo Audio, Dolby
True HD, DTS-HD audio output
HDMI OUTPUT
The HDMI connection carries standard high
definition video signals and multi-channel audio
signals to AV components such as HDMI equipped
TVs, in digital form without degradation.
USB INPUT
You can playback media files such as JPEG,MP3 in
the flash memories by USB port on the front panel.
BD PROFILE 2.0 Support
• CD-R (CD recordable) Audio and MP3 files
• CD-RW (CD rewritable) Audio and MP3 files
- This player is compatible with the PAL color
system only.
- NTSC discs will not play.
Regional code
Both the Blu-ray Disc Player and the discs are coded
by region. These regional codes must match in order
to play the disc. If the codes do not match, the disc
will not play.
The Region Number for this Blu-ray Disc Player is
described on the rear panel of the Blu-ray Disc Player.
You can see the various function through the
Ethernet port.
2
- Subtitle Updates
- Download new Movie trailer
ALL
- the play games on the BD-disc and also online game
- Advanced Applications : online shopping, Chatting
(Blu-ray region code)
(DVD-Video region code)
TOUCH SENSOR Button
You can enjoy the stylish Touch Sensor button on
the Front Panel.
COMPONENT/COMPOSITE/S-VIDEO/COAXIAL/OPTICAL
OUTPUT
You will be able to select various Video/Audio output
- Video output : Component, Composite, S-video
- Audio output : Analog 2ch, Optical, Coaxial
5.1ch Analog Output
You can enjoy the 5.1ch Analog sound by
connecting Analog outputs to the 5.1 terminals of
your Amplifier.
Which discs you can use
The following discs can be used in your
Blu-ray Player.
• BD-ROM
• DVD Video (Digital Versatile Disc)
• DVD-RW/-R
• DVD+RW/+R
• Audio CD (Compact Disc Digital Audio)
6
Downloaded From Disc-Player.com Sherwood Manuals
Disc-related Terms
Title (DVD/BD only)
The main film, accompanying feature content, or
music album. Each title is assigned a title reference
number enabling you to locate it easily.
Chapter (DVD/BD only)
Sections of a movie or a musical piece that are
smaller than titles. A title is composed of one or
several chapters. Each chapter is assigned a number
to enable you to easily locate the chapter you want.
Depending on the disc, chapters may not be labeled.
Track (Audio CD only)
Sections of a musical piece on an audio CD. Each
track is assigned a number, enabling you to easily
locate the track you want.
About Symbols
About the
Symbol
‘ ‘ may appear on the TV screen during operation.
This icon means the function explained in this
User’s Guide is not available on that specific disc.
BDP-6003-English2008.12.56:19PM˘
` 7
Overview Features
• If you use a bad quality USB cable, the USB
device might not be recognized.
BD (Blu-ray Disc or BD) is an optical disc storage
media format meant for High Definition audio,video
and high density data.
• The compatibility with MP3 players and digital
still cameras is somewhat restricted.
The name Blu-ray Disc is derived from the blue laser
used to read and write this type of disc.
It can store 25GB(single layer) or 50GB(dual layer) on
a single sided disc. That's 5 to 10times more
capacity than a normal DVD.
The BD-ROM format for movie distribution supports
three highly advanced video codes, including
AVC,VC-1 and MPEG-2.
Will BD Player work with any kind of TV
set?
If you are to enjoy the full picture quality of the High
Definition from BD then the player should be
connected to a 1080 High Definition TV via HDMI
connection.
But, our Blu-ray Disc player is also designed to work
with the conventioned TV that has either a composite
or S-Video input.
What is a 1080 High Definition?
1080 High Definition has a resolution of 1920 pixels x
1080 lines.
HD broadcasts are only available as a maximum of
1080 lines interlaced, while Blu-ray Disc can provide
1080 lines progressively scanned.
- This Blu-ray player can playback only mp3
format contents.
- This Blu-ray player does not support the audio
contents encrypted by DRM (Digital Right
Management).
• Either USB hub device or hub extension
connectivity is not supported.
• There are lots of kinds of USB devices. Some of
the USB devices mentioned above might not be
compatible with this Blu-ray player. In other
words, the USB host function of this product
does not guarantee the compatibility with all of
USB devices.
• This Blu-ray player supports both the high and
full speed USB devices (Does not support Low
speed devices).
Copyright Notice
This product incorporates copyright protection
technology that is protected by U.S.patents and other
intellectual property rights owned by Macrovision
Corporation and other rights owners. Use of this
copyright protection technology must be authorized
by Macrovision Corporation, and is intended for
home and other limited viewing uses only unless
otherwise authorized by Macrovision corporation.
Reverse engineering or disassembly is prohibited.
What is USB (Universal Serial Bus)?
USB is an external bus standard that supports data
transfer rates of 12 Mbps. A single USB port can be
used to connect up to 127 peripheral devices, such as
digital cameras, MP3 players, and removable
storage.USB also supports Plug-and-Play installation
and hot plugging.
• The USB port provides USB 2.0 Full Speed
connectivity and also backward compatibility
with USB 1.1 (USB 1.0) devices.
7
Downloaded From Disc-Player.com Sherwood Manuals
PRODUCT INFORMATION
What is BD?
BDP-6003-English2008.12.56:19PM˘
` 8
Overview Features
Precautions
Handling the Unit
When shipping the unit
The original shipping carton and packing
materials will come in handy. For maximum
protection, re-pack the unit as it was originally
packaged at the factory.
When setting up the unit
The picture and sound of a nearby TV, VCR, or
radio may be distorted during playback. In this
case, position the unit away from the TV, VCR,
or radio, or turn off the unit after removing the
disc.
To keep the surface clean
Do not use volatile liquids, such as insecticide
spray, near the unit. Do not leave rubber or
plastic products in contact with the unit for a
long period of time. They will leave marks on
the surface.
Cleaning the Unit
To clean the cabinet
Use a soft, dry cloth. If the surfaces are
extremely dirty, use a soft cloth lightly
moistened with a mild detergent solution. Do
not use strong solvents such as alcohol,
benzine, or thinners, as these might damage
the surface of the unit.
To obtain a clear picture
This set is a high-tech, precision device. If the
optical pick-up lens and disc drive parts are
dirty or worn, the picture quality will be poor.
Regular inspection and maintenance are
Unpacking
Check that you have the following items :
Remote control Video/Audio cord
8
Downloaded From Disc-Player.com Sherwood Manuals
Instruction
manual
recommended after every 1,000 hours of use.
(This depends on the operating environment.)
For details, please contact your nearest dealer.
Notes about the discs
Handling Discs
Do not touch the
playback side of the
disc. Hold the disc
by the edges so that
fingerprints will not
get on the surface.
Do not stick paper or tape on the disc.
Storing Discs
After playing, store the disc in its case.
Do not expose the disc to direct sunlight or sources
of heat, or leave it in a parked car exposed to
direct sunlight, as there may be a considerable
temperature increase inside the car, which could
distort the disc.
Cleaning Discs
Fingerprints and dust on the
disc can cause poor picture
quality and sound distortion.
Before playing, clean the disc
with a clean cloth. Wipe the
disc from the centre outward.
Do not use strong solvents
such as alcohol, benzine, thinners, commercially
available cleaners, or anti-static spray intended for
older vinyl records.
BDP-6003-English2008.12.56:19PM˘
` 9
Identification of Controls
PRODUCT INFORMATION
Main body (front panel)
! Disc Tray
To load/unload a disc.
* USB port
To input a USB device.
@ STANDBY/ON button
To switch the unit On or Off.
( REMOTE SENSOR
Receives a IR signal from the remote control.
# OPEN/CLOSE button
To open or close the disc tray.
) Operation Display Window
Displays operation of device. For more
information, see “Operation Display Window”
at page 10.
$ PLAY/PAUSE button
To play or pause a loaded disc.
% STOP
To stop disc playback.
^ PREV button
To skip back from the current title, chapter or
track.
& NEXT button
To skip forward to the next title, chapter or
track.
9
Downloaded From Disc-Player.com Sherwood Manuals
BDP-6003-English2008.12.56:19PM˘
` 10
Identification of Controls
Operation Display Window
!
@
$%
^
! HDMI output indicator
@ Playing time/ current status indicator
# REPEAT MODE indicator
$ Playback indicator
% Pause indicator
^ Video output resolution indicators
& Disc Type indicators
10
Downloaded From Disc-Player.com Sherwood Manuals
#
&
BDP-6003-English2008.12.56:19PM˘
` 11
Identification of Controls
PRODUCT INFORMATION
Main body (Rear Panel)
@ #
!
1
)
(
! POWER SUPPLY SOCKET WIRE
Supply unit power from the wall socket.
@ VIDEO OUT
Video output (composite) that you can
connect to your TV or AV receiver using the
supplied video cable.
# AUDIO OUT (2Ch)
Stereo analog outputs for connection to your
TV or AV receiver or stereo system.
$ COMPONENT VIDEO OUT
Connects to TV or monitor equipped with
Component input. This provides sharper &
cleaner picture than composite video.
% AUDIO OUT (5.1Ch)
Multi-channel (5.1Ch) analog audio outputs
for connection to an AV receiver with multichannel analog audio inputs.
* &
$ %
^
* S-VIDEO OUTPUT
Connects to TV or monitor equipped with SVIDEO input.
( Fan
The fan always runs when the power is on.
Ensure a minimum of 4 inches of clear space
on all sides of the fan when installing the
product.
) HDMI OUT
Audio/Video High definition multimedia digital
output terminal. Use the HDMI cable, connect
this HDMI output terminal to the HDMI input
terminal on your TV for the best quality
picture.
1 LAN
Connect this LAN terminal to the LAN terminal
on your modem for software upgrades.
^ DIGITAL AUDIO COAXIAL OUT
Connects digital audio under play mode into
an AV amplifier or a receiver equipped with
digital audio decoder for you to enjoy the
theatre-quality sound in your home.
& DIGITAL AUDIO OPTICAL OUT
Connects digital audio under play mode into
an AV amplifier or a receiver equipped with
digital audio decoder for you to enjoy the
theatre-quality sound in your home.
11
Downloaded From Disc-Player.com Sherwood Manuals
BDP-6003-English2008.12.56:19PM˘
` 12
Identification of Controls
Remote Control
! Open/Close button
Opens and closes the disc tray.
@ Power button
!
@
Turns on, or sets the player to standby mode.
# Number buttons
Enters the MP3, Photo files or Audio CD numbers etc.
#
#
$ Repeat Playback button
Allows you to repeat a title, chapter, track or disc.
% Play/Pause button
Press to play/pause a disc.
$
%
^
&
*
(
6
^ Stop button
Press to stop a disc.
7
8 & PREVIOUS button (move into a previous
9
chapter or track) Press to skip backwards.
0
* REVERSE SEARCH button
“
Press to search a disc backwards.
‘ ( Pop-up Menu button
Use this to enter the pop-up menu.
)
) Direction buttons
Move/Select in OSD.
1
2
3
4
5
+
1 Return button
Returns to the previous display.
2 Display button
Displays current setting or disc status.
=
Q 3 COLOR Buttons : RED(A), GREEN (B),
YELLOW(C), BLUE(D)
Press to navigate the video display during BD-ROM
disc playback.
4 Audio button
Use this to access various audio functions on a disc
(BD/DVD).
5 Subtitle button
Press this to switch the BD/DVD’s subtitle language.
6 REPEAT A-B Button
Allows you to repeat playback of a certain section.
12
Downloaded From Disc-Player.com Sherwood Manuals
BDP-6003-English2008.12.56:19PM˘
` 13
Identification of Controls
PRODUCT INFORMATION
7 SLOW Button
Each time this button is pressed, the disc will play
slowly.
!
@
8 FORWARD SEARCH Button
Press to search a disc forwards.
9 NEXT button (move into a next chapter or
track) Press to skip forwards.
#
#
0 Home menu Button
Use this to enter the home menu.
“ Disc menu Button
$
%
^
&
*
(
6
Use this to enter the disc menu.
‘ OK Button
7
Confirms menu selections. Displays information on the
8
current and next programmes.
9
0 + PIP Button
Use this to enter the PIP mode.
“
‘
)
= ZOOM Button
Enlarges photos on JPEG discs. Enlarges the video
image.
Q ANGLE Button
1
2
3
4
5
+
Displays a screen in multi angles (only in multi-angle
supported BD/DVD).
Remote Control Operation Range
=
Q
Point the remote control at the remote sensor
and press the buttons.
Distance: Within 23 ft (7 m) of the remote
sensor.
Angle: Within 30° in each direction of the
remote sensor.
Remote Control Battery Installation
Detach the battery cover on the
rear of the remote control, and
insert two AA batteries. Make
sure the polarities (+ and -) are
aligned correctly.
Caution
Do not mix old and new batteries. Never mix
different types of batteries (standard, alkaline, etc.).
13
Downloaded From Disc-Player.com Sherwood Manuals
BDP-6003-English2008.12.56:19PM˘
` 14
Connections
This section involves various methods of connecting the Blu-ray Disc Player to other external components.
Turn off all equipment before operation.
To enable you to set up your new Blu-ray Disc Player, it must be connected it to your TV using
either a COMPONENT or S-Video and associated AUDIO cable. If a unit has HDMI connection, you
can use a HDMI cable as well.
Connecting to a TV with an Audio/Video cable
1 Using the included Audio/Video cable, connect the VIDEO (yellow) / AUDIO (red and white) OUT
on the rear of the Blu-ray Disc Player to the VIDEO (yellow) / AUDIO (red and white) IN terminals
of your TV.
2 Turn on the Blu-ray Disc Player and TV.
3 Press the input selector on your TV remote control until the Video signal from the Blu-ray Disc Player
appears on the TV screen.
Back of the player
Audio/Video cable
(included)
Television
NOTE
High definition video cannot be output with this connection. Use connection below (HDMI cable connection) for
high definition video.
14
Downloaded From Disc-Player.com Sherwood Manuals
BDP-6003-English2008.12.56:19PM˘
` 15
Connections
Connecting to a TV with an HDMI cable
1 Using the included HDMI-HDMI cable, connect the HDMI OUT terminal on the rear of the Blu-ray Disc
Player to the HDMI IN terminal of your TV.
2 Turn on the Blu-ray Disc Player and TV.
3 Press the input selector on your TV remote control until the HDMI signal from the Blu-ray Disc Player
appears on your TV screen.
CONNECTIONS
NOTE
You can enjoy high quality, digital video and audio using only HDMI cable.
Back of the player
HDMI cable
(not included)
Television
NOTE
Depending on your TV, certain HDMI output resolutions may not work.
About HDMI
HDMI (High Definition Multimedia Interface) supports both video and audio on a single digital
connection for use with DVD Players, Set-Top Boxes, and other AV devices. HDMI was developed to
provide the technologies of HDCP (High Definition Contents Protection). HDCP is used to protect
digital content transmitted and received.
HDMI has the capability to support standard, enhanced, or high-definition video plus standard to
multi-channel surround-sound audio, HDMI features include uncompressed digital video, a bandwidth
of up to 8 gigabytes per second, one connector (instead of several cables and connectors), and
communication between the AV source and AV devices such as DTVs.
HDMI, the HDMI logo and High-Definition Multimedia Interface are trademarks or registered
trademarks of HDMI licensing LLC.
15
Downloaded From Disc-Player.com Sherwood Manuals
BDP-6003-English2008.12.56:19PM˘
` 16
Connections
Connecting to a TV (S-Video cable)
Connecting to your TV using an S-Video cable.
You will enjoy high quality images. S-Video separates the picture element into black and white(Y) and
color(C) signals to present clearer images than regular video input mode.
(Audio signals are delivered through the audio output.)
1 Using an S-Video cable (not included), connect the S-VIDEO OUT terminal on the rear of the Blu-ray
Disc Player to the S-VIDEO IN terminal of your TV.
2 Using the included audio cables, connect the AUDIO (red and white) OUT terminals on the rear of
the Blu-ray Disc Player to the AUDIO (red and white) IN terminals of your TV. Turn on the Blu-ray
Disc Player and TV.
3 Press the input selector on your TV remote control until the S-Video signal from the Blu-ray Disc Player
appears on your TV screen.
Back of the player
S-Video cable
(not included)
Television
NOTE • Unplug the yellow plug of Audio/Video cable.
• Actual video quality depends on the television.
16
Downloaded From Disc-Player.com Sherwood Manuals
Audio/Video cable
(included)
BDP-6003-English2008.12.56:19PM˘
` 17
Connections
Connecting to a TV (Component cable)
Connecting to your TV using Component video cables.
You will enjoy high quality and accurate color reproduction images. Component video separates the
picture element into black and white(Y), blue(PB), red(PR) signals to present clear and clean images.
(Audio signals are delivered through the audio output.)
Back of the player
Audio/Video cable
(included)
Component cable
(not included)
Television
NOTE
• Unplug the yellow plug of Audio/Video cable.
• Depending on the manufacturer, the component terminals on your TV may be marked ‘R-Y, B-Y, Y’ or ‘Cr, Cb, Y’
instead of ‘Pr, Pb, Y’. The number and position of terminals may vary depending on the TV set. Please refer to the
user's manual of your TV.
17
Downloaded From Disc-Player.com Sherwood Manuals
CONNECTIONS
1 Using component video cables (not included), connect the COMPONENT VIDEO OUT terminals on
the rear of the Blu-ray Disc Player to the COMPONENT IN terminals of your TV.
2 Using the included audio cables, connect the AUDIO (red and white) OUT terminals on the rear of
the Blu-ray Disc Player to the AUDIO (red and white) IN terminals of your TV. Turn on the Blu-ray
Disc Player and TV.
3 Press the input selector on your TV remote control until the Component signal from the Blu-ray Disc
Player appears on the TV screen.
BDP-6003-English2008.12.56:19PM˘
` 18
Connections
Connecting to an AUDIO SYSTEM (2 CHANNEL AMPLIFIER)
1 Using the audio cables provided, connect the AUDIO (red and white) OUT terminals on the rear of
the Blu-ray Disc Player to the AUDIO (red and white) IN terminals of your Amplifier.
2 Using the video signal cable(s), connect the HDMI, COMPONENT, S-VIDEO, or VIDEO OUT
terminals on the rear of the Blu-ray Disc Player to the HDMI, COMPONENT, S-VIDEO, or VIDEO IN
terminal of your TV as described on pages 14 to 17.
3 Turn on the Blu-ray Disc Player, TV and Amplifier.
4 Press the input select button of the Amplifier to select the external input in order to hear sound from
the Blu-ray Disc Player. Refer to your Amplifier's user manual to set the Amplifier's audio input.
Back of the player
Audio/Video cable
(included)
2-Channel
Stereo Amplifier
• Manufactured under license from Dolby Laboratories. ‘Dolby‘ and the double-D symbol are
trademarks of Dolby Laboratories.
• Manufactured under license under U.S. Patent #: 5,451,942 and other U.S. and worldwide
patents issued and pending. DTS and DTS Digital Out are registered trademarks and the
DTS logos and Symbol are trademarks of DTS, Inc. © 1996-2007 DTS, Inc. All Rights
Reserved.
18
Downloaded From Disc-Player.com Sherwood Manuals
BDP-6003-English2008.12.56:19PM˘
` 19
Connections
Connecting to an AUDIO SYSTEM (5.1 CHANNEL AMPLIFIER)
Back of the player
5.1 Channel
Amplifier
19
Downloaded From Disc-Player.com Sherwood Manuals
CONNECTIONS
1 Using the audio cables, connect the 5.1 ANALOG AUDIO OUT (Front R, Front L, CENTER,
SUBWOOFER, Surround L, Surround R) terminals on the rear of the Blu-ray Disc Player to the 5.1
Channel ANALOG AUDIO IN (Front R, Front L, CENTER, SUBWOOFER, Surround L, Surround R)
terminals of your Amplifier.
2 Using the video signal cable(s), connect the HDMI, COMPONENT, S-VIDEO, or VIDEO OUT
terminals on the rear of the Blu-ray Disc Player to the HDMI, COMPONENT, S-VIDEO, or VIDEO IN
terminal of your TV as described on pages 14 to 17.
3 Turn on the Blu-ray Disc Player, TV and Amplifier.
4 Press the input select button of the Amplifier to select external input in order to hear sound from the
Blu-ray Disc Player. Refer to your Amplifier's user manual to set the Amplifier's audio input.
BDP-6003-English2008.12.56:19PM˘
` 20
Connections
Connecting to an AUDIO SYSTEM (DOLBY DIGITAL, DTS AMPLIFIER)
1 If using an optical cable (not included), connect the DIGITAL AUDIO OUT (OPTICAL) terminal on the
rear of the Blu-ray Disc Player to the DIGITAL AUDIO IN (OPTICAL) terminal of your Amplifier. If
using a coaxial cable (not included), connect the DIGITAL AUDIO OUT (COAXIAL) terminal on the
rear of the Blu-ray Disc Player to the DIGITAL AUDIO IN (COAXIAL) terminal of the Amplifier.
2 Using the video signal cable(s), connect the HDMI, COMPONENT, S-VIDEO, or VIDEO OUT
terminals on the rear of the Blu-ray Disc Player to the HDMI, COMPONENT, S-VIDEO, or VIDEO IN
terminal of your TV as described on pages 14 to 17.
3 Turn on the Blu-ray Disc Player, TV and Amplifier.
4 Press the input select button of the Amplifier to select the external input in order to hear sound from
the Blu-ray Disc Player. Refer to your Amplifier's user manual to set the Amplifier's audio input.
Back of the player
OR
Amplifier
NOTE
• The position of terminals may vary depending on the Amplifier. Please refer to the user's manual of your
Amplifier.
• When using this connection, Blu-ray Discs with an LPCM audio soundtrack will only be heard over the front two
channels.
20
Downloaded From Disc-Player.com Sherwood Manuals
BDP-6003-English2008.12.56:19PM˘
` 21
Connections
Connecting to an AUDIO SYSTEM (HDMI SUPPORTED AMPLIFIER)
Television
Amplifier
Back of the player
NOTE
• The position of terminals may vary depending on the Amplifier. Please refer to the user's manual of your
Amplifier.
21
Downloaded From Disc-Player.com Sherwood Manuals
CONNECTIONS
1 Using the included HDMI cable, connect the HDMI OUT terminal on the rear of the Blu-ray Disc Player
to the HDMI IN terminal of your Amplifier.
2 Using the HDMI-HDMI cable, connect the HDMI OUT terminal of the Amplifier to the HDMI IN
terminal of your TV.
3 Turn on the Blu-ray Disc Player, TV and Amplifier.
4 Press the input select button of the Amplifier to select the external input in order to hear sound from
the Blu-ray Disc Player. Refer to your Amplifier's user manual to set the Amplifier's audio input.
BDP-6003-English2008.12.56:19PM˘
` 22
Connections
Connecting to Internet site for Software Upgrades
Using the Direct LAN Cable (UTP cable), connect the LAN terminal on the rear of the Blu-ray Disc Player
to the LAN terminal of your modem.
- Connect to the Internet for future software upgrades.
Back of the player
NOTE
• See pages 37~38 for the Software Upgrade procedure.
22
Downloaded From Disc-Player.com Sherwood Manuals
BDP-6003-English2008.12.56:19PM˘
` 23
On-Screen Display Overview
The On-Screen Display provides feedback on the status of the Blu-ray disc Player and/or the currently
loaded disc. To access the On-Screen Display (or OSD), press [Display].
Disc Information options for BD/DVD-Video
• Press [DISPLAY] once during playback.
• Press […†] buttons to select an item.
• Press [œ √] buttons to make the desired setup or
press the OK button.
• You can see the detailed operation below or next
page. (Title, chapter, time, audio...)
• Press [DISPLAY] again to exit the Disc information
option menu and wait the 3 seconds.
BD-VIDEO
TITLE
CHAPTER
PLAYBACK TIME
AUDIO
SUBTITLE
REPEAT
œ
1/43
3/16
00:30:00
CONNECTIONS
√ PLAY
Total Time
: 02 :24 : 19
Resolution
: 1920x1080p24
VIDEO Format : MPEG2
√
ENG/6
ENG
Off
Elapsed time/ Search To Time
Shows the current title number and total number
of titles, and skips to the desired title number.
Shows the elapsed playing time [h:m:s], and skips
to the desired time.
1 Press [DISPLAY] during playback. The on-
1 Press [DISPLAY] during playback. The on-
screen display appears on the TV screen.
2 Then ‘TITLE’ line is already selected.
3 Use [œ √] to change the title numbers. Or
press the OK button to call the submenu. Use
[…†] to select the desired title number and
press OK to confirm your choice.
• Press the RETURN button to return back to the
previous step.
screen display appears on the TV screen.
2 Use […†] to select the ‘PLAYBACK TIME’ line
on the on-screen display. You can see the
elapsed playing time.
3 Press [OK] to modify the time. Use […†] to
change the time and use [œ √] to move left
or right.
4 Press [OK] to confirm the start time. Playback
starts from the changed time on the disc.
• For titles recorded without DVD navigation
information, such as recorded from broadcast
programmes or line input, ‘Elapsed time/ Search
To Time’ function is not available.
• Press the RETURN button to return back to the
previous step.
Chapter
Shows the current chapter number and total
number of chapters, and skips to the desired
chapter number.
1 Press [DISPLAY] during playback. The onscreen display appears on the TV screen.
2 Use […†] to select the ‘CHAPTER‘ line on the
on-screen display.
3 Use [œ √] to change the chapter numbers.Or
press the OK button to call the submenu. Use
[…†] to select the desired chapter number
and press OK to confirm your choice.
• Press the RETURN button to return back to the
previous step.
Audio
Shows the current audio type and audio
soundtrack language and changes the setting.
1 Press [DISPLAY] during playback. The onscreen display appears on the TV screen.
2 Use […†] to select the ‘AUDIO‘ line on the
on-screen display.
3
Use [œ/√] to select the desired audio
language.
23
Downloaded From Disc-Player.com Sherwood Manuals
SETUP
Title
BDP-6003-English2008.12.56:19PM˘
` 24
On-Screen Display Overview
Subtitle
Repeat
Shows the current subtitle language, and changes
the setting.
This function can be used to repeatedly play a title,
chapter or disc.
1 Press [DISPLAY] during playback. The on-
1 Press [DISPLAY] during playback. The on-
screen display appears on the TV screen.
2 Use […†] to select the ‘SUBTITLE‘ line on the
on-screen display.
3
Use [œ/√] to select the desired subtitle
language.
screen display appears on the TV screen.
2 Use […†] to select the ‘REPEAT‘ line on the
on-screen display.
3
Use [œ/√] to select the desired repeat type
(Title/Chapter/All/Off).
• Repeat A-B is only displayed, in case of REPEAT
A-B activated.
Displaying Disc Information
• Press [DISPLAY] twice during playback.
Press [DISPLAY] twice to display the information
displayed on-screen.
Playback status
Playback status (Text)
√
x1
Hour unit
00:00 24:02
PLAY 59:34
Scan speed
information
Total Track Time
48:04 1:12:08 1:38:08 2:00:10 2:24:19
Ch. 1/2
Current Chapter
Playback progressive bar
Current time(h/m/s)]
Press Playback mode (PLAY, STOP, REW, FF, PREV,
NEXT and SLOW] button, then the following
information displayed on-screen.
Playback status Playback status (Text)
√
x1
Scan speed
information
PLAY
59:56
Ch. 1/2
Current time(h/m/s)] Current Chapter
24
Downloaded From Disc-Player.com Sherwood Manuals
Some discs may not provide all the features shown
in the on-screen display examples.
BDP-6003-English2008.12.56:19PM˘
` 25
Setup menu
The “Setup” display appears with the related items. Various features of the Blu-ray disc player can be
adjusted in the SETUP menu (e.g., when changing the connected device or the audio/video output, etc.).
Setting up the Language options
A user can set OSD language, Menu language, Audio language
and Subtitle language.
If you set these language options, in advance, they will come
up automatically every time you watch a movie.
1 With the unit in Stop mode, press the HOME
MENU button.
2 Press the œ √ buttons to select Setup, then
✔ English
OSD Language
Menu Language
French
Audio Language
Spanish
Subtitle Language
German
Russian
press the OK button.
3 Press the † button to select Language setup,
then press the √ button. Language setup menu
will be displayed.
†
language option, press the √ button.
OK
• OSD language : For the on-screen menu of your
Blu-ray Disc Player.
Select
…†œ √ Move
OSD Language
Auto
✔ English
Menu Language
Audio Language
French
Subtitle Language
Spanish
Portugues
Italian
German
Dutch
• Menu language : For the disc menu contained
on the disc.
• Audio language : For the disc audio language.
• Subtitle language : For the disc subtitles.
• “OSD” means “On Screen Display”.
• Auto: When you select “Auto” in “Menu language” or
“Audio language” item, one of the recorded languages
on the disc is automatically selected.
• Other: When you select "Menu language"," Audio
language" or "Subtitle language", select another
language and then press number buttons then confirm
to enter the corresponding 4-digit number according to
the language code list on page 55.
• Off: When you select “Off” in “Subtitle language”
item, the subtitles are removed on the screen.
OK
Select
…†œ √ Move
OK
Select
…†œ √ Move
OSD Language
Off
✔ English
Menu Language
Audio Language
French
Subtitle Language
Spanish
Portugues
Italian
German
Dutch
language, then press the OK button to confirm
your preferred language.
OK
Select
…†œ √ Move
…
†
RETURN Back
OSD Language
Auto
✔ English
Menu Language
Audio Language
French
Subtitle Language
Spanish
Portugues
Italian
German
Dutch
5 Press the …† buttons to select the desired
• The selected language will only appear if it is
supported on the disc.
• Press the œ button to return to the previous menu.
Press the RETURN or HOME MENU button to exit
the menu.
RETURN Back
…
†
RETURN Back
…
†
RETURN Back
25
Downloaded From Disc-Player.com Sherwood Manuals
SETUP
4 Press the …† buttons to select the desired
…
BDP-6003-English2008.12.56:19PM˘
` 26
Setup menu
Setting up the Video options
A user can set up a connected TV condition and screen.
This function depends on the disc or TV type. It may not work with some discs or TVs.
TV Aspect Ratio
1 With the unit in Stop mode, press the HOME
MENU button.
2 Press the œ √ buttons to select Setup, then
press the OK button.
3 Video setup is already selected, Then press the
√ button. Video setup menu will be displayed.
√
4 If TV Aspect Ratio is selected, press the √
TV Aspect Ratio
Resolution
button to select the desired screen setting.
• 4:3 Letter Box : Select when you
want to see the total 16:9 ratio
screen BD/DVD supplies, even
though you have a TV with a 4:3
ratio screen. Black bars will
appear at the top and bottom of
the screen.
OK
Select
…†œ √ Move
TV Aspect Ratio
Resolution
RETURN Back
4:3 Pan & Scan
✔ 4:3 Letter Box
16:9 Wide
• 4:3 Pan-Scan : Select this for
conventional size TV when you
want to see the central portion of
the 16:9 screen. (Extreme left and
right side of movie picture will be
cut off.)
OK
Select
…†œ √ Move
RETURN Back
• 16:9 Wide : You can view the full 16:9 picture on your widescreen TV.
5 Press the …† buttons to select the desired screen setting, then press the OK button to confirm
your choice.
• Depending on the disc type, some aspect ratios may not be available.
• Press the œ button to return to the previous menu. Press the RETURN or HOME MENU button to exit the menu.
26
Downloaded From Disc-Player.com Sherwood Manuals
BDP-6003-English2008.12.56:19PM˘
` 27
Setup menu
Resolution
Sets the output resolution of the Component and HDMI video signal.
1 Follow steps 1-3 as shown under ‘TV Aspect
Ratio’.
2 Press the …† buttons to select ‘Resolution’,
then press the √ button.
The number in 576i, 576p, 720p, 1080i and 1080p
and 1080p24 indicates the number of lines of video.
The i and p indicate interlace and progressive scan,
respectively.
√
TV Aspect Ratio
Resolution
SETUP
• 1080p24 : Outputs 1080 lines of progressive
video. For connection to a 1080p24-compatible TV
using the HDMI OUT jack.
• 1080p : Outputs 1080 lines of progressive video.
• 1080i : Outputs 1080 lines of interlaced video.
OK
Select
…†œ √ Move
RETURN Back
• 720p : Outputs 720 lines of progressive video.
• 576p : Outputs 576 lines progressive video.
TV Aspect Ratio
Resolution
• 576i : Outputs 576 lines of interlaced video.
If the connected TV does not support the movie
frame or the selected resolution, you will see the
following message:
If you select Yes and the resolution is not supported,
the TV's screen will be blank.
OK
Select
576i
576p
720p
✔ 1080i
1080p
1080p24
…†œ √ Move
RETURN Back
3 Press the …† buttons to select the desired video
resolution, then press the OK button to confirm
your choice.
• Press the œ button to return to the previous menu. Press the RETURN or HOME MENU button to exit the
menu.
• When playing BD-Video recorded in 24 frames, this unit displays each frame at 1/24 second intervals. So it
needs to be set only when the unit is connected to a TV with an HDMI terminal that supports 1080/24P
input.
27
Downloaded From Disc-Player.com Sherwood Manuals
BDP-6003-English2008.12.56:19PM˘
` 28
Setup menu
Setting up the Audio options
Allows you to set up the Audio device and sound status depending on the audio system being used with
the player.
Digital Output
1 With the unit in Stop mode, press the HOME
MENU button.
2 Press the œ √ buttons to select Setup, then
press the OK button.
3 Press the † button to select Audio setup, then
press the √ button. Audio setup menu will be
displayed.
√
4 Press the …† buttons to select ‘Digital
Digital Output(S/PDIF)
Digital Output(HDMI)
Speaker Setup
PCM Down Sampling
Dynamic Compression
Output(S/PDIF)’ or ‘Digital Output(HDMI)’
then press the √ button.
• Bitstream : Select this when the Blu-ray disc
player is connected to a Dolby Digital or DTS
decoder (or an amplifier or other equipment
with a Dolby Digital or DTS decoder) through
coaxial or optical port. Please refer to the page
20. When a Dolby Digital, DTS or MPEG DISC is
played, select this, the coaxial or optical port
will output in the corresponding digital format
(source code).
OK
Select
…†œ √ Move
RETURN Back
Digital Output(S/PDIF) ✔ Bitstream
Digital Output(HDMI)
PCM
Speaker Setup
PCM Down Sampling
Dynamic Compression
• PCM : Select this when the Blu-ray disc player
…†œ √ Move
OK
Select
RETURN Back
is connected with a TV or a power amplifier
through an audio cord. And select this when your equipment does not decode the respective
audio format.
5 Press the …† buttons to select the desired item, then press the OK button to confirm your
choice.
• If you have selected a LPCM sound track on a disc, the output will automatically be set to PCM.
• When playing a Dolby Digital movie make sure the Digital Output is set to Bitstream.
• If the HDMI device (Receiver, TV) is not compatible with compressed formats (Dolby digital, DTS), the
audio signal outputs as PCM.
• Press the œ button to return to the previous menu. Press the RETURN or HOME MENU button to exit the
menu.
• When PCM is selected, these audio formats are output as PCM 5.1ch from the HDMI OUT and PCM 2ch
from Digital Audio Output.
28
Downloaded From Disc-Player.com Sherwood Manuals
BDP-6003-English2008.12.56:19PM˘
` 29
Setup menu
Speaker Setup
If you have connected this player to an Amp/Receiver or Home theater via the 5.1 channel Analog
outputs you need to set the Speaker Options for the best sound.
1 Follow steps 1-3 as shown under ‘Digital
Digital Output(S/PDIF)
Digital Output(HDMI)
Speaker Setup
PCM Down Sampling
Dynamic Compression
Output’.
2 Press the …† buttons to select ‘Speaker
Setup’, then press the √ and the OK button.
Then 5.1CH screen will be displayed.
OK
3 Select the speaker setting that needs adjusting by
Select
…†œ √ Move
Adjust the setting by pressing the œ √ buttons.
5.1 CH
SETUP
Digital Output(S/PDIF)
Digital Output(HDMI)
Speaker Setup
PCM Down Sampling
Dynamic Compression
pressing …† buttons.
RETURN Back
• SPEAKER SETUP
- C (Center) - Large, Small or None
- L/R (Left front speaker/Right front
speaker) - Large or Small
OK
- LS/RS (Left Surround speaker/Right
Surround speaker) - Large, Small or None
…†œ √ Move
RETURN Back
Speaker Setup - 5.1 CH
- LFE (Subwoofer) - LFE or None
• SPEAKER
• Large : Select when the speaker supports
low-frequency (under 100Hz) reproduction.
• Small : Select when the speaker does not
support low-frequency reproduction.
• None : Select to disable the speakers.
Select
L
Large
R
Large
Ls
Large
Rs
Large
C
Large
LFE
LFE
Confirm
OK
Select
…†œ √ Move
Test Tone
RETURN Back
4 When done, use the …† buttons to select “Confirm” and press the OK button to confirm your
choice.
• Test tone will be sent to L-> C -> R -> RS -> LS -> LFE in order so you can make sure the speakers are set
up correctly.
• Press the …† buttons to return to the previous menu. Press the RETURN button to exit the menu.
• If LFE is on, bass below 100Hz will be outputted through a Subwoofer instead of the speakers.
• If LFE is off and front speaker is set to Large, LFE sound will be outputted through the Front Speaker.
29
Downloaded From Disc-Player.com Sherwood Manuals
BDP-6003-English2008.12.56:19PM˘
` 30
Setup menu
PCM Down Sampling
When the Amplifier connected to the player is not 96KHz compatible, you can select the ‘OFF’, then
96KHz signals will be down converted to 48KHz.
Set ‘PCM Down Sampling’ to ON or OFF for this effect.
1 With the unit in Stop mode, press the HOME
MENU button.
2 Press the œ √ buttons to select Setup, then
press the OK button.
3 Press the † button to select Audio setup, then
press the √ button. Audio setup menu will be
displayed.
4 Press the …† buttons to select ‘PCM Down
√
Sampling’ then press the √ button.
• On : Signals are converted to 48KHz.
• Off : When the Amplifier connected to the Bluray disc player is 96KHz compatible,
signals are output as 96KHz.
OK
then press the OK button to confirm your choice.
OK
Downloaded From Disc-Player.com Sherwood Manuals
Select
…†œ √ Move
RETURN Back
Digital Output(S/PDIF) ✔ On
Digital Output(HDMI)
Off
Speaker Setup
PCM Down Sampling
Dynamic Compression
5 Press the …† buttons to select the desired item,
30
Digital Output(S/PDIF)
Digital Output(HDMI)
Speaker Setup
PCM Down Sampling
Dynamic Compression
Select
…†œ √ Move
RETURN Back
BDP-6003-English2008.12.56:19PM˘
` 31
Setup menu
Dynamic Compression
While watching movies, you may wish to compress the dynamic range of the audio output (the
difference between the loudest and softest passages).
This allows you to listen to a movie at lower volume without losing clarity of sound.
Set ‘Dynamic Compression’ to ON or OFF for this effect.
1 With the unit in Stop mode, press the HOME
MENU button.
2 Press the œ √ buttons to select Setup, then
press the OK button.
3 Press the † button to select Audio setup, then
4 Press the …† buttons to select ‘Dynamic
√
Compression’ then press the √ button.
• On : Select this, if you hear loud sounds softer
and soft sounds louder.
• Off : Select this to view a program in the
dynamic range as recorded in the disc.
OK
SETUP
press the √ button. Audio setup menu will be
displayed.
Digital Output(S/PDIF)
Digital Output(HDMI)
Speaker Setup
PCM Down Sampling
Dynamic Compression
Select
…†œ √ Move
RETURN Back
Digital Output(S/PDIF) ✔ On
Digital Output(HDMI)
Off
Speaker Setup
PCM Down Sampling
Dynamic Compression
5 Press the …† buttons to select the desired item,
then press the OK button to confirm your choice.
OK
Select
…†œ √ Move
RETURN Back
31
Downloaded From Disc-Player.com Sherwood Manuals
BDP-6003-English2008.12.56:19PM˘
` 32
Setup menu
Setting up Media (Parental Lock) options
This function works in conjunction with BD/DVDs that have been assigned a rating which helps you
control the types of BD/DVDs that your family watches.
Change Password
1 With the unit in Stop mode, press the HOME
Change Password Enter New Password
DVD Parental Lock
BD Parental Lock
MENU button.
2 Press the œ √ buttons to select Setup, then
√
press the OK button.
3 Press the † button to select Parental setup,
OK
then press the œ √ button. Parental setup menu
will be displayed.
Select
…†œ √ Move
RETURN Back
Change Password Enter New Password
DVD Parental Lock
Current System
BD Parental LockEnter Password
4 Press the √ button to select ‘Enter New
password’, then press the OK button. “Enter
Current System Password” message will be
displayed. Enter the current password using the
number buttons on the remote control.
Cancel
OK
5 Enter the 4-digit new password using the number
Select
…†œ √ Move
RETURN Back
Change Password Enter New Password
DVD Parental Lock
Enter New System Password
BD Parental Lock
buttons on the remote control. Then press the
OK button to confirm.
Confirm
You will be asked for the password when playing
restricted discs or when changing the control
level.
Cancel
OK
Select
…†œ √ Move
RETURN Back
• If you forget your password for “Parental Lock” ;
1. remove the disc.
2. you will need to reset the player (page 34). Note that all the settings you made also return to their
defaults
• Press the œ button to return to the previous menu. Press the RETURN or HOME MENU button to exit the
menu.
• Initial password is ‘0000’.
Don’t forget your password after changing password.
32
Downloaded From Disc-Player.com Sherwood Manuals
BDP-6003-English2008.12.56:19PM˘
` 33
Setup menu
DVD Parental Lock
1 Follow steps 1-3 as shown under ‘Change
Password’.
2 Press the …† buttons to select ‘DVD Parental
Lock’, then press the √ button to select ‘Enter
BD Lock Level’. Press √ button.
3 ”Enter current system password” message will
Change Password
DVD Parental Lock
BD Parental Lock
4 When done, use the …† buttons to select the
desired rating level and press the OK button to
confirm your choice.
OK
For example, if you select up to Level 6, discs that
contain Level 7, 8 will not play. A larger number
indicates that the program is intended for adult
use only. Level 1 is the most restrictive and Level
8 is the least. Level 0 has no limit.
Select
…†œ √ Move
✔ Level 0 - No Limit
Level 1 - Kid Safe
Level 2 - G
Level 3 - PG
Level 4 - PG13
Level 5 - PGR
Level 6 - R
Level 7 - NC 17
Level 8 - Adult
RETURN Back
✔ Level 0 - No Limit
Change Password
Level 1 - Kid Safe
DVD Parental Lock
Level 2 - G
BD Parental LockEnter Current System
Password
Level 3 - PG
Level 4 - PG13
Cancel
Level 5 - PGR
Level 6 - R
Level 7 - NC 17
Level 8 - Adult
OK
Select
…†œ √ Move
RETURN Back
• Press the œ button to return to the previous menu.
Press the RETURN or HOME MENU button to exit the
menu.
33
Downloaded From Disc-Player.com Sherwood Manuals
SETUP
be displayed. Enter the 4-digit password using
the number buttons on the remote control.
BDP-6003-English2008.12.56:19PM˘
` 34
Setup menu
BD Parental Lock
1 Follow steps 1-3 as shown under ‘Change
Password’.
2 Press the …† buttons to select ‘BD Parental
Lock’, then press the √ button to select ‘Enter
BD Lock Level’. And press the OK button.
3 ”Enter current system password” message will
Change Password Enter BD Lock Level
DVD Parental Lock
BD Parental Lock
Enter Current System
be displayed. Enter the 4-digit password using
the number buttons on the remote control.
Password
Cancel
4 When done, use the number buttons on the
remote control to select the desired Age limit
level from 0 to 255 year and press the OK button
to confirm your choice.
OK
Select
…†œ √ Move
RETURN Back
Change Password Enter BD Lock Level
DVD Parental Lock
BD Parental LockEnter BD Lock Level
(0-255)
2 5 5
Confirm
Cancel
• Press the œ button to return to the previous menu.
Press the RETURN or HOME MENU button to exit the
menu.
34
Downloaded From Disc-Player.com Sherwood Manuals
OK
Select
…†œ √ Move
RETURN Back
BDP-6003-English2008.12.56:19PM˘
` 35
Setup menu
Setting up General options
System Info
As the name suggests this lists the current version of software installed in this unit. System
information helps service personnel identify firmware information about your Blu-ray disc player in
case service is required.
1 With the unit in Stop mode, press the HOME
MENU button.
2 Press the œ √ buttons to select Setup, then
press the OK button.
press the √ button. General setup menu will be
displayed.
SETUP
System Info
Network Settings
Default Reset
Slideshow Interval
Local Storage
3 Press the † button to select General setup, then
√
4 Press the …† buttons to select ‘System Info’,
OK
Select
…†œ √ Move
RETURN Back
then you can see detailed information about the
current firmware.
System Info
Network Settings
Default Reset
Slideshow Interval
Local Storage
OK
Select
…†œ √ Move
B/E Version:
LB2-20081030
F/E Version:
CP12
Micom Version:
08.05
RETURN Back
• Press the œ button to return to the previous menu. Press the RETURN or HOME MENU button to exit the
menu.
35
Downloaded From Disc-Player.com Sherwood Manuals
BDP-6003-English2008.12.56:19PM˘
` 36
Setup menu
Network Settings
In some rare cases, the firmware upgrade may not succeed.
If this occurs, you may need to set up your IP address, Subnet Mask, Gateway and DNS by following
the steps below.
1 Follow steps 1-3 as shown under ‘System Info’.
System Info
Network Settings
Default Reset
Slideshow Interval
Local Storage
2 Press the …† buttons to select ‘Network
Settings’, then press the √ button to select
‘DHCP, IP, DNS...’ and press the OK button.
You will see a menu that allows you to make
network settings.
√
OK
…†œ √ Move
Select
RETURN Back
3 Press the …† buttons to select ‘DHCP’, then
press the OK button. You can set the DHCP to On
or Off.
System Info
Network Settings
Default Reset
Slideshow Interval
Local Storage
• If DHCP is set to On, you can’t select IP Address,
Subnet Mask or Gateway.
• If DHCP is set to Off, DNS selection is fixed to manual.
Press the …† buttons to select a desired item
and press the OK button to confirm your choice.
4 Press the …† buttons to select ‘DNS’, then
press the OK button. You can set the DNS to
Automatic or Manual.
• If DNS is set to Automatic, you can’t select
Primary/Secondary DNS.
Press the …† buttons to select a desired item
and press the OK button to confirm your choice.
OK
…†œ √ Move
Select
DHCP
IP Address
Subnet Mask
Gateway
DNS
Primary DNS
Secondary DNS
On
0 . 0 . 0 . 0
0 . 0 . 0 . 0
0 . 0 . 0 . 0
Manual
0 . 0 . 0 . 0
0 . 0 . 0 . 0
Save
OK
• When you select an item, use the number and …†œ √ buttons.
• To exit the setting mode of the DHCP or DNS, use the œ √ buttons.
Downloaded From Disc-Player.com Sherwood Manuals
RETURN Back
Network Settings
Select
Cancel
…†œ √ Move
5 When done, use the …† buttons to select “Save”, then press the OK button.
36
DHCP, IP, DNS...
Network Update
RETURN Back
BDP-6003-English2008.12.56:19PM˘
` 37
Setup menu
Network Update
When you wish to upgrade your Blu-ray player's firmware, check the following precondition.
First, connect this player's LAN terminal to the LAN terminal on your modem (see page 22).
After that, you must plug in external USB flash memory & check the network setting (see page36) and
follow the steps below.
1 With the unit in No Disc mode, follow steps 1-3
System Info
Network Settings
Default Reset
Slideshow Interval
Local Storage
as shown under ‘System Info’.
2 Press the …† buttons to select ‘Network
Settings’, then press the √ button and the †
button to select ‘Network Update ’ and press
the OK button.
√
OK
Select
…†œ √ Move
RETURN Back
the cable or network connection status.
System Info
Network Settings
Default Reset
Slideshow Interval
Local Storage
• If the upgrade is possible : You will see
information on the current and new versions of
firmware in a message box.
• If the upgrade is not possible : You will see the
following description in the message box.
OK
- If the cable is not connected :"Ethernet cable is
not connected. Please, check the Ethernet cable"
…†œ √ Move
RETURN Back
DHCP, IP, DNS...
System Info
Network Update
Network Settings
Default Reset
Slideshow Interval
Now, Update Checking.
Local Storage Please wait....
- If the network connection has failed : "This
system can not connected to internet for update.
Please, check the network setup"
- If update server is not operated : " Update
Server is under maintenance. Please try again
later"
Select
DHCP, IP, DNS...
Network Update
OK
Select
…†œ √ Move
RETURN Back
- If no later version is released (the latest version
has been already installed) : "The latest version of the firmware is already installed. There is
no need to update."
4 To perform the system upgrade, press the œ √ buttons to select ‘Yes’ and then press the OK
button.
37
Downloaded From Disc-Player.com Sherwood Manuals
SETUP
3 You will see a window that allows you to check
BDP-6003-English2008.12.56:19PM˘
` 38
Setup menu
5 The system update gets started.
DHCP, IP, DNS...
System Info
Network Update
Network Settings
Default Reset
Slideshow Interval
Downloading update data...
Local Storage
Please, do not turn off the power.
6 When the file download is done, you will see a
window that allows you to update firmware. To
perform the firmware update, press the œ √
buttons to select ‘Yes’ and then press the OK
button.
Cancel
OK
• You will see a message about the upgrade
process.
Select
…†œ √ Move
DHCP, IP, DNS...
System Info
Network Update
Network Settings
Default Reset
SlideshowUpdate
Interval
Firmware download is finished.
Do you want to update Firmware?
Local Storage
• If you do not want to update firmware, select
‘No’ and then press the OK button.
Start
OK
…†œ √ Move
RETURN Back
Please, do not turn off the power.
OK
Downloaded From Disc-Player.com Sherwood Manuals
Select
Cancel
DHCP, IP, DNS...
System Info
Network Update
Network Settings
Default Reset
Slideshow Interval
Firmware Update.
Local Storage Now, Processing...
• When the Network upgrade is done, check the
firmware details in the Firmware Info menu.
• Do not turn off the player during the System
Upgrade Otherwise, the player may not work
properly.
• When the network setting is not correct, upgrade
will be not operated properly.
38
RETURN Back
Select
…†œ √ Move
RETURN Back
BDP-6003-English2008.12.56:19PM˘
` 39
Setup menu
Default Reset
You can return all of the player settings to their factory defaults.
1 With the unit in Stop mode, press the HOME
MENU button.
2 Press the œ √ buttons to select Setup, then
press the OK button.
3 Press the † button to select General setup, then
press the √ button. General setup menu will be
displayed.
4 Press the …† buttons to select ‘Default Reset’
then press the √ button. Select ‘YES’ and press
the OK button, then your Blu-ray disc player is
reset to its original factory settings.
SETUP
System Info
Network Settings
Default Reset
Slideshow Interval
Local Storage
√
OK
Select
…†œ √ Move
System Info
Network Settings
Default Reset
Slideshow Interval
Local Storage
• After Restoring Defaults, the unit is powered off
automatically.
• Press the œ button to return to the previous menu.
Press the RETURN or HOME MENU button to exit the
menu.
OK
Select
…†œ √ Move
RETURN Back
Yes
No
RETURN Back
39
Downloaded From Disc-Player.com Sherwood Manuals
BDP-6003-English2008.12.56:19PM˘
` 40
Setup menu
Slideshow Interval
You can display still pictures one by one at a constant interval.
1 With the unit in Stop mode, press the HOME
MENU button.
2 Press the œ √ buttons to select Setup, then
press the OK button.
3 Press the † button to select General setup, then
press the √ button. General setup menu will be
displayed.
System Info
Network Settings
Default Reset
Slideshow Interval
Local Storage
4 Press the …† buttons to select ‘Slideshow
Interval’ then press the √ button.
√
• 5/10/15/20 secs : The player display still
pictures one by one at the selected interval.
OK
5 Press the …† buttons to select the desired item,
Select
• Press the œ button to return to the previous menu.
Press the RETURN or HOME MENU button to exit the
menu.
OK
Downloaded From Disc-Player.com Sherwood Manuals
RETURN Back
✔ 5 sec
System Info
10 sec
Network Settings
15 sec
Default Reset
20 sec
Slideshow Interval
Local Storage
then press the OK button to confirm your choice.
40
…†œ √ Move
Select
…†œ √ Move
RETURN Back
BDP-6003-English2008.12.56:19PM˘
` 41
Setup menu
Local Storage
Local storage(USB Memory) is used on the player for storing Blu-ray Disc content.
Playback of the content in local storage is dependent on the disc.
Clear ADA (Application Data Area)
- To delete BD-J Disc Index information in your USB
1 You must Insert your USB memory device at USB
port in front of the panel.
2 With the unit in Stop mode, press the HOME
3 Press the œ √ buttons to select Setup, then
SETUP
System Info
Network Settings
Default Reset
Slideshow Interval
Local Storage
MENU button.
press the OK button.
√
4 Press the † button to select General setup, then
OK
press the √ button. General setup menu will be
displayed.
…†œ √ Move
RETURN Back
✔ Clear ADA
System Info
Clear BUDA
Network Settings
Default Reset
Slideshow Interval
Do you want to clear ADA?
Local Storage
5 Press the …† buttons to select ‘Local Storage’
then press the √ button. Select ‘Clear ADA’ and
press the OK button. Select ‘Yes’ and press the
OK button, then your Blu-ray disc player deletes
the data information in your USB.
Select
Yes
OK
Select
…†œ √ Move
No
RETURN Back
41
Downloaded From Disc-Player.com Sherwood Manuals
BDP-6003-English2008.12.56:19PM˘
` 42
Setup menu
Clear BUDA (Binding Unit Data Area)
System Info
Network Settings
Default Reset
Slideshow Interval
Local Storage
- To delete BD-J Disc Data information in your USB
1 Follow steps 1-4 as shown under 'Clear ADA' of
Local storage.
√
OK
Select
…†œ √ Move
RETURN Back
2 Press the …† buttons to select ‘Local Storage’
then press the √ button. Select ‘Clear BUDA’
and press the OK button. Select ‘Yes’ and press
the OK button, then your Blu-ray disc player
deletes the data in your USB.
Clear ADA
System Info
Network Settings ✔ Clear BUDA
Default Reset
Slideshow Interval Do you want to clear BUDA?
Local Storage
Yes
No
Format As EXT3
- To format the USB memory as a EXT3 format
OK
1 Follow steps 1-4 as shown under 'Clear ADA' of
…†œ √ Move
System Info
Network Settings
Default Reset
Slideshow Interval
Local Storage
Local storage.
2 Press the …† buttons to select ‘Local Storage’
then press the √ button. Select ‘Format As
EXT3’ and press the OK button. Select ‘Yes’ and
press the OK button, then your Blu-ray disc player
formats the USB memory as a EXT3 format.
Select
RETURN Back
Clear ADA
Clear BUDA
Do you want to format?
Yes
OK
Select
…†œ √ Move
No
RETURN Back
• In most cases, the Contents directory stores related files to each title. (These directories contain downloaded
files from the Disc)
• At least, USB memory size must be larger than 1GB for using the local storage.
Screen Saver
- When the player is left in the stop or resume stop mode for more than 10 minutes without any user
interface, a screen saver will appear on your TV.
• During screen saver mode, Blu-ray player can recover by pressing any button including panel button.
Auto Power Off
- When the player is left in the screen saver mode for more than 30 minutes, the power will
automatically turn off.
42
Downloaded From Disc-Player.com Sherwood Manuals
BDP-6003-English2008.12.56:19PM˘
` 43
Playback functions
Most of the BD playback operations are common to DVD or BD. This section covers BD/DVD/CD playback
in general, together with the basic operation of the player.
Playing a Disc
• Turn on your TV and set it to the correct Video Input (the input the Blu-ray player is connected to).
• If you connected an external Audio System, turn on your Audio System and set it to the correct Audio
Input.
1 After plugging in the player, the first time you press "
" button on the front panel or the
"POWER" button on the remote control to turn the unit on.
2 Press [OPEN/CLOSE] to open the disc tray.
3 Load your disc in the tray with the playback side down
(label side up).
4 Press [OPEN/CLOSE] to close the tray.
5 'LOAD' appears on the front panel display, and playback
starts automatically. If playback does not start, press [PLAY
√].
6 Press
to stop playback.
7 Press
to remove the disc.
8 Press
to turn off the player.
1 If you want to search at a faster speed on the BD/DVD, press [REW (œœ)] or [FF (√√)] during
playback. The Blu-ray disc player will go into Search mode.
2 Press [REW] or [FF] to select the desired speed: √√ X2, √√ X4, √√ X8, √√ X16, √√ X32, √
PLAY, √√ X2 ... (forward) or œœ X2, œœ X4, œœ X8 œœ X16, œœ X32, √PLAY, œœ X2 ...
(backward).
Skipping Tracks
When playing a BD/DVD, if you press the NEXT (√√■) button, it moves to the next title, chapter or
track. If you press the PREVIOUS (■œœ)] button, it moves to the beginning of the previous title,
chapter or track.
43
Downloaded From Disc-Player.com Sherwood Manuals
PLAYBACK
Fast Forward/Backward
BDP-6003-English2008.12.56:19PM˘
` 44
Playback functions
Still Picture and Frame-by-Frame (STEP) Playback
1 Press [PLAY/PAUSE] during playback. The Blu-ray disc player will go into Pause mode.
2 You can advance the picture frame-by-frame by pressing [SLOW ( ■ √)] repeatedly during Pause
mode.
Slow Motion
Press "SLOW" button to play slowly. Enjoy slow motions by the following steps.
■ √x1/2 ➝ ■ √x1/4 ➝ ■ √x1/8 ➝ ■ √x1/16 ➝■ √x1/32 ➝ √PLAY ➝ ■ √x1/2 ...
• To return to normal speed playback, press the PLAY/PAUSE ( √/■ ■ ) button.
Slow motion operates only in the forward direction.
External Storage(USB)
Some BD discs (profile 1.1(Bonus view,PIP) & profile 2.0 (BD-LIVE)) need to Local storage
capability.
This is used for storing audio/video and subtitle updates with BD disc.
So your Blu-ray player has to use USB flash memory as a external storage in case above.
When you see the following message on your TV screen during playing the BD-ROM disc, "Please
plug in a USB which has at least 1GB space" then plug in the USB flash memory and enjoy the
movie or music.
44
Downloaded From Disc-Player.com Sherwood Manuals
BDP-6003-English2008.12.56:19PM˘
` 45
Watching a Movie
Using the Display, Disc Menu & Pop up Menu function
Using the Display
1 During playback, press DISPLAY button on the
remote control.
2 Press the […†] buttons to select the desired
item.
3 Use the [œ √…†] buttons to make the desired
setup and then press the OK button.
BD-VIDEO
√ PLAY
Total Time
: 02 :24 : 19
Resolution
: 1920x1080p24
VIDEO Format : MPEG2
TITLE
CHAPTER
PLAYBACK TIME
AUDIO
SUBTITLE
REPEAT
œ
1/43
3/16
00:30:00
√
ENG/6
ENG
Off
4 To make the screen disappear, press the DISPLAY
button again.
For more information, see “Disc information options for BD/DVD-Video” at page 23.
Using the Disc Menu
1 During playback, press DISC MENU button on the remote control.
2 Use the [œ √…†] buttons to make the desired setup, then press the OK button.
• The Disc menu setup items may vary from disc to disc.
PLAYBACK
Using the Pop up Menu
1 During playback, press POP UP MENU button on the remote control.
2 Use the [œ √…†] buttons to make the desired setup, then press the OK button.
• The Pop up menu setup options may vary from disc to disc.
Changing the Audio Language
Press [AUDIO] and then press [AUDIO] repeatedly to
hear a different audio language or audio track when
playing multi-language BD/DVD.
Audio Format: English AC3 2ch/2
You can also change the Audio Language by
using the DISPLAY button. (For more information,
see “Disc information options for BD/DVD-Video” at
page 23.)
• A BD disc can contain up to 32 audio languages and a DVD up to 8.
45
Downloaded From Disc-Player.com Sherwood Manuals
BDP-6003-English2008.12.56:19PM˘
` 46
Watching a Movie
Various playback functions
Subtitles
Press [SUBTITLE] and then press [SUBTITLE]
repeatedly during playback to select among all
available subtitle languages.
You can also change the Subtitle Language by
using the DISPLAY button. (For more information, see
“Disc information options for BD/DVD-Video” in 24p.)
Subtitle Language: English
Zoom
The Zoom function allows you to magnify the video
image and scroll around the enlarged image.
1 Press [ZOOM] during Play mode to activate the
Zoom function.
Each press of the [ZOOM] button changes the
Zoom level as follows:
200% ➝ 400% ➝ 800% ➝ 1600% ➝
100% (normal size)
2 Use the [œ √…†] buttons to scroll around the
zoomed picture.
3 To resume normal playback, press [ZOOM]
repeatedly until the 100% (normal picture)
appears.
• The Zoom function may not work on some DVDs (ex. Jpg..)
Angle
Some discs have images with different screen angles,
you may select among them. For example, when you
watch a running train, you may select to watch it
from the front, the left window or the right window
without stopping it.
1 Press [ANGLE] during Play mode to activate the
angle function.
2 Keep pressing [ANGLE] till the preferred angle
appears.
• Multi Angle function is limited to a DVD disc supporting multi angle information.
46
Downloaded From Disc-Player.com Sherwood Manuals
200%
BDP-6003-English2008.12.56:19PM˘
` 47
Watching a Movie
Repeat
When play a disc, this function can be used to
repeatedly play a title, chapter or disc.
Press "REPEAT" button, the screen shows in order.
Title
When playing a BD/DVD disc :
Title ➝ Chapter ➝ Off
• Title : Current title is repeated.
• Chapter : Current chapter is repeated.
• Off : Repeat playback is cancelled.
• Depending on the disc, this function may not work.
A-B (DVD only)
You may repeat a defined period from A to B.
1 At the point where you want to start the repeat
Repeat A/B A-
playback, press [A-B].
2 At the point where you want to end the repeat
playback, press [A-B] again. Then a defined
period from A to B is played back.
PLAYBACK
3 Press [A-B] to exit from repeat playback mode.
• Depending on the disc, this function may not work.
PIP
You can use the PIP feature to simultaneously play
secondary video and secondary audio.
Alternately, you can press the PIP button on the
remote control to activate or deactivate the PIP.
• Secondary video can be played from a disc
compatible with the PIP function.
• Depending on the disc, this function may not work.
47
Downloaded From Disc-Player.com Sherwood Manuals
BDP-6003-English2008.12.56:19PM˘
` 48
Listening to Music
Playing an Audio CD (CD-DA)
1 After plugging in the player, the first time you
press " " button on the front panel or the
"POWER" button on the remote control to turn
the unit on.
2 Press [OPEN/CLOSE] to open the disc tray.
3 Insert an Audio CD (CD-DA) into the disc tray.
4 The CD plays automaically. If it doesn’t playback,
use the [œ √] buttons to select the “Music”
menu. Then press the OK button.
MUSIC
DISC
√
œ
5 The music list screen will be displayed. And the
File 1/26
Track 1
00:18
03:36
√ Track 1
Track 2
DISC
USB
Track 3
first track is will be played back. Use the […†]
buttons to select the track you want to play, and
then press the OK or PLAY button.
Track 4
Track 5
Track 6
Track 7
†
…
Select † Move
OK
√■ ■ Play
RETURN Exit
Playing an MP3 file
1 Follow steps 1-2 as shown under ‘Playing an
MUSIC
√
03:36
œ
DISC
USB
✔ √ 03.mp3
04.mp3
05.mp3
3 “HOME MENU” screen will be displayed.
Use the [œ √] buttons to select the “MUSIC”
menu. Then press the OK button.
File1/45
03.mp3
00:18
Audio CD (CD-DA)’.
2 Insert an MP3 disc into the disc tray.
DVD/
06.mp3
07.mp3
08.mp3
OK
Select
…
† Move
√■ ■ Play
RETURN Exit
4 You can go to the Media selection menu (DISC or
USB) by using the [œ ] button at the top folder.
And press the […†] buttons to select the media type (DISC or USB) you want to play.
5 Press [√] button. Then The music list screen will be selected. Use the […†] buttons to select
the file you want to play, and then press the OK or PLAY button.
48
Downloaded From Disc-Player.com Sherwood Manuals
BDP-6003-English2008.12.56:19PM˘
` 49
Listening to music
Various playback functions
Skipping Tracks (Files)
During playback, if you press the NEXT (√√■) button, it moves to the next track (file) and playing
it. If you press the PREVIOUS (■œœ)] button, it moves to the beginning of the previous track (file)
and playing it.
Fast Forward/Backward (only Audio CD (CD-DA)
1 If you want to search at a faster speed on the Audio-CD, press [REW (œœ)] or [FF (√√)] during
playback. The Blu-ray disc player will go into Search mode.
2 Press [REW] or [FF] to select the desired speed: √√ X2, √√ X4, √√ X8, √√ X16, √√ X32
(forward) or œœ X2, œœ X4, œœ X8 œœ X16, œœ X32 (backward).
• Press the PLAY button to return to normal playback.
Repeat Audio CD (CD-DA) & MP3
During playback, press the REPEAT button repeatedly to select the repeat mode you want.
When playing an Audio CD (CD-DA):
Normal status ➝ All ➝ Track
PLAYBACK
• Normal status : Tracks on a disc are played in the order in which they were recorded on the
disc.
• All : All tracks are repeated.
• Track : Current track is repeated.
• Off : Repeat playback is cancelled.
When playing an MP3 disc:
Normal status ➝ All ➝ Track
• Normal status : Current file is played.
• All : Current file is repeated.
• Track : Current track is repeated.
• Off : Repeat playback is cancelled.
Pause mode (only Audio CD (CD-DA)
Press [PLAY/PAUSE] during playback. The Blu-ray disc player will go into Pause mode.
49
Downloaded From Disc-Player.com Sherwood Manuals
BDP-6003-English2008.12.56:19PM˘
` 50
Viewing a Picture
This Blu-ray Disc Player can play JPEG Picture files on a disc such as CD-R/RW, DVD+R/RW, DVD-R/RW or
USB memory.
Viewing a Picture
1 After plugging in the player, the first time you
press " " button on the front panel or the
"POWER" button on the remote control to turn
the unit on.
2 Press [OPEN/CLOSE] to open the disc tray.
3 Insert a JPEG disc into the disc tray.
4 “HOME MENU” screen will be displayed.
Use the [œ √] buttons to select the “PHOTO”
menu. Then press the OK button.
PHOTO
DISC/4Mega Pixel JPEG
œ
File 4/281
DISC/
IMG_0044.JPG
5 You can go to the Media selection menu (DISC or
USB) by using the [œ ] button at the top folder.
And press the […†] buttons to select the media
type (DISC or USB) you want to play.
IMG_0045.JPG
IMG_0046.JPG
DISC
USB
IMG_0047.JPG
IMG_0048.JPG
IMG_0049.JPG
IMG_0050.JPG
IMG_0051.JPG
6 Press [√] button. Then the photo list screen will
OK
Select
…
† Move
√■ ■ Play
RETURN Exit
be selected. Use the […†] buttons to select the
photo file you want to view, and then press the
OK button.
• √ button : to select the next image
• œ button : to select the previous image
Various playback functions
Slide Show
1 Follow steps 1-5 as shown under ‘Viewing a Picture’.
2 Press [√] button. Then the photo list screen will be selected. Use the […†] buttons to select
the photo file you want to play, and then press the PLAY button.Then the Slide Show starts.
3 Press [ ] button to stop Slide Show and the player returns to browser screen.
• You can set the time interval of slide show in General part of SETUP menu. (For more information, see
“Slide Show Interval” at page 40)
• Press the RETURN or HOME MENU button to exit the PHOTO list screen.
50
Downloaded From Disc-Player.com Sherwood Manuals
BDP-6003-English2008.12.56:19PM˘
` 51
Listening to music
Skipping photo Files manually
During playback, if you press the NEXT (√√■) or √ button, it moves to the next image (file). If you
press the PREVIOUS (■œœ)] or œ button, it moves to the previous image (file).
Rotate the image
When playing JPEG, you can rotate the image in various direction by using the […†] buttons.
• … button : to rotate the image (90 degrees to clock wise)
• † button : to rotate the image (90 degrees to counter clock wise)
Zoom
This function is only available for still pictures smaller than 640 x 480.
1 When playing JPEG, press the ZOOM button repeatedly to select the zoom mode you want.
• ZOOM : Normal status (100%) ➝ 125% ➝ 150% ➝ 200%
2 Press "UP/DOWN/LEFT/RIGHT“[…†œ √] button to move the enlarged picture.
• When zooming in, the picture may be cut off.
PLAYBACK
Repeat JPEG files
During playback, press the REPEAT button repeatedly to select the repeat mode you want.
When playing a JPEG disc:
All ➝ Off
• All : All files are repeated.
• Off : Repeat playback is cancelled.
51
Downloaded From Disc-Player.com Sherwood Manuals
BDP-6003-English2008.12.56:19PM˘
` 52
Troubleshooting
Check the following guide for the possible cause of a problem before contacting customer support.
Symptom
Cause
Solution
No power.
The power cord is disconnected.
Plug the power cord into the wall outlet
securely.
No picture.
The TV is not set to receive Blu-ray
disc player signal output.
Select the appropriate video input on the
TV so the picture from the Blu-ray disc
player appears on the TV screen.
Connect the video cable securely.
The video cable is not connected
securely.
The TV power is turned off.
Turn on the TV.
The equipment connected with the
audio cable is not set to receive Bluray disc player signal output.
The audio cables are not connected
securely.
The power on the equipment
connected with the audio cable is
turned off.
The audio cables are damaged.
Select the correct input mode on the audio
receiver so you can listen to the sound
from the Blu-ray disc player.
Connect the audio cables securely.
Playback picture is poor.
The disc is dirty.
Clean the disc.
Blu-ray disc player does
not start playback.
No disc is inserted.
Insert a disc. (Check that the disc
indicator on the front panel display is lit.)
Insert a playable disc. (Check the disc
type, color system, and regional code.)
Place the disc with the playback side
down.
Place the disc on the disc tray correctly
inside the guide.
No sound.
An unplayable disc is inserted.
The disc is placed upside down.
The disc is not placed within the
guide.
Turn on the equipment connected with the
audio cable.
Replace with new ones.
The disc is dirty.
The Parental Control level is set.
Clean the disc.
Cancel the Parental Control function or
change the rating level.
5.1 channel sound is not
being reproduced.
5.1 channel sound is reproduced only
when the following conditions are
met. :
1.The Blu-ray Disc Player is connected
with the proper Amplifier
2.The disc is recorded with 5.1
channel sound.
Check whether the disc being played has
the “5.1 ch” mark on the outside.
Check if your audio system is connected
and working properly.
In a SETUP Menu, is the Digital Output set
to Bitstream?
Disc Menu doesn’t
appear.
The disc has no Disc menu.
Check if the disc has a Menu.
Play mode differs from
the Setup Menu
selection.
The disc is not encoded with the
corresponding function.
Some of the functions selected in the
Setup Menu may not work properly.
52
Downloaded From Disc-Player.com Sherwood Manuals
BDP-6003-English2008.12.56:19PM˘
` 53
Troubleshooting
Symptom
Solution
No HDMI output.
Check the connection between the TV and the HDMI jack of the Blu-ray Disc
Player.
Check if your TV supports 576i, 576p, 720p, 1080i, 1080p or 1080p24 HDMI input
resolution.
Abnormal HDMI output
screen.
If random noise appears on the screen, it means that TV does not support
HDCP (High-bandwidth Digital Content Protection).
Moisture Condensation
Moisture condensation can occur:
In locations where moisture condensation may occur:
When the Blu-ray Disc Player is moved from a cold
place to a warm place.
Keep the Blu-ray Disc Player plugged into an AC
power outlet with the power on. This will help
prevent condensation.
Under extremely humid conditions.
When condensation has occurred, wait a few hours for
the Blu-ray Disc Player to dry before using it.
APPENDIX
53
Downloaded From Disc-Player.com Sherwood Manuals
BDP-6003-English2008.12.56:19PM˘
` 54
Specifications
General
Power requirements
Power consumption
AC200V-240V~, 50/60 Hz
23W
(Standby:0.9W)
Dimensions(approx.)
435 x 55 x 353 mm (w x h x d)
Mass (approx.)
Net : 3.4kg Gross : 4.5kg
Operating temperature 41°F to 95°F (5°C to 35°C)
Operating humidity
5% to 90%
Signal system
PAL Color
Video Output
Composite Video
Component Video
S-Video
1 channel : 1.0 Vp-p (75Ω load)
BD/DVD : 576i
Y : 1.0 Vp-p (75Ω load)
Pr : 0.70 Vp-p (75Ω load)
Pb : 0.70 Vp-p (75Ω load)
BD/DVD : 1080i, 720p, 576p, 576i
Luminance Signal : 1.0 Vp-p (75Ω load)
Chrominance Signal : 0.3 Vp-p (75Ω load)
BD/DVD : 576i
Video/Audio
HDMI
19pin (HDMI standard, Type A) Output format
• Video : 1080p/1080i/ 720p/ 576p/ 576i
• Audio : 192KHz/ 96KHz/ 48KHz/ 44.1KHz
Audio Output
2 Channel
5.1 Channel
Digital Audio Output
Frequency Response
S/N Ratio
Harmonic distortion
Dynamic Range
Channel separation
L(1/L), R(2/R)
F/L, F/R, R/L, R/R, C/T, S/W
Optical/Coaxial
20Hz ~ 20KHz (±1dB)
More than 95 dB
Less than 0.001%
More than 120 dB
More than 90 dB
Design and specifications are subject to change without notice.
54
Downloaded From Disc-Player.com Sherwood Manuals
BDP-6003-English2008.12.56:19PM˘
` 55
Appendix
Language code list
You can input the desired language for Disc Audio, Disc Subtitle or Disc Menu.
Language
code no.
abbr.
Language
code no.
abbr.
Language
code no.
AA
AB
AF
SQ
AM
AR
HY
AS
AY
AZ
BA
EU
BN
BH
BI
BE
BG
MY
CA
ZH
CO
CS
DA
NL
EN
EO
ET
FO
FI
FR
FY
KA
DE
GA
GL
EL
GN
GU
HA
HE
HI
HU
IS
IU
IE
IA
ID
Afar
Abkhazian
Afrikaans
Albanian
Amharic
Arabic
Armenian
Assamese
Aymara
Azerbaijani
Bashkir
Basque
Bengali
Bihari
Bislama
Breton
Bulgarian
Burmese
Catalan
Chinese
Corsican
Czech
Danish
Dutch
English
Esperanto
Estonian
Faroese
Finnish
French
Western Frisian
Georgian
German
Irish
Galician
Greek
Guarani
Gujarati
Hausa
Hebrew
Hindi
Hungarian
Icelandic
Inuktitut
Interlingue
Interlingua
Indonesian
6565
6566
6573
6578
6582
6586
6590
6595
6602
6603
6606
6611
6617
6620
6623
6628
6632
6634
6639
6648
6661
6671
6673
6687
6694
6696
6697
6701
6705
6708
6714
6722
6724
6728
6729
6739
6740
6742
6746
6748
6752
6757
6761
6766
6767
6769
6771
IT
JV
JA
KN
KS
KK
RW
KY
KO
KU
LA
LV
LN
LT
MK
ML
MI
MR
MY
MG
MT
MO
MN
NA
NE
NO
OC
OR
FA
PL
PT
QU
RO
RU
SA
SR
Italian
Javanese
Japanese
Kannada
Kashmiri
Kazakh
Kinyarwanda
Kirghiz
Korean
Kurdish
Latin
Latvian
Lingala
Lithuanian
Macedonian
Malayalam
Maori
Marathi
Malay
Malagasy
Maltese
Moldavian
Mongolian
Nauru
Nepali
Norwegian
Occitan
Oriya
Persian
Polish
Portuguese
Quechua
Romanian
Russian
Sanskrit
Serbian
Scots
Croatian
Slovak
Slovenian
Samoan
Shona
Sindhi
Somali
Spanish
Sundanese
Swahili
6777
6778
6780
6788
6790
6793
6800
6801
6806
6815
6821
6822
6825
6826
6838
6844
6847
6849
6851
6861
6862
6867
6868
6880
6886
6895
6904
6906
6921
6925
6927
6932
6940
6943
6950
6953
6956
6958
6970
6971
6977
6979
6980
6983
6986
6993
6996
SV
TA
TT
TE
TG
TL
TH
BO
TI
TO
TS
TK
TR
TW
UK
UR
UZ
VI
VO
CY
WO
XH
YI
YO
ZA
ZU
Swedish
Tamil
Tatar
Telugu
Tajik
Tagalog
Thai
Tibetan
Tigrinya
Tonga
Tsonga
Turkmen
Turkish
Twi
Ukrainian
Urdu
Uzbek
Vietnamese
Volapuk
Welsh
Wolof
Xhosa
Yiddish
Yoruba
Zhuang
Zulu
6997
7001
7002
7003
7007
7008
7009
7011
7013
7019
7024
7025
7028
7031
7036
7039
7040
7043
7044
7051
7054
7056
7059
7060
7064
7066
HR
SK
SL
SM
SN
SD
SO
ES
SU
SW
APPENDIX
abbr.
55
Downloaded From Disc-Player.com Sherwood Manuals