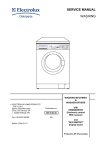
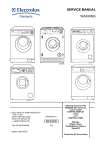
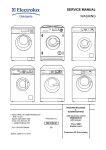
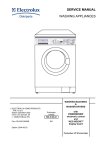
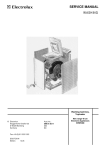
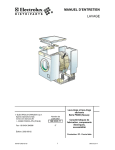
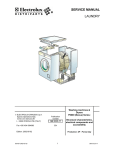
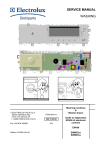
Download Electrolux Washing machines with EWM 1000 PLUS Service manual
Transcript
SERVICE MANUAL WASHING ELECTROLUX HOME PRODUCTS ITALY S.p.A. Spares Operations Italy Corso Lino Zanussi, 30 I - 33080 PORCIA /PN Fax +39 0434 394096 Edition: 2006-07-28 Publication no. 599 38 17-97 Washing machines with EWM 1000 PLUS electronic control system and “AEG Nexxxt” display board With sensor EN Production ZP (Porcia-Italy) CONTENTS 1 2 3 4 Purpose of this manual .............................................................................................................................. 5 PRECAUTIONS ......................................................................................................................................... 5 GENERAL CHARACTERISTICS............................................................................................................... 5 CONTROL PANEL..................................................................................................................................... 6 4.1 Control/display board.......................................................................................................................... 7 4.1.1 Version with display:.................................................................................................................... 7 4.2 Washing programmes......................................................................................................................... 8 4.2.1 Configuration of the programmes................................................................................................ 8 4.3 Programme selector ........................................................................................................................... 8 4.4 Start/Pause ......................................................................................................................................... 8 4.5 Functions of the buttons ..................................................................................................................... 8 5 WASHING PROGRAMMES AND OPTIONS ............................................................................................ 9 5.1 Programmes ....................................................................................................................................... 9 5.2 Options of the washing cycle ............................................................................................................ 10 5.3 Description of options ....................................................................................................................... 11 5.3.1 Night cycle ................................................................................................................................. 11 5.3.2 Rinse-hold.................................................................................................................................. 11 5.3.3 Pre-wash.................................................................................................................................... 11 5.3.4 Soak........................................................................................................................................... 11 5.3.5 Stains......................................................................................................................................... 11 5.3.6 Short (daily) ............................................................................................................................... 11 5.3.7 Very short .................................................................................................................................. 11 5.3.8 Economy / Energy label............................................................................................................. 11 5.3.9 Sensitive .................................................................................................................................... 12 5.3.10 Extra rinse.................................................................................................................................. 12 5.3.11 Bleach........................................................................................................................................ 12 5.3.12 “Half load” button ....................................................................................................................... 12 5.3.13 Easy-Iron ................................................................................................................................... 12 5.3.14 Reduced spin speed.................................................................................................................. 12 5.3.15 No spin....................................................................................................................................... 13 5.3.16 Modifying the spin speed........................................................................................................... 13 5.3.17 Time reduction (Quick) .............................................................................................................. 13 5.3.18 Temperature adjustment ........................................................................................................... 13 5.3.19 “Exclusion of the buzzer” ........................................................................................................... 13 5.3.20 Delayed-start time ..................................................................................................................... 13 5.4 Variation of the rinses according to the options................................................................................ 14 5.5 Display (some models) ..................................................................................................................... 15 5.6 LEDs ................................................................................................................................................. 15 6 WASHING PROGRAMMES .................................................................................................................... 16 6.1 Base programmes for Cotton / Linen: cold-30-40-60-90° (without options) ..................................... 16 6.2 Cotton / Linen Cycles: 90 Eco, 60 - 40/50 “energy label” (without options) ..................................... 17 6.3 Base programmes for Synthetics Cycles: cold - 30- 40 – 50 - 60° (without options) ....................... 18 6.4 Delicates Cycles: cold – 30° - 40° (without options)......................................................................... 19 6.5 Wool Cycles: cold - 30° - 40°.......................................................................................................... 20 6.6 Hand wash Cycles: cold - 30° - 40° .................................................................................................. 20 6.7 Drum movements at low speed and during spin .............................................................................. 21 6.7.1 D55 Delicate movement ............................................................................................................ 21 6.7.2 N55 Normal movement.............................................................................................................. 21 6.7.3 E55 Vigorous movement ........................................................................................................... 21 6.7.4 PWL_1 (wool) Delicate movement ............................................................................................ 21 6.7.5 PWL_4 (hand wash) Delicate movement .................................................................................. 21 6.7.6 Cotton/Linen, Synthetics – C0 Intermediate Synthetics Prewash Spin..................................... 22 6.7.7 C1 Cotton/Linen Wash Spin ...................................................................................................... 22 6.7.8 C2 Cotton/Linen Intermediate Spin ........................................................................................... 22 6.7.9 COT_CF Cotton/Linen Final Spin.............................................................................................. 22 6.7.10 SYN_CF Synthetics Intermediate and Final Spin...................................................................... 22 6.7.11 DEL_ CF Delicates Final Spin ................................................................................................... 23 6.7.12 WOOL_CF Hand Wash and Wool Final Spin............................................................................ 23 6.7.13 Easy iron Impulse Cycle ............................................................................................................ 23 6.7.14 Intermediate Spin for Cotton/Linen CSR with Super-rinse option ............................................. 23 6.8 Control of water level in tub .............................................................................................................. 24 6.8.1 Time water fill ............................................................................................................................ 24 7 TECHNICAL CHARACTERISTICS.......................................................................................................... 25 7.1 EWM1000 Plus Electronic control .................................................................................................... 25 7.1.1 Functions of the circuit board .................................................................................................... 25 7.1.2 Memory in the control system.................................................................................................... 25 7.2 Power supply and programme selection .......................................................................................... 27 7.3 Door interlock.................................................................................................................................... 27 7.3.1 Voltmetric interlock with PTC..................................................................................................... 27 7.3.2 Instantaneous door interlock ..................................................................................................... 28 7.4 Control pressure switch for water level in the tub............................................................................. 29 7.4.1 Pressure switch settings............................................................................................................ 29 7.5 Detergent dispenser ......................................................................................................................... 29 7.6 Water fill system ............................................................................................................................... 30 7.6.1 Calculation of flow rate .............................................................................................................. 30 7.7 Drain pump ....................................................................................................................................... 31 7.8 Anti-flooding device .......................................................................................................................... 31 7.9 Water Control (not in all models) ...................................................................................................... 32 7.10 Heating .......................................................................................................................................... 33 7.10.1 Heating element ........................................................................................................................ 33 7.10.2 Temperature sensor .................................................................................................................. 33 7.11 Motor ............................................................................................................................................. 34 7.12 Power supply to motor .................................................................................................................. 34 7.13 Anti-foam control system............................................................................................................... 34 7.14 “FUCS” (Fast Unbalance Control System).................................................................................... 35 8 DEMO Mode ............................................................................................................................................ 37 8.1 Demo mode setting........................................................................................................................... 37 8.2 Exiting demo mode ........................................................................................................................... 37 9 DIAGNOSTICS SYSTEM ........................................................................................................................ 38 9.1 Access to diagnostics system........................................................................................................... 38 9.2 Exiting diagnostics system................................................................................................................ 38 9.3 Phases of the diagnostics test .......................................................................................................... 38 9.3.1 Display board diagnostics.......................................................................................................... 40 9.3.2 Programme selector .................................................................................................................. 40 10 ALARMS............................................................................................................................................... 41 10.1 Displaying the alarms to the user.................................................................................................. 41 10.1.1 Alarms displayed during normal operation ................................................................................ 41 10.2 Reading the alarm codes .............................................................................................................. 42 10.2.1 Displaying the alarm .................................................................................................................. 42 10.2.2 Examples of alarm displays....................................................................................................... 42 10.2.3 Operation of alarms during diagnostics..................................................................................... 43 10.3 Notes about some alarms ............................................................................................................. 43 10.4 Rapid reading of alarm codes ....................................................................................................... 43 10.5 Cancelling the last alarm............................................................................................................... 43 10.6 Table of alarm codes..................................................................................................................... 44 11 BASIC CIRCUIT DIAGRAM ................................................................................................................. 46 11.1 Diagram (without Water Control)................................................................................................... 46 11.1.1 Key to circuit diagram ................................................................................................................ 47 11.2 Diagram (with Water Control)........................................................................................................ 48 11.2.1 Key to circuit diagram ................................................................................................................ 49 1 Purpose of this manual The purpose of this manual is to provide service engineers who are already familiar with the repair procedures for traditional washing machines with information regarding appliances fitted with the EWM 1000 plus electronic control system and produced in Porcia (Italy). The electronic control system plus EWM1000 plus consists of a main electronic board and one control/display board, “Aeg Nexxxt” version. The following are described: • General characteristics • Control panel and washing programmes • Technical characteristics • Guide to the diagnostics For detailed information concerning hydraulic circuit, structural characteristics of the appliances and accessibility, please refer to Service Manual of washing machines and washer-dryers Series P6000/Nexus (publication no. 599 35 23-17). 2 PRECAUTIONS Electrical appliances must be serviced only by qualified Service Engineers. Always remove the plug from the power socket before touching internal components. 3 GENERAL CHARACTERISTICS Programme selector Serial port Power supply Type of washing Rinsing system Motor Spin speed Anti-unbalancing system Water fill Detergent drawer Control of water level in the tub Door safety device Power of heating element Temperature control Sensors 24-position with incorporated general switch DAAS-EAP communications protocol up to 38400 baud 220/240V 50/60 Hz (configurable) Traditional with “eco-ball” sphere Traditional Collector, with tachometric generator 850 ÷ 1600 rpm FUCS 1 solenoid valve with 1 inlet – 2 or 3 outlets 3 compartments: prewash/stains, wash, conditioners 4 compartments: prewash/stains, wash, conditioners, bleach two-level pressure switch: 1st level and anti-boiling safety level (the other levels refer to fixed-time fills) possibility of three-level pressure switch: 1st level, anti-boiling and antiflooding safety levels Traditional (with PTC) Instantaneous Up to 1950W NTC sensor Water Control 4 CONTROL PANEL The configuration of the control panel depends on the following: ª Type of control/display board ª Programme selector ª Design of the control panel (no. of buttons, LEDs) ª Different configuration of the buttons Example of control panel: Buttons: - max. 8, horizontally LEDs: - max. 26 Display: - 3 digits with 24 red LEDs 4.1 4.1.1 Control/display board Version with display: Ö 3 digits Ö 27 LEDs: 26 red, one bicolour (red and green) Ö 9 buttons Version without display: Ö 26 LEDs: 25 red, one bicolour (red and green) Ö 8 buttons 4.2 Washing programmes 4.2.1 Configuration of the programmes The table below lists the parameters that can be used to define the washing programmes. Types of fabrics Special programmes Temperature Spin Options (Normal/Possible) Programme phases 4.3 Cotton/linen, Synthetics, Delicates, Wool, Hand-wash Soak, Rinses, Spin, Drain, Conditioner Normal, Maximum: the initial temperature is the maximum that can be selected for a specific washing programme Normal, Minimum, Maximum Bleach, Economy (energy label), Stains, Short, Very short, Reduced spin speed, Night-time cycle, Half-load, Easy-Iron, Rinse Hold, Extra rinse, Pre-wash, Soak and Sensitive Pre-wash, Wash, Rinses, Spin, Economy, Delayed start Programme selector The programme selector defines the type of washing cycle (ex: water level, drum movement, no of rinses) and washing temperature to be selected according to the type of wash. The programme selector can be rotated both clockwise and anti-clockwise. The first position is used to cancel the current programme and to switch the appliance off, if the main switch is incorporated in the selector. 4.4 Start/Pause Start: after selecting the programme and the desired options, press this button to start. If the delay time ahs been selected, the countdown will begin and the display will indicate it. The LED stops flashing and remains lit for the whole duration of the programme. Pause: by pressing the button again, the current programme is interrupted and the display or the corresponding LED starts flashing. During the pause phase it is possible to open the door only if the machine is not during the heating phase, the water level is not high and the drum is not moving. During the pause it is possible to modify the programme as follows: - the OPTIONS of the cycle can be modified before the phase by which they have to be performed - the SPIN can be modified before the final spin To re-start the programme press the START/PAUSE button again. 4.5 Functions of the buttons The washing programmes and the functions of the single buttons vary for the different models, since they are determined by the configuration operation of the appliance. 5 WASHING PROGRAMMES AND OPTIONS 5.1 Programmes The washing programmes can be configured. The basic programmes are listed in the table below. Programme Cotton Synthetic fabrics Delicates Wool Hand-wash 90 90E 60 60E 50 50/40E 40 30 cold 60 60/50E 50 40 30 cold 40 30 cold 40 30 cold 40 30 cold Soak Rinses Delicate rinses Conditioner Drain Spin Delicate spin Mini Temperature (°C) 87 67 60 50 (*)(**) 50 44 (*) 40 30 20 60 42 (*) 50 40 30 20 40 30 20 40 35 20 40 35 20 Number of rinses Final spin (rpm) 3 450/650/850/1000/1200/ 1300/1400/1600 3 Max. 900 3 450/700 3 Max. 1000 3 Max. 1000 30/20 ------------------30 ---3 3 1 ---------2 ---Max. 1600 Max. 700 Max. 1600 ---Max. 1600 Max. 700 Max. 1000 (*) “Energy label” programmes (**) Programme COTTON 60 E Group G18 G19 G20 G22 Temperature (°C) 50 53 45 47 5.2 Options of the washing cycle The selection of the options is to be carried out after switching on the appliance and setting the desired programme with the selector and before pressing the start/pause button. When the button is pressed, the corresponding LED lights; by pressing it again the LED switches off. Possible options according the selected programme X X X X X X X X X X X X X X X X X X X X X X X X X X X X X X X X X X X X X X X X X X X X X X X X X X X X X X X X X X X X X X X X X X X X X X X X X X X X X X X X X X X X X X X X X X X X X X X X X X X X X X X X X X X X X X X X X X X X X X X X X X X X X X X X X X X X X X X X X X X X X X X X X X X X X X X X X X X X X X X X X X X X X X X X X X X X X X X X X X X X X X X X X X X X X X X X X X X X X X X X X Easy iron X X X X X X X X X X X X X X Half-load X X X X X X X X X X Bleach X X X X X X X X X X X Extra rinse X X X X X X X X X X X Sensitive Short X X X X Economy Daily X X X X X X X X X X X No spin SOAK RINSES CONDITIONER DRAIN SPIN RINSE HOLD NIGHT CYCLE PRE-WASH SOAK STAINS DAILY SHORT ECONOMY SENSITIVE EXTRA RINSE BLEACH HALF LOAD EASY IRON REDUCED SPIN SPPED NO SPIN PRE-SELECTION PRE-WASH WASH RINSES SPIN Stains WOOL – HANDWASH Soak DELICATES Pre-wash MINI PROGRAMME X X X X X X X X X X X Rinse-hold SYNTHETIC FABRICS X X X X X X X X X X X X X X X X X X X X X X X X X X X X X X X X X X X X X X Reduced spin speed Phases in which selection is possible Compatibility with OPTIONS Compatibility with PROGRAMMES COTTON 90°C 60°C 50°C 40°C 30°C Cold 60°C 50°C 40°C 30°C Cold 30°C Cold 40°C 30°C Cold 40°C 30°C Cold Night cycle OPTIONS X X X X X X X X X X X X X X X X X X X X X X X X X X X X X X X X X X X X X X X X X X X X X X X X X X X X X X X X X X X X X X X X X X X X X X X X X X X X X X X X X X X X X X X X X X X X X X X X X X X X X X X X X X X X X X X X X X X X X X X X X X X X 5.3 Description of options 5.3.1 Night cycle ª Eliminates all spin phases and adds three rinses in COTTON cycles and two rinses in SYNTHETICS cycles. ª Stops the appliance with water in the tub before the final rinse. ª Switches off the buzzer (if configured) ª To drain the water select a drain or spin cycle. 5.3.2 Rinse-hold ª Stops the appliance with water in the tub before the final spin cycle. ª Switches off the buzzer (if configured) ª To drain the water select a drain or spin cycle. 5.3.3 Pre-wash ª Adds a pre-wash phase at the start of the cycle with water heating to 30°C (or cold, if selected). ª In COTTON and SYNTHETICS cycles, performs a short spin before passing to the washing phase. ª This option cannot be selected for WOOL and HAND-WASH cycles. 5.3.4 Soak ª Adds a pre-wash phase (30’ duration with wool cycle movement) at the start of the cycle with water heating at 30°C (or cold, if selected). ª In COTTON and SYNTHETICS cycles, performs a short spin (impulse) before passing to the washing phase. ª Together with the delayed start option it is possible to select a soak time from 30 minutes up to 10 hours. ª This option cannot be selected for WOOL and HAND-WASH cycles. 5.3.5 Stains ª Adds a 5-minute motor movement phase after heating to 40°C. ª Ducts water to the pre-wash/stains compartment in order to introduce the special stain-removal product. ª This option cannot be selected for DELICATES, WOOL and HAND-WASH cycles. ª The movements during the washing phase change from vigorous to normal. 5.3.6 Short (daily) ª Modifies the structure of the washes in the COTTON and SYNTHETICS programmes in order to obtain good washing performance with a very short cycle (optimization for small loads). 5.3.7 Very short ª Modifies the structure of the COTTON, SYNTHETICS and DELICATES programmes in order to obtain short washing times (optimization for small or lightly-soiled loads). ª Reduces the number of rinse cycles (one less). ª Increases the water level in the remaining two rinse cycles. 5.3.8 Economy / Energy label ª Modifies the structure of the COTTON 40°/50°/60°/90° - SYNTHETIC FABRICS 50°/60° programmes in order to reduce energy consumption. ª Reduces the washing temperature in 90°/60°/50° programmes, while for the 40° programme the temperature is increased by 4°. ª Increases the duration of the wash phase. 5.3.9 Sensitive ª Adds a rinse in the COTTON – SYNTHETIC FABRICS. ª During the cotton cycles the movements pass from vigorous to normal. ª Eliminates the intermediate spins except from the last two which are reduced. 5.3.10 Extra rinse Adds two rinses in the COTTON, SYNTHETICS and DELICATES cycles. Eliminates the intermediate spin cycles, with the exception of the last rinse, which is reduced to 450 rpm. If the appliance features this button press it and then the corresponding LED lights. If the appliance does not feature it, proceed as follows: To activate it, after selecting a COTTON or SYNTHETICS or DELICATES cycle, press the buttons (no. 1) and button no. 3 simultaneously for at least 2 seconds, till the corresponding phase LED switches on. This option remains always active, also in the following cycles; to deactivate it, repeat the same procedure: press button (no. 1) and button no. 3 simultaneously for at least 2 seconds, till the extra rinse LED switches off. 5.3.11 Bleach ª Ducts water through the bleach compartment at the beginning of the first rinse in COTTON cycles. ª Pre-wash possible only where there are three solenoids. ª In models with two solenoids the bleach is not compatible with the pre-wash option. 5.3.12 “Half load” button ª Eliminates a rinse in the COTTON programmes. 5.3.13 Easy-Iron • ª ª ª ª • ª ª ª ª ª In COTTON programmes: Adds three rinses. Eliminates the intermediate spins. Performs an impulse spin phase. Adds an “untangling” phase after the spin cycle. In SYNTHETICS cycles: Reduces the heating temperature in 50/60° cycles to 40°C. Increases the washing time. Prolongs the cooling phase at the end of the washing phase. Adds one rinse without spin cycle. Adds an “untangling” phase after the impulse spin cycle. 5.3.14 Reduced spin speed ª Reduces the speed of all spins as shown in the table. 600 700 800 900 1000 1100 1200 1300 1400 1500 1600 Maximum spin speed (rpm) 450 450 450 450 500 550 600 650 700 750 800 Reduction for COTTON (rpm) Reduction for ALL OTHER CYCLES 450 450 450 450 450 450 450 450 450 450 450 (rpm) 5.3.15 No spin ª Eliminates all the spin phases. ª If selected, three rinses are added in the COTTON cycle and one in the SYNTHETICS cycle. 5.3.16 Modifying the spin speed ª Reduces the speed of all spin cycles. ª The last position can be used for NO SPIN, RINSE-HOLD. ª If the NO-SPIN option is selected, three rinses are added in the COTTON cycle, and one in the SYNTHETICS cycle. 5.3.17 Time reduction (Quick) ª Modifies the structure of the COTTON - SYNTHETICS– DELICATES programmes to obtain washing time very short (optimization for small or lightly-soiled loads). ª Reduces the no. of rinses (one rinse less). ª Increases the water level of the other two rinses. ª Corresponds to the SHORT- VERY SHORT cycles on the basis of the configuration of the appliance. 5.3.18 Temperature adjustment ª Used to select the washing temperature compatibly with the limit temperature for the cycle. ª Can be used during the cycle selection phase: the temperature can be modified only if the heating phase has not started (in pause mode). 5.3.19 “Exclusion of the buzzer” In models with the buzzer it is possible to exclude the acoustic signal during the selection or at the end of the cycle, but the alarm remains on. ª Press buttons no. 1 and no. 4 (or no. 5) simultaneously to deactivate the buzzer for 2 seconds; this option will be memorised until it will be deactivated with the same procedure. 5.3.20 Delayed-start time • Models with digit ª It is possible to select, during the programme selection phase, a delayed start from 30 minutes up to 23 hours () 30’) 60’) 90’) 2h) 3h...) 23h) 0h). ª During the delay phase, the time decreases every hour up to 2h, then by 30minutes. ª To start the cycle immediately, after the delay time began: press the Start/Pause button, cancel the delay time by pressing the relative button and press Start/Pause again. • Models with led ª Insert a pause before the start of the programme, the delay time is indicated by the corresponding LEDs. ª To start the cycle immediately, after the delay time began: press the Start/Pause button, cancel the delay time by pressing the relative button and press Start/Pause again. 5.4 Variation of the rinses according to the options 6 6 5 4 4 3 3 2 Sensitive 6 6 5 4 4 3 - Night cycle, super rinse and half load 6 6 5 4 4 3 3 2 Night cycle and half load 5 5 4 5 5 4 5 4 Super rinse and night cycle 2 2 2 - Super rinse and half load Easy-ironing 3 3 2 3 3 2 3 2 Exclusion of spin Night cycle DELICATES Super rinse SYNTHETIC FABRICS Normal Eco – Energy label Very short Normal Eco – Energy label Very short Normal Eco – Energy label Very short Half load COTTON Normal PROGRAMMES No of rinses with the options 4 4 4 - 8 8 7 6 6 6 5 4 5 5 5 - 7 7 7 - 4 4 3 4 4 3 4 3 5.5 Display (some models) The display shows the following information: Ö three flashing digits, when the appliance is switched on. Ö the duration of the washing programme, which appears after selecting it. This time corresponds to that necessary for the maximum load for every type of programme. After starting the programme, the time diminishes (and updates) by every minute. Ö the end of the programme indicated by a "0" (when it is possible to open the door). Ö the delayed start, selected by the relative button. After pressing the START/PAUSE button, the countdown starts and the delayed time diminishes by every hour. In the last 2 hours diminishes by 30min. Ö an alarm code, indicating anomalies in the functioning of the machine. 5.6 LEDs The LEDs indicate different information according to the type of configuration; the End-of-cycle Led is featured in all models. Type of Led Functions Lights during selection mode if the programme includes the pre-wash phase, and during the execution of the pre-wash. Lights during selection mode if the programme includes the wash phase, and during the Wash execution of the wash. Lights during selection mode if the programme includes the pre-wash or wash phases, and Pre-wash/Wash during the execution of these phases. Lights during selection mode if the programme includes rinse phases, and during the Rinse execution of the rinse. Lights during selection mode if the programme includes the spin phase, and during the Spin execution of the spin. Lights during selection mode if the programme includes the drain phase, and during the Drain execution of the drain Lights when this option has been memorized (if included in the cycle) during the execution Extra rinse of the rinse. Lights if the programme includes the rinse-hold option and at the end of the cycle, when Rinse hold the appliance stops with water in the tub. Lights during execution of the cycle Current cycle Pre-wash End of cycle Lights when the programme has been completed; also used to display alarm conditions Blocked filter Lights at the end of the cycle if the drain filter is blocked. Overdosing ON/OFF Door Time-to-end Lights at the end of the cycle if an overdosing alarm of detergent occurs. Lights when the appliance is switched on ª Lights when the door is locked by the interlock. ª Switches off when the door is locked. ª Flashes when the door is about to unlock (it is clear above all in models with safety device with PTC) Lights when the display shows the time-to-end 6 WASHING PROGRAMMES Base programmes for Cotton / Linen: cold-30-40-60-90° (without options) Phase N. Delay - Delayed start 0 Drain 1 2 3 4 5 6 7 8 9 Water fill Cold wash Water fill Heating Maintenance Drain + spin Drain Cotton water fill Cold wash Pre-wash 6.1 Function 10 Cotton heating Wash 11 Maintenance 12 Cotton heating 13 Maintenance Cooling Rinses 1st rinse 2nd rinse Last rinse (conditioner ) 14 15 16 17 18 19 20 21 Cooling water fill Movement Drain Drain + spin Drain Cotton water fill Movement Drain 22 Drain + spin Time/ control Delay time VAE + 2”+ 6” pause P1 + QPW1 (*) 5’ QPW2 (*) T 10’ VAE + 14” + 4,5’ 20” P1 + Qhl (*) 10’ Movement No mov D55 from full D55 N55 4’(87°)/5’(20-40°) /10’(60°) N55 T E55 D55 No Mov C1 No Mov N 55 from full N 55 from full 5’ C2 20“ P1 30” Qn3 8’ VAE + 15” No Mov N 55 from full 34 Drain + spin 9’ COT_CF 35 Detach movement 1’ N55 Drain Cotton water fill Movement Time water fill Movement Drain 300/450/650 rpm Refill: P1+Qw 20/30/40/ 60/87 30/40/60/ 87 Only if >67°C 450/650/850 rpm No Mov Refill: P1+Qn1 No Mov No Mov 28 29 30 31 32 33 Cold = 20°C E55 20“ P1+Qn2 5’ VAE + 15” 27 Drain + spin 30° N55 from full C2 Drain Cotton water fill Movement Drain Refill: P1 C0 No Mov 5’ 23 24 25 26 Notes No Mov T 14’(87°)/35’(2040°) /20’(60°) Qc (*) 2’ VAE + 14” 5’ 20” P1 5’ VAE + 15” Heat. °C 450/650/850/1000rp m Refill: P1+Qne No Mov 450/650/850/1000rp m Refill: P1 No Mov 450/650/850/1000/ Max. SW W1A3C005 Notes: time needed to 1st level water fill time water fills are changeable and calculated by the electronic on the basis of the delivery rate (see specific table) T time needed to heat the water at the set temperature ” seconds ‘ minutes VAE time needed to drain the water till “empty” position of anti- boiling (safety heater) pressure switch Movement: in this column are described the drum movements at low speed and during spin. (See paragraph “drum movements”) The times of drain phases with spin cycle are indicative and do not take into consideration the intervention of antiunbalance and antifoam protections. P1 (*) Cotton / Linen Cycles: 90 Eco, 60 - 40/50 “energy label” (without options) Phase N. Delay - Delayed start 0 Drain Function 1 2 3 4 5 6 Water fill Cold wash Water fill Heating Maintenance Drain + spin 7 Drain 8 Cotton water fill 9 Cold wash 10 Cotton heating Pre-wash 6.2 11 Maintenance Wash 11a Maintenance 44 12 Cotton heating 13 Maintenance 1st rinse 13a Maintenance Maintenance 14 Drain 15 Drain + spin 16 Drain 17 Cotton water fill 18 Movement 19 Drain 20 Drain + spin 21 Drain Rinses 22 Cotton water fill 2nd rinse 23 Movement 24 Drain 25 Drain + spin Last rinse (conditioner ) 26 27 28 29 30 31 Drain Cotton water fill Movement Time water fill Movement Drain 32 Drain + spin Time/ Control Delay time VAE + 2”+ 6” pause P1 + QPW1 (*) 5’ QPW2 (*) T 10’ VAE + 14” + 4,5’ 20” P1 + Qe (*) 10’ T 10’(67°) / 10’(50°) / 40’(44°) T 15’ (44º) T 30’(67°)/(15’ - 50º)/ 20’(44°) 5’ 15’ VAE + 14” 5’ 20” P1 5’ (2xG22 a 60°) VAE + 15” Movement Notes No Mov No Mov D55 from full D55 Refill: P1 30 C0 No Mov N55 from full N55 Cold = 20°C 300/450/650 rpm Refill: P1+Qwe 67/50/44 E55 per 50º E55 N55 (44º) E55 E55 N55 E55 No Mov C1 No Mov N 55 from full Only for 45°C 67/44 N55 for 67º Only for 50°C Only for 50°C 450/650/850 rpm Refill: P1+Qne No Mov 5’ C2 20” No Mov P1 (C1≥850 g/’) P1+Qn2 (C1<850 g/’) 5’ VAE + 15” Heat. °C 450/650/850/1000rp m N 55 from full Refill: P1+Qne No Mov 5’ C2 20” P1 30” Qn3 8’ VAE + 15” No Mov N 55 from full 9’ COT_CF 450/650/850/1000rp m Qn3e for cycle 60° Refill: P1 No Mov 450/650/850/1000/ Max. SW W1A3C005 Notes: time needed to 1st level water fill time water fills are changeable and calculated by the electronic on the basis of the delivery rate (see specific table) T time needed to heat the water at the set temperature ” seconds ‘ minutes VAE time needed to drain the water till “empty” position of anti- boiling (safety heater) pressure switch Movement: in this column are described the drum movements at low speed and during spin. (See paragraph “drum movements”) The times of drain phases with spin cycle are indicative and do not take into consideration the intervention of antiunbalance and antifoam protections. P1 (*) Base programmes for Synthetics Cycles: cold - 30- 40 – 50 - 60° (without options) Phase N. Delay - Delayed start 0 Drain 1 2 3 4 5 6 7 8 9 Water fill Cold wash Water fill Heating Maintenance Drain + spin Drain Synthetics water fill Cold wash Prewash 6.3 Function 10 Heating Wash 11 Maintenance 12 Heating Cooling Rinses 1st rinse 2nd rinse Last rinse (softener) 13 14 15 16 17 18 19 20 21 22 23 24 Maintenance Cooling water fill Movement Drain Drain Water fill Movement Drain Drain Water fill Movement Drain 25 Drain 26 27 28 29 30 31 32 33 Drain + spin Water fill Movement Time water fill Movement Drain Drain + spin Detach movement Time/ control Delay time VAE + 2”+ 6” pause P1 + QPW1 (*) 5’ QPW2 (*) T 10’ VAE + 15” + 4,5’ 20” P1 + Qsy (*) 5’ T 10’ T 15’ Qc (*) 1’ VAE 1’ P1+ Qyr1 (*) 3’ VAE 1’ P1+ Qyr2 (*) 3’ VAE Movement Heat. °C Notes No Mov No mov D 55 from full D 55 C0 No mov N 55 from full N55 for T>40° E55 for T< / = 40° E55 Refill: P1 30° Cold = 20°C 300/450/650 rpm Refill: P1+Qy1 20/30/40/ Economy = 42°C 50/60 Economy = E55 30/40/50/ Economy = 42°C 60 Economy = 25’ N55 No mov D55 E55 from full Refill: P1 No mov D55 E 55 from full Refill: P1 No mov 1’ D55 4’ P1 30” Qyr3 5’ VAE + 14” 4,5’ 1’ C0 300/450/650 rpm E55 from full Refill: P1 No mov SYN_CF N55 (max. 900rpm) Not for Economy SW W1D00102 Notes: time needed to 1st level water fill time water fills are changeable and calculated by the electronic on the basis of the delivery rate (see specific table) T time needed to heat the water at the set temperature ” seconds ‘ minutes VAE time needed to drain the water till “empty” position of anti- boiling (safety heater) pressure switch Movement: in this column are described the drum movements at low speed and during spin. (See paragraph “drum movements”) The times of drain phases with spin cycle are indicative and do not take into consideration the intervention of antiunbalance and antifoam protections. P1 (*) Delicates Cycles: cold – 30° - 40° (without options) Phase N. Delay - Delayed start 0 Drain 1 2 3 4 5 6 7 8 9 10 11 12 13 14 15 16 17 18 19 20 21 22 23 24 25 26 27 28 29 Water fill Cold wash Water fill Heating Maintenance Drain Delicates water fill Cold wash Heating Maintenance Heating Maintenance Drain Drain Water fill Movement Drain Drain Water fill Movement Drain Drain Water fill Movement Time water fill Movement Drain Drain + spin Detach movement Wash Pre-wash 6.4 Rinses 1st rinse 2nd rinse Last rinse (softener) Function Time/ control Delay time VAE + 2”+ 6” pause P1 + QPW1 (*) 5’ QPW2 (*) T 3’ VAE + 15” P1 + Qdw1 (*) 1’ T 10’ T 10’ VAE 1’ P1+ Qrd1 (*) 5’ VAE 1’ P1+ Qrd1 (*) 5’ VAE 1’ P1 30” Qrd2 (*) 3’ VAE 3,8’ 1’ Movement Heat. °C Notes No Mov No mov D55 from full D55 Refill: P1 30 No mov D55 from full D55 Cold = 20°C Refill: P1+Qdw2 20/30/40 D55 No mov D55 D55 D55 No mov D55 D55 D55 No mov D55 20/30/40 Refill: P1 Refill: P1 D55 from full Refill: P1 No mov DEL_CF N55 (450/700rpm) SW W1D00102 Notes: time needed to 1st level water fill time water fills are changeable and calculated by the electronic on the basis of the delivery rate (see specific table) T time needed to heat the water at the set temperature ” seconds ‘ minutes VAE time needed to drain the water till “empty” position of anti- boiling (safety heater) pressure switch Movement: in this column are described the drum movements at low speed and during spin. (See paragraph “drum movements”) The times of drain phases with spin cycle are indicative and do not take into consideration the intervention of antiunbalance and antifoam protections. P1 (*) Wool Cycles: cold - 30° - 40° Phase N. Delay - Delayed start 0 Drain 1 2 3 4 5 6 7 8 9 10 11 12 13 14 15 16 17 18 19 Wool water fill Cold wash Heating Maintenance Drain Water fill Time water fill Movement Drain Water fill Time water fill Movement Drain Water fill Movement Time water fill Movement Drain Drain + spin Wash 6.5 1st rinse Rinses 2nd rinse Last rinse (softener) Function Time/ control Delay time VAE + 2”+ 6” pause P1 + Qwo (*) 1’ T 14’ VAE+14” P1 Qwor1 (*) 3’ VAE+14” P1 Qwor1 (*) 3’ VAE+14” P1 30” Qwor2 (*) 5’ VAE+14” 3,5’ Movement Heat. °C Notes No Mov No mov Pwl_1 from full Refill:P1+Qwo1 20/33/38 v No mov Pwl_1 Refill:P1 No mov No mov Pwl_1 Refill:P1 No mov No mov Pwl_1 Refill:P1 No mov WOOL_CF (max. 1000rpm) SW W1D00102 Hand wash Cycles: cold - 30° - 40° Phase N. Delay - Delayed start 0 Drain 1 2 3 4 5 6 7 8 9 10 11 12 13 14 15 16 17 18 19 Wool water fill Cold wash Heating Maintenance Drain Water fill Time water fill Movement Drain Water fill Time water fill Movement Drain Water fill Movement Time water fill Movement Drain Drain + spin Wash 6.6 Rinses 1st rinse 2nd rinse Last rinse (softener) Function Time/ control Delay time VAE + 2”+ 6” pause P1 + Qwh (*) 1’ T 14’ VAE+14” P1 Qwor1 (*) 3’ VAE+14” P1 Qwor1 (*) 3’ VAE+14” P1 30” Qwor2 (*) 5’ VAE+14” 3,5’ Movement Heat. °C Notes No Mov No mov No mov Refill:P1+Qwh1 Pwl_4 20/33/38 No mov No mov Pwl_4 Refill:P1 No mov No mov Pwl_4 Refill:P1 No mov No mov Pwl_4 Refill:P1 No mov WOOL_CF (max. 1000rpm) SW W1D00102 Notes: time needed to 1st level water fill time water fills are changeable and calculated by the electronic on the basis of the delivery rate (see specific table) T time needed to heat the water at the set temperature ” seconds ‘ minutes VAE time needed to drain the water till “empty” position of anti- boiling (safety heater) pressure switch Movement: in this column are described the drum movements at low speed and during spin. (See paragraph “drum movements”) The times of drain phases with spin cycle are indicative and do not take into consideration the intervention of antiunbalance and antifoam protections. P1 (*) 6.7 6.7.1 Drum movements at low speed and during spin D55 Delicate movement D55 sec rpm 12 4 12 4 6.7.2 N55 Normal movement N 55 sec rpm 8 8 8 8 6.7.3 0 55 0 -55 PWL_1 (wool) Delicate movement PWL_1 sec rpm 40 1 40 1 6.7.5 0 55 0 -55 E55 Vigorous movement E 55 sec rpm 3 10 3 10 6.7.4 0 55 0 -55 0 35 0 -35 PWL_4 (hand wash) Delicate movement PWL_4 sec rpm 57 1 57 1 0 35 0 -35 6.7.6 Cotton/Linen, Synthetics – C0 Intermediate Synthetics Prewash Spin C0 (Prewash) rpm FUCS 300 FUCS 450 FUCS 450 650 6.7.7 sec. x 0 x 0 x 5 0 AF no no no no no no no C1 Cotton/Linen Wash Spin C1 (wash) rpm FUCS FUCS imp FUCS 450 650 850 850 sec x x x 30 15 10 60 AF no no no AF AF AF no 6.7.8 C2 Cotton/Linen Intermediate Spin C2 (intermediate) rpm FUCS FUCS imp FUCS 450 650 850 1000 sec x x x 30 20 10 60 AF no no no AF AF AF no 6.7.9 COT_CF Cotton/Linen Final Spin COT_CF (cotton final) rpm FUCS FUCS imp FUCS 450 650 850 1000 1150 1400 sec x x x 30 15 5 95 75 110 AF no no no AF AF AF no no no 6.7.10 SYN_CF Synthetics Intermediate and Final Spin SYN_CF (intermediate/final) rpm FUCS FUCS imp FUCS 450 650 900 sec x x x 5 10 55 AF no no no no no no 6.7.11 DEL_ CF Delicates Final Spin CF (delicates final) rpm FUCS FUCS imp FUCS 450 700 900 sec x x x 35 5 20 AF no no no AF AF AF 6.7.12 WOOL_CF Hand Wash and Wool Final Spin CF (wool final) rpm FUCS FUCS imp FUCS 450 650 850 1000 sec x x x 5 1 1 20 AF no no no AF AF AF no 6.7.13 Easy iron Impulse Cycle EASY_IRON_IMP rpm FUCS 450 FUCS 650 FUCS 800 FUCS 900 sec x 0 x 0 x 0 x 0 AF no no no AF no AF no AF 6.7.14 Intermediate Spin for Cotton/Linen CSR with Super-rinse option CSR rpm FUCS FUCS imp FUCS 450 sec x x x 120 AF no no no AF Notes: AF indicates if antifoam function is active FUCS antiunbalance function before spin phase x variable duration • In the diagrams the speed is indicated as rotations per minute and the time in seconds 6.8 Control of water level in tub The water fill is carried out in two phases: • level fill: is controlled by the closure of 1st level pressure switch in full position • time fill: the duration is calculated by the electronic to fill the set quantity. The different levels are determined by the model configuration and depend on the type of tub used. 6.8.1 Time water fill Type Description of time fill Levels for COTTON/LINEN First prewash water fill (all cycles) Prewash water fill after cold wash (all cycles) Normal water fill/half load Half load water fill for “VERY SHORT” cycle Water fill for “energy label” cycle Water fill for maintenance cold wash “energy label” cycle Refill for “energy label” cycle if prewash has not been selected Wash refill if the cycle is not “energy label” Cooling water fill “Stains” compartment water fill Water fill for “quick cycle” rinses Normal water fill for 1st rinse Normal water fill for other rinses Normal water fill for last rinse Water fill for economy last rinse Normal water fill for rinse of “energy label” cycle Water fill for rinse of “energy label” cycle Water fill for super-rinse and night cycle if no spin has occurred Water fill for super-rinse and night cycle if spin has occurred Levels for SYNTHETICS Qsy Wash water fill Qsy1 Wash water fill for VERY SHORT cycle Qy1 Wash water fill if prewash has not been selected Qyr1 Normal water fill for 1st rinse Qyr2 Normal water fill for other rinses Qyr3 Normal water fill for last rinse Levels for DELICATES Qdw1 Wash water fill Qdw2 Wash refill Qrd1 Normal water fill for 1st rinse and other rinses Qrd2 Normal water fill for last rinse Levels for WOOL Qwo Wash water fill Qwo1 Wash refill Qwor1 Normal water fill for 1st rinse and other rinses Qwor2 Normal water fill for last rinse Levels for HAND WASH Qwh Wash water fill Qwh1 Wash refill (The data in the table are indicative) Qpw1 Qpw2 Qhl Qhl2 Qe Qec Qwe Qw Qc Qs Qk Qn1 Qn2 Qn3 Qn3e Qne Qne_60 Qsr1 Qsr2 G20 litres G19 G21/2 G18 litres litres litres 3,5 3,5 3,5 4,5 4,5 0 0 1,5 3,0 1,5 12,5 7,5 9,0 10,0 10,0 4,0 4,0 5,5 6,0 5,0 3.5 5,0 5,5 2,5 0 0 1,0 4,0 1,0 12,0 8,0 9,0 10,0 10,0 7,0 7,0 8,0 6,0 3,5 3,5 3,5 4,5 3,5 0 0 1,5 3,0 1,5 12,5 8,5 9,5 12,5 12,5 4,0 4,0 5,5 6,0 5 3,5 0 5,5 0 0 0 2,0 4,0 1,5 11,0 7,0 7,0 7,0 7,0 0 0 7,0 8,0 1,0 3,5 2,0 8,0 8,0 9,5 0 2,5 3,0 8,0 8,0 8,0 1,0 4,0 2,0 8,5 8,5 10,0 3,0 2,5 3,0 6,0 6,0 6,0 8,5 0 10,0 11,0 9,0 0 9,5 11,5 9,0 0 11,0 11,5 9,5 0 9,0 10,5 10,0 0 8,0 8,0 8,5 0 9,5 10,0 10,5 0 8,5 8,5 9,0 0 7,5 8,0 10,0 0 8,5 10,0 10,5 0 8,5 0 7 TECHNICAL CHARACTERISTICS 7.1 EWM1000 Plus Electronic control The EWM1000 Plus electronic control consists of a main PCB (1) and a control/display board (2). 7.1.1 Functions of the circuit board PROGRAMM E SELECTOR DISPLAY BOARD LEDs µP Buttons Display ELECTRICAL LOADS µP SENSORS Buzzer MAIN CIRCUIT BOARD Ö The circuit board receives signals relative to the cycle settings via the control/display board. The buttons, the LEDs and the display are also mounted on this board which is connected to the programme selector. Ö The board also powers all the electrical components (solenoid valves, washing motor, drain pump, heating element, door interlock). Ö The board controls the temperature of the washing water via an NTC sensor, as well as the speed of rotation of the washing pump according to the signal received from the tachometric generator. Ö It checks the water level in tub via the level pressure switch and the safety one. 7.1.2 Memory in the control system µP Asynchronous external serial port ROM Power Fail and machine status RAM Synchronous internal serial port EEPROM (external to the µP) Configuration of the appliance Description of the cycle The main circuit board features an EEPROM memory (external to the microprocessor) which stores in memory data relative to the configuration, description of the cycle, cycle status in case of a power failure, and any alarm conditions. The configuration data (entered in the factory using a computer with a DAAS interface) determine the functionalities of the appliance (number and type of programmes, options, LEDs etc). The overall structure of the microprocessor memory on the main PCB is subdivided into three sections: ROM This area of memory contains the software with the general instructions that control the operation of the appliance, such as those of the electrical components and alarms. The ROM is set up by the manufacturer of the microprocessor, and cannot be modified. RAM This part of memory contains all the variables used during the execution of the wash programme, which are written in dynamic format. The RAM can be read using a DAAS interface. EEPROM This area of memory contains: → the data necessary to restart the appliance in case of a power failure; → the parameters for the wash cycle, such as water fill level, speed and type of motor movement, and the temperature during the various phases of the wash cycle. Once written, this data is protected and, normally, can be read only using a DAAS interface; → data relative to the configuration of the appliance, such as the speed of the final spin phase, the volume of the tub, the type of washing system, etc. This data may be entered either via a DAAS interface or via the control/display board. 7.2 Power supply and programme selection The main board (3) is powered by the interference suppressor (1) and by the closure of the contacts of the main switch (2). The affected connectors are J6-2 (neutral) and J10-1 (line). The control/display board (4) is powered at 5V by the main board: through the programme selector (5) it is possible to select the programme. The selection of the options / start is performed through the board buttons (4). The buzzer (if featured) (6) is powered by the display board. 7.3 Door interlock There are two types of door interlock: • voltmetric with PTC: it is always necessary to wait from 1 to 3 minutes before opening the door. • instantaneous: the door can be opened as soon as the cycle ends. 7.3.1 Voltmetric interlock with PTC 1. Suppressor 2. Main switch (button or programme selector) 3. Door interlock 4. Main PCB 5. Door pilot lamp closed • Operating principle ª When the washing programme is started by pressing the START/PAUSE button, the bi-metal PTC (contacts 3-5) is powered by the triac on the PCB (J6-2 connector): after 2 – 4 seconds, this closes the switch (5-4) which powers the electrical components of the appliance (only if the door is closed). ª The door interlock prevents aperture of the door while the appliance is in operation. ª At the end of the washing programme, the PCB disconnects the interlock from the power supply, but the door remains locked for 1 to 2 minutes (PTC cooling time). Door locked” pilot lamp ª Certain models feature a pilot lamp which lights to indicate that the door is locked. This pilot lamp switches off when the door can be opened. 7.3.2 Instantaneous door interlock 1. Suppressor 2. Main switch (button or programme selector) 3. Door interlock 4. Main PCB 5. Door pilot lamp off • Operating principle ª When the appliance is switched on, the ON/OFF switch closes and the bi-metal PTC (contact 4-2) is powered; the door, however, is not locked. ª When the programme starts (START/PAUSE button), the PCB transmits a 20 msec voltage signal to contacts 4-3 of the solenoid valve (J10-2 connector of the board) (at least 6 seconds must elapse after switching on); this signal locks the door and, at the same time, closes the main switch (contacts 4-5) which powers all the components in the appliance. • At the end of the programme, the PCB transmits two 20 msec signals (at an interval of 200 msec). - the first signal does not release the door. the second signal (which is transmitted only if the system functions correctly) releases the door interlock and at the same time the contacts of the main switch are opened. • ª - Conditions necessary for door release Before transmitting the door release signals, the main PCB checks for the following conditions: the drum must be stationary (no signal from the tachometric generator) the water level must not be higher than the lower edge of the door the temperature of the water must not exceed 40°C. • Automatic release device ª In the event of a power failure, if the appliance is switched off, or if the solenoid should malfunction, the bi-metal PTC cools over a period of 1 to 4 minutes, and then releases the door. • “Door locked” pilot lamp ª Certain models feature a pilot lamp which lights to indicate that the door is locked. This pilot lamp switches off when the door can be opened. 7.4 Control pressure switch for water level in the tub Control of the water level is performed by a two or three-level pressure switch which functions as follows: • • • contact 11-14: anti-boiling safety level contact 21-24: first level contact 31-32: anti-overflow safety level (not all models) 7.4.1 Pressure switch settings Anti-boiling level 1st level Anti- overflow level 7.5 Full (mm) 60± 3 95± 3 390± 15 Refill (mm) 35± 3 65± 3 240±50 Full (mm) 55± 3 80± 3 390± 15 Refill (mm) 35± 3 55± 3 240±50 Detergent dispenser The EWM 1000 plus electronic system can control different types of dispensers: Type 3 compartments Detergent dispenser No. of solenoid valves Pre-wash/Stains – Wash – Conditioner (pre-wash and stain are in alternance) 2 Pre-wash/Stains – Wash – Bleach - Conditioner (the pre-wash/stain and conditioner compartment are linked together with a “intersection”) 2 Pre-wash/Stains – Wash – Bleach - Conditioner (pre-wash and stain are in alternance) 3 4 compartments 7.6 Water fill system The solenoid valves are powered by the PCB via two or three triacs. The status of the pressure switch (empty/full) is detected by two “sensing” lines”. 1. PCB 2. Anti-boiling level 3. 1st level 4. Pre-wash solenoid 5. Wash solenoid 6. Bleach solenoid (some models) 7. Heating element AB_S Anti-boiling level sensor L1_S 1st level sensor 7.6.1 Calculation of flow rate Calculation of the capacity – necessary to determine the time for the supplementary fill – is performed by measuring the time that elapses between the closure of the anti-boiling contact on FULL and the closure of the 1st level contact. Flow rate = • Volume Time (T1-T2) Volume = Volume of the tub between the two levels (anti-boiling and 1st level) T1 –T2 = The time that elapses between the closure of the anti-boiling and 1st level contacts on FULL Water fill diagram ELT = solenoid valve P1 = 1st level AB = anti-boiling level rpm = drum rotation speed Water in = water fill Phase A: The phase during which the initial fill takes place: 1. Water fill until the anti-boiling pressure switch closes on FULL. 2. Water fill until the 1st level pressure switch closes on FULL: the delivery of the solenoid is calculated during this phase. 3. Water fill for time Q, which varies according to delivery and cycle phase. Phase B: If the 1st level pressure switch returns to EMPTY, a supplementary fill is performed until the pressure switch returns to close on FULL. This phase may be followed by a further timercontrolled fill. 7.7 Drain pump 1. PCB 2. Anti-boiling pressure switch 8. Drain pump AB_S Anti-boiling level sensor The PCB powers the drain pump via a triac as follows: ª for a pre-determined period. ª until the anti-boiling pressure switch closes on EMPTY, after which the pump is actioned for a brief period or passes to the subsequent phase. 7.8 Anti-flooding device 1. PCB 8. Drain pump 9. Anti-overflow pressure switch HV1_S Anti-overflow level sensor The third pressure switch level (if featured) is used as an anti-overflow safety device: if the pressure switch contact should open in the FULL position, the PCB actions the drain pump until the pressure switch returns to the EMPTY position. 7.9 Water Control (not in all models) The Water Control system is a sensor located in contact with the base frame. The sensor detects water leaks inside the machine (not only during normal operation, but also when the unit is off and plugged in) and starts the drain pump. 1. 2. 3. 4. 5. 6. Main board 1st LEV. Pressure switch Anti-boiling pressure switch AE Drain pump Anti-interference filter Water Control Besides supporting the various components on the appliance (drain pump, recirculation pump, shock absorbers, etc.), the base frame is designed to be a container that collects any water leaks that may occur (from the tub, from a tube or pipe, etc.). These leaks are directed into an area where a float is installed. When this float is raised by water, it actuates a microswitch that starts the drain pump. When the switch is tripped, an alarm is also signalled (if the machine is switched on). Important: When replacing the drain pump or tube, arrange the tube so that it doesn’t interfere with the float. 1. 2. 3. 4. microswitch actuated by float float drain tube cover 7.10 Heating 1. PCB 2. Anti-boiling pressure switch 3. 1st level pressure switch 6. Heating element 7. NTC temperature sensor K1 Relay AB_S Anti-boiling level sensor L1_S 1st level sensor The heating element is powered by a relay on the PCB via the contacts of the pressure switch when closed on FULL. 7.10.1 Heating element 1. Heating element (1950W) 2. NTC-Sensor 7.10.2 Temperature sensor The temperature is controlled by the PCB by means of a NTC temperature sensor. TEMPERATURE (ºC) 20 60 80 Nominal value 6050 1250 640 RESISTANCE(Ω) Maximum value 6335 1278 620 Minimum value 5765 1222 660 7.11 Motor 1. PCB 2. Motor 3. Anti-boiling/anti-foam pressure switch M = rotor P = motor safety cut-out S = stator T = tachometric generator AB_S Anti-boiling/anti-foam level sensor 7.12 Power supply to motor The PCB powers the motor via a triac. The direction of rotation is reversed by switching of the contacts on the two relays (K2-K3), which modify the connection between the rotor and the stator. In certain models (1200-1600rpm), a third relay (K4) is used to power the stator (full or half field) according to the spin speed The speed of rotation of the motor is determined by the signal received from the tachometric generator. During the spin phases, the microprocessor, depending on the software configuration, may perform the antifoam control procedure (if featured) and the anti-unbalancing control procedure. 7.13 Anti-foam control system The anti-foam control procedure (if featured) is performed via the anti-boiling pressure switch (AB). Spin phase without foam Spin phase with little foam Spin Anti-foam ( Level AB ) 300 rpm pulses 300 rpm pulses FUCS • • Spin FUCS Spin with little foam: if the contact of pressure switch AB closes on FULL, the spin phase is interrupted; the drain pump continues to operate and, when the contact returns to EMPTY, the spin phase is resumed. Spin with excessive foam in the tub (critical situation): The control system detects whether the pressure switch commutates 5 times to FULL. In this case, the spin phase is skipped, and a one-minute drain cycle is performed with the motor switched off; in the case of a washing phase, a supplementary rinse is added. 7.14 “FUCS” (Fast Unbalance Control System) rpm The control procedure for unbalanced loads is performed dynamically, before each spin cycle, as follows: ª The phase begins at a speed of 55 rpm; the speed can never fall below this threshold, otherwise the check is repeated. ª At intervals of 300 ms, the balance is calculated and compared with predetermined limits. If the value is less than the lower limit, the speed of the drum is increased by a certain value depending on the transmission relation between motor pulley/drum; if the unbalancing is higher, it is decreased by the same value. The reduction in the speed of the drum distributes the washing correctly; this procedure is repeated until the wash load is completely balanced. ª Correct balancing of the wash load is achieved at a speed of 115 rpm, after which the spin cycle begins. Real speed Selected speed The Unbalancing Control function takes place in different phases: each phase is characterized by: ª an unbalancing index (0-1-2-3) ª an unbalancing threshold value (ex: 350, 650, 850, 1200rpm) ª a time out (max. time) • Ending of the FUCS balancing phase The phase is ended when: ª The drum rotation speed is 115 rpm (or 85rpm in some cases of unbalancing index). In this case the spin is performed. ª In some cases the optimal balancing value is not reached: a reduced spin is performed depending on the unbalancing. ª In the worst case, in which all phases are not sufficient to reach a minimum balancing value, the spin is not performed. • Example of perfect balancing Phase 0, Time-out=60 sec 115 rpm 55 rpm Phase 1 Time-out=60 sec • Balancing in the available longer interval 1 2 Phase 1 2 3 4 5 6 7 • 3 4 5 Unbalancing index 0 1 2 3 1 2 3 Unbalancing after all phases In this case the spin (or impulse) is not performed. 6 7 Time-out (sec) 60 120 60 90 120 90 90 8 DEMO Mode A special cycle has been created for demonstration of the operation of these appliances in retail outlets without connecting the appliance to the water supply. In this way, the salesman can select any programme; after starting the cycle by pressing START, the appliance will perform certain phases only, and will skip those which cannot be performed (water fill, drain, heating). The cycle takes place as follows: ª the door locking device is actioned in the normal way (i.e. the door remains locked while the appliance is in operation, and can be opened at the end of the cycle or in pause mode) ª motor: all low-speed movements are enabled, while the pulse signals and the spin cycle are excluded ª the water fill solenoids and the drain pump are disabled ª display: since the phases of the cycle take place in rapid succession (1 second of the demo cycle is equivalent to 1 minute of the actual cycle), the time-to-elapse decreases by 1 unit per second. Remember that the time-to-elapse does not always correspond to the actual cycle time ª alarms: for reasons of safety, the following groups of alarms remain enabled: E40 (door closed), E50 and E90 (communication between the boards/configuration). 8.1 Demo mode setting ª Switch the appliance off ª Press buttons 1 and 5 simultaneously and then, holding them down, switch the appliance on by rotating the programme selector of two positions clockwise ª Hold buttons 1 and 5 down until the LEDs start flashing (about 5 seconds). 8.2 Exiting demo mode ª To exit demo mode, switch the appliance off. 9 DIAGNOSTICS SYSTEM 9.1 Access to diagnostics system Using a single procedure, it is possible to access to the diagnostics system. After accessing this function, the following operations can be performed: control of the operation of each of the components in the appliance read / cancel the alarms The diagnostics cycles are available only if the communication between the main PCB and the display board is correct; moreover there should not be configuration errors of the appliance. To access: 1. Cancel the set programme and switch the appliance off. 2. Press buttons 1 and 2 simultaneously and then, holding them down, switch the appliance on by rotating the programme selector of one position clockwise. In the first position the function test of the buttons and the corresponding LEDs is performed; by rotating the programme selector clockwise the operation diagnostics of each component and the reading of the alarms is carried out. 9.2 Exiting diagnostics system ª To exit the diagnostics system switch the appliance off, on and then off again. 9.3 Phases of the diagnostics test Independently of the type of selector, after activating the diagnostics system, the operation diagnostics of the different components and the reading of the alarms can be performed, by rotating the selector clockwise. In models with digit the code of the selector position is displayed for a second. In the diagnostics cycle all alarms are activated. If during the cycle operation an alarm occurs, the appliance blocks and the LEDs (and the display) flash indicating the relative code. . Diagnostics phases Selector position 1 2 3 4 5 6 7 8 9 --- Components actioned Operating conditions Function checked All the LEDs light in sequence. When a button is Operation of the pressed, the corresponding Always activated user interface LED lights (and the buzzer, if featured, sounds) Door locked Water ducted Water level below Door interlock through washing anti-flooding level Washing solenoid Maximum time 5 compartment minutes Door locked Water ducted Water level below through pre-wash Door interlock anti-flooding level compartment Pre-wash solenoid Maximum time 5 (bleach) minutes Door locked Water ducted Water level below Door interlock anti-flooding level through conditioner Pre-wash and wash solenoids compartment Maximum time 5 minutes Door locked Water ducted through Water level below Door interlock. bleach/stains anti-flooding level Bleach/stains solenoid. Maximum time 5 compartment minutes Door interlock Door locked. Washing solenoid if the level Water at 1st level. Heating of water in the tub is below Maximum time 10 min. 1st level or up to 90ºC. (*) Heating element. Door interlock. Door locked (Washing solenoid if the level Water level at 1st level. Check for leaks from of water in the tub is below 1st the tub level). Motor (55 rpm clockwise, 55 rpm counterclockwise, 250 rpm impulse) Drain and spin; Door interlock Door locked control of Drain pump Water level lower than congruence in Motor up to 650 rpm then at anti-boiling level for closure of level maximum spin speed spinning pressure switches --------- --- Displayed parameters (1) Button codification (**)Selection position code (**)Selection position code (**)Selection position code (**)Selection position code (**)Selection position code (**)Selection position code (**)Selection position code --- 10 Reading/cancelling last alarm Alarm code 11, 12 ...24 All LEDs light in sequence. Pressing a button the corresponding LED lights (and the Buzzer sounds, if featured) (*) In most cases, this time is sufficient to check the heating. However, the time can be increased by repeating the phase without draining the water: for a moment to a different phase of the diagnostics cycle and then back to the heating control phase (if the temperature is higher than 80°C, heating does not take place). (**) See table page 39, “Display code”. (1) Models with Display. 9.3.1 Display board diagnostics After entering the diagnostics system, the display board is checked: all LEDs and the display light in sequence (if featured). Pressing all buttons, the corresponding LEDs switch on or those closer; the display shows the hexadecimal code corresponding to the button codification. 9.3.2 Programme selector In the table are indicated the closures between the contact C6 (common) and the other contacts (C1−C5) of the programme selector in the different positions and the corresponding codification. The code is displayed only in the appliances with display. Selector position Type 24 positions 1 - Cancel 2 3 4 5 6 7 8 9 10 11 12 13 14 15 16 17 18 19 20 21 22 23 24 Closure of selector contacts (C6 is the common) C1 C2 C3 C4 C5 0 0 0 0 0 0 1 1 1 0 0 1 1 0 1 0 1 1 1 0 0 0 0 0 1 1 1 1 1 0 0 0 0 1 0 0 0 0 0 0 0 0 1 1 0 1 0 0 1 0 1 0 1 0 0 0 0 0 1 0 1 1 1 1 1 1 0 1 0 0 0 1 1 0 0 1 1 1 0 0 1 1 0 1 0 1 0 1 1 1 0 0 0 0 1 0 1 1 0 0 0 1 0 1 0 1 1 1 0 0 1 1 0 1 0 1 1 0 0 0 Display code 1E 06 14 0C 1C 0A 01 03 09 0E 12 0b 11 18 13 1A 19 1b 05 16 02 04 08 10 10 ALARMS 10.1 Displaying the alarms to the user Control of the alarm system can be configured; according to the model, therefore, some or all of the alarms may be displayed to the user. Normally all the alarms are displayed to the user except for: - E10 – water fill - E20 – drain water - E40 – door closure - E90 – configuration The alarms are active during the execution of the washing programme; except for the alarms relative to the configuration and power/frequency supply which are displayed also in the selection phase. The door can normally be opened (except where specified) when an alarm condition has occurred on condition that: • The level of the water in the tub is below 1st level • The temperature of the water is lower than 55°C Certain alarm conditions require that a drain phase be performed before the door can be opened: • Cooling water fill if the temperature is in excess of 65°C • Drain until closure of both pressure switch contacts (1st level and anti-boiling safety system) on EMPTY within a maximum of 3 minutes. 10.1.1 Alarms displayed during normal operation The type of alarm condition is displayed to the user by the repeated flashing of the END OF CYCLE LED (0.4 seconds lit, 0.4 seconds off, with an interval of 2.5 seconds between sequences). This LED is featured on ALL MODELS, though configured in different positions. If, for example, the user should forget to close the door, the control system will detect alarm E41 about 15 seconds after the start of the cycle; the cycle remains in PAUSE mode and the display, if featured, would display E40. Simultaneously the LED end-of-cycle flashes repeating the sequence indicated in the table. The four flashing indicate the first of the two digits of the alarm E41 (the alarms relative to a same function are grouped by families). In this case, once the door has been closed, it is sufficient to press the start button to start the programme. LED end of cycle On/Off Time (Sec.) Value 0.4 1 0.4 0.4 2 0.4 0.4 3 0.4 0.4 4 0.4 2.5 Pause between sequences 10.2 Reading the alarm codes In order to read the last alarm code memorized in the EEPROM on the PCB: • Enter diagnostics mode • Irrespective of the type of PCB and configuration, turn the programme selector clockwise to the tenth position. 10.2.1 Displaying the alarm The alarm is displayed by a repeated flashing sequence of the two LEDs (0.4 seconds lit, 0.4 seconds off, with an interval of 2.5 seconds between sequences). The buzzer (if featured) will sound “bips” in synchronization with the flashing of the LEDs. • END OF CYCLE LED → indicates the first digit of the alarm code (family) • START/PAUSE → indicates the second digit of the alarm code (number within the family) These two LEDs are featured on all models (though they are configured differently), and flash simultaneously. Notes: • The first letter of the alarm code “E” (Error) is not displayed, since this letter is common to all alarm codes. • The alarm code “families” are shown in hexadecimal; in other words: → A is represented by 10 flashes → B is represented by 11 flashes → ... → F is represented by 15 flashes • Configuration errors are shown by the flashing of a series of LEDs. 10.2.2 Examples of alarm displays Example: Alarm E43 will display the following: • On the display, if featured, E43 • The sequence of four flashes of the End-of-cycle LED indicates the first number E43; • The sequence of three flashes of the Start/Pause LED indicates the second number E43; END-OF-CYCLE LED On/Off Time (Sec.) 0.4 0.4 0.4 0.4 0.4 0.4 0.4 0.4 2.5 START/PAUSE LED Value 1 2 3 4 Pause On/Off Time (Sec.) 0.4 0.4 0.4 0.4 0.4 0.4 3,3 Value 1 2 3 Pause 10.2.3 Operation of alarms during diagnostics All alarms are enabled during the components diagnostics phase. Moving the selector to pass from one control phase to the other, the appliance exits the alarm condition and performs the selected phase (if the alarm does not occur again). 10.3 Notes about some alarms Configuration alarms ª E91: the error is indicated by the flashing of all the LEDs, E90 is displayed on the display, if featured ª E92: the error is indicated by the flashing of the LEDs placed over the buttons, E90 is displayed on the display, if featured ª E93: the error is indicated by the flashing of the phase/warning LEDs, E90 is displayed on the display, if featured ª EB1-EB2-EB3 alarms: in case of problems with the power supply, the machine remains in alarm condition till the frequency or the power supply voltage returns to correct values or the appliance is switched off. “EB0” alarm family is displayed and it is not possible to enter the diagnostics or to use “alarm fast display” mode: the alarm complete can be read only when the abnormal situation terminated. E51- E52 alarms: during the diagnostics test all alarms are displayed: normally, moving the selector to pass from one control phase to the other, the appliance exits the alarm condition and performs the selected phase. This does not happen for the E51 alarms (motor power triac short-circuited) and E52 (no signal of motor tachometric generator): the only possibility to exit from the alarm condition is to switch the appliance off. 10.4 Rapid reading of alarm codes The last alarm code can be displayed even if the programme selector is not in the tenth position (diagnostics) or if the appliance is in normal operating mode (e.g. during the execution of the washing programme): ª Press buttons 1 and 5 simultaneously for at least 2 seconds: the LED switch off and then display the sequence of flashes indicating the alarm. ª The alarm sequence is displayed for the time in which the buttons are hold down ª The reading system is the same as that indicated in paragraph. 10.2 ª During the time the alarm is displayed, the appliance continues to perform the cycle or, if it is in the selection phase, it keeps in memory the options previously chosen. 10.5 Cancelling the last alarm It is good practice to cancel the last alarm, after reading the alarm code to check whether the alarm re-occurs during the diagnostics control after the reparation of the appliance. 1. Select diagnostics mode and turn the programme selector to the tenth position (reading of alarm) 2. Press buttons 1 and 5 simultaneously. 3. Hold buttons 1 and 5 down (about 2 seconds). SOI/DT 2006-07 dmm 43/49 599 38 17 97 10.6 Table of alarm codes Alarm Description E11 Difficulties in water fill for washing E13 Water leakage E21 Difficulties in draining E23 E24 E33 E35 E36 E37 E39 Possible fault Tap closed or mains pressure insufficient; drain hose incorrectly positioned; water fill solenoid faulty; leaks from the hydraulic circuit of the pressure switch; pressure switch faulty; wiring faulty; PCB faulty. Drain hose incorrectly positioned; mains pressure insufficient; water fill solenoid faulty; leakage/blockage of pressure switch hydraulic circuit; pressure switch faulty. Drain hose kinked/blocked/incorrectly positioned; drain filter blocked/dirty; drain pump faulty; wiring faulty; PCB faulty; current leakage from heating element to ground. Start Cycle paused with door closed Start Cycle paused Start Drain pump faulty; wiring faulty; PCB faulty. Door open E42 Problems of door closure E43 Interlock power supply triac faulty E44 E45 Door interlock sensor faulty Door interlock sensing circuit triac faulty Door interlock faulty; wiring faulty; PCB faulty. Door interlock faulty; wiring faulty; PCB faulty. Door interlock faulty; wiring faulty; PCB faulty. PCB faulty. PCB faulty E51 Motor power supply triac short-circuited PCB faulty; current leakage from motor or from wiring. No signal from motor tachometric generator Motor faulty; wiring faulty; PCB faulty E53 Motor triac sensing circuit faulty E54 Motor relay contacts sticking E61 Insufficient heating during washing SOI/DT 2006 07 dmm PCB faulty. PCB faulty; current leakage from motor or from wiring NTC sensor faulty; heating element faulty; wiring faulty; PCB faulty. 44/49 Reset Cycle paused with door closed Safety drain cycle – Cycle stopped with door open Safety drain cycle – Cycle stopped Fault in “sensing” circuit of drain pump triac PCB faulty. with door released Incongruence between closure of anti-boiling Pressure switch faulty; current leakage from heating element to ground; Safety drain cycle – Cycle stopped and 1st level pressure switch contacts heating element; wiring faulty; PCB faulty. with door open Cycle blocked. Safety drain cycle. Water fill solenoid faulty; leakage from pressure switch hydraulic circuit; Water overflow (flooding) Drain pump always in operation (5 pressure switch faulty; wiring faulty; PCB faulty. minutes on, 5 minutes off etc.) Fault in “sensing” circuit of anti-boiling PCB faulty. Cycle blocked, door locked. pressure switch 1st level sensing circuit faulty PCB faulty. Cycle blocked, door locked. “HV” sensor of anti-overflow level faulty PCB faulty. Cycle blocked, door locked. Drain pump triac faulty E41 E52 Action/machine status OFF OFF OFF/reset OFF/reset OFF/reset OFF/reset OFF/reset Cycle paused Start Cycle paused Start (Safety drain cycle) Cycle blocked OFF (Safety drain cycle) Cycle blocked (Safety drain cycle) Cycle blocked OFF OFF Cycle blocked, door locked (after 5 attempts) Cycle blocked, door locked (after 5 attempts) Cycle blocked, door locked Cycle blocked, door locked (after 5 attempts) The heating phase is skipped OFF/reset OFF/reset OFF OFF --- 599 38 17 97 Alarm Description E62 Overheating during washing E66 Heating element power relay faulty E71 Washing NTC sensor faulty E74 Washing NTC-sensor badly positioned E82 E83 Error in selector reset position Error in reading selector E91 E92 E93 E94 E95 E97 EB1 EB2 EB3 EF1 EF2 EF3 E00 Possible fault NTC sensor faulty; heating element faulty; wiring faulty; PCB faulty. PCB faulty; current leakage from heating element to ground. NTC sensor faulty; wiring faulty; PCB faulty. NTC sensor badly positioned; NTC sensor faulty; wiring faulty; PCB faulty. PCB faulty (Wrong configuration data). Selector, wiring PCB faulty (Wrong configuration data). Selector, wiring Action/machine status Safety drain cycle – Cycle stopped with door open Safety drain cycle – Cycle stopped with door open Reset OFF OFF The heating phase is skipped Start The heating phase is skipped Start Cycle cancelled OFF/reset --- Cycle interrupted --- Cycle interrupted --- Cycle interrupted Cycle interrupted OFF/reset OFF/reset Cycle interrupted OFF/reset Cycle interrupted OFF/reset Power supply problems (incorrect / disturbance); PCB faulty. Power supply problems (incorrect / disturbance); PCB faulty. Power supply problems (incorrect / disturbance); PCB faulty. Cycle interrupted Cycle interrupted Cycle interrupted ------- Drain filter blocked (too long drain phase) Overdosing of detergent (too much foam during drain phases) Drain tube blocked/kinked/too high; Drain filter dirty/blocked. Excessive detergent dosing; drain tube kinked/blocked; Drain filter dirty/blocked. Warning displayed at the end of cycle (specific LED) --- (specific LED) --- Control water intervention Water leakage on the base; faulty water control device. Water drain and cycle blocked Communication incongruence between main Wiring faulty; Faulty control/display board PCB- display board Main PCB faulty. (versions not compatible) Communication incongruence between main Wrong control/display board; PCB- display board Wrong PCB (do not correspond to the model). (versions not compatible) Incorrect configuration of appliance Incorrect configuration data; PCB faulty. Incorrect configuration of washing cycle Incorrect configuration data; PCB faulty. Communication error between microprocessor PCB faulty. and EEPROM Incongruence between programme selector Faulty PCB (Wrong configuration data). and cycle configuration Frequency of appliance incorrect Voltage too high Voltage too low SOI/DT 2006 07 dmm No alarm --- 45/49 --- --- OFF/reset --- 599 38 17 97 11 BASIC CIRCUIT DIAGRAM 11.1 Diagram (without Water Control) SOI/DT 2006 07 dmm 46/49 599 38 17 97 11.1.1 Key to circuit diagram 1. 2. 3. 4. 5. 6. 7. 8. 9. 10. 11. 12. 13. 14. 15. 16. 17. 18. 19. 20. Components in the appliance Electronic board Suppressor ON/OFF switch ON/OFF pilot lamp Door interlock Anti-boiling pressure switch Heating element 1st level pressure switch Anti-overflow pressure switch (not all models) Pre-wash solenoid valve Wash solenoid valve Bleach solenoid valve (not all models) Drain pump Closed door lamp (not all models) Control/display board Thermal cut-out (motor) Stator (motor) Rotor (motor) Tachometric generator (motor) NTC temperature sensor SOI/DT 2006 07 dmm Components of the PCB BELV_TY DOOR_TY DRAIN_TY K1 K2 K3 K4 MOTOR_TY PWELW_TY Serial interface WELV_TY 47/49 Bleach solenoid Triac Door interlock Triac Drain pump Triac Heating element relay Motor relay: clockwise rotation Motor relay: anti-clockwise rotation Motor relay: half field power supply (models with higher spin at 1200 rpm) Motor Triac Pre-wash solenoid Triac Asynchronous serial interface Wash solenoid Triac 599 38 17 97 11.2 Diagram (with Water Control) SOI/DT 2006 07 dmm 48/49 599 38 17 97 11.2.1 Key to circuit diagram 1. 2. 3. 4. 5. 6. 7. 8. 9. 10. 11. 12. 13. 14. 15. 16. 17. 18. 19. 20. Components in the appliance Electronic board Suppressor Drain pump Water control Anti-boiling pressure switch Door interlock Heating element 1st level pressure switch Anti-overflow pressure switch (not all models) Pre-wash solenoid valve Wash solenoid valve Bleach solenoid valve (not all models) Closed door lamp (not all models) Selector Control/display board Thermal cut-out (motor) Stator (motor) Rotor (motor) Tachometric generator (motor) NTC temperature sensor SOI/DT 2006 07 dmm Components of the PCB BELV_TY DOOR_TY DRAIN_TY K1 K2 K3 K4 MOTOR_TY PWELW_TY Serial interface WELV_TY 49/49 Bleach solenoid Triac Door interlock Triac Drain pump Triac Heating element relay Motor relay: clockwise rotation Motor relay: anti-clockwise rotation Motor relay: half field power supply (models with higher spin at 1200 rpm) Motor Triac Pre-wash solenoid Triac Asynchronous serial interface Wash solenoid Triac 599 38 17 97


