1
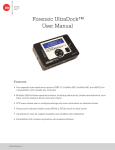
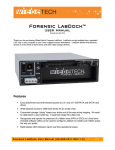
A Brand of CRU-DataPort
Product Name
Forensic UltraDock v4
Drive Compatibility
•
•
•
2.5-inch & 3.5-inch SATA drives
3.5-inch IDE/PATA drives
Additional types using optional Combo Adapters
Host Interfaces
•
•
•
•
eSATA
FireWire 800 (two ports, daisy-chainable)
FireWire 400
USB 2.0
Power Supply
Input: 100-240VAC; Output: +12V / +5V
Operating System
•
•
•
Shipping Weight
3 pounds, including accessories
Compliance
CE, FCC, RoHS, C-Tick
Support
We don’t want anything to go wrong with your product. But if it does, Tech Support is
standing by and ready to help. Contact us through wiebetech.com/techsupport. Phone
support also available at (866) 744-8722. WiebeTech is a brand of CRU.
Windows 7, Vista, XP
Mac OS X
Linux distributions supporting FireWire
A Brand of CRU-DataPort
Forensic UltraDock™ v4 Quick Start Guide
For more information and the full user manual for this product, please
visit http://www.wiebetech.com/techsupport.php. WiebeTech is a brand of CRU.
Forensic Device User Advisory
Before using this tool for accessing sensitive data, it’s
a good idea to verify the write-blocking function of
the product. This is easily done: attach a known good
formatted drive, and verify that the drive mounts properly
on your computer. Copy files to the drive. Due to the
“spoof writing” style of write-blocking employed by this
product, the files will appear to copy successfully. Next,
unmount and remount the drive. The files that you copied
should not appear after the drive is remounted. If they do appear, there is a problem with your
forensic device, and you should contact our support department for further instructions.
CRU-WiebeTech support may be reached at 866-744-8722 (toll free) or [email protected] (email).
Forensic UltraDock and WiebeTech are trademarks of CRU Acquisitions Group, LLC. Other marks are the property of their respective owners.
© 2008, 2011 CRU Acquisitions Group, LLC. All rights reserved.
Limited Product Warranty
CRU-DataPort (CRU) warrants Forensic UltraDock to be free of significant defects in material and workmanship for a period of two years from the original date of
purchase. CRU’s warranty is nontransferable and is limited to the original purchaser.
Limitation of Liability: The warranties set forth in this agreement replace all other warranties. CRU expressly disclaims all other warranties, including but not limited
to, the implied warranties of merchantability and fitness for a particular purpose and non-infringement of third-party rights with respect to the documentation and
hardware. No CRU dealer, agent, or employee is authorized to make any modification, extension, or addition to this warranty. In no event will CRU or its suppliers be
liable for any costs of procurement of substitute products or services, lost profits, loss of information or data, computer malfunction, or any other special, indirect,
consequential, or incidental damages arising in any way out of the sale of, use of, or inability to use any CRU product or service, even if CRU has been advised of the
possibility of such damages. In no case shall CRU’s liability exceed the actual money paid for the products at issue. CRU reserves the right to make modifications and
additions to this product without notice or taking on additional liability.
FCC Compliance Statement: “This device complies with Part 15 of the FCC rules. Operation is subject to the following two conditions: (1) This device may not cause
harmful interference, and (2) this device must accept any interference received, including interference that may cause undesired operation.”
This equipment has been tested and found to comply with the limits for a Class B digital device, pursuant to Part 15 of the FCC Rules. These limits are designed to provide reasonable protection against harmful interference when the equipment is operated in a home or commercial environment. This equipment generates, uses, and
can radiate radio frequency energy and, if not installed and used in accordance with the instruction manual, may cause harmful interference to radio communications.
In the event that you experience Radio Frequency Interference, take the following steps to resolve the problem:
1)
Ensure that the case of your attached drive is grounded.
2)
Use a data cable with RFI reducing ferrites on each end.
3)
Use a power supply with an RFI reducing ferrite approximately 5 inches from the DC plug.
4)
Reorient or relocate the receiving antenna.
A9-000-0014-1 Rev. 1
1. Installation Steps
1.1 Attaching a Bottom Plate to your 3.5 inch Drive.
(This step is optional but recommended.) The purpose of the plate is to provide
protection to the drive electronics and aid heat dissipation.
a. A
ttach the bottom plate to the drive using the four
screws supplied.
b. Attach a rubber bumper to each corner.
1.2 Attaching SATA Drives (3.5 inch & 2.5 inch)
a. Insert Forensic UltraDock’s 4-wire power cable into the
corresponding socket on the SATA power/data combo
cable.
b. Plug the SATA power/data combo cable into UltraDock’s SATA port.
c. Plug the SATA power/data combo connector into the drive.
A Brand of CRU-DataPort
A Brand of CRU-DataPort
1.3 Attaching IDE/PATA Drives (3.5 inch)
a. Configure the jumpers on your hard drive. The drive must be set to the Master setting.
Consult the instructions for your drive (some drives display configuration information
on the drive’s label). A few drives have both “Master with Slave Present” and “Master
without Slave” options. Choose the latter in this case. In rare cases, if the Master
setting does not work then try Cable Select.
2.2 U
sing Forensic UltraDock v4 with Combo Adapters
CRU-WiebeTech offers optional Combo Adapters that can allow your Forensic UltraDock
to access many additional types of drives. Follow these three simple steps to use a Combo
Adapter with your dock:
a. Attach the dock’s 4-wire power connector to the adapter.
b. Connect the dock’s IDE ribbon cable to the adapter’s IDE pins.
c. Connect the drive to the adapter.
Rear of Hard Drive
IDE Interface
Jumper Power
Pins
b. Attach the free end of the IDE ribbon cable to the back of the hard drive. The connector
is keyed to insert only one way. The IDE pins on the hard drive are fragile, so be very
careful when inserting or removing the IDE connector.
c. Attach the 4-pin power connector from the dock into the back of the hard drive. As with
the IDE cable, the connector will only fit one way.
2. Operating Your Forensic UltraDock
2.1 Connecting and Powering Forensic UltraDock
a. Connect the eSATA, FireWire or USB cable from your computer into the corresponding
port on the Forensic UltraDock.
b. Connect power to the Forensic UltraDock. Use either the included AC adapter or you can
connect a 4-wire power cable from inside a computer case. This is useful if you wish to
access a drive inside a computer without removing it first.
Your Forensic UltraDock is now ready to use! Turn on the unit by moving the power switch
to the “I” position. The red drive access indicator will light briefly after the unit is powered
up. Thereafter, it will light whenever the drive is accessed.
You are now ready to use Forensic UltraDock to access the drive.
3. Forensic Software Utility
Forensic Software Utility is a free software application designed for optional usage with Forensic
UltraDock. The software allows you to configure the way the dock handles any hidden areas
found on attached drives (i.e. HPA and/or DCO), update the Forensic UltraDock’s firmware, and
capture real-time info about both the write-blocker and the attached drive which can be saved
to a log file. Forensic Software Utility and its user manual are available for download from the
WiebeTech website.
http://www.wiebetech.com/software/forensic_software_utility.php