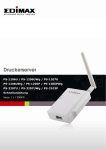
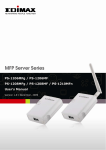
Download Edimax PS-1210MFn User`s manual
Transcript
Multi-Language QIG in Driver CD ================================================ Český: Českého průvodce rychlou instalací naleznete na přiloženém CD s ovladači Deutsch: Finden Sie bitte das deutsche QIG beiliegend in der Treiber CD Español: Incluido en el CD el QIG en Español Français: Veuillez trouver l’français QIG ci-joint dans le CD Italiano: Incluso nel CD il QIG in Italiano Magyar: A magyar telepítési útmutató megtalálható a mellékelt CD-n Nederlands: De nederlandse QIG treft u aan op de bijgesloten CD Polski: Skrócona instrukcja instalacji w języku polskim znajduje się na załączonej płycie CD Português: Incluído no CD o QIG em Portugues Русский: Найдите QIG на pусскoм языке на приложеном CD Romana: Cd-ul cuprinde Ghid de instalare rapida in limba romana Slovensky: Anglického sprievodcu rýchlou inštaláciou nájdete na priloženom CD s ovládačmi. Türkçe: Ürün ile beraber gelen CD içinde Türkçe Hızlı Kurulum Kılavuzu'nu bulabilirsiniz 简体中文: 产品包装 CD 光盘中含有简体中文版快速安装手冊 繁體中文: 產品包裝隨附 CD 中含有繁體中文版快速安裝指南 1 Copyright© by Edimax Technology Co, LTD. all rights reserved. No part of this publication may be reproduced, transmitted, transcribed, stored in a retrieval system, or translated into any language or computer language, in any form or by any means, electronic, mechanical, magnetic, optical, chemical, manual or otherwise, without the prior written permission of this company. This company makes no representations or warranties, either expressed or implied, with respect to the contents hereof and specifically disclaims any warranties, merchantability or fitness for any particular purpose. Any software described in this manual is sold or licensed "as is". Should the programs prove defective following their purchase, the buyer (and not this company, its distributor, or its dealer) assumes the entire cost of all necessary servicing, repair, and any incidental or consequential damages resulting from any defect in the software. Further, this company reserves the right to revise this publication and to make changes from time to time in the contents hereof without obligation to notify any person of such revision or changes. The product you have purchased and the setup screen may appear slightly different from those shown in this QIG. For more detailed information about this product, please refer to the User's Manual on the CD-ROM. The software and specifications are subject to change without notice. Please visit our web site www.edimax.com for the update. All right reserved including all brand and product names mentioned in this manual are trademarks and/or registered trademarks of their respective holders. 2 Contents 1. Product Introduction .........................................................5 2. Product Package ..............................................................6 3. Getting Started .................................................................7 3.1. Hardware Installation Procedure...............................7 3.2. Software Installation Procedure ................................8 3.2.1 EZMax Installation Wizard..................................9 3.2.2 MPF Server Utility Installation ..........................10 3.3. Using MFP Server Utilities ......................................21 3.4. Install the MFP Drivers/Utilities ...............................22 3.4.1 Never Install MFP Driver/Utilities......................23 3.4.2 MFP Drivers/Utilities has been installed ...........26 4. Using the MFP ...............................................................28 4.1. Sharing Print ...........................................................29 4.2. Sharing Scan ..........................................................30 4.3. Sharing Card Reader ..............................................31 4.4. Fax a File ................................................................32 3 Copyright© by Edimax Technology Co, LTD. all rights reserved. No part of this publication may be reproduced, transmitted, transcribed, stored in a retrieval system, or translated into any language or computer language, in any form or by any means, electronic, mechanical, magnetic, optical, chemical, manual or otherwise, without the prior written permission of this company. This company makes no representations or warranties, either expressed or implied, with respect to the contents hereof and specifically disclaims any warranties, merchantability or fitness for any particular purpose. Any software described in this manual is sold or licensed "as is". Should the programs prove defective following their purchase, the buyer (and not this company, its distributor, or its dealer) assumes the entire cost of all necessary servicing, repair, and any incidental or consequential damages resulting from any defect in the software. Further, this company reserves the right to revise this publication and to make changes from time to time in the contents hereof without obligation to notify any person of such revision or changes. The product you have purchased and the setup screen may appear slightly different from those shown in this QIG. For more detailed information about this product, please refer to the User's Manual on the CD-ROM. The software and specifications are subject to change without notice. Please visit our web site www.edimax.com for the update. All right reserved including all brand and product names mentioned in this manual are trademarks and/or registered trademarks of their respective holders. 4 1. Product Introduction Thank you for purchasing and using our MFP server. This MFP server allows your Multi-function, all-in-one printer (called for short: MFP) or printer to become a shared device on the network. Unlike many print servers, it can communicate with MFP and printer as if it is connected directly to your computer. Because of the features, all users can share print, scan, card reader and fax functions through the network. Furthermore, the MFP Server can build the bi-directional communication with MFPs and Printers so that it can help to monitor important information such as ink levels and paper levels. The MFP server supports print, scan, card reader and fax sharing functions in the most popular operating systems: Windows 2000 SP4 above, Windows XP SP1 above and Windows Vista. It also supports Windows XP and Vista scanning utility and MFP vendors’ scanning utilities. When you want to scan in the Windows XP, Vista or Windows7, you can choose one of the utilities. Not only be a MFP Server, this MFP Server can also be a traditional print server. It supports TCP/IP network protocol and LPR, RAW and IPP printing protocols. It can share print function in the various common network operating systems including Windows 2000/XP/Vista/7, Unix, Linux and MAC OS 9.x above. The MFP server is the best solution for users to share MFP or printer conveniently and easily. It offers the most flexibility and manageability for MFP or printer on your Local Area Network at an extremely low cost and with an absolute minimum setup and maintenance required. 5 2. Product Package This package contains the following components: One MFP Server One Antenna (PS-1206MFg, PS-1208MFg or PS-1210MFn only) One Power Adapter One Quick Installation Guide One CD (EZmax Wizard / Utility, Multi-language Quick Installation Guide & User Manual) 6 3. Getting Started Before you start, you should have: One computer with Windows 2000 SP4 above, Windows XP SP1 above, Windows Vista (32-bit/64-bit) or Windows 7. One MFP or printer with USB port and an installation CD One Category 5 Ethernet Cable One USB Cable 3.1. Hardware Installation Procedure 1. Unpack the MFP Server package and verify that all the items listed in the previous section are provided. 2. Plug the USB cable to the MFP Server with the MFP or printer that you want to share on the network. 3. Connect the MFP Server to your network by attached the network cable to the network port of the MFP server. 4. Connect the power adapter to the MFP Server. The MFP Server will perform the Power-On-Self-Test (POST) after it is powered on. When the Status LED is unlighted, the MFP Server is ready. Note: 1. You must use the power adapter shipped along with the MFP Server, do NOT use any other power adapter from other sources. 2. To prevent the compatibility problem between MFP Server and a few MFP or printer, it is recommended that you power on the MFP Server before the MFP or printer. 7 3.2. Software Installation Procedure Before you start, you should check your computer’s operating system. This program can be run in Windows 2000 SP4 above, Windows XP SP1 above and Windows Vista. The following procedures are running in Windows XP, for Windows 2000, Windows Vista or Windows 7, the procedures are similar. Tip: You have to uninstall all the MFP server drivers and utilities if you have installed the previous version. 8 3.2.1 EZMax Installation Wizard This wizard can be run in Windows 2000/XP/Vista/7. The following procedures are operated in Windows XP. You can install the MFP Server by EZMAX Setup Wizard in the CD-ROM including in the package. The wizard is an easy and quick configuration tool for internet connection with series process. When you start EZMAX Setup Wizard, you will get the following welcome screen. Please choose the language to start the configuration. The wizard will guide you to finish your network connection. We will not provide any instruction for the EZMAX Setup Wizard here. If you lose the CD ROM or you prefer the traditional setup procedure, please follow the instruction as following step in this quick installation guide. ** Default login user name & password: User name: admin Password: 1234 9 3.2.2 MPF Server Utility Installation **Please find the utility manually from CD-ROM drive’s root directory or download it from Edimax website. If you have any question please check with Edimax local technical support team. 1. Please execute the MFP Server Utility installation software manually. 2. The “MFP Server Utilities - InstallShield Wizard” is displayed, please click "Next". 10 3. Click “Next” to install the MFP Server utilities in the default folder or click “Change” to specify the destination folder where you would like to install the MFP Server utilities. 11 4. The system starts installing the MFP Server Utilities. 12 5. The “MFP Server Configuration” screen is displayed. If you want to configure the MFP Server, please click “”Next” directly. Or you can select “No, I will configure the MFP Server later” and click “Next” to complete the installation. The following steps are for MFP Server Configuration. 13 6. The MFP Server List will auto search the MFP Servers in the network. Select the MFP Server you want to setup and click “Next” to continue. 7. Enter the “User Name” and “Password” of the MFP Server you have selected to login the MFP Server. The default “User Name” is “admin”; default “Password” is “1234.” 14 8. Set the “Alias Name” and the “MFP Server Description” to the MFP Server here. Click on “Next”. Note: You can define the location or other information of the MFP Server for easy to find the MFP by filling “MFP Server Description”. 15 9. Please set the network settings for the MFP Server manually. By default, the network settings are as follows. IP Address: 192.168.2.2 Subnet Mask: 255.255.255.0 If you have selected “DHCP”, the MFP Server will try to determine your network settings automatically. If a DHCP Server is present within the network, the MFP Server will automatically obtain and configure the network settings assigned by the DHCP Server. The assigned IP Address will be shown in the IP Address fields. If no DHCP Server is present within the network, please assign the network settings of the MFP Server manually. Please click “Next” once you have found appropriate network settings for the MFP Server. Note: The MFP Server IP Address should be in the same network segment with the connected computer. If the network settings are incorrect, a message will be prompted to remind you after you click “Next”. Please make sure that you have set the right settings before going to the next step. If you don’t want to set it now, please click “Cancel” to finish the installation. You can then use the “Server Manager” utility to configure the MFP Server. 16 10. The “Wireless Network Settings” screen will allow you to connect your wireless MFP Server to your wireless router, access point, or point-to-point ad-hoc connection. The MFP Server will automatically scan the wireless networks nearby. Please select the appropriate wireless network that you would like to connect from the list and click “Next”. You may choose to scan for the wireless access point or router (Infrastructure mode) or the wireless adapters (Ad Hoc mode). Or, you can manually enter the wireless network information (Manual mode). By default, the wireless settings are as below. Mode: Ad Hoc SSID: Default Channel: 11 17 11. If you chose to connect to an encrypted network, the “Wireless Security Settings” screen will be appeared. You have to select the “Security Mode” and enter the key the same as the settings on your wireless devices. For more information about the security settings, please refer to the Section 7.8 in the manual. 12. The configurations are finished. Please click “Finish” to apply new settings. 18 13. Click “Finish” to complete the installation. Note: If the Windows XP Firewall in your system has been enabled, the MFP Server will automatically open ports for the MFP Server programs smoothly run in your system. It will not cause abnormal behaviors or unsafe on your system. 14. Choose “Yes” if you want to run the “MFP Manager” utility automatically when Windows starts. It is recommended to enable the setting. 19 15. The default wireless setting is “Auto”. The MFP Server will detect if the MFP Server is connected to a wired LAN network through the attached Ethernet cable. If yes, it will work in wired network. To enable the wireless setting, please remove the Ethernet cable. For more detailed information about wireless setting, please refer to Section 7.8 in the manual. 20 3.3. Using MFP Server Utilities After the installation is completed, there will be three utilities and a text file in the MFP Server’s Program folder. MFP Manager – Allows you to manage the connection between the MFP and your computer for sharing MFP function. Server Configuration – Allows you to configure the MFP Server’s IP Address, network protocols and other advanced features. It also allows you to manage the MFP Server. Uninstall – Assistant for removing all installed MFP Server software programs. About Version – Display the version of each utility including in the MFP Server software programs. 21 3.4. Install the MFP Drivers/Utilities When the installation is completed, the “MFP Manager” will be popped up. It will automatically find the MFP Servers and the connected MFPs in the network and show it in the “MFP Server List”. Before you start to install the MFP selected from the “MFP Server List”, please check your computer’s MFP installation status. You never install the MFP drivers/utilities; please refer to the Section 3.4.1. You have installed the MFP drivers/utilities; please refer to the Section 3.4.2. 22 3.4.1 Never Install MFP Driver/Utilities Before the installation, please read the manual of the MFP. Some MFP requires users to install the drivers/utilities before connecting the MFP to your computer. Some MFP requires connecting the MFP to your computer during the installation. Please refer to the below illustration of “HP ALL-In-One Series” which is the screen displayed during the installation. To connect the MFP to your computer through the MFP Server just like you have directly connected the MFP to your computer through the USB cable, you can follow the steps below. 23 1. Select the MFP that you want to install in the “MFP Server List” and click “Connect” button. 2. The Windows will detect the new hardware and prompt to install the MFP drivers. When the system stops prompting, the drivers are all installed. If the system can’t find the MFP driver, please insert the installation CD of the MFP and designated to find drivers in the CD. Note: If the MFP you have connected is a composite device, the system will install the driver for composite device at first. The following screen will be popped up, please click “Continue Anyway”. When the system stops prompting, the drivers are all installed. If the system can’t find the MFP driver, please insert the installation CD of the MFP and designated to find drivers in the CD. 24 3. After you have completed the MFP installation, you will see the MFP is added to the “Printers and Faxes” in Windows. 25 3.4.2 MFP Drivers/Utilities has been installed To bundle the MFP drivers/utilities that you have installed to the MFP Server, please follow the steps below. 1. Select the MFP that you want to install in the “MFP Server List” and click “Connect” button. 2. The Windows will detect the new hardware and prompt to install the MFP drivers. When the system stops prompting, the drivers are all installed. If the system can’t find the MFP driver, please insert the installation CD of the MFP and designated to find drivers in the CD. Note: If the MFP you have connected is a composite device, the system will install the driver for composite device at first. The following screen will be popped up, please click “Continue Anyway”. When the system stops prompting, the drivers are all installed. If the system can’t find the MFP driver, please insert the installation CD of the MFP and designated to find drivers in the CD. 26 3. After the installation, a copy of the MFP will be added to the “Printers and Faxes” in Windows. Tip : The new copy of the MFP is bundled to the MFP Server. Please use the MFP to share print, scan, card reader or fax functions through the network. 27 4. Using the MFP After you have followed the install wizard to finish the MFP installation, the MFP is now connected to your computer. You can start sharing print, scan, card reader or fax functions provided by the MFP. Tip 1: If you have finished using the MFP, please click “Disconnect” to release the MFP. Another users can’t use the MFP until the MFP is released. Tip 2: It is recommended to enable “Idle Timeout” setting. The MFP Server will auto release your connection to the MFP after a period of idle time that you have assigned. So the MFP will not be occupied too long and other users can share the MFP frequently. Please refer to Section 6.1 in the manual for more information. 28 4.1. Sharing Print The MFP will be added to “Printers and Faxes” in the Windows after the MFP is installed. When you have connected to the MFP by clicking “Connect” in the “MFP Manager”, the MFP Server will auto create the connection between the MFP and your computer and then you can print a document just follows the same steps as usual. Tip: If you have sent a printing job to the MFP while the MFP is connecting by a user, you may be prompted that the device is not found or the document is failed to print. Please resend the printing job after the MFP is idle or not being connected. 29 4.2. Sharing Scan Most of the MFP provides scan utility for users. You can scan pictures or documents through the utility. In Windows XP and Windows Vista, user can also scan from Windows XP/Vista/7 scanning utility. An example: HP 1600 Series Utilities Windows XP Scanning Utility 30 4.3. Sharing Card Reader If the MFP supports card reader function, you can read the files from the plugged card reader through the MFP Server. 31 4.4. Fax a File If the MFP supports fax function, you can fax files from your computer to the fax number you designated. An example: Fax through HP Officejet 5600 Series After the MFP is installed, there is a fax device will be added to “Printers and Faxes” in the Windows. When you have connected to the MFP by clicking “Connect” in the “MFP Manager”, you can fax a file through the MFP Server to the fax device. Procedures to fax a file 1. In the Microsoft Office or other programs, select “Print” from the “File” menu. 2. The following screen will be popped up, select the fax device and then click “Print”. 32 3. The “Send Fax” screen is popped up, please configure the file and enter the fax number. Click “Send Fax” to fax the file. 33 Federal Communication Commission Interference Statement This equipment has been tested and found to comply with the limits for a Class B digital device, pursuant to Part 15 of FCC Rules. These limits are designed to provide reasonable protection against harmful interference in a residential installation. This equipment generates, uses, and can radiate radio frequency energy and, if not installed and used in accordance with the instructions, may cause harmful interference to radio communications. However, there is no guarantee that interference will not occur in a particular installation. If this equipment does cause harmful interference to radio or television reception, which can be determined by turning the equipment off and on, the user is encouraged to try to correct the interference by one or more of the following measures: 1. Reorient or relocate the receiving antenna. 2. Increase the separation between the equipment and receiver. 3. Connect the equipment into an outlet on a circuit different from that to which the receiver is connected. 4. Consult the dealer or an experienced radio technician for help. FCC Caution This device and its antenna must not be co-located or operating in conjunction with any other antenna or transmitter. This device complies with Part 15 of the FCC Rules. Operation is subject to the following two conditions: (1) this device may not cause harmful interference, and (2) this device must accept any interference received, including interference that may cause undesired operation. Any changes or modifications not expressly approved by the party responsible for compliance could void the authority to operate equipment. Federal Communication Commission (FCC) Radiation Exposure Statement This equipment complies with FCC radiation exposure set forth for an uncontrolled environment. In order to avoid the possibility of exceeding the FCC radio frequency exposure limits, human proximity to the antenna shall not be less than 20cm (8 inches) during normal operation. The antenna(s) used for this transmitter must not be co-located or operating in conjunction with any other antenna or transmitter. 34 R&TTE Compliance Statement This equipment complies with all the requirements of DIRECTIVE 1999/5/EC OF THE EUROPEAN PARLIAMENT AND THE COUNCIL of March 9, 1999 on radio equipment and telecommunication terminal Equipment and the mutual recognition of their conformity (R&TTE) The R&TTE Directive repeals and replaces in the directive 98/13/EEC (Telecommunications Terminal Equipment and Satellite Earth Station Equipment) As of April 8, 2000. Safety This equipment is designed with the utmost care for the safety of those who install and use it. However, special attention must be paid to the dangers of electric shock and static electricity when working with electrical equipment. All guidelines of this and of the computer manufacture must therefore be allowed at all times to ensure the safe use of the equipment. EU Countries Intended for Use The ETSI version of this device is intended for home and office use in Austria, Belgium, Denmark, Finland, France, Germany, Greece, Ireland, Italy, Luxembourg, Bulgaria, Cyprus, Czech Republic, Estonia, Hungary, Latvia, Lithuania, Malta, Poland, Romania, Slovakia, Slovenia, the Netherlands, Portugal, Spain, Sweden, and the United Kingdom. The ETSI version of this device is also authorized for use in EFTA member states: Iceland, Liechtenstein, Norway, and Switzerland. EU Countries not intended for use None Please check the declaration of conformity on www.edimax.com 35 36


