1
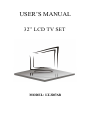
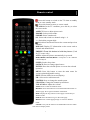
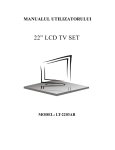
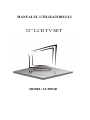
MANUALUL UTILIZATORULUI 32” LCD TV SET MODEL: LT-3207AB Cuprins Introducere Avertizări Atenţie Descrierea unitătii principale Telecomşia Meniul - ajustările de baza Specificaţii Probleme şi soluţii 1 Introducere Vă mulţumim pentru alegerea facuta achiziţionşi produsul TV LCD. Se poate utiliza ca un televizor color normal sau ca si monitor PC. Pentru a vă bucura pe deplin de la început, citiţi cu atenţie acest manual şi păstraţi-l la îndemână pentru consultari ulterioare. INSTALAREA ①Pozitionati televizorul în cameră acolo unde sursa de lumină nu este direcţionată direct spre ecran. Întunericul total sau o reflecţie pe ecran poate cauza oboseala ochilor. Este recomşiată o lumină indirectă si placută pentru o vizionare confortabilă. ②Lăsaţi suficient spaţiu între perete şi televizor pentru a permite aerisirea lui.. ③Evitaţi locaţiile excesiv de calde pentru a preveni posibila deteriorare a televizorului sau defectarea prematura a unei componente.. ④Acest televizor poate fi conectat la AC180-240V~ 50/60Hz. ⑤Nu instalaţi receptorul într-o locaţie în apropierea surselor de căldură, cum ar fi radiator, conducte de aer cald, lumina directă a soarelui, sau într-un loc care sa nu permita circulatia aerului. Nu acoperiţi orificiile de ventilare atunci când se utilizează televizorul.. ⑥Led-ul indicatorului luminos va ramane aprins aproximativ 30 de secunde după oprirea energiei electrice sau dupa oprirea televizorului, în tot aceast timp, nu se poate reporni televizorul până când indicatorul luminos nu se stinge complet. 2 Avertizări AVERTIZARE RISC DE ELECTROCUTARE NU DESCHIDETI! ATENŢIE: PENTRU A EVITA RISCUL DE ELECTROCUTARE . NU SCOATETI CAPACUL DIN SPATELE APARATULUI ! NU SE REGASESC PIESE DE SCHIMBAT IN INTERIOR . INTERVENTIILE SE REALIZEAZA NUMAI DE PERSONAL CALIFICAT . Acest simbol este destinat pentru a alerta utilizatorul sa evite riscul de electrocutare, nu demontaţi acasa acest echipament cu excepţia personalui de service calificat.. Acest simbol este destinat să alerteze utilizatorul de prezenţa a importante instrucţiuni legate de operaţiuni de întreţinere în manualul de utilizare al aparatului. 3 Atenţie Avetizare Tensiuni de voltaj ridicat sunt utilizate în funcţionarea acestui produs. Nu scoateti capacul din spatele aparatului . Interventiile se realizeaza numai de personal de service calificat. . Avetizare Pentru a preveni riscul de incendiu sau electrocutare, nu expuneţi unitatea principală la umiditate. Avetizare Nu scăpaţi sau împingeţi obiecte în interiorul televizorului. Nu vărsaţi nici un fel de lichid pe carcasa televizorului.. Avetizare Evitaţi expunerea unităţii principale la lumina directă a soarelui şi alte surse de căldură. Nu pozitionati televizorul direct pe alte aparate care degaja caldura. De exemplu dvd playere, amplificatoare audio. . Nu blocati gurile de ventilare din spatele aparatului. Ventilarea este esentiala pentru a preveni defectarea componentelor electronice. Nu pozitionati cablul de alimentare sub televizor – risca sa se incalzesca execesiv. 4 Atenţie Avetizare Nu stati pe telvizor, nu va rezemati si nu împingeti brusc produsul Ar trebui să acordati o atenţie specială copiilor . Avetizare Do not place the main unit on an unstable cart stşi, shelf or table. Serious injury to an individual, şi damage to the television, may result if it should fall. Avetizare Nu aşezaţi unitatea principală pe o suprafaţă instabilă, Riscati vătămarea gravă a unei persoane, şi, pot rezulta daune aparatului în cazul în care ar cadea Avetizare Panoul LCD folosit în acest produs este confecţionat din sticlă. Prin urmare, se poate sparge atunci când produsul a căzut sau a fost lovit. Fiţi atenţi să nu vă răniţi de bucaţile de sticla sparte in cazul in care panelul LCD se sparge. 5 Descrierea unităţii principale Funcţiile Panoul de control VOL+ : cresterea Volumului. VOL- : scăderea Volumului. CH+ : urmatorul post TV. CH- : precedentul post TV MENU : Apăsaţi pentru a selecta meniul principal. TV/AV : Selectaţi semnalul de intrare. POWER : Fie porneşte aparatul fie comută la modul de aşteptare. Conexiunile TV: 1. intrare HDMI 1. 2. intrare HDMI 2. 3. intrare HDMI 3. 4. intrare VGA – pentru a se conecta PC-ul. 5. intrare Video. 6. intrare Audio. 7. intrare Compozit. 8. intrare SCART. 9 intrare PC audio. 10. iesire Casti HEADPHONE. 11. iesire Antenna/ ATV. Configurarea alimentării cu curent electric AC Priza 6 Telecomşia : Pornire / oprire, apăsaţi o dată pentru a opri televizorul şi apăsaţi din nou pentru a porni televizorul oprit. : Apăsaţi acest buton pentru a dezactiva sau a restabili sunetul. NICAM/A2: În modul TV, apăsaţi această tastă pentru a selecta setarile de sunet. ASPECT: Apăsaţi pentru a selecta dimensiunea imaginii. PMODE: Selectaţi modul imagine. SMODE: Selectaţi modul sunet. 0-9: Selectaţi trecerea la un canal folosind 0-9. -/--: Selectaţi numarul de cifre al programului. : Comuta înapoi şi înainte între posturile TV curente şi anterioare. DISPLAY: Informaţii Ecran TV. FREEZE: Apăsaţi acest buton pentru a salva imaginea în oglindă. (Numai pentru modul de semnal TV). AUTO: modul Foto ajustează automat PC-ul. RED, GREEN, YELLOW, BLUE: Corespund la diferite subiecte colorate. SLEEP: Setaţi oprirea automata. SOURCE: Apăsaţi pentru a schimba sursa de semnal. ENTER: Introduceţi opţiunea selectată sau efectuaţi operaţia selectată. MENU: Apăsaţi acest buton pentru a intra în meniul principal pentru diferite opţiuni de reglaj. EXIT: Ieşire OSD (On-Screen Display)Ieşire pe ecran. CH/CH: Schimbati canalul în sus şi în jos. VOL/VOL : Reglaţi volumul. NR : Selectaţi modul de reducere a zgomotului. SYSTEM: Apăsaţi pentru a selecta sistemul de sunet. TEXT: Apăsaţi pentru a intra în modul Teletext. REVEAL: Apăsaţi acest buton pentru a dezvălui informaţii ascunse în pagina de teletext. Apăsaţi din nou pentru a ascunde aceste informaţii. SIZE: Afişa în partea de jos de sus, sau a tuturor paginii pentru a citi cu uşurinţă în modul teletext. INDEX: Apăsaţi acest buton pentru a merge la pagina de index. HOLD: Pastreaza un pasaj sau mai multe pagini pe ecran în modul teletext. S.PAGE: Se efectuează funcţia de subcod în text în timp ce intra în modul de afişare text 7 Meniul OSD- ajustările de bază IMAGINEA Puteţi selecta tipul de imagine, care corespunde cel mai bine pentru vizionare. 1. Apăsaţi butonul “MENU” pentru a accesa meniul OSD Apăsaţi butonul “/”pentru a selecta meniul “PICTURE”. Intrati in meniul “PICTURE” 2. 3. 4. 5. 6. 7. 8. 9. 10. ap ă sand butonul “”. Apăsaţi butonul “/” pentru a selecta modul “PICTURE MODE” şi apăsaţi butonul “/”pentru a selecta modul de imagine pe care il doriti. Apăsaţi butonul “/”pentru a selecta “CONTRAST” şi apăsaţi butonul “/”pentru a intra in meniul de ajustare contrast pentru a regla contrastul. Apăsaţi butonul “/” pentru a selecta “BRIGHTNESS” şi apăsaţi butonul “/”pentru a intra in meniul de ajustare luminozitate pentru a regla luminozitatea. Apăsaţi butonul “/”pentru a selecta “HUE” şi apăsaţi butonul “/”pentru a accesa meniul de ajustare nuanţă pentru a regla nuanţa. Notă: Aceasta optiune este numai pentru NTSC Apăsaţi butonul “/”pentru a selecta “SATURATION” şi apăsaţi butonul “/”pentru a intra in meniul ajustare de saturaţie pentru a ajusta saturaţia. Apăsaţi butonul “/”pentru a selecta “SHARPNESS” şi apăsaţi butonul “/”pentru a intra in meniul ajustare claritatea pentru a regla claritatea. Apăsaţi butonul “/” pentru a selecta “COLOR TEMP” şi apăsaţi butonul “/” pentru a selecta temperatura de culoare pe care o doriti.. Apăsaţi butonul “/” pentru a selecta “SCALE” şi apăsaţi butonul “/”pentru a selecta scara pe care o doriti. Apăsaţi butonul “MENU” pentru a reveni la meniul precedent. SUNETUL Puteţi selecta tipul de sunet, care corespunde cel mai bine modului dvs. de ascultare.. 1. Apăsaţi butonul “MENU” pentru a accesa meniul OSD. Apoi apăsaţi butonul “/” pentru a selecta meniul “SOUND”. Accesati meniul “SOUND” apăsand butonul “”. 8 2. Apăsaţi butonul “/” pentru a selecta “VOLUME” şi apăsaţi butonul “/”pentru a intra in meniul ajustare volum pentru a regla volumul. 3. Apăsaţi butonul “/” pentru a selecta “SOUND MODE” şi apăsaţi butonul “/” pentru a selecta modul de sunet pe care le doriti. 4. Apăsaţi butonul “/” pentru a selecta “BASS” şi apăsaţi butonul “/”pentru a intra in modul ajustare bass pentru a regla bass-ul.. 5. Apăsaţi butonul “/” pentru a selecta “TREBLE” şi apăsaţi butonul “/”pentru a accesa meniul de ajustare înalte, pentru a ajusta înaltele. 6. Apăsaţi butonul “/” pentru a selecta “BALANCE” şi apăsaţi butonul “/”pentru a intra in meniul ajustare balanţa sunet pentru a regla balanţa. 7. Apăsaţi butonul “MENU” pentru a reveni la meniul precedent. SISTEM 1. Apăsaţi butonul “MENU” pentru a accesa meniul OSD. Apoi apăsaţi butonul “/” pentru a selecta meniul “SYSTEM”. Accesati meniul “SYSTEM” apăsand butonul “”. 2. Apăsaţi butonul “/” pentru a 3. 4. 5. 6. 7. selecta “OSD - LANGUAGE” şi apăsaţi butonul “/” pentru a selecta limba de operare care o doriti Apăsaţi butonul “/” pentru a selecta “DURATION” şi apăsaţi butonul “/”pentru a intra meniul de ajustare durata pentru a regla durata. Apăsaţi "/" buton, selectaţi "HALFTONE", şi apoi apăsaţi "/" pentru a intra ajusta transparenţa a meniului, ajusta transparenţa. Apăsaţi butonul “/” pentru a selecta “SLEEP” şi apăsaţi butonul “/” pentru a selecta timpul de functionare pe care il doriti.. Apăsaţi butonul “/” pentru a selecta “RESET” şi apăsaţi butonul “” pentru a activa functia de resetare. Apăsaţi butonul “MENU” pentru a reveni la meniul precedent. SETARI AVANSATE 1. Apăsaţi butonul “MENU” pentru a accesa meniul OSD. Apoi apăsaţi butonul “/” pentru a selecta meniul “ADVANCE”. Accesati meniul “ADVANCE” ap ă sand butonul “”. 9 2. Apăsaţi butonul “/” pentru a selecta “NR” şi apăsaţi butonul “/” pentru a selecta modul dinamic de reducere a zgomotului pe care il doriti. 3. Apăsaţi butonul “/” pentru a selecta “BLUE SCREEN” şi apăsaţi butonul “/” pentru a selecta fundalul albastru al ecranului activ sau inactiv.. 4. Apăsaţi "/" buton, selectaţi "DLC", apoi apăsaţi "/" pentru a selecta funcţia DLC on sau off. 5. Apăsaţi butonul “/” pentru a selecta “TT LANGUAGE” şi apăsaţi butonul “/” pentru a selecta limba de teletext locala pe care o doriti. 6. Apăsaţi "/" buton, selectaţi "Auto Format" şi apăsaţi "/" pentru a selecta funcţia de formatare automată on sau off. (Numai pentru sursa SCART) 7. Apăsaţi butonul “MENU” pentru a reveni la meniul precedent. TV Puteţi face ajustarile dorite în modul TV. 1. Apăsaţi butonul “MENU” pentru a accesa meniul OSD. Apoi apăsaţi butonul “/” pentru a selecta meniul “CHANNEL”. Accesati meniul “CHANNEL” ap ă sand 2. 3. 4. 5. butonul “”. Apăsaţi butonul “/” pentru a selecta “COUNTRY” şi apăsaţi butonul “/” pentru a selecta tara care o doriti . Apăsaţi butonul “/” pentru a selecta “COLOR SYSTEM” şi apăsaţi butonul “/” pentru a selecta sistemul local de culoare. Apăsaţi butonul “/” pentru a selecta “SOUND SYSTEM” şi apăsaţi butonul “/” pentru a selecta modul de sunet local. Notă: Când imaginea sau sunetul nu funcţionează bine, vă rugăm să selectaţi sistemul de sunet sau de imagine locale in caz contrar calitatea sunetului sau imaginii au de suferit.. Apăsaţi butonul “/” pentru a selecta “AUTO TUNE” şi apăsaţi butonul “”pentru a realiza cautarea automata a posturilor. Apoi apăsaţi butonul “MENU” pentru a iesi. 10 6. Apăsaţi butonul “/” pentru a selecta “MANUAL TUNE” şi apăsaţi butonul “”pentru a intra in meniul de reglare manuală pentru a face tuning manual. 7. Apăsaţi butonul “/” pentru a selecta optiunea “Channel Edit” şi accesati meniul “CHANNEL EDIT” apăsand butonul “”. a) Nume: Utilizati butoanele “ ” “” “” “” pentru a alege canalele care doriti sa le redenumiti. Apăsaţi butonul “red” pentru a putea incepe aceasta operatie.Utilizati apoi butoanele “” “” pentru a selecta zonele editabile şi utilizati butoanele “ ” “” pentru a selecta caracterele. Apoi apăsaţi butonul “red” inca odata pentru a confirma numele şi apăsaţi butonul “green” pentru a anula aceasta operatie. b) Stegere: Utilizati butoanele “ ” “” “” “” pentru a alege canalele care doriti sa fie sterse. Apăsaţi butonul “green”, şi apoi canalele in cuza vor fi sterse. c) Inserare : Utilizati butoanele “” “” “” “”pentru a alege canalele care doriti sa fie adaugate. Apăsaţi butonul “BLUE” entru a putea incepe aceasta operatie. Apoi utilizati butoanele “” “” “” “” pentru a alege canalele care doriti sa fie inserate. Apăsaţi butonul “red” pentru a confirma operatiunea de inserare şi apăsaţi butonul “green” pentru a anula aceasta operatie. 11 8. Apăsaţi butonul “/” pentru a selecta “FINE TUNE” şi apăsaţi butonul “/”pentru a intra in meniul de ajustare fina a canalelor TV pentru a regla cat mai fin receptia acestora.. 9. Apăsaţi "/" buton, selectaţi "SKIP", apoi apăsaţi "/" pentru a selecta canalul pentru a trece sau a dezactiva 10. Apăsaţi "/" buton, selectaţi "AFC", apoi apăsaţi "/" buton pentru a deschide sau închide automat funcţia de control de frecvenţă. 11. Apăsaţi butonul “MENU” pentru a reveni la meniul precedent. PC (ATUNCI CŞI SURSA SEMNALULUI ESTE PC-UL) 1. Apăsaţi butonul “MENU” pentru a accesa meniul OSD. Apoi apăsaţi butonul “/” pentru a selecta meniul “PC”. Accesati meniul “PC” ap ă sand 2. 3. 4. 5. 6. 7. butonul “”. Apăsaţi butonul “/” pentru a selecta “H-POSITION” şi apăsaţi butonul “/”pentru a intra in meniul de ajustare pe orizontala pentru a regla latimea ecranului.. Apăsaţi butonul “/” pentru a selecta “V-POSITION” şi apăsaţi butonul “/”pentru a intra in meniul de ajustare pe verticala pentru a regla inaltimea ecranului.. Apăsaţi butonul “/” pentru a selecta “CLOCK” şi apăsaţi butonul “/”pentru a accesa meniul de ajustare ceas pentru a regla ceasul. Apăsaţi butonul “/” pentru a selecta “PHASE” şi apăsaţi butonul “/” to intra on ajustare meniu pentru a regla faza. Apăsaţi butonul “/” pentru a selecta “AUTO ADJUST” şi apăsaţi butonul “” pentru a realize ajustarea automata. Apăsaţi butonul “MENU” pentru a reveni la meniul precedent. 12 Specificaţii INTRAREA RGB Model Rezoluţie Frecvenţa orizontală (KHz) Frecvenţa Verticală (HZ) DOS 720x400 31.5 70 VGA 640x480 31.5 60 SVGA 800x600 37.9 60 XGA 1024x768 48.4 60 WXGA 1360x768 47.7 60 INTRAREA HDMI Model Rezoluţie Frecvenţa orizontală (KHz) VGA 640 x 480 31.47 59.94 480i 720 x480i 15.73 59.94/60 576i 720 x 576i 15.63 50 480p 720 x480p 31.47 59.94/60 576p 720 x 576p 31.26 50 720p 1280 x 720p 37.50 50 44.96 59.94/60 28.13 50 33.75 59.94/60 1080i 1920 x 1080i Frecvenţa Verticală (HZ) INTRAREA COMPOZIT VIDEO (YPbPr) Model Rezoluţie Frecvenţa orizontală (KHz) Frecvenţa Verticală (HZ) 480i 720 x480i 15.73 59.94/60 576i 720 x 576i 15.63 50 480p 720 x480p 31.47 59.94/60 576p 720 x 576p 31.26 50 720p 1280 x 720p 37.50 50 44.96 59.94/60 28.13 50 33.75 59.94/60 1080i 1920 x 1080i 13 Probleme şi soluţii Înainte de consultarea personalului de service, verificati diagrama următoare pentru o posibilă cauză a nefuncţionarii aparatului, si verificaţi soluţia oferită. PROBLEMA Televizorul nu porneste Fără imagine, fără sonor Imagine neclară, sunet funcţional Sonor neclar SOLUTIE ●Asiguraţi-vă că este conectat la priza cablul de alimentare. ●Bateriile telecomenzii pot fi nefuncţionale - înlocuiţi bateriile. ●Verificaţi cablul de conexiune între TV şi antenă / cablu TV. ●Apăsaţi butonul de pornire de pe telecomşiă. ●Apăsaţi butonul SOURCE de pe telecomadă, apoi apăsaţi butonul “▲/▼”în mod repetat pentru a selecta sursa TV. ●Verificaţi cablul de interfaţă între TV şi antenă / cablu TV. ●Încercaţi un alt canal, postul poate avea dificultăţi de difuzare pentru moment.. ●Reglaţi luminozitatea / contrastul din meniul Video. ● Mutaţi orice sursa de unde infraroşii departe de televizor. Panoul TFT LCD foloseste un panel format din pixeli care necesită o tehnologie sofisticată pentru a fi produs. Cu toate acestea, pot exista cativa pixeli luminosi sau întunecati pe ecran. Acesti pixeli nu vor avea niciun impact asupra performanţei produsului si este normală existenta lor. 14 Eliminarea echipamentelor electrice şi electronice folosite Semnificaţia simbolului din figura alăturată, este că acest produs nu trebuie tratat ca un deşeu menajer. Vă rugăm, eliminaţi acest echipament la punctul de colectare pentru reciclarea deşeurilor de echipamente electrice şi electronice. În Uniunea Europeană şi în alte ţări europene, sistemele de colectare pentru produsele electrice şi electronice folosite care sunt separate. Prin asigurarea că eliminarea acestui produs este făcută corect, veți ajuta la prevenirea unui potenţial mediu periculos pentru sănătatea umană, lucru care ar putea fi provocat de manipularea necorespunzătoare a deşeurilor provenite din acest produs. Reciclarea materialelor va ajuta la conservarea resurselor naturale. Prin urmare, vă rugăm să nu aruncaţi echipamentele electrice şi electronice alături de deşeurile menajere. Pentru mai multe informaţii detaliate despre reciclarea acestui produs, vă rugăm să contactaţi biroul local, serviciul pentru eliminarea deşeurilor sau magazinul din care aţi cumpărat produsul. Pentru mai multe informaţii şi condiţii de garanţie, vă rugăm să vizitaţi: www.akai.com.ro 15 USER’S MANUAL 32” LCD TV SET MODEL: LT-3207AB Contents Introduction Warning Caution Main Unit Description Remote Control OSD basic adjustment Specifications Trouble Shooting -1- Introduction Thank you very much for your purchase of our product of LCD TV. It serves as a normal colour TV and PC monitor. To enjoy your set to the full from the very beginning, read this manual carefully and keep it handy for ready reference. INSTALLATION ① Locate the receiver in the room where direct light does not strike the screen. Total darkness or a reflection on the picture screen can cause eyestrain. Soft and indirect lighting is recommended for comfortable viewing. ② Allow enough space between the receiver and the wall to permit ventilation. ③ Avoid excessively warm locations to prevent possible damage to the cabinet or premature component failure. ④ This TV receiver can be connected to AC180-240V~50/60HZ. ⑤ Do not install the receiver in a location near heat sources such as radiator, air ducts, direct sunlight, or in a place somewhere like close compartment and close area. Do not cover the ventilation openings when using the set. ⑥ The indicator light will last about 30 seconds to go out after cutting off the electricity, during this period, you cannot repower it on until the indicator light goes out, thanks a lot for your attention! -2- Warning CAUTION RISK OF ELECTRIC SHOCK DO NOT OPEN CAUTION: TO AVOID THE RISK OF ELECTRIC SHOCK. DO NOT REMOVE COVER (OR BACK). NO USER- SERVICEABLE PARTS INSIDE. REFER SERVICING TO QUALIFIED SERVICE PERSONNEL. This symbol is intended to alert the user to avoid the risk of electric shock, do not disassemble this equipment by anyone except a qualified service personnel. This symbol is intended to alert the user to the presence of important operation and maintenance instructions in the literature accompanying the equipment. -3- Caution Caution High voltages are used in the operation of this product. Do not remove the back cabinet from your set. Refer servicing to qualified service personnel. Caution To prevent fire or electrical shock hazard, Do not expose the main unit to moisture. Caution Do not drop or push objects into the television cabinet slots or openings. Never spill any kind of liquid on the television receiver. Caution Avoid exposing the main unit to direct sunlight and other source of the heat. Do not stand the television receiver directly on other products which give off heat. E. g. video cassette players, Audio amplifiers . Do not block the ventilation holes in the back cover. Ventilation is essential to prevent failure of electrical component. Do not squash power supply cord under the main unit. -4- Caution Caution Never stand on, lean on, push suddenly the product or its stand. You should pay special attention to children. Caution Do not place the main unit on an unstable cart stand, shelf or table. Serious injury to an individual, and damage to the television, may result if it should fall. Caution When the product is not used for an extended period of time, it is advisable to disconnect the AC power cord from the AC outlet. Caution The LCD panel used in this product is made of glass. Therefore, it can break when the product is dropped or applied with impact. Be careful not to be injured by broken glass pieces in case the LCD panel breaks. 5 Main unit description Control Panel Key Function VOL+ : Volume up. VOL- : Volume down. CH+ : TV channel up. CH- : TV channel down. MENU : Press to select the main menu. TV/AV : Select the input signal. POWER : Switch on when at standby mode or enter the standby mode. TV Terminal Connections 1. HDMI 1 input terminal. 2. HDMI 2 input terminal. 3. HDMI 3 input terminal. 4. VGA input terminal of simulation signal of PC. 5. Video input terminal. 6. AUDIO input terminal. 7. Component input terminal. 8. SCART input terminal. 9. PC AUDIO terminal. 10. HEADPHONE output terminal. 11. Antenna/close circuit TV network port. Power Input Configuration AC POWER 6 Remote control : Press this button to switch on the TV when at standby mode or enter standby mode. : Press this button to mute or restore sound. NICAM/A2: In the TV condition, press this key to select the stereo mode. ASPECT: Press to adjust picture ratio. PMODE: Select picture mode. SMODE: Select sound mode. 0-9: Select and switch to a channel using 0 - 9. -/--: Switch the program digit. : Switch back and front between the current and previous channels. DISPLAY: Display TV information on the screen such as channel and channel label. FREEZE: Press this button to hold the picture. (Used for TV source only) AUTO: Adjust the picture automatically in pc mode. RED,GREEN,YELLOW,BLUE: Correpond to the different colored subjects. SLEEP: Set the sleep timer. SOURCE: Press to change signal source. ENTER: Enter the selected option or execute the selected operation. MENU: Press this button to enter the main menu for various optional adjustable setting. EXIT: Exit the OSD (On-screen display). NR.: Select noise reduction mode. SYSTEM: Press to change the sound system. CH/CH: Change the channel up and down. VOL/VOL: Adjust the volume. TEXT: Press to enter the Teletext mode. REVEAL: Press this button to reveal the hidden information in Teletext page. Press again to hide the information. SIZE: Display the top, bottom or all of page to read easily in Teletext mode. INDEX: Press this button to go to the index page. HOLD: Freeze a multi-page passage on screen in Teletext mode. S.PAGE: Carry out the function of SUBCODE in the text while enter the text display mode. 7 OSD basic adjustment PICTURE You can select the type of picture, which best corresponds to your viewing. 1. Press the “MENU” button to enter the OSD menu. Then press “/” button to select the “PICTURE” menu. Enter the “PICTURE” menu by pressing “” button. 2. Press “/” button to select “PICTURE MODE” and press the “/” button to select the picture mode . 3. Press “/” button to select “CONTRAST” and press the “/” button to enter contrast adjustment menu to adjust contrast. 4. Press “/” button to select “BRIGHTNESS” and press the “/” button to enter brightness adjustment menu to adjust brightness. 5. Press “/” button to select “HUE” and press the “/” button to enter hue adjustment menu to adjust hue. Note: The item hue is only for NTSC 6. Press “/” button to select “SATURATION” and press the “/” button to enter saturation adjustment menu to adjust saturation. 7. Press “/” button to select “SHARPNESS” and press the “/” button to enter sharpness adjustment menu to adjust sharpness. 8. Press “/” button to select “COLOR TEMP” and press the “/” button to select the color temp. 9. Press “/” button to select “SCALE” and press the “/” button to select the scale which you drsire. 10. Press the “MENU” button to return to upper-menu. SOUND You can select the type of sound, which best corresponds to your listening. 1. Press the “MENU” button to enter the OSD menu. Then press “/” button to select the “SOUND” menu. Enter the “SOUND” menu by pressing “” button. 2. Press “/” button to select “VOLUME” and press the “/” button to enter volume adjustment 8 menu to adjust volume. 3. Press “/” button to select “SOUND MODE” and press the “/” button to select the sound mode. 4. Press “/” button to select “BASS” and press the “/” button to enter bass adjustment menu to adjust bass. 5. Press “/” button to select “TREBLE” and press the “/” button to enter treble adjustment menu to adjust treble. 6. Press “/” button to select “BALANCE” and press the “/” button to enter balance adjustment menu to adjust balance. 7. Press the “MENU” button to return to upper-menu. SYSTEM 1. Press the “MENU” button to enter the OSD menu. Then press “/” button to select the “SYSTEM” menu. Enter the “SYSTEM” menu by pressing “” button. 2. Press “/” button to select “OSD LANGUAGE” and press the “/” button to select the OSD language which you desire. 3. Press “/” button to select “DURATION” and press the “/” button to enter duration adjustment menu to adjust duration. 4. Press “/” button to select “TRANSPARENCY” and press the “/” button to enter transparency adjustment menu to adjust transparency. 5. Press the “/” button to select “SLEEP” and press the “/” button to select the sleep time which you desire. 6. Press “/” button to select “RESET” and press the “” button to do reset function. 7. Press the “MENU” button to return to upper-menu. ADVANCE 1. Press the “MENU” button to enter the OSD menu. Then press “/” button to select the “ADVANCE” menu. Enter the “ADVANCE” menu by pressing “” button. 2. Press “/” button to select “NR” and press the “/”button to select 9 the dynamic noise reduction mode 3. Press “/” button to select “BLUE SCREEN” and press the “/”button to select the blue background on or off. 4. Press “/” button to select “DLC” and press the “/”button to select the DLC function on or off. 5. Press “/” button to select “TXT LANGUAGE” and press the “/”button to select the TXT LANGUAGE area. 6. Press “/” button to select “AUTO FORMAT” and press the “/”button to select the AUTO FORMAT function on or off.(used for scart source only) 7. Press the “MENU” button to return to upper-menu. CHANNEL You can make the desired adjustment in the TV mode. 1. Press the “MENU” button to enter the OSD menu. Then press “/” button to select the “CHANNEL” menu. Enter the “CHANNEL” menu by pressing “” button. 2. Press “/” button to select “COUNTRY” and press the “/” button to select the country which you desire . 3. Press “/” button to select “COLOR SYSTEM” and press the “/” button to select the color system mode. 4. Press “/” button to select “SOUND SYSTEM” and press the “/” button to select the sound mode which you desire. Note: When the picture or sound can't work well, please select the sound system to the local sound system. 5. Press “/” button to select “AUTO TUNE” and press the “” button to do auto search. Then press “MENU” button to exit. 6. Press “/” button to select “MANUAL TUNE” and press the “” button to enter manual tune adjustment menu to do manual tuning. 10 7. Press “/” button to select “PROGRAM EDIT” item and enter the channel edit menu by pressing “” button. a) NAME: Use the “ ” “” “” “” buttons to choose the channel which you want to name. Press the “red” button to enter the operation. Then use the “” “” buttons to select the edited digit and use the “ ” “” buttons to select the character. Then press the “red” button again to confirm the name and press the “green” button to cancel this operation. b)Delete: Use the “ ” “” “” “” buttons to choose the channel which you wanted to delete. Press the “green” button, and then the channel will be deleted. c)Insert : Use the “” “” “” “” buttons to choose the channel which you want to insert. Press the “BLUE” button to enter the operation. Then use the “” “” “” “” buttons to choose the channel which you want to in sert with. Press the “red” button to confirm the insert operation and press the “green” button to cancel this operation. 8. Press “/” button to select “FINE TUNE” and press the “/”button to enter fine tune adjustment menu to adjust for best tuning. 9. Press “/” button to select “SKIP” and press the “/”button to select skip the channel on or off. 10. Press “/” button to select “AFC” and press the “/”button to turn on or off the function of automatic frequency control. 11. Press the “MENU” button to return to upper-menu. 11 PC ( When signal source is PC ) 1. Press the “MENU” button to enter the OSD menu. Then press “/” button to select the “PC” menu. Enter the “PC” menu by pressing “” button. 2. Press “/” button to select “H-POSITION” and press the “/” button to enter H-POSITION adjustment menu to adjust H-POSITION. 3. Press “/” button to select “V-POSITION” and press the “/” button to enter V-POSITION adjustment menu to adjust V-POSITION. 4. Press “/” button to select “CLOCK” and press the “/” button to enter clock adjustment menu to adjust clock. 5. Press “/” button to select “PHASE” and press the “/” button to enter Phase adjustment menu to adjust phase. 6. Press “/” button to select “AUTO ADJUST” and press the “” button to do auto adjustment. 7. Press the “MENU” button to return to upper-menu. 12 Specifications RGB INPUT Model Resolution Horizontal Frequency (KHz) Vertical Frequency (HZ) DOS 720x400 31.5 70 VGA 640x480 31.5 60 SVGA 800x600 37.9 60 XGA 1024x768 48.4 60 WXGA 1360x768 47.7 60 HDMI INPUT Model Resolution Horizontal Frequency (KHz) Vertical Frequency (HZ) VGA 640 x 480 31.47 59.94 480i 720 x480i 15.73 59.94/60 576i 720 x 576i 15.63 50 480p 720 x480p 31.47 59.94/60 576p 720 x 576p 31.26 50 720p 1280 x 720p 37.50 50 44.96 59.94/60 28.13 50 33.75 59.94/60 1080i 1920 x 1080i COMPONENT VIDEO (YPbPr) INPUT Model Resolution Horizontal Frequency (KHz) Vertical Frequency (HZ) 480i 720 x480i 15.73 59.94/60 576i 720 x 576i 15.63 50 480p 720 x480p 31.47 59.94/60 576p 720 x 576p 31.26 50 720p 1280 x 720p 37.50 50 44.96 59.94/60 28.13 50 33.75 59.94/60 1080i 1920 x 1080i 13 Trouble Shooting Before consulting service personnel, check the following chart for a possible cause of the trouble you are experiencing and for a solution. PROBLEM TV will not turn on SOLUTION ●Make sure the power cord is plugged in. ●The batteries in the remote control may be exhausted replace the batteries. ●Check the interface cable between TV and No picture, no sound antenna/cable TV. ●Press the power button on the remote. ●Press the SOURCE button the remote, then press the “▲/▼”button repeatedly to select the TV source. ●Check the interface cable between TV and Poor picture, sound OK antenna/cable TV. ●Try another channel, the station may have broadcast difficulties. ●Adjust the brightness/contrast in the Video menu. Audio noise ●Move any infrared equipment away from the TV. The TFT LCD panel uses a panel consisting of sub pixels which requires sophisticated technology to produce. However, there may be few bright or dark pixels on the screen. These pixels will have no impact on the performance of the product. 14 Disposal of used electrical and electronic equipment The meaning of the symbol on the material, its accessory or packaging indicates that this product shall not be treated as household waste. Please, dispose of this equipment at your applicable collection point for the recycling of electrical and electronic equipments waste. In the European Union and Other European countries which there are separate collection systems for used electrical and electronic product. By ensuring the correct disposal of this product, you will help prevent potentially hazardous to the environment and to human health, which could otherwise be caused by unsuitable waste handling of this product. The recycling of materials will help conserve natural resources. Please do not therefore dispose of your old electrical and electronic equipment with your household waste. For more detailed information about recycling of this product, please contact your local city office, your household waste disposal service or the shop where you purchased the product. For more information and warranty conditions, please visit: www.akai.com.ro 15