1
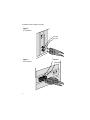
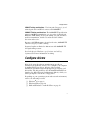
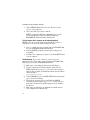
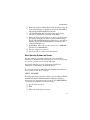
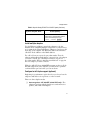
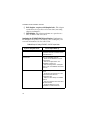
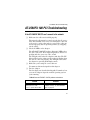
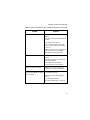
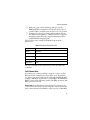
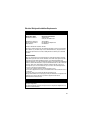
Allied Telesyn
Ethernet Network Adapter
Installation Manual
AT-2560FX 100 PCI
AT-2560TX 10/100 PCI
PN 613-10583-00 Rev. B
i
AT-2560FX 100 and AT-2560TX 10/100 PCI
Warranty:
Your Allied Telesyn CentreCOM Ethernet Network Adapter has a lifetime warranty.
Refer to the warranty card supplied with the product for the full Warranty Statement.
Trademarks:
CentreCOM is a trademark of Allied Telesyn International Corp.
Ethernet is a registered trademark of Xerox Corporation.
Microsoft, Windows, Windows NT, and MS-DOS are registered trademarks and LAN
Manager and Windows for Workgroups are trademarks of Microsoft Corporation.
Novell and NetWare are registered trademarks of Novell, Inc.
PC-NFS is a trademark of Sun Microsystems, Inc.
PC/TCP is a registered trademark of FTP Software, Inc.
ST is a registered trademark of AT&T.
3Com is a registered trademark of 3Com.
UNIX is a registered trademark in the United States and other countries licensed
exclusively through X/Open Company Limited.
©Copyright 1997 Allied Telesyn International Corp. (Allied Telesyn). All rights
reserved. No part of this publication may be reproduced without prior written
permission from Allied Telesyn.
Allied Telesyn reserves the right to make changes in specifications and other
information contained in this document without prior written notice. The information
provided herein is subject to change without notice. In no event shall Allied Telesyn
be liable for any incidental, special, indirect, or consequential damages whatsoever,
including but not limited to lost profits, arising out of or related to this manual or the
information contained herein, even if Allied Telesyn has been advised of, known, or
should have known, the possibility of such damages.
ii
Safety Warning and Emissions Notice
This equipment must be operated in accordance with safety precautions and
Radio Frequency Interference (RFI) considerations. Be sure to read the safety
and emissions information starting on page 29.
Dieses Gerät ist gemäß den einschlägigen Sicherheits- und
Funkentstörungsbestimmungen zu betreiben. Bitte lesen Sie die
diesbezüglichen Informationen ab Seite 30.
Dette udstyr skal anvendes i overensstemmelse med sikkerhedsreglerne og
under hensyntagen til risikoen for afgivelse af radiofrekvensforstyrrelser (RFI).
Oplysningerne på side 31 ff vedrørende sikkerhed og forstyrrelser bør derfor
gennemlæses omhyggeligt.
Cet équipement doit fonctionner en respectant certaines précautions en
matière de sécurité et de parasites en radiofréquence. Lisez les informations
qui commencent à la page 31 et qui sont consacrées à la sécurité et aux
émissions.
Dit apparaat moet in overeenstemming met veiligheidsmaatregelen en Radio
Frequentiestoring (Radio Frequency Interference of RFI) worden gebruikt.
Lees de informatie aangaande veiligheid en uitstraling op pagina 32.
Tätä laitetta tulisi käyttää varotoimenpiteiden ja radiotaajuista interferenssiä
(RFI) koskevien näkökohtien mukaan. Sivulta 32 alkavat turvallisuus- ja
emissiotiedot tulisi lukea ehdottomasti.
Questa apparecchiatura deve essere fatta funzionare in conformità delle
precauzioni sulla sicurezza e delle considerazioni sull' interferenza a radio
frequenza. Non mancate di leggere le informazioni sulla sicurezza e sulle
emissioni, che cominciano a pagina 33.
Questa apparecchiatura deve essere fatta funzionare in conformità delle
precauzioni sulla sicurezza e delle considerazioni sull' interferenza a radio
frequenza. Non mancate di leggere le informazioni sulla sicurezza e sulle
emissioni, che cominciano a pagina 33.
Este equipamento deve ser operado de acordo com precauções de
segurança e considerações respeitantes à Interferência de Frequência
Radiofónica (RFI). É essencial ler as informações sobre segurança e
emissões, a partir da página 34.
Este equipo ha de operarse de conformidad con las precauciones de
seguridad y consideraciones de Interferencia de radiofrecuencias (RFI).
Cerciorarse de que se lee la información sobre seguridad y emisiones
partiendo de la página 34.
Denna utrustning måste användas i enlighet med rådande
säkerhetsbestämmelser och med hänsyn tagen till risken för
elektromagnetiska störningar. Läs säkerhets- och utsläppsinformationen med
början på sid. 35.
iii
AT-2560FX 100 and AT-2560TX 10/100 PCI
Where to go for more information
Help files
For detailed information about the adapter, see the online help
files.
To view the help files, insert the Allied Telesyn CardAssistant
diskette in a floppy drive, switch to that drive, and type
SETUP
/README
ENTER
Topics include
❑ Installing Allied Telesyn AT-2560FX 100 and AT-2560TX
10/100 PCI drivers
❑ Latest news and general adapter information
❑ Hardware specifications and cabling information
❑ Adapter installation and special configurations
❑ Running diagnostics
Online Services
You can use your modem or Internet connection to download
drivers, troubleshooting tips, and more. Online services include
❑ Internet (FTP server)
❑ CompuServe
❑ Allied Telesyn BBS
See “Where To Find Us” on page 37.
iv
Contents
Where to go for more information ........................................................................ iv
About the AT-2560FX 100 and AT-2560TX 10/100 PCI adapters ........................ 1
Install the card in a PCI slot ................................................................................... 1
Attach the cable to the media port ........................................................................ 3
Configure drivers .................................................................................................... 7
AT-2560FX 100 PCI Troubleshooting .................................................................... 21
AT-2560TX 10/100 PCI Troubleshooting ............................................................... 23
Technical information ............................................................................................ 26
v
About the AT-2560FX 100 and AT-2560TX 10/100
About the AT-2560FX 100 and AT2560TX 10/100 PCI adapters
The AT-2560FX 100 PCI adapter card supports 100BASE-FX
network media (ST® and SC connector types). The AT-2560TX
10/100 PCI adapter card supports 10BASE-T and 100BASE-TX
network media.Table 1 summarizes the support.
Table 1: Supported Network Media
Card Model
100BASE-FX
100BASE-TX
10BASE-T
AT-2560FX SC 100
Supported
N/A
N/A
AT-2560FX ST 100
Supported
N/A
N/A
AT-2560TX 10/100
N/A
Supported
Supported
Install the card in a PCI slot
Refer to your computer’s manual for specific information on
installing card-cage accessories in your computer.
WARNING
High voltages inside the computer present a safety hazard.
Make sure the power is OFF before removing the cover.
CAUTION
This LAN adapter card is for use only with IBM or compatible
UL-listed personal computers that have installation
instructions detailing installation of card-cage accessories.
Installation should be performed with precautions to prevent
damage to static-sensitive components.
1
AT-2560FX 100 and AT-2560TX 10/100 PCI
Figure 1:
PCI Slot
PCI slot
1. Make sure the computer’s power is turned OFF.
2. Take the cover off the computer, and locate a PCI
busmaster adapter slot. In most computers, all slots are
busmaster enabled, but some are not. If you have
configuration problems, see your computer’s
documentation to determine if your PCI slots are
busmaster enabled.
3. Remove the cover bracket from the slot.
4. Push the adapter into the slot until the
adapter is seated firmly. Then secure the
adapter bracket with a screw.
5. Replace the computer cover and plug in the
power cord.
2
Attach the cable to the media port
NOTE
Peripheral Component Interconnect (PCI) computers
automatically detect and configure PCI-compliant adapters
while booting. The AT-2560FX 100 and AT-2560TX 10/100
PCI adapter interrupt request (IRQ) number and I/O memory
address are automatically set each time you start your
computer.
In some mixed ISA/PCI PCs you must make sure the AT2560’s PCI slot has a unique IRQ level assigned. Allocation of
interrupts is controlled by the PCI computer’s Basic Input/
Output System (BIOS). Usually PCI IRQs are accessed
through menus of “CMOS Setup,” ISA Configuration Utility
(ICU), or “BIOS Setup” available when booting the computer.
See the PCI computer manual(s) for setup access and
instructions.
Attach the cable to the media port
AT-2560FX 100 PCI
The AT-2560FX 100 PCI provides the choice of either SC- or STtype duplex (transmit and receive) connectors for 100BASE-FX
Fast Ethernet. Figures 2 and 3 show the connector options.
WARNING
Hazardous light emissions may exist in fiber optic systems.
Severe eye damage may result if precautions are not taken.
Never look into a transmitting fiber optic device, transceiver,
repeater, or cable.
100BASE-FX wiring considerations. Use either 50/100 mm or 62.5/
125 mm multimode fiber cables. For full-duplex operation, the
maximum cable run distance is two-kilometers, and for halfduplex operation, the maximum distance is 412 meters.
3
AT-2560FX 100 and AT-2560TX 10/100 PCI
Figure 2:
ST Connectors
TX
RX
FD
Transmit
Receive
Figure 3:
SC Connectors
Transmit
Receive
SC
SC
TX
RX
FD
4
Attach the cable to the media port
Connect the transmit receptacle at one end of the segment to the
receive receptacle at the other end and vice versa. Be sure to
align the key on the cable connector with the keyway on the
adapter card receptacle when attaching the cable. Especially
with the ST-type connectors, forcing cable insertion can cause
receptacle or connector damage.
AT-2560TX 10/100 PCI
The AT-2560TX 10/100 PCI provides a RJ45 UTP connector for
10BASE-T and 100BASE-TX Fast Ethernet. Figure 4 shows the
UTP connector.
Figure 4:
RJ45 Connector
K
LN
T
AC
100
NOTE
Always use Category 5 (CAT5) cabling when operating at 100
Mbps. Use Category 3, 4, or 5 at 10 Mbps.
5
AT-2560FX 100 and AT-2560TX 10/100 PCI
There are various grades of voice-quality and data-quality cables
available. These can appear to be similar externally, and their
DC characteristics are also similar, although their AC
characteristics, and therefore high-speed data transmission
characteristics, are radically different. The six common modular
cable specifications and their applicability to 10BASE-T or
100BASE-TX network use are shown in Table 2.To reliably
operate your network at 100 Mbps, you must use TPE Category
5 Data Grade wire with this adapter. While Category 3 or 4 wire
may initially seem to work, it will soon cause data loss.
Table 2: Usable and Unusable Twisted-Pair Cable
Cable
Level
Cable
Description
AC
Char.
Specification
Twist/
Foot
OK TO
USE?
1
Unshielded
untwisted
N/A
CCITT
none
NO!
2
Unshielded
Indv.Twisted Pairs
100 W
±30 W
RS232 1BASE5
none
NO!
100 W
±15 W
TI, AT&T ISDN
3-5
10BASE-T
ONLY
5-8
10BASE-T
ONLY
8-10
BOTH
10BASE-T
AND
100BASETX
N/A
NO!
3
Typ. Unshielded
Indv. Twisted Pairs
AT&T PDS
10BASE-T
IBM Type 3
4
Unshielded
Enhanced Indv.
Twisted Pairs
100 W
±30 W
EIA, TIA
10BASE-T
NEMA
5
IBM
Type 1
6
Unshielded
Indv. Twisted Pairs
Shielded
Indv. Twisted Pairs
100 W
±30 W
10BASE-T
150 W
PCC FT 1
EIA, TIA
Configure drivers
10BASE-T wiring considerations. Use four-pair Category 3, 4, or 5
twisted-pair cable and RJ-45 connector for 10BASE-T.
100BASE-TX wiring considerations. The 100BASE-TX specification
supports 100 Mbps transmission over two pairs of twisted pair
Ethernet (TPE) wiring. In two-pair wiring, one pair of wires is
used for transmission, and the second is used for collision
detection and receive.
Because a 125 MHz frequency is used on the wire, 100BASE-TX
calls for Category 5 (CAT 5) wiring.
Segment lengths are limited to 100 meters with 100BASE-TX
for signal timing reasons.
See the help topic Hardware specifications and cabling
information for more information on wiring.
Configure drivers
Most of the network software manufacturers provide an
installation program that allows you to configure your computer
by making dialog-box choices. As part of the network
installation, the install script will prompt for the adapter card
driver files. The driver files for the AT-2560TX 10/100 PCI are
found on the Allied Telesyn CardAssistant diskette, which you
will be prompted to insert into a floppy drive.
Depending on your operating system and network environment,
refer to the following sections:
❑ Windows® 95 on page 8
❑ Windows NT® on page 10
❑ DOS and Windows 3.1 with NetWare on page 13
7
AT-2560FX 100 and AT-2560TX 10/100 PCI
Some networking software does not provide an install program
for the driver. In this case, the manufacturer’s instructions for
installing the software is your primary source of information.
There are some installation notes beginning on page 15; the
README files on the CardAssistant diskette may also help.
Windows 95
Have your Windows 95 installation media available, as Windows
95 prompts for files when you install the new adapter.
NOTE
Windows 95 attempts to find the auxiliary files it needs, and
gives a message if a file is not found. In this case, either the
diskette drive or CD-ROM drive designation are needed as the
path. If you installed Windows 95 from CD-ROM, the
installation files are typically located at D:\win95, where D:
is your CD-ROM drive.
1. After you install the AT-2560 adapter, start Windows 95.
The New Hardware Found dialog box appears. If this box
does not appear and Windows 95 starts normally, you will
need to manually add the adapter software. See page 10.
2. Click “Driver from disk provided by hardware
manufacturer,” then click OK. The Install From Disk dialog
box appears.
3. Insert the Allied Telesyn CardAssistant disk.
4. Specify A:\ (or B:\) as the path, then click OK.
5. Follow prompts for any Windows 95 installation disks and
restart when prompted.
Install A2560SET software and test the adapter. Although not
required for operation, it’s a good idea to run diagnostic tests
every time you install an adapter. The Allied Telesyn A2560SET
program is an enhanced configuration and diagnostics utility for
Windows 95. To install A2560SET:
8
Configure drivers
1. Insert the CardAssistant disk.
2. From Explorer, double click on the 3.5 Floppy disk icon.
3. Find the A2560SET icon and click the right mouse button.
From the menu that appears click Install.
4. The A2560SET files are copied to your hard disk.
5. Start A2560SET by double-clicking on its icon in the
Control Panel. (If the icon doesn’t show up, choose Refresh
under the View menu in the Control Panel window.)
6. The A2560SET software examines your computer and
displays the Adapter Setup Window. This window shows
the adapter’s I/O address, interrupt, and Ethernet address.
7. Click Test to begin diagnostics.
There are two testing options. Testing with the NDIS driver
checks overall operation of the adapter with the network. The
second option tests the adapter hardware only. Read both
sections below before testing.
Test the adapter and driver together. The adapter and driver test
doesn’t require you to unload the NDIS driver. You don’t need to
restart after testing.
1. Click Test NDIS.
2. When the test is complete, click OK to exit.
3. If this test fails, try again, unloading NDIS first.
Test the adapter hardware only (recommended). This test unloads
the NDIS driver. You will need to restart after testing.
1. Click Unload NDIS.
2. After the NDIS driver unloads, click OK to continue.
3. When the test is complete, click OK to exit or click
Advanced for more testing options. Click Help in the
Advanced Diagnostics window for more information.
4. Restart the computer. You must restart the computer
before accessing any network drives.
9
AT-2560FX 100 and AT-2560TX 10/100 PCI
Manually adding an adapter in Windows 95. If the New Hardware
Found dialog box does not appear at startup, or if you are adding
a second adapter, use the following procedure.
1.
2.
3.
4.
5.
6.
7.
From the Control Panel, double click the System icon.
Click the Device Manager tab in the window that appears.
Double-click Other Devices (question mark icon) in the list.
Double-click PCI Ethernet Controller.
Click the Driver tab and then click Change Driver.
Select Network Adapters and click OK.
Click Have Disk from the window that appears. Insert the
Allied Telesyn CardAssistant disk and click OK.
8. Follow any prompts for Windows 95 installation disks and
restart when prompted.
Troubleshooting. If you can’t connect to a server or Windows 95
reports an error after you double-click Network Neighborhood,
see page 21 for the AT-2560FX 100 PCI or page 23 for the AT2560TX 10/100 PCI.
Windows NT—server or workstation
If your computer displays an error while booting, it may require
additional steps to configure. See the PCI Installation Tips
section on page 26 for more information if you get an error.
NT 4.0—install network drivers. After putting the adapter in the
computer and starting Windows NT, you need to install the
drivers and test the adapter.
1. Double-click the Network icon in the Control Panel.
2. Select the Adapters tab; click the Add button.
3. From the Select Network Adapter pop-up window, do not
select from the Network Adapter list; choose the Have
Disk button.
10
Configure drivers
4. Insert the CardAssistant diskette into your floppy disk
drive and then type A:\ in the Insert Disk dialog box.
(Substitute the drive letter of the floppy drive if
necessary.) Click OK.
5. Verify that "ATI AT2560FX PCI Ethernet Adapter"
appears in the Select OEM Option dialog box. Then click
OK.
6. The A2560SET program automatically scans computer
resources and determines the settings assigned to your
adapter. It also adds an icon to the Control Panel for future
use of A2560SET.
NT 3.x—install network drivers. After putting the adapter in the
computer and starting Windows NT, you need to install the
drivers and test the adapter.
1. Double-click the Network icon in the Control Panel.
2. Click the Add Adapter button.
3. Don’t select an Allied Telesyn adapter from the
list. Instead, scroll to the end of the list and select:
<Other> Requires disk from manufacturer.
4. Insert the Allied Telesyn CardAssistant disk in a floppy
drive and click OK. Drivers and the Allied Telesyn
A2560SET utility are installed and A2560SET starts.
A2560SET automatically scans computer resources and
determines what resources were assigned to the adapter.
Test the adapter. It is a good idea to run diagnostics any time you
add an adapter.
A2560SET is an enhanced utility that you can use to easily
configure and test your adapter in Windows NT.
1. Click Test.
If you’ve just added the adapter, the network driver is not
active and the diagnostics will test the adapter and its connection to the network.
11
AT-2560FX 100 and AT-2560TX 10/100 PCI
If you’re testing an existing AT-2560TX 10/100 PCI adapter, the network driver will probably be active and the diagnostics will test the driver. This diagnostic tracks the driver’s actual network activity.
2. Click OK to accept the adapter’s configuration.
3. Click OK in the Network Settings dialog box and when
prompted, restart Windows NT.
4. To install multiple adapters, repeat this procedure for each
new adapter. See “Install multiple adapters” on page 17.
To run the A2560SET software at any time, double-click the
Allied Telesyn AT-2560TX 10/100 PCI icon in the Control Panel.
Troubleshooting. If you can’t connect to a server, or if Windows
NT reports an error while trying to connect, try the suggestions
here, then turn to page 21 for the AT-2560FX 100 PCI or page 23
for the AT-2560TX 10/100 PCI.
❑ Make sure you’re using the drivers that are on the
CardAssistant diskette that ships with this adapter.
❑ Make sure the driver is loaded and the protocols are bound.
See the Network Bindings dialog box in Windows NT.
❑ Make sure the PCI slots are busmaster enabled (refer to
your computer’s documentation).
❑ Make sure network cables are securely attached to both the
adapter and hub port and the adapter LNK light is on.
❑ Make sure the hub port is configured for the same duplex
mode as the adapter. See page 17 for more information on
full duplex.
❑ Test the adapter (page 10).
❑ After installing the adapter you can run A2560SET from
your hard disk. To do this, double-click the A2560SET icon
in the Control Panel.
❑ Check with your LAN administrator—you may need to
install supplemental networking software.
12
Configure drivers
DOS and Windows 3.1 setup for Novell NetWare clients
Test the adapter and install network drivers. Although not required
for operation, it’s a good idea to run diagnostic tests every time
you install an adapter. Allied Telesyn’s SETUP program lets you
test the adapter to see if there are any problems with the
adapter hardware, the cabling, or the network connection.
SETUP can automatically install NetWare DOS ODI client
drivers for you or display a README file with installation
instructions for other network drivers.
1. If your computer already has Allied Telesyn AT-2560TX
10/100 PCI or AT-2560FX 100 PCI network drivers
installed, restart the computer without loading them. If the
drivers are loaded from the AUTOEXEC.BAT file, type REM
in front of each line that loads a network driver. Or, with
DOS 6.x or later, press F5 as DOS starts, to bypass the
lines.
2. Insert the Allied Telesyn CardAssistant diskette in a
floppy drive, switch to that drive, and at the DOS prompt,
type
SETUP
ENTER
3. If you have more than one AT-2560 adapter in your
computer, an adapter selection menu appears on the
screen. Select the adapter you want by noting the Ethernet
address. See page 17 for more information on multiple
adapters.
4. Select Automatic setup from the Main menu. Then follow
the instructions on the screen. (If you want to test the
adapter with a responder on the network, see the next
procedure.)
SETUP displays the adapter’s configuration and then runs
a series of diagnostic tests that makes sure the adapter and
network are functioning properly. If SETUP finds a problem, it displays the results and some possible solutions.
13
AT-2560FX 100 and AT-2560TX 10/100 PCI
5. When SETUP finishes the tests, the Install network
drivers screen appears.
6. Select the driver you want to install.
SETUP can install a NetWare client driver for you. If
you’re installing other drivers, SETUP displays a
README file with installation instructions.
Test the adapter with a responder on the network (optional).
SETUP can test the network more thoroughly if you have a
responder on the network while running the tests.
1. Go to a computer on the network with an AT-2560FX 100
PCI or AT-2560TX 10/100 PCI installed.
2. Run the SETUP program, and set up the adapter as a
responder.
3. Return to the computer you want to test. Run SETUP and
test the adapter.
Troubleshooting. If you can’t connect to a server, try the
suggestions here, then turn to page 21 for the AT-2560FX 100
PCI or page 23 for the AT-2560TX 10/100 PCI.
❑ Make sure you’re using the drivers for this adapter.
❑ If you’re replacing an existing adapter, make sure the
LINK statement in your NET.CFG is correct for your new
adapter. For example, the LINK statement for a NetWare
client should be:
LINK DRIVER A2560ODI
❑ Verify FRAME type in your NET.CFG file matches frame
type your server is using.
❑ If setting up a server, check your LOAD and BIND
statements. (For NetWare, type config at the console to
make sure the driver is loaded and protocols are bound to
the driver.)
❑ Make sure the PCI slots are busmaster enabled (refer to
your computer’s documentation).
14
Configure drivers
❑ Make sure adapter and hub duplex mode match. See page 17
for more information on duplex modes for the AT-2560FX
100 and AT-2560TX 10/100 PCI adapters.
❑ (AT-2560TX 10/100 PCI only) Make sure you’re using
Category 5 wiring when operating at 100 Mbps.
❑ Make sure the network cables are securely attached to both
the adapter and hub port and the card is communicating:
For the AT-2560FX 100 PCI, check that the receive light is
flashing. For the AT-2560TX 10/100 PCI verify that the
adapter LNK light is on.
❑ At 100 Mbps, make sure you are connected to a 100BASETX hub (not a 100BASE-T4).
❑ Test the adapter (see page 13).
❑ Check the help (see page iv for instructions).
Other Operating Systems and Servers
If you’re using an operating system (OS) other than DOS,
Windows 3.1, Windows NT, or Windows 95, or if you are setting
up a server, you’ll need to read our online tips.
On a DOS computer, view the appropriate help file for
information on installing your network driver.
To view help, insert the Allied Telesyn CardAssistant disk into a
drive, switch to that drive, and type
SETUP /README
Look through the first selection, which covers installing ATI AT2560FX 100 and AT-2560TX 10/100 PCI Ethernet Adapter
drivers, for the operating system you need. The README files
contain driver information for the following:
❑ Novell (client & server)
❑ IBM
❑ Microsoft (workstation & server)
15
AT-2560FX 100 and AT-2560TX 10/100 PCI
❑ LANtastic
❑ Banyan
Set speed (AT-2560TX 10/100 PCI option)
The AT-2560TX 10/100 PCI default is to auto-set the card for the
network speed. Configuration for manually fixed speed is an
option; you must set the speed manually when configuring the
AT-2560TX 10/100 PCI for full-duplex support. The steps for
setting speed are specific to the driver you’re loading for your
network environment. See Table 3.
Table 3: Steps for Setting AT-2560TX 10/100 PCI Speed
If you’re using this driver. . .
set the speed by. . .
DOS/ODI clients
Editing the NET.CFG file. Add this
parameter under the Link Driver section:
SPEED 100 (or 10 for 10 Mbps
operation)
Windows NT
Using the A2560SET program:
1. Click “Network” in the Control Panel.
2. Click the Configure button. The
A2560SET program runs.
3. Click the Change button. Set Speed to
100 (or 10), exit A2560SET and restart
Windows.
Windows 95
Setting the Speed in the Control Panel:
1. Click the Network icon in the Control
Panel and select the Configuration tab.
2. Select the Allied Telesyn AT-2560TX
10/100 PCI.
3. Click the Properties button and select
the Advanced tab.
4. Set Speed to 100 Mbps (or 10 for 10
Mbps operation), exit A2560SET and
restart Windows.
16
Configure drivers
Table 3: Steps for Setting AT-2560TX 10/100 PCI Speed (Continued)
If you’re using this driver. . .
Others network software
set the speed by. . .
To view the README files, insert the
Allied Telesyn CardAssistant diskette,
and from the DOS-prompt type
SETUP /README
ENTER
Install multiple adapters
Use the Ethernet address to match the adapter to the slot
number when configuring multiple adapters. For your reference,
we’ve printed the adapter’s Ethernet address on a sticker on the
back edge of the adapter. The Ethernet address is sometimes
called the Node address or the MAC address.
For a Novell server, repeat the procedure under “Test the
adapter and install network drivers” on page 13 for each adapter
you want to install. For a Windows NT server, repeat the
procedure under “NT 4.0—install network drivers” on page 10
for each adapter you want to install.
While the Allied Telesyn A2560SET program can detect all the
AT-2560 adapters in your computer, you still need to perform
each installation process before you can use them.
Configure for full duplex support (optional)
Duplexing is a performance option that lets you choose how the
adapter sends and receives packets over the network.
There are three duplex modes:
❑ Auto-negotiate (AT-2560TX 10/100 PCI only). The
adapter negotiates with the hub how to send and receive
packets, either full or half duplex.
17
AT-2560FX 100 and AT-2560TX 10/100 PCI
❑ Full duplex (requires full-duplex hub). The adapter
sends and receives packets at the same time, increasing
adapter performance.
❑ Half duplex. The adapter performs one operation at a
time; it either sends or receives.
Configuring the AT-2560FX 100 PCI for full-duplex. Configuration
for full duplex is specific to the driver you’re loading for your
network environment. See the table below.
Table 4: Steps for Setting AT-2560FX 100 PCI Duplex Mode
If you’re using this driver .
set the duplex mode by. . .
DOS/ODI clients
Editing the NET.CFG file. Add this
parameter under the Link Driver section:
FORCEDUPLEX 2
Windows NT
Using the A2560SET program:
1. Doule-click the Network icon in the
Control Panel.
2. Click the Configure button. The
A2560SET program runs.
3. Click the Change button. Set Duplex
Mode to Full, exit A2560SET and restart
Windows.
Windows 95
Setting the Duplex mode in the Control
Panel:
1. Double-click the Network icon in the
Control Panel and select the
Configuration tab.
2. Select the Allied Telesyn AT-2560FX
100 PCI.
3. Click the Properties button and select
the Advanced tab.
4. Set Duplex Mode to Full, exit
A2560SET and restart Windows.
18
Configure drivers
Table 4: Steps for Setting AT-2560FX 100 PCI Duplex Mode (Continued)
If you’re using this driver .
Others network software
set the duplex mode by. . .
See the Duplex support README file.
To view the README files, insert the
Allied Telesyn CardAssistant diskette,
and from the DOS-prompt type
SETUP /README
ENTER
Configuring the AT-2560TX 10/100 PCI for full-duplex. If you have a
switch that doesn’t support auto-negotiation, you’ll need to
manually configure for speed and full-duplex support.
Configuration is specific to the driver you’re loading for your
network environment. See the table below.
NOTE
On a AT-2560TX 10/100 PCI, you must set the Speed when
configuring for full-duplex support. Don’t leave the Speed set
to Auto-negotiate.
Table 5: Steps for Setting AT-2560TX 10/100 PCI Duplex Mode
If you’re using this driver. . .
DOS/ODI clients
set the duplex mode by. . .
Editing the NET.CFG file. Add these
parameters under the Link Driver
section:
SPEED 100 (or 10 for AT-2560TX 10/
100 PCI 10 Mbps operation)
FORCEDUPLEX 2
19
AT-2560FX 100 and AT-2560TX 10/100 PCI
Table 5: Steps for Setting AT-2560TX 10/100 PCI Duplex Mode (Continued)
If you’re using this driver. . .
set the duplex mode by. . .
Windows NT
Using the A2560SET program:
1. Click the Network icon in the Control
Panel.
2. Click the Configure button. The
A2560SET program runs.
3. Click the Change button. Set Speed to
100 (or 10).
4. Click the Advanced button. Set Duplex
Mode to Full, exit A2560SET and restart
Windows.
Windows 95
Setting the Speed and Duplex mode in
the Control Panel:
1. Click the Network icon in the Control
Panel and select the Configuration tab.
2. Select the Allied Telesyn AT-2560TX
10/100 PCI.
3. Click the Properties button and select
the Advanced tab.
4. Set Speed to 100 Mbps (or 10 for 10
Mbps operation).
5. Set Duplex Mode to Full, exit
A2560SET and restart Windows.
Others network software
See the Duplex support README file.
To view the README files, insert the
Allied Telesyn CardAssistant diskette,
and from the DOS-prompt type
SETUP /README
20
ENTER
AT-2560FX 100 PCI Troubleshooting
AT-2560FX 100 PCI Troubleshooting
If the AT-2560FX 100 PCI can’t connect to the network
❑ Make sure the cables are installed properly
The network cables must be securely attached at all connections. The transmit connector on one end must be connected
to the receive on the other and vice versa. If the cables are
attached properly but the problem persists, try swapping
out the cables.
❑ Check the LEDs on the adapter
The AT-2560FX 100 PCI has three diagnostic LEDs above
the cable connectors. These lights help indicate if there’s a
problem with the connector, cable, or hub.
The TX light is ON when the adapter sends data. The RX
light is ON when the adapter receives data; it flashes when
the cable is connected properly. The FD light is ON when
the adapter is operating in full-duplex mode.
❑ Make sure you’re using the correct drivers
You must use drivers designed for this adapter.
❑ Test the adapter
Test the adapter as described in this guide. Remember, how
you test the adapter depends on which operating system
you’re running.
Table 6: Common AT-2560FX 100 PCI problems and solutions
Problem
SETUP reports the adapter’s
interrupt as ‘0’ or ‘255’
SETUP reports ‘No PCI Bus'
Solutions
The PCI BIOS isn’t configuring the
adapter correctly. Try “PCI installation
tips” on page 26.
21
AT-2560FX 100 and AT-2560TX 10/100 PCI
Table 6: Common AT-2560FX 100 PCI problems and solutions (Continued)
Problem
Solutions
Computer hangs when loading
drivers
Change the PCI BIOS interrupt settings.
See “PCI installation tips” on page 26.
Diagnostics pass, but the
connection fails.
Make sure the network cables are
securely attached.
Make sure Receive at one end is
connected to Transmit at the other.
(Swapping them briefly to check causes
no harm)
LEDs do not light.
Check all connections at the adapter and
the hub.
Try another port on the hub.
Make sure the duplex mode is right for
the hub.
Make sure the hub port is configured for
100 Mbps.
See page 26 for more information.
Network may be idle; try sending data
from this workstation.
The adapter isn’t transmitting or
receiving data; try another adapter.
The adapter stopped working
when another adapter was added
to the computer.
Make sure the cables are connected to
the AT-2560FX 100 PCI.
Make sure your PCI system BIOS is
current.
Try reseating the adapter.
See “PCI installation tips” on page 26.
22
AT-2560TX 10/100 PCI Troubleshooting
Table 6: Common AT-2560FX 100 PCI problems and solutions (Continued)
Problem
The adapter stopped working
without apparent cause.
Solutions
Try reseating the adapter or try a
different slot.
The network driver files may be corrupt
or deleted. Reinstall the drivers.
Try a different AT-2560FX 100 PCI.
AT-2560TX 10/100 PCI
Troubleshooting
If the AT-2560TX 10/100 PCI can’t connect to the network
❑ Make sure the cable is installed properly
The network cable must be securely attached at all connections. If the cable is attached but the problem persists, try a
different cable.
If you’re operating at 100 Mbps, you must use TPE Category 5 wiring (certified to 100 Mbps). See the help file section
called Hardware specifications and cabling information for a
list of recommended cables and information on how to install
the cabling properly.
If you’re directly connecting two workstations (no hub), use
a cross-over cable. See the help file section called Hardware
specifications and cabling information for information on
cross-over cables.
❑ Check the LED lights on the adapter
23
AT-2560FX 100 and AT-2560TX 10/100 PCI
The AT-2560TX 10/100 PCI has three diagnostic LEDs
above the cable connectors. These lights help indicate if
there’s a problem with the connector, cable, or hub.
The LNK light is ON when the adapter receives a Link
pulse from the hub. If the light is OFF, there may be a bad
connector, bad cable, or problem with the hub. The LNK
light is also OFF when running diagnostics in SETUP.
The ACT light is on when there’s read/write activity on the
network. It doesn’t always mean there is activity on the
adapter. If the ACT light isn’t on, make sure the hub and
network are operating and the drivers are loaded.
The 100 light is on when a 100 Mbps connection is established.
❑ Make sure you’re using the correct drivers
You must use the drivers that come with this adapter.
❑ Test the adapter
Test the adapter as described in this guide. Remember, how
you test the adapter depends on which operating system
you’re running.
Table 7: Common AT-2560TX 10/100 PCI problems and solutions
Problem
SETUP reports the adapter’s
interrupt as ‘0’ or ‘255’
SETUP reports ‘No PCI Bus'
Solutions
The PCI BIOS isn’t configuring the
adapter correctly. Try “PCI installation
tips” on page 26.
Computer hangs when loading
drivers
Change the PCI BIOS interrupt settings.
See the next page for PCI installation
tips.
Diagnostics pass, but the
connection fails.
Make sure the network cable is securely
attached.
Make sure you’re using Category 5
cabling when operating at 100 Mbps.
24
AT-2560TX 10/100 PCI Troubleshooting
Table 7: Common AT-2560TX 10/100 PCI problems and solutions (Continued)
Problem
LNK LED does not light.
Solutions
Make sure you’ve loaded the network
drivers.
Check all connections at the adapter and
the hub.
Try another port on the hub.
If you forced the duplex mode, make
sure you also force the speed to either
10 or 100.
Make sure the hub port is configured for
the correct speed, 10 or 100 Mbps.
See page 26 for more information.
ACT LED does not light.
Make sure you’ve loaded the network
drivers.
Network may be idle; try sending data
from this workstation.
The adapter isn’t transmitting or
receiving data; try another adapter.
Data is corrupted or sporadic.
Make sure you’re using Category 5
cabling when operating at 100 Mbps.
The adapter stopped working
when another adapter was added
to the computer.
Make sure the cable is connected to the
AT-2560TX 10/100 PCI.
Make sure your PCI system BIOS is
current.
Try reseating the adapter.
See “PCI installation tips” on page 26.
25
AT-2560FX 100 and AT-2560TX 10/100 PCI
Table 7: Common AT-2560TX 10/100 PCI problems and solutions (Continued)
Problem
The adapter stopped working
without apparent cause.
Solutions
Try reseating the adapter or try a
different slot.
The network driver files may be corrupt
or deleted. Reinstall the drivers.
Try a different AT-2560TX 10/100 PCI.
Technical information
PCI installation tips
Some PCI computers require additional steps to configure a PCI
adapter. You may need to
❑ Reserve interrupts (IRQs) and/or memory addresses for
ISA adapters. This prevents PCI cards from trying to use
the same settings ISA cards are using. Check your PCI
BIOS Setup program; there may be IRQ options such as
‘Enable for ISA’ or ‘Disable for PCI’.
❑ Enable the PCI slot and assign an IRQ. In some PCI
computers, you must use the PCI BIOS Setup program to
enable the PCI slot and assign an IRQ. This is especially
common in older PCI computers with the Phoenix BIOS.
❑ Update your PCI BIOS. An updated PCI system BIOS can
correct some PCI configuration problems. Call your
computer manufacturer to see if an updated BIOS version is
available for your computer. Phone numbers for the top PCI
computer manufacturers are listed in the PCI installation
help file on the Allied Telesyn CardAssistant diskette.
26
Technical information
❑ Make sure your extended memory manager, the file
EMM386.EXE, is updated for PCI. Search for the file on
your hard drive, and make sure the date is at least 5/31/94.
❑ Configure the slot for level-triggered interrupts. The slot
the adapter is using must be configured for level-triggered
interrupts rather than edge-triggered interrupts. Check
your PCI BIOS Setup program.
Table 8 shows some example PCI BIOS Setup program
parameters.
Table 8: Example PCI BIOS Parameters
PCI slot #:
Slot where the adapter is installed (1-3)
Master:
ENABLED
Slave:
ENABLED
Latency timer:
40
Interrupt:
Choose any one of several that the BIOS Setup provides.
Edge-level:
Level
The exact wording of these parameters varies with different
computers.
Fast Ethernet hubs
New hubs are becoming available to support a variety of Fast
Ethernet LAN configurations. These hubs can be divided into
two basic types: shared and switched. The AT-2560FX 100 PCI
requires a 100 Mbps capable hub set to 100 Mbps. AT-2560TX 10/
100 PCI can be used with hubs capable of 10 Mbps operation, 100
Mbps operation, or both.
Shared hubs. In a shared network environment, computers are
connected to hubs called repeaters. All ports of the repeater hub
share a fixed amount of bandwidth, or data capacity. A 100 Mbps
27
AT-2560FX 100 and AT-2560TX 10/100 PCI
shared hub means that all nodes on the hub must share the 100
Mbps of bandwidth. As stations are added to the hub, the
effective bandwidth available to any individual station gets
smaller.
Think of a shared repeater hub as a single-lane highway that
everyone shares. As the number of vehicles on the highway
increases, the traffic becomes congested and transit time for
individual cars increases.
On a shared hub all nodes must operate at the same speed, either
10 Mbps or 100 Mbps. Fast Ethernet repeaters provide 100 Mbps
of available bandwidth, ten times more than what’s available
with a 10BASE-T repeater.
Repeaters use a well-established, uncomplicated design, making
them highly cost effective for connecting PCs within a
workgroup. These are the most common type of Ethernet hubs in
the installed base.
Switched hubs. In a switched network environment, each port
gets a fixed, dedicated amount of bandwidth. In the highway
scenario, each car has its own lane on a multi-lane highway and
there is no sharing.
In a switched environment, data is sent only to the port which
leads to the proper destination station. Network bandwidth is
not shared among all stations and each new station added to the
hub gets access to the full bandwidth of the network.
If a new user is added to a 100 Mbps switching hub, the new
station receives its own dedicated 100 Mbps link and doesn’t
impact the 100 Mbps bandwidth of another station. Switching
hubs can effectively increase the overall bandwidth available on
the network, significantly improving performance.
28
Electrical Safety and Installation Requirements
U.S. Federal Communications Commission
DECLARATION OF CONFORMITY
Manufacturers Name:
Manufacturers Address:
Allied Telesyn International
950 Kifer Road
Sunnyvale, CA 94086 USA
Manufacturers Telephone:
Declares that the product:
Model Number:
408-730-0950
PCI 100 Ethernet Adapter Card
AT-2560FX/TX
Complies with FCC Part 15B, Class B Limits:
This device complies with part 15 of the FCC Rules. Operation is subject to the following
two conditions: (1) This device may not cause harmful interference, and (2) This device
must accept any interference received, including interference that may cause undesired
operation.
RADIATED ENERGY
Note: This equipment has been tested and found to comply with the limits for a Class B
digital device pursuant to Part 15 of the FCC Rules. These limits are designed to provide
reasonable protection against harmful interference in a residential installation. This
equipment generates, uses, and can radiate radio frequency energy and, if not installed and
used in accordance with instructions, may cause harmful interference to radio or television
reception, which can be determined by turning the equipment off and on; the user is
encouraged to try to correct the interference by one or more of the following measures:
- Reorient or relocate the receiving antenna.
- Increase the separation between the equipment and the receiver.
- Connect the equipment into an outlet on a circuit different from that to which the receiver
is connected.
- Consult the dealer or an experienced radio/TV technician for help.
Changes and modifications not expressly approved by the manufacturer or registrant of this
equipment can void your authority to operate this equipment under Federal
Communications Commission rules.
Canadian Department of Communications
This Class B digital apparatus meets all requirements of the Canadian Interference-Causing
Equipment Regulations.
Cet appareil numérique de la classe B respecte toutes les exigences du Règlement sur le
matériel brouilleur du Canada.
29
AT-2560FX 100 and AT-2560TX 10/100 PCI
STANDARDS: This product meets the following standards.
RFI Emission
EN55022 Class B
Immunity
EN50082-1
Electrical Safety
EN60950, UL1950, CSA 950, EN60825
LIGHTNING DANGER
DANGER: DO NOT WORK on equipment or CABLES during periods of
LIGHTNING ACTIVITY.
AT-2560FX: This is a "CLASS 1 LED PRODUCT"
OPERATING TEMPERATURE
This product is designed for a maximum ambient temperature of 40˚ C.
All Countries: Install product in accordance with local and National
Electrical Codes.
NORMEN: Dieses Produkt erfüllt die Anforderungen der nachfolgenden Normen.
Hochfrequenzstörung
EN55022 Klasse B
Störsicherheit
EN50082-1
Elektrische Sicherheit
EN60950, UL1950, CSA 950
EN60825
GEFAHR DURCH BLITZSCHLAG
GEFAHR: Keine Arbeiten am Gerät oder an den Kabeln während eines
Gewitters ausführen.
AT-2560FX: Das ist ein "LED Produkt der Klasse 1"
BETRIEBSTEMPERATUR
Dieses Produkt wurde für den Betrieb in einer Umgebungstemperatur
von nicht mehr als 40˚ C entworfen.
Alle Länder: Installation muß örtlichen und nationalen elektrischen
Vorschriften entsprechen.
30
STANDARDER: Dette produkt opfylder følgende standarder.
Radiofrekvens forstyrrelsesemission EN55022 Klasse B
Immunitet
EN50082-1
Elektrisk sikkerhed.
EN60950, UL1950, CSA 950,
EN60825
FARE UNDER UVEJR
FARE: UNDLAD at arbejde på udstyr eller KABLER i perioder med
LYNAKTIVITET.
AT-2560FX: Dette er et "Produkt under Klasse 1 LED"
Betjeningstemperatur
Dette apparat er konstrueret til en omgivende temperatur på maksimum
40 grader C.
Alle lande: Installation af produktet skal ske i overensstemmelse med
lokal og national lovgivning for elektriske installationer.
EISEN: Dit product voldoet aan de volgende normen.
RFI Emissie
EN55022 Klasse B
Immuniteit
EN50082-1
Electrische Veiligheid
EN60950, UL1950, CSA 950
EN60825
GEVAAR VOOR BLIKSEMINSLAG
GEVAAR: NIET aan toestellen of KABELS WERKEN bij BLIKSEM.
AT-2560FX: Dit is een "Klasse 1 LED-produkt"
Bedrijfstemperatuur
De omgevingstemperatuur voor dit produkt mag niet meer bedragen
dan 40 graden Celsius.
Alle landen: het toestel installeren overeenkomstig de lokale en
nationale elektrische voorschriften.
31
AT-2560FX 100 and AT-2560TX 10/100 PCI
NORMES: ce produit est conforme aux normes de suivantes
Emission d'interférences radioélectriques
EN55022 Classe B
Immunité
EN50082 - 1
Sécurité électrique
EN60950, UL1950,
CSA 950, EN60825
DANGER DE FOUDRE
DANGER : NE PAS MANIER le matériel ou les CÂBLES lors d'activité
orageuse.
AT-2560FX: Ce matériel est un "Produit à diode électroluminescente de classe 1"
TEMPÉRATURE DE FONCTIONNEMENT
Ce matériel est capable de tolérer une température ambiante maximum
de 40 degrés Celsius.
Pour tous pays : Installer le matériel conformément aux normes
électriques nationales et locales.
STANDARDIT: Tämä tuote on seuraavien standardien mukainen.
Radioaaltojen häirintä
EN55022 Luokka B
Kestävyys
EN50082-1
Sähköturvallisuus
EN60950, UL1950, CSA 950
EN60825
SALAMANISKUVAARA
HENGENVAARA: ÄLÄ TYöSKENTELE laitteiden tai KAAPELEIDEN
KANSSA SALAMOINNIN AIKANA.
AT-2560FX: Tämä on "ensimmäisen luokan valodiodituote"
KÄYTTöLÄMPöTILA
Tämä tuote on suunniteltu ympäröivän ilman maksimilämpötilalle 40˚C.
Kaikki maat: Asenna tuote paikallisten ja kansallisten
sähköturvallisuusmääräysten mukaisesti.
32
STANDARD: questo prodotto è conforme ai seguenti standard.
Emissione RFI (interferenza di radiofrequenza) EN55022 Classe B
Immunità
EN50082-1
Sicurezza elettrica
EN60950, UL1950, CSA 950
EN60825
PERICOLO DI FULMINI
PERICOLO: NON LAVORARE sul dispositivo o sui CAVI durante
PRECIPITAZIONI TEMPORALESCHE.
AT-2560FX: Questo è un "Prodotto con LED di Classe 1"
Temperatura di funzionamento
Questo prodotto è concepito per una temperatura ambientale massima
di 40 gradi centigradi.
Tutti i paesi: installare il prodotto in conformità delle vigenti normative
elettriche nazionali.
SIKKERHETSNORMER: Dette produktet tilfredsstiller følgende sikkerhetsnormer.
RFI stråling
EN55022 Klasse B
Immunitet
EN50082-1
Elektrisk sikkerhet
EN60950, UL1950, CSA 950
EN60825
FARE FOR LYNNEDSLAG
FARE: ARBEID IKKE på utstyr eller KABLER i TORDENVÆR.
AT-2560FX: Dette er et "klasse 1 LED produkt”
Driftstemperatur
Dette produktet er konstruert for bruk i maksimum romtemperatur på
40 grader celsius.
Alle land: Produktet må installeres i samsvar med de lokale og
nasjonale elektriske koder.
33
AT-2560FX 100 and AT-2560TX 10/100 PCI
PADRõES: Este produto atende aos seguintes padrões.
Emissão de interferência de radiofrequência
EN55022 Classe B
Imunidade
EN50082-1
Segurança Eléctrica
EN60950, UL1950, CSA 950
EN60825
PERIGO DE CHOQUE CAUSADO POR RAIO
PERIGO: NÃO TRABALHE no equipamento ou nos CABOS durante
períodos suscetíveis a QUEDAS DE RAIO.
AT-2560FX: Este é um "PRODUTO CLASSE 1 LED"
TEMPERATURA DE FUNCIONAMENTO
Este produto foi projetado para uma temperatura ambiente máxima de
40 graus centígrados.
Todos os países: Instale o produto de acordo com as normas nacionais
e locais para instalações elétricas.
ESTÁNDARES: este producto cumple con los siguientes estándares.
Emisión RFI
EN55022 Clase B
Inmunidad
EN50082-1
Seguridad eléctrica
EN60950, UL1950, CSA 950
EN60825
PELIGRO DE RAYOS
PELIGRO: NO REALICE NINGUN TIPO DE TRABAJO O CONEXION en
los equipos o en LOS CABLES durante TORMENTAS ELECTRICAS.
AT-2560FX: Este es un "producto de diodo luminiscente (LED) clase 1"
Temperatura requerida para la operación
Este producto está diseñado para una temperatura ambiental máxima
de 40 grados C.
Para todos los países: Monte el producto de acuerdo con los Códigos
Eléctricos locales y nacionales.
34
STANDARDER: Denna produkt uppfyller följande standarder.
Radiostörning
EN55022 Klass B
Immunitet
EN50082-1
Elsäkerhet
EN60950, UL1950, CSA 950
EN60825
FARA FöR BLIXTNEDSLAG
FARA: ARBETA EJ på utrustningen eller kablarna vid ÅSKVÄDER.
AT-2560FX : Detta är en "Klass 1 lysdiodprodukt"
DRIFTSTEMPERATUR
Denna produkt är konstruerad för rumstemperatur ej överstigande 40
grader Celsius.
Alla länder: Installera produkten i enlighet med lokala och statliga
bestämmelser för elektrisk utrustning.
35
Where To Find Us
For Technical Support or Service
Location
Phone
Fax
Americas
United States, Canada, Mexico, Central
America, South America
1 (800) 428-4835
1 (206) 481-3790
Asia
Singapore, Taiwan, Thailand, Malaysia,
Indonesia, Korea, Philippines, China, India
(+65) 3815-613
(+65) 3833-830
Australia
Australia, New Zealand
(612) 416-0619
(612) 416-9764
France
France, Belgium, Luxembourg, The
Netherlands, Middle East, Africa
(+33) 1-60-92-15-32
(+33) 1-69-28-37-49
Germany
Germany, Switzerland, Austria, Eastern
Europe
(+49) 30-435-900-126
(+49) 30-435-70-650
Hong Kong
(+852) 2-529-4111
(+852) 2 529-7661
Italy
Italy, Spain, Portugal, Greece, Turkey, Israel
(+39) 2-416047
(+39) 2-419282
Japan
(+81) 3-3443-5640
(+81) 3-3443-2443
United Kingdom
United Kingdom, Denmark, Norway, Sweden,
Finland, Iceland
(+44) 1-235-442560
(+44) 1-235-442490
Technical Bulletin Board Service
1 (206) 483-7979
CompuServe
World Wide Web
Go ALLIED
http://www.alliedtelesyn.com
37
For Information Regarding Allied Telesyn International Corp.
Allied Telesyn International Corp.
19015 North Creek Parkway Suite 200
Bothell, WA 98011
Tel: 1 (206) 487-8880
Fax: 1 (206) 489-9191
Allied Telesyn International Corp.
950 Kifer Road
Sunnyvale, CA 94086
Tel: 1 (800) 424-4284 (USA and Canada)
Fax: 1 (408) 736-0100
For Sales Information
Australia
United States
Lindfield, NSW
Tel: (612) 416-0619, Fax: (612) 416-9764
Canada
Scottsdale, AZ
Tel: (602) 423-7087 Fax: (602) 423-7088
Los Angeles, CA
Tel: (310) 412-8684, Fax: (310) 412-8685
Mission Viejo, CA
Tel: (714) 699-0628, Fax: (714) 699-0276
San Diego, CA
Tel: (619) 279-3899, Fax: (619) 279-3897
Santa Ana, CA
Tel: (714) 838-0434, Fax: (714) 838-9721
Clearwater, FL
Tel: (813) 726-0022, Fax: (813) 726-0234
Norcross, GA
Tel: (770) 448-7214, Fax: (770) 448-2600
Reading, MA
Tel & Fax: (617) 944-3492
Eden Prairie, MN
Tel: (612) 829-7506, Fax: (612) 903-5284
St. Louis, MO
Tel: (314) 894-6160, Fax: (314) 894-3773
Dover, NH
Tel: (603) 743-3010, Fax: (603) 743-6327
Plaistow, NH
Tel: (603) 382-0815, Fax: (603) 382-0818
Portsmouth, NH
Tel: (603) 431-6461, Fax: (603) 431-1649
Morrisville, NC
Tel: (919) 468-0831, Fax: (919) 468-0829
Lake Oswego, OR
Tel: (503) 699-3130, Fax: (503) 636-6575
Austin, TX
Tel: (512) 261-6378, Fax: (512) 261-6379
Dallas, TX
Tel: (214) 365-9471, Fax: (214) 365-9472
San Antonio, TX
Tel: (210) 646-8744
Vienna, VA
Tel: (703) 506-0196, Fax: (703) 506-1986
Rexdale, Ontario
Tel: (416) 675-6738, Fax: (416) 675-0057
Richmond, British Columbia
Tel: (604) 244-0678, Fax: (604) 270-3644
England
Abingdon, Oxon
Tel: (+44) 1235-442500, Fax: (+44) 1235-442590
France
Les Ulis
Tel: (+33) 1-60921525, Fax: (+33) 169-28-37-49
Germany
Berlin
Tel: (+49) 30-435-90-00, Fax: (+49) 30-435-706-50
Freising
Tel: (+49) 8161-9906-0, Fax: (+49) 8161-9906-22
Hong Kong
Wanchai
Tel: (+852) 2-529-4111, Fax: (+852) 2-529-7661
Italy
Milano
Tel: (+39) 2-416047, Fax: (+39) 2-419282
Japan
Machida-shi, Tokyo
Tel: (+81) 427-21-8141, Fax: (+81) 427-21-8848
Yodogawa-ku, Osaka
Tel: (+81) 6-391-6310, Fax: (+81) 6-391-6325
Singapore
Tel: (+65) 383-3832, Fax: (+65) 383-3830
38