1
Index
Contents FAQs
FAQS
Table of Contents
How to Use This Manual
Safety Precautions
Printer Parts and Their Function
Further Printing Techniques
Printing Media
Checking the Status of the Printer
Routine Maintenance
Using the Canon iP90 Setup Utility
Troubleshooting
Appendix
Index
Printing is Blurred/Colors are Wrong
Printer Moves But The Ink Is Not
Ejected
Cannot Install Printer Driver
Printing Does Not Start
The POWER Lamp Flashes Orange
Error Writing/Output to USBnnn or
MPUSBPRNnn
Colors are Unclear
Paper Jams
Paper Does Not Feed Properly
White Streaks
Table of Contents
How to Use This Manual
How to Read This Manual
Safety Precautions
Printer Parts and Their Function
Front View
Operation Panel
Rear View
Inside the Printer
Further Printing Techniques
Printing Photographs
Printer Driver Functions
Printer Driver Functions
BJ Printer Utility
Printing Media
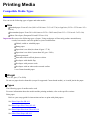
Compatible Media Types
Photo Paper Pro PR-101
Photo Paper Plus Glossy PP-101
Photo Paper Plus Semi-Gloss SG-101
Matte Photo Paper MP-101
Glossy Photo Paper GP-401
High Resolution Paper HR-101N
Photo Paper Plus Double Sided PP-101D
T-Shirt Transfers TR-301
Transparencies CF-102
Photo Stickers PS-101
Envelopes
Checking the Status of the Printer
BJ Status Monitor Functions
Printer Setup Utility (or Print Center)
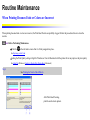
Routine Maintenance
When Printing Becomes Faint or Colors are Incorrect
Printing the Nozzle Check Pattern
Print Head Cleaning
Print Head Deep Cleaning
Aligning the Print Head
Replacing an Ink Tank
Using the Canon iP90 Setup Utility
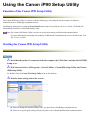
Function of the Canon iP90 Setup Utility
Starting the Canon iP90 Setup Utility
Setup Utility Functions
Setup Utility Functions
Troubleshooting
Cannot Install Printer Driver
Print Quality is Poor
Printer Does Not Start or Stops During Print Jobs
Paper Does Not Feed Properly or Paper Jams
The POWER Lamp Flashes Orange
An Error Message is Displayed on the Screen
Cannot Print Properly from the Digital Camera
Cannot Print Properly through Infrared Communication
Problems Relating to Windows
Appendix
Printing Area
Deleting Selected Printers
Uninstalling Printer Drivers
Uninstalling the On-screen Manual
Cleaning the Inside of the Printer
Transporting Printer
Traveling Abroad with the Printer
Specifications
Index
How to Use This Manual
This manual is written in HTML (Hyper Text Markup Language), the language used to display texts and images
on Worldwide Web Pages.
Various Web browsers are available for seeing HTML view and therefore the same text or image may appear
different depending on the browser you use. This manual has been prepared on the assumption that it would be
displayed and read under the following conditions:
Web browser: Microsoft® Internet Explorer 5.0 or later.
Web browser screen: Full screen
Resolution of display (Desktop): 800 x 600 pixels or above
Color amount of display: 16 bit or more
Web browser: Microsoft® Internet Explorer 5.0 or later, Safari 1.0 or later.
Web browser screen: Full screen
Resolution of display (Desktop): 800 x 600 pixels or above
Color amount of display: 32,000 or more
This manual refers to Windows XP Service Pack 2 (hereafter, called Windows XP SP2) and Mac OS X v.10.3.x
operation. The operations may vary slightly depending on your operating system.
Note The Bluetooth unit is not available to some regions due to the law of the countries or the regulations.
For details, countact your local Canon service representative.
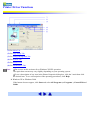
How to Read This Manual
Let's take a look at how to read this manual. For instructions on how to use the browser, refer to the User's Guide
or Help topics of the browser you use.
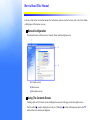
Manual Configuration
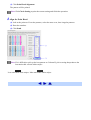
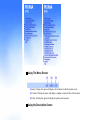
This manual consists of three screens: Contents, Menu, and Description screen.
(1) Contents screen
(2) Menu screen
(3) Description screen
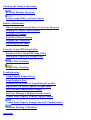
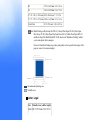
Using The Contents Screen
Clicking a title on the Contents screen will display the associated title page on the Description screen.
The title with the mark is displayed in two layers. Clicking the
the titles in the lower layer displayed.
button will change the mark to the
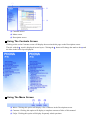
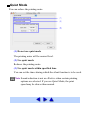
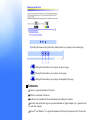
Using The Menu Screen
(1) Index: Clicking this option will display a list of indexes in the Description screen.
(2) Contents: Clicking this option will display a complete contents of titles of this manual.
(3) FAQs: Clicking this option will display frequently asked questions.
and
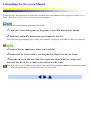
Using the Description Screen
(1) Clicking the character string with a blue underline allows you to jump to the associated page.
(2)
: Clicking this button allows you to jump to the previous page.
(3)
: Clicking this button allows you to jump to the next page.
(4)
: Clicking this button allows you to jump to the beginning of this page.
Trademarks
Canon is a registered trademark of Canon Inc.
PIXMA is a trademark of Canon Inc.
PhotoRecord is a trademark of Canon Information System Research Australia.
Macintosh, Mac and the Mac logo are registered trademarks of Apple Computer, Inc., registered in the
U.S. and other countries.
Microsoft ® and Windows ® are registered trademarks of Microsoft Corporation in the U.S. and other
countries.
IrDA Feature Trademark and IrDA Logo are owned by the Infrared Data Association.
The Bluetooth ® word mark and logos are owned by the Bluetooth SIG, Inc. and any use of such marks
by Canon, Inc. is under licence.
All other product and brand names are trademarks of their respective owners.
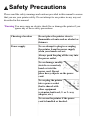
Safety Precautions
Please read the safety warnings and cautions provided in this manual to ensure
that you use your printer safely. Do not attempt to use printer in any way not
described in this manual.
Warning You may cause an electric shock/fire or damage the printer if you
ignore any of these safety precautions.
Choosing a location
Do not place the printer close to
flammable solvents such as alcohol or
thinners.
Power supply
Never attempt to plug in or unplug
the printer from the power supply
when your hands are wet.
Always push the plug all the way into
the power outlet.
Never damage, modify,
stretch or excessively
bend or twist the
power cord. Do not
place heavy objects on the power
cord.
Never plug the printer
into a power socket
that is shared with
other equipment
(extension lead/cord, 2- or 3- way
adapter, etc.).
Never use the printer if the power
cord is bundled or knotted.
If you detect smoke, unusual smells
or strange noises around the printer,
immediately unplug the printer at the
power supply and call for service.
Periodically, unplug
the printer and use a
dry cloth to wipe off
any dust or dirt
collected on the plug and the power
outlet. If the printer is placed at a
location exposed to a lot of dust,
smoke, or high humidity, the dust
collected on the plug absorbs
moisture and may cause insulation
failure and fire.
Use the universal AC adapter that
came with the printer (CANON,
K30244). Do not use it for other
products.
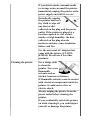
Cleaning the printer
Use a damp cloth
to clean the
printer. Never use
flammable
solvents such as
alcohol, benzene or thinners.
If flammable solvents come in contact
with electrical components inside the
printer, it could cause a fire or
electric shock.
Always unplug the printer from the
power outlet before cleaning the
printer.
If you accidentally switch the printer
on while cleaning it, you could injure
yourself or damage the printer.
Maintaining the printer Do not attempt to disassemble or
modify the printer. There are no user
serviceable parts inside the printer.
The printer contains high-voltage
components. Never attempt any
maintenance procedure not described
in this guide.
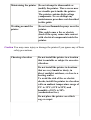
Working around the
printer
Do not use flammable sprays near the
printer.
This could cause a fire or electric
shock if the spray comes into contact
with electrical components inside the
printer.
Caution You may cause injury or damage the printer if you ignore any of these
safety precautions.
Choosing a location
Do not install the printer in a location
that is unstable or subject to excessive
vibration.
Do not install the printer in locations
that are very humid or dusty, in
direct sunlight, outdoors, or close to a
heating source.
To avoid the risk of fire or electric
shocks, install the printer in a location
with an ambient temperature range of
5°C to 35°C (41°F to 95°F) and
humidity of 10% to 90%
(condensation free).
Do not place the printer on a thick
rug or carpet.
Power supply
Ensure that the area
around the power
outlet is kept clear at
all times so you can
easily unplug the power cord if
necessary.
Never remove the plug
by pulling on the cord.
Do not use an extension
lead/cord.
Working around the
printer
Never put your hands or fingers in
the printer while it is printing.
Do not carry or store
the printer with the
round side down.
A failure can result.
Do not place any object on the
printer.
Do not place metal objects (paper
clips, staples, etc.) or containers of
flammable solvents (alcohol, thinners,
etc.) on top of the printer.
If any foreign object (metal or liquid)
fall into the printer, unplug the power
cord and call for service.
Print heads and ink
tanks
For safety reasons store print heads
and ink tanks out of the reach of
small children.
If a child ingests any ink, consult a
doctor immediately.
Do not shake print heads or ink
tanks.
Ink may leak out and stain clothing or
the surrounding area.
Never touch the electrical
contacts on a print head
after printing.
The metal parts may be very hot and
could cause burns.
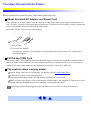
Universal AC Adapter
When you pack the universal AC
adapter for travel or storage, never
wrap the cord around the body of AC
adapter to prevent the cord from
splitting or separating from the body
of the AC adapter and causing a short
circuit.
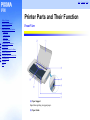
Printer Parts and Their Function
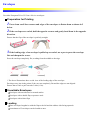
Front View
(1) Paper Support
Open before printing to support paper.
(2) Paper Guide
When loading paper, ensure the left edge just touches this guide.
To move the Paper Guide, slide it in the appropriate direction.
(3) Auto Sheet Feeder
Load paper here. Paper feeds automatically, one sheet at a time.
(4) Direct Print Port
Connects the printer to a Canon digital camera/PictBridge compliant camera.
(5) IrDA Interface Port
Connects the printer to a computer through a wireless IrDA connection.
(6) Print Head Cover
Open to replace the ink tanks.
(7) Paper Output Slot Cover
Printed paper ejects here.
(8) Paper Thickness Lever
Adjusts the gap between the Print Head and surface of the printing paper. Move the lever to the correct
position for the media in use.
(9) Operation Panel
See Operation Panel
Operation Panel
(1) POWER Button
Press to turn the printer on or off.
(2) RESUME/CANCEL Button
Press to resume printing once an error has been resolved. The printer will then initialize ready for
printing.
Also, to cancel printing in progress, press this button.
(3) POWER Lamp
Off : the printer is turned off.
Green : the printer is ready to print.
Flashing green : the printer is preparing to print, or is currently printing.
Flashing orange : an error has occurred and the printer is not ready to print.
Flashing orange and green alternately : an error has occurred that may require a service call.
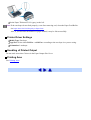
Rear View
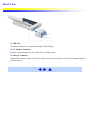
(1) USB Port
Connects the printer to a computer through a USB interface.
(2) AC Adapter Connector
Provides connection point for the Universal AC Adapter plug.
(3) Charger Connector
Connects the optional battery. For how to connect and use this connector, refer to the manual supplied
with the battery.
Inside the Printer
(1) Print Head Holder
Install the Print Head here.
(2) Print Head Lock Lever
Locks the Print Head into the holder.
Once the Print Head is installed, do not touch this lever.
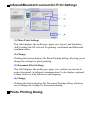
(3) Bluetooth unit connector
Connect the optional Bluetooth unit here. This option is a unit that allows you to print wireless from a
Bluetooth device.
For further information, refer to the Bluetooth Unit BU-10 User's Guide.
Important
The Bluetooth unit may not be available in some regions or countries due to the laws or
regulations applicable to those areas.
For details, contact a Canon service representative.
Never touch the transparent tape. The printer may be faulty and unable to print data.
*Transparent tape
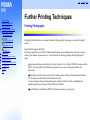
Further Printing Techniques
Printing Photographs
Using Easy-PhotoPrint allows you to make borderless (full page) prints from images you took with a digital
camera.
Easy-PhotoPrint supports Exif Print.
The image captured with an Exif Print-compliant digital camera can be optimized using data, such as camera
settings (white balance, exposure time), etc. stored at the time of shooting, yielding extremely high-quality prints.
The photo applications are included in the Setup Software & User's Guide CD-ROM that comes with the
printer. You can install the Easy-PhotoPrint program. Just go to your setup guide and follow the
instructions.
This chapter describes the steps used to print borderless photos with Easy-PhotoPrint under Windows XP.
The steps used under Macintosh are basically the same.
You can edit images taken with a digital camera by using the Red-Eye Correction and Digital Face
Smoothing functions, and then print them with Easy-PhotoPrint.
Easy-PhotoPrint can handle only JPEG files (file name extension: .jpg and .jpeg).
Note Media Types Suitable for Borderless Printing
Photo Paper Plus Glossy (Letter/A4, 4" x 6" / 101.6 x 152.4 mm, 5" x 7" / 127.0 x 177.8 mm)
Photo Paper Plus Semi-Gloss (Letter/A4, 4" x 6" / 101.6 x 152.4 mm)
Photo Paper Plus Double Sided (Letter/A4, 5" x 7" / 127.0 x 177.8 mm)
Photo Paper Pro (Letter/A4, 4" x 6" / 101.6 x 152.4 mm)
Matte PhotoPaper (Letter/A4)
Glossy Photo Paper (Letter/A4, 4" x 6" / 101.6 x 152.4 mm, Credit Card)
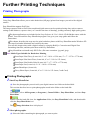
Printing Photographs
1 Start Easy-PhotoPrint.
(1) Store the photographs you took with your digital camera in a folder on the hard disk.
This section describes how to print photographs stored in the folder on the hard disk.
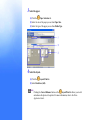
(2)
Click Start , select All Programs (or Programs ), Canon Utilities , Easy-PhotoPrint , and then EasyPhotoPrint.
Double-click the hard disk icon, the Applications folder, the Easy-PhotoPrint folder, and then doubleclick the Easy-PhotoPrint icon.
The
Image Selection sheet is displayed.
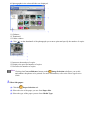
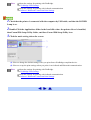
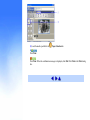
2 Select photographs.
(1) Select the folder containing the photograph you want to print.
All photographs in the selected folder are displayed.
*1 Guidance
*2 Thumbnail
*3 Folder window
(2) Click [
] on the thumbnail of the photograph you want to print and specify the number of copies.
*1 Increases the number of copies.
*2 Displays the specified number of copies.
*3 Decreases the number of copies.
Note
Clicking the Correct/Enhance button on the
Image Selection tab allows you to edit
and enhance the photos to be printed. For more information, refer to the Photo Application
Guide.
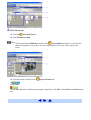
3 Select the paper.
(1) Click the
Paper Selection tab.
(2) Select the size of the paper you use from Paper Size.
(3) Select the type of the paper you use from Media Type.
4 Select the layout.
(1) Click the
Layout/Print tab.
(2) Select Borderless (full).
Note
Clicking the Correct/Enhance button on the
Layout/Print tab allows you to edit and
enhance the photos to be printed. For more information, refer to the Photo Application
Guide.
(3) Load the media specified in the
Paper Selection tab.
(4)
Click Print.
Click Print. When the confirmation message is displayed, click OK. Click Print in the Print dialog
box.
Printer Driver Functions
(1) See Main Tab
(2) See Page Setup Tab
(3) See Stamp/Background Tab
(4) See Effects Tab
(5) See Profiles Tab
(6) See Maintenance Tab
Note
The screens in this section refer to Windows XP SP2 operation.
The equivalent screens may vary slightly depending on your operating system.
To see a description of any item in the Printer Properties dialog box, click the ? mark then click
the desired item. To see a description of the operating procedures, click Help.
In Windows XP or Windows 2000
If the button does not appear, click Start and select All Programs (or Programs ), Canon iP90 and
Guide.
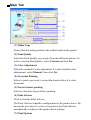
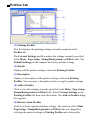
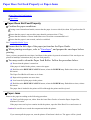
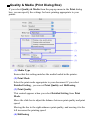
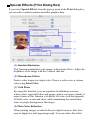
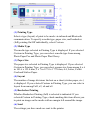
Main Tab
(1) Media Type
Ensure that this setting matches the media loaded in the printer.
(2) Print Quality
Select the Print Quality you require from the different options. To
select a custom Print Quality, select Custom and click Set.
(3) Color Adjustment
Select the method of color adjustment. To make detailed color
adjustments, select Manual , then click Set.
(4) Grayscale Printing
Select to print a grayscale version (black and white) of a color
document.
(5) Preview before printing
Select to check the layout before printing.
(6) Print Advisor
Click to start the Print Advisor.
The Print Advisor simplifies configuration of the printer driver. By
having the user answer a series of questions, the Print Advisor
automatically configures the printer driver settings.
(7) Print Options
When the size of the print data is adjusted automatically in accordance
with which port is to be used, the print time can be shortened. This
option is effective when IrDA and optional Bluetooth communications
are used and not a USB connection. Moreover, you can select the
option for spool data size to reduce print size.
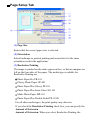
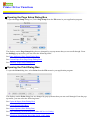
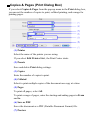
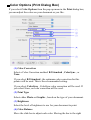
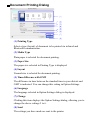
Page Setup Tab
(1) Page Size
Ensure that the correct paper size is selected.
(2) Orientation
Select landscape or portrait printing and ensure that it is the same
orientation used in the application.
(3) Borderless Printing
The image is printed on the entire paper surface, so that no margins are
left on the four sides of the paper. The media types available for
Borderless Printing are
Photo Paper Pro PR-101
Glossy Photo Paper GP-401
Photo Paper Plus Glossy PP-101
Photo Paper Plus Semi-Gloss SG-101
Matte Photo Paper MP-101
Photo Paper Plus Double Sided PP-101D
For all other media types, the print quality may decrease.
If you check the Broderless Printing check box, you can specify the
Amount of Extension.
Amount of Extension: When you select Borderless Printing, the
sections that extend beyond the paper are not printed because the
image is enlarged to a size slightly larger than the paper size. You can
use a slide bar to adjust how much the image extends beyond the
paper. Usually, you need not to adjust this setting. If you move the
slide bar to the left to reduce the extension amount, a border may
appear.
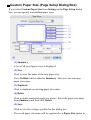
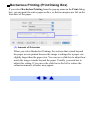
(4) Printing Type
Select a printing method from the following.
Normal-size Printing: The document is printed according to the
original dimensions. This setting is usually selected by default at
factory.
Fit-to-Page Printing: The document is automatically resized and
printed to fit into a specified page size.
Scaled Printing: The document is resized when printed. When this is
selected, you can specify Printer Paper Size and Scaling.
Page Layout Printing: Pages are reduced and printed so that multiple
document pages fit on each printed page.
Poster Printing: This enlarges and splits the print image across several
sheets of paper. The printed sheets can then be assembled to make a
large poster.
Booklet Printing: A multiple-page document is printed so that four
pages of the document fit on each printed page. The print order is set
automatically. After the document is printed, you can create a booklet
by folding and saddle-stitching the document.
(5) Duplex Printing
The document is printed on both sides of the paper. After printing one
side, turn the ejected page over, and print on the other side.
(6) Staple Side
Select a staple side for binding.
(7) Specify Margin
Specify the staple margin.
(8) Reverse Order
Prints the document starting with the last page first.
(9) Collate
Select to print multiple copies of the document one copy at a time.
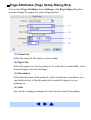
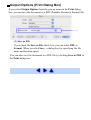
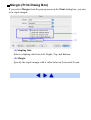
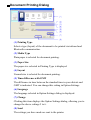
Stamp/Background Tab
(1) Stamp
Select the check box and choose the stamp.
(2) Place stamp over text
When Stamp is selected, you can select this check box. When selected,
the stamp is printed over the text.
(3) Define Stamp
This allows you to create new stamps, or modify details of a selected
stamp.
(4) Stamp first page only
When Stamp is selected, you can select this check box. When selected,
the stamp is printed only on the first page.
(5) Background
Select the check box and choose the background image you wish to
use.
(6) Select Background
This allows you to register a new background, or modify details of a
selected background.
(7) Background first page only
When Background is selected, you can select this check box. When
selected, the background image is printed only on the first page.
Effects Tab
(1) Simulate Illustration
This function manipulates color image data with certain effects. Select
the check box and adjust the brightness of the image with the Contrast
slide bar.
(2) Monochrome Effects
Prints a color image in a single color. Select the check box and choose
a color or use a custom color using Select Color.
(3) Vivid Photo
By using this function, you can reproduce breathtaking sceneries,
where colors, especially blues and greens, appear even more vibrant. A
major feature of this function is its ability to create vivid backgrounds
of fields, trees, oceans, and skies, while maintaining the natural skin
tones of people that appear in the images.
(4) Image Optimizer
Improves the contours and smoothes jaggedness that occur when
photographic or graphic image data is enlarged within an application.
(5) Photo Optimizer PRO
Optimizes the color of images taken from a digital camera or scanner.
It is especially effective for images affected by color imbalance and
over- or under exposure.
When printing several images on one page, optimization is usually
applied to each image according to its requirements. However, if the
image data has been manipulated using clipping, rotation or other such
operations, group optimization of all images on that page is
recommended. In such cases, select the Apply Throughout Page
check box.
(6) Photo Noise Reduction
When printing images recorded with your digital cameras, blue skies
may be dappled or dark appearing rough. You can reduce this effect
with the Photo Noise Reduction function. Using this function with
photographs other than those taken with a digital camera may cause
images to be disturbed.
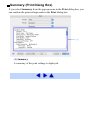
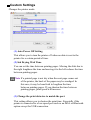
Profiles Tab
(1) Printing Profiles
This list displays the printing settings currently registered in the
Profiles tab.
The Current Settings profile contains the settings currently specified
in the Main , Page Setup , Stamp/Background and Effects tabs. The
Default Settings profile contains the factory default settings.
(2) Details
Displays all the printer settings selected in Printing Profiles.
(3) Description
Displays a description of the printer settings selected in Printing
Profiles. You can enter a description when saving the printer settings.
(4) Add to Profiles
Click to save the settings currently specified in the Main , Page Setup ,
Stamp/Background and Effects tabs. Select Current Settings in the
Printing Profiles list then click this button. The Add to Profiles dialog
box appears.
(5) Retrieve from Profiles
Click to activate registered printer settings. The contents of the Main ,
Page Setup , Stamp/Background and Effects tabs are changed by
selecting the printer settings in Printing Profiles and clicking this
button.
This button is disabled when Current Settings is selected.
(6) Delete
Click to delete unwanted printer settings. Select the unwanted item in
the Printing Profiles list and click Delete.
Current Settings and Default Settings cannot be deleted.
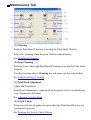
Maintenance Tab
(1) Cleaning
Perform Print Head Cleaning to unclog the Print Head Nozzles.
Select this cleaning when the print result is unsatisfactory.
See Print Head Cleaning
(2) Deep Cleaning
Perform a more thorough Print Head Cleaning to unclog the Print Head
Nozzles.
Use this function only if Cleaning has not improved the print quality.
See Print Head Deep Cleaning
(3) Print Head Alignment
Aligns the Print Head.
Print Head Alignment is required when the print result is unsatisfactory
(e.g., displaced ruled lines).
See Aligning the Print Head
(4) Nozzle Check
Prints a nozzle check pattern to ensure that the Print Head Nozzles are
ejecting ink properly.
See Printing the Nozzle Check Pattern
(5) Ink Counter Reset
Resets ink counter to an initial value. Click this if you did not select
Yes when a confirmation message of ink tank replacement is displayed
after installing a new ink tank. Select the ink tank you have just
installed and click Execute.
(6) Low Ink Warning Setting
Click to set whether to display alerts, such as Display low ink warning
or Display a confirmation message of ink tank replacement. Modify
the settings, and click Send.
When Display a confirmation message of ink tank replacement is
selected, a message asking whether or not the ink tank has been
replaced is automatically displayed whenever an ink tank is replaced.
(7) Bottom Plate Cleaning
Click to clean the Bottom Plate smudged during duplex printing.
See Cleaning the Inside of the Printer
(8) Ink Usage Control
You can be set as the mode which saves black ink. Moreover, when a
black ink tank is empty and a new tank is not immediately available,
you can change to the mode which can be printed only in color ink as
an emergency measure.
(9) Power Off
Click to turn the printer off.
(10) Auto Power
This allows you to turn the printer off when no data is sent to the
printer for a certain period of time.
(11) Custom Settings
Click to modify the printer mode. Change the settings in the Custom
Setting dialog box and then click Send to change the printer mode.
(12) Quiet Mode
Set Quiet Mode to reduce the printing noise. You can set the times
during which the Quiet Mode is to be used.
However, the effect may be small, depending on the Print Quality
setting. If you use Quiet Mode, the print speed may be slower than
normal.
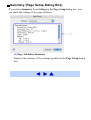
(13) Start Status Monitor
Click to start the BJ Status Monitor, to check the printer status and the
progress of printing jobs.
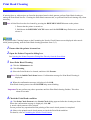
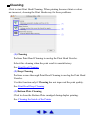
Print Head Cleaning
If missing lines or white stripes are found in the printed nozzle check pattern, perform Print Head cleaning to
unclog the Print Head Nozzles. Cleaning the Print Head consumes ink, so perform Print Head cleaning only when
necessary.
Note A Print Head can also be cleaned by pressing the RESUME/CANCEL button on the printer.
1. Ensure that the printer is turned on.
2. Hold down the RESUME/CANCEL button until the POWER lamp flashes once, and then
release it.
If you pressed the Cleaning button on the Examining the Nozzle Check Pattern screen displayed after nozzle
check pattern printing, start the Print Head cleaning procedure from 3-(3).
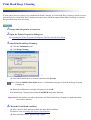
1 Ensure that the printer is turned on.
2 Open the Printer Properties dialog box.
See Opening the Printer Properties Dialog Box Directly from the Start Menu
3 Start Print Head Cleaning.
(1) Click the Maintenance tab.
(2) Click Cleaning.
(3) Select the Print Head to be cleaned, and then click Execute.
Note Click the Initial Check Items button. Confirmation message for Print Head Cleaning is
displayed.
(4) When the confirmation message is displayed, click OK.
Print Head cleaning starts when the POWER lamp starts blinking.
Important Do not perform any other operations until the Print Head cleaning finishes. This takes
about 60 seconds.
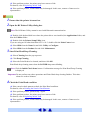
4 Check the Print Head condition.
(1) Click Print Check Pattern in the Nozzle Check dialog appeared after the cleaning are done.
When the confirmation message is displayed, click OK.
A nozzle check pattern will be printed.
Do not perform any operation until the printing of the nozzle check pattern is completed.
(2) Observe the printed nozzle check pattern to check the Print Head condition.
For details, refer to Examining the Nozzle Check Pattern.
(3) If the problem persists after you performed Print Head normal cleaning three times, execute Print
Head deep cleaning.
For details, refer to Print Head Deep Cleaning.
If you pressed the Cleaning button on the Examining the Nozzle Check Pattern screen displayed after a nozzle
check pattern printing, start the Print Head Cleaning procedure from 3-(3).
1 Ensure that the printer is turned on.
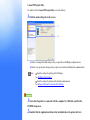
2 Open the BJ Printer Utility dialog box.
Note The BJ Printer Utility cannot be used with Bluetooth communication.
(1) Double-click the hard disk icon where the printer driver was installed, the Applications folder, and
then the Utilities folder.
(2) Double-click the Printer Setup Utility icon.
If you are using an OS other than Mac OS X v.10.3, double-click the Print Center icon.
(3) Select iP90 from the Name list and click Utility or Configure.
(4) Select iP90 from the Product list and click Maintenance.
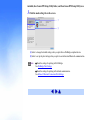
3 Start Print Head Cleaning.
(1) Select Cleaning from the pop-up menu.
(2) Click Cleaning.
(3) Select the Print Head to be cleaned, and then click OK.
Print Head cleaning starts when the POWER lamp starts blinking.
Note Click the Initial Check Items button. Confirmation message for Print Head Cleaning is
displayed.
Important Do not perform any other operations until Print Head cleaning finishes. This takes about
60 seconds.
4 Check the Print Head condition.
(1) Click Print Check Pattern in the dialog appeared after cleaning are done.
A nozzle check pattern will be printed.
Do not perform any operation until the printing of the nozzle check pattern is completed.
(2) Observe the printed nozzle check pattern to check the Print Head condition.
For details, refer to Examining the Nozzle Check Pattern.
(3) If the problem persists after you performed the Print Head normal cleaning three times, execute Print
Head deep cleaning.
For details, refer to Print Head Deep Cleaning.
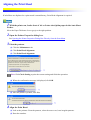
Opening the Printer Properties Dialog Box
The Printer Properties dialog box can be opened from either within an application, or directly from the Windows
Start menu.
Note This manual refers to Windows XP Service Pack 2 operation.
The operations may vary slightly depending on your operating system.
Opening the Printer Properties Dialog Box from your Application
Program
The operations may vary slightly depending on your application program. This section describes only a
general procedure for opening the Printer Properties dialog box.
1 In your application, select the command to print a document.
The Print dialog box can usually be opened by selecting Print from the File menu.
2 Ensure that the Canon iP90 is selected. Then click Preferences (or Properties).
The Printer Properties dialog box opens.
Note Depending on your application program, the command and menu names may differ, and there may be
more steps involved in opening the Printer Properties dialog box. For further details, see the user's
manual for your application.
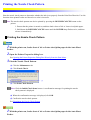
Opening the Printer Properties Dialog Box Directly from the Start Menu
This method is used for maintenance operations such as Print Head cleaning, or to specify printer settings
common to all application programs.
When the Printer Properties dialog box is opened from the Start menu, additional tabs appear, including the
Details tab. These do not appear when the Printer Properties dialog box is opened from within an application.
For further information about these additional tabs, refer to your Windows documentation.
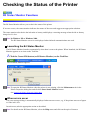
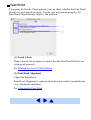
1 Click Start and select Control Panel, Printers and Other Hardware, and then Printers and
Faxes.
For non-Windows XP users, click Start , select Settings , and then Printers.
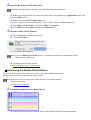
2 Select the Canon iP90 icon.
3 Open the File menu and select Printing Preferences (or Properties).
The Printer Properties dialog box opens.
Printing the Nozzle Check Pattern
Print the nozzle check pattern to determine whether the ink ejects properly from the Print Head Nozzles. Use this
function when printed results are blurred or a color is incorrect.
Note The nozzle check pattern can also be printed by pressing the RESUME/CANCEL button on the
printer.
1. Ensure that the printer is turned on, and then load a sheet of A4 or Letter-sized plain paper.
2. Hold down the RESUME/CANCEL button until the POWER lamp flashes twice, and then
release it immediately.
Printing the Nozzle Check Pattern
1 With the printer on, load a sheet of A4 or Letter-sized plain paper in the Auto Sheet
Feeder.
2 Open the Printer Properties dialog box.
See Opening the Printer Properties Dialog Box Directly from the Start Menu
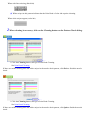
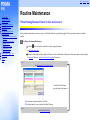
3 Print the Nozzle Check Pattern.
(1) Click the Maintenance tab.
(2) Click Nozzle Check.
(3) Click Print Check Pattern.
Note Click the Initial Check Items button. A confirmation message for printing the nozzle
check pattern is displayed.
(4) When the confirmation message is displayed, click OK.
(5) Confirm the nozzle check pattern.
See Examining the Nozzle Check Pattern
1 With the printer on, load a sheet of A4 or Letter-sized plain paper in the Auto Sheet
Feeder.
2 Open the BJ Printer Utility dialog box.
Note The BJ Printer Utility cannot be used with Bluetooth communication.
(1) Double-click the hard disk icon where the printer driver was installed, the Applications folder, and
then the Utilities folder.
(2) Double-click the Printer Setup Utility icon.
If you are using an OS other than Mac OS X v.10.3, double-click the Print Center icon.
(3) Select iP90 from the Name list and click Utility or Configure.
(4) Select iP90 from the Product list and click Maintenance.
3 Print the Nozzle Check Pattern.
(1) Select Test Print from the pop-up menu.
(2) Click Nozzle Check.
(3) Click Print Check Pattern.
Note Click the Initial Check Items button. A confirmation message for printing the nozzle
check pattern is displayed.
(4) Confirm the nozzle check pattern.
See Examining the Nozzle Check Pattern
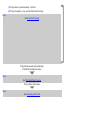
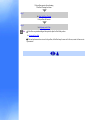
Examining the Nozzle Check Pattern
The nozzle check pattern should appear as follows when ink is discharged properly.
Examine the nozzle check pattern output by the printer.
Note If the ink level is low, the nozzle check pattern is not printed properly.
Replace an ink tank.
See Replacing an Ink Tank
1 Confirm the printed nozzle check pattern.
(1) Lines missing in this pattern indicate that the Print Head of black ink requires cleaning.
When with lines missing (black ink)
(2) White stripes in this pattern indicate that the Print Head of color ink requires cleaning.
When white stripes appear (color ink)
2 When cleaning is necessary, click on the Cleaning button on the Pattern Check dialog.
* Click the Cleaning button, then go to Print Head Cleaning.
See Print Head Cleaning
If there are neither missing lines nor white stripes in the nozzle check pattern, click Exit to finish the nozzle
check.
* Click the Cleaning button, then go to Print Head Cleaning.
See Print Head Cleaning
If there are neither missing lines nor white stripes in the nozzle check pattern, click Quit to finish the nozzle
check.
Replacing an Ink Tank
If the print result is not improved after maintenance such as Print Head cleaning, an ink tank runs out of ink.
Replace the ink tank with a new one. When replacing an ink tank, check the model number very carefully.
The printer will not print properly if a wrong ink tank is used, or installed in the incorrect position.
Black: BCI-15 Black
Color: BCI-16 Color
See Replacing an Ink Tank
See Resetting the Ink Counter
See How Low Ink Warning Setting Works
Replacing an Ink Tank
When an ink tank runs out of ink, replace it using the following steps.
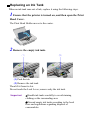
1 Ensure that the printer is turned on, and then open the Print
Head Cover.
The Print Head Holder moves to the center.
2 Remove the empty ink tank.
(1) Push the tab.
(2) Remove the ink tank.
Then lift it from its slot.
Do not touch the Lock Lever; remove only the ink tank.
Important
Handle ink tanks carefully to avoid staining
clothing or the surrounding area.
Discard empty ink tanks according to the local
laws and regulations regarding disposal of
consumables.
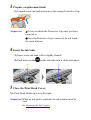
3 Prepare a replacement tank.
(1) Unpack a new ink tank and remove the orange Protective Cap.
Important
Do not re-attach the Protective Cap once you have
removed it.
Once the Protective Cap is removed, do not touch
the open ink port.
4 Insert the ink tank.
(1) Insert a new ink tank with it slightly slanted.
(2) Push down on the
on the ink tank until it clicks into place.
5 Close the Print Head Cover.
The Print Head Holder moves to the right.
Important When an ink tank is replaced, the ink counter must be
reset.
See Resetting the Ink Counter
Note
To maintain optimal print quality, use an ink tank
within six months of its first use.
Once an ink tank has been used, do not remove it
from the printer and leave it out in the open. This will
cause the ink tank to dry out and the printer may not
function properly if it is reinstalled.
Color ink consumption may occur even when blackand-white or grayscale printing is specified.
Color ink is consumed in the head cleaning and deep
cleaning, which are necessary to maintain the printer's
capabilities.
When an ink tank runs out of ink, replace the ink
tank with a new one immediately. If printing is
continued with no ink in the ink tank, a problem may
occur. And, the Low Ink Warning dialog which tells
the exchange time of an ink tank cannot be indicated
properly.
Resetting the Ink Counter
When an ink tank is replaced, the ink counter must be reset. The low ink
warning is only displayed properly if the ink counter is reset.
Message Prompting Confirmation of Ink Tank
Replacement
If an ink tank is removed, the printer will output a message prompting you to
confirm replacement of the ink tank at the start of the next print job.
When an ink tank has been replaced, follow the procedure below to reset the
ink counter. The low ink warning is only displayed properly if the ink
counter is reset.
Important If infrared communication is performed in Windows XP
or Windows 2000, the printer will not output the
message asking for confirmation of ink tank
replacement.
Reset the ink counter from the printer driver when you
replace the ink tank.
1 Check the message, and click Yes.
Note Mistakenly clicking No instead, will prevent the low ink
warning from functioning properly. If this happens, be
sure to open the driver's Properties dialog box and
manually reset the ink tank counter in the Maintenance
tab.
See Resetting the Ink Counter in Printer Properties dialog box
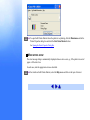
2 Select the replaced ink tank, and click OK.
The dialog box allows you to select the replaced ink tank.
When both black and color ink tanks have been replaced, select both Black
and Color.
If you have not replaced the ink tank with a new one, click Cancel.
Resetting the Ink Counter in Printer Properties dialog box
1 Open the Printer Properties dialog box and click the
Maintenance tab.
See Opening the Printer Properties Dialog Box Directly from the Start
Menu
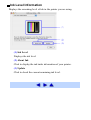
2 Click Ink Counter Reset.
3 Select the newly installed ink tank, then click OK.
Note The BJ Printer Utility cannot be used with Bluetooth communication.
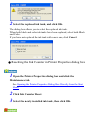
1 Double-click the hard disk icon where the printer driver was
installed, the Application folder, the Utilities folder, and then the
Printer Setup Utility icon.
If you are using an OS other than Mac OS X v.10.3, double-click the
Print Center icon.
2 Select iP90 from the Name list and click Utility or Configure.
3 Select iP90 from the Product list and click Maintenance.
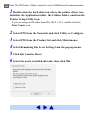
4 Select Remaining Ink Level Setting from the pop-up menu.
5 Click Ink Counter Reset.
6 Select the newly installed ink tank, then click OK.
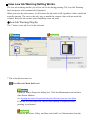
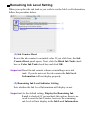
How Low Ink Warning Setting Works
The low ink warning notifies you of low ink levels during printing. The Low Ink Warning
has been preset to be automatically displayed.
When you reset the ink counter, it will assume the ink tank is full regardless of how much ink
actually remains. The reset is the only way to match the counter value with an actual ink
volume. Reset the ink counter when installing a new ink tank.
Low Ink Warning Display
The '!' shows a low ink level in the ink tank.
* The color ink becomes low.
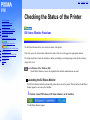
Note How to Check Ink Level
Open the Printer Properties dialog box. Click the Maintenance tab and then
Start Status Monitor.
See Opening the Printer Properties Dialog Box Directly from the Start Menu
If the ink level becomes low, the low ink warning is displayed when
printing is performed.
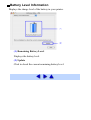
Open the BJ Printer Utility, and then select Ink Level Information from the
pop-up menu.
See Opening the BJ Printer Utility
How to Display Low Ink Warning Correctly
Reset the ink counter every time you install a new ink tank
The ink counter cannot work correctly unless you synchronize it with the actual ink level.
The ink counter can only be adjusted when it is reset at the time a new ink tank is installed.
Do not reset the ink counter of an ink tank in use.
Synchronization of the counter and the actual ink level will not work properly.
Important If you did not reset the counter when you installed the current ink tanks, the low ink
warning may not function correctly, until the next time you replace the ink tanks.
Also, ensure that you treat both counters separately.
See Low Ink Warning Displays Ink Tank with '?'
BJ Printer Utility
Opening the BJ Printer Utility
To open the BJ Printer Utility , follow the procedure below.
Note The BJ Printer Utility cannot be used with Bluetooth communication.
1 Double-click the hard disk icon where the printer driver was installed, the Applications
folder, and then the Utilities folder.
2 Double-click the Printer Setup Utility icon.
If you are using an OS other than Mac OS X v.10.3, double-click the Print Center icon.
The Printer List opens.
3 Select your printer name from the Name list and click Utility.
If you are using an OS other than Mac OS X v.10.3, select your printer name from the Name list and click
Configure.
4 Select your printer name from the Product list and click Maintenance.
The BJ Printer Utility launches.
The displays on the BJ Printer Utility are changed by pop-up menus that you can scroll through. From the
pop-up menus, you can select the following items.
See Cleaning
See Test Print
See Ink Level Information
See Remaining Ink Level Setting
See Ink Saving Settings
See Battery Level Information
See Quiet Mode
See Custom Settings
Cleaning
Click to start Print Head Cleaning. When printing becomes faint or colors
are incorrect, cleaning the Print Heads may fix these problems.
(1) Cleaning
Perform Print Head Cleaning to unclog the Print Head Nozzles.
Select this cleaning when the print result is unsatisfactory.
See Print Head Cleaning
(2) Deep Cleaning
Perform a more thorough Print Head Cleaning to unclog the Print Head
Nozzles.
Use this function only if Cleaning has not improved the print quality.
See Print Head Deep Cleaning
(3) Bottom Plate Cleaning
Click to clean the Bottom Plate smudged during duplex printing.
See Cleaning the Inside of the Printer
Print Head Deep Cleaning
If print quality does not improve by standard Print Head Cleaning, try Print Head Deep Cleaning, which is a more
powerful process. Print Head Deep Cleaning consumes more ink than standard Print Head Cleaning, so perform
this procedure only when necessary.
1 Ensure that the printer is turned on.
2 Open the Printer Properties dialog box.
See Opening the Printer Properties Dialog Box Directly from the Start Menu
3 Start Print Head Deep Cleaning.
(1) Click the Maintenance tab.
(2) Click Deep Cleaning.
(3) Select the Print Head to be cleaned, and then click Execute.
Note Click the Initial Check Items button. Confirmation message for Print Head Deep Cleaning
is displayed.
(4) When the confirmation message is displayed, click OK.
Print Head Deep Cleaning starts when the POWER lamp starts blinking.
Important Do not perform any other operations until Print Head Deep Cleaning is completed (about
two to three minutes).
4 Check the Print Head condition.
(1) Print a nozzle check pattern to check the Print Head condition.
For details, refer to Printing the Nozzle Check Pattern.
(2) If the problem persists, perform step 3 again.
(3) If the problem persists, the printer may have run out of ink.
For details, refer to Replacing an Ink Tank.
(4) If the problem persists, a Print Head may be damaged. In this case, contact a Canon service
representative.
1 Ensure that the printer is turned on.
2 Open the BJ Printer Utility dialog box.
Note The BJ Printer Utility cannot be used with Bluetooth communication.
(1) Double-click the hard disk icon where the printer driver was installed, the Applications folder, and
then the Utilities folder.
(2) Double-click the Printer Setup Utility icon.
If you are using an OS other than Mac OS X v.10.3, double-click the Print Center icon.
(3) Select iP90 from the Name list and click Utility or Configure.
(4) Select iP90 from the Product list and click Maintenance.
3 Start Print Head Deep Cleaning.
(1) Select Cleaning from the pop-up menu.
(2) Click Deep Cleaning.
(3) Select the Print Head to be cleaned, and then click OK.
Print Head deep cleaning starts when the POWER lamp starts blinking.
Note Click the Initial Check Items button. Confirmation message for Print Head Deep Cleaning
is displayed.
Important Do not perform any other operations until Print Head deep cleaning finishes. This takes
about two to three minutes.
4 Check the Print Head condition.
(1) Print a nozzle check pattern to check the Print Head condition.
For details, refer to Printing the Nozzle Check Pattern.
(2) If the problem persists, perform step 3 again.
(3) If the problem persists, the printer may have run out of ink.
For details, refer to Replacing an Ink Tank.
(4) If the problem persists, a Print Head may be damaged. In this case, contact a Canon service
representative.
Aligning the Print Head
If ruled lines are displaced or a print result is unsatisfactory, Print Head Alignment is required.
1 With the printer on, load a sheet of A4 or Letter-sized plain paper in the Auto Sheet
Feeder.
Move the Paper Thickness Lever (gray) to the right position.
2 Open the Printer Properties dialog box.
See Opening the Printer Properties Dialog Box Directly from the Start Menu
3 Print the pattern.
(1) Click the Maintenance tab.
(2) Click Print Head Alignment.
(3) Click Print Head Alignment.
Note Click Check Setting to print the current setting and finish the operation.
(4) When the confirmation message is displayed, click OK.
(5) After the pattern is printed, click Yes.
4 Align the Print Head.
(1) Look at the printout. From the patterns, select the most even, least irregular patterns.
(2) Enter the numbers.
(3) Click OK.
Note If it is difficult to pick up the best pattern on Column H, pick a setting that produces the
least noticeable vertical white stripes.
Less noticeable white stripes More noticeable white stripes
(4) When the confirmation message is displayed, click OK.
1 With the printer on, load a sheet of A4 or Letter-sized plain paper in the Auto Sheet
Feeder.
Move the Paper Thickness Lever (gray) to the right position.
2 Open the BJ Printer Utility dialog box.
Note The BJ Printer Utility cannot be used with Bluetooth communication.
(1) Double-click the hard disk icon where the printer driver was installed, the Applications folder, and
then the Utilities folder.
(2) Double-click the Printer Setup Utility icon.
If you are using an OS other than Mac OS X v.10.3, double-click the Print Center icon.
(3) Select iP90 from the Name list and click Utility or Configure.
(4) Select iP90 from the Product list and click Maintenance.
3 Print the pattern.
(1) Select Test Print from the pop-up menu.
(2) Click Print Head Alignment.
(3) Click Print Head Alignment.
The pattern will be printed.
Note Click Check Setting to print the current setting and finish the operation.
4 Align the Print Head.
(1) Look at the print out. From the patterns, select the most even, least irregular patterns.
(2) Enter the numbers.
(3) Click Send.
Note If it is difficult to pick up the best pattern on Column H, pick a setting that produces the
least noticeable vertical white stripes.
Less noticeable white stripes More noticeable white stripes
Cleaning the Inside of the Printer
If the printed paper is smudged, the inside of the printer may be dirty. To always get best quality printing result,
periodical cleaning of that part is recommended.
You can clean that part in two ways:
See Cleaning the Bottom Plate
See Cleaning the Protrusions inside the Printer
Important When using Photo Paper Plus Double Sided PP-101D, be sure to clean the inside of the printer before
printing.
See Photo Paper Plus Double Sided PP-101D
Cleaning the Bottom Plate
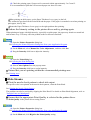
1 Ensure that the printer is turned on and there is no paper loaded in the Auto Sheet Feeder.
2 Place A4 or Letter-sized plain paper in landscape, horizontally fold it in half, and open it.
3 Load it in the Auto Sheet Feeder with the opened side facing up.
* Insert the paper with open.
4 Open the Printer Properties dialog box.
See Opening the Printer Properties Dialog Box Directly from the Start Menu
5 Start Bottom Plate Cleaning.
(1) Click the Maintenance tab.
(2) Click Bottom Plate Cleaning.
(3) When the confirmation message is displayed, click Execute.
Paper will be ejected.
Confirm discharged paper. When dirt sticks still, carry out cleaning again.
If dirt is not removed after three times cleaning, there is a possibility that the inside of the printer is dirty.
Clean the inside of the printer in accordance with the following steps.
See Cleaning the Protrusions inside the Printer
1 Ensure that the printer is turned on and there is no paper loaded in the Auto Sheet Feeder.
2 Place A4 or Letter-sized plain paper in landscape, horizontally fold it in half, and open it.
3 Load it in the Auto Sheet Feeder with the opened side facing up.
* Insert the paper with open.
4 Open the BJ Printer Utility dialog box.
Note The BJ Printer Utility cannot be used with Bluetooth communication.
(1) Double-click the hard disk icon where the printer driver was installed, the Applications folder, and
then the Utilities folder.
(2) Double-click the Printer Setup Utility icon.
If you are using the OS other than Mac OS X v.10.3, double-click the Print Center icon.
(3) Select iP90 from the Name list and click Utility or Configure.
(4) Select iP90 from the Product list and click Maintenance.
5 Start Bottom Plate Cleaning.
(1) Select Cleaning from the pop-up menu.
(2) Click Bottom Plate Cleaning.
(3) When the confirmation message is displayed, click Execute.
Paper will be ejected.
Confirm discharged paper. When dirt sticks still, carry out cleaning is carried out again.
If dirt is not removed after three times cleaning, there is a possibility that the inside of the printer is dirty.
Clean the inside of the printer in accordance with the following steps.
See Cleaning the Protrusions inside the Printer
Cleaning the Protrusions inside the Printer
If protrusions inside the printer are stained, wipe ink off the protrusions using a swab or the like.
Important
Before cleaning, be sure to turned off the printer.
Never touch the transparent tape. The printer may be faulty and unable to print data.
* Transparent tape
Photo Paper Plus Double Sided PP-101D
This paper is provided with glossy coating on both sides, ensuring superior color reproduction.
This paper is suitable for borderless printing.
See Printing Photographs
Important When using Photo Paper Plus Double Sided paper, be sure to clean the inside of the printer before
printing.
If the inside of the printer is dirty, printed paper may be smudged.
See Cleaning the Inside of the Printer
This media is available in A4 / Letter and 5" x 7" / 127.0 x 177.8 mm sizes.
Loading
Load only one sheet at a time.
Set the Paper Thickness Lever (gray) to the right.
If paper is curled, uncurl it before loading in the Auto Sheet Feeder.
Clean the space by the side of Paper Output Slot Cover, so that neither garbage nor dirt adheres to paper.
Note To Print with Duplex Printing (In Windows)
After printing one side, load the paper in the Auto Sheet Feeder to print on the other side, according to
the message shown on the screen.
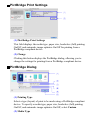
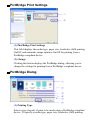
Printer Driver Settings
Media Type: Photo Paper Plus Double Sided
Page Size: Ensure that the setting matches the size set in the application.
Handling of Printed Output
Remove each sheet as soon as it is printed.
After printing, dry the printouts for more than 30 minutes. When printouts need to be stacked up, allow
them to dry for about 48 hours with a plain paper in the package of the media inserted between the adjacent
printouts after allowing each printout to dry for about 30 minutes.
Avoid drying printouts with a hair dryer or by exposing them to direct sunlight.
Do not touch the surfaces of printouts or stack them up before ink dries up.
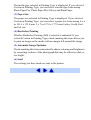
Storing Printed Output
Store printouts in album or plastic files to protect them from direct exposure to air.
* Album or plastic files protect printouts from color fading.
Avoid storing printouts in a hot or humid location or in direct sunlight. Store them in a normal operating
environment.
Avoid displaying or exhibiting printouts outdoors or in direct sunlight.
Printing Area
See Printing Area
Note When creating a photograph or illustration data subject to borderless printing, select the same size as
that of the paper you use and paste it in the editing window without providing any margin.
If your application software can set margins, set the left, right, top, and bottom margins to "0 mm". For
how to set margins, refer to the instruction manual for your application software.
Appendix
Printing Area
To ensure the best print quality, the printer allows a margin along each edge of media. The actual printable area
will be the area without these margins. By selecting Borderless Printing*, printing with no margins is possible.
* This is available in A4/Letter, 4" x 6" /101.6 x 152.4 mm, 5" x 7" / 127.0 x 177.8 mm and Credit Card paper
size.
Recommended printing Canon recommends that you print within this area. (
)
area (dark blue):
Printable area (light blue): The area where it is possible to print. However, printing in this area can adversely
)
affect the print quality or the paper feed precision. (
See A4, B5, A5, 4" x 6", 5" x 7", Credit Card
See Letter, Legal
See Envelopes
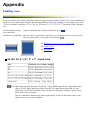
A4, B5, A5, 4" x 6", 5" x 7", Credit Card
Size
Printable Area (width x height)
A4
203.2 x 289.0 mm / 8.0 x 11.4 in
B5
175.2 x 249.0 mm / 6.9 x 9.8 in
A5
141.2 x 202.0 mm / 5.6 x 7.9 in
4" x 6" / 101.6 x 152.4 mm 94.8 x 144.4 mm / 3.7 x 5.7 in
5" x 7" / 127.0 x 177.8 mm 120.2 x 169.8 mm / 4.7 x 6.7 in
Credit Card
47.2 x 78.0 mm / 1.86 x 3.07 in
Note When Printing on Photo Paper Pro PR-101, Glossy Photo Paper GP-401, Photo Paper Plus
Glossy PP-101, Photo Paper Plus Semi-Gloss SG-101, Matte Photo Paper MP-101 and
Photo Paper Plus Double Sided PP-101D, selection of "Borderless Printing" enables you to
make prints with no margins.
However, Borderless Printing may reduce print quality on the top and bottom edges of the
paper or cause it to become smudged.
Recommended printing area
Printable area
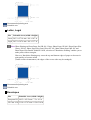
Letter, Legal
Size
Printable Area (width x height)
Letter 203.2 x 271.4 mm / 8.0 x 10.7 in
Legal 203.2 x 347.6 mm / 8.0 x 13.7 in
Note When Printing on Photo Paper Pro PR-101, Glossy Photo Paper GP-401, Photo Paper Plus
Glossy PP-101, Photo Paper Plus Semi-Gloss SG-101, Matte Photo Paper MP-101 and
Photo Paper Plus Double Sided PP-101D, selection of "Borderless Printing" enables you to
make prints with no margins.
However, Borderless Printing may cause the top and bottom edges of paper to decrease in
print quality or become soiled
(Under certain circumstances, the edges of the reverse side may be smudged).
Recommended printing area
Printable area
Envelopes
Size
Printable Area (width x height)
European DL 190.5 x 103.2 mm / 7.5 x 4.1 in
US Com. #10 211.8 x 97.97 mm / 8.34x 3.86 in
Printable area
Problems Relating to Windows
The BJ Status Monitor is Not Displayed
Cannot Print in Background (In Windows Me or Windows 98)
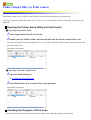
The BJ Status Monitor is Not Displayed
In Windows Me or Windows 98, check the bi-directional setting.
(1) Open the Printer Properties dialog box.
See Opening the Printer Properties Dialog Box Directly from the Start Menu
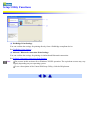
(2) Click the Details tab, and then click the Spool Settings and ensure that the Enable bi-directional
support for this printer is selected.
Ensure that the Enable Status Monitor is selected.
(1) Open the Printer Properties dialog box.
See Opening the Printer Properties Dialog Box Directly from the Start Menu
(2) Click the Maintenance tab, and then select Start Status Monitor.
(3) Ensure that the Enable Status Monitor check box is selected in the Option menu.
Cannot Print in Background (In Windows Me or Windows 98)
Check the amount of free space on the hard disk.
Background printing requires a certain amount of disk space. You may need to delete unnecessary files, or
disable Background Printing.
Ensure that the Background Printing is enabled.
(1) Open the Printer Properties dialog box.
See Opening the Printer Properties Dialog Box Directly from the Start Menu
(2) Click the Page Setup tab, and then click Printer control and select Background printing.
Cannot Print Properly through Infrared Communication
The required driver is not installed
The installation place of the printer is not proper
During infrared communication, infrared rays were interrupted or another infrared communication unit is
operating nearby
The requirements for infrared communications with the computer or other devices are not satisfied
The infrared communication driver is inactive
The printer port status is wrong (In Windows Me or Windows 98)
The printer port setting is wrong
The required driver is not installed
Check whether the driver meeting the following requirements is installed.
Windows 98 or later must be preinstalled and Microsoft Infrared Communication Driver must be installed in
the computer.
For details on Microsoft Infrared Communication Driver, refer to your computer's operation manual.
For details on the requirements for infrared communication, refer to the Quick Start Guide.
The installation place of the printer is not proper
Check whether the printer is installed in an appropriate place.
Place the printer at a proper distance from the computer, PDA (Personal Digital Assistants) or a mobile
phone, oppose their infrared ports at a proper angle, remove obstacles between them if they exist, and retry
printing. The allowable distance and angle for infrared communication depends on the functions of the
computer, PDA or mobile phone and the environmental conditions. Place the printer at a distance of 31.5
inch/80 cm or shorter from the computer or PDA and adjust the infrared port angle properly. When printing
from a mobile phone, place it at a distance of 7.9 inch/20 cm or shorter.
For how to print through infrared communication, refer to the Quick Start Guide.
Check whether iP90 is detected by the computer.
In Windows XP, Windows 2000, or Windows Me
(1) Check whether the Wireless Link icon is displayed on the task bar.
If not displayed, iP90 is not detected by the computer.
Ensure that the printer is turned on. Bring the printer and computer closer to each other in such a manner
that their infrared ports are opposed properly.
(2) Place the mouse cursor on the Wireless Link icon.
Ensure that "iP90 is in range" is displayed.
If the name of another unit is displayed, change the orientation of this unit or turn it off.
In Windows 98
(1) Click Start and select Settings and Control Panel.
(2) Double-click the Infrared icon.
If the Infrared icon is not displayed, the infrared communication driver may not be installed. Refer to
your Windows documentation.
(3) Ensure that iP90 is displayed on the Status tab.
If not displayed, ensure that the printer is turned on. Bring the printer and computer closer to each other
in such a manner that their infrared ports are opposed properly.
If the same problem persists, turn off the printer and then remove the Universal AC Adapter (remove the
battery if loaded). Next, connect the Universal AC Adapter (and the battery if you use it). Next, turn on
the printer and retry printing.
If the name of another unit is displayed, change the orientation of this unit or turn it off.
During infrared communication, infrared rays were interrupted or
another infrared communication unit is operating nearby
If infrared communication between the infrared ports of the printer and computer or PDA is interrupted by
any obstacle for ten and several seconds or longer during printing, the paper on which data is being printed is
ejected and the printer is reset. Remove the obstacle and retry printing.
If an infrared communication unit is operating nearby, interference can occur and fail in printing the
document to the end. While printing a document through infrared communication, do not operate another
infrared communication unit, such as a remote controller of a TV, nearby.
For how to print through infrared communication, refer to the Quick Start Guide.
The requirements for infrared communications with the computer or
other devices are not satisfied
Printing from the computer
Use a computer equipped with the infrared communication port based on the IrDA version 1.1 standard.
Printing from the PDA or mobile phone
Use a PDA or a mobile phone equipped with an IrDA port and which was based on the IrMC version 1.1.
The infrared communication driver is inactive
Check whether the infrared communication driver is active.
In Windows Me
(1) Click Start and select Settings and then Control Panel.
(2) Ensure that the Wireless Link icon is displayed.
If the Wireless Link icon is not displayed, the infrared communication driver may not be installed. Refer
to your Windows documentation.
In Windows 98
(1) Click Start , select Settings , and then Control Panel.
(2) Double-click the Infrared icon.
(3) Click the Options tab.
(4) Select the Enable infrared communication check box (or select the Enable infrared
communication on : check box).
(5) Click the OK button.
The printer port status is wrong (In Windows Me or Windows 98)
Check the printer port status.
(1) Right-click My Computer and select Properties.
(2) On the Device Manager sheet, click Port (COM/LPT) (or Port (COM&LPT) ) and double-click
Virtual infrared LPT port (or Infrared printer (LPT) port ).
(3) Check whether any device problem is displayed on the General (or Information) sheet.
If any device problem is displayed, refer to your Windows documentation.
The printer port setting is wrong
When printing from the computer through infrared communication, check whether the IR port is selected as
the printer port (LPT3 port in Windows Me or Windows 98). If another port is selected, the printer may
malfunction.
(1) Open the Printer Properties dialog box.
See Opening the Printer Properties Dialog Box Directly from the Start Menu
(2) Click the Ports tab (or Details tab) to check the settings.
Cannot Print Properly from the Digital Camera
The following messages may be displayed on a digital camera or digital video camcorder* when images are
printed directly from them. Correct the error according to the procedure below.
*Hereafter, a digital still camera and a digital video camcorder are collectively called a camera.
Note
PictBridge and Bubble Jet Direct compatible cameras can be connected to the printer for direct
printing.
Error messages displayed on the camera compatible with Canon PictBridge or Canon Bubble Jet
Direct are described below. Error messages and button operation may be different depending on the
type of your camera.
If your camera is ready for PictBridge other than Canon PictBridge and you do not know how to
recover an error from the camera, check the flashing pattern of the POWER lamp on the printer.
See The POWER Lamp Flashes Orange
If the connected camera does not support PictBridge or Bubble Jet Direct, the POWER lamp on
the printer flashes nine times. If this happens, disconnect the connection cable and press the
RESUME/CANCEL button.
If the operation time or data transmission time is too long when the camera is connected to this
printer, a communication time error may occur and no more images can be printed. If this error
occurs, disconnect the camera connection cable, press the RESUME/CANCEL button and then
connect the cable once again. They will automatically turn on. If not, turn it on.
If this error persists, select another photo and check whether it can be printed normally.
If the print is faint or uneven, the Print Head Nozzles may be clogged.
See When Printing Becomes Faint or Colors are Incorrect
If paper is curled or the print surface is scratched during printing, check whether the paper in use
is proper. If the print surface is scratched even when proper paper is used, move the Paper
).
Thickness Lever (gray) to the left position (Envelope
See Printed Surface is Scratched
For more details, also refer to the user's manual for the camera.
If there is a problem with the camera, contact a Canon service representative. For non-Canon
cameras, contact a manufacturer of them.
Printer in use
Images are printed from the computer.
Wait until printing ends. The printer automatically starts printing the images from the camera after
completing the current printing.
Printer warming up
Wait until warm-up ends. When it is ready, the printer starts printing automatically.
No Paper/ Paper error
Reload paper in the Auto Sheet Feeder of the printer and select Continue*1 in the Error screen on the camera.
Paper Jam
Select Cancel in the Error screen on the camera to cancel the print job. Remove the jammed paper, load new
media, and press the RESUME/CANCEL button.
Printer cover open
Close the Print Head Cover.
No Print Head
No Print Head is installed or the Print Head is defective (The POWER lamp on the printer flashes five
times).
Install a Print Head according to your setup guide. If a Print Head has already been installed, remove it, and
then reinstall it.
If the problem still remains, the Print Head may be defective. Contact a Canon service representative.
Waste tank (waste ink absorber*2) full
The waste ink absorber is nearly full.
Selecting Continue*1 in the Error screen on the camera resumes printing. Printing can be continued for a
while, but printing cannot be continued when the waste ink absorber becomes full. Canon recommends to
contact a Canon service representative as soon as possible.
Ink tank is empty
Printing resumes once the Print Head Cover is closed after an ink tank replacement.
You can continue printing by selecting Continue*1 in the display on your camera with the ink tank empty.
But, it is recommended you replace it with a new one immediately after printing. It may damage the printer if
you continue printing with empty ink tanks.
Printer error
The optional battery level is low (The POWER lamp on the printer flashes twelve times).
Follow the procedure below to secure the power supplies.
(1) Turn off the printer.
(2) Connect the supplied Universal AC Adapter or load a charged battery.
(3) Turn on the printer.
An error requiring servicing has occurred (The POWER lamp on the printer flashes alternately orange
and green).
Select Cancel in the Error screen on the camera to cancel the print job.
Disconnect the cable connected to the camera, turn off the printer, and unplug the power cord of the printer
from the outlet. Leave the printer for a while, plug the power cord of the printer back in the outlet, turn on
the printer, and connect the camera to the printer. If the error persists, contact a Canon service
representative.
*1 You can press the RESUME/CANCEL button on the printer instead of selecting Continue.
*2 Ink used for cleaning is absorbed in the waste ink absorber placed in the printer. If this error occurs,
replacement of the waste ink absorber and maintenance of the printer are required.
The POWER Lamp Flashes Orange
An error has occurred in the printer. The number of flashes indicates the type of error, as outlined below. Check
the cause and take appropriate action.
Two flashes: Out of paper or paper feed error
Reload the paper correctly and press the RESUME/CANCEL button.
Three flashes: Paper jam
If paper has jammed in the printer, clear the jam, reload the paper in the printer correctly and press the
RESUME/CANCEL button.
See Paper Jams
Four flashes: Ink tank is not installed properly
Open the Print Head Cover and check whether an ink tank is installed. If an ink tank is installed, push the
button of the ink tank, and reinstall the ink tank properly.
Five flashes: No Print Head installed, or Print Head failure
Install a Print Head.
When the error continues, contact a Canon service representative.
Eight flashes: Waste ink absorber almost full
Ink used for cleaning is absorbed in a waste ink absorber placed in the printer. Eight flashes indicate that the
waste ink absorber is nearly full. Press the RESUME/CANCEL button to cancel the error so that you can
continue printing.
Important If this error occurs, replacement of the waste ink absorber and maintenance of the printer
are required. Canon recommends to contact a Canon service representative as soon as
possible. Once the waste ink absorber becomes completely full, it cannot be printed until
the Waste ink tank is exchanged.
Nine flashes: A specified period of time has lapsed without receiving a response
from a digital camera or digital video camcorder / The digital camera or digital video
camcorder connected is not compatible with this printer
Disconnect the camera cable, press the printer's RESUME/CANCEL button and reconnect the cable.
If the error is still unresolved, there is a possibility that you are using a digital camera or digital video
camcorder that is not supported by this printer. Use digital cameras or digital video camcorders that are
compatible with this printer.
Twelve flashes: Battery level is low
Charge the battery. For details on how to charge the battery, refer to the manual supplied with the battery.
POWER lamp flashes alternate green and orange:
An error that requires contacting a Canon service representative may have occurred.
Disconnect the printer cable from the printer, and then turn the printer off and unplug the printer from the
power supply for a while. Plug the printer back in and turn the printer back on.
If the problem remains, contact a Canon service representative.
The Power lamp repeats the illumination sequence in which it goes out twice every
5 seconds (Bluetooth communication is used)
When Bluetooth communication is used and BJ Status Monitor is active with the printer power on, the green
Power lamp repeats the illumination sequence in which it goes out twice every 5 seconds even if nothing is
printed. This operation is not abnormal but it indicates that Bluetooth Communication is checking the printer
condition. When BJ Status Monitor ends, the Power lamp will stay lit.
Paper Does Not Feed Properly or Paper Jams
Paper Does Not Feed Properly
Paper Jams
Paper Does Not Feed Properly
Confirm the paper conditions.
If using a non-Canon brand media, ensure that the paper is not too thick (less than 105 gsm/less than 28
lbs).
Ensure that the paper is not too thin (more than 64 gsm/more than 17 lbs).
Ensure that the number of sheets loaded does not exceed the recommended level.
Ensure that the paper is not creased, curled or wrinkled.
See Compatible Media Types
Ensure that the left edge of the paper just touches the Paper Guide.
When printing envelopes, refer to "Envelopes", and prepare the envelopes before
printing.
Once you have prepared the envelopes, load them in the printer in portrait orientation. If the envelopes are
placed in landscape orientation, they may not feed properly.
You may need to clean the Paper Feed Roller. Follow the procedure below.
(1) Ensure that the printer is turned on.
If the paper is loaded in the printer, remove the paper.
(2) Hold down the RESUME/CANCEL button; when the POWER lamp flashes three times, release
the button.
The Paper Feed Roller will rotate as it cleans.
(3) Repeat this operation one more time.
(4) Load a stack of plain paper in the printer.
(5) Hold down the RESUME/CANCEL button; when the POWER lamp flashed three times, release
the button.
The paper that is loaded in the printer will feed through the printer and be ejected.
Paper Jams
Remove the paper according to the following procedure.
(1) Slowly pull the paper out, either from the Auto Sheet Feeder or from the Paper Output Slot,
whichever is easier.
If the paper tears and a piece remains inside the printer, open the Print Head Cover and remove it.
Caution Be careful not to touch the components inside the printer.
If you cannot pull the paper out, turn the printer off and turn it back on. The paper will be ejected
automatically.
(2) After removing all paper, close the Print Head Cover.
(3) Reload the paper into the printer and press the RESUME/CANCEL button.
Note When reloading the paper into the printer, refer to "Paper Does Not Feed Properly" to
ensure that you are using the correct paper and are loading it into the printer correctly.
Printing Media
Compatible Media Types
You can use the following types of paper and other media.
Size
Standard paper: From A5 size (148.0 x 210.0 mm / 5.83 x 8.27 in) to legal size (215.9 x 355.6 mm / 8.5 x
14.0 in)
Non-standard paper: From 54.0 x 86.0 mm to 215.9 x 584.2 mm (From 2.13 x 3.39 in to 8.5 x 23.0 in)
Others: Envelopes (European DL and US Com. #10)
Important Do not use the following types of paper. Using such paper will not only produce unsatisfactory
results, but can also cause the printer to jam or malfunction.
Folded, curled or wrinkled paper
Damp paper
Paper that is too thin (less than 64 gsm / 17 lb)
Paper that is too thick *(more than 105 gsm / 28 lb)
Picture postcards
Postcards with an affixed photo or sticker
Envelopes with double flap
Envelopes with pressure seals
Envelopes with an embossed or treated surface
* non-Canon branded paper
Weight
64 to 105 gsm (17 to 28 lb)
Do not use paper heavier than this (except for supported Canon-brand media), as it could jam in the paper.
Types
The following types of media can be used.
For more information about the media and the printing methods, refer to the specific sections.
Plain paper
Refer to your setup guide for instructions on how to print with plain papers.
See Photo Paper Pro PR-101
See Photo Paper Plus Glossy PP-101
See Photo Paper Plus Semi-Gloss SG-101
See Matte Photo Paper MP-101
See Glossy Photo Paper GP-401
See High Resolution Paper HR-101N
See Photo Paper Plus Double Sided PP-101D
See T-Shirt Transfers TR-301
See Transparencies CF-102
See Photo Stickers PS-101
See Envelopes
Important Put unused papers back into the package, and store them avoiding high temperature, humid and direct
sunlight.
Photo Paper Pro PR-101
This is a thick paper with a treated surface that enhances gloss and provides superior color reproduction. It is ideal
for printing high quality photographs. This media is available in A4/Letter and 4" x 6" / 101.6 x 152.4 mm sizes.
Loading
Load the paper with the glossier side facing up.
A maximum of 1 sheet of A4/Letter paper can be loaded at once. A maximum of 10 sheets of 4" x 6" /
101.6 x 152.4 mm paper can be loaded at once.
Set the Paper Thickness Lever (gray) to the right.
If the paper is curled, flatten it before loading.
Printer Driver Settings
Media Type: Photo Paper Pro
Page Size: Ensure that the setting matches the size set in the application.
Handling of Printed Output
Do not stack more than 5 sheets in the Paper Output Slot Cover.
Do not touch the printed surface until the ink is fixed (approx. 30 minutes).
Colors in dark images may appear indistinct at first, but become clearer after about 30 minutes.
When printouts can be arranged without stacking them up, allow them to dry for about 24 hours. When
printouts need to be stacked up, allow them to dry for about 24 hours with plain paper (e.g., copying paper)
inserted between the adjacent printouts after allowing each printout to dry for about 15 minutes.
Avoid drying printouts with a hair dryer or by exposing them to direct sunlight.
Storing Printed Output
Store printouts in photo albums, plastic folders, and photo frames to protect them from direct exposure to
air.
Plastic folders protect printouts from color fading.
Avoid storing printouts in an adhesive-type album, as you may not be able to remove them.
When storing printouts in a pocket-type album, insert them in the pockets as far as they will go. The
edges of the printouts may turn yellow depending on the type of pocket album.
Avoid storing printouts in a hot or humid location or in direct sunlight. Store them in a normal operating
environment.
Avoid displaying or exhibiting printouts outdoors or in direct sunlight.
Printing Area
See Printing Area
Note When you use Borderless Printing, create the data by using the same size as the paper size, and paste
the data so that it fills the editing screen without leaving any margins. If you are using an application
that allows you to set margins, set the left, right, top and bottom margins to 0 mm or 0 inches. For
instructions on setting margins, refer to the user's manual for your application.
Photo Paper Plus Glossy PP-101
This is a thick paper with a glossy water-resistant coating and provides superior color reproduction. It is ideal for
printing high quality photographs. This media is available in A4/Letter, 4" x 6" / 101.6 x 152.4 mm and 5" x 7" /
127.0 x 177.8 mm sizes.
Loading
Load the paper with the glossier side facing up.
A maximum of 5 sheets of A4/Letter paper can be loaded at once. A maximum of 10 sheets of 4" x 6" /
101.6 x 152.4 mm and 5" x 7" / 127.0 x 177.8 mm paper can be loaded at once.
To prevent sheets from sticking to each other in the time of using A4/Letter paper, separate them from
each other before loading them in the Auto Sheet Feeder. Load the necessary number of paper (a maximum
of 5 or 10 sheets) in the Auto Sheet Feeder one at a time.
Set the Paper Thickness Lever (gray) to the right.
If the paper is curled, flatten it before loading.
Printer Driver Settings
Media Type: Photo Paper Plus Glossy
Page Size: Ensure that the setting matches the size set in the application.
Handling of Printed Output
Do not stack more than 5 sheets in the Paper Output Slot Cover.
When printouts can be arranged without stacking them up, allow them to dry for about 24 hours. When
printouts need to be stacked up, allow them to dry for about 24 hours with plain paper (e.g., copying paper)
inserted between the adjacent printouts after allowing each printout to dry for about 15 minutes.
Avoid drying printouts with a hair dryer or by exposing them to direct sunlight.
Storing Printed Output
Store printouts in photo albums, plastic folders, and photo frames to protect them from direct exposure to
air.
Plastic folders protect printouts from color fading.
Avoid storing printouts in an adhesive-type album, as you may not be able to remove them.
When storing printouts in a pocket-type album, insert them in the pockets as far as they will go. The
edges of the printouts may turn yellow depending on the type of pocket album.
Avoid storing printouts in a hot or humid location or in direct sunlight. Store them in a normal operating
environment.
Avoid displaying or exhibiting printouts outdoors or in direct sunlight.
Printing Area
See Printing Area
Note When you use Borderless Printing, create the data by using the same size as the paper size, and paste
the data so that it fills the editing screen without leaving any margins. If you are using an application
that allows you to set margins, set the left, right, top and bottom margins to 0 mm or 0 inches. For
instructions on setting margins, refer to the user's manual for your application.
Photo Paper Plus Semi-Gloss SG-101
This is a matte water-resistant paper and provides superior color reproduction. It is ideal for printing high quality
photographs. This media is available in A4/Letter and 4" x 6"/101.6 x 152.4 mm sizes.
Loading
Load the paper with the side that does not have logos facing up.
A maximum of 5 sheets of A4/Letter paper can be loaded at once. A maximum of 10 sheets of 4" x 6" /
101.6 x 152.4 mm paper can be loaded at once.
To prevent sheets of paper from sticking to each other in the time of using A4/Letter paper, separate them
from each other before loading them in the Auto Sheet Feeder. Load the necessary number of paper (a
maximum of 5 or 10 sheets) in the Auto Sheet Feeder one at a time.
Set the Paper Thickness Lever (gray) to the right.
If the paper is curled, flatten it before loading.
Printer Driver Settings
Media Type: Photo Paper Plus Glossy
Page Size: Ensure that the setting matches the size set in the application.
Handling of Printed Output
Do not stack more than 5 sheets in the Paper Output Slot Cover.
When printouts can be arranged without stacking them up, allow them to dry for about 24 hours. When
printouts need to be stacked up, allow them to dry for about 24 hours with plain paper (e.g., copying paper)
inserted between the adjacent printouts after allowing each printout to dry for about 15 minutes.
Avoid drying printouts with a hair dryer or by exposing them to direct sunlight.
Storing Printed Output
Store printouts in photo albums, plastic folders, and photo frames to protect them from direct exposure to
air.
Plastic folders protect printouts from color fading.
Avoid storing printouts in an adhesive-type album, as you may not be able to remove them.
When storing printouts in a pocket-type album, insert them in the pockets as far as they will go. The
edges of the printouts may turn yellow depending on the type of pocket album.
Avoid storing printouts in a hot or humid location or in direct sunlight. Store them in a normal operating
environment.
Avoid displaying or exhibiting printouts outdoors or in direct sunlight.
Printing Area
See Printing Area
Note When you use Borderless Printing, create the data by using the same size as the paper size, and paste
the data so that it fills the editing screen without leaving any margins. If you are using an application
that allows you to set margins, set the left, right, top and bottom margins to 0 mm or 0 inches. For
instructions on setting margins, refer to the user's manual for your application.
Matte Photo Paper MP-101
This is a thick matte water-resistant paper and provides superior color reproduction. It is suitable for a variety of
printing purposes such as paper crafts, calendars and photos with matte finish.
This media is available in A4/Letter sizes.
Loading
Load the paper with the whiter side facing up.
A maximum of 10 sheets of A4/Letter paper can be loaded at once.
Set the Paper Thickness Lever (gray) to the right.
Printer Driver Settings
Media Type: Matte Photo Paper
Page Size: Ensure that the setting matches the size set in the application.
Handling of Printed Output
Do not stack more than 5 sheets in the Paper Output Slot Cover.
Colors may slightly change if papers are stacked up before the ink is completely dry. It is recommended
that you allow the ink to dry for 24 hours.
Do not attempt to dry the ink with a hair dryer or by exposing printed sheets to direct sunlight.
Storing Printed Output
Do not store or display printouts in hot, damp or humid conditions.
Never expose them to heat or direct sunlight.
Store printouts in photo albums, photo frames or presentation binders to protect them from direct
exposure to air or sunlight.
Do not mount printouts in an adhesive-type album, as you may not be able to remove them.
Be aware that some types of plastic folders and albums may cause the edges of the paper to turn yellow.
Printing Area
See Printing Area
Note When you use Borderless Printing, create the data by using the same size as the paper size, and paste
the data so that it fills the editing screen without leaving any margins. If you are using an application
that allows you to set margins, set the left, right, top and bottom margins to 0 mm or 0 inches. For
instructions on setting margins, refer to the user's manual for your application.
Glossy Photo Paper GP- 401
This paper is thicker than High Resolution Paper and has a glossy printing surface to produce printouts close to
photograph quality. This media is available in A4/Letter, 4" x 6" / 101.6 x 152.4 mm and Credit Card sizes.
Loading
Load the paper with the whiter side facing up.
A maximum of 10 sheets can be loaded at once.
Be sure to set the paper to portrait regardless of the direction to print.
To prevent sheets from sticking to each other in the time of using A4/Letter paper, separate them from
each other before loading them in the Auto Sheet Feeder. Load the necessary number of paper (a maximum
of 10 sheets) in the Auto Sheet Feeder one at a time.
Set the Paper Thickness Lever (gray) to the right.
Printer Driver Settings
Media Type: Glossy Photo Paper
Page Size: Ensure that the setting matches the size set in the application.
Handling of Printed Output
Remove each sheet as soon as it is printed.
Do not touch the printed surface nor stack the printed sheets until the ink is fixed (approx. two minutes).
Printing Area
See Printing Area
Note When you use Borderless Printing, create the data by using the same size as the paper size, and paste
the data so that it fills the editing screen without leaving any margins. If you are using an application
that allows you to set margins, set the left, right, top and bottom margins to 0 mm or 0 inches. For
instructions on setting margins, refer to the user's manual for your application.
High Resolution Paper HR-101N
This type of paper provides better color reproduction than plain paper. It is suitable for printing business
documents that feature graphics, and printing photographs. This media is available in A4 / Letter size.
Loading
Load the paper with the whiter side facing up.
Do not load paper higher than the limit mark. A maximum of 10 sheets can be loaded.
Set the Paper Thickness Lever (gray) to the right.
Printer Driver Settings
Media Type: High Resolution Paper
Page Size: Ensure that the setting matches the size set in the application.
Handling of Printed Output
Do not stack more than 10 sheets in the Paper Output Slot Cover. If the output paper is curled, it may prevent
the next sheet being ejected. In this case, or if the ink takes a long time to dry, remove each sheet as soon as it
is printed.
Printing Area
See Printing Area
T-Shirt Transfers TR-301
This paper is used to create iron-on transfers. The image is printed backwards when Media Type is set to T-Shirt
Transfers in the printer driver.
Note For the customers in the United States, use the T-Shirt Transfers TR-101.
Loading
Load the paper with the side that does not have green lines facing up.
Load only one sheet at a time.
Set the Paper Thickness Lever (gray) to the left.
If the T-Shirt Transfer is curled, flatten it by curling it in the opposite direction.
Printer Driver Settings
Media Type: T-Shirt Transfers
Page Size: Ensure that the setting matches the size set in the application.
Handling of Printed Output
Remove each sheet as soon as it is printed.
The T-Shirt Transfer should be used as soon as possible. Refer to the supplied instructions for details on
how to use the paper.
Printing Area
See Printing Area
Transparencies CF-102
This film is ideal for printing presentation material for use with overhead projectors.
Loading
Place one sheet of plain A4/Letter paper under the transparencies in the Auto Sheet Feeder.
A maximum of 10 sheets can be loaded at once.
Set the Paper Thickness Lever (gray) to the right.
To prevent sheets from sticking to each other, separate them from each other before loading them in the
Auto Sheet Feeder. Load the necessary number of paper (a maximum of 10 sheets) in the Auto Sheet
Feeder one at a time.
Printer Driver Settings
Media Type: Transparencies
Page Size: Ensure that the setting matches the size set in the application.
Handling of Printed Output
Remove each sheet as soon as it is printed.
Do not touch the printed surface until the ink is fixed (approx. 15 minutes).
Printing Area
See Printing Area
Photo Stickers PS-101
Photo Stickers PS-101 is a peel-and-stick sheet that allows you to make your original stickers using your favorite
photo. It is a glossy sheet and is highly resistant to water. On each sheet, you can print 16 photo stickers with
excellent printing quality. This media is available in the size of 4" x 6" / 101.6 x 152.4 mm.
Loading
Load each sheet with the glossy side up. Printing on the back side can stain the inside of the printer or
your clothes.
Place the sheet in portrait in such a manner that the top margin is larger than the bottom margin. For more
information, refer to the instructions on the back of the sheet package.
Load one sheet at a time.
If a sheet is curled, uncurl it before loading.
Do not use a sheet from which stickers are going to come off or you have peeled off stickers.
Set the Paper Thickness Lever (gray) to the right.
Printer Driver Settings
Media Type: Photo Paper Plus Glossy
Page Size: 4" x 6" / 101.6 x 152.4 mm
Handling of Printed Output
Remove each sheet as soon as it is printed.
Note When printing a Photo Stickers (PS101) sheet, it is recommended using the PhotoRecord (v2.2 or later)
provided with the printer. It is easily printed by selecting "16-Sticker Label" from "Perforated Paper"
menu in the "Select Printer & Album Type" of the PhotoRecord (Windows only).
Envelopes
Use either European DL or US Com. #10 size envelopes.
Preparation for Printing
1 Press down on all four corners and edges of the envelopes to flatten them as shown in 2
below.
2 If the envelopes are curled, hold the opposite corners and gently bend them in the opposite
direction.
Ensure that the flap of the envelope is perfectly straight.
3 If the leading edge of an envelope is puffed up or curled, use a pen to press the envelope
flat and sharpen the crease.
Press the envelope completely flat, working from the middle to the edge.
* The above illustrations show a side view of the leading edge of the envelope.
Envelopes may jam in the printer if they are not completely flat and the edges are not aligned.
Ensure that no curl or puff exceeds 3 mm (0.1 in).
Unsuitable Envelopes
Envelopes with an embossed or treated surface
Envelopes with a double flap or pressure seals
Envelopes with sticker flaps
Loading
Place envelopes lengthwise with the flap to the left and the address side facing upwards.
A maximum of 5 envelopes can be loaded at once.
Set the Paper Thickness Lever (gray) to the left.
Note If the envelopes do not feed properly, even after removing curl, clean the Paper Feed Roller.
See Paper Does Not Feed Properly or Paper Jams
Also, if you decrease the number of paper loaded, it may be fed successfully.
Printer Driver Settings
Media Type: Envelope
Page Size: Select either DL Env. or #10 Env. according to the envelope size you are using.
Orientation: Landscape
Handling of Printed Output
Do not stack more than 5 sheets in the Paper Output Slot Cover.
Printing Area
See Printing Area
Checking the Status of the Printer
BJ Status Monitor Functions
The BJ Status Monitor allows you to check the status of the printer.
If an error occurs, the status monitor indicates the nature of the error and suggests an appropriate solution.
The status monitor also checks the ink tanks or battery and displays a warning message when the ink or battery
charge level is low.
Note In Windows XP or Windows 2000
The BJ Status Monitor screen is not displayed when infrared communications are used.
Launching the BJ Status Monitor
The BJ Status Monitor launches automatically when data is sent to the printer. When launched, the BJ Status
Monitor appears as an icon on the Task Bar.
1 Click the Canon iP90 button (or BJ Status Monitor) on the Task Bar.
The BJ Status Monitor appears.
Note To open the BJ Status Monitor when the printer is not printing, click the Maintenance tab in the
Printer Properties dialog box and click the Start Status Monitor button.
See Opening the Printer Properties Dialog Box
When errors occur
The error message dialog is automatically displayed when an error occurs, e.g. if the printer runs out of paper
or if the ink is low.
In such cases, take the appropriate action as described.
Note For details on the BJ Status Monitor, select the Help menu and click on the topic of interest.
Printer Setup Utility (or Print Center)
The Printer Setup Utility (or Print Center) allows you to check the progress of your print job.
If you are using an OS other than Mac OS X v.10.3, you can use the Print Center to check the progress of your
print job.
Opening the Printer Setup Utility (or Print Center)
Opening from the Finder
1 Select Applications from the Go menu.
2 Double-click the Utilities folder, and then double-click the Printer Setup Utility icon.
If you are using an OS other than Mac OS X v.10.3, double-click the Utilities folder, and then double-click
the Print Center icon.
The Printer List opens.
Opening from an Application
1 Open the Print dialog box.
See Opening the Print Dialog Box
2 Select Edit Printer List from the Printer pop-up menu.
The Printer List opens.
Checking the Progress of Print Jobs
Double-click the printer name displayed in the Name list to check the progress of print jobs.
(1) The status of the printer and information about the document being printed are displayed.
(2) Information about the documents being printed and queued for printing is displayed.
...Cancels printing of the specified document.
...Pauses printing of the specified document.
...Resumes printing of the specified document.
...Pauses printing of all documents. Upon clicking, the icon turns to
resume printing of all documents.
(Start Jobs), which is to
Printer Driver Functions
Opening the Page Setup Dialog Box
To open the Page Setup dialog box, select Page Setup from the File menu in your application program.
The displays on the Page Setup dialog box are changed by pop-up menus that you can scroll through. From
the Settings pop-up menu, you can select the following items.
See Page Attributes (Page Setup Dialog Box)
See Custom Paper Size (Page Setup Dialog Box)
See Summary (Page Setup Dialog Box)
Opening the Print Dialog Box
To open the Print dialog box, select Print from the File menu in your application program.
The displays on the Print dialog box are changed by pop-up menus that you can scroll through. From the popup menus, you can select the following items.
See Copies & Pages (Print Dialog Box)
See Layout (Print Dialog Box)
See Output Options (Print Dialog Box)
See Paper Handling (Print Dialog Box) (Mac OS X v.10.3 Only)
See ColorSync (Print Dialog Box) (Mac OS X v.10.3 Only)
See Quality & Media (Print Dialog Box)
See Color Options (Print Dialog Box)
See Special Effects (Print Dialog Box)
See Borderless Printing (Print Dialog Box)
See Margin (Print Dialog Box)
See Summary (Print Dialog Box)
Page Attributes (Page Setup Dialog Box)
If you select Page Attributes from Settings in the Page Setup dialog box,
you can change the paper size and scaling options.
(1) Format for
Select the name of the printer you are using.
(2) Paper Size
Select the paper size for the print job. To enter the size manually, select
Custom Paper Size from Settings.
(3) Orientation
Select the direction of the print job. In the Landscape orientation, you
can further select to flip the print job to match the paper you are
printing on.
(4) Scale
Specify the scaling percentage to resize the document for printing.
Custom Paper Size (Page Setup Dialog Box)
If you select Custom Paper Size from Settings in the Page Setup dialog
box, you can specify nonstandard paper sizes.
(1) Summary
A list of all saved paper sizes is displayed.
(2) New
Click to enter the name of the new paper size.
First, Untitled will be added to Summary , then you can enter any
paper size name.
(3) Duplicate
Click to duplicate an existing paper size name.
(4) Delete
Click to delete unwanted paper size names. Select the paper size name
from Summary and then click Delete.
(5) Save
Click to save the settings specified in this dialog box.
The saved paper size name will be registered as a Paper Size option in
the Page Setup dialog box.
(6) Paper Size
Set the height and width of the custom paper size.
The ranges your printer can handle are 3.39 to 23.0 in. (86.0 to 584.2
mm) for height and 2.13 to 8.50 in. (54.0 to 215.9 mm) for width.
(7) Printer Margins
Set the margins for the custom paper size.
The minimum margins are;
Top 0.12 in. (0.3 cm), Bottom 0.2 in. (0.5 cm), Left 0.13 in. (0.34 cm),
and Right 0.13 in. (0.34cm).
Set your margins to values above these.
Summary (Page Setup Dialog Box)
If you select Summary from Settings in the Page Setup dialog box, you
can check the settings of the page attributes.
(1) Page Attributes Summary
Displays the contents of the settings specified in the Page Setup dialog
box.
Copies & Pages (Print Dialog Box)
If you select Copies & Pages from the pop-up menu in the Print dialog box,
you can set the number of copies to print, collated printing, and a range for
printing pages.
(1) Printer
Select the name of the printer you are using.
If you select Edit Printer List , the Print Center starts.
(2) Presets
Save and delete Print dialog settings.
(3) Copies
Enter the number of copies to print.
(4) Collated
Select to print multiple copies of the document one copy at a time.
(5) Pages
To print all pages, select All.
To print a range of pages, enter the starting and ending pages in From
and to.
(6) Save as PDF
Saves the document as a PDF (Portable Document Format) file.
(7) Preview
Previews the appearance of the document to be printed, before printing.
Layout (Print Dialog Box)
If you select Layout from the pop-up menu in the Print dialog box, you can
specify the page layout printing settings.
(1) Pages per Sheet
Select the number of pages of the document to appear on one page.
(2) Layout Direction
If you select more than 2 pages to be printed at a reduced size on one
page, select the page order.
(3) Border
Select the type and width of line to create borders around the pages.
Output Options (Print Dialog Box)
If you select Output Options from the pop-up menu in the Print dialog
box, you can save the document as a PDF (Portable Document Format) file.
(1) Save as File
If you check the Save as File check box, you can select PDF as
Format. When you click Save , a dialog box for specifying the file
name and location opens.
You can also save the document as a PDF file by clicking Save as PDF in
the Print dialog box.
Paper Handling (Print Dialog Box) (Mac OS X
v.10.3 Only)
If you select Paper Handling from the pop-up menu in the Print dialog
box, you can specify the page printing order and the pages to be printed out.
(1) Reverse page order
A document having multiple pages is printed starting with the last
page.
(2) Print
To print all pages of a document, select All pages.
To print only even-numbered pages or odd-numbered pages, select
Odd numbered pages or Even numbered pages.
ColorSync (Print Dialog Box) (Mac OS X v.10.3
Only)
If you select ColorSync from the pop-up menu in the Print dialog box, you
can adjust color using ColorSync.
(1) Color Conversion
Select Standard to perform color management with the application.
Select In Printer to perform color management with the printer.
(2) Quartz Filter
Selecting a Quartz Filter allows you to change only the print result
without changing the document data.
Quality & Media (Print Dialog Box)
If you select Quality & Media from the pop-up menu in the Print dialog
box, you can specify the settings for basic printing appropriate to your
printer.
(1) Media Type
Ensure that this setting matches the media loaded in the printer.
(2) Print Mode
Select the print mode appropriate to your document. If you select
Detailed Setting , you can set Print Quality and Halftoning.
(3) Print Quality
This control appears when you select Detailed Setting from Print
Mode.
Move the slide bar to adjust the balance between print quality and print
speed.
Moving the bar to the right enhances print quality, and moving it to the
left increases the printing speed.
(4) Halftoning
This control appears when you select Detailed Setting from Print
Mode.
Set halftoning method.
Select either Dither or Diffusion ink dot configurations.
Dither is a suitable method to print pictures and graphs where you
wish to clearly define the difference between colors.
Diffusion is a suitable method to print graphics and photographs
where there are subtle color gradations.
(5) Grayscale Printing
Select to print a grayscale version (black and white) of a color
document.
Color Options (Print Dialog Box)
If you select Color Options from the pop-up menu in the Print dialog box,
you can adjust the colors on your document as you like.
(1) Color Correction
Select a Color Correction method: BJ Standard , ColorSync , or
None.
If you select BJ Standard , the optimum color correction for this
printer will be used. This is the recommended setting.
If you select ColorSync , ColorSync color correction will be used. If
you select None, no color correction will be used.
(2) Print Type
Select either Photo or Graphic , based on the type of your document.
(3) Brightness
Select the level of brightness to use for your document to print.
(4) Color Balance
Move the slide bar to adjust each color. Moving the bar to the right
strengthens the color, and moving it to the left weakens the color.
(5) Intensity
Move the slide bar to adjust the print intensity. Moving the bar to the
right makes the printing darker, and moving it to the left makes the
printing lighter.
Special Effects (Print Dialog Box)
If you select Special Effects from the pop-up menu in the Print dialog box,
you can edit or optimize photos and other graphics data.
(1) Simulate Illustration
This function manipulates color images with certain effects. Adjust the
brightness of the image with the Contrast slide bar.
(2) Monochrome Effects
Prints a color image in a single color. Choose a color or use a custom
color using Select Color.
(3) Vivid Photo
By using this function, you can reproduce breathtaking sceneries,
where colors, especially blues and greens, appear even more vibrant. A
major feature of this function is its ability to create vivid backgrounds
of fields, trees, oceans and skies, while maintaining the natural skin
tones of people that appear in the images.
(4) Photo Noise Reduction
When printing images recorded with your digital cameras, blue skies
may be dappled or dark appearing rough. You can reduce this effect
with the Photo Noise Reduction function. Using this function with
photographs other than those taken with a digital camera may cause the
images to be disturbed.
Borderless Printing (Print Dialog Box)
If you select Borderless Printing from the pop-up menu in the Print dialog
box, you can print the entire paper surface, so that no margins are left on the
four sides of the paper.
(1) Amount of Extension
When you select Borderless Printing, the sections that extend beyond
the paper are not printed because the image is enlarged to a paper size
slightly larger than the paper size. You can use a slide bar to adjust how
much the image extends beyond the paper. Usually, you need not to
adjust this setting. If you move the slide bar to the left to reduce the
extension amount, a border may appear.
Margin (Print Dialog Box)
If you select Margin from the pop-up menu in the Print dialog box, you can
set a staple margin.
(1) Stapling Side
Select a stapling side from Left, Right, Top, and Bottom.
(2) Margin
Specify the staple margin with a value between 0 mm and 30 mm.
Summary (Print Dialog Box)
If you select Summary from the pop-up menu in the Print dialog box, you
can confirm the print settings made in the Print dialog box.
(1) Summary
A summary of the print settings is displayed.
Test Print
If you print the Nozzle Check pattern, you can check whether the Print Head
Nozzles are ejecting ink properly. If colors are not printing properly, the
Print Head Alignment may improve the problem.
(1) Nozzle Check
Prints a nozzle check pattern to ensure that the Print Head Nozzles are
ejecting ink properly.
See Printing the Nozzle Check Pattern
(2) Print Head Alignment
Aligns the Print Head.
Print Head Alignment is required when the print result is unsatisfactory
(e.g., displaced ruled lines).
See Aligning the Print Head
Ink Level Information
Displays the remaining level of ink in the printer you are using.
(1) Ink Level
Displays the ink level.
(2) About Ink
Click to display the ink tanks information of your printer.
(3) Update
Click to check the current remaining ink level.
Remaining Ink Level Setting
When you replace the ink tank or you wish to see the Ink Level Information,
follow the procedure below.
(1) Ink Counter Reset
Resets the ink counter to an initial value. If you click here, the Ink
Counter Reset panel opens. Next, click the Black Ink Tank check
box or Color Ink Tank check box and click OK.
Important Reset the ink counter whenever installing a new ink
tank. If you do not reset the ink counter the Ink Level
Information will not display properly.
(2) Remaining Ink Level Indicator Setting
Sets whether the Ink Level Information will display or not.
Important As the default setting, Display the Remaining Ink
Level is checked. If you uncheck this option, there is no
need to reset the Ink Counter, however the remaining
ink level will not display in the Ink Level Information.
Ink Saving Settings
You can be set as the mode which saves black ink. Moreover, when a black
ink tank is empty and a new tank is not immediately available, you can
change to the mode which can be printed only in color ink as an emergency
measure.
(1) Save Black Ink
Print with less ink consumption.
(2) Use Composite Black
Black is printed in color ink, without using black ink. This option is
utilize when there is no black ink.
Battery Level Information
Displays the charge level of the battery in your printer.
(1) Remaining Battery Level
Displays the battery level.
(2) Update
Click to check the current remaining battery level.
Quiet Mode
You can reduce the printing noise.
(1) Do not use quiet mode
The printing noise will be normal level.
(2) Use quiet mode
Reduces the printing noise.
(3) Use quiet mode within specified time
You can set the times during which the silent function is to be used.
Note Sound reduction is not as effective when certain printing
options are selected. If you use Quiet Mode, the print
speed may be slower than normal.
Custom Settings
Changes the printer mode.
(1) Auto Power Off Setting
This allows you to turn the printer off when no data is sent to the
printer for a certain period of time.
(2) Ink Drying Wait Time
You can set the time between printing pages. Moving the slide bar to
the right lengthens the time and moving it to the left reduces the time
between printing pages.
Note If a printed page is not dry when the next page comes out
of the printer, the back of the paper may be smudged. In
this case, it may be beneficial to lengthen the time
between printing pages. If you shorten the time between
printing pages, print speed will increase.
(3) Change the print data size to match the port.
This setting allows you to shorten the print time. Especially if the
printer is connected to a low-speed port such as an IrDA or Bluetooth
option except for USB connection.
Routine Maintenance
When Printing Becomes Faint or Colors are Incorrect
When printing becomes faint or colors are incorrect, the Print Head Nozzles are probably clogged. Follow the procedures below to clean the
nozzles.
Note Before Performing Maintenance
Push the
on the ink tank to ensure that it is firmly snapped into place.
See Replacing an Ink Tank
Setting the Print Quality setting to High for Windows or Fine for Macintosh with the printer driver may improve the print quality.
See Main Tab (Windows), Quality & Media (Print Dialog Box) (Macintosh)
Step 1
See Printing the Nozzle Check Pattern
After Print Head Cleaning,
print the nozzle check pattern.
(1) If the pattern is printed normally, click Exit.
(2) If the print quality is poor, perform Print Head Cleaning.
Step 2
See Print Head Cleaning
If the problem remains after performing
Print Head Cleaning three times
Step 3
See Print Head Deep Cleaning
If the problem still remains
Step 4
See Replacing an Ink Tank
Note
If ruled lines are printed misaligned when printed, adjust the Print Head position.
See Aligning the Print Head
If ink tank replacement does not resolve the problem, a Print Head may be worn out. In this case, contact a Canon service
representative.
Printer Does Not Start or Stops During Print Jobs
Printing Does Not Start
Printing Stops Before It is Completed
Printer Moves But The Ink Is Not Ejected
Print Head Holder Does Not Move to the Center
Printing Does Not Start
Ensure that the printer is turned on.
If the POWER lamp is off, press the POWER button.
The POWER lamp lights green.
If the POWER lamp is flashing green, the printer is initializing. Wait until the POWER lamp stops flashing.
Note When printing a large amount of data such as a photo or graphics, it takes longer than usual
to begin printing. While the POWER lamp is flashing, the computer processes the data and
sends it to the printer. Simply wait until the processing is completed.
When printing data while using the optional battery, check the battery level. For more details, refer to the
manual supplied with the battery.
Ensure that the printer is securely connected to the computer.
When printing data while using the optional battery, ensure that the battery is installed properly.
Note If you are using a switch box or other device, remove and reconnect the printer directly to
the computer. Try printing again.
If printing is now successful, there may be a problem with the device.
Also there could be a problem with the cable(s). Replace the cable(s) and try printing
again.
Ensure that there are no problems in the system.
Restart your computer. It may solve the problem.
Delete an undesired print job if there is any. Use the BJ Status Monitor in Windows or Printer Setup Utility in
Macintosh for the deletion. If you are using an OS other than Mac OS X v.10.3, use the Print Center for
deletion.
(1) Open the Printer Properties dialog box.
See Opening the Printer Properties Dialog Box Directly from the Start Menu
(2) Click Maintenance tab and then Start Status Monitor.
(3) Click Display Print Queue.
(4) Select Cancel All Documents in the Printer menu.
When the confirmation message is displayed, click Yes.
The print job is deleted.
Note In Windows Me or Windows 98
Click to select an undesired document and select Purge Print Documents in the Printer
menu.
(1) Open the Printer Setup Utility (or Print Center ), and display the list of print jobs in progress.
See Printer Setup Utility (or Print Center)
(2) Select the undesired document and click
(Delete).
The print job is deleted.
Ensure that the correct printer driver is selected.
In Windows, ensure that the Canon iP90 is selected in the Print dialog box.
In Macintosh, ensure that the Canon iP90 is selected in the Printer Setup Utility (or Print Center ).
Note In Windows, you can set the Canon iP90 as the default printer.
Ensure that the printer port is set correctly.
Set "USBnnn" or "MPUSBPRNnn" ("n" represents a number) as the printer port.
(1) Open the Printer Properties dialog box.
See Opening the Printer Properties Dialog Box Directly from the Start Menu
(2) Click the Ports tab (or Details tab) and set the printer port.
Printing Stops Before It is Completed
Check the status of the POWER lamp.
When the POWER lamp is flashing green, the printer is processing data. Printing a large amount of data such
as a photo or graphics takes time for the computer to process the data, during which the printer may appear
not to be functioning.
In addition, when printing material that uses a large amount of black ink on plain paper continuously, the
printer will sometimes pause. In either case, simply wait until the processing is completed.
Cancel the print job and turn the printer off for at least 15 minutes to cool the Print
Head down.
The Print Head can overheat when continuously printing for long time. To protect the Print Head, the printer
will sometimes pause automatically at a line break before resuming.
In this event, interrupt the print job at a convenient time and turn the printer off for at least 15 minutes.
Furthermore, when continuously printing graphics or photos with intense colors, printing may stop to protect
the Print Head. In this case, printing will not resume. Turn the printer off and wait for at least 15 minutes.
Caution Do not touch the Print Head or nearby components. Inside the printer, the area around the
Print Head can become extremely hot.
Printer Moves But The Ink Is Not Ejected
Print the nozzle check pattern to ensure that the ink is ejected properly.
If the nozzle check pattern is not printed correctly, clean the Print Head.
See Printing the Nozzle Check Pattern
If the problem is not resolved by cleaning the Print Head several times, replace either of ink tanks. If Print
Quality still remains poor, the Print Head may be worn out. Contact a Canon service representative.
When installing an ink tank, press the
place.
button of the ink tank until it clicks into
Print Head Holder Does Not Move to the Center
Ensure that the printer is turned on.
The Print Head Holder will not move unless the power is on. If the POWER lamp is off, close the Print Head
Cover and turn the power on.
When the POWER lamp is flashing green, the printer is initializing.
When the POWER lamp stops flashing, open the Print Head Cover again.
If the Print Head Cover has been left open for a while, close and reopen it.
If the Print Head Cover is left open for more than 10 minutes, the Print Head Holder moves to the right to
prevent the Print Head from drying out. Close and reopen the Print Head Cover to return the holder to the
center.
Print Quality is Poor
Cannot Print to End of Job
Colors are Unclear
Printing is Blurred/Colors are Wrong
Straight Lines are Misaligned
Part or the whole of a line and/or an image has not been printed (In Windows XP or Windows
2000)
Printed Paper Curls or Ink Blots
Back of Paper is Smudged
Printed Surface is Scratched
White Streaks
Colors are Uneven or Streaked
Cannot Print to End of Job
Ensure that the Page Size setting in the printer driver matches the size of the paper
loaded in the printer.
First, check the Page Size setting in the application.
Then ensure that the Page Size setting in the Printer Properties dialog box for Windows or the Page Setup
dialog box for Macintosh matches the size set in the application.
Check the amount of free space on the hard disk.
You may need to increase the amount of free space on the disk by deleting any unnecessary files.
Colors are Unclear
Ensure that the Media Type setting in the printer driver matches the media loaded in
the printer.
If you are printing a photograph or an illustration in Windows, also increase the Print Quality on the Main
tab. In Macintosh, select Quality & Media from the pop-up menu in the Print dialog box, and then click
Printing a top-quality photo or Printing tables and charts.
If glossy photo paper other than Canon speciality media is used, select Other Photo
Paper from Media Type.
It may resolve the problem.
Load one sheet at a time and remove each sheet as soon as it is printed.
Ensure that the specified ink tank is installed.
Ensure that there is ink left.
When an ink tank has run out of ink, replace it with a new one.
See When Printing Becomes Faint or Colors are Incorrect
Note Printed colors may not match screen colors perfectly due to basic differences in the
methods used to produce colors. Color control settings and environmental differences can
also affect how colors appear on a screen.
Printing is Blurred/Colors are Wrong
Ensure that the ink tank is installed properly.
Open the Print Head Cover and press the
button of the ink tank and install an ink tank properly.
See Replacing an Ink Tank
Ensure that the appropriate paper is selected in the printer driver.
Ensure that the paper selected for Media Type in Main tab (Windows) or Print Dialog Box (Macintosh)
matches the paper loaded in the printer.
Print the nozzle check pattern to ensure that ink is ejected properly.
If the nozzle check pattern is not printed correctly, clean the Print Head.
See Printing the Nozzle Check Pattern
If the problem is not resolved after cleaning the Print Head several times, carry out a Deep Cleaning. When
you still do not solve it, replace either ink tank. If print quality still remains poor, the Print Head may be worn
out. Contact a Canon service representative.
Ensure that you are printing on the correct side of the media.
You can only print on one side of certain media. Note that printing with front side or back side of the paper
misused may cause ink to spread or print in the wrong color.
See Printing Media
Straight Lines are Misaligned
Check whether the Paper Thickness Lever (gray) position is correct.
See Printing Media
Align the Print Head.
(1) Open the Printer Properties dialog box.
See Opening the Printer Properties Dialog Box Directly from the Start Menu
(2) Click the Maintenance tab.
(3) Click Print Head Alignment.
Follow the on-screen instructions.
(1) Open the BJ Printer Utility.
See Opening the BJ Printer Utility
(2) Select Test Print from the pop-up menu and then click Print Head Alignment.
Follow the on-screen instructions.
In the printer driver settings, select a higher Print Quality setting.
(1) Open the Printer Properties dialog box.
See Opening the Printer Properties Dialog Box from your Application Program
(2) On the Main tab, click High for the Print Quality setting.
(1) Open the Print dialog box.
See Opening the Print Dialog Box
(2) Select Quality & Media from the pop-up menu and then click Detailed Setting.
(3) Drag the Print Quality slide bar to the Fine end.
Part or the whole of a line and/or an image has not been printed (In
Windows XP or Windows 2000)
On the Main tab, click Print Options , and select Reduce spool data size.
When the Reduce spool data size is set, the print quality may be degraded. Under Scaled Printing, fine lines
may not be printed.
Thin lines may not be printed when printing with the Page Layout Printing or
Printing with Binding Margin function. Try making the lines of the document
bolder and thicker.
Printed Paper Curls or Ink Blots
Use High Resolution Paper or Photo Paper Pro to print images that require a lot of
ink (i.e. pictures with intense colors or photographs).
Ensure that the appropriate paper is selected in the printer driver.
Ensure that the paper selected for the Media Type in Main tab (Windows) or Print Dialog Box (Macintosh)
matches the paper loaded in the printer.
Back of Paper is Smudged
If the next page prints before the ink is dry, enable the Pause Page printer driver
setting.
You can either remove each printed sheet from the Paper Output Slot Cover as soon as it is printed, or enable
Pause Page to pause after each sheet has printed.
(1) Ensure that the printer is turned on and open the Printer Properties dialog box.
See Opening the Printer Properties Dialog Box Directly from the Start Menu
(2) Click the Maintenance tab.
(3) Click Custom Settings to open the Custom Setting dialog box.
(4) Drag the Ink Drying Wait Time slide bar, and then click Send.
(5) When a message is displayed, click OK.
(1) Ensure that the printer is turned on and open the BJ Printer Utility.
See Opening the BJ Printer Utility
(2) Select Custom Settings from the pop-up menu.
(3) Drag the Ink Drying Wait Time slide bar, and then click Send.
(4) When a message is displayed, click OK.
Clean the inside of the printer.
If the inside of the printer is dirty, the printed paper may be smudged. Periodically clean the inside of the
printer.
See Cleaning the Inside of the Printer
You may need to clean the Paper Feed Roller. Follow the procedure below.
(1) Ensure that the printer is turned on.
If paper is loaded in the printer, remove the paper.
(2) Hold down the RESUME/CANCEL button; when the POWER lamp flashes three times, release
the button.
The Paper Feed Roller will rotate as it cleans.
(3) Repeat this operation one more time.
(4) Load a stack of plain paper in the printer.
(5) Hold down the RESUME/CANCEL button; when the POWER lamp flashes three times, release
the button.
The paper that is loaded in the printer will feed through the printer and be ejected.
Printed Surface is Scratched
Ensure that you are using a suitable paper.
The paper weight must be less than 105 gsm (28 lbs).
If you use non-Canon brand paper heavier than 105 gsm (28 lbs), the Print Head may scratch the printed
surface.
Print with the correct paper.
Also see Compatible Media Types, and check the suitable paper for printing.
The papers must not be curled.
If all four corners or the printing surface of the paper is curled, the paper may become dirty or the paper
may not feed properly. Use paper after correcting paper curl as follows.
(1) Face up the printing surface*1, and cover it with a non-printing regular paper to avoid damaging the
surface.
(2) Roll up the paper in a direction opposite to paper curl as the figure below.
(3) Check the printing paper if paper curl is corrected within approximately 2 to 5 mm*2.
It is recommended to print the curl-corrected paper one sheet at a time.
When printing on thick paper, set the Paper Thickness Lever (gray) to the left.
This widens the gap between the Print Head and the paper. If the paper is scratched even when printing on
plain paper, also try this.
Return the Paper Thickness Lever (gray) to the right position after printing.
Reduce the Intensity setting in the printer driver and try printing again.
When printing an image with high intensity, especially on plain paper, the paper may absorb too much ink
and become wavy. This may cause the printed surface to become scratched.
(1) Open the Printer Properties dialog box.
See Opening the Printer Properties Dialog Box from your Application Program
(2) On the Main tab, select Manual for Color Adjustment , and then click Set.
(3) Drag the Intensity slide bar to adjust the intensity.
(1) Open the Print dialog box.
See Opening the Print Dialog Box
(2) Select Color Options from the pop-up menu.
(3) Drag the Intensity slide bar to set the intensity.
Ensure that you are printing within the recommended printing area.
See Printing Area
White Streaks
Print the nozzle check pattern to check ink output.
If a specific color is not printed in the nozzle check pattern, clean the Print Head.
See Printing the Nozzle Check Pattern
The problem can also be resolved by aligning the Print Head. For details on Print Head Alignment, refer to
"Straight Lines are Misaligned".
Ensure that the appropriate Print Quality is selected in the printer driver.
Set Print Quality in the printer driver setting screen.
(1) Open the Printer Properties dialog box.
See Opening the Printer Properties Dialog Box from your Application Program
(2) On the Main tab, click High for the Print Quality setting.
(1) Open the Print dialog box.
See Opening the Print Dialog Box
(2) Select Quality & Media from the pop-up menu and then click Detailed Setting.
(3) Drag the Print Quality slide bar to the Fine end.
Colors are Uneven or Streaked
Increase the Print Quality setting in the printer driver settings.
(1) Open the Printer Properties dialog box.
See Opening the Printer Properties Dialog Box from your Application Program
(2) On the Main tab, click High for the Print Quality setting.
(1) Open the Print dialog box.
See Opening the Print Dialog Box
(2) Select Quality & Media from the pop-up menu and then click Detailed Setting.
(3) Drag the Print Quality slide bar to the Fine end.
Troubleshooting
Cannot Install Printer Driver
Ensure the installation procedure
Close any other applications, including anti-virus software, before installation
If the Installer for the printer driver does not start up automatically when you insert the Setup
Software & User's Guide CD-ROM, click Start, select My Computer and then double-click the CD-ROM
icon
Ensure that there are no problems with the Setup Software & User's Guide CD-ROM
Ensure the installation procedure
Install the printer driver following the procedures described in your setup guide.
If the printer driver was not installed correctly, delete the printer driver and restart your computer. Try to
reinstall the printer driver.
See Uninstalling Printer Drivers
Note If the Installer was forcibly terminated due to an error in Windows, Windows may be
unstable and this will prevent the printer driver from being installed.
Close any other applications, including anti-virus software, before
installation
Sometimes the printer driver cannot be installed because another application is running.
If the Installer for the printer driver does not start up automatically
when you insert the Setup Software & User's Guide CD-ROM, click Start,
select My Computer and then double-click the CD-ROM icon
For non-Windows XP users, open the My Computer window and then double-click the CD-ROM icon.
Note If you are typing in the file name, you must specify the CD-ROM drive letter and the
installation program ("Msetup4.exe"). The CD-ROM drive letter is computer dependent.
Ensure that there are no problems with the Setup Software & User's
Guide CD-ROM
In Windows, use Explorer to ensure that the CD-ROM can be read. In Macintosh, check that the CD-ROM
icon is visible. If there is a problem with the CD-ROM, contact a Canon service representative.
Uninstalling Printer Drivers
Note Close applications that are running before uninstalling the printer driver.
Use the Uninstaller to delete any unwanted printer drivers. This allows you to delete the files associated with the
printer driver at the same time.
Important In Windows XP and Windows 2000, when not logged on as a computer administrator or
Administrators , you cannot delete printer drivers.
1 Click Start and select All Programs (or Programs), Canon iP90 and Uninstall.
2 When the confirmation message is displayed, click Yes.
3 When all the files have been deleted, click OK.
The deletion of the printer driver is complete.
If a message prompts you to restart your computer, click OK to restart your computer.
Note
In Windows Me or Windows 98, you can also start the Uninstaller by double-clicking on
Uninstall in the Canon iP90 folder on the desktop.
When using Bluetooth communication, uninstall the printer driver, and delete a printer
registration from the Bluetooth device, too.
When you want to delete printer driver or install it again, uninstall a printer driver with the following steps.
Important When a printer driver is uninstalled in this method, all the printer drivers manufactured by Canon
which have already been installed in the computer are uninstalled.
Only a specific printer can not be deleted.
Note When not logged on as Administrator, you cannot delete printer drivers. For further information about
Administrator, refer to your Macintosh documentation.
1 Open the Printer Setup Utility (or Print Center).
See Printer Setup Utility (or Print Center)
2 From the Printer List window, select all registered BJ printers.
3 Select Delete Selected Printers from the Printer Setup Utility's Printers menu.
4 Double-click the hard disk icon where the printer driver was installed, the Library folder,
the Printers folder, the Canon folder, and then drag the BJ Printer folder into the Trash.
5 Restart your computer.
Deleting Selected Printers
Follow the steps described below to delete the unnecessary printer from the printer list.
The printer drivers which have been installed on your computer can be left.
1 Open the Printer Setup Utility (or Print Center ).
See Printer Setup Utility (or Print Center)
2 Select the BJ printer you want to delete on the printer list.
3 Select Delete Selected Printers from the Printer Setup Utility's Printers menu.
Uninstalling the On-screen Manual
Follow the steps described below to uninstall the installed On-screen Manuals (Photo Application Guide, User's
Guide , Bluetooth Unit BU-10 User' Guide) from your computer.
Note that this uninstall procedure will uninstall all guides.
1 Click Start, select All Programs (or Programs), Canon iP90 Manual and Uninstall.
2 When the Confirm File Deletion message is displayed, click Yes.
When the message prompting you to restart your computer is displayed, click OK to restart your computer.
1 Double-Click the Applications folder in the hard disk.
2 Double-click the Canon Utilities , and drag the iP90 Manual icon into the Trash.
3 Drag the On-screen Manuals (iP90 Photo Application Guide, iP90 User's Guide, iP90
Bluetooth Unit BU-10 User's Guide) on the desktop into the Trash.
Note When the On-screen Manual was copied on the hard disk by pushing an Open button during the install,
delete the manual directly from the place where it was copied.
Setup Utility Functions
(1) PictBridge Print Settings
You can confirm the settings for printing directly from a PictBridge compliant device.
See PictBridge Print Settings
(2) Infrared / Bluetooth connection Print Settings
You can confirm the settings for printing via infrared and Bluetooth connection.
See Infrared / Bluetooth Connection Print Settings
Note
The screens in this section refer to Mac OS X 10.3.4 operation. The equivalent screens may vary
slightly depending on your operating system.
To see a description of the Canon iP90 Setup Utility, click the
button.
PictBridge Print Settings
(1) PitctBridge Print Settings
This field displays the media type, paper size, borderless (full) printing
On/Off, and automatic image optimize On/Off for printing from a
PictBridge compliant device.
(2) Change
Clicking this button displays the PictBridge dialog, allowing you to
change the settings for printing from a PictBridge compliant device.
PictBridge Dialog
(1) Printing Type
Select a type (layout) of print to be made using a PictBridge compliant
device. To specify a media type, paper size, borderless (full) printing
On/Off, and automatic image optimize On/Off, select Custom.
(2) Media Type
The media type selected in Printing Type is displayed. If you selected
Custom in Printing Type, you can select a media type from among
Photo Paper Pro, Photo Paper Plus Glossy and Plain Paper.
(3) Paper Size
The paper size selected in Printing Type is displayed. If you selected
Custom in Printing Type, you can select a paper size from among 4 x 6
in 101.6 x 152.4 mm, 5 x 7 in 127.0 x 177.8 mm, Letter, Credit Card
and A4 size.
(4) Borderless Printing
Whether Borderless Printing (full) is selected is indicated. If you
selected Custom in Printing Type, check-marking this item allows you
to print an image on the media with no margin left around the image.
(5) Automatic Image Optimize
Check-marking this item automatically adjusts coloring and brightness
by correcting sections of the photograph that may be either too dark or
too bright.
(6) Send
The settings you have made are sent to the printer.
Infrared/Bluetooth connection Print Settings
(1) Photo Print Settings
This field displays the media type, paper size, layout, and borderless
(full) printing On/Off selected for printing via infrared and Bluetooth
communication.
(2) Change
Clicking this button displays the Photo Printing dialog, allowing you to
change the settings for photo printing.
(3) Document Print Settings
This field displays the media type, paper size, and layout selected to
print a document via infrared communication. It also displays optional
settings such as a time difference and language.
(4) Change
Clicking this button displays the Document Printing dialog, allowing
you to change the settings for document printing.
Photo Printing Dialog
(1) Printing Type
Select a type (layout) of print to be made via infrared and Bluetooth
communication. To specify a media type, paper size, and borderless
(full) printing On/Off individually, select Custom.
(2) Media Type
The media type selected in Printing Type is displayed. If you selected
Custom in Printing Type, you can select a media type from among
Photo Paper Pro and Photo Paper Plus Glossy.
(3) Paper Size
The paper size selected in Printing Type is displayed. If you selected
Custom in Printing Type, you can select a paper size from among 4 x 6
in 101.6 x 152.4 mm, 5 x 7 in 127.0 x 177.8 mm, A4, Letter, Credit
Card and Sticker Paper.
(4) Layout
The number of image divisions laid out on a sheet (sticker paper, etc.)
is displayed. If you selected Custom in Printing Type, you can select a
layout from among Full, x2, x4 and x8.
(5) Borderless Printing
Whether Borderless Printing (full) is selected is indicated. If you
selected Custom in Printing Type, check-marking this item allows you
to print an image on the media with no margin left around the image.
(6) Send
The settings you have made are sent to the printer.
Document Printing Dialog
(1) Printing Type
Select a type (layout) of document to be printed via infrared and
Bluetooth communication.
(2) Media Type
Plain paper is selected for document printing.
(3) Paper Size
The paper size selected in Printing Type is displayed.
(4) Layout
Normal-size is selected for document printing.
(5) Time difference with GMT
The difference in time between the standard time in your district and
GMT is indicated. You can change this setting in Option Settings.
(6) Language
The language selected in Option Settings dialog is displayed.
(7) Change
Clicking this item displays the Option Settings dialog, allowing you to
change the above settings 5 to 6.
(8) Send
The settings you have made are sent to the printer.
Option Settings Dialog
(1) Time difference with GMT
You can change the time difference with GMT.
(2) Language
You can select a printing language from among West European, East
European and Cyrillic.
Infrared/Bluetooth connection Print Settings
(1) Photo Print Settings
This field displays the media type, paper size, layout, and borderless
(full) printing On/Off selected for printing via infrared and Bluetooth
communication.
(2) Change
Clicking this button displays the Photo Printing dialog, allowing you to
change the settings for photo printing.
(3) Document Print Settings
This field displays the media type, paper size, and layout selected to
print a document via infrared communication. It also displays optional
settings such as a time difference and language.
(4) Change
Clicking this button displays the Document Printing dialog, allowing
you to change the settings for document printing.
Photo Printing Dialog
(1) Printing Type
Select a type (layout) of print to be made via infrared and Bluetooth
communication. To specify a media type, paper size, and borderless
(full) printing On/Off individually, select Custom.
(2) Media Type
The media type selected in Printing Type is displayed. If you selected
Custom in Printing Type, you can select a media type from among
Photo Paper Pro and Photo Paper Plus Glossy.
(3) Paper Size
The paper size selected in Printing Type is displayed. If you selected
Custom in Printing Type, you can select a paper size from among 4 x 6
in 101.6 x 152.4 mm, 5 x 7 in 127.0 x 177.8 mm, A4, Letter, Credit
Card and Sticker Paper.
(4) Layout
The number of image divisions laid out on a sheet (sticker paper, etc.)
is displayed. If you selected Custom in Printing Type, you can select a
layout from among Full, x2, x4 and x8.
(5) Borderless Printing
Whether Borderless Printing (full) is selected is indicated. If you
selected Custom in Printing Type, check-marking this item allows you
to print an image on the media with no margin left around the image.
(6) Send
The settings you have made are sent to the printer.
Document Printing Dialog
(1) Printing Type
Select a type (layout) of the document to be printed via infrared and
Bluetooth communication.
(2) Media Type
Plain paper is selected for document printing.
(3) Paper Size
The paper size selected in Printing Type is displayed.
(4) Layout
Normal-size is selected for document printing.
(5) Time difference with GMT
The difference in time between the standard time in your district and
GMT is indicated. You can change this setting in Option Settings.
(6) Language
The language selected in Option Settings dialog is displayed.
(7) Change
Clicking this item displays the Option Settings dialog, allowing you to
change the above settings 5 to 6.
(8) Send
The settings you have made are sent to the printer.
Option Settings Dialog
(1) Time difference with GMT
You can change the time difference with GMT.
(2) Language
You can select a printing language from among West European, East
European and Cyrillic.
PictBridge Print Settings
(1) PitctBridge Print Settings
This field displays the media type, paper size, borderless (full) printing
On/Off, and automatic image optimize On/Off for printing from a
PictBridge compliant device.
(2) Change
Clicking this button displays the PictBridge dialog, allowing you to
change the settings for printing from a PictBridge compliant device.
PictBridge Dialog
(1) Printing Type
Select a type (layout) of print to be made using a PictBridge compliant
device. To specify a media type, paper size, borderless (full) printing
On/Off, and automatic image optimize On/Off, select Custom.
(2) Media Type
The media type selected in Printing Type is displayed. If you selected
Custom in Printing Type, you can select a media type from among
Photo Paper Pro, Photo Paper Plus Glossy and Plain Paper.
(3) Paper Size
The paper size selected in Printing Type is displayed. If you selected
Custom in Printing Type, you can select a paper size from among 4 x 6
in 101.6 x 152.4 mm, 5 x 7 in 127.0 x 177.8 mm, Letter, Credit Card
and A4 size.
(4) Borderless Printing
Whether Borderless Printing (full) is selected is indicated. If you
selected Custom in Printing Type, check-marking this item allows you
to print an image on the media with no margin left around the image.
(5) Automatic Image Optimize
Check-marking this item automatically adjusts coloring and brightness
by correcting sections of the photograph that may be either too dark or
too bright.
(6) Send
The settings you have made are sent to the printer.
Setup Utility Functions
(1) PictBridge Print Settings
You can confirm the settings for printing directly from a PictBridge compliant device.
See PictBridge Print Settings
(2) Infrared / Bluetooth connection Print Settings
You can confirm the settings for printing via infrared and Bluetooth connection.
See Infrared / Bluetooth Connection Print Settings
Note
The screens in this section refer to Windows XP SP2 operation. The equivalent screens may vary
slightly depending on your operating system.
To see a description of the Canon iP90 Setup Utility, click the Help button.
Using the Canon iP90 Setup Utility
Function of the Canon iP90 Setup Utility
The Canon iP90 Setup Utility is used to set up the media type, size and print layout to print via infrared
communication or PictBridge compliant devices.
Installing the printer driver using the Easy Install button in the Setup Software & User's Guide CD-ROM will
automatically install the Canon iP90 Setup Utility.
Note The Canon iP90 Setup Utility can also set up the print setting via Bluetooth communication.
For more information on settings for printing via Bluetooth communication, refer to the Bluetooth Unit
BU-10 User's Guide.
Starting the Canon iP90 Setup Utility
1 Check that the printer is connected with the computer by USB cable, and that the POWER
Lamp is on.
2 Click Start and select All Programs , Canon Utilities , Canon iP90 Setup Utility and Canon
iP90 Setup Utility.
Or, double-click the Canon iP90 Setup Utility icon on the desktop.
3 Click the mode setting tab on the screen.
(1) Select to change the default settings when you print from a PictBridge compliant device.
(2) Select to set up the print settings when you print via an infrared and Bluetooth communication.
Note
About the settings for printing with PictBridge.
See PictBridge Print Settings
About the settings for printing with infrared communication.
See Infrared / Bluetooth Connection Print Settings
1 Check that the printer is connected with the computer by USB cable, and that the POWER
Lamp is on.
2 Double-Click the Applications folder in the hard disk where the printer driver is installed,
then Canon iP90 Setup Utility folder, and then Canon iP90 Setup Utility icon.
3 Click the mode setting tab on the screen.
(1) Select to change the default settings when you print from a PictBridge compliant device.
(2) Select to set up the print settings when you print via an infrared and Bluetooth communication.
Note
About the settings for printing with PictBridge.
See PictBridge Print Settings
About the settings for printing with infrared communication.
See Infrared / Bluetooth Connection Print Settings
An Error Message is Displayed on the Screen
Error Writing/Output to USBnnn or MPUSBPRNnn
Have you replaced an ink tank with a new one? is Displayed
Low Ink Warning Displays Ink Tank with '?'
Other Error Messages
Error Writing/Output to USBnnn or MPUSBPRNnn
Ensure that the printer is turned on.
If the POWER lamp is off, turn the printer on.
When the POWER lamp is flashing green, the printer is initializing. Wait until the POWER lamp stops
flashing.
Ensure that paper is loaded.
There is a possibility that the "No paper" error has not been reset.
Load paper and press the RESUME /CANCEL button.
Ensure that the printer port setting corresponds to the printer interface connection.
(1) Open the Printer Properties dialog box.
See Opening the Printer Properties Dialog Box Directly from the Start Menu
(2) Click the Ports tab (or Details tab), and then select MPUSBPRNnn (Canon iP90) or USBnnn
(Canon iP90) ("n" represents a number) in the Print to the following port.
Ensure that the printer is securely connected to the computer.
Note If you are using a switch box or other devices, remove and reconnect the printer directly to
the computer and try printing again.
If printing is now successful, there may be a problem with the device.
Also there could be a problem with the cable(s). Replace the cable(s) and try printing
again.
Verify the printer port status.
(1) Right-click My Computer and select Properties.
(2) Click the Hardware tab, Device Manager , and double-click Universal serial bus controller , USB
Printing Support.
In Windows Me or Windows 98, click Universal serial bus controller on the Device Manager tab, and
then double-click Canon iP90.
(3) On the General tab, ensure that there is any indication of a problem with the device.
If spooling action is abnormal, disable it to send the print data directly to the printer
and try printing again. (In Windows Me or Windows 98)
(1) Open the Printer Properties dialog box.
See Opening the Printer Properties Dialog Box Directly from the Start Menu
(2) Click the Details tab.
(3) Click Spool Settings, and then select Print directly to the printer.
There may be a problem in the printer driver. Uninstall the printer driver and then
reinstall it.
See Uninstalling Printer Drivers
Have you replaced an ink tank with a new one? is Displayed
If an ink tank is removed, a confirmation message of ink tank replacement may be displayed before the next
print job.
If an ink tank has been replaced with a new one:
Click Yes and select the replaced ink tank to reset the ink counter.
If the ink tank has not been replaced with a new one:
Click No to close the dialog box.
You can choose to disable the display of a confirmation message.
(1) Ensure that the printer is turned on.
(2) Open the Printer Properties dialog box.
See Opening the Printer Properties Dialog Box Directly from the Start Menu
(3) Click the Maintenance tab and then click Low Ink Warning Setting icon.
(4) Clear the check box of Display a confirmation message of ink tank replacement off and click Send.
Low Ink Warning Displays Ink Tank with '?'
If the following icons are displayed in BJ Status Monitor, the ink level and ink counter are not matched.
Reset the ink counter from the printer driver when you replace the ink tank.
See Resetting the Ink Counter
Note When Display a confirmation message of ink tank replacement is selected, a message
asking whether or not the ink tank has been replaced is automatically displayed whenever
the ink tank is replaced.
Turn the low ink warning off until you replace the ink tank to stop the warning
message.
(1) Ensure that the printer is turned on.
(2) Open the Printer Properties dialog box.
See Opening the Printer Properties Dialog Box Directly from the Start Menu
(3) Click the Maintenance tab and then click Low Ink Warning Setting icon.
(4) Clear the check box of Display low ink warning off and click Send.
(5) When the confirmation message is displayed, click OK.
Clear the check box of Display the Remaining Ink Level to stop displaying the ink
level.
(1) Ensure that the printer is turned on.
(2) Open the BJ Printer Utility.
See Opening the BJ Printer Utility
(3) Select Remaining ink level setting from the pop-up menu.
(4) Clear the check box of Display the Remaining Ink Level and click Send.
(5) When the confirmation message is displayed, click OK.
Other Error Messages
If the BJ Status Monitor is displayed, follow the on-screen instructions.
If an error occurs during printing, the error dialog with the BJ Status Monitor is displayed. Follow the dialog
message instructions.
Refer to "Low Ink Warning Displays Ink Tank with '?'"as it is in the case.
If one of the following messages is displayed outside of the BJ Status Monitor:
Could not spool successfully due to insufficient disk space
Increase the amount of free space on the disk by deleting any unnecessary files.
Could not spool successfully due to insufficient memory
Increase available memory by closing any other applications currently running.
If you still cannot print, restart Windows and try printing again.
Printer driver could not be found
Uninstall the printer driver and then reinstall it.
See Uninstalling Printer Drivers
Background printing failed (In Windows Me or Windows 98)
Restart Windows and try printing again.
Could not print Application name - File name
Try printing again once the current job is finished.
If a message with the format "Error No.: n" is displayed:
Error No.: 300
Ensure that the printer is turned on, and that the printer and the computer are securely connected. If the
problem remains, verify the Printer Setup Utility (or Print Center) setting. If you are using an OS other than
Mac OS X v.10.3, start Print Center and verify the setting.
(1) Open the Printer Setup Utility (or Print Center ).
See Printer Setup Utility (or Print Center)
(2) Ensure that the iP90 is displayed in the Printer List.
Error No.:1700
The printer has a built-in waste ink absorber* to hold the ink used during Print Head cleaning. Eight flashes
indicates that this absorber is nearly full.
Press the RESUME/CANCEL button to clear the error so you can continue printing. Before the waste ink
absorber becomes completely full, contact a Canon service representative.
*The waste ink absorber absorbs ink used during cleaning, for example. When you experience this error, you
will need to call for servicing to replace the waste ink absorber and to check the printer for proper operation.
Error No.:2001
Disconnect the camera cable, press the RESUME/CANCEL button to the printer and reconnect the cable.
If the error is still unresolved, the digital camera or digital video camcorder that is not supported by this
printer. Use a digital camera or digital video camcorder compatible with this printer.
Transporting Printer
When relocating the printer or storing the printer for a long period of time, pack the printer using the original
packing materials.
If you do not have the original packing materials, pack the printer carefully using in protective material and place
inside a sturdy box.
1 Turn the printer off and unplug the printer.
Important Do not unplug the printer while the POWER lamp is lit or flashing to protect the printer
from the damage.
2 Close the Paper Rest and Paper Output Slot Cover.
3 Disconnect the printer cable from the computer and from the printer, and then disconnect
the Universal AC Adapter from the printer.
Note When the battery is connected to the printer but is not used for a long period of time (6
months or longer), remove the battery pack from the battery charger. For details on how to
remove the battery pack, refer to the manual supplied with the battery.
4 Pack the printer in a plastic bag.
Note
Do not carry or store the printer with the round side down.
A failure can result.
Clearly label the box as "Fragile", if using a transporting company.
Traveling Abroad with the Printer
Before traveling abroad with the printer, ensure that the following notes.
About Universal AC Adapter and Power Cord
The Universal AC Adapter can be used abroad to power the printer from power supplies ranging from AC
100 V to 240 V. However, the specification of the Power Cord differs for each country, please purchase the
Power Cord suitable for the specification of each country.
For details, call for Canon service representative.
*1 Power Cord
*2 Universal AC Adapter
Universal AC Adapter is not dependent on the specification of each country. It is common also
abroad and can use.
Fill Out the CIWS Card
Fill out the CIWS Card (Canon International Warranty System) with the date of purchase and the name of
where the printer was purchased. Carry this warranty card with you when you travel, so you can request
repairs or servicing of the printer at your destination. For details, refer to the CIWS card.
The cautions when carrying printer
Pack up firmly in the case of carrying bag. For details, refer to Transporting Printer.
Do not place any heavy object on the printer.
Strong vibration and shock could cause the printer's malfunction or leak of ink.
When you remove the Power Cord, check that the POWER lamp is off completely. If the Power Cord is
pulled out while the POWER lamp is on or flashing, it will become the failure.
Note X-ray and any other baggage inspection devices have no adverse effect on this printer.
Specifications
Printer
Printing resolution:
4800 X 1200 dpi. max.
(Ink droplets can be placed in a pitch of 1/4800
inch at minimum.)
Print speed *
*Print speed may vary with the content of the
document and the processing speed of the host
computer.
Black printing
Max Speed (Custom Setting 5): 16 ppm
Standard: 12.7 ppm
Color printing
Max Speed (Custom Setting 5): 12 ppm
Standard: 7.2 ppm
Print width:
203.2 mm max. (8.0 in)
(for Borderless Printing: 215.9 mm/8.5 in)
Resident print control mode:
Canon extended mode
Receive buffer:
42 KB
Interface:
USB/IrDA Ver.1.1/Direct Print Port/Bluetooth
Ver.1.1 (option)
Acoustic noise level:
Approx. 40 dB (A) (in the highest print quality
mode)
Operating environment:
Temperature: 5 to 35°C (41 to 95°F)
Humidity: 10 to 90%RH (no condensation)
Storage environment:
Temperature: 0 to 40°C (32 to 104°F)
Humidity: 5 to 95% RH (no condensation)
Power supply:
AC 100-240 V, 50/60 Hz
Power consumption:
Standby: 1 W or lower
Printing: Approx. 10 W
OFF: Approx. 0.2 W
Dimensions
(with a Paper Support and Paper Output Slot
Cover retracted):
310 (W) X 174 (D) X 51.8 (H) mm
12.20 (W) X 6.85 (D) X 2.04 (H) in
Weight:
Approx. 1.8 kg (4 lb.)
Print Head:
Black: 160 X 2 nozzles (600 dpi)
Cyan, Magenta, Yellow: 128 X 2 X 3 nozzles
per each color (600 dpi)
Ink Tanks:
Capacity (pages):
Black (BCI-15 Black) approx. 185 *1 , approx.
450 *2
Color (BCI-16 Color) approx. 100 *2
*1 1500 characters per page, normal text, at
standard and plain paper mode with Windows
XP printer driver
*2 Based on printing the ISO JIS-SCID No.5
pattern at standard and plain paper mode
with Windows XP printer driver
Universal AC adapter
Dimensions:
118 (W) x 58 (D) x 25.8 (H) mm
4.65 (W) X 2.28 (D) X 1.02 (H) in
Weight:
Approx. 200 g (0.44 lb.)
Rated input:
AC 100 to 240 V
Rated output:
DC 16 V, 1.8 A
Camera Direct Print
Canon "Bubble Jet Direct"
Compatible Paper
Card #1 (Photo Paper Pro 4" x 6"/101.6 x
152.4 mm),
Card #2 (Photo Paper Plus Glossy, Photo
Paper Plus Semi-Gloss, or Glossy Photo Paper
4" x 6"/101.6 x 152.4 mm),
Card #3 (Photo Paper Plus Glossy 5" x
7"/127.0 x 177.8 mm),
LTR (Photo Paper Pro, Photo Paper Plus
Glossy, Photo Paper Plus Semi-Gloss, or
Glossy Photo Paper Letter size)
A4 (Photo Paper Pro, Photo Paper Plus
Glossy, Photo Paper Plus Semi-Gloss, or
Glossy Photo Paper A4 size)
Layout Print
Standard: Borderless / with border, Index
Print: 6-80 images (Depending on the size of
print media)
Print Quality
Standard
Effect
Exif Print compatible
DPOF Version
Ver. 1.00 compatible
(Index print, number of copies, select images,
print special characters (date))
PictBridge
Paper size
Default (Photo Paper Plus Glossy 10 x 15 cm /
4" x 6"), 10 x 15 cm / 4" x 6" (Photo Paper
Plus Glossy, Photo Paper Pro, Photo Paper
Plus Semi-Gloss, Glossy Photo Paper, or Photo
Stickers), 13 x 18 cm / 5" x 7" (Photo Paper
Plus Glossy)*, A4 / 8.5" x 11" (Photo Paper
Plus Glossy A4/Letter, Photo Paper Pro A4 /
Letter, Photo Paper Plus Semi-Gloss A4 /
Letter, Glossy Photo Paper A4 / Letter, Plain
Paper A4 / Letter), Credit Card (Glossy Photo
Paper)
*If using a Canon PictBridge-compatible
camera, you can select it.
Paper type
Default (Photo Paper Plus Glossy), Photo
(Photo Paper Plus Glossy), Fast Photo (Photo
Paper Pro), Plain Paper
Layout
Default (Borderless), Borderless, Bordered, 2up/4-up/9-up/16-up*
*When 4" x 6" is selected from "Paper Size",
these options may be available in "Layout".
For details on "Layout", see Quick Start
Guide.
Trimming
Off (No trimming)
Image optimize
Default (Exif Print), "VIVID"*, "NR" (Noise
Reduction)*, "VIVID+NR"*
*If using a Canon PictBridge-compatible
camera, you can select it.
Date print
Default (Off: No printing)
BJ Printer Driver System Requirements
Use a computer equipped on which
Windows XP, Windows 2000, Windows Me,
Windows 98 can operate.
USB interface or IrDA Ver 1.1
CD-ROM drive
Available hard-disk space for printer
driver installation (including temporary
files)
Windows XP/Windows 2000: 150 MB
Windows Me/Windows 98: 65 MB
USB operation can only be guaranteed on a
PC with pre-installed Windows XP, Windows
2000, Windows Me, or Windows 98.
Use a Macintosh series computer
equipped with USB interface on which Mac
OS X v.10.2.1 or later.
Available hard-disk space for printer
driver installation
Mac OS X v.10.2.1 or later: 340 MB
USB interface
CD-ROM drive
The following functions are not
supported:
- Duplex Printing
- Poster Printing
- Fit to Page Printing
- Booklet Printing
- Reverse Order Printing (except for Mac
OS X v.10.3.x)
- Photo Optimizer Pro
Additional System Requirements for Electric Manual
15MB free hard disk space
Windows: Microsoft® Internet Explorer 5.0 or later
Macintosh: Microsoft® Internet Explprer 5.0 or later, Safari 1.0 or later
Index
ABCDEFGHILMNOPQRSTUVW
A
About Ink
AC Adapter Connector
Add to Profiles
Aligning the Print Head
Amount of Extension (Printer Driver Functions (Macintosh))
Amount of Extension (Printer Driver Functions (Windows))
Auto Power Off Setting (BJ Printer Utility (Macintosh))
Auto Power (Printer Driver Functions (Windows))
Auto Sheet Feeder
Automatic Image Optimize (Macintosh)
Automatic Image Optimize (Windows)
B
Background
Background first page only
Background printing
Battery Level Information
BJ Printer Utility
BJ Status Monitor (BJ Status Monitor Functions)
BJ Status Monitor (Problems Relating to Windows)
Bluetooth Settings (Macintosh)
Bluetooth Settings (Windows)
Bluetooth unit connector
Booklet Printing
Border
Borderless Printing (Photo Printing Dialog (Macintosh))
Borderless Printing (Photo Printing Dialog (Windows))
Borderless Printing (PictBridge Dialog (Macintosh))
Borderless Printing (PictBridge Dialog (Windows))
Borderless Printing (Printer Driver Functions (Macintosh))
Borderless Printing (Printer Driver Functions (Windows))
Bottom Plate Cleaning (BJ Printer Utility (Macintosh))
Bottom Plate Cleaning (Printer Driver Functions (Windows))
Brightness
C
Change the print data size to match the port.
Charger Connector
Cleaning (BJ Printer Utility (Macintosh))
Cleaning (Printer Driver Functions (Windows))
Cleaning the Inside of the Printer
Collate
Collated
Color Adjustment
Color Balance
Color Conversion
Color Correction
Compatible Media Types
Copies
Custom Settings (BJ Printer Utility (Macintosh))
Custom Settings (Printer Driver Functions (Windows))
D
Deep Cleaning (BJ Printer Utility (Macintosh))
Deep Cleaning (Print Head Deep Cleaning)
Deep Cleaning (Printer Driver Functions (Windows))
Define Stamp
Delete (Printer Driver Functions (Macintosh))
Delete (Printer Driver Functions (Windows))
Deleting Selected Printers
Description
Details
Digital camera
Digital video camcorder
Direct Print Port
Do not use quiet mode
Document Print Settings (Macintosh)
Document Print Settings (Windows)
Duplex Printing
Duplicate
E
Easy-PhotoPrint
Effects Tab
Envelopes
Error Message
Examining the Nozzle Check Pattern
F
Fit-to-Page Printing
Format for
G
Glossy Photo Paper GP-401
Grayscale Printing (Printer Driver Functions (Macintosh))
Grayscale Printing (Printer Driver Functions (Windows))
H
Halftoning
High Resolution Paper HR-101N
I
Image Optimizer
Infrared / Bluetooth connection Print Settings (Macintosh)
Infrared / Bluetooth connection Print Settings (Windows)
Ink Counter Reset (Printer Driver Functions (Macintosh))
Ink Counter Reset (Printer Driver Functions (Windows))
Ink Drying Wait Time
Ink Level
Ink Tank
Ink Usage Control
Intensity
IrDA Interface Port
L
Language (Option Setting Dialog (Macintosh))
Language (Option Setting Dialog (Windows))
Layout (Document Printing Dialog (Macintosh))
Layout (Document Printing Dialog (Windows))
Layout (Photo Printing Dialog (Macintosh))
Layout (Photo Printing Dialog (Windows))
Layout Direction
Low Ink Warning Setting (How Low Ink Warning Setting Works)
Low Ink Warning Setting (Printer Driver Functions (Windows))
M
Main Tab
Maintenance Tab
Margin
Matte Photo Paper MP-101
Media Type (Document Printing Dialog (Macintosh))
Media Type (Document Printing Dialog (Windows))
Media Type (Photo Printing Dialog (Macintosh))
Media Type (Photo Printing Dialog (Windows))
Media Type (PictBridge Dialog (Macintosh))
Media Type (PictBridge Dialog (Windows))
Media Type (Printer Driver Functions (Macintosh))
Media Type (Printer Driver Functions (Windows))
Monochrome Effects (Printer Driver Functions (Macintosh))
Monochrome Effects (Printer Driver Functions (Windows))
N
New
Normal-size Printing
Nozzle Check (BJ Printer Utility (Macintosh))
Nozzle Check (Printer Driver Functions (Windows))
O
Opening the Printer Properties Dialog Box
Operation Panel
Orientation (Printer Driver Functions (Macintosh))
Orientation (Printer Driver Functions (Windows))
P
Page Attributes Summary
Page Layout Printing
Page Setup Tab
Page Size
Pages
Pages per Sheet
Paper Guide
Paper Output Slot Cover
Paper Size (Custom Paper Size (Macintosh))
Paper Size (Document Printing Dialog (Macintosh))
Paper Size (Document Printing Dialog (Windows))
Paper Size (Page Attributes (Macintosh))
Paper Size (Photo Printing Dialog (Macintosh))
Paper Size (Photo Printing Dialog (Windows))
Paper Size (PictBridge Dialog (Macintosh))
Paper Size (PictBridge Dialog (Windows))
Paper Support
Paper Thickness Lever
Photo Noise Reduction (Printer Driver Functions (Macintosh))
Photo Noise Reduction (Printer Driver Functions (Windows))
Photo Optimizer PRO
Photo Paper Plus Double Sided PP-101D
Photo Paper Plus Glossy PP-101
Photo Paper Plus Semi-Gloss SG-101
Photo Paper Pro PR-101
Photo Print Settings (Macintosh)
Photo Print Settings (Windows)
Photo Stickers PS-101
PictBridge Print Settings (Macintosh)
PictBridge Print Settings (Windows)
Place stamp over text
Poster Printing
POWER Button
POWER Lamp
Power Off
Presets
Preview
Preview before printing
Print
Print Advisor
Print Center
Print Head Alignment (BJ Printer Utility (Macintosh))
Print Head Alignment (Printer Driver Functions (Windows))
Print Head Cleaning
Print Head Cover
Print Head Deep Cleaning
Print Head Holder
Print Head Lock Lever
Print Mode
Print Options
Print Quality (Printer Driver Functions (Macintosh))
Print Quality (Printer Driver Functions (Windows))
Print Type
Printable area
Printer
Printer Driver (Macintosh)
Printer Driver (Windows)
Printer Margins
Printer Setup Utility
Printing Area
Printing Photographs
Printing Profiles
Printing the Nozzle Check Pattern
Printing Type (Document Printing Dialog (Macintosh))
Printing Type (Document Printing Dialog (Windows))
Printing Type (Photo Printing Dialog (Macintosh))
Printing Type (Photo Printing Dialog (Windows))
Printing Type (PictBridge Dialog (Macintosh))
Printing Type (PictBridge Dialog (Windows))
Printing Type (Printer Driver Functions)
Profiles Tab
Q
Quartz Filter
Quiet Mode (BJ Printer Utility (Macintosh))
Quiet Mode (Printer Driver Functions (Windows))
R
Remaining Battery Level
Remaining Ink Level Indicator Setting
Replacing an Ink Tank
RESUME/CANCEL Button
Retrieve from Profiles
Reverse Order
Reverse page order
S
Safety Precautions
Save
Save as File
Save as PDF
Save Black Ink
Scale
Scaled Printing
Select Background
Setup Utility (Macintosh)
Setup Utility (Windows)
Simulate Illustration (Printer Driver Functions (Macintosh))
Simulate Illustration (Printer Driver Functions (Windows))
Specifications
Specify Margin
Stamp
Stamp first page only
Stamp/Background Tab
Staple Side
Stapling Side
Start Status Monitor
Summary (Page Setup Dialog Box (Macintosh))
Summary (Print Dialog Box (Macintosh))
T
Time difference with GMT (Option Setting Dialog (Macintosh))
Time difference with GMT (Option Setting Dialog (Windows))
Transparencies CF-102
Transporting Printer
Traveling Abroad with the Printer
T-Shirt Transfers TR-301
U
Uninstalling Printer Drivers
Uninstalling the On-screen Manual
Update (Battery Level Information)
Update (Ink Level Information)
USB Port
Use Composite Black
Use quiet mode
Use quiet mode within specified time
V
Vivid Photo (Printer Driver Functions (Macintosh))
Vivid Photo (Printer Driver Functions (Windows))
W
When Printing Becomes Faint or Colors are Incorrect
Index
Table of Contents
How to Use This Manual
Safety Precautions
Printer Parts and Their Function
Front View
Printer Parts and Their Function
Front View
Operation Panel
Rear View
Inside the Printer
Further Printing Techniques
Printing Media
Checking the Status of the Printer
Routine Maintenance
Using the Canon iP90 Setup Utility
Troubleshooting
Appendix
Index
(1) Paper Support
Open before printing to support paper.
(2) Paper Guide
Contents
FAQs
When loading paper, ensure the left edge just touches this guide.
To move the Paper Guide, slide it in the appropriate direction.
(3) Auto Sheet Feeder
Load paper here. Paper feeds automatically, one sheet at a time.
(4) Direct Print Port
Connects the printer to a Canon digital camera/PictBridge compliant camera.
(5) IrDA Interface Port
Connects the printer to a computer through a wireless IrDA connection.
(6) Print Head Cover
Open to replace the ink tanks.
(7) Paper Output Slot Cover
Printed paper ejects here.
(8) Paper Thickness Lever
Adjusts the gap between the Print Head and surface of the printing paper. Move the lever to the correct
position for the media in use.
(9) Operation Panel
See Operation Panel
Index
Table of Contents
How to Use This Manual
Safety Precautions
Contents
FAQs
Further Printing Techniques
Printing Photographs
Printer Parts and Their Function
Further Printing Techniques
Printing Photographs
Printer Driver Functions
Using Easy-PhotoPrint allows you to make borderless (full page) prints from images you took with a digital
camera.
Printer Driver Functions
BJ Printer Utility
Printing Media
Checking the Status of the Printer
Routine Maintenance
Using the Canon iP90 Setup Utility
Troubleshooting
Appendix
Index
Easy-PhotoPrint supports Exif Print.
The image captured with an Exif Print-compliant digital camera can be optimized using data, such as camera
settings (white balance, exposure time), etc. stored at the time of shooting, yielding extremely high-quality
prints.
The photo applications are included in the Setup Software & User's Guide CD-ROM that comes with the
printer. You can install the Easy-PhotoPrint program. Just go to your setup guide and follow the
instructions.
This chapter describes the steps used to print borderless photos with Easy-PhotoPrint under Windows
XP. The steps used under Macintosh are basically the same.
You can edit images taken with a digital camera by using the Red-Eye Correction and Digital Face
Smoothing functions, and then print them with Easy-PhotoPrint.
Easy-PhotoPrint can handle only JPEG files (file name extension: .jpg and .jpeg).
Note Media Types Suitable for Borderless Printing
Photo Paper Plus Glossy (Letter/A4, 4" x 6" / 101.6 x 152.4 mm, 5" x 7" / 127.0 x 177.8 mm)
Photo Paper Plus Semi-Gloss (Letter/A4, 4" x 6" / 101.6 x 152.4 mm)
Photo Paper Plus Double Sided (Letter/A4, 5" x 7" / 127.0 x 177.8 mm)
Photo Paper Pro (Letter/A4, 4" x 6" / 101.6 x 152.4 mm)
Matte PhotoPaper (Letter/A4)
Glossy Photo Paper (Letter/A4, 4" x 6" / 101.6 x 152.4 mm, Credit Card)
Printing Photographs
1 Start Easy-PhotoPrint.
(1) Store the photographs you took with your digital camera in a folder on the hard disk.
This section describes how to print photographs stored in the folder on the hard disk.
(2)
Click Start , select All Programs (or Programs ), Canon Utilities , Easy-PhotoPrint , and then EasyPhotoPrint.
Double-click the hard disk icon, the Applications folder, the Easy-PhotoPrint folder, and then doubleclick the Easy-PhotoPrint icon.
The
Image Selection sheet is displayed.
2 Select photographs.
(1) Select the folder containing the photograph you want to print.
All photographs in the selected folder are displayed.
*1 Guidance
*2 Thumbnail
*3 Folder window
(2) Click [
] on the thumbnail of the photograph you want to print and specify the number of copies.
*1 Increases the number of copies.
*2 Displays the specified number of copies.
*3 Decreases the number of copies.
Note
Clicking the Correct/Enhance button on the
Image Selection tab allows you to edit
and enhance the photos to be printed. For more information, refer to the Photo
Application Guide.
3 Select the paper.
(1) Click the
Paper Selection tab.
(2) Select the size of the paper you use from Paper Size.
(3) Select the type of the paper you use from Media Type.
4 Select the layout.
(1) Click the
Layout/Print tab.
(2) Select Borderless (full).
Note
Clicking the Correct/Enhance button on the
Layout/Print tab allows you to edit
and enhance the photos to be printed. For more information, refer to the Photo
Application Guide.
(3) Load the media specified in the
Paper Selection tab.
(4)
Click Print.
Click Print. When the confirmation message is displayed, click OK. Click Print in the Print dialog
box.
Index
Table of Contents
How to Use This Manual
Safety Precautions
Contents
FAQs
Printing Media
Compatible Media Types
Printer Parts and Their Function
Further Printing Techniques
Printing Media
Compatible Media Types
Photo Paper Pro PR-101
You can use the following types of paper and other media.
Photo Paper Plus Glossy PP-101
Photo Paper Plus Semi-Gloss SG-101
Matte Photo Paper MP-101
Glossy Photo Paper GP-401
High Resolution Paper HR-101N
Photo Paper Plus Double Sided PP-101D
T-Shirt Transfers TR-301
Transparencies CF-102
Photo Stickers PS-101
Envelopes
Checking the Status of the Printer
Size
Standard paper: From A5 size (148.0 x 210.0 mm / 5.83 x 8.27 in) to legal size (215.9 x 355.6 mm / 8.5
x 14.0 in)
Non-standard paper: From 54.0 x 86.0 mm to 215.9 x 584.2 mm (From 2.13 x 3.39 in to 8.5 x 23.0 in)
Others: Envelopes (European DL and US Com. #10)
Important Do not use the following types of paper. Using such paper will not only produce unsatisfactory
results, but can also cause the printer to jam or malfunction.
Routine Maintenance
Folded, curled or wrinkled paper
Using the Canon iP90 Setup Utility
Damp paper
Troubleshooting
Appendix
Paper that is too thin (less than 64 gsm / 17 lb)
Index
Paper that is too thick *(more than 105 gsm / 28 lb)
Picture postcards
Postcards with an affixed photo or sticker
Envelopes with double flap
Envelopes with pressure seals
Envelopes with an embossed or treated surface
* non-Canon branded paper
Weight
64 to 105 gsm (17 to 28 lb)
Do not use paper heavier than this (except for supported Canon-brand media), as it could jam in the paper.
Types
The following types of media can be used.
For more information about the media and the printing methods, refer to the specific sections.
Plain paper
Refer to your setup guide for instructions on how to print with plain papers.
See Photo Paper Pro PR-101
See Photo Paper Plus Glossy PP-101
See Photo Paper Plus Semi-Gloss SG-101
See Matte Photo Paper MP-101
See Glossy Photo Paper GP-401
See High Resolution Paper HR-101N
See Photo Paper Plus Double Sided PP-101D
See T-Shirt Transfers TR-301
See Transparencies CF-102
See Photo Stickers PS-101
See Envelopes
Important Put unused papers back into the package, and store them avoiding high temperature, humid and
direct sunlight.
Index
Table of Contents
Contents
FAQs
Checking the Status of the Printer
How to Use This Manual
Safety Precautions
Printer Parts and Their Function
Further Printing Techniques
Printing Media
BJ Status Monitor Functions
Checking the Status of the Printer
BJ Status Monitor Functions
Printer Setup Utility (or Print Center)
Routine Maintenance
Using the Canon iP90 Setup Utility
Troubleshooting
Appendix
Index
The BJ Status Monitor allows you to check the status of the printer.
If an error occurs, the status monitor indicates the nature of the error and suggests an appropriate solution.
The status monitor also checks the ink tanks or battery and displays a warning message when the ink or battery
charge level is low.
Note In Windows XP or Windows 2000
The BJ Status Monitor screen is not displayed when infrared communications are used.
Launching the BJ Status Monitor
The BJ Status Monitor launches automatically when data is sent to the printer. When launched, the BJ Status
Monitor appears as an icon on the Task Bar.
1 Click the Canon iP90 button (or BJ Status Monitor) on the Task Bar.
The BJ Status Monitor appears.
Note To open the BJ Status Monitor when the printer is not printing, click the Maintenance tab in the
Printer Properties dialog box and click the Start Status Monitor button.
See Opening the Printer Properties Dialog Box
When errors occur
The error message dialog is automatically displayed when an error occurs, e.g. if the printer runs out of
paper or if the ink is low.
In such cases, take the appropriate action as described.
Note For details on the BJ Status Monitor, select the Help menu and click on the topic of interest.
Index
Table of Contents
How to Use This Manual
Safety Precautions
Contents
FAQs
Routine Maintenance
When Printing Becomes Faint or Colors are Incorrect
Printer Parts and Their Function
Further Printing Techniques
Printing Media
Checking the Status of the Printer
Routine Maintenance
When Printing Becomes Faint or Colors
are Incorrect
Printing the Nozzle Check Pattern
When printing becomes faint or colors are incorrect, the Print Head Nozzles are probably clogged. Follow the procedures below to clean the
nozzles.
Note Before Performing Maintenance
Print Head Cleaning
Print Head Deep Cleaning
Push the
Aligning the Print Head
on the ink tank to ensure that it is firmly snapped into place.
See Replacing an Ink Tank
Replacing an Ink Tank
Using the Canon iP90 Setup Utility
Setting the Print Quality setting to High for Windows or Fine for Macintosh with the printer driver may improve the print quality.
Troubleshooting
See Main Tab (Windows), Quality & Media (Print Dialog Box) (Macintosh)
Appendix
Index
Step 1
See Printing the Nozzle Check Pattern
After Print Head Cleaning,
print the nozzle check pattern.
(1) If the pattern is printed normally, click Exit.
(2) If the print quality is poor, perform Print Head Cleaning.
Step 2
See Print Head Cleaning
If the problem remains after performing
Print Head Cleaning three times
Step 3
See Print Head Deep Cleaning
If the problem still remains
Step 4
See Replacing an Ink Tank
Note
If ruled lines are printed misaligned when printed, adjust the Print Head position.
See Aligning the Print Head
If ink tank replacement does not resolve the problem, a Print Head may be worn out. In this case, contact a Canon service
representative.
Index
Table of Contents
How to Use This Manual
Safety Precautions
Contents
Using the Canon iP90 Setup Utility
Function of the Canon iP90 Setup Utility
Printer Parts and Their Function
Further Printing Techniques
Printing Media
Checking the Status of the Printer
Routine Maintenance
Using the Canon iP90 Setup Utility
The Canon iP90 Setup Utility is used to set up the media type, size and print layout to print via infrared
communication or PictBridge compliant devices.
Function of the Canon iP90 Setup Utility
Starting the Canon iP90 Setup Utility
Installing the printer driver using the Easy Install button in the Setup Software & User's Guide CD-ROM will
automatically install the Canon iP90 Setup Utility.
Setup Utility Functions
Setup Utility Functions
Troubleshooting
Appendix
Note The Canon iP90 Setup Utility can also set up the print setting via Bluetooth communication.
For more information on settings for printing via Bluetooth communication, refer to the Bluetooth
Unit BU-10 User's Guide.
Index
Starting the Canon iP90 Setup Utility
1 Check that the printer is connected with the computer by USB cable, and that the
POWER Lamp is on.
2 Click Start and select All Programs , Canon Utilities , Canon iP90 Setup Utility and
FAQs
Canon iP90 Setup Utility.
Or, double-click the Canon iP90 Setup Utility icon on the desktop.
3 Click the mode setting tab on the screen.
(1) Select to change the default settings when you print from a PictBridge compliant device.
(2) Select to set up the print settings when you print via an infrared and Bluetooth communication.
Note
About the settings for printing with PictBridge.
See PictBridge Print Settings
About the settings for printing with infrared communication.
See Infrared / Bluetooth Connection Print Settings
1 Check that the printer is connected with the computer by USB cable, and that the
POWER Lamp is on.
2 Double-Click the Applications folder in the hard disk where the printer driver is
installed, then Canon iP90 Setup Utility folder, and then Canon iP90 Setup Utility icon.
3 Click the mode setting tab on the screen.
(1) Select to change the default settings when you print from a PictBridge compliant device.
(2) Select to set up the print settings when you print via an infrared and Bluetooth communication.
Note
About the settings for printing with PictBridge.
See PictBridge Print Settings
About the settings for printing with infrared communication.
See Infrared / Bluetooth Connection Print Settings
Index
Table of Contents
How to Use This Manual
Safety Precautions
Contents
FAQs
Troubleshooting
Cannot Install Printer Driver
Printer Parts and Their Function
Further Printing Techniques
Printing Media
Checking the Status of the Printer
Routine Maintenance
Ensure the installation procedure
Using the Canon iP90 Setup Utility
Close any other applications, including anti-virus software, before installation
Troubleshooting
Cannot Install Printer Driver
Print Quality is Poor
Printer Does Not Start or Stops During
Print Jobs
Paper Does Not Feed Properly or Paper
Jams
If the Installer for the printer driver does not start up automatically when you insert the Setup
Software & User's Guide CD-ROM, click Start, select My Computer and then double-click the CDROM icon
Ensure that there are no problems with the Setup Software & User's Guide CD-ROM
The POWER Lamp Flashes Orange
An Error Message is Displayed on the
Screen
Cannot Print Properly from the Digital
Camera
Cannot Print Properly through Infrared
Communication
Ensure the installation procedure
Install the printer driver following the procedures described in your setup guide.
If the printer driver was not installed correctly, delete the printer driver and restart your computer. Try to
reinstall the printer driver.
See Uninstalling Printer Drivers
Problems Relating to Windows
Appendix
Index
Note If the Installer was forcibly terminated due to an error in Windows, Windows may be
unstable and this will prevent the printer driver from being installed.
Close any other applications, including anti-virus software, before
installation
Sometimes the printer driver cannot be installed because another application is running.
If the Installer for the printer driver does not start up automatically
when you insert the Setup Software & User's Guide CD-ROM, click Start,
select My Computer and then double-click the CD-ROM icon
For non-Windows XP users, open the My Computer window and then double-click the CD-ROM icon.
Note If you are typing in the file name, you must specify the CD-ROM drive letter and the
installation program ("Msetup4.exe"). The CD-ROM drive letter is computer dependent.
Ensure that there are no problems with the Setup Software & User's
Guide CD-ROM
In Windows, use Explorer to ensure that the CD-ROM can be read. In Macintosh, check that the CD-ROM
icon is visible. If there is a problem with the CD-ROM, contact a Canon service representative.
Index
Table of Contents
How to Use This Manual
Safety Precautions
Contents
FAQs
Appendix
Printing Area
Printer Parts and Their Function
Further Printing Techniques
Printing Media
Checking the Status of the Printer
Routine Maintenance
Using the Canon iP90 Setup Utility
Troubleshooting
Appendix
To ensure the best print quality, the printer allows a margin along each edge of media. The actual printable area
will be the area without these margins. By selecting Borderless Printing*, printing with no margins is possible.
* This is available in A4/Letter, 4" x 6" /101.6 x 152.4 mm, 5" x 7" / 127.0 x 177.8 mm and Credit Card paper
size.
Printing Area
Deleting Selected Printers
Uninstalling Printer Drivers
Uninstalling the On-screen Manual
Cleaning the Inside of the Printer
Recommended printing Canon recommends that you print within this area. (
)
area (dark blue):
Printable area (light blue): The area where it is possible to print. However, printing in this area can adversely
)
affect the print quality or the paper feed precision. (
Transporting Printer
Traveling Abroad with the Printer
See A4, B5, A5, 4" x 6", 5" x 7", Credit Card
Specifications
Index
See Letter, Legal
See Envelopes
A4, B5, A5, 4" x 6", 5" x 7", Credit Card
Size
Printable Area (width x height)
A4
203.2 x 289.0 mm / 8.0 x 11.4 in
B5
175.2 x 249.0 mm / 6.9 x 9.8 in
A5
141.2 x 202.0 mm / 5.6 x 7.9 in
4" x 6" / 101.6 x 152.4 mm 94.8 x 144.4 mm / 3.7 x 5.7 in
5" x 7" / 127.0 x 177.8 mm 120.2 x 169.8 mm / 4.7 x 6.7 in
Credit Card
47.2 x 78.0 mm / 1.86 x 3.07 in
Note When Printing on Photo Paper Pro PR-101, Glossy Photo Paper GP-401, Photo Paper
Plus Glossy PP-101, Photo Paper Plus Semi-Gloss SG-101, Matte Photo Paper MP-101
and Photo Paper Plus Double Sided PP-101D, selection of "Borderless Printing" enables
you to make prints with no margins.
However, Borderless Printing may reduce print quality on the top and bottom edges of the
paper or cause it to become smudged.
Recommended printing area
Printable area
Letter, Legal
Size
Printable Area (width x height)
Letter 203.2 x 271.4 mm / 8.0 x 10.7 in
Legal 203.2 x 347.6 mm / 8.0 x 13.7 in
Note When Printing on Photo Paper Pro PR-101, Glossy Photo Paper GP-401, Photo Paper
Plus Glossy PP-101, Photo Paper Plus Semi-Gloss SG-101, Matte Photo Paper MP-101
and Photo Paper Plus Double Sided PP-101D, selection of "Borderless Printing" enables
you to make prints with no margins.
However, Borderless Printing may cause the top and bottom edges of paper to decrease in
print quality or become soiled
(Under certain circumstances, the edges of the reverse side may be smudged).
Recommended printing area
Printable area
Envelopes
Size
Printable Area (width x height)
European DL 190.5 x 103.2 mm / 7.5 x 4.1 in
US Com. #10 211.8 x 97.97 mm / 8.34x 3.86 in
Printable area
FAQS
Printing is Blurred/Colors are Wrong
Printer Moves But The Ink Is Not Ejected
Cannot Install Printer Driver
Printing Does Not Start
The POWER Lamp Flashes Orange
Error Writing/Output to USBnnn or MPUSBPRNnn
Colors are Unclear
Paper Jams
Paper Does Not Feed Properly
White Streaks
Index
Table of Contents
How to Use This Manual
Safety Precautions
Printer Parts and Their Function
Further Printing Techniques
Printing Media
Checking the Status of the Printer
Routine Maintenance
Contents
FAQs
How to Use This Manual
This manual is written in HTML (Hyper Text Markup Language), the language used to display texts and images
on Worldwide Web Pages.
Various Web browsers are available for seeing HTML view and therefore the same text or image may appear
different depending on the browser you use. This manual has been prepared on the assumption that it would be
displayed and read under the following conditions:
Using the Canon iP90 Setup Utility
Troubleshooting
Appendix
Index
Web browser: Microsoft® Internet Explorer 5.0 or later.
Web browser screen: Full screen
Resolution of display (Desktop): 800 x 600 pixels or above
Color amount of display: 16 bit or more
Web browser: Microsoft® Internet Explorer 5.0 or later, Safari 1.0 or later.
Web browser screen: Full screen
Resolution of display (Desktop): 800 x 600 pixels or above
Color amount of display: 32,000 or more
This manual refers to Windows XP Service Pack 2 (hereafter, called Windows XP SP2) and Mac OS X v.10.3.x
operation. The operations may vary slightly depending on your operating system.
Note The Bluetooth unit is not available to some regions due to the law of the countries or the regulations.
For details, countact your local Canon service representative.
How to Read This Manual
Let's take a look at how to read this manual. For instructions on how to use the browser, refer to the User's Guide
or Help topics of the browser you use.
Manual Configuration
This manual consists of three screens: Contents, Menu, and Description screen.
(1) Contents screen
(2) Menu screen
(3) Description screen
Using The Contents Screen
Clicking a title on the Contents screen will display the associated title page on the Description screen.
The title with the mark is displayed in two layers. Clicking the
and the titles in the lower layer displayed.
button will change the mark to the
Using The Menu Screen
(1) Index: Clicking this option will display a list of indexes in the Description screen.
(2) Contents: Clicking this option will display a complete contents of titles of this manual.
(3) FAQs: Clicking this option will display frequently asked questions.
Using the Description Screen
(1) Clicking the character string with a blue underline allows you to jump to the associated page.
(2)
: Clicking this button allows you to jump to the previous page.
(3)
: Clicking this button allows you to jump to the next page.
(4)
: Clicking this button allows you to jump to the beginning of this page.
Trademarks
Canon is a registered trademark of Canon Inc.
PIXMA is a trademark of Canon Inc.
PhotoRecord is a trademark of Canon Information System Research Australia.
Macintosh, Mac and the Mac logo are registered trademarks of Apple Computer, Inc., registered in the
U.S. and other countries.
Microsoft ® and Windows ® are registered trademarks of Microsoft Corporation in the U.S. and other
countries.
IrDA Feature Trademark and IrDA Logo are owned by the Infrared Data Association.
The Bluetooth ® word mark and logos are owned by the Bluetooth SIG, Inc. and any use of such marks
by Canon, Inc. is under licence.
All other product and brand names are trademarks of their respective owners.