1
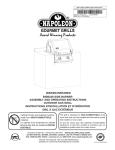
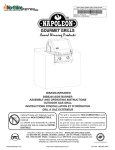
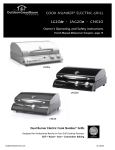
Cook Number Grill
™
CNG-TRAVELER Gas GRill
OWNER’S MANUAL
• Assembly
• Operation
• Maintenance
GAS-FIRED
LISTED
CAUTION: DO NOT DISCARD THIS MANUAL
NOTICE TO INSTALLER AND CONSUMER
• Read, understand and follow
these instructions for safe
installation and operation.
WARNING
If the information in these instructions
is not followed exactly, a fire or explosion may result causing property damage, personal injury or death.
WARNING
1. Do not store or use gasoline or other
flammable liquids or vapors in the vicinity of this or any other appliance.
2. An LP cylinder not connected for
use shall not be stored in the vicinity of this or any other appliance.
DANGER
If you smell gas:
1. Shut off gas to the appliance.
2. Extinguish any open flame.
3. Open lid.
4. If odor continues keep away from the
appliance and immediately call your gas
supplier or your fire department.
• These instructions must be left with the
consumer and the consumer should
retain them for future reference.
D
DISO NO
CA T
RD
Read the following instructions carefully and be sure your grill is properly installed, assembled and maintained.
Failure to follow these instructions may
result in serious bodily injury and/or
property damage. If you have questions
concerning assembly or operation, consult your dealer, gas appliance service
person or your LP gas company.
This outdoor cooking gas appliance is
not intended to be installed in or on recreational vehicles and/or boats.
Installation and service must be performed
by a qualified installer, service agency, or
the gas supplier. In the Commonwealth of
Massachusetts installation must be performed by a licensed plumber or gas fitter.
The Outdoor GreatRoom Company • Cook Number Grill CNG-TRAVELER Gas Grill • Rev. A
1
780-920A 5/08
TABLE OF CONTENTS
WARRANTY ................................................................................... 3
SAFETY INSTRUCTIONS ............................................................. 4
SERVICE PARTS LIST................................................................... 6
ASSEMBLY INSTRUCTIONS......................................................... 8
LIGHTING INSTRUCTIONS..........................................................11
COOKING INSTRUCTIONS ........................................................ 12
COOK NUMBER SYSTEM........................................................... 13
CLEANING AND MAINTENANCE INSTRUCTIONS ................... 15
CONTACT INFORMATION........................................................... 17
The Outdoor GreatRoom Company • Cook Number Grill CNG-TRAVELER Gas Grill • Rev. A
2
WARRANTY
Cook Number Grill CNG-TRAVELER Gas Grill
Limited Lifetime Warranty
The Outdoor GreatRoom Company extends the following warranty for Cook Number Grill - CNG-TRAVELER
Gas Grill used in the United States of America or Canada. Dealers and employees of The Outdoor GreatRoom
Company have no authority to make any warranty or authorize any remedies in addition to or inconsistent with the
terms of this warranty. This warranty gives you specific legal rights. You may also have other rights that vary from
state to state.
The Outdoor GreatRoom Company warrants that this Cook Number Grill - CNG-TRAVELER Gas Grill (the “Product”) will be free from defects in material and workmanship as follows:
• Stainless steel parts - for the life of the Product.
• All other parts - for a period of one year from the Product’s date of purchase.
This warranty is subject to the conditions, exclusions and limitations described below.
This warranty applies only to the original owner of the Product and is nontransferable. Fire Stone’s obligation under
this warranty does not extend to damages resulting from (1) assembly, operation or maintenance of the Product not
in accordance with the Installation/Assembly Instructions, Operating Instructions and the Listing Agency Identification Label furnished with the Product; (2) installation or use which does not comply with local building codes and ordinances; (3) shipping, improper handling, improper operation, abuse, misuse, accident or unworkmanlike repairs;
(4) use of fuels other than those specified in the Operating Instructions; (5) installation or use of components not
supplied with the Product or any other components not expressly authorized and approved in writing by Fire Stone;
and/or (6) modification of the Product not expressly authorized and approved in writing by Fire Stone. Any of the
circumstances described in the previous sentence voids this warranty. This warranty is void if the Product or any
component has been removed, repaired or replaced before The Outdoor GreatRoom Company has been afforded
a reasonable opportunity to inspect the Product. This warranty does not cover LP tanks.
This warranty is limited to the replacement of defective components and The Outdoor GreatRoom Company may
fully discharge its obligations under this warranty by replacing, at its discretion, the defective components. The
Outdoor GreatRoom Company will provide replacement parts at no charge and will pay reasonable and necessary
freight costs related to replacing defective components under this warranty. The maximum amount recoverable
under this warranty is limited to the purchase price of the Product and, if The Outdoor GreatRoom Company is
unable to provide replacement components in an expedient and cost-effective manner, The Outdoor GreatRoom
Company may discharge all obligations under this warranty by refunding the purchase price of the Product.
EXCEPT TO THE EXTENT PROVIDED BY LAW, The Outdoor GreatRoom Company MAKES NO EXPRESS WARRANTIES OTHER THAN THE WARRANTY EXPRESSED HEREIN. THE DURATION OF ANY IMPLIED WARRANTY IS LIMITED TO THE DURATION OF THE WARRANTY SPECIFIED ABOVE. IN NO EVENT SHALL The
Outdoor GreatRoom Company BE LIABLE FOR ANY INCIDENTAL OR CONSEQUENTIAL DAMAGES CAUSED
BY DEFECTS IN THE PRODUCT. Some states do not allow limitations on how long an implied warranty lasts, or
do not allow exclusion or limitation of incidental or consequential damages, so these limitations may not apply to
you.
To obtain service under this warranty, you must:
1. Obtain service and/or parts at any authorized dealer, or send written notice of the claimed condition to The
Outdoor GreatRoom Company, 12400 Portland Ave. So., Burnsville, MN 55337.
2. Provide documentary proof that you are the original owner of the Product.
3. Provide The Outdoor GreatRoom Company reasonable opportunity to investigate the claim, including reasonable opportunity to inspect the Product prior to any repair or replacement work and before the Product or any
component of the Product has been removed.
The Outdoor GreatRoom Company • Cook Number Grill CNG-TRAVELER Gas Grill • Rev. A
3
Read These Safety Instructions
WARNING
Fire Risk
Explosion Risk
Failure to comply with these instructions could
result in a fire or explosion which could cause
property damage, serious bodily injury or death.
WARNING
Combustion by-products produced when using this
product contain chemicals known to the State of California to cause cancer, birth defects, or other reproductive harm.
Grill Installation Codes
This grill has been tested in accordance with ANSI Z21.582005/CSA 1.6-2005 and ANSI Z21.58a-2006/CSA1.6a2006. The installation of this gas grill must conform with local codes or, in the absence of local codes with the National
Fuel Gas Code, ANSI Z223.1/NFPA54 (In the USA) or Natural Gas and Propane Installation Code, CSA B149.1 or
Propane Storage and Handling Code, B149.2 (in Canada).
Never use this gas grill in a garage, porch, shed, breezeway or any other enclosed area. The gas grill is to be used
outdoors only, with at least 6 inch clearance from the back
and sides of the grill to any combustible surface. The gas
grill shall not be located under overhead combustible construction. Do not obstruct the flow of combustion or ventilation air around the gas grill housing. Do not block the
bottom air vents.
This outdoor gas grill is not intended to be installed in or on
recreational vehicles and/or boats.
Correct LPG Cylinder Use
This gas grill is designed for use with a standard disposable 1 lb. Liquid Propane Gas (LPG) cylinder, not included
with grill box. Never connect the gas grill to an LPG cylinder that exceeds this capacity. The LPG cylinder must be
an “OPD” gas cylinder which offers an Overfill Prevention
Device. This safety feature prevents the cylinder from being overfilled which can cause malfunction of the LPG cylinder and/or grill.
The LPG cylinder must be constructed and marked in accordance with the Specifications for LP-Gas Cylinders of the
U.S. Department of Transportation (DOT) or the National
Standard of Canada, CAN/CSA-B339, Cylinders, Spheres
and Tubes for Transportation of Dangerous Goods: and
Commission, as applicable.
In addition:
1. The LPG cylinder must also be provided with a listed
overfilling prevention device, and a cylinder connection device compatible with the connection for outdoor
cooking appliances.
2. The LPG cylinder used must have a collar to protect the
cylinder valve.
3. The cylinder supply system must be arranged for vapor
withdrawal. See Figure 5 on page 9.
4. Never connect an unregulated LPG cylinder to the gas
grill.
5. Do not store a spare LP-gas cylinder under or near this
appliance or any other ignition source.
If this information is not followed exactly, a fire
causing death or serious injury may occur.
6. Always keep LPG cylinders in an upright position when
not in use. 7. Do not store (or use) combustible materials, gasoline or
other flammable vapors and liquids in the vicinity of this
gas grill. 8. Do not subject the LPG cylinder to excessive heat.
9. When the gas grill is not in use the LPG cylinder must
be disconnected from the grill. 10. Never store an LPG cylinder indoors. If storing the gas
grill in the garage or other indoor location, always disconnect and remove the LPG cylinder. Cylinders must
be stored outdoors out of the reach of children and
must not be stored in a building, garage or any other
enclosed area.
The Outdoor GreatRoom Company • Cook Number Grill CNG-TRAVELER Gas Grill • Rev. A
4
• Never light the gas grill with the lid closed or before
checking to insure the burner tubes are fully seated over
the gas valve orifices.
• Never allow children to operate the grill. Do not allow
children to play near the grill.
• Never obstruct the flow of combustion and ventilation
air to the grill.
WARNING
Fire Risk
Explosion Risk
A strong gas smell, or the hissing sound of gas indicates a serious problem with the gas grill or the LPG
cylinder.
• Get away from the LPG cylinder.
• Do not try to fix the problem yourself.
• Call the fire department. (Do not call near the LPG cylinder because the telephone is an electrical device.)
Failure to immediately follow the steps listed above
could result in a fire or explosion which could cause
property damage, serious bodily injury or death.
Beware of Spiders
CAUTION: Spiders and small insects occasionally spin
webs or make nests in the grill burner tubes during transit and warehousing. These webs can lead to a gas
flow obstruction which could result in a fire in and
around the burner tubes. This type of fire is known as
a “FLASH-BACK” and can cause serious damage to
the grill and create an unsafe operating condition for the
user.
Although an obstructed burner tube is not the only cause of
“FLASH-BACK”, it is the most common cause.
To reduce the chance of “FLASH-BACK”, clean the
burner tubes before assembling the grill, and at least
once a month in late summer or early fall when spiders are most active. Also perform this burner tube
cleaning procedure if the grill has not been used for an
extended period of time.
The Outdoor GreatRoom Company • Cook Number Grill CNG-TRAVELER Gas Grill • Rev. A
5
How to Order Replacement Parts
CNG-TRAVELER Service Parts List
IMPORTANT: THIS IS DATED INFORMATION. The most current information is located on your dealers VIP site. When
ordering, supply serial and model numbers to ensure correct service parts.
ITEM
DESCRIPTION
PART NUMBER
1
Hood
TRV-HOOD
2
Sear Plate
TRV-SEAR
3
Grill Grid
TRV-GRILL
4
Regulator Tube
TRV-REG
5
Control Panel
TRV-CNTRPAN
6
Electrod
TRV-ELECTRODE
7
To order replacement parts, contact the dealer where the product was purchased.
To obtain the correct replacement part(s) for
this model, please refer to the service parts
list. The following information is required to
assure receipt of correct parts:
• Gas Grill Model Number (see data sticker
on grill)
• Part Number AND Part Description
8
• Quantity of parts needed
9
Items not shown
1
Valve
TRV-VALVE
2
Logic Box
TRV-LOGIC
Important: Keep this assembly and operating instruction manual for convenient referral
and for part replacement.
Important: Use only factory authorized parts.
The use of any unauthorized factory part can
be dangerous and will also void the product
warranty.
The Outdoor GreatRoom Company • Cook Number Grill CNG-TRAVELER Gas Grill • Rev. A
6
Assembly Instructions
Unpacking and Initial Prep Cleaning
Carefully unpack your Cook Number Grill™ and remove
all shipping elements used to protect your grill in transit.
Before you begin, we first recommend removing the Grilling Grate and the Searing Plate and washing them both
with warm soapy water. (See Figure 1).
Searing Plate
2. The gas manifold is factory installed as part of the control panel assembly attached to the front of the grill
cabinet.
3. A 1/2 inch gas flexible tube is factory installed from the
main burner orifice to the BOTTOM fitting on the manifold. Gas flows from the manifold/gas valve through
this flex tube to the burner orifice when the ignitor control knob is operated.
4. Use the 3/4 inch open-end wrench to ensure the flex
tube swivel nuts are tight, but DO NOT over-tighten or
you may strip the threads.
Grilling Grate
WARNING
DO NOT use Teflon tape or sealant on these
gas manifold fittings.
Figure 1
Step 2.
Tools Needed
•
3/4 inch Open-end Wrench
Supplies Needed
•
1 lb. Disposable LPG Cylinder
•
Regulator/gas tube (included with grill)
•
Two “D” size Batteries (Included with grill)
•
Non-corrosive Commercial Leak Check Solution
Step 1. Gas Manifold
Check Batteries
1. Parts/Items Needed: None
2. The battery box, with two “D” size batteries, is factory
installed as part of the control panel assembly attached
to the front of the grill cabinet. (See Figure 3).
“D” Size Battery
Battery Box
1. Parts/Items
Needed: 3/4 inch
open-end wrench.
(See Figure 2).
Figure 3
3. Check the batteries to ensure they are firmly secured
in the grill’s battery box. Push the negative end of the
battery (flat end) against the spring and snap the battery up into the battery box.
Figure 2
The Outdoor GreatRoom Company • Cook Number Grill CNG-TRAVELER Gas Grill • Rev. A
7
Step 3.
Check Grease Drawer
1. Parts/Items Needed: None
2. Pull the grease drawer out of the grill at the left front
corner. Check that the aluminum tray is secured in the
brackets underneath the drawer and slide the drawer
back into the grill. (See Figure 4).
LPG
Cylinder
NUT
Grease Drawer
Figure 5
5. Checking For LP Gas Leaks
Never test for leaks with a flame. Check for gas leaks prior
to first use, at the beginning of each season, or every time
the LPG cylinder is changed. Follow these four steps:
• Use a commercially-available non-corrosive leak check
solution.
Aluminum Tray
• Turn the grill ignitor control knob to the full OFF position
(clockwise).
Figure 4
Step 4 Connecting Gas Cylinder
A. Connecting a 1 lb. Disposable Liquid Propane Gas
(LPG) Cylinder to the Grill
1. Make sure the burner control knob and OFF/ON rocker
switch are in the OFF position.
2. Check the cylinder valve features to ensure it has proper external mating threads to fit the grills LPG regulator. Screw the LPG regulator to the cylinder and hand
tighten.
3. Inspect the grill’s gas manifold connection port for any
damage or debris. Remove any debris. Never attempt
to use damaged or plugged equipment.
4. When connecting the LPG cylinder to the manifold
connection, hand tighten the nut of the connection tube
clockwise to a full stop (see Figure 5). DO NOT use a
wrench to tighten because it could damage the Quick
Coupling Nut and result in a hazardous condition.
• Apply the leak check solution to all gas connections.
Bubbles will appear in the leak check solution if the connections are not properly sealed. Tighten or repair as
necessary.
• If there is a gas leak that cannot be repaired, disconnect
the cylinder from the grill and call the gas grill dealer, or gas
supplier for repair assistance. B. Disconnecting a 1 lb. Disposable Liquid Propane
Gas (LPG) Cylinder from the Grill
1. Turn burner control knob to the full OFF position. (Turn
clockwise to close.)
2. Detach the LPG cylinder by turning the Quick Coupling
Nut of the connection tube counterclockwise.
CAUTION
When the appliance is not in use, the supply cylinder must be detached from the appliance.
CAUTION
Before the first use and at the beginning of each season (and whenever the LPG gas cylinder has been
changed):
1. Read all safety, lighting and operating instructions.
2. Check gas valve orifices, burner tubes and burner
ports for any obstructions.
3. Perform gas leak check according to instructions
found in this manual.
The Outdoor GreatRoom Company • Cook Number Grill CNG-TRAVELER Gas Grill • Rev. A
8
Step 5. Install Searing Plate and
Grilling Grate
1. Parts/Items Needed: Searing plate and grilling grate.
4. Slide the grilling grate into the grill compartment. The
back edge will rest on the fixed cross member and the
front edge on the front ledge in the compartment. (See
Figure 7).
2. Open the grill hood and remove and discard any other
debris found in the burner compartment.
3. Hold the searing plate with the two feet on the bottom
away from you and set it into the back of the grill compartment. The bottom feet of the plate rest along the rear
ledge of the compartment and the front edge rests on top
of the factory installed cross member. (See Figure 6).
Searing Plate
Grilling Grate
Figure 7
Figure 6
The Outdoor GreatRoom Company • Cook Number Grill CNG-TRAVELER Gas Grill • Rev. A
9
Lighting Instructions
Basic Lighting Procedures
1. Familiarize yourself with the safety guidelines at the
front of this manual. Do not smoke while lighting grill or
checking gas supply connections.
2. Be sure the LPG cylinder is filled.
3. Make sure all gas connections are securely tightened.
4. Ensure that 2 - “D” size batteries have been installed.
5. Open the grill lid.
WARNING
Explosion Risk / Fire Risk
Failure to open the grill lid during the lighting procedures
could result in a fire or explosion which could cause
property damage, serious bodily injury or death.
WARNING
Fire Risk
Explosion Risk
A strong gas smell, or the hissing sound of gas indicates a serious problem with the gas grill or the LPG
cylinder.
• Get away from the LPG cylinder.
• Do not try to fix the problem yourself.
• Call the fire department. (Do not call near the LPG cylinder because the telephone is an electrical device.)
Failure to immediately follow the steps listed above
could result in a fire or explosion which could cause
property damage, serious bodily injury or death.
WARNING
6. Set ignitor control knob and OFF/ON rocker switch
to OFF. (See Figure 8).
Hot Surfaces
• Never lean over the grill cooking area
while lighting the gas grill.
• Keep face and body a safe distance (at
least 18 inches) from the lighting hole or
burners, when lighting the grill by match.
Control Knob
OFF/ON Rocker Switch
Lighting the Grill by Match
Figure 8
7. Depress the OFF/ON rocker switch on the front panel to
the right - the “ON” position.
8. Push in and turn ignitor control knob to HIGH. The builtin ignitor will click and spark to ignite burner. Ignitor may
need realignment to generate adequate spark.
9. Confirm ignition by viewing flame through the grilling
grate slots.
10. If the burner does not light, turn the ignitor control knob
to OFF, wait 5 minutes for gas to clear, then retry.
11. Adjust temperature control knob to the desired cooking
temperature.
To light the gas grill by match, follow steps 1 through 7 of
the Basic Lighting Procedures. Then remove the grilling
grate and searing plate from the grill. Place a long, lit match
or a long lit grill lighter next to the main burner ports and
turn the ignitor control knob to the HIGH setting to release
gas. The burner should light immediately. (See Figure 9).
Replace the searing plate and grilling grate in the grill.
WARNING
Explosion Risk / Fire Risk
IF YOU SMELL GAS:
• Shut off gas supply to the grill.
• Extinguish any open flame.
• Open grill lid.
• If odor continues, immediately call your gas company or local fire department.
Failure to comply with these instructions could result
in a fire or explosion which could cause property damage, serious bodily injury or death.
Burner Ports
Figure 9
The Outdoor GreatRoom Company • Cook Number Grill CNG-TRAVELER Gas Grill • Rev. A
10
If the grill fails to light properly:
1. Turn ignitor control knob to OFF. Wait at least five minutes for gas to clear, then retry.
• Problem: Disconnected Ignition Wires
2. Check gas supply and connections.
3. Repeat lighting procedure. If the grill still fails to operate properly, turn ignitor control knob and OFF/ON
rocker switch to OFF, then check the following: • Problem: Plugged orifice
Correction: Remove the LPG cylinder connection tube,
grate and grease drawer from the grill. Open the hood
and rotate the grill 90º until the control panel faces up.
Remove the four 5/16 inch hex nuts and spacers from
the underside of the control panel. Use a 3/4 open end
wrench to disconnect the 1/2 inch gas flex tube from
the back of the orifice. Lift the control panel off its four
studs and set it aside without removing the electrical
ignitor wire. Insert a thin 2-3 inch needle through the
back of the orifice to gently clear any obstructions.
Reinstall the control panel, and reconnect the gas flex
tube and reinstall all cooking components.
If an obstruction is suspected in the gas valve, please
call the gas grill dealer or gas appliance service person
for assistance.
•
Problem: Misalignment of ignitor on burner
Correction: Check for proper position of the electrode
tip. The tip of the electrode should be pointing over
burner ports at the top of the burner. The gap between
the spark electrode and the burner should be 1/8 inch.
Adjust if necessary. Press and turn ignitor control knob
counterclockwise and check for presence of spark.
(See Figure 10).
Correction: Inspect the Ignitor junction box found beneath the Control Panel. Connect loose Ignitor wires to
the junction box and try to light the grill.
• Problem: Weak batteries
Correction: Replace “D” size batteries in ignitor module underneath grill control panel.
4. If all checks or corrections have been made and the
grill still fails to operate properly, remove the LPG cylinder from the grill and call the gas grill dealer or gas
appliance service person.
WARNING
Explosion Risk
Fire Risk
If a “FLASH-BACK” fire occurs in or around the
burner tubes:
• Turn the control knob and OFF/ON switch to
OFF position.
•
Disconnect the LPG cylinder from the grill.
• Once the grill has cooled down, clean the burner tubes and burners according to the cleaning
instructions in this manual.
Failure to comply with these instructions could result in a fire or explosion which could cause serious
property damage, bodily injury or death.
Spark Electrode
Burner
Figure 10
The Outdoor GreatRoom Company • Cook Number Grill CNG-TRAVELER Gas Grill • Rev. A
11
Cooking Instructions
Important: Before cooking on the grill for the first time,
wash the grilling grate and sear plate with warm, soapy water. Rinse and dry thoroughly.
A Few Tips:
•
Be sure to wash your hands thoroughly before AND
after handling any meat or fish - especially chicken.
Burn-off
•
For tempting grill marks on both sides, flip 3 or 4 minuets before the signal.
•
For medium and well-done steaks to finish grilling at
the same time, sear well-done steaks an extra 30 to
45 seconds.
•
Meat continues to cook internally after it’s removed
from the grill. Allow for a 5 to 10 degree rise in temperature.
To preheat, light the grill on HIGH, close the lid and follow
this timetable:
•
Use tongs - not forks - for flipping chicken to retain the
flavorful juices.
• For both high and low temperature cooking, preheat
grill 10 minutes.
•
If weather is cold or windy, cook times may be longer.
Before cooking on the gas grill for the first time, you will
want to “burn off” the grill to eliminate any odor or foreign
matter. Just ignite the burner, close the lid, and operate grill
on the HIGH setting for about five minutes.
Preheating
• To slow cook, preheating is not necessary.
Cooking Temperatures / Gourmet Grilling
Good chefs know that meat perfectly done means it’s
reached a certain internal temperature. Now, the Cook
Number System lets you know the second you’ve achieved
that perfect temperature. This allows you to grill like a gourmet chef the first time you try.
Flare-Ups
The fats and juices dripping from grilled food can cause
flare-ups. Since flare-ups impart a favorably distinctive taste
and color to food cooked over an open flame, they should
be accepted up to a point. Nevertheless, uncontrolled flaring can result in a ruined meal.
WARNING
After lighting the burner:
1. Switch on the Cook Number System.
2. Insert the temperature sensor into the center of the
meat.
3. Turn Cook Number dial to desired setting from one the
of the 10 settings - rare to well done.
HOT! DO NOT TOUCH.
SEVERE BURNS MAY RESULT.
CLOTHING IGNITION MAY RESULT.
Surfaces are hot during operation and
cool down.
4. Close the hood.
5. At the signal (beep and flashing lights), your food is
ready.
• Keep children away. CAREFULLY SUPERVISE
children in same area as grill.
•
Alert children and adults to hazards of high temperatures.
•
Never lean over the cooking area while grill is on.
The Outdoor GreatRoom Company • Cook Number Grill CNG-TRAVELER Gas Grill • Rev. A
12
Cook number system™
Cook Number System
Grill by the numbers and suddenly, you’re an expert.
Filets
Stuffed
Medium
Cooked
Rare
R/MedR
MedR
Med
Well
M/MedW MedW
Burgers
Med
MedW
Well
Brats
Med
MedW
Well
Breast
Thigh
Well
WWell
Dark
The Outdoor GreatRoom Company • Cook Number Grill CNG-TRAVELER Gas Grill • Rev. A
13
™
Cleaning and Maintenance Instructions
correctly placed inside the end of the burner tube. Also
check the position of the spark electrode. (See Figure 11).
As with all appliances, proper care and maintenance will keep
this grill in top operating condition and prolong its life. By following these cleaning procedures on a timely basis, the grill
will stay clean and work properly with minimum effort.
Burner Tube
Cleaning The Cooking Surfaces
Before initial use and periodically, wash the grilling grate
and searing plate in a soap and warm water solution. Use a
wash cloth or vegetable brush to clean the cooking grids.
Orifice
CAUTION: Never try to clean the cooking grids until they
are cool to the touch.
Cleaning The Grease Drawer
To reduce the chance of fire, the Grease Drawer should
be visually inspected before each grill use. Remove any
grease and wash grease drawer and aluminum tray with a
mild soap and warm water solution or discard and replace
with a new aluminum tray.
Cleaning The Burner Tubes and Burner Ports
NOTE: It is not necessary to remove the burner
when cleaning the burner tubes and ports.
To reduce the chance of “FLASH-BACK” follow the procedure below at least once a month in late summer or early
fall when spiders are most active or when the grill has not
been used for a period of time.
1. Turn all burner controls and OFF/ON switch to the full
OFF position.
2. Detach the LPG cylinder by turning the Quick Coupling
Nut on the connection tube counterclockwise.
3. Remove the grilling grate and searing plate.
Figure 11
WARNING
Explosion Risk
Fire Risk
• Check to ensure the orifice is inside the burner
tube before using the gas grill.
• If the burner tube does not fit over the orifice (this
on unit), lighting the burner may cause explosion
and/or fire.
Keep surface of even heat vaporizer plate clean
1. Remove grilling grate.
2. Use a putty knife to scrape area clean below the grate.
3. Make sure perforations are free of any obstructions.
Checking Burner Flame Patterns
For proper operation the burner flame characteristics should
be steady, not lifting or floating. (See Figure 12).
Regardless of which burner cleaning procedure is used, we
recommend you also complete the following steps to help
prolong burner life.
1. Clean front and rear burner ports from area below searing plate.
2. Use a wire brush to clean the entire outer surface of
burner until free of food residue and dirt.
3. Clean any clogged ports with a stiff wire, such as an
open paper clip.
4. Inspect burner for damage (cracks or holes) and if such
damage is found, order and install a new burner. After
installation, check to insure that the gas valve orifice is
Figure 12
The Outdoor GreatRoom Company • Cook Number Grill CNG-TRAVELER Gas Grill • Rev. A
14
CAUTION: Be sure the grill is OFF and cool before cleaning.
WARNING
Annual Cleaning of The Grill Interior
Burning-off the grill after every cookout will keep it ready
for instant use. However, once a year you should give the
entire grill a thorough cleaning to keep it in top operating
condition.
Follow these steps:
1. Turn all control knobs and OFF/ON switch to the full
OFF position.
Fire Risk
Explosion Risk
Do not line the bottom of the grill housing with aluminum foil, sand or any substance that will restrict the
flow of grease into the grease drawer and obstruct air
flow.
• Failure to comply with these instructions could result in a fire or explosion which could cause property damage, serious bodily injury or death.
2. Detach the LPG cylinder by turning the Quick Coupling
Nut of the connection tube counterclockwise.
3. Remove the grilling grate, searing plate, and grease
drawer with its aluminum tray. Wash each item with a
mild soap and warm water solution, rinse thoroughly
and let dry.
4. Cover burner orifice with aluminum foil.
Cleaning Exterior Surfaces
Before initial use, and periodically thereafter, wash the grill
using a mild soap and warm water solution. Use a wash
cloth or sponge for this process. Do not use a stiff wire or
brass brush that might remove paint during the cleaning
process.
5. Brush the inside and bottom of the grill with a stiff wire
brush, and wash with a mild soap and warm water solution. Rinse thoroughly and let dry.
6. Remove aluminum foil from orifice and check orifice for
obstruction.
7. Check spark electrode, adjusting as needed. The Electrode tip should be pointing toward the burner ports
approximately 1/8 inch from the burner surface. (See
Figure 13).
Spark Electrode
Burner
Figure 13
8. Reconnect the gas source and observe the burner
flame for correct operation.
9. Re-install the searing plate, grilling grate and grease
drawer with its aluminum tray.
The Outdoor GreatRoom Company • Cook Number Grill CNG-TRAVELER Gas Grill • Rev. A
15
Contact Information
Please contact your The Outdoor GreatRoom
Company dealer with any questions or concerns.
For the number of your nearest dealer, please call
952-358-7410.
12400 Portland Ave. So.
Burnsville, Mn 55337
www.OutdoorGreatrooms.com
Model No.:_________________________________
Serial No.:_________________________________
- NOTES ________________________________________________________________________________________________
________________________________________________________________________________________________
________________________________________________________________________________________________
________________________________________________________________________________________________
________________________________________________________________________________________________
________________________________________________________________________________________________
________________________________________________________________________________________________
________________________________________________________________________________________________
________________________________________________________________________________________________
CAUTION
Do NOT discard this manual.
•
Important operating and maintenance
instructions included.
•
Read, understand and follow these instructions for safe installation and operation.
•
Leave this manual with party responsible
for use and operation.
Printed in China Copyright 2008
This product is covered by one or more of the following patents: (United States) 4,112,913; 4,408,594; 4,422,426; 4,424,792; 4,520,791; 4,793,322; 4,852,548; 4,875,464; 5,000,162; 5,016,609; 5,076,254
5,191,877; 5,218,953; 5,328,356; 5,429,495; 5,452,708; 5,542,407; 5,613,487; (Australia) 543790; 586383; (Canada) 1,123,296; 1,297,746; 2,195,264; (Mexico) 97-0457; (New Zealand) 200265; or other
U.S. and foreign patents pending.
The Outdoor GreatRoom Company • Cook Number Grill CNG-TRAVELER Gas Grill • Rev. A
16