1
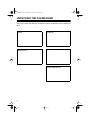
43-1204.fm Page 1 Wednesday, August 18, 1999 8:45 AM
OWNER’S MANUAL
TFX-1032
Fax Machine with Automatic Cutter
Please read before using this equipment.
Cat. No. 43-1204
43-1204.fm Page 2 Wednesday, August 18, 1999 8:45 AM
READ THIS BEFORE
INSTALLATION
We have designed your fax machine to
conform to federal regulations, and
you can connect it to most telephone
lines. However, each device that you
connect to the phone line draws power
from the phone line. We refer to this
power draw as the device’s Ringer
Equivalence Number, or REN (the
REN is shown on the back of your fax
machine).
If you are using more than one phone
or other device on the line, add up all
the RENs. If the total is more than five,
your phones might not ring. In rural areas, a total REN of three might impair
ringer operation. If ringer operation is
impaired, disconnect one of the devices from the line.
Warning: To prevent fire or shock hazard, do not expose this product to rain
or moisture.
CAUTION
RISK OF ELECTRIC SHOCK.
DO NOT OPEN.
!
CAUTION: TO REDUCE THE RISK OF
ELECTRIC SHOCK, DO NOT REMOVE
COVER OR BACK. NO USER-SERVICEABLE PARTS INSIDE. REFER SERVICING TO QUALIFIED PERSONNEL.
This symbol is intended to alert you
to the presence of uninsulated dangerous voltage within the product’s
enclosure that might be of sufficient
magnitude to constitute a risk of
electric shock. Do not open the
product’s case.
!
This symbol is intended to inform
you that important operating and
maintenance instructions are included in the literature accompanying this product.
This fax machine has been tested and
found to comply with all applicable UL
and FCC standards.
© 1995 Tandy Corporation.
All Rights Reserved.
Radio Shack is a registered trademark used by Tandy Corporation.
2
43-1204.fm Page 3 Wednesday, August 18, 1999 8:45 AM
FEATURES
Your Radio Shack TFX-1032 Fax Machine with Automatic Cutter is perfect
for your home or office. Because it is
compliant with international standards,
you can send and receive faxes virtually anywhere in the world.
16-Character
Digital
Display—
shows various messages for easy operation.
Built-In Telephone Handset—lets
you use your TFX-1032 as a regular
telephone.
It also has these features:
10-Page Automatic Document Feed
—lets you place up to ten pages of
your document on the tray — a feature
seldom found on small fax machines.
Automatic Paper Cutter —cuts the
received data into separate pages.
Copy Function—allows you to make
enlarged or reduced copies.
Automatic Telephone, Fax, and TAD
Switching —routes the incoming call
to the appropriate device.
Built-In Anti-Curl System—prevents
the incoming fax from curling.
Activity Report—makes it easy to
keep a record of all faxes sent and received.
Polling—lets you request a fax from
an unattended fax machine.
Music On Hold —serenades callers
when you place them on hold.
Limited Fax Reception—helps to
prevent unwanted faxes.
28 Memory Automatic Dialing —lets
you store frequently-called numbers
so you can dial them with a touch of a
button (8 one-touch memories) or by
specifying the memory location number (20 speed-dial memories).
Hearing-Aid Compatible —so you
can use the fax machine’s handset to
make calls if you use a hearing aid that
has a T (telephone) switch.
Three Resolution Modes (Fine/Superfine/Normal) —let you select the
transmission mode best suited to the
original document.
Please read this Owner’s Manual completely before you use your TFX-1032.
16-Shade Halftone — prints incoming
faxes in 16 shades of grey — not just
black and white.
100-Foot (30-Meter) Paper Capacity
For your records, we suggest you
record your fax machine’s serial number in the space provided. The serial
number is on the bottom of the fax machine.
Serial Number __________________
3
43-1204.fm Page 4 Wednesday, August 18, 1999 8:45 AM
FCC STATEMENT
Your fax machine complies with Part
68 of FCC Rules. You must, upon request, provide the FCC registration
number and the REN to your phone
company. Both numbers are shown on
the bottom of your fax machine.
Note: You must not connect your fax
machine to:
• Coin-operated systems
• Party-line systems
• Most electronic key phone systems
Important: The Telephone Consumer
Protection Act of 1991 makes it unlawful for any person to use a computer or
other electronic device to send any
message via telephone fax machine,
unless the message clearly contains in
a margin at the top or bottom of each
transmitted page or on the first page of
the transmission:
• The date, time, identification of the
business, individual, or other
entity
• The telephone number of the
sending machine.
To program this information into your
fax machine, see Page 13.
THE FCC WANTS YOU
TO KNOW
In the unlikely event that your fax machine causes problems on the phone
line, the phone company can disconnect your service. The phone company
attempts to notify you in advance. If
advance notice is not practical, the
phone company notifies you of your
right to file a complaint with the FCC.
Also, the phone company can make
changes to its lines, equipment, operations, or procedures that could affect
the operation of your telephone equipment. The phone company notifies you
of these changes in advance, so you
can take steps to prevent interruption
of your phone service.
LIGHTNING
Your fax machine has built-in protection circuits to reduce the risk of damage from surges in phone and power
line current. These protection circuits
meet or exceed FCC requirements.
However, lightning striking the phone
line or power lines can damage your
fax machine.
Lightning damage is not common.
Nevertheless, if you live in an area that
has frequent electrical storms, we suggest that you unplug your fax machine
during storms to reduce the possibility
of damage.
4
43-1204.fm Page 5 Wednesday, August 18, 1999 8:45 AM
CONTENTS
Unpacking the Fax Machine . . . . . . . . . . . . . . . . . . . . . . . . . . . . . . . . . . . . . . . . . . . . 6
Installation . . . . . . . . . . . . . . . . . . . . . . . . . . . . . . . . . . . . . . . . . . . . . . . . . . . . . . . . . . 7
Choosing a Location . . . . . . . . . . . . . . . . . . . . . . . . . . . . . . . . . . . . . . . . . . . . . . . 7
Connecting to the Phone Line . . . . . . . . . . . . . . . . . . . . . . . . . . . . . . . . . . . . . . . . 7
Connecting to Power . . . . . . . . . . . . . . . . . . . . . . . . . . . . . . . . . . . . . . . . . . . . . . . 8
Connecting the Handset . . . . . . . . . . . . . . . . . . . . . . . . . . . . . . . . . . . . . . . . . . . . 8
Connecting an Extension Phone or Answering Machine . . . . . . . . . . . . . . . . . . . . 8
Setting Up the Fax Machine . . . . . . . . . . . . . . . . . . . . . . . . . . . . . . . . . . . . . . . . . . . . 9
Installing the Paper . . . . . . . . . . . . . . . . . . . . . . . . . . . . . . . . . . . . . . . . . . . . . . . . 9
Paper Handling . . . . . . . . . . . . . . . . . . . . . . . . . . . . . . . . . . . . . . . . . . . . . . . . . . . 9
Setting the Dialing Mode . . . . . . . . . . . . . . . . . . . . . . . . . . . . . . . . . . . . . . . . . . . 10
Setting the Ringer Volume . . . . . . . . . . . . . . . . . . . . . . . . . . . . . . . . . . . . . . . . . . 11
Setting the Speaker Volume . . . . . . . . . . . . . . . . . . . . . . . . . . . . . . . . . . . . . . . . . 11
Setting the Key Entry Tones . . . . . . . . . . . . . . . . . . . . . . . . . . . . . . . . . . . . . . . . . 11
Entering Basic Information . . . . . . . . . . . . . . . . . . . . . . . . . . . . . . . . . . . . . . . . . . 12
Setting the Receive Mode . . . . . . . . . . . . . . . . . . . . . . . . . . . . . . . . . . . . . . . . . . 14
Telephone Operation . . . . . . . . . . . . . . . . . . . . . . . . . . . . . . . . . . . . . . . . . . . . . . . . 16
Making Calls . . . . . . . . . . . . . . . . . . . . . . . . . . . . . . . . . . . . . . . . . . . . . . . . . . . . 16
Answering a Call . . . . . . . . . . . . . . . . . . . . . . . . . . . . . . . . . . . . . . . . . . . . . . . . . 16
Putting a Call on Hold . . . . . . . . . . . . . . . . . . . . . . . . . . . . . . . . . . . . . . . . . . . . . 16
Using Redial . . . . . . . . . . . . . . . . . . . . . . . . . . . . . . . . . . . . . . . . . . . . . . . . . . . . . 16
Adding a Pause . . . . . . . . . . . . . . . . . . . . . . . . . . . . . . . . . . . . . . . . . . . . . . . . . . 16
One-Touch Dialing . . . . . . . . . . . . . . . . . . . . . . . . . . . . . . . . . . . . . . . . . . . . . . . . 17
Speed Dialing . . . . . . . . . . . . . . . . . . . . . . . . . . . . . . . . . . . . . . . . . . . . . . . . . . . . 18
Clearing One-Touch / Speed-Dial Memories . . . . . . . . . . . . . . . . . . . . . . . . . . . . 19
Printing a Memory Number List . . . . . . . . . . . . . . . . . . . . . . . . . . . . . . . . . . . . . . 19
Fax Operation . . . . . . . . . . . . . . . . . . . . . . . . . . . . . . . . . . . . . . . . . . . . . . . . . . . . . . 20
Preparing a Document . . . . . . . . . . . . . . . . . . . . . . . . . . . . . . . . . . . . . . . . . . . . . 20
Making a Copy . . . . . . . . . . . . . . . . . . . . . . . . . . . . . . . . . . . . . . . . . . . . . . . . . . . 20
Sending a Fax . . . . . . . . . . . . . . . . . . . . . . . . . . . . . . . . . . . . . . . . . . . . . . . . . . . 21
Setting the Contrast / Resolution . . . . . . . . . . . . . . . . . . . . . . . . . . . . . . . . . . . . . 21
Fax Redialing . . . . . . . . . . . . . . . . . . . . . . . . . . . . . . . . . . . . . . . . . . . . . . . . . . . . 22
Sending International Faxes . . . . . . . . . . . . . . . . . . . . . . . . . . . . . . . . . . . . . . . . 22
Receiving Faxes Using an Extension Telephone . . . . . . . . . . . . . . . . . . . . . . . . . 23
Voice Contact . . . . . . . . . . . . . . . . . . . . . . . . . . . . . . . . . . . . . . . . . . . . . . . . . . . . 24
Requesting a Fax from Another Machine (Polling) . . . . . . . . . . . . . . . . . . . . . . . . 24
Limiting Fax Reception . . . . . . . . . . . . . . . . . . . . . . . . . . . . . . . . . . . . . . . . . . . . . 25
Activity Reports . . . . . . . . . . . . . . . . . . . . . . . . . . . . . . . . . . . . . . . . . . . . . . . . . . 25
Setting the Feature Switches . . . . . . . . . . . . . . . . . . . . . . . . . . . . . . . . . . . . . . . . . . 27
Problem Solving . . . . . . . . . . . . . . . . . . . . . . . . . . . . . . . . . . . . . . . . . . . . . . . . . . . . 30
Clearing a Document Jam . . . . . . . . . . . . . . . . . . . . . . . . . . . . . . . . . . . . . . . . . . 32
Clearing a Paper Jam . . . . . . . . . . . . . . . . . . . . . . . . . . . . . . . . . . . . . . . . . . . . . 32
Cleaning Document Feed Roller One . . . . . . . . . . . . . . . . . . . . . . . . . . . . . . . . . 33
Cleaning Document Feed Roller Two . . . . . . . . . . . . . . . . . . . . . . . . . . . . . . . . . . 33
Care and Maintenance . . . . . . . . . . . . . . . . . . . . . . . . . . . . . . . . . . . . . . . . . . . . . . . 34
Specifications . . . . . . . . . . . . . . . . . . . . . . . . . . . . . . . . . . . . . . . . . . . . . . . . . . . . . . 35
5
43-1204.fm Page 6 Wednesday, August 18, 1999 8:45 AM
UNPACKING THE FAX MACHINE
Be sure to unpack the following accessories before you dispose of the packing material.
Handset
Telephone Cord
Fax Machine
Recording Paper
One-Touch Memory Card
6
43-1204.fm Page 7 Wednesday, August 18, 1999 8:45 AM
INSTALLATION
CHOOSING A LOCATION
Select a location for your fax machine
that:
• Is not in direct sunlight.
• Is near an AC power outlet and
modular phone line jack.
CONNECTING TO THE
PHONE LINE
Plug one end of the supplied modular
cord into the LINE jack on the back of
the fax machine. Plug the cord’s other
end into a modular telephone line jack.
• Is at least 4 inches from other
objects.
• Is not near heating or air conditioner units.
• Does not block the ventilation
openings.
• Keeps cords out of the way of normal activities.
Also note these important considerations:
• Do not place objects on top of or
under the fax machine.
• Do not place the fax machine on a
rugged surface or on thick carpet
which might cause a jam when
you feed a document.
Note: Your fax machine connects directly to a modular telephone line jack.
If your telephone wiring does not have
a modular jack, you can update the
wiring yourself or have the telephone
company update it for you.
• Radio Shack stores sell jacks and
adapters to convert older wiring
methods to modular wiring.
• The telephone company charges
to install the necessary jacks.
• The USOC number of the jack to
be installed is RJ11C.
7
43-1204.fm Page 8 Wednesday, August 18, 1999 8:45 AM
CONNECTING TO
POWER
Plug the power cord into a standard
grounded three-pin AC outlet.
CONNECTING AN
EXTENSION PHONE OR
ANSWERING MACHINE
To connect an extension telephone or
answering machine to your fax machine, plug one end of a modular cord
into the EXT. TEL jack on the left side of
the fax machine. Then plug the cord’s
other end into the telephone you want
to use as an extension or into an answering machine.
Caution: The polarized 3-pin plug only
fits in 3-pin outlets. If the AC outlet
does not have holes for all three pins,
have an electrician install a properly
grounded outlet for you.
CONNECTING THE
HANDSET
Plug the handset’s modular plug into
the HANDSET jack on the left side of the
fax machine. Place the handset in its
cradle.
8
Note: Connecting the fax to an answering machine lets you use the answering
machine
feature.
See
“Answering Machine Reception” on
Page 15.
43-1204.fm Page 9 Wednesday, August 18, 1999 8:45 AM
SETTING UP THE FAX MACHINE
INSTALLING THE PAPER
4. Insert the paper end into the
paper exit slot.
Follow these steps to install the paper
roll.
5. Pull out the end of the roll from the
exit slot until it extends about 4
inches.
Note: Use only Radio Shack Cat. No.
43-1260 or 43-1264 Thermal Fax Paper in your fax machine.
1. Open the operation panel.
6. Close the cover by firmly pressing
both left and right corners on the
back of the cover. The TFX-1032
automatically cuts the extra paper.
2. Press OPEN to open the paper
cover.
PAPER HANDLING
Thermal paper is heat-sensitive. Follow these tips while handling it:
• Store unused thermal paper away
from high temperatures (158°F or
over) and high humidity. These
can darken the paper.
3. Remove any slack from the roll
and place it in the paper holder in
the direction shown, with both
sides seated securely.
• Store copies away from direct
sunlight and at a temperature
below 94°F. Direct sunlight and
high heat can fade the image.
• Avoid storing thermal copies next
to blueprint (diazo) copies and
plastic film or binders. The chemicals in these materials could fade
the image.
9
43-1204.fm Page 10 Wednesday, August 18, 1999 8:45 AM
• Avoid applying tape to image
areas on copies. The chemicals in
some transparent tape adhesives
could fade the image.
• Avoid storing two copies with the
images together. The printed
image can transfer from one copy
to the other.
• Do not touch the thermal paper
with sweaty or dirty hands.
SETTING THE DIALING
MODE
The TFX-1032 is factory-set to the
tone dialing mode. If your telephone
line uses pulse dialing, you must
change the dialing mode setting. If you
are not sure which type of service you
have, do this test.
1. Lift the handset and listen for a
dial tone.
2. Press any number other than 0.
Note: If your phone system
requires that you dial an access
code (9, for example) before you
dial an outside number, do not
press 0 or the access code.
If the dial tone stops, you have tone
service.
10
If the dial tone continues, you have
pulse service. Follow these steps to
set your fax to the pulse dialing mode.
1. Press MENU four times. The fax
machine displays:
4:SET MODE ?
2. Press SET, then press MENU twice
so the fax machine displays:
3:FEATURE SW. ?
3. Press SET twice
machine displays:
TONE
so
the
fax
(00)
4. Press 0 1 to select the pulse mode.
The fax machine displays:
10PPS
(01)
5. Press SET to save your selection.
The fax machine displays:
(01)PAUSE TIME
6. Press STOP/CLEAR twice. The fax
machine displays the date and
time (or CHECK PAPER ROLL if
you have not installed paper).
43-1204.fm Page 11 Wednesday, August 18, 1999 8:45 AM
SETTING THE RINGER
VOLUME
Set
on the fax machine’s left side
to OFF, M (medium), or H (high) to control the ringer volume.
to OFF, the
Note: When you set
ringer does not sound. However, the
fax machine still answers calls and receives faxes.
SETTING THE SPEAKER
VOLUME
2. Press SET, then press MENU twice.
The fax machine displays:
3:FEATURE SW. ?
3. Press SET, then enter 1 7. The fax
machine displays:
(17)KEY SOUND
4. Press SET. The fax machine displays the current setting.
0 0—Off
0 1—Low
Set
on the left side of the fax machine to L (low), M (medium), or H
(high) to control the fax machine’s
speaker volume.
SETTING THE KEY
ENTRY TONES
0 2—High
5. Enter your choice. For example,
enter 0 1 to select low-pitched key
tones.
6. Press SET to save the new setting.
7. Press STOP/CLEAR twice to return
to the normal display.
Each time you press a key on the fax
machine, it sounds a tone. You can set
the tone to have a high or low pitch, or
you can turn off the key tones. The default setting is a high-pitched tone.
Follow these steps to change the key
entry tone setting.
1. Press MENU four times. The fax
machine displays:
4:SET MODE ?
11
43-1204.fm Page 12 Wednesday, August 18, 1999 8:45 AM
ENTERING BASIC
INFORMATION
•
Setting the Date and Time
If you make a mistake, press
or
to position the cursor in the appropriate place,
then enter the correct number.
5. Press SET.
Set the date and time so they appear in
the top margin of all transmitted faxes.
Note: To cancel the date and time setting procedure, press STOP/CLEAR any
time before you press SET in Step 5.
1. Press MENU four times. The fax
machine displays:
4:SET MODE ?
6. Press STOP/CLEAR twice to return
to the normal display.
Entering Your Name and
Phone Number
You must enter your phone number
and name before sending faxes, so receiving fax machines and their operators can identify the fax source.
Notes:
2. Press SET. The fax machine displays:
1:TIME SET ?
3. Press SET again. The fax machine
displays the currently set date and
time. The first digit flashes.
02.15 ’95 11:35
4. Use the number keys to enter the
month, day, the last two digits of
the year, the hour, and the minutes.
Notes:
•
12
The TFX-1032 uses 24-hour
format. To enter 1:00 PM, for
example, enter 1 3 0 0.
• It is illegal to send a fax without
your name (or company name)
and phone number. The fax
machine can print this information
inside or outside the top margin.
Use feature switch 20 (see “Setting the Feature Switches” on
Page 27).
• To keep track of what you enter,
write down all information first.
• The phone number can be 20 digits and the name 24 characters. If
necessary, abbreviate the name.
• To delete extra characters, press
DELETE.
• To stop the name and phone number setting procedure, press STOP/
CLEAR or pause for longer than 1
minute any time before Step 7.
43-1204.fm Page 13 Wednesday, August 18, 1999 8:45 AM
1. Press MENU four times. The fax
machine displays:
4:SET MODE ?
2. Press SET. Then press MENU once.
The fax machine displays:
2:STATION CODE ?
3. Press SET. The fax machine displays the first 10 characters of the
name (or nothing if no name is
set) and the letters A-E.
:ABCDE
The blinking block in the left of the
display indicates where the next
letter enters. The underscore indicates the selected letter.
4. Repeatedly press 5 to select the
group with the letter you want to
enter. Then press 2 or 8 to go up
or down to the line with the letter.
Finally, press 4 or 6 to position the
underline under the letter.
Group 1
Group 2
Group 3
ABCDE
FGHIJ
KLMNO
PQRST
UVWXY
Z
abcde
fghij
klmno
pqrst
uvwxy
z
12345
67890
.,:;•
+–/&*
#’"()
< >!?=
5. Press
to enter the letter.
Note: If you accidentally enter a
wrong character, press
once,
then press DELETE and enter the
correct character.
6. Repeat Steps 4 and 5 to enter the
complete name (up to 24 characters).
7. Press SET to store the name. The
fax machine briefly displays:
STATION TEL No.?
Then the display blanks or displays the currently set telephone
number.
8. Use the keypad to enter the fax
machine’s phone number (up to
20 digits). To enter a dash, press
SPEED DIAL.
9. Press SET to store the phone number. Then press STOP/CLEAR.
Here is an example.
Follow these steps to enter My Co. as
the name and 817-555-1931 as the
phone number.
Note: Watch the display as you do this
example.
1. Press MENU four times, then press
SET, MENU, SET.
2. Press 8 twice.
3. Press 6 twice.
13
43-1204.fm Page 14 Wednesday, August 18, 1999 8:45 AM
4. Press
. This enters the M.
5. Press 5 once.
6. Press 2 twice.
7. Press 4 once.
8. Press
. This enters the y.
9. Press 0. This enters the space.
10. Press 5 twice.
SETTING THE RECEIVE
MODE
The fax machine has three receive
modes: automatic, manual, and answer.
Reception
Mode
AUTO
Indicator
ANS.
Indicator
11. Press 6 twice.
Automatic
On
Off
12. Press
Manual
Off
Off
Answering
Machine
Off
On
. This enters the C.
13. Press 5 once.
14. Press 8 twice.
15. Press 4 once.
16. Press
. This enters the o.
Each time you press Rx.MODE, the receive mode changes.
17. Press 5 once.
18. Press 8 twice.
19. Press
Manual Reception
. This enters the period.
20. If necessary, repeatedly press
DELETE to delete extra letters in an
old stored name.
21. Press SET.
22. Press 817 SPEED DIAL 555 SPEED
DIAL 1931 .
23. If necessary, repeatedly press
DELETE to delete extra digits in an
old stored number.
24. Press
CLEAR .
SET.
Then press STOP/
If you most often use your fax machine
as a regular telephone, select manual
reception.
When the phone rings, pick up the
handset. If it is a voice call, talk as usual. If it is a fax call:
• If feature switch 54 is turned on
(see
“Setting
the
Feature
Switches” on Page 27), the fax
machine automatically switches to
receive the fax when it detects the
fax tones. Hang up the handset.
• If feature switch 54 is turned off,
press START when you hear the
fax tones. Then hang up the handset.
14
43-1204.fm Page 15 Wednesday, August 18, 1999 8:45 AM
Automatic Reception
In this mode, when a call comes in,
your fax machine automatically answers.
Note: You use feature switch 07 (see
“Setting the Feature Switches” on
Page 27) to set how many rings occur
before the fax machine answers.
After the fax machine answers:
• If the fax machine detects fax
tones, it receives the document.
• If the call is a voice call, the caller
continues to hear several simulated ring signals. Then the fax
machine starts to sound fax tones.
Notes:
•
•
With feature switch 09, you
can change the number of
simulated rings that sound
after the line connects to no
rings (position 00) or between
3 and 11 rings. If you set this
switch to 00, the fax machine
does not sound simulated
rings, and answers callers
with a fax tone.
If the call is long distance, the
caller is charged from the time
the simulated rings start, even
if they hang up as soon as
they hear the fax tones.
Answering Machine
Reception
Use this mode when you connect an
answering machine to EXT. TEL and
want to receive both phone messages
and faxes while you are away.
Set your answering machine to answer
calls within 4 rings. Otherwise, the fax
machine answers after 40 seconds
and sounds fax tones.
When someone calls, the answering
machine answers the call and plays
your announcement. If the fax machine
detects fax tones during the announcement, it disconnects the answering
machine and receives the fax.
Notes:
• If there are 6 seconds of silence,
the fax machine begins sounding
fax tones.
• In your outgoing announcement,
tell callers to press START on their
fax machine to send a fax.
• Automatic switching might not
function properly on certain
answering systems.
• You might have trouble retrieving
answering machine messages
from a remote phone if you connect it to the fax machine. Try setting the fax machine to the manual
reception mode and feature switch
54 to 01 (ON).
15
43-1204.fm Page 16 Wednesday, August 18, 1999 8:45 AM
TELEPHONE OPERATION
MAKING CALLS
Note: You must connect the power
cord to an AC outlet to make calls from
the fax machine.
1. Press DIAL, or lift the handset.
2. Dial the number you want to call.
3. If you pressed DIAL in Step 1, lift
the handset and talk when the call
is answered.
ANSWERING A CALL
When the telephone rings, lift the
handset and talk.
Note: If you hear a fax tone, someone
is trying to send you a fax. If feature
switch 54 is turned on, hang up the
handset after the fax machine displays
RECEIVING . The fax machine automatically receives the fax. If feature
switch 54 is turned off, press START
then hang up the handset. See “Setting the Feature Switches” on Page 27.
PUTTING A CALL ON
HOLD
To put a call on hold, press HOLD.
Press HOLD again to resume the conversation.
Note: You can place the handset on
the cradle, if desired. To resume the
conversation, lift the handset.
16
The fax machine is factory-set with a
music-on-hold feature. See “Setting
the Feature Switches” to turn this feature on and off.
USING REDIAL
The redial function lets you quickly dial
the last number dialed. Follow these
steps to redial the number.
1. Press DIAL, or lift the handset. Listen for a dial tone.
2. Press REDIAL/PAUSE. The fax
machine automatically redials the
last number dialed.
ADDING A PAUSE
On some telephone systems, you must
dial an access number (9, for example)
for an outside line. You can add a
pause for redialing or memory-dialing
so dialing pauses for about 3 seconds
after the access number. This gives
the outside line time to connect.
Note: You can change the pause delay time using feature switch 01.
To add a pause for redial, enter the access number, press REDIAL/PAUSE, and
enter the phone number.
To add a pause for memory dialing, follow the above procedure when you
store a number in memory (see “OneTouch Dialing” and “Speed Dialing”).
43-1204.fm Page 17 Wednesday, August 18, 1999 8:45 AM
ONE-TOUCH DIALING
You can store up to eight telephone
numbers in the one-touch memories.
You can then dial a stored number at
the touch of a single button.
Storing a Number in a OneTouch Memory
1. Press MENU three times. The fax
machine displays:
3:O.T & S.D SET?
2. Press SET. The fax machine displays:
O.T No. = 1 ?
3. Press the one-touch key (1–8) you
want to store the number in.
4. Press SET. If the memory is empty,
the fax machine displays:
:ABCDE
Otherwise, the fax machine displays the first 10 characters of the
name and CHANGE.
Name and Phone Number” on
Page 12 to see how to enter characters.
6. Press SET.
7. Enter the telephone number, up to
32 digits.
Notes:
• Press SPEED DIAL to enter a
hyphen (for easy viewing).
Press REDIAL/PAUSE to enter a
pause (a semi-colon appears
on the display). The hyphen or
pause counts as one digit in the
memory.
• If you make a mistake in entering a fax/phone number, use
to move the cursor over the
wrong digit, press DELETE to
delete the digit, then enter the
correct digit.
• To stop programming, press
STOP/CLEAR.
8. Press SET.
9. To program other one-touch numbers, repeat Steps 3–8. Otherwise, press STOP/CLEAR.
Dialing a One-Touch Number
1. Press DIAL or lift the handset. Listen for a dial tone.
Note: If a name appears, press
SET to change the name or STOP/
CLEAR to cancel number storage.
2. Press the one-touch key (1-8) for
the number you want to call.
5. Enter the contact’s name (up to 16
characters). See “Entering Your
When the call is answered, lift the
handset, if necessary, and talk.
17
43-1204.fm Page 18 Wednesday, August 18, 1999 8:45 AM
When storing or making test calls to
emergency numbers:
4. Press SET. If the memory is empty,
the fax machine displays:
• Remain on the line and briefly
explain to the dispatcher the reason for the call.
• Perform such activities in the offpeak hours, such as early morning or late evening.
SPEED DIALING
You can store up to 20 telephone numbers in memory then dial a stored number by entering a two-digit memorylocation code.
Storing a Number in SpeedDial Memory
1. Press MENU three times. The fax
machine displays:
3:O.T & S.D SET?
2. Press SET. The fax machine displays:
O.T No. = 1 ?
3. Use the number keys to enter a
two-digit speed-dial number (01–
20). For example, enter 1 0 to store
a number in speed-dial memory
10.
:ABCDE
Otherwise, the fax machine displays the first 10 characters of the
stored name and CHANGE.
Note: If a name appears, press
to change the name or press
STOP/CLEAR to cancel number
storage.
SET
5. Enter the contact’s name (up to 16
characters). See “Entering Your
Name and Phone Number” on
Page 12 to see how to enter characters.
6. Press SET.
7. Enter the telephone number, up to
32 digits.
Notes:
• Press SPEED DIAL to enter a
hyphen (for easy viewing).
Press REDIAL/PAUSE to enter a
pause (a semi-colon appears).
The hyphen or pause counts as
one digit in memory.
• If you make a mistake in entering a number, use
to move
the cursor over the wrong digit,
press DELETE to delete the digit,
then enter the correct digit.
• To stop programming, press
STOP/CLEAR.
8. Press SET.
18
43-1204.fm Page 19 Wednesday, August 18, 1999 8:45 AM
9. Repeat Steps 3–8 to program
other numbers. Otherwise, press
STOP/CLEAR .
Dialing a Speed-Dial Memory
Number
1. Press DIAL or lift the handset. Listen for a dial tone.
2. Press SPEED DIAL, then enter the
two-digit speed-dial memory number (01-20) you want to call.
PRINTING A MEMORY
NUMBER LIST
Follow these steps to print a list of the
one-touch and speed-dial numbers
stored in the fax machine.
1. Press MENU three times. The fax
machine displays:
3:O.T & S.D SET?
2. Press COPY. The fax machine displays:
CLEARING ONE-TOUCH /
SPEED-DIAL MEMORIES
1. Press MENU three times. The fax
machine displays:
O.T & S.D LIST
and prints a list of all stored numbers.
3:O.T & S.D SET?
2. Press SET.
3. Press the one-touch key or enter
the speed-dial memory number of
the memory you want to clear.
4. Press SET. The fax machine displays the name and CHANGE.
5. To clear the entry, press MENU.
The fax machine displays CANCEL.
6. Press SET to clear the memory.
Repeat Steps 3–5 to clear other
memories.
7. Press STOP/CLEAR.
19
43-1204.fm Page 20 Wednesday, August 18, 1999 8:45 AM
FAX OPERATION
PREPARING A
DOCUMENT
The quality of the copy at the receiving
fax machine depends on the quality of
the original document you send. Do
not try to send documents that are:
• Wet or damp
• Covered with wet ink or paste
• Chemically processed (such as
pressure-sensitive paper or carbon-coated paper)
• Coated (such as glossy paper)
• Too thin (such as onionskin, airmail paper, or magazine pages)
• Curled or folded
• Made of cloth or metal
• Larger or smaller than the allowable document size (maximum
size 81/2 × 59 inches, minimum
size 57/8 × 57/8 inches)
Note: If a document is exactly 81/2
inches wide, 1/4 inch on both sides
might not fax properly.
To send a document of poor quality,
make a photocopy of the original. Then
fax the copy.
Caution: Remove staples and paper
clips from documents you want to
send. These could damage the fax machine.
20
MAKING A COPY
You can copy a document to check
how it will be received, or to check the
fax machine’s operation.
1. Place the original document (up to
10 pages) face down in the paper
tray. The fax machine automatically draws in the first page.
2. Select a contrast/resolution mode,
if necessary. See “Setting the
Contrast/Resolution” on Page 21.
Note: For copying, the fax
machine uses fine or superfine
resolution only. The fax machine
uses the fine setting if the resolution is set to STD.
3. Press COPY. The fax machine displays:
ZOOM RATE ? 100 %
Note: If you do not need to make
an enlarged or reduced copy, skip
to Step 5.
4. Press COPY to select the desired
zoom mode. Each time you press
the key, the display changes in this
order, 125%—80%—100%.
Note: You can turn off the zoom
option. See “Setting the Feature
Switches” on Page 27.
5. Press START. The fax machine
starts to copy. It cuts each page
as it exits the fax machine.
43-1204.fm Page 21 Wednesday, August 18, 1999 8:45 AM
SENDING A FAX
1. Place the original document (up to
10 pages) face down in the paper
tray. The fax machine automatically draws in the first page.
SETTING THE
CONTRAST /
RESOLUTION
Set the contrast and resolution for the
document you want to send.
Note: A document must be in the paper tray before you can change these
settings.
Setting the Contrast
Repeatedly press CONTRAST to select:
2. Select a contrast/resolution mode
if necessary. See “Setting the
Contrast/Resolution.”
3. With the handset on hook, either
manually enter, redial, one-touch
memory dial, or speed dial the
number.
Note: If you make a mistake when
entering a phone number, press
STOP/CLEAR , then enter the correct
number.
4. Press START to dial the number.
When the other fax machine
answers, transmission begins.
Note: Press STOP/CLEAR to interrupt a
transmission or to remove a document
set for transmission.
NORMAL —For normal documents.
LIGHT —For light documents.
HALFTONE —For photos or originals
with shades of gray. (The resolution is
automatically set to FINE.)
Setting the Resolution
Repeatedly press RESOLUTION to select:
STD —For most documents.
FINE —For small print or print from a
dot-matrix printer.
SUPERFINE —For text with
small characters or graphics.
very
21
43-1204.fm Page 22 Wednesday, August 18, 1999 8:45 AM
Notes:
• Superfine only works with fax
machines that have the ITU-T
standard superfine feature. If the
receiving fax machine does not
have this feature, the fax is sent
using fine resolution.
• You can set the fax machine to
remain in the selected modes or
to return to the default modes
after each fax. See “Setting the
Feature Switches” on Page 27.
FAX REDIALING
If a dialed number is busy, the fax machine hangs up, waits 3 minutes, then
redials the number up to the number of
times you set with feature switch 06.
See “Setting the Feature Switches” on
Page 27.
To manually redial, press REDIAL/
PAUSE.
22
SENDING
INTERNATIONAL FAXES
When you send faxes to other countries, poor phone line quality might
cause transmission errors. The overseas feature helps reduce these errors.
After placing the document, press
SPEED DIAL then #. When the fax machine displays OVERSEAS Tx SET,
dial the number as usual.
You can also use this feature for local
faxes if you get frequent errors.
43-1204.fm Page 23 Wednesday, August 18, 1999 8:45 AM
RECEIVING FAXES
USING AN EXTENSION
TELEPHONE
This feature lets you receive a fax after
answering a telephone call on an extension telephone, either connected to
the fax machine or to a jack that uses
the same line as the fax machine.
Connected to the Fax
Machine
Before you use this feature, you must:
• Confirm feature switch 08 is set to
something other than 00 (OFF).
The number you select is also the
number you dial to receive a fax.
The default setting is 33. See
“Setting the Feature Switches” on
Page 27.
• Set the fax machine to either the
manual or automatic reception
mode (see “Setting the Receive
Mode” on Page 14). This feature
does not work if you set the fax
machine
to
the
answering
machine reception mode.
To switch to receive a fax during a call
on a telephone connected to the fax
machine, dial the number you selected
with feature switch 08. The fax machine disconnects the phone and prepares to receive a fax. Hang up the
phone.
Connected to Another Jack
Before you use this feature, you must:
• Set feature switch 57 to 01 (ON).
The default setting is OFF. See
“Setting the Feature Switches” on
Page 27.
• Set the fax machine to either the
manual or automatic receive
mode. This feature does not work
if you set the fax machine to the
answering machine reception
mode.
To switch to receive a fax during a call
on an extension phone, press * then #
on the extension phone. The fax machine prepares to receive a fax. When
you hear fax tones, hang up the phone.
Notes:
• If you answer a voice call on an
extension phone while the fax
machine is sounding simulated
rings, you can stop the fax
machine by pressing * then # on
the extension phone.
• You cannot use this feature from a
pulse-dialing extension phone.
• This feature might not function
properly on certain telephones.
• Callers can also use this feature
by pressing * then # on their
touch-tone phone.
23
43-1204.fm Page 24 Wednesday, August 18, 1999 8:45 AM
VOICE CONTACT
Requesting a Voice Contact
After you receive or send a document,
you might want to talk to the person at
the transmitting/receiving fax machine.
To do so, simply lift the handset while
the fax machine is sending or receiving
the document.
When sending or receiving is complete, the other fax machine rings or
sounds tones. When the other party
comes on the line, begin your conversation.
Notes:
• If you hang up the handset before
fax operation is complete, the
voice contact request is cancelled.
• If the other party does not pick up
their handset within 10-15 seconds, the phone line disconnects.
• If the other fax machine does not
have the voice contact function,
the phone line disconnects.
Answering a Voice Contact
Request
If your fax machine beeps and displays
PHONE CALLING immediately after
you send or receive a document, the
other party is requesting voice contact.
Pick up the handset and begin the conversation.
24
REQUESTING A FAX
FROM ANOTHER
MACHINE (POLLING)
Your fax machine lets you call a remote, unattended fax machine and request that it send a document to you.
The remote machine must be set to
send the document before you call,
and must use ITU-T compatible polling.
Note: Your TFX-1032 fax machine
cannot be polled.
1. Press MENU. The fax machine displays:
POLLING Rx ?
2. Press SET. The fax machine displays:
PARTY ?
3. Call the remote fax machine. You
can use manual, one-touch memory, or speed dialing.
4. Press SET. The fax machine
begins dialing. When the line connects, reception automatically
begins.
43-1204.fm Page 25 Wednesday, August 18, 1999 8:45 AM
LIMITING FAX
RECEPTION
ACTIVITY REPORTS
You can set the fax machine to check
the other party’s fax number and only
receive a fax if the number exactly
matches one stored in your fax machine’s one-touch or speed dialing
memories.
Note: Even a stored number cannot be
received if the other fax machine does
not have a fax identification feature or
if the fax number has not been programmed into their fax machine.
Check with the other parties before
setting this function.
To turn on this feature, set feature
switch 26 to 01 (ON). To turn off this
feature, set feature switch 26 to 00
(OFF). The default is off. See “Setting
the Feature Switches” on Page 27.
The activity report shows up to 20 of
the most recent transmissions/receptions, including any error codes.
1. Press MENU twice.
machine displays:
The
fax
2: ACT. REPORT ?
2. Press COPY. The fax machine displays:
ACTIVITY REPORT
and prints the report.
You can set the fax machine to print a
transmission report after each fax by
setting feature switch 31. See “Setting
the Feature Switches” on Page 27.
Sample Activity Report
25
43-1204.fm Page 26 Wednesday, August 18, 1999 8:45 AM
Error Codes
The following error codes print on the activity and transmission reports to help you
troubleshoot problems.
ERROR CODE
DESCRIPTION
OK
• No error encountered.
E-10
• Other fax machine did not respond. Contact the other party
and confirm you are dialing the correct fax number.
• Be sure you connected the telephone line to the fax
machine’s LINE jack.
E-20
• You pressed STOP/CLEAR.
E-21
• The original document jammed. Remove the document and
correctly place it in the tray.
E-23
• Paper ran out during reception. Replace the paper.
E-24
• Paper jammed during reception. Check the paper.
E-25
• Cutter did not operate. Contact your local Radio Shack
store for service assistance.
E-30
• Print quality poor due to telephone interference. If this code
frequently appears, contact your local phone company.
E-40
• The other party’s fax machine had a problem (out of paper,
paper jam, or similar).
E-50
• Fax was stopped by the other party (line disconnected during a fax transmission).
E-60
• Communication impossible due to poor phone line quality.
E-71
• Communication impossible due to compatibility problems or
the limited fax reception feature is turned on. Contact the
other party, or confirm feature switch 26 is set to 00 (OFF).
26
43-1204.fm Page 27 Wednesday, August 18, 1999 8:45 AM
SETTING THE FEATURE SWITCHES
Your fax machine has several features you turn on and off using the built-in feature
switches. The following table lists the feature switches, available settings, default
settings, and the page where the feature is discussed.
Feature
Switch
00
01
06
07
Settings
(*Default)
Description
Dial Mode
*00 —Tone
01 —Pulse
02 —2 seconds
Amount of time (in seconds) the
*03 —3 seconds
fax machine pauses for pause
04 —4 seconds
entries
05 —5 seconds
06 —6 seconds
07 —7 seconds
08 —8 seconds
09 —9 seconds
10 —10 seconds
11 —11 seconds
12 —12 seconds
00 —Off
Number of automatic redial
01 —1 time
attempts
*02 —2 times
03 —3 times
00 —Short ring
Number of rings before the fax
01 —1 ring
machine answers when set to the
02 —2 rings
auto mode
03 —3 rings
04 —4 rings
*05 —5 rings
See Page
10
16
22
15
|
08
11 —11 rings
Remote reception activation code 00 —Off
10-99 —Select a two-digit
23
number (default is 33)
27
43-1204.fm Page 28 Wednesday, August 18, 1999 8:45 AM
Feature
Switch
Description
Settings
(*Default)
See Page
09
00 —Off
Number of simulated rings that
01 —3 rings
the fax machine sounds when set
02 —5 rings
to automatic reception before
*03 —7 rings
switching to fax reception
04 —9 rings
05 —11 rings
15
10
Music on hold
16
17
20
00 —Off
*01 —On (Greensleeves)
00 —Off
Key entry tones
01 —Low
*02 —High
Selects whether your name and *01 —Outside
phone number print inside or out- 02 —Inside
11
12
side the fax margin
28
26
Limited fax reception
27
Resolution setting that the fax
machine returns to after transmissions
28
Contrast setting that the fax
machine returns to after transmissions
31
Transmission report
36
Halftone quality
50
Copy enlargement/reduction
option (zoom rate)
54
Automatic fax sensing
57
Parallel phone connection
*00 —Off
01 —On
00 —STD
01 —FINE
02 —SUPERFINE
*03 —No return
00 —NORMAL
01 —LIGHT
02 —HALFTONE
*03 —No return
*00 —Off
01 —After each fax
02 —After error
00 —Faster
*01 —Slower/better quality
00 —Off
*01 —On
00 —Off
*01 —On
*00 —Off
01 —On
25
21/22
21/22
25
21/22
20
15
23
43-1204.fm Page 29 Wednesday, August 18, 1999 8:45 AM
Follow these steps to change feature
switch settings.
Repeat Steps 5-8 to make additional changes.
1. Press MENU four times. The fax
machine displays:
9. Press STOP/CLEAR twice when you
finish.
Notes:
4: SET MODE ?
2. Press SET. The fax machine displays:
1: TIME SET ?
3. Press MENU twice.
machine displays:
The
• To print a feature switch setting
list, press COPY after Step 3.
• To stop the feature switch setting
procedure, press STOP/CLEAR
twice.
fax
3: FEATURE SW ?
4. Press SET. The fax machine displays:
(00) DIAL MODE
5. Enter the number of the switch
you want to change. For example,
press 2 and 6 to change the limited fax reception feature.
6. Press SET. The fax machine displays the current setting.
7. Enter the desired setting. For
example, enter 0 and 1 to select
ON to turn on the limited fax
reception feature.
8. Press SET.
29
43-1204.fm Page 30 Wednesday, August 18, 1999 8:45 AM
PROBLEM SOLVING
If problems occur during operation, check below before taking the fax machine for
service. If the problem still exists, contact your local Radio Shack store for help.
Symptoms
Possible Cause/Solution
Fax machine does not operate.
The fax machine displays
PAPER ROLL.
CHECK
AC plug not connected.
Paper not properly installed. See “Clearing a
Paper Jam” on Page 32
General
The recording paper has run out. See “Clearing a Document Jam” on Page 32
The fax machine displays
ORIGI- The document you are sending is not prop-
NAL JAM .
erly set in the tray.
You cannot insert a document.
Document is too thin or too thick.
Another document is jammed. See “Clearing
a Document Jam” on Page 32.
You set more than 10 sheets on the input
tray.
Sending a Fax
Cannot send a fax.
Document is not set far enough into the slot.
Paper ran out on the receiving fax machine.
The receiving fax machine is set for manual
reception.
You connected the telephone line to EXT.TEL
instead of LINE.
Fax machine does not answer the
phone.
Fax machine is set for manual reception. Lift
the handset and press START to begin
receiving the fax.
AC cord is not connected.
Receiving a Fax
The paper has run out.
Fax reception does not begin after
the fax machine answers.
Limited fax reception is turned on.
The paper has run out.
You connected the telephone line to EXT.TEL
instead of LINE.
The received fax is not dark enough. You are not using the recommended fax
paper.
The transmitted original might be light.
Received fax is blank.
The paper is loaded upside-down.
The transmitted original was upside-down.
30
Received copy has distorted sections
Phone line or original document quality is
poor.
Line on edge of fax.
Paper roll is near the end.
43-1204.fm Page 31 Wednesday, August 18, 1999 8:45 AM
Extension phone
Phone calls
Error
Light
Symptoms
Possible Cause/Solution
Error indicator lights.
Press STOP/CLEAR to turn off the error light.
Print an activity report and check the error
code.
No dial tone.
The telephone line is not properly connected.
Sound from speaker is too low.
Monitor volume switch is set to L.
Cannot hear rings.
Ringer volume is set to OFF.
Fax/phone calls do not go through.
Dialing mode is not set correctly.
Cannot make a phone call.
A fax is being sent or received.
Telephone does not ring.
Too many phone devices are connected to
the same line.
Remote reception does not work
with phone connected to the fax
machine.
Fax machine set to answer mode.
Remote reception feature switch (08) is
turned off.
You started the call from the extension
phone. Press START on the fax machine.
Remote reception does not work
with phone connected to same line
as the fax machine.
Parallel phone connection feature switch (57)
is turned off.
Fax machine set to answer mode.
You started the call from the extension
phone. Press START on the fax machine.
31
43-1204.fm Page 32 Wednesday, August 18, 1999 8:45 AM
CLEARING A
DOCUMENT JAM
CLEARING A PAPER
JAM
The fax machine beeps and displays
ORIGINAL JAM if the document you
are sending jams. If the ERROR indicator lights, press STOP/CLEAR first.
Then follow these steps to clear the
jam.
The fax machine beeps and displays
CHECK PAPER ROLL when the paper jams. Follow these steps to clear
the jam.
1. Lift the cover.
1. Open the cover.
2. Raise the document release lever.
2. Press OPEN to open the paper
cover.
3. Remove the jammed document
while pressing the green release
lever.
4. Reposition the release lever and
close the cover.
32
3. Remove the jammed paper.
4. Cut off the jammed section of the
paper and reinsert the roll.
5. Close the cover by firmly pressing
both left and right corners on the
back of the cover. The fax
machine automatically cuts the
extra paper.
43-1204.fm Page 33 Wednesday, August 18, 1999 8:45 AM
CLEANING DOCUMENT
FEED ROLLER ONE
CLEANING DOCUMENT
FEED ROLLER TWO
If document jams frequently occur or if
the fax machine feeds more than one
sheet at a time, clean document feed
roller one with a cotton swab dampened with a small amount of a detergent.
If a streak or dirty pattern appears on a
copy or a fax you have sent, clean document feed roller two with a soft, clean,
slightly damp cloth.
1. Open the cover.
1. Open the cover then pull the document release lever as shown in
the figure.
2. To rotate document feed roller two,
press the document sensor, as
shown.
2. To rotate document feed roller
one, press the document sensor,
as shown.
3. Clean document feed roller two,
then dry it thoroughly to keep documents from jamming.
3. Clean document feed roller one,
then dry it thoroughly to keep documents from jamming.
4. Close the cover.
4. Replace the document release
lever and close the cover.
33
43-1204.fm Page 34 Wednesday, August 18, 1999 8:45 AM
CARE AND MAINTENANCE
Your Radio Shack TFX-1032 Fax Machine with Automatic Cutter is an example of
superior design and craftsmanship. The following suggestions will help you care for
your fax machine so you can enjoy it for years.
Keep the fax machine dry. If it gets wet, wipe it dry. Liquids might contain minerals that can corrode electronic circuits. If a liquid enters the
fax machine, immediately unplug the AC power cord. Do not turn on
the fax machine. Contact your local Radio Shack store for service.
Use and store the fax machine only in normal temperature environments. Temperature extremes can shorten the life of electronic devices, discolor receiving paper, and distort or melt plastic parts.
Handle the fax machine gently and carefully. Dropping it can damage
circuit boards and cases and can cause the fax machine to work improperly.
Keep the fax machine away from dust and dirt, which can cause premature wear of parts.
CLEANER
Wipe the fax machine with a damp cloth occasionally to keep it looking new. Do not use harsh chemicals, cleaning solvents, or strong detergents.
Modifying or tampering with the fax machine’s internal components can cause a
malfunction and might invalidate its warranty and void your FCC authorization to operate it. If the fax machine is not performing as it should, take it to your local Radio
Shack store for assistance. If the trouble is harming the telephone lines, the telephone company might ask you to disconnect the fax machine until you resolve the
problem.
34
43-1204.fm Page 35 Wednesday, August 18, 1999 8:45 AM
SPECIFICATIONS
Paper Size . . . . . . . . . . . . . . . . . . . . . . . . . . . . . . . . . . . . . . . . 8 1/2 inches × 98 feet
216 mm × 30 meters
Effective Scanning Width . . . . . . . . . . . . . . . . . . . . . . . . . . . . 81/3 Inches (212 mm)
Effective Recording Width . . . . . . . . . . . . . . . . . . . . . . . . . . . 81/3 Inches (212 mm)
Transmission Speed . . . . . . . . . . . . . . . . . . . . . . . . . . 9600/7200/4800/2400 BPS
Transmission Time . . . . . . About 20 seconds/page (Standard Transmission Mode)
Main Scanning Density . . . . . . . . . . . . . . . . . . . . . . . . . . . . . . . . . . . . . . . . . 8 Pels
Sub Scanning Density . . . . . . . . . . . . . . . . . . . . . . 3.85 lines/mm (Standard mode)
7.7 lines/mm (Fine mode)
15.4 lines/mm (Superfine mode)
Compression Mode . . . . . . . . . . . . . . . . . . . . MH (Modified Huffman) and Original
Reading Method . . . . . . . . . . . . . . . . . . . . . . . . . . . . . . . . . Contact Image Sensor
Recording Method . . . . . . . . . . . . . . . . . . . . . . . . . . . . . . . . . . . . . Thermal Printing
Power Supply . . . . . . . . . . . . . . . . . . . . . . . . . . . . . . . . . . . . . . AC 120 V, 50/60 Hz
Power Consumption . . . . . . . . . . . . . . . . . . . . . . . . . . . . . . . . . . . . . Standby: 5 W
Transmission: 20 W
Reception: 130 W
Copy: 150 W
Overall Dimensions . . . . . . . . . . . . . . . . . . . . . . . . . . . . . . . 31/2 × 15 × 103/8 Inches
(90 × 381 × 263 mm)
Weight . . . . . . . . . . . . . . . . . . . . . . . . . . . . . . . . . . . . . . . . . . . 10 lbs, 6 oz (4.3 kg)
Ambient Temperature . . . . . . . . . . . . . . . . . . . . . . . . . . . . . . . . 41–95°F (5–35°C)
Specifications are typical; individual units might vary. Specifications are subject to
change and improvement without notice.
35
43-1204.fm Page 36 Wednesday, August 18, 1999 8:45 AM
RADIO SHACK LIMITED WARRANTY
This telephone product is warranted against manufacturing defects in material and
workmanship for 90 days from the date of purchase from Radio Shack company owned
stores and authorized Radio Shack franchisees and dealers. Within this period Radio
Shack will repair the telephone product without charge for parts and labor. Simply bring
your Radio Shack sales slip as proof-of-purchase date to any Radio Shack store.
This warranty does not cover damage or failure caused by or attributable to Acts of God,
abuse, misuse, improper or abnormal usage, faulty installation, improper maintenance,
lightning or other incidence of excess voltage, or any repairs other than those provided
by a Radio Shack Authorized Service Facility, or transportation costs. Radio Shack is
not responsible or liable for indirect, special, or consequential damages arising
out of or in connection with the use or performance of the product or other damages with respect to loss of property, loss of revenues or profit, or costs of
removal, installation or reinstallation.
EXCEPT AS PROVIDED HEREIN, RADIO SHACK MAKES NO EXPRESS WARRANTIES AND ANY IMPLIED WARRANTIES ARE LIMITED IN DURATION TO THE DURATION OF THE WRITTEN LIMITED WARRANTIES CONTAINED HEREIN. Some states
do not allow the limitation or exclusion of incidental or consequential damages and
some states do not allow limitation or exclusion of implied warranties; therefore, the
aforesaid limitation(s) or exclusion(s) may not apply to the purchaser. There will be
charges rendered for repairs to the product made after the expiration of the aforesaid 90
days warranty period.
This warranty gives you specific legal rights and you may also have other rights which vary from
state to state.
We Service What We Sell
9/94
RADIO SHACK
A Division of Tandy Corporation
Fort Worth, Texas 76102
7A5
Printed in Japan