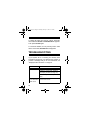
1
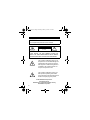
43-931A.fm Page 1 Monday, January 15, 2001 9:14 AM
Cat. No. 43-931A
OWNER’S MANUAL
Please read before using this equipment.
System 931
79-Memory Caller ID
with Dial Back
43-931A.fm Page 2 Monday, January 15, 2001 9:14 AM
WARNING: To reduce the risk of fire or shock hazard,
do not expose this product to rain or moisture.
CAUTION
RISK OF ELECTRIC SHOCK. DO
NOT OPEN.
!
CAUTION: TO REDUCE THE RISK OF ELECTRIC SHOCK, DO NOT REMOVE COVER OR
BACK. NO USER-SERVICEABLE PARTS INSIDE.
REFER SERVICING TO QUALIFIED PERSONNEL.
This symbol is intended to alert you to
the presence of uninsulated dangerous
voltage within the product’s enclosure
that might be of sufficient magnitude to
constitute a risk of electric shock. Do
not open the product’s case.
!
This symbol is intended to inform you
that important operating and maintenance instructions are included in the literature accompanying this product.
© 2000 RadioShack Corporation.
All Rights Reserved.
RadioShack is a registered trademark used by
RadioShack Corporation.
2
43-931A.fm Page 3 Monday, January 15, 2001 9:14 AM
FEATURES
Your RadioShack System 931 79-Memory Caller ID
displays the caller’s telephone number (and name, if
available in your area) and the current date and time,
as provided by your local phone company to Caller ID
subscribers. The date and time are set when your Caller ID receives its first call.
Note: Check with your local phone company regarding name service availability.
The System 931 stores and displays up to 79 single
(number only) or multiple (name and number) Caller
ID records, and includes these features:
3-Line Liquid Crystal Display — makes it easy to
clearly see the caller’s name (if available), phone number, and the current time and date.
Out of Area Indication — lets you know when an incoming call is from an area that does not send any
Caller ID information.
Trilingual Operation — lets you set the system to display messages in English, French, or Spanish.
3
43-931A.fm Page 4 Monday, January 15, 2001 9:14 AM
Dial Back — lets you redial a telephone number
stored in the Caller ID call record memory.
New Call Indicator — flashes when you have new
calls to review.
VIP Call List — lets you save up to 20 important call
records so they will not be deleted when you delete
other calls from the system’s memory.
Contrast Control — lets you adjust the display contrast for the best readability.
Mounting Options — you can place the system on a
desk, shelf, or table, or mount it on a wall.
Note: Your system requires four AAA batteries (not
supplied) for power.
4
43-931A.fm Page 5 Monday, January 15, 2001 9:14 AM
This system has been tested and found to comply with
all applicable FCC standards and is ETL listed.
We recommend you record the system’s serial number here. The number is on the system’s bottom panel.
Serial Number: _________________________
Important Information:
• To use this system, you must be in an area where
Caller ID service is available, and you must subscribe to the service.
• Where Caller ID is offered, one or more of the following options are generally available:
–
–
–
caller’s number only
caller’s name only
caller’s name and number
Your system displays the caller’s name only if that
option is available in your area.
5
43-931A.fm Page 6 Monday, January 15, 2001 9:14 AM
FCC INFORMATION
We have designed your system to conform to federal
regulations, and you can connect it to most telephone
lines. However, each system (and each device, such
as a telephone or answering machine) that you connect to the telephone line draws power from the telephone line. We refer to this power draw as the
device’s ringer equivalence number, or REN. The
REN is on the bottom of the system.
If you use more than one telephone or other device
on the line, add up all of the RENs. If the total is more
than five, your telephone might not ring. In rural areas, a total REN of three might impair ringer operation. If ringer operation is impaired, remove a device
from the line.
Your system complies with Part 68 of FCC Rules.
You must, upon request, provide the FCC registration
number and the REN to your telephone company.
Both numbers are on the bottom of the system.
Note: You must not connect your system to:
• coin-operated systems
• party-line systems
• most electronic key telephone systems
6
43-931A.fm Page 7 Monday, January 15, 2001 9:14 AM
In the unlikely event that your system causes problems on the phone line, the phone company can temporarily disconnect your service. If this happens, the
phone company attempts to notify you in advance. If
advance notice is not practical, the phone company
notifies you as soon as possible and advises you of
your right to file a complaint with the FCC.
Also, the phone company can make changes to its
lines, equipment, operations, or procedures that
could affect the operation of this system. The telephone company notifies you of these changes in advance, so you can take the necessary steps to
prevent interruption of your telephone service.
This equipment complies with the limits for a Class B
digital device as specified in Part 15 of FCC Rules.
These limits provide reasonable protection against radio and TV interference in a residential area. However,
your equipment might cause TV or radio interference
even when it is operating properly. To eliminate interference, you can try one or more of the following corrective measures:
• Reorient or relocate the TV or radio’s receiving
antenna.
7
43-931A.fm Page 8 Monday, January 15, 2001 9:14 AM
• Increase the distance between the equipment
and the radio or TV.
• Use outlets on different electrical circuits for the
equipment and the radio or TV.
Consult your local RadioShack store if the problem
continues.
8
43-931A.fm Page 9 Monday, January 15, 2001 9:14 AM
CONTENTS
Preparation . . . . . . . . . . . . . . . . . . . . . . . . . . . . .
Installing Batteries . . . . . . . . . . . . . . . . . . . .
Connecting the System . . . . . . . . . . . . . . . .
Connecting to a Single-Line Phone . . . .
Connecting to a Two-Line Phone . . . . .
Connecting to an Answering Machine . .
Mounting the System . . . . . . . . . . . . . . . . . .
Attaching the Mounting Bracket . . . . . . .
Mounting on a Wall . . . . . . . . . . . . . . . .
Adjusting the Display Contrast . . . . . . . . . . .
Choosing a Language . . . . . . . . . . . . . . . . .
Setting the Local Area Code . . . . . . . . . . . . .
10
10
13
13
14
15
16
17
18
19
20
20
Operation . . . . . . . . . . . . . . . . . . . . . . . . . . . . . .
Receiving and Storing Calls . . . . . . . . . . . . .
Reviewing Call Records . . . . . . . . . . . . . . . .
Redialing from Memory . . . . . . . . . . . . . . . .
Displayed Call Information . . . . . . . . . . .
Deleting Calls . . . . . . . . . . . . . . . . . . . . . . . .
Deleting a Single Call . . . . . . . . . . . . . .
Deleting All Calls . . . . . . . . . . . . . . . . . .
VIP Call List . . . . . . . . . . . . . . . . . . . . . . . . .
21
21
22
23
23
27
27
28
28
Troubleshooting . . . . . . . . . . . . . . . . . . . . . . . . . 30
Lightning . . . . . . . . . . . . . . . . . . . . . . . . . . . . 31
9
43-931A.fm Page 10 Monday, January 15, 2001 9:14 AM
PREPARATION
INSTALLING BATTERIES
Your System 931 requires four AAA batteries (not supplied) for power. For the longest operation and best
performance, we recommend alkaline batteries, available at your local RadioShack store.
Cautions:
• Always use fresh batteries of the required size
and recommended type.
• Do not mix old and new batteries, different types
of batteries (standard, alkaline, or rechargeable),
or rechargeable batteries of different capacities.
Follow these steps to install batteries.
Notes:
• When you replace the batteries, do not press any
button on the system after you remove the old
batteries. Doing so could erase all stored information.
10
43-931A.fm Page 11 Monday, January 15, 2001 9:14 AM
• When replacing the batteries, have fresh ones on
hand before you begin. If you do not install the
new batteries within about 2 minutes after removing the old ones, you will lose all the information
stored in the system.
1. Make sure the system is unplugged from the telephone line. If you are replacing the batteries,
unplug both modular line cords from the back of
the system.
2. Use a Phillips screwdriver to loosen the screw on
the battery compartment cover.
3. Slide the battery compartment cover off, then
remove it.
4. Put four fresh AAA batteries into the compartment as indicated by the polarity symbols (+ and
–) marked inside.
5. Close the cover and secure it with the screw. If
you are replacing the batteries, reconnect the
phone line and the phone.
When BATT appears or the display dims, replace the
batteries.
11
43-931A.fm Page 12 Monday, January 15, 2001 9:14 AM
Cautions:
• Always remove old or weak batteries. Batteries
can leak chemicals that can damage your system.
• Dispose of dead batteries promptly and properly.
Do not bury or burn them.
CONNECTING THE SYSTEM
Your system connects directly to a modular telephone
line jack. If your telephone wiring does not have a
modular jack, you can update the wiring yourself using jacks and adapters (available at your local
RadioShack store), or have the telephone company
update the wiring for you. You must use compatible
modular jacks that are compliant with Part 68 of FCC
Rules.
Note: The USOC number of the jack to be installed is
RJ11C (or RJ11W for a wall plate jack).
You can also connect it to an answering machine.
12
43-931A.fm Page 13 Monday, January 15, 2001 9:14 AM
Cautions:
• Never install telephone wiring during a lightning storm.
• Never touch uninsulated telephone wires or
terminals, unless the telephone line has been
disconnected at the network interface.
• Use caution when installing or modifying telephone lines.
Connecting to a Single-Line Phone
TO LINE
TO PHONE
13
43-931A.fm Page 14 Monday, January 15, 2001 9:14 AM
1. Disconnect the telephone line cord from the
phone and plug it into the system’s LINE jack.
2. Plug one end of the supplied line cord into the
system’s PHONE jack.
3. Plug the other end of the cord into the phone’s
jack.
Connecting to a Two-Line Phone
To record information about calls received on a twoline phone, you can connect two System 931s using a
2-line, 3-way adapter such as Cat. No. 279-402 (not
supplied). Each system only records information about
calls received on the line to which it is connected.
Follow these steps to connect two System 931s to a
two-line phone.
L2
L1
14
L3
43-931A.fm Page 15 Monday, January 15, 2001 9:14 AM
1. Disconnect the telephone line cord from the modular phone jack (on the wall) and plug it into L1 +
L2 on the 2-line, 3-way adapter.
2. Plug the adapter into the modular phone jack on
the wall.
3. Plug one end of the supplied line cord into the
LINE jack on one of the System 931s.
4. Plug the other end of the cord into either L1 or L2
on the adapter.
5. Repeat Steps 3 and 4 to connect another System
931 to the remaining open jack (L1 or L2) on the
adapter.
Connecting to an Answering Machine
TO LINE
TO PHONE
Line Jack
Phone Jack
15
43-931A.fm Page 16 Monday, January 15, 2001 9:14 AM
1. Plug a telephone line cord from the phone line
into the System 931’s LINE jack.
2. Plug one end of the supplied line cord into the
system’s PHONE jack and plug the cord’s other
end into the answering machine’s line jack.
3. Plug a third line cord into the answering
machine’s phone jack and the telephone’s modular jack.
4. Set your answering machine to answer after two
or more rings. This gives the System 931 time to
record the call information that the phone company sends between the first and second rings.
MOUNTING THE SYSTEM
You can place the system directly on a desk, shelf, or
table or attach the supplied mounting bracket if you
want the system to sit up at an angle. Or, you can use
the bracket to mount the system on a wall.
16
43-931A.fm Page 17 Monday, January 15, 2001 9:14 AM
Attaching the Mounting Bracket
1. Align the slots on the bottom of the system with
the hooks on the mounting bracket.
2. Gently push the system down on the bracket to
secure it.
If you are placing the system on a desk, shelf, or table,
pull out the stand on the back of the bracket until it
clicks.
To remove the system from the bracket, press up from
the bottom of the system until it snaps off the bracket.
17
43-931A.fm Page 18 Monday, January 15, 2001 9:14 AM
Mounting on a Wall
To mount the system on the wall, you need two screws
(not supplied) with heads larger than the keyhole slots
on the back of the mounting bracket.
Follow these steps to mount the system on a wall.
1. Using the keyhole slots in the mounting bracket
as a template, mark the mounting screw locations on the wall.
2. Drill a hole in the wall at each marked location.
3. Thread a screw through each hole, letting the
head extend 1/8 inch from the wall.
4. Attach the mounting bracket to the system (see
“Attaching the Mounting Bracket” on Page 17).
5. Route the phone line cords through the slots on
the back of the bracket.
18
43-931A.fm Page 19 Monday, January 15, 2001 9:14 AM
6. Line up the keyhole slots on the bracket with the
screws in the wall, then slide the system down
onto the screws until it is secure.
Keyhole Slots
ADJUSTING THE DISPLAY
CONTRAST
To lighten or darken the display, press DELETE and
REVIEW
buttons until CONTRAST ADJUST appears in the display. To scroll through the contrast set. Then press REVIEW
tings, press REVIEW
or wait about 10 seconds.
DELETE
REVIEW
19
43-931A.fm Page 20 Monday, January 15, 2001 9:14 AM
CHOOSING A LANGUAGE
Your System 931 is programmed to display messages
in English, but you can change it to display in French
or Spanish. Follow these steps to change the language.
1. Hold down REVIEW
and CALL BACK for
about 3 seconds until the current language
(ENGLISH, ESPANOL, or FRANCAIS) appears.
2. Within 10 seconds, press REVIEW
language you want appears.
until the
3. When you release REVIEW
, the new lanor wait
guage is set. Then press REVIEW
about 10 seconds.
SETTING THE LOCAL AREA
CODE
Before receiving calls, enter the local area code. Otherwise, the system shows the area code for all calls received. If you must dial an area code to make local
calls, skip this procedure.
20
43-931A.fm Page 21 Monday, January 15, 2001 9:14 AM
1. Hold down both REVIEW buttons until LOCAL
AREA CODE appears.
2. To change the first digit, press REVIEW
until
the desired number appears, then press DELETE.
3. Repeat Step 2 to set the second and third digit.
4. Press REVIEW
or wait about 10 seconds.
OPERATION
RECEIVING AND STORING CALLS
Caller ID is a service provided by your telephone
company. When you subscribe to this service, the
telephone company sends the caller’s telephone
number (and name, if available) and the call’s date
and time between the first and second rings. The system receives and displays this information for each
call and updates the display with the current date and
time. Your system saves up to 79 call records, then
replaces the oldest call record with each new one.
21
43-931A.fm Page 22 Monday, January 15, 2001 9:14 AM
During an incoming call, the red NEW CALL indicator
flashes.
Note: When the system is not receiving a call, you
can press DELETE to toggle between 12- and 24-hour
time displays.
REVIEWING CALL RECORDS
Each time you receive a call, the system saves a call
record in memory. Each call record includes the time
and date of the call, the call number (the order in
which the call was received), the caller’s telephone
number, and the caller’s name (if available).
To scroll through the call records, repeatedly press
or
.
(or hold down) REVIEW
Notes:
• If no call information is stored, -NO CALLappears when you press REVIEW
or
.
• If you do not press a button within about 10 seconds, the system automatically returns to the
time and date display.
• After you review all calls, -END
appears. Simply press REVIEW
view the calls again.
22
OF
or
LISTto
43-931A.fm Page 23 Monday, January 15, 2001 9:14 AM
REDIALING FROM MEMORY
Follow these steps to redial a telephone number
stored in the Caller ID’s memory.
1. Press either REVIEW button to view the desired
call record.
2. Lift the handset of your touch-tone telephone and
confirm the presence of a dial tone.
3. If the number to be redialed is out of your area
code, dial 1 on your telephone.
4. Press CALL BACK to redial the displayed telephone number.
Displayed Call Information
The system can display the following information.
Display (English,
French, Spanish)
REPT
Description
You have received a call
from the same phone
number more than once.
23
43-931A.fm Page 24 Monday, January 15, 2001 9:14 AM
Display (English,
French, Spanish)
Description
LONG DISTANCE
LONGUE DISTANCE
LARGA DISTANCIA
Appears with LDC (long
distance call) if the sent
Caller ID information does
not include a name, but
indicates that the incoming call is long distance.
-UNKNOWN NAME-NOM INCONNUNOM DESCONOCIDO
The incoming call is from
an area that does not
send Caller ID name information.
UNKNOWN NUMBER
NUMERO INCONNU
NUM DESCONOCIDO
The incoming call is from
an area that does not
send Caller ID number information.
UNKNOWN CALLER
APPELER INCONNU
DESCONOCIDO
The incoming call is from
an area that does not
send any Caller ID information.
24
43-931A.fm Page 25 Monday, January 15, 2001 9:14 AM
Display (English,
French, Spanish)
Description
-BLOCKED NAME-NOM BLOQUENOMBRE PRIVADO
The caller has blocked the
Caller ID name information from being sent.
BLOCKED NUMBER
-NUMERO BLOQUENUMERO PRIVADO
The caller has blocked the
Caller ID number information from being sent.
BLOCKED CALL
APPEL BLOQUE
LLAMADA PRIVADA
The caller has blocked
any Caller ID information
from being sent.
-SERVICE ERRORERREUR DE LIGNE
ERROR EN LINEA
Call information was distorted before reaching the
system. Normal static on
the telephone can cause
this message. If it happens often, contact your
phone company.
BATT
Battery level is low.
25
43-931A.fm Page 26 Monday, January 15, 2001 9:14 AM
Display (English,
French, Spanish)
Description
-NO CALL-PAS D APPEL-NO LLAMADA-
No call information is
stored in the system.
NEW
NOUV
NUEVO
The system has received
incoming calls that have
not been reviewed.
TOTAL
TOT.
TOTAL
The total number of incoming calls (not including VIP calls).
#NEW
You have a new call that
has not been reviewed.
-RECORD STORED-MEMORISE-MEMORIZADO-
The caller ID record is
stored in VIP memory.
VIP
VIP memory is active.
-VIP MEMO FULL-VIP PLEIN-VIP LLENO-
No new VIP number can
be entered.
26
43-931A.fm Page 27 Monday, January 15, 2001 9:14 AM
Display (English,
French, Spanish)
Description
DELETE ALL?
EFFACER TOUT?
BORRAR TODO?
The system needs confirmation that you want to
delete all numbers from
memory.
-NO DATA SENTPAS DE DONNEES
-NO ENVIADO-
Call information was not
sent by the phone company.
DELETING CALLS
Deleting a Single Call
1. Repeatedly press (or hold down) either REVIEW
key until you see the call record you want to
delete.
2. Press DELETE. The system deletes that record
and automatically renumbers the remaining call
records. After 10 seconds, the time and date
reappear.
27
43-931A.fm Page 28 Monday, January 15, 2001 9:14 AM
Deleting All Calls
1. While the system displays the time and date,
press either REVIEW key.
2. Hold down DELETE until the system displays
DELETE ALL?.
3. While DELETE ALL? appears, press DELETE
again. -NO CALL- appears.
To cancel the deletion, do not press any button.
After about 10 seconds, DELETE ALL? disappears.
VIP CALL LIST
Your system lets you save up to 20 call records in its
VIP call list so they will not be deleted if you delete all
calls from the system’s memory. This lets you save a
list of important callers. When you receive a call from
a number that is on the VIP call list, the red NEW CALL
indicator lights.
Follow these steps to store call records in the VIP call
list.
28
43-931A.fm Page 29 Monday, January 15, 2001 9:14 AM
1. Repeatedly press either REVIEW key until you
see the call record you want to store as a VIP
call.
2. Hold down VIP until VIP flashes and -RECORD
STORED- appears. The system stores the
record as a VIP call record.
VIP
Note: If the system’s memory is full (20 VIP call
records stored), -VIP MEMO FULL- appears
when you press VIP. To store another VIP call
record, you must first delete an existing one.
To review VIP call records, press VIP, then repeatedly
press either REVIEW key.
To delete a VIP call record, select the call record you
want to delete, press DELETE.
29
43-931A.fm Page 30 Monday, January 15, 2001 9:14 AM
To delete all entries from the VIP call list, press VIP,
then hold down DELETE until DELETE ALL? appears.
Then press DELETE again.
To cancel the deletion, do not press any button. After
about 10 seconds, DELETE ALL? disappears.
TROUBLESHOOTING
If your System 931 is not working as it should, these
suggestions might help you eliminate the problem. If
you see a message that you do not understand, see
“Displayed Call Information” on Page 23.
Problem
Blank screen
Solution
Make sure batteries are installed.
Adjust the contrast (see “Adjusting
the Display Contrast” on Page 19).
Check with your local telephone company.
No dial tone on
phone attached to
Caller ID unit
30
Check all cabling to make sure connections are secure.
43-931A.fm Page 31 Monday, January 15, 2001 9:14 AM
Problem
Solution
Check installation.
Problem
Solution
Disconnect the Caller ID unit and
reconnect the phone to see if the
phone works without it.
Incoming call with
no Caller ID information
You answered the call before the System 931 received the call information.
Wait until your phone rings at least
twice before answering a call.
LIGHTNING
Your telephone has built-in protection circuits to reduce the risk of damage from surges in telephone line
and power line current. These protection circuits meet
or exceed the FCC requirements. However, lightning
striking the telephone or power lines can damage
your telephone.
Lightning damage is not common. Nevertheless, if
you live in an area that has severe electrical storms,
we suggest that you unplug your phone during storms
to reduce the possibility of damage.
31
43-931A.fm Page 32 Monday, January 15, 2001 9:14 AM
Limited One-Year Warranty
This product is warranted by RadioShack against manufacturing defects in material
and workmanship under normal use for one (1) year from the date of purchase from
RadioShack company-owned stores and authorized RadioShack franchisees and
dealers. EXCEPT AS PROVIDED HEREIN, RadioShack MAKES NO EXPRESS
WARRANTIES AND ANY IMPLIED WARRANTIES, INCLUDING THOSE OF MERCHANTABILITY AND FITNESS FOR A PARTICULAR PURPOSE, ARE LIMITED IN
DURATION TO THE DURATION OF THE WRITTEN LIMITED WARRANTIES CONTAINED HEREIN. EXCEPT AS PROVIDED HEREIN, RadioShack SHALL HAVE NO
LIABILITY OR RESPONSIBILITY TO CUSTOMER OR ANY OTHER PERSON OR
ENTITY WITH RESPECT TO ANY LIABILITY, LOSS OR DAMAGE CAUSED DIRECTLY OR INDIRECTLY BY USE OR PERFORMANCE OF THE PRODUCT OR
ARISING OUT OF ANY BREACH OF THIS WARRANTY, INCLUDING, BUT NOT
LIMITED TO, ANY DAMAGES RESULTING FROM INCONVENIENCE, LOSS OF
TIME, DATA, PROPERTY, REVENUE, OR PROFIT OR ANY INDIRECT, SPECIAL,
INCIDENTAL, OR CONSEQUENTIAL DAMAGES, EVEN IF RadioShack HAS BEEN
ADVISED OF THE POSSIBILITY OF SUCH DAMAGES.
Some states do not allow limitations on how long an implied warranty lasts or the exclusion or limitation of incidental or consequential damages, so the above limitations
or exclusions may not apply to you.
In the event of a product defect during the warranty period, take the product and the
RadioShack sales receipt as proof of purchase date to any RadioShack store.
RadioShack will, at its option, unless otherwise provided by law: (a) correct the defect
by product repair without charge for parts and labor; (b) replace the product with one
of the same or similar design; or (c) refund the purchase price. All replaced parts and
products, and products on which a refund is made, become the property of
RadioShack. New or reconditioned parts and products may be used in the performance of warranty service. Repaired or replaced parts and products are warranted
for the remainder of the original warranty period. You will be charged for repair or replacement of the product made after the expiration of the warranty period.
This warranty does not cover: (a) damage or failure caused by or attributable to acts
of God, abuse, accident, misuse, improper or abnormal usage, failure to follow instructions, improper installation or maintenance, alteration, lightning or other incidence of excess voltage or current; (b) any repairs other than those provided by a
RadioShack Authorized Service Facility; (c) consumables such as fuses or batteries;
(d) cosmetic damage; (e) transportation, shipping or insurance costs; or (f) costs of
product removal, installation, set-up service adjustment or reinstallation.
This warranty gives you specific legal rights, and you may also have other rights
which vary from state to state.
RadioShack Customer Relations, 200 Taylor Street, 6th Floor, Fort Worth, TX 76102
We Service What We Sell
09A00
12/99
Printed in China