1
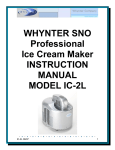
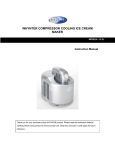
WHYNTER Compressor Cooling Ice Cream Maker MODEL# : IC-2L Instruction Manual Thank you for your purchase of this WHYNTER product. Please read this Instruction Manual carefully before using product to ensure proper use. Keep this manual in a safe place for future reference. Introduction With this Whynter SNO IC-2L Ice Cream Maker frozen desert maker, you can have delicious fresh desserts in minutes- not only rich ice cream but silky sorbets, sherbets, Italian gelato, fresh frozen yogurts and refreshing frozen drinks. The possibilities are endless. Your family and friend will love the results, and never again need you feel guilty that you bought desert because you didn’t have time to make one. Using this SNO Ice Cream Maker is simple and effortless because, unlike other ice cream makers, it has its own freezing mechanism. You don’t need salt or ice, so there’s no mess. It also has a safety feature which makes a beeping alarm if the blade becomes stuck either because of ice on the sidewall of the bowl or because the ice cream has become too hard. Finally, it has a specially designed removable bowl for easy storage and cleaning. This Ice Cream Maker is so easy to work with; you can make several flavors to serve together in less time than it takes to make most cakes. With the SNO Ice Cream Maker you can experiment with freezing all kinds of mixtures, not just sweet ones. Consider chicken soup or tomato and basil sorbets, marvelous for a cooling first course on a hot summer day. An added plus, the Ice Cream Maker will make smooth, refreshing frozen drinks like daiquiris or pina coladas, sure to be the hit of any party. Fruit based ice creams, sorbets and sherbets are only truly luscious when they still have the just picked flavor that time so rapidly destroys. That is why no commercial fruit ice, sherbets or ice cream can ever be as good as freshly homemade. For fruit ices, sherbets or ice creams to have a long freezer life, the fruits must be cooked, thereby destroying their freshness. If your creations are consumed in a short time frame, you can use uncooked fruit purees for a much better flavor. Ice Cream Recipes can be downloading from the IC-2L product page on our website, www.whynter.com or just send us an email at [email protected] and we’ll send you a guide to introduce you to a variety of mixtures-ice creams, frozen yogurts, sherbets, sorbets- which will open up a world of possibilities to explore, and once you have mastered the basics, let your imagination run wild, as you try new flavors and fun combinations. Parts Overview A- Housing B- Ventilation Openings C- Removable Bowl D- Cooling Cylinder E- Transparent Cover or Lid F- Churn Motor Power Plug G- Churn Motor H- Churn Blade I- Main Power Switch J- Timer (LCD Control) Display K- Power Cord L- Ice Cream Scoop M- Small Window (for adding Ingredients) N – Churn motor stand (prevent the churn motor from rolling when taken off) Appliance Safety Your safety and the safety of others are very important to us. To reduce the risk of fire, electrical shock, or injury when using your appliance, follow these basic precautions Plug into a grounded 3-prong outlet, do not remove grounding prong, do not use an adapter, and do not use an extension cord. Do not use if the power supply cord is damaged. If damaged, it must be replaced by a qualified electrician. It is recommended that a separate circuit, serving only your appliance be provided. Use receptacles that cannot be turned off by a switch or pull chain. Never clean appliance parts with flammable fluids or harsh chemicals. These fumes can create a fire hazard or explosion. Do not store or use gasoline or other flammable vapors and liquids in the vicinity of the appliance or any other appliance. Before proceeding with cleaning and maintenance operations, make sure to unplug the appliance. Do not connect or disconnect the electric plug with wet hands. Do not attempt to repair or replace any part of your appliance unless it is specifically recommended in this manual. All other servicing should be referred to a qualified technician. FOLLOW WARNING CALL OUTS BELOW ONLY WHEN APPLICABLE TO YOUR MODEL Make sure all Ventilation Openings (B) have a minimum clearance of 10” (25cm.) from surrounding walls and other appliances. Choose a well-ventilated area with temperatures above 60°F (16°C) and below 90°F (32°C). This appliance must be installed in an area protected from the element, such as wind, rain, water spray or drips. The appliance should not be located next to ovens, grills or other sources of high heat. It is important for the appliance to be leveled in order to work properly. For a stable installation, make sure the appliance is placed on a flat, level and solid surface. Ensure that the surface on which the appliance is placed is strong enough to hold the appliance. This appliance is not intended for use by young children or physically-challenged persons without supervision/assistance. Young children must be supervised to ensure safety around this or any appliance. Do not use solvent-based cleaning agents of abrasives on the interior. These cleaners may damage or discolor the interior. The appliance is an electrical appliance. To avoid injury from electrical shock do not operate the appliance with wet hands, while standing on a wet surface or while standing in water. Do not use outdoors or in wet conditions. When positioning or moving the appliance ensure that it is not turned upside down or greater than 45° or more off level. Never pull the cord to disconnect it from the outlet. Grasp the plug and pull it from the outlet. Never lift, carry or drag the appliance by the power cord. This appliance is designed for household, non-commercial use only. Any other use will void the warranty. Setup / Operation / Maintenance Place your Ice Cream Maker on a level counter. Make sure all Ventilation Openings (B) have a minimum clearance of 10” (25cm.) from surrounding walls and other appliances. Before using your SNO Ice Cream Maker, remove the Bowl (C) and Churn (H) and wash in warm water. The Lid (E) and Motor Drive (G) are attached and should be cleaned with a damp cloth. Do not place any part in the dishwasher. Thoroughly dry the Bowl (C) inside and outside and the blade (H) into the Lid/ Churn motor assembly (E/G) and set aside. Plug the Power Cord (K) into a standard electrical outlet (110/120V-60Hz). With the Lid/Churn Motor Assembly (E/G) off, pour ingredients according to the selected recipe into bowl (C). Replace Lid/Churn Motor Assembly (E/G). Turn the main power Switch (I) located at the rear of the appliance on. This turns on the cooling compressor and Timer Display Panel (J). Next, set the required time. The Timer Display (J) will automatically display the time set from the previous batch. To change and set the time, press the yellow timer set switch. By pressing and releasing, single minutes can be set, pressing and holding the yellow timer set switch down, will advance the minutes quickly. The time can be set from 0-60 minutes. Recommended time is 25-30 minutes. The previously set time may be changed by pressing the yellow timer set switch a second time within 6 seconds of the first setting. Once the time has been set, press the Red Start/Stop Switch to start the Churn Blade (H). When the set time has elapsed to “0” on the Timer Display (J), the buzzer will buzz 5 times alerting you that the ice cream is done. Press the Red Start/Stop Switch to stop the churn. Remove the Lid/Churn Motor Assembly (E/G) and check the ice cream. If it is ready shut the Main Power Switch (I) and remove the ice cream. Always use plastic or wooden utensils, never use metal to avoid damaging the Bowl (C). The Yellow Timer Set Switch works as a timer only; it does not turn the churn or cooling motor “Off” automatically. Both must be turned “On” and “Off” manually. If the ice cream needs more time, do not turn “Off” the Main Power Switch (I). Place the Lid/Churn Motor Assembly (E/G) in position, set the additional time required and press the Red Start/Stop Switch to start the churn. If the Churn Motor (G) was not turned “Off” after the set time elapsed, the Churn Blade (H) will continue until the blade becomes stuck in the frozen ice cream. 30 seconds after being stuck, the buzzer will buzz and the Timer Display (J) will flash. After 5 minutes, the Churn Motor (G) will shut “Off” automatically preventing any damage to the motor. The buzzer and flashing display will continue. To, reset the machine, press the Red Start/Stop Switch and turn “Off” the Main Power Switch (I). The churn blade and ice cream at this point will be frozen solid and will require defrosting before it can be removed. Be careful not to damage the removable bowl. Always unplug the unit from the outlet when not in use. If the Main Power Switch(I) is turned “Off”, always allow at least 3 minutes, before turning it back ”On”. Always keep the Ice Cream Maker in an upright position to avoid reduction of cooling performance. There will be a variation in the time it takes for a batch of ice cream to freeze, depending on the amount and on the temperature of ingredients used. If you want quicker results, use less ingredients and/or refrigerate the ingredients before use. For any faults which cannot be cleared and for further assistance and service the contact information is shown on the next page. Appliance Technical Data Voltage: Power: Cooling Temperature: Frozen dessert batch: Dimensions : Shipping dimensions: Net weight: Gross weight: 110/120V-60Hz 3.30 Amp 235W or about ⅓ HP -11F or -24C 2 Quarts+ (about 2 Liters) 11’’W x 20’’L x 15’’L x 13’’H (28cm.W x 38cm.L x 33cm. H) 16 ¼ ”W x 20”L x 17 ¾ ”H (41cm.W x 51cm.L x 45cm. H) 39Lbs. (17.75Kg.) 43Lbs. (19.5 Kg.) ONE YEAR LIMITED WARRANTY This WHYNTER ice cream maker is warranted, to the original owner within the 48 continental states, for one year from the date of purchase against defects in material and workmanship under normal use and service. Should your WHYNTER ice cream maker prove defective within one year from the date of purchase, return the defective part or unit, freight prepaid (within two months of purchase; after two months to one year, customer will be responsible for freight cost to Whynter’s service department), along with an explanation of the claim to Whynter LLC. Please package the ice cream maker carefully in its original packaging material to avoid damage in transit. Please retain original box and packaging material. Under this warranty, Whynter will repair or replace any parts found defective. This warranty is not transferable. After the expiration of the warranty, the cost of labor and parts will be the responsibility of the original owner of the unit. THIS WARRANTY DOES NOT COVER: Acts of God, such as fire, flood, hurricanes, earthquakes and tornadoes. Damage, accidental or otherwise, to the ice cream maker while in the possession of a consumer not caused by a defect in material or workmanship; Damage caused by consumer misuse, tampering, or failure to follow the care and special handling provisions in the instructions. Damage to the finish of the case, or other appearance parts caused by wear. Damage caused by repairs or alterations to the ice cream maker by anyone other than authorized by the manufacturer. Freight and Insurance cost for the warranty service. To obtain service or information, contact Whynter LLC via Email at [email protected] or call 866-WHYNTER.


![13.56MHz [MIFARE] Contactless Smart Card](http://vs1.manualzilla.com/store/data/005689074_1-1b5ba2b7f854420e24ee51932ec4423a-150x150.png)