1
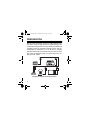
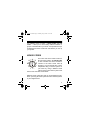
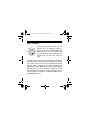
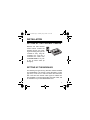
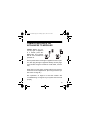
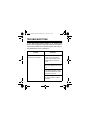
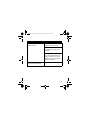
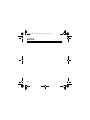
61-2677CD.fm Page 1 Tuesday, July 6, 1999 11:05 AM
Cat. No. 61-2677C D
OWNER’S MANUAL
Please read before using this equipment.
Mini Remote Control Center
61-2677CD.fm Page 2 Tuesday, July 6, 1999 11:05 AM
INTRODUCTION
With your RadioShack Mini Remote Control Center you can
discover the convenience, comfort, and security of a Plug ’N
Power® system.
You can turn off all lights and appliances plugged into your
Plug ’N Power Mini Remote Control Center with the touch of
one button from anywhere in your home.
The Mini Remote Control Center lets you control up to eight
groups of lights or appliances anywhere in your house, using special modules (not included). There are several different types of modules — some plug into AC outlets and
others replace wall outlets or wall switches, so you can tailor
your system to your needs. RadioShack stocks a wide
range of modules and Plug ’N Power accessories.
© 1999 Tandy Corporation.
All Rights Reserved.
RadioShack and Plug ’N Power are registered trademarks
used by Tandy Corporation.
2
61-2677CD.fm Page 3 Tuesday, July 6, 1999 11:05 AM
CONTENTS
Preparation ....................................................................... 4
House Codes ................................................................ 5
Unit Codes .................................................................... 6
Installation ........................................................................ 7
Setting Up the Control Center ....................................... 7
Setting Up the Modules ................................................. 7
Setting the Module’s Codes ........................................ 12
Connecting Lights or Appliances to Modules .............. 13
Operation ........................................................................ 14
Controlling Modules by Unit Codes ............................. 14
Turning On All Lights ................................................... 15
Turning Off All Units .................................................... 16
Dimming Lights ........................................................... 17
Manual Control of Lights and Appliances .................... 18
Intercom Interference .................................................. 19
Power Interruptions ..................................................... 19
Safety Precautions ........................................................ 20
Troubleshooting ............................................................ 22
Plug ’N Power System Chart ....................................... 24
Care ................................................................................. 25
3
61-2677CD.fm Page 4 Tuesday, July 6, 1999 11:05 AM
PREPARATION
Plug ’N Power controllers, such as your Mini Remote Control Center send out high-frequency signals through your
household’s wiring system. The Plug ’N Power modules (not
included) receive the controller’s signals and turn the connected lights or appliances on or off. Be sure to carefully
read this manual and the manuals that come with the modules. They are designed to help you get the most from your
Plug ’N Power system.
Example of a Plug ’N Power System In Use
4
61-2677CD.fm Page 5 Tuesday, July 6, 1999 11:05 AM
Two different types of codes — house codes and unit
codes — allow you to control many different modules or
groups of modules within your home. It is important that you
understand how these codes are used before you set up
your system.
HOUSE CODES
The house code is the master code for a
Plug ’N Power system. Set HOUSE CODE
on the controller and all the modules it
M
E controls to the same house code (A
through P). You can operate two or more
K
G independent Plug ’N Power systems in
I
your home by using a different house
code for each system. Each system must
have its own controller and modules.
O
A
C
Different house codes also help you avoid interference between your Plug ’N Power system and other similar systems
in your neighborhood.
5
61-2677CD.fm Page 6 Tuesday, July 6, 1999 11:05 AM
UNIT CODES
15
1
13
11
9
In each Plug ’N Power system, you can
operate up to 16 different modules or
3
groups of modules. Set UNIT CODE to the
5 desired code (1–16). The controller lets
you independently control each group of
7
modules that you set to the same unit
code.
The Mini Remote Control Center is intended for small Plug
’N Power systems and does not provide independent control
of all 16 unit codes. You can use it to independently control
only unit codes 1 through 8. (The Mini Controller’s ALL
LIGHTS ON and ALL UNITS OFF commands affect modules
with unit codes 1–16. (See “Operation” on Page 14.) If you
need independent control of more than eight groups of modules, we suggest our 16-Button Controller, available at your
local RadioShack store.
6
61-2677CD.fm Page 7 Tuesday, July 6, 1999 11:05 AM
INSTALLATION
SETTING UP THE CONTROL CENTER
Because the Mini Remote
Control Center controls the
modules through your existing house wiring, set up of the
controller is easy. Plug the
controller’s AC cord into a
convenient AC outlet, then
set HOUSE CODE to any one
of the 16 house codes (A
through P).
SETTING UP THE MODULES
The following are types of Plug ’N Power modules available
from RadioShack. We include a brief description of each
type here, but be sure to read and follow the instructions
that come with each module. Other types of modules are
also available. If you have special Plug ’N Power needs, ask
for assistance at your local RadioShack store.
7
61-2677CD.fm Page 8 Tuesday, July 6, 1999 11:05 AM
Appliance Modules — These modules
are designed to control small appliances
that draw up to 500 W of power and
have a two-prong, polarized AC plug.
You can also use appliance modules to
control resistive-load motors rated at 15
amps, 1/3 horsepower. Appliance modules are not affected by the controller’s
ALL LIGHTS ON command; this helps
prevent accidental activation of an appliance.
You can use appliance modules to control up to 500 W of incandescent lighting, but the lights will not respond to the
ALL LIGHTS ON command. See “Turning On All Lights” on
Page 15.
Universal Appliance Modules — Universal modules are the same as appliance
modules; however, these modules provide
connections for appliances that have 3prong, grounded plugs. You must plug
these modules into 3-prong AC outlets.
8
61-2677CD.fm Page 9 Tuesday, July 6, 1999 11:05 AM
Lamp Dimmer Modules — These modules are designed to control lamps, and
can be dimmed from the controller. You
can connect up to 300 W of incandescent
lighting to these modules. Lamp dimmer
modules respond to the controller’s ALL
LIGHTS ON command.
Caution: Use the modules only for lighting devices. Some
devices might be damaged by use of the dimmer circuit. Do
not use this type of module with light fixtures that have builtin dimmers.
Wall Switch Modules — These modules replace an existing wall switch, and allow you
to manually control the lights. You can connect up to 500 W of incandescent lighting
with one of these modules. Wall switch modules respond to the controller’s ALL LIGHTS
ON command.
9
61-2677CD.fm Page 10 Tuesday, July 6, 1999 11:05 AM
Caution: Do not use the lamp dimmer, wall switch, or 3-way
wall switch modules with fluorescent lighting.
3-Way Wall Switch Modules — These modules are
similar to wall switch modules, except that they are designed to control a light that
is currently controlled by two
different wall switches. The
3-way modules come with a
companion switch to replace
the second existing switch.
The 3-way modules respond
to the controller’s ALL
LIGHTS ON command and
can control up to 500 W of incandescent lighting. Of course,
you can also control these switches manually.
10
61-2677CD.fm Page 11 Tuesday, July 6, 1999 11:05 AM
Wall Outlet Modules — These modules completely replace
existing wall outlets, but you control only one of a module’s
receptacles from your controller. The other receptacle is always on.
You can connect appliances that draw a total
of up to 1800 W to an outlet module. Because you might use an outlet module to
control appliances, these modules do not respond to the controller’s ALL LIGHTS ON
command.
Warnings:
• The switch and outlet modules require
direct connection to your house wiring. Be sure that the
electricity is turned off at the circuit breaker while you
are installing one of these modules. If you are not familiar with typical house wiring installations, we suggest
that you have these types of modules professionally installed.
11
61-2677CD.fm Page 12 Tuesday, July 6, 1999 11:05 AM
• Low-voltage electricity flows through the circuit controlled by a switch module, even when the switch is off.
This is necessary for proper operation of the switch
module. You can completely turn off the electricity by
setting the switch’s disable switch to off (left).
Caution: Do not use a wall outlet module to replace an outlet that is controlled by a wall switch.
SETTING THE MODULE’S CODES
Set HOUSE CODE on all your modules to the same letter as
HOUSE CODE on your controller (A through P).
When setting the UNIT CODE, make sure that all modules
that are set to the same unit code respond as a group. If you
have several modules controlling lights in a single room, set
them to the same unit code. (If you set every light module to
a different unit code, you might not have enough separate
unit codes to complete your system.)
12
61-2677CD.fm Page 13 Tuesday, July 6, 1999 11:05 AM
CONNECTING LIGHTS OR
APPLIANCES TO MODULES
Caution: Before you connect any light or appliance
to a module, press ALL
UNITS OFF. This assures
that all of the modules are
powered off.
Set the power switch on the light or appliance to the on position, then plug the light or appliance directly into the plug’s
power module. Plug the module into a wall outlet, if necessary.
Write down your unit codes, module locations, and connected devices on the supplied chart. (See “Plug ’N Power System Chart” on Page 24.)
See “Operation” on Page 14 to test each module. See
“Troubleshooting” on Page 22 if your system does not work
properly.
13
61-2677CD.fm Page 14 Tuesday, July 6, 1999 11:05 AM
OPERATION
Operation of a Plug ’N Power system is simple, but be sure
that you have a complete chart of your system close by so
you know exactly what you are controlling. See the “Plug ’N
Power System Chart” on Page 24.
Note: Each switch on your controller performs two functions
— ON or OFF, BRIGHT or DIM, and so on. These functions
are clearly marked. Pressing the top of a rocker switch activates one function and pressing the bottom activates another. When you press a button, the transmit indicator lights,
indicating that a signal has been sent.
CONTROLLING MODULES BY UNIT
CODES
You can control any module or group of modules that you
set for a particular unit code. Of course, all of the modules
must be set to the same house code as the controller. (See
“House Codes” on Page 5.)
14
61-2677CD.fm Page 15 Tuesday, July 6, 1999 11:05 AM
1. Set the mini controller’s selector switch to the desired
unit code range (1–4 or 5–8).
2. To turn on all the devices connected to modules with
the same unit code setting, press ON for the desired
unit code switch (1/5, 2/6, 3/7, or 4/8).
3. To turn off all the devices connected to modules with
the same unit code setting, press OFF for the desired
unit code switch (1/5, 2/6, 3/7, or 4/8).
TURNING ON ALL LIGHTS
To turn on all the lights that are connected to light dimmer
modules, wall switch modules, or 3-way switch modules,
press ALL LIGHTS ON.
Warning: Do not use a module that responds to the ALL
LIGHTS ON command to control potentially dangerous devices (such as heaters or fans, for example).
15
61-2677CD.fm Page 16 Tuesday, July 6, 1999 11:05 AM
Note: The modules must be set to the same house code as
the controller, but not necessarily the same unit codes. In
fact, modules set to unit codes 9–16 respond to ALL LIGHTS
ON even though your mini controller cannot independently
control modules set to unit codes above 8. (If you are using
the mini controller as a second controller in a Plug ’N Power
system, you might encounter this situation.)
TURNING OFF ALL UNITS
To turn off all devices that are connected to modules that
you set to the same house code as the controller, press ALL
UNITS OFF. This feature is especially useful when you want
to turn off everything at the same time.
16
61-2677CD.fm Page 17 Tuesday, July 6, 1999 11:05 AM
DIMMING LIGHTS
You can dim any lights that are connected to lamp dimmer
modules.
1. Set the mini controller’s selector switch to the desired
unit code range (1–4 or 5–8).
2. Press the ON switch for the unit code of the lamp dimmer modules you want to dim (1/5, 2/6, 3/7, or 4/8).
3. Hold down DIM until the light dims to the desired level. If
you dim the lights too much, hold down BRIGHT to raise
the light level.
Caution: Do not connect anything other than a lamp to a
lamp dimmer module. The dimmer circuit might damage
other devices.
17
61-2677CD.fm Page 18 Tuesday, July 6, 1999 11:05 AM
MANUAL CONTROL OF LIGHTS AND
APPLIANCES
Even though your lights and appliances are connected to
Plug ’N Power modules, you can still turn most of them on
and off manually.
• For most products, simply turn the power switch off and
back on again.
• For 3-way lamps, you might have to turn the lamp’s
switch several times before the light turns on.
• You always have manual control of wall switch modules
by simply using their on/off buttons.
• You cannot manually turn on instant-on TVs that are
connected to Plug ’N Power modules.
18
61-2677CD.fm Page 19 Tuesday, July 6, 1999 11:05 AM
INTERCOM INTERFERENCE
Some intercoms also send signals through the house wiring.
If you have this type of system, it is likely that it will interfere
with the operation of your Plug ’N Power system. However,
it will interfere only when both systems are in use at the
same time (if you leave an intercom in a child’s room in the
transmit mode, for example). If this is a problem, use an intercom that has its own separate wiring system.
POWER INTERRUPTIONS
When power is restored after a power failure, lamp dimmer
modules and both types of wall switch modules default to
OFF. Appliance modules remain in the state they were in before the power failure.
19
61-2677CD.fm Page 20 Tuesday, July 6, 1999 11:05 AM
SAFETY PRECAUTIONS
• Do not attempt to control lights or appliances that exceed the ratings of the modules. If you want to control
appliances that exceed the ratings of the standard modules, ask your RadioShack salesperson for assistance.
• Do not connect a heating appliance to your Plug ’N
Power system.
• If you want to control fluorescent, mercury vapor, sodium vapor, or low-voltage lights, ask your RadioShack
salesperson for assistance.
• Do not use lamp dimmer modules to control light fixtures that have built-in dimmers.
• Do not use wall switch or 3-way switch modules to replace switches that control wall outlets or non-lighting
devices.
20
61-2677CD.fm Page 21 Tuesday, July 6, 1999 11:05 AM
• The switch and outlet modules require direct connection to your house wiring. If you are not familiar with typical house wiring installations, we suggest that you
have these types of modules professionally installed. In
any case, be sure that the electricity is turned off at the
circuit breaker while you are installing one of these
modules.
• Low-voltage electricity flows through the circuit controlled by a switch module even when the switch is off.
• Before changing a light bulb, make sure the remote’s
slide switch is set to the left position.
21
61-2677CD.fm Page 22 Tuesday, July 6, 1999 11:05 AM
TROUBLESHOOTING
If your Mini Remote Control Center is not working as it
should, these suggestions might help eliminate the problem.
If the controller still does not operate properly, take it to your
local RadioShack store for assistance.
Problem
A particular module doesn’t
respond to the controller.
Remedies
Be sure the module and controller are set to the same
house code and that you are
addressing the correct unit
code.
Be sure the power switch for
the light or appliance is turned
on.
Try plugging the light or appliance into a different AC outlet
that you know is “live.”
If the light/appliance works,
move the module to a different outlet.
22
61-2677CD.fm Page 23 Tuesday, July 6, 1999 11:05 AM
None of the modules respond
to the controller.
Be sure the controller is
plugged into an AC outlet.
Be sure the controller is set to
the same house code as the
modules.
Try plugging the light or appliance into a different AC outlet
with the module in the same
outlet. Then try a different outlet for the module.
Lights and/or appliances turn
on and off by themselves.
Try a different house code.
23
61-2677CD.fm Page 24 Tuesday, July 6, 1999 11:05 AM
PLUG ’N POWER SYSTEM CHART
Module
Unit Code
24
Module
Location
Connected
Device
61-2677CD.fm Page 25 Tuesday, July 6, 1999 11:05 AM
CARE
To enjoy your Mini Remote Control Center for a long time:
• Keep the mini controller dry. If it gets wet, wipe it dry immediately.
• Use and store the mini controller only in normal temperature environments.
• Handle the mini controller gently and carefully. Don’t
drop it.
• Keep the mini controller away from dust and dirt.
• Wipe the mini controller with a damp cloth occasionally
to keep it looking new.
Modifying or tampering with the mini controller’s internal
components can cause a malfunction and invalidate its warranty. If your mini controller is not performing as it should,
take it to your local RadioShack store for assistance.
25
61-2677CD.fm Page 26 Tuesday, July 6, 1999 11:05 AM
NOTES
26
61-2677CD.fm Page 27 Tuesday, July 6, 1999 11:05 AM
27
61-2677CD.fm Page 28 Tuesday, July 6, 1999 11:05 AM
Limited One-Year Warranty
This product is warranted by RadioShack against manufacturing defects in material and workmanship
under normal use for one (1) year from the date of purchase from RadioShack company-owned stores
and authorized RadioShack franchisees and dealers. EXCEPT AS PROVIDED HEREIN, RadioShack
MAKES NO EXPRESS WARRANTIES AND ANY IMPLIED WARRANTIES, INCLUDING THOSE OF
MERCHANTABILITY AND FITNESS FOR A PARTICULAR PURPOSE, ARE LIMITED IN DURATION
TO THE DURATION OF THE WRITTEN LIMITED WARRANTIES CONTAINED HEREIN. EXCEPT AS
PROVIDED HEREIN, RadioShack SHALL HAVE NO LIABILITY OR RESPONSIBILITY TO CUSTOMER OR ANY OTHER PERSON OR ENTITY WITH RESPECT TO ANY LIABILITY, LOSS OR
DAMAGE CAUSED DIRECTLY OR INDIRECTLY BY USE OR PERFORMANCE OF THE PRODUCT
OR ARISING OUT OF ANY BREACH OF THIS WARRANTY, INCLUDING, BUT NOT LIMITED TO,
ANY DAMAGES RESULTING FROM INCONVENIENCE, LOSS OF TIME, DATA, PROPERTY, REVENUE, OR PROFIT OR ANY INDIRECT, SPECIAL, INCIDENTAL, OR CONSEQUENTIAL DAMAGES,
EVEN IF RadioShack HAS BEEN ADVISED OF THE POSSIBILITY OF SUCH DAMAGES.
Some states do not allow the limitations on how long an implied warranty lasts or the exclusion of incidental or consequential damages, so the above limitations or exclusions may not apply to you.
In the event of a product defect during the warranty period, take the product and the RadioShack sales
receipt as proof of purchase date to any RadioShack store. RadioShack will, at its option, unless otherwise provided by law: (a) correct the defect by product repair without charge for parts and labor; (b) replace the product with one of the same or similar design; or (c) refund the purchase price. All replaced
parts and products, and products on which a refund is made, become the property of RadioShack.
New or reconditioned parts and products may be used in the performance of warranty service. Repaired or replaced parts and products are warranted for the remainder of the original warranty period.
You will be charged for repair or replacement of the product made after the expiration of the warranty
period.
This warranty does not cover: (a) damage or failure caused by or attributable to acts of God, abuse,
accident, misuse, improper or abnormal usage, failure to follow instructions, improper installation or
maintenance, alteration, lightning or other incidence of excess voltage or current; (b) any repairs other
than those provided by a RadioShack Authorized Service Facility; (c) consumables such as fuses or
batteries; (d) cosmetic damage; (e) transportation, shipping or insurance costs; or (f) costs of product
removal, installation, set-up service adjustment or reinstallation.
This warranty gives you specific legal rights, and you may also have other rights which vary from state
to state.
RadioShack Customer Relations, 200 Taylor Street, 6th Floor, Fort Worth, TX 76102
We Service What We Sell
07A99
04/99
Printed in China