1
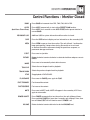
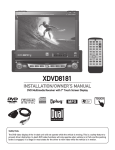
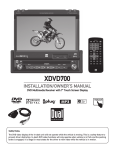
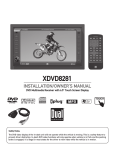
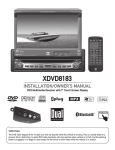
XDVD710 INSTALLATION/OWNER’S MANUAL DVD Multimedia Receiver with 7” Touch Screen Display Safety Notes: The DVD video display of the in-dash unit will not operate while the vehicle is moving. This is a safety feature to prevent driver distraction. In-dash DVD video functions will only operate when vehicle is in Park and the parking brake is engaged. It is illegal in most states for the driver to view video while the vehicle is in motion. Copyright Notes This product incorporates copyright protection technology that is protected by method claims of certain U.S. patents and other intellectual property rights owned by Macrovision Corporation and other rights owners. Use of this copyright protection technology must be authorized by Macrovision Corporation, and is intended for home and other limited viewing uses only unless otherwise authorized by Macrovision Corporation. Reverse engineering or disassembly is prohibited. Manufactured under license from Dolby Laboratories. “Dolby” and the double-D symbol are trademarks of Dolby Laboratories. Windows Media and the Windows logo are trademarks, or registered trademarks of Microsoft Corporation in the United States and or other countries. All other trademarks are property of their respective owners. XDVD710 PREPARATION Table of Contents Page DVD Region Management . . . . . . . . . . . . . . . . . . . . . . . . . . . . . . . . . . . . . . . . Warning Statement . . . . . . . . . . . . . . . . . . . . . . . . . . . . . . . . . . . . . . Safety Information/Precautions . . . . . . . . . . . . . . . . . . . . . . . . . . . . . . . . . . . Preparation/Mounting/Wiring . . . . . . . . . . . . . . . . . . . . . . . . . . . . . . . . . . . . . Remote Control Overview . . . . . . . . . . . . . . . . . . . . . . . . . . . . . . . . . . . . . Control Locations - Monitor Closed . . . . . . . . . . . . . . . . . . . . . . . . . . . . . . . . . . Control Locations - Monitor Open . . . . . . . . . . . . . . . . . . . . . . . . . . . . . . . . . Control Locations - Remote . . . . . . . . . . . . . . . . . . . . . . . . . . . . . . . . . . . . . . General Operation . . . . . . . . . . . . . . . . . . . . . . . . . . . . . . . . . . . . . . . . . . . . . . General Setup Menu . . . . . . . . . . . . . . . . . . . . . . . . . . . . . . . . . . . . . . . . . . . . . Setting the Clock . . . . . . . . . . . . . . . . . . . . . . . . . . . . . . . . . . . . . . . . . . . . Anti-theft Code . . . . . . . . . . . . . . . . . . . . . . . . . . . . . . . . . . . . . . . . . . . . . . . Screen Setup. . . . . . . . . . . . . . . . . . . . . . . . . . . . . . . . . . . . . . . . . . . . . AM/FM Tuner Operation . . . . . . . . . . . . . . . . . . . . . . . . . . . . . . . . . . . . . . . . . Warning Statement . . . . . . . . . . . . . . . . . . . . . . . . . . . . . . . . . . . . . . . DVD Operation . . . . . . . . . . . . . . . . . . . . . . . . . . . . . . . . . . . . . . . . . . . . . . . . DVD Setup . . . . . . . . . . . . . . . . . . . . . . . . . . . . . . . . . . . . . . . . . . . . . . . . . . . . CD Operation . . . . . . . . . . . . . . . . . . . . . . . . . . . . . . . . . . . . . . . . . . . . . . . . . . MP3/WMA Operation . . . . . . . . . . . . . . . . . . . . . . . . . . . . . . . . . . . . . . . . . . . . Media Compatibility Information . . . . . . . . . . . . . . . . . . . . . . . . . . . . . . Warranty . . . . . . . . . . . . . . . . . . . . . . . . . . . . . . . . . . . . . . . . . . . . . . . . . . . . . Troubleshooting . . . . . . . . . . . . . . . . . . . . . . . . . . . . . . . . . . . . . . . . . . . . . . . . Specifications . . . . . . . . . . . . . . . . . . . . . . . . . . . . . . . . . . . . . . . . . . . . . . . . . . 2 3 4 5-7 8 9-10 11-12 13-14 15-20 21-22 23 24 25-28 29-30 31 32-39 40-42 43-44 45-46 47-48 49 50 51 DVD Region Management Some DVD discs can be played only in certain playback modes according to the intentions of the software. As the XDVD710 plays discs according to their intentions, some functions may not work as intended. Please be sure to read the instructions provided with each disc. This player has been designed to play back DVD software that has been encoded for specific region areas. It cannot play back DVD software encoded for other region areas than the region areas for which it has been designed. The XDVD710 will play discs labeled “Region 1” or “All”. DVD region codes: 1 - USA, Canada 2 - Japan, Europe, South Africa, Middle East 3 - Rep. of Korea, Taiwan, Hong Kong, Parts of Southeast Asia 4 - Australia, New Zealand, Mexico, South America 5 - Eastern Europe, Russia, India, Africa 6 - China 2 XDVD710 PREPARATION WARNING Upon installation of this Monitor/DVD player (“unit”) into a vehicle, the driver of the vehicle must not operate this unit by watching videos or playing video games while driving. Failure to follow this instruction could lead to driver distraction which could result in serious injury or death to the vehicle’s occupants or persons outside the vehicle and/or property damage. Several states prohibit the installation of monitors/DVD players if the screen is visible from the driver’s seat. If you reside in a jurisdiction which has enacted such a law, this unit must not be installed so that the screen is visible from the driver’s seat. When installing this unit in the front console/dashboard, the unit must be positioned so that it is facing the front passenger seat only. Failure to follow this instruction could lead to driver distraction which could result in serious injury or death to the vehicle’s occupants or persons outside the vehicle and/or property damage. This unit is designed so that it may be operated only when the vehicle is in “Park” and the parking brake is fully engaged. To this end, this unit includes a parking brake lock-out feature which prohibits the unit from operating if the vehicle is not in “Park” and/or the parking brake is not fully engaged. When installing this unit, the installer must connect the parking brake detect wire (“Yellow-Blue Lead”) to the parking brake mechanism in order to make the parking brake lock-out feature operable. DO NOT simply ground the parking brake detect wire to a metal portion of the vehicle. Failure to properly install the parking brake lock-out feature could lead to driver distraction which could result in serious injury or death to the driver’s occupants or persons outside the vehicle and/or property damage. Once the parking brake lock-out feature is installed, the owner/user must not attempt to disrupt/neutralize the parking brake lock-out feature by (a) partially engaging the parking brake and/or (b) purchasing/using any device or unit designed to send necessary brake signals to the unit. Failure to follow these instructions could lead to driver distraction which could result in serious injury or death to the driver’s occupants or persons outside the vehicle and/or property damage. When operating this unit, keep the unit’s volume level low enough so that the vehicle’s occupants can hear traffic-related sounds such as police and emergency vehicles. Failure to follow this instruction could lead to driver distraction which could result in serious injury or death to the vehicle’s occupants or persons outside the vehicle and/or property damage. 3 XDVD710 OPERATION Safety Information Please read all instructions carefully before attempting to install or operate. Due to its technical nature, it is highly recommended that your DUAL XDVD710 is installed by a professional installer or an authorized dealer. This product is only for use in vehicles with 12VDC negative ground only. Safety Notes: The DVD video display of the in-dash unit will not operate while the vehicle is moving. This is a safety feature to prevent driver distraction. In-dash DVD video functions will only operate when vehicle is in Park and the parking brake is engaged. It is illegal in most states for the driver to view video while the vehicle is in motion. To prevent damage or injury: 1. Make sure to ground the unit securely to the vehicle chassis ground. 2. Do not remove the top or bottom covers of the unit. 3. Do not install the unit in a spot exposed to direct sunlight or excessive heat or the possibility of water splashing. 4. Do not subject the unit to excessive shock. 5. When replacing a fuse, only use a new one with the prescribed rating. Using a fuse with the wrong rating may cause the unit to malfunction. 6. To prevent short circuits when replacing a fuse, disconnect the wiring harness first. 7. Use only the provided hardware and wire harness. 8. You cannot view video while the vehicle is moving. Find a safe place to park and engage the parking brake. 9. If you experience problems during installation, consult your nearest DUAL dealer. 10.If the unit malfunctions, reset the unit as described on page 12 first. If the problem still persists, consult your nearest DUAL dealer or call tech assistance @ 1-866-382-5476. 11.To clean the monitor, wipe only with a dry silicone cloth or soft cloth. Do not use a stiff cloth, or volatile solvents such as paint thinner and alcohol. They can scratch the surface of the panel and/or remove the printing. 12.When the temperature of the unit falls (as in winter), the liquid crystal inside the screen will become darker than usual. Normal brightness will return after using the monitor for a while. Additional Notes: 1.When extending the ignition, battery or ground cables, make sure to use automotive-grade cables or other cables with an area of 0.75mm (AWG 18) or more to prevent voltage drops. 2.Do not touch the liquid crystal fluid if the LCD is damaged or broken. The liquid crystal fluid may be hazardous to your health or fatal. If the liquid crystal fluid from the LCD contacts your body or clothing, wash it off with soap immediately. This device complies with part 15 of the FCC rules and regulations. Operation is subject to the following two conditions: 1) This device may not cause harmful interference, and 2) This device must accept any interference received, including interference that may cause undesired operation. 4 XDVD710 INSTALLATION Preparation Please read entire manual before installation. Before You Start •Disconnect negative battery terminal. Consult a qualified technician for instructions. •Avoid installing the unit where it would be subject to high temperatures, such as from direct sunlight, or where it would be subject to dust, dirt or excessive vibration. Getting Started •Slide the unit out of the mounting sleeve. •Install mounting sleeve into opening, bending tabs to secure. •Connect wiring harness and antenna as shown on pages 6-7. Consult a qualified technician if you are unsure. •Certain vehicles may require an installation kit and/or wiring harness adapter (sold separately). •Test for correct operation and slide unit into mounting sleeve. • Attach unit to mounting sleeve using supplied #1 Phillips screws. •Snap trim ring into place. •Mount the iplug™ adapter to any smooth clean surface using the supplied double-sided tape or Phillips head screws. Mounting sleeve opening dimensions 7-3/16” x 2-1/16” (183 mm x 53 mm) TYPICAL FRONT-LOAD DIN MOUNTING METHOD 5 XDVD710 INSTALLATION Expanded Wiring Diagram - Inputs/Outputs Wiring Notes: Subwoofer output The SUBWOOFER audio output (Blue RCA) is active in all audio modes and must be connected to an external amplifier. Rear view camera A rear view camera (not included) can be used with the CAMERA input. NEED HELP?? Call our Technical Service Hotline, 1-866-382-5476. Safety Notes: The DVD video display of the in-dash unit will not operate while the vehicle is moving. This is a safety feature to prevent driver distraction. In-dash DVD video functions will only operate when vehicle is in Park and the parking brake is engaged. It is illegal in most states for the driver to view video while the vehicle is in motion. Altering or defeating this safety feature is a violation of law and is prohibited. 6 XDVD710 INSTALLATION Wiring Diagram - Optional A/V Connections 7 XDVD710 OPERATION IR Remote Preparation To first use the IR Remote control, you must first pull the battery insulation tape out Notes: • Remove the battery if the remote will not be used for a month or longer • Remove and dispose of battery properly Insert or replacing the Battery: Remove the battery holder Remove the battery from the battery holder Install the new battery Make sure to keep the (+) side up Insert the battery holder CAUTION!!! • Do not store battery with metallic objects or materials 8 XDVD710 OPERATION Control Locations - Monitor Closed 1 2 4 3 5 6 16 15 14 13 12 11 10 9 8 7 Play/Pause/Scan 1 Band 9 2 Auto Store/Preset Scan 10 Stop 3 Secondary LCD 11 Chapter/Track Up 4 Display 12 Chapter/Track Down 5 Open/Close Monitor 13 Fast Forward 6 Eject 14 Fast Reverse 7 Rotary Encoder/Enter 15 Mute 8 Mode 16 Power/Volume Monitor Notes: • This model incorporates a motorized moving monitor. Before final installation, make sure the monitor will not obstruct the dash, shifter or any other controls. • Upon installation, do not attempt to move the monitor up/down by hand. Use the ANGLE / and OPEN buttons on the front panel only. • The unit will stop if it encounters any obstacles during the open/close sequence. If this occurs, remove the obstacle and press OPEN again to resume the monitor open/close sequence. 9 XDVD710 OPERATION Control Functions - Monitor Closed BAND AS/PS (Auto Store /Preset Scan) SECONDARY LCD Press BAND to increment from FM1, FM2, FM3, AM1] FM1. Press AS/PS momentarily to start station PRESET SCAN function, Press AS/PS for 2 seconds to start AUTO STORE station preset function in current BAND. Additional LCD for system information while monitor is closed. DISP Press the DISP button to display various information on the secondary LCD. OPEN Press OPEN to open or close the monitor. The unit will emit 1 confirmation beep upon opening, 3 beeps when closing. Be careful not to not touch or obstruct the monitor movement during the open/close sequence, or permanent damage could occur. EJECT Press once to eject disc. ROTARY MODE TRACK UP TRACK DOWN STOP PLAY/PAUSE Rotate clockwise/counter-clockwise to select desired item and press once to ENTER. Press once to incrementally select desired source. Selects the next chapter/track for playback. Selects the previous chapter/track for playback. Stop playback of DVD/CD/MP3. Press once for PAUSE, press again for PLAY. FAST FORWARD Fast forward the content. FAST REVERSE Fast reverse the content. MUTE POWER ON/OFF VOLUME Press once to MUTE audio, MUTE will appear in the secondary LCD. Press again to return audio. Press POWER momentarily to turn the unit on, the unit will beep 2 times. Press and hold POWER for more than 2 seconds, unit will beep 1 time, then turn off. Note: EJECT will still function even if POWER is off. Rotate clockwise/counter clockwise for desired VOLUME level, 10 XDVD710 OPERATION Control Locations - Monitor Open 1 2 3 4 5 1 Disc-in indicator - Red = Disc inserted, White = No disc. 2 ANGLE - Press to decrease the monitor view angle. 3 ANGLE - Press to increase the monitor view angle. 4 INFO - Press to select DVD INFO and press and hold for BRIGHTNESS. 5 Press to RESET system. Safety Notes: The DVD video display of the in-dash unit will not operate while the vehicle is moving. This is a safety feature to prevent driver distraction. In-dash DVD video functions will only operate when vehicle is in Park and the parking brake is engaged. It is illegal in most states for the driver to view video while the vehicle is in motion. 11 XDVD710 OPERATION Control Functions - Monitor Open Disc-in indicator Monitor Angle pq White = No disc Red = Disc inserted Press ANGLE p to increase the monitor view angle. Press ANGLE q to decrease the monitor view angle. Notes: • Do not attempt to move the monitor up/down by hand - severe damage will occur. Use the front panel buttons or the remote control only. • The color of the LCD monitor varies between viewing angles. Select the angle with the most optimum view for your location. • The last position of the monitor will be saved in memory. The monitor will return to its last position automatically the next time it is opened. INFO/PIC Press INFO button for 1 second to display DVD disc information. Press and hold INFO for 2 seconds to change TFT LCD BRIGHTNESS: Press ANGLE p to increase, ANGLE q to decrease or use VOLUME rotary to adjust the level up or down, (0 minimum/20 maximum), 10 is default. SYSTEM RESET If you experience abnormal operation or, your unit is inoperable, press the RESET button for 3 seconds, located on the front bottom-right corner of the unit. After a system reset, the unit restores all factory default settings. Note: Use the tip of a pen to access the button. 12 XDVD710 OPERATION Control Locations - Remote 1 2 3 4 5 6 7 8 9 10 11 12 13 14 15 16 17 18 19 20 21 22 23 24 25 26 27 28 29 30 31 32 33 34 35 36 37 38 39 40 1 Mode 16 Info 31 Root 2 Mute 17 Search 32 Repeat 3 Open/Close 18 Key #0 33 Chapter/Track Down 4 Power 19 Band/Stop 34 Chapter/Track Up 5 Key #1 20 Audio Select 35 Fast Rewind 6 Key #2 21 Escape 36 Fast Forward 7 Key #3 22 4-Way - Up 37 Zoom 8 Volume Up 23 Menu 38 Audio 9 Key #4 24 Picture 39 Angle 10 Key #5 25 4-Way - Left 40 Sub-Title 11 Key #6 26 Ok 12 Volume Down 27 4-Way - Right 13 Key #7 28 Repeat A-B 14 Key #8 29 Title Menu 15 Key #9 30 4-Way - Down * The remote control uses one 3 volt Lithium CR2025 battery. For best performance, replace only with CR2025 or equivalent. 13 XDVD710 OPERATION Control Functions - Remote Mode Press once to incrementally select desired source. Mute Press once to MUTE audio, press again to return audio. Open/Close Power Keys 0-9 Volume Up Volume Down Info Search Band/Stop Audio Select Escape 4-Way -Up/Down/Left/Right Menu Picture Ok Repeat A-B Title Menu Root Repeat Chapter/Track Down Chapter/Track Up Press once to open monitor, press again to close the monitor. Press once to turn the unit on, press again to turn unit off. Direct access chapter/track/preset station for current BAND. Increase VOLUME. Decrease VOLUME. Displays DVD information. Search function in the DVD/CD disc mode. Press to increment BAND, or STOP while in DVD/MP3 mode. Enter AUDIO Setup mode. Exit current menu. Navigating system and DVD menus. Enter the MAIN system menu. BRIGHTNESS parameter setting for TFT. Starts/pauses playback or confirm settings. Repeat playback from time frame A to time frame B. Enters the title menu on DVD. Enters the main menu of the DVD. Repeats playback of current chapter/track or folder. Selects the previous chapter/track for playback. Selects the next chapter/track for playback. Fast Rewind Fast reverses the disc content. Fast Forward Fast forwards the disc content. Zoom Zooming in/out on an image from DVD disc. Audio Change the audio language for DVD disc playback. Angle Selects between different angles (when available) for a scene. Sub-Title Language selection for subtitle. 14 XDVD710 OPERATION General Operation Power On/Off Monitor Open/Close Press POWER momentarily to turn the unit on, the unit will beep 2 times. Press and hold POWER for more than 2 seconds, unit will beep 1 time, then turn off. Note: EJECT will still function even if POWER is off. Press OPEN to open or close the monitor. The unit will emit 1 confirmation beep when opening, 3 beeps when closing. Be careful not to not touch the monitor during the open/close sequence. Notes: • The unit will stop automatically during open/close if an obstacle is detected. If this occurs, remove the obstacle and press OPEN again to resume the monitor open/close sequence. • Audio can be heard while the monitor is closed. Monitor Angle Position Press ANGLE p to increase the monitor view angle. Press ANGLE q to decrease the monitor view angle. Notes: • Do not attempt to move the monitor up/down by hand - severe damage will occur. Use the front panel buttons or the remote control only. • The color of the LCD monitor varies between viewing angles. Select the angle with the most optimum view for your location. • The last position of the monitor can be saved in memory. The monitor will return to its last position automatically the next time it is opened. Notes: • The vehicle must be in park and the parking brake applied to view video on the in-dash monitor. • As a safety feature, a blue “CAUTION” screen will show on the display when the vehicle's parking brake is not engaged. DVD, AV1 audio can be heard while the vehicle is in motion. • The video display of the in-dash unit will not operate while the vehicle is moving. This is a safety feature to prevent driver distraction. In-dash video functions will only operate when vehicle is in Park and the parking brake is engaged. It is illegal in most states for the driver to view video while the vehicle is in motion. Refer to local laws in your area. See DVD operation on page 32 for more details on how to initialize the PARKING BRAKE. 15 XDVD710 OPERATION General Operation Mode Optional Mode Selection Volume Mute Audio Adjustment from front panel Press MODE to select between TUNER, DVD, AUX IN, and CAMERA inputs. Modes of operation are indicated in the OSD (On Screen Display) and secondary LCD. With the monitor open, press the top left corner of the screen to display the OSD menu. Press TUNER, DVD, AUX IN or CAMERA icon to select the desired source. Adjust VOLUME using rotary encoder or the VOL buttons (00-40). Press MUTE to silence the audio; Press MUTE again to cancel. will appear in the OSD. Press in VOLUME rotary knob on left front panel, Press in VOLUME again to advance to desired parameter to be changed, Turn VOLUME rotary Q or P to adjust to desired level, Press in VOLUME to advance to next selection, Press and hold the VOLUME button on the front panel to exit. ITEM 00 00 EQ 00 R F 00 L R 00 L Audio Adjustment from Remote RANGE USER FLAT JAZZ POP CLASSIC ROCK NEWS URBAN MOVIE RAVE TECHNO BASS -7 +7 TREBLE -7 +7 FADE -7 +7 BALANCE -7 +7 SUB -7 +7 OFF ON LOUD Press the SEL button, Press the p q buttons on the remote to select an item to be adjusted, Press or to adjust the desired setting, Press the ESC button on the remote control to exit the audio control menu. Notes: The Bass and Treble levels are only adjustable when EQ is set to "User” mode. The Loud function compensates for deficiencies in sound ranges at low levels. When the Loud function is on, LOUD is displayed on the screen. 16 XDVD710 OPERATION General Operation INFO/PIC RGB BRIGHTNESS CVBS Screen Controls SHARPNESS CONTRAST COLOR BRIGHTNESS TINT Note: Adjustments to SHARPNESS, CONTRAST, COLOR, BRIGHTNESS & TINT are only possible while in either AUX-IN or CAMERA CVBS mode. Press INFO button for 1 second to display DVD disc information. Press and hold INFO for 2 seconds to change TFT LCD BRIGHTNESS: Press ANGLE p to increase, ANGLE q to decrease, or use VOLUME rotary to adjust the level up or down. (0 minimum/20 maximum) 10 is default. While in AUX IN or CAMERA mode: Press and hold INFO for 2 seconds to access PICTURE MENU, press INFO briefly again to step to next selection: PICTURE MENU [SHARPNESS [CONTRAST [COLOR [BRIGHTNESS [TINT 10 10 10 10 10 L Press q or p to adjust the sharpness (0 minimum/+20 maximum). Press q or p to adjust the contrast (0 minimum/+20 maximum). Press q or p to adjust the color (0 minimum/+20 maximum). Press q or p to adjust the brightness (0 minimum/+20 maximum). Press q or p to adjust the tint (0 minimum/+20 maximum). 17 XDVD710 OPERATION General Operation BAND Press BAND to increment from FM1, FM2, FM3, AM1] FM1. AS/PS (Auto Store /Preset Scan) Press AS/PS momentarily to start station PRESET SCAN function. The unit will now scan your program presets for 10 seconds for each preset in that band. Press AS/PS again to stop scanning. Press AS/PS for 2 seconds to start AUTO STORE station preset function in current BAND. DISP Press the DISP button to display various information on the secondary LCD screen when the monitor is closed. OPEN Press OPEN to open or close the monitor. The unit will emit 1 confirmation beep upon opening, 3 beeps when closing. Be careful not to not touch or obstruct the monitor movement during the open/close sequence, or permanent damage could occur. EJECT Press once for DISC ejection. ROTARY MODE TRACK UP TRACK DOWN STOP PLAY/PAUSE Press to access MAIN menu, rotate clockwise/counter-clockwise to select desired item and press once to ENTER. Press once to incrementally select desired source. Selects the next chapter/track for playback. Selects the previous chapter/track for playback. Stop playback of DVD/CD/MP3. Press once for PAUSE, press again for PLAY. FAST FORWARD Fast forward the disc content. FAST REVERSE Fast reverse the disc content. MUTE Press once to MUTE audio, press again to return audio, an icon indicator will flash on the TFT monitor. POWER ON/OFF Press POWER momentarily to turn the unit on, the unit will beep 2 times. Press and hold POWER for more than 2 seconds, unit will beep 1 time, then turn off. Note: EJECT will still function even if POWER is off. VOLUME PROGRAMMABLE TURN-ON VOLUME Rotate VOLUME rotary knob Q or P for desired VOLUME level, press once to access the AUDIO SETUP MENU. Turn VOLUME rotary to desired listening level, press and hold VOLUME rotary knob for 3 seconds to program currently selected volume level. 18 XDVD710 OPERATION General Operation Secondary LCD Information 1 2 3 4 Note: Secondary LCD only functions when TFT monitor is closed. 1) LOC 2) ST 3) TIME 4) LOUD 19 LOCAL indicator, icon will be off when DISTANCE (DX) is selected STEREO radio station indicator Displays TRACK time, TUNING frequency, MP3 ID3 info, & CLOCK, etc LOUDNESS selection indicator XDVD710 OPERATION General Operation Main Menu Access There are three methods to access the MAIN menu • Press the ENTER button on the right ROTARY knob • Press the MENU button on the remote control • Touch the upper left corner of the touch screen 1 3 2 10 9 8 L 7 6 Touch Access Buttons 1) 2) 3) 4) 5) 6) 7) 8) 9) 10) Rapid Dial 5 4 Touch to access AM/FM TUNER mode Touch to access CD/DVD mode, (CD/DVD must be inserted) Touch to RETURN to previous screen Touch to access CAMERA mode, if optional camera isn't connected then "No Video Signal" will be displayed Touch to STANDBY screen, touch screen again or any button to resume display Note: VOLUME level can be controlled in STANDBY mode Touch to access AUXILIARY A/V INPUT mode Touch to access SCREEN SETUP menu Touch to access GENERAL SETUP menu Touch to access CD/DVD SETUP menu, (CD/DVD must be inserted to function) Touch to access MAIN Source menu RAPID DIAL can also control touch screen functions from the main menu • Select desired function rotating clockwise or counter-clockwise • Function will be outlined in yellow • Press to confirm/ENTER 20 XDVD710 OPERATION GENERAL Setup - Menu General Setup Menu L Note: Default anti-theft password is 0000 Settings Default Radio USA Clock adjust Clock Mode AM 12Hr Camera Image Normal Video Format Auto TFT Auto Open Off Anti-theft Code Anti-theft active 0000 Off • Press the GENERAL button to access the GENERAL setup mode • Select desired parameter you wish to change • Page will return back to previous screen after 10 seconds of inactivity or by pressing the RETURN button GENERAL Setup Menu matrix Options USA S-Amer1 S-Amer2 Europe 00:00 12Hr 24Hr Normal Reverse Auto NTSC PAL On Off Manual ---On Function Set to appropriate setting for your country See adjusting the clock on page 23 for more details PM 6:00 18:00 Normal Image Mirror camera input image 180 degrees System will auto detect NTSC or PAL For NTSC compatibility For PAL compatibility TFT panel will automatically open when IGN is turned on TFT panel will not auto open when IGN is turned on TFT will only open/close when OPEN button is pressed Must enter password to turn anti-theft on or off System will require a password if main battery power is removed for more than 5 minutes No password will be required if power is removed Load all factory parameters to their original settlings, Note: This will not reset the anti-theft password. Off Load Factory Yes Are you defaults sure? Yes/Cancel Note: Not all GENERAL setup features are described in detail. 21 XDVD710 OPERATION GENERAL Setup - Adjusting Radio Frequency Adjusting Radio Frequency L 1 Step 1 1) Touch top left corner of screen L 2 Step 2 2) Touch GENERAL setup button L 3 Step 3 3) Touch USA L L 5 4 Step 4 4) Touch the setting for your region Step 5 Touch RETURN to exit 22 XDVD710 OPERATION GENERAL Setup - Adjusting the Clock 12Hr Clock Mode L 1 Step 1 1) Touch top left corner of screen L 2 Step 2 2) Touch GENERAL setup button L 3 Step 3 3) Touch 00:00 area in the CLOCK row L 7 L L L 8 5 6 Steps 4-8 4) Keypad should now appear 5) Enter HOURS, touch ok 6) Enter MINUTES, touch ok 7) Touch AM or PM to set 8) Touch RETURN to exit 24Hr Clock Mode 23 If you desire 24Hr format, select 24Hr from CLOCK MODE, then follow steps 1-8. XDVD710 OPERATION GENERAL Setup - Setting the Anti-theft code By default Anti-theft password is 0000 and is turned Off. To turn this feature on, follow the steps below. CAUTION!! This will lock your unit from operating if battery POWER is disconnected for more than 5 minutes. Step 1 & 2 L 1 L 2 1) Touch top left corner of screen 2) Touch GENERAL Setup button L 4 Step 3 & 4 L 3 3) Touch down arrow button 4) Touch ---- L 6 Step 5 & 6 Note: it is recommended that you choose your own 4-digit password Step 7 & 8 carefully, write it down somewhere and keep in a safe location. In the event you ever loose or forget your password, call our tech hot line for support on how to unlock your system. Step 9 & 10 5) Enter 0000, then press ok L 5 L 6) Touch OFF L 8 7 7) Touch ON L 9 8) Touch ---- again 9) Enter your new 4-digit password, then press ok. 10 L 10) Touch RETURN to exit 24 XDVD710 OPERATION SCREEN Setup - Menu Screen Setup Menu L • Press the SCREEN button to access the SCREEN setup mode • Select desired parameter you wish to change • Page will return back to previous screen after 10 seconds of inactivity or by pressing the RETURN button SCREEN Setup Menu matrix Settings Default Options Brightness 10 0 - 20 Screen Tilt Screen Saver 4 On TS Calibrate No 1-6 Off On No Yes Version Function Press the or buttons on the remote or press the right rotary once and rotate clockwise/counter-clockwise to adjust the BRIGHTNESS to the desired setting Select 1 to 6 to adjust the default tilt angle of the screen Select On to activate the screen saver, Off to deactivate Touch Yes to enter the Touch Screen calibration mode Software version of unit System Standby L To conserve the LCD backlight lifespan or to eliminate glare while night driving, press STANDBY. The TFT screen will black out, however all other operations continue to operate. Press any button except VOLUME or touch the screen again to return to normal viewing. 25 XDVD710 OPERATION SCREEN Setup - Setting TFT Brightness This will set the default setting for the TFT display brightness. This can also be set by pressing the INFO button on the front TFT panel. Step 1 Step 2 L 1 1) Touch top left corner of screen L 2 2) Touch SCREEN setup button L 3 Step 3 3) Touch [-] to dim TFT L L 5 4 Step 4 4) Touch [+] to brighten TFT 0 - 20 is possible Default = 10 Step 5 5) Touch RETURN to exit 26 XDVD710 OPERATION SCREEN Setup - Setting TFT Angle Set for best viewing angle in your vehicle L 1 Step 1 1) Touch top left corner of screen Step 2 L 2 2) Touch SCREEN setup button L 3 Step 3 3) Touch a number displayed in SCREEN TILT row L L 5 4 Step 4 4) Touch desired angle for best viewing angle 1 - 6 is possible Default = 4 Step 5 27 5) Touch RETURN to exit XDVD710 OPERATION SCREEN Setup - Touch Screen Calibration On occasion, the touch screen will have to be calibrated. Follow these steps as described. L 1 Step 1 1) Touch top left corner of screen Step 2 L 2 2) Touch SCREEN setup button LL 3 Step 3 & 4 4 3) Touch No in TS Calibration row 4) Then touch Yes L 5 Note: For proper calibration you must touch each pointer for 2 seconds. If pointers are not touched properly, the calibration sequence will start over until the calibration is done correctly. Step 5 & 6 5) Touch and hold the pointers as indicated on the screen for 2 seconds each 6) Screen will automatically return to MAIN MENU, touch RETURN to exit 28 XDVD710 OPERATION AM/FM Tuner Operation AM/FM Tuner TFT Display 2 1 3 4 19 5 18 6 L 17 16 15 29 14 13 12 11 7 10 9 8 1) Current MODE information, touch upper left area to return to MAIN MENU 2) Current PRESET station indicator 3) STEREO broadcast indicator 4) Clock 5) PRESET page up 6) LOCAL/DISTANCE selection 7) PRESET page down 8) Auto station SCAN button 9) MANUAL TUNE up 10) MANUAL TUNE down 11) SEEK TUNE up 12) SEEK TUNE down 13) AS/PS (AUTO STORE/PRESET SCAN) 14) BAND selection, FM1, FM2, FM3, AM 15) VOLUME indicator 16) LOUD indicator 17) Equalizer indicator, touch to access AUDIO Setup menu 18) Current radio frequency indicator 19) Current radio BAND indicator XDVD710 OPERATION AM/ FM Tuner Operation Auto Seek Tuning Manual Tuning Auto Store (AS) Press the button to auto SEEK up the next strongest station. Press the button to auto SEEK down the next strongest station. Press the button to manually tune up one step at a time. Press the button to manually tune down one step at a time. Press and hold AS/PS for more than 2 seconds to automatically store the twelve strongest stations in the current band. Automatic Local tuning is activated during the initial band scan, repeat for other bands. Note: All presets within the current band will be overwritten. Program Scan (PS) Press AS/PS for less than 2 seconds to scan presets 1-12 on the current band, pausing for 10 seconds at each. Press AS/PS again to cancel. SCAN Press SCAN to preview strong stations on the current band, pausing for 10 seconds at each station. Press SCAN again to cancel. LOC/DX Radio Station Touch LOC button on the TFT to activate LOC/DX tuning. When the LOCAL function is on, LOC will appear. Only radio stations with a strong signal are received. DISTANCE (DX) is for radio stations that are far away and/or have weak signals. Storing Radio Stations PRESET Up to 36 FM stations and 12 AM stations can be stored. To store a station, select the desired band and station. Press and hold the desired preset button (1-12) for more than 2 seconds. When stored, the PRESET number will appear in the display. The station can be recalled anytime by pressing the corresponding preset button on the TFT. Recalling a Radio Station PRESET PRESET Page Up/Down Touch a corresponding radio frequency for less than 2 seconds to recall. Only 6 PRESETS can be display at one time, use PRESET page up/down to access next stored PRESETS accordingly. L 30 XDVD710 OPERATION WARNING Upon installation of this Monitor/DVD player (“unit”) into a vehicle, the driver of the vehicle must not operate this unit by watching videos or playing video games while driving. Failure to follow this instruction could lead to driver distraction which could result in serious injury or death to the vehicle’s occupants or persons outside the vehicle and/or property damage. Several states prohibit the installation of monitors/DVD players if the screen is visible from the driver’s seat. If you reside in a jurisdiction which has enacted such a law, this unit must not be installed so that the screen is visible from the driver’s seat. When installing this unit in the front console/dashboard, the unit must be positioned so that it is facing the front passenger seat only. Failure to follow this instruction could lead to driver distraction which could result in serious injury or death to the vehicle’s occupants or persons outside the vehicle and/or property damage. This unit is designed so that it may be operated only when the vehicle is in “Park” and the parking brake is fully engaged. To this end, this unit includes a parking brake lock-out feature which prohibits the unit from operating if the vehicle is not in “Park” and/or the parking brake is not fully engaged. When installing this unit, the installer must connect the parking brake detect wire (“Yellow-Blue Lead”) to the parking brake mechanism in order to make the parking brake lock-out feature operable. DO NOT simply ground the parking brake detect wire to a metal portion of the vehicle. Failure to properly install the parking brake lock-out feature could lead to driver distraction which could result in serious injury or death to the driver’s occupants or persons outside the vehicle and/or property damage. Once the parking brake lock-out feature is installed, the owner/user must not attempt to disrupt/neutralize the parking brake lock-out feature by (a) partially engaging the parking brake and/or (b) purchasing/using any device or unit designed to send necessary brake signals to the unit. Failure to follow these instructions could lead to driver distraction which could result in serious injury or death to the driver’s occupants or persons outside the vehicle and/or property damage. When operating this unit, keep the unit’s volume level low enough so that the vehicle’s occupants can hear traffic-related sounds such as police and emergency vehicles. Failure to follow this instruction could lead to driver distraction which could result in serious injury or death to the vehicle’s occupants or persons outside the vehicle and/or property damage. 31 XDVD710 OPERATION DVD Operation - Parking Brake Initialization SAFETY WARNING CAUTION !!! IT'S UNLAWFUL TO OPERATE A VEHICLE WHILE VIDEO IS DISPLAY IN THE DRIVERS VIEWING AREA ENGAGE EMERGENCY BRAKE TO ENJOY VIDEO Front TFT Video Initialization • The video display of the in-dash unit will not operate while the vehicle is moving. This is a safety feature to prevent driver distraction. In-dash video functions will only operate when vehicle is in Park and the PARKING BRAKE is engaged. It is illegal in most states for the driver to view video while the vehicle is in motion. Refer to local laws in your area. • Audio can be heard while the monitor is closed. • The vehicle must be in park and the parking brake applied to view video on the in-dash monitor. • As a safety feature, “ENGAGE PARKING BRAKE” blue screen will show on the display when the vehicle's parking brake is not engaged. Video display on the front monitor isn't allowed until the PARKING BRAKE is engaged. By connecting the yellow/blue PARKING BRAKE wire to brake switch circuit as described below, DVD and AV1 audio can be heard while the vehicle is in motion without engaging the parking brake. Follow these two initialization procedures carefully to allow video playback on XDVD710 front panel TFT: There are two situations that start the PARKING BRAKE sequence. Parking Brake Initialization Situation 1 First situation is while driving: 1) Stop vehicle, put in Park, make sure PARKING BRAKE is off/released 2) Depress PARKING BRAKE for 1 second 3) Release PARKING BRAKE for 1 second 4) Depress PARKING BRAKE permanently Note: Once above procedure 1-4 is completed, video will display in approximately 6 seconds. Parking Brake Initialization Situation 2 Second situation is while already parked and the PARKING BRAKE is already applied: 1) Keep vehicle in Park, PARKING BRAKE should be on 2) Release PARKING BRAKE for 1 second 3) Depress PARKING BRAKE for 1 second 4) Release PARKING BRAKE for 1 second 5) Depress PARKING BRAKE permanently Notes: Once 2nd procedure 1-5 is completed, video will display in approximately 6 seconds. The transition time must be less than 2 seconds between depress and release.This procedure will have to repeated if the IGN is turned off. 32 XDVD710 OPERATION DVD Operation DVD Region Management Some DVD discs can be played only in certain playback modes according to the intentions of the software. As the XDVD710 plays discs according to their intentions, some functions may not work as intended. Please be sure to read the instructions provided with each disc. This player has been designed to play back DVD software that has been encoded for specific region areas. It cannot play back DVD software encoded for other region areas than the region areas for which it has been designed. The XDVD710 will play discs labeled “Region 1” or “All”. DVD region codes: 1 - USA, Canada 2 - Japan, Europe, South Africa, Middle East 3 - Rep. of Korea, Taiwan, Hong Kong, Parts of Southeast Asia 4 - Australia, New Zealand, Mexico, South America 5 - Eastern Europe, Russia, India, Africa 6 - China DVD Disc Symbols Notes: Some DVD discs can be played only in certain playback modes according to the intentions of the software. As the XDVD710 plays discs according to their intentions, some functions may not work as intended. Please be sure to read the instructions provided with each disc. 33 XDVD710 OPERATION DVD Operation - Inserting a Disc DVD Loading Slot Eject button Insert CD/DVD with label facing upwards Inserting a Disc When inserting a DVD disc, usually it will play automatically. Other sub-menus may have to be pressed to access the DVD movie/music content. Read the directions of your specific DVD disc for other features. Note: If PARENTAL Lock is activated and the disc inserted is not authorized, a 4-digit code must be entered and/or the disc be authorized. See "RATING MENU" on page 42. Note: Only one disc can be inserted at a time. Ejecting the Disc Resetting the Loading Mechanism Press the EJECT button. If the disc loads abnormally or an system error occurs, press and hold the eject button for 3 seconds to reset the loading mechanism. The disc will eject and normal operation should resume. 34 XDVD710 OPERATION DVD Operation - Touch Screen Controls Hidden Touch Screen area while in TUNER mode There are several hidden TOUCH SCREEN areas outlined below: "A" area can be used in any mode to access MAIN menu L Hidden Touch Screen areas while in DVD mode "A-F" areas can be used in DVD mode to access: A - Displays MAIN menu B - Displays DVD track information C - Selects PREVIOUS chapter D - Selects NEXT chapter E - Displays the full DVD transport controls F - GOTO search menu L 35 XDVD710 OPERATION DVD Operation - Touch Screen Controls Using the hidden Touch Screen Controls A - Displays MAIN menu B - Displays DVD track information C - Selects PREVIOUS chapter D - Selects NEXT chapter E - Displays the full DVD transport controls F - GOTO search menu L L AREA A Access MAIN Menu AREA B Displays Track Information AREA C Selects PREVIOUS Track AREA D Selects NEXT Track Note: A DVD disc must be inserted to access these functions and features. L L L L AREA E Full DVD Transport Controls AREA F DVD Search 36 XDVD710 OPERATION DVD Operation - Touch Screen Controls Using the hidden Touch Screen Controls DVD Transport Control OSD L Touch AREA E 1) Touch the PLAY button or on the front panel to resume disc playback 2) Touch the PAUSE button again to suspend the disc playback 3) button to STOP playback, touch Touch resume playback 4) Touch the REVERSE button to FAST REVERSE on DVD, 2x, 4x, 8x to 20x 5) Touch the FORWARD button to FAST FORWARD on DVD, 2x, 4x, 8x to 20x 6) Touch the REPEAT to scroll through the following: or ok on the remote to DVD: Repeat Title, Repeat Chapter, Repeat Off A) Use the A-B function to define a specific area of disc to repeat. Press the Repeat A-B button to set a start point of the (A) selection. B) Press the A-B button again once you reach the desired end point (B) of the repeated section. The selected portion of the DVD will now repeat continuously. C) Press A-B button once again to cancel the A-B selection and stop repeat playback. 37 7) Touch to change Audio language playback 8) Touch to change Subtitle of DVD 9) Touch to return to DVD MAIN menu XDVD710 OPERATION DVD Operation - Searching a DVD Searching a DVD L Searching by Time, Title or Chapter Touch the top right screen - AREA F Search by TIME example 1) Touch the in the TIME area 2) A touch keypad will now appear, enter your desired TIME to search 3) Press ok Notes: Some DVD discs can be played only in certain playback modes according to the intentions of the software. As the XDVD710 plays discs according to their intentions, some functions may not work as intended. Please be sure to read the instructions provided with each disc. 38 XDVD710 OPERATION DVD Operation Direct Chapter / Track Selection During DVD and CD playback, you can use the numeric keypad on the remote control to access tracks directly. Viewing an Alternate picture Angle (DVD only) Some DVD's contain scenes that have been shot simultaneously from different angles. For discs recorded with multiple angles, press the ANGLE button on the remote control to toggle between available angles. Multi-Language Disc If you are watching a disc recorded in multiple languages, press the AUDIO button on the remote control to choose your desired language. You can also touch AREA E and use the Changing Subtitle Language button to change languages. If you are watching a disc recorded in multiple languages with subtitles, press the SUB-T button on the remote control to choose your desired subtitle, You can also touch AREA E and use the DVD Playback Information button to change subtitles. During playback, press the INFO button on the remote control or touch AREA B to display the DVD playback information on screen. The following information will be displayed: Playback Information 39 1) Indicates current source playing 2) Indicates the fourth of sixteen titles on the DVD is currently playing 3) Indicates the first of twenty chapters on the DVD is currently playing 4) Indicates the playback time of the current title 5) Indicates the USER defined EQ levels 6) Indicates the LOUD setting is on 7) Indicates the current time XDVD710 OPERATION DVD Setup Menu - Language LANGUAGE Setup Menu Note: A DVD disc must be inserted to access these functions and features. With the monitor open in DVD mode, press the AREA A (top left screen) to display the MAIN menu. Press DVD Setup to access the DVD setup menu. L L Press LANGUAGE icon to select LANGUAGE setup page Disc Subtitle Press to select desired disc subtitle language L Audio Language L Press to select desired disc audio language L DVD Menu English French Spanish Auto Off = DEFAULT English = DEFAULT French Spanish Press to select desired disc menu language English = DEFAULT French Spanish L 40 XDVD710 OPERATION DVD Setup Menu - Video Video Setup Menu Note: A DVD disc must be inserted to access these functions and features. With the monitor open in DVD mode, press the AREA A (top left screen) to display the MAIN menu. Press DVD Setup to access the DVD setup menu. L L Press VIDEO icon to select from the following menus: TV Shape Press to select desired TV shape L Angle Mark 4:3 16:9 = DEFAULT NORMAL - 4:3 L WIDE - 16:9 Select On to activate angle mark On = DEFAULT Off L View Mode Press to select desired view mode L 41 FILL Original H FIT W FIT FIT to Screen = DEFAULT Pan Scan XDVD710 OPERATION DVD Setup Menu - Rating Rating Setup Menu Note: A DVD disc must be inserted to access these functions and features. With the monitor open in DVD mode, press the AREA A (top left screen) to display the MAIN menu. Press DVD Setup to access the DVD setup menu. L L Press RATING icon to select from the following menus: Enable Parental Lock Password Press ---- to enter a password, then press Ok Setting Parental Lock Password Rating Setting L L L 1. Enter a 4-digit code 2. Write the code down 3. Save in a safe place When unlock symbol is displayed, press current rating then select desired rating Parental Password Override L 1. Kid Safe 2. G 3. PG 4. PG-13 5. PG-R 6. R 7. NC-17 8. Adult = DEFAULT In the event you forget or loose your PARENTAL LOCK password, enter 9991. 42 XDVD710 OPERATION CD Operation CD User Interface 43 1) Current MODE information, touch upper left area to return to MAIN MENU 2) Disc title 3) Track title 4) Current TIME 5) Touch to PLAY/PAUSE disc playback 6) Touch to STOP disc playback 7) Touch to PAGE down 8) Touch to PAGE up 9) Touch to FAST REVERSE current track 10) Touch to FAST FORWARD current track 11) Touch to SCAN CD tracks for 10 seconds each track, touch again to deactivate 12) Touch to activate/deactivate REPEAT: Single mode 13) Touch to activate/deactivate RANDOM mode 14) Current track and total number of tracks on the disc 15) Elapsed playback time 16) Playback information 17) Volume indicator XDVD710 OPERATION CD Operation Playing CD-DA discs After inserting a CD disc, files will play in numerical order in the directory. L Selecting by Keypad Touch to display keypad. Enter desired track number and press ok. L Selecting by Direct Track Access Touch desired track for DIRECT TRACK access. L L Previous/Next Page Touch to view UP/DOWN pages of available TRACKS. 44 XDVD710 OPERATION MP3/WMA Operation MP3/WMA User Interface 45 1) Current MODE information, touch upper left area to return to MAIN MENU 2) Disc title 3) Track title 4) Current TIME 5) Touch to PLAY/PAUSE disc playback 6) Touch to STOP disc playback 7) Touch to PAGE down 8) Touch to PAGE up 9) Touch to PREVIOUS FOLDER 10) Touch to NEXT FOLDER 11) Touch to FAST FORWARD MP3 tracks, touch PLAY to deactivate 12) Touch to activate/deactivate REPEAT: Single mode 13) Touch to activate/deactivate RANDOM mode 14) Touch to access the DIRECT TRACK access keypad 15) Current track and total number of tracks on the disc 16) Elapsed playback time 17) Playback information 18) Volume indicator XDVD710 OPERATION MP3/WMA Operation Playing MP3/WMA files After inserting an MP3/WMA disc, files will play in numerical order in the directory. L Selecting by Single Track Touch to display keypad. Enter desired track number and press ok. L Selecting by Direct Track Access Touch desired track for DIRECT TRACK access. L L Previous/Next Page Touch to view UP/DOWN pages of available TRACKS. 46 XDVD710 OPERATION Media Compatibility Media Compatibility The following types of discs/files are compatible: • CD-ROM (ISO), CD-R, CD-RW, DVD+R/RW, DVD-R/RW • CD-DA, DVD Video • MP3 data • WMA data The following types of discs/files are not compatible: • WMA files that are protected by DRM (Digital Rights Management) • WMA lossless format • Discs recorded with Track At Once or packet writing • MP3 PRO format • MP3 playlists • WAV format • WMV format • JPG format • DivX format • AVI format • MPG format Some recordable DVDs and CDs may be incompatible with this unit, depending on media type and recording method. Playback Order Compatible Recording Formats MP3/WMA playback sequence is based on recorded order of files and begins in the root folder of the disc. Any empty folders or folders that do not include MP3/WMA files are skipped. This unit may not play files in the order they were recorded in. Refer to your recording software’s user’s manual for more information. • ISO9660 level 1 • ISO9660 level 2 • Yellow Book MODE 1 • Yellow Book MODE 2 FORM 1 • Multi session • Maximum files - 1500 • Maximum folder levels - 8 • MPEG-1/2 Audio Layer-3 ISO9660 standards: • Maximum nested folder depth is 8 (including the root folder). • Valid characters for folder/file names are letters A-Z (all caps), numbers 0-9, and “_” (underscore). Some characters may not be displayed correctly, depending on the character type. • This device can play back discs in Joliet and other standards that conform to ISO9660. MP3/WMA written in the formats other than the above may not play and/or their file names or folder names may not be displayed properly. 47 XDVD710 OPERATION Media Compatibility Additional MP3/WMA Information An internal buffer provides ESP (Electronic Skip Protection) to virtually eliminate skipping. When playing a disc recorded with regular audio files (CD-DA or .WAV) and MP3/WMA files, the unit will play the MP3/WMA files only. Only MP3 files with filename extension (.mp3) can be played. Only WMA files with filename extension (.wma) can be played. Do not attempt to play discs which contain non-MP3/WMA files with the MP3/WMA extension. Sampling Frequency Rates MP3 32kHz ~ 48kHz WMA 32kHz ~ 48kHz Transfer Bit rates MP3 WMA 40kbps ~ 320kbps constant Variable bit rates 40kbps ~ 192kbps constant Variable bit rates Note: Some files may not play or be displayed correctly, depending on sampling rates and bit rates. Recommended Settings For best results, use the following settings when burning an MP3 disc: 128kbps or higher constant bit rate 44.1kHz or higher sampling frequency For best results, use the following settings when burning a WMA disc: 64kbps or higher constant bit rate 44kHz or higher sampling frequency 48 XDVD710 WARRANTY Limited One Year Warranty This warranty gives you specific legal rights. You may also have other rights which vary from state to state. Dual Electronics Corp. warrants this product to the original purchaser to be free from defects in material and workmanship for a period of one year from the date of the original purchase. Dual Electronics Corp. agrees, at our option, during the warranty period, to repair any defect in material or workmanship or to furnish an equal new, renewed or comparable product (whichever is deemed necessary) in exchange without charges, subject to verification of the defect or malfunction and proof of the date of purchase. Subsequent replacement products are warranted for the balance of the original warranty period. Who is covered? This warranty is extended to the original retail purchaser for products purchased and used in the U.S.A. What is covered? This warranty covers all defects in material and workmanship in this product. The following are not covered: installation/removal costs, damage resulting from accident, misuse, abuse, neglect, product modification, improper installation, incorrect line voltage, unauthorized repair or failure to follow instructions supplied with the product, or damage occurring during return shipment of the product. 49 What to do? 1. Before you call for service, check the troubleshooting guide in your owner’s manual. A slight adjustment of any custom controls may save you a service call. 2. If you require service during the warranty period, you must carefully pack the product (preferably in the original package) and ship it by prepaid transportation with a copy of the original receipt from the retailer to an authorized service center. 3. Please describe your problem in writing and include your name, a return UPS shipping address (P.O. Box not acceptable), and a daytime phone number with your shipment. 4. For more information and for the location of the nearest authorized service center please contact us by one of the following methods: • Call us toll-free at 1-866-382-5476 • E-mail us at [email protected] Exclusion of Certain Damages: This warranty is exclusive and in lieu of any and all other warranties, expressed or implied, including without limitation the implied warranties of merchantability and fitness for a particular purpose and any obligation, liability, right, claim or remedy in contract or tort, whether or not arising from the company’s negligence, actual or imputed. No person or representative is authorized to assume for the company any other liability in connection with the sale of this product. In no event shall the company be liable for indirect, incidental or consequential damages. XDVD710 OPERATION Troubleshooting Problem Unit will not turn on (no power) Cause Action Yellow wire not connected or incorrect voltage Check connections for proper voltage (11~16VDC) Red wire not connected or incorrect voltage Black wire not connected Check connection to ground Fuse blown Replace fuse Unit has power (but no sound) Speaker wires not connected Check connections at speakers One or more speaker wires touching each other or touching chassis ground Insulate all bare speaker wires from each other and chassis ground Unit blows fuse Yellow or red wire touching chassis ground Check for pinched wire Speaker wires touching chassis ground Check for pinched wire Incorrect fuse rating Use fuse with correct rating Parking brake safety circuit not connected Parking brake not applied Check connections at parking brake Apply parking brake Reverse circuit not connected Vehicle is not in reverse Check connections at reverse lamp Select reverse gear Unit has audio (but no video) No video display (when in reverse) DVD does not start playback Physical defect in media Wrong region IR remote does not work Excessive skipping Bad Disc appears on display Incorrect Region Code appears on display Front panel will not open/close Check media for scratches Use discs labeled "Region 1" or "All" only. Dead battery Replace battery Unit is not mounted correctly Check mounting sleeve Physical defect in media Check media for scratches Focus error or disc is in upside down Press eject or RESET Region code error Use only DVDs labeled “Region 1” or “All” only. Front panel obstructed Remove the obstacle and press OPEN again to resume the monitor open/close sequence. 50 XDVD710 OPERATION Specifications DVD Player Frequency response: 10Hz-20kHz Channel separation @ 1kHz: >65dB D/A converter: 24 Bit FM Tuner Tuning range: 87.5MHz-107.9MHz Usable sensitivity: 8.5dBf 50dB quieting sensitivity: 10dBf Stereo separation @ 1kHz: 40dB Frequency response: 30Hz-13kHz AM Tuner Tuning range: 530kHz-1710kHz Usable sensitivity: 22uV Frequency response: 30Hz-2.2kHz Monitor Panel size: 7” (177.8 mm) diagonal measurement View angle (up/down/left/right): 30/60/60/60 Resolution: 480 W x 234 H Brightness (cd/m2): 350 Contrast ratio: 300:1 Elements: 336,960 General Operating voltage: 11-16 VDC, negative ground Speaker output impedance: 4~8 ohms Line output voltage: 2 Volts Line output impedance: 200 ohms Chassis dimensions: 7" x 7" x 2" (178 x 178 x 51 mm) Design and specifications subject to change without notice. CEA-2006 Power Standard Specifications (reference: 14.4VDC +/- 0.2V, 20Hz~20kHz) Power Output: 17 Watts RMS x 4 channels at 4 ohms and < 1% THD+N Signal to Noise Ratio: 80dBA (reference: 1 watt into 4 ohms) 51 XDVD710 OPERATION Notes 52 XDVD710 OPERATION Notes 53 XDVD710 OPERATION Notes 54 Dual Electronics Corp. Toll Free: 1-866-382-5476 www.dualav.com ©2009 Dual Electronics Corp. All rights reserved. NSA0509-V03 Printed in China