1
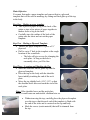
U.S. Guitar Kits, Inc.
Assembly Instructions for Acoustic Cutaway Guitar Kit
Welcome
Thank you for purchasing the kit. All the guitar components needed to build
your guitar are included to build a fine instrument. You will need glue,
finish, a variety of ordinary woodworking tools and average woodworking
skills. Knowledge of the use and sharpening of scrapers is crucial and
included is a set of instructions for this tool from a tool supplier.
Please note that although we warrant this kit to be free from defects in
materials and workmanship for 30 days from purchase, we cannot guarantee
the outcome of your instrument since skill levels vary greatly. If you take
your time and follow these instructions precisely and in the order in which
they are presented you will be rewarded with an instrument of which you
can be proud for a lifetime. Take your time, work carefully. Please keep
your kit sealed until ready to use to avoid problems due to moisture and
humidity. We will not replace parts that have been affected by moisture.
Always use safe methods while working and employ all safeguards
including safety glasses and other personal safety devices.
Copyright © 2011 by U.S. Guitar Kits, Inc. All rights reserved.
2
Tools, Jigs and Materials
- 25-30 Spool Clamps;
- Small router or laminate trimmer;
- a rabbeting bit set that includes the following cuts;
1) 1” Cutting Diameter Bit
2) .88” Bearing-Binding Cut
3) .48 – Six Pieces of Purfling
4) .64 – Five Pieces of Purfling
5) .70 – Four Pieces of Purfling
The set is available from www.usguitarkits.com or available as
separate items.
Determine the number of purfling strips to be used and select the
appropriate bearing (.48, .64 or .70).
The .88” is used for the thicker binding strip on both the top and
back.
- a ½” diameter or smaller flush trim router bit. Ball bearing pilot is
strongly recommended;
- 1 F-style clamp;
- A STRAIGHT straightedge at least 18” long;
- a selection of small flat chisels- ¼” and ½” are required, 1/8” chisel
and others are nice to have;
- flat scrapers
- a utility knife AND an Exacto® type knife;
- #1 & #2 phillips screwdrivers and a 10mm deep socket with handle or
equivalent open end wrench;
- a shot filled hammer with plastic or brass heads (or both);
- a tapered reamer (plumbers reamer) 3 & 5 degree or one 1/8” to ½”
- a selection of drill bits including 3/8”, .065”/1.7mm, .182”/4.6mm,
.056”/1.4mm;
- a roll of blue painters tape (or other strong tape that does not leave a
residue) OR some (25 to 30) big fat rubber bands measuring at least
16” to 24” long when stretched;
- choice of aliphatic resin (Titebond) or liquid hide glue;
- bottle of slow setting gel cyanoacrylate glue and a bottle of
accelerator, de-bonder recommended to un-stick fingers;
- tube of Duco® cement or similar clear plastic-to-wood glue;
- acetone;
- some scrap wood blocks of varying sizes;
- a 20” radius sanding block including 80, 120 & 220 grit adhesive
backed sandpaper;
2
3
- 400, 600, 1000, 1500 grit sponge sanding pads, higher grit micromesh pads are optional depending on the desired sheen of the
fingerboard;
- a fret crowning file;
- a small triangular file;
- a bastard mill file;
- a good wipe-on gel finish. Avoid stain and oil finishes and give
preference to hard finishes such as lacquer or urethane. Avoid
Minwax® (sorry).
A final word before you start- It is highly recommended that you read ALL
of the assembly instructions first, then go back and start assembly. Although
it may not make sense to you be sure to follow the instructions in precise
sequence or you may have to disassemble parts or even start over.
Also, be sure to read and understand the use and care of all tools and wear
the proper safety equipment including but not limited to safety glasses,
hearing protection and all guards that are part of the equipment used.
It is important to note that this is a fine project that takes time and very
precise measurement. Be sure to take your time on each step and ALWAYS
be safe using the tools during your woodworking projects. Also, be in the
right frame of mind where your mind is clear and not distracted. Stay
focused and you’ll be more likely to remain safe and end up with a nice
guitar.
Good Luck!
3
4
Guitar Terms & Anatomy
The guitar is made up of several components. The following list is a list of
those components that can be cross referenced to the diagram for easy
identification.
Not illustrated are:
1) Frets-Hammered/Pressed into the Fingerboard
2) Abalone Dots & 12th Position Marker-Glue into the Fingerboard
3) Kerfed Lining-Pre-glued to inside of soundbox where the sides meet the
top & back
4) Bracing-Pre-glued to top & back
5) Binding & Purfling-Glued to the perimeter of top & back where it meets
the sides
4
5
Anatomy of the Top-Brace Structure
The top is pre-braced and you will begin by marking
and cutting bracing and then thinning out the bracing on
the ends to fit into the kerfed lining on the sides of the
guitar.
Note: Identifying the braces. See picture.
Note: The bracing on the top consists of the
Shoulder Brace, an X-Brace, 2 Tone Bars and 2
small Finger Braces as well as a Bridge Plate.
It is important to note that the only braces that touch
the lining are the shoulder brace and X-braces. All
the others are scalloped flush to the back of the top
and cut short of the sides and kerfed lining.
5
6
Main Objective:
You must first make a paper template and convert that to a plywood
template that will be used in marking, dry fitting and final glue up of the top
to the body.
Step One – Making a paper template
• Take a piece of paper as big as the back of the
guitar or tape a few pieces of paper together to
make a sheet as big as the back.
• Carefully trace the outline of the back of the
guitar onto the sheet and cut out the paper
template.
Step Two – Making a Plywood Template
• Transfer the paper template to a piece of ¾”
plywood.
• Drill or cut a 4” hole in the template at the rough
location of the sound hole.
o The hole will give access for clamping the
neck plate. As long as the hole is
reasonably close, you’ll be fine.
Step Three – Locating and Marking the Top
• Mark the centerline on the guitar top and the
plywood template.
• Place the top on the body with the shoulder
brace initially touching the end of the neck
plate.
• Move the top slightly back (1/16”-1/8”) so that
the shoulder brace does not touch the end of the
neck plate.
Note: If the shoulder brace and the neck plate
touch, it could cause an undesirable vibration later on.
• Without moving the top, carefully place the plywood template
over the top so that the neck end of the template is flush with
the end of the sides and is centered on the top and body.
• Mark the excess (waist material) that will be trimmed from
the top.
6
7
Step Four – Marking the Brace Locations on the Plywood Template
• Locate the bracing and transfer the marks onto the plywood template.
This will require that the top NOT move during any of the marking.
Step Five – Stretching the Sides
• Using a flexible tape measure, measure the
distance between the kerfed lining on the
back at the widest part of the guitar.
• Using the wooden shipping stretcher, take
the previous measurement and add ¼”
(equal to the kerfed lining on both sides).
• Cut the stretcher to that length and slightly
round the ends so that the sharp corners
don’t damage the sides when installed.
• Cut the stretcher almost all the way
through, put a shim in the kerf cut and re-tape it back together using
blue tape. This is done so that once the top is glued on, the tape can be
removed and the stretcher can be broken and removed through the
sound hole. Otherwise, the stretcher could become lodged and
difficult to remove.
• Slowly and gently spread the sides to install the stretcher below where
the top will install by approximately 1”. If it sits to close to the top,
the stretcher will interfere with the braces of the top.
7
8
• Sight down the sides of the guitar to ensure the sides
do not appear to be bowed inward. You should be
dead on. If not, modify the length of the stretcher
either longer or shorter to correct any bow in the
sides.
• Once the stretcher is in place and the sides are “true”,
leave it in place during the entire process all the way
through the glue up of the top.
Step Six – Positioning the Plywood Template
• Use two spool clamps and position the plywood
template and the guitar top so they are flush at the ends.
o You’ll notice that the side of the body may not match the
plywood template at the point….no worries.
Step Seven – Clamping the Plywood Template
• Using firm pressure, push the sides in flush with the plywood template
and clamp using the spool clamps.
o Note the difference with just two clamps in position.
o This will ensure the top remains flat and any body twists are
eliminated.
o This allows for accurate marking locations for the
kerfing/lining pockets.
8
9
Step Eight - Marking the Brace Locations on the Body
• Transfer the bracing marks on the plywood template to the sides.
• Connect the marking lines of the braces for the pocket locations in the
kerfing/lining.
Step Nine – Trim the Top
• Trim the top using a band saw or coping
saw.
Note: You must use a fine blade and a slow
feed rate if you are using a band saw.
Because you are cutting with the bracing on
the table, the top is unsupported in areas
and has the potential to crack with too fast
or aggressive cut. Take your time!
Step Ten – Mark the Braces for the Length Cut
• Mark the ends of the bracing in from the perimeter of the top by the
thickness of the sides (3/32”), not including the kerfing/lining.
Note: The ends of the braces will sit into a pocket you will cut in the
kerfing/lining and not all the way through the side.
9
10
Main Objective:
The next steps are focused on trimming, shaping and fitting the braces on the
top.
Step Eleven – Trimming the Brace Ends
• Mark the ends of bracing that will touch the side kerfing 3/32” thick
or simply lay a sharp pencil flat on the back and mark the ends of the
bracing.
• Scallop the end of the bracing to the 3/32” mark.
• The shoulder brace can be left thick as this does not dramatically
change the overall sound. Using a sharp chisel, follow the existing
curve of the brace and reshape the end to be 3/32” thick.
Alternative to Step 11: Using a small laminate router, cantilever it over
the workbench on a piece of 1” scrap and use a ½” straight cutter set at a
height that will cut the brace to 3/32” high. (Be sure to cut a test piece.)
With the top face down, pass the ends of the x-braces and shoulder brace
under the cutter to trim the ends. Now scallop the braces to the new
height of the ends of the braces. This method will ensure a uniform
height for all the braces. A Dremel tool with a base and a small straight
cutter could be used to trim the lining, being careful not to cut all the way
through the sides of the guitar. See the attached photo.
Note: Be sure to review pages 11-15 for tips and information on
scalloping the braces.
Note: When you are using a chisel and creating constant downward
pressure to thin your bracing, be sure to rest the top on a hard surface. If
you use a spongy non-skid pad to rest the top on, you risk significant flex
and possible damage to the top. Be careful…be gentle!!
10
11
Step 12 - Scalloping the ends of the Tone Braces
• Place the top face down on a clean non slip surface. Cut the bracing
off flush with the back of the top. Be careful not to make cuts/divets
in the back of the top with the saw.
You will need to chisel the small
pieces off being careful NOT to pry
and risk cracking the top or separating
the brace from the top. Once
removed, lightly scrape the surface
where the brace was glued to ensure a
clean surface to glue the top to the
sides.
Note: The ends of the tone braces do not touch the
sides of the guitar.
Mark the brace for scalloping.
Note: Mark the trim line approximately 1/8” back
from the existing curve and follow the same curve.
Scalloping the end of the tone brace.
Note: The end thickness should be
around 3/32”.
The final shaping of the tone brace.
Note: Use a chisel to round off the edges and final
smooth with 120 grit sandpaper.
11
12
Marking and Scalloping a Tone Brace
12
13
Bevel the sides of the braces
and final smooth with 120 grit
sandpaper.
The Finger Brace
The final shaping of a finger brace.
Note: The end of the finger
brace can be scalloped almost flush
with the top.
Scalloping the Braces
The previous several photos are used to illustrate the methods used to trim
away the heaviness of the braces to allow for better top vibration which
produces better tone and volume.
This is a detailed science for the professional luthiers and there are many
schools of thought.
Provided in the instructions are simple cutouts that can be placed beside the
braces for marking that will provide good sound results.
13
14
Tone Brace
Lower X-Brace
Brace Templates
Cut out and lay
on side of braces
to mark
Upper X-Brace
Finger Brace
14
15
Main Objective:
The final step in preparing to install the top is cutting the pockets in the
lining and doing the final dry fit of the top.
Step Thirteen - Preparing the Sides for the Top
The sides have lining already attached around the inside perimeter of the
body of the soundbox. Lining provides a larger gluing surface for the top to
attach. Each brace needs to be let into the lining by cutting small pockets for
the bracing to rest on.
• Transfer the marks along the top of the lining, connecting the
diagonals of the X-brace and the shoulder brace.
1. Mark the depth of each pocket equal to the ends of the braces. Ie
3/32”. Now, VERY carefully, start to cut away the lining at each mark
with a chisel or utility knife until the top fits flush onto the soundbox.
15
16
4) Continue to dry fit the top until it lays
completely flush with the sides with even
pressure all the way around.
Note: Many makers like to sign their guitars.
If you plan on autographing the guitar on the
inside, now is the time.
Step Fourteen - Gluing the Top
1) Final dry fit the top to the sides making sure the top fits nicely.
2) Apply glue around the entire perimeter of the soundbox on the lining
and on the neck and end blocks. Be very careful, sloppy glue joints
inside a guitar are a sure sign of careless workmanship. Do not apply
glue to the top!
3) Install the top, check all your alignments again, making sure the ends
of the braces are seating in their pockets.
Note: The main objective in gluing the top is to ensure the top of the
neck plate is completely in contact with the bottom side of the top.
4) Place the clamping caul on the top. Align the caul flush with the end
of the body at the neck end. Use a few spool clamps to hold
everything in place at this point during the alignment.
Note: Be sure all braces are seated in the pockets to ensure the top will sit
flush on the sides.
16
17
5) Clamp, through the soundhole using an f-style or c-clamp, the neck
plate and the clamping caul. Be sure to site in the neck cavity for a
flush fit between the top of the neck plate and the bottom side of the
top. Scrape any excess glue overflow in the neck pocket with a 1/8”
chisel once the entire glue up is in clamps.
6) Before you put too many clamps in place, be sure to push the sides in
so that they are flush to the caul and the top.
7) Using approximately 25-30 spools clamps, continue clamping about
¾”-1” apart.
8) Inspect as best you can to insure the top is firmly fixed onto the
soundbox. If you see gaps, use a little more clamping pressure.
7) Set the assembly aside until the glue sets. With aliphatic resin
(white or yellow glue) this means about 1 hour, preferably 2 hours.
8) Remove clamps.
Note: We suggest spool clamps that can be hand tightened with medium,
even pressure. Over tightening clamps is unnecessary and creates
unneeded stresses.
Note: If the spool clamps can not be tightened in a particular area to
bring the top flush to the sides for some reason, you can use other clamps
like f-style or c-clamps. Make sure the clamping pressure is over the
sides and not over the middle of the back or this will crack the back and
likely create irreversible damage.
17
18
So far….so good!
You have now completed all the steps to complete the top installation.
Miscellaneous Parts Preparation: There are several small parts that need
to be prepared for assembly and can be worked on in no particular order.
1) Using a tapered reamer slowly remove enough material to make the
machines a press fit. Note: Backside of the headstock only!!
OR
Using a 3/8” non-brad point drill bit and a drill press, center the drill
and bore 3/8” deep holes on the backside of the headstock, following
the existing holes. (DO NOT DRILL ALL THE WAY THROUGH!)
Note: Use a drill press to control the depth of cut.
Tip: Drill a scrap block to determine depth so that machine sits flush
in the hole.
IMPORTANT NOTE: DO NOT DRILL HOLES ALL THE WAY
THROUGH THE FACE OF THE HEADSTOCK.
2) Truss rod fitting-Make sure the truss rod’s flat surface is face up and
lay just below flush with the top of the neck. The truss rod should fit
without having to jam it in, at the same time, it should not be loose.
3) Sand bridge-Sand the back of the bridge to remove any machine
marks and clean the surface with acetone (just before glue up) to
remove any oils and create good adhesion for the glue. Break the
edges on the rest of the surfaces.
4) Sand the Fingerboard-Sand only the back of the fingerboard to
remove any machine marks being careful not to remove any more
material than necessary. Also, sand evenly being careful not to sand a
twist in the fingerboard. Clean this surface with acetone (just before
glue up) to remove any oils and create good adhesion for the glue.
18
19
Main Objective
Cut notch in top for neck tang. Set the neck angle. Prepare and
glue the fingerboard to the neck. Cut groove for binding and glue
top and back binding.
Step Fifteen - Cutting the notch in the top for the neck tang
Set up a small laminate router with a small, bottom bearing flush trimming
router bit and follow the groove of the neck tang. Be careful at the end to
ensure you do not create a tear out at the end of the cut.
Flush trim approximately 1” on each side of the neck pocket, where the neck
will touch the body.
Note: The cutter depth should be set up so that the bottom of the cutter is
flush or just below the thickness of the top.
Note: If you do not have a bottom bearing flush trim router bit that will
work, use a straight cutter and “freehand” the cut, staying clear of the sides
of the neck plate mortise. Finish trim the sides of the mortise using a chisel.
Step Sixteen - Preparing the Neck
This is one of the most critical steps in the entire build and an extremely
important step in fitting to the body before the fingerboard is attached. Extra
time here will ensure a tight fit between the back of the fingerboard and the
top in final assembly, as well as having good playability.
The tang is separate from the neck at this point. Go ahead
and hold the neck heel flat against the body of the guitar and
hold a straightedge on top of the neck to span the body. The
goal is to have the neck “in plane” referring to a straight line
running on top of the neck and the top, to the rough location
of the bridge.
Next, you should place the fingerboard on
top of the neck with the bridge in its rough
location. Place the straight edge on top of the
fingerboard and project it out to the bridge.
The straight edge should be above the
height of the bridge by 3/32”.
19
20
See below for details to correct “Pitch Back or Pitch Forward”. If sanding is
needed, a light touch and careful attention not to sand a twist into the neck.
Continue to check progress by attaching the neck and placing a straight edge
over the neck and check for “flat” across the top. As a final step, bolt the
neck on using the two long neck bolts and check the measurement at the
bridge.
IMPORTANT NOTE: Mark the top of the neck at the two sides where the
tang will be inserted. Make that mark 1/8” back on both sides. These are
“witness” marks that are guides that will keep you from sanding one side
more than the other.
DISC SANDER INSTRUCTIONS - CORRECTING NECK ANGLE
If you have a disc sander, the below instructions will provide steps to
quickly correct the neck angle. The machine setup here is critical to the
outcome and improper setup and subsequent sanding could result in an
undesirable and irreversible result. Check and double check!
2. Make some markings on the
face to be sanded and two marks
at the top of the neck.
3. Push the neck heel face flat on
the sander disk face (without it
on) and then push the mitre
gauge (loose at this point) up
against the side of the
neck....tighten the angle knob.
This will ensure you will sand
the correct angle left to right and
not sand a skew.
• Set the angle of the table (small
increments) and sand a quick
witness mark to be sure you
sanding evenly on the neck heel
face.
IMPORTANT NOTE: Be sure to initially touch the neck to the heel surface
and check that the sanding mark is not just on one side. This will cause the
neck to sit skewed on the body of the guitar.
20
21
Pitch Back
If your neck is pitched back and there is a large gap above the bridge and
below the straightedge, the neck heel needs to be sanded more at the top of
the neck and feathered in to the bottom of the neck heel (little if any off the
neck heel). This will allow the neck to rotate forward.
Solution: If the neck is sitting to far back, an adjustment of the table so that
the heel closest to the top of the neck is pretty much the only thing being
sanded and the bottom of the heel barely gets touched.
Once the bottom of the heel comes in contact with the disk
face....STOP...you're there.….re-fit.
• Once the neck angle is bolted on to the body and it is determined that
everything is correct, fit the neck tang and bolt it in.
o Remove any material from the tang from the end that fits into
the neck. Otherwise, the bolt hole in the neck plate may not line
up with the threaded inset on the tang.
• Remove the neck and neck tang from the body and glue the tang into
the neck.
• Once the glue is dry (1 hour), bolt the neck back on to the body using
all three bolts.
• Using a circular motion and a sanding block, sand the tang flush to the
top. This is critical to ensure the fingerboard will lay flat on the top.
• Using the straight edge, check one final time with the fingerboard
lying on top of the neck and the bridge in position, that the clearance
remains 3/32” from the underside of the straightedge to the top of the
bridge.
Step Seventeen – Fitting the Truss Rod and Gluing the Fingerboard
Locate the truss rod. The truss rod is a threaded steel rod embedded in a
square aluminum channel. It strengthens the neck and also allows the
counteraction of string pull over time.
1) Insert the truss rod into the slot on the neck. Install it so
that the allen key adjuster is towards the headstock and
is bottomed out in the slot. Do not allow the truss rod to
extend into the headstock. The fit should be snug but
not too tight. If it is too tight, carefully open the slot
with a file or sandpaper. Ultimately the truss rod should
be flush or slightly below the surface of the neck.
21
22
2) Mark a centerline on the fingerboard that can easily be seen at the
body end of the fingerboard.
3) Locate the string nut, a small piece of hard material
with 6 slots in it. Place the nut temporarily on the flat
neck surface and use it to hide the seam in the
headstock. Be sure it lays flat on the neck surface and
not at all on the headstock angled surface.
4) Locate the fingerboard. Place the narrow edge at the
top of the neck against the nut and center it carefully
NO GOOD!
along the length of the neck.
5) Use the centerline you marked on the end of the fingerboard to help
center it up on the body at the same time be sure the side of the
fingerboard is flush with the side in the cutaway area.
Note: You may also need to shift the fingerboard at the nut end to be sure
the fingerboard sits flush with the side at the cutaway area and the
centerline is pointing to center at the bridge area. Otherwise, the bridge
location could end up being slightly off center which could be noticeable
although not really changing the way it plays or sounds.
6) Once the fingerboard is perfectly located on the neck, place a piece of
blue tape at the end of the fingerboard. This will provide the
placement for the fingerboard on the neck during glue up and prevent
glue buildup on this surface.
7) Without moving the fingerboard, flip the neck and fingerboard over
and use a pencil to trace around the neck tang. This will provide you
with the proper alignment of the fingerboard left to right when you go
to glue up. In addition, this also shows where and where not to place
glue on the fingerboard. Also, make a mark on the fingerboard where
the threaded insert is located. You don’t want to put glue there either.
22
23
8) With the marking complete, make a simple clamping caul by tracing
the fingerboard onto a piece of ¾” plywood and cut it out. Using this
during the glue up will help to evenly distribute clamping pressure.
9) Apply glue to the neck surface, avoiding the truss rod.
10)
Apply glue to the back of the fingerboard.
NOTE: Try not to get any glue on the top of the truss rod and also do not
apply glue down the center on the back of the fingerboard and the
location of the threaded insert.
11)
Place the fingerboard on the neck and using the plastic wire ties
or c-clamps with a caul, anchor the fingerboard securely until the glue
sets. A perfect amount of glue will show itself as tiny dots of
squeezeout along the entire length of the fingerboard on both sides.
Rather than wiping off glue squeezeout wait a little while until it starts
to set and then scrape it off. If you use hide glue allow it to dry
completely then scrape it off. This will avoid finishing problems later.
NOTE: There are many ways and various clamps that can be used to
secure the fingerboard to the neck. Some builders already have a bunch of cclamps or f-style clamps and these will work fine. Others use a long rubber
bike tire inner tube that can be wrapped around the fingerboard, neck and
caul. The two main goals are good pressure and perfect alignment/position
of the fingerboard to the neck. Don’t forget to put a clamp on to secure the
neck tang to the back of the fingerboard. This is critical.
12)
Set this assembly aside to dry and let it dry for at least 1-2
hours. (assuming aliphatic resin-white or yellow glue)
Step Eighteen - Preparing & Leveling the Fingerboard
The fingerboard is the heart of the guitar. Take your time on the following
steps to ensure you have a good straight fingerboard with the proper radius.
Your fingerboard is made from Indian rosewood or Sonokeling (plantation
grown rosewood) and has been slotted, but requires some handwork to
complete.
1) Using a wood file, file the neck flush to the fingerboard being careful
NOT to remove any wood from the fingerboard. This is not the final
shaping step of the neck. This simply smoothes the fingerboard to the
23
24
neck so that you don’t tear your fingers up when you’re using the
radius block.
2) With the neck off the body, use a 20” radius sanding block with 80
grit sandpaper to sand until a radius is formed the length of the
fingerboard.
Important Note: Continue checking the radius by citing down both ends of
the fingerboard being careful NOT to sand too much off one side or the
other. It must be even and straight along the length of the fingerboard.
Critical Step/Note
Important Note: Once the radius is really close, go ahead and install the
neck to the body using all three bolts. Double check the fingerboard again
for straight along the length. The straight edge should sit on top of the
fingerboard and be between 1/32” and 1/16” above the top of the bridge in
its rough location. Continue to work on this step until it’s perfect as this step
has the most impact on final setup and overall playability.
3) Locate the routed rectangle on the face of the fingerboard at the 12th
fret and the genuine abalone block inlay. This rectangle represents the
12th fret and will be inlaid with the abalone block.
4) Using a small chisel, square the corners of the routing until the
supplied inlay fits flush & snugly. Clean any dust from the routed
hole.
a. Just Right! Try to fit the marker in as flush as possible.
b. Too High. If the marker sits to high, continue to remove
material from the bottom of the cutout until it sits flush.
c. Too Low. If the marker sits to low, the dust from the radius
sanding can be packed with the marker to build up the height.
Note: Blow out the fret slots and place tape over the surrounding fret slots to
eliminate any glue flowing into them.
5) Put several drops of cyanoacrylate glue into the hole and press the
inlay into it firmly with the chisel. Hold for about 60 seconds. DO
NOT get glue in the fret slots!!!!
6) Locate the remaining abalone dot inlays. Using a pin or toothpick,
apply a small drop of cyanoacrylate into a hole on the fingerboard,
press an inlay into it and then proceed to the next hole. Do not put
glue in all the holes and then install the inlays… do one at a time.
24
25
Using accelerator will speed the process of the CA glue open time to a
matter of seconds.
Note: Accelerator uses a chemical process that creates intense heat and a
nasty smell that can burn and irritate your nose, eyes and skin. Be sure to
take all the precautions and read the instructions that are on the bottle of the
product you use.
7) Allow this assembly to dry then lightly sand the abalone inlays until
flush with the fingerboard. Use a 20” radius sanding block,
progressing through the different grits of sandpaper. 80 & 120. You
can use 150, 180 & 220 grits by hand without the radius block as
these are not shaping or aggressive grits. Use the foam sanding pads
and continue to sand to as high grits as you wish. Some builders use
the micro-mesh pads bringing the polishing of the fingerboard through
12,000 grit. This will result in a glass like, silky feel on the
fingerboard.
Note: Remember, there is NO finish applied to the fingerboard.
8) Along one edge of the fingerboard there are more holes. Re-drill
following the holes using the .056”/1.4mm to ensure a good fit.
Locate the small white plastic rods included in the kit. Dry fit first!!
9) Squeeze a small amount of CA glue onto a scrap board and roll the
end of the rod in the glue. Insert the rod until it bottoms out, then cut it
off close to the fingerboard with a utility knife. Continue until all the
holes are filled.
25
26
Main Objective:
Complete all fretting steps including installation and dressing as well as
shaping the neck.
Step Nineteen - Fretting the Fingerboard
The fretting process is where each fret is carefully hammered into place.
1) Use a small triangular file in the fret slots to break the edge and
create relief.
JUST BREAK THE EDGE!!
Important Note: Clean the fret slots by running a thin knife or
saw, being careful not to expand the width of the fret slot.
Important Note: Sight the edge of the fingerboard and a fret tang.
Check to make sure that the fret slots are cut deep enough to accept
the tang. If a slot is not deep enough, use the Japanese saw to
deepen the slots.
2) Position the neck securely on a bench, supporting the area where
you will hammer the fret. Gently but firmly hammer the fret by
taping the ends to get it started and alternate hits on each end and
moving toward the middle until the fret is tight to the fingerboard.
You will hear and feel a noticeable difference when the fret is
completely seated.
Note: Below are two simple to make jigs for fretting. The first one allows
you to have solid support directly underneath the fret you’re working on.
The second jig gives full support on the high end of the fingerboard while
hammering these frets. Notice in both applications, the jig is sitting directly
on the bench and not on the foam mat. Otherwise, you’ll never be able to
fully seat the fret.
26
27
3) Trim any fret excess with the end nippers flush to the fingerboard.
Step Twenty - Dressing the Frets
Be sure all frets are completely seated and flush to the
fingerboard.
1) Using a “bastard mill file”, file the ends of the
frets flush to the side of the fingerboard.
2) Using the same file at roughly a 30-40 degree
angle, file the ends of the frets to create a soft
relief. When filing, stop just at a point where
the file begins to hit the side of the
fingerboard all the way up and down the neck.
Step Twenty One - Shaping the Neck and Installing the Heel Cap
This aspect of the guitar is the most personal part of the guitar. Everyone has
a different feel and you may prefer to shape the back of the neck differently
than someone else. This is all a personal preference. Without doing anything
more than sanding the existing neck shape, the guitar neck will likely feel
comfortable for many different players.
As a guide, we suggest using a round wood rasp and cutting a groove in the
neck at the first fret to roughly .86” and .95” at the 11th fret.
Then, using the same file, connect the two grooves in a straight line and
begin rounding, shaping and feathering in the neck to a comfortable feel.
The finish thickness at the first fret should be no less than .83” and .90” at
the 11th fret.
There is a small plastic heel cap that needs to be glued with the neck on the
body. Once glued, remove the neck and shape the heel and any further neck
shaping for final comfort. Many builders will replace the plastic piece with a
solid wood replacement for a nice finish detail.
27
28
Main Objective:
Complete the process of cutting the binding and purfling channels in the
body, final fitting of the binding on the back and gluing of both the binding
and purfling materials.
Step Twenty Two - Grooving the top & back and gluing the binding &
purfling.
The “purfling” (thin black and white strips) and binding (thicker black or
white strip) of the soundbox is another critical step and you must take extra
care to get this step right. You need to feel comfortable with a small
laminate router with only half of the base maintaining stability on the
soundbox. Technique and a steady, safe hand will ensure a good cut. The
back tends to be more difficult because it has a slight curve that creates
different angles as you move around the soundbox.
Note: Before cutting either the binding or the purfling on the guitar, cut a
test groove on a scrap piece of wood and check the fit on the material that
will go in the groove you cut.
1) Install the 1” rabbeting bit in a small laminate router with the .88”
bearing to match the width and depth of the binding. Set the height
just slightly shallower that the height of the binding. It is preferable to
be a little shallow instead of too deep because you have no room for
sanding the wood flush to the binding. Go all the way around the body
and cut the groove.
2) Using the same router bit setup, cut the groove all the way around on
the back of the guitar.
3) Because the back is slightly curved, it is necessary to further trim the
groove by hand, to ensure equal depth all the way around the back.
Notice that at the top and bottom and even sometimes at the waist of
the back, the depth of cut is less than other areas cut with the router.
4) Being very careful, scrape or chisel an equal depth and feather in
these areas by sanding or using smaller bearings (.86”/.84”) for the
router bit. We recommend dry fitting the binding on the back to
ensure there will be an even thickness of binding after it is scraped.
Note: Before moving to the next step, determine how many pieces of
“purfling” you will use. There are six individual pieces, 3 black & 3 white.
Use as many or as few pieces of the binding as you wish. We recommend
that you use a contrasting piece of “purfling” next to the binding.
28
29
Note: Cut the groove for the “purfling” on the TOP ONLY!!!
5) Install the 1” rabbeting bit in a small laminate router to match the
width and depth of the purfling. Set the height just slightly shallower
than the height of the purfling. Go all the way around the body and
cut the groove.
Important Note: Remember to change to a lower depth of cut for the
purfling. If not you will have made an irreversible cut.
Note: Use the following setups for the number of purfling strips
a. .48 – Six Pieces of purfling
b. .64 – Five Pieces of purfling
c. .70 – Four pieces of purfling
6) Scrape one side of the binding to ensure that the glued side is smooth.
Note: The binding has a thin contrasting strip that must be scraped flush on
the side that will be glued in the groove. Otherwise, the binding will not sit
in the groove properly. If the thin strip is separated from the wider binding
strip, don’t worry about scraping this area. When you glue the binding on,
the glue will re-adhere this spot.
Note: All the layers of the “purfling” are attached to one another on one end.
Before trying to glue all of the layers of the “purfling” and the binding for
the top at the same time, unravel the “purfling” layers and run them through
your fingertips tape them to a flat board or let them hang freely for a day or
two to “relax”.
7) Make a clean 90 degree angle cut on one
end of the binding. Get your Duco
cement, binding, and blue tape close by.
Starting at the top, middle of the back,
begin by sparingly applying glue into
about 3” of the rabbet. Fit the binding
into the channel then tape it firmly in
place. Continue gluing & taping until you
go all the way around the guitar. Don’t stretch the binding. Take a
few of those big rubber bands (if you have them) and stretch them
around the waist (narrow part) of the body. If you do not have rubber
bands, use plenty of blue tape at the waist of the guitar. Check for any
29
30
gaps between the body and binding, and then check again. Proceed
around the guitar, and finish where you started, cutting a tight butt
joint to hide the joint. (See Special Tip)
8) Allow the glue to dry overnight.
Note: The gluing section must be completed in a single
session.
Special Tip: Pour enough acetone to cover a small pile
of binding shavings in a small container. The acetone
will melt the binding shavings and can be
poured/placed in the butt joint seam if you have a gap.
Allow it to dry and sand flush for a vanishing joint.
9) Remove tape and scrape binding flush with the back and sides.
Instruction sheet available for reference.
This will take a good amount of time and where the most noticeable
details can be found on your instrument. So, take your time.
Note: While scraping, be sure to scrape only the binding and NOT the sides
or back veneer. The veneer is thin and scraping through will leave you with
a noticeable mistake. Some finishing tricks can be performed to hide a small
problem but try not to do this.
Important Note: When scraping the sides be sure you visually look at the
thickness of the binding looking at the front and back views. Pay particular
attention to ensure that you do not thin out the binding thickness to a very
thin line in some areas. Using a scraper that has been rounded on the end
will allow you to scrape precisely at the joint between the wood of the side
and where the binding starts. Basically, you can cheat this a little where you
are only scraping this one spot and not at the edge of the binding closest to
the back.
30
31
Main Objective:
Marking the location for the bridge.
Step Twenty Three - Marking the location of the Bridge
The bridge location is another critical step. There are several books, articles
and tools to read up on to better understand this process. The key is to
simply understand the distance from the nut to the twelfth fret needs to be
equal to the distance from the twelfth fret to the saddle with “compensation.”
1) Attach the neck to the body using all three bolts.
2) Place a straightedge on the side of the fingerboard and project a
line down to the rough area of the bridge. Do this on both sides of
the fingerboard.
3) The kit comes with a bridge locator tool. This tool sets the scale
length by positioning it with the end of the fingerboard (nut end)
and allowing the bridge saddle to accept the raised insert in the
tool.
4) With the bridge locator tool in place with the bridge, use a sharp
pencil to mark a dot through the 1 and 6 position of the bridge onto
the top.
5) Use these marks to center the bridge left to right to ensure the
strings will be centered across the fingerboard.
Note: If the bridge is located to one side or the other, the
strings could fall off the fingerboard at the higher frets
and make it unplayable. Once the bridge is perfectly
centered you can proceed.
6) Tape the bridge in place temporarily while
holes are drilled using the .182”/4.6mm bit,
through the bridge pins holes at the first and
sixth string locations.
STOP-IT’S DECISION MAKING TIME!
31
32
Main Objective:
At this point, the major construction is complete and there are two directions
you can go to proceed.
1. Continue the construction including attaching the bridge,
machines, fitting the saddle and doing the final setup to make the
guitar playable.
2. Stop the building and complete all the sanding and finish prep and
complete the finishing. The advantage to going this route is that
applying finish and particularly the rubout of the finish is much
easier with the bridge not yet installed.
Note: At this point, the manual will proceed by showing you the tape off
areas needed to finish the guitar.
• Complete all final scraping and finish sanding. We do not recommend
sanding much beyond 150 or 180 grits as the higher grits could create
a shiny surface and prevent good finish adhesion.
• Taping the bridge area. Place some blue tape on the top in the rough
area where the bridge will be located. Poke holes through the tape
where the holes are in the top for the bridge clamp. Using the bridge
clamp, place the 2 studs through the clamp, through the bridge and
through the top. This will perfectly locate the bridge on the top. Use a
sharp utility knife and carefully cut around the perimeter of the bridge
being careful no to cut the top…tape only! Peel away the excess blue
tape and remove the bridge. Build up several layers of tape over this
first layer to prevent any finish from getting on the bare wood.
• Using the exact same process, tape off the sides and top of the body
where the neck and fingerboard will attach. Again, lay the tape, bolt
on the neck and cut away the excess.
• Tape off the top of the fingerboard including the nut end and where
the nut will attach to the neck. Also, tape off the truss rod pocket.
• Tape off the surface of the neck heel and back of the fingerboard that
will attach to the side and top. Install a long bolt into the threaded
insert and you’ll have a way to hold and/or hang the neck during
finish and/or drying process.
32
33
You are ready for finish!
Main Objective:
Remove the tape, attach the bridge, ream the bridge pin holes and fit the
saddle.
Step Twenty Four – Attaching the Bridge
• The tape used to preserve the bare wood
underneath is completely encased in finish.
• Using a utility knife, cut through the finish and
remove the tape where the holes are for the
bridge clamp studs.
• Using the clamps again, place the studs through
•
•
•
•
the clamp, through the bridge and onto the top.
Either completely clamp it down or hold it
securely while you firmly and carefully cut
around the perimeter of the bridge and through
the finish only….not the top.
Be sure to remove any stray blue tape and
ensure the surface is completely bare wood
only.
Apply acetone to a rag and wipe the back of the bridge to clean it and
remove any natural oils. Let it dry for a few minutes.
Apply glue to back of bridge and use the
bridge clamp to locate the bridge and
tighten the wing-nuts and thumb screws
securely.
33
34
Note: Be sure to use 1/8” scraps between the thumb screws and the bridge to
eliminate any damage to the bridge.
DO NOT OVERTIGHTEN!!!!!
Note: The pictures showing the bridge clamp
glue up were taken in a typical class
environment where the bridge is attached before
the final finish.
Step Twenty Five – Fitting the Saddle and Reaming the Bridge Pin Holes
• Fit the saddle into the bridge by taking a flat piece of wood to use as a
handle and attach a piece of double stick tape and pick up the saddle
with the tape. Slowly sand one face of the saddle on a flat surface
using adhesive back sandpaper attached to a flat and “true” surface.
Gently round the corners of the two ends. Continue to test fit the
saddle until it fits snugly in the bridge without having to force it but
NOT loose. Be sure the saddle bottoms out in the bridge.
• Drill the remaining holes in the bridge using the .182”/4.6mm drill bit.
Using the tapered reamer, slowly cut and fit the bridge pins so the ball
sits just above the height of the bridge. Be sure NOT to go to deep or
the pins will not hold the string in the bridge.
Step Twenty Six - Install Machines
• There are three left and three right
machines. To make this simple, be sure to
position the machines so that the screw hole
is down. Install the machines on one side of
the headstock and using a small straight
edge, line up all the machines. The straight
edge will make it easier to lineup. Once in
place, mark the hole and drill a 1/16” hole.
Be careful not to drill all the way through.
Secure each machine with a single screw.
34
35
• Make sure there is a flat, clean surface for the nut to rest on and that
there is solid contact on both the bottom of the nut as well as the end
of the fingerboard. This will ensure good glue adhesion for the nut.
• Cut a pencil in half the long way, sand it flat on a piece of sandpaper
and sharpen the lead to a point. Lay the flat side of the pencil on the
top three or four frets with two layers of blue tape on the top of these
frets, dry fit the nut and project a pencil line onto the face of the nut.
Be sure that the grooves cut into the nut are slightly above this line.
Assuming they are, go ahead and glue the nut using CA glue. If the
grooves are below the pencil line, the nut will need to be shimmed
with a small piece of veneer. Once the nut is glued, erase the pencil
line and re-draw the line again to be sure it is exactly where it needs to
be. Using the specific nut files for the diameter of the string size,
slowly file to just slightly above the pencil line being sure to file back
from the from edge of the nut.
Note: Continue to lower the saddle until the adjustments &
specifications in the next section can be met. Be sure to read and
understand the tolerances you are shooting for and continue to test
play the guitar until it plays the way you want.
Note: The first time you string your instrument, the guitar will need to
settle before making drastic adjustments. Remember, there is now a
lot of tension from the strings that will begin to make the adjustments
difficult initially. Most production guitars will be strung and left aside
for a period of time while the neck settles with tension and at pitch.
Step Nineteen-Truss Rod Adjustment
Every guitar is going to be different and will
react differently to string tension. Be sure to snug the truss rod adjustment so
it does not rattle but do not create any additional adjustment without letting
the guitar settle in with all the strings at full tension, at pitch.
35
36
Depending on how well the frets were originally seated and the care taken to
ensure a flat, straight neck, the guitar may only require nut and saddle height
adjustments to create the playability you desire. If lowering the strings to a
desired height creates a high fret, try and first determine if it just needs to be
hammered a bit more or it truly is a high fret. If in fact a fret(s) is determined
to be high, the following crowning step may be needed.
Crowning
1. Using a double cut file, slowly level the high frets being careful not to
lower the surrounding frets.
2. Using a fret crowning file, create an
even crown on each high fret to
ensure the string will ride freely over
the top with no snags.
3. Using the same file, round each of the
ends of the frets.
4. Using the small needle file, remove
the burr on either side of the fret.
Note: This is a critical step and will
take a fair amount of time, skill and practice to perfect the techniques.
There are several books, articles and tools to read up on to better
understand this process. This could be class by itself so this manual is
simply to take you through the proper steps.
Continue to work on dressing the frets and completing any and all of the
previous steps so far.
Step Twenty-Setup
Set up determines the guitar’s playability and reflects the individual builder
or player’s preferences. If you are looking for a fingerboard that is easier to
play, you’ll want lighter strings and a lower action. If you like your sound to
project better, you might prefer a slightly higher action. The action is set by
the amount of relief you’ve allowed the neck to maintain. Please refer to the
diagrams below for an explanation of Action.
36
37
String tension can pull the neck up and therefore increased the spacing
between the strings and the fingerboard and may be reduced by the use of
the Truss rod to counteract the effect of the string tension.
If the action is low, buzzing is more likely to occur. So a lower action
requires more attention to Setup. A certain tolerance must be maintained
between strings and frets and a slight fall away must be introduced where the
fingerboard lies over the guitar body.
It is not a good idea to try to set up your guitar before you’ve strung it to
pitch, in other words, before you have tuned the strings to the tension they
are likely to maintain. This is simply because you need to know what the
neck’s reaction is going to be before you can decide on the proper remedy.
In a perfect world the neck will bend just the right amount to give you the
right action and you will hear no buzzing. That is, however, very unlikely.
You may want to make any necessary adjustments before you tackle
intonation since any changes in the neck, nut, bridge or even string choice
will require that you revisit intonation.
The tone and volume of the acoustic guitar are very much affected by the
bridge and saddle since this is the place where the vibration of the string is
transmitted to the guitar’s body. A little patient attention to these areas will
greatly improve your playing enjoyment.
Let’s take a look at some of the tolerances we are shooting for.
Height of the saddle portion protruding from bridge = Min. : .093”
Max. : .25”
Ideal : .12”
Optimum distance from high E string to first fret = .06”
Optimum distance from low E string to first fret = . 08”
Optimum distance from high E string to 12th fret = .12”
Optimum distance from low E string to 12th fret = .14”
37
38
Step Twenty One-Trussrod Cover
Once the setup is complete and any truss rod adjustment is made, position
the truss rod cover by butting it up against the nut. Mark and pre-drill the
holes and secure cover with the three black screws.
Step Twenty Two-Strap Button and End Pin
Drill the endpin with a ¼” drill bit and follow that hole with a tapered
reamer, continuing to test fit so that the endpin will require a slight tap for
final seating. Do not completely seat this endpin until the final sanding and
finishing is complete.
The strap button comes complete with a button, screw and a felt washer. Do
not install this until the guitar has been completely finished with a top coat.
Locate the button on the bottom side of the neck heel. (The bottom side is
the side of the neck furthest away when you are holding the guitar to play it).
Exactly where to place the strap is up to you and may also be based on the
strap design itself. Be sure to drill hole clear of the neck bolts.
Note: Be sure to drill hole for strap button very close to the size of the screw.
Drilling too small of a hole and “forcing” the screw in could potentially
crack the neck heel.
38
39
Step Twenty Three-Finishing
You will want to apply a top coat of finish to the instrument to protect the
bare wood from dirt and oils. There are countless finishing products to use
and will post on our website forum, feedback from those that have already
built kits. Many builders use nitro-cellulose lacquer but there are many
precautions needed to use this product. There are many water-borne products
available that are less volatile and less hazardous. Also, there are some nice
hand rubbed oil finishes that require much more work but with spectacular
results. We suggest several tests on scrap woods to find the perfect finish
before working directly on your new instrument.
We hope that you have enjoyed the process and have an instrument that you
will show to others. Hopefully, you or someone you have made this for will
begin to play this with the appreciation of all your time and efforts.
Thanks again for purchasing a kit from US Guitar Kits, Inc.
We would love to see a picture of your finished guitar.
Visit our site at www.usguitarkits.com or send us an e-mail at
[email protected].
Safe building and happy playing!!!!!
Copyright © 2011 by U.S. Guitar Kits, Inc.
All rights reserved.
39
40
U.S. Guitar Kits, Inc.
Finishing Instructions for Acoustic Guitar Kit
Time to Bring it Alive-The Finish!!!
Be careful not to get to hasty. Instead, take your time and savor the rewards
of a beautiful guitar with a fantastic finish.
There are many finishing specific books and references available on the
subject and would suggest reading up and experimenting on scraps before
applying a final finish.
There are also many finishes that can be used that will provide a durable and
beautiful finish.
Disassemble the Guitar
Before starting to sand, remove the neck from the body, machines, truss rod
cover and endpin.
Surface Preparation
Anyone will tell you, the finish is only as good as the preparation. This
means taking extra special attention to the details of sanding through the
various grits, not skipping grits, and finishing with grits up to 150 or 180.
Note: It is crucial to hand sand the sides and back to ensure a light
touch, being careful NOT to sand through the veneer. BE CAREFUL!
Note: Using a scraper, scrape any excess glue. Do not try and sand out
a glue “blob” on the back or sides. You will sand through the veneer
before you sand the glue. AGAIN, BE CAREFUL!!!
Taping
Once you have completed all of the sanding, tape off the fingerboard, bridge
and nut. (Remove the nut if you have not already glued it.) Place tape where
the nut was placed if it is removed. Otherwise, the glue will not stick to the
finish.
Once, you have completed the sanding and taping process you are ready to
begin applying a finish.
40
41
Grain Filler
Grain filler is used on open pore woods like mahogany to raise the low areas
of the pores and help to level the final finish and not see waves.
The color grain filler used can either be used to simply level the pores or
used to highlight the pores with a contrasting color like black. The latter
creates a visually deep, rich look to the surface of the neck and headstock.
If you built a Sapele guitar, this can also be done on the back and sides.
Note: Do not apply grain filler to the surface of the fingerboard. This
should already be taped/masked off at this point.
Note: NEVER apply grain filler to the top of either of the guitars. This
would be incorrect. There are NO deep pores to fill on Cedar or
Spruce.
Before applying grain filler, many professional finishers will use a sealer
coat of shellac on the surface and letting it dry before applying the grain
filler. This will prevent the moisture in the filler from swelling the wood and
creating cracks in the finish later.
Once the grain filler has dried completely, sand the excess off and wipe the
surface with a clean rag.
Nitro-Cellulose Lacquer
The most common finish seen on most production guitars today is nitrocellulose lacquer.
It is typically sprayed in a very specific environment with many precautions
taken to comply with the product safety requirements.
This should not be taken lightly as there are significant health and safety
concerns as well as strict laws enforcing proper methods of use and disposal.
USGK offers finishing products from the Behlen company that can produce
excellent results when used properly and in accordance with safety and
application procedures. Products include vinyl sealer and instrument lacquer
for the finish. They also have a full set of rub out products to bring a super
glossy finish to your guitar. You can also use super high grit wet polishing
41
42
sandpapers starting at 3600 grit all the way up to 12000 grit to achieve equal
results.
Check out the posting link below on the Discussion Forum for complete
instructions on applying Behlen Vinyl Sealer & Instrument Lacquer as well
as the process for rub out using Behlen products.
http://usguitarkits.com/acoustic-guitar-building-forum/guitar-buildersforum/guitar-building-forum
Additional Products and Sources
There are many finishes that are not as volatile or ass difficult to control that
can achieve good results in a well ventilated area.
Again, follow the instructions regarding the specific product you use.
Consult a local retail finishing supplier for ideas on user friendly finishes.
There are also mail order finishes focused on “water borne” type finishes
that can be applied either by spray or brush that do not have the volatility of
nitro-cellulose lacquer.
Final Comments on Finishing
It is very difficult to take you through every step of finishing as there is a
world of various finishes and application techniques as well as material use
and safety precautions to follow.
We do stress preparation as the key to any finish.
We also stress following a complete finishing process on some scrap
materials to understand all the steps to achieve the final look you want.
Copyright © 2011 by U.S. Guitar Kits, Inc.
All rights reserved.
42