1
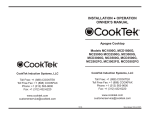
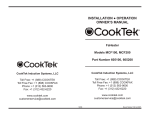
OWNER’S MANUAL
INSTALLATION
AND OPERATION
Use and Care of CookTek MagnaWave Cooktop –
Models MC1500, MCD1500, MC1800, MCD1800,
MC2500, MCD2500, MC3000, MCD3000,
MC3500, MCD3500, MC2502F, MCD2502F,
MC2502S, MCD2502S, MC3002S, MCD3002S,
MC3502S, MCD3002F, MCD3502F
CookTek, Inc.
810 W. Washington • Chicago, IL 60607 U.S.A.
Tel: 1-312-563-9600 • Fax: 1-312-432-6220
102922
1
PREPARING YOUR COOKTEK MAGNAWAVE COOKTOP FOR USE
Before operating your Cooktop, do the following:
1. Remove all packing material.
2. Place the unit on a dry, level, hard, stable, and non-flammable surface.
3. Keep unit away from other heat sources and allow at least 2 inches clearance for
air circulation at sides, front and rear of the unit. If either the air intake or
exhaust outlet is blocked, the internal temperature will rise, causing an error code
to occur.
Grounding Instructions:
The Cooktop must be properly grounded. In the event of an electrical short circuit,
grounding reduces the risk of electric shock by providing a safe path for the electric
current. The Cooktop has a power cord with a 3-prong grounding plug, which must
be used in a compatible and properly grounded outlet. It is the owner’s responsibility to replace any 2-prong wall outlet with a properly grounded 3-prong wall
receptacle.
For your safety, never cut, remove, or disable the electrical (ground) connection
from the plug. Never use an adapter plug or an extension cord with the Cooktop.
WARNING: Electric shock can result from an improperly grounded plug. Please
consult a qualified electrician if you have any questions about these grounding
instructions.
Before You Begin:
Some units may come equipped with a removable IEC Power Cord. Please make
sure that this power cord is firmly attached to your CookTek unit BEFORE plugging
the unit into the power receptacle and before attempting operation.
ELECTRICAL INSTALLATION REQUIREMENTS*
Every installation site has different electrical wiring. Because many different local
codes exist, it is the Owner and Installer’s responsibility to comply with those codes.
CookTek is not responsible for any consequential damages as a result of failure to
comply with installation requirements.
• Read all installation instructions carefully before starting installation.
• Remove Cooktop carefully from carton.
• Remove all loose packaging and accessories.
• It is the responsibility of the installer to comply with all federal, state and local
codes.
• Any installation not matching the specifications discussed in this manual automatically voids the product’s warranty.
• CookTek recommends that a dedicated electrical line be used for each Cooktop
installed. Electrical circuits should not be shared with any other electrical
equipment.
2
INSTALLATION OF DROP IN COOKTOPS
• When installing the drop-in Cooktop, use the dimensions provided in this
manual to trace the cutout dimensions onto the countertop.
• Be sure to allow for a minimum clearance of 2” between all sides of the
housing and any surface or obstacle, and 9” between the bottom of the housing
and any surface or obstacle.
• Cut out and drill holes as required in countertop.
• Drill holes for control box mounting.
• When installing the drop-in Cooktop , apply a bead of an NSF Standard 51
approved sealant (such as Dow Corning 732 Multi-Purpose Sealant or GE RTV
108) around all four edges of the countertop cutout. Carefully follow sealant
manufacturer's instructions to insure proper adhesion.
• Multi-Purpose Sealant or GE RTV 108) around all four edges of the countertop
cutout. Carefully follow sealant manufacturer’s instructions to insure proper
adhesion.
• Locate Cooktop over countertop cutout. Pass control panel and cord through
cutout, then pass the base of the Cooktop through the hole until flange rests on
the countertop.
• Mount control panel using screws supplied. Mounting options are illustrated in
attached drawing.
• Plug Cooktop into a grounded 120V or 200-240V (depending on the model
purchased), single-phase receptacle. Check rating plate on the Cooktop to
verify correct voltage. NOTE: For proper operation, a dedicated circuit
should be used for each unit installed. Each circuit should be protected
with a 20 amp minimum circuit breaker. For best operation, the counter
should have an opening near the unit for fresh air to circulate underneath.
APPROVED FOR COMMERCIAL USE
CookTek’s MagnaWave cooktops have been tested to be in conformance with UL
197 and CSA C22.2 standards and bear the commercially rated approvals.
CookTek’s Magna Wave cooktops have been tested to be in conformance with the
European Economic Area standards and bear the CE marking signifying European
Conformity.
COOKING BY POWER COOK (WATTAGE)*
General Operation:
Plug cooktop into a grounded, single-phase receptacle. Models will run on 100120V drawing up to 1800W depending on model. Or on 208-240V drawing a maximum of 3500W depending on the model. Check rating plate on unit to verify
correct voltage and wattage. Voltages below 120V or 240V can result in less than
rated power and slower heating times.
3
NOTE: For proper operation, an independent dedicated circuit should be used for
each unit installed. Each circuit should be protected with a 20 amp circuit breaker.
When your application requires a high intense heat or you want a quick temperature
increase, the Power Cook mode should be used.
What to Do:
1. Turn the Cooktop “ON” by turning the control knob to the right.
2. Momentarily depress the Power Cook button.
3. Turn the control knob until the desired Power Cook setting (1-20) appears on the
LED Display.
4. Turn the control knob to the left to decrease power and to the right to increase
power.
5. To turn the Cooktop off, turn the control knob to the far left until it “clicks” and
the LED display no longer illuminates.
IMPORTANT: You can switch between SmarTemp and Power Cook at anytime just
by pressing the SmarTemp/Power Cook button.
IMPORTANT INFORMATION
• Never heat an empty pan, it may damage the Cooktop or cookware and overheat the unit. When overheating occurs, an error code will flash on the LED
display and the Cooktop will shut itself off automatically. When the temperature returns to normal, the Cooktop will start to cook again.
• Remember to turn the Cooktop off after each use.
• Keep the Cooktop away from gas and electric ranges or open flames. Do not
place in the oven. If the surrounding air temperature is too high, the Cooktop
will cease to function properly.
• Be sure to dry off the outside of the pan before use. Otherwise As If the pan
temperature rises, the water droplets on the outside of the pan may begin to
boil and spatter.
• Do not touch the ceramic plate (or the top of the Cooktop) immediately after
use. The heat from the pan will be transferred to the ceramic plate causing it to
be hot to the touch.
• Do not place any articles on the Cooktop other than inductive cookware. For
example, do not place cans on top of the Cooktop as they may explode.
• Do not use aluminum foil on top of the Cooktop.
• Do not use the Cooktop near a faucet, swimming pool, sink, or other areas
where water can be found. Never store the Cooktop outside or upside down.
• Do not obstruct, block, or alter the air entrance or outlet. Do not stick foreign
objects into these openings.
• Do not strike or damage the Cooktop. Do not put the Cooktop in your luggage.
Throwing or dropping the Cooktop can damage the internal components or
crack the Cooktop, voiding your Warranty. If the Cooktop becomes cracked,
unplug immediately and do not use.
4
CARE & CLEANING
Your CookTek Induction Cooktop is easy to keep clean. Be sure to follow these easy
instructions:
1. Turn the unit OFF and remove the plug from any power outlets prior to cleaning.
2. When the unit is cool, wipe the surface and body with a damp cloth. Use a mild
scouring agent on the stainless steel housing such as Bon Ami or Barkeeper’s
Friend for greasy or resistant soiling. Do not use a lye-based cleaner, such as an
oven cleaner, as it may damage the Cooktop.
3. To clean the glass surface, use a mild detergent or glass Cooktop cleansing cream.
4. Never immerse the Cooktop in water or put it in the dishwasher.
Your CookTek MagnaWave Cooktop has two different cooking
modes: SmarTemp and Power Cook. Professional cooks will appreciate the special features and advantages of each mode.
COOKING BY SMARTEMP (TEMPERATURE)*
When your recipe requires a precise and even temperature to be maintained over a
period of time, the SmarTemp mode is ideal. Just follow these simple steps.
What to Do:
1. Turn the Cooktop “ON” by turning the control knob to the right.
2. Place cookware containing ingredients on the Cooktop.
3. Depress the SmarTemp button.
4. Turn the control knob until the desired cooking temperature appears on the LED
Display. The temperature displayed will change from the set temperature to the
measured temperature 3 seconds after the control knob is moved. The LED will
show the measured temperature until the desired temperature is achieved.
5. To turn the Cooktop off, turn the control knob to the far left until it “clicks” and
the LED display is no longer illuminated.
NOTE: If the unit is left on and has been left unattended for 5 or more minutes
without a pan on its surface, the unit will enter a “Sleep Mode” to conserve energy.
You will know that the unit is in “Sleep Mode” because the LED will display horizontal dashes. The Power Knob must be rotated in either direction to exit “Sleep
Mode” and begin normal operation.
SmarTemp monitors the temperature of the bottom of the pan.
For actual temperature of the food contents, a contact thermometer should be used.
WARRANTY STATEMENT
All commercial cooking equipment manufactured by CookTek is warranted against
defects in materials and workmanship for a period of one year from the date of Sale,
or 18 months from the date of shipment from our factory, whichever comes first.
IMPORTANT! Keep a copy of your sales receipt to verify date of purchase. A valid
proof of purchase, indicating Serial Number (s) and date of purchase is required to
5
obtain Warranty Service. This warranty is for the benefit of the original purchaser and
is non-transferable. Any defects in materials or workmanship, which are brought to the
attention of CookTek by written notification within the aforesaid warranty period will
be repaired or replaced, at CookTek’s discretion, with new or recertified products or
parts. THIS IS THE SOLE REMEDY FOR ANY BREACH OF THIS WARRANTY.
IN NO EVENT WILL COOKTEK BE LIABLE FOR DAMAGES OF ANY KIND,
WHETHER DIRECT OR INDIRECT, SPECIAL OR CONSEQUENTIAL.
THIS WARRANTY IS THE COMPLETE AND ONLY WARRANTY, EXPRESS
OR IMPLIED IN LAW OR FACT, INCLUDING BUT NOT LIMITED TO, WARRANTIES OF MERCHANTABILITY, SUITABILITY, QUALITY, OR FITNESS
FOR ANY PARTICULAR PURPOSE.
This warranty is void if it is determined that upon inspection by an authorized
service agent that the equipment has been modified, misused, misapplied, improperly installed, or damaged in transit or by fire, flood or act of God. Warranty will be
considered void if the serial nameplate has been removed or if the unit has been
opened or modified in any way, or service has been attempted by unauthorized personnel. IMPORTANT! Keep a copy of your sales receipt to verify date of purchase.
A valid proof of purchase, indicating Serial Number(s) and date of purchase is
required to obtain Warranty Service. The prices charged by CookTek for its products are based upon the limitations in this warranty. Seller’s obligation under this
warranty is limited to the repair of covered defects without charge by a CookTek
factory authorized service agent or one of its sub-service agencies.
To receive Warranty Service, Please call CookTek at 312-563-9600 to obtain an RA
number. This RA number must be printed on the outside of the return shipping container, or on the address label when returning units for service. Units received
without an RA number will be refused at our shipping dock and may encounter a
delay in service. Units must be taken or shipped to the required authorized service
agency with transportation charges prepaid for service. CookTek will provide return
freight. In addition to restrictions contained in this warranty, specific limitations are
shown in the Service Policy and Procedure Guide. Please save all packaging materials for possible use in shipping. CookTek assumes no liabilities whatsoever for any
damages incurred in transit.
Warranty void if not purchased in country of origin or through an authorized
CookTek service agent. For additional information and other details concerning
warranty, please contact our Service Department at:
In the United States:
CookTek
810 W. Washington Boulevard • Chicago, IL 60607
Tel: (888) 266-5835 • Fax: (888) 266-5329
Outside of the United States:
Tel: 1-312-563-9600 • Fax: 1-312-432-6220
Worldwide Web:
WWW.CookTek.com
Rev. 6/7/05
6
IMPORTANT SAFETY PRECAUTIONS
There are certain safeguards that should always be followed whenever this appliance
is used:
• To reduce the risk of fire, electric shock, or injury - please read, follow and save
all instructions.
• Never immerse cords, plugs or appliance in water.
• Supervise carefully when appliance is used near children. Keep children away
from appliance when in operation.
• Always unplug appliance immediately after use and allow for cooling time if
handling, transporting, or storing.
• Do not use any appliance that has a damaged cord or plug, or one that has malfunctioned or been damaged. Consult the warranty and follow instructions for
service.
• Do not use any accessories or attachments that are not recommended by the manufacturer. Use of unapproved accessories may cause injuries and void the warranty.
• The pan on the appliance will heat continuously as long as the power is ON. The
pan will be hot and caution should be exercised when working on or near the
appliance.
• Do not let the power cord touch hot surfaces or hang over the edge of the
counter. Do not move the appliance when electric power is connected.
• Do not move the appliance while a hot pan or pan containing hot liquids is on top
of the appliance.
• To disconnect appliance, turn control knob to “OFF”. You will hear a “click”.
You may then remove the plug from the outlet.
• Do not use CookTek Induction Cooktop for anything other than its intended use
as described in this manual. This unit is designed to heat and cook food and is
not intended for laboratory or industrial use.
• Do not put food or unopened cans on the Cooktop’s surface.
• This product may only be serviced by an authorized service agent or by CookTek
personnel. Do not attempt to open the unit or perform service of any kind. For
service information contact CookTek at 1-312-563-9600.
• This appliance must be grounded. Connect only to a properly grounded outlet.
Before operating, read grounding instructions and Electrical Installation
Requirements on Page 3 of this booklet. Do not use an extension cord.
• Do not overcook food or leave appliance unattended while in use.
• In the unlikely event of a grease fire, smother flame by covering pan with a tightfitting lid, cookie sheet, or flat tray. DO NOT USE WATER. When the fire is
under control, turn off appliance and unplug from wall.
• Use only with induction-compatible and efficient cookware.
• Place Cooktop on a level, hard, stable, non-flammable surface before use.
7
TROUBLESHOOTING GUIDE
Symptom
Probable Cause
No Power
Unit Unplugged
(No Lights or Fan Noise)
Pan Does Not Heat
Cooktop Suddenly
Stops Heating
Possible Solution
Plug Unit into Appropriate Receptacle
No Power to Receptacle
Make Sure that Receptacle is Energized
No Power to Receptacle
Check Wall Switches
No Power to Receptacle
Check Circuit Breaker
No Power to Receptacle
Plug a different electronic device into the
receptacle to make sure that power is
present
Pan is Not Induction Efficient
Use Induction Efficient Pan
Pan Diameter is less than 7 inches
Use a larger Induction Efficient Pan
Pan Not Centered Over
Cooktop Logo
Center Pan
Possible Power Brown Out
Assure proper voltage/power levels
Circuit Shared with another
Electrical Device
Make sure that the Cooktop is not sharing
a circuit with other Electrical Devices.
Air Vents Blocked or Insufficient
Air Circulation
Check air vents to make sure that they are
not blocked. Make sure that there is
sufficient air flow around the appliance
Safety Shut-Off Engaged
The Safety Shut-Off will engage if an empty
pan is left on the Cooktop surface while the
unit is working at full power. Make sure that
the Cooktop surface is clear. Wait 15-20
minutes for the unit to reset.
Pan Does Not Get Hot Extension Cord In Use
Enough Even Though
Power Levels Are Set
To Maximum-Induction Circuit Shared with Another
Efficient Pan In Use
Electrical Device
Pan Cooks Unevenly,
Pan is Not Induction Efficient
Does Not maintain Heat Pan Bottom May Not Be Flat
Level, or Overheats
Enough
Do Not use extension cords. Extension
cords may affect the power levels
reaching the appliance
Make sure that the Cooktop is not sharing
a circuit with other Electrical Devices.
Use Induction Efficient Pan
Use Flatter Pan
Pan Not Centered Over
Cooktop Logo
Center Pan
Pan Diameter is Less Than 7 inches
Use a larger Induction Efficient Pan
8
In the event of a Possible Malfunction, your CookTek MagnaWave Cooktop
will display an Error Code on the LED Display. Please consult the following
table when encountering an Error Code.
Error Error Description
Code
Potential Cause
Action Required
1
RTD (temperature
sensor) is malfunctioning
RTD sensor has shorted
Reconnect or replace RTD.
Service may be required.
2
RTD (temperature
sensor) temperature is
too high
Glass surface is too hot or RTD
sensor has broken
Remove any pans from cooktop
surface and let unit cool. Then
turn unit off, then on. If problem
was temperature related, the unit
will return to normal operation,
otherwise service is required.
3
Current is too high
Possible mechanical damage to
Try different cookware. Service
coil or foreign object on cooktop. may be required
4
Electronics are
overheating
Fan broken, bad ventilation,
ambient temperature too hot
Check airflow. Clear air vents.
Listen for fan operation.
6
Input Line (From Power
Outlet) Voltage Too High
Something else is one the same
circuit. Line voltage fluctuations
at end or beginning of work day.
(Voltage > 132Vac for 120V
model or > 264Vac for 240V
model)
To reset, unplug unit, wait
5 seconds, and plug in again.
If problem persists, have an
electrician monitor the line
voltage.
7
Hardware failure
Inverter I/O problem
To reset, unplug unit, wait
5 seconds, and plug in again.
Service may be required.
8
Zero cross error
Bad AC source, board
component failure
Turn unit off, then on. Plug unit
into outlet on different circuit
breaker. If problem persists,
service is required on device.
16
System error
CPU I/O problem
To reset, unplug unit, wait
5 seconds, and plug in again.
Two Hob (Two Position) Cooktops
Operation of the two hob (two position) Cooktop is exactly the same as the single
position Cooktop. Each position will have its own, independently controlled, OnOff Control Knob and its own, separately controlled, SmarTemp button. It is not
necessary to turn on both positions for the Cooktop to function.
NOTE: For Proper operation a dedicated circuit should be used for each unit
installed. Each unit should be protected with a 30A minimum circuit breaker.
9