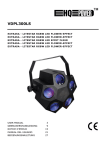
1
Rechargeable Wireless
Optical Mouse
Belkin Ltd.
Express Business Park • Shipton Way
Rushden • NN10 6GL • United Kingdom
Tel: +44 (0) 1933 35 2000
Fax: +44 (0) 1933 31 2000
Belkin GmbH
Hanebergstrasse 2
80637 Munich • Germany
Tel: +49 (0) 89 143405 0
Fax: +49 (0) 89 143405 100
Belkin B.V.
Starparc Building • Boeing Avenue 333
1119 PH Schiphol-Rijk • The Netherlands
Tel: +31 (0) 20 654 7300
Fax: +31 (0) 20 654 7349
Belkin SAS
5 Rue du Petit Robinson • 3ème étage
78350 Jouy en Josas • France
Tel: +33 (0) 1 34 58 14 00
Fax: +33 (0) 1 39 46 62 89
© 2005 Belkin Corporation. All rights reserved. All trade names are
registered trademarks of respective manufacturers listed.
4720ea_F8E845ea_man.indb 1
P74720ea
Belkin Tech Support
Europe: 00 800 223 55 460
7/3/05 5:12:03 pm
Rechargeable Wireless
Optical Mouse
Navigate, input data, and charge
for advanced wireless
functionality
EN
___
FR
___
DE
___
NL
___
ES
___
IT
User Manual
4720ea_F8E845ea_man.indb 2
F8E845ea
7/3/05 5:12:07 pm
EN
___
FR
___
DE
___
NL
___
ES
___
IT
1
17
33
49
65
81
4720ea_F8E845ea_man.indb 3
7/3/05 5:12:07 pm
4720ea_F8E845ea_man.indb 4
F8E845ea
7/3/05 5:12:11 pm
Rechargeable Wireless
Optical Mouse
Navigate, input data, and
charge for advanced wireless
functionality
EN
___
FR
___
DE
___
NL
___
ES
___
IT
User Manual
4720ea_F8E845ea_man.indb 1
F8E845ea
7/3/05 5:12:12 pm
Table of Contents
1 Introduction . . . . . . . . . . . . . . . . . . . . . . . . . . . . . . . . .3
1
System Requirements . . . . . . . . . . . . . . . . . . . . . . .4
Packaging Includes . . . . . . . . . . . . . . . . . . . . . . . . .4
2
3
Overview . . . . . . . . . . . . . . . . . . . . . . . . . . . . . . . . . .4
2 Hardware Installation . . . . . . . . . . . . . . . . . . . . . . . . .5
Connecting the USB Mouse . . . . . . . . . . . . . . . . . . .6
4
Connecting the PS/2 Mouse . . . . . . . . . . . . . . . . . . .7
5
3 Software Installation . . . . . . . . . . . . . . . . . . . . . . . . . .9
Synchronizing your Mouse to your Receiver . . . . . .8
Software Features . . . . . . . . . . . . . . . . . . . . . . . . . 10
Button Functions . . . . . . . . . . . . . . . . . . . . . . . . . . 10
Charging . . . . . . . . . . . . . . . . . . . . . . . . . . . . . . . . . 10
4 Troubleshooting . . . . . . . . . . . . . . . . . . . . . . . . . . . . . 11
5 Information . . . . . . . . . . . . . . . . . . . . . . . . . . . . . . . . . 14
4720ea_F8E845ea_man.indb 2
7/3/05 5:12:12 pm
Introduction
Congratulations and thank you for purchasing the
Rechargeable Wireless Optical Mouse from Belkin. You
are about to experience a whole new world of computing
convenience with superior input features and navigating
accuracy. The Mouse works from up to six feet away without
a cord, giving you unencumbered freedom of movement. It
provides five customizable buttons, including the convenient
scroll wheel, to make repetitive tasks simpler than ever.
Please review this User Manual thoroughly to ensure
your safe, long-term use of the Mouse, and for help
in getting the most from its advanced features.
4720ea_F8E845ea_man.indb 3
1
2
3
4
5
3
7/3/05 5:12:12 pm
Introduction
System Requirements
1
•
Windows® 98 SE, Me, 2000, or XP
•
CD-ROM drive
•
5MB of available disk space
3
•
USB or PS/2 port
4
Packaging Includes
2
5
•
Rechargeable Wireless Optical Mouse
•
Charging Cradle
•
Software CD
•
User Manual
•
2 NiMH Batteries
•
PS/2 Adapter
Overview
Before starting the installation of the hardware and
software for the Mouse, please remove any drivers or
software from any mice that were previously installed on
your computer. This is to avoid any conflicts they may
create, which could result in an improper installation
of your Mouse. Please consult the documents that
came with your previous mouse for proper instructions
on how to uninstall the software and drivers.
4720ea_F8E845ea_man.indb 4
4
7/3/05 5:12:13 pm
Hardware Installation
Important: Before connecting your Mouse or installing
software, be sure to identify the type of mouse port you are
using (USB or PS/2). Refer to the diagrams below if you have
difficulty determining which kind of port your Mouse uses.
1
2
3
USB Port
PS/2 Port
Important: Do not install the software until the
4
5
Mouse is connected to your computer. If you
have not yet connected the Mouse, please follow
the Hardware Installation instructions.
Note: Your Mouse is functional without installing the
software provided. However, we recommend software
installation because the software allows you to program the
Mouse buttons for various functions, adding personalized
efficiency and enjoyment to your computing experience.
4720ea_F8E845ea_man.indb 5
5
7/3/05 5:12:13 pm
Hardware Installation
Connecting the USB Mouse
1
USB in Windows 98 SE, Me, 2000, and XP
2
1.
3
Make sure your computer is turned
on before installing the Mouse.
2.
4
Connect the receiver to an available
USB port on your computer.
3.
A New Hardware Wizard will start automatically.
Note: Windows 98 SE may require you to insert
5
your Windows 98 SE Installation CD into your
computer’s CD-ROM drive to complete the install.
4.
When your Installation is complete, insert the
batteries into the Mouse and the Mouse should
sync up with the receiver automatically.
Note: If the Mouse does not sync up with the
receiver automatically, please see instructions titled
“Synchronizing your Mouse to your Receiver”.
5.
4720ea_F8E845ea_man.indb 6
When your Mouse is properly connected and
functioning as a standard mouse, you can start the
software installation for the extra button features.
6
7/3/05 5:12:13 pm
Hardware Installation
Connecting the PS/2 Mouse
PS/2 in Windows 98 SE, Me, 2000, and XP
1
1.
Turn off your computer.
2
2.
Connect the USB-to-PS/2 connector to
the mouse cable on the receiver.
3
3.
Insert the cable with the connector to the
PS/2 (6-pin) mouse port on your computer.
4
4.
Place the batteries into the Mouse.
5.
Turn the computer on.
6.
When the computer finishes starting
up, it will automatically detect the
Mouse and make it function.
5
Note: If the Mouse does not work, please
see instructions under “Synchronizing
your Mouse to your Receiver”.
7.
When your Mouse is properly connected,
you can start the software installation.
4720ea_F8E845ea_man.indb 7
7
7/3/05 5:12:13 pm
Hardware Installation
Synchronizing your Mouse to your Receiver
1
2
3
4
5
If the Mouse does not automatically sync with the
receiver, press the connect button on the front of the
receiver. The light on the receiver will blink rapidly.
Then sync the Mouse to the receiver by pushing the
sync button on the bottom of the Mouse. The light on
the receiver will stop blinking and light brightly.
Note: Each time you repeat this step, the Mouse will
randomly select a new ID. This allows multiple wireless
mice to work in the same location without cross talk. If
you experience cross talk with another wireless mouse,
repeat the synchronizing steps to change the channel.
4720ea_F8E845ea_man.indb 8
8
7/3/05 5:12:13 pm
Software Installation
Important: Do not install the software until the
Mouse is connected and properly functioning to your
computer. If you have not yet connected the Mouse,
please follow the Hardware Installation instructions.
1.
Insert the included installation CD into your
CD-ROM drive. After a few moments, the
main menu will start automatically.
2.
Select “Install Driver” and the
computer will begin installation.
3.
Follow the on-screen instructions
to complete the installation.
1
2
3
4
5
Note: If the computer does not automatically
detect the CD, do the following:
1.
Click the “Start” button and select “Run”.
2.
From the run dialog box, enter “<driver>:\
Setup” and click “OK”. (“<driver>” being the
letter of the drive that identifies your CD-ROM
driver under “My Computer”. For example, if
the CD is in driver D, enter “D:\Setup”.)
3.
Follow the on-screen installation instructions.
4720ea_F8E845ea_man.indb 9
9
7/3/05 5:12:14 pm
Software Installation
Software Features
1
2
Your Mouse’s software enables a variety of exciting
features and functions that will help you to increase
your productivity with your new Mouse.
3
In order to control the Mouse’s high-end features, you will
need to access your Mouse’s Properties dialog box, either
through the Control Panel or through your Mouse’s software.
4
Through your Mouse’s Properties dialog box, you
will find and control the following features:
5
Please note that only the scroll wheel, fourth, and fifth
buttons are programmable through the software.
Button Functions
Left Button
Middle or Wheel Button
Right Button
Fourth Button
Fifth Button
Primary Mouse Button
(standard click-and-drag action)
Quick/Auto Scroll
Context Menu
IE Back (if available)
IE Forward (if available)
Charging
The receiver/cradle must be connected to an outlet using
the included AC cable. Place the Mouse into the base
station to charge. Please be sure to use the rechargeable
batteries provided. Allow batteries to charge for at
least 10 to 12 hours before first using your Mouse.
4720ea_F8E845ea_man.indb 10
10
7/3/05 5:12:14 pm
Troubleshooting
If you are having any problems with the
installation or operation of your Mouse, please
review the following section. If the problem is
not referred to below, or the suggested solutions
do not solve the problem, please contact our
technical support staff at 00 800 223 55 460.
1
2
3
Why isn’t my pointer moving smoothly?
The Mouse works well on a wide variety of surfaces,
especially those with textured and/or patterned features.
Problems will arise, however, if you attempt to use the
Mouse on mirrors, glass, or on some half-tone-printed
surfaces.
4
5
Why don’t the scroll functions
work with my notebook?
Check to be sure that you have disabled your notebook’s
trackball, touch pad, or J-key in the BIOS; then, enable
the external port so that all your Mouse’s functions will
be available.
4720ea_F8E845ea_man.indb 11
11
7/3/05 5:12:14 pm
Troubleshooting
1
My USB Mouse was not detected by
the system and won’t work. Why?
Please do the following:
2
1. Make sure your USB Mouse is completely
plugged into the USB port.
3
4
5
4720ea_F8E845ea_man.indb 12
2. Check the functioning of your system’s USB
port in the Device Manager page of System
Properties. If there is a circled exclamation point
through the USB port’s icon, the USB controller
has some problem. Please try to uninstall and
then reinstall the USB driver, or contact your PC
manufacturer’s technical support department.
3. Check the version of your operating
system. If you are not running Windows
98 SE, Me, 2000, or XP, please update
your operating system to one of these, so
that the USB device can be enabled.
4. Make sure that the USB port is
enabled in the BIOS setup.
12
7/3/05 5:12:14 pm
Troubleshooting
My Mouse is not responding.
1
Please do the following:
1. Be sure to install the batteries
positioned for correct polarity.
2. Make sure you have connected
the receiver correctly.
3. Make sure the receiver is at least
8 inches (approx. 20cm) away from
other electrical devices such as
computers, monitors, and printers.
4720ea_F8E845ea_man.indb 13
2
3
4
5
13
7/3/05 5:12:14 pm
Information
FCC Statement
1
DECLARATION OF CONFORMITY WITH FCC RULES FOR
ELECTROMAGNETIC COMPATIBILITY
2
We, Belkin Corporation, of 501 West Walnut Street, Compton, CA 90220, declare
under our sole responsibility that the product,
3
4
5
F8E845
to which this declaration relates,
Complies with Part 15 of the FCC Rules. Operation is subject to the following two
conditions: (1) this device may not cause harmful interference, and (2) this device
must accept any interference received, including interference that may cause
undesired operation.
Caution: Exposure to Radio Frequency Radiation.
The radiated output power of this device is far below the FCC radio frequency
exposure limits. Nevertheless, the device shall be used in such a manner that the
potential for human contact during normal operation is minimized. When connecting
an external antenna to the device, the antenna shall be placed in such a manner
to minimize the potential for human contact during normal operation. In order to
avoid the possibility of exceeding the FCC radio frequency exposure limits, human
proximity to the antenna shall not be less than 20cm (8 inches) during normal
operation.
Federal Communications Commission Notice
This equipment has been tested and found to comply with the limits for a Class
B digital device, pursuant to Part 15 of the FCC Rules. These limits are designed
to provide reasonable protection against harmful interference in a residential
installation.
This equipment generates, uses, and can radiate radio frequency energy. If this
equipment does cause harmful interference to radio or television reception, which
can be determined by turning the equipment off and on, the user is encouraged to
try and correct the interference by one or more of the following measures:
• Reorient or relocate the receiving antenna.
• Increase the distance between the equipment and the receiver.
• Connect the equipment to an outlet on a circuit different from that to which the
receiver is connected.
• Consult the dealer or an experienced radio/TV technician for help.
4720ea_F8E845ea_man.indb 14
14
7/3/05 5:12:14 pm
Information
Modifications
The FCC requires the user to be notified that any changes or modifications to this
device that are not expressly approved by Belkin Corporation may void the user’s
authority to operate the equipment.
1
2
Canada-Industry Canada (IC)
The wireless radio of this device complies with RSS 210 Industry Canada. This
Class B digital apparatus complies with Canadian ICES-003.
Cet appareil numérique de la classe B conforme á la norme NMB-003 du Canada.
3
Belkin Corporation Limited Lifetime Product Warranty*
4
Belkin Corporation warrants this product against defects in materials and
workmanship for its lifetime. If a defect is discovered, Belkin will, at its option, repair
or replace the product at no charge provided it is returned during the warranty
period, with transportation charges prepaid, to the authorized Belkin dealer from
whom you purchased the product. Proof of purchase may be required.
5
This warranty does not apply if the product has been damaged by accident, abuse,
misuse, or misapplication; if the product has been modified without the written
permission of Belkin; or if any Belkin serial number has been removed or defaced.
THE WARRANTY AND REMEDIES SET FORTH ABOVE ARE EXCLUSIVE IN LIEU OF ALL
OTHERS, WHETHER ORAL OR WRITTEN, EXPRESSED OR IMPLIED. BELKIN SPECIFICALLY
DISCLAIMS ANY AND ALL IMPLIED WARRANTIES, INCLUDING, WITHOUT LIMITATION,
WARRANTIES OF MERCHANTABILITY AND FITNESS FOR A PARTICULAR PURPOSE.
No Belkin dealer, agent, or employee is authorized to make any modification,
extension, or addition to this warranty.
BELKIN IS NOT RESPONSIBLE FOR SPECIAL, INCIDENTAL, OR CONSEQUENTIAL
DAMAGES RESULTING FROM ANY BREACH OF WARRANTY, OR UNDER ANY OTHER
LEGAL THEORY, INCLUDING BUT NOT LIMITED TO, LOST PROFITS, DOWNTIME,
GOODWILL, DAMAGE TO OR REPROGRAMMING, OR REPRODUCING ANY PROGRAM
OR DATA STORED IN, OR USED WITH, BELKIN PRODUCTS.
Some states do not allow the exclusion or limitation of incidental or consequential
damages or exclusions of implied warranties, so the above limitations or exclusions
may not apply to you. This warranty gives you specific legal rights, and you may
also have other rights that vary from state to state.
*Batteries not included under warranty.
4720ea_F8E845ea_man.indb 15
15
7/3/05 5:12:14 pm
Rechargeable Wireless
Optical Mouse
Belkin Ltd.
Express Business Park • Shipton Way
Rushden • NN10 6GL • United Kingdom
Tel: +44 (0) 1933 35 2000
Fax: +44 (0) 1933 31 2000
Belkin GmbH
Hanebergstrasse 2
80637 Munich • Germany
Tel: +49 (0) 89 143405 0
Fax: +49 (0) 89 143405 100
Belkin B.V.
Starparc Building • Boeing Avenue 333
1119 PH Schiphol-Rijk • The Netherlands
Tel: +31 (0) 20 654 7300
Fax: +31 (0) 20 654 7349
Belkin SAS
5 Rue du Petit Robinson • 3ème étage
78350 Jouy en Josas • France
Tel: +33 (0) 1 34 58 14 00
Fax: +33 (0) 1 39 46 62 89
© 2005 Belkin Corporation. All rights reserved. All trade names are
registered trademarks of respective manufacturers listed.
4720ea_F8E845ea_man.indb 16
P74720ea
Belkin Tech Support
Europe: 00 800 223 55 460
7/3/05 5:12:15 pm
Souris Optique Sans Fil
Rechargeable
Navigation, saisie de données
et chargement en une
seule solution sans fil
Manuel de
l’utilisateur
4720ea_F8E845ea_man.indb 17
EN
___
FR
___
DE
___
NL
___
ES
___
IT
F8E845ea
7/3/05 5:12:16 pm
Table des Matières
1 Introduction . . . . . . . . . . . . . . . . . . . . . . . . . . . . . . . . 19
1
Configuration Requise . . . . . . . . . . . . . . . . . . . . . .20
Contenu de l’emballage . . . . . . . . . . . . . . . . . . . . .20
2
3
Présentation . . . . . . . . . . . . . . . . . . . . . . . . . . . . . .20
2 Installation du matériel . . . . . . . . . . . . . . . . . . . . . . . 21
Branchement de la souris USB . . . . . . . . . . . . . . .22
4
Branchement de la souris PS/2 . . . . . . . . . . . . . . .23
5
3 Installation du logiciel . . . . . . . . . . . . . . . . . . . . . . . .25
Synchronisation de votre Souris avec le Récepteur 24
Fonctionnalités du logiciel . . . . . . . . . . . . . . . . . . .26
Fonctions des boutons . . . . . . . . . . . . . . . . . . . . . .26
Chargement . . . . . . . . . . . . . . . . . . . . . . . . . . . . . .26
4 Dépannage . . . . . . . . . . . . . . . . . . . . . . . . . . . . . . . . . 27
5 Information . . . . . . . . . . . . . . . . . . . . . . . . . . . . . . . . .30
4720ea_F8E845ea_man.indb 18
7/3/05 5:12:16 pm
Introduction
Félicitations et merci d’avoir choisi la Souris Optique
Sans Fil Rechargeable de Belkin. Vous êtes sur le point
de découvrir les fonctions extraordinaires de saisie et de
navigation offertes par cette souris. La Souris fonctionne
sans fil dans un rayon de 1,8 mètre du récepteur, pour une
liberté de mouvement inégalée. Elle possède 5 boutons
programmables ainsi qu’une molette de défilement pratique,
pour exécuter vos tâches courantes en un tournemain.
Veuillez prendre le temps lire ce manuel afin de vous
assurer une utilisation sécuritaire de cette Souris,
et de tirer le maximum de votre nouvel achat.
4720ea_F8E845ea_man.indb 19
1
2
3
4
5
19
7/3/05 5:12:16 pm
Introduction
Configuration Requise
1
Windows® 98 SE, Me, 2000 ou XP
Lecteur de CD-ROM
2
5 Mo d’espace libre sur le disque dur
Port USB ou PS/2
3
4
Contenu de l’emballage
Souris Optique Sans Fil Rechargeable
5
Socle de recharge
Logiciel sur CD-ROM
Manuel de l’utilisateur
2 piles au NiMH
Adaptateur PS/2
Présentation
Avant de débuter l’installation du matériel et du
logiciel de la Souris, veuillez supprimer tous les
pilotes et logiciels de toutes les souris précédemment
installées sur votre ordinateur. Ceci permet d’éviter les
conflits, ce qui entraînerait une mauvaise installation
de votre Souris. Veuillez consulter la documentation
accompagnant votre souris précédente pour savoir
comment désistaller le logiciel et les pilotes.
4720ea_F8E845ea_man.indb 20
20
7/3/05 5:12:16 pm
Installation du matériel
Important : Avant de brancher votre Souris ou installer le
logiciel, identifiez le type de port Souris que vous utilisez
(USB ou PS/2). Jetez un œil sur les schémas ci-dessous
si vous ne connaissez pas votre type de port Souris.
Important : N’installez pas le logiciel avant de
brancher la Souris à votre ordinateur. Si vous
n’avez pas déjà branché la Souris, veuillez suivre
les instructions d’installation du matériel
1
2
3
4
5
USB Port
PS/2 Port
Remarque : Votre Souris peut fonctionner sans
l’installation du logiciel fourni. Toutefois, nous vous
recommandons d’installer le logiciel, car celuici vous permet de programmer les boutons de la
Souris pour exécuter plusieurs fonctions fréquentes,
ce qui rend son utilisation encore plus efficace.
4720ea_F8E845ea_man.indb 21
21
7/3/05 5:12:16 pm
Installation du matériel
Branchement de la souris USB
1
USB sous Windows 98 SE, Me, 2000 et XP
2
1.
3
Veillez à ce que votre ordinateur soit
allumé avant d’installer la Souris.
2.
4
Branchez le récepteur sur n’importe quel
port USB libre sur votre ordinateur.
3.
L’Assistant Ajout de nouveau matériel démarre.
Remarque : Si vous utilisez Windows 98
5
SE, il se peut que vous deviez insérer le CD
d’installation de Windows 98 SE dans votre
lecteur de CD-ROM pour terminer l’installation.
4.
Lorsque l’installation est terminée,
insérez les piles dans la Souris. La
synchronisation entre le récepteur et la
Souris devrait se faire automatiquement.
Remarque : S’il n’y a pas de
synchronisation automatique, consultez
la section intitulée « Synchronisation de
votre Souris avec le récepteur ».
Lorsque votre Souris est correctement installée
et fonctionne comme une souris standard, vous
pouvez débuter l’installation du logiciel contenant
les fonctions supplémentaires des boutons.
4720ea_F8E845ea_man.indb 22
22
7/3/05 5:12:17 pm
Installation du matériel
Branchement de la souris PS/2
PS/2 sous Windows 98 SE, Me, 2000 et XP
1
1.
Éteignez l’ordinateur.
2
2.
Branchez l’adaptateur USB-PS/2 sur le
cordon de la souris du récepteur.
3
3.
Insérez le câble avec l’adaptateur dans le port
souris PS/2 (6 broches) de votre ordinateur.
4
4. Placez les piles dans la souris.
5.
Allumez l’ordinateur.
6.
Lorsque le démarrage de l’ordinateur est
terminé, celui-ci détecte automatiquement
la souris et lui permet de fonctionner.
5
Remarque : Si la souris ne fonctionne pas,
consultez la section « Synchronisation
de votre Souris avec le récepteur ».
7.
Lorsque votre souris est correctement branchée,
vous pouvez lancer l’installation du logiciel.
4720ea_F8E845ea_man.indb 23
23
7/3/05 5:12:17 pm
Installation du matériel
1
2
3
4
5
Synchronisation de votre Souris
avec le Récepteur
Si la synchronisation entre la Souris et le récepteur ne
se fait pas automatiquement, appuyez sur le bouton
« Connect [Connexion] », à l’avant du récepteur.
Le témoin du récepteur clignote rapidement.
Pour synchroniser la Souris avec le récepteur, appuyez sur
le bouton de synchronisation, sous la Souris. Le témoin
du récepteur cesse de clignoter et demeure allumé.
Remarque : Chaque fois que vous répétez cette procédure,
la Souris sélectionne une nouvelle ID au hasard. Ceci permet
à plusieurs souris sans fil de fonctionner à proximité, sans
interférence ni daphonie. Si vous remarquez la présence de
diaphonie avec une autre souris, répétez le processus de
synchronisation pour changer le canal de fonctionnement.
4720ea_F8E845ea_man.indb 24
24
7/3/05 5:12:17 pm
Installation du logiciel
Important : N’installez pas le logiciel avant de
brancher la Souris à votre ordinateur et avant
de vous assurer que la Souris fonctionne.
1
Si vous n’avez pas déjà branché la Souris, veuillez
suivre les instructions d’installation du matériel
2
3
1.
Insérez le CD d’installation fourni dans le
lecteur de CD-ROM. Le menu principal apparaît
automatiquement, quelques instants plus tard.
4
2.
Sélectionnez « Install Driver [Installer le
Pilote] » pour commencer l’installation.
5
3.
Suivez les instructions qui apparaissent à
l’écran afin de terminer l’installation.
Remarque : Si l’ordinateur ne détecte
pas le CD automatiquement, veuillez
suivre la procédure suivante :
1.
Cliquez sur le bouton « Démarrer »
et choisissez « Exécuter ».
2.
Dans la boîte de dialogue, entrez « <lecteur>:\
Setup » et cliquez « OK ». (« <lecteur> » représente
la lettre de votre lecteur de CD-ROM, que vous
trouverez dans « Poste de Travail ». Par exemple, si
la lettre de votre lecteur est D, entrez « D:\Setup ».)
3.
Suivez les instructions d’installation
qui apparaissent à l’écran.
4720ea_F8E845ea_man.indb 25
25
7/3/05 5:12:17 pm
Installation du logiciel
Fonctionnalités du logiciel
1
2
3
4
5
Le logiciel de votre nouvelle Souris comprend des fonctions
très pratiques, qui vous permettront d’être plus productif
et plus efficace. Pour configurer ces fonctions, vous devez
accéder aux Propriétés de votre Souris, soit en passant
par le Panneau de Configuration ou en passant par le
logiciel de la Souris. Dans la fenêtre Propriétés, vous
verrez les fonctions suivantes : Prenez note que la molette
de défilement, le quatrième et le cinquième bouton sont
les seuls à pouvoir être programmés à l’aide du logiciel.
Fonctions des boutons
Bouton de gauche
Bouton de souris standard
(actions cliquer-déplacer standard)
Bouton central ou molette Défilement rapide/automatique
Bouton de droite
Menu contextuel
Quatrième bouton
Page précédente avec
IE (si disponible)
Cinquième bouton
Page suivante avec
IE (si disponible)
Chargement
Le récepteur/socle doit être branché à une prise
secteur, à l’aide du câble CA fourni. Placez la Souris
dans le socle de recharche pour la recharger. Assurezvous de n’utiliser que les piles rechargeables fournies.
Veuillez allouer un temps de charge de 10 à 12 heures
avant d’utiliser votre Souris pour la première fois.
4720ea_F8E845ea_man.indb 26
26
7/3/05 5:12:17 pm
Dépannage
Si vous éprouvez des problèmes avec l’installation
ou le fonctionnement de votre Souris, veuillez lire
la section suivante. Si votre problème n’est pas
abordé ci-dessous, ou si les conseils n’ont pas
réglé le problème, veuillez contacter le service
d’assistance technique au 00 800 223 55 460.
Pourquoi est-ce que mon pointeur
se déplace par à-coups ?
La Souris fonctionne sur la plupart des surfaces, même
les surfaces texturées ou à motifs. Le fonctionnement
peut être sérieusement compromis si vous utilisez la
Souris sur des surfaces telles qu’un mirroir, du verre ou
des surfaces imprimées en demi-teintes.
1
2
3
4
5
Pourquoi la fonction de défilement
ne fonctionne-t-elle pas avec
mon ordinateur portable ?
Assurez-vous d’avoir désactivé la boule de commande,
le pavé tactile ou la touche J de votre ordinateur portable,
dans le BIOS. Ensuite, activez le port externe, afin que
toutes les fonctions de votre Souris soient disponibles.
4720ea_F8E845ea_man.indb 27
27
7/3/05 5:12:17 pm
Dépannage
1
My USB Mouse was not detected by
the system and won’t work. Why?
Ma Souris USB n’est pas détectée par le système et elle
ne fonctionne pas. Pourquoi ?
2
3
Veuillez suivre la procédure suivante :
4
5
4720ea_F8E845ea_man.indb 28
1. Assurez-vous que votre Souris USB est
bien branchée dans le port USB.
2. Vérifiez le fonctionnement de votre port USB
à l’aide du Gestionnaire de Périphérique,
dans les Propriétés Système. S’il y a un point
d’exclamation encerclé à l’icône du port USB,
le contrôleur USB a rencontré un problème.
Veuillez désinstaller puis réinstaller le pilote
USB, ou contactez le service d’assistance
technique du fabricant de votre ordinateur.
3. Vérifiez la version de votre système
d’exploitation. Si vous n’utilisez pas Windows 98
SE, Me, 2000 ou XP, veuillez mettre à jour votre
système d’exploitation avec l’une des versions
ci-dessus, pour activer le périphérique USB.
4. Assurez-vous que le port USB
est activé dans le BIOS.
28
7/3/05 5:12:18 pm
Dépannage
Ma Souris ne répond pas.
Veuillez suivre la procédure suivante :
1
1. Vérifiez à ce que les piles soient
2
insérées convenablement (polarité).
2. Vérifiez à ce que le récepteur soit
3
correctement branché.
3. Vérifiez à ce que le récepteur soit éloigné
d’au moins 20 cm des autres appareils
électriques, comme les ordinateurs,
les moniteurs et les imprimantes.
4720ea_F8E845ea_man.indb 29
4
5
29
7/3/05 5:12:18 pm
Information
Déclaration FCC
1
2
DÉCLARATION DE CONFORMITÉ À LA RÉGLEMENTATION FCC EN
MATIÈRE DE COMPATIBILITÉ ÉLECTROMAGNÉTIQUE
Nous, Belkin Corporation, sis au 501 West Walnut Street, Compton CA, 90220,
États-Unis, déclarons sous notre seule responsabilité que le produit,
F8E845
3
4
5
auquel se réfère la présente déclaration,
est conforme aux normes énoncées à l’alinéa 15 de la réglementation FCC. Le
fonctionnement est assujetti aux deux conditions suivantes : (1) cet appareil
ne peut pas provoquer d’interférence nuisible et (2) cet appareil doit accepter
toute interférence reçue, y compris des interférences pouvant entraîner un
fonctionnement non désiré.
Attention : Exposition aux radiations dues aux fréquences radio.
La puissance d’émission en sortie de cet appareil reste largement en dessous des
limites d’exposition aux fréquences radios de la FCC. Toutefois, il est conseillé d’utiliser
l’appareil de manière à minimiser les risques d’exposition dans des conditions de
fonctionnement normales. Lorsqu’une antenne extérieure est raccordée à l’appareil,
la placer de manière à minimiser les risques d’exposition dans des conditions de
fonctionnement normales. Pour éviter la possibilité d’excéder les limites d’exposition
aux fréquences radio de la FCC, il est conseillé d’éviter qu’une personne se trouve à
moins de 20 cm de l’antenne dans des conditions de fonctionnement normales.
Avertissement de la Commission Fédérale des Communications (FCC)
L’appareil a été testé et satisfait aux limites de la classe B des appareils numériques,
conformément à l’alinéa 15 de la réglementation de la FCC. Ces limites sont conçues
de manière à assurer une protection raisonnable contre les interférences nuisibles au
sein d’une installation domestique.
L’appareil génère, utilise et peut irradier une énergie radio fréquence.. Si cet équipement
cause des interférences nuisibles sur le plan de la réception radio ou télévision,
pouvant être déterminées en mettant l’appareil sous et hors tension, l’utilisateur est
invité à tester et à corriger l’interférence en prenant une des mesures suivantes :
• Réorienter ou changer de place l’antenne de réception.
• Augmenter la distance entre l’appareil et le récepteur.
• Connecter l’appareil à une prise située sur un circuit différent de celui sur lequel
le récepteur est connecté.
• Consulter le revendeur ou un technicien en radio/TV pour obtenir de l’aide.
4720ea_F8E845ea_man.indb 30
30
7/3/05 5:12:18 pm
Information
Modifications
La réglementation de la FCC souligne la nécessité d’indiquer à l’utilisateur que toute
modification, de quelque nature que ce soit et non agréée par Belkin Corporation, lui
retire le droit d’utiliser l’appareil.
Canada-Industrie Canada (IC)
La radio sans fil de cet appareil est conforme à la
norme RSS 210 d’Industrie Canada.
This Class B digital apparatus complies with Canadian ICES-003.
Cet appareil numérique de la classe B est conforme
à la norme NMB-003 du Canada.
Garantie à vie limitée du produit de Belkin Corporation*
Belkin Corporation garantit ce produit contre tout défaut matériel ou de fabrication
pendant toute sa durée de vie. Si l’appareil s’avère défectueux, Belkin le réparera ou
le remplacera gratuitement, à sa convenance, à condition que le produit soit retourné,
port payé, pendant la durée de la garantie, au dépositaire Belkin agréé auprès duquel
le produit a été acheté. Une preuve d’achat peut être exigée.
1
2
3
4
5
La présente garantie est caduque si le produit a été endommagé par accident, abus,
usage impropre ou mauvaise application, si le produit a été modifié sans autorisation
écrite de Belkin, ou si un numéro de série Belkin a été supprimé ou rendu illisible.
LA GARANTIE ET LES VOIES DE RECOURS SUSMENTIONNÉES FONT FOI EXCLUSIVEMENT
ET REMPLACENT TOUTES LES AUTRES, ORALES OU ÉCRITES, EXPLICITES OU
IMPLICITES. BELKIN REJETTE EXPRESSÉMENT TOUTES LES GARANTIES IMPLICITES,
Y COMPRIS MAIS SANS RESTRICTION, LES GARANTIES AFFÉRENTES À LA QUALITÉ
LOYALE ET MARCHANDE ET À LA POSSIBILITÉ D’UTILISATION À UNE FIN DONNÉE.
Aucun dépositaire, représentant ou employé de Belkin n’est habilité à apporter des
modifications ou adjonctions à la présente garantie, ni à la proroger.
BELKIN N’EST PAS RESPONSABLE DES DOMMAGES SPÉCIAUX, DIRECTS OU INDIRECTS,
DÉCOULANT D’UNE RUPTURE DE GARANTIE, OU EN VERTU DE TOUTE AUTRE THÉORIE
JURIDIQUE, Y COMPRIS MAIS SANS RESTRICTION LES PERTES DE BÉNÉFICES,
TEMPS D’ARRÊT, FONDS DE COMMERCE, REPROGRAMMATION OU REPRODUCTION
DE PROGRAMMES OU DE DONNÉES MÉMORISÉS OU UTILISÉS AVEC DES PRODUITS
BELKIN OU DOMMAGES CAUSÉS À CES PROGRAMMES OU À CES DONNÉES.
Certains pays ne permettent pas d’exclure ou de limiter les dommages accidentels
ou consécutifs ou les exclusions de garanties implicites, de sorte que les limitations
d’exclusions ci-dessus ne s’appliquent pas dans votre cas. La garantie vous confère
des droits légaux spécifiques. Vous pouvez également bénéficier d’autres droits qui
varient d’un pays à l’autre.
*Les piles ne sont pas incluses dans la garantie.
4720ea_F8E845ea_man.indb 31
31
7/3/05 5:12:18 pm
Souris Optique Sans Fil
Rechargeable
Belkin Ltd.
Express Business Park, Shipton Way
Rushden, NN10 6GL, Royaume-Uni
Tel: +44 (0) 1933 35 2000
Fax: +44 (0) 1933 31 2000
Belkin GmbH
Hanebergstrasse 2
80637 Munich, Allemagne
Tel: +49 (0) 89 143405 0
Fax: +49 (0) 89 143405 100
Belkin B.V.
Boeing Avenue 333
1119 PH Schiphol-Rijk, Pays-Bas
Tel: +31 (0) 20 654 7300
Fax: +31 (0) 20 654 7349
Belkin SAS
5 Rue du Petit Robinson, 3ème étage
78350 Jouy en Josas, France
Tel: +33 (0) 1 34 58 14 00
Fax: +33 (0) 1 39 46 62 89
© 2005 Belkin Corporation. Tous droits réservés. Toutes les marques de
commerce sont des marques déposées de leurs fabricants respectifs.
4720ea_F8E845ea_man.indb 32
P74720ea
Assistance Technique Belkin
Europe: 00 800 223 55 460
7/3/05 5:12:18 pm
Aufladbare optische
Funkmaus
Navigation, Dateneingabe
und Aufladen mit modernster
kabelloser Funktionalität
EN
___
FR
___
DE
___
NL
___
ES
___
IT
Benutzerhandbuch
4720ea_F8E845ea_man.indb 33
F8E845ea
7/3/05 5:12:19 pm
Inhaltsverzeichnis
1 Einführung . . . . . . . . . . . . . . . . . . . . . . . . . . . . . . . . .35
1
Systemanforderungen . . . . . . . . . . . . . . . . . . . . . .36
Verpackungsinhalt . . . . . . . . . . . . . . . . . . . . . . . . .36
2
3
Übersicht . . . . . . . . . . . . . . . . . . . . . . . . . . . . . . . .36
2 Hardware-Installation . . . . . . . . . . . . . . . . . . . . . . . . 37
Anschließen der USB-Maus . . . . . . . . . . . . . . . . . .38
4
Anschließen der PS/2-Maus . . . . . . . . . . . . . . . . . .39
5
3 Software-Installation . . . . . . . . . . . . . . . . . . . . . . . . . 41
Synchronisierung der Maus mit dem Empfänger . .40
Merkmale der Software . . . . . . . . . . . . . . . . . . . . .42
Tastenfunktionen . . . . . . . . . . . . . . . . . . . . . . . . . .42
Aufladen . . . . . . . . . . . . . . . . . . . . . . . . . . . . . . . . .42
4 Fehlersuche . . . . . . . . . . . . . . . . . . . . . . . . . . . . . . . .43
5 Informationen . . . . . . . . . . . . . . . . . . . . . . . . . . . . . . .46
4720ea_F8E845ea_man.indb 34
7/3/05 5:12:19 pm
Einführung
Wir freuen uns, dass Sie sich für die aufladbare optische
Funkmaus von Belkin entschieden haben. Genießen Sie
die komfortable Bedienung der Maus mit leistungsfähigen
Eingabefunktionen und präziser Navigation. Die Maus kann
in einem Abstand zum Empfänger von bis zu drei Metern
kabellos verwendet werden und ermöglicht Ihnen so eine
uneingeschränkte Bewegungsfreiheit. Zur Vereinfachung
wiederkehrender Arbeitsabläufe ist sie mit fünf
programmierbaren Tasten (inklusive Scrollrad) ausgestattet.
Lesen Sie dieses Handbuch bitte sorgfältig durch, um
eine sichere und langfristige Verwendung der Maus
sicherzustellen und die fortschrittlichen Funktionen voll
ausnutzen zu können.
4720ea_F8E845ea_man.indb 35
1
2
3
4
5
35
7/3/05 5:12:20 pm
Einführung
Systemanforderungen
1
•
Windows ® 98 SE, ME, 2000 oder XP
•
CD-ROM-Laufwerk
•
5 MB freier Festplattenspeicher
3
•
USB- oder PS/2-Anschluss
4
Verpackungsinhalt
2
5
•
Aufladbare optische Funkmaus
•
Ladecradle
•
CD mit Software
•
Benutzerhandbuch
•
2 NiMH-Batterien
•
PS/2-Adapter
Übersicht
Bevor Sie die Hardware- oder Software-Installation der
Maus beginnen, deinstallieren Sie bitte sämtliche Treiber
oder Software von vorher auf dem Computer installierten
Mäusen. Dadurch werden mögliche Konflikte vermieden, die
zu einer fehlerhaften Installation der Maus führen könnten.
Informationen zur korrekten Deinstallation der Software und
Treiber Ihrer alten Maus finden Sie in der Dokumentation des
alten Geräts..
4720ea_F8E845ea_man.indb 36
36
7/3/05 5:12:20 pm
Hardware-Installation
Wichtig: Bestimmen Sie vor dem Anschließen der Maus
und vor der Installation der Software den verwendeten
Mausanschluss (USB oder PS/2). Für den Fall, dass Sie
nicht sicher sind, welcher Mausanschluss verwendet wird,
sind die beiden Anschlusstypen in der folgenden Abbildung
dargestellt.
1
2
3
USB Port
PS/2 Port
Wichtig: Installieren Sie die Software erst, wenn die Maus
4
5
an den Computer angeschlossen ist. Wenn Sie die Maus
noch nicht angeschlossen haben, befolgen Sie bitte die
Anweisungen im Abschnitt „Hardware-Installation“.
Hinweis: Die Maus ist auch ohne Installation der
mitgelieferten Software betriebsbereit. Es empfiehlt sich
aber, die Software zu installieren, da Sie mit Hilfe der
Software die Maustasten mit verschiedenen Funktionen
belegen können, um so ein effizienteres und komfortableres
Arbeiten zu ermöglichen.
4720ea_F8E845ea_man.indb 37
37
7/3/05 5:12:20 pm
Hardware-Installation
Anschließen der USB-Maus
1
USB bei Windows 98 SE, ME, 2000, XP
2
1.
3
Achten Sie darauf, dass der Computer
eingeschaltet ist, bevor Sie die Maus installieren.
2.
4
Schließen Sie den Empfänger an einen
verfügbaren USB-Anschluss des Computers an..
3.
Ein Hardware-Assistent wird automatisch geöffnet.
Hinweis: Bei Windows 98 SE kann es erforderlich
sein, dass Sie die Windows 98 SE InstallationsCD in das CD-ROM-Laufwerk des Computers
einlegen, um die Installation abzuschließen.
5
4.
Wenn die Installation abgeschlossen ist, legen
Sie die Batterien in die Maus ein; daraufhin
erfolgt automatisch die Synchronisation
der Maus mit dem Empfänger.
Hinweis: Falls die Synchronisierung der Maus
mit dem Empfänger nicht automatisch erfolgt,
lesen Sie bitte die Anweisungen im Abschnitt
„Synchronisierung der Maus mit dem Empfänger“.
5.
4720ea_F8E845ea_man.indb 38
Wenn die Maus ordnungsgemäß angeschlossen
ist und die Standard-Mausfunktionen einwandfrei
arbeiten, können Sie die Software-Installation für
die zusätzlichen Tastenfunktionen beginnen.
38
7/3/05 5:12:20 pm
Hardware-Installation
Anschließen der PS/2-Maus
PS/2 bei Windows 98 SE, ME, 2000, XP
1
1.
Schalten Sie den Computer aus.
2
2.
Schließen Sie den USB-PS/2-Adapter an
das Mauskabel des Empfängers an.
3
3.
Schließen Sie das Kabel mit dem Adapter an den
6-poligen PS/2-Mausanschluss des Computers an.
4
4.
Legen Sie die Batterien in die Maus ein.
5.
Schalten Sie den Computer ein.
6.
Nach dem Hochfahren erkennt der Computer die
Maus automatisch und macht sie betriebsbereit.
5
Hinweis: Wenn die Maus nicht funktioniert,
lesen Sie die Anleitungen im Abschnitt
„Synchronisierung der Maus mit dem Empfänger“.
7.
Wenn die Maus ordnungsgemäß angeschlossen ist,
können Sie die Software-Installation beginnen.
4720ea_F8E845ea_man.indb 39
39
7/3/05 5:12:20 pm
Hardware-Installation
1
2
3
4
5
Synchronisierung der Maus mit dem
Empfänger
Wenn die Synchronisierung der Maus mit dem Empfänger
nicht automatisch erfolgt, drücken Sie die Verbindungstaste
an der Vorderseite des Empfängers. Die Kontrollleuchte am
Empfänger beginnt, schnell zu blinken.
Führen Sie dann die Synchronisierung durch, indem Sie die
Synchronisierungstaste an der Unterseite der Maus drücken.
Die Kontrollleuchte am Empfänger hört auf zu blinken und
leuchtet auf.
Hinweis: Jedes Mal wenn dieser Schritt durchgeführt wird,
wählt die Maus eine neue ID zufällig aus. So können mehrere
Funkmäuse an einem Standort betrieben werden, ohne sich
gegenseitig zu stören. Wenn eine weitere Funkmaus auf
derselben Funkfrequenz sendet (Cross Talk), führen Sie die
Synchronisierung erneut durch, um den Kanal zu ändern.
4720ea_F8E845ea_man.indb 40
40
7/3/05 5:12:21 pm
Software-Installation
Wichtig: Installieren Sie die Software erst, wenn die Maus
an den Computer angeschlossen ist und einwandfrei
funktioniert. Wenn Sie die Maus noch nicht angeschlossen
haben, befolgen Sie bitte die Anweisungen im Abschnitt
„Hardware-Installation“.
1
2
3
1.
Legen Sie die mitgelieferte Installations-CD in
das CD-ROM-Laufwerk ein. Nach kurzer Zeit
wird automatisch das Hauptmenü gestartet.
4
2.
Wählen Sie die Option „Install Driver“ (Treiber
installieren), und die Installation wird gestartet.
3.
5
Befolgen Sie die Anweisungen auf dem
Bildschirm, um die Installation abzuschließen.
Hinweis: Wenn der Computer die CD nicht
automatisch erkennt, gehen Sie wie folgt vor:
1.
Klicken Sie auf die Schaltfläche „Start“,
und wählen Sie „Ausführen“.
2.
Im Dialogfeld „Ausführen“ geben Sie
„<Laufwerk>:\Setup“ ein, und klicken Sie
auf „OK“. (Dabei steht „<Laufwerk>“ für den
Laufwerksbuchstaben Ihres CD-ROM-Laufwerks,
den Sie unter „Arbeitsplatz“ anzeigen lassen
können. Wenn der Laufwerksbuchstabe
beispielsweise D ist, geben Sie „D:\Setup“ ein.)
3.
Befolgen Sie die Installationsanweisungen
auf dem Bildschirm.
4720ea_F8E845ea_man.indb 41
41
7/3/05 5:12:21 pm
Software-Installation
Merkmale der Software
1
2
Die Software der Maus beinhaltet eine Reihe von
interessanten Funktionen, mit denen Sie Ihre Effizienz im
Umgang mit der Maus steigern können.
3
Um die Highend-Funktionen der Maus zu steuern, müssen
Sie das Dialogfeld „Eigenschaften von Maus“ über die
Systemsteuerung oder über die Maus-Software aufrufen.
4
Im Dialogfeld „Eigenschaften von Maus“ können Sie die
folgenden Funktionen einstellen:
5
Beachten Sie bitte, dass nur das Scrollrad sowie die vierte und
fünfte Maustaste über die Software programmierbar sind.
Tastenfunktionen
Linke Maustaste
Mittlere Maustaste oder Scrollrad
Rechte Maustaste
Vierte Maustaste
Fünfte Maustaste
Primäre Maustaste
(Standardfunktionen wie
Auswählen und Ziehen)
Quick/Auto Scroll
Kontextmenü
Internet Explorer Zurück
(sofern verfügbar)
Internet Explorer Vorwärts
(sofern verfügbar)
Aufladen
Die Basisstation mit Empfänger und Cradle muss
mit dem mitgelieferten Netzkabel an eine Steckdose
angeschlossen werden. Legen Sie die Maus zum Aufladen
in die Basisstation. Achten Sie darauf, die mitgelieferten
wiederaufladbaren Batterien zu verwenden. Laden Sie die
Batterien mindestens 10 bis 12 Stunden lang auf, bevor Sie
die Maus erstmals benutzen.
4720ea_F8E845ea_man.indb 42
42
7/3/05 5:12:21 pm
Fehlersuche
Wenn irgendwelche Probleme bei der Installation oder
Verwendung der Maus auftreten, lesen Sie bitte den
folgenden Abschnitt. Wenn das Problem dort nicht
aufgeführt ist oder durch die Lösungsvorschläge
nicht behoben werden kann, setzen Sie sich bitte
mit unserem technischen Kundendienst unter der
Nummer 00 800 223 55 460 in Verbindung.
Warum bewegt sich der
Mauszeiger ungleichmäßig?
Die Maus funktioniert auf den meisten Oberflächen
problemlos; besonders geeignet sind strukturierte
oder gemusterte Oberflächen. Bei einer Verwendung
auf spiegelnden Oberflächen, Glas oder manchen mit
Halbtonrastern bedruckten Oberflächen ist jedoch mit
Problemen zu rechnen.
1
2
3
4
5
Warum können die Scroll-Funktionen
beim Anschluss an ein Notebook
nicht genutzt werden?
Stellen Sie sicher, dass der Trackball, das Touchpad
oder die Mausfunktion der Taste J des Notebooks im
BIOS deaktiviert sind; aktivieren Sie dann den externen
Anschluss, so dass alle Mausfunktionen verfügbar sind.
4720ea_F8E845ea_man.indb 43
43
7/3/05 5:12:21 pm
Fehlersuche
1
Meine USB-Maus wird vom System nicht
erkannt und funktioniert nicht. Warum?
Bitte führen Sie die folgenden Schritte aus:
2
3
4
5
4720ea_F8E845ea_man.indb 44
1. Stellen Sie sicher, dass der Stecker der USBMaus vollständig in den USB-Anschluss
eingesteckt ist.
2. Überprüfen Sie die Funktion des USBAnschlusses im Fenster „Geräte-Manager“
unter „Systemeigenschaften“. Wenn ein
Ausrufungszeichen in einem Kreis auf dem
Symbol für den USB-Anschluss angezeigt wird,
besteht ein Problem mit dem USB-Controller.
Versuchen Sie, den USB-Treiber zu deinstallieren
und danach erneut zu installieren, oder wenden
Sie sich an den technischen Kundendienst des
PC-Herstellers.
3. Überprüfen Sie die Version Ihres
Betriebssystems. Wenn Sie nicht Windows
98 SE, Me, 2000 oder XP verwenden, führen
Sie bitte ein Upgrade auf eine der genannten
Versionen durch, damit das USB-Gerät aktiviert
werden kann.
4. Stellen Sie sicher, dass der USB-Anschluss im
BIOS-Setup aktiviert ist.
44
7/3/05 5:12:21 pm
Fehlersuche
Meine Maus reagiert nicht.
Bitte führen Sie die folgenden Schritte aus:
1. Überprüfen Sie, ob die Batterien mit der richtigen
Polarität eingelegt sind.
2. Stellen Sie sicher, dass der Empfänger
ordnungsgemäß angeschlossen ist.
3. Stellen Sie sicher, dass der Empfänger einen
Mindestabstand von 20 cm zu anderen
elektrischen Geräten (wie z. B. Computern,
Monitoren und Druckern) hat.
4720ea_F8E845ea_man.indb 45
1
2
3
4
5
45
7/3/05 5:12:21 pm
Informationen
FCC-Erklärung
1
2
3
4
5
KONFORMITÄTSERKLÄRUNG ZUR EINHALTUNG DER FCCBESTIMMUNGEN ÜBER ELEKTROMAGNETISCHE KOMPATIBILITÄT
Wir, Belkin Corporation, eine Gesellschaft mit Sitz in 501 West Walnut Street, Compton,
CA 90220, USA, erklären hiermit in alleiniger Verantwortung, dass der Artikel mit der Nr.
F8E845
auf den sich diese Erklärung bezieht,
im Einklang mit Teil 15 der FCC-Regelungen steht. Der Betrieb unterliegt den beiden
folgenden Bedingungen: (1) Dieses Gerät darf schädigende Störungen nicht verursachen
und (2) dieses Gerät muss jedwede Störung annehmen, einschließlich der Störungen, die
einen unerwünschten Betrieb verursachen könnten.
Achtung: Hochfrequente Strahlungen
Die Strahlungsleistung dieses Geräts liegt deutlich unter den FCC-Grenzwerten für
hochfrequente Strahlungen. Dennoch ist bei der Gerätenutzung darauf zu achten, dass im
Normalbetrieb Menschen möglichst wenig schädlichen Strahlungen ausgesetzt werden. Beim
Anschluss einer externen Antenne an das Gerät muss die Antenne so aufgestellt werden,
dass im Normalbetrieb Menschen möglichst wenig Strahlungen ausgesetzt werden. Um
sicherzustellen, dass die FCC-Grenzwerte für Belastungen durch hochfrequente Strahlungen
nicht überschritten werden, ist im Normalbetrieb stets ein Abstand von mindestens 20 cm zur
Antenne einzuhalten.
FCC-Erklärung zur Funkentstörung
Dieses Gerät entspricht nachweislich den Grenzwerten für digitale Geräte der Klasse B
gemäß Teil 15 der FCC-Vorgaben. Diese Grenzwerte dienen dem angemessenen Schutz vor
schädlichen Strahlungen beim Betrieb von Geräten im Wohnbereich.
Das Gerät erzeugt und verwendet hochfrequente Strahlungen und kann sie ausstrahlen.
Verursacht dieses Gerät Störungen des Radio- oder Fernsehempfangs (was sich durch Einund Ausschalten des Gerätes feststellen lässt), so können Sie versuchen, die Störung auf
folgende Weise zu beseitigen:
• Neuausrichtung oder Standortänderung der Empfangsantenne.
• Vergrößern des Abstands zwischen Gerät und Empfänger.
• Anschluss des Geräts an eine Steckdose in einem anderen Stromkreis als dem des
Empfängers.
• Den Händler oder einen erfahrenen Rundfunk- und Fernsehtechniker hinzuziehen.
4720ea_F8E845ea_man.indb 46
46
7/3/05 5:12:21 pm
Informationen
Anpassungen
Nach den Vorschriften der FCC muss dem Benutzer mitgeteilt werden, dass Änderungen oder
Modifikationen an diesem Gerät, die nicht ausdrücklich von der Belkin Corporation genehmigt
wurden, dazu führen können, dass die Berechtigung des Benutzers zum Betrieb des Geräts
erlischt.
Canada-Industry Canada (IC)
Das Funksystem dieses Geräts entspricht de Bestimmung RSS 210 von Industry Canada.
Dieses digitale Gerät der Klasse B entspricht der kanadischen Norm ICES-003.
Cet appareil numérique de la classe B conforme á la norme NMB-003 du Canada.
Eingeschränkte lebenslange Produktgarantie* von Belkin
Belkin Corporation garantiert die Schadensfreiheit des Produktes in Material und Herstellung für
die Lebensdauer des Produktes. Bei Feststellung eines Fehlers wird Belkin das Produkt nach
eigenem Ermessen entweder kostenlos reparieren oder austauschen, sofern es während des
Garantiezeitraums ausreichend frankiert an den autorisierten Belkin-Händler zurückgesendet
wurde, bei dem es erworben wurde. Ein Kaufnachweis kann verlangt werden.
1
2
3
4
5
Diese Garantie erstreckt sich nicht auf die Beschädigung des Produkts durch Unfall,
missbräuchliche, unsachgemäße oder fehlerhafte Verwendung oder Anwendung. Ebenso ist die
Garantie unwirksam, wenn das Produkt ohne schriftliche Genehmigung durch Belkin verändert
oder wenn eine Belkin-Seriennummer entfernt oder unkenntlich gemacht wurde.
DIE VORSTEHENDEN GARANTIEBEDINGUNGEN UND RECHTSBEHELFE SCHLIESSEN
ALLE ANDEREN GEWÄHRLEISTUNGEN UND RECHTSBEHELFE – OB MÜNDLICH
ODER SCHRIFTLICH, AUSDRÜCKLICH ODER KONKLUDENT – AUS UND TRETEN AN
DEREN STELLE. BELKIN ÜBERNIMMT INSBESONDERE KEINERLEI KONKLUDENTE
GEWÄHRLEISTUNGEN, U. A. AUCH KEINE GEWÄHRLEISTUNG DER EIGNUNG FÜR EINEN
BESTIMMTEN ZWECK ODER DER HANDELSÜBLICHEN QUALITÄT.
Kein Händler, Bevollmächtigter bzw. Vertreter oder Mitarbeiter von Belkin ist befugt, diese
Gewährleistungsregelung in irgendeiner Weise abzuändern oder zu ergänzen.
BELKIN HAFTET NICHT FÜR KONKRET BESONDERE, NEBEN- ODER FOLGESCHÄDEN
AUFGRUND DER VERLETZUNG EINER GEWÄHRLEISTUNG ODER NACH MASSGABE EINER
ANDEREN RECHTSLEHRE (U. A. FÜR ENTGANGENE GEWINNE, AUSFALLZEITEN, GESCHÄFTSODER FIRMENWERTEINBUSSEN BZW. DIE BESCHÄDIGUNG, NEUPROGRAMMIERUNG ODER
WIEDERHERSTELLUNG VON PROGRAMMEN ODER DATEN NACH SPEICHERUNG IN ODER
NUTZUNG IN VERBINDUNG MIT BELKIN-PRODUKTEN).
Da in manchen Ländern der Ausschluss oder die Beschränkung der Haftung für Nebenoder Folgeschäden bzw. ein Ausschluss konkludenter Gewährleistungen nicht zulässig ist,
haben die vorstehenden Beschränkungen und Ausschlussregelungen für Sie möglicherweise
keine Gültigkeit. Diese Garantie räumt Ihnen spezifische Rechte ein, die von Land zu Land
unterschiedlich ausgestaltet sind.
*Die Garantie gilt nicht für Batterien.
4720ea_F8E845ea_man.indb 47
47
7/3/05 5:12:22 pm
Aufladbare optische
Funkmaus
Belkin Ltd.
Express Business Park • Shipton Way
Rushden • NN10 6GL • Großbritannien
Tel: +44 (0) 1933 35 2000
Fax: +44 (0) 1933 31 2000
Belkin GmbH
Hanebergstrasse 2
80637 Munich • Deutschland
Tel: +49 (0) 89 143405 0
Fax: +49 (0) 89 143405 100
Belkin B.V.
Starparc Building • Boeing Avenue 333
1119 PH Schiphol-Rijk • Niederlande
Tel: +31 (0) 20 654 7300
Fax: +31 (0) 20 654 7349
Belkin SAS
5 Rue du Petit Robinson • 3ème étage
78350 Jouy en Josas • Frankreich
Tel: +33 (0) 1 34 58 14 00
Fax: +33 (0) 1 39 46 62 89
© 2005 Belkin Corporation. Alle Rechte vorbehalten. Alle Produktnamen
sind eingetragene Warenzeichen der angegebenen Hersteller.
4720ea_F8E845ea_man.indb 48
P74720ea
Belkin Tech Support
Europe: 00 800 223 55 460
7/3/05 5:12:22 pm
Oplaadbare draadloze
optische muis
Een geavanceerde draadloze
oplossing voor eenvoudig
navigeren en data invoeren
EN
___
FR
___
DE
___
NL
___
ES
___
IT
Handleiding
4720ea_F8E845ea_man.indb 49
F8E845ea
7/3/05 5:12:23 pm
Inhoud
1 Inleiding . . . . . . . . . . . . . . . . . . . . . . . . . . . . . . . . . . . 51
1
Systeemvereisten . . . . . . . . . . . . . . . . . . . . . . . . . .52
Inhoud verpakking: . . . . . . . . . . . . . . . . . . . . . . . . .52
2
3
Overzicht . . . . . . . . . . . . . . . . . . . . . . . . . . . . . . . .52
2 Hardware installeren . . . . . . . . . . . . . . . . . . . . . . . . .53
De USB-muis aansluiten . . . . . . . . . . . . . . . . . . . . .54
De PS/2-muis aansluiten . . . . . . . . . . . . . . . . . . . .55
4
5
De muis met de ontvanger synchroniseren . . . . . .56
3 Software installeren . . . . . . . . . . . . . . . . . . . . . . . . . 57
Eigenschappen software . . . . . . . . . . . . . . . . . . . .58
Knopfuncties . . . . . . . . . . . . . . . . . . . . . . . . . . . . .58
Opladen . . . . . . . . . . . . . . . . . . . . . . . . . . . . . . . . .58
4 Problemen oplossen . . . . . . . . . . . . . . . . . . . . . . . . .59
5 Informatie . . . . . . . . . . . . . . . . . . . . . . . . . . . . . . . . . .62
4720ea_F8E845ea_man.indb 50
7/3/05 5:12:23 pm
Inleiding
Wij danken u hartelijk voor de aankoop van de oplaadbare
draadloze optische muis van Belkin waarvan u veel
plezier zult hebben. U gaat een totaal nieuwe dimensie
van computergemak beleven met onovertroffen
invoerfuncties en cursorprecisie. De muis werkt zonder
kabel tot op 1,8 m afstand waardoor u een onbelemmerde
bewegingsvrijheid geniet. De muis heeft vijf knoppen die u
zelf kunt configureren, inclusief een gemakkelijk bereikbaar
scrollwieltje dat repeterende werkzaamheden makkelijker
maakt dan ooit.
Neem deze handleiding zorgvuldig door waardoor u de
muis vele jaren betrouwbaar kunt blijven gebruiken en alle
mogelijkheden van de geavanceerde functies kunt benutten.
4720ea_F8E845ea_man.indb 51
1
2
3
4
5
51
7/3/05 5:12:23 pm
Inleiding
Systeemvereisten
1
•
Windows ® 98 SE, Me, 2000 of XP
•
Cd-romstation
•
5 MB vrije ruimte op de harde schijf
3
•
USB- of PS/2-poort
4
Inhoud verpakking:
2
5
•
Oplaadbare draadloze optische muis
•
Oplaadhouder
•
Cd-rom met software
•
Handleiding
•
2 NiMH-batterijen
•
PS/2-adapter
Overzicht
Verwijder voordat u de hardware en software voor de
muis installeert alle stuurprogramma’s en software van
alle muizen die tevoren op uw computer zijn geïnstalleerd.
Hierdoor voorkomt u mogelijke conflicten die een perfecte
installatie van uw nieuwe muis in de weg staan. Lees in
de handleiding van uw vorige muis hoe u de bijbehorende
software en stuurprogramma’s verwijdert.
4720ea_F8E845ea_man.indb 52
52
7/3/05 5:12:23 pm
Hardware installeren
Belangrijk: Let goed op welk type muispoort u gebruikt
(USB of PS/2) voordat u de muis aansluit of de bijbehorende
software installeert. Kijk goed naar de onderstaande
tekeningen als u twijfelt welk type poort uw muis gebruikt
1
2
3
USB Port
PS/2 Port
Belangrijk: U mag de software pas installeren nadat u
4
5
de muis op uw computer hebt aangesloten. Als u de muis
nog niet hebt aangesloten, volg dan de aanwijzingen onder
‘Hardware installeren’.
Let op: U kunt de muis ook gebruiken zonder de
bijgeleverde software te installeren. Toch adviseren wij
u de software te installeren. Hierdoor kunt u namelijk de
muisknoppen voor allerlei functies programmeren waarmee
u het werken op de computer met een op u persoonlijk
afgestemde efficiency verrijkt.
4720ea_F8E845ea_man.indb 53
53
7/3/05 5:12:24 pm
Hardware installeren
De USB-muis aansluiten
1
USB onder Windows 98 SE, Me, 2000 en XP
2
1.
3
Zorg ervoor dat uw computer ingeschakeld is
voordat u de muis installeert.
2.
4
Sluit de ontvanger aan op een vrije USB-poort van
uw computer.
3.
Een wizard voor de nieuwe hardware start
automatisch.
5
Let op: Windows 98 SE kan u vragen de installatiecd van Windows 98 SE in het cd-romstation van uw
computer te plaatsen om de installatie te voltooien.
4.
Plaats de batterijen in de muis zodra de installatie
is voltooid waarna de muis automatisch met de
ontvanger moet synchroniseren.
Let op: Als de muis niet automatisch met de
ontvanger synchroniseert, volg dan de aanwijzingen
op pagina 6, ‘De muis met de ontvanger
synchroniseren’.
5.
4720ea_F8E845ea_man.indb 54
Wanneer uw muis correct is aangesloten en als
standaardmuis functioneert, kunt u de installatie
van de software voor de extra knoppenfuncties
starten.
54
7/3/05 5:12:24 pm
Hardware installeren
De PS/2-muis aansluiten
PS/2 onder Windows 98 SE, Me, 2000 en XP
1
1.
Zet uw computer uit.
2
2.
Bevestig de USB-naar-PS/2-connector
op de muiskabel van de ontvanger.
3
3.
Sluit de kabel met de connector aan op de
(zespolige) PS/2-muispoort van de computer.
4
4.
Plaats de batterijen in de muis.
5.
Schakel de computer in.
6.
Zodra de computer is opgestart, herkent hij
automatisch de muis en zorgt hij dat de muis werkt.
5
Let op: Als de muis niets doet, lees dan
de aanwijzingen onder ‘De muis met
de ontvanger synchroniseren’.
7.
Wanneer de muis correct is aangesloten, kunt
u de installatie van de software starten.
4720ea_F8E845ea_man.indb 55
55
7/3/05 5:12:24 pm
Hardware installeren
De muis met de ontvanger synchroniseren
1
2
3
4
5
Als de muis niet automatisch met de ontvanger
synchroniseert, drukt u de verbindingsknop voorop de
ontvanger in. Het lampje op de ontvanger gaat nu snel
knipperen. Vervolgens synchroniseert u de muis met de
ontvanger door het synchronisatieknopje aan de onderkant
van de muis in te drukken. Het lampje op de ontvanger stopt
met knipperen en blijft continu branden.
Let op: Telkens als u deze stap herhaalt, kiest de muis een
willekeurige nieuwe identiteit. Hierdoor kunnen meerdere
draadloze muizen zonder dat zij elkaar storen op dezelfde
locatie worden gebruikt. Als u van een andere draadloze
muis hinder ondervindt, herhaal dan de handmatige
synchronisatie om een ander kanaal te kiezen.
4720ea_F8E845ea_man.indb 56
56
7/3/05 5:12:24 pm
Software installeren
Belangrijk: U mag de software pas installeren nadat de
muis op uw computer is aangesloten en daarmee goed
samenwerkt.
1
Als u de muis nog niet hebt aangesloten, volg dan de
aanwijzingen onder ‘Hardware installeren’.
2
1.
Plaats de bijgeleverde installatie-cd in uw cdromstation. Na enige ogenblikken start het
hoofdmenu automatisch.
3
2.
Selecteer ‘Install Driver’ (Stuurprogramma
installeren) waarna de computer begint met
installeren.
3.
Volg de aanwijzingen op het beeldscherm om de
installatie te voltooien.
4
5
Let op: Ga als volgt te werk als de computer de cd
niet automatisch herkent:
1.
Klik op de knop ‘Start’ en selecteer ‘Run’
(Uitvoeren).
2.
Typ in het dialoogvenster ‘Run’ (Uitvoeren) de tekst
‘<driver>:\Setup’ en klik op ‘OK’. (hierin vult u in
plaats van ‘<driver>‘ de stationsletter in waaronder
het station onder ‘My Computer’ (Deze computer)
bekend is. Als u bijvoorbeeld de cd in station D
hebt geplaatst, typt u ‘D:\Setup’, maar zonder de
aanhalingstekens.)
3.
Volg de installatieaanwijzingen op uw beeldscherm.
4720ea_F8E845ea_man.indb 57
57
7/3/05 5:12:24 pm
Software installeren
Eigenschappen software
1
2
De software van uw muis activeert allerlei interessante
eigenschappen en functies die u helpen uw productiviteit met de
nieuwe muis te verhogen.
3
Om de geavanceerde functies van de muis te kunnen gebruiken,
moet u via het configuratiescherm of de software van uw muis het
dialoogvenster ‘Properties’ (Eigenschappen) van uw muis openen.
4
Via het dialoogvenster ‘Properties’ (Eigenschappen) van uw muis
kunt u de volgende functies opzoeken en bedienen:
5
Via de software kunt u alleen het scrollwieltje en knop vier en vijf
programmeren.
Knopfuncties
Linker knop
Middelste of wielknop
Rechter knop
Vierde knop
Vijfde knop
Primaire muisknop
(standaardactie voor aanklikken en
verslepen)
Snel/automatisch scrollen
Contextmenu
IE terug (indien beschikbaar)
IE vooruit (indien beschikbaar)
Opladen
Sluit de ontvanger/houder met de bijgeleverde netkabel op een
stopcontact aan. Plaats de muis in het basisstation om op te laden.
Gebruik alleen de bijgeleverde oplaadbare batterijen. Voordat u de
muis de eerste maal gebruikt, moeten de batterijen minstens 10 tot
12 uur worden opgeladen.
4720ea_F8E845ea_man.indb 58
58
7/3/05 5:12:25 pm
Problemen oplossen
Lees het volgende hoofdstuk goed door als u bij de
installatie of bediening van de muis op een probleem
stuit. Als u het probleem hieronder niet vindt of
wanneer de voorgestelde oplossingen het probleem
niet kunnen verhelpen, neem dan contact op het
onze technische helpdesk op 00 800 223 55 460.
1
2
3
Waarom beweegt mijn cursor niet gelijkmatig?
De muis werkt perfect op allerlei oppervlakken, vooral op
oppervlakken met een weefselstructuur en/of patronen.
Er kunnen echter problemen ontstaan als u probeert de
muis te gebruiken op spiegels, glas of op bepaalde met
halftinten bedrukte oppervlakken
4
5
Waarom werken de scrollfuncties bij mijn
notebook niet?
Controleer of u de trackball, het touchpad en de Jtoets in de BIOS van uw notebook inderdaad hebt
uitgeschakeld. Activeer vervolgens de externe poort
zodat alle functies van de muis beschikbaar zijn.
4720ea_F8E845ea_man.indb 59
59
7/3/05 5:12:25 pm
Problemen oplossen
1
Mijn USB-muis wordt door de computer niet
herkend en werkt niet. Waarom?
Ga als volgt te werk:
2
1. Zorg ervoor dat uw USB-muis volledig in de
USB-poort is bevestigd.
3
4
5
4720ea_F8E845ea_man.indb 60
2. Controleer de werking van de USB-poort van
uw computer op de pagina ‘Device Manager’
(Apparaatbeheer) van ‘System Properties’
(Systeemeigenschappen). Als er een omcirkeld
uitroepteken op het pictogram van de USBpoort staat, heeft de USB-controller wellicht een
probleem. Probeer het USB-stuurprogramma te
verwijderen en installeer het vervolgens opnieuw.
Of neem contact op met de technische helpdesk
van de fabrikant van uw pc.
3. Controleer welke versie van uw
besturingssysteem u gebruikt. Als uw computer
niet onder Windows 98 SE, Me, 2000 of XP
draait, werk uw besturingssysteem dan bij tot
één hiervan zodat het USB-apparaat kan worden
geactiveerd.
4. Zorg ervoor dat de USB-poort in de BIOSconfiguratie is geactiveerd.
60
7/3/05 5:12:25 pm
Problemen oplossen
Mijn muis reageert niet.
1
Ga als volgt te werk:
1. Zorg ervoor dat u de batterijen in de juiste stand
aanbrengt.
2. Controleer of u de ontvanger correct hebt
aangesloten.
3. Tussen de ontvanger en andere elektrische
apparaten zoals computers, monitoren en
printers moet een ruimte van minstens 20 cm
vrijblijven.
4720ea_F8E845ea_man.indb 61
2
3
4
5
61
7/3/05 5:12:25 pm
Informatie
FCC-verklaring
1
2
3
4
5
VERKLARING VAN CONFORMITEIT MET DE FCC-VOORSCHRIFTEN VOOR
ELEKTROMAGNETISCHE COMPATIBILITEIT
Wij, Belkin Corporation, gevestigd 501 West Walnut Street, Compton, CA 90220,
Verenigde Staten van Amerika, verklaren hierbij dat wij de volledige verantwoordelijkheid
aanvaarden dat het product met het typenummer
F8E845
waarop deze verklaring betrekking heeft, voldoet aan deel 15 van de FCC-voorschriften.
Het gebruik van dit product is onderworpen aan de volgende twee voorwaarden: (1) de
apparatuur mag geen schadelijke storingen veroorzaken en (2) de apparatuur dient alle
hierop inwerkende storingen te accepteren waaronder begrepen storingen die een niet
gewenste werking kunnen veroorzaken.
Voorzichtig: Blootstelling aan radiofrequente straling.
Het door dit apparaat uitgestraalde vermogen ligt ver beneden de hiervoor in de FCCvoorschriften vastgelegde grenswaarden. Niettemin dient dit apparaat zodanig te worden
gebruikt dat bij normaal gebruik de mogelijkheid van persoonlijk contact tot een minimum
beperkt blijft. Ook bij het aansluiten van een externe antenne op dit apparaat moet de
antenne zodanig worden geplaatst dat bij normaal gebruik de mogelijkheid van persoonlijk
contact tot een minimum beperkt blijft. Om te voorkomen dat de in de FCC-voorschriften
aangegeven grenswaarden van blootstelling aan radiofrequente straling worden overschreden,
mag men de antenne terwijl deze in werking is niet dichter naderen dan tot op een afstand
van 20 centimeter.
Kennisgeving van de Federal Communications Commission (FCC)
Deze apparatuur is getest en voldoet aan de normen voor een digitaal apparaat van Klasse B,
zoals vastgelegd in Deel 15 van de FCC-voorschriften. Deze normen zorgen bij de installatie
in een woonomgeving voor een aanvaardbare bescherming tegen schadelijke interferentie.
Deze apparatuur genereert en gebruikt radiofrequentie-energie en kan deze uitstralen.
Als deze apparatuur de radio- of televisieontvangst stoort, wat u kunt vaststellen door de
apparatuur in- en uit te schakelen, kunt u proberen de storing op te heffen met een of meer
van de volgende maatregelen:
• Het verdraaien of verplaatsen van de ontvangstantenne.
• Het vergroten van de afstand tussen de installatie en de ontvanger.
• Het aansluiten van de installatie op een stopcontact van een andere groep dan die waarop
de ontvanger is aangesloten.
• Door de hulp in te roepen van de verkoper of een deskundig radio/televisietechnicus.
4720ea_F8E845ea_man.indb 62
62
7/3/05 5:12:25 pm
Informatie
Wijzigingen
De Federal Communications Commission eist dat de gebruiker wordt gewaarschuwd dat elke
verandering aan het apparaat die niet uitdrukkelijk door Belkin Corporation is goedgekeurd de
bevoegdheid van de gebruiker om het apparaat te bedienen teniet kan doen.
Canada - Industry Canada (IC)
De draadloze radio van dit apparaat voldoet aan RSS 210 Industry Canada. Dit apparaat van
Klasse B voldoet aan de voorschriften van de Canadese ICES-003.
Cet appareil numérique de la classe B conforme á la norme NMB-003 du Canada.
Beperkte levenslange productgarantie van Belkin Corporation*
Belkin Corporation geeft garantie voor de levensduur van het product op materiaal- en
fabricagefouten. Wanneer een defect wordt geconstateerd, zal Belkin naar eigen keuze
het product repareren of kosteloos vervangen, op voorwaarde dat het product tijdens de
garantieperiode met vooruitbetaalde vervoerskosten wordt geretourneerd aan de officiële
Belkin dealer bij wie het product is gekocht. Overlegging van het aankoopbewijs kan
noodzakelijk zijn.
1
2
3
4
5
Deze garantie is niet van toepassing als het product is beschadigd als gevolg van een
ongeluk, van misbruik, verkeerd gebruik of een verkeerde toepassing; als het product zonder
schriftelijke toestemming van Belkin is gewijzigd of als een serienummer dat door Belkin is
aangebracht, is verwijderd of onleesbaar gemaakt.
DE GARANTIE EN VERHAALSMOGELIJKHEDEN DIE HIERVOOR ZIJN UITEENGEZET SLUITEN ELKE
ANDERE GARANTIE OF VERHAALSMOGELIJKHEID UIT, HETZIJ MONDELING OF SCHRIFTELIJK,
HETZIJ UITDRUKKELIJK OF IMPLICIET. BELKIN WIJST UITDRUKKELIJK ELKE EN ALLE IMPLICIETE
AANSPRAKELIJKHEID OF GARANTIE AF, WAARONDER ZONDER ENIGE BEPERKING GARANTIES
BETREFFENDE DE VERKOOPBAARHEID OF GESCHIKTHEID VOOR EEN BEPAALDE TOEPASSING.
Geen enkele dealer, vertegenwoordiger of werknemer van Belkin is bevoegd tot wijziging,
uitbreiding of aanvulling van deze garantie.
BELKIN IS NIET AANSPRAKELIJK VOOR BIJZONDERE, BIJKOMENDE OF VERVOLGSCHADE
ONTSTAAN DOOR GARANTIEVERBREKING VAN WELKE AARD OOK OF UIT HOOFDE
VAN ENIG ANDER JURIDISCH BEGINSEL, MET INBEGRIP VAN MAAR NIET BEPERKT
TOT BEDRIJFSSTILSTAND, VERLIES VAN WINST OF GOODWILL, BESCHADIGING HETZIJ
HERPROGRAMMERING OF REPRODUCTIE VAN ENIG PROGRAMMA OF VAN DATA OPGESLAGEN
IN OF GEBRUIKT IN SAMENHANG MET BELKIN PRODUCTEN.
In sommige staten of landen is het niet toegestaan incidentele schade, gevolgschade en
impliciete garanties uit te sluiten; in dat geval gelden de bovenstaande garantiebeperkingen
wellicht niet voor u. Deze garantie verleent u specifieke rechten en afhankelijk van het land
waarin u woont, hebt u mogelijk ook andere rechten.
*Batterijen vallen niet onder de garantie.
4720ea_F8E845ea_man.indb 63
63
7/3/05 5:12:25 pm
Oplaadbare draadloze
optische muis
Belkin Ltd.
Express Business Park • Shipton Way
Rushden • NN10 6GL • Verenigd Koninkrijk
Tel: +44 (0) 1933 35 2000
Fax: +44 (0) 1933 31 2000
Belkin GmbH
Hanebergstrasse 2
80637 München • Duitsland
Tel: +49 (0) 89 143405 0
Fax: +49 (0) 89 143405 100
Belkin B.V.
Starparc Building • Boeing Avenue 333
1119 PH Schiphol-Rijk • Nederland
Tel: +31 (0) 20 654 7300
Fax: +31 (0) 20 654 7349
Belkin SAS
5 Rue du Petit Robinson • 3ème étage
78350 Jouy en Josas • Frankrijk
Tel: +33 (0) 1 34 58 14 00
Fax: +33 (0) 1 39 46 62 89
© 2005 Belkin Corporation. Alle rechten voorbehouden. Alle handelsnamen
zijn gedeponeerde handelsmerken van de betreffende rechthebbenden.
4720ea_F8E845ea_man.indb 64
P74720ea
Belkin technische ondersteuning
Europa: 00 800 223 55 460
7/3/05 5:12:26 pm
Ratón óptico
inalámbrico recargable
Puede navegar, introducir datos
y cargar para una funcionalidad
inalámbrica avanzada
EN
___
FR
___
DE
___
NL
___
ES
___
IT
Manual del usuario
4720ea_F8E845ea_man.indb 65
F8E845ea
7/3/05 5:12:27 pm
Índice de contenido
1 Introducción . . . . . . . . . . . . . . . . . . . . . . . . . . . . . . . .67
1
Requisitos del sistema . . . . . . . . . . . . . . . . . . . . . .68
El paquete incluye . . . . . . . . . . . . . . . . . . . . . . . . .68
2
3
Descripción general . . . . . . . . . . . . . . . . . . . . . . . .68
2 Instalación del hardware . . . . . . . . . . . . . . . . . . . . .69
Conexión del ratón USB . . . . . . . . . . . . . . . . . . . . . 70
4
Conexión del ratón PS/2 . . . . . . . . . . . . . . . . . . . . 71
5
3 Instalación del software . . . . . . . . . . . . . . . . . . . . . .73
Sincronización de su ratón con su receptor . . . . . .72
Propiedades del software . . . . . . . . . . . . . . . . . . . 74
Funciones de los botones . . . . . . . . . . . . . . . . . . . 74
Carga . . . . . . . . . . . . . . . . . . . . . . . . . . . . . . . . . . . 74
4 Resolución de problemas . . . . . . . . . . . . . . . . . . . . . . 75
5 Información . . . . . . . . . . . . . . . . . . . . . . . . . . . . . . . . 78
4720ea_F8E845ea_man.indb 66
7/3/05 5:12:27 pm
Introducción
Felicidades y gracias por comprar el ratón óptico
inalámbrico recargable de Belkin. Está a punto de
entrar a un nuevo mundo de conveniencia informática
con propiedades superiores de entrada y precisión de
navegación. El ratón opera a una distancia de hasta 1,8
m sin necesidad de cables, proporcionándole libertad de
movimiento sin restricciones. Proporciona cinco botones
programables, incluyendo una rueda de desplazamiento
cómoda, para que las tareas repetitivas resulten más fáciles
que nunca.
Consulte este manual del usuario detalladamente para
asegurar la utilización segura y de larga duración de su
ratón, y aprovechar al máximo sus avanzadas propiedades.
4720ea_F8E845ea_man.indb 67
1
2
3
4
5
67
7/3/05 5:12:27 pm
Introducción
Requisitos del sistema
1
•
Sistema operativo Windows ® 98 SE, Me, 2000 o XP
•
Unidad de CD-ROM
•
5MB de espacio disponible en el disco
3
•
Puerto USB o PS/2
4
El paquete incluye
2
5
•
Ratón óptico inalámbrico recargable
•
Base de carga
•
Software en CD
•
Manual del usuario
•
2 baterías NiMH
•
Adaptador PS/2
Descripción general
Antes de iniciar la instalación del hardware y software
del ratón, desinstale los controladores o software de
cualquier ratón previamente instalado en su ordenador. De
esta manera, se evitará todo conflicto que pueda llegar a
causar una inadecuada instalación de su ratón. Consulte
los documentos de su ratón anterior para obtener las
instrucciones adecuadas de cómo desinstalar el software y
los controladores.
4720ea_F8E845ea_man.indb 68
68
7/3/05 5:12:27 pm
Instalación del hardware
Importante: Antes de conectar su ratón o instalar el
software, asegúrese de identificar el tipo de puerto de ratón
que está utilizando (USB o PS/2). Consulte los siguientes
gráficos si no está seguro del tipo de puerto que utiliza su
ratón.
1
2
3
USB Port
PS/2 Port
Importante: No instale el software hasta que el ratón esté
4
5
conectado a su ordenador. Si todavía no ha conectado el
ratón, siga las instrucciones de instalación del hardware.
Atención: Su ratón funciona aun sin instalar el software
incluido. Sin embargo, le recomendamos instalar el software
ya que éste le permite programar los botones de ratón
con varias funciones, complementando su experiencia
informática con eficiencia personalizada y diversión.
4720ea_F8E845ea_man.indb 69
69
7/3/05 5:12:28 pm
Instalación del hardware
Conexión del ratón USB
1
USB en Windows 98 SE, Me, 2000 y XP
2
1.
3
Asegúrese de encender su ordenador antes de
instalar el ratón.
2.
4
Conecte el receptor a un puerto USB disponible de
su ordenador.
3.
El asistente para nuevo hardware se iniciará
automáticamente.
5
Atención: Puede que Windows 98 SE le solicite
insertar su CD de instalación de Windows 98 SE
en la unidad de CD-ROM de su ordenador para
completar la instalación.
4.
Cuando se haya completado la instalación,
coloque las baterías en el ratón y este último debe
sincronizarse con el receptor automáticamente.
Atención: Si el ratón no se sincroniza con
el receptor automáticamente, consulte las
instrucciones tituladas “Sincronización de su ratón
con su receptor”.
5.
4720ea_F8E845ea_man.indb 70
Cuando su ratón esté conectado correctamente y
funcionando como un ratón estándar, puede iniciar
la instalación del software para disfrutar de las
propiedades adicionales de botón.
70
7/3/05 5:12:28 pm
Instalación del hardware
Conexión del ratón PS/2
PS/2 en Windows 98 SE, Me, 2000 y XP
1
1.
Apague su ordenador.
2
2.
Conecte el conector USB-a-PS2 al cable del ratón
en el receptor.
3
3.
Introduzca el cable con el conector en el puerto del
ratón PS/2 (6 espigas) de su ordenador.
4
4.
Coloque las baterías en el ratón.
5.
Encienda su ordenador.
6.
Cuando el ordenador termine de arrancar, éste
detectará automáticamente el ratón y hará que
funcione.
5
Atención: Si el ratón no funciona, consulte las
instrucciones tituladas “Sincronización de su ratón
con su receptor”.
7.
Cuando el ratón esté conectado correctamente,
puede iniciar la instalación del software.
4720ea_F8E845ea_man.indb 71
71
7/3/05 5:12:28 pm
Instalación del hardware
Sincronización de su ratón con su receptor
1
2
3
4
5
Si el ratón no se sincroniza automáticamente con el
receptor, presione el botón de conexión en la parte
delantera del receptor. La luz en el receptor parpadeará
rápidamente. Luego, pulse el botón de sincronización en
la parte inferior del ratón para sincronizar el ratón con el
receptor. La luz del receptor dejará de parpadear y se
iluminará con brillo.
Atención: Cada vez que repita este paso, el ratón
seleccionará al azar un nuevo ID. Esto permite que varios
ratones inalámbricos funcionen en la misma ubicación
sin producir diafonía. Si experimenta diafonía con otro
ratón inalámbrico, repita los pasos de sincronización para
cambiar el canal.
4720ea_F8E845ea_man.indb 72
72
7/3/05 5:12:28 pm
Instalación del software
Importante: No instale el software hasta que el ratón esté
conectado a su ordenador y funcionando correctamente.
Si todavía no ha conectado el ratón, siga las instrucciones
de instalación del hardware.
1.
Inserte el CD de instalación incluido en su unidad
de CD-ROM. Tras unos segundos, el menú
principal se iniciará automáticamente.
2.
Seleccione “Install Driver” (Instalar controlador) y el
ordenador iniciará la instalación.
3.
Siga las instrucciones que aparecen en pantalla
para completar la instalación.
1
2
3
4
5
Atención: Si el ordenador no detecta
automáticamente el CD, siga los siguientes pasos:
1.
Haga clic sobre el botón “Start” (Iniciar) y
seleccione “Run” (Ejecutar).
2.
En el cuadro de diálogo de ejecución, tipee
“<unidad de disco>:\Setup” y haga clic sobre “OK”
(Aceptar). (“<unidad de disco>” corresponde a la
letra de la unidad que identifica su unidad de CDROM en “My Computer” (Mi PC). Por ejemplo, si el
CD está en la unidad de disco D, debe tipear “D:\
Setup”.)
3.
Siga las instrucciones de instalación que aparecen
en pantalla.
4720ea_F8E845ea_man.indb 73
73
7/3/05 5:12:28 pm
Instalación del software
Propiedades del software
1
2
El software de su ratón habilita una gama de propiedades
y funciones interesantes que le ayudarán a aumentar su
productividad con su nuevo ratón.
3
A fin de controlar las propiedades de alto rendimiento del ratón,
será necesario que acceda al cuadro de diálogo de propiedades
de su ratón, ya sea a través del panel de control o a través del
software de su ratón.
4
En el cuadro de diálogo de propiedades de su ratón, encontrará
y tendrá control sobre las siguientes propiedades:
5
Tome en cuenta que sólo la rueda de desplazamiento, el cuarto
y quinto botón son programables mediante el software.
Funciones de los botones
Botón izquierdo
Botón primario del ratón
(comando estándar de hacer clic y
arrastrar)
Botón de rueda o del medio Desplazamiento rápido/automático
Botón derecho
Menú contextual
Cuarto botón
Hacia atrás en el Explorador de
Internet (si disponible)
Quinto botón
Hacia delante en el Explorador de
Internet (si disponible)
Carga
El receptor/base debe estar conectado a un tomacorriente
utilizando el cable de CA incluido. Coloque el ratón en la
estación base para cargar. Asegúrese de utilizar las baterías
recargables incluidas. Cargue las baterías por un período
mínimo de 10 a 12 horas antes de utilizar su ratón.
4720ea_F8E845ea_man.indb 74
74
7/3/05 5:12:28 pm
Resolución de problemas
Si tiene algún problema con respecto a la instalación
o funcionamiento de su ratón, revise la siguiente
sección. Si el problema no aparece en esta lista o
las soluciones sugeridas no resuelven el problema,
póngase en contacto con nuestro departamento
de asistencia técnica al 00 800 223 55 460.
1
2
3
¿Por qué mi cursor no se desplaza con fluidez?
El ratón funciona bien sobre una amplia gama de
superficies, en particular aquellas con textura y/o con
diseño. Sin embargo, pueden ocurrir problemas si
intenta utilizar el ratón sobre espejos, vidrio o sobre
superficies impresas de tono medio..
4
5
¿Por qué las funciones de desplazamiento
no funcionan con mi ordenador portátil?
Asegúrese de haber desactivado el trackball (bola
rodante), el touch pad (pantalla táctil) o la tecla J en el
BIOS de su ordenador portátil. Luego, habilite el puerto
externo de tal manera que las funciones de su ratón
estén disponibles.
4720ea_F8E845ea_man.indb 75
75
7/3/05 5:12:28 pm
Resolución de problemas
1
El sistema no detectó mi ratón USB y,
por lo tanto, no funciona. ¿Por qué?
Siga los siguientes pasos:
2
1. Asegúrese de que su ratón USB esté
totalmente conectado al puerto USB.
3
4
5
4720ea_F8E845ea_man.indb 76
2. Revise el funcionamiento del puerto USB de
su sistema en el Administrador de dispositivos
de las Propiedades del sistema. Si aparece
un signo de admiración en un círculo en el
ícono del puerto USB, el problema está en
el controlador USB. Trate de desinstalar y
luego volver a instalar el controlador USB, o
póngase en contacto con el departamento de
asistencia técnica del fabricante de su PC.
3. Verifique la versión de su sistema operativo. Si
no está utilizando Windows 98 SE, Me, 2000 o
XP, actualice su sistema operativo con cualquiera
de las versiones anteriores, de tal manera
que se pueda habilitar el dispositivo USB.
4. Asegúrese de que el puerto USB esté
habilitado en la configuración del BIOS.
76
7/3/05 5:12:29 pm
Resolución de problemas
Mi ratón no responde.
1
Siga los siguientes pasos:
1. Asegúrese de instalar las baterías y
colocarlas con la polaridad correcta.
2. Asegúrese de que el receptor esté
correctamente conectado.
3. Asegúrese de que el receptor esté a una
distancia mínima aproximada de 20 cm de
otros dispositivos eléctricos tales como
ordenadores, monitores e impresoras.
4720ea_F8E845ea_man.indb 77
2
3
4
5
77
7/3/05 5:12:29 pm
Información
Declaración de la FCC (Comisión de comunicaciones de EE.UU.)
1
2
3
4
5
DECLARACIÓN DE CONFORMIDAD CON LAS NORMAS DE LA FCC
SOBRE COMPATIBILIDAD ELECTROMAGNÉTICA
Nosotros, Belkin Corporation, con sede en 501 West Walnut Street, Compton, CA 90220
(EE.UU.), declaramos bajo nuestra sola responsabilidad que el producto,
F8E845
al que hace referencia la presente declaración,cumple con la sección 15 de las normas
de la FCC. Su utilización está sujeta a las siguientes dos condiciones: (1) este dispositivo
no debe provocar interferencias nocivas y (2) este dispositivo debe aceptar cualquier
interferencia recibida, incluidas las interferencias que puedan provocar un funcionamiento
no deseado.
Advertencia: Exposición a las radiaciones de radiofrecuencia.
La energía de salida emitida por este dispositivo se encuentra muy por debajo de los límites
de exposición a radiofrecuencias establecidos por la FCC. En todo caso, el dispositivo
será utilizado de tal forma que se minimice la posibilidad de contacto humano durante el
funcionamiento normal. Cuando se conecta una antena externa al dispositivo, dicha antena
deberá ser colocada de tal manera que se minimice la posibilidad de contacto humano
durante el funcionamiento normal. Con el fin de evitar la posibilidad de superar los límites de
exposición a radiofrecuencias establecidos por la FCC, la proximidad del ser humano a la
antena no deberá ser inferior a los 20 cm durante el funcionamiento normal.
Declaración de la Federal Communications Commission (FCC - Comisión de
comunicaciones de EE.UU.)
Las pruebas realizadas con este equipo dan como resultado el cumplimiento con los límites
establecidos para un dispositivo digital de la clase B, de acuerdo a la sección 15 de las
normas de la FCC. Estos límites se establecen con el fin de proporcionar una protección
razonable contra interferencias nocivas en zonas residenciales.
Este equipo genera, utiliza y puede irradiar energía de radiofrecuencias. Si este equipo
provoca interferencias nocivas en la recepción de radio y televisión, las cuales se pueden
determinar encendiendo y apagando seguidamente el dispositivo, el mismo usuario puede
intentar corregir dichas interferencias tomando una o más de las siguientes medidas:
• Reorientar o colocar en otro lugar la antena de recepción.
• Aumentar la distancia entre el equipo y el receptor.
• Conectar el equipo a la toma de un circuito distinto de aquel al que está
conectado el receptor.
• Solicitar la ayuda del distribuidor o de un técnico experto en radio / televisión.
4720ea_F8E845ea_man.indb 78
78
7/3/05 5:12:29 pm
Información
Modificaciones
La FCC exige que el usuario sea notificado de que cualquier cambio o modificación del
presente dispositivo que no sea aprobado expresamente por Belkin Corporation podría
invalidar el derecho del usuario para utilizar este equipo.
Canadá: Industria de Canadá (IC)
La radioemisión inalámbrica de este dispositivo cumple con las especificaciones RSS 139 y
RSS 210 de la Industria de Canadá. Este aparato digital de la clase B cumple con la norma
canadiense ICES-003.
Cet appareil numérique de la classe B conforme á la norme NMB-003 du Canada.
Garantía limitada de por vida para los productos de Belkin Corporation*
Belkin Corporation garantiza este producto de por vida contra defectos con respecto a mano de
obra y materiales. En el caso de presentarse una falla, Belkin decidirá, a su discreción, entre la
reparación o la sustitución del producto, en ambos casos sin costes, siempre y cuando el producto
haya sido devuelto al distribuidor autorizado de Belkin donde se adquirió el producto durante
el período de garantía y con los gastos de transporte abonados. Es posible que se solicite una
prueba de compra.
1
2
3
4
5
Esta garantía perderá su validez en el caso de que el producto haya sido dañado de forma
accidental, por abuso o utilización errónea del mismo; si el producto ha sido modificado sin la
autorización por escrito de Belkin; o si alguno de los números de serie de Belkin ha sido eliminado
o deteriorado.
LA GARANTÍA Y RESTITUCIONES LEGALES ESTABLECIDAS EXPRESAMENTE EN EL
PRESENTE ACUERDO SUSTITUYEN A TODAS LAS DEMÁS, ORALES O ESCRITAS, EXPRESAS
O IMPLÍCITAS. BELKIN RECHAZA DE MANERA EXPLÍCITA TODAS LAS DEMÁS GARANTÍAS
IMPLÍCITAS, INCLUYENDO, SIN LIMITACIÓN, LAS GARANTÍAS DE COMERCIABILIDAD Y DE
IDONEIDAD PARA UN FIN ESPECÍFICO.
Ningún distribuidor, agente o empleado de Belkin está autorizado a realizar ningún tipo de
modificación, extensión o alteración de la presente garantía.
BELKIN NO SE HARÁ EN NINGÚN CASO RESPONSABLE POR LOS DAÑOS IMPREVISTOS
O CONSIGUIENTES RESULTANTES DE UN INCUMPLIMIENTO DE LA GARANTÍA, O BAJO
NINGUNA OTRA CONDICIÓN LEGAL, INCLUYENDO, PERO NO EXCLUSIVAMENTE, LOS
BENEFICIOS PERDIDOS, PERÍODOS DE INACTIVIDAD, BUENA VOLUNTAD, DAÑOS DURANTE
LA REPROGRAMACIÓN O REPRODUCCIÓN DE CUALQUIERA DE LOS PROGRAMAS O DATOS
ALMACENADOS EN O EMPLEADOS CON LOS PRODUCTOS BELKIN.
Algunas jurisdicciones no permiten la exclusión o limitación de los daños imprevistos o
consecuentes ni las exclusiones de las garantías implícitas, por lo que cabe la posibilidad de que
las anteriores limitaciones o exclusiones no le afecten. Esta garantía le proporciona derechos
legales específicos y usted puede beneficiarse asimismo de otros derechos legales específicos que
varían entre las distintas jurisdicciones.
*La garantía no se aplica a las baterías.
4720ea_F8E845ea_man.indb 79
79
7/3/05 5:12:29 pm
Ratón óptico
inalámbrico recargable
Belkin Ltd.
Express Business Park • Shipton Way
Rushden • NN10 6GL • Reino Unido
Tel: +44 (0) 1933 35 2000
Fax: +44 (0) 1933 31 2000
Belkin GmbH
Hanebergstrasse 2
80637 München • Alemania
Tel: +49 (0) 89 143405 0
Fax: +49 (0) 89 143405 100
Belkin B.V.
Starparc Building • Boeing Avenue 333
1119 PH Schiphol-Rijk • Holanda
Tel: +31 (0) 20 654 7300
Fax: +31 (0) 20 654 7349
Belkin SAS
5 Rue du Petit Robinson • 3ème étage
78350 Jouy en Josas • Francia
Tel: +33 (0) 1 34 58 14 00
Fax: +33 (0) 1 39 46 62 89
© 2005 Belkin Corporation. Todos los derechos reservados. Todos los nombres
comerciales son marcas registradas de los respectivos fabricantes enumerados.
4720ea_F8E845ea_man.indb 80
P74720ea
Asistencia técnica de Belkin
Europa: 00 800 223 55 460
7/3/05 5:12:29 pm
Mouse Ottico Wireless
Ricaricabile
Per navigare, immettere
dati, ricaricare ed avere così
una funzionalità wireless
all’avanguardia
EN
___
FR
___
DE
___
NL
___
ES
___
IT
Manuale utente
4720ea_F8E845ea_man.indb 81
F8E845ea
7/3/05 5:12:30 pm
Indice
1 Introduzione . . . . . . . . . . . . . . . . . . . . . . . . . . . . . . . .83
1
Requisiti del sistema . . . . . . . . . . . . . . . . . . . . . . .84
La confezione include . . . . . . . . . . . . . . . . . . . . . . .84
2
3
Descrizione generale . . . . . . . . . . . . . . . . . . . . . . .84
2 Installazione dell’hardware . . . . . . . . . . . . . . . . . . . .85
Collegamento del mouse USB . . . . . . . . . . . . . . . .86
4
Collegamento del mouse PS/2 . . . . . . . . . . . . . . . . 87
5
3 Installazione del software . . . . . . . . . . . . . . . . . . . . .89
Sincronizzazione del mouse con il ricevitore . . . .88
Caratteristiche del software . . . . . . . . . . . . . . . . . .90
Funzioni del pulsante . . . . . . . . . . . . . . . . . . . . . . .90
Caricamento . . . . . . . . . . . . . . . . . . . . . . . . . . . . . .90
4 Rilevazione e risoluzione delle anomalie . . . . . . . . . 91
5 Informazioni . . . . . . . . . . . . . . . . . . . . . . . . . . . . . . . .94
4720ea_F8E845ea_man.indb 82
7/3/05 5:12:31 pm
Introduzione
Congratulazioni e grazie per aver acquistato il Mouse Ottico
Wireless Ricaricabile Belkin. Potrete così sperimentare
le eccellenti opzioni di immissione dati ed accuratezza
della navigazione. Il mouse funziona fino a 1,8 metri di
distanza, senza alcun filo, garantendovi in questo modo
un’insuperabile libertà di movimento. È provvisto di cinque
tasti che possono essere personalizzati, inclusa la rotella di
scorrimento, per facilitare i compiti ripetitivi.
Si prega di leggere attentamente questo manuale per
ottenere le migliori prestazioni dal mouse, garantirne una
lunga durata ed ottenere il massimo dalle sue funzioni
avanzate.
4720ea_F8E845ea_man.indb 83
1
2
3
4
5
83
7/3/05 5:12:31 pm
Introduzione
Requisiti del sistema
1
•
Windows ® 98 SE, Me, 2000 o XP
•
Drive per CD-ROM
•
5 MB di spazio libero su disco fisso
3
•
Porta USB o PS/2
4
La confezione include
2
5
•
Mouse Ottico Wireless Ricaricabile
•
Base caricabatteria
•
CD con il software di installazione
•
Manuale utente
•
Due batterie NiMH
•
Adattatore PS/2
Descrizione generale
Prima di iniziare ad installare l’hardware ed il software
del mouse, rimuovere qualsiasi driver o software di altri
mouse precedentemente installati sul computer. Ciò
evita il verificarsi di eventuali conflitti, che potrebbero
causare un’installazione inadeguata del mouse. Si prega
di consultare il manuale del mouse usato in precedenza,
in modo tale da seguire le istruzioni corrette su come
disinstallare software e driver.
4720ea_F8E845ea_man.indb 84
84
7/3/05 5:12:31 pm
Installazione dell’hardware
Importante: prima di collegare il mouse o di installare il
software, assicurarsi di identificare il tipo di porta del mouse
usata (USB o PS/2). Se non si sapesse quale tipo di porta
usi il mouse, vedere il diagramma sotto riportato.
1
2
3
USB Port
PS/2 Port
Importante: non installare il software prima di aver
4
5
collegato il mouse al computer. Se il mouse ancora non
fosse stato collegato, seguire le istruzioni per l’installazione
dell’hardware.
Nota: il mouse funziona anche senza l’installazione del
software a corredo. Tuttavia, si consiglia di installare il
software, in quanto questo permette di programmare i tasti
del mouse per effettuare varie operazioni, renderlo più
efficiente e personalizzarlo.
4720ea_F8E845ea_man.indb 85
85
7/3/05 5:12:31 pm
Installazione dell’hardware
Collegamento del mouse USB
1
USB in Windows 98 SE, Me, 2000 e XP
2
1.
3
Assicurarsi che il computer sia acceso
prima di installare il mouse.
2.
4
Collegare il ricevitore ad una porta
USB libera del computer.
3.
Automaticamente si avvia il programma
per l’installazione dell’hardware.
5
Nota: se si sta usando Windows 98 SE, è
possibile che il sistema richieda l’inserimento del
CD di installazione di Windows 98 SE nel drive
del CD ROM, per completare l’installazione.
4.
Una volta terminata l’installazione, inserire
le batterie nel mouse. Quest’ultimo
dovrebbe automaticamente effettuare la
sincronizzazione con il ricevitore.
Nota: se la sincronizzazione non viene
effettuata automaticamente, leggere le istruzioni
riportate nel capitolo “Sincronizzazione
del mouse con il ricevitore”.
5.
4720ea_F8E845ea_man.indb 86
Una volta che il mouse è collegato e funzionante,
si può procedere con l’installazione del software
per aggiungere le funzioni aggiuntive del pulsante.
86
7/3/05 5:12:31 pm
Installazione dell’hardware
Collegamento del mouse PS/2
PS/2 in Windows 98 SE, Me, 2000 e XP
1
1.
Spegnere il computer.
2
2.
Collegare il connettore da USB a PS/2
al cavo del mouse sul ricevitore.
3
3.
Inserire il cavo con il connettore alla porta
del mouse PS/2 (a 6 pin) sul computer
4
4.
Inserire le batterie nel mouse.
5.
Accendere il computer.
6.
Dopo aver effettuato il riavvio, il computer
rileverà il mouse e questo sarà funzionante.
5
Nota: se il mouse non dovesse funzionare,
seguire le istruzioni riportate nel capitolo
“Sincronizzazione del mouse con il ricevitore”.
7.
Una volta che il mouse è ben collegato, si può
procedere con l’installazione del software.
4720ea_F8E845ea_man.indb 87
87
7/3/05 5:12:32 pm
Installazione dell’hardware
Sincronizzazione del mouse con il ricevitore
1
2
3
4
5
Se il mouse non effettua la sincronizzazione con il ricevitore
automaticamente, premere il pulsante di connessione sul
lato anteriore del ricevitore. Il LED sul ricevitore lampeggia
velocemente. Quindi, sincronizzare il mouse con il ricevitore
premendo il pulsante di sincronizzazione sulla base del
mouse. Il LED sul ricevitore smette di lampeggiare e si
accende.
Nota: ogni volta che si effettua questa operazione, il mouse
sceglie una nuova ID in modo casuale. Ciò permette a vari
mouse di funzionare dalla stessa postazione, senza diafonia.
Se si dovessero verificare problemi di diafonia con un altro
mouse wireless, ripetere i passi per la sincronizzazione per
cambiare il canale.
4720ea_F8E845ea_man.indb 88
88
7/3/05 5:12:32 pm
Installazione del software
Importante: non installare il software prima che il mouse
sia stato collegato al computer e sia perfettamente
funzionante. Se il mouse ancora non fosse stato collegato,
seguire le istruzioni per l’installazione dell’hardware.
1.
Inserire il CD di installazione a corredo
nell’apposito drive del CD ROM. Dopo alcuni istanti
il menu principale si apre automaticamente.
2.
Selezionare “Install Driver”(Installa driver),
dopodiché il computer inizierà l’installazione.
3.
Seguire le istruzioni visualizzate sullo schermo
per completare l’installazione del programma.
1
2
3
4
5
Nota: se il mouse non rileva automaticamente
il CD, seguire le seguenti istruzioni:
1.
Fare clic sul tasto “Start”(Avvio) e
selezionare “Run”(Esegui).
2.
Dalla finestra di dialogo “run”, digitare “<driver>:\
Setup” e fare clic su “OK”. (“<driver>” è
la lettera del drive che rappresenta il driver
del CD ROM in “My Computer”(Risorse
del computer). Per esempio, se il CD è
nel driver D, digitare “D:\Setup”).
3.
Seguire le istruzioni a video per l’installazione.
4720ea_F8E845ea_man.indb 89
89
7/3/05 5:12:32 pm
Installazione del software
Caratteristiche del software
1
2
3
4
5
Il software del mouse permette di usufruire di una serie di
funzioni e caratteristiche che aumentano la produttività del
mouse.
Per poter controllare le funzioni di alto livello del
mouse, bisognerà accedere alla finestra di dialogo
“Properties”(Proprietà) del mouse, mediante il “Control Panel”
(pannello di controllo) o usando il software del mouse.
Mediante la finestra di dialogo “Properties”(Proprietà) si
possono controllare le seguenti funzioni:
Notare che solamente il quarto ed il quinto pulsante della rotella
di scorrimento possono essere programmati con il software.
Funzioni del pulsante
Pulsante sinistro
Pulsante medio o rotella
Pulsante destro
Quarto pulsante
Quinto pulsante
Pulsante del mouse primario
(azione standard “clicca e
trascina”)
Scorrimento veloce/automatico
Menu dei contenuti
IE Back (se disponibile)
IE Forward (se disponibile)
Caricamento
Il ricevitore/base deve essere collegato ad una presa di
corrente, usando il cavo CA in dotazione. Inserire il mouse
nella base caricabatteria per caricarlo. Assicurarsi di usare
le batterie ricaricabili in dotazione. Prima di usare il mouse
per la prima volta, caricare le batterie per almeno 10-12 ore.
4720ea_F8E845ea_man.indb 90
90
7/3/05 5:12:32 pm
Rilevazione e risoluzione delle anomalie
Se si dovessero avere dei problemi con l’installazione
o il funzionamento del mouse, leggere il capitolo
seguente. Se il problema non dovesse essere tra
quelli di seguito riportati, o se le soluzioni riportate
non dovessero risolvere il problema, contattare
l’assistenza tecnica al numero 00 800 223 55 460.
1
2
3
Perché il puntatore non si muove
in modo scorrevole?
Il mouse funziona bene su una vasta gamma di superfici,
specialmente su quelle ruvide e/o decorate. Tuttavia, si
verificheranno problemi, nel caso in cui si tentasse di
usare il mouse su specchi o su superfici stampate con
mezzitoni.
4
5
Perché le funzioni di scorrimento
non funzionano con il notebook?
Assicurarsi di aver disabilitato la trackball del notebook,
il touch pad o la J-key nel BIOS; quindi attivare la porta
esterna in modo tale da avere a disposizione tutte le
funzioni del mouse.
4720ea_F8E845ea_man.indb 91
91
7/3/05 5:12:32 pm
Rilevazione e risoluzione delle anomalie
1
Il sistema non rileva il mio mouse USB
e questo non funziona. Perché?
Seguire il seguente procedimento:
2
1. Accertarsi che il mouse USB sia
ben collegato alla porta USB.
3
4
5
4720ea_F8E845ea_man.indb 92
2. Assicurarsi che la porta USB del sistema
funzioni correttamente, controllando nella
pagina “Device Manager”(Gestione delle
unità) delle “System Properties” (Proprietà
di sistema). Se sull’icona della porta USB
appare un punto esclamativo cerchiato, si
stanno verificando dei problemi nel dispositivo
di controllo USB. Disinstallare ed installare
nuovamente il driver USB, oppure contattare
l’assistenza tecnica del produttore del PC.
3. Controllare la versione del sistema operativo.
Se non doveste avere Windows 98 SE, Me,
2000 o XP, dovrete aggiornare il sistema
operativo ad uno di questi, in modo tale da
permettere l’abilitazione del dispositivo USB.
4. Accertarsi che la porta USB sia attivata
nella configurazione BIOS.
92
7/3/05 5:12:32 pm
Rilevazione e risoluzione delle anomalie
Il mouse non risponde ai comandi
Seguire il seguente procedimento:
1. Assicurarsi di aver inserito correttamente le
batterie, rispettando la giusta polarità.
2. Assicurarsi di avere ben collegato il ricevitore.
1
2
3. Accertarsi che il ricevitore sia ad almeno 20
3
cm di distanza da altri dispositivi elettrici
quali computer, monitor e stampanti.
4
4720ea_F8E845ea_man.indb 93
5
93
7/3/05 5:12:32 pm
Informazioni
Dichiarazione FCC
1
2
3
4
5
DICHIARAZIONE DI CONFORMITÀ CON LE LEGGI FCC PER LA
COMPATIBILITÀ ELETTROMAGNETICA
Noi sottoscritti, Belkin Corporation, con sede al 501 West Walnut Street, Compton,
California 90220, dichiariamo sotto la nostra piena responsabilità che il prodotto,
F8E845
, cui questa dichiarazione fa riferimento,
è conforme all’art. 15 delle norme FCC�. Bisogna rispettare le seguenti condizioni
d’uso:�(1) il dispositivo non deve causare interferenze dannose e (2) il dispositivo
deve accettare qualsiasi interferenza ricevuta, comprese eventuali interferenze
che possano causare un funzionamento anomalo.
Cautela: esposizione alle radiazioni di radiofrequenza.
La potenza in uscita irradiata da questa periferica è molto inferiore ai limiti di
esposizione alla radiofrequenza FCC. Tuttavia, la periferica dovrà essere utilizzata
in modo da ridurre al minimo il potenziale rischio di contatto umano nel corso del
suo funzionamento. Se il dispositivo viene collegato ad un’antenna esterna, questa
deve essere posizionata in modo da ridurre al minimo il potenziale rischio di contatto
umano nel corso del suo funzionamento. Per evitare un eventuale superamento dei
limiti di esposizione alle radiofrequenze FCC, non è consentito avvicinarsi all’antenna
di oltre 20 cm nel corso del normale funzionamento.
Informazione della Commissione Federale per le Comunicazioni
Questa attrezzatura è stata testata ed è risultata conforme ai limiti previsti per le
periferiche digitali di classe B, in conformità alla Sezione 15 delle norme FCC. Questi
limiti sono stati stabiliti per garantire la dovuta sicurezza da eventuali interferenze di
questo genere nel caso delle installazioni domestiche.
Questo dispositivo genera, utilizza e può emettere energia di radiofrequenza.
Se questo apparecchio causasse interferenze dannose per la ricezione delle
trasmissioni radiotelevisive, determinabile spegnendo o riaccendendo l’apparecchio
stesso, si suggerisce all’utente di cercare di rimediare all’interferenza adottando una
o più delle seguenti misure:
• Modificare la direzione o la posizione dell’ antenna ricevente.
• Aumentare la distanza tra il dispositivo ed il ricevitore.
• Collegare il dispositivo ad una presa di un circuito diversa da quella cui è collegato
il ricevitore.
• Consultare il rivenditore o un tecnico radio/TV specializzato.
4720ea_F8E845ea_man.indb 94
94
7/3/05 5:12:33 pm
Informazioni
Modifich
Le indicazioni FCC prevedono che l’utente venga informato del fatto che eventuali variazioni
o modifiche apportate a questo dispositivo non espressamente approvate da Belkin
Corporation potrebbero annullare la facoltà dell’utente di utilizzare il dispositivo.
Canada- Industry Canada (IC)
L’apparecchio radio wireless di questo dispositivo è conforme alle indicazioni RSS 139 &
RSS 210 Industry Canada. Questo apparecchio digitale di Classe B è conforme allo standard
canadese ICES-003.
Cet appareil numérique de la classe B conforme á la norme NMB-003 du Canada.
Garanzia a vita sul prodotto Belkin Corporation*
Belkin Corporation garantisce a vita questo prodotto da eventuali difetti di materiale e
lavorazione. Qualora venisse rilevata un’anomalia, Belkin provvederà, a propria discrezione,
a riparare o sostituire il prodotto gratuitamente, a condizione che esso sia restituito entro il
periodo di garanzia, con le spese di trasporto prepagate, al rivenditore Belkin autorizzato dal
quale è stato acquistato. Potrebbe venire richiesta la prova di acquisto.
1
2
3
4
5
Questa garanzia non sarà valida nel caso il prodotto sia stato danneggiato accidentalmente,
per abuso, uso non corretto o non conforme, qualora sia stato modificato senza il permesso
scritto di Belkin, o nel caso in cui il numero di serie Belkin fosse stato cancellato o reso
illeggibile.
LA GARANZIA ED I RIMEDI DI CUI SOPRA PREVALGONO SU QUALSIASI ALTRO
ACCORDO, SIA ORALE CHE SCRITTO, ESPRESSO O IMPLICITO. BELKIN DECLINA
SPECIFICATAMENTE QUALSIASI OBBLIGO DI GARANZIA IMPLICITO COMPRESE, SENZA
LIMITI, LE GARANZIE DI COMMERCIABILITÀ O IDONEITÀ AD UN PARTICOLARE SCOPO.
Nessun rivenditore, agente o dipendente Belkin è autorizzato ad apportare modifiche,
ampliamenti o aggiunte alla presente garanzia.
BELKIN DECLINA QUALSIASI RESPONSABILITÀ PER EVENTUALI DANNI SPECIALI,
ACCIDENTALI, DIRETTI O INDIRETTI IMPUTABILI AD UN’EVENTUALE VIOLAZIONE DELLA
GARANZIA O IN BASE A QUALSIASI ALTRA TEORIA LEGALE, COMPRESI, MA NON
SOLO, I CASI DI MANCATO GUADAGNO, INATTIVITÀ, DANNI O RIPROGRAMMAZIONE O
RIPRODUZIONE DI PROGRAMMI O DATI MEMORIZZATI O UTILIZZATI CON I PRODOTTI
BELKIN.
Alcuni Stati non consentono l’esclusione o la limitazione delle garanzie implicite o della
responsabilità per i danni accidentali, pertanto i limiti di esclusione di cui sopra potrebbero
non fare al caso vostro. Questa garanzia consente di godere di diritti legali specifici ed
eventuali altri diritti che possono variare di stato in stato.
*Le batterie sono escluse dalla garanzia.
4720ea_F8E845ea_man.indb 95
95
7/3/05 5:12:33 pm
Mouse Ottico Wireless
Ricaricabile
Belkin Ltd.
Express Business Park • Shipton Way
Rushden • NN10 6GL • Regno Unito
Tel: +44 (0) 1933 35 2000
Fax: +44 (0) 1933 31 2000
Belkin GmbH
Hanebergstrasse 2
80637 Monaco di Baviera • Germania
Tel: +49 (0) 89 143405 0
Fax: +49 (0) 89 143405 100
Belkin B.V.
Starparc Building • Boeing Avenue 333
1119 PH Schiphol-Rijk • Paesi Bassi
Tel: +31 (0) 20 654 7300
Fax: +31 (0) 20 654 7349
Belkin SAS
5 Rue du Petit Robinson • 3ème étage
78350 Jouy en Josas • Francia
Tel: +33 (0) 1 34 58 14 00
Fax: +33 (0) 1 39 46 62 89
© 2005 Belkin Corporation. Tutti i diritti riservati. Tutti i nomi commerciali
sono marchi registrati dai rispettivi produttori elencati.
4720ea_F8E845ea_man.indb 96
P74720ea
Assistenza tecnica Belkin
Europa: 00 800 223 55 460
7/3/05 5:12:33 pm