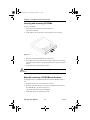
1
ebud.book Page i Friday, February 4, 2000 11:11 AM
eBuddy
User Manual
eBuddy version 3.1
EarthWalk Communications, Inc.
-i-
2/4/00
ebud.book Page ii Friday, February 4, 2000 11:11 AM
Copyright Notice
This manual, software and firmware described in it are copyrighted by their
respective owners and protected under the laws of the Universal Copyright
Convention. You may not reproduce, transmit, transcribe, store in a retrieval
system, or translate into any language, in any form or by any means, electronic,
mechanical, magnetic, optical, chemical, biological, molecular, manual, or otherwise, any part of this publication without the express written permission of
the publisher.
All products and trade names described within are mentioned for identification
purposes only. No affiliation with or endorsement of the manufacturer is made
or implied. Product names and brands appearing in this manual are registered
trademarks of their respective companies.
The information published herein has been checked for accuracy as of publishing. No representation or warranties regarding the fitness of this document for
any use are made or implied by the publisher. We reserve the right to revise this
document or make changes in the specifications of the product described
therein at any time without notice and without obligation to notify any person
of such revision or change.
© 1999, EarthWalk Communications, Inc.
eBuddy User Manual
-ii-
2/4/00
ebud.book Page iii Friday, February 4, 2000 11:11 AM
Notice
This equipment has been tested and found to comply with the limits for a Class
B digital device, pursuant to Part 15 of the FCC rules. These limits are
designed to provide reasonable protection against harmful interference in a residential installation. This equipment generates, uses and can radiate radio frequency energy and, if not installed and used in accordance with this manual,
may cause harmful interference to radio communications. However, there is no
guarantee that interference will not occur in a particular installation. If this
equipment does cause harmful interference to radio or television reception,
which can be determined by turning the equipment off and on, the user is
encouraged to try to correct the interference by one or more of the following
measures:
•
•
•
•
reorient or relocate the receiving antenna of the radio or television
increase the physical distance between the equipment and the receiver
connect the equipment to an outlet on a different circuit from the one to
which the receiver is connected
consult the dealer or an experienced radio/TV technician for help
Shielded interface cables must be used in order to comply with emission limits.
Changes or modifications not expressly approved by the party responsible for
compliance could void the user’s authority to operate the equipment.
2/4/00
-iii-
eBuddy User Manual
ebud.book Page iv Friday, February 4, 2000 11:11 AM
eBuddy User Manual
-iv-
2/4/00
ebud.book Page v Friday, February 4, 2000 11:11 AM
Contents
1: Introducing the eBuddy ............................................. 1
Using this manual ................................................................. 2
Manual organization......................................................... 2
Precautionary symbols..................................................... 2
Unpacking your eBuddy........................................................ 3
Optional accessories........................................................ 3
LCD protective covering................................................... 3
Sales and technical support.................................................. 4
Safety and operating precautions ......................................... 5
Setting up your eBuddy......................................................... 6
Plugging in the AC power adapter ................................... 6
Opening the LCD panel ................................................... 6
Turning on the power ....................................................... 9
Turning off the power ....................................................... 9
eBuddy accessories and peripherals ............................... 9
Using the eBuddy’s keyboard ............................................. 11
Key definitions................................................................ 12
Key combinations........................................................... 15
Pointing stick.................................................................. 17
LED indicators..................................................................... 19
Battery charge LED........................................................ 19
Ports.................................................................................... 20
2: Peripherals and accessories...................................21
Integrated wireless card...................................................... 22
Configuring the Integrated wireless card ....................... 22
IrDA infrared port ................................................................ 25
BIOS setup .................................................................... 25
Enabling infrared communication................................... 26
Setting IrDA port properties ........................................... 26
Setting up communications with specific devices .......... 27
Universal Serial Bus (USB) port.......................................... 29
-v-
2/4/00
ebud.book Page vi Friday, February 4, 2000 11:11 AM
Contents
Internal modem ................................................................... 30
Installing the modem telephone cord ............................. 30
Removing a modem telephone cord .............................. 30
Using the serial and parallel ports....................................... 33
Serial port....................................................................... 33
Parallel port.................................................................... 33
Connecting an external monitor .......................................... 34
Using the external CD-ROM drive ...................................... 35
Connecting the external CD-ROM drive ........................ 35
Inserting and removing CD-ROMs................................. 36
Manually removing a CD-ROM from the drive ............... 36
Disconnecting the external CD-ROM drive .................... 37
Using the external floppy disk drive .................................... 39
Connecting the external floppy disk drive ...................... 39
Disconnecting the external floppy disk drive.................. 39
Using the stylus................................................................... 42
3: Hardware installation ...............................................43
Memory expansion.............................................................. 44
Installing memory........................................................... 44
Removing memory......................................................... 44
Battery pack ........................................................................ 47
Removing the battery pack ............................................ 47
Installing the battery pack .............................................. 47
Charging the battery pack.............................................. 47
Hard disk drive (HDD) installation....................................... 50
Removing the HDD ........................................................ 50
Installing the HDD .......................................................... 51
4: Software ....................................................................53
Device Drivers..................................................................... 54
Video, sound, and modem drivers ................................. 54
PIIX4 driver .................................................................... 54
Flash BIOS upgrade utility ............................................. 54
eBuddy User Manual
-vi-
2/4/00
ebud.book Page vii Friday, February 4, 2000 11:11 AM
Contents
CD-ROM driver ................................................................... 55
System Software................................................................. 56
PC_Cillin 98 ................................................................... 56
Suspend to disk ............................................................. 56
5: BIOS setup ................................................................57
Using the BIOS/CMOS setup utility .................................... 58
CMOS setup utility – function summary.............................. 60
Standard CMOS setup........................................................ 62
BIOS features setup............................................................ 63
Chipset features setup ........................................................ 67
Power management setup .................................................. 71
PNP/PCI configuration ........................................................ 74
Load setup defaults............................................................. 76
Integrated peripherals ......................................................... 77
Password setting................................................................. 80
IDE HDD auto detection...................................................... 81
Save and exit setup ............................................................ 82
Exit without saving .............................................................. 83
Appendix A:eBuddy specifications.............................85
Index..............................................................................87
2/4/00
-vii-
eBuddy User Manual
ebud.book Page viii Friday, February 4, 2000 11:11 AM
Contents
eBuddy User Manual
-viii-
2/4/00
ebud.book Page 1 Friday, February 4, 2000 11:11 AM
1: Introducing the eBuddy
Congratulations on the purchase of your new wireless eBuddy notebook computer. Your eBuddy provides you with enormous computing power in an ultracompact package.
The eBuddy 3.1 has been designed to function as part of EarthWalk’s NetWize
system. You eBuddy includes a built-in integrated wireless card and antenna to
allow it to communicate with the NetWize SmartCart in a mobile classroom
scenario.
The eBuddy 3.1 functions as a stand-alone system, too. You can use it by itself
outside of the classroom environment, and with its built-in wireless technology,
you can use it with other types of compatible wireless systems.
Enjoy your new eBuddy!
-1-
2/4/00
ebud.book Page 2 Friday, February 4, 2000 11:11 AM
Chapter 1: Introducing the eBuddy
Using this manual
If you are familiar with PC computers and the Windows Operating System, you
will find yourself right at home with the eBuddy. Nonetheless, we recommend
that you leaf through this manual before using the eBuddy to familiarize yourself with the computer’s functions and unique capabilities, the included peripheral devices, hardware, and software features.
Manual organization
This manual is organized as follows:
❑ Chapter 1: Introducing the eBuddy. Even if you are a seasoned computer
user, you should review this chapter to familiarize yourself with the
eBuddy’s layout and configuration. This chapter also includes important
safety precautions that should be followed to avoid damage to the unit.
❑ Chapter 2: Peripherals and accessories. This Chapter describes and
explains how to set up the included and options accessories for your
eBuddy, including the Integrated wireless card, IrDA infrared port, serial
and parallel ports, internal modem, external monitor, external CD-ROM
drive, and external floppy disk drive.
❑ Chapter 3: Hardware installation. This chapter explains how to install new
or additional memory, replacement battery packs, and replacement hard
disk drives in your eBuddy.
❑ Chapter 4: Software. This chapter introduces the software that is included
with your eBuddy.
❑ Chapter 5: BIOS Setup. This chapter is for advanced users who wish to
examine or alter the BIOS configuration of their eBuddy.
Precautionary symbols
When special precautions are necessary, you will see one of the following symbols and an explanation of the precaution:
Caution. A triangle with an exclamation point in it means that you should perform the indicated procedure with caution to avoid obtaining unexpected or
undesirable results from the procedure.
Warning. A triangle with a lightning bolt means that you should pay careful
attention for safety reasons or to avoid physical damage to the unit.
eBuddy User Manual
-2-
2/4/00
ebud.book Page 3 Friday, February 4, 2000 11:11 AM
Unpacking your eBuddy
Unpacking your eBuddy
Carefully open the box and remove your new eBuddy notebook computer and
all of its accessories. These should include the following:
❑
❑
❑
❑
❑
❑
eBuddy notebook computer
AC power adapter
power cord
CD-ROM and/or diskettes containing system software and drivers
computer carrying case
eBuddy user manual
Optional accessories
The following accessories are optional and available from EarthWalk (contact
your sales representative or email EarthWalk at [email protected]):
❑
❑
❑
❑
external floppy disk drive
cable for external floppy disk drive
external CD-ROM drive
cable for external CD-ROM drive
LCD protective covering
The LCD screen has a thin plastic protective film that you should remove and
discard.
Remove the film slowly and gently to avoid damaging the LCD screen.
2/4/00
-3-
eBuddy User Manual
ebud.book Page 4 Friday, February 4, 2000 11:11 AM
Chapter 1: Introducing the eBuddy
Sales and technical support
For technical support with your eBuddy, contact EarthWalk at:
[email protected]
or visit our web site at:
http://www.earthwalk.com
To purchase optional accessories and supplies, or to obtain replacement battery
packs, contact your sales representative, or contact EarthWalk at:
[email protected]
eBuddy User Manual
-4-
2/4/00
ebud.book Page 5 Friday, February 4, 2000 11:11 AM
Safety and operating precautions
Safety and operating precautions
Before setting up your eBuddy as described in this chapter, make a note of the
following precautions for operating and handling your eBuddy:
❑ Never allow water or liquid of any kind to come in contact with the
eBuddy.
❑ Save the original packaging and packing materials that you received your
eBuddy in. If you ever need to ship the computer, the original materials
offer the best protection.
❑ Do not allow foreign objects to fall into the eBuddy when the case is open.
❑ If your computer is malfunctioning, contact EarthWalk for assistance. Do
not try to repair the unit yourself.
❑ Be careful not to cut the surface of the LCD display. It contains a liquid
that can irritate the skin. Avoid inhaling the vapor from this fluid. If the liquid comes into contact with your body, wash with soap and water and avoid
further contact.
❑ Use only the AC power adapter or the internal battery that came with your
eBuddy to power the system. Do not use any other power source.
❑ The AC power adapter generates heat when plugged in. Be sure to place it
in a well-ventilated area.
❑ Do not connect the eBuddy to the AC power adapter or to a telephone line
(modem) during a thunderstorm.
❑ Do not drop the battery pack, or the battery housing could be damaged. If
dropped, return the battery to EarthWalk for testing, repair, or replacement.
❑ Do not short the battery connectors.
❑ Once the battery pack has been exhausted (it will last for approximately
500 charge and discharge cycles), remove it and replace it with a new battery. Do not leave a dead battery in the eBuddy.
❑ Never dispose of the battery pack by incinerating.
❑ Only use the external CD-ROM and the external floppy disk drive that
came with your eBuddy or which are available from EarthWalk.
2/4/00
-5-
eBuddy User Manual
ebud.book Page 6 Friday, February 4, 2000 11:11 AM
Chapter 1: Introducing the eBuddy
Setting up your eBuddy
When setting up and operating your eBuddy, we recommend the following precautions:
•
•
•
Always place the eBuddy on a flat table or other level surface.
Keep the eBuddy and its accessories away from dust, water, and heat
sources.
Do not attempt to operate the eBuddy in a moving automobile or any other
environment where it may be subject to falling or sudden movement.
Plugging in the AC power adapter
Your eBuddy has been designed to operate on internal battery power for maximum portability and convenience, however, you can also use the AC adapter to
conserve battery life and charge. You will also need to use the AC adapter to
charge the battery.
1. Place the eBuddy on a flat table or other level surface.
2. Connect the AC power cord to the adapter (see Figure 1-2).
Use only the AC adapter that came with your eBuddy. Use of other equipment
may damage the eBuddy and/or its accessories, and invalidate your warranty.
3. Plug the adapter’s DC outlet connector into the DC-IN connector on the
eBuddy.
Connect the adapter to 110/120-volt power only.
The battery pack will begin charging once the system has been connected to
the AC power.
Opening the LCD panel
To open the LCD panel of your eBuddy:
1. Slide the latches on the side of the panel forward, as shown in Figure 1-3.
2. Lift the LCD panel while holding the latches forward.
The LCD screen has a thin plastic protective film that you should remove and
discard. Remove the film slowly and gently to avoid damaging the LCD screen.
Be careful not to cut the surface of the LCD display. The display contains a liquid that can irritate the skin. Avoid inhaling the vapor from this fluid. If the liq-
eBuddy User Manual
-6-
2/4/00
ebud.book Page 7 Friday, February 4, 2000 11:11 AM
Setting up your eBuddy
LCD screen
Speaker
Microphone
Speaker
DC power in
Stylus
Integrated wireless card
LED indicators
Pointing stick
(mouse) buttons
Pointing stick
Power switch
Charge LED
Li-Ion battery pack
Modem phone
jack
Power LED
Figure 1-1. The eBuddy and its components
2/4/00
-7-
eBuddy User Manual
ebud.book Page 8 Friday, February 4, 2000 11:11 AM
Chapter 1: Introducing the eBuddy
Figure 1-2. AC adapter and power cord
Figure 1-3. Opening the LCD panel
uid comes into contact with your body, wash with soap and water and avoid
further contact.
eBuddy User Manual
-8-
2/4/00
ebud.book Page 9 Friday, February 4, 2000 11:11 AM
Setting up your eBuddy
Turning on the power
To turn on the power to your eBuddy:
1. Open the LCD panel and locate the power button at the top of the keyboard
(see Figure 1-4).
2. Press the power button to turn on the eBuddy.
3. If you are powering up your eBuddy for the first time, you should follow
the instructions that appear on the screen to set up and configure the system
and software. See Chapter 5, “BIOS setup” for more information on setup
and configuration.
Turning off the power
When power management settings are active (see “Power management setup”
on page 71), system shutdown will automatically turn off the power. If for
some reason the system can not be shut down in this manner, you can turn off
the power by pressing the power button.
You must hold the power button down for approximately five seconds, until the
power turns off.
Close the LCD panel when the system has powered down. The two side latches
will automatically lock the panel securely in the closed position.
Do not unplug the power cord while the eBuddy is powered up, or you could
damage the unit.
eBuddy accessories and peripherals
Setup instructions for the eBuddy’s accessories are provided in Chapter 2,
“Peripherals and accessories.”
2/4/00
-9-
eBuddy User Manual
ebud.book Page 10 Friday, February 4, 2000 11:11 AM
Chapter 1: Introducing the eBuddy
Power on
Power off
Figure 1-4. Turning the power on and off
eBuddy User Manual
-10-
2/4/00
ebud.book Page 11 Friday, February 4, 2000 11:11 AM
Using the eBuddy’s keyboard
Using the eBuddy’s keyboard
Your eBuddy’s keyboard provides surprising comfort and ease of use, despite
the small footprint. This section describes the keyboard and pointing stick of
your eBuddy and explains how to use them to control the system hardware and
software.
Keep dirt, liquids, and heavy objects away from the keyboard and the pointing
stick.
Figure 1-5. The eBuddy’s keyboard
2/4/00
-11-
eBuddy User Manual
ebud.book Page 12 Friday, February 4, 2000 11:11 AM
Chapter 1: Introducing the eBuddy
Key definitions
It is important for you to be familiar with the use of the following keys on your
eBuddy. Many of the keys may be familiar to you, however some keys have
functions specific to the eBuddy.
Key
Definition
Num Lock
The Num Lock key
enables the numeric
keypad (shown at
right).
When the numeric keypad is enabled, the normal letter assignment
of each key is changed
to the blue number
character at the upper right of the key. You can use the
numeric keypad to facilitate entry of large amounts of
numeric data.
The Num Lock LED is turned on when the numeric keyboard is enabled. Press the key a second time to disable (turn
off) the numeric keypad.
Caps Lock
The Caps Lock key reverses the function of the Shift key
with respect to letters (and only letters). In other words,
when Caps Lock is enabled, pressing a letter key will produce an upper-case letter. Holding the Shift key down while
pressing a letter key will produce a lower-case letter.
The Caps Lock LED is turned on when Caps lock is enabled.
Press the key a second time to disable (turn off) Caps Lock.
Scroll Lock
Pressing the Scroll Lock key turns on Scroll Lock, the function of which differs according to the software you are using.
The Scroll Lock LED is turned on when Scroll lock is
enabled. Press the key a second time to disable (turn off)
Scroll Lock.
eBuddy User Manual
-12-
2/4/00
ebud.book Page 13 Friday, February 4, 2000 11:11 AM
Using the eBuddy’s keyboard
Key
Definition
Function (Fn)
Use the Function key in combination with other keys (similar to Shift and Ctrl) to actuate special software and eBuddy
hardware functions. See “Key combinations” on page 15 for
more information on the use of this key.
Backspace
Press the Backspace key to delete the character to the left of
the cursor.
Tab
The Tab key has several functions, depending on the software and operating system you are using. Normally, the Tab
key will move the cursor to the next tab stop. It is also used
by most Windows programs to move between fields in a dialog box. Hold the Shift key down while pressing the Tab key
to tab backward in a line of text or move backward through
fields in a dialog box.
Shift
Hold the Shift key down while pressing letter, number, or
other keys to select the upper-case version of the letter, or the
symbol shown at the top of the key on number keys and symbol keys.
Start
Press this key to trigger the Start button on the Task Bar
(Windows 98 only).
Menu
Press this key to activate a context menu. The context menu
activated depends on the Windows 98 program being run and
the position of the mouse pointer when you press the key
(Windows 98 only).
Escape
Use the Escape key to cancel certain Windows commands.
The Escape key may have additional functions determined
by the software you are using.
2/4/00
-13-
eBuddy User Manual
ebud.book Page 14 Friday, February 4, 2000 11:11 AM
Chapter 1: Introducing the eBuddy
Key
Definition
Enter
Press the Enter key to execute commands, create a hard
return, or other functions specific to the software you are
using.
Pause
Press the Pause key to temporarily disable screen output.
Press any other key to resume output.
Ctrl
Hold down the Ctrl key while pressing other keys to activate
special functions and features according to the software you
are using.
Alt
Hold down the Alt key while pressing other keys to activate
special functions and features according to the software you
are using.
Delete
In most word processing programs, you can press the Delete
key to delete the character to the right of the mouse pointer.
The Delete key has other functions, depending on the software you are using.
When starting your eBuddy, press the Delete key to run the
Setup program (see Chapter 5, “BIOS setup”).
eBuddy User Manual
-14-
2/4/00
ebud.book Page 15 Friday, February 4, 2000 11:11 AM
Using the eBuddy’s keyboard
Key combinations
The following key combinations have special functions as described below:
Key combination
Definition
F11 key
This key combination simulates the F11 key
used by some software programs.
F12 key
This key combination simulates the F12 key
used by some software programs.
Speaker mute
Press this key combination to mute the
eBuddy’s internal speaker. Press it again to reenable the speaker.
Select internal/external monitor
This key combination can be used, if you have
an external monitor, to toggle between the following three modes:
• eBuddy LCD screen only
• eBuddy LCD screen and external monitor
• external monitor only
Increase speaker volume
Press this key combination to increase speaker
volume.
Decrease speaker volume
Press this key combination to decrease speaker
volume.
Backlit brightness decrease
Press this key combination to decrease the
brightness of the backlit LCD screen.
2/4/00
-15-
eBuddy User Manual
ebud.book Page 16 Friday, February 4, 2000 11:11 AM
Chapter 1: Introducing the eBuddy
Key combination
Definition
Backlit brightness increase
Press this key combination to increase the
brightness of the backlit LCD screen.
Reduce SCC display contrast
Press this key combination to reduce the contrast in your eBuddy Super Clear Color (SCC)
display.
Increase SCC display contrast
Press this key combination to increase the contrast in your eBuddy Super Clear Color (SCC)
display.
Page Up
Press this key combination to change the up
arrow function to Page Up.
Page Down
Press this key combination to change the down
arrow function to Page Down.
Implement suspend to RAM power down
mode
Use this key combination to implement suspend
to RAM mode in order to save power. You can
resume normal operation by pressing any key.
eBuddy User Manual
-16-
2/4/00
ebud.book Page 17 Friday, February 4, 2000 11:11 AM
Using the eBuddy’s keyboard
Key combination
Definition
Implement suspend to disk mode
This key combination implements suspend to
disk. The eBuddy will “sleep” to save power,
resuming normal functionality when you press
any other key.
The system can also be placed in sleep mode by
closing the LCD panel.
Suspend to disk mode will only function if it has
been enabled on your eBuddy. Contact EarthWalk technical support for additional information.
Pointing stick
The eBuddy comes with a pointing stick built into the center of the keyboard
(see Figure 1-6). When using a graphic user interface such as Windows 98, you
can use the pointing stick to move the mouse pointer on the screen. Press the
stick in the direction you want to move the pointer.
Pointing stick
Pointing stick buttons
Figure 1-6. The eBuddy’s pointing stick and pointing stick buttons
The left and right stick pointer buttons function in the same manner as left and
right mouse buttons, respectively.
2/4/00
-17-
eBuddy User Manual
ebud.book Page 18 Friday, February 4, 2000 11:11 AM
Chapter 1: Introducing the eBuddy
You can connect an external pointing device, such as a mouse or trackball, to
your eBuddy using the COM port or USB port (see “Ports” on page 20). You
must use the BIOS setup program to configure your BIOS as discussed in
“BIOS features setup” on page 63.
Keep dirt, liquids, and heavy objects away from the keyboard and the pointing
stick.
eBuddy User Manual
-18-
2/4/00
ebud.book Page 19 Friday, February 4, 2000 11:11 AM
LED indicators
LED indicators
LED indicators, located above the keyboard, provide the following information:
Icon
Meaning
Power/Battery low
This LED displays a green light when the system is using
power from the AC adapter, or when drawing power from a
fully-charged battery pack.
The LED displays an orange light when the battery charge
is low.
Suspend
When this LED is on it indicates that the system is in Suspend to RAM mode (see “Power management setup” on
page 71 for more information).
Hard disk drive (HDD)
The LED turns on to indicate HDD activity.
Num Lock
The LED turns on when Num Lock is enabled.
Caps lock
The LED turns on when Caps Lock is enabled.
Scroll lock
The LED turns on when Scroll Lock is enabled.
Battery charge LED
The battery charge LED (see Figure 1-1 on page 7) will turn on when the battery is fast-charging. After the battery has charged to 90 percent, the battery
will charge in trickle-charge mode and the LED will shut off.
The battery will charge in approximately two hours when the eBuddy is off. It
will take approximately twice that long (four hours) if the eBuddy is in operation.
2/4/00
-19-
eBuddy User Manual
ebud.book Page 20 Friday, February 4, 2000 11:11 AM
Chapter 1: Introducing the eBuddy
Ports
Figure 1-7 shows a rear view of the eBuddy, where the external ports are
located.
Figure 1-7. Rear view of the eBuddy, showing the ports
Port
Function
1. CD-ROM port
This port is used to connect the eBuddy’s
external CD-ROM drive.
2. COM port
A DB9 serial port for connecting an external
mouse or other serial devices.
3. Parallel port/FDD port
A DB25 parallel port for connecting a printer
or other parallel port device. It is also used to
connect the external floppy disk drive (FDD)
4. CRT port
A DB15 port for connecting an external VGA,
SVGA, or XGA monitor.
5. USB Port
A Universal Serial Bus (USB) port for connecting USB devices.
6. IrDA
An IrDA 1.1-compatible FIR infrared port
eBuddy User Manual
-20-
2/4/00
ebud.book Page 21 Friday, February 4, 2000 11:11 AM
2: Peripherals and accessories
This chapter describes the installation and setup of the following peripherals
and accessories:
❑
❑
❑
❑
❑
❑
❑
❑
❑
❑
Integrated wireless card
IrDA infrared port
USB port
Modem
Serial port
Parallel port
External monitor
External CD-ROM drive*
External floppy disk drive*
Stylus*
*Optional accessories are available from EarthWalk. Contact your sales representative or email EarthWalk at [email protected].
-21-
2/4/00
ebud.book Page 22 Friday, February 4, 2000 11:11 AM
Chapter 2: Peripherals and accessories
Integrated wireless card
Your wireless eBuddy is equipped with an Integrated wireless card (see
Figure 2-1) and internal antenna that enable it to communicate with other wireless devices such as the NetWize SmartCart.
Figure 2-1. The eBuddy’s Integrated wireless card
The Integrated wireless card is factory-installed. Do not try to remove the card
or you may damage your eBuddy.
Configuring the Integrated wireless card
The integrated wireless card comes pre-configured with your NetWize system.
The following instructions will help you to re-configure the card, if necessary.
Since the configuration of the Integrated wireless card depends on the corresponding configuration of the NetWize system, you should ask the NetWize
System Administrator to assist you with all configuration tasks.
eBuddy User Manual
-22-
2/4/00
ebud.book Page 23 Friday, February 4, 2000 11:11 AM
Integrated wireless card
To configure the Integrated wireless card:
1. Click Start, point to Settings, then click Control Panel.
2. Double-click Network.
3. Click LANEscape/WL2432 PCMCIA Adapter to select it, then click
Properties (see Figure 2-2).
Figure 2-2. Configuring the Integrated wireless card
4. Click the Advanced tab to display the configuration properties, as shown
in Figure 2-3.
5. Click each property and set the corresponding value as follows:
a. Click Default Channel and set the Value to correspond to the channel in use by the SmartCart’s (or other device’s) access point.
b. Click ESSID and enter a Value corresponding to the SmartCart’s
access point.
c. Click Network Type and choose a value corresponding to the SmartCart’s access point (normally, this value will be “Infrastructure”).
d. Click RTS Threshold and choose a value or 2,300.
6. Click OK to close the dialog box, then click OK to close the Network dialog box. Close the Control Panel.
2/4/00
-23-
eBuddy User Manual
ebud.book Page 24 Friday, February 4, 2000 11:11 AM
Chapter 2: Peripherals and accessories
Figure 2-3. LANEscape/WL2432 PCMCIA Adapter Properties
eBuddy User Manual
-24-
2/4/00
ebud.book Page 25 Friday, February 4, 2000 11:11 AM
IrDA infrared port
IrDA infrared port
The IrDA-compatible infrared port (Figure 2-4) enables wireless serial data
transfer between any peripheral device or computer equipped with the IrDA
interface. You can select infrared port as FIR or SIR from the BIOS setup. The
infrared port can only be used when UART2 mode is set to FIR or SIR in the
Integrated Peripherals setup in the BIOS setup.
In order for reliable infrared data transfer to occur, the eBuddy should be
placed within three feet of the other infrared device. In addition, the two infrared ports (on the eBuddy and the other device) must be aligned within a range
of 30° horizontally and 15° vertically.
IrDA port
Figure 2-4. The IrDA 1.1-compatible infrared FIR port
The following instructions explain how to set up the infrared port for operation
in Windows 98.
BIOS setup
The BIOS settings must be correct in order for the infrared port to function
properly:
1. Go into the BIOS setup utility and select Integrated Peripherals (refer to
Chapter 5, “BIOS setup” and “Integrated peripherals” on page 77).
2. Check the setting for UART2 Mode and make sure that it is set to IrDA
FIR.
3. Set FIR Mode Use DMA to 1.
4. Exit from the BIOS setup utility, saving your changes as described in
Chapter 5. The eBuddy will continue to boot up into Windows 98. Continue with the next section, “Enabling infrared communication.”
2/4/00
-25-
eBuddy User Manual
ebud.book Page 26 Friday, February 4, 2000 11:11 AM
Chapter 2: Peripherals and accessories
Enabling infrared communication
The following steps enable infrared communication in Windows 98:
1. In Windows 98, click Start, point to Settings, and click Control Panel.
Figure 2-5. Infrared Monitor dialog box
2. Double-click Infrared and click the Options tab (see Figure 2-5).
3. Select Enable infrared communication and click OK. Close the Control Panel.
4. Re-boot the system and proceed to the next section, “Setting IrDA port
properties.”
Setting IrDA port properties
The following steps set the proper parameters for the eBuddy to communicate
with other infrared devices:
1. In Windows 98, click Start, point to Settings, and click Control Panel.
2. Double-click Network and click IRDA v3.0 Fast Infrared Port to
select it, as shown in Figure 2-6.
3. Click Properties and go to the Advanced tab.
4. Click Infrared Transceiver A in the Property box and choose
HP HSDL-2300 for the Value, as shown in Figure 2-7.
5. Click OK to accept these settings, then OK again to accept the new network properties. Click Yes to restart the system when prompted.
eBuddy User Manual
-26-
2/4/00
ebud.book Page 27 Friday, February 4, 2000 11:11 AM
IrDA infrared port
Figure 2-6. Network dialog box
Figure 2-7. IrDA v.3.0 Fast Infrared Port Properties
Setting up communications with specific devices
The IrDA port functions like other ports on your eBuddy, and can be used to
communicate with any infrared device with compatible device drivers.
2/4/00
-27-
eBuddy User Manual
ebud.book Page 28 Friday, February 4, 2000 11:11 AM
Chapter 2: Peripherals and accessories
For example, you can install printer drivers as described in your Windows documentation, and assign them to print to the IrDA port for the ultimate in convenience. Of course, the printer must be equipped with an infrared port.
To communicate with a compatible computer, such as another eBuddy:
1. On the Windows 98 Desktop, double-click My Computer.
2. Double-click Infrared Recipient and select the other computer.
3. Click Send Files and choose the file you want to send to the other computer.
4. If set up to receive infrared data, the files will be received by the other computer and stored in a designated folder such as “My received files.”
Note: these procedures provide a general outline only. Specific procedures will
depend on the specific device you are communicating with and its operating
system or communication protocol. Consult the documentation for the device
in question.
eBuddy User Manual
-28-
2/4/00
ebud.book Page 29 Friday, February 4, 2000 11:11 AM
Universal Serial Bus (USB) port
Universal Serial Bus (USB) port
The host USB port on the back of the eBuddy (Figure 2-8) can be used to connect any USB-compatible device.
You should enable the USB keyboard in the Integrated Peripherals setup in
BIOS setup if you want to use a USB keyboard. See “Integrated peripherals”
on page 77 for more information.
Never press keys on the internal keyboard and an external USB keyboard at the
same time.
USB port
Figure 2-8. The Universal Serial Bus (USB) port
2/4/00
-29-
eBuddy User Manual
ebud.book Page 30 Friday, February 4, 2000 11:11 AM
Chapter 2: Peripherals and accessories
Internal modem
The eBuddy comes equipped with an internal 56.6 Kbps software modem. In
order for the modem to function properly, you should select UART2 mode as
modem in the Integrated Peripherals setup in BIOS setup (see “Integrated
peripherals” on page 77).
The telephone cord connects to the jack on the right side of the eBuddy as
shown in Figure 2-9.
Figure 2-9. Modem phone jack
Installing the modem telephone cord
To install the modem telephone cord (refer to Figure 2-10):
1. Turn the eBuddy’s power off.
2. Open the cover of the modem phone jack on the right side of the eBuddy as
shown in (1).
3. Insert the modular plug of the telephone cord at about 45° into the phone
jack until it clicks firmly into place, as shown in (2).
Removing a modem telephone cord
To remove the modem telephone cord (refer to Figure 2-11):
1. Turn the eBuddy’s power off.
2. Press the telephone cord security lock as shown in (1).
3. Slowly and gently remove the modular plug from the jack as shown in (2).
4. Close the modem phone jack cover.
eBuddy User Manual
-30-
2/4/00
ebud.book Page 31 Friday, February 4, 2000 11:11 AM
Internal modem
Figure 2-10. Installing a modem telephone line
2/4/00
-31-
eBuddy User Manual
ebud.book Page 32 Friday, February 4, 2000 11:11 AM
Chapter 2: Peripherals and accessories
Figure 2-11. Removing the modem phone cord from the eBuddy
eBuddy User Manual
-32-
2/4/00
ebud.book Page 33 Friday, February 4, 2000 11:11 AM
Using the serial and parallel ports
Using the serial and parallel ports
The eBuddy comes with one serial (COM) port and one parallel port as shown
in Figure 2-12.
Serial (COM) port
Parallel port
Figure 2-12. The eBuddy’s serial and parallel ports
Serial port
To use the serial (or COM) port You should select UART mode as COM1 in the
Integrated peripherals setup of the BIOS setup.
If you want to connect an external mouse to the serial port, disable the internal
PS/2 pointing stick in the BIOS features setup.
Parallel port
The parallel port is normally used to connect a parallel printer. Certain other
devices, such as scanners, can also use this port. You can configure the setup of
the parallel port in the Integrated Peripherals setup in the BIOS setup.
2/4/00
-33-
eBuddy User Manual
ebud.book Page 34 Friday, February 4, 2000 11:11 AM
Chapter 2: Peripherals and accessories
Connecting an external monitor
You can connect a VGA (640 x 480), SVGA (800 x 600), XGA (1024 x 768),
or multisync monitor to the CRT port (Figure 2-13) on the back of your
eBuddy.
CRT port
Figure 2-13. The eBuddy’s external CRT port
1. Turn off the power to the eBuddy.
2. Connect the monitor cable to the CRT port on your eBuddy.
3. Connect the monitor’s power cord to AC power.
4. Turn on the external monitor, and then turn on the eBuddy.
5. Select the display output from the Standard CMOS setup
in BIOS setup (see “Standard CMOS setup” on page 62),
or press Fn+F4 to select the display output option you
want (e-Buddy LCD screen only, e-Buddy LCD screen
and external monitor, or external monitor only).
eBuddy User Manual
-34-
2/4/00
ebud.book Page 35 Friday, February 4, 2000 11:11 AM
Using the external CD-ROM drive
Using the external CD-ROM drive
An external CD-ROM drive is available from EarthWalk. You should only use
this CD-ROM drive, which has been specifically designed to operate with your
eBuddy.
Connecting the external CD-ROM drive
To install your external CD-ROM drive:
1. Turn the eBuddy’s power off.
2. Place the CD-ROM drive on a table or other flat surface.
3. Open the cover of the CD-ROM port.
4. Locate the CD-ROM cable and connect the cable to the CD-ROM drive.
5. Connect the cable to the CD-ROM port on the eBuddy.
6. Turn on the eBuddy.
The CD-ROM drive should now function normally.
Figure 2-14. Connecting the CD-ROM drive to the eBuddy
2/4/00
-35-
eBuddy User Manual
ebud.book Page 36 Friday, February 4, 2000 11:11 AM
Chapter 2: Peripherals and accessories
Inserting and removing CD-ROMs
To insert a CD-ROM:
1. Press the insert/eject button as shown in Figure 2-15.
The CD tray will open.
2. Gently pull the CD tray out until you can easily lay a CD in the tray.
Figure 2-15. Opening the CD-ROM tray
3. Place the CD with the labeled side up in the CD tray.
4. Gently push down on the center of the CD until it snaps over the retaining
ring in the center of the drive tray. Be sure that the CD is well-positioned in
the tray.
5. Gently push the CD tray back until it closes.
Do not force the tray to close or you may damage your CD or the CD-ROM
drive.
Manually removing a CD-ROM from the drive
To manually remove a CD-ROM from the drive when the eBuddy’s power is
off:
1. Straighten a paper clip or use a similar piece of wire.
2. Insert the end of the paper clip or wire into the small hole on the front of
the CD-ROM drive, as shown in Figure 2-17.
The CD tray will unlock and pop out slightly.
3. Gently pull out the tray and remove the CD.
eBuddy User Manual
-36-
2/4/00
ebud.book Page 37 Friday, February 4, 2000 11:11 AM
Using the external CD-ROM drive
Figure 2-16. Opening the CD-ROM tray
Figure 2-17. Hole for manually removing a CD-ROM
Disconnecting the external CD-ROM drive
To disconnect the external CD-ROM drive (refer to Figure 2-18):
1. Turn the eBuddy’s power off.
2. Remove the connector from the eBuddy by pressing the clips on the side of
the connector simultaneously, as shown in (1).
3. Holding the clips in, pull the connector gently out of the port, as shown in
(2).
4. Similarly, remove the connector from the CD-ROM drive by pressing the
clips on the side of the connector simultaneously, as shown in (3), and pull
the connector gently out of the port, as shown in (4).
2/4/00
-37-
eBuddy User Manual
ebud.book Page 38 Friday, February 4, 2000 11:11 AM
Chapter 2: Peripherals and accessories
Figure 2-18. Removing the external CD-ROM drive
eBuddy User Manual
-38-
2/4/00
ebud.book Page 39 Friday, February 4, 2000 11:11 AM
Using the external floppy disk drive
Using the external floppy disk drive
An external floppy disk drive is available from EarthWalk. You should only use
this floppy disk drive, which has been specifically designed to operate with
your eBuddy.
FDD (parallel) port
Figure 2-19. The Floppy Disk Drive (FDD) port
Connecting the external floppy disk drive
To install your external floppy disk drive (refer to Figure 2-20):
1. Turn the eBuddy’s power off.
2. Place the floppy disk drive on a table or other flat surface.
3. Open the cover of the floppy disk or I/O port as shown in (1).
4. Locate the floppy disk cable and connect the cable to the floppy disk drive,
as shown in (2).
5. Connect the cable to the floppy disk (parallel) port on the eBuddy, screwing in the two screws on the side of the connector to secure it, as shown in
(3).
6. Turn on the eBuddy.
The floppy disk drive should now function normally.
Disconnecting the external floppy disk drive
To disconnect the external floppy disk drive (refer to Figure 2-21):
1. Turn the eBuddy’s power off.
2. Remove the connector from the eBuddy by unscrewing the screws on
either side of the connector, as shown in (1).
3. Pull the connector gently out of the port, as shown in (2).
2/4/00
-39-
eBuddy User Manual
ebud.book Page 40 Friday, February 4, 2000 11:11 AM
Chapter 2: Peripherals and accessories
Figure 2-20. Connecting the floppy disk drive to the eBuddy
4. Remove the connector from the CD-ROM drive by pressing the clips on the
side of the connector simultaneously, as shown in (3), and pull the connector gently out of the port, as shown in (4)
eBuddy User Manual
-40-
2/4/00
ebud.book Page 41 Friday, February 4, 2000 11:11 AM
Using the external floppy disk drive
Figure 2-21. Removing the external floppy disk drive
2/4/00
-41-
eBuddy User Manual
ebud.book Page 42 Friday, February 4, 2000 11:11 AM
Chapter 2: Peripherals and accessories
Using the stylus
If your eBuddy is equipped with a touch screen, it will have a removable stylus
as shown in Figure 2-22.
Figure 2-22. Removing and replacing the stylus
When replacing the stylus into the housing, push it gently until it clicks firmly
into place.
Do not use a pen or pencil or any sharp item as a substitute for the stylus, or
you may damage the LCD screen.
eBuddy User Manual
-42-
2/4/00
ebud.book Page 43 Friday, February 4, 2000 11:11 AM
3: Hardware installation
This chapter covers the installation and use of the following system hardware:
❑ Memory expansion chips
❑ Battery pack
❑ Hard disk drive (HDD)
-43-
2/4/00
ebud.book Page 44 Friday, February 4, 2000 11:11 AM
Chapter 3: Hardware installation
Memory expansion
Your eBuddy comes with 32 MB of SDRAM installed. You can add one additional 144-pin SO-DIMM memory module.
Memory modules are available from EarthWalk. Contact your sales representative or email EarthWalk at [email protected].
Memory modules are sensitive electronic components that are easily damaged.
We recommend that you obtain the assistance of a computer technician or
someone who is very familiar with the installation of computer hardware.
Installing memory
To install a memory module on the eBuddy (refer to Figure 3-1):
1. Turn off the power to the eBuddy.
2. Remove the AC adapter and the battery pack from the eBuddy (see
“Removing the battery pack” on page 47).
3. Close the display panel and remove any cables connected to the eBuddy.
4. Place the eBuddy upside-down on a flat surface.
5. Remove the two screws from the memory panel cover, as shown in (1).
6. Remove the memory cover, as shown in (2).
Do not allow any liquid or foreign objects to fall into the memory module
housing.
7. Insert the SO-DIMM memory module at approximately 45° to the memory
socket, as shown in (3). Push it gently down toward the motherboard until
it is firmly seated in place, as shown in (4).
8. Replace the memory panel cover as shown in (5).
9. Replace the two screws in the memory panel cover to secure it, as shown in
(6).
Removing memory
To remove a memory module:
1. Turn of the power to the eBuddy.
2. Remove the AC adapter and the battery pack from the eBuddy (see
“Removing the battery pack” on page 47).
eBuddy User Manual
-44-
2/4/00
ebud.book Page 45 Friday, February 4, 2000 11:11 AM
Memory expansion
Figure 3-1. Installing memory
2/4/00
-45-
eBuddy User Manual
ebud.book Page 46 Friday, February 4, 2000 11:11 AM
Chapter 3: Hardware installation
3. Close the display panel and remove any cables connected to the eBuddy.
4. Place the eBuddy upside-down on a flat surface.
5. Remove the two screws from the memory panel cover, as shown in (1) in
Figure 3-1.
6. Remove the memory cover, as shown in (2) in Figure 3-1.
7. Release the latches on each side of the memory module, as shown in (1) in
Figure 3-2.
8. Lift the memory module until it is approximately 45° from the eBuddy, as
shown in (2) in Figure 3-2.
9. Remove the memory module, as shown in (3) in Figure 3-2.
Figure 3-2. Removing memory
eBuddy User Manual
-46-
2/4/00
ebud.book Page 47 Friday, February 4, 2000 11:11 AM
Battery pack
Battery pack
The eBuddy comes equipped with a Lithium-Ion battery pack that will last for
approximately 500 charge and discharge cycles. To increase battery life, enable
the eBuddy’s power management features in BIOS Power Management setup
(see “Power management setup” on page 60) and in the Windows 98 power
management settings (refer to your Windows 98 documentation).
Replacement batteries can be obtained from EarthWalk. Contact your sales
representative or email EarthWalk at [email protected].
Removing the battery pack
To remove the battery pack:
1. Turn off the eBuddy’s power and disconnect the AC adapter.
2. Slide the two latches outward at the same time (see Figure 3-3).
3. Remove the battery pack.
Be careful not to short the battery pack connector pins.
Installing the battery pack
To install the battery pack:
1. Insert the battery pack at the front of the eBuddy, as shown in Figure 3-4.
The battery pack should seat comfortably in place.
2. Slide the two latches in to lock the battery pack in place.
Charging the battery pack
The battery pack will charge continuously when it is installed in the eBuddy
and the AC power adapter is connected. If the power is turned off, the battery
pack will take approximately two hours to charge fully. When the power is on,
the charging process will take approximately four hours. These times will be
shorter if the battery pack is already partially charged.
The battery fast charge LED (see “Battery charge LED” on page 19) will be on
when the battery pack is fast charging, and off when the battery pack is in
trickle-charge mode.
2/4/00
-47-
eBuddy User Manual
ebud.book Page 48 Friday, February 4, 2000 11:11 AM
Chapter 3: Hardware installation
Figure 3-3. Removing the battery pack
You should only attempt to charge the battery pack at ambient temperatures
between 41°F (5°C) and 104°F (40°C).
eBuddy User Manual
-48-
2/4/00
ebud.book Page 49 Friday, February 4, 2000 11:11 AM
Battery pack
Figure 3-4. Installing a battery pack
2/4/00
-49-
eBuddy User Manual
ebud.book Page 50 Friday, February 4, 2000 11:11 AM
Chapter 3: Hardware installation
Hard disk drive (HDD) installation
You should only use the hard disk drives that have been specially manufactured
for your eBuddy. When installing or removing a hard disk drive, we recommend that you obtain the assistance of a computer technician or someone who
is very familiar with the installation of computer hardware.
Removing the HDD
To remove the HDD from your eBuddy:
1. Turn off the power to your eBuddy.
2. Disconnect the AC power adapter and the battery pack.
3. Remove the screws inside the battery compartment, as shown in
Figure 3-5.
Figure 3-5. Removing the screws in the battery compartment
4. Close the LED screen and place the eBuddy, upside down, on a clean flat
surface.
5. Remove the four screws in the HDD cover plate, as shown in (1) in
Figure 3-6.
6. Remove the cover plate by lifting it off as shown in (2).
eBuddy User Manual
-50-
2/4/00
ebud.book Page 51 Friday, February 4, 2000 11:11 AM
Hard disk drive (HDD) installation
7. Remove the HDD as shown in (3).
Figure 3-6. Removing the hard disk drive
Installing the HDD
To install a hard disk drive:
1. Connect the new HDD to the HDD interface as shown in (1) in Figure 3-7.
2. Place the HDD cover plate over the HDD as shown in (2) and (3).
3. Replace the screws, securing the HDD cover plate as shown in (4).
4. Fasten the two screws in the battery compartment, as shown in Figure 3-8.
5. Re-install the battery pack (see “Installing the battery pack” on page 47).
2/4/00
-51-
eBuddy User Manual
ebud.book Page 52 Friday, February 4, 2000 11:11 AM
Chapter 3: Hardware installation
Figure 3-7. Installing a hard disk drive
Figure 3-8. Replacing the screws in the battery compartment
eBuddy User Manual
-52-
2/4/00
ebud.book Page 53 Friday, February 4, 2000 11:11 AM
4: Software
Your eBuddy comes with the following (software) on diskettes and/or CDROM and is described in this chapter. This chapter also provides you with procedures for setting up your IrDA infrared port to function with Windows 98.
Device drivers
You will probably never need to install these drivers. They are included as a
backup in case you need to restore a damaged driver, program, or other system
software file.
❑ Video drivers1
❑ Sound card drivers1
❑ Modem driver1
❑ PIIX4 driver2
❑ CD-ROM Driver1
❑ Flash BIOS upgrade utility
Programs
❑ PC_Cillin 98 virus protection software1
❑ Suspend To Disk utility
1. This software is pre-installed on your eBuddy.
2. Not to be used with Windows 98
-53-
2/4/00
ebud.book Page 54 Friday, February 4, 2000 11:11 AM
Chapter 4: Software
Device Drivers
This section describes the device drivers that accompany your eBuddy. You
will probably never need to use them, but they are made available to you in
case of an emergency, such as a hard disk failure. Contact EarthWalk technical
support for additional information.
Insert the CD-ROM containing these drivers to view instructions for loading
them. The CD-ROM will run automatically, displaying a menu for each driver.
Click on the appropriate button to obtain instructions for loading the driver.
If you need to load the CD-ROM driver itself, see “CD-ROM driver” on
page 55.
Video, sound, and modem drivers
These drivers are pre-installed on your eBuddy. They are also provided on CDROM in case you need to re-install them for any reason. You must have Windows 98 installed prior to installing or re-installing these drivers.
PIIX4 driver
This driver is not needed for Windows 98. It is provided in case you prefer to
use the Windows 95 operating system. It provides a patch that allows Windows
95 to use the features of the new IDE controllers in the eBuddy.
Flash BIOS upgrade utility
This utility is used to update the Flash BIOS Read-Only Memory (ROM). Your
eBuddy comes with the newest release already installed. The only time you
would need to use this software is in the event that EarthWalk releases an
upgrade to the ROM.
eBuddy User Manual
-54-
2/4/00
ebud.book Page 55 Friday, February 4, 2000 11:11 AM
CD-ROM driver
CD-ROM driver
This driver is provided in case you need to re-load your operating system (for
example, if you install a new hard disk). In such a case, you will need to be able
to access the CD-ROM drive.
To install CD-ROM drivers:
1. Turn off the power to the eBuddy.
2. Connect the external floppy disk drive to the eBuddy as described in “Connecting the external floppy disk drive” on page 39.
3. Connect the external CD-ROM drive to the eBuddy as described in “Connecting the external CD-ROM drive” on page 35.
4. Turn on the power to the eBuddy and boot up the system into command
mode or DOS.
5. Insert the CD-ROM drivers diskette into the floppy disk drive.
6. Run install.exe from the diskette. You can run this program:
from command mode (DOS): type install at the A: prompt and press
Enter.
7. Accept the default or recommended settings presented by the program
installation screen, and click OK to run the program.
The program will install device driver in your config.sys file and place an
entry in your autoexec.bat file to execute the MSCDEX.EXE program
when the eBuddy boots up. MSCDEX is a Microsoft program that assigns
a drive letter to the CD-ROM drive. It must be present on the system at
boot-up in order for the computer to access the CD-ROM drive.
2/4/00
-55-
eBuddy User Manual
ebud.book Page 56 Friday, February 4, 2000 11:11 AM
Chapter 4: Software
System Software
This section describes the additional software that accompanies your eBuddy.
Insert the CD-ROM containing these applications to view instructions for loading them. The CD-ROM will run automatically, displaying a menu for each
driver. Click on the appropriate button to obtain instructions for loading the
program.
PC_Cillin 98
This antivirus program is included with your system and is pre-installed. You
should register the program with the program manufacturer to ensure that you
continue to receive the latest versions of this software.
Suspend to disk
The Suspend to disk utility is required to set up and use the Suspend To Disk
functions described in Chapter 5, “BIOS setup.” We do not recommend installing this utility unless you are very familiar with computer hardware setup. It
requires you to have unpartitioned space on your hard drive. Since the eBuddy
is shipped with all space on the hard drive in use by the C: partition, installation
of this feature would require you remove the operating system, re-partition the
hard drive, and re-install the operating system. Contact EarthWalk technical
support if you wish to obtain further information or assistance with installing
this software.
eBuddy User Manual
-56-
2/4/00
ebud.book Page 57 Friday, February 4, 2000 11:11 AM
5: BIOS setup
The eBuddy’s BIOS controls many of the computer’s functions.
Some of these are referred to in other chapters of this manual. You
can enter the BIOS setup program by pressing the Delete key
when the system is booting up. The Delete key is in the lower right
corner of the keyboard on your eBuddy.
Use the features in BIOS setup with care. Write down the original settings
before you make any changes, in case you need to recover these settings.
You will see the message Press DEL to enter setup at the bottom of the
screen when the system first starts to boot up. You must press the Delete key
while this message is still being displayed.
When you enter the setup program, you will see the CMOS Setup Utility Main
Screen shown in Figure 5-1. Use the arrow keys to highlight any menu item
and press Enter to select it.
Figure 5-1. CMOS Setup Utility – Main Screen
-57-
2/4/00
ebud.book Page 58 Friday, February 4, 2000 11:11 AM
Chapter 5: BIOS setup
Using the BIOS/CMOS setup utility
Use the following keys to navigate through and choose setup utility functions.
Each panel in the setup utility includes a legend that describes these keys and
their functions.
Key
Function
Escape
Press to exit a panel in the setup utility and
return to the Main Screen. Press Escape from
the Main Screen to exit the setup utility. There
is also a menu item on the Main Screen to exit
without saving (“Exit without saving” on
page 83).
F10
Press this key to save and exit the setup utility
program. There is also a menu item on the Main
Screen to save and exit (see “Save and exit
setup” on page 82). You can use either method.
Arrow Keys
Use the left, right, up, and down arrow keys to
navigate through the panels and highlight menu
choices.
Change color
Use Shift + F2 to change the color of the display for the BIOS/CMOS setup utility.
Help
Press F1 to obtain more information about certain entries in the setup menu
Modify values
Use the PgUp and PgDn keys to modify items.
eBuddy User Manual
-58-
2/4/00
ebud.book Page 59 Friday, February 4, 2000 11:11 AM
Using the BIOS/CMOS setup utility
Key
Function
Old Values
Use F5 to load old values for the panel.
Load setup defaults
Use the F7 key to load the default values for the
panel.
2/4/00
-59-
eBuddy User Manual
ebud.book Page 60 Friday, February 4, 2000 11:11 AM
Chapter 5: BIOS setup
CMOS setup utility – function summary
You can reach any of the following functions from the CMOS Main Screen:
Standard CMOS setup
Allows you to set several basic eBuddy system parameters including the system time and date, and disk drive parameters. See “Standard CMOS setup” on
page 62 for more information.
BIOS features setup
BIOS features allow you to set anti-virus protection, enable the cache, determine boot sequence, Typematic settings, and other special functions. See
“BIOS features setup” on page 63 for more information.
Chipset features setup
The functions on this panel are primarily intended to change DRAM and BIOS
parameters. See “Chipset features setup” on page 67 for more information.
Power management setup
Allows you to set power management functions for the eBuddy. See “Power
management setup” on page 71 for more information.
PNP/PCI configuration
Allows you to set PNP/PCI parameters. See “PNP/PCI configuration” on
page 74 for more information.
Load setup defaults
This function loads BIOS default settings. When you choose this item on the
Main Screen, you are prompted to Load SETUP defaults (Y/N)? Choose Y
for yes or N for no, and press Enter.
eBuddy User Manual
-60-
2/4/00
ebud.book Page 61 Friday, February 4, 2000 11:11 AM
CMOS setup utility – function summary
Integrated peripherals
This panel allows you to set IDE hard drive parameters and programmed I/O
features. See “Integrated peripherals” on page 77 for more information.
Password setting
This function allows you to set a supervisor or a user password. For more information, see “Password setting” on page 80.
IDE HDD auto detection
This feature allows you to automatically detect and configure your hard disk
parameters. This BIOS includes this feature in case you are unsure of the
proper settings for your hard drive. See “IDE HDD auto detection” on page 81
for more information.
Save & exit setup
Allows you to save the changes you have made in BIOS setup and continue
booting up the system. When prompted to SAVE to CMOS and EXIT (Y/
N)? Press Y then Enter to save your changes. The system will continue the
startup (boot-up) sequence. Press N then Enter to return to the BIOS Setup
Utility Main Screen.
Exit without saving
Similar to Save & exit setup, except that your changes will not be saved. When
prompted to Quit Without Saving (Y/N)? Press Y then Enter to discard
your changes. The system will continue the startup (boot-up) sequence. Press
N then Enter to return to the BIOS Setup Utility Main Screen.
2/4/00
-61-
eBuddy User Manual
ebud.book Page 62 Friday, February 4, 2000 11:11 AM
Chapter 5: BIOS setup
Standard CMOS setup
Figure 5-2. Standard CMOS setup panel
The Standard CMOS setup panel is shown in Figure 5-2. The Standard CMOS
setup allows you to set the time and date for your system hard disk parameters,
floppy disk drive parameters, and selected other parameters.
eBuddy User Manual
-62-
2/4/00
ebud.book Page 63 Friday, February 4, 2000 11:11 AM
BIOS features setup
BIOS features setup
Figure 5-3. BIOS features setup panel
The BIOS features setup panel is shown in Figure 5-3. It includes the following
functions:
Anti-Virus Protection
When enabled, during and after the system boots up, any attempt to write to the
boot sector or partition table of the hard disk drive will halt the system and the
following error message will appear:
!WARNING!
Disk boot sector is to be modified
Type “Y” to accept write or “N” to abort write
Award Software, Inc.
This is intended to alert you and provide you with an opportunity run thirdparty anti-virus software.
The options for this setting are Enabled and Disabled.
CPU Internal Cache
When enabled, the CPU internal cache can speed up memory access. The
options for this setting are Enabled and Disabled.
2/4/00
-63-
eBuddy User Manual
ebud.book Page 64 Friday, February 4, 2000 11:11 AM
Chapter 5: BIOS setup
External Cache
When enabled, the on-board 512K L2 cache will be used. The options for this
setting are Enabled and Disabled.
Quick Power On Self Test
This speeds up Power On self Test (POST) after you turn the power on to the
eBuddy. If it is set to Enable, the BIOS will shorten or skip some checks during
POST. The options for this setting are Enabled and Disabled.
Boot Sequence
This item determines which drive the computer will boot from (A or C).
Boot Up NumLock Status
This item determines whether NumLock is on or off on boot-up. When NumLock is on, the numeric keypad is enabled. See the description of the Num
Lock key on page 12 for more information.
Boot Up System Speed
The options for this setting are High and Low.
Gate A20 Option
This item allows you to choose how the A20 gate is handled. The A20 gate is
used to address memory above 1 MB. Initially, the A20 gate was handled from
the keyboard. Today, although keyboards still provide this support, it is more
common and much faster for the system chipset to provide support for the A20
gate. The options are Normal or Fast.
Typematic Rate Setting
This setting determines if the Typematic rate will be used. When disabled,
holding down a key on the keyboard continuously will only send the key character or function to the system one time. The BIOS will only report that the key
is down. When the Typematic rate is enabled, the BIOS will report that the key
is down, but if the key remains down, it will report that the key has been
pressed repeatedly. You could use this feature to accelerate cursor movements
eBuddy User Manual
-64-
2/4/00
ebud.book Page 65 Friday, February 4, 2000 11:11 AM
BIOS features setup
with the arrow keys, for example. The options for this setting are Enabled and
Disabled.
Typematic Rate (Chars/Sec)
When the Typematic rate is enabled, this item allows you to choose the rate at
which the keystrokes will be repeated. The options for this setting are 6, 8, 10,
12, 15, 20, 24, or 30 characters per second.
TypeMatic Delay (Msec)
When the Typematic rate is enabled, this item allows you to choose the delay
from the moment the key is depressed to the time when the repeating function
begins. The options for this setting are 250, 500, 750, or 1000 Msec.
Security Option
This option allows you to limit access to your eBuddy system as a whole, or
only to the BIOS setup utility. Your choice in this option will not assign a password, but determines whether the password you set elsewhere (see page 80)
will apply to the system or to setup.
The options for this setting are System and Setup. See “Password setting” on
page 80 for more information about passwords.
PS/2 mouse function control
Use this item to set up an external PS/2 mouse.
PCI/VGA Palette Snoop
This item determines if MPEG ISA/VESA/VGA cards will function with PCI/
VGA or not. The options for this setting are Enabled and Disabled.
OS Select for DRAM > 64MB
This item allows you to access memory over 64MB in OS/2. The options for
this setting are Non-OS/2 and OS/2.
2/4/00
-65-
eBuddy User Manual
ebud.book Page 66 Friday, February 4, 2000 11:11 AM
Chapter 5: BIOS setup
Video BIOS Shadow
This option determines whether video BIOS is copied to RAM. Enabling this
option will increase video speed. The options for this setting are Enabled and
Disabled.
eBuddy User Manual
-66-
2/4/00
ebud.book Page 67 Friday, February 4, 2000 11:11 AM
Chipset features setup
Chipset features setup
Figure 5-4. Chipset features setup panel
The Chipset features setup panel is shown in Figure 5-4. It includes the following functions:
Auto Configuration
Sets pre-defined values for DRAM, cache, and timing according to the CPU
type and system clock. The options for this setting are Enabled and Disabled.
When this item is enabled, the pre-defined items can not be modified.
DRAM Timing
DRAM timing is controlled by DRAM timing registers. The timings programmed into this register depend on the system design. Slower rates may be
necessary for certain system designs to support loose layouts or slower memory. The options are 60ns and 70ns.
DRAM Leadoff Timing
This item sets the number of CPU clock cycles allowed before reads and writes
to DRAM are performed:
2/4/00
-67-
eBuddy User Manual
ebud.book Page 68 Friday, February 4, 2000 11:11 AM
Chapter 5: BIOS setup
DRAM Read Burst (EDO/FP)
This sets the timing for burst mode reads from two different DRAM (EDO/
FPM). Burst read and write requests are generated by the CPU in four separate
parts. The first part provides the location within the DRAM where the read or
write is to take place. The remaining three parts provide the actual data. The
lower the timing numbers, the faster the system will address memory:
x222/x333
Read DRAM (EDO/FPM) timings are 2-2-2/3-3-3
x333/x444
Read DRAM (EDO/FPM) timings are 3-3-3/4-4-4
DRAM Write Burst Timing
This sets the timing for burst mode writes from DRAM. Burst read and write
requests are generated by the CPU in four separate parts. The first part provides
the location within the DRAM where the read or write is to take place. The
remaining three parts provide the actual data. The lower the timing numbers,
the faster the system will address memory:
x222
Write DRAM timings are 2-2-2-2
x333
Write DRAM timings are 3-3-3-3
Fast EDO Lead Off
The default value is Disabled.
Refresh RAS# Assertion
The options are 4 Clks or 5 Clks.
Fast RAS to CAS Delay
When DRAM is refreshed, both rows and columns are addressed separately.
This setup item allows you to determine the timing of the transition from Row
Address Strobe (RAS) to Column Address Strobe (CAS). Options are as follows:
3
Three CPU clock delay
2
Two CPU clock delay
eBuddy User Manual
-68-
2/4/00
ebud.book Page 69 Friday, February 4, 2000 11:11 AM
Chipset features setup
DRAM Page Idle Timer
The options are 2, 4, 6, or 8 Clks.
DRAM enhanced Paging
The options for this setting are Enabled and Disabled.
Fast MA to RAS# Delay
The options for this setting are 1 Clks or 2 Clcks.
SDRAM (Cas Lat/RAS-to-CAS)
Do not change the default value of this setting unless you install SDRAM that
requires changes. The options are 2/2 or 3/3. Contact EarthWalk technical support for more information.
SDRAM Speculative Read
If you set Enable, the CPU will save the data in DRAM in speculative mode. If
an error occurs, the CPU will cancel the function, as some operating systems
do not support this function. The options are Enable or Disable, and the default
is Disable.
System (Video) BIOS Cacheable
This setting determines whether the area of RAM used by the system (Video)
BIOS can be cached.
8 bit I/O Recovery Time
The timing of the 8-bit ISA card. This item determines the programmable
recovery time into back-to-back I/O cycles.
16 Bit I/O Recovery Time
The timing of the a6-bit ISA card.
2/4/00
-69-
eBuddy User Manual
ebud.book Page 70 Friday, February 4, 2000 11:11 AM
Chapter 5: BIOS setup
Memory Hole at 15M-16M
This function keeps the 15M-16M address for the ISA interface.
PCI 2.1 Compliance
The options for this setting are Enabled and Disabled. You should always
enable this function on the eBuddy.
eBuddy User Manual
-70-
2/4/00
ebud.book Page 71 Friday, February 4, 2000 11:11 AM
Power management setup
Power management setup
Figure 5-5. Power Management setup panel
The Power management setup panel is shown in Figure 5-5. It includes the following functions:
Power Management
This item allows you to select pre-set Minimum or Maximum power management settings, changing the other items in the panel to recommended pre-set
settings. You can also disable power management, or set it to User Define.
When you select User Define, the power management setting will reflect the
settings you choose elsewhere in the panel.
PM Control by APM
Choose Yes to enable APM. APM will then control the function of power management. Choose No to have the BIOS ignore APM when initiating the power
management mode.
Video Off After
The options for this setting are Suspend or Standby.
2/4/00
-71-
eBuddy User Manual
ebud.book Page 72 Friday, February 4, 2000 11:11 AM
Chapter 5: BIOS setup
HDD Power Down
This setting will determine how many minutes elapse from the last keyboard or
mouse input until the HDD powers down. You can set the delay from 1 to 15
minutes, or disable HDD Power Down altogether.
MODEM Use IRQ
You can only change the value of this setting when Power Management is set
to User Define. Options for this setting are NA, 3, 4, 5, 7, 9, 10, or 11.
Doze Mode
When enabled, the CPU clock will run at a slower speed to conserve power,
following a delay of the specified number of seconds when no input activity
has occurred. All other devices will run at normal speed. The options for this
setting are 8, 12, 16, 20, 24, or 28 seconds. The setting can also be Disabled.
Standby Mode
When enabled, the hard disk drive and video will be turned off to conserve
power, following a delay of one minute to 1 hour (per your selection) when no
input activity has occurred. All other devices will run at normal speed. The setting can also be Disabled.
Suspend Mode
When enabled, the entire system will be turned off to conserve power, following a delay of one minute to 1 hour (per your selection) when no input activity
has occurred. The setting can also be Disabled.
Suspend Mode Option
The options are Auto, STD, and STR. STD invokes Suspend to Disk mode;
STR invokes Suspend to RAM mode. When you close the eBuddy’s LCD
screen, the system is automatically placed in STD mode.
Resume by Alarm
Use this setting to wake the system upon alarm. The options for this setting are
Enabled and Disabled.
eBuddy User Manual
-72-
2/4/00
ebud.book Page 73 Friday, February 4, 2000 11:11 AM
Power management setup
Resume by Ring
When a message comes in by fax or E-mail, the system will be awakened
immediately. The options for this setting are Enabled and Disabled.
2/4/00
-73-
eBuddy User Manual
ebud.book Page 74 Friday, February 4, 2000 11:11 AM
Chapter 5: BIOS setup
PNP/PCI configuration
Figure 5-6. PNP/PCI configuration
The Award Plug and Play BIOS is capable of automatically configuring Windows 95 or 98 Plug and Play-compatible devices. This function only works
with Windows 98. The options are Auto or Manual.
The PNP/PCI configuration panel is shown in Figure 5-6.
Auto is the normal setting for Windows 98. If you select Manual, the following
items will appear in this panel:
IRQ - 3/4/5/7/9/10/11/12/14/15, DMA - 0/1/3/5/6/7
This item allows you to determine the IRQ/DMA assigned to the ISA bus and
is not available to any PCI slot.
Reset Configuration Data
This item allows you to reset configuration data. The options for this setting are
Enabled or Disabled. The default is Disabled.
PCI IDE IRQ Map to
This item allows you to configure your system to the type of IDE disk controller in use. By default, setup assumes that your controller is an Industry Standard Architecture (ISA) device rather than a PCI controller.
eBuddy User Manual
-74-
2/4/00
ebud.book Page 75 Friday, February 4, 2000 11:11 AM
PNP/PCI configuration
If you have a PCI controller, change this setting to specify which slot has the
controller and which PCI interrupt (A, B, C, or D) is associated with the connected hard drives.
Remember that this setting refers to the hard disk drive itself, rather than individual partitions. Since each IDE controller supports two separate hard drives,
you can select the INT# for each. You will note that the primary has a lower
interrupt than the secondary as described in lot x using INT# above.
Selecting PCI Auto allows the system to automatically determine how your
IDE disk system is configured.
2/4/00
-75-
eBuddy User Manual
ebud.book Page 76 Friday, February 4, 2000 11:11 AM
Chapter 5: BIOS setup
Load setup defaults
This function loads BIOS default settings. When you choose this item on the
Main Screen, you are prompted to Load SETUP defaults (Y/N)? Choose Y
for yes or N for no, and press Enter.
eBuddy User Manual
-76-
2/4/00
ebud.book Page 77 Friday, February 4, 2000 11:11 AM
Integrated peripherals
Integrated peripherals
Figure 5-7. Integrated peripherals panel
The integrated peripherals panel is shown in Figure 5-7.
IDE HDD Block Mode
This item allows you to set your hard disk controller to use the fast block mode
to transfer data to and from your HDD. The options for this setting are Enabled
(IDE controller uses block mode) or Disabled (IDE controller uses standard
mode).
IDE Primary Master PIO
IDE Primary Slave PIO
IDE Secondary Master PIO
IDE Secondary Slave PIO
IDE hard disk drive controllers can support up to two separate hard disk drives.
These drives have a master/slave relationship determined by the cabling configuration attaching them to the controller. Your system supports two IDE controllers — a primary and a secondary controller — so you can install up to four
separate hard disk drives.
PIO means Programmed Input/Output. Rather than have the BIOS issue a
series of commands to transfer data to or from the disk drive, PIO allows the
BIOS to tell the controller what it wants and then let the controller and the CPU
2/4/00
-77-
eBuddy User Manual
ebud.book Page 78 Friday, February 4, 2000 11:11 AM
Chapter 5: BIOS setup
perform the task by themselves. This is simpler and more efficient, as well as
faster.
Your system supports five modes, numbered from 0 (the default) to 4, which
differ primarily in their timing. When Auto is selected, the BIOS will select the
best available mode. This applies to all of these setup items.
IDE Primary Master UDMA
IDE Primary Slave UDMA
IDE Secondary Master UDMA
IDE Secondary Slave UDMA
These items allow you to decide if you want to use Ultra DMA. The options fro
these settings are Auto and Disabled.
On Chip Primary PCI IDE
When you choose Enabled, the following two additional items will appear:
•
•
IDE Primary Master PIO
IDE Primary Slave PIO
There are six choices for each item: Auto, mode 0, 1, 2, 3, 4.
There are two built-in IDE controllers in your system, and both of them operate
on the PCI bus. You can choose Enabled to enable the primary controller.
On Chip Secondary PCI IDE
When you choose Enabled, the following two additional items will appear:
•
•
IDE Secondary Master PIO
IDE Secondary Slave PIO
There are six choices for each item: Auto, mode 0, 1, 2, 3, 4.
There are two built-in IDE controllers in your system, and both of them operate
on the PCI bus. You can choose Enabled to enable the Secondary controller.
USB Keyboard Support
You can enable USB keyboard support with this item.
eBuddy User Manual
-78-
2/4/00
ebud.book Page 79 Friday, February 4, 2000 11:11 AM
Integrated peripherals
Onboard FDC Controller
This item enables the floppy disk drive controller on the motherboard. The
options for this setting are Enabled and Disabled.
Onboard Serial port 1 and 2
This option enables serial port 1/2 on the motherboard and specifies the base I/
O port address for serial port 1/2.
UART1 / UART2 Mode
UART1 mode can be set to COM1 or Touch panel.
UART2 mode can be set to Modem, Sharp IR, IrDA SIR, and IrDA FIR.
Onboard Parallel Port
This item enables the parallel port on the motherboard and specifies the parallel port base I/O port address.
Parallel Port Mode
The options for this setting are Compatible, EPP, and ECP.
2/4/00
-79-
eBuddy User Manual
ebud.book Page 80 Friday, February 4, 2000 11:11 AM
Chapter 5: BIOS setup
Password setting
You can set two passwords:
•
•
Setup password – controls access to the BIOS setup utility.
System password – controls access to the entire system
You can only set one password at a time using this setting. Which password is
set is determined by the settings in BIOS features setup (see “Security Option”
on page 65).
Setup password
If you set a Setup password, this will set the password you entered and secure
access to the BIOS setup utility. When a password has been enabled you will
be prompted to enter it every time you try to enter BIOS setup. This prevents
unauthorized people from changing any part of your system configuration.
System password
If you set a System password, it will require the user to enter the password
before the system will boot up.
Setting the password
The procedure is the same whether you are setting a Setup password or System
password.
When you choose this item on the CMOS Setup Utility Main Screen, you are
prompted to Enter Password:
1. Type a password up to eight characters in length, and press Enter.
2. When prompted to Confirm Password:, re-type the password and press
Enter.
eBuddy User Manual
-80-
2/4/00
ebud.book Page 81 Friday, February 4, 2000 11:11 AM
IDE HDD auto detection
IDE HDD auto detection
When you select this feature, the BIOS will automatically detect settings for
your HDD. You will be prompted to accept the settings or not.
Type Y to accept the settings, or N to cancel auto detection without saving the
settings.
Once you accept or reject the auto detection settings, auto detection will proceed to the next hard drive in the system, if present.
2/4/00
-81-
eBuddy User Manual
ebud.book Page 82 Friday, February 4, 2000 11:11 AM
Chapter 5: BIOS setup
Save and exit setup
After changing BIOS settings, you can select this item to save the new settings
and continue the bootup process. You can also do this by pressing the F10 key
(see “Using the BIOS/CMOS setup utility” on page 58).
When prompted, press Y to save the settings and exit the setup utility. Press N
to cancel the operation and continue editing the BIOS settings.
eBuddy User Manual
-82-
2/4/00
ebud.book Page 83 Friday, February 4, 2000 11:11 AM
Exit without saving
Exit without saving
After changing BIOS settings, you can select this item to exit the setup utility
without saving any changes you made, and continue the bootup process. You
can also do this by pressing the Escape key (see “Using the BIOS/CMOS setup
utility” on page 58).
When prompted, press Y to discard the settings and exit the setup utility. Press
N to cancel the operation and continue editing the BIOS settings.
2/4/00
-83-
eBuddy User Manual
ebud.book Page 84 Friday, February 4, 2000 11:11 AM
Chapter 5: BIOS setup
eBuddy User Manual
-84-
2/4/00
ebud.book Page 85 Friday, February 4, 2000 11:11 AM
Appendix A: eBuddy specifications
CPU Pentium processor with MMX technology, 266 Mhz
Mainboard Chipset Intel 430TX Chipset (MTXC + PIIX4)
Display Chipset NeoMagic Nm2097 controller
LCD 8.2” SCC (Super Clear Color) color LCD
Resolution: 640x 480(VGA)
Contrast ratio: 50:1
8.4” TFT 256K color LCD
Resolution: 800 x 600 (SVGA)
Contrast ratio: 150:1
Primary Cache 32 KB CPU internal cache
Secondary Cache 512 KB Synchronous Burst Pipeline
ROM 256 KB, 150ns Flash ROM
RAM 32 MB SDRAM on board
One 144-pin SO-DIMM socket for RAM expansion
Maximum expansion: 96 MB including onboard 32 MB
Video RAM 1.2 MB
HDD 9mm height, 2.5” IDE 3.2 GB HDD
FDD One external 3.5” 1.44 MB FDD Module
CD-ROM One optional External 24x CD-ROM Module
Modem (Optional) built-in V.90, 56.6K software modem
Audio 16-bit stereo FM synthesizer
Full duplex operation
Sound Blaster Game compatible
Built-in 3D enhanced controller
Supports two speakers and one microphone
USB port One host USB port
Infrared port One IrDA 1.1-compatible FIR port
PCMCIA Slot One PCMCIA type-II slot with ejector
PCMCIA 2.1-compatible
Cardbus and ZV -port
Serial (COM) Port One DB9 RS232C serial port
Parallel port / FDD port One DB25 parllel port with EPP/ECP or auto switch to FDD
port
FDD/CD-ROMport Connects to the external FDD or CD-ROM module specific to
the eBuddy
-85-
2/4/00
ebud.book Page 86 Friday, February 4, 2000 11:11 AM
Appendix A: eBuddy specifications
VGA Monitor port One DB15 Monitor port for an external VGA, SVGA, or
XGA monitor
Battery 10.8V, 1500mAH Li-Ion removable Battery Pack
Battery pack built-in batery smart bus gauge
Charger System built-in Li-Ion battery fast charger with charge LED
indicator
AC power adapter AC input 100V AC - 24- V AC, 50/60 Hz
DC output 18V DC @ 2.5 amps
Dimensions 259mm(l) x 170mm(W) x 31mm(H)
Weight 1.3 Kg
eBuddy User Manual
-86-
2/4/00
ebud.book Page 87 Friday, February 4, 2000 11:11 AM
Index
A
AC power adapter 3, 5, 6, 8
AC power cord 6
access point 23
accessories, optional 3
Alt key 14
antenna 22
antivirus program 56
anti-virus protection 63
arrow keys 58
CD-ROM port 20
CD-ROMs
inserting and removing 36
removing manually 36
change color 58
Chipset features setup 60, 67
CMOS Setup Utility Main
Screen 57
COM port 18, 20, 21, 33
Control Panel 23
CRT port 20, 34
Ctrl key 14
B
backlighting 15, 16
Backspace key 13
battery charge LED 19, 47
battery pack 5, 6, 43, 47
charge time 19
charging 47
disposal of 5
installing 47
obtaining replacement
batteries 4, 47
recharge cycles 5
removing 47
temperature range to charge
in 48
BIOS features setup 60, 63
BIOS setup program 14, 18, 57–83
using 58
D
Default Channel 23
Delete key 14, 57
device drivers 54
E
EarthWalk 4
http://www.earthwalk.com 4
[email protected] 3, 4, 21,
44, 47
[email protected] 4
Enter key 14
Escape key 13, 58
ESSID 23
Exit without saving 61, 83
external monitor 15, 21
connecting 34
external mouse 33
external pointing device 18
C
Caps Lock key 12
Caps Lock LED 12, 19
carrying case 3
CD-ROM drive, external 3, 5, 21
cable for 3
connecting 35
disconnecting 37
driver installation 55
using 35–38
eBuddy User Manual
F
F1 key (help) 58
F10 key (exit setup utility) 58
F11 key 15
F12 key 15
F5 key (old values) 59
F7 key (load setup defaults) 59
-87-
ebud.book Page 88 Friday, February 4, 2000 11:11 AM
Index
M
memory
installing 44
obtaining memory modules 44
removing 44
memory expansion 43, 44–46
Menu key 13
Modem 21
modem 30
modem driver 54
modem telephone cord
installing 30
removing 30
monitor, external 15
Flash BIOS upgrade utility 54
floppy disk drive, external 3, 5, 21
cable for 3
connecting 39
disconnecting 39
using 39–41
Function (Fn) key 13
G
graphic user interface 17
H
hard disk drive (HDD) 43, 50
installing 51
removing 50
N
NetWize 22
NetWize System Administrator 22
Network Type 23
Num Lock key 12
Num Lock LED 12, 19
I
IDE HDD auto detection 61, 81
Integrated peripherals 61, 77
Integrated wireless card 21, 22
configuring 22
integrated wireless card 22
IrDA infrared port 20, 21, 25
installation for
Windows 98 25–28
O
optional accessories 3
P
Page Down key 16
Page Up key 16
Parallel port 21
parallel port 33
Parallel port/FDD port 20
password 61, 65
Pause key 14
PC_Cillin 98 56
PgDn key 58
PgUp key 58
PIIX4 driver 54
PNP/PCI configuration 60, 74
pointing device, external 18
pointing stick 17
ports 20
K
keyboard 11–17
L
LANEscape/WL2432 PCMCIA
Adapter 23
LCD panel
opening and closing 6, 8
LCD screen 3, 5, 15
backlighting 15, 16
protective covering 3, 6
LED indicators 19
Load setup defaults 60, 76
-88-
eBuddy User Manual
ebud.book Page 89 Friday, February 4, 2000 11:11 AM
Index
power
turning off 9
turning on 9
power cord 3
Power management setup 60, 71
Power/Battery low LED 19
stylus 21, 42
using 42
Super Clear Color (SCC) display 16
suspend LED 19
suspend to disk 56
suspend to disk mode 17
suspend to RAM mode 16
System Administrator 22
system software and drivers 3
R
repairing the eBuddy 5
RTS Threshhold 23
T
Tab key 13
Task Bar 13
technical support 4
thunderstorm, precautions during 5
touch screen 42
trickle-charge mode 19, 47
Typematic feature 64, 65
S
safety 5
Save & exit setup 61
Save and exit setup 82
Scroll Lock key 12
Scroll Lock LED 12, 19
serial (COM) port 18, 20, 21, 33
setting up the eBuddy 6
Shift key 13
shipping the computer 5
SmartCart 22
software 53–56
sound driver 54
speaker volume 15
speaker, internal 15
Standard CMOS setup 34, 60, 62
Start key 13
stick pointer
buttons 17
eBuddy User Manual
U
Universal Serial Bus (USB) port 18,
20, 21, 29
unpacking the eBuddy 3
user manual 3
V
video driver 54
volume, speaker 15
W
Windows 98 13, 17, 25, 26, 53, 54
-89-