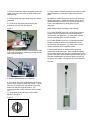
1
The Edelbrock/QwikSilver Carburetor has four (4)
adjustments:
1. IDLE SPEED: Mechanical, does not affect air/fuel
mixture.
2. LOW-MID RANGE: Adjustment on top of slide will
raise or lower the needle.
3. MID-FULL RANGE: Requires a needle change.
There are NO jets in this carburetor to change!
4. ACCELERATOR PUMP: For Pumper Series
carburetors only. This will affect the throttle response at
low rpm’s.
should be used for starting only when motor is cold. On
some occasions a cold motor may fire without the use of
the enrichener.
KICK START MOTORS
1. Turn enrichener lever to 6:00 or 12:00 (see figure 1).
THROTTLE CABLE REQUIREMENTS
NOTE: Most QwikSilver carburetors require the use of a
two cable (push-pull) throttle assembly and cables. If
your kit was supplied with dual cables, you must be
certain both cables are used. See your supplemental
instructions for more details.
CARBURETOR INSTALLATION
See supplement supplied with carburetor.
NOTE: QwikSilver recommends consulting an
authorized service manual for make, model and year
of motorcycle/ATV before disassembly of stock parts.
PRECAUTIONS
Several warnings and precautions should be taken
before and during installation:
1.) Check fuel petcock making sure it is in the “OFF”
position.
2.) Disconnect battery if bike is equipped with electric
start to eliminate the possibility of sparks or
accidentally engaging the starter.
3.) Read instructions thoroughly and carefully, making
sure all are completely understood before beginning
installation. Please call with any questions.
CARBURETOR OPERATION
COLD STARTING PROCEDURE (Non-Pumper
Series carbs)
The Edelbrock/QwikSilver carb is equipped with an
enrichener system for cold starts. The enrichener
Figure 1
2.) Hold decompression lever (for kick-start models) and
kick through two or three times making certain the throttle
is in the closed position. This will prime the engine.
3.) Bring engine up to compression and kick all the way
through. If engine does not fire, try to kick a few more
times before priming engine again.
After engine fires it may require the throttle be held at a
high idle (1000-1200 RPM) for several seconds to warm
engine. Be sure to return enrichener arm to the 9:00
position (OFF) to avoid a rich condition.
COLD STARTING PROCEDURE FOR PUMPER SERIES
CARBS.
For Pumper Series carbs the enrichener will not be
needed in most cases as the accelerator pump can be
used to prime the engine by simply twisting the throttle two
times before attempting to start engine.
ELECTRIC START MOTORS (non-Pumper Series
carburetors)
1.) Turn enrichener lever to 6:00 or 12:00 as seen in figure
2.) Engage starter until motor fires.
NOTE: It may be necessary to crack the throttle open
approx 1/8 of an inch to help the motor turn over faster and
aid in starting.
3.) After engine fires it may require the throttle be held at a
high idle (1000-1200 RPM) for several seconds to warm
engine. Be sure to return enrichener arm to the 9:00
position (OFF) to avoid a rich condition.
two types of idle systems QwikSilver uses, depending on
application.
REMOTE IDLE CABLE
COLD STARTING PROCEDURE FOR PUMPER
SERIES CARBS.
For Pumper Series carbs the enrichener will not be
needed in most cases as the accelerator pump can
be used to prime the engine by simply twisting the
throttle two times.
If cold start problems persist, please refer to the
troubleshooting guide at the end of this manual.
HOT STARTS
Now that the engine has been run and is warm the
enrichener will not be necessary. Simply bring the
engine up to compression and kick all the way
through or engage starter until engine fires. If engine
does not fire, it may be necessary to open the throttle
approx 1/8 of an inch.
NOTE: DO NOT OPEN THE THROTTLE ON A
PUMPER SERIES CARBURETOR IF THE ENGINE
IS WARM AND NOT RUNNING! DOING THIS WILL
FLOOD THE ENGINE, MAKING IT DIFFICULT TO
RESTART.
The remote idle cable will be included in the carburetor
hardware kit. It is recommended that the cable be
installed onto the carburetor before carb is installed onto
the engine. The nut MUST be removed before cable is
installed onto carburetor. Adjust cable until there is
approximately 1/16-1/8 inch of slide opening, this should
allow the engine to idle during initial start up.
CABLE WHEEL IDLE SCREW
If you think the engine is flooded, you can clear out
the cylinder by SLOWLY opening the throttle to wide
open and kick through eight to ten times with the
decompression lever held in. For electric start
engines open the throttle SLOWLY to wide open and
engage starter for three to four seconds. Once this is
done the engine should fire normally.
If hot start problems persist, please refer to the
troubleshooting guide at the end of this manual.
ADJUSTING CARBURETOR
IDLE ADJUSTMENT
The idle adjustment screw mechanically adjusts the
idle by keeping the slide slightly open at idle. This will
be affected by adjustments made to the needle
adjuster upon tuning the low to mid range. There are
The idle speed screw is installed on the carburetor and
pre-set at the factory.
1. Start engine and warm for 3-5 minutes.
2. Once engine is warm set idle to manufacturers
recommended specifications.
NOTE: Idle speed may change when adjustments are
made to the needle adjuster. This will require the repeat of
steps (1) and (2).
All Edelbrock/QwikSilver performance carburetors
come preset from the factory for use on stock based
motorcycles with an aftermarket “slip-on” exhaust.
Depending on the modifications that have been made
to your engine, a slight adjustment to the air/fuel
mixture may be necessary.
Before attempting to tune your Edelbrock/QwikSilver
carburetor, a new spark plug is recommended. This
will make it a lot easier to tune, and if an old plug was
in use this should give you better performance.
INITIAL RIDE
NOTE: The engine’s performance is usually the best
way to tune the carburetor. Due to different grades of
gasoline, gasoline additives and altitudes, plug
readings may differ from engine to engine.
IDLE TO MID-RANGE AIR/FUEL MIXTURE
ADJUSTMENT
All idle to mid-range mixture adjustments are made by
raising or lowering the needle height in the slide. The
needle adjuster is located in the slide on top of the needle
and adjusts the needle height. By turning the center slot
on the needle adjuster ( see figure 2) to the right (clock
wise) will richen the mixture, or turning it to the left
(counter clock wise) will lean the mixture. These
adjustments are referred to as “clicks”. Each click equals
¼ of a turn. The usable range is approximately 32 clicks
with zero (0) clicks being full rich and thirty two (32) being
full lean. The number of clicks is always referred from full
rich. Example: 14 clicks would be 14 clicks from full rich,
zero (0) clicks. QwikSilver recommends making 1 or 2
click increments when adjusting needle height.
Figure 2
After the initial idle speed has been set, it is now time
for an initial test ride. While riding the motorcycle pay
close attention to the 0 to 1/3 throttle position. In
this range watch and listen for the following:
LEAN CONDITION
A.
B.
C.
D.
Hard starting
Flat spot off idle
Lag in acceleration
Popping or backfiring through exhaust or
intake on deceleration.
E. Erratic idle (engine will not idle consistently)
These problems can be remedied by richening the
needle position (turn the needle adjuster to the right).
NOTE: Before making adjustments for this condition,
check for intake and exhaust leaks. These leaks
have similar symptoms.
ADJUSTMENT METHODS
Use one of the two methods described below.
Method 1, Metering Adjustment Tool (easiest). See figure
3.
Figure 3
RICH CONDITION
A.
B.
C.
D.
E.
Black smoke at idle
Lazy acceleration
Poor mileage
Surge at low speeds
Rough idling
These problems can be remedied by leaning the
needle position (turn the needle adjuster to the left).
NOTE: Before making adjustments for this condition
make sure enrichener is completely off (9:00
position).
1. Remove the hex plug from the carburetor cap using a
7/16” wrench.
2. Install the Metering Adjustment Tool #8450 into the
carburetor cap plug hole. Thread M.A.T. into cap until
finger tight, then snug ¼ -1/2 turn. DO NOT OVERTIGHTEN AS DAMAGE MAY OCCUR TO CAP!
3. With engine off, open throttle to wide open.
For pumper Series carburetors, remember to open
slowly to avoid flooding.
4. Push red knob down (with throttle still open) and
turn until it engages with the needle adjuster and
some resistance is felt. See figure 4. Once
resistance is felt, it is now time to make your
adjustment.
Figure 4
3. Insert a 3/16 flat blade screwdriver into the cap hole and
engage into the needle adjuster and make necessary
adjustments as described above.
IDLE TO MID-RANGE MIXTURE ADJUSTMENT
CONTINUED
4. Reinstall cap plug and tighten carefully.
5. Reinstall carburetor back into manifold and reattach air
boot or air cleaner.
6. Restart engine and reset idle speed if necessary.
Evaluate performance and repeat if necessary.
NEEDLE SIZE ADJUSTMENTS
MIXTURE ADJUSTMENT (MID-RANGE TO FULL
THROTTLE)
TO MAKE RICHER (MORE FUEL) 0-1/3
THROTTLE.
The needle size in the carburetor controls the mid-wide
open throttle mixture. QwikSilver pre-jets the carburetors
at the factory for a stock based engine with an aftermarket
exhaust system. Some engine combinations may require
different needles and settings depending on the altitude
and modifications done to your engine.
Pushing down, turn the red adjuster knob to the
RIGHT (clockwise) one (1) or two (2) clicks
depending on the severity of the lean condition.
Ride motorcycle and pay close attention
to the engine’s performance from 1/3 to full throttle. In this
range watch for the following.
TO MAKE LEANER (LESS FUEL) 0-1/3
THROTTLE.
LEAN CONDITION
Pushing down, turn the red adjuster knob to the LEFT
(clockwise) one (1) or two (2) clicks depending on the
severity of the rich condition.
A. Will not rev out in higher rpm’s.
B. Poor acceleration when throttle is rolled on at higher
rpm’s.
C. Detonation (pinging).
Make your adjustments according to the following:
Release knob and throttle. Restart engine and reset
idle speed if necessary. Evaluate performance and
repeat if necessary.
NOTE: If proper adjustment cannot be obtained
through the standard range of adjustment see
“Needle size adjustments” later in this manual.
Method 2, 3/16 flat blade screwdriver.
1. Remove carburetor from manifold.
2. Remove the hex plug from the carburetor cap
using a 7/16 wrench.
RICH CONDITION
A. Black smoke from exhaust at high rpm’s.
B. Lazy acceleration.
C. Power falls off at wide open throttle and accelerates
when throttle is rolled closed slightly.
ADJUSTMENTS-SLIDE REMOVAL
Most applications will require the removal of the
carburetor. Some will be able to loosen manifold clamp
and rotate carburetor horizontal to access the three (3)
9/64 cap screws.
1. Remove remote idle cable (if equipped) or turn idle
speed screw to the left until it no longer touches the
carburetor cap.
8. Using a wide, flat blade screwdriver remove the needle
adjuster assembly, needle and needle spring from the
slide.
2. Remove three 9/64 cap screws using allen wrench
(provided).
3. Lift cap off of carburetor body and pull back
towards air boot /air filter. See figure 5.
All QwikSilver carburetors are pre set from the factory for
specific applications. QwikSilver supplies two (2) spare
needles with each carburetor, one (1) richer and one (1)
leaner. See supplement for jetting specs on your
carburetor.
Figure 5.
Make needle change according to the following:
A. To make RICHER (more fuel) 1/3-full throttle position.
Read the number printed on the needle that was just
removed from the carburetor. To make richer, you will
need to install the NEXT HIGHER # needle.
B. To make LEANER (less fuel) 1/3-full throttle position.
Read the number printed on the needle that was just
removed form the carburetor. To make leaner, you will
need to install the NEXT LOWER # needle.
4. After cap has been removed, remove the torx head
T-10 screw (see figure 6.) attaching the slide actuator
strip to the inside wheel.
Figure 6.
9. Place needle spring on needle with the small end
towards the needle head (up). Insert needle and spring
into the slide, aligning the nub on the needle head into the
groove in the slide. Insert needle adjuster actuator pin into
slide with threaded hole up and also aligning roll pin into
the groove in the slide. See figure 8 for correct sequence.
Figure 8.
5. Remove slide assembly from carb body
6. Turn center slot of the needle adjuster to the right
and count the number of clicks until it stops. This will
allow you to reposition the new needle in the same
location for idle-mid range adjustment. It is
recommended this number be written down for later
use.
7. Line up slots (inner and outer) on the needle
adjuster. See figure 7.
Figure 7.
10. Put a drop of BLUE Loctite 242 or equivalent on
the upper threads (above crossdrilled holes) of the
needle adjuster and install into slide. Tighten needle
adjuster assembly in slide with a wide, flat blade
screwdriver.
NOTE: Make sure Loctite does not get into the
crossdrilled holes of needle adjuster. If this happens
clean needle adjuster with WD-40 or a penetrating oil.
DO NOT USE ANY HARSH CHEMICALS TO
CLEAN NEEDLE ADJUSTER ASSEMBLY!
11. Using a 3/16 flat blade screwdriver, turn center
slot of needle adjuster (see figure 9) to the right
(clockwise) until it stops. Now turn to the left
(counter-clockwise) counting clicks (one click equals
¼ turn) until the number acquired from step 6 is
obtained.
Some adjustment may be needed to this setting after
engine has been test ridden again. Generally, If you
go to a richer needle (higher #) you will be a couple of
clicks leaner on your setting. Just opposite for a
leaner needle (lower #) richer setting.
Figure 9.
13. Replace cap and cap gasket onto top of carburetor
body and secure with the three allen cap screws. NOTE:
Before tightening screws, open carburetor to wide open
and hold while tightening screws. This will ensure cap is
centered on carburetor body.
14. Reinstall carburetor into manifold and secure all
clamps and hoses before starting engine.
ACCELERATOR PUMP ADJUSTMENTS
For QwikSilver Pumper Series carburetors, the following
will help you adjust your accelerator pump to it’s proper
settings.
Accelerator pumps are primarily used on four-stroke
applications where instant low-rpm throttle response is
desired and/or required. The QwikSilver accelerator pump
is easily adjustable to fine-tune the throttle response and
ride ability of the engine to different combinations and
riding styles.
The pump adjustment screw is pre set for each application
(see your supplement sheet for base settings)
12. Install slide into carburetor body and make sure
slide moves freely and will completely close with it’s
own weight. Use a drop of BLUE Loctite 242 or
equivalent (medium strength) on the 4-40 torx screw
and attach the slide actuator strip to the inner wheel.
When tightening screw, place a small flat blade
screwdriver between the slide strip and carburetor
body. See figure 10. This will prevent the slide strip
from twisting.
Figure 10.
To make adjustments to the pump, it is recommended you
determine if the engine requires more or less “pump shot”.
To determine which way to adjust the pump, use the
following to help guide you.
EXAMPLES:
A. The engine wants to stall or stumble during quick
throttle openings = not enough pump shot. Turn
adjustment screw in (clockwise) until hesitation
goes away.
B. The engine is sluggish during a “roll on” of the
throttle then cleans out and accelerates normally =
too much pump shot. Turn adjustment screw out
(counter clockwise) until engine accelerates
smooth.
Do not try to adjust pump by revving the motor. This
adjustment should be done then tested with a load on the
motor i.e. riding the bike and going through the first three
gears.
To make adjustments to the accelerator pump (figure 11)
you will need the following tools: 5/16 of 8mm open end
wrench and a flat-blade screwdriver.
the end of the float to the top of the bowl. See figure 12.
Please refer to your instruction supplement for
recommended float height.
Figure 11
Figure 12.
Check needle goes here
To make adjustment to pump use the following
procedure.
1. While holding the screw from turning, loosen
the jam nut approx. 1 turn.
2. Turn the screw in the direction required for
proper adjustment.. Remember: right for
more fuel, left for less fuel. QwikSilver
recommends that 1/8 of a turn adjustments
be made until proper pump shot is achieved.
3. Once pump has been set to optimized
setting, hold screw form turning and tighten
jam nut.
GENERAL INFORMATION
Float adjustments are made by carefully bending the small
tab on the back of the float. See figure 13.
Figure 13.
FLOAT ADJUSTMENT
1. Disconnect throttle cables and fuel line from
carburetor and remove from engine.
2. Remove four (4) float bowl screws using the 9/64
allen wrench provided.
WARNING!!! Gasoline is very flammable. DO
NOT work on any carburetor while smoking or around
an open flame. It is also strongly recommended that
any procedure pertaining to gasoline be performed in
a well-ventilated area, as the vapors can be harmful.
3. Drain fuel from bowl into a fuel safe container.
CAUTION!!! QwikSilver Pumper Series carburetors
contain a small brass check needle that can fall out
when bowl is turned upside down. It is recommended
that the bowl be emptied through a strainer or rag to
catch the check needle. Reinstall check needle (point
down) into hole on top of float bowl flange. See arrow
in figure 12.
4. Tilt float bowl upside-down so float closes needle
completely. Using a machinists scale, measure from
By bending the tab outward (away form float) you will
lower the float level. Bending the tab inward will raise the
float level.
NOTE: Changing the float level will affect the
carburetor jetting. If the float level has been
readjusted, it may be necessary to retune the
carburetor.
SPARK PLUG READINGS
Plug reading: Porcelain will be snow-white in color with
whisker-like protrusions.
If possible, ride for a good distance to get a proper
reading on the spark plug(s). NEVER let engine idle
for a long period of time before checking spark plugs.
EXAMINE AND EVALUATE FOR THE FOLLOWING
CONDITIONS.
Condition-Good Performance
Bike performance: Smooth idle, good acceleration,
good fuel economy.
Plug Reading: Porcelain area of spark plug should
be white to a light tan color with no flaking. Threaded
area will have a dark discoloration.
Condition-Rich in the low-mid range
Bike performance: Rough idle, poor fuel economy,
black smoke at idle.
Plug reading: Porcelain and threaded area will be
black and sooty.
Condition-Lean low-mid range.
Bike Performance: Hard starting, poor throttle
response, popping through exhaust during
deceleration. Motor will only idle with enrichener on.
Plug reading: White porcelain, may be flaking.
Threaded area will be clean.
Condition- Rich mid-wide open
Bike performance: Motor will fall off at higher rpm’s.
A slight reduction of throttle will make engine pick up
and rev. If there is an extremely rich condition motor
will sputter at wide-open throttle. Poor fuel economy.
NOTE: Careful, sometimes the rev limiter is mistaken
for this condition.
Plug reading: Porcelain will be dark brown to black
in color and possibly sooty. Threaded area will be
black and sooty.
Condition- Lean mid-wide open
Bike performance: Poor acceleration above half
throttle. May pop through air cleaner.
WARRANTY POLICY
Edelbrock/QwikSilver Carburetors and all parts included in
carburetor kits are warranted to the original purchaser to be free
of manufacturing defects in materials and workmanship for a
period of one (1) year from the original date of purchase. Any
part that fails to conform to these conditions will be repaired or
replaced at the discretion of Edelbrock/QwikSilver, upon receipt
of the defective part within the one (1) year warranty period.
In the event a part has been rendered defective,
Edelbrock/QwikSilver must be notified prior to the return of the
defective part. A Return Authorization Number MUST BE
OBTAINED prior to the return of any defective parts.
A part that is suspected to be defective must not be replaced
without prior authorization from Edelbrock/QwikSilver.
Edelbrock/QwikSilver will not be liable for any consequential or
incidental damages resulting from the failure of any
Edelbrock/QwikSilver part, the breach of any warranties, the
failure to deliver, delay in delivery, delivery in non-conforming
condition, or for any other breach of duty between
Edelbrock/QwikSilver and a customer.
All warranties will be void under any of the following conditions:
1. Merchandise was improperly installed or used in an
abnormal application.
2. Merchandise has been modified or altered in any way.
DISCLAIMER
It is the sole responsibility of the user to determine the
suitability of the product for his/her use, and the user shall
assume all legal, personal injury risk and liability and all
other obligations, duties and risks associated therewith.
Edelbrock/QwikSilver will not be liable for any
modifications made to carburetors designed to meet
emissions standards. Any modifications to these products
will void and certification and all warranties they may carry.
Please contact Edelbrock/QwikSilver with any questions at
(909) 654-6677 ext.2 8:00am-12: 30pm, 1:30pm-5:00pm
PST, Monday through Friday.