1
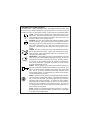
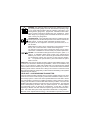
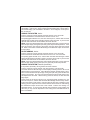
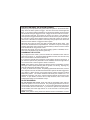
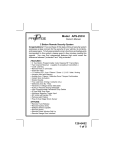
MODEL PRO-9744
Owner's Manual
Remote Alarm with
Selectable Pre-Load Features
Important! The PRO-9744 alarm system is configurated for many different user
preferences. Please read this entire manual to fully understand the operation of
your specific unit's installation.
FEATURES & OPTIONS:
l2
Four Button Anti Code Grabbing Programmable Transmitters
6 Channel Code Learning Receiver
l Remote Panic All Modes
l Protected Valet/Manual Override
l 8 Function LED- Armed, Disarmed, Arming, Zone 1, Zone 2, Zone 3,
Zone 4, & Valet
l Intrusion Alert With Memory
l Audible Arm, Disarm, Defective Zone, and Tamper Indication
l Instant Siren Activation
l Starter Disable
l True Last Door Arming
l Defective Zone By-Pass
l Hard Wire Switch Sensing
l On Command RF Chirp Delete
l 6 Tone Multi-Tone Siren
l Multiple Vehicle Operation
l On Command R.F. Chirp Delete
l R.F. Shock Sensor Delete
l
SELECTABLE FEATURES:
l
Active or Passive Arming
Active or Passive Door Locks
l Ignition Control Door Lock On/Off
l Ignition Control Door Unlock, (Drivers Door or All Doors), On or Off
l Independent RF Headlamp Control
l 20 Second Headlight Illumination Arm Or Disarm, Both Or None
l Panic On Lock Button Or On Separate Button
l
-1-
TRANSMITTER ICONS (Symbols):
The PRO-9744's 4 button transmitter has a replaceable membrane (button pad)
that uses icons to denote operation of your security system. The icons used are a
standard in use by the automotive industry. Their functions are described below.
LOCK: The closed lock symbol is the Lock and Arm button of your
transmitter. This function will allow the locking of the vehicle doors
(with optional door lock interface and power door locks), and the
arming or setting of the security system.
UNLOCK: The open lock symbol is the Unlock and Disarm button
of your transmitter. This function will allow unlocking of the vehicle's
driver door, or all doors, (with optional door lock interface and power
door locks), dependent on the way the control module is programmed. This button will also disarm the security system if it is
armed.
TRUNK: The open trunk symbol on the transmitter button will operate the vehicle's trunk release, (option, with existing power trunk,
relay required). Press and hold this button for two seconds to activate the trunk release option.
HEADLIGHT: The headlamp symbol on the transmitter button will
allow you to turn on the headlamps (with optional relay), at any time
to illuminate your path to and from your vehicle. Pressing this button will turn on the headlamps from the maximum operating distance of the transmitter. The lights will remain on for 20 seconds
then will automatically turn off.
START: The key symbol on the transmitter button will activate the
optional remote control starting device if added to your vehicle. This
button will always require a double push to active the remote start
unit. This is to prevent accidental, unintended, activation of the
remote starting device. To remote start your vehicle, press this button two times within 5 seconds.
PANIC: This Red circular symbol on the transmitter button will activate the security system's panic feature. This allows the operator to
turn on the siren and flash the parking lights from the maximum
operating range of the transmitter. To activate the Panic feature,
press and hold this button for three seconds. To turn off the panic
mode, press and release the same button one time. If you do not
turn off the panic mode, the siren will sound and the lights will continue to flash for 30 seconds.
NOTE: If there is no separate panic button as shown on your transmitter, then the red lock symbol button is used for panic. Operation
is the same as described above.
-2-
GARAGE: The (optional) Audiovox garage door interface will control
any existing electric garage door from the maximum operating range
of your hand held transmitter. With the interface connected to your
existing electric garage door, program this transmitter button following the program instructions supplied with your AS-9254 kit. When
within range of your garage, press and release this button one time to
open or close your garage door.
LOCK/UNLOCK: The transmitter button with the combined lock and
unlock symbol on it will allow the operator to lock all doors and arm the
alarm system, as well as unlock and disarm the alarm system.
The system can be configured to unlock only the driver's door, or unlock all doors.
Additionally the system can be configured to unlock the driver's door
then by use of a second button, unlock all remaining doors.
The manner in which the system unlocks the door(s) can be configured at time of installation to accommodate your personal preference.
OPTION: The transmitter button(s) with the word option, option 1, or
option 2, is available to allow remote control of any optional device
added to your vehicle. Some of the more popular devices are window
up, window down, electric sun roof open or close, fuel door release,
etc.... To operate the optional device, press and release the option
button one time.
PRO-9744: Your Security System has many features and available options, some
of which were selected or added during installation, others can be added at any
time. For your reference, wallet card provided with your system lists the optional
devices which have been added to your vehicle, as well as show which transmitter
button(s) will be used to activate them. Taking a few minutes to read this manual,
along with the wallet card, will provide you with a better understanding of the system's
operation and it's features.
YOUR ANTI - CODE GRABBING TRANSMITTER:
The four button transmitter included with your security system employs one of the
most secure means of radio frequency transmission available in today's automotive security systems. Some of the more sophisticated thieves use what is known
as a code grabber. This device is capable of capturing, storing, and then re-broadcasting your transmitter's code at a later date to disarm your alarm. Your anti-code
grabbing transmitter changes it's code every time you press a button. This changed
code is anticipated by the alarm and your system responds. If a thief captures
your transmitter code in an attempt to re-broadcast it a later date, the alarm,
expecting a different code than what was captured, ignores what the thief transmits. This makes this system nearly impossible to defeat with a code grabber.
Because of this sophisticated technology, if the transmitter is operated more than
-3-
50 times away from the alarm system, it is possible for the unit to go out of synchronization. If this occurs, simply pressing the transmitter button 2 times within 1
second will realign your transmitter to the alarm. Once realigned, normal operation is resumed.
ARMING THE SYSTEM, Active:
Turn the engine off, exit the vehicle and close all doors, hood, and trunk.
Press and release the transmitter button with the lock icon on it.
The parking lights will flash once, the siren will chirp once, and the dash mounted
LED will begin to flash slowly indicating that the system is armed. If you have the
optional door lock/unlock circuit installed, the doors will lock.
NOTE: If the siren chirped three times, this indicates that a door, hood or trunk has
been left ajar. Simply closing that open entry point will provide full protection. If the
siren did not chirp upon arming of the system, then the chirps have been turned
off. Refer to the section entitled "Eliminating the Arm/Disarm Chirps" shown later
in this manual.
SILENT ARMING, Active:
Turn the engine off, exit the vehicle and close all doors, hood, and trunk.
Press and hold the transmitter button with the lock icon on it for 2 seconds.
The parking lights will flash once, and the dash mounted LED will begin to flash
slowly indicating that the system is armed. The siren will not chirp. If you have the
optional door lock/unlock circuit installed, the doors will lock.
NOTE: If the siren chirped three times, this indicates that a door, hood or trunk has
been left ajar. Simply closing that open entry point will provide full protection.
ARMING THE SYSTEM, Passive (Automatic):
If the passive (automatic) arming feature has been selected:
Turn the engine off, exit the vehicle, and close all doors, hood and trunk.
The dash mounted LED will begin to flash rapidly indicating that the 30 second
passive arming cycle has begun. If the LED does not begin to flash rapidly, a door,
hood or trunk has been left ajar. Simply closing that open entry point will allow the
arming cycle to begin. Any entry point opened during the 30 second arming cycle
will suspend the arm timer. When all entry points are closed, the arm timer will
begin again.
At the end of the 30 second arming cycle, the parking lights will flash once, the
siren will chirp once, and the dash mounted LED will begin to flash slowly indicating that the system is fully armed. If the siren did not chirp upon completion of the
arming cycle, the chirps have been turned off. Refer to the section on "Eliminating
the Arm/Disarm Chirps" shown later in this manual. Passive door locking is a
selectable feature. If you have the optional door lock/unlock circuit installed, the
doors may or may not lock dependent on the setting of this selectable feature at
time of installation.
-4-
PROTECTION WHILE THE SYSTEM IS ARMED:
Opening any of the protected entry points while the system is armed will immediately cause the alarm system to trigger. The siren will sound, and the lights will
flash. If the optional interior illumination circuit has been added, the interior light
will also flash during the triggered mode. A trigger mode will continue for 30 seconds, the alarm will reset, and continue to monitor your vehicle. If the thief left a
door opened, the triggered mode will continue for six 30 second cycles, after which,
the open door (zone) will be isolated and the system will continue to monitor all
other zones. Whenever the system is armed any strong impact to the vehicle will
cause the shock detector to trigger the alarm system.
Whenever the system is armed, the dash mounted LED will slowly flash. This
serves as a visual deterrent to a potential thief. This LED is a very low current light
emitting diode which will not cause the vehicle's battery to drain even if the vehicle
is left unattended for long periods of time.
Whenever the system is armed, the vehicle starting system is disabled, the vehicle cannot be started even with the ignition key.
DISARMING THE SYSTEM:
As you approach the vehicle, press and release the transmitter button with the
open lock symbol on it. The parking lights will flash two times, the siren will chirp
twice, and the dash mounted LED will turn off.
If you have the optional door lock/unlock circuit installed, the doors will unlock. If
you have the optional entry illumination circuit installed, the interior light will turn
on for 20 seconds or until the ignition switch is turned on.
NOTE: If the passive arming mode was selected at time of installation, the LED
will begin to flash rapidly indicating that the system is re-arming. Opening any
door will suspend the automatic arming cycle.
If, when you disarmed the system, the parking lights flashed three times, and the
siren chirped four times, this indicates that the alarm system had been triggered in
your absence. Before turning on the ignition switch, examine the dash mounted
LED's flash pattern. The number of flashes will identify the violated zone. For
additional information, refer to the "Intrusion Warning Signals" shown later in this
manual. If upon disarm, the siren did not chirp two times, refer to the section
entitled "Eliminating The Arm/Disarm Chirps".
SILENT DISARMING:
As you approach the vehicle, press and hold the transmitter button with the
open lock symbol on it for two seconds. The parking lights will flash two times,
and the dash mounted LED will turn off. If you have the optional door lock/unlock
circuit installed, the doors will unlock. If you have the optional entry illumination
circuit installed, the interior light will turn on for 20 seconds or until the ignition
switch is turned on.
NOTE: If the passive arming mode was selected at time of installation, the LED
-5-
will begin to flash rapidly indicating that the system is re-arming. Opening any
door will suspend the automatic arming cycle. If the parking lights flashed three
times, and the siren chirped four times, this indicates that the alarm system had
been triggered in your absence. Before turning on the ignition switch, examine
the dash mounted LED's flash pattern. The number of flashes identifies the
violated zone. For additional information, refer to the "Intrusion Warning Signals"
shown later in this manual. If upon disarm, the siren did not chirp two times, refer
to the section entitled "Eliminating The Arm/Disarm Chirps".
INTRUSION WARNING SIGNALS:
The system will warn you if an intrusion attempt has been made in your absence.
Upon disarm, the siren will chirp four times and the parking lights will flash three
times, indicating that the security system had been triggered. Enter the vehicle
and before turning on the ignition switch, observe the LED flash pattern.
If the LED is flashing 1x pause, 1x pause, etc... then an intrusion attempt was
made and detected by the shock sensor.
If the LED is flashing 2x pause, 2x pause, etc... then an intrusion attempt was
made and detected by opening of the hood or trunk.
If the LED is flashing 3x pause, 3x pause, etc... then an intrusion attempt was
made and detected by opening of the vehicle doors.
If the LED is flashing 4x pause, 4x pause, etc... then an intrusion attempt was
made and detected by any additional sensors connected to the vehicle.
All of the above LED patterns are intended to give you the opportunity to inspect
area's of your vehicle for possible damage. These LED warning patterns are stored
in the system's memory and will be erased when the ignition key is turned to the on
position.
VALET OPERATION:
The valet switch allows you to temporarily by-pass all alarm functions, eliminating
the need to hand your keychain transmitter to valets or garage mechanics. When
the system is in the valet mode, all alarm features are by-passed however, the
panic feature, as well as the optional door lock/unlock circuit, will remain operational. To enter the valet mode:
Start with the alarm disarmed and valet switch in the off position.
Turn the ignition switch to the on position.
Turn the valet switch to the on position.
The dash mounted LED will turn on solid indicating that the valet mode has been
successfully entered.
To return to the normal mode of operation, move the valet switch to the off position
any time the ignition switch is in the on position.
MANUAL OVERRIDE OPERATION:
In the event you lose your transmitter or if the transmitter battery fails while the
-6-
system is in the armed mode, it will be necessary to override the system to
operate the vehicle. In this situation, to override and disarm the system:
Start with the valet/override switch in the off position. Open the vehicle door with
the door key. (The alarm will sound). Turn the ignition switch to the on position.
"Within 10 seconds" turn the valet/override switch to the on position.
The alarm will disarm and the vehicle can now be started and operated normally.
Always remember to move the valet/override switch to the off position to insure the
vehicle remains protected.
ELIMINATING THE NORMAL ARM/DISARM CHIRPS:
You can selectively eliminate the normal arm and disarm chirps by holding the lock
or unlock button slightly longer when arming and disarming. This will prevent the
siren chirps for one arm or disarm cycle. If you wish to disable these chirps all the
time:
Start with the valet/override switch in the off position. Turn the ignition switch on,
then off. Within 10 seconds of turning off the ignition, flip the valet switch on, off, on,
off, on, then off.
If the chirps were enabled before you started, the siren will emit two short chirps
indicating that the chirps are now disabled. If the chirps were disabled before you
started, the siren will emit one short chirp indicating that the chirps are now enabled.
NOTE: If the chirps have been disabled, this effects only the normal one chirp
(arm/lock) and the two chirp (disarm/unlock) chirps. The three chirp defective zone
and the four chirp tamper indication remain operational. These chirps are for safety
and will not be disabled. If the vehicle battery is disconnected for servicing, when
power is restored, the arm/disarm chirps will revert to normal operation.
REMOTE PANIC OPERATION:
The panic feature can be operated from the maximum operating range of your
keychain transmitter. Access to the panic feature can be programmed to operate
from the transmitter button with the red lock symbol on it or can be operated from a
dedicated panic button as shown on page one of this manual. In either case,
dedicated panic button or operation from the lock button, press and hold this button for 3 seconds to activate the panic feature. Once activated, the siren will sound
and the parking lights will flash for a period of 30 seconds. If you wish to cancel the
panic mode anytime during the 30 second cycle, press and release the button
used to activate the feature.
REMOTE SHOCK SENSOR CONTROL:
The shock sensor feature of your security system is intended to detect strong vibrations or impact to the vehicle when attempted break-ins are made to the vehicle's
glass. The shock sensor is operational every time you lock/arm your security system. It may be necessary at times to disable the shock sensor for one arming cycle
-7-
because of harsh thunder storms or when parking along routes of heavy construction.
To disable the shock sensor for one arming cycle, anytime after the
system is armed, simultaneously press the two transmitter buttons
shown.
The siren will emit a single chirp indicating that the shock sensor is bypassed for
that arming cycle.
STANDARD TRANSMITTER OPTIONS:
REMOTE TRUNK RELEASE BUTTON:
The remote trunk release option, if installed in your vehicle can be
programmed to operate either with a single push of the transmitter
button for 2 seconds, or a double push of the transmitter button. The
programming of your system is indicated on the card packaged with
your transmitter.
OPTION BUTTON:
The option button of your transmitter can be programmed to operate a variety of
available options. Some of the more popular devices are Remote Start, Window
Roll Up or Down, Sunroof Open/Close, Garage door interface.
The operation of your optional device may require a single press or
a double press of the transmitter button with the word "Option" on it.
The optional device connected to your system, and the operation of
it is indicated on the card packaged with your transmitter.
SYSTEM FUNCTIONS AT A GLANCE
Dash Mounted LED Indications:
Rapid Flashing
=
Passive Arming
Slow Flashing
=
Armed
Off
=
Disarmed
On Solid
=
Valet Mode
1 Flash Pause...
=
Intrusion Zone 1
2 Flash Pause...
=
Intrusion Zone 2
3 Flash Pause...
=
Intrusion Zone 3
4 Flash Pause...
=
Intrusion Zone 4
Siren and or Horn/Light Indications:
1 Chirp, 1 Flash
=
Armed
2 Chirps, 2 Flashes
=
Disarmed
3 Chirps, 2 Flashes
=
Arming With Door Ajar
4 Chirps, 3 Flashes
=
Disarming After Intrusion
THIS DEVICE COMPLIES WITH PART 15 OF THE FCC RULES. OPERATION IS SUBJECT TO THE
FOLLOWING TWO CONDITIONS: (1) THIS DEVICE MAY NOT CAUSE HARMFUL INTERFERENCE, AND
(2) THIS DEVICE MUST ACCEPT ANY INTERFERENCE RECEIVED, INCLUDING INTERFERENCE THAT
MAY CAUSE UNDESIRED OPERATION.
NOTE: The manufacturer is not responsible for any radio or TV interference caused by unauthorized modifications to this equipment. Such modifications could void the user's authority to operate the equipment.
-8-
Form No. 128-5040