Download edia oan CAnOn ZR800 - The Evergreen State College
Transcript
edia
oan
Proficiency Required
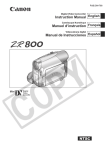
Operating Guide for
Canon ZR800
Media Loan Operating Guides are also available online at www.evergreen.edu/medi/ml/handouts.htm.
Condensation
Moving the camcorder rapidly
between hot and cold temperatures
may cause condensation (water
droplets) to form on its internal
surfaces. Stop using the camcorder if
condensation is detected. Continued
use may damage the camcorder.
Remove the casette, place the
camcorder in an airtight plastic
bag and let it adjust to temperature
changes slowly before removing it from
the bag
When condensation is detected the
camcorder automatically shuts of, the
warning message "CONDENSATION
HAS BEEN DETECTED" appears for
approx. 4 seconds and a water drop
icon starts flashing
A cassette can not be loaded when
condensation is detected
Caring for Media Loan Equipment
N
Do not drop the camcorder!
N
Do not leave the camcorder in excessive
heat, such as a car!
N
Do not subject the camcorder to moisture or
water!
N
Do not use excessive physical force!
N
Do not store this camcorder in excessive
cold!
N
Never push objects of any kind into the
camcorder through any opening!
N
Do not leave the viewfinder exposed to
direct sunlight as it may melt!
Dirty Heads
The following symptoms may appear if the video
heads become even a little dirty.
Mosaic or other blocky video artifacts or banding
appear on the picture during playback.
Sound becomes distorted, or there is no sound
during playback.
After the condensation warning stops
flashing, wait for 1 more hour before
resuming use.
Charging the Battery
Turn off the camcorder and attach the battery pack
to the camcorder by lightly pressing the battery
pack and sliding it down until it clicks. Then plug the
power adaptor into a power outlet. Connect the
power adaptor to the camcorder’s DC IN terminal.
The CHARGE indicator starts flashing. The indicator
will stay on when the charging is completed. Once
the Battery is Fully Charged disconnect the power
adapter from the camcorder and from the power
outlet.
To Remove the Battery Pack
Press BATT. to release the battery pack. Lift the
battery pack and then pull it out.
Battery Charging Times and Life
The standard life batteries take about 145 min. to
charge with a typical recording time of one hour.
Extended life batteries take about 285 min. to
charge with a typical recording time of 165 min.
The message “HEADS DIRTY, USE CLEANING
CASSETTE” appears.
Media Loan
360.867.6253
¸ Please Recycle!
The Evergreen State College
Olympia, WA 98505
ZR800 | 03.07.08 | JW
Media Loan
Canon zr800
Battery precautions
N
Treat the battery pack with care!
N
Do not expose battery to heat or fire (It
might explode)
N
Do not try to disassemble or modify it
N
Do not drop or knock it
N
Do not get it wet
N
Charged battery packs will discharge
naturally, so charge them the day of
use to ensure a full charge.
N
Attach the terminal cover whenever a
battery pack is not in use. Contact with
metallic objects may cause a short
circuit and damage the battery pack.
Rotating the LCD Panel
You can rotate the panel
180 degrees toward the
lens, allowing the subject
to monitor the LCD screen
while you use the viewfinder.
This is also useful if you plan
on recording yourself.
Recording
Move the lens cover
switch down to open
the lens cover.
Inserting and Removing a Tape
Slide the OPEN/EJECT button fully in the direction
of the arrow and open the cassette in the
compartment cover. The cassette compartment
opens automatically.
Holding the lock
button pressed
down, set the POWER
switch to CAMERA.
Insert the cassette
with the window
facing the grip belt.
To remove a cassette
pull it straight out.
Press Start/Stop to
begin recording.
Using the Zoom
Move the zoom lever toward W to zoom out (wideangle). Move it toward T to zoom in (telephoto). You
can also change the zoom speed by pressing gently
for a slow zoom and harder for faster zooms.
Press the PUSH mark
on the cassette
compartment until it
clicks.
Reviewing the Last Scene Recorded
Wait for the cassette
compartment
to retract
automatically and
close the cassette
compartment cover. Do not interfere with the
cassette compartment while it is opening or closing
automatically, or attempt to close the cover before
the cassette compartment has fully retracted.
Set the mode switch to P.
If the joystick guide does not appear on screen,
press the joystick to display it.
Toggle the joystick left momentarily, you may have
to toggle it up or down to stop it.
Playing Back Movies
Holding down the lock button set the POWER
switch to PLAY. If the joystick guide does not appear
on screen, press the joystick to display it. Use the
joystick to locate the point where you want to begin
playback by toggling it left or right. Push the joystick
up to begin playback. Push the joystick up to pause
the playback or down to stop it.
canon zr800
Media Loan
Magnifying the Playback Image
Camera Setup Menu
To enlarge the playback image move the zoom
lever toward T. To reduce or return to normal move
the zoom lever toward W.
Toggle the joystick up or down until you find the END
SEARCH option and press the joystick.
In the SETUP menu the following can be adjusted;
Shutter speed, Auto slow shutter (automatically uses
slow shutter speeds to obtain brighter recordings in
places with insufficient lighting), Zoom speed, Image
stabilization (compensates for camcorder shake
even at full telephoto), wide-screen (16:9 is standard
for this camera, if you desire 4:3 recording you must
set this) and Self timer.
Toggle the joystick left or right until you get to
EXECUTE and press the joystick.
Note: for more functions and to set manual functions
the camera must be in P mode.
i Note: End search cannot be used once you
remove the cassette.
Manual Focus Adjustment
Locating the End of the Last Scene
Press FUNC. button on LCD screen
Auto-focus may not work well on some subjects or
conditions. In such cases, focus manually. With the
mode switch in P, adjust the zoom. Push the joystick
down towards [FOCUS] to activate manual focus.
Adjust the focus with the left and right arrows (right
for farther focal distance, left for closer focus. Press
down to return to auto-focus or up to save focus
adjustment.
When you Have Finished Recording
Close the lens cover and the LCD panel.
Turn off the camcorder and remove the tape.
Disconnect the power source and remove the
battery pack.
i Note: To protect the tape and video heads, the
cam will enter stop mode if left in record pause
mode for 4½ minutes. To resume recording press
Start/Stop.
Infinity Focus
For focusing on faraway objects, adjust the zoom,
then keep the joystick pushed down towards
[FOCUS] for more than 2 seconds until an infinite sign
appears. Push the joystick down towards [FOCUS]
again will return the camcorder to auto-focus and
left or right will return the camera to manual focus.
FUNC Menu
The following can be adjusted or set using the FUNC
menu; Recording Program, White Balance, Digital
effects, and Speaker volume.
White Balance
Selecting a Function The white balance function helps you accurately
reproduce colors under different lighting conditions
so that white objects will always look truly white in
your recordings. There are 4 options for the white
balance setting.
Press FUNC.
Toggle the joystick up or down to change
applications.
Toggle the joystick left or right to choose desired
setting from the available options.
Auto - Settings are automatically set by the
camcorder. Use this setting for outdoor scenes.
Press FUNC To save the settings and close the menu.
Daylight - For recording outdoors on a bright day.
Selecting an Option from the Setup Menus
Tungsten - For recording under tungsten and
tungsten type (3-wavelength) fluorescent lighting.
Press FUNC.
Select the menu icon at the bottom of the screen by
pressing the joystick. You can also hold FUNC down
for more than 2 seconds to open directly the setup
menus screen.
Set - Use the custom white balance for special
situations not covered by the other options.
With the mode switch on P, press FUNC button then
scroll to the currently selected white balance. When
you select [SET] do not press FUNC and continue
instead with the procedure below.
Select the desired menu from the left side of the
column by toggling the joystick up or down and
pressing it in when found.
Point the camera at a white object, zoom in until it
fills the whole screen and press the joystick. When
the adjustment is completed, the WB icon will stop
flashing and stays on. The camcorder retains the
custom setting even if you turn off the camcorder. Press FUNC to save the setting and close the menu.
Toggle the joystick up or down to select the setting
you want to change and press the joystick.
Select the desired option by toggling the joystick up
or down and then press it in to save.
Press FUNC at any time to close the menu.
Media Loan
Canon zr800
Manual Exposure Adjustment
Audio Menu
Backlit subjects may be underexposed or subjects
under strong lights may be overexposed. To correct
this, you can manually adjust the exposure. With the
Mode switch set to P (except for fireworks settings),
if the joystick does not appear on screen, press the
joystick to display it. Push the joystick UP towards
[EXP]. [EXP] on the joystick guide changes to light
blue and the exposure adjustment indicator and
the neutral value "+/- 0" appear on the screen. If
you operate the zoom during exposure lock, the
brightness of the image may change. Pushing up
on the joystick will return the camcorder to auto
exposure.
Under AUDIO menu you can adjust Output channel, Wind screen, Mix balance, and Audio mode.
Adjusting the Volume
Press FUNC.
Toggle the joystick up or down to find the SPEAKER
and toggle the joystick left or right to adjust the
volume.
Press FUNC to close the menu.
Audio Recording Mode
You can change the quality of the audio recording
between 16 and 12bit (16bit is recommended). Press
the FUNC button, then MENU. Select Audio setup,
then Audio mode, select your desired option then
FUNC again to confirm.
Changing the Shutter speed
Use the automatic exposure (AE) program to set
the shutter speed or select one of the special scene
recording programs.
Make sure the mode switch is set to P
To set the Shutter speed in P;
press the FUNC button, and choose
Menu, then camera setup, then shutter
and select the speed you wish to use.
Suggestions are listed below. The screen
will display only the denominator ( P 250
for 1/250).
1/60 - For general recordings
1/100 - For recording indoor sports scenes
1/250, 1/500, 1//1000 - For recording
from within a car or train, or for recording
moving subjects such as roller coasters
1/2000 - For recording outdoor sports
such as Tennis or Baseball on sunny days
Do not move the mode switch while
recording as the brightness of the image
may change abruptly.
i Note: If the speed selected flashs it is
inappropriate for lighting conditions.
Recording movies under fluorescent lights
If the screen starts to flicker, set the
shutter speed to 1/100.
Self Timer
Set the camcorder in record pause
mode, press FUNC then choose MENU
and select Camera setup then self
timer. Select ON and press FUNC. Press
START/STOP and the camera will begin
recording after a 10 second delay.
canon zr800
Media Loan
Selecting the Audio Channel
Digital Video Dubbing
You can select the audio channel to play back
when playing back a tape with audio recorded on
two channels (either stereo sound or bilingual audio
signals). There are 3 options for this setting.
You can input video from other video devices and
record on the tape in the camcorder. Connect
the camcorder to a digital video source. Load a
blank cassette in camera and load desired casette
or disk into connected device. Press FUNC button
select REC PAUSE and press the joystick. Then
select [EXECUTE] and press the joystick again. Start
the playback on the connected device. Press the
joystick up to start recording and again to pause
recording, and down to stop recording.
L/R - Left and right channels (stereo) / Main +sub
signals (bilingual)
L/L - Left channel only (stereo) / Main signal only
(bilingual)
R/R - Right channel only (stereo) / Sub signal only
(bilingual)
Transferring Video Recordings
Press the FUNC button and select MENU. Select
Audio setup then Output Channel and select desire
option and finalize with the FUNC button.
Turn off all devices when making connections!
Start the computer and set the camcorder to PLAY mode. Connect the camcorder to the computer
using a DV cable. Make sure you have the correct
cable for the port on the computer (see chart).
If the computer freezes while the camcorder is
connected to it, disconnect the DV cable and turn
off the camcorder and the computer. After a short
while, turn them on again, set the camcorder to
PLAY mode and restore the connection.
Windscreen
When using the built-in microphone, the camcorder
automatically reduces the background sound of
wind, but you can turn the windscreen off when you
want the microphone to be as sensitive as possible.
Using an External Microphone
Connect the external microphone to the MIC
terminal, using a condenser
microphone with a 3.5 mm stereo plug
and no more than 3 meters of cable. Audio recording levels will vary.
Note: You must use a condenser
microphone (a microphone with it's
own power source, i.e. batteries)
Playback on a TV screen
Turn off all devices when making
connections!
Before making the connections,
select the [TV TYPE] setting according
to the TV set that you will connect
the camcorder to. Connect the
camcorder to the TV and turn on the
camcorder and TV, or VCR.
Recording to a VCR or Digital Video Recorder
Connect the camera to the recording
device using either the RCA cables or
the appropriate DV cable depending
on the device. Load the recorded
casette into the camcorder and
a blank casette or disk into the
recording device. Locate the scene
you wish to copy and pause slightly
before it. Begin playback and press
record on the device at the desired
time. Stop recording when playback
is complete and stop playback on the
camera.
Media Loan
Canon zr800
Proficiency questions
Written Test: Complete this written portion on a separate sheet of paper before
arriving for your operational proficiency.
1. What general precautions should you observe when using the palmcorder?
2. List the steps in providing battery power to the palmcorder.
3. How long should you charge a battery? How long will it last?
4. List the steps to insert a casette.
5. List the steps in displaying the menu and selecting an item for each camera.
6. How do you adjust the white balance for each camera?
7. How do you set manual focus for each camera?
8. List the different auto exposures for each camera.
9. What is the extent of your financial responsibility when you check out the palmcorder?
Operational Proficiency: to be done during your scheduled appointment.
A. Remove the palmcorder from the case and identify all controls and parts.
B. Correctly and securely set up palmcorder on a tripod.
C. Attach the palmcorder to its AC adaptor and a monitor.
D. Load a tape.
E. Set the clock/date display.
F. Set and describe the white balance, auto exposure, and tape speed.
G. Set the palmcorder for recording using AC. Set up an external mic and plug in headphones. Starting at
the beginning of the tape, do some recording. Playback the recording.
H. Set up a battery to be charged.
I. Pack the palmcorder back in its case.


