1
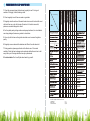
GAS TANKLESS WATER HEATERS
INSTRUCTIONS MANUAL
WINTER
INVIERNO
SUMMER
VERANO
GAS
WINTER
INVIERNO
SUMMER
VERANO
GAS
WINTER
INVIERNO
SUMMER
VERANO
GAS
GAS
GAS
GAS
POWER GAS MODEL
WATER/AGUA
WATER/AGUA
WATER/AGUA
Congratulations! You've just purchased a new Marey POWER GAS
tankless water heater and will soon begin enjoy the benefits of
“going tankless”.
FUNCTIONS AND FEATURES
04
CONSTRUCTION AND NAME OF EACH PART
05
PRECAUTIONS
07
INSTALLATION
09
Use this manual to guide you through the installation and operation,
as it contains important safety tips and instructions.
OPERATIONS AND WARNINGS
12
INSTRUCTIONS FOR DAILY MAINTENANCE
14
Please take the time to read and understand the safety and
installation manual in its entirety before you attempt to install your
new POWER GAS tankless water heater.
CUSTOMER SERVICE
16
OTHER PRODUCTS
17
Having instant hot water and savings in space and electricity will
quickly convince you that you have made the best decision for
meeting your home's hot water needs.
If you are not familiar with basic plumbing and electricity, we highly
recommend that you consult the services of a professional to assist
you with this installation.
02
03
1. Water-controlled automatic ignition:
The water-controlled automatic ignition is provided through a double-ignition highrating device. The flame is sensed by ions. This sensitivity control makes it easy
and convenient to operate.
Flue duct type
2. Auto cut-off protection:
The auto-cut-off protection will shut off the gas supply immediately if a flameout
accidentally occurs, therefore preventing a gas leak.
3. Energy savings:
The advanced combustion system comes with a Winter/Summer switch. In winter,
it strengthens the flame. In summer, it reduces the flame. This provides more
comfort and energy savings.
4. Low water pressure start-up function:
When the water pressure is lower than 0.025 Mpa, the unit can still start. This is
suitable for customers living in high floors or with low water pressure.
5. Anti-freezing protection:
When the temperature is very low, remove the water discharge valve to discharge
accumulated water inside the water pipe. This feature prevents damage caused
by freezing water.
Back plate
Gas -collecting roof
Heat exchanger
Temperature controller
Main combustor
Ignition pin I
Ignition pin II
6. Anti-dry combustion protection:
Once dry combustion occurs, the protection device will automatically shut off the
gas supply.
Sensor pin
Gas adjusting valve
7. Over-pressure protection:
When water pressure is over 1.0Mpa, the unit will automatically relieve the
pressure to avoid damage.
Specification
Water-gas interlock
Water adjusting valve
Solenoid valve
Microactive switch
Sighting Window
Pulse generator
Winter/Summer knob
Instruction
Battery Box
Gas controlling knob
Water controlling knob
Hot water outlet pipe
Water discharge valve
Gas inlet pipe
Water heater type C/D
(Drawing 1)
Water inlet pipe
Sighting Window
Specification
Winter/Summer knob
Instruction
Gas controlling knob
Water controlling knob
04
(Drawing 1)
(Drawing 2)
05
Forced exhausted type
Technical parameters:
0.4 PSI
NG
0.3 PSI
10-Layer Safety Protection
Pulse Double Ignition
79,228 BTU/h
Water Pressure Controlled
POWER GAS 10L FE
Wind-pressure valve
Force
Exhaust
Type
Power wire
16L/min
4.2Gal/min
10L/min
2.7Gal/min
G1/2 Pipe
LPG
111,903
BTU/h
Cold Water Pipe
Hot Water Pipe
0.3 PSI
10L/min
2.7Gal/min
ø 0.37 inches / ø 9.5 mm Rubber Hose
NG
POWER GAS 16L
Flue Duct Type
Smog-collecting hood
79,228 BTU/h
5L/min
1.3Gal/min
Gas Pipe
0.4 PSI
POWER GAS 10L
Hot Water
Outlet Per
Minute
LPG
34,614 BTU/h
3.6 - 145.0 PSI / 0.25 - 10 bar
0.3 PSI
Applicable
Water Pressure
0.4 PSI
NG
Safety Device
LPG
Ignition Mode
0.3 PSI
Control Model
0.4 PSI
NG
Exhaust
Discharge Mode
Related Gas
Pressure
LPG
POWER GAS 5L
Heat Load
Gas Type
Model
Exhaust Fan
Heat exchanger
Electric controller
Ignition pin II
Main combustion
Sensor pin
Microactive switch
Ignition pin II
Water temperature
adjusting valve
Gas adjusting valve
Solenoid valve
Water outlet pressure
1. The water heater must be installed in a well-ventilated area and an exhaust
pipe must be installed to discharge the exhaust gas. During operation, the water
heater consumes a lot of oxygen, so the air inlet hole should be made of at least
0.06 square meters and the exhaust pipe must be installed.
·Poor air circulation and a lack of an exhaust pipe will cause lack of oxygen.
Carbon monoxide poisoning, death and serious accidents can occur due to
incomplete combustion.
2. Don´t expose the water heater to strong wind or rain.
3. Only use the type of gas that is specified on the nameplate.
4. Gas connections should be done by a professional.
Water discharge valve
Pulse Generator
5. Don´t use rubber pipes that are aging or cracked.
Water inlet pipe
6. The water heater must not be installed near flammable or volatile substances.
7. The water pressure should not be lower than 0.025Mpa.
Gas inlet pipe
8. The water heater shouldn´t be installed above cooking appliances, such as
ovens or stoves.
(Drawing 3)
06
9. The water heater shouldn´t be installed near stairs nor safety exits (except
beyond 5m).
07
1. Heater Installation
A) Drill 8mm holes according to the dimensions shown on Drawing 7, and put in
6mm expansion screws (If the dimensions are different, please use those
instead).
B) Hang the water heater and secure it with the expansion screw at the hole in
the lower bracket. See Drawing 8.
Exhaust fan
There must be an air
inlet and an exhaust outlet
Washer
Nut
Expansion screw
Air inlet
Heater Case
(Drawing 4)
(Drawing 7)
(Drawing 8)
2. Pipe Installation
A) Connect the cold water inlet pipe.
Ÿ The cold water inlet joint is G1/2” threaded pipe.
The water heater must not be
exposed to strong wind.
(Drawing 5)
The water heater must not be
installed outside.
(Drawing 6)
Ÿ The water inlet pipe should be connected by using flexible metal tube or rigid
pipe.
Ÿ The inner diameter of the inlet pipe (including the valve) should not be less
than 8mm.
Ÿ The cold water valve must be installed with the water inlet pipe.
Ÿ Please make sure that the filter in the cold water inlet is installed correctly.
There are always many impurities in the new pipe. Flush them out with water
before connecting it. After making sure there is no residue in the pipe, install
the rubber gasket and tighten the water inlet join
08
09
B) Connecting the hot water outlet pipe.
Wind cap
ŸThe hot water outlet joint is G1/2” threaded pipe.
ŸThe hot water outlet should be connected by flexible metal tube or by rigid pipe.
ŸThe inner diameter of the water outlet pipe (including the valve) shouldn´t be
less than 8mm.
Fix bracket
Straight pipe
Decoration board
Bend connection
C) After installation, fully open the cold water valve to test the flow of water and
check whether there are any water leaks. Adjust or fix as needed.
D) Installing the gas supply pipe.
The gas inlet joint is G1/2” threaded pipe. The gas inlet pipe joint and rubber
gasket are already attached together. The special soft rubber tube may be used if
it meets technical specifications.
NOTE: The gasket must be installed, otherwise, the water heater will burn out.
Secure it tightly with the pipe clip while connecting it.
After the gas inlet is connected, open the gas supply valve and check for gas
leaks at the joints by using soap water. Adjust or fix as needed.
Liquefied petroleum gas users should use the high-quality, low pressure adjusting
valve of with the flux above 0.6m/h.
3. Installing the exhaust pipe.
Pipe for connection
Water discharge siphon
Water heater
Wall
(Drawing 9)
C) Make an air inlet door not less than 0.06 square meters at the bottom part of
the wall.
D) If the wall is made of flammable material, a clapboard needs to be installed
between the flue pipe and the wall.
E) If the flue pipe is connected to a public chimney, the flue pipe section should be
as short as possible and the joint with the public chimney must not leak at all.
A) Following the outline dimensions of the flue pipe as a guide, make a hole with
the diameter a little larger than the flue pipe at the suitable position to install the
flue pipe horizontally.
B) The installation of the flue is shown in Drawing 10. The total height of the
exhaust pipe should be more than 2.3 meters and the horizontal length should not
exceed 3 meters. There should be a vertical ascending flue pipe and the hole
should not be less than 250mm above the exhaust pipe cover. The gap between
the flue pipe and the hole should not be filled with cement; otherwise any repairs
would be difficult.
10
11
1. Operations
A) Open the cell box and put in correctly two D cell batteries.
F) During operation, please pay attention to the combustion. If there is abnormal
combustion, close the gas valve right away and contact the service center or gas
company for maintenance.
B) Open both the hot water and cold water valves. Close the water inlet valve
after you make sure the cold water is flowing out through the water outlet and the
ignition pins discharge.
G) When the outdoor temperature is below zero and pipe freezing may occur, the
remaining water should be discharged after using the heater. Water should be
discharged in the following manner:
C) Start the gas supply.
·Turn off the gas supply valve, turn off the tap water supply valve, turn the water
temperature adjusting the switch to the low temperature position, turn on the hot
water supply valve, remove the water discharge valve to discharge the remaining
water, re-install the water discharge valve.
D) Open the water inlet valve or outlet valve again and the combustor will ignite
right away. Hot water should flow out immediately. Sometimes, if there is air in the
pipe, the combustor may not ignite the first time. So, try two or three times.
E) All water heaters have a seasonal Summer/Winter switch to meet your water
temperature needs.
F) If you close the water inlet or the water outlet valve, the water heater will stop
working. If needed, just re-open the water inlet or outlet valve. Please note that
the temperature of the hot water flowing out is very high at that moment. Please,
wait for the temperature to adjust.
G) If you close the water inlet valve or the water outlet valve, the water heater will
shut off immediately. Then, shut off the main gas supply.
H) The body of the water heater can become very hot during operation, so please
don´t touch any part of the water heater except for the switches.
I) While using the water heater, please pay attention to the initial water flow
temperature to prevent getting scalded.
J) Check the gas pipes and hoses regularly. If you find joints that are not tightly
secured or if there are cracks, you should stop using the heater and perform the
necessary maintenance.
K) We recommend you use copper pipe to install the heater gas entrance.
2. Warnings
A) Don't use the water heater in a sealed room or in a room with poor air
circulation.
B) The exhaust pipe must be installed to discharge exhaust gas outside.
C) During operation, if you find out there is a gas leak, close the gas valve
immediately. The cause of that should be checked out and the service center or
gas company should be contacted for repair.
D) Before going to sleep or leaving the house, shut off the gas supply.
E) Do not block the exhaust pipe or the air inlet. This can cause incomplete
combustion and lead to gas poisoning.
12
13
1. Check the gas supply pipe (rubber house) regularly to see if it is in good
condition. If its aging, cracked, leaking or bent.
Troubleshooting
2. Check regularly to see if there are water or gas leaks.
3. Regularly clean the surface of the water heater to remove dirt or dust with a wet
cloth, and then use a dry cloth to wipe off moisture. For hard to remove dirt,
please use a neutral detergent to clean it.
4. For the plastic parts, printing surfaces and sprayed surfaces, it is not suitable to
use strong detergent, benzene or gasoline to clean them.
5. Use a dry cloth to clean on the ignition electrode so as to ensure the ignition
quality.
6. Regularly remove and wash the stainless steel filter in the cold water inlet.
7. During operation, please pay attention to the flame to see if it is normal
condition. Check the heat exchanger and combustor whether there is dust or dirt
every half a year. Cleaning should be done by a professional.
8. Avoid accidents. Don´t modify the water heater by yourself.
Packing list
The whole of package of the water heater includes:
1.Installation kit
2.Shower Heat
3.Intructions Manual
14
1 set
1 piece
1 pieces
15
Marey Heater offers an excellent Customer Service. If you have any question
about our product, need information about how to install a unit, about our
Warranty Services, or if you want to share a suggestion, contact us!
Please visit our website to get to know more about other Marey products.
GAS PORTABLE
POWER PAK
SANTON
AQUAMATIC
MINI MAREY
POWER GAS
1-877-727-0277
[email protected]
A Toll Free number for all your needs!
16
17