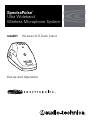
1
SpectraPulse
Ultra Wideband
Wireless Microphone System
®
mtu201 Wireless XLR Desk Stand
Set-up and Operation
2
This device complies with Part 15 of the FCC rules.
Operation is subject to the following conditions:
(1) This device may not cause harmful interference and
(2) This device must accept any interference received, including interference which
may cause undesired operation.
Note: This equipment has been tested and found to comply with the limits for
a Class A digital device, pursuant to Part 15 of the FCC Rules. These limits are
designed to provide reasonable protection against harmful interference when the
equipment is operated in a commercial environment. This equipment generates,
uses, and can radiate radio frequency energy and, if not installed and used in
accordance with the instruction manual, may cause harmful interference to radio
communications. Operation of this equipment in a residential area is unlikely
to cause harmful interference. However, if the equipment does cause harmful
interference, the user will be required to correct the interference at own expense.
CAUTION! Electrical shock can result from removal of SpectraPulse® components’ covers.
Refer servicing to qualified service personnel. No user-serviceable parts inside. Do not
expose to rain or moisture.
The circuits inside the SpectraPulse® components have been precisely adjusted for
optimum performance and compliance with federal regulations. Do not attempt to open
the drm141 Digital Receiver Module (main assembly), aci707 Audio Control Interface,
mtu101 Boundary Microphone Transmitter, mtu201 XLR Desk Stand Transmitter, or
cei007 Charging/Encryption Interface. To do so will void the warranty, and may cause
improper operation.
Notice to individuals with implanted cardiac pacemakers or AICD devices:
Any source of RF (radio frequency) energy may interfere with normal functioning of the
implanted device. All wireless microphones have low-power transmitters (less than 0.05
watts output) which are unlikely to cause difficulty, especially if they are at least a few
inches away. Note also that any medical-device disruption will cease when the RF
transmitting source is turned off. Please contact your physician or medical-device
provider if you have any questions, or experience any problems with the use of
this or any other RF equipment.
3
Please note that your SpectraPulse® system operates in a frequency band in a way which
may make its use subject to certain FCC and other regulatory agency restrictions and
licensing requirements. No changes or modifications may be made to this equipment
except by the expressly approved responsible party for compliance. Changes or
modifications could void the user’s authority to operate the equipment, and will also void
Audio-Technica warranty coverage. For further information, Please contact your local office
of the FCC as applicable.
Battery precautions
• Each mtu201 Wireless XLR Desk Stand is powered by 2 AA batteries; alkaline batteries
are included, but rechargeable SANYO brand NiMH AA batteries are recommended.
• Each cei007 Charging/Encryption Interface comes equipped with 14 rechargeable
SANYO brand NiMH AA batteries. Note: Other models of NiMH batteries may work,
but the cei007, mtu101 and mtu201 are optimized for use with SANYO NiMH
AA batteries.
• SpectraPulse® cei007 Charging/Encryption Interface is intended only for use of mtu101
Boundary Microphone Transmitters and mtu201 XLR Desk Stand Transmitters equipped
with rechargeable AA Nickel Metal Hydride (NiMH) batteries. Do not use the charging
station for products other than the Audio-Technica SpectraPulse® system. WARNING:
Do not use the cei007 Charging/Encryption Interface to charge batteries of other types
besides NiMH or damage may result.
• Rechargeable batteries must be charged before initial use or after prolonged non-use.
• When recharging, follow instructions in the SpectraPulse® Owners Manual.
• When inserting batteries into the mtu201, observe correct polarity as marked. • Do not use a leaking battery. If battery leakage occurs, avoid contact with skin. If contact
occurs, immediately wash thoroughly with soap and water. If battery leakage comes into
contact with your eyes, immediately flush with water and seek medical attention.
• Do not expose the batteries to fire. Do not heat, deform, solder, disassemble or modify.
• Do not peel off or damage the outer tube of a battery.
• Do not use these batteries together with dry cells, other types of batteries, new and
old batteries together, or batteries with different charge levels.
Note: This SpectraPulse® system is approved for indoor use only.
Note: See SpectraPulse® Owners Manual for full system specifications.
4
5
Contents
What’s in the box
mtu201 Installation & Operation
mtu201 Controls Specifications 3.Connect an Engineered Sound® gooseneck microphone with 3-pin XLRM-type output to
the XLRF-type input on the mtu201 XLR Desk Stand Transmitter.
Page
Page
Page
Page
4
4
6
8
What’s in the box:
• SpectraPulse® mtu201 XLR Desk Stand Transmitter(s)
• AA Alkaline batteries (2 batteries per transmitter)
mtu201
XLR Desk Stand Transmitter
Installation & Operation
Thank you for purchasing the mtu201 XLR Desk Stand Transmitter, a component of
Audio-Technica’s SpectraPulse® Ultra Wideband Wireless Microphone System. Please
follow the information contained in this manual closely, and refer to the SpectraPulse®
Owners Manual for system operating instructions.
The mtu201 XLR Desk Stand Transmitter is optimized to work with Audio-Technica
Engineered Sound® gooseneck microphones with 3-pin XLRM-type output. The unit
provides phantom power to the microphone and features a programmable touch-sensitive
switch (for push-to-talk, push-to-mute, or toggle operation) and 9-hour rechargeable battery
life. It also offers an on/off switch and LEDs indicating power/mute and link status as well
as low-battery warning. Each mtu201 operates using 2 AA batteries. Standard alkaline or
NiMH rechargeable batteries can be used. Charging contacts on the base of the mtu201
allow it to be dropped into the Audio-Technica cei007 Charging/Encryption Interface; see
SpectraPulse® Owners Manual for instructions.
1.Insert 2 fully charged rechargeable NiMH AA batteries or 2 fresh AA 1.5V batteries in
each mtu201 XLR Desk Stand Transmitter. (See Battery Selection & Battery Installation,
page 6). Note: Be certain the NiMH batteries are fully charged: see SpectraPulse®
Owners Manual.
2.Select a unique channel address on the bottom of each mtu201 XLR Desk Stand
Transmitter. (1-7 for the first aci707 audio control interface unit used; 8-14 for the second
aci707 unit). (See Channel Address Selection, page 6.)
4.Turn on the power switch on the bottom of each mtu201. The Power LED on the top of
the base will glow blue. (See Power On/Power Off, page 6.)
5.Confirm link status. If the mtu201 XLR Desk Stand Transmitter is properly linked, the Link
LED will glow blue and the top green light on the corresponding aci707 channel will light.
(See SpectraPulse® Owners Manual.)
6.Confirm mute/live audio status. When the audio is on, the elliptical Live Audio LEDs
glow blue. To change mute status, depress the desk stand transmitter’s soft-touch
switch. (See Audio/Mute LED, page 7 ). (Note: Switch function is programmable. See
SpectraPulse® Owners Manual.)
7.Confirm battery status. Low battery is indicated by blinking power light (at the top of the
desk stand transmitter). (See Low Battery Warning, page 7.)
8.With the aci707 on and connected as desired, the drm141 connected, and the XLR desk
stand transmitter on, speak into each microphone and verify audio operation. Set the input
levels on your connected equipment as needed. (If connected equipment requires line-level
inputs, set DIP Switch #6 to line level as described in DIP Switch 6 selects Line or Mic level
in SpectraPulse® Owners Manual). You are now set to use the system.
Note: For SpectraPulse® system operation, see SpectraPulse® Owners Manual.
6
7
mtu201
XLR Desk Stand Transmitter Controls
5.Power LED and Low-battery Warning
The Power LED on the top of the desk stand transmitter glows blue to indicate the
power is on.
1. Battery Selection and Installation
The mtu201 Wireless XLR Desk Stand Transmitter operates on two AA batteries
(standard alkaline or rechargeable). Please make certain that your batteries are fresh
or fully charged. Two AA 1.5V alkaline batteries are included with each desk stand
transmitter. SANYO rechargeable NiMH AA batteries (preferred for best battery-life
performance) are included with the optional cei007 Charging/Encryption Interface. Note:
Other models of NiMH batteries may work, but the cei007 and the mtu201 are
optimized for use with SANYO NiMH AA batteries.
When battery performance is low, the Power LED will blink as a warning. When the system
is linked, a bottom orange LED on the corresponding aci707 channel will illuminate to
provide additional indication of low-battery status.
a Open the battery door by sliding the button down.
b. Insert two fresh or fully charged AA batteries into the battery compartment, being
careful to observe correct polarity as marked on the inside of the door.
c. Close the battery door.
7.Link LED
The Link LED glows blue to indicate the desk stand transmitter is properly linked to the
system. (The top green light on the corresponding aci707 channel also lights.)
6.Audio/Mute LED
When a desk stand transmitter’s audio is on, the elliptical Audio/Mute LEDs glow blue.
When the unit is muted, the LEDs are off. A red light on the corresponding aci707 channel
also indicates when audio is muted.
8.Soft-touch Button
A soft-touch button on the front face of the desk stand transmitter operates as a mute
(press on/off) switch or a control switch; to change mute status, depress the soft-touch
button. Choose the function of the button (Push-to-talk, Push-to-Mute, Toggle, and Off)
at the SpectraPulse® aci707 Audio Control Interface. (See SpectraPulse® Owners Manual
for details.)
2.Channel Address Selection
Channel address selection is via a rotary switch on the bottom of each desk stand
transmitter. The switch is numbered for channel addresses 1 through 14; these channel
addresses correspond to the audio outputs on the aci707 unit. Use the provided screwdriver
to select a different channel address for each desk stand transmitter (you cannot have two
microphones on the same channel address). The Audio Control Interface (aci707) comes
from the factory set for channel addresses 1 through 7. If you wish to use it for channel
addresses 8 through 14, change the DIP switch on the back panel of the aci707 as described
in the SpectraPulse® Owners Manual.
3.XLRF-type Connector
The mtu201 XLR Desk Stand Transmitter is equipped with a 3-pin XLRF-type connector
for connection to any Audio-Technica Engineered Sound® gooseneck microphone with
3-pin XLRM-type output.
4.Power On/Off
A slide switch on the bottom of each desk stand transmitter turns the unit on and off.
3
5
1
4
7
6
8
2
8
Specifications
Input connector
XLR-female low impedance intended for use with Audio-Technica
gooseneck microphone of Engineered Sound series.
Bias voltage to
mic feed
The mtu201 delivers 11.5V DC to the XLR connector in order to
power any of the A-T Engineered Sound series microphones.
Battery type Two 1.5 volt AA alkaline batteries are included. Rechargeable
SANYO brand NiMH AA batteries are recommended; they are
included with the available cei007 Charging/Encryption Interface.
Battery life
Approximately 9 hours depending on battery type and use
Current
Consumption
180 mA at 3V DC
Average RF power
40 nanowatts
Weight
612 g (1.35 lb.)
Dimensions
82.6 mm (3.25") W x 131 mm (5.19") D x 63.0 mm (2.48") H
Optional Encryption
AES level 3, 128 bit
Audio-Technica U.S., Inc.
1221 Commerce Drive, Stow, Ohio 44224 (330) 686-2600
www.audio-technica.com
P52066 ©2008 Audio -Technica U.S., Inc. Printed in U.S.A.