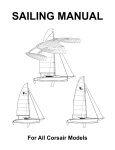
1
THE F-27 MANUAL
by Ian Farrier
This manual contains important information about the safe operation and maintenance of your new F-27.
We urge you to read it carefully, become familiar with the procedures described, and follow its recommendations, to help make your sailing trouble-free and enjoyable.
Your F-27 is designed and built as a high performance cruising yacht, which when used as intended,
with its enormous stability and unsinkability, is one of the safest and fastest yachts afloat.
As you become familiar with the boat, you may discover alternative methods of operation that have
advantages. We would appreciate if you would share these with us so that we can share them with other
F-27 owners through the Trailertri Newsletter. Should you encounter any problems then please don’t
hesitate to call your dealer, or Corsair Marine direct for assistance.
PREPARATION
If taking delivery of your boat direct from the factory , it is set up ready to go sailing. The only task
left to do is adjust the top shrouds to the floats once they are extended the first time. If your F-27 has
been shipped to you, then some items may not have been installed to avoid possible shipping damage.
Any set-up work then required is covered later in this manual.
To go sailing, you only need to provide the proper safety equipment (if not ordered with the boat),
chart of the area to be sailed, food, water, and fuel. Everything else needed for normal local sailing comes
with the F-27.
LOADING
Multihulls should be treated like aircraft when it comes to loading. The F-27 is a light responsive
craft, and due to its narrow waterline does not have an unlimited load carrying ability. Overloading can
affect performance and handling, while excessive overloading can also affect safety.
Always be conscious of weight and take care not to carry unnecessary items.
F-27 Sailing Manual Page 1
The design load-carrying capacity of the F-27 is 1200lbs. This is the maximum additional weight that can be
added to the boat as it comes from the factory, with its standard equipment.
Thus the total of crew weight, clothing, bedding, additional equipment, food, water, fuel and all other supplies
should not exceed 1200lb. This is a more than adequate payload, giving a capacity of up to 6 adults for general day
sailing, 3 to 4 adults for limited coastal crulsing, but no more than 2 adults for long ocean crossings. Some overloading is acceptable for general sailing in sheltered waters, the only adverse affect being a minor loss in performance.
When storing supplies, try to keep all heavy items located low down as possible and in the forward end of the
cabin. Avoid carrying any heavy items aft of the galley unit and never in the aft cabin, as too much weight aft can
cause transom drag, affecting performance. The F-27 has a very buoyant bow and additional weight should always
be kept forward rather than aft.
Avoid loading more than 75 Ibs in each float. These should not be used for excessively heavy items but are
ideal for such things as sails, fenders etc. Heavy weights in the ends of any boat, be it the bow, stern, or floats, can
adversely affect the general motion.
To maintain a light boat, and that sparkling edge to performance, it is highly recommended that you go through
everything on board, several times a year, and take off any items that do not get used. This prevents the gradual
buildup of unnecessary weight.
OUTBOARD MOTOR
The outboard well is located aft of the cockpit on the port side and the outboard will tilt up while underway. The
recommended motor size is 8HP and the well will accommodate most motors of this size. We have found 8 HP is
more than adequate for most circumstances, giving a boat speed of around 7 knots. Some 15 HP motors can be fitted, giving about 10 knots under power, but they are heavier, and will consume more gas.
A long shaft motor is the minimum required, and the extra long 25” shaft motors are the best. Some motors may
have the tilt control mechanism mounted in an awkward place to reach, due to the well, but we have found this is
easily overcome by attaching an extension lever. The remote control option also helps to make operation very easy.
With weight being important, try to keep the outboard less than 801b. A list of motors that we have found to be
very suitable is in the back of this manual.
F-27 Sailing Manual Page 2
There are a number of specialist ‘Sail Boat’ motors now available and these are designed for heavy, hard to push,
displacement boats, and their propellers are effectively ‘geared down’, to give high thrust at low speeds. However,
the F-27 has a very easily driven hull and really does not need such a propeller. The result can be the same as always driving your car in low gear. You will have plenty of thrust, but speed is low, and the economy can be poor.
However, these motors do have advantages, and if used, you should experiment with different propellers to get the
best and most efficient performance.
The outboard gas tank should be located in the storage locker under the port side cockpit seat. A duct connects
this through to the outboard well, and the fuel line is run through this. The storage locker is ventilated via this duct
and a drain out the hull side.
The motor can be used while the floats are extended or folded and should always be tilted up when sailing. It is
normally left down while trailering, and launching or retrieving. The well has several advantages, such as keeping
the motor close at hand, protection from swamping, and locating the propeller in a more efficient position. There is
much less cavitation, due to the propeller coming out of the water, than there is with stern mounted outboards. This
means a smaller motor can be as efficient as a bigger motor.
One drawback with bigger motors is that they cannot be turned significantly to improve low speed steering. This
means that maneuverability when just starting off is limited, as the main rudder will not start turning the boat until
some speed is built up. So, if starting from rest, always allow a little extra room to turn in crowded areas, or be
pointing in the right direction. After boat No. 100, the well was considerably enlarged to help overcome this.
When motoring while folded, the turning circle is reduced slightly by the tiller hitting the folding struts. This can
be overcome, by folding up the end of the tiller. Thus full rudder can then be applied, if needed, for any tight turns.
The daggerboard SHOULD ALWAYS BE DOWN when motoring, to prevent any sideways movement. If not,
you will have a hovercraft like motion with wide skidding turns. With the daggerboard down, handling is excellent.
TRAILERING
The total towing weight, including dual axle trailer, is approximately 41001bs, not including any personal gear,
stores etc. Check that the vehicle is approved, and equipped as recommended by its manufacturer for towing this
weight, and the capacity of the towing hitch is suitable.
While towing, watch for strong crosswinds. The F-27 is a relatively light boat for towing, but it is a big boat
with considerable windage. For easy, stable towing, the trailer should be balanced to have 5 to 10% of the total
weight on the coupling ball. This can be measured by a bathroom scale. We recommend about a 200 to 3001b
tongue weight. If you find ‘fish tailing’ occurs, increase this weight. A simple change like shifting the gas tank forward can make a considerable difference to trailer behavior.
The trailer lights clip into special brackets on the boat’s transom, and are independently wired from the trailer.
Be sure to fit the correct lights on the appropriate sides. The wire should be run along the top of the boat, looped
around the foredeck cleat and then connected to the towing vehicle. Independent wiring avoids the frequent breakdowns that occur with wiring through the trailer being attacked by saltwater. When the trailer is being towed on its
own, there are matching brackets on the trailer for the lights.
Before trailering, check that the tires are inflated correctly, the 2 beam locking pins are in place, the rudder is
fully up and tied to one side, the pop-top is secured down, and the boat is tied down to the trailer. There should be
one tie-down per side, these being looped around the spinnaker winches on the cockpit coamings, and tied to the
tie-down loops on the trailer. The bow eye should also be tied down to the winch post, in addition to the winch line.
Check that all the trailer supports bear equally against the hulls.
CAUTION:
When trailering, BE SURE to pivot up or remove the trailer jockey wheel,
and that the hitch is locked on to the ball.
Should the mast extend back past the trailer lights by more than the legal amount, the appropriate warning flag
should be tied on the back. The mast can be positioned far enough forward to eliminate any excessive overhang, but
this may not be possible if the towing vehicle is a van.
F-27 Sailing Manual Page 3
Mast step is shown here with mast in position, ready to raise. One fastpin is inserted through the pivot bracket/
maststep ‘leg’ on each side of the daggerboard. The pivot brackets are in line with the shroud chainplates and thus
the mast is held from going sideways while being winched up.
When trailering, allow extra distance
for stopping. Watch also for low bridges,
overhanging trees or awnings etc.
CAUTION:
The overall height on the trailer is approx. 11’6” amd care
should be taken to avoid all low, overhead obstacles.
RIGGING
VERY IMPORTANT WARNING:
For ease of rigBefore starting to rig, check to see that there are no powerlines for the mast to touch
ging, it is highly
while being raised, or while being moved to the ramp.
recommended that
you follow the exact
procedure as set out below. This has been developed from hundreds of launchings and has proven to be fast, easy
and efficient. Using this procedure, two people can completely rig the F-27 and have it launched in under 20 minutes of arriving at the ramp. It is possible in fact, to be launched, unfolded, and sailing within 15 minutes with just
two. One person should easily have the boat rigged and launched in under 30 minutes.
Don’t be dismayed if it takes you considerably longer the first few times out. It will take a little practice, to become familiar with the procedure, and the more you rig the boat, the easier and quicker it will become.
The Recommended Set-Up Procedure Is As Follows:
1. Remove the trailer tie downs, and the trailer lights. We normally tie the 2 tie-downs together and then use
them as the bow line for launching. Saves stowing them, and then finding a bow line.
2. Undo the trailer winch hook, and pull some slack so that the hook will pass over the bow roller. Leave it lying
on the foredeck.
3. Remove the mast raising bar from bracket on the front of the trailer and also leave it on the foredeck. Climb
onto the bow using the non-skid areas on the float bows as stepping points.
F-27 Sailing Manual Page 4
CAUTION:
The float bows can be slippery - particularly warn children to take care while climbing up or down.
4. Move aft alongside the mast undoing the rope mast ties (at each end) and the Velcro rigging ties as you go.
5. Lift the forward end of the mast and walk aft, rolling the mast on the aft mast roller. You may need to stop
about half way back, rest the mast step on the deck, and go aft to lift the intermediate shrouds outside the aft mast
support side tubes. Clear any other possible obstructions to the wires on the way back to the mast step. Continue
walking the mast back until the ‘legs’ of the mast step reach the pivot brackets. Now’s the time to fit the Windex to
the top of the mast. Lift the mast up until the Windex can be fitted to the masthead from the ground behind the boat.
If rigging single-handed, the mast will actually balance in this position to enable fitting the Windex.
6. The mast should now be connected to the pivot brackets with the fast pins. You may have to brace your feet
against the beam recesses and push the mast hard aft to insert the pins. If still difficult check that all stays are clear,
the Gibb T Ball stay terminals into the mast have not snagged sideways, and the mast is centered on the aft roller .
7. Position the mast raising bar on to the top of the fwd. beams. Take the trailer winch hook, and pull it back
over the mast raising bar roller and connect it to the jib halyard snapshackle after it has been unhooked from the
spinnaker eye on the mast. Check to see that the jib halyard is SECURELY TIED OFF at the cleat on the side of the
mast.
8. The mast can now be winched up, first CHECKING ONCE AGAIN FOR POWERLINES. Check to see that
all rigging wires are clear and have not snagged anywhere on the boat.
Mast is ready for raising, with raising bar in place and jib halyard connected to trailer winch line. Only the winch
line should pass over the mast raising bar to avoid unnecessary wear on the halyard.
F-27 Sailing Manual Page5
For launching, or retrieving, the trailer should not be taken in any further than this. The vehicle is still clear of the
water, and the F-27 is an easy push-off from here.
The lower and intermediate shrouds will hold the mast steady, on the way up, limiting any sideways movement.
Mast raising is thus a one man operation.
9. Once the mast is fully up, connect the forestay to the bow chainplate, and wind the trailer winch further until
the inner forestay can be connected to its chainplate. Clevis pins with spring retaining clips are used on both turnbuckle toggles, and once initial adjustment has been done neither forestay turnbuckle needs to be undone during
normal rigging or de-rigging, only the clevis pins are removed or inserted.
Lower and intermediate shrouds remain connected during all rigging and de-rigging procedures. After the initial
adjustment, there is no need to undo these or disconnect them from the shroud chainplates.
10. Once both forestays are connected. slacken off the trailer winch, disconnect the jib halyard, and return it to
the spinnaker eye on the mast. Rewind the winch and reconnect hook to the bow eye.
11. The topping lift is now disconnected from the boom vang eye on the back of the mast and connected to the
stainless steel strap on the end of the boom to take the weight. Remove the sail bag from the mainsail/boom and
insert the shaft at the front of the boom through the mast pivot hole.
12. Fit the roller furling handle (which is normally kept in the anchor well) on the front with the fast pin, and
insert the handle shaft into the mast hole. Tighten all the battens in the mainsail, if required. Connect the mainsheet
to the strap on the end of the boom. Feed the mainsail head into the track on the mast and connect the main halyard.
13. Run all the halyard lines from the mast through the turning blocks back to the correct rope clutches on the aft
end of the cabin roof.
14. Connect the mast electric plug if the mast lights will be used.
HINT If the mast lights are not to be used it is better not to connect the plug, as it is easy to forget when
lowering the mast, with consequent possible damage to the plug.
15. The jib or genoa can now be hanked on and the sheets laid out and connected to the clew. The sheets are normally kept in the anchor well. The headsail can be kept under control by a shock cord which should be kept on the
foredeck for this purpose. Just leave it hooked to the toerail.
F-27 Sailing Manual Page 6
16. Untie the rudder, and check that the daggerboard up line is cleated. The outboard motor should also be in the
down position - there is no need to tilt it while on the trailer, or while launching or retrieving.
17. Remove the mast raising bar and store. The aft mast support is also now removed and stored.
Your F-27 is now ready to launch - took you less than 30 minutes right?
VERY IMPORTANT WARNING:
LAUNCHING
Before
taking
the
boat to the ramp, check to see that there are no
Back the trailer down the ramp until
powerlines
for the mast to touch.
the trailer is submerged up until the
inward bend of the side frame members (about 8’ back from the winch post). You should now be able to get to the winchpost without getting your feet
wet.
Disconnect the winch hook and push the boat off, while holding on to the bow line, or you can get on board (but
start the motor first before pushing off). Be careful of crosswinds or wind from the stern. The F-27, with its shallow
draft, will move quickly sideways in such conditions, and you should not launch until there is sufficient maneuvering room alongside.
This ability to go sideways is one drawback of shallow draft, and you should always make allowances for it
when launching/retrieving or under power. First priority at every launch should be to LOWER THE DAGGERBOARD!!. This helps to prevent any sideways movement, and gives excellent maneuverability under power.
The F-27 is a big boat to handle at ramps, but because of its lightness, it is easy to move around. The trick is not
to fight it, but to plan ahead what you are going to do, and gently guide it in the correct direction.
An offshore wind at the ramp is ideal, as the boat will just lie quietly downwind at the end of the bow line. It is
just then a simple matter of boarding over the float bows, and backing off or just walking her over to the boarding
dock, if available.
An onshore wind is probably the most difficult, as the boat will swing sideways once launched, and come towards the ramp. In this situation the boat should be held off the ramp from a central position on the side. You will
find a balance point where it will lie evenly until you are ready to board.
If a dock is alongside it is a good idea to run a stern line to the dock, so that the stern can be pulled to the dock
after launching, thus preventing it from swinging around.
A good way of launching in all conditions, if extra help is available, is for someone on board to start the motor
before launching, and simply back the boat away from the ramp - remembering, of course, to drop the daggerboard
once clear of the trailer. This can be done single-handed also, by pushing the boat off, and then climbing aboard
using the float bows.
The F-27 is always launched folded, and unfolding can be done at any time once afloat. It can be done either at
the dock, or while motoring away, even in choppy conditions. Folded stability is very good, but it is limited. Always take care in strong crosswinds and avoid fast tight turns!
CAUTION:
Always take care in very strong winds (30 knots and above) while folded and with mast up. A combination of a fast tight turn and the mast windage could cause a rollover in such conditions. If in doubt, unfold one or both sides and any danger is eliminated.
To unfold, first check that there are no ropes across the beam recesses, and the tiller is clear. Remove the beam
locking pin at the forward end of the cabin side, place your foot on the top of the upper folding strut, grasp the top
of the beam and pull downwards, while pushing with your foot.
CAUTION:
Check that no one has their foot/hand/fingers in or near the beam recesses!
The float will unfold, but be careful it doesn’t pick up too much speed towards the end. Hold the beam down and
tighten the bolts using the speed wrench provided. These bolts should be tightened firmly but not excessively.
Should you have difficulty in holding the beams down to tighten the bolts, then the usual cause is wingnets that
have been lashed too tightly. These should be slackened slightly.
F-27 Sailing Manual Page 7
The top shroud is shown here, connected to the float, and with the tensioner tackle in place and tightened. Optional
stanchion bases can be seen on the float decks, the stanchions just plugging into these when required. The lifelines
are clipped onto the float deck padeyes on the bow and stern.
It is not necessary to hold both fwd. and aft beams when folding, one person operating either beam is all that is
required. The wingnets will extend and automatically tighten themselves.
The top shrouds should now be connected to the floats, the turnbuckles being attached to the chainplates on the
float decks. If these are set up correctly, there should be just enough slack (but not too much) to insert the clevis
pins. The turnbuckle can then remain fixed, and is never undone. Just the spring clip and clevis pin are inserted or
removed.
The top shrouds are then tensioned by the block and tackles anchored on the aft beams and attached to the
shackle located about 4’ up the top shrouds. Pull these on firmly, checking that the mast is straight. The first time
out the block & tackle rope should be marked when the mast is straight, as a reference mark for future use and adjustment. These tackles will need considerable tightening when going to windward in rough seas, as they keep the
mast straight and forestay tight for good pointing ability. Do not allow the leeward shroud to become visibly loose.
SAILING
The mainsail can now be hoisted, after first releasing the roller furling handle on the front of the mast so the
boom is free to turn. Turn directly into the wind and commence pulling on the halyard. You may find a winch necessary to get the main fully up, the self-tailing jib sheet winch being ideal. As the main goes up it will automatically
unroll from the boom. Winch the halyard tight until all the wrinkles just disappear from the mainsail luff , and lock
the halyard with the rope clutch. Then lock the roller furling handle, and release the topping lift.
The F-27 sails perfectly well, and tacks easily under mainsail alone. If you have a lot of tacking to clear a channel then it can be much easier with just the main. You don’t have to worry about tacking the jib, you won’t be going
too fast, particularly in crowded waters, and visibility is excellent. The correct technique for sailing mainsail only is
to sheet it free to avoid choking the boat.
F-27 Sailing Manual Page 8
The traveller can be locked on the centerline, and the mainsheet slackened off so the boom is about 12” out from
the centerline. Your boat speed should be 5- 6 knots in 10 to 15 knots of wind. If you find boat speed is less, then
the problem is an oversheeted main or trying to point too high.
There is a technique involved in sailing main only, but once you learn how, then it’s a very relaxed form of sailing. Like having a self-tacking jib, but without the hassles of a self-tacking jib! The secret in successful main only
sailing is to ease the main out more, particularly after a tack. Don’t try to point high until boatspeed has built up.
The jib halyard can now be connected and the jib hoisted. Using the halyard winch, tighten until the wrinkles
just disappear from the jib luff. Never tighten any tighter. As the wind increases you will find the halyard will need
tightening, again just enough to just get the wrinkles out. Sheet the jib and you are sailing!
If available, two additional controls should be added to the mainsail at this stage, these being the boom vang
which just snaps on, and the Cunningham eye tackle. The fiddle block with cleat is snap shackled to the port leg of
the mast step, and the line from the top fiddle block is passed through the Cunningham eye on the sail and hooked
to the horn cleat on the starboard side of the mast. This gives an 8:1 purchase, and should be adjusted to just remove the wrinkles from the mainsail luff. Neither of these controls are essential for everyday sailing, their main
purpose being to give more efficient control over the mainsail. Both must be removed when roller furling.
The F-27 is sailed like any other yacht, the most notable differences being the response and lightness of the
helm, and the low angle of heel. This ranges from a normal average of 5 to 8 degrees to a maximum of about 12
degrees.
Pointing ability is excellent, but care must be taken not to oversheet or try to point too high. Just a few degrees
less pointing, with sheets slackened just slightly, can see boatspeed jump from 6 or 7 knots to 9 or 10 knots.
Boom vang is shown here fitted, while Cunningham eye tackle can be seen alongside mast. Line from Cunningham
tackle goes up through Cunningham eye on the sail and down the other side of the mast to the horn cleat. This can
be re-threaded after roller reefing to give Jiffy reefing style control.
F-27 Sailing Manual Page 9
Barber hauler for the jib is being used here, and led back to the aft deadeye and cleat on the cockpit coaming. Additional eyes are on the float deck for the genoa and mainsail. Mainsail eye is used to set up a downhaul or a preventer. Note the spinnaker pole stored alongside the cabin. Forward deadeye and cleat on the coaming is for the
spinnaker guy/tweaker.
When reaching, the headsail shape can be greatly improved by using one of the optional barber haulers. This is a
line hooked to the headsail clew, and led to a block attached to one of the eyes on the float wingnet rail and then
back to a cam cleat on the cockpit coaming. Two barber haulers are included as part of the optional Performance
Package and these give a wide range of sheet adjustment. One can also be used on the boom to hold it down while
running or reaching. This is much more efficient than the traditional boom vang and a good safety feature to prevent an unexpected jibe.
SPINNAKER
The optional spinnaker is a very easy sail to use on the F-27, because of the wide beam and level sailing. There
are no control problems and the spinnaker becomes a very practical and safe sail for family sailing.
It can be used with or without a pole, the pole only being necessary for serious racing or close reaching.
POLELESS To use poleless, single snapshackle blocks are set on the float bows or fwd. beams, and the outer Ubolts on the aft beams. Guy or tweaker lines, which have a single block fixed on the forward end are then led
through the forward blocks and back to the forward leads and cam cleats on the cockpit coamings.
The spinnaker sheets are now led through the guy/tweaker blocks back to the snapshackle blocks on the aft
beams, and then to the coaming winches.
The spinnaker is usually launched from the leeward wing net with the leeward guy/tweaker line fully released,
and the spinnaker is then being sheeted directly to the aft beam. On the windward side the guy/tweaker line is
pulled fully on which means the sheet line then goes to the windward float bow to act as the guy.
This gives infinite adjustment, and to jibe the spinnaker, one only has to let the guy/tweaker line off on one side,
pull it on on the other, and readjust the sheets! No need to go forward to jibe the pole!
F-27 Sailing Manual Page 10
Spinnaker sheet and guy/tweaker line set-up to use the spinnaker poleless. Separate sheets could also be used to the
spinnaker clew - one to the bow, and the other to the stern sheeting block.
The spinnaker set-up when using the pore. Pore downhaur and topping rift can also be seen.
F-27 Sailing Manual Page 11
Roller reefing is being demonstrated here. It’s simply a matter of going forward and winding the handle. Probably
the quickest, simplest reefing system available. The main halyard can be released as required by hand holding or
standing on it with your foot where it enters the mast. Works amazingly well. The new tack eye for the Cunningham
eye tackle can also be seen ready for use.
Another poleless system is to have two lines going to the Spinnaker clews, one line to a fwd. block on the float
bow or the fwd. beam, to act as a guy, while the other line goes aft to a block on the outer U bolts on the aft beams to
act as a sheet.
WITH A POLE When using the pole, the snapshackle blocks on the bows should be attached to the outer U-bolts
on the forward beams, with the guy/tweakers set up as above. This gives excellent control, and the spinnaker can still
be flown poleless if wished, but not quite as effectively. Jibing the pole is easy, just disconnect both ends, walk over
the other side and reconnect it. The spinnaker will still set fine with the pole off .
The main advantage of the pole is it gives slightly better control on tight reaches, preventing the spinnaker tack
from rising up and down with the puffs. It also helps prevent any oscillation of the spinnaker due to big swells. The
poleless system can be further improved in this regard by the addition of a 3rd line down to the main hull bow. But
such a line is not really necessary for general cruising.
REEFING
The F-27 comes with 2 reefing systems in one. The primary system is a well proven roller reefing boom which is
very fast and easy to operate, and infinitely adjustable.
To reef, first disconnect the boom vang and Cunningham eye tackle. The topping lift should also now be used to
lift the back of the boom a couple of inches above horizontal. Now take the main halyard around the winch and release the rope clutch. Go forward with the halyard held in hand, unlock the furling handle and begin turning. As the
main is rolled down, let the halyard slowly run out to suit. When the main is rolled up sufficiently, lock the furling
handle, let off the topping lift, return to the cockpit and retension the halyard. Reefing is complete.
If you find a problem with the mainsail rolling up close to and jamming against the mast, Ihis is usually caused by
not lifting the end of the boom sufficiently with the topping lift.
You may also find it easier to regulate the speed at which the halyard runs out, as you wind the boom, by just
standing on it with your foot where it enters the mast.
F-27 Sailing Manual Page 12
The boom vang cannot be reconnected, but with the barber hauler system available, if needed, from the floats, this is
not of any importance.
The second reefing system available is a jiffy reefing system. This gives slightly better sail control for better sailing efficiency.
To use, simply roller reef as described above, but only roll the main up until the selected jiffy reefing points are
reached (two sets included as standard). Lock the furling handle as before, and then reattach the Cunningham eye
tackle to the reefing tack eye.
Now unthread the outhaul line and rethread it through the new reefing clew eye. All the controls of a jiffy reefing
system are now in place, except you don’t have to tie off the sail as it is already neatly rolled around the boom! It is
however advisable to take a line from the Cunningham eye forward and around the mast. This avoids the possibility
of the bolt rope pulling out of the mast groove.
F-27 Sailing Manual Page 13
SAFETY
The modern trimaran with its enormous stability and unsinkability is a very safe craft, and has now established an
excellent safety record. However, this safety is dependent on the operator and how the craft is handled.
The major hazard to be avoided is capsize, and a few simple rules make this virtually impossible. Capsize is rare
with well sailed cruising multihulls, but can occasionally occur with racers pushed to the limit - just like race cars.
The important factor, as with a car, is that the degree of risk is up to the skipper. Drive too fast for the conditions and
the risk of a crash is higher. The decision is yours. It’s not taken away from you by a heavy keel below, making it
impossible to go fast. Nobody seriously suggests weighing down a car to prevent a rollover. Aircraft wouldn’t crash
either if weighed down enough so they couldn’t get off the ground!
Like a car, a multihull has the capability of very high speeds when desired, but the risk factor can be higher. The
choice is yours however, as it is not compulsory to go fast. In general, the risk factor will only begin to increase
when boat speed exceeds 15 knots while reaching, or about 8 knots to windward. When sailed for the conditions, or
with safety in mind, the F-27 is the safest craft afloat. Major safety features are:
UNSINKABILITY: This is the best safety feature for any boat. The F-27 is an unsinkable boat, being constructed
almost completely in foam sandwich. Even the interior furniture is foam sandwich. Cut it into 1000 pieces and virtually every piece would float. With no heavy keel, and a number of watertight compartments, it is therefore completely
immune from sinking, even with all watertight compartments flooded!. No matter what happens, you can be assured
that your F-27 will always be there, and will never go aground in 200 feet of water!
Watertight compartments are as follows:
Floats are divided into 3 compartments each.
The forward berth - this acts as a safety barrier against collision with floating objects.
The 4 beams, each of which is foam filled.
The aft berth.
RIGHTING SYSTEM: The F-27 has taken multihull safety a step further forward by offering a built-in righting
system which is described later in this manual. This makes it one of the safest craft afloat - being both unsinkable and
rightable - a very rare combination It is still very important to operate the F-27 with care, and any unnecessary risks
should always be avoided.
SAFETY COMPARTMENT: This is located in the port coaming, with an access hatch in the top and bottom.
Safety equipment should always be kept in here, including flares, righting ropes, spare tools, cutting implements etc.
in watertight bags (this is not a watertight compartment).
1.
VERY IMPORTANT WARNING
Be fully aware that it is possible to capsize the F-27 and the following rules
should always be observed for safe sailing.
Always reef early as follows:
a. Genoa should be replaced by jib in windspeeds greater than 12 knots.
b. Main should be reefed to 1st set of reef points when wind reaches 20 knots.
c. Main should be further reefed to 2nd reef points when wind reaches 25 knots and jib replaced by Storm jib.
d. In winds over 35 knots main should be roller reefed to 4th batten from the top.
e. Over 50 knots, main should be furled more, or completely, leaving only the storm jib.
If necessary, all sail can be taken off and a Storm Parachute Anchor put out. This is now a well proven method for
a multihull to survive even the worst of storms. It appears to virtually eliminate the danger of capsize from both extreme wave action and hurricane force winds.
Other variations are possible on the above depending on the circumstances. Experienced racing crews can even
delay reefing to beyond the above limits. A quick way to reduce sail, and achieve a very comfortable and safe motion
is to simply drop the jib and sail under main only, reefed if considered necessary. This avoids the need to tack the jib,
and the fully battened main remains docile and easy to handle.
Sometimes, when running downwind, it is better to drop the main and run under jib only. The F-27 can go to
windward and tack while sailing under either jib or mainsail alone.
2. When winds are strong and gusty, and the boat is being sailed hard, then always have the sheet of the biggest sail
up, be it the mainsail, genoa, or spinnaker, in hand, ready for quick release. Use only the cam cleats provided
and never use self-tailers as cleats in high winds - they are too hard to release fast.
F-27 Sailing Manual Page 14
Always be ready to release the sheets if you feel the boat is being pressed too hard - Instruct your crew to do likewise.
VERY IMPORTANT WARNING
Never leave the sheets unattended, if un-reefed and the wind is exceeding 20 knots
In general, your visual indication of the F-27 being over-pressed is when the leeward float is pressed far enough
down to have waves regularly wash over it. If cruising with your family, then this is the time to start reefing for the
best comfort. But if sailing for speed, this is not of great concern, providing the crew is vigilant, and this sort of sailing has been done for hours at very high speeds. It is not unusual to drive the low resistance float bows through waves
and this has been found to have no adverse effect on the boat.
3. Beware of being caught side on, with little speed and with all sails sheeted in tight. This can happen after a tack
if concentration is lost.
4. If caught in a severe thunderstorm, a simple safety procedure is to drop all sail and simply let the boat drift. You
will lie side on to the wind which is quite safe, unless the waves are very large (15 feet or over), in which case you
should steer off downwind. The F-27 will steer quite well from a reach to a run with no sails up in any winds over 5
knots - try it sometime. It is even possible to round up into the wind.
5. Another safety procedure in a severe storm is to simply drop all sails and anchor. Anchoring is probably not
used enough as a safety procedure. It is very effective. At sea a Storm Parachute anchor has the same effect.
6. Always listen to the latest weather forecast before you set out on any sailing trip.
7. Always leave yourself a large safety margin, be it while sailing, or simply motoring around.
8. Always carry full safety gear, including life jackets, as required by U.S. Coast Guard and local regulations.
Safe, high speed sailing is a reality with the F-27. This shows the prototype F-27 reaching at 15 knots in just 18 to 20
knot winds. Note that the skipper is steering with just his thumb resting on the tiller. Even at these speeds the F-27 is
dry, comfortable, and always under control.
F-27 Sailing Manual Page 15
The above procedures give a very high safety margin and should always be observed whenever safety is paramount.
If absolute performance is required, and an experienced crew is aboard, the above limits can be comfortably exceeded. In some earlier sea trials full sail has been carried in over 40 knots of wind, including the spinnaker. This is
not for the inexperienced however, and any skipper doing such sailing must be prepared for and accept the responsibility for the extra risks involved.
ANCHORING
Trimarans tend to be lively at anchor, due to their light weight and shallow draft. They tend to sail from side to
side, which can be annoying. This is simple to overcome, however, by a bridle set-up going to each float bow. These
have eyes fitted as standard for the spinnaker, which can be used for the bridle.
When anchoring, just layout your anchor as per normal, over the main hull bow roller. Set up the rope bridles, running through the blocks on the float bows and back to the spinnaker coaming winches. Bring the 2 bridle lines together in the center of the boat and attach to the anchor line. Let the line out further until the bridles take over the
load. You will then have a well behaved F-27.
The optional Deepset Danforth anchor is intended only for the usual short cruises, lunch stops, weekending etc.
For serious long distance cruising a second, bigger anchor such as a Danforth D2000 (20001bs holding power) or
equivalent should be added as the main anchor with at least 25’ of 5/16” chain.
RUDDER & DAGGERBOARD
Both the rudder and daggerboard have 2 control lines, a red line to pull up and a blue line to pull down. The rudder
will kick back, should it hit bottom hard enough, the pull down line pulling through the clam cleat.
The rudder has an extra horn cleat on the side, and this should only be used if the central clam cleat is worn, and is
letting go at higher speeds. Never use the horn cleat where there is a danger of grounding. There is also a lock bolt
hole in the back edge of the rudder case, which should be used in long offshore passages.
The daggerboard, will not kick back, it being designed to break off should it ever hit bottom hard enough. This
protects the daggerboard case from damage - a much more expensive repair. Obviously, one should therefore be careful around shallow waters, keeping alert and boat speed down. The daggerboard is very strong and will only break off
with an exceptionally hard grounding. Normally you can expect the boat to come to a shuddering stop, with no damage, should you hit bottom at speeds less than 8 knots or so. It’s then just a matter of retracting the daggerboard and
continuing on your way.
CAUTION:
Even at low speeds, a grounding can cause the crew to be thrown forward, and care
should be taken to prevent this, or to be prepared for it.
The daggerboard case itself is exceptionally strong, and is not likely to be damaged in even the worst possible
grounding. Even with a lost daggerboard, the F-27 is sailable, and will still go to windward. In this case you should
allow her to heel as far as possible, submerging the lee float to pick up lateral area.
When manoeuvering in confined waters always have the daggerboard down. This promotes quick turns, preventing any sideways motion. In general, the daggerboard should always be down, except when running downwind in
light to moderate conditions, for a little less drag, and more speed.
The daggerboard should always be half to fully down when running or reaching in heavy winds or seas. It greatly
enhances directional control, keeping the tiller nice and light.
Should you at any time find the helm heavy, then the cause is either, the daggerboard is up, the rudder has
kicked back slightly (always watch for this), or the mainsail is sheeted in too tight ( a common fault) . Even in the
strongest winds, or the fastest 20 knot spinnaker run, the helm should always be light enough for easy one-handed
control. If not, you should check for reasons why.
DAGGERBOARD REMOVAL: Daggerboard can be removed for inspection anytime the mast is down while on
the water or the trailer. Unbolt the step and tape a ‘messenger’ line to the end of the pull down line. Note how the
lines pass through the cheek blocks on the step for refitting. Move the mast to one side and just pull the board up and
out. If you forget the ‘messenger’ line, the pull down line can be rethreaded through the cheek block inside the daggerboard case (with some difficulty) from underneath the boat.
F-27 Sailing Manual Page 16
VERY IMPORTANT WARNING:
Take great care while folded if winds are 30 knots or more. A combination of a high cross wind and a
fast, tight turn, can be sufficient to overcome the folded stability, and this may result in a rollover.
Mainsail is furled, ready for trailering, while top shrouds have been disconnected from the floats and secured to the
mast. All that remains is to fold her up.
If necessary , the cheek block can be removed for inspection from inside the forward port settee.
RETRIEVING
After sailing is finished, the jib is dropped and the mainsail is roller furled. Remember to lift the boom aft end by
at least 2” with the topping lift when furling. This prevents the mainsail bunching up against the mast when being
rolled.
Once fully rolled, you should then hold the mainsail with one hand, and reverse wind the boom with the other. This
loosens the tightly rolled main, preventing any wrinkles, and relieves any bending force on the battens. The floats can
be folded before arriving at the ramp, the folded beam being easier in confined areas, and it allows the float bows to
be useful step off points, if needed.
To fold, first release the top shrouds from the floats, the tensioning tackles being clipped to the float decks, while
shrouds should be strapped to the mast by the Velcro strap. This stops them from flopping around. An alternative is to
attach them to the jib Barber hauler saddle eyes on the float decks just behind the forward beams. This keeps them
from moving, yet allows the float to fold up.
Before folding, first check to see no one is on the floats or wingnets, and then undo the beam bolts. The beams on
the side first released will spring about 12” into the air as the last bolt is undone. Grasp the top of the beam and lift
upward to fold, TAKING CARE NOT TO LET THE FLOAT SWING IN TOO FAST AGAINST THE CENTER HULL AND POSSIBLY DAMAGE THE STOPS. You will have to slow it slightly. Insert the beam locking
pin. If the float does not fold in fully, the usual cause is the wingnet catching on the aft corner of the cabin side rail.
To correct, just push the wingnet down under the cabin side rail.
Now fold the second side. You will find this slightly more difficult, and the hand hold on the inner end of the aft
beam will have to be used. Crew weight on the opposite side also helps. Lift, and once again don’t let the float come
in too fast once it starts moving.
F-27 Sailing Manual Page 17
For retrieving, the trailer should not be submerged anymore than this. You still should be able to see the ends of the
float supports. Conditions here are ideal, but should there be a cross wind the side guide rail should be fitted, or a
side line should be taken to the dock or shore.
Insert the beam locking pin. Raise the daggerboard and rudder, and cleat both in the up position. The F-27 is now
ready for the trailer.
If there is a cross wind at the ramp, then the Side Guide Rail should be fitted to the leeward side of the trailer. This
will prevent the F-27 swinging sideways off the trailer. Back the trailer down into the water until the water reaches
the forward inward bend of the trailer side members and the float supports are just visible above water level. Don’t
submerge the trailer any further than this. Gently guide the F-27 into the center and pull up as far as it will go. Take
care here, that it comes on straight, and avoid pulling it over the center hull side supports, as this can damage the Log
paddlewheel sender unit on the bottom of the hull (gets expensive to replace).
A side line from the windward aft cleat may also be helpful in cross winds to prevent the stern swinging too far
sideways.
If motoring onto the trailer, leave the daggerboard down until the last minute - otherwise any crosswind makes
it very difficult to keep her on center. Once fully on, connect the trailer winch hook, and winch on the remaining few
feet.
The F-27 can now be pulled from the water, and once on level ground remember to check that it is fully winched
on. Once out of the water there always tends to be some slack in the winch wire. Tie an extra safety line from the
bow eye down to the winch post, ready for de-rigging.
DE-RIGGING
Remove the bow line, separate the two lines, and use as the side tie-downs. Fit the aft mast support and the trailer
lights.
Remove the jib and fold. The jib sheets can be stowed in the anchor well ready for instant use next time. The jib
can be stowed inside one of the floats - thus keeping it from cluttering up the main cabin. The genoa will also fit inside afloat.
If possible, relieve the tension on the battens, and these can be left in the loosely rolled main. Remove the roller
furling handle and stow in the anchor well. Leave the topping lift on, to take the weight, and pull the boom/mainsail
aft to disconnect from the mast.
F-27 Sailing Manual Page 18
Lay it down on the cabin roof to one side and fit the sail cover/bag. Disconnect the topping lift, and reconnect to
boom vang eye on the mast.
The boom/mainsail is heavy and hard to handle. It can be stowed in the cabin if you wish, but takes a lot of effort,
and a lot of room inside. We have found it much more convenient to stow it on the cabin roof, where it is protected
by its bag and is ready for instant use next time.
Release the jib halyard from the rope clutch and turning block and cleat it to the horn cleat on the mast side.
Other end should be left attached to spinnaker pole ring on mast to set correct length for mast lowering. Release the
trailerwinch hook, pass it over the bow roller and hook to the jib halyard. Tension the winch until the inner forestay
just becomes slack, allowing the pins to be removed from the forestay and inner forestay. There is no need to slacken
the turnbuckles.
Take the forestays back and tie to the mast. Remove all the halyards etc. from the rope clutches and turning
blocks. Wrap these round and round the mast to retain the stays neatly against the mast. It is important that this is
done now, otherwise when lowering the mast the stays will tend to fall away all over the boat. It also makes subsequent rigging much easier.
Fit the mast raising bar on top of the fwd. beams, and begin lowering the mast by letting out the trailer winch.
Take care that the winch rope meets the roller on the mast raising bar, and that the mast is central when it reaches the
aft mast support. Be careful that you don’t let go of the winch handle while lowering, Should this happen it will
start spinning very fast and can cause injury. Don’t try and stop it - except by using the winch brake. DON’T try and
grab the handle - you could break your arm.
Once the mast is fully down, disconnect the winch rope, wind on the winch, reconnect to the bow eye, and retension. The jib halyard is reconnected to the spinnaker ring on the mast.
Remove the mast step pivot pins (don’t loose these), and lift the mast up to enable the Windex to be removed from
the masthead. Walk the mast forward until the intermediate shrouds reach the aft mast support.
Mast is held in the trailering position by the pulpit, and all stays should be tied to the mast with the Velcro ties.
Don’t leave any wires to rub on the deck as they will soon cause wear marks. The mainsail can be seen in its bag and
stowed on the cabin roof
F-27 Sailing Manual Page 19
Rest the mast on the deck and go aft to lift the intermediate shrouds over the aft mast support. Continue forward
until the mast can be rested on the carrier on the pulpit.
Tie the mast to the pulpit and aft mast support. All rigging wires and stays should now be tied securely to the mast
with the Velcro ties. This is to prevent them from rubbing on the deck which will quickly wear through any gelcoat or
paint.
CAUTION:
Do not use elastic cord type ties on the mast, with hooks, as they can be dangerous
by whipping back and causing eye damage.
Rudder should be fully up, with the tiller handle folded up and tied to one side of the traveller. Should local regulations not permit the rudder to be left on the transom, it should be removed and stowed in the towing vehicle. Secure
the pop-top down with the front hold downs, or it could lift up during high speed towing.
Connect the trailer lights (making sure they are on the correct sides) and then check that the trailer is correctly positioned under the hull. You are now ready for the road.
LIFTING OUT
Should there be no ramp present, then the F-27 can be quite safely lifted in and out by the usual dockside lift.
Slings can be used around the complete folded craft, the best bearing areas for the slings being the area of the beams.
Alternative lift points are the inner forestay or shroud chainplates, and the traveller horse sides. If required, permanent lifting Eyes can be fitted to the cabin roof corners.
MARINA DOCKING
For marina docking, the top shrouds are released from the floats and the floats folded as normal. The marina slip
can then be entered and the F-27 moored as with any other craft.
One problem with marina docking is oil stains or growth on the lower float sides. This is not a major problem with
short stays in a slip, but will be a nuisance over a long period.
There are several ways to overcome this, one being the use of an anti-fouling wax on the float sides. Thus the gelcoat finish is preserved and only an occasional wipe is needed.
Rudder is shown in trailering position, with tiller folded up and tied off to one side. Endless line mainsheet traveller
control system can also be seen.
F-27 Sailing Manual Pape 20
Anti-fouling paint could also be applied to the float sides but this would not be very attractive as it would need to be
2’ 6” wide.
The best solution for long term Marina docking is to fit the optional Marina docking upper folding struts.
These are variable length struts that give a secondary folding motion, allowing the float’s position in the water to
be changed (when folded), pushing them out and rotating them up. The float’s normal sailing position remains the
same, but folded beam will be increased to 11’ 9”. This will still fit in a standard Marina Slip, but the float sides are
lifted higher out of the water. A 15” wide band of anti-fouling will then be sufficient along the bottom of the float.
This wider beam also gives a large increase in folded stability, and ensures safety in very high crosswinds (60
knots and above) while docked.
The Marina struts can be set up to allow the boat to directly fold to the Marina docking position or to fold to the
trailering position (8’ 5” beam) and 1hen extend them for Marina Docking in a secondary folding motion. This takes
a little longer, but avoids the problem of trying to get into your slip while 11’ 9” wide. The extended float bows do
not give you much room to manouever in this case.
To Convert Trailering Mode into Docking Mode:
1. Fold up boat to the normal trailering position.
2. Insert the ½” locking pins at each Lower Folding Strut and remove the two normal trailering locking pins at
front cabin corners (if inserted).
3. Remove the 3/8” lock bolts or pins on the Upper Folding Struts.
4. Kick Upper Strut outward while extending float, until ¾” x 2 ½” bolts can be inserted (with nylon washer) and
tightened.
System is now installed and folding is done same as normal, except use a ½” locking pin on at least one lower
Folding Strut on each side to lock in folded position. To revert back to trailering beam just reverse above procedure.
CAUTION:
The Marina Docking position is not as strong as the normal folded position. Do not motor in choppy water with
the floats locked in the Marina Docking Position. Waves acting on the semi extended float can exert a great force
on the locking pins and cause them to fail. The float may then extend unexpectedly which could cause injury. Always unfold immediately after leaving your slip or just before entering. Normal folding can always be done in
choppy conditions. The only problem is when a force acts on these locking pins.
F-27 Sailing Manual Page 21
This shows the cabin settee converted into a bunk by using the extension panel/cushion. Behind the flap on the aft
panel is the trash can. This has a washable gelcoat surface inside for easy cleaning.
CABIN
The cabin is primarily designed to accommodate 4 adults, with 5 berths to choose from. These are a single berth in
the bow, one each side of the cabin, and a cosy double in the aft cabin.
The starboard cabin berth is formed by using an extension panel/cushion, which fits by sliding under the settee
cushion, and resting on the cabin step and a support on the daggerboard case. Two wing nuts are then tightened on
two bolts under the settee top, firmly locking the extension in place. The extension panel/cushion can be stored behind the settee back. You now have a wide and very strong berth. The cabin table fits into slides either side of the
daggerboard case, and is attached firmly to the cabin floor with a wingnut. It can be quickly folded and stowed either
behind the port seat back or under the cockpit floor.
The pop-top is easily raised for full standing headroom at any time, even while sailing. It is not, however, designed to be sat on while in the raised position. Take care when lowering, not to catch any fingers along the edge. It
should be firmly locked in the down position by the catches on the front. These still allow the aft end of the pop-top
to be raised enough for access.
Take care not to force pop-top when raising with forward catches
The molded trash bin is located just
secured. If lifted too high there is a danger of breaking the brackets.
behind the starboard settee, and can be
removed by releasing a barrel bolt under
the cockpit floor.
Full instruction sheets for the optional stove, instruments etc., are provided with your F-27 and these should be
read thoroughly before operation.
There is ample storage space, such as under the settees, aft in the cockpit coamings, in the galley unit, under the
removable panels in the floor, and behind the seatbacks. The space aft, behind the starboard seatback is ideal for storing rolled up charts, while a chart table could also be fitted in this area. This may be a future option.
The F-27 interior is now fully lined with a lightweight polyester and thermally bonded nylon fabric. It has excellent durability, is immune to deterioration by rot, is not attacked by moths, mildew, or insects and has the best flameproof rating in its class. It does not have a troublesome foam backing, and all external fasteners pass right through for
easy access.
F-27 Sailing Manual Page 22
The internal wiring system has provision for adding extra accessories such as a Loran, Autohelm, etc., and comes
with extra unused circuit breakers for this purpose. There is a lighter socket located next to the trash can flap for any
accessories such as a spotlight, or portable TV. A fully detailed wiring diagram is included later in this manual.
The battery is located in its own compartment on the starboard forward side of the cabin. This has an access/
ventilation hole and care should be taken that nothing metallic is thrown in onto the battery terminals. A battery
test meter will give you an indication of the amount of charge left in the battery .
The cabin can be effectively ventilated, even while raining, by opening the anchor well hatch, and the screw-in
hatches in the forward cabin into the anchor well. Fresh air can thus enter through the anchor well, flow through the
cabin, and exit out 1he optional vent in the aft cabin roof.
If raining, and you have the optional pop-top cover fitted, some rain may be able to drip into the cabin through the
open hatchway. To prevent this, just slide the upper Plexiglass hatch slide between the cover and the pop-top and let
it extend aft about 12” over the cockpit, with the pop-top cover aft flap laying on top. This will eliminate any annoying drips.
When using the aft hatch top slide, from inside, be careful that the locking hasp does not slip over the locking
eye, thus making the hatch non-removable from inside. Your only way out is to then slide out under the cockpit.
To prevent locking yourself in, an easy solution is to just rest the hatch slide on top of its slides, using the hasp to stop
it sliding forward. You just then lift the hatch up when you want to get out.
MAINTENANCE
For continued safe and enjoyable operation of the F-27 it is essential that regular maintenance be carried out.
After every sail, the complete boat and trailer should always be thoroughly washed down with fresh water. This is
very important to keep that new look, and to prevent rust taking hold on the trailer. Particularly wash out the brakes
and suspension area of the trailer.
Regularly check the bilges of the center hull and the floats for any water.
Sails should always be rolled up or folded (the same way as you receive them) - dried first if wet.
All folding system pivot pins should be occasionally checked for corrosion and that the circlips are still in place.
The stainless steel beam bolts should have their threads lightly oiled periodically.
If possible, keep your F-27 under cover, as this will ensure the gelcoat keeps its gloss for the life of the boat. Only
the best available gelcoat is used in the F-27, but even the best will eventually begin to fade. It is also not unusual to
find occasional hairline cracks in gelcoat. Gelcoat is a very hard brittle coating over a relatively flexible resin, and it
is almost impossible to guarantee Gelcoat to be crack free during its lifetime. These are cosmetic defects only and in
no way threaten the safety of the boat. The resin underneath is a special high performance marine resin, very water
resistant, and unlikely to be affected by any water entering the cracks.
These cracks are also impossible to repair. They are normally caused by flexing, and will just crack again after any
repair. We believe the F-27, with its almost total foam sandwich construction, is one of the least likely boats to suffer
from such cracks, due to the great panel stiffness, but the possibility still exists and the F-27 cannot be guaranteed
against such cracks.
The rudder and daggerboard control lines should be periodically inspected for wear, and the rudder pull-down line
should be replaced yearly. Rudder blade should swing up and down easily in the case.
Rudder blade should also be periodically checked for any cracks in the join seam, and horizontal cracks just where
it emerges from the rudder case. If any develop here, the blade should be replaced. Cracks here should not be regarded as cosmetic. Check case and transom gudgeons also for any cracks.
All halyards should be regularly inspected, particularly where they enter the mast while the sails are up. The rope
spinnaker halyard should have the worn piece at the top cut off each year, and the halyard retied to the snap shackle.
All wire halyards should be replaced at the first sign of any broken strands, or every 3 years.
All stays should be regularly checked, and replaced if any broken strands are detected. Stainless steel is prone
to fatigue, and in a trailer boat it is not uncommon to get kinks in the stays while rigging or de-rigging.
This further stresses the wire, and even though the stays are oversize, it is strongly recommended that all stays be
replaced after 3 years.
F-27 Sailing Manual Page 23
Mast should be regularly checked, particularly in welded areas, for cracks or corrosion.
Trailer rollers should be regularly cleaned and oiled, as should the trailer winch. It is a good idea to spray all parts
of the trailer with a preserving oil. Winch line should be regularly checked and replaced should any wear be present.
CAUTION:
When raising the mast there is considerable tension on the jib halyard and winch line. Be doubly careful when
checking these for wear as failure of either one could result in severe injury.
Wingnets and bow nets should be regularly checked for wear, and replaced every 3 years.
Deck fittings should be periodically checked and replaced if any significant wear is detected.
Beam stops - where beams hit against the cabin sides - these should be checked to see that the floats are at least
1/8” clear of the center hull.
MAST RAISING ON THE WATER
It may be necessary in some areas to launch with the mast down and raise the mast later. To do this you will need
an additional strong block to attach to the bow roller fitting. A spinnaker sheet block is ideal.
The mast raising bar must be carried on board and the floats should be left folded until after you have cleared any
obstruction. Once in clear water, fit the mast raising bar, and the strong block to the jib tack fitting. Run a long line
(spinnaker sheet is ideal) from the jib halyard through this block and back to one of the sheet winches. The mast can
now be winched up. The procedure is reversed for lowering the mast.
Should the mast ever need to be lowered to pass under a low bridge then a similar set-up can be used, but it may
not be necessary to fold up and use the mast raising bar. This is only necessary should the mast have to be lowered
right down. While lowering the mast, should the lowering line reach the position of the mast raising bar, then THE
MAST RAISING BAR MUST BE FITTED. Lowering any further will put a great strain on the lowering line, and
the mast will fall as the angle of pull gets too small.
RIGGING AND SAILING HINTS
This manual is not intended to be a Sailing Instruction Manual, and it is assumed that all buyers do have a basic
sailing knowledge and skill. There are however, many aspects of sailing the F-27 efficiently, and the following covers
some of these.
SETTING UP YOUR RIG
Rig tension and mast set-up are very important for good performance and we have found most owners do not tension their rigs enough. To avoid this we recommend you purchase a simple rig tension gauge (Loos Type recommended) available at Marine stores or from Corsair Marine. This gauge is included in the Performance Package option.
The mast is normally set-up before the F-27 leaves the factory, but the rigging wire will stretch a little initially and
all settings should be checked after a few sails. The following procedure should be followed.
1. Start with mast raised and floats in the folded position either on the water or the trailer.
2. Forestay and lowers should be slack and the cap shrouds are detached. Mast is now supported only by the inner
forestay and the intermediate shrouds.
3. Adjust inner foretay and intermediate shrouds so fore and aft mast rake is just parallel to the aft edge of the forward beams, giving a mast rake of 1.5 degrees.
This is most accurately gauged by lying on deck while sighting up the flat aft edge of the foward beam. Your line
of sight should pass through a point about 3” forward of the masthead which is the same distance the beams are forward of the mast base.
4. Measure the side to side position of the mast by using the pole topping lift line or jib halyard stretched taut first
to one forward cabin corner on port then starboard. If the line shows a shorter distance on one side than the other the
mast must be leaning toward the shorter side.
Loosen one intermediate shroud and tighten the other until the pole lift or jib halyard shows the same measurement to similar positions on port and starboard sides of the boat.
5. Using the Loos tension guage, adjust the intermediate shrouds to 1460lbs or 42 on the Loos guage scale making
sure to maintain the fore and aft alignment of the mast by appropriate adjustment of the inner forestay.
F-27 Sailing Manual Page 24
Maintain side to side position by using exactly the same number of turns on the port and starboard intermediate
shroud turnbuckles.
6. Adjust the lower shroud tension to 680lbs or 36 on the Loos scale making the portion of the mast controlled by
the lowers aligned with the section already fixed by the intermediates.
7. The forestay is now adjusted to allow being easily pinned by hand without bending the mast forward. This will
result in 2-3 inches of mast pre-bend (masthead bending aft) when the cap shrouds are tightened. Forestay length is
adjusted in or out to suit personal preference or local sailing conditions which may require more or less pre-bend.
Bending the mast over 6-7 inches is neither recommended nor generally usefull.
8. With the boat on the water and the floats extended, now adjust the cap shrouds to have just enough slack to allow fitting the clevis pins by hand. It is important that these be not excessively loose.
9. With cap shroud tensioners attached to the cap shrouds, tension the four part tackle of the tensioners until the
forestay is at 36 on the Loos scale or 680lbs.
F-27 Sailing Manual Page 25
The port and starboard tensioners must be adjusted so the mast is perfectly straight, side to side, when sighting up the
bolt rope groove. Mark this “light air” setting for future quick reference by using a 1” strip of tape or marker pen just
above the knot on the tensioner and another 1” strip wrapped around the line adjacent to the first or “base” strip. This
allows you to return to this particular rig tension without measuring or sighting up the mast by simply aligning to two
tape marks on each tensioner.
10. Repeat step 9 for scale setting of 40 (1060lbs), 43 (1800lbs), and 45 (2500lbs). The reading of 45 on the forestay being used for the windiest conditions.
11. The jibs cut for Corsair Marine are designed to be used with about 4 inches of forestay sag. You will soon determine which marks to use on the tensioners to keep forestay sag in this general area.
12. Mainsails supplied by Corsair Marine are cut with 3 to 4 inches of luff curve which means if the mast is prebent less than 3”, the main will be somewhat more full, whereas more pre bend in the mast will tend to flatten the
main for windy conditions. Increasing cap shroud tensions will increase mast bend somewhat.
Further pre bend is available by increasing tension on the inner forestay by adjusting the turnbuckle or increasing
the forestay length. Any variation in the length of forestay or cap shrouds will necessitate a recalibration of cap
shroud tensioner settings as in steps 9 and 10.
For good windward performance all shrouds and stays MUST BE TIGHT and mast bent as described. This cannot be emphasized too much don’t worry about damaging the boat - you won’t break it!
An important rule, vital to the well being of your mast, is to be sure that your leeward cap shroud is NEVER
VISIBLY LOOSE. If it is very loose you could lose your mast.
This will be caused by the windward cap shroud stretching and allowing the masthead to bend off to where the
mast could fail at the inner forestay attachment point. To tighten your cap shrouds while underway, you can use the
spinnaker winches on the tensioners, or else pull on the leeward tensioner a set amount to remove any slack. Now
tack and pull on the other side an equal amount. It is easier to tension the leeward shroud rather than the windward
one. Your top shrouds tension in heavy weather should always be 2000lbs or more.......... Don’t forget to relieve this
when not sailing.
The performance capability of a tight rig and properly set sails to windward in heavy airs is really impressive. You
should be able to tack through about 80deg. while maintaining a boat speed of 9 to 10 knots.
WINDWARD PERFORMANCE
This is very dependent on the crew’s skill, and no matter how well the boat is set up, the end result depends on
how the crew sails the boat.
You will find the F-27 points very high as it comes from the factory . The main thing to avoid is over sheeting the
genoa or jib. Pulling these on as tight as you can will guarantee pointing ability, but the boat speed will be slow. The
correct way is to let the sheet out 1 - 2” from being tight on, so that the curve of the genoa leach matches the curve of
the mainsail. It should not backwind the main, yet your pointing angle and boatspeed should both be excellent.
Once you have achieved good boatspeed, then experiment by tightening sheets very slightly, pointing slightly
higher, while trying to maintain the same boatspeed.
In general, the mainsail traveller should be on the centerline, and should be moved to windward by up to 6” in
lighter conditions. As the wind increases the traveller can be moved out slightly, and more mainsheet tension applied.
In very strong winds the mainsheet should be pulled on as tight as you can. You cannot overtighten this. A tight
mainsheet helps keep the forestay straight for good pointing ability. In these conditions the shroud tensioners should
also be very tight. Even the leeward top shroud should have no slack.
If, after heavy weather sailing to windward, you find the shroud tensioners easy to release when you return to the
ramp - then you have not had them tight enough. A tight forestay is absolutely vital for good windward performance
in heavy weather.
The most recent development in heavy weather windward work has been to position the mainsheet traveller about
center or slightly to leeward and pull the mainsheet on as tight as you can. We used to set the traveller about 6” to 9”
to leeward, but have since found that by keeping it higher you keep the slot between jib and main more open. This is
crucial to good windward performance. Any back winding of the main will choke the boat.
F-27 Sailing Manual Page 26
The correct way to sheet your spinnaker for really tight reaching, to the aft traveller. With high winds, the spinnaker
sheet can be taken to the windward headsail sheet winch for windward side control.
Equally as important, the jib must be relatively flat with NO HOOK in the leach.
The jib and genoa sheet tracks have been set at the best angle for all around efficient sailing. To improve light
weather windward performance even further, another genoa track can be mounted 3” further inboard. This is for experienced sailors only, for if the genoa is not properly sheeted and the mainsail set exactly right, performance can be
terrible!
But if set up right, the F-27 will match the pointing ability of the best IOR monohull racers, but with more boatspeed. Pointing high and going fast is one of the hardest things to achieve in any boat, but with a little care and tuning
the F-27 is one of the best.
When reaching, it is absolutely vital that the mainsail be let out far enough. A very common mistake is to sheet it
in too tight, with loss of boat speed, a heavy helm and an excessive heel angle.
ALWAYS REMEMBER YOU WILL GO FASTER BY EASING THE SHEETS OUT. PULLING THEM
ON TIGHTER IS MORE LlKELY TO SLOW YOU DOWN.
Your mainsail comes with leach tell tails fitted as standard. Watch these, and should they disappear behind the
mainsail to leeward, then you are sheeted in too tight. They should always be flowing aft.
The genoa or jib should also be barber hauled out to the floats when reaching. This is used to get the perfect shape
in the headsail (so that it doesn’t backwind the main) boosting performance significantly.
In light winds the 8:1 Harken mainsheet system can tend to bind and be hard to let out. To overcome this there is a
lever on the side of the cam cleat block that disconnects the ratchet. The mainsheet system will then run out very easily.
SPINNAKER HINT: The spinnaker can be sheeted to the outer U-bolt on the aft beams, as described earlier,
which is simple and works very effectively for general sailing. However, for the best performance, particularly while
reaching, the sheeting block should be moved in to snap on to one of the lower holes on the side of the mainsheet
traveller. This sheeting point, and the optional radial spinnaker really give exceptional tight reaching ability, and you
will be able to outpoint any other type of boat.
F-27 Sailing Manual Page 27
The drawback is that the sheet must be taken outside the top shrouds and will chafe on the shroud while being used as
the guy. To avoid this the sheet/guy (windward side) block can be shifted to the outer U-bolt on the aft beam.
SAFETY/PERFORMANCE HINT
When spinnaker running before very large seas, with speeds of 20 knots or more, there can be a danger of pitch
poling. This can be caused by pressure from the mainsail which cannot be released downwind. The solution is
to drop the mainsail, which virtually eliminates this risk. This rule only applies to racers, as cruisers should
have reduced sail well before this becomes a danger - right??
The F-27 has several unique sailing features, one of these being the ability to make continuous 360 degree turns in
the one spot. To do this, while going to windward for instance, just tack her but don’t touch any of the sheets. You
will continue to turn, jibe, and tack again indefinitely. Can be a handy tactic on starting lines.
A simple way of heaving too, is to just tack as above, but immediately put the helm over to turn back into the
wind, with the jib/genoa sheeted on the windward side. This prevents you tacking again and you will instead falloff.
The rudder then takes over again and turns you back into the wind.
You will stabilize like this, just off the wind, moving forward very slightly. The helm can be lashed over and you
now have a stable, barely moving work platform to do any needed repairs, stop for lunch, or just wait for someone
else to catch up!
Should you ever loose the rudder for whatever reason, don’t despair. Among the F-27’s repertoire of tricks is the
ability to sail without the rudder. It takes a little practice to get right, and it is worth trying sometime. Pull the rudder
up clear of the water (first making sure you have plenty of room!). Now, to go to windward, you sheet the jib or
genoa as per normal but let the main right out.
Pull the main on slightly and you will begin moving. Pull the main on more and you will come higher, let it out
and you will go lower. Pull the main hard on and you will tack. Immediately let it right out until you stabilize on a
reach, and then start pulling it in until you are going high again.
This takes a bit of practice to get it right, and for a time you will be all over the place, but after a while you will be
able to work your way to windward, tacking too, just by adjusting the mainsail.
You can also sail surprisingly effectively without any sails. The mast alone is sufficient to get steerage way downwind, and once moving you can bring her up on to a reach, even back into the wind. This can be a handy feature for
coming into a ramp or dock at a greatly reduced speed. Another feature is the ability to back up. This takes a bit of
practice, but by turning into the wind, and waiting until she starts going backwards, you can control this backing for
as long as you want.
Just steer the rudder whichever way you want to go. Can be useful in backing off a beach, or away from a dock just let her go back, swing around once in clear water, and then accelerate away.
OFFSHORE SAILING
The F-27 has been built strong enough for offshore sailing, and it has crossed both the Atlantic and Pacific oceans.
However, it should be noted that the F-27 is a small boat for such long offshore passages, and for this reason Corsair
Marine does not recommend it for such voyages, unless in very experienced hands and correctly set up, with the
IMPORTANT WARNING
CORSAIR MARINE DOES NOT GUARANTEE THE SAFETY OF THE F-27 AT SEA AS OFFSHORE SAILING
CAN BE A HAZARDOUS UNDERTAKING, WITH MANY RISKS. NUMEROUS FACTORS BEYOND OUR
CONTROL WILL AFFECT THE SAFETY OF ANY OFFSHORE VOYAGE AND ANY OWNER TAKING THE
F-27 OFFSHORE MUST ACCEPT FULL RESPONSIBILITY FOR ANY RISKS INVOLVED.
proper safety gear.
It is not within the scope of this manual to go into all the necessary equipment for offshore sailing, this being covered by many readily available books, and/or offshore safety regulations. Particular items that should be carried are
the optional Storm jib, and a properly set up STORM PARACHUTE ANCHOR. The parachute anchor is a recent
development for multihulls and offers a very comfortable and safe method for surviving severe storms.
F-27 Sailing Manual Page 28
The top shroud tensioning tackle is shown fitted on the float deck for trailering. Forward snapshackle is connected to
barber hauler eye while rope tie prevents tackle block from moving around. This also shows how trailer tie-down
should be done.
The only item on the boat that would need additional reinforcement is the pop-top, and it is recommended that
this be bolted down by two additional bolts, one on each side of the pop-top at the forward corners. These should be
3/8” bolts, with fender washers, passing down through the pop-top coaming, to specially shaped wood backing blocks
at least 4” long inside. Use wing nuts and large fender washers inside. There is no need to reinforce the pop-top for
general sailing as green water on deck is very unusual in a multihull, and the standard hold downs are more than adequate for short coastal trips etc.
A rudder lockdown bolt should also be fitted in the hole in the back top edge of the rudder blade. This will
strengthen and prevent the rudder accidentally kicking back on a long voyage, possibly causing failure. It also acts as
a safety shear pin should you hit anything solid offshore.
The cap shrouds to the floats should be set up tight, independent of the tensioners, using the turnbuckles. The tensioners can still be used as required, and these become very powerful.
Further information or advice for anyone contemplating an offshore voyage is available from Corsair Marine.
SETTING UP A NEW BOAT
If your boat is being delivered to you away from the factory, it may need some set-up work, as certain items will
be left off to avoid damage.
In most cases the stays will already be fitted to the mast, and you can assume that the mast has been raised and the
initial set-up done.
If not, then the stays will need to be fitted to the mast, and this is just a matter of inserting the stay end T ball fittings into the slots on the mast, and turning straight. Each stay will be labelled as to what it is. The only exception is
the forestay, which needs a clevis pin to be inserted. The lower shrouds have retaining rubbers inserted so that the
shrouds cannot fallout while rigging. The intermediate shrouds will need to be wired to the spreader ends.
Once the stays are fitted, roll the mast back and fit it to the deck hinges. Now connect the lower and intermediate
shrouds to the chainplates on the cabin roof, leaving these slightly loose as they will tighten as you raise the mast.
You now need the mast raising bar, which is normally on a bracket at the front of the trailer.
F-27 Sailing Manual Page 29
Raise the mast as described earlier, checking that the shrouds don’t get too tight. Connect forestay and inner forestay. Shrouds and forestays should now be adjusted as described earlier.
The tensioning tackles should be fitted to the float decks, ready for use once the floats are unfolded as described
earlier under Launching.
All standard equipment and any options ordered are normally stored inside the boat, behind the port and starboard
seatbacks. Trailer side guide rail is stored in its bracket on the trailer.
RIGHTING SYSTEM
This has been tested and shown to be workable on a Farrier designed 19’ Tramp in choppy conditions, and on an F-27 in
smooth water. It has not been tested at sea and there is no guarantee that it will work at sea. The Tramp was deliberately rolled
over, the F-27 was a capsize.
The capsize was caused by the spinnaker combined with a mainsail sheeted tight amidships (never do this while under spinnaker in any circumstances). Both sails were being carried in winds gusting to 35 knots, with NO ONE holding the sheets. Crew
was owner and 10 year old daughter - definitely not a sensible way of sailing. Boat speed was over 20 knots and the capsize happened while changing from a run to a reach, and the crew were not able to release the sheets in time. In these conditions the
sheets should always be hand held without exception. The spinnaker sheet can be easily led to the windward jib sheet winch,
making this very easy to do.
After capsize both crew surfaced under the wingnets, but found plenty of space to breathe due to the high floating position.
There appears to be little danger in being trapped here. They were then able to get on to the upturned boat (now a safe 19’ wide
raft) , which was towed ashore, and righted, with little damage, the next day.
Should a capsize occur, stay calm, and make sure all crew are accounted for. Anyone inside can stay there, it being perfectly
safe for some time. There is absolutely no danger of sinking.
Surge is the major enemy inside the boat, and the first priority should be to seal all hatches, vents etc. and try to keep the boat
dry as possible. Pop-top will remain in place as this will try to float upwards. Main battery switch should be turned off and all
loose objects stored in the cabin settees, these now being above water. Surge will otherwise remove everything. Water level while
inverted is about the top of the galley unit - float decks are only immersed about 2” to 3”.
If possible, the battery should be removed as it will discharge under water. Being a sealed unit there appears to be no danger
of acid or Gas.
If offshore, the crew outside should obtain a cutting tool from the safety compartment, which is accessible while inverted, and
cut an access hole into the hull between the aft bunk and the cockpit storage lockers. Depending on the conditions, any crew inside can come out to help with righting, or those outside can shelter inside until conditions are more favorable.
You now have a large, relatively comfortable life raft, well stocked with provisions. If righting fails, you are still better off
than in a small liferaft with minimal provisions.
Righting should only be attempted once the weather is suitable, and outside assistance looks unlikely. Take your time and
think out each step.
The boat will be floating side on to the waves, and procedure is as follows:
1. Put on a lifejacket - this is essential for easy working in the water.
2. Attach righting ropes to the U-bolt padeyes on both windward float beams and bring them over the main hull to the leeward
float. Use a pair of lines for each available crew member.
3. Disconnect and save both shroud tensioners, which can then be used to help as necessary.
4. Release both top shrouds from the float chainplates and allow to drop.
5. Connect a line to the U-bolt on forward leeward beam and connect this to righting line from other side using 4:1 shroud
tensioner.
6. Release all beam bolts. This can be done while alongside without diving. The bow nets will have to be unlashed to reach
forward beam bolts.
7. Stand on the wingnet and pull on the shroud tensioner. The float on the side you are standing on will fold up, your weight
helping. Once folded insert the beam locking pins. Repeat process with other side float.
You now need to drop the mast off, and use its weight to assist righting, by helping the hull to rotate in the direction desired.
This is done by hanging it from a line passing over the leeward float, and attached to the windward float.
If in sheltered waters then damage to mast can be minimized by pulling back into the trailering position. However, outside
assistance may then be needed to rotate the boat.
8. Release the forestay, attach a line, and take to the center of the leeward float. Run the line over center hull to attach to the
windward float deck eye just in front of the Lewmar deck hatch.
9. Release all halyards from the rope clutches, and unthread from the turning blocks.
10. Release mainsheet from traveller, the jib sheets, jib tack, inner forestay, and all shrouds. The mast is now hanging from
the pivot pins, which will soon break from the motion of the unsupported mast. If not, then remove the nuts of the deck pivot
brackets from inside. The mast will now drop and will hang from the leeward float.
F-27 Sailing Manual Page 30
11. Now open all hatches on the leeward float, and pullout the air vent tubes. Stand on the leeward float, cessfully
stabilizing yourself with the righting ropes, to the windward side, and hold the air vent tubes in the air. The float will
now flood with any trapped air escaping out the air vent tubes. You may need to occasionally blow into the vent tubes
to displace any water.
12. As the float floods, start rocking back and forth in time with the waves. Once the float is flooded sufficiently,
the boat will roll upright. It’s possible to climb around the boat as it rotates to end up on deck. The beam retaining
pins will fall out and the floats will tend to unfold themselves. Now tighten the beam bolts, and start bailing. A long
tubular type bilge pump (such as Beckson 136PF) is needed to do this suc
The mast is now hanging from the pivot
pins, which will soon break from the motion of the unsupported mast. If not, then remove the nuts of the deck pivot
brackets from inside. The mast will now drop and will hang from the leeward float.
You may initially need to wrap a rag or towel around its body where it enters the circular float hatch to prevent
water re-entering. Pump should always be secured so that it cannot float away.
If you find your weight is insufficient to cause righting then additional weight such as the outboard motor, or battery can be sent down the mast line to assist.
The mast may or may not be salvageable, depending on the number of crew available, and a jury rig may now be
needed to reach shore.
GENERAL HINTS
SAFETY: The single most important precaution against possible capsize is to be alert and always ready to let the
sheets go. To put this in perspective, in over 16 years of trimaran sailing, in rough New Zealand and Australian conditions, I have only had to let the sheets go 2 or 3 times. On all occasions, this was a spinnaker sheet, while racing
When sailing offshore the following items should always be stored in the safety hatch, with lanyards
attached, and in watertight bags:
EPIRB unit
Flares
Cutting Tools
Bolt Cutters
Spare Beam Bolt Wrench
Ropes
VHF Hand Held Radio
Pliers
Extra wrenches & tools
hard in winds over 25 knots. I don’t recall ever having to let go a mainsheet or genoa sheet. Simply luffing up
slightly, sometimes even bearing away, is usually all that is required. The risk of capsize can be virtually eliminated
simply by reducing sail according to the conditions, and being prepared to let the sheets go.
When under spinnaker in winds of over 20 knots it should always be a matter of policy to never leave the spinnaker sheet unattended. It should be hand held, not even cleated, and occasionally let slip to test it hasn’t seized on the
winch barrel. Cruisers shouldn’t even use the spinnaker in over 20 knots. Under main and jib you can still exceed 15
knots, with complete comfort and safety.
FOLDING: If anything seems hard or difficult, STOP and see where it is misaligned, or snagged. When rolling
back the mast common places to snag are the winches, the boom, or the stern roller. If folding or unfolding is tight
STOP, as it is usuallya wingnet catching. Correct this or you may rip an eyelet out. The spinnaker pole release line
can also catch on the winches. A common error is to try and fold without disconnecting the top shrouds (I’ve done it
myself!}. The beam won’t budge, so remember to check this. Also remember to connect the top shrouds after unfolding, and before you hoist a sail (I’ve done this too!).
Happy and Safe Sailing,
Ian Farrier\
PERSONAL RESPONSIBILITY
Corsair Marine has made exhaustive efforts to minimize the risk of personal injury, loss, or any other form of damage, while
operating the F-27, but obviously it is impossible to completely eliminate every risk. Winches cannot be made trip proof, nonskid can wear and cause slipping, rigging wires can be kinked while rigging and later fatigue, lifelines can be fallen over, frequent groundings at speed can cause eventual daggerboard or rudder failure, neglect of proper maintenance can cause early failure, and lack of experience can cause accidents in congested areas, or bad conditions. Sailing can be hazardous at times, and the
boat operator should accept responsibility for such hazards, maintain the boat accordingly, watch out for, and warn crew members of all possible dangers.
Many of these risks have been covered in this manual, but obviously it is impossible to
cover them all. Some recommended procedures may not even be the correct ones in certain situations. The operator
should therefore always be vigilant against possible safety hazards and correct or warn against any possible danger
immediately.
F-27 Sailing Manual Page 31
F-27 SPECIFICATIONS:
L.O.A............................ 27’ 1”
L.W.L............................ 26’ 3”
Beam ............................ 19’ 1”
Folded beam ..................... 8’ 5”
Cabin beam ...................... 8’ 2”
Draft Hull only ................. l’ 2”
Draft d/board down............... 4’11”
Approx. Weight .................. 2600lb
Mast length...................... 37’
Mast height above water.......... 41’ 6”
Load Capacity ................... 1200lb
Height on trailer ............... 11’ 6”
Approx trailer wgt............... 1200lb
Loaded Towing Weight............. 4100lb
Water capacity .................. 15gals
Tank is on Port side of Daggerboard case
Fuel capacity ................... 6 gals
Optional Holding Tank capacity... 8 gals
THE F-27 COMES WITH THE FOLLOWING
STANDARD ITEMS:
Aft mast support
Beam bolt speed wrench
Beam bolt wrench (spare)
Clew shackle (jib)
Cushions
Fwd. Privacy curtain
Fiddle blocks (2) (large - Shroud tensioners)
Fiddle blocks $ cleats (2) (large - Shroud tens.)
Main sheet Ouad. block and small snap shackle (fits on
boom)
Main Sheet Hexa-Cat 8 part block with cleat
Mast raising bar
Sailing manual & associated literature
Shackles ½” (Cap Shrouds) (2)
Toolkit with spares as listed below
Shackle 3/16” (1 spare)
Shackle ¼” long style (1 spare)
Shackles 3/8” (3) (mainsail tack, clew & 1 spare)
7/16” Clevis Pins (2 spares)
Clevis Pin Spring retaining clips (2 spares)
1/4” x 1 ½” fast Pin (1 spare)
Beam/Float locking pin (1 spare)
Turnbuckle Locking rings (4 spares)
Shock cord with hooks (bow tie) (1)
Jib Tack shackle
Velcro mast ties (6)
Winch handles (2)
Sailing Manual
ROPES:
Bow netting.............. ¼” x 13’ (2) ¼” x 8’ (2)
D/b upline ................ 3/8” x 16’ (red)
D/b down/lne............ 3/8” x 19’ (blue)
Jib sheet...................1/2” x 54’
Mainsheet................. 7/16 x 80’
Mast tie downs......... ¼” X 6’ - 2
Bow tie down............3/8” x 12’
Rudder d/line............3/8” x 12’ (blue)
Rudder up line..........3/8” x 6’ (red)
Rudder up line.......... 3/8” x 8’ (red)
Shrd. Tens ...............7/16 x 19’ - 2
Topping lift ...............1/4” x 35’
Topping lift halyard... ¼” x 43’
Trailer Tiedowns...... 3/8” x 16’ - 2
Wingnets.................. ¼” x 22’ (2) ¼” X 8’ (2)
ROPE OPTIONS
Spinnaker
Spinnaker Sheets..................... 3/8” x 46’ red (2)
Spinnaker Guys........................ 3/8” x 42’ gold (2)
Pole Downhaul......................... 3/8” x 18’ blue (1)
Performance Package
Barber Haulers............ 3/8” x 20’ blue (2)
Cunningham Eye..................... 3/8” x 16’ red
Cunningham Eye..................... ¼” x 6’ black
Boom Vang.............................. 7/16” x 18’ white
Traveller 4:1 control................. 3/8” x 25’ blue
RIGGING (all measurements are pin to pin)
Forestay (toggle to turnbuckle)............. 34’ 10”
Cap Shrouds (T ball to toggle).............. 31’ 8”
Inner Forestay (T ball to turnbuckle)..... 21’ 3”
Intermediates (T ball to turnbuckle)...... 20’ 8”
Lower shrds. (T ball to turnbuckle)....... 10’ 0”
Lower Cap shrds. (Eye to turnbuckle)... 3’ 6”
RUNNING RIGGING (7x19 s.s. 3/16” wire)
Main Halyard - wire 36’ 9” - 7/16” rope tail 46’ long
Jib Halyard - wire 32’ 6” - 7/16” rope tail 42’ long
Spinn. Halyard - 3/8” red rope 80’ long
Spinn. Pole lift - 5/16” gold rope 46’ long
F-27 Designed By: Ian Farrier
The F-27’s folding system is protected by U.S. Patent
No. 3937166, U.K. Patent 1522310, and other Patents are
Pending.
Manufactured by:
CORSAIR MARINE
150 Center St.
Chula Vista, Ca. 92011, U.S.A.
Ph. (619) 585-3005
Fax (619) 585-3092
F-27 Sailing Manual Page 32
F-27 Sailing Manual Page 33
We have tried to make your F-27 as perfect as possible. However, mistakes do occur, no matter how hard we try to
avoid them. Should you find anything wrong or anything omitted from your F-27, please let us know. We will endeavor to remedy the problem immediately, and your informing us will help prevent it from happening again.
Let us know also of any improvement you may find or develop, so that we may incorporate it into future boats
and inform other owners.
************************
OUTBOARD WELL: This will fit most motors under 10 Horsepower, but we have found some motors fit better
than others. Some motors may not fit at all - check with us before purchasing, if not on the list below. Extra long
25” shaft is highly recommended if available.
MOTORS THAT FITWELL ARE:
Mariner 4HP, Mariner 5HP, Honda 7HP, Yamaha 8HP, Evinrude 8HP & 15HP Suzuki 8HP, Nissan 8HP
MOTORS THAT DO NOT FIT WELL ARE:
Honda 5HP (Will fit but needs modifications to the well - motor is long fore and aft)
Yamaha 9.9HP (Will fit after some slight modifications to well- the aft vertical wall of well may need trimming
(this is a very heavy motor.)
************************
NEWSLETTER: Every purchaser of a new F27 will automatically receive a free 1 year subscription to the Newsletter TRAILERTRI, which is published 4 times a year. This covers all aspects of the Trailertri concept, from cruising stories and races, to improvements and sailing hints.
************************
BEAM BOLTS: It is very unlikely, but it is possible for a Beam bolt to gall and seize in a bolt pad, which can
prevent you from folding up the boat. If this happens, then you can still fold up the boat by simply releasing the bolt
pad nuts from inside. The Beam bolt must then be cut off and replaced, along with the bolt pad. To avoid this, keep
the threads lubricated with a Teflon grease.
************************
WINCH LINE: The trailer winch rope should be regularly replaced. This tends to wear quite rapidly and is under
a high strain when lifting the mast. A breakage here could be very dangerous. It is always advisable to stand clear
of the line while lifting the mast. Also, frequently check the trailer winch line is tight when on a long trip.
************************
MAST: When pinning the mast to the deck pivot brackets, the shrouds must all be straight and not hooked on
anything. Otherwise it can be difficult to push the mast far enough aft.
************************
LAUNCHING: If immersing the trailer to the bend in the frame will still not let you free the boat, watch out: a
few inches more can have your boat drifting away, so have lines secured.
************************
MAINSAIL FURLING: When rolling the mainsail, the topping lift must be tight or it may roll up with the sail.
There is a bit of a knack in rolling up the main. If it is not rolling smoothly, check the topping lift is on, and lifting
the aft boom end up above horizontal by several inches. If you find the mainsail bunching up against the mast, this
is the cause. If still not smooth, try a quick reverse turn or so, to loosen the mainsail on the boom, and then resume
rolling. The furling main is a great convenience, and really saves a lot of problems when dropping the main.
************************
HOISTING MAINSAIL: If this is tight going up or down (a not uncommon problem with full batten mains), rub
some bee’s wax or similar on the boltrope. Works well. Remember to also check that the mainsail foot outhaul is
slackened off.
***********************
FOLDING THE FLOATS - the first one is very easy, but the buoyancy of the folded hull can make the other
more difficult. Try folding the port float first (the heavier side), and put the crew on the port side when folding the
starboard float - helps considerably.
************************
CLEANING FLOATS: These can be extended for cleaning, if wished, while boat is on the trailer. Float supports
must first be dropped down, and the boat then rocked one way. The ‘high side’ float can then be extended. Let the
boat lean the other way and the remaining float can be extended. You will need to support the floats in some way
once extended.
************************
BIMINI TOP: The bimini top is a popular option, due to its ability to shade the cockpit. However, storage presented
a problem until we realized it could be simply hung over the stern and tied to the pushpit.
************************
VISITORS: The mere sight of this boat on the trailer, let alone how quickly a novice can launch and retrieve her,
results in a Pied Piper effect. If you take the time to talk to all the people and answer all their questions, you’ll never
get sailing. This can be one of the most difficult, time consuming parts of sailing the F-27. If you find this a regular
happening, consider becoming one of our demonstration boats, and at least the occasional commission will help compensate for the lost time.
************************
RUST: Stainless Steel Rusts - well it doesn’t really, but many grades will get an occasional brown stain in saltwater, that looks like rust. The grade used on most marine fittings is Type 304 or 303, and both of these will show this.
Type 316, a more expensive grade, but actually slightly weaker, does not. We use all three grades on the F-27, depending on the application. To avoid this staining, always wash your boat down with fresh water after every outing.
The brown stains will not appear if the salt is washed off .
************************
SHROUD TENSIONERS: When leaving the F27 for any length of time with floats extended, the shroud tensioners
should be let off. If not, the high tension could slowly bend the boat, due to the ‘creep’ characteristics of fiberglass.
This rule applies to all boats with adjustable backstays.
************************
IMPORTANT: The spring retaining clips used on the Turnbuckle clevis pins should be regularly checked to ensure
they are will still ‘clip’ fit on the clevis pin. Replace if they have lost their spring and have become loose.
************************
PERFORMANCE HINT: For the best performance while running downwind, weight should be kept forward. At
least one crew member should sit on the main hull bow. This reduces wetted area and can make a significant difference.
************************
CLEAN BOAT HINT: If you are having problems with un-house trained birds on your boat, just leave a dummy,
but lifelike, snake in the cockpit floor. Works a treat.
***********************
EXTRA VENTILATION: Small extra ventilation hatches can be added to the cabin roof, and the main hull transom. For details contact CORSAIR MARINE for an installation guide.
***********************
DOUBLE BERTH:A double berth option for the main cabin is available from CORSAIR, but some owners have
discovered that the cabin table does a good temporary job also. Just slide it under the cushions between the cabin settees, drop a cushion or foam on top, and you have a rough but comfortable double berth.
************************
MASTHEAD WIRING: Should you wish to fit masthead instruments or lights, then there is a masthead wiring tube
inside the mast, and this will have a messenger line already in it to pull through any wiring. The line is visible on the
top of the mast, and removal of the maststep will give access to the line and the tube at the bottom.
************************
RUDDER BOTTOM PAINT: Rudder should not be painted a dark color as this will void any warranty on the rudder. The heat generated may cause the rudder to warp or the join seam to open.
***********************
LOG/DEPTH SENDERS: The optional Navico senders currently being fitted have two positions available. One
extended and one flush for more details see the Navico Manual. The extended position can give a more accurate reading but beware of trailering when in this position. The senders can be damaged when going on or off the trailer. Even
when not extended take care, for if the boat comes on crooked, the log sender paddle wheel can still be damaged.
***********************
F-27 Set-Up Checklist
Before using this list be sure to read full procedure as detailed in the F-27 Manual
[ ] CHECK FOR POWERLINES.
[ ] Remove trailer tie downs, and trailer lights. Tie the 2 tie-downs together and use as bow line.
[ ] Undo trailer winch hook, pull all the line out and leave hook lying on the foredeck. Bow eye should still
be tied vertically down to trailer.
[ ] Place mast raising bar on foredeck.
[ ] Undo rope mast ties & velcro rig ties.
[ ] lift forward mast end and walk aft. Watch for any obstructions to wires. Roll mast back until the 'legs'
of the mast step reach the pivot brackets.
[ ] If required, fit Windex and wind instrument to top of mast.
[ ] Connect mast to pivot brackets with fast pins.
[ ] Place mast raising bar on top of fwd. beams. Pull winch line back over raising bar and connect to jib
halyard snapshackle. Check jib halyard is SECURELY TIED OFF to the mast side cleat.
[ ] CHECK FOR POWERLINES and then winch mast up. Check that all rigging wires are clear.
[ ] Connect forestay to chainplate. Winch further until inner forestay can be connected to chainplate. There
is NO NEED to adjust the turnbuckles.
[ ] Remove the mast raising bar and store.
[ ] Slacken winch, disconnect jib halyard, and return to spinnaker pole ring.
Rewind winch and connect hook to bow eye.
[ ] Disconnect topping lift from mast boom vang eye and connect to boom end. insert gooseneck shaft
through mast.
[ ] Fit the roller furling handle on front of mast. Remove sail cover.
[ ] Connect mainsheet to boom. Feed mainsail head into mast track and connect main halyard.
[ ] Run all halyard lines through turning blocks back to rope clutches.
[ ] Connect mast electric plugs if required
[ ] Hank on foresail and connect sheets.
[ ] Untie rudder, and check daggerboard up line is cleated. Outboard motor should also be in the down
position.
[ ] Remove and store aft mast support.
[ ] Untie bow vertical tie-down.
Your F-27 is now ready to launch - it should have taken you less than 30 minutes! If not, you didn't follow
this list and are probably doing something that is not required.
VERY IMPORTANT WARNING:
Before taking the boat to the ramp, check to see that there are no powerlines for the mast to touch.
F-27 De-Rigging Checklist
[ ] Remove bow1ine, separate the tie downs, and tie-down sides of boat. Fit aft mast support and
trailer lights and connect to vehicle.
[ ] Remove jib and fold. Jib sheets are stowed in archor well, jib inside a float.
[ ] Tie the bow eye vertically down to the traier.
[ ] Release trailer winch hook, pull some slack, pass it over the bow roller and lay it on the foredeck.
[ ] Reverse roll main to loosen on boom, and then remove roller furling handle and stow in anchor
well. Fit sail cover.
[ ] Remove main sheet and attach to main traveler.
[ ] With topping lift on, pull the boom/mainsail aft to disconnect trom the mast and lay down on
cabin roof.
[ ] Disconnect topping lift, and connect to mast boom vang eye.
[ ] Release jib halyard from rope clutch and cleat it to mast horn cleat. Other end should be left
attached to spinnaker pole ring on mast.
[ ] Hook the trailer winch hook to the jib halyard. Tension winch until clevis pins can be removed
from forestay and inner forestay. There is no need to adjust the turnbuckles.
[ ] Tie forestays to the mast. Remove all lines from rope clutches and turning blocks. Wrap around
the mast to retain the stays against mast.
[ ] Fit mast raising bar on top of the fwd. beams, lower mast by easing out trailer winch. Be careful
that you don't let go of the winch handle while lowering.
[ ] Once mast is down, disconnect winch line, reconnect to the boweye, and retension.
[ ] Reconnect jib halyard to the spinnaker ring on mast.
[ ] Remove the mast step pivot pins, remove Windex and windspeed sender if necessary , and then
walk mast forward until intermediate shrouds reach aft mast support.
[ ] Rest mast on the deck and go aft to lift intermediate shrouds over the aft mast support. Continue forward until mast can be rested on the carrier on the pulpit.
[ ] Tie mast to pulpit and aft mast support.
[ ] Tie all rigging wires to the mast with Velcro ties.
[ ] Rudder should be fully up. Lash tiller handle to one side of the traveller.
[ ] Secure pop-top down with front hold downs.
De-rigging may take a little longer than rigging, due to the need to fold sails and properly stow the
various items. However, it should not take you any longer than 35 minutes.
***************************************************************************
The above 39 pages (Title page and 38 manual pages) were the original manual that came with my F-27
(#374). They are as accurate as I could make them except that the original consisted of 2 columns per
page and I opted not to use columns. The page breaks are either exactly where they were in the original
or within one sentence. (I chose not to divide sentences between pages). The original had a photo copy of
Ian’s signature. This version has a script version of his name instead. I hope you find them as helpful as I
did. --- Gary Heinrich 2003
The following pages came with the boat as well so I included them here.
1 – F-27 Setup Checklist
2 – F-27 De-Rigging Checklist
3 – F-27 Sail Selection Chart
Due to changes in Word over the years and the difficulty of proper printing with illustrations, I created a .pdf
version. I made every effort not to change Gary’s excellent work. —-Phil Collins 2007