1
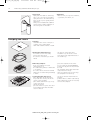
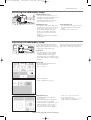
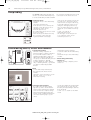
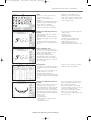
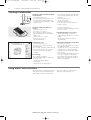
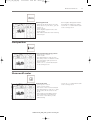
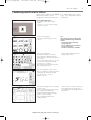
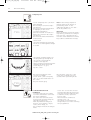
165_170_180_SM_engl
19.04.2004
8:58 Uhr
Seite 1
Safety Instructions
1
IMPORTANT SAFETY INSTRUCTIONS
When using an electrical machine, basic safety
precautions should always be followed, including the
following.
9. Turn power switch to «0» when making any adjustments in the needle area, such as threading or changing the needle, threading the bobbin or changing
the presser foot.
Read all instructions before using this sewing computer.
When the sewing computer is not in use, it should be
disconnected from the electricity supply by removing the
plug from the outlet.
10. Always unplug the sewing computer from the electrical outlet when removing covers, lubricating or when
making any other user servicing adjustments mentioned in this instruction manual.
11. Never drop or insert any object into any opening.
DANGER
12. Do not use outdoors.
To reduce the risk of electric shock:
1. A sewing computer should never be left unattended
when plugged in.
2. Always unplug this sewing computer from the electric
outlet immediately after using and before cleaning.
13. Do not operate where aerosol (spray) products are
being used or where oxygen is being administered.
14. Before disconnecting, turn all controls to the off («0»)
position then remove the plug from the outlet.
15. Do not unplug by pulling on the cord but grasp the
plug before pulling.
WARNING
To reduce the risk of burns, fire, electric shock or injury to
persons:
16. No responsibility will be taken for any damage caused
as the result of misuse of the sewing and embroidery
computer.
1. Do not allow to be used as a toy. Close attention
is necessary when this sewing computer is used by or
near children.
17. Under no circumstances should the sewing computer
be left unattended when using the embroidery
module.
2. Use the sewing computer only for its intended use as
described in this manual. Use only attachments
recommended by the manufacturer as contained in
this manual.
18. For the protection of the electronic components: Do
not remove the embroidery card from the embroidery
module while embroidering.
3. Never operate this sewing computer if
· it has a damaged cord or plug
· it is not working properly
· it has been dropped or damaged
· it has fallen into water
Return the sewing computer to the nearest authorized BERNINA dealer or service centre for examination, repair, electrical or mechanical adjustment.
4. Never operate the sewing computer with any air
openings blocked. Keep ventilation openings of
the sewing computer and foot control free from
accumulation of lint, dust and loose cloth.
5. Keep fingers away from all moving parts. Special
care is required around the sewing needle.
SERVICING DOUBLEINSULATED PRODUCTS
In a double-insulated product, two systems of insulation
are provided instead of grounding. No grounding means
is provided on a double-insulated product nor should a
means for grounding be added to the product. Servicing
a double-insulated product requires extreme care and
knowledge of the system and should only be done by
qualified service personnel. Replacement parts for a
double-insulated product must be identical to those
parts in the product. A double insulated product is
marked with the words «DOUBLE INSULATION» or
«DOUBLE INSULATED».
The symbol
6. Always use the BERNINA original stitch plate.
The wrong plate can cause the needle to break.
7. Do not use bent needles.
8. Do not pull or push fabric while stitching. It may
deflect the needle causing it to break.
may also be marked on the product.
SAVE THESE
INSTRUCTIONS!
This sewing and embroidery computer is intended for
household use only.
008904.55.04_EMB_0401_a165 a170 a180_EN
165_170_180_SM_engl
19.04.2004
8:58 Uhr
Seite 2
2
BERNINA
®
Choosing a BERNINA Embroidery is a decision which will have a positive impact on
your sewing for years to come.
Customer satisfaction has been the driving force of our family company for over
100 years and I intend to continue that tradition of delivering superb Swiss quality,
future-orientated sewing technology and unrivaled customer service.
The new BERNINA family of creative sewing and embroidery systems gives you the
unique opportunity to select what you need to satisfy your sewing needs and
”Welcome to
requirements.
As the name suggests, the “artista” range of computer sewing is pure artistry.
These machines provide unlimited scope for total sewing pleasure. They inspire
the BERNINA
creativity and allow you to translate your ideas into practical sewing of the finest
quality.
family”
In addition, a wide range of sewing accessories, together with sewing publications
full of practical and creative ideas, add to the joy of sewing the BERNINA way.
It gives me great pleasure to welcome you into the BERNINA family.
H. P. Ueltschi
Owner BERNINA
Sewing Machine Company
www.bernina.com
Fritz Gegauf Ltd. · BERNINA Sewing Machines · CH-8266 Steckborn/Switzerland
008904.55.04_EMB_0401_a165 a170 a180_EN
165_170_180_SM_engl
19.04.2004
8:58 Uhr
Seite 3
Contents
1
Safety instructions
2
Foreword
4
Details of the embroidery module
5
Standard and optional accessories (artista 165/170/180)
6–7
8–14
Connecting the embroidery module
General operating instructions
15–16
Messages
17–18
Embroidery stabilizers
18–19
Hooping the Fabric
Attaching/removing the hoops
19
Adjusting the hoops
20
Coding the hoops
20–21
22
Embroidering motifs, letters and numbers
Starting to embroider
22–30
Using motifs with functions
31–34
Combining motifs and/or letters
34–35
Saving motifs
35–36
Deleting data
36
Free arm embroidery
37
Thread breakage during embroidery
38
Embroidery threads/Summary of embroidery motifs
39
Optional accessories
40
Index
008904.55.04_EMB_0401_a165 a170 a180_EN
3
165_170_180_SM_engl
4
19.04.2004
8:58 Uhr
Seite 4
Details
Details of the embroidery module
2
1
3
4
5
6
View from the front
1
8
8
7
View from the back
1
2
3
4
5
6
7
8
9
10
Embroidery surface
Embroidery arm
Embroidery hoop connection
Accessory box
Connecting lug right
Connecting lug center
Sewing computer connection cable
Cable holder
Embroidery card slot
Embroidery card ejection button
10
9
View from the left side
008904.55.04_EMB_0401_a165 a170 a180_EN
165_170_180_SM_engl
19.04.2004
8:58 Uhr
Seite 5
Details
Standard and optional accessories (artista 165/170/180)
2MB (165)
Standard accessories
- Large embroidery hoop and template (200 mm x 155 mm)
- Medium embroidery hoop and template (130 mm x 100 mm)
- Embroidery presser foot no. 15
- Embroidery module bag
- Net for upper thread spools
(pull over upper thread spool for even spooling)
- Selection of embroidery needles
Optional accessories
- Small embroidery hoop and template (40 mm x 60 mm)
- Free arm adapter (to use with the small hoop)
2MB/ 4MB standard
Standard accessories
- Large embroidery hoop
- Small embroidery hoop
- Templates for embroidery hoops (large, small)
- Adapter for free arm embroidery
- Embroidery presser foot no. 15
- Embroidery module bag
- Net for upper thread spools
(pull over upper thread spool for even spooling)
- Selection of embroidery needles
Optional accessories
- Medium embroidery hoop (including template)
- Straight stitch plate
- A variety of embroidery cards
- PC software
- Multi-spool thread stand
- Magic box
- Reader / Writer box
- CPS software
- artista embroidery software
- Artlink software
008904.55.04_EMB_0401_a165 a170 a180_EN
5
165_170_180_SM_engl
6
19.04.2004
8:58 Uhr
Seite 6
Connecting the embroidery module
Attaching the module to the sewing computer
Attaching the module to the sewing computer
· turn the sewing computer off
· remove the accessory box from the sewing computer
· place the module on the sewing computer behind the
free arm
· push the module from the left towards the sewing
computer so that the connecting lugs engage in the
base plate
Release the cable
· the cable connects the module to the sewing computer
· pull the cable out of the holder on the back of the
module
Store the cable on the module
· insert the cable into both cable holders
· press cable gently to secure
Connecting the cable
· insert the plug into the socket on the right hand side of
the sewing computer, flat side to the front
Release the cable
· hold the cable with the black plug
· open the connection cover on the end of the plug
· pull the plug out
Removing the module
· grip the back right corner to lift the module and
remove to the left
Attention:
When connecting the embriodery module
and/or the free-arm adapter, attention must be paid
that all items are on a flat and even surface!
Note:
Always separate the module and sewing computer for
transportation. Never transport them attached.
The embroidery module should only be attached or
disconnected when the sewing computer is turned off.
008904.55.04_EMB_0401_a165 a170 a180_EN
165_170_180_SM_engl
19.04.2004
8:58 Uhr
Seite 7
Connecting the embroidery module
7
Connecting the adapter for free arm embroidery (optinal ass.)
The adapter is used for embroidering tubular items
(sleeves, trousers, socks, etc.) on the free arm of the
sewing computer.
Attaching the adapter to the sewing computer
· remove the sewing computer accessory box
· place the adapter on the sewing computer behind the
free arm
· push the adapter towards the sewing computer from
the left so that the connecting lugs engage in the base
plate of the sewing computer
Attaching the module to the adapter
· place the module on the adapter with the front edge of
the module as close as possible to the L-shaped raised
guide on the adapter
· push the module towards the guide from the left until
the connecting lugs engage in the base plate of the
adapter
Free arm embroidery hoop (optinal ass.)
· the small, oval embroidery hoop is specially designed
for free arm embroidery
Note:
· only the small hoop can be used for free arm
embroidery
· only the small hoop will produce perfect motifs
Removing the adapter
· remove the module from the adapter
· the rear right corner of the adapter is designed to be
used as a grip
· hold the adapter with this grip and remove from the
base plate of the sewing computer
008904.55.04_EMB_0401_a165 a170 a180_EN
165_170_180_SM_engl
8
19.04.2004
8:58 Uhr
Seite 8
General operating instructions
Preparing the sewing computer for embroidery
Presser foot no. 15 for embroidery
· attach the embroidery foot no. 15
· raise the presser foot so that the
embroidery hoop can be attached
Needles for embroidery
· use a size 80 or 90 needle,
depending on the thread
· use an embroidery or metafil
needle for decorative or
metallic threads
· use a new needle
· make sure the needle is in the
highest position so that you can
attach the embroidery hoop
Note:
For more information on Needles see
Instruction Manual pages 65–66
Lower the feed dog
· press the button on the right side
of the sewing computer to lower
the feed dog
1
5 8
25 20 15 10
14
14
58
1
10 15 20 25
Straight stitch plate
(optional accessory)
· remove the standard stitch plate
· the straight stitch plate has a small
needle hole
· the stitch insertion points (upper
and lower thread knotting) are
limited which produces a better
embroidery result
Threading the sewing computer
See sewing computer instruction manual, pages 8–10
· when using glossy or slippery
embroidery threads, slip the net
over the upper thread spool
· this prevents the thread slipping
and gives an even thread feed
Note:
When using metallic or specialty
threads, using the vertical spool pin
may also help avoid problems.
Multi-spool thread stand
(optional accessory)
Designed for embroidery, the stand
holds 13 spools at once for convenient threading and sewing of designs.
008904.55.04_EMB_0401_a165 a170 a180_EN
165_170_180_SM_engl
19.04.2004
8:58 Uhr
Seite 9
General operating instructions
Adjusting the thread tension
See sewing computer instruction
manual
The artista 180 is equipped with
automatic thread tension. When a
motif is selected, the tension will be
set automatically. Adjustments for
difficult or unusual fabrics can be
made if necessary.
3
5
The artista 165 and artista 170 have
manually adjusted thread tension.
The tension should be set to between 4 and 6 for all embroidery.
Adjustments for difficult or unusual
fabrics can be made if necessary.
Bobbin thread tension
Insert the thread into the finger of
the bobbin (left picture artista 165
and artista 170) or into the guide
spring (right picture artista 180) for
embroidery.
Selecting motifs
The artista sewing and embroidery
system is operated with a combination of external buttons and touch
screen.
Switch the sewing computer on
· turn the power switch to “1”
165
Altering the upper thread tension
see sewing computer instruction
manual
Welcome Screen
· the Welcome screen appears for
approximately 3 seconds
· this screen can be omitted in the
Setup program of the sewing
computer
008904.55.04_EMB_0401_a165 a170 a180_EN
Altering the upper thread tension
see sewing computer instruction
manual, page 12
9
165_170_180_SM_engl
10
19.04.2004
8:58 Uhr
Seite 10
General operating instructions
Menu
· the main menu appears with 2
options:
· embroidery module
· embroidery card
To activate the embroidery module
· touch the embroidery module
symbol
· this activates the motifs in the
module (only when the module is
connected)
To activate the embroidery card
· touch the embroidery card symbol
(teddy bear)
· this activates the motifs on the card
in use (only when a card has been
inserted)
· when either symbol is touched for
the first time after the sewing
computer is turned on, a message
will appear as a reminder to drop
the feed dog
· touch “esc” to continue
Open or delete a saved motif
· press external mem button
· memory screen appears
· open or delete the desired
motif from the embroidery
module or memory card
Selecting motifs from the embroidery
module
· after selecting the embroidery
module, all the motifs appear on
the screen
· a number appears on the screen
against each motif
· scroll using the arrows to view the
complete menu
· the embroidery module symbol
appears at the top left
· this identifies motifs from the
embroidery module
· select a motif by touching the
symbol on the screen
· the symbol for embroidery cards
(teddy bear) appears in the gray bar
under the scroll arrows
· touch to select
· motifs from the card appear on the
screen (you can switch between
module and card, assuming card is
inserted)
· touch “esc”
· the main menu appears
To activate the embroidery card
· touch the embroidery card symbol
(teddy bear)
· this activates the motifs on the card
in use (only when a card has been
inserted)
· these appear on the screen
Select a motif from the card
· the motifs of the card appear on
the screen
· a number appears on the screen
with each motif
· scroll to view the complete menu
· the embroidery card symbol
appears top left on the screen
· this identifies motifs on the
embroidery card
· touch to select the motif of your
choice
· the symbol for the module appears
in the gray bar under the scroll
arrows
· touch to select
· the module menu appears (you can
switch between module and card,
assuming card is inserted)
· touch “esc”
· the main menu appears
008904.55.04_EMB_0401_a165 a170 a180_EN
165_170_180_SM_engl
19.04.2004
8:58 Uhr
Seite 11
General operating instructions
11
Embroidery functions
Starting embroidery with the quick
reverse button on the head frame
· start by pressing the quick reverse
button on the frame head (approx.
3 seconds will elapse before the
audio signal stops)
· the sewing computer does about
6 stitches, then stops, so that you
can cut the thread tails
Layout 1 and layout 2
· press “layout 1” or “layout 2” to
switch between the layout screens
· it is not possible to embroider in the
layout screens
Menu
· found on the sewing and layout 1
or layout 2 screens
· touch to select
· either the embroidery module or
card stitch summary appears
Multi-color motifs*
· found on the sewing screen
· the total number of colors appears
small on the right
· the number of the color to be
embroidered appears large on the
left
· touch the right or left arrow to
change the color
· the sections for the selected color
are highlighted in black on the
embroidery screen, the remainder
of the motif appears gray
Manual adjustment of color
sequence*
· on rescrolling through the color
sequence, the end of the preceding
color appears
· the large number on the left in the
rectangle then changes from black
to gray
Single/multi color motif/
embroidery time*
· found on the sewing screen
· touch the symbol
· white background = multi color
motifs, each color is embroidered
separately
· the embroidery time for the actual
color is shown
· gray background – single color
motifs
· the complete (remaining)
embroidery time is shown in the left
section of the screen
Embroidery sequence*
· found on the sewing screen
· touch to select
· screen shows thread breakage
symbol with arrows
Embroidery sequence control
(on thread breakage)
· touch the right or left arrow
· the embroidery sequence can be
checked in stages
· if the thread has broken, touch one
of the arrows
· the needle follows the sequence in
small forward or reverse steps
(left arrow – reverse, right arrow –
forwards)
Embroidery speed
· touch “M –” = proportional
reduction of embroidery speed
· touch “M +” = proportional increase
of embroidery speed
· the percentage speed (%) is shown
in symbol “M +”
· the embroidery time always relates
to 100% speed
* see message P.16 “No embroidery hoop attached” and the related response
008904.55.04_EMB_0401_a165 a170 a180_EN
165_170_180_SM_engl
12
19.04.2004
8:58 Uhr
Seite 12
General operating instructions
Memory
· press external “mem” button
· a special memory screen opens
· Single motifs or combinations can
be saved, opened or deleted
Start*
· found in layout 1
· touch symbol
· the embroidery hoop is brought
into the start position, i.e. into the
correct position for the first stitch
Motif center*
· found in layout 1
· touch symbol
· the center of the motif is displayed
· the embroidery hoop is moved so
that the needle is positioned exactly
in the center of the motif
Check size*
· found in layout 1
· touch symbol
· the hoop coding is activated,
causing the hoop to move
· the contours of the motif are
registered within a rectangle
Alter size*
· found in layout 1
· touch the left field to reduce the
motif
· touch the right field to enlarge the
motif
· the changes are displayed in
percent in the center field
· touch the center field to return the
motif to its original (100%) size
Show
· found in layout 1 and 2
· after reducing or enlarging a motif,
the new motif size is displayed on
the screen
· touch symbol
· the altered motif appears in its
revised form
· the hourglass appears next to the
show symbol during this operation
Hourglass
· the hourglass symbol indicates an
altered or displaced motif is being
recalculated
· the calculation time is approximately 1–10 minutes depending on
the motif
· no operations are possible on the
sewing computer when the hourglass is blinking!
Horizontal mirror image (right/left)
· found in layout 1
· touch symbol
· the sewing computer sews the
motif in horizontal mirror image
· the marked corner of the motif
changes from right to left
Rotate motif*
· found in layout 1
· touch the left symbol
· the motif will be rotated
5° clockwise
· touch the right symbol
· the motif will be rotated
5° anti-clockwise
· the degree (°) of rotation is shown
in the right symbol
· motifs can be rotated into 72
different positions
· the motif turns on the screen
· the lower right corner of the motif
is always marked, indicating the
orientation of the design
OK
· touch symbol
· confirms all previous selections
· switches to normal screen with
embroidery color sequence
· the motif is now calculated as the
hourglass blinks
* see message P.16 “No embroidery hoop attached” and the related response
008904.55.04_EMB_0401_a165 a170 a180_EN
165_170_180_SM_engl
19.04.2004
8:58 Uhr
Seite 13
General operating instructions
13
Directional Arrows*
· found in layout 1
· touch an arrow
· the activated motif will be moved in
the direction selected
· touch center to reposition the motif
in the center of the hoop
Hoop relocater*
· found on the sewing screen
· If the thread has to be changed
when the needle is very close to the
edge of the hoop, touch this symbol
and the hoop moves horizontally
to the center
· symbol turns dark gray
· rethread the needle
· touch the symbol again to return to
the previous position
· the sewing computer continues
where it stopped
Temporary save*
· found in layout 1
· saves the motif (in layout) in a
temporary memory while combining
designs
· symbol turns light gray
· motif can be recalled and combined
with another design(s)
Retrieve*
· found in layout 1
· switches between motifs when
combining designs
· the active embroidery motif appears
black
· selects the motifs in the order they
were programmed
Delete*
· found in layout 1
· erases a motif on temporary hold
· select desired motif:
touch switch symbol
· touch “del”
· the motif is deleted and the next
one is highlighted
Adjust the motif width*
· found in layout 2
· touch the left field
· this compresses the motif
horizontally
· touch the right field
· this widens the motif horizontally
· the adjustment in percent appears
in the center
· touch center to return the motif to
its original size (100%)
Adjust the motif height*
· found in layout 2
· touch the left field
· this compresses the motif vertically
· touch the right field
· this lengthens the motif vertically
· the center field shows the
adjustment in percent
· touch center to return the motif to
its original (100%) size
* see message P.16 “No embroidery hoop attached“ and the related response
008904.55.04_EMB_0401_a165 a170 a180_EN
165_170_180_SM_engl
14
19.04.2004
8:58 Uhr
Seite 14
General operating instructions
Adjust the density
· found in layout 2
· touch the left field
· this increases the stitch density
(more stitches)
· touch the right field
· this reduces the stitch density
(fewer stitches)
· the center field shows the adjustment in percent
· touch center to return the motif to
its basic setting
Adjust the stitch length
· found in layout 2
· touch the left field; this reduces the
stitch length
· touch the right field; this increases
the stitch length
· the center field shows the adjustment in percent
· touch center symbol to return the
motif to its basic settings
· affects only fill stitches, not outline
· can be changed to accommodate
varying thicknesses of threads
Convert long Stitch to short
(straight) stitch:
· found in layout 2
· touch the right symbol – the stitch
length is increased
· touch the left symbol – the stitch
length is reduced
· the stitch length is shown in mm in
the center symbol
· touch the center symbol =
return to basic setting (off)
Screen symbols
These symbols appear on the left of the sewing and
layout (1 and 2) screens.
Presser foot
· indicates the recommended presser
foot for embroidery (no. 15)
Embroidery hoop coding
· shows the small, medium, and large
hoops
· the most suitable hoop for the
motif chosen is highlighted
Embroidery time
· the motif is developed on the
screen
· the total embroidery time for the
selected motif is displayed in
minutes
· the remaining embroidery time
for a motif or individual color is
shown while embroidering
Motif size
· indicates the size in millimeters of
the chosen motif
Recalculation of an embroidery motif
· after altering the size or stitch
density etc. of a motif, the motif
will be recalculated
· after pressing “ok”, the screen
reverts to the previous screen
· the hourglass blinks
· the percentage of completed
alteration appears on-screen as the
design is recalculated
008904.55.04_EMB_0401_a165 a170 a180_EN
165_170_180_SM_engl
19.04.2004
8:58 Uhr
Seite 15
Messages
15
Messages
The following messages may appear on the screen of
the artista sewing computer during certain operations.
They are reminders, warnings, or confirmations about
the features and functions being selected. Below is a list
of the messages pertaining to the embroidery module
(see the sewing computer instruction manual for
messages that pertain to the sewing computer) and the
appropriate responses.
MESSAGE
RESPONSE
Lower presser foot.
· touch “esc” to return to the previous screen.
· lower the presser foot and begin to sew.
Raise presser foot.
· when the check function is selected, the presser foot
must be raised.
· raise the foot and touch “esc” to return to the
previous screen.
Drop the feed dog.
· the feed dog must be in the down position for
embroidery.
· this message shows as a reminder when you first
select a pattern each time the sewing computer is
turned on.
· touch “esc” to return to the previous screen.
Free arm system:
Do not connect hoop until processing is completed and
check button (layout 1) is pushed.
Appears as a reminder to wait until the selected stitch
is processed before attaching the hoop if working with
the free arm adapter.
Needle must be in the highest position.
· appears if the needle is not in the highest position
when the sewing computer is “reading” the size of
the hoop attached to the sewing computer.
· raise the needle using the handwheel and touch
“esc” to return to the previous screen.
Use a larger embroidery hoop.
· the size of motif and the size of the hoop are
incompatible.
· change hoops or reduce the motif size.
· touch “esc” to return to the previous screen.
The pattern cannot be completed in this size.
Please reduce your pattern size.
· the pattern has exceeded the maximum size for
sewing.
· touch “esc” to return to the previous screen.
· reduce the size and continue the embroidering
process.
This embroidery module version is not compatible
with the machine.
Check the version in the setup program.
· the sewing computer and the embroidery module
must have the same version of software indicated in
the setup program to stitch properly.
· see setup program in the artista sewing computer
instruction manual.
Warning: This motif has not yet been saved.
With this selected function, the motif will be lost.
· appears when attempting to quit the editing process
of combining patterns without placing the last motif
on temporary hold.
· select “yes“ or “no“ as desired; will return to the
previous screen.
The memory is too small to combine the selected
motifs.
· too many designs have been selected to combine as a
new design.
· touch “esc“ to return to the previous screen.
· delete one or more of the motifs and continue the
editing process.
The memory capacity is too small for this
combination. One of the last motifs edited
will not be saved.
The memory capacity is too small to save this
combination of patterns. The last of the motifs edited
will not be saved.
Your embroidery motif is finished.
· design is completed; remove the hoop from the
embroidery module.
· touch “esc” to return to the previous screen.
008904.55.04_EMB_0401_a165 a170 a180_EN
165_170_180_SM_engl
16
19.04.2004
8:58 Uhr
Seite 16
Messages
MESSAGE
RESPONSE
Card exchange was not accepted. Possible loss of data!
Please refer to your instruction manual before
exchanging cards.
· Never remove a card from the embroidery module
when the hourglass is blinking!
· If your personal memory card does not work after the
exchange, it must be reformatted (see p. 36).
Your personal design card is full, or you have
inserted a programmed design card which you
cannot save.
· appears when the sewing computer is unable to save
to the card inserted into the module.
· touch “esc” to return to the previous screen.
Please insert a BERNINA blank card.
· appears when the store function has been selected
and there is no card inserted into the embroidery
module.
· insert a personal design card and touch “esc” to
return to the previous screen.
· continue with the saving process by touching store
again.
Your edited text does not fit in the hoop.
Please shrink the size or rotate the pattern.
The letter combination chosen is too large to stitch in
the hoop. Rotate the letters 90° or reduce the size to
fit in the hoop.
More than 20 characters cannot be edited.
· shrink the size of the letters (in layout) or work stageby-stage.
Please check the upper thread.
· check to see if the needle thread has run out or has
broken.
· rethread the needle if necessary. The sewing
computer will not sew until this is corrected.
· touch “esc” to return to the previous screen.
The bobbin winder is on.
· check to see if the bobbin winder is on. If the bobbin
winder is on, the foot pedal is inactive and the
sewing computer will not sew.
· disengage the winder if needed. The sewing
computer will not sew until this is corrected.
· Note: This message will appear when winding a
bobbin: touch “esc” to clear it from the screen.
Do you really want to delete the contents of
this memory?
· confirm the delete command before the contents of
the memory are erased.
· touch “yes” to continue with the deletion process
· touch “no” to stop the process.
Insufficient memory for this function.
This motif can be moved around and embroidered.
· The memory capacity is too small to convert this many
stitches.
No embroidery hoop attached.
· appears when a letter or motif is selected without a
hoop on the embroidery module.
· touch “esc” and attach the appropriate hoop to the
embroidery module.
· go to layout 1 and touch “check” so the embroidery
module can recognize the hoop.
Your personal memory capacity is full. Use a blank card
to save the motif, or delete a motif in your personal
memory capacity.
· appears if the memory in the embroidery module is
full.
· a design in the memory must be deleted or a new
memory card inserted.
Designs that have been downloaded from the PC
embroidery software cannot be altered in size within
the machine.
· Edit the motif using the PC software and then load on
the machine again or
· save the motif on a memory card or on the
embroidery module and then edit.
008904.55.04_EMB_0401_a165 a170 a180_EN
165_170_180_SM_engl
19.04.2004
8:58 Uhr
Seite 17
Embroidery stabilizers
17
Embroidery stabilizers
Perfect embroidery should lie absolutely flat on the fabric without
pulling or puckering. The best way
to achieve this, especially when
embroidering large motifs or embroidering large areas, is to use a special
stabilizer.
There is a wide range of stabilizers
and interfacings available which are
suitable for a variety of applications.
All quality stabilizers have no ‘give’
or ‘stretch’.
Embroidery on a single layer of fabric
is not recommended. The fabric
tends to pucker and the edges of the
embroidery start to wave after being
removed from the hoop. Stabilizer
can be eliminated for embroidering
small motifs on thick, firm fabrics,
such as denim or home furnishing
fabrics. However, it is always worth
test sewing to see whether or not a
stabilizer would improve the results.
Tear-away stabilizers
· similar to interfacing; tears like
paper
· one or more layers can be used
· comes in light and heavy weight
· for more stability, apply to the
wrong side of the fabric
with temporary adhesive spray
before hooping
· tears away from the back of the
embroidery after stitching
· stabilizer will remain under larger
embroidered areas
Cut-away stabilizers
· one or more layers can be used
· comes in light and heavy weight
· for more stability, apply to the
wrong side of the fabric
with temporary adhesive spray
before hooping
· cut away from the back of the
embroidery after stitching
· stabilizer will remain under larger
embroidered areas
Iron-on interfacing
· this is pressed (fused) to the wrong
side of the fabric
· iron-on interfacings are available in
a variety of thicknesses and should
be selected to suit the fabric being
used
· removable iron-on interfacing is
also available
Paper backed adhesive stabilizer
· place stabilizer in hoop, paper side
up
· use a pin to score the paper and
remove it to reveal the self-adhesive
surface
· position the piece of fabric to be
embroidered on the stabilizer
Application:
· for pieces (collars etc.) smaller than
the hoop
· ideal for delicate fabrics such as
jersey, silk, etc.
Water soluble stabilizer
· solvable stabilizer looks like plastic
wrap
· solvable stabilizers are ideal protection for fabrics with a thick or
looped pile such as toweling; place
stabilizer on both sides of the fabric
and hoop all three layers
· dissolve stabilizer in cold water
when embroidery is complete
· solvable stabilizer can also be removed by gently tearing it away when
used as a topping on non-washable
fabrics like velvet.
Applications:
· ideal for toweling, velvet, bouclé
knits, etc.
· ideal for fine, sheer fabrics such as
organdy, batiste, etc.
008904.55.04_EMB_0401_a165 a170 a180_EN
Application:
· for most general embroidery
applications
Application:
· for most general embroidery
applications
Application:
· for all fabrics which tend to pull or
stretch when being embroidered,
e.g. jerseys, tricot, etc.
165_170_180_SM_engl
18
19.04.2004
8:58 Uhr
Seite 18
Embroidery stabilizers/Embroidery hoops
Spray starch
· spray starch is ideal for stiffening
fine, soft or loosely woven fabrics
· spray the area to be embroidered,
leave to dry or press gently with a
warm iron
· always use an additional stabilizer
such as water soluble stabilizer on
the wrong side of the fabric
Application:
· ideal for fine, loosely woven fabrics,
e.g. batiste, fine linen, etc.
Hooping the Fabric
Centering
· determine the center of the piece
of fabric to be embroidered
· mark with a fabric marker or chalk
Opening the embroidery hoop
· loosen the screw if necessary
· remove the inner hoop
· the arrows on both hoops should
match
· the arrows on the large and
medium hoops are at the center
front and on the right hand side of
the small hoop
Embroidery template
· there is a template for each
embroidery hoop
· the embroidery surface is marked in
1 cm squares
· the center and corners are marked
with holes for transferring markings
to fabric
· place the template in the inner
hoop so that the word BERNINA is
at the front (by the arrows) and can
be read
· the template will engage automatically in the inner hoop
· there is a finger hole for removing
the template from the hoop
Securing the fabric in the hoop
· place the fabric under the inner
hoop with the center point in the
center of the template
· place fabric and inner hoop on top
of the outer hoop
· match the arrows
· press the inner hoop into the outer
hoop making sure that the fabric
does not distort
· the hoops must be flush with one
another
· pull the fabric to make it absolutely
taut; tighten the screw as necessary
· remove the template
008904.55.04_EMB_0401_a165 a170 a180_EN
165_170_180_SM_engl
19.04.2004
8:58 Uhr
Seite 19
Embroidery hoops
19
Attaching the embroidery hoop
Needle and presser foot
· raise the needle and presser foot
· hold the hoop with the right side of
the fabric facing up and the
attaching mechanism to the left
· pass it under the presser foot
Attaching the hoop
· squeeze the ends of the attaching
mechanism on the side of the hoop
· position the center points of the
hoop (small raisings) over the
bracket of the embroidery arm
· press down on the hoop until it
engages
· release the attaching mechanisms
of the hoop
Removing the hoop
· press both ends on the hoop attaching mechanism towards each
other
· pull up to remove the hoop
Adjusting the embroidery hoop
If the embroidery module was not
bought with the sewing computer
but as a later addition, it is necessary
to adjust the embroidery hoop
before using it for the first time. This
adjustment calibrates the needle to
the center of the embroidery hoop.
Preparation
· the embroidery module must be
attached directly to the sewing
computer without the adapter
· attach the large or medium hoop to
the module with the corresponding
template
Open Setup
· press the external setup button
· the menu appears
· select “Service”
· the menu appears
· select “Adjustment of hoop”
Adjusting the hoop
· the adjustment screen appears
· touch “check”
· the sewing computer follows the
contours of the hoop, finally
positioning the needle in the center
· if the needle does not come to a
stop in the exact center of the
hoop, use the arrows to adjust it
008904.55.04_EMB_0401_a165 a170 a180_EN
· touch “ok”– close the screen
· close setup with “esc”
· touch “check” in Layout 1 – close
embroidery hoop adjustment
165_170_180_SM_engl
20
19.04.2004
8:58 Uhr
Seite 20
Embroidery Hoops/Embroidering motifs, letters, and numbers
Hoop coding
The artista embroidery module can
check to see which embroidery hoop
is on the embroidery module and will
let you know if a different size needs
to be used for the motif selected.
Starting the motif
· attach the hoop to the embroidery
module
· select the desired motif
· if the presser foot is lowered, the
message “raise the presser foot”
will appear on the screen
· raise the presser foot
· the embroidery hoop moves to start
the hoop coding
· after the hoop size has been read,
the contours of the motif are
registered within a rectangle
· if the hoop size suits the motif, the
hoop moves to the start position
· if the motif is too big for the hoop,
a message appears on the screen
· change to the appropriate hoop
size, if needed, and select “check”
(in layout 1) to read the new hoop
size
· touch “ok” (Layout 1)
· embroider the motif
· the message “lower the presser
foot” appears on the screen
· lower the presser foot
Embroidering motifs, letters and numbers
Preparing the machine
· turn the sewing computer off
· attach module to sewing computer
· use a size 80 needle for fine to
medium-weight fabrics and a size
90 needle for thick, firm fabrics
· use glossy or dull embroidery thread
as upper thread (no. 40–50)
· for the bobbin use a fine embroidery or darning thread, e.g. Mettler
no. 60/2 or embroidery bobbin
thread
· thread the sewing computer
· secure the fabric in the embroidery
hoop
· attach the hoop to the embroidery
module
Switch sewing/embroidery
computer on
· turn the sewing computer power
switch on
Menu
· touch embroidery module (left)
· this activates the motifs in the
module
· when the “lower feed dog” screen
appears, touch “esc” to close
· lower the feed dog
Selecting motifs and letters
· the embroidery module symbol
appears top left to show that the
motifs in the module are activated
· scroll to view the complete range
· all motifs which appear after the
letters can be combined with them
· select the lettering style of your
choice
· touch the teddy bear symbol under
the scroll arrows to open the embroidery card (assuming a card has
been inserted)
· touch “esc” to return to the main
menu
008904.55.04_EMB_0401_a165 a170 a180_EN
165_170_180_SM_engl
19.04.2004
8:58 Uhr
Seite 21
Embroidering motifs, letters, and numbers
21
Letters
· the letters of the selected style
appear on the screen
· scroll to view all letters and
numbers
· memory is automatically activated
when you select a lettering style
· select a letter or number
· it appears in the memory bar
· select the next letter or number
· it appears to the right of the
previous one in the memory bar
· touch “del” to delete the last entry
· touch “OK” and the screen reverts
to the sewing screen
Sewing screen with motif and color
selection
· after pressing “OK” the sewing
screen appears
· the saved letters and/or numbers
appear in the large section of the
screen
· letters and numbers are always
saved in one color (brush button is
active)
· the following information appears
on the screen
· presser foot
· design number
· embroidery time
· finished size (in millimeters)
· the cross symbol indicates the
starting point of a color
· letters and numbers can be
embroidered from this screen only
Letters in different colors
· letters and numbers are always
saved in one color (brush is active)
· touch the brush symbol to close
single color embroidery
· the sewing computer stops
automatically after every letter
· the thread color can be changed
· the embroidery time for each new
color is shown
Rotating letters
· sometimes the embroidery hoop is
too narrow for a word you want to
write
· if this is the case, rotate the word
by 90º in Layout 1 (see also
Rotating motifs, page 27)
· the word can now be positioned in
the whole length of the embroidery
hoop
· longer words or sentences can be
embroidered in this manner
Sewing screen with motif and color
selection
· after selecting a motif, the screen
changes to the sewing screen
· the activated motif always appears
in the main section of the screen
· the hoop positions itself automatically after the motif development
· the following information appears
on the screen:
· presser foot
· motif number
· embroidery time (after motif is
processed)
· finished motif size
· the color sequence and selection
can be activated from this screen
(by touching the arrows)
· the sections for the color being
sewn are in black on the screen, all
other sections appear gray
· the cursor indicates the starting
point of the color selected
· the motif can be embroidered from
this screen only
008904.55.04_EMB_0401_a165 a170 a180_EN
165_170_180_SM_engl
22
19.04.2004
8:58 Uhr
Seite 22
Starting to embroider/Motifs and functions
Starting to embroider
Starting to embroider with the quick
reverse button
· lower the presser foot
· press the quick reverse button on
the head frame (approximately 3
seconds will elapse until the audio
signal stops)
· the sewing computer will automatically sew approximately 6 stitches
and stop
· raise the presser foot
· cut the thread tail
· lower the presser foot
· press the quick reverse button to
resume sewing
Starting to embroider with foot
control
· lower the presser foot
· press the foot control
· the sewing computer will stop
automatically after a few stitches
(approx. 6)
· release the foot control
· raise the presser foot
· cut the thread tail
· lower the presser foot
· continue embroidering by pressing
the foot control
Complete the color
· lower the presser foot
· press the foot control or quick
reverse button
· the sewing computer embroiders all
the sections in the color selected
and stops automatically when
complete
Cutting thread ends after embroidery
· raise the presser foot
· remove the embroidery hoop from
the embroidery arm
· cut threads close to the embroidery
· carefully remove any connecting
threads from the embroidered area
if necessary
· Take care that the bobbin thread is
not cut too tightly on the stitch
plate when removing the embroidery hoop. This prevents tangling
when starting again.
Color change
· the sewing computer is
automatically ready to embroider
the next color
· change the upper thread
accordingly
· embroider as described above
Interrupting with the foot control
· when the sewing computer is
embroidering, tap the foot control
lightly
· the sewing computer will stop
automatically
Using motifs with functions
All motifs can be combined with the
various functions integrated in the
embroidery module. You can alter
the color sequence, rotate motifs,
adjust the stitch density, etc.
008904.55.04_EMB_0401_a165 a170 a180_EN
165_170_180_SM_engl
19.04.2004
8:58 Uhr
Seite 23
Motifs and functions
23
Embroidery screen
Embroidery screen
· after selecting a motif, the embroidery screen with color selection and
sequence appears
· the selected motif appears in the
large section of the screen
· the following information appears
on the screen
· presser foot
· design number
· embroidery time
· finished size (in millimeters)
· touch “Layout 1” or “Layout 2” =
switch between layout screens
several functions can be
combined with the motif
· “menu” opens the embroidery
module menu
· the number of the color to be
embroidered is shown on the left
(large)
· use the arrows to scroll the color
sequence of the motif
· the total number of colors for the
motif selected is on the right (small)
· the sections for the color to be
embroidered are in black on the
screen
· the remaining sections appear gray
on the screen
· the cursor indicates the starting
point of a particular color
· touch the brush symbol to embroider the motif in one color (no color
changing stop)
· touch sequence control to control
the embroidery sequence and move
forward or backward in small steps
· touch the hoop relocater symbol to
move the frame horizontally into the
center for easier threading.
· touch “M –”or “M +” = the embroidery speed will be reduced or
increased proportionately.
Size changes, mirror image, rotations
· the embroidery motif always
appears in its original form in the
normal embroidery screen
· size changes are not shown on the
screen
· the size is shown in millimeters
· mirror images and rotations are not
shown on the screen unless “show”
(in layout) is selected
· any alterations which have been
made can be viewed at any time in
either of the layout screens
Change the color sequence
Color sequence
· use the arrows to scroll through the
color sequence of the motif
· the total number of colors for the
motif selected is shown on the right
(small)
· the number of the current color is
shown on the left (large)
· the sections for the color to be
embroidered are shown in black on
the screen
· the remaining sections appear gray
on the screen
· the cursor indicates the starting
point of a particular color
Manual sequence
· scroll the color sequence until you
reach the area of your choice, e.g.
color 4
· embroider the color, the machine
stops automatically
· scroll to the next color, e.g. 6
· embroider
· continue until the motif is complete
· when scrolling backward through
the color sequence, the end of the
previous color is always shown:
the large number on the left in the
rectangle changes from black to
gray.
For instance:
When changing from color 6 to 4,
the left arrow must be pressed until
the number 3 appears in gray. Then,
press the right arrow once and the
number 4 appears in black. Now
color 4 can be embroidered.
008904.55.04_EMB_0401_a165 a170 a180_EN
165_170_180_SM_engl
24
19.04.2004
8:58 Uhr
Seite 24
Motifs and functions
Single color motifs
Single color
· touch the brush symbol
Embroider the motif in one color
· the motif will be embroidered in
one color
· the sewing computer stops
automatically when the motif is
complete
Layout 1 and 2
Layout 1
· select “layout 1” in the sewing
screen
· layout 1 screen appears
· the 8 directional arrows appear to
the right of the motif
· sizing functions will appear at the
upper right of the screen
· touch “ok” to return to sewing
screen
· motif is embroidered from sewing
screen
Layout 2
· select “layout 2” in the sewing
screen
· layout 2 screen appears
· Alterations to the stitch density
(zig-zag) and stitch length as well
as conversion from long Stitch to
straight stitch are shown next to
the stitch symbol
· touch “layout 1” to return to that
screen
· touch “ok” to return to sewing
screen
· embroidery can only be done from
the sewing screen
Move motif to new position
Move motif with arrows
· the motif can be moved to another
position within the embroidery
hoop
· open Layout 1 screen
· use the 8 directional arrows to
move the motif within the hoop
· when a motif is moved, the motif
frame stays visible but the motif
itself disappears
· touch “center” to return the motif
to the center of the hoop
008904.55.04_EMB_0401_a165 a170 a180_EN
165_170_180_SM_engl
19.04.2004
8:58 Uhr
Seite 25
Motifs and functions
Retrieving the motif
· when the motif has been moved to
the position of your choice, you can
retrieve it
· touch “show”
· the hourglass appears next to the
show symbol
· this indicates that the motif is being
redeveloped
25
· the hourglass disappears and the
motif appears again in its frame
· touch “ok” to confirm and return
to the sewing screen
Start position
Start and embroidery hoop position
· open Layout 1 screen
· touch “start”
· the embroidery hoop moves into
the start position so that the needle
is in exactly the right position for
the first stitch
· touch “ok” to confirm and return
to the sewing screen
Show motif center
Show motif center
· open Layout 1 screen
· touch “motif center”
· the center of the motif is indicated
· the embroidery hoop moves so that
the needle is in the center of the
motif
· this feature is particularly useful
if you want the motif exactly in
the center of the fabric you are
embroidering
008904.55.04_EMB_0401_a165 a170 a180_EN
· touch “ok” to confirm and return
to the sewing screen
165_170_180_SM_engl
26
19.04.2004
8:59 Uhr
Seite 26
Motifs and functions
Check size
Check motif size
· open Layout 1 screen
· touch check symbol
· the embroidery hoop moves to the
back so that the hoop coding can
be registered (embroidery hoop
teeth and sensor in embroidery
arm)
· when this is complete, the contours
of the motif are read
· if the hoop and motif are suited,
the hoop moves into the start
position
· if the motif is too large for the
hoop, a message appears on the
screen
· touch “ok” to confirm and return
to the sewing screen
Adjust motif size
· open Layout 1 screen
· touch the left field
· the motif will be reduced
· touch the right field
· the motif will be enlarged
· the center field shows the adjustment in percent
· touch the center field to return the
motif to its basic size (100%)
· when a motif has been enlarged or
reduced, only the motif frame is
visible until the show function (in
layout) is activated
· the altered size stays active until
the sewing computer is turned off
or the size is changed again
· when the sewing computer is
switched on again, the basic
settings will apply
Retrieving the motif
· once the size of the motif has been
altered to your wishes, it can be
retrieved
· touch “show”
· the hourglass appears next to the
show symbol
· this indicates that the motif is being
redeveloped
· the hourglass disappears and the
motif appears in its frame
· touch “ok” to confirm and return
to the sewing screen
· the motif appears in the sewing
screen in its original size
· the motif size is recalculated during
the screen change
· as the motif is recalculated, the
percentage of complete alterations
appears in place of the embroidery
time
Adjust motif size
008904.55.04_EMB_0401_a165 a170 a180_EN
165_170_180_SM_engl
19.04.2004
8:59 Uhr
Seite 27
Motifs and functions
27
Mirror image (horizontal)
Horizontal mirror image
· open Layout 1 screen
· touch the mirror symbol
· the motif will be shown in mirror
image (and later embroidered as
such)
· when mirror image is applied, only
the motif frame appears on the
screen
· the corner marking moves from the
bottom right to bottom left of the
frame
· the mirror image remains active
until a new motif is selected
· a wonderful variety of combinations
are possible using mirror image
together with the rotation feature
Retrieving the motif
· after applying mirror image, the
motif can be retrieved
· touch show
· hourglass blinks to the right of the
“show” symbol
· this indicates that the motif is being
redeveloped
· the hourglass disappears and the
motif appears in its frame
· touch “ok” to confirm and return
to the sewing screen
· the motif always appears in its
original form (not mirror imaged) in
the sewing screen
· amendments take place during the
screen change
· as the motif is recalculated, the
percentage of complete alterations
appears in place of the embroidery
time
Rotate motif
· open Layout 1 screen
· touch the left symbol
· the motif is roated 5° clockwise
· touch the symbol again
· the motif is now rotated 10°, etc.
· touch the right symbol
· the motif is roated 5° anticlockwise, etc.
· the motif can therefore be rotated
in 72 different positions
· a variety of combinations are
possible using horizontal mirror
image
· only the motif frame is shown and
rotated
· the rotation only stays active until a
new motif is selected
· if a design is too large to be rotated
within the hoop, reduce the size,
rotate it, and return the motif to its
original size
Retrieving the motif
· after rotating, the motif can be
retrieved
· touch show
· hourglass blinks to the right of the
“show” symbol
· this indicates that the motif is being
redeveloped
· the hourglass disappears and the
motif appears in its frame
· touch “ok” to confirm and return
to the sewing screen
· the motif will appear on the sewing
screen in its original size (not
rotated)
· amendments take place during the
screen change
· as the motif is recalculated, the
percentage of complete alterations
appears in place of the embroidery
time
Rotate motif
008904.55.04_EMB_0401_a165 a170 a180_EN
165_170_180_SM_engl
28
19.04.2004
8:59 Uhr
Seite 28
Motifs and functions
Horizontal and vertical adjustments
Horizontal adjustments
Reduce or increase the motif width
· open Layout 2 screen
· touch the left field
· the motif will be compressed
horizontally
· touch the right field
· the motif will be widened horizontally
· the center field shows the adjustment in percent
· touch center to return the motif to
its original state
· only the motif frame is visible when
it is being altered
· the changes are active until a new
motif is selected
Vertical adjustments
Shorten or lengthen the motif
· open Layout 2 screen
· touch the left field
· the motif will be shortened
vertically
· touch the right field
· the motif will be lengthened
vertically
· the center field shows the adjustment in percent
· touch center to return the motif to
its original state
· only the motif frame is visible when
it is being altered
· the changes are active until a new
motif is selected
Note: If the motif has been rotated
90˚, the width and length adjustments will appear to be opposite;
they are made to the original orientation of the motif
Retrieving the motif
· after adjusting, the motif can be
retrieved
· touch “show”
· hourglass blinks to the right of the
“show” symbol
· this indicates that the motif is being
redeveloped
· the hourglass disappears and the
motif appears in its frame
· touch “ok” to confirm and return to
the sewing screen
· the motif always appears in its original form (unaltered) in the sewing
screen
· amendments take place during the
screen change
· as the motif is recalculated, the
percentage of complete alterations
appears in place of the embroidery
time
008904.55.04_EMB_0401_a165 a170 a180_EN
165_170_180_SM_engl
19.04.2004
8:59 Uhr
Seite 29
Motifs and functions
29
Altering the stitch density
Altering the stitch density
(e.g. when using fine or thick threads)
· open Layout 2 screen
· touch the left field
· the stitch density will be increased
(more stitches)
· touch the right field
· the stitch density will be reduced
(fewer stitches)
· the center field shows the adjustment in percent
· touch the center to return the motif
to its basic state (100%)
· only the motif frame is visible when
the density has been adjusted
· the adjustment remains active until
a new motif is selected
Retrieving the motif
· after adjusting, the motif can be
retrieved
· touch “show”
· hourglass blinks to the right of the
“show” symbol
· this indicates that the motif is being
redeveloped
· the hourglass disappears and the
motif appears in its frame
· touch “ok” to confirm and return to
the sewing screen
· the motif always appears in its original form (unaltered) in the sewing
screen
· amendments take place during the
screen change
· as the motif is recalculated, the
percentage of complete alterations
appears in place of the embroidery
time
Altering the stitch length
Altering the stitch length
(e.g. for fine or thick threads)
· open Layout 2 screen
· touch the left field
· the stitch length will be reduced
· touch the right field
· the stitch length will be increased
· the center field shows the adjustment in percent
· touch the center to return the motif
to its basic state (100%)
· only the motif frame appears when
the density has been adjusted
· the adjustment remains active until
a new motif is selected
008904.55.04_EMB_0401_a165 a170 a180_EN
Retrieving the motif
· after adjusting, the motif can be
retrieved
· touch “show”
· hourglass blinks to the right of the
“show” symbol
· this indicates that the motif is being
redeveloped
· the hourglass disappears and the
motif appears in its frame
· touch “ok” to confirm and return
to the sewing screen
· the motif always appears in its original form (unaltered) in the sewing
screen
· amendments take place during the
screen change
· as the motif is recalculated, the
percentage of complete alterations
appears in place of the embroidery
time
165_170_180_SM_engl
30
19.04.2004
8:59 Uhr
Seite 30
Motifs and functions
Convert Stitches
The embroidery motifs are filled with long or straight stitches.
•
•
Long stitch:
alternates from one side to the other
Straight stitch (fill stitch):
consecutive stitches at regular
intervals
Convert Long Stitch to straight (fill)
stitch:
• open Layout 2 screen
• touch right or left symbol
• Long Stitch ist converted into straight
stitch, max. length 7 mm
Straight stitch as fill stitch:
• touch the right symbol again
• the max. straight stitch length is
increased
• touch the left symbol again
• the max. straight stitch length is
reduced
• the actual max. straight stitch length
(mm) is shown in the center symbol
Long Stitch as fill stitch:
• touch the center symbol
• the basic setting (off) is restored, the
motif will be filled with Long Stitch
Application:
• For example for motifs or letters
which are filled with Long Stitch
008904.55.04_EMB_0401_a165 a170 a180_EN
165_170_180_SM_engl
19.04.2004
8:59 Uhr
Seite 31
On-screen editing
31
Combining motifs and/or letters
Motifs can be combined in the artista
embroidery module to create
completely new designs. Motifs can
be combined with letters. Create
logos, crests, and badges without
using the PC.
Select embroidery letters
· touch the embroidery module
symbol
· touch “esc” to close the message
“lower feed dog”
· menu screen appears
· select the lettering style of your
choice
Tip:
Use Temporary Save to adjust the
distance between large and small
letters.
· select large letter and touch
temporary save
· select small letter(s), position in
Layout 1 and save
· touch ok = the letters combine
· letter screen appears
· program the letters as desired
· the sequence is displayed in the
memory bar across the lower part of
the screen
· the letter showing at the top of the
screen is the last letter selected
· touch “ok” to confirm
· the sewing computer will switch to
the embroidery screen
· the hourglass will blink as the
design is processed
· the letters appear on the screen;
the hoop will move and position the
starting point under the needle
· touch “layout 1” to go to
layout 1 screen
· the letters will appear as a rectangle
on the screen
· move to the desired position using
the eight directional arrows
· make any additional changes as
desired – resize smaller or larger,
rotate, or mirror image
· the rectangle will reflect the
changes made
008904.55.04_EMB_0401_a165 a170 a180_EN
· touch “show” to retrieve the motif
(the changes are reflected more
accurately by the rectangle than by
the motif)
165_170_180_SM_engl
32
19.04.2004
8:59 Uhr
Seite 32
On-screen editing
Temporary save
· touch “temporary save”; the hourglass will flash
· the lettering is stored in a temporary memory
· the motif is inactive and will show
as light gray on the screen
· touch the menu button
· press the external “clr” button to
delete the contents in the temporary memory
· the motif saved last will remain as
unsaved motif
Note: if the sewing computer is
turned off before the motif(s) is
permanently saved – in the
embroidery module or on a card –
the motif(s) will be lost.
Important:
Before saving the motif in the temporary memory, it must be moved by at
least one step – using the arrows –
from the center. Otherwise it will not
be possible to add another motif(s).
· menu screen
· select the desired motif, using the
arrows to scroll through the designs
if needed
· the sewing computer will process
the design and go through each
color on the screen until the
complete motif appears
· the hoop will move and position the
starting point under the needle
· touch “layout 1” to go to
layout 1 screen
· the new motif appears on the
screen as a rectangle
· touch “show”, then “temporary
save” to see the actual motifs on
the screen
· they are inactive (grey)
Note: Because of the size of the
screen, the rectangles are more
accurate when positioning motifs
To switch within the motif
combination
· touch the temporary save symbol
· touch the switch button to activate
the motif combination
· the active motif (in black) can be
positioned as desired by using the
eight directional arrows
· make any additional changes as
desired – resize smaller or larger,
rotate, mirror image, etc.
· the rectangle will show the changes
made
· touch “del” to erase the selected
motif and automatically retrieve the
next motif from the temporary save
· to add more motifs, repeat the
previous steps
· when motifs are combined as
desired, touch “ok”
· the sewing screen appears and
designs will process in the order they
were programmed
008904.55.04_EMB_0401_a165 a170 a180_EN
165_170_180_SM_engl
19.04.2004
8:59 Uhr
Seite 33
On-screen editing
33
· the combination design will appear
on-screen
· to sew without saving, press the
start button and stitch the design
· if working with letters and all in one
color is desired, touch the brush
symbol; it will turn gray. The sewing
computer will stitch all of the letters
without stopping for color changes.
· during the sewing of the last letter,
deactivate the brush function; it will
turn light again. The sewing computer will stop at the end of the
letter and at color changes for the
remaining motifs
Saving the combined motif
· touch the external “mem” button
· if the embroidery module function
is active: the motif can be saved in
the embroidery module
· activate the embroidery card
function to save the motif on an
inserted memory card
· if the memory card is inserted after
the “mem” button was touched,
the embroidery card function is
automatically activated
· touch “store”
· the combined motif will be saved in
the next available memory place –
either embroidery module or card
· when the motif is being saved, the
appropriate memory place button
and the hourglass which appears
between the “del” and the “ok”
button, both blink
· combined motifs that have been
saved give a new embroidery motif;
the new design can only be
modified as a whole
· the combined motif appears as a
rectangle in the layout screen
· touch “ok” to switch to sewing
screen
· embroidering will occur in the
programmed sequence and color by
color
If combining variations of the same
motif, use the duplicating feature to
add each new design quickly and
easily. Select the design one time
from the desired menu and duplicate
it the number of times desired.
· following the directions on pages
24–32, select the desired design
and go to layout 1
· the motif will appear as a rectangle
· touch “show” to retrieve the motif
Note: The rectangle is more
accurate when positioning motifs
· press “temporary save”
· the rectangle will become inactive
and turn gray
· with the rectangle inactive, use the
positioning arrows to move it
· a duplicate rectangle will move to
the new position, leaving the original one in place; press temporary
save
· each time this is repeated, the new
rectangle will move from the last
one selected
· once the desired number of motifs
have been duplicated, edit and
position them as desired following
the directions on pages 30–34
Duplicating
008904.55.04_EMB_0401_a165 a170 a180_EN
165_170_180_SM_engl
34
19.04.2004
8:59 Uhr
Seite 34
On-screen editing/Saving motifs
Arched lettering
Use the rotating feature of the edit
function to create arched lettering.
· following the directions on pages
24–32, select the desired letters as
individual motifs
· go to layout 1
· the motifs will appear as rectangles
· select each letter, move and rotate
it in succession as desired, e.g.,
B = 300°, E = 330°, R = 0°, N = 30°,
I = 60° etc., pressing “temporary
save” after each letter is correctly
positioned
· touch “ok” when the letters form
the desired arch
· the sewing screen appears
· the design will be developed in the
programming sequence
· follow the instructions on pages
34–35 to save the design
Saving motifs in the embroidery module
Layout 1 screen (example)
· motifs can be saved in the
Embroidery screen or in Layout 1 or
Layout 2 screens
· press external “mem” button
Memory screen
· the memory screen appears
· activate the embroidery module
function
· touch “store”
· the motif will be automatically
saved in the next available memory
space
Note:
A motif which was altered in size,
switch density, etc. then saved on the
embroidery module (memory card)
will be retrieved as a new motif when
selecting it. The sewing computer
considers the final setting as original
size (100%). The motif as it was
before alterations were made, will
not be retrievable after saving the
final version of the design.
Select a motif saved in the
embroidery module
· the newly saved motifs are added to
the end of the list of motifs
· scroll through the view of motifs to
find the last saved motif at the end
of the list
· the small “m” in the top left of the
motif field shows that the motif is
from the embroidery module
memory
008904.55.04_EMB_0401_a165 a170 a180_EN
165_170_180_SM_engl
19.04.2004
8:59 Uhr
Seite 35
Saving motifs/Deleting data
35
Saving motifs on memory cards
Bernina memory cards (blank)
· blank cards can be purchased from
your Bernina ® dealer
· motifs, individual letters or numbers
and combinations can only be saved
on these memory cards
· up to 15 different designs can be
saved on the memory card (depending on the number of stitches)
Layout 1 screen (example)
· motifs can be saved in the
Embroidery screen or in Layout 1 or
Layout 2 screens
· press external “mem” button
Memory screen
· the memory screen appears
· insert memory card into embroidery
module
· this activates the embroidery card
function
· touch “store”
· the motif will be automatically
saved in the next available space
Note:
Never remove the card from the
embroidery module when the
hourglass is blinking! The save
process will be interrupted and the
design data lost.
Note:
A motif which was altered in size,
stitch density, etc. then saved on
memory card (embroidery module)
will be retrieved as a new motif when
selecting it. The sewing computer
considers the final setting as original
size (100%). The motif as it was
before alterations were made, will
not be retrievable after saving the
final version of the design.
Deleting data
Memory screen
· open the Memory screen (press
external “mem” button)
· activate the embroidery module
function to delete items and make
space on the embroidery module
memory
· activate the embroidery card
function to delete items and make
space on the memory card
· select the desired data item, e.g. 2
· touch “del”
008904.55.04_EMB_0401_a165 a170 a180_EN
· a message will appear asking you if
you really want to delete the
contents of the memory
· touch “yes”
· the contents will be deleted
· contents of other memories will
move one place forward
· the used capacity is displayed in
percent above the motif
165_170_180_SM_engl
36
19.04.2004
8:59 Uhr
Seite 36
Deleting data/Free-arm embroidery
Delete complete contents of memory (embroidery module or card)
Memory screen
· open the memory screen (touch
external “mem” button)
· either the embroidery module
function or the embroidery card
function must be active
· press the external “clr” button
· all memories blink
· touch “del” when all memories are
still blinking
· the contents will be deleted
· the memory card is reformatted
Free-arm embroidery (optional accessory)
Preparation
· insert the adapter between the
sewing computer and embroidery
module
· do not attach the embroidery hoop
yet
· select a motif that can be sized to
40 x 60 mm (e.g. letter)
Note:
Always without a hoop attached!
Adapter recognition
· select a motif or letter
· the selected motif will be developed
in the sewing screen
· at the same time, the hoop connection will be activated which produces the impulse for recognizing
the adapter
· do not attach the hoop until the
stitch processing is complete and
the check button is pushed
Attach the hoop to the machine
· attach the embroidery hoop only
when the adapter recognition is
complete
· alter and adapt the motif as desired
and then embroider
008904.55.04_EMB_0401_a165 a170 a180_EN
165_170_180_SM_engl
19.04.2004
8:59 Uhr
Seite 37
Thread breakage during embroidery
37
Thread breakage during embroidery
Sometimes the upper thread can
either break or run out while you are
embroidering. If this happens, the
sewing computer stops automatically.
If the lower thread breaks or runs
out, only artista 180 stops automatically.
Artista 165 and artista 170 don’t feature a lower thread control, and so
doesn’t stop automatically when the
lower thread breaks or runs out.
Upper thread breaks
· the artista 165, artista 170 and artista 180 stop if the upper thread
breaks or runs out
· an error message appears on the
screen
· check the thread and re-thread if
necessary
· touch “esc” to return to the sewing
screen
Activate upper and lower thread
control using the Setup program
(see the sewing computer instruction
manual).
Lower thread runs out
· only artista 180 stops automatically
if the lower thread runs out (1–6 m
remaining thread of average
thickness; up to 15 m with a fine
thread)
· a message appears on the screen
· check the lower thread, refill spool
· touch “esc” to return to the sewing
screen
· artista 165 and artista 170 don’t
stop automatically
Stitch sequence control when thread
breaks
· touch the stitch control symbol in
the sewing screen
· the screen changes
Stitch sequence control
(when thread breaks)
To check:
· touch the right or left arrow
(right = forward, left = reverse)
· the embroidery hoop is moved
through the stitch sequence
· touch continuously to run through
the sequence quickly
When thread breaks:
· touch the left arrow once
· the needle is moved back approximately 6 stitches
· touch the arrow again
· the needle moves back one step
at a time
· touch continuously to move the
needle more quickly
Beginning embroidery again
· set the needle sufficiently far back
for the embroidery to start a few
stitches before the break
· touch “ok”
· the sewing screen appears
· lower the presser foot
· start sewing by pressing the foot
control or the securing button on
the head frame
· after the first few stitches, the
sewing computer stops
· cut the thread ends
· complete the motif
008904.55.04_EMB_0401_a165 a170 a180_EN
165_170_180_SM_engl
38
19.04.2004
8:59 Uhr
Seite 38
Embroidery Threads / Embroidery motifs-Summary
Embroidery threads
Professionally digitized designs are
normally digitized for 40-weight
thread which can be found in polyester and rayon varieties giving the
embroidery a pretty sheen. They are
available in a wide range of colors
with new colors being added from
time to time.
Metallic threads also con add dimension to your embroidery and will sew
the easiest by using the vertical spool
holder and the supplementary thread
guide (optional accessory). A needle
designed for use with metallic
threads will also improve results.
ding 60/2 cotton or embroidery bobbin thread. It is not necessary to
match the bobbin thread to the
upper thread. White or black are the
most commonly used bobbin colors.
Regardless of the type of thread you
choose, you should always buy a
quality thread from a reputable
maufacturer. Poor quality threads
usually give poorly stitched designs
and break often.
Choose a finer thread for the bobbin
to avoid unnecessary thread build up
and bulk. Several are available inclu-
Summary of embroidery motifs
This appendix provides you with a
complete overview of all the motifs
in the embroidery module.
Each motif is shown with the total
number of colors and color sequences. The sequences correspond to the
exact embroidery sequence determined in the embroidery module to
ensure perfect and beautiful results.
You can naturally change and mix
the colors to suit your own personal
tastes. There are no limits to your
own imagination and creativity.
Tip: It’s worth trying out new combinations on fabric remnants. You
can always use your practice pieces
to make unusual and individual
greetings cards!
008904.55.04_EMB_0401_a165 a170 a180_EN
165_170_180_SM_engl
19.04.2004
8:59 Uhr
Seite 39
Optional Accessories
Optional accessories
Small hoop
For use with the Free arm adapter, it is useful for small and/or tubular areas
such as pant legs, sleeves or baby clothing. It comes with a template and the
stitching field is 40 x 60 mm.
Free arm adapter
Attachment that allows the embroidery module to sit away from the free arm
of the sewing machine enabling tubular areas to be embroidered easily. It is
used with the small hoop (40 x 60 mm).
CPS
(Customized Pattern Selection)
Software to enhance your embroidery by providing a library of designs that
can be interchanged with the designs that come with the embroidery module. Designs are of a wide variety making it easy to find something you like.
Artlink software
Artlink comes with 24 designs, including many licensed designs. This software has the ability to rotate, rescale, mirror image and preview designs
before they are sewn.
Artista embroidery software
Bernina software comes in a variety of levels enabling you to choose the software right for you. All are Windows based, easy to learn and fun to use.
Editor provides a powerful base for the designer software. It comes with 211
designs and 42 alphabets giving you the creative freedom to edit existing
designs and personalize them. Add Auto-Designer for automatic digitizing
capabilities with a single click beginning with your own artwork. Move to the
Designer level to have manual digitizing tools, plus the ability to use your
Windows True Type fonts in your embroideries. Add Cross-Stitch at any level
to do cross stitch embroidery by machine. Add PhotoSnap to be able to
stitch a picture at the Auto-Designer level and on. Choose one software
package for your embroidery needs and have it all with Designer Plus.
Mutli spool thread stand
An attachment for the sewing computer to hold as many as 13 spools at one
time, making embroidery thread changes convenient and easy.
Magic box
The magic box attaches to your computer and converts most home embroidery card designs to the card of your choice. Used with the artista embroidery software, it also functions as a reader/ writer box.
Reader /Writer box
The reader/writer box is a peripheral for your computer that is useful for reading and writing embroidery card data. It writes to a personal design card
(optional accessory) and is convenient when the computer is not located near
the artista 165.
Embroidery cards
New cards are constantly being introduced to satisfy consumer preferences.
They offer a wide variety of designs with particular themes and supplement
the embroidery designs that come with your module.
Medium embroidery hoop
For medium sized designs on smaller areas, up to max. 100 x 130 mm
008904.55.04_EMB_0401_a165 a170 a180_EN
39
165_170_180_SM_engl
19.04.2004
8:59 Uhr
Seite 40
40
Index
Index
Accessories, optional
Accessories, standard
Adjusting the hoop
Artista embroidery software
Artlink software
Attaching the module
5, 39
5
19
39
39
6
B
Bobbin case finger
· retrieve
· temporary save
H
13
13
Hoop coding
Hoops – attaching
Hoops – securing fabric
Hoop adjusting
20
19
18
19
L
9
Letters/numbers –
embroidering
20–21
C
31–34
6
3
14, 30
D
Details of the embroidery module 4
Deleting motifs
35–36
E
Embroidery card
Embroidery threads
Embroidering motifs, letters
and numbers
Embroidery motif-Summary
Embroidery Speed
39
38
20–21
38
11
F
Free arm adapter
39
Free arm adapter, attaching
7
Free arm embroidery
36
Free arm hoop
7
Functions (description)
11–14
· alter size
12
· check size
12
· directional arrows
13
· horizontal mirror image
12
· hoop relocator
13
· hourglass
12
· layout screens 1 and 2
11
· mem
12
· menu
11
· motif center
12
· motif density
14
· motif height
13
· motif width
13
· multi-color motifs
11
· OK
12
· rotate motif
12
· sequence control
(thread breakage)
11
· show
12
· single color motifs
11
· start
12
· starting embroidery with the quick
reverse button
11
· stitch length
14
Magic box
Memory cards
· deleting motifs
· saving motifs
Messages
Motifs and functions
· adjust size
· change color sequence
· check size
· horizontal adjustment
· layout screens 1 and 2
· mirror image
· motif center
· move motif
· rotate motif
· show
· single color motifs
· start position
· stitch density
· stitch length
· vertical adjustment
Motifs – embroidering
Multi spool thread stand
14
14
10
10
23
17–18
22
22
22
37
8
T
Thread breakage
Thread tension
M
Combining motifs and/
or letters
Connecting cable
Contents
Convert stitches
· motif size
· presser foot
Selecting motifs from cards
Selecting motifs from module
Sewing Screen
Stabilizers
Starting to embroider
· foot control
· quick reverse button
Stitch sequence control
Straight stitch plate
37
9
39
35
35–36
35
15–16
22–29
26
23
26
28
24
27
25
24
27
25
24
25
29
29
28
20–21
39
N
Needles
8
O
Optional accessories
· CPS embroidery motifs
· embroidery cards
· small hoop
39
39
39
39
P
Preparing the sewing computer
8–9
S
Safety instructions
Saving Motifs
Screen symbols
· calculating alterations
· embroidery hoop coding
· embroidery time
1
34–35
14
14
14
14
008904.55.04_EMB_0401_a165 a170 a180_EN
04/01 EN 008 904 55 04
A