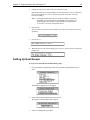
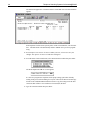
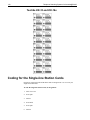
1
Telephone Switching Systems for AmAndA@SOHO Version 3.xx Switching Guide: 7/01 Edition ii Telelphone Switching Systems for Amanda@SOHO Copyright and Trademark Notices Copyright 1992–2001 The Amanda Company, Inc. All Rights Reserved. This guide and the software described herein are copyrighted with all rights reserved. No part of this publication may be reproduced, transmitted, stored in a retrieval system, or translated into any language in any form by any means without the prior written permission of The Amanda Company, Inc. Amanda and Amanda@ are registered trademarks and sales trademarks of The Amanda Company. Other brand names and product names mentioned in this manual are trademarks or registered trademarks of their respective owners. Limited Warranty on Software The Amanda Company, Inc. warrants the media on which the software is recorded to be free from defects in materials and faulty workmanship for a period of 90 days from the date the software is delivered. If a defect in the media should occur during this period, you may return the media to The Amanda Company and The Amanda Company will replace the media without charge. THE AMANDA COMPANY MAKES NO WARRANTIES (OTHER THAN THOSE SET FORTH ABOVE) TO ANY PERSON OR ENTITY WITH RESPECT TO THE PRODUCT OR ANY DERIVATIVES THEREOF OR ANY SERVICES OR LICENSES AND DISCLAIMS ALL IMPLIED WARRANTIES, INCLUDING WITHOUT LIMITATION WARRANTIES OF MERCHANTABILITY, PERFORMANCE, NONINFRINGEMENT, AND FITNESS FOR A PARTICULAR PURPOSE. THE AMANDA COMPANY WILL NOT BE LIABLE FOR ANY BUG, ERROR, OMISSION, DEFECT, DEFICIENCY, OR NONCONFORMITY IN ANY SOFTWARE. THE SOFTWARE IS LICENSED “AS IS,” AND THE PURCHASER ASSUMES THE ENTIRE RISK AS TO ITS QUALITY AND PERFORMANCE. IN NO EVENT AND NOTWITHSTANDING ANY DOCUMENT, REPRESENTATION, OR OTHERWISE, SHALL THE AMANDA COMPANY BE LIABLE TO YOU FOR DIRECT, INDIRECT, SPECIAL, INCIDENTAL, CONTINGENT, OR CONSEQUENTIAL DAMAGES, INCLUDING DAMAGES FROM LOSS OR CORRUPTION OF DATA, INTERRUPTED USE, LOST PROFITS, COST OF PROCURING SUBSTITUTE GOODS, TECHNOLOGY OR SERVICES, EVEN IF THE AMANDA COMPANY OR AN AUTHORIZED AMANDA COMPANY DEALER HAS BEEN ADVISED OF THE POSSIBILITY OF SUCH DAMAGES. YOU AGREE THAT THE AMANDA COMPANY’S LIABILITY ARISING OUT OF CONTRACT, NEGLIGENCE, STRICT LIABILITY, WARRANTY, OR OTHER LEGAL OR EQUITABLE THEORY SHALL NOT EXCEED ANY AMOUNTS PAID BY YOU FOR THIS PRODUCT. Any written or oral information or advice given by Amanda Company dealers, distributors, agents, or employees will in no way increase the scope of this warranty, nor may you rely on such oral or written communication. Some states do not allow the exclusion or limitation of implied warranties or liability for incidental or consequential damages, so the above limitation or exclusion may not apply to you. This warranty gives you specific legal rights, and you may also have other rights which vary from state to state. This Agreement shall be governed by the laws of the State of California without regard to the conflicts of laws or provisions thereof. iii Fraudulent Usage Advisory Although the Amanda software is designed to resist fraudulent usage, including unauthorized access to a long distance network, no product, including the Amanda software, is able to prevent such unauthorized usage. The Amanda software is likewise unable to prevent such uses as may constitute an invasion of privacy or other tort. THE AMANDA COMPANY MAKES NO EXPRESS OR IMPLIED WARRANTY AGAINST UNLAWFUL OR UNAUTHORIZED USE OF YOUR AMANDA SYSTEM OR ITS CAPABILITIES AND HEREBY DISCLAIMS ALL LIABILITY ARISING FROM SUCH USE. YOU AGREE TO INDEMNIFY, DEFEND, AND HOLD THE AMANDA COMPANY HARMLESS FOR ANY UNAUTHORIZED OR FRAUDULENT USE OF YOUR LICENSED AMANDA SOFTWARE. THE AMANDA COMPANY 13765 ALTON PARKWAY, UNIT F IRVINE, CA 92618 TELEPHONE (949) 859–6279 FAX (949) 859–4380 iv Telelphone Switching Systems for Amanda@SOHO Contents Copyright and Trademark Notices . . . . . . . . . . . . . . . . . . . . . . . . . . . . . . . . . . . . . . . .ii Limited Warranty on Software. . . . . . . . . . . . . . . . . . . . . . . . . . . . . . . . . . . . . . . . . . .ii Fraudulent Usage Advisory . . . . . . . . . . . . . . . . . . . . . . . . . . . . . . . . . . . . . . . . . . . . iii Chapter 1: Introducing the Switches . . . . . . . . . . . . . . . . . . . . . . . . . . . . . . . . . . . . . . . . . . . . . . . . . 1 Using a PBX with Amanda . . . . . . . . . . . . . . . . . . . . . . . . . . . . . . . . . . . . . . . . . . . . . 1 Identifying the Telephone Switching System . . . . . . . . . . . . . . . . . . . . . . . . . . . . 2 Chapter 2: Programming the AT&T Partner Plus . . . . . . . . . . . . . . . . . . . . . . . . . . . . . . . . . . . . . . 3 Getting Started . . . . . . . . . . . . . . . . . . . . . . . . . . . . . . . . . . . . . . . . . . . . . . . . . . . . . . . 3 Using Amanda as a Primary Automated Attendant . . . . . . . . . . . . . . . . . . . . . . . . . . . 3 Using Amanda as a Backup Attendant. . . . . . . . . . . . . . . . . . . . . . . . . . . . . . . . . . . . . 4 Using Amanda as a Voice Messaging Center . . . . . . . . . . . . . . . . . . . . . . . . . . . . . . . 4 Programming Hunt Group 7. . . . . . . . . . . . . . . . . . . . . . . . . . . . . . . . . . . . . . . . . . . . . 5 Assigning Extensions to Ring-No-Answer Service . . . . . . . . . . . . . . . . . . . . . . . . . . . 5 Setting the Number of Rings for No Answer . . . . . . . . . . . . . . . . . . . . . . . . . . . . 6 Determining When Voice Mail Answers Calls . . . . . . . . . . . . . . . . . . . . . . . . . . . . . . 7 Assigning Outside Lines to Hunt Group 7. . . . . . . . . . . . . . . . . . . . . . . . . . . . . . . . . . 8 Voice Mail Coverage for Outside Lines (Optional). . . . . . . . . . . . . . . . . . . . . . . . . . . 9 Setting Up a Night Button . . . . . . . . . . . . . . . . . . . . . . . . . . . . . . . . . . . . . . . . . . . . . . 9 Optional Programming. . . . . . . . . . . . . . . . . . . . . . . . . . . . . . . . . . . . . . . . . . . . . . . . 11 Transferring Callers to Other User’s Voice Mail . . . . . . . . . . . . . . . . . . . . . . . . 11 Transferring Callers to Your Voice Mail . . . . . . . . . . . . . . . . . . . . . . . . . . . . . . 11 Programming a Do Not Disturb Button . . . . . . . . . . . . . . . . . . . . . . . . . . . . . . . 12 Using the Template . . . . . . . . . . . . . . . . . . . . . . . . . . . . . . . . . . . . . . . . . . . . . . . . . . 13 Notification and Integration Files . . . . . . . . . . . . . . . . . . . . . . . . . . . . . . . . . . . . . . . 15 Chapter 3: Programming the AT&T Partner II . . . . . . . . . . . . . . . . . . . . . . . . . . . . . . . . . . . . . . . 17 Getting Started . . . . . . . . . . . . . . . . . . . . . . . . . . . . . . . . . . . . . . . . . . . . . . . . . . . . . . 17 Using Amanda as a Primary Automated Attendant . . . . . . . . . . . . . . . . . . . . . . . . . . 17 Using Amanda as a Backup Attendant. . . . . . . . . . . . . . . . . . . . . . . . . . . . . . . . . . . . 18 Using Amanda as a Voice Messaging Center . . . . . . . . . . . . . . . . . . . . . . . . . . . . . . 18 Programming Hunt Group 7. . . . . . . . . . . . . . . . . . . . . . . . . . . . . . . . . . . . . . . . . . . . 19 Assigning Extensions to Ring-No-Answer Service . . . . . . . . . . . . . . . . . . . . . . . . . . 19 Setting the Number of Rings for No Answer . . . . . . . . . . . . . . . . . . . . . . . . . . . 20 Determining When Voice Mail Answers Calls . . . . . . . . . . . . . . . . . . . . . . . . . . . . . 21 Assigning Outside Lines to Hunt Group 7. . . . . . . . . . . . . . . . . . . . . . . . . . . . . . . . . 22 Voice Mail Coverage for Outside Lines (Optional). . . . . . . . . . . . . . . . . . . . . . . . . . 23 Setting Up a Night Button . . . . . . . . . . . . . . . . . . . . . . . . . . . . . . . . . . . . . . . . . . . . . 23 Optional Programming. . . . . . . . . . . . . . . . . . . . . . . . . . . . . . . . . . . . . . . . . . . . . . . . 25 Transferring Callers to Other User’s Voice Mail . . . . . . . . . . . . . . . . . . . . . . . . 25 Transferring Callers to Your Voice Mail . . . . . . . . . . . . . . . . . . . . . . . . . . . . . . 25 Programming a Do Not Disturb Button . . . . . . . . . . . . . . . . . . . . . . . . . . . . . . . 26 vi Telephone Switching Systems for Amanda@SOHO Using the Template. . . . . . . . . . . . . . . . . . . . . . . . . . . . . . . . . . . . . . . . . . . . . . . . . . .27 Notification and Integration Files. . . . . . . . . . . . . . . . . . . . . . . . . . . . . . . . . . . . . . . .27 Chapter 4: Programming the Comdial Unisyn . . . . . . . . . . . . . . . . . . . . . . . . . . . . . . . . . . . . . . . .29 Getting Started . . . . . . . . . . . . . . . . . . . . . . . . . . . . . . . . . . . . . . . . . . . . . . . . . . . . . .29 Interfacing with a Voice Mail System. . . . . . . . . . . . . . . . . . . . . . . . . . . . . . . . .29 Programming the Unisyn for Voice Mail. . . . . . . . . . . . . . . . . . . . . . . . . . . . . . . . . .30 Configuring the Ports . . . . . . . . . . . . . . . . . . . . . . . . . . . . . . . . . . . . . . . . . . . . . . . . .31 Setting Up Ringing Operation . . . . . . . . . . . . . . . . . . . . . . . . . . . . . . . . . . . . . . . . . .32 Assigning Voice Mail Ports to a Hunt Group . . . . . . . . . . . . . . . . . . . . . . . . . . . . . .34 Setting Up Call Forwarding . . . . . . . . . . . . . . . . . . . . . . . . . . . . . . . . . . . . . . . . . . . .34 Setting Up the Intercom Hunt Group . . . . . . . . . . . . . . . . . . . . . . . . . . . . . . . . . . . . .35 Setting Up Line Groups . . . . . . . . . . . . . . . . . . . . . . . . . . . . . . . . . . . . . . . . . . . . . . .35 Setting Prime Line Intercom for Voice Mail Ports . . . . . . . . . . . . . . . . . . . . . . . . . .36 Setting Up Message Waiting . . . . . . . . . . . . . . . . . . . . . . . . . . . . . . . . . . . . . . . . . . .36 Setting Up Ringing Line Preference. . . . . . . . . . . . . . . . . . . . . . . . . . . . . . . . . . . . . .37 Other Considerations . . . . . . . . . . . . . . . . . . . . . . . . . . . . . . . . . . . . . . . . . . . . . . . . .37 Using Timed Hold Recall . . . . . . . . . . . . . . . . . . . . . . . . . . . . . . . . . . . . . . . . . .37 Using Unanswered Call Transfer Recall. . . . . . . . . . . . . . . . . . . . . . . . . . . . . . .38 Using Private Lines . . . . . . . . . . . . . . . . . . . . . . . . . . . . . . . . . . . . . . . . . . . . . . .38 Programming a Direct Login Button . . . . . . . . . . . . . . . . . . . . . . . . . . . . . . . . . . . . .39 Notification and Integration Files. . . . . . . . . . . . . . . . . . . . . . . . . . . . . . . . . . . . . . . .39 Chapter 5: Programming the Iwatsu Adix . . . . . . . . . . . . . . . . . . . . . . . . . . . . . . . . . . . . . . . . . . . .43 Entering and Exiting Programming Mode . . . . . . . . . . . . . . . . . . . . . . . . . . . . . . . . .43 Initializing the System . . . . . . . . . . . . . . . . . . . . . . . . . . . . . . . . . . . . . . . . . . . . . . . .43 Using the Telephone Keys and Buttons . . . . . . . . . . . . . . . . . . . . . . . . . . . . . . . . . . .43 Setting Up an Iwatsu ADIX . . . . . . . . . . . . . . . . . . . . . . . . . . . . . . . . . . . . . . . . . . . .45 Notification and Integration Files. . . . . . . . . . . . . . . . . . . . . . . . . . . . . . . . . . . . . . . .47 Chapter 6: Programming the NEC Electra, Level I . . . . . . . . . . . . . . . . . . . . . . . . . . . . . . . . . . . .49 Getting Started . . . . . . . . . . . . . . . . . . . . . . . . . . . . . . . . . . . . . . . . . . . . . . . . . . . . . .49 Programming the Hunt Group . . . . . . . . . . . . . . . . . . . . . . . . . . . . . . . . . . . . . . . . . .50 Programming System Mode . . . . . . . . . . . . . . . . . . . . . . . . . . . . . . . . . . . . . . . . . . . .51 Programming Night and Day Modes . . . . . . . . . . . . . . . . . . . . . . . . . . . . . . . . . . . . .52 Programming Call Forwarding. . . . . . . . . . . . . . . . . . . . . . . . . . . . . . . . . . . . . . . . . .53 Notification and Integration Files. . . . . . . . . . . . . . . . . . . . . . . . . . . . . . . . . . . . . . . .54 Chapter 7: Programming the NEC Electra II . . . . . . . . . . . . . . . . . . . . . . . . . . . . . . . . . . . . . . . . .57 Getting Started . . . . . . . . . . . . . . . . . . . . . . . . . . . . . . . . . . . . . . . . . . . . . . . . . . . . . .57 Programming Voice Mail Access. . . . . . . . . . . . . . . . . . . . . . . . . . . . . . . . . . . . . . . .59 Programming the Hunt Group . . . . . . . . . . . . . . . . . . . . . . . . . . . . . . . . . . . . . . . . . .60 Programming a Quick Transfer . . . . . . . . . . . . . . . . . . . . . . . . . . . . . . . . . . . . . . . . .61 Programming the Interior Ring Pattern . . . . . . . . . . . . . . . . . . . . . . . . . . . . . . . . . . .61 Programming Message Waiting Indications (MWI) . . . . . . . . . . . . . . . . . . . . . . . . .61 Programming Telephones to Forward to Voice Mail. . . . . . . . . . . . . . . . . . . . . . . . .62 Notification and Integration Files. . . . . . . . . . . . . . . . . . . . . . . . . . . . . . . . . . . . . . . .62 Chapter 8: Programming Panasonic KXTD 1232 . . . . . . . . . . . . . . . . . . . . . . . . . . . . . . . . . . . . . .65 Using a Panasonic Telephone. . . . . . . . . . . . . . . . . . . . . . . . . . . . . . . . . . . . . . . . . . .65 Getting Ready. . . . . . . . . . . . . . . . . . . . . . . . . . . . . . . . . . . . . . . . . . . . . . . . . . . . . . .66 Programming a Panasonic . . . . . . . . . . . . . . . . . . . . . . . . . . . . . . . . . . . . . . . . . . . . .66 vii Forwarding Calls to Voice Mail . . . . . . . . . . . . . . . . . . . . . . . . . . . . . . . . . . . . . . . . .70 Notification and Integration Files. . . . . . . . . . . . . . . . . . . . . . . . . . . . . . . . . . . . . . . .70 Chapter 9: Programming Panasonic DBS 824 . . . . . . . . . . . . . . . . . . . . . . . . . . . . . . . . . . . . . . . . .73 Getting Started . . . . . . . . . . . . . . . . . . . . . . . . . . . . . . . . . . . . . . . . . . . . . . . . . . . . . .73 Using the Telephone. . . . . . . . . . . . . . . . . . . . . . . . . . . . . . . . . . . . . . . . . . . . . . . . . .74 Programming the Hunt Group . . . . . . . . . . . . . . . . . . . . . . . . . . . . . . . . . . . . . . . . . .75 Using Third-Party Voice Mail . . . . . . . . . . . . . . . . . . . . . . . . . . . . . . . . . . . . . . . . . .76 Programming Call Forwarding. . . . . . . . . . . . . . . . . . . . . . . . . . . . . . . . . . . . . . . . . .76 Stopping the Busy Signal . . . . . . . . . . . . . . . . . . . . . . . . . . . . . . . . . . . . . . . . . . . . . .76 Using Amanda as a Primary Auto Attendant . . . . . . . . . . . . . . . . . . . . . . . . . . . . . . .76 Using Amanda as a Backup Attendant. . . . . . . . . . . . . . . . . . . . . . . . . . . . . . . . . . . .77 Programming Each Telephone . . . . . . . . . . . . . . . . . . . . . . . . . . . . . . . . . . . . . . . . . .79 To Use Answer Supervision . . . . . . . . . . . . . . . . . . . . . . . . . . . . . . . . . . . . . . . .79 To Use Call Forwarding . . . . . . . . . . . . . . . . . . . . . . . . . . . . . . . . . . . . . . . . . . .79 To Use a Voice Mail Message Key. . . . . . . . . . . . . . . . . . . . . . . . . . . . . . . . . . .80 To Use a Voice Mail Transfer Key . . . . . . . . . . . . . . . . . . . . . . . . . . . . . . . . . . .81 Notification and Integration Files. . . . . . . . . . . . . . . . . . . . . . . . . . . . . . . . . . . . . . . .81 Chapter 10: Programming the Samsung DCS 2.2/Compact. . . . . . . . . . . . . . . . . . . . . . . . . . . . . . .83 Getting Started . . . . . . . . . . . . . . . . . . . . . . . . . . . . . . . . . . . . . . . . . . . . . . . . . . . . . .83 Using the Keys on the Telephone . . . . . . . . . . . . . . . . . . . . . . . . . . . . . . . . . . . .84 Programming MMC: 207 . . . . . . . . . . . . . . . . . . . . . . . . . . . . . . . . . . . . . . . . . . . . . .84 Programming MMC: 726 . . . . . . . . . . . . . . . . . . . . . . . . . . . . . . . . . . . . . . . . . . . . . .86 Notification and Integration Files. . . . . . . . . . . . . . . . . . . . . . . . . . . . . . . . . . . . . . . .91 Chapter 11: Programming the Sprint Protegé CTX . . . . . . . . . . . . . . . . . . . . . . . . . . . . . . . . . . . . .93 Connecting the Parts. . . . . . . . . . . . . . . . . . . . . . . . . . . . . . . . . . . . . . . . . . . . . . . . . .93 Initiating Programming . . . . . . . . . . . . . . . . . . . . . . . . . . . . . . . . . . . . . . . . . . . . . . .94 Getting Around in the Protegé Software . . . . . . . . . . . . . . . . . . . . . . . . . . . . . . . . . .95 Setting Up Voice Mail Port Types . . . . . . . . . . . . . . . . . . . . . . . . . . . . . . . . . . . . . . .96 Setting Up Hunt Groups . . . . . . . . . . . . . . . . . . . . . . . . . . . . . . . . . . . . . . . . . . .97 Setting Up Special Features . . . . . . . . . . . . . . . . . . . . . . . . . . . . . . . . . . . . . . . . . . .101 Displaying the Name VMAIL on a Notification . . . . . . . . . . . . . . . . . . . . . . . . . . .104 Programming Buttons. . . . . . . . . . . . . . . . . . . . . . . . . . . . . . . . . . . . . . . . . . . . . . . .105 Setting Up Call Forwarding . . . . . . . . . . . . . . . . . . . . . . . . . . . . . . . . . . . . . . . . . . .111 Setting Up the Ringing . . . . . . . . . . . . . . . . . . . . . . . . . . . . . . . . . . . . . . . . . . . . . . .116 Notification and Integration Files. . . . . . . . . . . . . . . . . . . . . . . . . . . . . . . . . . . . . . .117 Chapter 12: Programming the Toshiba DK Series . . . . . . . . . . . . . . . . . . . . . . . . . . . . . . . . . . . . .119 Getting Ready . . . . . . . . . . . . . . . . . . . . . . . . . . . . . . . . . . . . . . . . . . . . . . . . . . . . . .119 Coding for the Single-line Station Cards . . . . . . . . . . . . . . . . . . . . . . . . . . . . . . . . .120 Managing Message Waiting Lights . . . . . . . . . . . . . . . . . . . . . . . . . . . . . . . . . . . . .121 Managing Voice Mail Ports . . . . . . . . . . . . . . . . . . . . . . . . . . . . . . . . . . . . . . . . . . .121 Notification and Integration Files. . . . . . . . . . . . . . . . . . . . . . . . . . . . . . . . . . . . . . .122 Chapter 13: Programming the Vodavi DHS. . . . . . . . . . . . . . . . . . . . . . . . . . . . . . . . . . . . . . . . . . .125 Creating Ports . . . . . . . . . . . . . . . . . . . . . . . . . . . . . . . . . . . . . . . . . . . . . . . . . . . . . .125 Using the Starplus Telephone. . . . . . . . . . . . . . . . . . . . . . . . . . . . . . . . . . . . . . . . . .126 Programming Voice Mail . . . . . . . . . . . . . . . . . . . . . . . . . . . . . . . . . . . . . . . . . . . . .127 Information about Prefixes and Suffixes. . . . . . . . . . . . . . . . . . . . . . . . . . . . . .132 Information about the Softkeys . . . . . . . . . . . . . . . . . . . . . . . . . . . . . . . . . . . . .132 Forwarding Telephones on No Answer . . . . . . . . . . . . . . . . . . . . . . . . . . . . . . . . . .133 viii Telephone Switching Systems for Amanda@SOHO Speed-dialing . . . . . . . . . . . . . . . . . . . . . . . . . . . . . . . . . . . . . . . . . . . . . . . . . . . . . .134 Using Amanda as a Backup Attendant. . . . . . . . . . . . . . . . . . . . . . . . . . . . . . . . . . .137 Transferring Calls. . . . . . . . . . . . . . . . . . . . . . . . . . . . . . . . . . . . . . . . . . . . . . . . . . .138 Switching between Day and Night Service . . . . . . . . . . . . . . . . . . . . . . . . . . . . . . .139 Notification and Integration Files. . . . . . . . . . . . . . . . . . . . . . . . . . . . . . . . . . . . . . .139 Chapter 14: Programming the WIN 36D . . . . . . . . . . . . . . . . . . . . . . . . . . . . . . . . . . . . . . . . . . . . .141 Getting Started . . . . . . . . . . . . . . . . . . . . . . . . . . . . . . . . . . . . . . . . . . . . . . . . . . . . .141 Programming the Hunt Group . . . . . . . . . . . . . . . . . . . . . . . . . . . . . . . . . . . . . . . . .142 Turning Off the MIT Tone . . . . . . . . . . . . . . . . . . . . . . . . . . . . . . . . . . . . . . . . . . . .146 Programming Call Forwarding. . . . . . . . . . . . . . . . . . . . . . . . . . . . . . . . . . . . . . . . .147 Programming Voice Mail Extended Inband Signaling . . . . . . . . . . . . . . . . . . . . . .150 Using Amanda as a Primary Automated Attendant . . . . . . . . . . . . . . . . . . . . . . . . .151 Making Amanda a Backup Attendant . . . . . . . . . . . . . . . . . . . . . . . . . . . . . . . . . . .153 Making Amanda a Voice Messaging Center . . . . . . . . . . . . . . . . . . . . . . . . . . . . . .155 Notification and Integration Files. . . . . . . . . . . . . . . . . . . . . . . . . . . . . . . . . . . . . . .155 Index . . . . . . . . . . . . . . . . . . . . . . . . . . . . . . . . . . . . . . . . . . . . . . . . . . . . . . . . . . . . . . . .157 Chapter 1: Introducing the Switches Using a PBX with Amanda Amanda@SOHO works with the following telephone switching systems. Telephone Switching Systems PBX Number AT&T Partner Plus 110 AT&T Partner 2 111 Comdial DSU/Unisyn 2-digit extension plan 3-digit extension plan 121 122 Inter-Tel GMX 12/24 140 Iwatsu Adix 8/24 (S/M Series) 150 Iwatsu Adix 16/48 151 NEC Electra, Level I (release 2.00+) 170 NEC Electra II (release 3.00+) 171 Panasonic KXTD 1232 191 Panasonic DBS 192 Samsung DCS 2.2/Compact 220 Sprint CTX/MTX 230 Toshiba DK-8 250 Toshiba DK-16 251 Toshiba DK-16e, DK-40 252 Vodavi Starplus DHS 260 WIN 36D 270 WIN 100D 271 2 Telephone Switchings Systems for Amanda@SOHO Each chapter in this guide covers either one telephone switching system or one manufacturer. For some manufacturers that have more than one switching system listed, each system has its own chapter because the programming is different. These chapters offer the information needed to program a new system with voice mail. It does not cover other aspects of programming the system. Nor does it prescribe corrections to make to previously programmed systems. Each chapter includes recommendations from dealers and switching system manuals. The Amanda Company assumes no liability for the accuracy of the information. Identifying the Telephone Switching System This guide explains how to: • • Tell Amanda what telephone switching system she will be working with Program that telephone switching system to work with Amanda correctly As the person installing Amanda, you must notify Amanda about the type of telephone switching system she will be using. + + + + enter the Amanda Company number for your PBX + Amanda repeats your selection as a confirmation. After selecting a telephone switching system, you can dial to hang up or enough ’s to return to the administrator menu and select a new set of options, for example, to designate the operator’s or the fax machine’s extension. To log into Amanda: Dial: _______ (Amanda’s number) + + (the mailbox) + + security code (initially the same number as the mailbox) + NOTE: If Amanda asks for a security code immediately (because the telephone switching system uses an auto-login feature), use: Dial: _______ (Amanda’s number) + mailbox + + + + security code + OR You can dial the mailbox’s security code (even though Amanda will say it is an invalid security code). Then provide the mailbox: Dial: _______ + security code + + mailbox + + To log into Amanda from outside of the office: Dial: _______ (the office number) + + mailbox + + security code + Chapter 2: Programming the AT&T Partner Plus Getting Started To connect Amanda to the switching system: 1. Run direct wiring from RJ-11 jack (one-pair) on Partner 206 module to RJ-11 jack (two-pair) on the voice board. 2. Run wiring from 66 block to RJ-11 jack (two-pair) to the Amanda Rhetorex voice board. OR • Use four RJ-11 mounting cords, one cord for each voice mail port. Plug one into each extension port on the 206 Module. The 206 Module must be 3.1 or higher in order to turn the message lights on and off for single-line telephones. To start programming the AT&T Partner: • Press . To exit programming the AT&T Partner: • Press . Programming is done only from extension 10 or 11. Using Amanda as a Primary Automated Attendant If you are using Amanda as a primary automated attendant, you need to read the following sections. Many of these sections also apply to using Amanda as a backup attendant or a voice messaging center; sometimes the settings are identical. Sometimes they are different. Be sure to use the settings for the primary automated attendant. Section to read: To program: Programming Hunt Group 7 #505 Hunt Group Extensions Assigning Extensions to RingNo-Answer Service #310 VMS Cover Setting the Number of Rings for No Answer #117 VMS Cover Rings Determining When Voice Mail Answers Calls #506 VMS Hunt Delay 4 Telephone Switching Systems for Amanda@SOHO Section to read: Assigning Outside Lines to Hunt Group 7 To program: #507 VMS Hunt Schedule #206 Group Call Distribution Using Amanda as a Backup Attendant If you are using Amanda as a backup attendant, you need to read the following sections. Many of these sections also apply to using Amanda as a primary automated attendant or a voice messaging center; sometimes the settings are identical. Sometimes they are different. Be sure to use the settings for the backup attendant. Section to read: To program: Programming Hunt Group 7 #505 Hunt Group Extensions Assigning Extensions to RingNo-Answer Service #310 VMS Cover Setting the Number of Rings for No Answer #117 VMS Cover Rings Determining When Voice Mail Answers Calls #506 VMS Hunt Delay #507 VMS Hunt Schedule #206 Group Call Distribution Assigning Outside Lines to Hunt Group 7 Using Amanda as a Voice Messaging Center If you are using Amanda as a voice messaging center, you need to read the following sections. Many of these sections also apply to using Amanda as a primary automated attendant or a backup attendant; sometimes the settings are identical. Sometimes they are different. Be sure to use the settings for a voice messaging center. Section to read: To program: Programming Hunt Group 7 #505 Hunt Group Extensions Assigning Extensions to RingNo-Answer Service #310 VMS Cover Setting the Number of Rings for No Answer #117 VMS Cover Rings Determining When Voice Mail Answers Calls #506 VMS Hunt Delay Chapter 2: Programming the AT&T Partner Plus 5 Section to read: Assigning Outside Lines to Hunt Group 7 To program: #507 VMS Hunt Schedule #206 Group Call Distribution Programming Hunt Group 7 You program Hunt Group 7 for voice mail. It should be a circular hunt group. You program it identically, regardless of whether Amanda is being used as a primary automated attendant, a backup attendant, or a voice messaging center. It is a circular hunt group. Procedure #505 Hunt Group Extensions lets you assign any number of extensions to a Hunt Group. The system supports up to seven Hunt Groups, with Hunt Group 7 used exclusively for voice messaging. Any number of extensions can be assigned to each Hunt Group. To assign an extension to Hunt Group 7: 1. Press 2. At the Group: prompt, enter a group number (7 is for voice messaging). For example, a display similar to the following appears: Hunt Group 7 Extension: 3. Enter an extension number. For example, to select extension 31, press 4. To assign the extension, press the display. 5. To assign another extension, press number shows on the display. Repeat step 4. 6. Select another procedure or exit programming mode. . until you see “1” for assigned to group on or until the extension EXTRA INFORMATION: After you assign the extensions associated with the voice messaging system hardware to Hunt Group 7, you can set the Transfer Return Extension (#306) for those extensions to extension 10 (or another extension with a person who can assist the caller). See a Partner manual for details. Assigning Extensions to Ring-No-Answer Service Procedure #310 VMS Cover automatically routes an extension’s unanswered intercom, transferred, and DIL/DID calls to Amanda after a specified number of rings so callers can leave messages. 6 Telephone Switching Systems for Amanda@SOHO You program it identically, regardless of whether Amanda is being used as a primary automated attendant, a backup attendant, or a voice messaging center. To program voice mail coverage: 1. Press 2. Enter the number of the extension to be covered by Amanda. For example, to program extension 11, press . 3. To assign Automatic VMS Cover, press on the display. 4. To program another extension, press number shows on the display. 5. Select another procedure or exit programming mode. until you see “1” for assigned or until the extension EXTRA INFORMATION: To manually change an extension’s VMS Cover state, users can program the VMS Cover feature on a button with lights. Users can then press the VMS Cover button to activate the feature (green light on) or deactivate the feature (green light off). NOTE: If Automatic VMS Cover is assigned at an extension, the green light is lit automatically after programming the VMS Cover button to indicate the VMS Cover is currently active. If this is the case, and the VMS Cover button is pressed, the feature is deactivated. To activate VMS Cover again, you must press the button. Automatic VMS Cover also applies to outside calls on lines assigned ownership with Line Coverage Extension (#208). See “Voice Mail Coverage for Outside Lines (Optional)” on page 9. Users with Automatic VMS Cover turned on can activate Do Not Disturb to Send All Calls immediately to their voice mailbox. If an extension has Automatic VMS Cover and Call Forwarding active, calls ring at the forwarding destination; they are not covered by Amanda. Standard telephones and system telephones without a programmed VMS Cover button cannot override this feature once it is assigned to an extension. Setting the Number of Rings for No Answer Procedure #117 VMS Cover Rings which applies to all system extensions programmed for VMS Cover, defines the number of times a call rings before it is sent to a user’s voice mailbox. Depending on your needs, you can program this procedure identically or differently for a primary automated attendant, a backup attendant, or a voice messaging center. (If an extension has VMS Cover or Automatic VMS Cover (#310) active, unanswered calls to that extension are routed to Amanda after the specified number of VMS Cover Rings.) Chapter 2: Programming the AT&T Partner Plus 7 To set the number of times calls ring before being sent to a mailbox: 1. Press 2. Enter a setting (1-9) for the number of rings by pressing until the setting you want appears on the display. If Amanda will be a: primary automated attendant backup attendant voice messaging center or Suggested setting: 3 3 3 For example, to set VMS Cover Rings to 3, press display similar to the following appears: or until a VMS Cover Rings 3 Rings 3. Select another procedure or exit programming mode. Determining When Voice Mail Answers Calls Procedure #506 VMS Hunt Delay and #507 VMS Hunt Schedule to schedule when voice mail answers calls. You program them differently, depending on whether Amanda is being used as a primary automated attendant, a backup attendant, or a voice messaging center. Procedure #506 VMS Hunt Delay determines when outside calls should be answered by Amanda. You can set the system for either immediate call handling (after the second ring) or delayed call handling (after the fourth ring). Delayed call handling gives the receptionist an opportunity to answer calls before they go to Amanda. Procedure #507 VMS Hunt Schedule determines whether the outside line assigned to Hunt Group 7 hunt through the VMS Hunt Group all the time, only during Day operation (Night Service is off), or only during Night operation (Night Service is on). To schedule voice mail response: 1. Press 2. Press until the appropriate value displays. (Values are “1” for Immediate and “2” for Delayed.) If Amanda will be a: primary automated attendant backup attendant voice messaging center This setting must be: Immediate Delayed Delayed 3. Press 4. Press until the appropriate value displays. (Values are “1” for Always, “2” for Day Only, and “3” for Night Only.) If Amanda will be a: primary automated attendant backup attendant voice messaging center This setting must be: Always Night Only Night Only 8 Telephone Switching Systems for Amanda@SOHO 5. Select another procedure or exit programming mode. If you set VMS Hunt Schedule for Day Only or Night Only, you must use Night Service Button (#503) to program a Night Service button for extension 10. See “Setting Up a Night Button” on page 9. Assigning Outside Lines to Hunt Group 7 Use procedure #206 Group Call Distribution to assign all outside lines to Hunt Group 7 (the voice mail hunt group). This provides automated attendant service on these lines. The outside calls ring directly into the hunt group instead of being answered and transferred by the receptionist. You program it identically, regardless of whether Amanda is being used as a primary automated attendant, a backup attendant, or a voice messaging center. To set up lines for Group Call Distribution: 1. Press 2. At the Group: prompt, press 3. At the Line: prompt, enter the desired line number. For example, for line 1, press . 4. To assign a line or use VMS Line Cover for group 7, press value is “3” for VMS Line Cover. 5. To program another line, press shows on the display. Then repeat step 4. 6. Select another procedure or exit programming mode. for voice messaging. or until the until the line number EXTRA INFORMATION: Hunt Group 7 is used exclusively for the voice messaging system. If you are using a voice messaging system, you have two Group Call Distribution options: • • Calls can be routed directly to the voice mailbox of a specific user after four rings. Choose VMS Line Cover (setting 3) for those lines and assign a line owner in the voice messaging system. As a more flexible alternative to the VMS Line Cover setting, you can use Line Coverage Extension (#208) with VMS Cover. This lets you specify the number of times calls ring—using MVS Cover Rings #117—at the user’s extension before going to the user’s mailbox. In addition, if the user’s extension has Do Not Disturb on, calls on the line can go immediately to coverage. Each outside line can be assigned to only one Hunt Group. The caller hears ringing, which continues until the call is answered if the Hunt Group receives an outside call and all members of that Hunt Group are busy (or have Do Not Disturb on). Chapter 2: Programming the AT&T Partner Plus 9 Voice Mail Coverage for Outside Lines (Optional) Procedure #208 Line Coverage Extension identifies an extension as the owner of a specific outside line so that the extension can activate VMS Cover (voice mail coverage) for that line. Line Ringing must be set to Immediate Ring or Delayed Ring and Line Access Restriction (#302) must be set to No Restriction or In Only. Users with VMS Cover turned on can send all calls immediately to their voice mailbox by activating Do Not Disturb. Only one owner can be assigned to a specific line. However, multiple lines can be owned by the same extension. This feature provides an alternative method of routing outside calls to the voice messaging system for Call Answer Service. To program a line coverage extension: 1. Press 2. Enter the line number. For example, to program line 12, press bers range from 01 to 12. 3. Enter the number of the extension to be assigned ownership of the line. Valid extension numbers range from 10 to 33. 4. Do one of the following: 5. • To delete the current setting, press Remove. • To program another line, press shows on the display. then repeat step 3. or . Valid line num- until the line number Select another procedure or exit programming mode. Setting Up a Night Button Procedure #503 Night Service Button identifies a button on the system telephone at extension 10 to be used to turn Night Service on and off. When Night Service is on, all lines assigned to the telephones of the users in the Night Service Group ring immediately, regardless of their normal Line Ringing settings. Night Service is useful if you want telephones to ring after regular business hours. For example, although Shipping Department workers do not answer calls directly during the day, you want them to answer incoming calls after hours. Night Service affects only the extensions identified using Night Service Group Extensions (#504). If you program a System Password (#403), the password must be entered when turning Night Service on or off. In addition, when Night Service is on, users in the Night Service Groups can dial only numbers on the Emergency Phone Number List (#406) and Marked 10 Telephone Switching Systems for Amanda@SOHO System Speed Dial Numbers without entering the System Password. Night Service with a System Password is useful for controlling unauthorized use of telephones after hours. The status of the Night Service button at extension 10 tells Amanda to operate in day or night mode. The Night Service button returns to the status (on or off) that it was in immediately prior to a power failure or the use of System Reset (#728). A Night Service must be programmed on the system telephone at extension 10. Night Service must be programmed on a button with lights. This feature does not work if it is programmed on a button without lights. A user in the Night Service Group can receive an after-hours outside call only if it comes in on a line that is assigned to that user’s telephone. Line assignments for extensions in the Night Service group can vary from one extension to another. Dialing restrictions for extensions not in the Night Service Group remain the same as during normal daytime operation. If you reassign the Night Service button, it is removed from the button where it was previously assigned. To program a Night Service Button at extension 10: 1. Press 2. Do one of the following: • To assign Night Service to the first available button, press display similar to the following appears: until a Night Service Button 1 Assigned - Ext10 • To remove the Night Service button assignment, press play similar to the following appears: until a dis- Night Service Button 2 Not Assigned - Ext10 • To assign Night Service to a specific button, press following appears: . A display similar to the Night Service Button 3 Select a Button Then press a programmable button with lights to assign Night Service to that button. 3. Select another procedure or exit programming mode. 4. Label the Night Service button at extension 10. For more information about #504, #403, and #406, check a Partner manual. Chapter 2: Programming the AT&T Partner Plus 11 Optional Programming The next few sections cover transferring callers directly to voice mail, leaving a message directly as one user for another, and Auto Dialing. Transferring Callers to Other User’s Voice Mail The Voice Mailbox Transfer feature (F14) lets a system telephone user transfer a caller directly to a specific extension’s voice mailbox so the caller can leave a message without first ringing that extension. This is useful when the user knows that the coworker is away from the telephone. You can program a Voice Mailbox Transfer button on a system telephone to transfer a caller directly to a voice mailbox by pressing the button then dialing the mailbox subscriber’s extension number. While a call is being transferred, the caller hears ringing if Ring on Transfer (#119) is active. If it is not active and the Music On Hold (#602) is active and an audio source is connected to the system, the caller hears music-on-hold. If neither Ring on Transfer nor Music On Hold is active, the caller hears silence. To program a direct transfer to voice mail: 1. Press . 2. Enter the number of the extension to be programmed with this feature. 3. Press a programmable button. 4. Press 5. Select another procedure or exit programming mode. . To use this feature: 1. From a system telephone, press the programmed button or press . 2. Dial the two-digit extension number (or press an Auto Dial button) of the mailbox subscriber for whom the caller wants to leave a message. The caller is routed to the mailbox and hears the recorded greeting for that mailbox. 3. Hang up. Transferring Callers to Your Voice Mail The MS Cover feature (F15) lets system telephone users press programmed buttons to turn VMS cover on and off, routing unanswered intercom and transferred calls for their extensions to the voice messaging system after the specified number of rings. You might use this if Amanda were being used as a backup attendant or voice messaging center. 12 Telephone Switching Systems for Amanda@SOHO This feature must be programmed on a button with lights. It does not apply to voicesignaled calls, Voice Interrupt on Busy calls, group calls, forwarded calls, coverage calls, or transfer-return calls. To program a direct transfer to voice mail: 1. Press . 2. Enter the number of the extension to be programmed with this feature. 3. Press a programmable button. 4. Press 5. Select another procedure or exit programming mode. . To use this feature: 1. From a system telephone, press the programmed button to turn VMS Cover on (light goes on). 2. Press it again to turn it off (light goes off). If you turn on VMS Cover while a call is ringing, the call is sent immediately to your voice mailbox. If VMS Cover is already on and a call begins to ring, you can turn on Do Not Disturb to send that call and any subsequent calls immediately to your voice mailbox. Programming a Do Not Disturb Button The Do Not Disturb Button feature (F01) lets a system telephone user press a programmed button to prevent incoming calls for the extension from audibly alerting (light still flashes). When Do Not Disturb is on, outside callers hear ringing while inside callers hear a busy signal. Users with Automatic VMS Cover (#310) Assigned or with VMS Cover turned on can activate Do Not Disturb to send all calls immediately to their voice mailbox. This feature requires a button with lights. When the Do Not Disturb feature is on, the light is also on, indicating that the telephone will not ring. Use this feature: • • • When you do not want calls transferred to you by the Partner Attendant or Amanda. If you are assigned to a Hunt Group and you leave your desk, so calls to the Hunt Group will skip your extension and ring immediately at the next available extension in the group. To avoid missing calls when this feature is not needed, turn it off. To program a Do Not Disturb button: 1. Press 2. Enter the number of the extension to be programmed with this feature. 3. Press a programmable button with lights. . Chapter 2: Programming the AT&T Partner Plus 13 4. Press . 5. Select another procedure or exit programming mode. Using the Template The following template is not actual size, but it can help you determine where the special keys, such as are. MLS-34D Overlay Next Procedure U Next item Next Data Remove V W X Prev Procedure Prev Item Prev Data Q R S T CC DD M N O P AA BB I J K L Y Z E F G H System Program Central Tel Program A B C D Feature Wild EE FF Enter 14 Telephone Switching Systems for Amanda@SOHO Partner-34D Telephone Y GG HH II JJ FF U V W X EE DD Q R S T CC BB M N O P AA Z G H I J K L A B C D E F Intercom Intercom Ext. Message Partner-18D/18 Telephone GG HH II JJ M N O P I J K L E F G H A B C D Intercom Intercom Ext. Message Partner-6 Telephone C D A B Intercom Ext. Intercom Message Chapter 2: Programming the AT&T Partner Plus 15 Notification and Integration Files For each telephone switching system, Amanda@SOHO stores files with notification, dial code, and integration information. When you select a telephone switching system, Amanda knows which files to use for your switch. The files contain: • The tokens that turn the message waiting light on are in c:\amanda\pbx.db\110.on. This file contains the tokens “,#09,%E”. • The tokens that turn the message waiting light off are in c:\amanda\pbx.db\110.off. This file contains the tokens “,#10,%E”. • The dial codes and integration strings used by the switch are in c:\amanda\pbx.db\110.pbx. This file contains the following lines: #################################################### # AT&T Partner Plus # #################################################### dl_dtwait F- # Dial code to put a caller on transfer hold dl_ndtret F- # Dial code to use when there is no transfer dialtone: dl_rnaret F- # Dial code to return to caller after Ring No Answer : dl_bsyret F- # Dial code to return to caller when there is a Busy : dl_hupret F- # Dial code to use after a call screening reject : dl_connect H # Dial code to connect the caller to the extension : tmo_dtwait 4 # Number of seconds to wait for dialtone detection : flashtm 55 # Number of 1/100 seconds to use for Flash time : dt_answer # Which DTMF tone to listen to for answer detection : dt_hangup # Which DTMF tone to listen to for hangup detection : dl_prefix # What to dial BEFORE dialing the User ID extension : dl_suffix H # What to dial AFTER dialing the User ID extension : dl_init # What to dial when the system first starts up : dl_stop # What to dial when the system performs a shutdown : dl_pickup # What to dial when a port goes off-hook dl_conference # What to dial to create/record a conference call integration 10 ‘#rr###’ integration 10 ‘#02#ss#rr#’ integration 10 ‘#03##rr#’ integration 10 ‘#00#ee#ss#’ integration 10 ‘#00#ee##’ integration 10 ‘#rrr###’ integration 10 ‘#02#sss#rrr#’ integration 10 ‘#03##rrr#’ integration 10 ‘#00#eee#sss#’ integration 10 ‘#00#eee##’ : : : 16 Telephone Switching Systems for Amanda@SOHO Chapter 3: Programming the AT&T Partner II Getting Started To connect Amanda to the switching system: 1. Run direct wiring from RJ-11 jack (one-pair) on Partner 206 module to RJ-11 jack (two-pair) on the voice board. 2. Run wiring from 66 block to RJ-11 jack (two-pair) to the Amanda Rhetorex voice board. OR • Use four RJ-11 mounting cords, one cord for each voice mail port. Plug one into each extension port on the 206 Module. To start programming the AT&T Partner: • Press . To exit programming the AT&T Partner: • Press . Programming is done only from extension 10 or 11. Using Amanda as a Primary Automated Attendant If you are using Amanda as a primary automated attendant, you need to read the following sections. Many of these sections also apply to using Amanda as a backup attendant or a voice messaging center; sometimes the settings are identical. Sometimes they are different. Be sure to use the settings for the primary automated attendant. Section to read: To program: Programming Hunt Group 7 #505 Hunt Group Extensions Assigning Extensions to RingNo-Answer Service #310 VMS Cover Setting the Number of Rings for No Answer #117 VMS Cover Rings Determining When Voice Mail Answers Calls #506 VMS Hunt Delay 18 Telephone Switching Systems for Amanda@SOHO Section to read: Assigning Outside Lines to Hunt Group 7 To program: #507 VMS Hunt Schedule #206 Group Call Distribution Using Amanda as a Backup Attendant If you are using Amanda as a backup attendant, you need to read the following sections. Many of these sections also apply to using Amanda as a primary automated attendant or a voice messaging center; sometimes the settings are identical. Sometimes they are different. Be sure to use the settings for the backup attendant. Section to read: To program: Programming Hunt Group 7 #505 Hunt Group Extensions Assigning Extensions to RingNo-Answer Service #310 VMS Cover Setting the Number of Rings for No Answer #117 VMS Cover Rings Determining When Voice Mail Answers Calls #506 VMS Hunt Delay #507 VMS Hunt Schedule #206 Group Call Distribution Assigning Outside Lines to Hunt Group 7 Using Amanda as a Voice Messaging Center If you are using Amanda as a voice messaging center, you need to read the following sections. Many of these sections also apply to using Amanda as a primary automated attendant or a backup attendant; sometimes the settings are identical. Sometimes they are different. Be sure to use the settings for a voice messaging center. Section to read: To program: Programming Hunt Group 7 #505 Hunt Group Extensions Assigning Extensions to RingNo-Answer Service #310 VMS Cover Setting the Number of Rings for No Answer #117 VMS Cover Rings Determining When Voice Mail Answers Calls #506 VMS Hunt Delay Chapter 3: Programming the AT&T Partner II 19 Section to read: Assigning Outside Lines to Hunt Group 7 To program: #507 VMS Hunt Schedule #206 Group Call Distribution Programming Hunt Group 7 You program Hunt Group 7 for voice mail. You program it identically, regardless of whether Amanda is being used as a primary automated attendant, a backup attendant, or a voice messaging center. It is a circular hunt group. Procedure #505 Hunt Group Extensions lets you assign any number of extensions to a Hunt Group. The system supports up to seven Hunt Groups, with Hunt Group 7 used exclusively for voice messaging. Any number of extensions can be assigned to each Hunt Group. To assign an extension to Hunt Group 7: 1. Press 2. At the Group: prompt, enter a group number (7 is for voice messaging). For example, a display similar to the following appears: Hunt Group 7 Extension: 3. Enter an extension number. For example, to select extension 31, press 4. To assign the extension, press the display. 5. To assign another extension, press number shows on the display. Repeat step 4. 6. Select another procedure or exit programming mode. . until you see “1” for assigned to group on or until the extension EXTRA INFORMATION: After you assign the extensions associated with the voice messaging system hardware to Hunt Group 7, you can set the Transfer Return Extension (#306) for those extensions to extension 10 (or another extension with a person who can assist the caller). See a Partner manual for details. Assigning Extensions to Ring-No-Answer Service Procedure #310 VMS Cover automatically routes an extension’s unanswered intercom, transferred, and DIL/DID calls to Amanda after a specified number of rings so callers can leave messages. You program it identically, regardless of whether Amanda is being used as a primary automated attendant, a backup attendant, or a voice messaging center. 20 Telephone Switching Systems for Amanda@SOHO To program voice mail coverage: 1. Press 2. Enter the number of the extension to be covered by Amanda. For example, to program extension 11, press . 3. To assign Automatic VMS Cover, press on the display. 4. To program another extension, press number shows on the display. 5. Select another procedure or exit programming mode. until you see “1” for assigned or until the extension EXTRA INFORMATION: To manually change an extension’s VMS Cover state, users can program the VMS Cover feature on a button with lights. Users can then press the VMS Cover button to activate the feature (green light on) or deactivate the feature (green light off). NOTE: If Automatic VMS Cover is assigned at an extension, the green light is lit automatically after programming the VMS Cover button to indicate the VMS Cover is currently active. If this is the case, and the VMS Cover button is pressed, the feature is deactivated. To activate VMS Cover again, you must press the button. Automatic VMS Cover also applies to outside calls on lines assigned ownership with Line Coverage Extension (#208). See “Voice Mail Coverage for Outside Lines (Optional)” on page 23. Users with Automatic VMS Cover turned on can activate Do Not Disturb to Send All Calls immediately to their voice mailbox. If an extension has Automatic VMS Cover and Call Forwarding active, calls ring at the forwarding destination; they are not covered by Amanda. Standard telephones and system telephones without a programmed VMS Cover button cannot override this feature once it is assigned to an extension. Setting the Number of Rings for No Answer Procedure #117 VMS Cover Rings which applies to all system extensions programmed for VMS Cover, defines the number of times a call rings before it is sent to a user’s voice mailbox. Depending on your needs, you can program this procedure identically or differently for a primary automated attendant, a backup attendant, or a voice messaging center. (If an extension has VMS Cover or Automatic VMS Cover (#310) active, unanswered calls to that extension are routed to Amanda after the specified number of VMS Cover Rings.) Chapter 3: Programming the AT&T Partner II 21 To set the number of times calls ring before being sent to a mailbox: 1. Press 2. Enter a setting (1-9) for the number of rings by pressing until the setting you want appears on the display. If Amanda will be a: primary automated attendant backup attendant voice messaging center or Suggested setting: 3 3 3 For example, to set VMS Cover Rings to 3, press display similar to the following appears: or until a VMS Cover Rings 3 Rings 3. Select another procedure or exit programming mode. Determining When Voice Mail Answers Calls Procedure #506 VMS Hunt Delay and #507 VMS Hunt Schedule to schedule when voice mail answers calls. You program them differently, depending on whether Amanda is being used as a primary automated attendant, a backup attendant, or a voice messaging center. Procedure #506 VMS Hunt Delay determines when outside calls should be answered by Amanda. You can set the system for either immediate call handling (after the second ring) or delayed call handling (after the fourth ring). Delayed call handling gives the receptionist an opportunity to answer calls before they go to Amanda. Procedure #507 VMS Hunt Schedule determines whether the outside line assigned to Hunt Group 7 hunt through the VMS Hunt Group all the time, only during Day operation (Night Service is off), or only during Night operation (Night Service is on). To schedule voice mail response: 1. Press 2. Press until the appropriate value displays. (Values are “1” for Immediate and “2” for Delayed.) If Amanda will be a: primary automated attendant backup attendant voice messaging center This setting must be: Immediate Delayed Delayed 3. Press 4. Press until the appropriate value displays. (Values are “1” for Always, “2” for Day Only, and “3” for Night Only.) If Amanda will be a: primary automated attendant backup attendant voice messaging center This setting must be: Always Night Only Night Only 22 Telephone Switching Systems for Amanda@SOHO 5. Select another procedure or exit programming mode. If you set VMS Hunt Schedule for Day Only or Night Only, you must use Night Service Button (#503) to program a Night Service button for extension 10. See “Setting Up a Night Button” on page 23. Assigning Outside Lines to Hunt Group 7 Use procedure #206 Group Call Distribution to assign all outside lines to Hunt Group 7 (the voice mail hunt group). This provides automated attendant service on these lines. The outside calls ring directly into the hunt group instead of being answered and transferred by the receptionist. You program it identically, regardless of whether Amanda is being used as a primary automated attendant, a backup attendant, or a voice messaging center. To set up lines for Group Call Distribution: 1. Press 2. At the Group: prompt, press 3. At the Line: prompt, enter the desired line number. For example, for line 1, press . 4. To assign a line or use VMS Line Cover for group 7, press value is “3” for VMS Line Cover. 5. To program another line, press shows on the display. Then repeat step 4. 6. Select another procedure or exit programming mode. for voice messaging. or until the until the line number EXTRA INFORMATION: Hunt Group 7 is used exclusively for the voice messaging system. If you are using a voice messaging system, you have two Group Call Distribution options: • • Calls can be routed directly to the voice mailbox of a specific user after four rings. Choose VMS Line Cover (setting 3) for those lines and assign a line owner in the voice messaging system. As a more flexible alternative to the VMS Line Cover setting, you can use Line Coverage Extension (#208) with VMS Cover. This lets you specify the number of times calls ring—using MVS Cover Rings #117—at the user’s extension before going to the user’s mailbox. In addition, if the user’s extension has Do Not Disturb on, calls on the line can go immediately to coverage. Each outside line can be assigned to only one Hunt Group. The caller hears ringing, which continues until the call is answered if the Hunt Group receives an outside call and all members of that Hunt Group are busy (or have Do Not Disturb on). Chapter 3: Programming the AT&T Partner II 23 Voice Mail Coverage for Outside Lines (Optional) Procedure #208 Line Coverage Extension identifies an extension as the owner of a specific outside line so that the extension can activate VMS Cover (voice mail coverage) for that line. Line Ringing must be set to Immediate Ring or Delayed Ring and Line Access Restriction (#302) must be set to No Restriction or In Only. Users with VMS Cover turned on can send all calls immediately to their voice mailbox by activating Do Not Disturb. Only one owner can be assigned to a specific line. However, multiple lines can be owned by the same extension. This feature provides an alternative method of routing outside calls to the voice messaging system for Call Answer Service. To program a line coverage extension: 1. Press 2. Enter the line number. For example, to program line 12, press bers range from 01 to 12. 3. Enter the number of the extension to be assigned ownership of the line. Valid extension numbers range from 10 to 33. 4. Do one of the following: 5. • To delete the current setting, press Remove. • To program another line, press shows on the display. then repeat step 3. or . Valid line num- until the line number Select another procedure or exit programming mode. Setting Up a Night Button Procedure #503 Night Service Button identifies a button on the system telephone at extension 10 to be used to turn Night Service on and off. When Night Service is on, all lines assigned to the telephones of the users in the Night Service Group ring immediately, regardless of their normal Line Ringing settings. Night Service is useful if you want telephones to ring after regular business hours. For example, although Shipping Department workers do not answer calls directly during the day, you want them to answer incoming calls after hours. Night Service affects only the extensions identified using Night Service Group Extensions (#504). If you program a System Password (#403), the password must be entered when turning Night Service on or off. In addition, when Night Service is on, users in the Night Service Groups can dial only numbers on the Emergency Phone Number List (#406) and Marked 24 Telephone Switching Systems for Amanda@SOHO System Speed Dial Numbers without entering the System Password. Night Service with a System Password is useful for controlling unauthorized use of telephones after hours. The status of the Night Service button at extension 10 tells Amanda to operate in day or night mode. The Night Service button returns to the status (on or off) that it was in immediately prior to a power failure or the use of System Reset (#728). A Night Service must be programmed on the system telephone at extension 10. Night Service must be programmed on a button with lights. This feature does not work if it is programmed on a button without lights. A user in the Night Service Group can receive an after-hours outside call only if it comes in on a line that is assigned to that user’s telephone. Line assignments for extensions in the Night Service group can vary from one extension to another. Dialing restrictions for extensions not in the Night Service Group remain the same as during normal daytime operation. If you reassign the Night Service button, it is removed from the button where it was previously assigned. To program a Night Service Button at extension 10: 1. Press 2. Do one of the following: • To assign Night Service to the first available button, press display similar to the following appears: until a Night Service Button 1 Assigned - Ext10 • To remove the Night Service button assignment, press play similar to the following appears: until a dis- Night Service Button 2 Not Assigned - Ext10 • To assign Night Service to a specific button, press following appears: . A display similar to the Night Service Button 3 Select a Button Then press a programmable button with lights to assign Night Service to that button. 3. Select another procedure or exit programming mode. 4. Label the Night Service button at extension 10. For more information about #504, #403, and #406, check a Partner manual. Chapter 3: Programming the AT&T Partner II 25 Optional Programming The next few sections cover transferring callers directly to voice mail, leaving a message directly as one user for another, and Auto Dialing. Transferring Callers to Other User’s Voice Mail The Voice Mailbox Transfer feature (F14) lets a system telephone user transfer a caller directly to a specific extension’s voice mailbox so the caller can leave a message without first ringing that extension. This is useful when the user knows that the coworker is away from the telephone. You can program a Voice Mailbox Transfer button on a system telephone to transfer a caller directly to a voice mailbox by pressing the button then dialing the mailbox subscriber’s extension number. While a call is being transferred, the caller hears ringing if Ring on Transfer (#119) is active. If it is not active and the Music On Hold (#602) is active and an audio source is connected to the system, the caller hears music-on-hold. If neither Ring on Transfer nor Music On Hold is active, the caller hears silence. To program a direct transfer to voice mail: 1. Press . 2. Enter the number of the extension to be programmed with this feature. 3. Press a programmable button. 4. Press 5. Select another procedure or exit programming mode. . To use this feature: 1. From a system telephone, press the programmed button or press . 2. Dial the two-digit extension number (or press an Auto Dial button) of the mailbox subscriber for whom the caller wants to leave a message. The caller is routed to the mailbox and hears the recorded greeting for that mailbox. 3. Hang up. Transferring Callers to Your Voice Mail The MS Cover feature (F15) lets system telephone users press programmed buttons to turn VMS cover on and off, routing unanswered intercom and transferred calls for their extensions to the voice messaging system after the specified number of rings. You might use this if Amanda were being used as a backup attendant or voice messaging center. 26 Telephone Switching Systems for Amanda@SOHO This feature must be programmed on a button with lights. It does not apply to voicesignaled calls, Voice Interrupt on Busy calls, group calls, forwarded calls, coverage calls, or transfer-return calls. To program a direct transfer to voice mail: 1. Press . 2. Enter the number of the extension to be programmed with this feature. 3. Press a programmable button. 4. Press 5. Select another procedure or exit programming mode. . To use this feature: 1. From a system telephone, press the programmed button to turn VMS Cover on (light goes on). 2. Press it again to turn it off (light goes off). If you turn on VMS Cover while a call is ringing, the call is sent immediately to your voice mailbox. If VMS Cover is already on and a call begins to ring, you can turn on Do Not Disturb to send that call and any subsequent calls immediately to your voice mailbox. Programming a Do Not Disturb Button The Do Not Disturb Button feature (F01) lets a system telephone user press a programmed button to prevent incoming calls for the extension from audibly alerting (light still flashes). When Do Not Disturb is on, outside callers hear ringing while inside callers hear a busy signal. Users with Automatic VMS Cover (#310) Assigned or with VMS Cover turned on can activate Do Not Disturb to send all calls immediately to their voice mailbox. This feature requires a button with lights. When the Do Not Disturb feature is on, the light is also on, indicating that the telephone will not ring. Use this feature: • • • When you do not want calls transferred to you by the Partner Attendant or Amanda. If you are assigned to a Hunt Group and you leave your desk, so calls to the Hunt Group will skip your extension and ring immediately at the next available extension in the group. To avoid missing calls when this feature is not needed, turn it off. To program a Do Not Disturb button: 1. Press 2. Enter the number of the extension to be programmed with this feature. 3. Press a programmable button with lights. . Chapter 3: Programming the AT&T Partner II 27 4. Press . 5. Select another procedure or exit programming mode. Using the Template Use the template in the chapter on the AT&T Partner Plus (see “Using the Template” on page 13). Notification and Integration Files For each telephone switching system, Amanda@SOHO stores files with notification, dial code, and integration information. When you select a telephone switching system, Amanda knows which files to use for your switch. The files contain: • The tokens that turn the message waiting light on are in c:\amanda\pbx.db\111.on. This file contains the tokens “,#09,%E”. • The tokens that turn the message waiting light off are in c:\amanda\pbx.db\111.off. This file contains the tokens “,#10,%E”. • The dial codes and integration strings used by the switch are in c:\amanda\pbx.db\111.pbx. This file contains the following lines: #################################################### # AT&T Partner II # #################################################### dl_dtwait F- # Dial code to put a caller on transfer hold dl_ndtret F- # Dial code to use when there is no transfer dialtone: dl_rnaret F- # Dial code to return to caller after Ring No Answer : dl_bsyret F- # Dial code to return to caller when there is a Busy : dl_hupret F- # Dial code to use after a call screening reject : dl_connect H # Dial code to connect the caller to the extension : tmo_dtwait 4 # Number of seconds to wait for dialtone detection : flashtm 55 # Number of 1/100 seconds to use for Flash time : dt_answer # Which DTMF tone to listen to for answer detection : dt_hangup # Which DTMF tone to listen to for hangup detection : dl_prefix # What to dial BEFORE dialing the User ID extension : dl_suffix H # What to dial AFTER dialing the User ID extension : dl_init # What to dial when the system first starts up : dl_stop # What to dial when the system performs a shutdown : dl_pickup # What to dial when a port goes off-hook dl_conference # What to dial to create/record a conference call integration 15 ‘#rr###’ integration 15 ‘#02#ss#rr#’ integration 15 ‘#03##rr#’ integration 15 ‘#00#ee#ss#’ integration 15 ‘#00#ee##’ integration 15 ‘#rrr###’ integration 15 ‘#02#sss#rrr#’ : : : 28 Telephone Switching Systems for Amanda@SOHO integration 15 ‘#03##rrr#’ integration 15 ‘#00#eee#sss#’ integration 15 ‘#00#eee##’ Chapter 4: Programming the Comdial Unisyn Getting Started The Comdial Unisyn Analog Key System Unit (KSU) comes in two configurations: the 308 and the 616. These are simple low cost systems that are feature rich and easy to install and program. Voice mail integration can be set up with a minimum of technical knowledge. The basic Unisyn KSU requires the addition of the following items to interface a voice processing system: • • • A TXIST Industry Standard Board to convert a four-port block of stations to universal station ports. Each board fits into a card mounting slot within the Unisyn KSU. For installation information, see the Unisyn manual (p. 1-7). A TXRNG Ringing Generator Board for ringing 90 volt IST devices, such as voice mail ports. A TXMWB Message Waiting Board for turning on message waiting lights in the system. NOTE: Comdial sells the Unisyn system in a package configuration that includes the KSU, one TXIST Industry Standard card and a TXRNG Ring Generator card. The 308 KSU comes configured with stations 14 through 17 as universal station positions (for use with voice mail systems and analog IST devices). The 616 comes configured with stations 22 through 25 as universal station positions. The packages do not include the TXMWG message waiting board. For technical assistance on programming the Comdial Unisyn KSU, call Comdial Technical Support at 800-366-8224. Certification is not required to receive technical assistance on the Comdial Unisyn system. Interfacing with a Voice Mail System You need to install an RJ11-type jack for each voice mail port to be connected to the Unisyn system. You should refer the installation of the jacks to a professional telecom installer. If, instead, you install these jacks yourself, refer to pages 2-12 through 2-15 of the Comdial Unisyn installation manual for complete instructions. 30 Telephone Switching Systems for Amanda@SOHO Programming the Unisyn for Voice Mail Programming the Unisyn is simple and straight forward. To program the voice processing integration, you need to be aware of the following: 1. Programming is done from either station 10 or 12 only. 2. To enter configuration mode, dial ITCM *#746*. 3. Define the voice mail station ports as Execumail before doing any other programming on the voice mail ports. If you fail to do this, all programming to the ports is lost when you eventually define them as Execumail ports. Do not change the station port types for the telephones in the system. Define only the ports you plan to connect to Amanda as voice mail ports. 4. Comdial has defined the entire process of integrating the Unisyn with a voice mail system in part 3.9 of the Unisyn manual. The essentials from that section have been reproduced in this chapter. 5. After the voice mail integration, you need to set up each station to call forward (when there is no answer) to the voice mail system as explained in this chapter. (Follow the directions in this chapter because there is a slight error in the Unisyn manual.) 6. To end programming, press SPKR. Use the following figure to locate buttons. Programmable buttons (B-Field) COMDIAL A1 A9 B1 B2 B3 A2 A10 B4 B5 B6 A3 A11 A4 A12 A5 A13 A6 A14 A7 A15 A8 A16 Speaker 1 Transfer/ Conference button 2 DEF 3 GHI 4 JKL 5 MNO 6 PRS 7 TUV 8 WXY 9 * Speaker button ABC OPER 0 # SPKR CONF MUTE HOLD TAP ITCM Programmable buttons (A-Field) Mute button Volume control Message waiting light Intercom button Hold button Tap button Chapter 4: Programming the Comdial Unisyn 31 Configuring the Ports You can program a station port to accept one of several different types of station equipment, such as: • • • Multiline telephone (Multiline without LCD) LCD (LCD speakerphone) Execumail The system defaults to LCD, so all the station ports on a new system are LCD. When you program a station port as a voice mail port, the telephone system automatically makes the following changes: • • • • No dial tone on port RR2 - Integration for a station busy/no answer forwarded to voice mail System sends DTMF 9 to voice mail when called by an internal caller Message waiting lights are handled automatically (if you have the TXMSG Message Waiting Board) To enable stations as voice mail ports: 1. If you are not already in configuration mode, dial ITCM *#746*. 2. Dial 51 “PORT TYPE”. 3. Select 08 to define the voice mail ports. The A1 to A16 buttons light up to indicate any ports already defined for voice mail. 4. Select all station ports that will be voice mail ports. Choose from stations 10 to 25 by dialing their numbers or, better yet, press A1 to A16. See the table below. 5. Press * to check the LCD port. 6. Press 07. The A1 to A16 buttons light up to indicate any ports already defined as LCD. Make sure that NO voice mail ports are selected. Also make sure that the rest of the ports are selected. 7. Press ** to finish but stay in configuration mode. Port DSS Button to Press 10 A1 11 A2 12 A3 13 A4 14 A5 15 A6 32 Telephone Switching Systems for Amanda@SOHO Port DSS Button to Press 16 A7 17 A8 18 A9 19 A10 20 A11 21 A12 22 A13 23 A14 24 A15 25 A16 Setting Up Ringing Operation The ringing that you set up determines whether Amanda is a primary or backup attendant: • • • Primary Attendant: Set up direct ringing to have Amanda answer any line that is ringing at a voice mail port. You will need to program the CO lines to ring directly to the Voice Mail Station Ports of the Unisyn system. One major consideration is that station hunting does not work on calls coming in on the CO lines. This means that you should program line one to direct ring at Amanda’s port one, line two to direct ring at Amanda’s port 2, and so on. you should also program delayed ringing for the lines to a second Amanda port in case the main port is busy when a call comes in. For example, program line one to delay ring to Amanda port two, line two to delay ring at Amanda port three, and so on. Backup Attendant: Set up delayed ringing to have Amanda answer a line ringing at a voice mail port after a specified number of rings. Special night user: Set up night ringing to use Amanda differently at night. You must choose a ringing assignment for the lines that you have assigned to the voice mail ports before the voice mail system can provide the automatic attendant feature. To program direct ringing: 1. If you are not already in configuration mode, dial ITCM *#746*. 2. Dial 54 “STA/LINE CONFIG”. 3. Dial 1 “DIRECT RING”. 4. Select the line ports (1 through 6) for direct ringing by dialing 01 through 06 or pressing B1 through B6 buttons (see table below). 5. Dial # when all the line ports have been selected. Chapter 4: Programming the Comdial Unisyn 33 6. Select the station ports to be programmed by dialing the station port number or pressing the A1 to A16 buttons. 7. Dial * when all the station ports have been selected. 8. Dial ** to finish but stay in configuration mode. Line Buttons to Press 01 B1 02 B2 03 B3 04 B4 05 B5 06 B6 To program delayed ringing: 1. If you are not already in configuration mode, dial ITCM *#746*. 2. Dial 54 “STA/LINE CONFIG”. 3. Dial 2 “DELAY RING”. 4. Select the line ports (1 through 6) for direct ringing by dialing 01 through 06 or pressing B1 through B6 (see table above). 5. Dial # when all the line ports have been selected. 6. Select the station ports to be programmed by dialing the station port number or pressing the A1 to A16 buttons. 7. Dial * when all the station ports have been selected. 8. Dial ** to finish but stay in configuration mode. To program night ringing: 1. If you are not already in configuration mode, dial ITCM *#746*. 2. Dial 54 “STA/LINE CONFIG”. 3. Dial 3 “NIGHT RING”. 4. Select the line ports (1 through 6) for direct ringing by dialing 01 through 06 or pressing B1 through B6 (see table above). 5. Dial # when all the line ports have been selected. 34 Telephone Switching Systems for Amanda@SOHO 6. Select the station ports to be programmed by dialing the station port number or pressing the A1 to A16 buttons. 7. Dial * when all the station ports have been selected. 8. Dial ** to finish but stay in configuration mode. NOTE: The hunt group procedure (below) is not used when the system is in night mode. You must program lines 1 through 4 to ports 1 through 4. Assigning Voice Mail Ports to a Hunt Group You must assign all voice mail ports to a circular hunt group to take advantage of that feature’s multiple-port interface. Make a circular hunt group by linking all voice mail ports to one another and then linking the last voice mail port in the hunt group with the first voice mail port in the hunt group. For example, with the voice mail system connected to station ports 014, 015, 016, and 017, place port 014 in a hunt group and link 015 to it, then place 015 in a hunt group and link 016 to it, then place 016 in a hunt group and link 017 to it. Lastly, place 017 in a hunt group and link 014 to it to complete the circle. With this arrangement, a call will first try to ring at port 014, then 015, and so forth until it tries all four voice mail ports. NOTE: This procedure does not work for night mode. See the procedure on night ringing (above) for more information. To program the voice mail port hunt group: 1. If you are not already in configuration mode, dial ITCM *#746*. 2. Dial 53 “STATION FEATURES”. 3. Dial 18 “ITCM HUNT LINK”. 4. Select the first linking station: Station 10 through 25 or press A1 through A16 (see table earlier in this chapter). 5. Select the second linking station: Station 10 through 25 or press A1 through A16. 6. Dial * to complete the link. 7. Repeat steps 4 through 6 until all the links have been created. 8. After linking the entire group, dial *** to finish but stay in configuration mode. Setting Up Call Forwarding The system can automatically forward busy and ring-no-answer calls to voice mail. When a user places a call to station A, for example, that call can be automatically forwarded to any other station associated by the intercom hunt group. Use this feature to arrange for calls to cycle rapidly through such associated stations, testing each one in turn with several rings. You can set stations within the hunt group to ring at different intervals. Before this feature can work, you must have programmed the hunt group. Chapter 4: Programming the Comdial Unisyn 35 The Comdial Unisyn manual skips a step needed when you set up call forwarding, so use the following procedure. To program call forwarding: 1. If you are not already in configuration mode, dial ITCM *#746*. 2. Dial 53 “STATION FEATURES”. 3. Dial 21 “CALL FWD RNA”. 4. Dial 1 through 9 for the number of rings before forwarding. 5. Select the station ports by pressing the A1 to A16 buttons. 6. Press ** to return to configuration mode. 7. Dial 16 (How Internal Stations Answer Calls). 8. Dial 2 (Tone Announce First). 9. Dial ***. Setting Up the Intercom Hunt Group To program the intercom hunt group: 1. If you are not already in configuration mode, dial ITCM *#746*. 2. Dial 53 “STATION FEATURES”. 3. Dial 18 “ITCM HUNT LINK”. 4. Select a station that will hunt for the voice mail system using the A1 through A16 buttons. NOTE: Select only one station at a time. The DSS light will be steady. 5. Select the first station port in the voice mail system using the A1 through A16 buttons. The light should blink. 6. Dial * when all the line ports have been selected. 7. Repeat steps 4 through 6 until all the stations that will hunt for the voice mail system have been linked. 8. When finished, dial ***. Setting Up Line Groups You need to group outside lines of the same type together for dial-up outgoing access. This is required to call an outside telephone number or a pager. Access codes for the line groups are as follows: 36 Telephone Switching Systems for Amanda@SOHO • • • • Group 1 = Dial 9 or Dial 0 Group 2 = Dial 81 Group 3 = Dial 82 Group 4 = Dial 83 Assigning line group automatically arranges the system for hybrid operation, which may incur a higher monthly tariff than the key system operation incurs. Ask the local telephone company for details. To program line groups: 1. If you are not already in configuration mode, dial ITCM *#746*. 2. Dial 35 “ASSIGN LINE GRPS”. 3. Dial 1 for Group 1. 4. Select line ports to be assigned by dialing 01 through 06 or B1 through B6. (The port is assigned if the LED is on.) 5. Dial * to assign lines to another group or ** to finish but stay in configuration mode. NOTE: To remove lines from a group, enter 0 for the line group. Setting Prime Line Intercom for Voice Mail Ports If you assign a group of lines, an intercom line, or one individual line to a particular station for use as its prime line, the station automatically selects that line for use when the user takes it off-hook. Single-line telephones must have either line groups or intercom already programmed. To program prime line intercom for voice mail ports: 1. If you are not already in configuration mode, dial ITCM *#746*. 2. Dial 53 “STATION FEATURES”. 3. Dial 15 for “PRIME LINE”. 4. Dial 50 for intercom line. 5. Select the voice mail station ports to be assigned by dialing 10 through 25 or A1 through A16. (The station is assigned if the LED is on.) 6. Dial * to assign stations to another prime line or *** to finish but stay in configuration mode. Setting Up Message Waiting Any station that you program with this feature can control the message waiting light at other stations in the system. When station users see their lights on, they can press ITCM HOLD to call the station that activated the line. Chapter 4: Programming the Comdial Unisyn 37 To program message waiting light for voice mail ports: 1. If you are not already in configuration mode, dial ITCM *#746*. 2. Dial 53 “STATION FEATURES”. 3. Dial 06 for “MSG. WAIT ORIG.”. 4. Select the station ports to be assigned this feature by dialing 10 through 25 or A1 through A16. (The station is assigned if the LED is on.) 5. Dial * to assign stations to another prime line or ** to finish but stay in configuration mode. Setting Up Ringing Line Preference When you assign this feature to a station, that station automatically answers a ringing line when its user goes off-hook. The ringing line shows as an orange LED only when you have canceled Ringing Line Preference. The IST ports must have ringing line preference assigned. To program ringing line preference: 1. If you are not already in configuration mode, dial ITCM *#746*. 2. Dial 53 “STATION FEATURES”. 3. Dial 09 for “RING LINE PREF.” 4. Select the station ports to be assigned this feature by dialing 10 through 25 or A1 through A16. (The station is assigned if the LED is on.) 5. Dial * to assign stations to another prime line or ** to finish but stay in configuration mode. Other Considerations This section covers some other features that may be of interest to you: Timed Hold Recall and Unanswered Call Transfer Recall. It also covers how to program private lines. Using Timed Hold Recall When you place a caller on hold, the call will ring at your station after the preprogrammed time limit. If you find that your calls are ringing back too soon and ending up in your voice mailbox because you are on another call, you might consider setting the hold recall time to 3 or 4 minutes. To use timed hold recall: 1. If you are not already in configuration mode, dial ITCM *#746*. 2. Dial 14 “HOLD RECALL XXXX”. 38 Telephone Switching Systems for Amanda@SOHO 3. Dial one of the following: 1 for 30 sec. 2 for 60 sec. 3 for 90 sec. 4 for 120 sec. 5 for 180 sec. 4. 6 for 240 sec. 7 for 300 sec. 8 for 360 sec. 9 for 420 sec. 0 for 0 sec. Dial * to finish but stay in configuration mode. Using Unanswered Call Transfer Recall When a call is transferred to a station and the station does not answer, you will probably want the call to go into the station’s mailbox. If the call returns to the transferring station instead of going to voice mail, you need to adjust the Call Transfer Recall time. To set call transfer recall: 1. If you are not already in configuration mode, dial ITCM *#746*. 2. Dial 11 “STA XFR RCL XXX”. 3. Dial one of the following: 1 for 10 sec. 2 for 20 sec. 3 for 25 sec. 4 for 30 sec. 5 for 45 sec. 4. 6 for 60 sec. 7 for 90 sec. 8 for 120 sec. 9 for 180 sec. 0 for 400 sec. Dial * to finish but stay in configuration mode. Using Private Lines If you have private lines in your system that need to be answered by the voice mail system, you must assign a voice mail ID to the private line and program the line to delay ring to the voice mail system. The voice mail ID causes the line to go to the right person’s voice mailbox if the line goes unanswered. For example, if line 3 is a private line for station 14, you want the line to be answered by the voice mailbox of station 14 if no one is available to answer the line. The line needs an identification number for this purpose. To assign a voice mail ID to the private line: 1. If you are not already in configuration mode, dial ITCM *#746*. 2. Dial 43 (voice mail line ID). 3. Press the line button (B1 through B6) for the private line. (In the example, you would have pressed B3 for line 3.) 4. Press # to clear the current ID. Chapter 4: Programming the Comdial Unisyn 5. Dial the number of the first voice mail port. 6. Dial *** to finish but stay in configuration mode. 39 To program the line to delay ring to the voice mail system: 1. If you are not already in configuration mode, dial ITCM *#746*. 2. Dial 54 “STA/LINE CONFIG”. 3. Dial 2 “DELAY RING”. 4. Press the line button (B1 through B6) for the private line. (In the example, you would have pressed B3 for line 3.) 5. Press #. 6. Dial the station number plus 2 (in this example, you would dial 142). 7. Dial *** to finish but stay in configuration mode. Programming a Direct Login Button A Direct Login button allows users to reach voice mail by pressing that button. Each station must be programmed individually. 1. Dial ITCM **1. 2. Press the button on the telephone set to be used for direct login. 3. Press ITCM again. 4. Dial the number for the voice mail system. 5. Press HOLD. 6. Dial 9. 7. Press SPKR. Notification and Integration Files For each telephone switching system, Amanda@SOHO stores files with notification, dial code, and integration information. When you select a telephone switching system, Amanda knows which files to use for your switch. The files contain: • The tokens that turn the message waiting light on are in c:\amanda\pbx.db\121.on for two-digit extensions and c:\amanda\pbx.db\122.on for three-digit extensions. This file contains the tokens “,*3,%E”. • The tokens that turn the message waiting light off are in c:\amanda\pbx.db\121.off for two-digit extensions and c:\amanda\pbx.db\122.off for three-digit extensions. This file contains the tokens “,#3,%E”. 40 Telephone Switching Systems for Amanda@SOHO • The dial codes and integration strings used by the switch are c:\amanda\pbx.db\121.pbx for two-digit extensions and c:\amanda\pbx.db\122.pbx for three-digit extensions. 121.pbx contains the following lines: #################################################### # Comdial DSU/Unison, 2-digit dial plan # #################################################### dl_dtwait F, # Dial code to put a caller on transfer hold dl_ndtret F- # Dial code to use when there is no transfer dialtone: : dl_rnaret F- # Dial code to return to caller after Ring No Answer : dl_bsyret F- # Dial code to return to caller when there is a Busy : dl_hupret F- # Dial code to use after a call screening reject : dl_connect H # Dial code to connect the caller to the extension : tmo_dtwait 0 # Number of seconds to wait for dialtone detection : flashtm 55 # Number of 1/100 seconds to use for Flash time : dt_answer # Which DTMF tone to listen to for answer detection : dt_hangup A # Which DTMF tone to listen to for hangup detection : dl_prefix , # What to dial BEFORE dialing the User ID extension : dl_suffix H # What to dial AFTER dialing the User ID extension : dl_init # What to dial when the system first starts up : dl_stop # What to dial when the system performs a shutdown : dl_pickup # What to dial when a port goes off-hook : dl_conference # What to dial to create/record a conference call : integration 10 ‘rr2’ integration 10 ‘rr3’ integration 10 ‘ee0’ integration 10 ‘9*ee’ integration 10 ‘rr’ 122.pbx contains the following lines: #################################################### # Comdial DSU/Unison, 3-digit dial plan # #################################################### dl_dtwait F, # Dial code to put a caller on transfer hold dl_ndtret F- # Dial code to use when there is no transfer dialtone: dl_rnaret F- # Dial code to return to caller after Ring No Answer : dl_bsyret F- # Dial code to return to caller when there is a Busy : dl_hupret F- # Dial code to use after a call screening reject : dl_connect H # Dial code to connect the caller to the extension : tmo_dtwait 0 # Number of seconds to wait for dialtone detection : flashtm 55 # Number of 1/100 seconds to use for Flash time : dt_answer # Which DTMF tone to listen to for answer detection : dt_hangup A # Which DTMF tone to listen to for hangup detection : dl_prefix , # What to dial BEFORE dialing the User ID extension : dl_suffix H # What to dial AFTER dialing the User ID extension : dl_init # What to dial when the system first starts up : dl_stop # What to dial when the system performs a shutdown : dl_pickup # What to dial when a port goes off-hook : dl_conference # What to dial to create/record a conference call : integration 10 ‘rrr2’ : Chapter 4: Programming the Comdial Unisyn integration 10 ‘rrr3’ integration 10 ‘eee0’ integration 10 ‘9*eee’ integration 10 ‘rrr’ 41 42 Telephone Switching Systems for Amanda@SOHO Chapter 5: Programming the Iwatsu Adix Entering and Exiting Programming Mode The Iwatsu ADIX can either use a laptop or terminal with Iwatsu-provided software, connected to the RJ45 port labeled “PC” on the front of the EDVIF circuit card, or can use a display telephone plugged into Port 1 (which defaults to extension 201). To enter programming mode from the telephone: 1. Place programming template over keypad and buttons (or use the diagram in this chapter). 2. Press Feature # 1 2 3 4 9 7 which places this telephone in programming mode. The display reads: ENTER CLASS X0#1 ADIX -M-KT To exit programming mode from the telephone: 1. Lift the telephone receiver and replace it. 2. Press the red reset button on the small red reset button (located on the CPU card inside the computer). 3. Wait for the display to show the date again. This takes a few minutes. Initializing the System IF the telephone system is not initialized, then you must first create Class 1 level telephone assignments which assign a physical port to a type of telephone and the logical port address. Once all of the telephones have been programmed, press the small red reset button (located on the CPU card) so that all new settings take place. IF the system is already initialized, ignore this section. Using the Telephone Keys and Buttons You use the telephone keys and buttons as you program. Use the following diagram to identify the keys and buttons if you don’t have the template on. 44 Telephone Switching Systems for Amanda@SOHO The Iwatsu software is organized into three types of areas: • • • Class areas which denote large categories of functions and settings Item areas that allow you to work on subcategories within a Class level Number areas which usually are settings and functions particular to a telephone or individual incoming C.O. line, etc. To access a programming area (once you are in programming mode): 1. Press Class. 2. Dial the two-digit class number (for example, 04). The display reads: 04.01 The 4 is the class and 01 represents the first item. 3. If you don’t want the first item, press Item. 4. Dial the two-digit item number (for example, 12). Chapter 5: Programming the Iwatsu Adix 45 The display reads: 04.12 24 The 4 is the class; 12 is the item. Because this item has no numbers, the item’s setting is displayed. In this example, the setting is 24. 5. If this item is divided into numbers, you press Num and dial the two-digit number. For example, if you were programming Class 4 Item 77 Number 14, the display would read: 04.77 <Num14> DA The 4 is the class; 77 is the item; 14 is the number. DA (or whatever value is displayed) is the current setting for this number. 6. 7. To enter the setting, dial the number (for example, dial 24 for 24). To enter letters, press the following buttons: For: Press DA SPKR SPKR DB SPKR TRAN DC SPKR FEAT DD SPKR HOLD F TRAN S FEAT After selecting a setting, press Enter to save that information before going on to the next class, item, or number. Setting Up an Iwatsu ADIX 1. The first area to address is Class 4, Item 12: The camp-on duration timer. This number must be at least 10 larger than the number for the Fwd No Answer Timer. The default is 60 (seconds). 2. The second area is Class 4, Item 13: The Fwd No Answer Timer. The default is 12 seconds. 3. Proceed to Class 4, Item 55: True Attendant Position. Input “1” if the physical port 1 is the attendant port. 4. Program Class 4, Item 71 (Voice Mail Data) as follows: Num 2 Camp-on Treatment 0=MOH 1=RBT Choose either music on hold or ring backtone. Num 10 Port DTMF Speed Choose 2 or 3 Num 11 Port In-Packet Pause Time 0 Num 12 Port Pre-Disconnect Signal 0 46 Telephone Switching Systems for Amanda@SOHO 5. 6. Num 13 Port Disconnect Signal Type 0 Num 14 Trunk Packeting 0 Num 15 Port Loop Open Duration 25 Program Class 4, Item 77 (Voice Mail Packet Codes) as follows. Num 1 Direct Trunk Call 01 Num 2 Direct Intercom Call 06 Num 3 Transferred Trunk Call 07 Num 4 Camp-On Recall 07 Num 5 Trunk Recall 07 Num 6 Direct Transfer to VM 06 Num 7 Station Xfer of CO Call 07 Num 8 Station Xfer of Intercom Call 07 Num 9 CO Call to Station to VM 07 Num 10 Intercom Call to Station to VM 07 Num 11 VM Call to Station to VM 07 Num 12 VM Call to Sta DND to VM 07 Num 13 Direct Station Login 06 Num 14 Station Answer Tone DA Num 17 VM Call to DND Sta to VM 07 Num 19 Disconnect Tone DD Num 21 Station to Direct Record 21 Program Class 7, Item 2 as follows: Num 47 7. 8. 9. Hunt Group Pilot 47 Program Class 7, Item 6 (Feature Access) as follows: Num 1 Clear Msg Light Code *01 Num 19 Send Msg Light On Code *19 Num 30 Operator Num 48 Mailbox Access 0 47 Program Class 8, Item 2 (Hunt Group Logical Port Numbers) as follows: Num 1 1st Amanda Port # Num 2 2nd Amanda Port # Num 3 3rd Amanda Port # Num 4 Last Amanda Port # Proceed to Class 10, Item 45 (Msg Key Assigned). Select 1 for Yes. 10. Program Class 10, Item 73 as follows: Chapter 5: Programming the Iwatsu Adix Num 1 47 Fixed Forwarding 1 (for Busy/NoAnswer) 11. Program Class 10, Item 78 as follows: Num 1 Forwarding Destination 47 Notification and Integration Files For each telephone switching system, Amanda@SOHO stores files with notification, dial code, and integration information. When you select a telephone switching system, Amanda knows which files to use for your switch. The files contain: • The tokens that turn the message waiting light on are in c:\amanda\pbx.db\150.on for the 8/24 and c:\amanda\pbx.db\151.on for the 16/48. This file contains the tokens “,*19,%U”. • The tokens that turn the message waiting light off are in c:\amanda\pbx.db\150.off for the 8/24 and c:\amanda\pbx.db\151.off for the 16/48. This file contains the tokens “,*01*19,%U”. • The dial codes and integration strings used by the switch are in c:\amanda\pbx.db\150.pbx for the 8/24 and c:\amanda\pbx.db\151.pbx for the 16/48. 150.pbx contains the following lines: IwatsuAdix 8/24 (S/M Series) #################################################### # Iwatsu Adix # #################################################### dl_dtwait F- # Dial code to put a caller on transfer hold : dl_ndtret F- # Dial code to use when there is no transfer dialtone: dl_rnaret F- # Dial code to return to caller after Ring No Answer : dl_bsyret F- # Dial code to return to caller when there is a Busy : dl_hupret F- # Dial code to use after a call screening reject : dl_connect H # Dial code to connect the caller to the extension : tmo_dtwait 1 # Number of seconds to wait for dialtone detection : flashtm 55 # Number of 1/100 seconds to use for Flash time : dt_answer A # Which DTMF tone to listen to for answer detection : dt_hangup D # Which DTMF tone to listen to for hangup detection : dl_prefix # What to dial BEFORE dialing the User ID extension : dl_suffix H # What to dial AFTER dialing the User ID extension : dl_init # What to dial when the system first starts up : dl_stop # What to dial when the system performs a shutdown dl_pickup dl_conference # What to dial when a port goes off-hook # What to dial to create/record a conference call integration 10 ‘07rrr’ integration 10 ‘06eee’ integration 10 ‘07rr’ integration 10 ‘06ee’ integration 10 ‘01ttt’ integration 10 ‘21iii’ : : : 48 Telephone Switching Systems for Amanda@SOHO 151.pbx contains the following lines: Iwatsu Adix 16/48 #################################################### # Iwatsu Adix # #################################################### dl_dtwait F--- # Dial code to put a caller on transfer hold : dl_ndtret - # Dial code to use when there is no transfer dialtone: dl_rnaret F- # Dial code to return to caller after Ring No Answer : dl_bsyret F- # Dial code to return to caller when there is a Busy : dl_hupret F- # Dial code to use after a call screening reject : dl_connect H # Dial code to connect the caller to the extension : tmo_dtwait 1 # Number of seconds to wait for dialtone detection : flashtm 55 # Number of 1/100 seconds to use for Flash time : dt_answer # Which DTMF tone to listen to for answer detection : dt_hangup A # Which DTMF tone to listen to for hangup detection : dl_prefix # What to dial BEFORE dialing the User ID extension : dl_suffix H # What to dial AFTER dialing the User ID extension : dl_init # What to dial when the system first starts up : dl_stop # What to dial when the system performs a shutdown : dl_pickup # What to dial when a port goes off-hook : dl_conference # What to dial to create/record a conference call : integration 20 ‘x7rrr’ integration 20 ‘x6eee’ integration 20 ‘x7rr’ integration 20 ‘x6ee’ Chapter 6: Programming the NEC Electra, Level I Getting Started This chapter covers the NEC Electra, Level I, software release 2.00 and later. To connect Amanda@SOHO to an NEC Electra, Level I, you need one SLT-F(1G)-200 digital-to-analog converter external box for each analog voice mail port. Connect Amanda@SOHO to the telephone switching system by connecting one RJ-11 pair from each voice mail port to the RJ-11 jack on the SLT. The RJ-11 cord from the SLT to the digital port is built into the NEC Electra. Once the two are connected, you are ready to program the NEC Electra. All programming of the telephone switching system must be done from station 10. To start programming: 1. Press the FNC key. 2. Press the HOLD key. 3. Press #0*. 4. For most features, you: a. b. Press an LK key (one of the keys just under the telephone’s display), such as LK1 for System Mode. Press a data number (two digits on the telephone), such as 67 for Voice Mail Access Code Assignment. When you get this far, you have entered a memory block, such as 1-67. (The 1 is from LK1 and the 67 is the data number.) c. d. e. An access code (usually two digits) representing the feature to be coded, a port number, station number, etc. automatically appears. You might have to press the TRF key to advance to the correct access code. Press the digits that indicate the setting for that access code. You might press a digit that represents yes or no, a series of digits which set the Message Waiting Indication, etc. While entering the data in step E, use the following keys: Meaning: To move the cursor to the left To move the cursor to the right Key to press: * # 50 Telephone Switching Systems for Amanda@SOHO Meaning: To type the setting To type a * To type a # To clear the setting Key to press: 0 to 9 LNR/SPD + * LNR/SPD + # HOLD 6. Press the TRF key to write the setting to the database and move on to the next data setting. For example, after providing a setting for port one or feature one, you move on to port two or feature two. When you reach the last port or feature, you move on to the next memory block. For example, you would move from memory block 1-67 to 168. 7. Press the SPKR key to stop programming. The following diagram shows a typical telephone set with its display and keys. Large LED NEC Display (LCD) CO/PBX LED 1 2 3 4 5 6 7 8 9 10 11 12 13 14 15 16 MIC 1 ICM 2 3 ABC DEF 4 5 6 GHI JKL MNO 7 8 9 PRS TUV WXY * 0 # HOLD OPER TRF ANS RECALL 1 2 3 4 5 6 7 8 9 10 11 12 13 14 15 16 17 18 19 20 Flexible Line Keys Setting Mode Selection MIC LED ICM LED FNC CNF LNR SPD SPKR RECALL Key No Function FNC Key Setting Special Mode Selection CNF Key No function LNR/SPD Key Pause, Hyphen SPKR Key To go back on-line ANS Key Mode Return TRF Key Data Write Dial Key Hold Key Clear Data Programming the Hunt Group The hunt group should be linear. Chapter 6: Programming the NEC Electra, Level I To program the hunt group: 1. Press the FNC key. 2. Press the HOLD key. 3. Press #0* 4. Assign physical ports to the logical voice mail extensions. a. b. Press the LK4 key. Press 06. This places you in memory block 4-06. The first port number appears on the display. c. d. e. Press 50. Press the TRF key to write the setting to the database. Repeat steps C and D for each port. After typing 50 for the last port, you enter memory block 4-07. 5. In memory block 4-07, you assign voice mail functions to ports. a. b. c. 6. Press 1 for Yes. Press the TRF key to write the setting to the database. Repeat steps C and D for each port. Press the SPKR key to stop programming. Programming System Mode System mode has the following features: • • • • • • Record Message Forward All Calls Forward Busy Forward No Answer DTMF Disconnect Signal Message Waiting Indication To program these features: 1. Press the FNC key. 2. Press the HOLD key. 3. Press #0*. 4. Press the LK1 key. 5. Press 67. This places you in memory block 1-67. The access code is VM01 and represents port one. 6. Press the TRF key until the access code becomes VM04. 51 52 Telephone Switching Systems for Amanda@SOHO 7. To record messages, press 667. 8. Press the TRF key to write the setting to the database and move on to access code VM05. 9. To forward all calls, press 667. 10. Press the TRF key to write the setting to the database and move on to access code VM06. 11. To forward busy, press 666. 12. Press the TRF key to write the setting to the database and move on to access code VM07. 13. To forward no answer, press 667. 14. Press the TRF key to write the setting to the database and move on to access code VM08. 15. Press the TRF key again to move on to access code VM09. 16. To detect the DTMF disconnect signal, make the setting 999#. To do that, you press 999+ LNR/SPD + #. 17. Press the TRF key again to move on to access code VM10. 18. To program the message lights on, press 641. 19. Press the TRF key to write the setting to the database and move on to access code VM11. 20. To program the message lights off, make the setting 64*. To do that, you press 64+ LNR/SPD + *. 21. Press the TRF key to write the setting to the database. 22. Press the SPKR key to stop programming. Programming Night and Day Modes By default, telephones connected to port numbers 01 and 02 ring on all incoming CO/PBX calls. Telephones connected to ports number 03+ do not ring on any incoming CO/PBX calls. To change this programming for day or night mode: 1. Press the FNC key. 2. Press the HOLD key. 3. Press #0*. Chapter 6: Programming the NEC Electra, Level I 4. Press the LK4 key. 5. Do one of the following: • Press 15 for CO/PBX Ring Assignment (Day Mode). • Press 16 for CO/PBX Ring Assignment (Night Mode). 53 If you select 15 you can program both Day Mode and Night Mode during this same programming session. The 15 or 16 is the second number from the left on the display. This places you in memory block 4-15 or 4-16—CO/PBX Ring Assignment. The first two characters at the left end of the display is the telephone port number, which ranges from 01 to 16. 6. Press the Dial Pad key corresponding to each CO/PBX number. The LCD display changes each time a Dial pad key is pressed. If it shows a setting, an incoming call from the corresponding CO/PBX line rings at the indicated station (0116). The setting is a trunk number and has up to eight digits. 7. You can enter a trunk number, remove one, or change one. 8. Press the TRF key to write the setting to the database and move on to the next telephone port number. 9. Repeat steps 6 through 8 until you advance to the next memory block. 10. If that memory block is 4-16—for CO/PBX Ring Assignment (Night Mode), you can repeat steps 6 through 9 for Night Mode. 11. Press the SPKR key to stop programming. Programming Call Forwarding Call Forwarding is programmed per station. the most recent of the Call Forward—Busy/ No Answer feature overrides any previous setting for this. Setting a station as Call Forward—All Calls when Call Forward—Busy/No Answer is already set changes the Call Forward—Busy/No Answer condition. Conflicting Call Forward settings are not allowed. For example, if Station A set Call Forward—All Calls to station B, and then sets Call Forward—Busy/No Answer to station C, busy calls forward to station B. To set Call Forward—Busy/No Answer: 1. Press the FNC key. The FNC key’s light goes on. 2. Press 62. 3. Enter the destination station number. 54 Telephone Switching Systems for Amanda@SOHO 4. Press the FNC key again. The FNC key’s light goes off. To cancel Call Forward—Busy/No Answer: 1. Press the FNC key. The FNC key’s light goes on. 2. Press 62. 3. Press the FNC key again. The FNC key’s light goes off. To set Call Forward—All Calls: 1. Press the FNC key. The FNC key’s light goes on. 2. Press 61. 3. Enter the destination station number. 4. Press the FNC key again. The FNC key’s light goes off. To cancel Call Forward—All Calls: 1. Press the FNC key. The FNC key’s light goes on. 2. Press 61. 3. Press the FNC key again. The FNC key’s light goes off. Notification and Integration Files For each telephone switching system, Amanda@SOHO stores files with notification, dial code, and integration information. When you select a telephone switching system, Amanda knows which files to use for your switch. The files contain: • The tokens that turn the message waiting light on are in c:\amanda\pbx.db\170.on. This file contains the tokens “641%U”. • The tokens that turn the message waiting light off are in c:\amanda\pbx.db\170.off. • The dial codes and integration strings used by the switch are in c:\amanda\pbx.db\170.pbx. This file contains the tokens “64*%U”. This file contains the following lines: Chapter 6: Programming the NEC Electra, Level I 55 NEC Electra, Level I (release 2.00+) #################################################### # NEC Electra Level 1 # #################################################### dl_dtwait F- # Dial code to put a caller on transfer hold dl_ndtret - # Dial code to use when there is no transfer dialtone: dl_rnaret F- # Dial code to return to caller after Ring No Answer : dl_bsyret F- # Dial code to return to caller when there is a Busy : dl_hupret F- # Dial code to use after a call screening reject : dl_connect H # Dial code to connect the caller to the extension : tmo_dtwait 4 # Number of seconds to wait for dialtone detection : flashtm 70 # Number of 1/100 seconds to use for Flash time : dt_answer # Which DTMF tone to listen to for answer detection : dt_hangup ‘999#’ # Which DTMF tone to listen to for hangup detection : dl_prefix # What to dial BEFORE dialing the User ID extension : dl_suffix H # What to dial AFTER dialing the User ID extension : dl_init # What to dial when the system first starts up : dl_stop # What to dial when the system performs a shutdown : dl_pickup # What to dial when a port goes off-hook : dl_conference # What to dial to create/record a conference call : integration 10 ‘rr667’ integration 10 ‘bb666’ : 56 Telephone Switching Systems for Amanda@SOHO Chapter 7: Programming the NEC Electra II Getting Started This chapter cover the NEC Electra II, software release 3.0 and later. To connect Amanda@SOHO to an NEC Electra II, you need one SLI-8G-21 single-line interface card (this works for up to eight analog voice mail ports). Run one pair wire for each voice mail port from the punch down block to the connector on the SLI. Once the two are connected, you are ready to program the NEC Electra II. The programming can be done from any station—so long as the telephone has a display. To start programming: 1. Press the FNC key. 2. Press #0*8974. 3. For most features, you: a. b. Press an LK key (one of the keys just under the telephone’s display), such as LK4. Press a data number (two digits on the telephone), such as 14 for Intercom Master Hunt Number. When you get this far, you have entered a memory block, such as 4-14. (The 4 is from LK4 and the 14 is the data number.) c. d. e. An access code (usually two digits) representing the feature to be coded, a port number, station number, etc. automatically appears. You might have to press the TRF key to advance to the correct access code. Press the digits that indicate the setting for that access code. You might press a digit that represents yes or no, a series of digits which set the Message Waiting Indication, etc. While entering the data in step E, use the following keys: Meaning: To move the cursor to the left To move the cursor to the right To type the setting To type a * Key to press: * # 0 to 9 LNR/SPD + * 58 Installing and Administering Amanda@SOHO Meaning: To type a # To clear the setting Key to press: LNR/SPD + # HOLD 4. Press the TRF key to write the setting to the database and move on to the next data setting. For example, after providing a setting for port one or feature one, you move on to port two or feature two. When you reach the last port or feature, you move on to the next memory block. For example, you would move from memory block 4-14 to 415. 5. Press the SPKR key to stop programming. The following diagram shows a typical telephone set with its display and keys. Message Waiting LED NEC Display (LCD) CO/PBX LED 1 2 3 4 5 6 7 8 9 10 11 12 13 14 15 16 MIC 1 ICM 2 3 ABC DEF 4 5 6 GHI JKL MNO 7 8 9 PRS TUV WXY 0 # * HOLD OPER TRF ANS RECALL 1 2 3 4 5 6 7 8 9 10 11 12 13 14 15 16 17 18 19 20 Flexible Line Keys Setting Mode Data Selection MIC LED ICM LED FNC CNF LNR SPD SPKR RECALL Key Next Page FNC Key Previous Page CNF Key Next Number LNR/SPD Key Pause, Hyphen SPKR Key To go back on-line ANS Key Mode Return TRF Key Data Write Dial Key Hold Key Clear Data, Pause Chapter 7: Programming the NEC Electra II Programming Voice Mail Access The hunt group should be circular. To program voice mail access: 1. Press the FNC key. 2. Press #0*8974. 3. To learn what physical port number is the first voice mail port: a. b. Press the LK7 key. Press 1. c. Press the TRF key until the unit name SLI8G-21 appears on the display. This puts you in memory block 7-1, the card interface slot assignment. The first port on this card is on the lower right of the display. It is a two-digit number. You must know which Single Line Ports you are using for voice mail before you can proceed. (For example, the port number might be 25.) Programming sample: Page No. Upper Slot No. Unit Name Port No. 1_________16:_______________=31 1>________08:____SLI8G-21___=25 4. To give that physical port an extension number, for example, 300: a. b. Press the LK4 key. Press 10. This puts you in memory block 4-10, for station number assignment. c. d. Go to the Tel Port No. and type the two-digit port number for the first port (from Step 3C). (For example, you might type 25.) Type the extension number (for example, 300) to be assigned to that port. Programming sample: Port No. Data No. Title Setting Data. 25________10____STA_____=300 e. Press the TRF key. The next physical port (for example 26) appears on the display. f. g. Type the next extension (for example, 301). Repeat Steps E and F for the rest of the ports. NOTE: You must know what extensions/station have been assigned to what ports. 59 60 Installing and Administering Amanda@SOHO Programming the Hunt Group The hunt group should be circular. To program the Intercom Master Hunt Number: 1. Press the LK4 key. 2. Press 14. This puts you in memory block 4-14, Intercom Master Hunt Number. 3. Go to the Tel Port No. and type the two-digit port number for the first port (for example, 25.) 4. Press LK2 to modify the displayed setting to YES. 5. Press the TRF key to enter. Programming sample: Tel Port No. Data No. Title Setting Data. 25/ _______14___MSTER__ =YS To forward calls: 1. Press the LK4 key. 2. Press 15. This puts you in memory block 4-15, Intercom Master Hunt FWD Assign. 3. Go to the Tel Port No. and type the two-digit port number for the first port (for example, 25.) 4. Type the extension that the first port should forward to (for example 301). Programming sample: Tel Port No. Data No. Title Setting Data. 25/ _______14___ICMFWD__ 301 5. Press the TRF key. 6. Return to memory block 4-15, by changing the 17 to a 15. Programming sample: Tel Port No. Data No. Title Setting Data. 25/ _______14___CLS(1)__ =15 7. Press the CNF key. 8. Enter the next extension to be forwarded to (for example 302). Chapter 7: Programming the NEC Electra II 61 Programming sample: Tel Port No. Data No. Title Setting Data. 25/ _______14___ICMFWD__ 303 9. Press the TRF key. 10. Repeat steps D through G for the rest of the voice mail ports in the hunt group.? for the rest of the extension in the hunt group? Programming a Quick Transfer To set the quick transfer to the extension for the first port: 1. Press the LK1 key. 2. Press 8. This puts you in memory block 1-8. 3. Enter the extension (for example, 300) for the first port. 4. Press the TRF key. Programming the Interior Ring Pattern To set the Interior Ring Pattern: 1. Press the LK1 key. 2. Press 2. This puts you in memory block 1-2. The setting should default to B, which is a ring that is 1 second on and 2 seconds off. For a longer ring, change the setting to A. While C and D are possible settings, their rings are too short to be usable in most environments. 3. Press LK4 for B or LK3 for A. Programming Message Waiting Indications (MWI) To program MWI: 1. Press the LK1 key. 2. Press 1. This puts you in memory block 1-1. 3. Go to the Dial code field. 62 Installing and Administering Amanda@SOHO 4. To change the field to 7*: a. b. c. 5. Press 7. Press the LNR/SPD key. Press #. Type 502 (to set MWI). Programming sample: Dial code field 47:__2DG_____(7*) = TIME DISPLAY 6. Function number 502 Press the TRF key to save your change. The Dial code field should be 7#, which is what you need for canceling the message waiting indicator. 7. Type 503 (to cancel MWI). Programming sample: Dial code field 47:__2DG_____(7#) = TIME DISPLAY Function number 503 Programming Telephones to Forward to Voice Mail You must program each telephone to forward to voice mail when the extension does not answer or is busy. To forward calls to voice mail: 1. Press the FNC key. 2. Press 43. 3. Enter the destination number. This is the extension for the first port or pilot number to the voice mail hunt group, for example, 300. 4. Press the SPKR key. Notification and Integration Files For each telephone switching system, Amanda@SOHO stores files with notification, dial code, and integration information. When you select a telephone switching system, Amanda knows which files to use for your switch. The files contain: • The tokens that turn the message waiting light on are in c:\amanda\pbx.db\171.on. This file contains the tokens “7*%U”. Chapter 7: Programming the NEC Electra II • 63 The tokens that turn the message waiting light off are in c:\amanda\pbx.db\171.off. This file contains the tokens “7#%U”. • The dial codes and integration strings used by the switch are in c:\amanda\pbx.db\171.pbx. This file contains the following lines: NEC Electra II (release 3.00+) #################################################### # NEC Electra Level II # #################################################### dl_dtwait F-- # Dial code to put a caller on transfer hold dl_ndtret - # Dial code to use when there is no transfer dialtone: dl_rnaret F- # Dial code to return to caller after Ring No Answer : dl_bsyret F- # Dial code to return to caller when there is a Busy : dl_hupret F- # Dial code to use after a call screening reject : dl_connect H # Dial code to connect the caller to the extension : tmo_dtwait 4 # Number of seconds to wait for dialtone detection : flashtm 60 # Number of 1/100 seconds to use for Flash time : dt_answer # Which DTMF tone to listen to for answer detection : dt_hangup # Which DTMF tone to listen to for hangup detection : dl_prefix # What to dial BEFORE dialing the User ID extension : dl_suffix H # What to dial AFTER dialing the User ID extension : dl_init # What to dial when the system first starts up : dl_stop # What to dial when the system performs a shutdown : dl_pickup # What to dial when a port goes off-hook dl_conference# What to dial to create/record a conference call integration 10 ‘rr’ integration 10 ‘rrr’ integration 10 ‘rrrr’ : : : 64 Installing and Administering Amanda@SOHO Chapter 8: Programming Panasonic KXTD 1232 Using a Panasonic Telephone You use the KX-T7230 or KX-T7235 telephone to program a Panasonic KXTD 1232. KX-T7230 KS-T7235 The display provides helpful information, such as what you should do now or what you have done. Both telephones use two information lines for programming. The upper line is called the Message Line and the lower line is called the Function Line. The Message Line shows you what you should do or what you should select. It also confirms what you have just entered. If your entry exceeds the 16-digit capacity of a line, you can shift the display by pressing the right arrow or left arrow button. The Function Line shows the current function of the soft buttons. These functions change with the programming procedures and as you press the SHIFT button. 66 Telephone Switching Systems for Amanda@SOHO Getting Ready Programming the Panasonic KXTD 1232 can be performed only from Jack 1, and only one telephone can be in programming mode at one time. While you are programming, your extension is treated as a busy extension. Before programming, confirm that: • • Your telephone is on-hook. No calls are on hold at your telephone. To start programming: 1. Press PROGRAM * #1234. 1234 is the default system password. Your telephone switching system may have another password. 2. When SYS-PGM NO? -> appears on the display, you dial the number of the program you want to use. To finish one program and go on to another: 1. Press STORE to store your changes. The STORE indicator light becomes red and you hear a beep if your changes were successfully stored. If you hear the alarm (three beeps), check that your entry is valid. 2. Press END. 3. Dial the number for the next program. To exit programming mode do one of the following: • • Lift the handset. Press END. When the initial message: SYS-PGM NO? -> appears on the display, press PROGRAM. Programming a Panasonic The following table explains what programs to use as you set up a Panasonic for use with Amanda. Program and Its Purpose What You Enter What You See on Display Start programming PROGRAM *#1234 SYS-PGM NO? -> CLR NEXT Call Hunting: Program the extension group that is assigned to Amanda for voice mail 106 Call Hunting SKP+ CLR NEXT NEXT EXT GRP NO?-> SKP+ CLR NEXT NEXT (or type group number) Groupx: Disable -> SEL+ NEXT Chapter 8: Programming Panasonic KXTD 1232 Program and Its Purpose 67 What You Enter What You See on Display SELECT (until VM appears as group setting) Groupx: VM -> SEL+ NEXT Store (the Auto Dial key) End (the Hold key) (see telephone diagrams) Extension Group Assignment: Place jacks that are connected to voice mail in their own extension group. 602 EXT Group Asn SKP+ CLR NEXT NEXT Jack NO? -> SKP+ CLR NEXT NEXT (or jack number)(01 goes to 01-1) #01-1:EXG1 -> SEL NEXT Type group number #01-1:EXGx -> SEL NEXT NEXT to #01-2, #021....#32-2 or #64-2 Store End Voice Mail Status DTMF Set: Change the disconnect signal to #9# and use the default call codes for the other signals. 113 VM Status Set SKP+ CLR NEXT NEXT (Press 1 if not already there.) RBT :1 -> SEL NEXT NEXT (Press 2 if not already there.) BT :2 -> SEL NEXT NEXT (Press 3 if not already there.) ROT :3 -> SEL NEXT NEXT (Press 4 if not already there.) DND :4 -> SEL NEXT NEXT (Press 5 if not already there.) Answer :5 -> SEL NEXT NEXT (Press #9# if not already there.) Disconnect :#9# SKP+ CLR NEXT NEXT (Press 9 if not already there.) Confirm:9 SKP+ CLR NEXT 68 Program and Its Purpose Mailbox ID Code: Make sure that all the jacks/extension have the value “Not Stored”. Telephone Switching Systems for Amanda@SOHO What You Enter What You See on Display NEXT (Press 6 if not already there.) FWD VM RBT:6 SKP+ CLR NEXT NEXT (Press 7 if not already there.) FWD VM BT:7 SKP+ CLR NEXT NEXT (Press 8 if not already there.) FWD EXT RBT:6 SKP+ CLR NEXT 609 Mailbox ID Code SKP+ CLR NEXT NEXT Jack NO?-> SKP+ CLR NEXT NEXT #01-1:Not Stored -> SEL NEXT If not “Not Stored” i.e. blank, press SHIFT to toggle to #01-1:Not Stored CLR NEXT If not “Not Stored” i.e. blank, press CLR #01-1: -> CLR NEXT -> Repeat last three steps for all jacks/extensions. Call Forwarding: Provide the code needed to leave and get messages. Operator/Manager: Enter the jack number that the operator is assigned to as OPE-1. If you have a backup operator, enter the jack number for that person as OPE-2. 114 VM Command Set SKP+ CLR NEXT NEXT #6H (to get the H, press the FLASH button) LV-MSG:#6H NEXT GETMSG:*H# *H# -> SEL NEXT 006 Operator/Manager SKP+ CLR NEXT NEXT OPE-1:Jack01 -> SEL NEXT You can also use this program to set a jack number for the manager. This provides an additional jack from which programming can be done. Chapter 8: Programming Panasonic KXTD 1232 Program and Its Purpose 69 What You Enter What You See on Display Type jack number (for example, 01 is Jack 1) No Answer Time: Changes the number of times a station rings before it is considered unanswered. NEXT OPE-2:Jack01 -> SEL NEXT 202 No Answer Time SKP+ CLR NEXT NEXT Time: 5 rings -> SEL NEXT Press number of rings Day Mode: Allows you to specify Amanda as a primary attendant or backup attendant during the day. Use Immdt as the setting for a primary attendant. Use 1, 3, or 6 Rings for a backup attendant. 603 DIL 1:N Asn Day SKP+ CLR NEXT NEXT Jack NO?-> SKP+ CLR NEXT Type jack number (01 goes to 01-1)(32-2) #01-1:CO01:Immdt -> SEL NEXT Press SELECT until you see the setting you want Night Mode: Allows you to specify Amanda as a primary attendant or backup attendant at night. Use Immdt as the setting for a primary attendant. Use 1, 3, or 6 Rings for a backup attendant. 604 NEXT DIL 1:N Asn Nig SKP+ CLR NEXT Jack NO?-> SKP+ CLR NEXT NEXT or type jack number(32-2) #01-1:CO01:Immdt -> SEL NEXT Press SELECT until you see the setting you want Store End NOTE: To see what extensions are assigned to what jacks, use PROGRAM *#1234 003. To see what extension a particular telephone is, use PROGRAM 996. 70 Telephone Switching Systems for Amanda@SOHO Forwarding Calls to Voice Mail Because Amanda does blind transfers, you need to program each telephone to forward calls to voice mail when that telephone is busy or not answered. To program calls to forward to voice mail on a digital telephone: 1. Go off-hook. 2. Dial 7105 and the first pilot number assigned to voice mail hunt group. The fwd/dnd button light will stay on. To cancel call forwarding: • Go off-hook and dial 7100. There is no way to turn it off using the button. Do Not Disturb can be controlled through Amanda or by programming a button with 7101. It can be canceled using 7100. Notification and Integration Files For each telephone switching system, Amanda@SOHO stores files with notification, dial code, and integration information. When you select a telephone switching system, Amanda knows which files to use for your switch. The files contain: • The tokens that turn the message waiting light on are in c:\amanda\pbx.db\191.on. This file contains the tokens “-701,%U”. • The tokens that turn the message waiting light off are in c:\amanda\pbx.db\191.off. This file contains the tokens “-700,%U”. • The dial codes and integration strings used by the switch are in c:\amanda\pbx.db\191.pbx. This file contains the following lines: Panasonic KXTD 1232 #################################################### # Panasonic KXT-D 1232 # #################################################### dl_dtwait F-- # Dial code to put a caller on transfer hold dl_ndtret - # Dial code to use when there is no transfer dialtone: : dl_rnaret F- # Dial code to return to caller after Ring No Answer : dl_bsyret F- # Dial code to return to caller when there is a Busy : dl_hupret F- # Dial code to use after a call screening reject : dl_connect H # Dial code to connect the caller to the extension : tmo_dtwait 0 # Number of seconds to wait for dialtone detection : flashtm 55 # Number of 1/100 seconds to use for Flash time : dt_answer # Which DTMF tone to listen to for answer detection : dt_hangup ‘#9#’ # Which DTMF tone to listen to for hangup detection : dl_prefix # What to dial BEFORE dialing the User ID extension : dl_suffix H # What to dial AFTER dialing the User ID extension : dl_init # What to dial when the system first starts up : Chapter 8: Programming Panasonic KXTD 1232 71 dl_stop # What to dial when the system performs a shutdown : dl_pickup # What to dial when a port goes off-hook : dl_conference # What to dial to create/record a conference call : integration 10 ‘#6rrr’ integration 10 ‘998#rrr#’ integration 10 ‘*eee#’ integration 10 ‘#6rr’ integration 10 ‘998#rr#’ integration 10 ‘*ee#’ integration 10 ‘rrr’ 72 Telephone Switching Systems for Amanda@SOHO Chapter 9: Programming Panasonic DBS 824 Getting Started Connect the Amphenol cable from the KSU to the punch down block. Cross connect the system wire runs to the station wire runs or to modular RJ-11 connectors. Use a single-line telephone adaptor (SLTA) to support up to four analog telephones. Requires one digital port per analog port. You can program the Panasonic 834 from up to four telephones so long as the attendant display telephone. A telephone that is connected to extension port1 with an extension number of 100 is automatically an attendant telephone.By default, extension port 2 (extension number 101) is the second attendant telephone, although this extension can be reprogrammed. The information in this chapter is for Panasonic DBS 824 software versions CPC-S and CPC-M 1.0 and higher. To start programming: 1. Press the ON/OFF key. 2. Press the PROG key. 3. Press ##. 4. Then you press an FF key. The keys with the lights on them are FF1 through FF8. Typically they are labeled Line 1 through Line 8. 5. After the FF key, you dial a series of digits, depending on the program and your needs. 6. Press the HOLD key to store your entry and move forward (to the next port number or program number). To stop programming: • Press the ON/OFF key. 74 Telephone Switching Systems for Amanda@SOHO Using the Telephone The following diagram shows you where the keys are on the Panasonic telephone. Panasonic DIGITAL PROG MUTE CONF AUTO Line 1 Line 2 Line 3 Line 4 VOL Line 5 VOL Line 6 DND/CF 1 2 ABC 3 DEF 4 GHI 5 JKL 6 MNO 7 PRS 8 TUV 9 WXY REDIAL EXT FLASH MUTE ON/OFF MSGE * 0 OPER # HOLD The CONF key resets an entry to its default s Key CONF FLASH HOLD VOL ^ * # Programming Use Resets entry to its default settings. Stores your entry and moves backward (decrements port number in the same address or decrements program address number). Stores your entry and moves forward (increments port number in the same address or increments program address number). Moves backward to the previous programming level. Stores your entry and moves backward (decrements program address number). Stores your entry and moves forward (increments program address number). Chapter 9: Programming Panasonic DBS 824 75 Programming the Hunt Group The hunt group is terminal. In a terminal hunt group, the hunt begins with the pilot number, and moves sequentially through the extensions in the hunt group. If all the extensions are busy, the call camps onto the hunt group and waits for an extension to become idle. To program the hunt group: 1. Start programming as explained in “Getting Started” on page 73. 2. Press the FF4 key. 3. Dial 3#. 4. Enter the number for this hunt group (1-4). 5. Dial #1#. 6. Enter the hunt group pilot number (any number in these ranges: 11-69 for CPC-S or 101-699 CPC-M). We suggest using 50 or 500. Write down the number you used here. You will need to use it again in the sections “To Use a Voice Mail Message Key” on page 80 and “To Use a Voice Mail Transfer Key” on page 81. 7. Dial #. 8. Press the FF4 key. 9. Enter the number for this hunt group (1-4). 10. Dial #2#. 11. Dial 0# for terminal hunting. 12. Press the FF4 key. 13. Dial 3#. 14. Enter the number for this hunt group (1-4). 15. Dial #5#. 16. Enter the extension number for the first Amanda port. 17. Dial #. 18. Press the HOLD key. 19. Repeat steps 16 through 18 for each Amanda port. 76 Telephone Switching Systems for Amanda@SOHO Using Third-Party Voice Mail You need to program this telephone switching system to use third-party voice mail. On the Panasonic 824 DBS, this is equivalent to setting the terminal type to 10. To use third-party voice mail: 1. Press the FF3 key. 2. Dial #2#10#. 3. Press the HOLD key. Programming Call Forwarding The Call Forward—No Answer Timer determines how long an unanswered call rings before it is sent to a secondary destination. To set call forward on no answer to 12 seconds: 1. Press the FF1 key. 2. Dial 3#17#2#. 3. Press the HOLD key. Stopping the Busy Signal The DBS 824 can be set to send either silence (default) or a busy tone to a voice mail port when the caller hangs up. To make sure that the voice mail busy tone is set to silence (on hang-up): 1. Press the FF1 key. 2. Dial 2#1#20#0#. 3. Press the HOLD key. Using Amanda as a Primary Auto Attendant In addition to the program you have already done, to make Amanda a primary auto attendant, you need to program the DBS 824 to send incoming calls from trunk lines to Amanda when the DBS 824 system is in Day mode. Do not do the procedures in “Using Amanda as a Backup Attendant” on page 77. Chapter 9: Programming Panasonic DBS 824 77 NOTE: You may need to be aware what hunt group is associated automatically with extensions in CPC-S and CPC-M software. In the following procedure, you use the extension that corresponds to the voice mail hunt group. Hunt Group 1 2 3 4 CPC-S Extension 23 24 25 26 CPC-M Extension 31 32 33 34 To program which extensions receive incoming calls during the day: 1. Press the FF4 key. 2. Dial 1#. 3. Dial the extension number (extensions range from 23 to 26 for CPC-S and from 31 to 34 for CPC-M). Use the extension that corresponds to the voice mail hunt group. 4. Dial #. 5. Dial the trunk number (which ranges from 1 to 6 for CPC-S and from 1 to 8 for CPC-M). 6. Dial #1#. 7. Press the HOLD key. 8. Repeat steps 1 through 7 for each trunk line. To program when Day mode starts: 1. Press the FF1 key. 2. Dial 3#25#. 3. Type the time at which Day mode starts using the format HHMM (two digits for the hour and two digits for the minutes). Also use the 24-hour clock. For example 8 a.m For example, 8:05 A.M. is 0805 and 8:30 P.M. is 2030. 4. Press the HOLD key. Using Amanda as a Backup Attendant To use Amanda as a backup attendant, you must clear the second, third, and fourth attendant positions. Do not do the procedures in “Using Amanda as a Primary Auto Attendant” on page 76. 78 Telephone Switching Systems for Amanda@SOHO To clear the second attendant: 1. Press the FF1 key. 2. Dial 2#1#22#. 3. Press the CONF key. 4. Press the HOLD key. To clear the third attendant: 1. Press the FF1 key. 2. Dial 2#1#23#. 3. Press the CONF key. 4. Press the HOLD key. To clear the fourth attendant: 1. Press the FF1 key. 2. Dial 2#1#24#. 3. Press the CONF key. 4. Press the HOLD key. To program which extensions receive incoming calls during the night: 1. Press the FF4 key. 2. Dial 2#. 3. Dial the extension number (extensions range from 23 to 26 for CPC-S and from 31 to 34 for CPC-M). Use the extension that corresponds to the voice mail hunt group. See “Using Amanda as a Primary Auto Attendant” on page 76 for the table that shows the extensions and the hunt group numbers. 4. Dial #. 5. Dial the trunk number (which ranges from 1 to 6 for CPC-S and from 1 to 8 for CPC-M). 6. Dial #1#. 7. Press the HOLD key. 8. Repeat steps 1 through 7 for each trunk line to be answered. Chapter 9: Programming Panasonic DBS 824 79 To program when Night mode starts: 1. Press the FF1 key. 2. Dial 3#1#. 3. Type the time at which Day mode starts using the format HHMM (two digits for the hour and two digits for the minutes). Also use the 24-hour clock. For example 8 a.m For example, 8:05 A.M. is 0805 and 8:30 P.M. is 2030. 4. Press the HOLD key. Programming Each Telephone To Use Answer Supervision This feature allows the Panasonic 824 DBS to send an answer signal to third-party voice mail systems. This provides quicker response time between the Panasonic 824 DBS. The following programming can be performed from an attendant telephone or any other telephone that has entered the programming access. To program answer supervision for voice mail: 1. Press the ON/OFF key. 2. Press the PROG key. 3. Dial #94. 4. Dial 1. 5. Press the HOLD key. This assigns a 1 as an answer signal to speed up answer detection. 6. Press the ON/OFF key. 7. Repeat steps 1 through 8 on each user’s telephone. To Use Call Forwarding Each telephone extension needs to be programmed to use the call forwarding ID code for voice mail. Do the following procedure on every user’s telephone. To call forward to voice mail: 1. Press the ON/OFF key. 2. Press the PROG key. 3. Press the AUTO key. 4. Dial *. 80 Telephone Switching Systems for Amanda@SOHO 5. Enter the extension number. 6. Enter the extension number again. 7. Press the HOLD key. 8. Press the ON/OFF key. 9. Repeat steps 1 through 8 on each user’s telephone. To Use a Voice Mail Message Key You should program a voice mail message key from every system (not single-line) telephone. The message key lights up when a message is waiting and when pressed will send “8xxx” (where xxx is the telephone’s extension number) to voice mail for a direct login. To program the message key: 1. Press the ON/OFF key. 2. Press the PROG key. 3. Press an FF key that is non-CO and has a light. 4. Press the CONF key. 5. Press the AUTO key. 6. Dial the voice mail hunt pilot (probably 50 or 500) that you entered in “Programming the Hunt Group” on page 75. 7. Press the AUTO key. 8. Dial 909 or 99, depending on the software version of your telephone switching system. 9. Press the HOLD key. 10. Press the PROG key. 11. Press the AUTO key. 12. Dial 909 or 99 (must match step 8). 13. Dial 8. 14. Dial the current telephone’s extension number. 15. Press the HOLD key. 16. Press the ON/OFF key. 17. Repeat steps 1 through 16 on each user’s telephone. Chapter 9: Programming Panasonic DBS 824 81 To Use a Voice Mail Transfer Key Programming a transfer key allows the users at that extension to forward a caller directly to voice mail without inband signalling. The extension call will go to the Company Greeting mailbox (usually 990). To program a transfer key: 1. Press the ON/OFF key. 2. Press the PROG key. 3. Press an FF key that is non-CO and has a light. 4. Press the CONF key. 5. Press the AUTO key. 6. Press the AUTO key again. 7. Dial the voice mail hunt pilot (probably 50 or 500) that you entered in “Programming the Hunt Group” on page 75. 8. Press the HOLD key. 9. Press the ON/OFF key. 10. Repeat steps 1 through 9 on each user’s telephone. Notification and Integration Files For each telephone switching system, Amanda@SOHO stores files with notification, dial code, and integration information. When you select a telephone switching system, Amanda knows which files to use for your switch. The files contain: • The tokens that turn the message waiting light on are in c:\amanda\pbx.db\192.on. This file contains the tokens “*4-%E”. • The tokens that turn the message waiting light off are in c:\amanda\pbx.db\192.off. This file contains the tokens “*5-%E”. • The dial codes and integration strings used by the switch are in c:\amanda\pbx.db\192.pbx. 82 Telephone Switching Systems for Amanda@SOHO This file contains the following lines: #################################################### # Panasonic DBS 824 # #################################################### dl_dtwait F- # Dial code to put a caller on transfer hold dl_ndtret - # Dial code to use when there is no transfer dialtone: dl_rnaret F- # Dial code to return to caller after Ring No Answer : dl_bsyret F- # Dial code to return to caller when there is a Busy : dl_hupret F- # Dial code to use after a call screening reject : dl_connect H # Dial code to connect the caller to the extension : tmo_dtwait 4 # Number of seconds to wait for dialtone detection : flashtm 75 # Number of 1/100 seconds to use for Flash time : dt_answer # Which DTMF tone to listen to for answer detection : dt_hangup # Which DTMF tone to listen to for hangup detection : dl_prefix # What to dial BEFORE dialing the User ID extension : dl_suffix H # What to dial AFTER dialing the User ID extension : dl_init # What to dial when the system first starts up : dl_stop # What to dial when the system performs a shutdown : dl_pickup # What to dial when a port goes off-hook dl_conference# What to dial to create/record a conference call integration 10 ‘r’ integration 10 ‘8e’ integration 10 ‘8ee’ integration 10 ‘8eee’ integration 10 ‘rr’ integration 10 ‘rrr’ : : : Chapter 10: Programming the Samsung DCS 2.2/ Compact Getting Started You can program the Samsung DCS 2.2/Compact from any LCD 12B or 24B keyset. To begin programming: 1. Press TRSF. The display shows: PROGRAMMING MODE ENTER PGM ID: 2. Dial 800 as in the following: PROGRAMMING MODE ENTER PGM ID: 800 The display shows: ENABLE TECH. PROG PASSCODE: 3. Dial the passcode. The default passcode is 4321. The display shows: ENABLE TECH. PROG DISABLE TENANT: 1 4. Press the up arrow once to change from Disable Tenant to Enable Tenant. The display shows: ENABLE TECH. PROG ENABLE TENANT: 1 5. Press TRSF to redisplay the date and time. Now you can begin programming. Follow the directions for programming 207 or 726 by dialing 207 or 726. 84 Telephone Switching Systems for Amanda@SOHO Using the Keys on the Telephone The following figure shows the special key functions. LEFT SOFT KEY A B C D RIGHT SOFT KEY SCROLL E F DIAL PAD VOL DOWN SPK UP 1 2 ABC 3 DEF 4 GHI 5 JKL 6 MNO 7 PRS 8 TUV 9 WXY * 0 OPER # HOLD TRSF ANS/ RLS Programming MMC: 207 You use MMC: 207 to create a VM/AA (Voice Mail/Automated Attendant) port. Because you must program MMC: 207 for each Amanda port, you will perform the following steps from 1 to 4 times. VM/AA ports receive the digits designated in MMC 726 VM/AA Options and also receive a true disconnect signal when a call is completed. Only SLI (Subscribers Line Interface) boards, not key daughterboards, support the disconnect signal. Do not make VM/AA ports data. If they are data, they become single-line ports and stop voice mail integration. VM/AA ports are protected against tones. Chapter 10: Programming the Samsung DCS 2.2/Compact 85 When programming MMC: 207, you use the following program keys: Purpose Key Scroll through a set of options UP and DOWN Arrows Enter selection Keypad Move cursor right and left RIGHT and LEFT Softkeys Move cursor from top to bottom line on display (or vice versa) RIGHT and LEFT Softkeys Store data and advance to next MMC SPK Clear entry HOLD Select ALL ANS/RLS Store and exit TRSF To create a VM/AA port: 1. Press TRSF then dial 207. The display shows a station number, followed by VMAA PORT and the default value NORMAL PORT: [209] VMAA PORT NORMAL PORT 2. Do one of the following: • Dial station number (for example, 209). OR • Press UP or DOWN to select a station number. Then press the RIGHT soft key to move the cursor to NORMAL PORT: If you picked station 209 (as in the example), the display would show: [209] VMAA PORT NORMAL PORT 3. Do one of the following: • Dial 1 for VMAA PORT. OR • Press UP or DOWN to select VMAA PORT. Then press the RIGHT soft key: If you picked station 209 (as in the example), the display would show: [209] VMAA PORT VMAA PORT 86 Telephone Switching Systems for Amanda@SOHO 4. Do one of the following: • Press TRSF to store and exit. OR • Press SPK to store and advance to the next MMC. Programming MMC: 726 You use MMC: 726 to set a series of VM/AA Options. There are eight main options for programming and several sub-options. Many of them are YES/NO. Others require a few numbers or letters of the alphabet. While you use the default settings in almost all cases, it is best to check that the settings are the ones they are supposed to be. When programming MMC: 726, you use the following program keys: Purpose Key Scroll through a set of options UP and DOWN arrows Enter selection Keypad Move cursor right and left RIGHT and LEFT Softkeys Move cursor from top to bottom line on display (or vice versa) RIGHT and LEFT Softkeys Store data and advance to next MMC SPK Clear entry HOLD Store and exit TRSF Inputs the letter A A Inputs the letter B B Inputs the letter C C To set VM/AA options: 1. Press TRSF then dial 726. The display shows the EXT for DN1 option and its default setting YES: EXT FOR DN1 YES 2. If the setting is as shown above: a. b. Press UP to go to the next option. Go on to the next numbered step. If the setting is not as shown above: a. b. c. Press the RIGHT softkey to move the cursor to the bottom line of the display. Press UP or DOWN to change NO to YES. Press the RIGHT softkey to move the cursor to the top line of the display. Chapter 10: Programming the Samsung DCS 2.2/Compact d. e. 2. 87 Press UP to go to the next option. Go on to the next numbered step. The display shows: TRK FOR DN1 YES Follow the directions given in step 1, depending on whether the setting is as shown or not as shown. 3. The display shows: EXT FOR DN2 NO Follow the directions given in step 1, depending on whether the setting is as shown or not as shown. 4. The display shows: TRK FOR DN2 NO Follow the directions given in step 1, depending on whether the setting is as shown or not as shown. 5. The display shows: SEPARATOR NO Follow the directions given in step 1, depending on whether the setting is as shown or not as shown. 6. The display shows: DISCONECT SIGNAL C If the setting is as shown above: a. b. Press UP to go to the next option. Go on to step 7. If the setting is not as shown above: a. b. c. d. 7. Press the RIGHT softkey to move the cursor to the bottom line of the display. Press C. Press UP to go to the next option. Go on to step 7. The display shows: CALL TYPE ID DIRECT CALL:* 88 Telephone Switching Systems for Amanda@SOHO If the setting is as shown above: a. b. Press the RIGHT softkey to move the cursor to the bottom line of the display. Go on to step 8. If the setting is not as shown above: a. b. c. 8. Press the RIGHT softkey to move the cursor to the bottom line of the display. Press *. Go on to step 8. Press UP for the next option. The display shows: CALL TYPE ID ALL FWD CALL:# 9. If # is not already the setting, press the RIGHT softkey to move the cursor to the bottom line of the display. Then press #. 10. Press UP for the next option. The display shows: CALL TYPE ID BSY FWD CALL:# 11. If # is not already the setting, press the RIGHT softkey to move the cursor to the bottom line of the display. Then press #. 12. Press UP for the next option. The display shows: CALL TYPE ID NOA FWD CALL:# 13. If # is not already the setting, press the RIGHT softkey to move the cursor to the bottom line of the display. Then press #. 14. Press UP for the next option. The display shows: CALL TYPE ID RECALL:# 15. If # is not already the setting, press the RIGHT softkey to move the cursor to the bottom line of the display. Then press #. 16. Press UP for the next option. The display shows: CALL TYPE ID DIR TRK CALL:6 Chapter 10: Programming the Samsung DCS 2.2/Compact 89 17. If 6 is not already the setting, press the RIGHT softkey to move the cursor to the bottom line of the display. Then press 6. 18. Press UP for the next option. The display shows: CALL TYPE ID OVERFLOW:# 19. If # is not already the setting, press the RIGHT softkey to move the cursor to the bottom line of the display. Then press #. 20. Press UP for the next option. The display shows: CALL TYPE ID DID CALL:# 21. If # is not already the setting, press the RIGHT softkey to move the cursor to the bottom line of the display. Then press #. 22. Press UP for the next option. The display shows: CALL TYPE ID MESSAGE CALL:* 23. If * is not already the setting, press the RIGHT softkey to move the cursor to the bottom line of the display. Then press *. 24. Press the RIGHT softkey TWICE and then press UP to go to the next option. The display shows: PROGRESS TONE ID DIAL TONE:BA If the setting is as shown above: a. b. Press the RIGHT softkey to move the cursor to the bottom line of the display. Go on to step 25. If the setting is not as shown above: a. b. c. d. Press the RIGHT softkey to move the cursor to the line with the setting. Press B. Press A. Go on to step 25. NOTE: A, B, and C are the first three keys in the bottom row of the function keys. 25. Rotate through the options for PROGRESS TONE ID by pressing UP. 90 Telephone Switching Systems for Amanda@SOHO They should be as displayed below: PROGRESS TONE ID BUSY TONE:4 PROGRESS TONE ID RINGBACK TONE:5 PROGRESS TONE ID DND NO MORE:6 PROGRESS TONE ID HDSET ANSWER:3 PROGRESS TONE ID SPKER ANSWER:3 26. Do one of the following: • Press TRSF to store and exit. OR • Press SPK to store and advance to the next MMC. MMC: 726 VM/AA Options Option What to Use for Amanda Description EXT FOR DN1 (option 0) YES YES or NO. Determines whether the switch forwards DTMF information to the VM/AA port about the station that is calling the VM/AA port station. TRK FOR DN1 (option 1) YES YES or NO. Determines whether the switch forwards DTMF information to the VM/AA port about the trunk that is calling the VM/AA port station. EXT FOR DN2 (option 2) NO YES or NO. Determines whether the switch forwards DTMF information to the VM/AA port about the station that is calling another station. TRK FOR DN2 (option 3) NO YES or NO. Determines whether the switch forwards DTMF information to the VM/AA port about the station that is calling another station. SEPERATOR (option 4) NO YES or NO. Determines whether the separator digit is sent between the DN1 and DN2 information. (YES is used only when all the preceding options are YES.) DISCONECT SIGNAL (option 5) C 0-9, A-C. Provides the digits in the signal that is sent when the calling station or CO line hangs up. Chapter 10: Programming the Samsung DCS 2.2/Compact 91 MMC: 726 VM/AA Options (Continued) What to Use for Amanda Option CALL TYPE ID (option 6) Description Offers several VM/AA options that allow you to customize the voice mail/switch interaction. * DIRECT CALL Indicates that the call originates from another station in the system. Use * for Amanda. # ALL FWD CALL Indicates that the call was forwarded to the VM/AA port from a station with CALL FORWARD ALL set. Use # for Amanda. # BSY FWD CALL Indicates that the call was forwarded to the VM/AA port from a station with CALL FORWARD BUSY set. Use # for Amanda. # NOA FWD CALL Indicates that the call was forwarded to the VM/AA port from a station with CALL FORWARD NO ANSWER set. Use # for Amanda. # RECALL Indicates that a call is recalling the VM/AA port after being transferred and not answered. Use # for Amanda. 6 DIR TRK CALL Indicates that a CO call has gone directly to VM/AA (for example, from a trunk line). Use 6 for Amanda. # OVERFLOW Indicates that a call has OVERFLOWED to the VM/AA port from a station group. Use # for Amanda. # DID CALL Indicates that a DID call has called the VM/ AA port. Use # for Amanda. * MESSAGE CALL Indicates that a message button or message reply feature code has been used to call the VM/AA port. Use * for Amanda. CALL PROGRESS TONES (option 7) 0-9. A-C. Indicates what DTMF digits can be sent instead of normal system tones. Use BA for Amanda. BA 4 5 6 3 3 Tone: Default: DIAL TONE BUSY TONE RNGBACK TONE DND NO MORE HDSET ANSWER SPKER ANSWER BA 4 5 6 3 2 (use 3 for Amanda) Notification and Integration Files For each telephone switching system, Amanda@SOHO stores files with notification, dial code, and integration information. When you select a telephone switching system, Amanda knows which files to use for your switch. The files contain: • The tokens that turn the message waiting light on are in c:\amanda\pbx.db\220.on. This file contains the tokens “,41,%E”. 92 Telephone Switching Systems for Amanda@SOHO • The tokens that turn the message waiting light off are in c:\amanda\pbx.db\220.off. This file contains the tokens “,42,%E”. • The dial codes and integration strings used by the switch are in c:\amanda\pbx.db\220.pbx. This file contains the following lines: Samsung DCS 2.2/Compact #################################################### # Samsung DCS # #################################################### dl_dtwait F- # Dial code to put a caller on transfer hold dl_ndtret - # Dial code to use when there is no transfer dialtone: dl_rnaret F- # Dial code to return to caller after Ring No Answer : dl_bsyret F- # Dial code to return to caller when there is a Busy : dl_hupret F- # Dial code to use after a call screening reject : dl_connect H # Dial code to connect the caller to the extension : tmo_dtwait 0 # Number of seconds to wait for dialtone detection : flashtm 55 # Number of 1/100 seconds to use for Flash time : dt_answer # Which DTMF tone to listen to for answer detection : dt_hangup C # Which DTMF tone to listen to for hangup detection : dl_prefix # What to dial BEFORE dialing the User ID extension : dl_suffix H # What to dial AFTER dialing the User ID extension : dl_init # What to dial when the system first starts up : dl_stop # What to dial when the system performs a shutdown : dl_pickup # What to dial when a port goes off-hook : dl_conference # What to dial to create/record a conference call : integration 10 ‘#rr’ integration 10 ‘#rrr’ integration 10 ‘*ee’ integration 10 ‘*eee’ integration 10 ‘6tt’ integration 10 ‘6ttt’ integration 10 ‘8ii’ integration 10 ‘8iii’ : Chapter 11: Programming the Sprint Protegé CTX Connecting the Parts The next few procedures explain how to set up the KSU, telephones, analog terminal adapter, and so on. To set up the analog terminal adapter (ATA): 1. Plug the proper end of its power cord into the analog terminal adapter but do not plug the electrical end into the electrical outlet yet. You might need to terminate two jacks with two extension ports from the KSU to simplify installation. 2. Plug in a line cord between the jack on the analog terminal adapter marked PBX and an extension port from the KSU. The last two ports (that is, extensions 215 and 216) are recommended. NOTE: When the analog terminal adapter is finally powered up, it must be done after the KSU has been fully powered up approximately 30 seconds. It must log on to the fully live KSU properly. A dealer expert on this system recommends installing two surge protectors with rocker on/off switches marked switch #1 and switch #2. He plugs the KSU into switch #1 and the analog terminal adapter into switch #2. If the customer has to reset the system, tell him to power both switches down, wait 45 seconds for full power down, turn switch #1 on, wait 30 seconds for full KSU power up, then turn switch #2 on. The voice mail is always placed on its own surge protector. If transfer operation of calls by the auto attendant does not work properly, a reset of this type is in order because the analog terminal adapter is probably confused. It does not happen too often, but static electricity and surges can sometimes confuse the adapter and prevent proper transfers of its single line output ports. Each analog terminal adaptor has two output ports, marked telephone 1 and telephone 2. Telephone 1 has the same number as the extension port from the KSU that you plugged into the PBX jack on the adaptor. Telephone 2 is the extension that is 72 numbers higher than the extension for telephone 1. For example: First analog adaptor Telephone 1 Telephone 2 Extension 215 (from extension 215 on the KSU) Extension 287 Telephone 1 Telephone 2 Extension 216 (from extension 215 on the KSU) Extension 288 First analog adaptor 94 Telephone Switching Systems for Amanda@SOHO To connect Amanda: 1. Connect these extensions to the Amanda Voice Mail unit with line cords. 2. Power up the telephone system with the rocker switch on the KSU. 3. Wait 30 seconds and power up the analog terminal adapter (plug in its power cord). 4. Power up Amanda. The system is now ready to test. The station user manuals for the telephones contain good descriptions for its use with voice mail. Initiating Programming To program the Protegé CTX telephone system: A working version of the Protegé programming software must be installed on a computer. It is important to note that the software only responds to COM ports 1 and 2. 1. After installing the software, go to the computer’s root directory. You should see the DOS prompt: C:\ or something similar. 2. Use a data cable (Sprint North Supply Part # 447854) to connect the DB9 cable between COM1 on the computer and the DB9 plug marked MODEM on the KSU. Do not use the SMDR port on the KSU for this connection. 3. Type S3F30 then press Enter. The Main Menu appears. The file c:\protege\s3f30\vmltest contains the information that is saved and restored. NOTE: Different versions of Sprint CTX software require different commands to initiate. The software installation guide should provide the proper command. You can also save and restore to and from drive A or the hard drive. To begin programming, or inspection, of the “scratchpad” memory of the current programming data: 1. From the Main menu, select RMP then press Enter. The RMP menu appears. Chapter 11: Programming the Sprint Protegé CTX 2. 95 Select Programming then press Enter. The Database Programming menu appears. Initially you should not make changes—just look around. You can escape each successive section level by pressing Escape and either accepting or rejecting changes. (You are asked to confirm only if you pressed any keys while in that section that changed the programming of the switch.) NOTE: All programming is done in the “scratchpad” memory on your local screen and changes are not activated on the telephone system until you are connected to the KSU and send the changes to the KSU by pressing F4. This same “scratchpad” memory is what is saved to (or restored from) the hard drive or floppy drive as a backup or a restore operation. You can also receive current programming information from the KSU when you are connected to the KSU and press F3. When you send or receive data from the KSU, you are offered the choice of moving ALL the data, SECTIONS, or INDIVIDUAL information. When programming a KSU, it is a good idea to connect to the KSU first and receive ALL the data. Then you know exactly what is in the KSU before making any changes. Remember that your new changes do not take effect until you send them to the KSU. The upper left corner of the screen initially says [Disc] indicating that you are not connected to the KSU. When connected, it says [Cnt]. To connect to the KSU: 1. Press F5. A password window appears on the screen. 2. Enter the password: 00000000 (8 zeros) then press Enter. The [Cnt] appears in the upper left corner of the screen. If you don’t send or receive anything over a period of about six minutes, the connection is broken automatically. Getting Around in the Protegé Software The basic keystrokes needed to operate the system are not always specified in the procedures in this chapter. To toggle a Yes/No or multiple choice field, press Enter while in the field until you see the desired value. To change a value in a text field (a field that does not toggle), press Enter while on the field. Then type a value into the field. Then press Enter again to accept the data. While in the field, you can press Esc to go back to the field’s original value. 96 Telephone Switching Systems for Amanda@SOHO The arrow keys move you to different fields on the screen. Page Up and Page Down move you to different pages of data if the screen contains more information than can fit on your monitor at one time. For example, there may be 3 pages of data, each labeled [1/3], [2/3], or [3/3]. To select an item from a menu, highlight it using the arrow keys then press Enter. Setting Up Voice Mail Port Types To set up the voice mail port types: 1. From the Database Programming menu, select Extension then press Enter. The Extension screen appears. 2. Select Category 3 then press Enter. The Extension - Category 3 screen appears. (It may have several pages.) Chapter 11: Programming the Sprint Protegé CTX 3. 97 Change the port type for each of the voice mail ports to V.M. (Page Down until you see the port number. Use the down arrow to move to that port’s row. Use the right arrow to move to the Port Type field. Press Enter until V.M. becomes its setting.) NOTE: An analog terminal adapter has two extension numbers: the one that the adapter is plugged into and the second higher extension that is 72 numbers higher. You can alter extension numbers by swapping them if you feel it is necessary. Most people do not. 4. Press Escape. You are asked if you wish to exit this feature every time you exit any section of programming. 5. Press Y for yes. 6. When asked to save the current settings, press Y for yes. Press Y again to override the existing file. Setting Up Hunt Groups To set up voice mail and auto attendant hunt groups: 1. From the Database Programming menu, select Extension Applications then press Enter. The Extension Application menu appears. 2. Select Uniform Call Distribution then press Enter. The Uniform Call Distribution menu appears. 3. Select UCD Setting then press Enter. 98 Telephone Switching Systems for Amanda@SOHO The Please Input Hunt Group Number screen appears. 4. Type 1. The Uniform Call Distribution - Parameter Programming: Hunt Group 1 screen appears. NOTE: The hunt group pilot number is 430. 5. The Attribute field is selected. Press the right arrow until Integrated VM becomes its setting. 6. Press the down arrow until you reach the Name field. 7. Press Enter. 8. Type VMAIL in the Name field. (This is only for clarity). 9. Press Enter to stop editing this field. 10. Press the down arrow to reach the Member field. 11. Press Enter. Chapter 11: Programming the Sprint Protegé CTX 99 The Uniform Call Distribution - Hunt Group Member: Hunt Group 1 screen appears. 12. Include all the extensions that are voice mail extensions as members in the hunt group. (Use the right arrow to select a NULL member. Press Enter. Type the number of the extension. Press Enter. Repeat for each extension. Press Escape and enough Ys to return to the previous screen.) 13. Make the hunt group Linear. (Press the down arrow to select Hunting Method. Then press Enter until Linear becomes its setting.) 14. No other changes are necessary to this group, so press Escape. The Please Input Hunt Group Number screen reappears. 15. Type 2. 100 Telephone Switching Systems for Amanda@SOHO The Uniform Call Distribution - Parameter Programming: Hunt Group 2 screen appears. NOTE: The hunt group pilot number is 431. 16. The Attribute field is selected. Press Enter until UCD becomes its setting. 17. Press the down arrow until you reach the Name field. 18. Press Enter. 19. Type AUTOATT in the Name field. (This is only for clarity). 20. Press Enter to stop editing this field. 21. Press the down arrow to reach the Member field. 22. Press Enter. The Uniform Call Distribution - Hunt Group Member: Hunt Group 2 screen appears. 23. Include all the extensions that are voice mail extensions as members in the hunt group. Chapter 11: Programming the Sprint Protegé CTX 101 (Use the right arrow to select a NULL member. Press Enter. Type the number of the extension. Press Enter. Repeat for each extension. Press Escape and enough Ys to return to the previous screen. Or exclude the extension that will be the last port of the voice mail unit from this group to avoid notification call collisions to incoming calls.) 24. Make the hunt group Linear. (Press the down arrow to select Hunting Method. Then press Enter until Linear becomes its setting.) 25. No other changes are necessary to this group, so press Escape. 26. Press Escape again and select Y for Yes to exit and Y for Yes to save the changes. Also press Y for Yes to override the existing file. 27. Press Escape until you are back at the Database Programming menu. Setting Up Special Features To set up the special voice mail features: 1. From the Database Programming menu, select Call Handling then press Enter. The Call Handling menu appears. 2. Select Category 2. 102 Telephone Switching Systems for Amanda@SOHO The Call Handling - Category 2 screen appears. 3. Increase the VM Dialing Ratio Tone Time to 150 ms. 4. No other changes are necessary to this Category so press Escape and answer Y for Yes to save the changes. Also press Y for Yes to override the existing file. 5. The Call Handling menu reappears. 6. Select Category 3. The Call Handling - Category 3 menu screen appears. 7. You might want to adjust the answering machine emulation time. The default is fine, however. 8. No other changes are necessary to this Category so press Escape and answer Y for Yes to save the changes. Also press Y for Yes to override the existing file. Chapter 11: Programming the Sprint Protegé CTX 103 The Call Handling menu reappears. 9. Select Category 4. The Call Handling - Category 4 menu screen appears. 10. If you want to allow answering machine emulation, set it to Y for Yes. 11. You can also set the sounds heard by a caller on No Ring Transfer, Transfer, and Recall as Music on Hold (MOH) or Ringback Tone. If there is no MOH on the system, you may prefer that the caller hears ringback instead of silence when they are transferred by the auto attendant. 12. No other changes are necessary to this Category so press Escape and answer Y for Yes to save the changes. Also press Y for Yes to override the existing file. 13. Press Escape until you are back at the Database Programming menu. 104 Telephone Switching Systems for Amanda@SOHO Displaying the Name VMAIL on a Notification To have telephones display VMAIL on a notification: 1. From the Database Programming menu, select Resource then press Enter. The Resource menu appears. 2. Select User Names then press Enter. The Resource - User Names screen appears. 3. Enter the name VMAIL 1 as the name for the extension of the first voice mail port, VMAIL 2 as the name of the extension for the second voice mail port and so on until all the voice mail ports are named. The screen display telephones will now display the name when a message light is lit. 4. No other changes are necessary to this Category so press Escape and answer Y for Yes to save the changes. Also press Y for Yes to override the existing file. Chapter 11: Programming the Sprint Protegé CTX 105 Programming Buttons To make voice mail easier to use, you should program the buttons on each telephone. You must first decide the physical location on each telephone of each button you wish to represent the following features. (See the diagrams below.) You need the following buttons: Button Description Feature Code MSG Message light and access to automatic recording of conversation when pressed while on a conversation F64 DND Do Not Disturb to send a call immediately to voice mail without waiting for the forwarding timer F4 VML XFR During a conversation, to transfer directly to a mailbox (by pressing HOLD key, VML XFR key, dialing the mailbox number, and pressing the XFR/ CONF button). 430 When not on a conversation, to access voice mail. With auto log on, this requires only your password. NIGHT On extension 201, to change ringing easily. F63 MUTE On versions of the CTX software prior to s3f30, you need a MUTE button if you use the answering machine emulation feature. See the answering machine emulation settings in “Setting Up Special Features” on page 101. The older software left the mute feature ON when a call went to voice mail. Without a button programmed for MUTE, you cannot see that the light is lit and do not realize that the telephone is muted. F76 NOTE: To program the buttons, it is best that the telephone that you are programming is plugged in and live on the system. The SEND will NOT work if the KSU does not SEE the telephone plugged in. You can program one plugged in telephone to the desired pattern layout and later when the other telephones are installed you can use the COPY FEATURE KEYS feature in the SYSTEM APPLICATION section. But FIRST you will have to RECEIVE (F3) the buttons of the newly plugged in telephones to convince the KSU that they are there. Then you can use the COPY feature. And finally you can SEND (F4) the copied feature keys section. 106 Telephone Switching Systems for Amanda@SOHO To program the buttons: 1. From the Database Programming menu, select Feature Key then press Enter. Chapter 11: Programming the Sprint Protegé CTX 107 The Feature Key menu appears. 2. Select Ext Feature Key Programming then press Enter. 3. Enter the extension directory number of the telephone to be programmed. (For example, 201). The screen indicates the type of telephone it sees as the Current Type. 4. Press Enter. 5. If the system saw the wrong telephone, exit this section of programming, unplug and replug the telephone and try again. 6. You now see a display of the individual buttons as shown in the following figures, depending on the type of telephone. 108 Telephone Switching Systems for Amanda@SOHO Chapter 11: Programming the Sprint Protegé CTX 109 You can program the buttons as you see fit as to their physical location on the telephone. 7. Select the button to be the DND button then press Enter. The Function menu appears. 8. Select Feature Key then press Enter. 9. Select FTR Access Key then press Enter. 110 Telephone Switching Systems for Amanda@SOHO The code line appears at the bottom of the screen. 10. The F needed for the code is already entered for you. Add the numeric part (the number 4) then press Enter. 11. Select the button to be the MSG button then press Enter. 12. For the Function, select Feature Key then press Enter. 13. Select FTR Access Key then press Enter. The code line appears at the bottom of the screen. 14. The F needed for the code is already entered for you. Add the numeric part (the number 64) then press Enter. 15. Select the button to be the VML XFR button then press Enter. 16. For the Function, select Feature Key. The code line appears at the bottom of the screen. 17. Select DIR No. then press Enter. (This is a hunt group pilot number.) 18. Type 430 then press Enter. 19. Select the button to be the Night button then press Enter. 20. For the Function, select Feature Key. 21. Select FTR Access Key then press Enter. 22. The F needed for the code is already entered for you. Add the numeric part (the number 63) then press Enter. 23. Select the button to be the MUTE button (if needed) then press Enter. 24. For the Function, select Feature Key. 25. Select FTR Access Key then press Enter. 26. The F needed for the code is already entered for you. Add the numeric part (the number 76) then press Enter. 27. When done with that telephone, press Escape. 28. You can enter another extension number to program or press Escape to exit and save your changes. Program the buttons for any other plugged in telephones. 29. When done, press Escape to exit. Press Y for Yes to confirm your exit, Y for Yes to save your changes. Also press Y for Yes to override the existing file. Chapter 11: Programming the Sprint Protegé CTX 30. You must now send the programmed information to the KSU for it to work. 31. Press F4 to send. 32. Select ALL then press Enter. The Send of ALL will take approximately 5 minutes. NOTE: At this point telephones with mailboxes already set up could manually forward their telephones back to the integrated hunt group 430 and it would work. It is preferable to set up automatic forwarding. Setting Up Call Forwarding To set up automatic call forwarding to voice mail: 1. From the Database Programming menu, select Extension Applications then press Enter. The Extension Application menu appears. 2. Select Preset Call Forward then press Enter. The Preset Call Forward menu appears. 3. Select System Call Forward Path then press Enter. 111 112 Telephone Switching Systems for Amanda@SOHO The Extension Application - System Preset Forward Path screen appears. 4. Select the Path No. 1 row. 5. Press Enter in the Path Name column. 6. Type VMAIL as the path name then press Enter. 7. Press the right arrow until you reach the Point 1 column then press Enter. 8. Type 430 then press Enter. (This is the integrated VM hunt group pilot number.) 9. Press Escape to exit. Press Y for Yes to confirm. Press Y for Yes to save your changes. Also press Y for Yes to override the existing file. 10. From the Preset Call Forward menu, select System Call Forward Timer then press Enter. Chapter 11: Programming the Sprint Protegé CTX 113 The Extension Application - System Call Forward Timer screen appears. 11. You might want to adjust the time for the Forward Start Timer from its default of 20 seconds. 12. Press Escape to exit. Press Y for Yes to confirm your exit, Y for Yes to save your changes. Also press Y for Yes to override the existing file. 13. From the Preset Call Forward menu, select Extension Preset Path then press Enter. The Please Input EXT DIR No. screen appears. It is easiest to program one telephone for the proper settings just before officially turning on the preset call forwarding for everyone. Then use the Preset Forward Copy Feature in the SYSTEM APPLCIATION section to copy the settings to all the other extensions that will have voice mailboxes. Then send (F4) the data. 14. Type the extension number then press Enter. 114 Telephone Switching Systems for Amanda@SOHO The Extension Application - Extension Preset Forward Path screen for that extension appears. Each telephone can have three separate paths. Under Forward Path A, enter the number 1. The Path Name will automatically indicate VMAIL due to previous programming. 15. Press Escape to exit. Press Y for Yes to confirm your exit, Y for Yes to save your changes. Also press Y for Yes to override the existing file. 16. From the Preset Call Forward menu, select Extension Preset Table then press Enter. The Please Input EXT DIR No. screen appears. It is easiest to program one telephone for the proper settings just before officially turning on the preset call forwarding for everyone. Then use the Preset Forward Copy Feature in the SYSTEM APPLCIATION section to copy the settings to all the other extensions that will have voice mailboxes. Then send (F4) the data. 17. Type the extension number then press Enter. Chapter 11: Programming the Sprint Protegé CTX 115 The Extension Application - Extension Preset Forward Table screen for that extension appears. 18. Enter the extension number to be programmed to automatically call forward. 19. Under Path A, selecting Y in the rows for ICM, Transferred, DND, No Answer, Day, and Night is recommended. This way intercom or transferred calls day or night are sent to voice mail after the Forward timer expires with No Answer or immediately if the telephone has activated the Do Not Disturb feature on the user’s telephone. 20. You might choose to set Y for C.O. Ring on specific telephones only. For example, suppose two businesses share the telephone system and two different receptionists answer the lines. The outside calls ringing on either telephone can be diverted to voice mail by placing that telephone in DND. The personal mailbox of that telephone can play the proper greeting to the caller. The companies’ lines would be totally independent of each other. 21. When you are done with this extension, press Escape to allow you to select another extension to program. 22. When you have programmed all the extensions for which there are forwarding conditions, press Escape to exit. Press Y for Yes to confirm your exit, Y for Yes to save your changes. Also press Y for Yes to override the existing file. Now you must send the programmed information to the KSU for it to work: 1. Press F4 to send. 2. Select Part then press Enter. 3. Select Extension Application then press Enter. 4. Press Escape until the Database Programming menu appears. When you Send or Receive data from or to the KSU, you must wait until the transfer is completed before pressing Escape. The screen will display “Completed.” 116 Telephone Switching Systems for Amanda@SOHO Setting Up the Ringing To set up the ringing for the system: 1. From the Database Programming menu, select C.O. Line then press Enter. The C.O. Line menu appears. 2. Select Ringing Position then press Enter. The C.O. Line - Ringing Position screen appears 3. Select the C.O. Line number to be programmed for ringing then press Enter to enter the Day/Night part of the screen. 4. In the Day1 column, you can enter up to six different extension or hunt group pilot numbers that will ring when the system is in normal Day1 mode. In the Night column, you can enter one extension or hunt group pilot number. The default to ring Day and Night is extension 201 only. Assume that extension 201 is the operator/receptionist for the following examples. Chapter 11: Programming the Sprint Protegé CTX 5. 117 To program C.O. Line 1 to ring at the operator during the day and to the auto attendant at night, enter extension 201 in the Day1 column of C.O. Line 1 (DIR# 748) and 431 in the Night column of line 1. (The pilot number of the Auto Attendant UCD Hunt Group as previously programmed is 431) To make the Auto Attendant back up the live operator during the normal Day ringing mode, you enter 431 in the Alt. Day column. NOTE: The timing for the alternate day ring is set under CALL HANDLING, Category 3, as the Ring Alt. Ringing Position Time. It is the same as delayed ring because the other extensions programmed to ring also still ring. The default timing for this is 14 seconds. 6. Press Escape to exit this particular C.O. Line and program another C.O. Line for ringing. 7. Select and program any other C.O. Lines you wish to program in the same way. 8. Press Escape to exit. Press Y for Yes to confirm your exit, Y for Yes to save your changes. Also press Y for Yes to override the existing file. Now you must send the programmed information to the KSU for it to work: 1. Press F4 to send. 2. Select Part then press Enter. 3. Select C.O. Line then press Enter. When you Send or Receive data from or to the KSU, you must wait until the transfer is completed before pressing Escape. The screen will display “Completed.” 4. Press Escape until the main menu appears. 5. Select Exit to DOS then press Enter. In the Protegé CTX programming, UCD hunt groups can be created that will return to the Integrated VM hunt group if not answered within a programmed time frame. They will enter identifying the call as the pilot number of the hunt group that they came from. For example, hunt group 3 (pilot number 432) could be set up for a group of sales representatives. The Overflow 1 Timer in this hunt group could be set for 24 seconds and the Overflow Destination could be set for 430 (the Integrated VM Hunt group). Then set up mailbox 432 as a regular mailbox that will transfer when dialed and take a message upon return. The greeting could say, “… To reach the operator, press 0. To try Sales again, press (programmed menu key back to mailbox 342), or just stay on the line to leave us a message.” Notification and Integration Files For each telephone switching system, Amanda@SOHO stores files with notification, dial code, and integration information. When you select a telephone switching system, Amanda knows which files to use for your switch. The files contain: • The tokens that turn the message waiting light on are in c:\amanda\pbx.db\230.on. This file contains the tokens “-#96,%E”. • The tokens that turn the message waiting light off are in c:\amanda\pbx.db\230.off. 118 Telephone Switching Systems for Amanda@SOHO This file contains the tokens “-#*96,%E”. • The dial codes and integration strings used by the switch are in c:\amanda\pbx.db\230.pbx. This file contains the following lines: Sprint CTX/MTX #################################################### # Sprint CTX/MTX # #################################################### dl_dtwait F- # Dial code to put a caller on transfer hold dl_ndtret F- # Dial code to use when there is no transfer dialtone: dl_rnaret F- # Dial code to return to caller after Ring No Answer : dl_bsyret F- # Dial code to return to caller when there is a Busy : dl_hupret F- # Dial code to use after a call screening reject : dl_connect H # Dial code to connect the caller to the extension : tmo_dtwait 4 # Number of seconds to wait for dialtone detection : flashtm 55 # Number of 1/100 seconds to use for Flash time : dt_answer # Which DTMF tone to listen to for answer detection : dt_hangup # Which DTMF tone to listen to for hangup detection : dl_prefix # What to dial BEFORE dialing the User ID extension : dl_suffix H # What to dial AFTER dialing the User ID extension : dl_init # What to dial when the system first starts up : dl_stop # What to dial when the system performs a shutdown : dl_pickup # What to dial when a port goes off-hook : dl_conference # What to dial to create/record a conference call : integration 10 ‘11rrr’ integration 10 ‘12eee’ integration 10 ‘13eee’ integration 10 ‘14iii’ integration 10 ‘21ttt’ integration 10 ‘22rrr’ integration 10 ‘ttt’ : Chapter 12: Programming the Toshiba DK Series Getting Ready The Toshiba DK-8 can have only 2 single-line voice mail ports. The hardware you need to provide voice mail includes all of the following: • • 1 DTMF Receiver Card 1 Single-Line (Analog) Station Card QRCU QSTU The DK-16 and DK-16e can support all four Amanda ports. The hardware needed includes all of the following: • • 1 DTMF Receiver Card 1 Single-Line (Analog) Station Card K4RCU KSTU (or RCTU) You also need a 20-button Toshiba telephone set hooked up to Extension 10. (See the diagram below of the 20-button set.) 120 Telephone Switching Systems for Amanda@SOHO Toshiba DK-16 and DK-16e Coding for the Single-line Station Cards Program 03 supports flexible PCB cabinet and slot assignments. Use it to code your single-line station cards. To code the single-line station cards, do Program 03: 1. Dial *#*#1*2*3. 2. Press Spkr. 3. Dial 03. 4. Press Hold. 5. Press Spkr. 6. Dial 00. Chapter 12: Programming the Toshiba DK Series 7. 121 Dial 92. (The telephone is either displaying 92 or you have to change what is displayed to 92.) 8. Press Hold. 9. Press Spkr. 10. Dial ##. 11. Press Hold. The telephone system’s power must be recycled after running program 03. 12. Press Spkr. 13. Dial ##. 14. Press Hold. Managing Message Waiting Lights Only Amanda should be able to turn message waiting lights on and off. To ensure that only Amanda lights these lights, do Program 10-2: 1. Dial *#*#1*2*3. 2. Press Spkr. 3. Dial 10. 4. Press Hold. 5. Press Spkr. 6. Dial 2. 7. Make sure that the 4 and 11 LED is ON. 8. Press Hold. Managing Voice Mail Ports All the voice mail ports should operate the same way. To control their class of service, do Program 31: 1. Dial *#*#1*2*3. 2. Press Spkr. 3. Dial 31. 122 Telephone Switching Systems for Amanda@SOHO 4. Press Hold. 5. Press Spkr. 6. Do one of the following: • On a DK-8, dial 008*009. This represents ports 8 and 9, and, therefore, extensions 18 and 19. • On a DK-16 or DK-16e, dial 008*011. This represents ports 8 through 11, and, therefore, extensions 18 through 21. 7. Make sure that the following LEDs are ON: 5, 9, 15, 16, 17, 18, 19, 20 All others must be OFF. 8. Press Hold. Notification and Integration Files For each telephone switching system, Amanda@SOHO stores files with notification, dial code, and integration information. When you select a telephone switching system, Amanda knows which files to use for your switch. The files contain: • The tokens that turn the message waiting light on are in c:\amanda\pbx.db\250.on, c:\amanda\pbx.db\251.on, and c:\amanda\pbx.db\252.on. This file contains the tokens “63%E” for the Toshiba DK-8 and Toshiba DK-16. It contains the tokens “#63%E” for the Toshiba DK-16e. • The tokens that turn the message waiting light off are in c:\amanda\pbx.db\250.off, c:\amanda\pbx.db\251.off, and c:\amanda\pbx.db\252.off. This file contains the tokens “64%E” for the Toshiba DK-8 and Toshiba DK-16. It contains the tokens “#64%E” for the Toshiba DK-16e. • The dial codes and integration strings used by the switch are in c:\amanda\pbx.db\250.pbx, c:\amanda\pbx.db\251.pbx, and c:\amanda\pbx.db\252.pbx. This file contains the following lines for the Toshiba DK-8: Toshiba DK-8 #################################################### # Toshiba DK-8 # #################################################### dl_dtwait F- # Dial code to put a caller on transfer hold dl_ndtret F- # Dial code to use when there is no transfer dialtone: : dl_rnaret F- # Dial code to return to caller after Ring No Answer : dl_bsyret F- # Dial code to return to caller when there is a Busy : dl_hupret F- # Dial code to use after a call screening reject : dl_connect H # Dial code to connect the caller to the extension : tmo_dtwait 4 # Number of seconds to wait for dialtone detection : flashtm 55 # Number of 1/100 seconds to use for Flash time : dt_answer # Which DTMF tone to listen to for answer detection : dt_hangup D # Which DTMF tone to listen to for hangup detection : Chapter 12: Programming the Toshiba DK Series 123 dl_prefix # What to dial BEFORE dialing the User ID extension : dl_suffix H # What to dial AFTER dialing the User ID extension : dl_init # What to dial when the system first starts up : dl_stop # What to dial when the system performs a shutdown : dl_pickup # What to dial when a port goes off-hook : dl_conference # What to dial to create/record a conference call : integration 10 ‘91rr’ integration 10 ‘91rrr’ integration 10 ‘92ee’ integration 10 ‘92eee’ integration 10 ‘92e’ integration 10 ‘92e#’ This file contains the following lines for the Toshiba DK-16: Toshiba DK-16 #################################################### # Toshiba DK-16 # #################################################### dl_dtwait F- # Dial code to put a caller on transfer hold dl_ndtret F- # Dial code to use when there is no transfer dialtone: : dl_rnaret F- # Dial code to return to caller after Ring No Answer : dl_bsyret F- # Dial code to return to caller when there is a Busy : dl_hupret F- # Dial code to use after a call screening reject : dl_connect H # Dial code to connect the caller to the extension : tmo_dtwait 4 # Number of seconds to wait for dialtone detection : flashtm 55 # Number of 1/100 seconds to use for Flash time : dt_answer # Which DTMF tone to listen to for answer detection : dt_hangup D # Which DTMF tone to listen to for hangup detection : dl_prefix # What to dial BEFORE dialing the User ID extension : dl_suffix H # What to dial AFTER dialing the User ID extension : dl_init # What to dial when the system first starts up : dl_stop # What to dial when the system performs a shutdown : dl_pickup # What to dial when a port goes off-hook : dl_conference # What to dial to create/record a conference call : integration 10 ‘91rr’ integration 10 ‘91rrr’ integration 10 ‘92ee’ integration 10 ‘92eee’ integration 10 ‘92e’ integration 10 ‘92e#’ This file contains the following lines for the Toshiba DK-16e: Toshiba DK-16e #################################################### # Toshiba DK-16e # #################################################### dl_dtwait F- # Dial code to put a caller on transfer hold dl_ndtret F- # Dial code to use when there is no transfer dialtone: : dl_rnaret F- # Dial code to return to caller after Ring No Answer : dl_bsyret F- # Dial code to return to caller when there is a Busy : dl_hupret F- # Dial code to use after a call screening reject : dl_connect H # Dial code to connect the caller to the extension : 124 Telephone Switching Systems for Amanda@SOHO tmo_dtwait 4 # Number of seconds to wait for dialtone detection : flashtm 55 # Number of 1/100 seconds to use for Flash time : dt_answer # Which DTMF tone to listen to for answer detection : dt_hangup D # Which DTMF tone to listen to for hangup detection : dl_prefix # What to dial BEFORE dialing the User ID extension : dl_suffix H # What to dial AFTER dialing the User ID extension : dl_init # What to dial when the system first starts up : dl_stop # What to dial when the system performs a shutdown : dl_pickup # What to dial when a port goes off-hook : dl_conference # What to dial to create/record a conference call : integration 10 ‘91rr’ integration 10 ‘91rrr’ integration 10 ‘92ee’ integration 10 ‘92eee’ integration 10 ‘92e’ integration 10 ‘92e#’ Chapter 13: Programming the Vodavi DHS Creating Ports When you create stations for the Vodavi DHS, you start with station 10. If, for example, stations 10 through 15 are for users, you might use 16 (on a two-port system) or 16 and 17 (on a four-port system) as the voice mail ports. (You add a two-port SLT expansion to create a four-port system.) To find the number for the second port, you take the number of the first port minus 10 (the number of the initial port) and then add 58. That means if you punch down 16, you get ports 16 and 64 (16 - 10 + 58 = 64). If you punch down 16 and 17, you get ports 16, 17, 64, and 65. These would end up as members of a hunt group as follows: Two-port system member 01: 16 member 02: 64 Four-port system member 01: 16 member 02: 17 member 03: 64 member 04: 65 126 Telephone Switching Systems for Amanda@SOHO Using the Starplus Telephone You program the Vodavi DHS using the Starplus telephone shown in the figure below. Chapter 13: Programming the Vodavi DHS 127 Programming Voice Mail This section explains how to set up the Vodavi DHS to work with Amanda as an automated attendant. To start programming the Vodavi DHS: 1. Press the Feature button. (FEAT is beneath the HOLD button to the right of the keypad.) 2. Dial #*. The display shows: DB PSWD: bksp show chg 3. Type the password (usually 000000). 4. Press the Show softkey. The display shows: SYSTEM TYPE: PBX back next show The “back,” “next,” and “show” are directly above three softkeys on the telephone. You select one by pressing the softkey beneath it. To make certain stations voice mail ports: 1. Press the Next softkey. The display shows: 1. STATION back next 2. show Press the Show softkey. The display shows: SHOW STA: bksp next chg 3. Enter the station number for a voice mail port by pressing numbers on the keypad. 4. Press the Show softkey. The display shows: DAY CLASS: 0 bksp next chg 128 Telephone Switching Systems for Amanda@SOHO 5. Press the Next softkey until the display shows: VM PORT: N back next chg 6. Press the Change softkey to change the N to Y for Yes. 7. Press the Next softkey. The display shows: SHOW STA: bksp next chg 8. Repeat steps 3 through 8 for each remaining voice mail port. 9. Press the HOLD button. (HOLD is next to the Trans button to the right of the keypad.) The display shows: 1. STATION back next show To program the hunt group: 1. Press the Next softkey until the display shows: 6. SYS APPLICAT. back next show 2. Press the Show softkey. The display shows: STA HUNT GROUP back next show 3. Press the Show softkey. The display shows: HUNT GROUP bksp show chg 4. Enter 1 using the keypad. 5. Press the Show softkey. The display shows: VOICE MAIL TYPE: N back next chg Chapter 13: Programming the Vodavi DHS 6. Press the Change softkey to change the N to Y for Yes. 7. Press the Next softkey. 129 The display shows: GROUP MEMBER back next show This is where you assign the voice mail extensions to the ports. 8. Press the Show softkey. The display shows: MEMBER 01: EMPTY back next chg 9. Press the Change softkey. 10. Enter the number for the voice mail port using the keypad. For example, if your voice mail ports are 16 and 64, enter 16 now. The display shows: MEMBER 01: 16 bksp save chg 11. Press the Save softkey. 12. Press the Next softkey. The display shows: MEMBER 02: EMPTY back next chg 13. Repeat steps 9 through 12 for each voice mail port. 14. Press the HOLD button. The display shows: GROUP MEMBER back next show 15. Press the Next softkey. The display shows: RING ASSIGNMENT bksp next show 16. Press the Show softkey. 130 Telephone Switching Systems for Amanda@SOHO The display shows: CO LINE 1: N back next chg 17. Press the Change softkey to change the N to Y for Yes. 18. Press the Next softkey. The display shows: CO LINE 2: N back next chg 19. Repeat steps 2 and 3 for each CO line. 20. Then press the HOLD button until you see the following: STA HUNT GROUP back next show To set voice mail prefixes and suffixes: 1. Press the Next softkey. The display shows: VOICE MAIL back next 2. show Press the Show softkey. The display shows: ICM PREFIX: EMPTY back next chg 3. Press the Change softkey. 4. Enter 6 using the keypad. The display shows: ICM PREFIX: 6 bksp save chg 5. Press the Save softkey. 6. Press the Next softkey. The display shows: XFR PREFIX: EMPTY back next chg Chapter 13: Programming the Vodavi DHS 131 7. Press the Change softkey. 8. Enter 7 using the keypad. The display shows: XFR PREFIX: 7 bksp save 9. chg Press the Save softkey. 10. Press the Next softkey. The display shows: SUFFIX DGT: 7 back next chg 11. Confirm that the Suffix Dgt is empty. 12. Press the Next softkey. The display shows: DIS DGT: EMPTY back next chg 13. Press the Change softkey. 14. Enter 7877 using the keypad. The display shows: DIS DGT: 7877 bksp save chg 15. Press the Save softkey. 16. Press the Next softkey. The display shows: VOICE MAIL back next show 17. Press the HOLD button. The display shows: 6. SYSTEM APPLICATION back next show 18. Press the CLEAR button. (The CLEAR button ends your programming session. It is located below the TRANS button, next to the keypad. 132 Telephone Switching Systems for Amanda@SOHO Information about Prefixes and Suffixes When a voice mail system is connected to the Starplus DHS via SLT ports, the operation of the voice mail system can be greatly enhanced by preprogramming digit codes strings that allow the caller entering voice mail to go to the appropriate menu level. The code that must be entered may be different, depending on the call type (CO transfer to VM, intercom call to VM, etc.) The Starplus DHS provides four codes string fields (shown in the table below). The Starplus DHS always sends the station directory number (an extension) to the voice mail system as the User ID. Three of the four code strings are prefixes or suffixed for the User ID. ICM PREFIX Intercom prefix. Up to four digits that precede the User ID when a station user calls voice mail to retrieve messages. When programmed correctly, the user is asked for his voice mail password. XFR PREFIX Transfer prefix. Up to four digits that precede the User ID when a CO line call is transferred to voice mail. When programmed correctly, the caller hears the user’s greeting and can leave a message without further dial code digit entry. SUFFIX DGT Suffix digit. Up to two digits added to intercom calls placed to the voice mail system to direct the caller to his Users ID. He enters his password to retrieve messages. Not needed for this application. DISC DGT Disconnect digits.Up to eight digits sent to the voice mail system when a station user (who is listening to messages) disconnects or when the CO line caller (who is leaving or listening to messages) hangs up. The DISC DGT makes the voice mail port available to new voice mail callers quickly. Information about the Softkeys On the telephone, there are three softkeys. The display shows what the current meaning of each softkey is: bksp, save, chg, next, back, or show. bksp Backspace. Erases the last data entered and returns to the previous prompt. save Store. If the entry is valid, pressing save confirms your selection. If the entry is invalid, pressing save refreshes the display so you can try again. chg Change. Allows you to change the current setting. next Moves you to the next category to be programmed. back Moves you to the previous category. show Display. Shows the first available setting within the current category. Chapter 13: Programming the Vodavi DHS 133 Forwarding Telephones on No Answer The following procedure should be performed on each user’s telephone. To forward to voice mail on no answer: 1. Press the Feature button. (FEAT is beneath the HOLD button to the right of the keypad.) 2. Dial #3. The display shows: PRESS FTR BTN 3. Press the MSG button. (MSG is beneath the CO4 button, above and to the right of the keypad. The display shows: SELECT FUNCTION CO LN STA FEAT 4. Press the third softkey. The display shows: FTR CODE: _ bksp save 5. chg Press the Feature button (on the telephone). The display shows: FTR CODE: F_ bksp save 6. chg Enter 64 using the keypad. The display shows: FTR CODE: F64 bksp save 7. Press the Save softkey. The display shows: PRESS FTR BTN 8. Press the HOLD button. chg 134 Telephone Switching Systems for Amanda@SOHO Speed-dialing The flex buttons (STA 10 to STA 21) can be programmed to speed-dial commonly called telephone numbers. First you must store the number to be speed-dialed in a bin, a storage location in the software database. Then you assign a flex button to the bin’s number. To store the speed dial number in a bin: 1. Press the Feature button. (FEAT is beneath the HOLD button to the right of the keypad.) 2. Dial #1. The display shows: SPEED NO: _ bksp show 3. chg Dial the bin number, for example, 00. The bin numbers 00 to 19 are used for personal speed dial numbers. The display shows: SPEED NO: bksp show 4. 00 chg Press the Show softkey. The display shows: EMPTY chg 5. Press the Change softkey. 6. Enter the telephone number to be dialed when this bin number is selected, for example 97394023. (You can enter up to 16 digits.) The display shows: 97394023 bksp save 7. chg Press the Save softkey. The display shows: SPEED NO: _ bksp show 8. chg Repeat steps 1 through 6 to associate other telephone numbers with bin numbers or press the Clear button to exit. Chapter 13: Programming the Vodavi DHS 135 To program a flex button to speed-dial a telephone number: 1. Press the Feature button. (FEAT is beneath the HOLD button to the right of the keypad.) 2. Dial #3. 3. Press the flex button to be assigned (for example, STA 21). The display shows: STATION 4. 21 chg Press the Change softkey. The display shows: SELECT FUNCTION CO LN STA FEAT 5. Press the FEAT softkey. The display shows: FTR CODE:__ bksp save chg 6. Press the Change softkey. 7. Press the Feature button (on the telephone). 8. Dial 1 (for speed dialing). 9. Dial the bin number where the number to be speed-dialed is stored. To program a system-wide speed-dialing: It is best to program system-wide speed-dialing from the operator’s extension (station 10). 1. Press the Feature button. (FEAT is beneath the HOLD button to the right of the keypad.) 2. Dial#0. The display shows: CHK PSWD:_ bksp save chg 3. Enter the password (usually 0000) 4. Press the Save softkey. 136 Telephone Switching Systems for Amanda@SOHO 5. Press the Next softkey until the display shows: 4. RESOURCES back next 6. show Press the Show softkey. Press the Next softkey until the display shows: SYSTEM SPEED NO back next show 7. Press the Show softkey. The display shows: SPEED NO: _ bksp show 8. chg Enter a number between 20 and 99, for example, 20. The display shows: SPEED NO: bksp show 9. 20 chg Press the Show softkey. The display shows: EMPTY back next chg 10. Press the Change softkey. 11. Enter the number to be speed-dialed, for example, 918008009822. (You can enter up to 16 digits.) The display shows: 918008009822 bksp save chg 12. Press the Save softkey. The display shows: 918008009822 back next chg 13. Follow the steps in the earlier procedure titled “To program a flex button to speed-dial a telephone number.” Chapter 13: Programming the Vodavi DHS 137 Using Amanda as a Backup Attendant If you want to use Amanda as a backup attendant during the day, you need to set up an alternate answering position. Calls that go unanswered at the attendant assigned telephone ring at the Alternate Position following expiration of a timer. You set the timer to 30, 60, 90, 120, 150 or 180 seconds. It defaults to 30. To set up the alternate answering position: 1. Press the Feature button. (FEAT is beneath the HOLD button to the right of the keypad.) The display shows: CALL FORWARD idle busy next 2. Press the Next softkey. The display shows: CALL FORWARD direct no 3. follow Press the No softkey. The display shows: NO ANS FWD TO: _ bksp save 4. chg Enter Amanda’s voice mail group number, for example, 82. The display shows: NO ANS FWD TO: 82 bksp save 5. chg Press the Save softkey. To set the time (after which the alternate position is called): 1. Press the Feature button. (FEAT is beneath the HOLD button to the right of the keypad.) 2. Dial #*. The display shows: DB PSWD: bksp show 3. chg Type the password (usually 000000). 138 Telephone Switching Systems for Amanda@SOHO 4. Press the Show softkey. The display shows: SYSTEM TYPE: PBX back next show 5. Press the Next softkey. The display shows: 1. STATION back next 6. show Press the Next softkey until the display shows: 3. CALL HANDLING back next show 7. Press the Show softkey. The display shows: PRIVACY RLS: N back next chg 8. Press the Next softkey until the display shows: RING ALT POS: 30 back next chg Transferring Calls To transfer an outside caller: 1. Press the Hold button. 2. Dial the extension number (or press a flex button that has been programmed to speeddial the extension number). 3. Press the Transfer button. 4. Hang up. To transfer a coworker into voice mail: 1. Press the Hold button. 2. Dial an Amanda voice port. 3. Press the Transfer button. 4. Hang up. Chapter 13: Programming the Vodavi DHS 139 Switching between Day and Night Service To switch from day to night service or vice versa: 1. Press the Feature button. (FEAT is beneath the HOLD button to the right of the keypad.) 2. Dial #0. The display shows: CHK PSWD:_ bksp save chg 3. Enter the password (usually 0000) 4. Press the Save softkey. The display shows: SELECT FUNCTION svc time spd 5. Press the Service (svc) softkey. The display shows (for example): SERVICE : DAY back next chg 6. Press the Change softkey to change from DAY to NITE or NITE to DAY. 7. Press the Clear button (on the telephone). Notification and Integration Files For each telephone switching system, Amanda@SOHO stores files with notification, dial code, and integration information. When you select a telephone switching system, Amanda knows which files to use for your switch. The files contain: • The tokens that turn the message waiting light on are in c:\amanda\pbx.db\260.on. This file contains the tokens “#96-%E”. • The tokens that turn the message waiting light off are in c:\amanda\pbx.db\260.off. • The dial codes and integration strings used by the switch are in c:\amanda\pbx.db\260.pbx. This file contains the tokens “#*96-%E”. This file contains the following lines: 140 Telephone Switching Systems for Amanda@SOHO Vodavi Starplus DHS #################################################### # Vodavi Starplus DHS # #################################################### dl_dtwait F- # Dial code to put a caller on transfer hold dl_ndtret - # Dial code to use when there is no transfer dialtone: dl_rnaret F- # Dial code to return to caller after Ring No Answer : dl_bsyret F- # Dial code to return to caller when there is a Busy : dl_hupret F- # Dial code to use after a call screening reject : dl_connect *H # Dial code to connect the caller to the extension : tmo_dtwait 4 # Number of seconds to wait for dialtone detection : flashtm 55 # Number of 1/100 seconds to use for Flash time : dt_answer # Which DTMF tone to listen to for answer detection : dt_hangup ‘7877’ # Which DTMF tone to listen to for hangup detection : dl_prefix # What to dial BEFORE dialing the User ID extension : dl_suffix H # What to dial AFTER dialing the User ID extension : dl_init # What to dial when the system first starts up : dl_stop # What to dial when the system performs a shutdown : dl_pickup # What to dial when a port goes off-hook : dl_conference # What to dial to create/record a conference call : integration 10 ‘7rrr’ integration 10 ‘7rr’ integration 10 ‘8rrr’ integration 10 ‘8rr’ integration 10 ‘6eee’ integration 10 ‘6ee’ integration 10 ‘*eee’ integration 10 ‘*ee’ : Chapter 14: Programming the WIN 36D Getting Started This chapter covers the WIN 36D and 36DX. To connect Amanda@SOHO to a WIN 36D, you need: • • One DTMF card (PW-13084B 24D DTMF MLS) One of the following: • One ULC-D card and two 2STL cards (for four analog ports) • One 8STL card (for eight analog ports) Run RJ-45 four-pair wire from the 8STL to cross connect. Connect two-pair wire (inside/ outside pair) to each RJ-11 plug. All programming of the telephone switching system must be done from station 10. To start programming: 1. Press the FEAT key. 2. Press 01#. 3. Press the FEAT key. 4. Press the FEAT key again. The display reads: PROGRAM NO. ?_ To stop programming: 1. Press the CO8 key. The display reads: QUIT 2. Press the HF key. The current date and time appear on the display. 142 Telephone Switching Systems for Amanda@SOHO The following diagram shows the WIN telephone: A B C D E F SPKR VOL CO1 MIC CO2 C. WAIT FEAT HF FLA ICM TRF HOLD CO3 SPD LNR CO4 CO5 CO6 1 2 4 5 GHI CO7 3 ABC 7 DEF 6 JKL 8 PRS MNO 9 TUV WXY CO8 * 0 OPER # Programming the Hunt Group The hunt group should be a Master 1 hunt group. A Master 1 hunt group hunts in a straight line through the hunt group if the call is transferred to the pilot of the hunt group. However, if a call is transferred to one of the stations within the hunt group, the call stays with that station. This is the recommended hunt group type for voice mail. The pilot is an actual extension. To program the hunt group: 1. Press FEAT + 01# + FEAT + FEAT (to start programming). The display reads: PROGRAM NO. ?_ 2. Dial 308. The display reads: 308:HUNT MODE 3. Press the HOLD key. The display reads: G1:MODE=1 Chapter 14: Programming the WIN 36D 4. 143 Dial 3. The display reads: 3:MAST 1 5. Press the HOLD key. The display reads: SEC EXT NO=000? 6. (Optional) If you want a secretarial overflow station, dial that station number. 7. Press the HOLD key. 8. Press the CO8 key to save your data and exit program 308. The display reads: QUIT 9. Press the HOLD key. The display reads: PROGRAM NO. ?_ 10. Dial 307. The display reads: 307:HUNT MEMBER 11. Press the HOLD key. The display reads: GROUP NO=1 12. Press the HOLD key. The display reads: 01:GRP EXT=000? 13. Dial the first extension number in the hunt group (for example, 18). 14. Press the HOLD key. The display reads: 02:GRP EXT=000? 15. Dial the second extension number in the hunt group (for example, 19) then press HOLD. 16. If applicable, repeat step 15 for each third and fourth extension numbers in the hunt group. 17. Press HOLD. The display reads: GROUP NO=2 144 Telephone Switching Systems for Amanda@SOHO 18. Press the CO8 key to save your data and exit program 307. The display reads: QUIT 19. Press the HOLD key. The display reads: PROGRAM NO. ?_ 20. Dial 309. The display reads: 309:PORT ASSIGN 21. Press the HOLD key. The display reads: S18:MODE=1? 22. Dial 3. The display reads: 3:V.MAIL 23. Press the HOLD key. Information about the next station appears. 24. Repeat steps 22 and 23 for each single-line extension in the hunt group. 25. Press the CO8 key to save your data and exit program 309. The display reads: QUIT 26. Press the HOLD key. The display reads: PROGRAM NO. ?_ 27. Dial 406. The display reads: 406:VOICE CALL 28. Press the HOLD key. The display reads: S10:MODE=1? 29. Press the HOLD key repeatedly—until you reach the first extension in the hunt group. The display reads: S18:MODE=1? Chapter 14: Programming the WIN 36D 145 30. Dial 2. The display reads: 2:OFF 31. Press the HOLD key. Information about the next station appears. 32. Repeat steps 30 and 31 for each extension in the hunt group. 33. Press the CO8 key to save your data and exit program 406. The display reads: QUIT 34. Press the HOLD key. The display reads: PROGRAM NO. ?_ 35. Dial 408. The display reads: 408:T-TO-T CNNT 36. Press the HOLD key. The display reads: S10:MODE=1? 37. Press the HOLD key repeatedly—until you reach the first extension in the hunt group. The display reads: S18:MODE=1? 38. Do one of the following: • If you do want trunk-to-trunk transfers, press 1. The display reads: 1:YES • If you do not want trunk-to-trunk transfers, press 2. The display reads: 2:NO 39. Press the HOLD key. Information about the next station appears. 40. Repeat steps 38 and 39 for each extension in the hunt group. 41. Press the CO8 key to save your data and exit program 408. The display reads: QUIT 146 Telephone Switching Systems for Amanda@SOHO 42. Press the HOLD key. The display reads: PROGRAM NO. ?_ 43. Dial 414. The display reads: 414:TEL BUSY 44. Press the HOLD key. The display reads: S10:MODE=1? 45. Press the HOLD key repeatedly—until you reach the first extension in the hunt group. The display reads: S18:MODE=2? 46. Dial 1. The display reads: 1:YES 47. Press the HOLD key. Information about the next station appears. 48. Repeat steps 46 and 47 for each extension in the hunt group. 49. Press the CO8 key to save your data and exit program 414. The display reads: QUIT 50. Press the HF key to stop programming. The current date and time appear on the display. Turning Off the MIT Tone The WIN 36D makes a message indicator tone (MIT) that can throw Amanda off. To turn off the MIT tone: 1. Press FEAT + 01# + FEAT + FEAT (to start programming). The display reads: PROGRAM NO. ?_ 2. Dial 206. The display reads: 206:MIT MODE Chapter 14: Programming the WIN 36D 3. 147 Press the HOLD key. The display reads: MODE=1 4. Dial 2. The display reads: 2:NO 5. Press the HOLD key. The display reads: MODE=2? 6. Press the CO8 key to save your data and exit program 414. The display reads: QUIT 7. Press the HF key to stop programming. The current date and time appear on the display. Programming Call Forwarding The next few programs control forwarding on stations during the day and at night. Program 303 sets the day call forward busy data for each station. If nothing is programmed in the night call forward program (304), the day will be in effect both day and night. Any station may be forwarded to any other station. the default is no forwarding of any type. Similarly programs 305 and 306 control call forward no answer for each station. Program 305 is for day and 306 is for night. To call forward busy by day: 1. Press FEAT + 01# + FEAT + FEAT (to start programming). The display reads: PROGRAM NO. ?_ 2. Dial 303. The display reads: 303:D CFWD BUSY 3. Press the HOLD key. The display reads: S10:cf TO S00? 148 Telephone Switching Systems for Amanda@SOHO 4. Dial the extension (18, for example) to which the call should be forwarded when extension 10 is busy. The display reads: S10:cf TO S18 5. Press the HOLD key to move to S11. 6. Repeat steps 4 and 5 for each extension that should be forwarded. NOTE: Leave all voice mail ports set to S00 (for no forwarding). For example, S18:CF TO S00? 7. Press the CO8 key to save your data and exit program 303. The display reads: QUIT 8. Press the HF key to stop programming. The current date and time appear on the display. To call forward busy by night: 1. Press FEAT + 01# + FEAT + FEAT (to start programming). The display reads: PROGRAM NO. ?_ 2. Dial 304. The display reads: 304:N CFWD BUSY 3. Press the HOLD key. The display reads: S10:cf TO S00? 4. Dial the extension (18, for example) to which the call should be forwarded when extension 10 is busy. The display reads: S10:cf TO S18 5. Press the HOLD key to move to S11. 6. Repeat steps 4 and 5 for each extension that should be forwarded. NOTE: Leave all voice mail ports set to S00 (for no forwarding). For example, S18:CF TO S00? 7. Press the CO8 key to save your data and exit program 304. The display reads: QUIT Chapter 14: Programming the WIN 36D 8. Press the HF key to stop programming. The current date and time appear on the display. To call forward no answer by day: 1. Press FEAT + 01# + FEAT + FEAT (to start programming). The display reads: PROGRAM NO. ?_ 2. Dial 305. The display reads: 305:N CFWD N.A. 3. Press the HOLD key. The display reads: S10:cf TO S00? 4. Dial the extension (18, for example) to which the call should be forwarded when extension 10 is busy. The display reads: S10:cf TO S18 5. Press the HOLD key to move to S11. 6. Repeat steps 4 and 5 for each extension that should be forwarded. NOTE: Leave all voice mail ports set to S00 (for no forwarding). For example, S18:CF TO S00? 7. Press the CO8 key to save your data and exit program 305. The display reads: QUIT 8. Press the HF key to stop programming. The current date and time appear on the display. To call forward no answer by night: 1. Press FEAT + 01# + FEAT + FEAT (to start programming). The display reads: PROGRAM NO. ?_ 2. Dial 306. The display reads: 306:N CFWD N.A. 149 150 Telephone Switching Systems for Amanda@SOHO 3. Press the HOLD key. The display reads: S10:cf TO S00? 4. Dial the extension (18, for example) to which the call should be forwarded when extension 10 is busy. The display reads: S10:cf TO S18 5. Press the HOLD key to move to S11. 6. Repeat steps 4 and 5 for each extension that should be forwarded. NOTE: Leave all voice mail ports set to S00 (for no forwarding). For example, S18:CF TO S00? 7. Press the CO8 key to save your data and exit program 306. The display reads: QUIT 8. Press the HF key to stop programming. The current date and time appear on the display. Programming Voice Mail Extended Inband Signaling Normally, when a call forwards from a station on the WIN 36D to a single-line port that has been designated as a voice mail port (using program 309), certain digits (in addition to the extension number from which the call is being forwarded) indicate that this call should be sent directly to a mailbox to take a message. These extra digits are programmed using the following program (109). To extend inband signaling: 1. Press FEAT + 01# + FEAT + FEAT (to start programming). The display reads: PROGRAM NO. ?_ 2. Dial 109. The display reads: 109:V/M DATA SET 3. Press the HOLD key. The display reads: TABLE NO ? Chapter 14: Programming the WIN 36D 4. 151 Dial 1. The display reads: 1:CFWD DIRECT 5. Press the HOLD key. The display reads: ID=0? 6. Dial #1 then press the fifth soft key (across the top of the telephone) to type an E. The display reads: #1E 7. Press the HOLD key. The display reads: ID=#1E? 8. Press the CO8 key to save your data and exit program 109. The display reads: QUIT 9. Press the HOLD key. The display reads: PROGRAM NO. ?_ 10. Repeat steps 2 through 9 using 2 as the Table No. and #2E as the inband signaling digits. 11. Repeat steps 2 through 9 using 3 as the Table No. and #1E as the inband signaling digits. 12. Repeat steps 2 through 8 using 4 as the Table No. and #4E as the inband signaling digits. 13. Press the HF key. The current date and time appear on the display. Using Amanda as a Primary Automated Attendant Program 507 defines the type of trunk for each CO line. To use Amanda as an automated attendant, each CO line must be set to 2: DIL. Then, using programs 505 and 506, you make the first extension in your hunt group the DIL station for day and night. To use Amanda as an automated attendant: 1. Press FEAT + 01# + FEAT + FEAT (to start programming). The display reads: PROGRAM NO. ?_ 152 Telephone Switching Systems for Amanda@SOHO 2. Dial 507. The display reads: 507:DISA TRK SET 3. Press the HOLD key. The display reads: CO01:TYPE =1 4. Dial 2. The display reads: CO01:TYPE =2 5. Repeat steps 3 and 4 for each CO line you are using. 6. Press the CO8 key to save your data and exit program 507. The display reads: QUIT 7. Press the HOLD key. The display reads: PROGRAM NO. ?_ 8. Dial 505. The display reads: 505:DAY DIL STA 9. Press the HOLD key. The display reads: CO01:STA=00? 10. Dial the first extension in your hunt group (for example, 18). The display reads: CO01:STA=18? 11. Press the CO8 key to save your data and exit program 507. The display reads: QUIT 12. Press the HOLD key. The display reads: PROGRAM NO. ?_ 13. Dial 506. The display reads: 506:NITE DIL STA Chapter 14: Programming the WIN 36D 153 14. Press the HOLD key. The display reads: CO01:STA=00? 15. Dial the first extension in your hunt group (for example, 18). The display reads: CO01:STA=18? 16. Press the CO8 key to save your data and exit program 507. The display reads: QUIT 17. Press the HF key to stop programming. The current date and time appear on the display. Making Amanda a Backup Attendant Program 507 defines the type of trunk for each CO line. To use Amanda as a backup attendant, each CO line must be set to 2: DIL. Then, using programs 505 and 506, you make extension 10 the DIL station for day and night. Be sure that extension 10 is set to call forward no answer to the first extension in your hunt group. For more details about call forward no answer, see “Programming Call Forwarding” on page 147. To use Amanda as a backup attendant: 1. Press FEAT + 01# + FEAT + FEAT (to start programming). The display reads: PROGRAM NO. ?_ 2. Dial 507. The display reads: 507:DISA TRK SET 3. Press the HOLD key. The display reads: CO01:TYPE =1 4. Dial 2. The display reads: CO01:TYPE =2 5. Repeat steps 3 and 4 for each CO line you are using. 154 Telephone Switching Systems for Amanda@SOHO 6. Press the CO8 key to save your data and exit program 507. The display reads: QUIT 7. Press the HOLD key. The display reads: PROGRAM NO. ?_ 8. Dial 505. The display reads: 505:DAY DIL STA 9. Press the HOLD key. The display reads: CO01:STA=00? 10. Dial 10 for station/extension 10. The display reads: CO01:STA=10? 11. Press the CO8 key to save your data and exit program 507. The display reads: QUIT 12. Press the HOLD key. The display reads: PROGRAM NO. ?_ 13. Dial 506. The display reads: 506:NITE DIL STA 14. Press the HOLD key. The display reads: CO01:STA=00? 15. Dial 10 for station/extension 10. The display reads: CO01:STA=10? 16. Press the CO8 key to save your data and exit program 507. The display reads: QUIT Chapter 14: Programming the WIN 36D 155 17. Press the HF key to stop programming. The current date and time appear on the display. Making Amanda a Voice Messaging Center Follow the steps in “Making Amanda a Backup Attendant” on page 153, but do not program station 10 to call forward no answer to the hunt group. Notification and Integration Files For each telephone switching system, Amanda@SOHO stores files with notification, dial code, and integration information. When you select a telephone switching system, Amanda knows which files to use for your switch. The files contain: • The tokens that turn the message waiting light on are in c:\amanda\pbx.db\270.on. This file contains the tokens “%E-#0”. • The tokens that turn the message waiting light off are in c:\amanda\pbx.db\270.off. • The dial codes and integration strings used by the switch are stored in c:\amanda\pbx.db\270.pbx. This file contains the tokens “**3,%E”. This file contains the following lines: WIN 36D #################################################### # WIN 36D # #################################################### dl_dtwait F- # Dial code to put a caller on transfer hold dl_ndtret - # Dial code to use when there is no transfer dialtone: dl_rnaret F- # Dial code to return to caller after Ring No Answer : dl_bsyret F- # Dial code to return to caller when there is a Busy : dl_hupret F- # Dial code to use after a call screening reject : dl_connect H # Dial code to connect the caller to the extension : tmo_dtwait 0 # Number of seconds to wait for dialtone detection : flashtm 55 # Number of 1/100 seconds to use for Flash time : dt_answer # Which DTMF tone to listen to for answer detection : dt_hangup ‘********’ # Which DTMF tone to listen to for hangup detection : dl_prefix # What to dial BEFORE dialing the User ID extension : dl_suffix H # What to dial AFTER dialing the User ID extension : dl_init # What to dial when the system first starts up : dl_stop # What to dial when the system performs a shutdown : dl_pickup # What to dial when a port goes off-hook dl_conference # What to dial to create/record a conference call integration 10 ‘#1ee’ integration 10 ‘#2bb’ integration 10 ‘#3rr’ : : : 156 Telephone Switching Systems for Amanda@SOHO Index Symbols .off 15 .off file AT&T Partner II 27 AT&T Partner Plus 15 Comdial 39 Iwatsu Adix 47 NEC Electra II 62 NEC Electra, Level I 54 Panasonic DBS 824 81 Panasonic KXTD 1232 70 Samsung DCS 2.2/Compact 92 Sprint CTX/MTX 117 Toshiba 122 Vodavi Starplus DHS 139 WIN 36D 155 .on 15 .on file AT&T Partner II 27 AT&T Partner Plus 15 Comdial 39 Iwatsu Adix 47 NEC Electra II 62 NEC Electra, Level I 54 Panasonic DBS 824 81 Panasonic KXTD 1232 70 Samsung DCS 2.2/Compact 92 Sprint CTX/MTX 117 Toshiba 122 Vodavi Starplus DHS 139 WIN 36D 155 .pbx file and contents AT&T Partner II 27 AT&T Partner Plus 15 Comdial 39 Iwatsu Adix 47 NEC Electra II 62 NEC Electra, Level I 54 Panasonic DBS 824 81 Panasonic KXTD 1232 70 Samsung DCS 2.2/Compact 91 Sprint CTX/MTX 117 Toshiba 122 Vodavi Starplus DHS 139 WIN 36D 155 Numerics 003 Panasonic KXTD 1232 69 006 Panasonic KXTD 1232 68 03 Toshiba 120 10-2 Toshiba 121 106 Panasonic KXTD 1232 66 109 WIN 36D and 36DX 150 1-1 NEC Electra II 61 110.off 15 110.on 15 110.pbx 15 111.off 27 111.on 27 111.pbx 27 114 Panasonic KXTD 1232 68 117 AT&T Partner II 20 AT&T Partner Plus 6 1-18 NEC Electra II 61 119 AT&T Partner II 25 AT&T Partner Plus 11 1-2 NEC Electra II 61 121.off 39 121.on 39 121.pbx 39 122.off 39 122.on 39 122.pbx 39 1234 Panasonic KXTD 1232 66 150.off 47 150.on 47 150.pbx 47 151.off 47 151.on 47 158 Telephone Switching Systems for Amanda@SOHO 151.pbx 47 1-67 NEC Electra, Level I 51 170.off 54 170.on 54 170.pbx 54 171.off 62 171.on 62 171.pbx 62 191.off 70 191.on 70 191.pbx 70 192.off 81 192.on 81 192.pbx 81 202 Panasonic KXTD 1232 69 206 AT&T Partner 8 AT&T Partner II 22 WIN 36D and 36DX 146 207 Samsung 84 208 AT&T Partner II 23 AT&T Partner Plus 9 220.off 91 220.on 91 220.pbx 91 230.off 117 230.on 117 230.pbx 117 250.off 122 250.on 122 250.pbx 122 251.off 122 251.on 122 251.pbx 122 252.off 122 252.on 122 252.pbx 122 260.off 139 260.on 139 260.pbx 139 270.off 155 270.on 155 270.pbx 155 302 AT&T Partner II 23 AT&T Partner Plus 9 303 WIN 36D and 36DX 147 304 WIN 36D and 36DX 148 305 WIN 36D and 36DX 149 306 AT&T Partner II 19 AT&T Partner Plus 5 WIN 36D and 36DX 149 307 WIN 36D and 36DX 143 WIN 36D and 36DX 142 WIN 36D and 36DX 144 308 309 31 Toshiba 121 310 AT&T Partner II 19, 20 AT&T Partner Plus 5, 6 403 AT&T Partner II 23 AT&T Partner Plus 9 4-06 NEC Electra, Level I 51 406 AT&T Partner 9 AT&T Partner II 23 WIN 36D and 36DX 144 408 WIN 36D and 36DX 145 4-10 NEC Electra II 59 4-14 NEC Electra II 60 414 WIN 36D and 36DX 146 4-15 NEC Electra II 60 NEC Electra, Level I 53 4-16 NEC Electra, Level I 53 503 AT&T Partner II 22, 23 AT&T Partner Plus 8, 9 Night Service button AT&T Partner II 24 AT&T Partner Plus 10 504 AT&T Partner II 23 AT&T Partner Plus 9 505 AT&T Partner II 19 AT&T Partner Plus 5 WIN 36D and 36DX 152, 154 506 AT&T Partner II 21 AT&T Partner Plus 7 WIN 36D and 36DX 152, 154 Index 159 507 AT&T Partner II 21 AT&T Partner Plus 7 WIN 36D and 36DX 152, 153 602 AT&T Partner II 25 AT&T Partner Plus 11 Panasonic KXTD 1232 67 Panasonic KXTD 1232 69 Panasonic KXTD 1232 69 Panasonic KXTD 1232 68 603 604 609 7-1 NEC Electra II 59 726 Samsung 86 728 AT&T Partner II 24 AT&T Partner Plus 10 996 Panasonic KXTD 1232 69 A accessing Comdial outside lines 35 voice mail 39 Iwatsu voice mail 46 after-hours AT&T Partner II Night Service for incoming calls 24 Night Service for outgoing calls 23 AT&T Partner Plus Night Service for incoming calls 10 Night Service for outgoing calls 9 Sprint night ringing button for incoming calls 105 alphanumeric Iwatsu letters 45 answering Comdial ringing line automatically 37 Iwatsu station answer tone 46 Samsung headset answer tone 90, 91 speaker answer tone 90, 91 assigning AT&T Partner II extensions to hunt group 19 Night Service 24 AT&T Partner Plus extensions to hunt group 5 Night Service 10 Comdial extensions to hunt group 34 line groups 36 prime line 36 voice mail ports to hunt group 34 voice mail to private line 38 Iwatsu message key 46 Panasonic KXTD 1232 extensions 67 jacks 67 Sprint extensions to hunt group 97 voice mail ports to hunt group 97 AT&T Partner II 17 backup attendant 18 integration files 27 notification files 27 primary automated attendant 17 voice messaging center 18 AT&T Partner Plus 3 backup attendant 4 integration files 15 notification files 15 primary automated attendant 3 voice messaging center 4 attendant Iwatsu operator 46 port 45 Panasonic KXTD 1232 set jacks for primary and backup 68 Samsung automated attendant ports 84 Sprint day and night 117 attendant, automated, Vodavi DHS 127 auditing Iwatsu direct record 46 automated attendant service AT&T Partner II 22 AT&T Partner Plus 8 automated attendant, Vodavi DHS 127 Automatic Cover procedure AT&T Partner II 19, 20 AT&T Partner Plus 5, 6 Automatic VMS Cover procedure AT&T Partner II 19, 20 AT&T Partner Plus 5, 6 automatically Comdial answering a ringing line 37 160 Telephone Switching Systems for Amanda@SOHO B back Vodavi DHS 132 backing up Sprint database 94 backup attendant AT&T Partner II 18 AT&T Partner Plus 4 Comdial 32 Panasonic KXTD 1232 set jack for 68 backup attendant, Vodavi DHS backup attendants Panasonic DBS 824 77 WIN 36D and 36DX 153 beginning Panasonic DBS 824 to program 73 Panasonic KXTD 1232 to program 66 Samsung to program 137 83 Sprint to program 94 bin numbers, Vodavi DHS 134 bksp Vodavi DHS 132 boards Comdial TXIST Industry Standard Board 29 TXMWB Message Waiting Board 29 TXRNG Ringing Generator Board 29 Panasonic KXTD 1232 65, 66 Samsung 84 Toshiba 119 busy Comdial call forwarding 34 Iwatsu 47 NEC Electra, Level I call forwarding 53 forwarding busy calls 52 Panasonic DBS 824S 76 Panasonic KXTD 1232 call forwarding 70 Samsung 88, 91 tone 90, 91 busy calls WIN 36D and 36DX 147 at night 148 buttons AT&T Partner II Do Not Disturb 26 Night Service 22, 23 VMS Cover feature 25 Voice Mailbox Transfer 25 AT&T Partner Plus 13 Do Not Disturb 12 Night Service 8, 9 VMS Cover feature 11 Voice Mailbox Transfer 11 Comdial Direct Login 39 Iwatsu 43 assign message key 46 settings and letters 45 Panasonic KX-T7230 65 Panasonic KX-T7235 65 Panasonic KXTD 1232 programming 65 Samsung 84 message call 91 Sprint 105 15 DCL Set 107 20 DCL Exec Set 106, 108 Business Set 106, 108 Business W/LCD Set 109 copy features to all extensions 105 Executive Set 109 message light 105 mute button 105 night ringing 105 programming 106 programming keys 95 recording 105 transfer caller to voice mail 105 Toshiba DK-16 and DK-16e 120 buttons, Vodavi DHS 135 C Call Answer Service AT&T Partner II 23 AT&T Partner Plus 9 call forwarding 147 AT&T Partner II 20 AT&T Partner Plus 6 Comdial programming 35 to voice mail for busy and ring no answer Iwatsu fixed forwarding 47 NEC Electra II 60, 62 NEC Electra, Level I 53 Panasonic DBS 824 76 Panasonic KXTD 1232 busy 70 cancel 70 programming 68 ring no answer 70 turn on 70 34 Index 161 PanasonicDBS 824 79 Samsung 88 busy 88, 91 forward all 91 ring no answer 91 Sprint to voice mail 111 call transfer recall Comdial 38 programming 38 caller on hold Comdial return 37 caller transferred Comdial return 38 callers, transferring 138 calls Iwatsu CO call to station to voice mail interface 46 direct intercom call 46 direct trunk call 46 intercom call to station to voice mail interface 46 station transfer of CO call 46 station transfer of intercom call 46 transferred trunk call 46 voice mail call to DND station to voice mail interface 46 voice mail call to station DND to voice mail interface 46 voice mail call to station to voice mail interface 46 NEC Electra, Level I forwarding all calls 52 forwarding busy calls 52 forwarding no answer 52 Panasonic DBS 824 transferred to voice mail 81 Samsung busy 88 call types 91 direct 87 direct inward dial 89, 91 direct trunk call 88, 91 forward all 91 forwarding 88, 91 message call 89, 91 overflow 89, 91 recall 88, 91 ring no answer 88, 91 Sprint call forwarding 111 call handling 97, 101 day mode 115 Do Not Disturb 115 intercom (ICM) 115 night mode 115 ring no answer 115 transferred 115 WIN 36D and 36DX at night 148 during the day 147 no answer 149 WIN 36D and 36DXduring the day 149 camping Iwatsu camp-on duration timer 45 camp-on recall 46 Central Office See CO chg Vodavi DHS 132 circular hunt groups Comdial 34 classes Iwatsu programming 44 CO Iwatsu CO call to station to voice mail interface 46 station transfer of CO call 46 Sprint line rings on specified telephones 115 codes dial 15, 27, 39, 47, 54, 62, 70, 81, 91, 117, 122, 139, 155 Iwatsu settings and letters 45 voice mail packet codes 46 Samsung call types 91 Comdial 29 integration files 39 notification files 39 connecting NEC Electra, Level I to Amanda 49 controlling unauthorized phone use AT&T Partner II 24 AT&T Partner Plus 10 conversations Iwatsu direct record 46 Sprint direct record 105 copyright ii Cover Rings procedure AT&T Partner II 20 AT&T Partner Plus 6 creating Comdial voice mail ports 31 162 Telephone Switching Systems for Amanda@SOHO Samsung voice mail ports 85 Sprint voice mail ports 96 D database backup/restore 94 day calls WIN 36D and 36DX 147 day mode NEC Electra, Level I 52 Panasonic KXTD 1232 programming 69 Sprint programming 115 day service, Vodavi DHS 139 defining Comdial voice mail ports 31 Sprint voice mail ports 96 delayed call handling AT&T Partner II 21 AT&T Partner Plus 7 Comdial 33 delayed ringing Comdial 33 Sprint alternate day ring 117 dial codes 15, 27, 39, 47, 54, 62, 70, 81, 91, 117, 122, 139, 155 dial tone Samsung 89, 91 DID See Direct Inward Dial direct Comdial login to voice mail 39 Iwatsu direct intercom call 46 direct record 46 direct transfer to voice mail interface direct trunk call 46 login to voice mail 46 Samsung calls 87, 91 direct inward dial 89, 91 direct trunk call 88, 91 Sprint direct record 105 Direct Inward Dial Samsung 89, 91 direct ringing Comdial 32 direct transfer to voice mailbox AT&T Partner II 25 AT&T Partner Plus 11 46 disconnect Iwatsu disconnect tone 46 port disconnect signal type 46 port pre-disconnect signal 45 Panasonic KXTD 1232 tone 67 Samsung signal 84, 90 disconnect digit Vodavi DHS 132 disconnect signals NEC Electra, Level I 52 DND See Do Not Disturb Do Not Disturb AT&T Partner II 20, 26 button feature 26 AT&T Partner Plus 6, 12 button feature 12 Iwatsu voice mail call to DND station to voice mail interface 46 voice mail call to station DND to voice mail interface 46 Panasonic KXTD 1232 tone 67 Samsung turning off 90, 91 Sprint programming 115 turning off 105 DTMF Iwatsu port speed 45 NEC Electra, Level I 52 Panasonic KXTD 1232 disconnect 67 Do Not Disturb 67 ring back tone 67 ring on transfer 67 transfer 67 Samsung busy tone 90, 91 data forwarded 90 dial tone 89, 91 disconnect signal 90 headset answer tone 90, 91 ring back tone 90, 91 separator digit 90 speaker answer tone 90, 91 Sprint music on hold 103 no ring transfer 103 ring back 103 transfer tone 103 Dual Tone Multi Frequency See DTMF Index 163 E emergency numbers AT&T Partner II creating list 23 AT&T Partner Plus creating list 9 ending Panasonic KXTD 1232 programming 66 entering Iwatsu programming 43 Panasonic DBS 824 programming 73 Panasonic KXTD 1232 programming 66 Samsung programming 83 Sprint programming 94 exiting Iwatsu programming 43 Panasonic KXTD 1232 programming 66 extensions Panasonic KXTD 1232 initializing 68 jacks, assigned to 69 specific telephone assigned to Samsung DTMF data forwarded 90 F F01 AT&T Partner II 26 AT&T Partner Plus 12 F14 AT&T Partner II 25 AT&T Partner Plus 11 F15 AT&T Partner 11 AT&T Partner II 25 feature buttons AT&T Partner Do Not Disturb 12 AT&T Partner II Do Not Disturb 26 F01 26 F14 25 F15 25 VMS Cover feature 25 Voice Mailbox Transfer 25 AT&T Partner Plus F01 12 F14 11 F15 11 69 VMS Cover feature 11 Voice Mailbox Transfer 11 Comdial Direct Login 39 Panasonic KX-T7230 65 Panasonic KX-T7235 65 Samsung message call 91 Sprint copy features to all extensions 105 mute button 105 night ringing 105 programming 106 transfer caller to voice mail 105 Toshiba DK-16 and DK-16e 120 feature keys Sprint 15 DCL Set 107 20 DCL Exec Set 108 Business Set 108 Business W/LCD Set 109 Executive Set 109 message light 105 features Iwatsu programming 44 flex buttons, Vodavi DHS 135 forwarding NEC Electra II 60, 62 NEC Electra, Level I 53 all calls 52 busy calls 52 no answer 52 Panasonic DBS 824 76, 79 WIN 36D and 36DX 147 forwarding on no answer Vodavi DHS 133 G Group Call Distribution AT&T Partner II 22 AT&T Partner Plus 8 H headsets Samsung headset answer tone 90, 91 hold Comdial timed hold recall 37 hunt groups AT&T Partner II 22 assigning extensions 19 assigning outside lines 22 Hunt Delay procedure 21 Hunt Group Extensions procedure 19 164 Telephone Switching Systems for Amanda@SOHO Hunt Schedule procedure 21 Night Service 21 AT&T Partner Plus 8 assigning extensions 5 assigning outside lines 8 Hunt Delay procedure 7 Hunt Group Extensions procedure 5 Hunt Schedule procedure 7 Night Service 7 Comdial assigning voice mail ports 34 circular 34 identifying ring for each extension 34 programming 34 Iwatsu Amanda ports 46 pilot 46 NEC Electra II 60 NEC Electra, Level I 51 Panasonic DBS 824 75 Panasonic KXTD 1232 programming 66 Sprint assigning voice mail ports 97 programming 97, 116 timing out 117 WIN 36D and 36DX 142 hybrid operation Comdial 36 I ICM See intercom immediate call handling AT&T Partner II 21 AT&T Partner Plus 7 Comdial 32 inband signalling WIN 36D and 36DX 150 initializing Iwatsu requirements 43 integration strings 15, 27, 39, 47, 54, 62, 70, 81, 91, 117, 122, 139, 155 intercom prefix Vodavi DHS 132 intercoms Comdial programming hunt groups 35 Iwatsu direct intercom call 46 intercom call to station to voice mail interface 46 station transfer of intercom call 46 Sprint programming 115 interior ring patterns NEC Electra II 61 interval between rings Comdial 34 Iwatsu 43 Iwatsu Adix integration files 47 notification files 47 J jacks Comdial 29 Panasonic KXTD 1232 display which extensions are assigned 69 initializing 68 voice mail 67 K keys AT&T Partner II Do Not Disturb 26 VMS Cover feature 25 Voice Mailbox Transfer 25 AT&T Partner Plus 13 Do Not Disturb 12 VMS Cover feature 11 Voice Mailbox Transfer 11 Comdial Direct Login 39 Iwatsu 43 assign message key 46 settings and letters 45 Panasonic KX-T7230 65 Panasonic KX-T7235 65 Panasonic KXTD 1232 programming 65 Samsung 84 message call 91 programming 85, 86 Sprint 105 15 DCL Set 107 20 DCL Exec Set 106, 108 Business Set 106, 108 Business W/LCD Set 109 copy features to all extensions 105 Executive Set 109 message light 105 mute button 105 night ringing 105 programming 106 programming keys 95 transfer caller to voice mail 105 Toshiba DK-16 and DK-16e 120 KSUs, list of 1 KX-T7230 Panasonic KXTD 1232 telephone 65 Index 165 KX-T7235 Panasonic KXTD 1232 telephone 65 KXTD 1232 Panasonic switch 65, 66 L letters Iwatsu coding 45 lights Comdial message waiting 36 programming message waiting lights Toshiba 121 line Comdial single-line telephone 36 Line Access Restriction procedure AT&T Partner II 23 AT&T Partner Plus 9 Line Coverage Extension procedure AT&T Partner II 23 AT&T Partner Plus 9 line groups Comdial programming 36 Line Ringing AT&T Partner 9 AT&T Partner II 23 login Comdial to voice mail by user 39 Iwatsu assign message key 46 login to voice mail by user 46 loop Iwatsu port loop open duration 46 M mailboxes Iwatsu access 46 master hunt number NEC Electra II 60 memory blocks NEC Electra II 1-1 61 1-18 61 1-2 61 4-10 59 4-14 60 4-15 60 7-1 59 37 NEC Electra, Level I 1-67 51 4-06 51 4-15 53 4-16 53 message keys Panasonic DBS 824 80 message waiting Iwatsu clear message light code 46 send message light on code 46 Sprint button 105 telephones display VMAIL 104 message waiting lights 52 Comdial programming 37 setting 36 Iwatsu clear message light code 46 send message light on code 46 Panasonic DBS 824 80 Sprint 104 Toshiba programming 121 messages NEC Electra II message waiting lights 61 NEC Electra, Level I recording 52 Samsung message call 89, 91 MIT tones WIN 36D and 36DX 146 MOH See music on hold monitoring Iwatsu direct record 46 music on hold AT&T Partner II Music On Hold procedure 25 AT&T Partner Plus Music On Hold procedure 11 Iwatsu setting 45 Sprint tone 103 MWI NEC Electra II 61 NEC Electra, Level I 52 N NEC Electra II call forwarding 60, 62 forwarding 60 hunt groups 60 integration files 62 166 Telephone Switching Systems for Amanda@SOHO interior ring patterns 61 master hunt group 60 memory block 1-1 61 memory block 1-18 61 memory block 1-2 61 memory block 4-10 59 memory block 4-14 60 memory block 4-15 60 memory block 7-1 59 MWI 61 notification files 62 programming 57 quick transfers 61 telephones 58 voice mail access 59 NEC Electra, Level I call forwarding 53 connecting to Amanda 49 day mode 52 disconnect signal 52 hunt groups 51 integration files 54 memory block 1-67 51 memory block 4-06 51 memory block 4-15 53 memory block 4-16 53 message waiting lights 52 MWI 52 night mode 52 notification files 54 programming 49 recording messages 52 system mode programming 51 telephones 50 next Vodavi DHS 132 night Sprint ringing 105 night calls WIN 36D and 36DX 148, 149 night mode AT&T Partner II Night Service button 22, 23 Night Service for incoming calls 24 Night Service for outgoing calls 23 Night Service Group Extensions procedure 23 removing Night Service 24 state of Night Service after power failure 24 AT&T Partner Plus Night Service button 8, 9 Night Service for incoming calls 10 Night Service for outgoing calls 9 Night Service Group Extensions procedure 9 removing Night Service 10 state of Night Service after power failure 10 NEC Electra, Level I 52 Panasonic KXTD 1232 programming 69 Sprint programming 115 night ringing Comdial 33 night service, Vodavi DHS 139 nite service Vodavi DHS 139 no answer AT&T Partner II 20 AT&T Partner Plus 6 Iwatsu 47 NEC Electra, Level I forwarding no answer 52 no answer call forwarding 53 Panasonic KXT 1232 setting ring count 69 Panasonic KXTD 1232 call forwarding 70 Samsung 88, 91 WIN 36D and 36DX 149 WIN36D and 36DX during the day 149 No Restriction AT&T Partner II line access restriction 23 AT&T Partner Plus line access restriction 9 notifying Comdial about new message 36 Sprint telephones display VMAIL 104 O off 15 off file AT&T Partner II 27 AT&T Partner Plus 15, 39 Iwatsu Adix 47 NEC Electra II 62 NEC Electra, Level I 54 Panasonic DBS 824 81 Panasonic KXTD 1232 70 Samsung DCS 2.2/Compact 92 Sprint CTX/MTX 117 Toshiba 122 Vodavi Starplus DHS 139 WIN 36D 155 on 15 on file AT&T Partner II 27 AT&T Partner Plus 15 Comdial 39 Iwatsu Adix 47 Index 167 NEC Electra II 62 NEC Electra, Level I 54 Panasonic DBS 824 81 Panasonic KXTD 1232 70 Samsung DCS 2.2/Compact 92 Sprint CTX/MTX 117 Toshiba 122 Vodavi Starplus DHS 139 WIN 36D 155 operator Iwatsu 46 Panasonic KXTD 1232 set jacks for primary and backup 68 outgoing calls Comdial line groups 35 outside Comdial pagers 35 telephone numbers 35 Sprint line rings on specified telephones 115 overflow Samsung calls 89, 91 Sprint timer and destination 117 overlay AT&T Partner Plus 13 Panasonic KX-T7230 65 Panasonic KX-T7235 65 Toshiba DK-16 and DK-16e 120 P Panasonic DBS 824 73 call forwarding 79 hunt groups 75 integration files 81 message keys 80 notification files 81 programming 73 stopping the busy signal 76 third-party voice mail 76 transfer keys 81 using Amanda as a backup attendant 77 Panasonic KXTD 1232 65 integration files 70 notification files 70 PanasonicDBS 824 call forwarding 76 telephone diagram 74 using Amanda as a primary auto attendant 76 password AT&T Partner II telephone access 23 AT&T Partner Plus telephone access 9 Samsung default for programming 83 Sprint for programming 95 patterns NEC Electra II ring patterns 61 pauses Iwatsu port in-packet pause time 45 pbx AT&T Partner II 27 AT&T Partner Plus 15 Comdial 39 Iwatsu Adix 47 NEC Electra II 62 NEC Electra, Level I 54 Panasonic DBS 824 81 Panasonic KXTD 1232 70 Samsung DCS 2.2/Compact 91 Sprint CTX/MTX 117 Toshiba 122 Vodavi Starplus DHS 139 notification files 139 WIN 36D 155 notification files 155 PBXs, list of 1 piloting Iwatsu hunt group 46 ports Comdial station 31 Iwatsu attendant 45 DTMF speed 45 hunt groups 46 port disconnect signal type 46 port in-packet pause time 45 port loop open duration 46 port pre-disconnect signal 45 settings 45 Samsung attendant 84 creating attendant 85 single-line vs. voice mail 84 Sprint creating voice mail 96 Toshiba programming voice mail ports 121 power failure AT&T Partner II Night Service button 24 168 Telephone Switching Systems for Amanda@SOHO AT&T Partner Plus Night Service button 10 preference Comdial ringing line 37 programming ringing line 37 prefixes Vodavi DHS 130 primary attendant Comdial 32 Panasonic KXTD 1232 set jack for 68 primary auto attendants Panasonic DBS 824 76 primary automated attendant AT&T Partner II 17 AT&T Partner Plus 3 primary automated attendants WIN 36D and 36DX 151 prime line Comdial 36 programming 36 private lines Comdial 38, 39 program 109 WIN 36D and 36DX 150 program 206 WIN 36D and 36DX 146 program 303 WIN 36D and 36DX 147 program 304 WIN 36D and 36DX 148 program 305 WIN 36D and 36DX 149 program 306 WIN 36D and 36DX 149 program 307 WIN 36D and 36DX 143 program 308 WIN 36D and 36DX 142 program 309 WIN 36D and 36DX 144 program 406 WIN 36D and 36DX 144 program 408 WIN 36D and 36DX 145 program 414 WIN 36D and 36DX 146 program 505 WIN 36D and 36DX 152, 154 program 506 WIN 36D and 36DX 152, 154 program 507 WIN 36D and 36DX 152, 153 programming 39 AT&T Partner II 17 AT&T Partner Plus 3 Comdial call forwarding 35 call transfer recall 38 delay ring for private line 39 Direct Login Button 39 hunt groups 34 intercom hunt groups 35 line groups 36 message waiting 37 prime line intercom 36 ringing line preference 37 timed hold recall 37 Iwatsu classes and features 44 entering and exiting 43 NEC Electra II 57 NEC Electra, Level I 49 Panasonic DBS 824 73 entering 73 Panasonic KXDT 1232 Amanda as primary and backup attendant 69 Panasonic KXTD 1232 66 beginning 66 Call Forwarding 68 call forwarding 70 Call Hunting 66 Day Mode 69 ending 66 entering 66 exiting 66 Extension Group Assignment 67 extension groups 67 extensions 68 Function Line 65 hunt groups 66 Mailbox ID Code 68 Message Line 65 Night Mode 69 No Answer Time 69 primary and backup attendants 69 ring no answer count 69 set manager’s jack for 68 PanasonicDBS 824 73 Samsung beginning 83 entering 83 keys 85, 86 passcode 83 Sprint beginning 94 CO line ringing 115 copy features to all extensions 105 day mode 115 Do Not Disturb 115 entering 94 Index 169 features 101 hunt groups 97, 116 intercom (ICM) 115 keys 95 night mode 115 password 95 ring no answer 115 transferred calls 115 Toshiba Program 03 120 Program 10-2 121 Program 31 121 single-line station cards 120 voice mail ports 121 Vodavi DHS 127 WIN 36D and 36DX 141 programming, Vodavi DHS, flex buttons Protegé See Sprint Q quick transfers NEC Electra II 61 R reaching Comdial outside lines 35 recall Comdial call transfer 38 timed hold 37 Iwatsu camp-on recall 46 trunk recall 46 Samsung 88 call transfer 91 Sprint music on hold 103 ring back tone 103 recording Iwatsu direct record 46 Sprint direct record 105 removing AT&T Partner II Night Service 24 AT&T Partner Plus Night Service 10 requirements Iwatsu initializing 43 resetting AT&T Partner II System Reset procedure 24 AT&T Partner Plus System Reset procedure 10 135 restoring Sprint database 94 returned Comdial caller on hold 37 caller transferred 38 Samsung 88 caller transferred 91 ring back tone Iwatsu setting 45 Panasonic KXTD 1232 67 Samsung 90, 91 Sprint 103 Ring No Answer Vodavi DHS 133 ring no answer AT&T Partner II 20 AT&T Partner Plus 6 Comdial 34 Iwatsu 47 Panasonic KXTD 1232 programming call forwarding 70 setting ring count 69 Samsung 88, 91 Sprint programming 115 Ring on Transfer procedure AT&T Partner II 25 AT&T Partner Plus 11 ring patterns NEC Electra II 61 ringing Comdial distinctive interval between rings 34 setting up 32 Sprint CO lines ring on specified telephones 115 ringing line Comdial preference 37 RNA See ring no answer S Samsung DCS 2.2/Compact integration files 91 notification files 91 save Vodavi DHS 132 saving Sprint database 94 schedule AT&T Partner Night Service 7 170 Telephone Switching Systems for Amanda@SOHO AT&T Partner II hunt groups 21 Night Service 21 AT&T Partner Plus hunt groups 7 Sprint hunt groups 116 security Samsung password for programming 83 Send All Calls to voice mail AT&T Partner II 20, 26 AT&T Partner Plus 6, 12 separator Samsung digit 90 setting Comdial message waiting lights 36 ringing 32 settings See also time limits Sprint answering machine emulation 103, show Vodavi DHS 132 signaling Iwatsu disconnect tone 46 port disconnect signal type 46 port pre-disconnect signal 45 Samsung busy tone 90, 91 dial tone 89, 91 disconnect 84, 90 Do Not Disturb 90, 91 headset answer tone 90, 91 ring back tone 90, 91 speaker answer tone 90, 91 Sprint Do Not Disturb 105 signalling WIN 36D and 36DX inband 150 signals NEC Electra, Level I disconnect 52 silencing telephone AT&T Partner II 20, 26 AT&T Partner Plus 6, 12 Sprint 105 single-line Samsung ports 84 Toshiba programming 120 105 softkeys Vodavi DHS 132 speakers Samsung speaker answer tone 90, 91 speed Iwatsu port DTMF speed 45 speed dial AT&T Partner II Marked System Speed Dial Numbers 23 AT&T Partner Plus Marked System Speed Dial Numbers 9 speed-dialing, Vodavi DHS 134 speed-dialing, Vodavi DHS, system-wide 135 Sprint 93 Sprint CTX/MTX integration files 117 notification files 117 stations Iwatsu CO call to station to voice mail interface 46 direct record 46 intercom call to station to voice mail interface 46 station answer tone 46 station transfer of CO call 46 station transfer of intercom call 46 voice mail call to DND station to voice mail interface 46 voice mail call to station DND to voice mail interface 46 voice mail call to station to voice mail interface 46 strings integration 15, 27, 39, 47, 54, 62, 70, 81, 91, 117, 122, 139, 155 suffix digit Vodavi DHS 132 suffixes Vodavi DHS 130 switching systems, list of 1 system mode NEC Electra, Level I 51 System Reset procedure AT&T Partner II Night Service button 24 AT&T Partner Plus Night Service button 10 T technical support Comdial 29 telephone costs Comdial 36 telephone switching systems, list of 1 Index 171 telephones NEC Electra II 58 NEC Electra, Level I 50 Panasonic KXTD 1232 specific telephone assigned to which extension 69 PanasonicDBS 824 74 WIN 36D and 36DX 142 template AT&T Partner Plus 13 Iwatsu 43 Panasonic KX-T7230 65 Panasonic KX-T7235 65 Samsung 84 Sprint 15 DCL Set 107 20 DCL Exec Set 106, 108 Business Set 106, 108 Business W/LCD Set 109 Executive Set 109 Toshiba DK-16 and DK-16e 120 The 117 third-party voice mail Panasonic DBS 824 76 time limits Comdial too short for caller on hold 37 too short for transferred call 38 Iwatsu camp-on duration timer 45 forward no answer timer 45 port DTMF speed 45 port in-packet pause time 45 port loop open duration 46 Sprint alternate day ring 117 answering machine emulation time 102 answering machine emulation(Y/N) 103, 105 Forward Start Timer 113 Overflow 1 Timer 117 Overflow Destination 117 Ring Alternate Ringing Position Time 117 System Call Forward Timer 112 VM Dialing Ratio Tone Time 101 timed hold recall Comdial programming 37 tones Iwatsu disconnect tone 46 port DTMF speed 45 station answer tone 46 Panasonic KXTD 1232 disconnect 67 Do Not Disturb 67 ring back tone 67 ring on transfer 67 transfer 67 Samsung busy 90, 91 dial tone 89, 91 disconnect 90 Do Not Disturb 90, 91 headset answer tone 90, 91 ring back tone 90, 91 speaker answer tone 90, 91 Sprint Do Not Disturb 105 no ring transfer 103 ring back tone 103 transfer 103 WIN 36D and 36DX MIT tones 146 Toshiba 119 integration files 122 notification files 122 Touch Tone See DTMF trademarks ii transfer keys Panasonic DBS 824 81 transfer prefix Vodavi DHS 132 Transfer Return Extension procedure AT&T Partner II 19 AT&T Partner Plus 5 transfer to voice mailbox AT&T Partner II 25 AT&T Partner Plus 11 transferred Iwatsu transferred trunk call 46 transferring AT&T Partner II callers to voice mail 25 AT&T Partner Plus callers to voice mail 11 Comdial callers to voice mail 34 fails 38 Iwatsu CO call to station to voice mail interface 46 direct transfer to voice mail interface 46 intercom call to station to voice mail interface 46 station transfer of CO call 46 station transfer of intercom call 46 Panasonic DBS 824 calls to voice mail 81 Panasonic KXTD 1232 tone 67 172 Telephone Switching Systems for Amanda@SOHO Samsung fails 91 Sprint 115 calls to voice mail 105 tone 103 transferring, Vodavi DHS, coworkers 138 transferring, Vodavi DHS, outside caller 138 transfers NEC Electra II quick transfers 61 trunks Iwatsu direct trunk call 46 transferred trunk call 46 trunk packeting 46 trunk recall 46 Samsung direct trunk call 88, 91 DTMF data forwarded 90 turn off ring AT&T Partner II 20, 26 AT&T Partner Plus 6, 12 Sprint 105 U unanswered calls AT&T Partner II 19, 20 AT&T Partner Plus 5, 6 unauthorized phone use AT&T Partner II 24 AT&T Partner Plus 10 uses fraudulent iii V VMS Cover feature AT&T Partner 25 VMS Cover Rings procedure AT&T Partner II 20 AT&T Partner Plus 6 VMS Hunt Schedule procedure AT&T Partner 7 AT&T Partner II 21 Vodavi 125 Vodavi DHS forward on no answer 133 per station programming 133 prefixes and suffixes 130 programming 127 softkeys 132 voice ports 127 Vodavi DHS, automated attendant 127 Vodavi DHS, backup attendant 137 Vodavi DHS, bin numbers 134 Vodavi DHS, day service 139 Vodavi DHS, flex buttons 135 Vodavi DHS, night service 139 Vodavi DHS, speed-dialing 134, 135 Vodavi Starplus DHS integration files 139 voice mail Panasonic DBS 824 third-party 76 voice mail access NEC Electra II 59 voice mail station ports Comdial 30, 31 voice mail transfers Panasonic DBS 824 81 Voice Mailbox Transfer feature AT&T Partner II 25 AT&T Partner Plus 11 voice messaging center AT&T Partner II 18 AT&T Partner Plus 4 WIN 36D and 36DX 155 voice ports Vodavi DHS 127 W warranty ii WIN 36D integration files 155 WIN 36D and 36DX 147 backup attendants 153 call forwarding 147 day calls 147, 149 hunt groups 142 inband signalling 150 MIT tones 146 night calls 148, 149 primary automated attendant 151 program 109 150 program 206 146 program 303 147 program 304 148 program 305 149 program 306 149 program 307 143 program 308 142 program 309 144 program 406 144 program 408 145 program 414 146 program 505 152, 154 program 506 152, 154 program 507 152, 153 programming 141 telephone diagram 142 voice messaging center 155