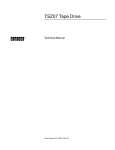
1
StorageWorks™ Solutions
SW300-Series RAID Enclosure
Installation and User’s Guide
Order Number: EK–SW300–UG. A01
This manual describes the SW300-series redundant array of
independent disks (RAID) enclosure, the rules for unpacking and
installing, configuring the enclosure, and its associated components, and
describes error analysis and fault isolation. Procedures for replacing the
major components also are described.
Digital Equipment Corporation
Maynard, Massachusetts
August 1994
Possession, use, or copying of the software described in this documentation is authorized only
pursuant to a valid written license from Digital, an authorized sublicensor, or the identified
licensor.
NOTE: This equipment has been tested and found to comply with the limits for a Class A
digital device, pursuant to Part 15 of the FCC Rules. These limits are designed to provide
reasonable protection against harmful interference when the equipment is operated in a commercial
environment. This equipment generates, uses, and can radiate radio frequency energy and, if not
installed and used in accordance with the instruction manual, may cause harmful interference to
radio communications.
The information in this document is subject to change without notice and should not be construed
as a commitment by Digital Equipment Corporation. Digital Equipment Corporation assumes no
responsibility for any errors that may appear in this document.
Any changes or modifications made to this equipment may void the user’s authority to operate the
equipment.
Operation of this equipment in a residential area may cause interference in which case the user,
at his own expense, will be required to take whatever measures may be required to correct the
interference.
WARNING
This is a Class A product. In a domestic environment, this product may cause radio interference in
which case the user may be required to take adequate measures.
While Digital believes the information included in this publication is correct as of the date of
publication, it is subject to change without notice.
Digital Equipment Corporation makes no representations that the interconnection of its products
in the manner described in this document will not infringe existing or future patent rights, nor
do the descriptions contained in this document imply the granting of licenses to make, use, or sell
equipment or software in accordance with the description.
This product has not been tested for compatibility with all other products or devices supplied by
Digital Equipment Corporation or third parties. Unless specifically stated by Digital to the contrary,
purchaser assumes all responsibility for testing and ensuring that the Digital StorageWorks
products, when combined with other products, address their particular needs.
© Digital Equipment Corporation, 1994
All Rights Reserved.
Printed in the United States of America.
CI, Digital, HSC, HSD, HSJ, HSZ, StorageWorks, and the DIGITAL logo are trademarks of Digital
Equipment Corporation.
This document was prepared using VAX DOCUMENT Version 2.1.
Contents
Preface . . . . . . . . . . . . . . . . . . . . . . . . . . . . . . . . . . . . . . . . . . . . . . . . . . . . . . . . . . . .
vii
1 Introduction to the SW300 Enclosure
1.1
1.2
1.3
1.3.1
1.3.2
1.3.3
1.3.4
1.3.5
1.3.6
1.3.7
1.4
Overview . . . . . . . . . . . . . . . . . . . . . . . . . . . . . . . . . . . .
Specifications . . . . . . . . . . . . . . . . . . . . . . . . . . . . . . . . .
Major Components . . . . . . . . . . . . . . . . . . . . . . . . . . . . .
AC Power Entry Controller . . . . . . . . . . . . . . . . . . .
The High-Availability Storage Subsystem Fault Bus
Environmental Monitor Unit (EMU) . . . . . . . . . . . .
HS Array Controllers . . . . . . . . . . . . . . . . . . . . . . . .
Dual Speed Blowers . . . . . . . . . . . . . . . . . . . . . . . . .
Power Supply SBBs . . . . . . . . . . . . . . . . . . . . . . . . .
Storage Device SBBs . . . . . . . . . . . . . . . . . . . . . . . .
SW300 SCSI Buses . . . . . . . . . . . . . . . . . . . . . . . . . . . .
.
.
.
.
.
.
.
.
.
.
.
.
.
.
.
.
.
.
.
.
.
.
.
.
.
.
.
.
.
.
.
.
.
.
.
.
.
.
.
.
.
.
.
.
.
.
.
.
.
.
.
.
.
.
.
.
.
.
.
.
.
.
.
.
.
.
.
.
.
.
.
.
.
.
.
.
.
.
.
.
.
.
.
.
.
.
.
.
.
.
.
.
.
.
.
.
.
.
.
.
.
.
.
.
.
.
.
.
.
.
.
.
.
.
.
.
.
.
.
.
.
.
.
.
.
.
.
.
.
.
.
.
.
.
.
.
.
.
.
.
.
.
.
.
.
.
.
.
.
.
.
.
.
.
1–1
1–3
1–4
1–4
1–5
1–6
1–8
1–9
1–10
1–11
1–13
2 Unpacking and Installation Instructions
2.1
2.2
2.3
2.4
2.5
2.6
Site Preparation . . . . . . . . . . . . . . . . . . . . . . . . .
Unpacking the SW300 Enclosure . . . . . . . . . . . .
Removing the SW300 Enclosure from the Pallet
Placing the SW300 Enclosure . . . . . . . . . . . . . .
Power Cords . . . . . . . . . . . . . . . . . . . . . . . . . . . .
Applying Power . . . . . . . . . . . . . . . . . . . . . . . . .
.
.
.
.
.
.
.
.
.
.
.
.
.
.
.
.
.
.
.
.
.
.
.
.
.
.
.
.
.
.
.
.
.
.
.
.
.
.
.
.
.
.
.
.
.
.
.
.
.
.
.
.
.
.
.
.
.
.
.
.
.
.
.
.
.
.
.
.
.
.
.
.
.
.
.
.
.
.
.
.
.
.
.
.
.
.
.
.
.
.
.
.
.
.
.
.
.
.
.
.
.
.
.
.
.
.
.
.
.
.
.
.
.
.
.
.
.
.
.
.
2–1
2–1
2–3
2–4
2–4
2–5
System Configurations . . . . . . . . . . . . . . . . . . . . . . .
Input Power Cord Routing and System Redundancy
Power Configurations . . . . . . . . . . . . . . . . . . . . . . . .
SW300 SCSI Buses . . . . . . . . . . . . . . . . . . . . . . . . .
Recommended Loading Sequence . . . . . . . . . . . . . . .
HS Array Controller Configurations . . . . . . . . . . . . .
.
.
.
.
.
.
.
.
.
.
.
.
.
.
.
.
.
.
.
.
.
.
.
.
.
.
.
.
.
.
.
.
.
.
.
.
.
.
.
.
.
.
.
.
.
.
.
.
.
.
.
.
.
.
.
.
.
.
.
.
.
.
.
.
.
.
.
.
.
.
.
.
.
.
.
.
.
.
.
.
.
.
.
.
.
.
.
.
.
.
.
.
.
.
.
.
.
.
.
.
.
.
3–1
3–1
3–2
3–2
3–3
3–3
.
.
.
.
.
.
.
.
.
.
.
.
.
.
.
.
.
.
.
.
.
.
.
.
.
.
.
.
.
.
.
.
.
.
.
.
.
.
.
.
.
.
.
.
.
.
.
.
.
.
.
.
.
.
.
.
.
.
.
.
.
.
.
.
.
.
.
.
.
.
.
.
.
.
.
.
.
.
.
.
.
.
.
.
.
.
.
.
.
.
.
.
.
.
.
.
.
.
.
.
.
.
.
.
.
.
.
.
.
.
.
.
.
.
.
.
.
.
.
.
.
.
.
.
.
.
.
.
.
.
.
.
.
.
.
.
4–1
4–3
4–3
4–5
4–5
4–5
4–6
4–6
3 Configuration Rules and Restrictions
3.1
3.2
3.3
3.4
3.5
3.6
4 Error Analysis and Fault Isolation
4.1
4.2
4.3
4.4
4.4.1
4.4.2
4.4.3
4.5
SW300 Front Panel Fault Notification . . . . . . . . . .
Environmental Monitor Unit (EMU) Functions . . .
EMU Control Panel LEDs and Fault Notifications
HS Array Controller LEDs and Fault Notification .
HSZ40 Operator Control Panel . . . . . . . . . . . .
HSZ40 Normal Operation . . . . . . . . . . . . . . . .
HSZ40 Fault Notification . . . . . . . . . . . . . . . . .
Storage Device SBB LEDs and Fault Notification .
.
.
.
.
.
.
.
.
iii
4.6
4.7
Power Supply SBB LEDs and Fault Notification . . . . . . . . . . . . . . . . . . . .
Dual Speed Blower Fault Notification . . . . . . . . . . . . . . . . . . . . . . . . . . . .
4–7
4–8
5 Removal and Installation Procedures
5.1
5.2
5.3
5.4
5.5
5.6
5.7
5.8
5.9
5.10
5.11
5.12
5.13
Removing a Power Supply SBB . . . . . . . . .
Installing a Power Supply SBB . . . . . . . . .
SBB Warm Swap . . . . . . . . . . . . . . . . . . . .
Removing a Storage Device SBB . . . . . . . .
Installing a Storage Device SBB . . . . . . . .
Removing an Environmental Monitor Unit
Installing an Environmental Monitor Unit
Removing a Controller . . . . . . . . . . . . . . . .
Installing a Controller . . . . . . . . . . . . . . . .
Removing a Dual Speed Blower . . . . . . . . .
Installing a Dual Speed Blower . . . . . . . . .
Removing an AC Power Entry Controller .
Installing an AC Power Entry Controller . .
.
.
.
.
.
.
.
.
.
.
.
.
.
.
.
.
.
.
.
.
.
.
.
.
.
.
.
.
.
.
.
.
.
.
.
.
.
.
.
.
.
.
.
.
.
.
.
.
.
.
.
.
.
.
.
.
.
.
.
.
.
.
.
.
.
.
.
.
.
.
.
.
.
.
.
.
.
.
.
.
.
.
.
.
.
.
.
.
.
.
.
.
.
.
.
.
.
.
.
.
.
.
.
.
.
.
.
.
.
.
.
.
.
.
.
.
.
.
.
.
.
.
.
.
.
.
.
.
.
.
.
.
.
.
.
.
.
.
.
.
.
.
.
.
.
.
.
.
.
.
.
.
.
.
.
.
.
.
.
.
.
.
.
.
.
.
.
.
.
.
.
.
.
.
.
.
.
.
.
.
.
.
.
.
.
.
.
.
.
.
.
.
.
.
.
.
.
.
.
.
.
.
.
.
.
.
.
.
.
.
.
.
.
.
.
.
.
.
.
.
.
.
.
.
.
.
.
.
.
.
.
.
.
.
.
.
.
.
.
.
.
.
.
.
.
.
.
.
.
.
.
.
.
.
.
.
.
.
.
.
.
.
.
.
.
.
.
.
.
.
.
.
.
.
.
.
.
.
.
.
.
.
.
.
.
.
.
.
.
.
.
.
.
.
.
.
.
.
.
.
.
.
.
.
.
.
.
.
.
.
.
.
5–1
5–2
5–2
5–3
5–5
5–6
5–6
5–6
5–7
5–7
5–8
5–9
5–9
SW300-Series Deskside RAID Enclosure . . . . . . . . . . . . . . . . .
SW300 Components (Cabinet Removed for Clarity) . . . . . . . . . .
SW300 Power Configuration . . . . . . . . . . . . . . . . . . . . . . . . . . .
Dual Speed Blowers (Cabinet Removed for Clarity) . . . . . . . . . .
3½-Inch Power Supply SBB . . . . . . . . . . . . . . . . . . . . . . . . . . . .
3½-Inch SBB . . . . . . . . . . . . . . . . . . . . . . . . . . . . . . . . . . . . . . .
5¼-Inch SBB . . . . . . . . . . . . . . . . . . . . . . . . . . . . . . . . . . . . . . .
SW300 SCSI Buses . . . . . . . . . . . . . . . . . . . . . . . . . . . . . . . . . .
Minimum Installation Clearance Measurements . . . . . . . . . . . .
Unpacking the SW300 Enclosure . . . . . . . . . . . . . . . . . . . . . . . .
Shipping Pallet Ramp Installation . . . . . . . . . . . . . . . . . . . . . . .
SW300 SCSI Buses . . . . . . . . . . . . . . . . . . . . . . . . . . . . . . . . . .
SW300 Light Emitting Diodes . . . . . . . . . . . . . . . . . . . . . . . . . .
EMU Control Panel LEDs and Switches . . . . . . . . . . . . . . . . . .
HS Controller Operator Control Panel . . . . . . . . . . . . . . . . . . . .
3½-Inch Storage SBB . . . . . . . . . . . . . . . . . . . . . . . . . . . . . . . . .
5¼-Inch SBB . . . . . . . . . . . . . . . . . . . . . . . . . . . . . . . . . . . . . . .
3½-Inch Power Supply SBB . . . . . . . . . . . . . . . . . . . . . . . . . . . .
Removing a Power Supply SBB (Cabinet Removed for Clarity) .
Removing a Storage Device SBB (Cabinet Removed for Clarity)
Removing a Dual Speed Blower (Cabinet Removed for Clarity) .
.
.
.
.
.
.
.
.
.
.
.
.
.
.
.
.
.
.
.
.
.
.
.
.
.
.
.
.
.
.
.
.
.
.
.
.
.
.
.
.
.
.
.
.
.
.
.
.
.
.
.
.
.
.
.
.
.
.
.
.
.
.
.
.
.
.
.
.
.
.
.
.
.
.
.
.
.
.
.
.
.
.
.
.
.
.
.
.
.
.
.
.
.
.
.
.
.
.
.
.
.
.
.
.
.
1–2
1–4
1–5
1–9
1–10
1–11
1–12
1–13
2–1
2–2
2–3
3–3
4–2
4–3
4–5
4–7
4–7
4–8
5–2
5–4
5–8
Glossary
Index
Figures
1–1
1–2
1–3
1–4
1–5
1–6
1–7
1–8
2–1
2–2
2–3
3–1
4–1
4–2
4–3
4–4
4–5
4–6
5–1
5–2
5–3
iv
Tables
1–1
1–2
2–1
3–1
3–2
4–1
4–2
5–1
SW300 Specifications . . . . . . . . . . . . . . . . . . . . . . . . . . . . . . . .
HS Controllers . . . . . . . . . . . . . . . . . . . . . . . . . . . . . . . . . . . . .
Country-Specific Power Cords . . . . . . . . . . . . . . . . . . . . . . . . .
Configurations . . . . . . . . . . . . . . . . . . . . . . . . . . . . . . . . . . . . .
Power Configurations . . . . . . . . . . . . . . . . . . . . . . . . . . . . . . . .
SW300 Front Panel Fault Notification . . . . . . . . . . . . . . . . . . .
EMU Control Panel LEDs/Switches and Description of Errors
Controller Response to the C_SWAP Signal . . . . . . . . . . . . . . .
.
.
.
.
.
.
.
.
.
.
.
.
.
.
.
.
.
.
.
.
.
.
.
.
.
.
.
.
.
.
.
.
.
.
.
.
.
.
.
.
.
.
.
.
.
.
.
.
1–3
1–8
2–4
3–1
3–2
4–2
4–4
5–3
v
Preface
Intended Audience
This manual is intended for use by customer and Digital™ employees responsible
for installing, configuring, operating, and maintaining the SW300-series
redundant array of independent disks (RAID) enclosure. Replacing the ac
power entry controller must be performed only by qualified service personnel.
Structure
This manual is organized as follows:
Chapter 1
Describes the SW300 enclosure including physical characteristics,
layout, specifications, components, and StorageWorks products.
Chapter 2
Describes site preparation, unpacking, installation, and powering up
procedures for the SW300 enclosure.
Chapter 3
Describes the rules and restrictions for configuring an SW300
enclosure.
Chapter 4
Describes the error analysis and fault isolation of the SW300
components.
Chapter 5
Describes the procedures for removing and installing the ac power
entry controllers, power supply and storage device StorageWorks
building blocks (SBBs), environmental monitor units (EMUs),
controllers, and dual speed blowers.
Glossary
Defines SW300 terms.
Related Documents
The following table lists documents (alphabetically by title) that contain
information related to this product.
Document Title
Order Number
StorageWorks Array Controllers HS Family of Array Controllers Service Manual
EK–HSFAM–SV
StorageWorks Array Controllers HS Family of Array Controllers User’s Guide
EK–HSFAM–UG
StorageWorks Solutions Configuration Guide
EK–BA350–CG
StorageWorks Solutions High-Availability Storage Subsystem Fault Bus OEM
Engineering Specification
EK–FAULT–ES
StorageWorks Solutions Shelf and SBB User’s Guide
EK–BA350–UG
StorageWorks Solutions 3½-Inch Device Installation Guide
EK–MC350–IG
StorageWorks Solutions 5¼-Inch Storage Device Installation Guide
EK–MC525–IG
StorageWorks SW800-Series Data Center Cabinet Installation and User’s Guide
EK–SW800–IG
vii
Electrostatic Discharge
CAUTION
Some of the components can be damaged by electrostatic discharge (ESD).
Do not implement the procedures in this document until you have taken
the proper precaution against ESD. As a minimum, you must wear
an ESD grounding strap whenever you handle any of the components,
storage devices, or remove an SBB cover.
Electronic Emissions
Note
Electronic devices emit radio frequencies that under certain conditions
may interfere with other electronic equipment or radio frequency
transmissions.
Should operation of SW300 cause unacceptable interference, the customer
is responsible for taking whatever steps are necessary to correct the
interference.
The SW300 complies with industry accepted product safety standards
and is intended for use only with storage devices that meet these
requirements. For continued compliance, install only SBBs that are
listed by Underwriter Laboratories, Inc., as an accessory for use with the
BA350-series shelves.
For a list of qualified SCSI devices, contact your Digital account
representative or the latest edition of the StorageWorks Solution
Configuration Guide.
Compatibility
For a list of compatible Digital storage devices, contact your Digital
representative.
Documentation Conventions
The following conventions are used in this manual:
viii
boldface type
Boldface type indicates the first instance of terms being defined in text,
in the glossary, or both.
italic type
Italic type indicates emphasis and complete manual titles. In the
glossary, italic type is also used to indicate cross-references.
Manufacturer’s Declarations
Following are manufacturer’s declarations applicable to StorageWorks SW300series RAID enclosures:
CAUTION
This is a class A product. In a domestic environment, this product may
cause radio interference, in which case the user may be required to take
adequate measures.
ACHTUNG !
Dieses ist ein Gerät der Funkstörgrenzwertklasse A. In Wohnbereichen
können bei Betrieb dieses Gerätes Rundfunkstörungen auftreten, in
welchen Fällen die Benutzer für entsprechende Gegenmaßnahmen
verantwortlich sind.
ATTENTION !
Ceci est un produit de Classe A. Dans un environment domestique, ce
produit risque de créer des interférences radiélectriques, il appartiendra
alors à l´utilisateur de prendre les mesures spécifiques appropriées.
Note
The equipment described in this manual is listed by the Underwriters
Laboratories Incorporated and bears the UL Listing mark. SW300-series
RAID enclosures are also certified by the Canadian Standards Association
and TUV Product Service GmbH and bear both the CSA certification and
TUV GS marks. The equipment also complies with the requirements for
CE-mark Class A.
Note
Das in dissem Manual beschriebene Gerät wurde von TÜV Produkt
Service GmbH auf Sicherheit geprüft und trägt das GS Zeichen. Bitte
beachten Sie, daß Eingriffe in das Gerät, Reparaturen oder der Einbau
von Erweiterungen nur von Digital Personal erfolgen darf, da sonst die
GS Zulassung ungültig wird. Die Zulassung wird auch ungültig, wenn
nicht von Digital qualifizierte Speichererweiterungen eingebaut verden.
Das Gerät muß so aufgestellt werden, daß die Steckdose frei zugänglich
ist.
ix
Für Bundesrepublik Deutschland
For Federal Republic of Germany
Pour la République féderale d’Allemagne
Hochfrequenzgerätezulassung und Betriebsgenehmigung
Bescheinigung des Herstellers/Importeurs:
Hiermit wird bescheinigt, daß die Einrichtung in Übereinstimmung mit
den Bestimmungen der DBP-Verfügung 523/1969, Amtsblatt 113/1969, und
Grenzwertklasse "A" der VDE0871 funkentstört ist.
Das Bundesamt für Zulassungen in der Telekommunikation der Deutschen
Bundespost (DBP) hat diesem Gerät eine FTZ-Serienprüfnummer zugeteilt.
Betriebsgenehmigung:
Hochfrequenzgeräte dürfen erst in Betrieb genommen werden, nachdem hierfür
von dem für den vorgesehenen Aufstellungsort zuständigen Fernmeldeamt mit
Funkstörungsmeßstelle die Genehmigung erteilt ist.
Als Antrag auf Erteilung einer Genehmigung dient eine Anmeldepostkarte
(Anhang des Handbuches) mit Angabe der FTZ-Serienprüfnummer.
Der untere Teil der Postkarte ist vom Betreiber zu vervollständigen und an das
örtliche Fernmeldeamt zu schicken. Der obere Teil bleibt beim Gerät.
Betreiberhinweis:
Das Gerät wurde funktechnisch sorgfältig entstört und geprüft. Die
Kennzeichnung mit der Zulassungsnummer bietet Ihnen die Gewähr, daß
dieses Gerät keine anderen Fernmeldeanlagen einschließlich Funkanlagen stört.
Sollten bei diesen Geräten ausnahmsweise trotzdem, z.B. im ungünstigsten Fall
beim Zusammenschalten mit anderen EVA-Geräten, Funkstörungen auftreten,
kann das im Einzelnen zusätzliche Funkentstörungsmaßnahmen durch den
Benutzer erfordern.
Bei Fragen hierzu wenden Sie sich bitte an die örtlich zuständige
Funkstörungsmeßstelle Ihres Fernmeldeamtes.
Externe Datenkabel:
Sollte ein Austausch der von Digital spezifizierten Datenkabel nötig werden,
muß der Betreiber für eine einwandfreie Funkentstörung sicherstellen, daß
Austauschkabel im Aufbau und Abschirmqualität dem Digital Originalkabel
entsprechen.
Kennzeichnung:
Die Geräte werden bereits in der Fertigung mit der Zulassungsnummer
gekennzeichnet und mit einer Anmeldepostkarte versehen. Sollte Kennzeichnung
und Anmeldepostkarte übergangsweise nicht mit ausgeliefert werden,
kontaktieren Sie bitte das nächstgelegene Digital Equipment Kundendienstbüro.
x
Acoustic Noise Declaration
SW300-Series RAID Enclosure
August 1, 1994
Acoustics—Preliminary Declared Values per ISO 9296 and ISO 7779
SoundPower
Level
, B‡
SoundPressure
, dBALevel
(Bystander Positions)
Product†
Idle
Operate
Idle
Operate
SW300-series RAID enclosure
6.10
6.12
46.7
47.0
† Current values for specific configurations are available from Digital Account Representatives.
‡ 1 B = 10 dBA
Schallemissionswerte—Vorläufige Werteangaben nach
ISO 9296 und ISO 7779/DIN EN27779
Gerät†
SW300-series RAID enclosure
Schalleistungspegel
, B‡
Schalldruckpegel
, dBA
(Beistehende Position)
Leerlauf
Leerlauf
6,10
Betrieb
6,12
46,7
Betrieb
47,0
† Aktuelle Werte für spezielle Ausrüstungsstufen sind über die Digital Equipment Vertretungen
erhältlich.
‡ 1 B = 10 dBA
xi
1
Introduction to the SW300 Enclosure
This chapter describes the SW300-series redundant array of independent disks
(RAID) enclosure including the unit layout, dimensions, and the small computer
system interface 2 (SCSI–2) connections (ports) for StorageWorks building block
(SBB) shelves.
Note
The SW300 enclosure contains up to two HS array controllers. This
manual contains only the removal and replacement procedures for the HS
array controllers. Controller descriptions, operation, and diagnostics are
provided in the specific controller documentation.
1.1 Overview
The SW300 enclosure, as shown in Figure 1–1, is a member of Digital’s
StorageWorks family of modular enclosures. This enclosure can accommodate
both data storage and controller combinations. The SW300 enclosure has the
following capabilities:
•
StorageWorks compatible
•
Provides packaging for the following components:
24 3½-inch SBBs, 8 5¼-inch SBBs, or mixed combinations
8 power supplies
8 dual speed blowers
2 environmental monitor units (EMUs)
2 ac power entry controllers
2 controllers
2 cache modules
6 single-ended SCSI buses
•
Redundant shelf power supplies
•
Redundant EMUs
•
Redundant ac power entry controllers
•
Hot/warm swap of all field replaceable units (FRUs)
•
Compatible with the High Availability Storage Subsystem Fault Bus
•
Optimized for four devices per SCSI bus
Introduction to the SW300 Enclosure 1–1
Figure 1–1 SW300-Series Deskside RAID Enclosure
CXO-4268A-MC
1–2 Introduction to the SW300 Enclosure
1.2 Specifications
Specifications for the SW300 enclosure are shown in Table 1–1.
Table 1–1 SW300 Specifications
Characteristic
Specification
Dimensions (nominal)
838.20 mm (33.00 in) height
476.25 mm (18.75 in) width
482.60 mm (19.00 in) depth
Weight
Cabinet with shipping packaging
106.65 kg (242.00 lb)
Maximum configuration
77.85 kb (178.00 lb)
Agency compliance
FCC, UL, CSA, TUV, and CE-mark
Electrical rating
100-120/220-240 V ac, 50/60 Hz, single phase,
12/6 amperes
Operating environment
Temperature
+10°C to +40°C (+50°F to +95°F)
Derate 1.8°C for each 1000 m altitude (1.0°F for
each 1000 ft altitude)
Relative humidity
10% to 90% (noncondensing)
Maximum wet bulb temperature: +28°C (+82°F)
Minimum dew point: +2°C (+36°F)
Altitude
Air quality
(maximum particle count)
From sea level to 2400 m (8000 ft)
Not to exceed 500,000 particles per cubic foot of
air at a size of 0.5 micron or larger
Nonoperating environment
Temperature
-40°C to +66°C (-40°F to +151°F)
(During transportation and associated shortterm storage)
Relative humidity
8% to 95% in original shipping container
(noncondensing); otherwise, 50%
(noncondensing)
Altitude
3600 m (12,000 ft)
Introduction to the SW300 Enclosure 1–3
1.3 Major Components
The major components of the SW300 enclosure are shown in Figure 1–2.
Figure 1–2 SW300 Components (Cabinet Removed for Clarity)
POWER A
POWER B
POWER
SUPPLY SBB
DUAL-SPEED
BLOWER
STORAGE
DEVICE SBB
AC POWER
ENTRY
CONTROLLER A
ENVIRONMENTAL
MONITOR UNIT
HS ARRAY
CONTROLLER
AC POWER
ENTRY
CONTROLLER B
CXO-4305A-MC
1.3.1 AC Power Entry Controller
The two ac power entry controllers provide the system on/off switch, ac power to
all power supply SBBs, noise filtering, surge suppression, and electromagnetic
interference (EMI) filtering.
In the SW300 enclosure, an auxiliary ac power source and a second ac power
entry controller supply ac power to a second power supply SBB in each shelf.
If the primary ac power source or ac power entry controller A fails, the shelf
1–4 Introduction to the SW300 Enclosure
remains powered by the ac power entry controller B. As shown in Figure 1–3, this
configuration provides complete power redundancy to the shelf ’s devices.
The ac power entry controller A provides power to the four power supply SBBs
on power supply bus A. This is the minimum power configuration (4+0) for the
system. The power supply SBB located at the top of power supply bus B provides
power for 4+1 redundancy.
For 4+4 redundancy, the ac power entry controller B provides power to the
four power supply SBBs on power supply bus B. See Chapter 3 for additional
information on power configurations.
Figure 1–3 SW300 Power Configuration
POWER
SUPPLY
BUS A
POWER
SUPPLY
BUS B
SHELF 4
SHELF 3
POWER SUPPLY
BUS A
(USED WITH 4+1
REDUNDANCY)
SHELF 2
SHELF 1
AC POWER
ENTRY
CONTROLLER A
PRIMARY AC
POWER SOURCE
CONTROLLERs
AND EMUs
AC POWER
ENTRY
CONTROLLER B
AUXILIARY AC
POWER SOURCE
CXO-4306A-MC
1.3.2 The High-Availability Storage Subsystem Fault Bus
The HS-series controllers use the StorageWorks high-availability storage
subsystem fault bus to monitor certain fault conditions in the subsystem’s
shelves and enclosure. The fault bus, which is not a FRU, offers the following
features:
•
Notification when a device is physically removed from or inserted into the
storage subsystem
•
Notification of a failure associated with a device shelf and enclosure (for
example, a shelf blower)
•
Visual indication of bus/device status, facilitating fault isolation by the user
The high-availability storage subsystem fault bus consists of four signals added
to each SCSI device port as described in the StorageWorks Solutions HighAvailability Storage Subsystem Fault Bus OEM Engineering Specification. The
controller uses the fault bus signals in the manner described in the specification.
Introduction to the SW300 Enclosure 1–5
1.3.3 Environmental Monitor Unit (EMU)
The EMU provides increased protection against catastrophic subsystem faults.
The SW300 enclosure has two EMUs to provide complete system redundancy. If
one EMU should fail, the other continues to monitor all system functions. The
EMU works with the controller to warn the user of various types of existing or
impending subsystem failures. The controller responds to such conditions by
displaying error messages to the operator via the maintenance terminal and host
interfaces. At the same time, it controls the warning light emitting diodes (LEDs)
on the HS controller operator control panel (OCP) and the storage devices. The
EMU reports faults by turning on status LEDs on the SW300 front panel.
The EMU has a selectable audible alarm switch on the front panel:
•
In the up (enable) position, the alarm is activated and produces an audible
signal whenever a fault condition occurs.
•
In the down (disable) position, the alarm is deactivated.
The EMU performs the following specific functions:
•
Monitors and controls the cabinet blowers—The EMU monitors the FAN_OK
signals coming from each of the eight blowers. If any blower malfunctions
(that is, its speed goes below a setpoint), the EMU turns all of the other
blowers up to high speed. This condition also generates a fault signal:
Turns on the Fault (amber) LED located on the upper right corner on the
front of the SW300
Turns on an LED on the EMU that identifies the defective blower
Turns off the SHELF_OK signal
Activates the audible alarm
The EMU monitors the FAN_INPLACE signals originating from each bank of
four blowers and detects if a blower is not installed or connected. If a blower
is not installed or connected, the EMU turns all of the other blowers up to
high speed. This condition also generates a fault signal:
•
–
Turns on the Fault (amber) LED located on the upper right corner on the
front of the SW300
–
Turns on a bank of LEDs on the EMU (thereby identifying the bank with
the missing blower)
–
Turns off the SHELF_OK signal
–
Activates the audible alarm
Monitors the power supplies—The EMU monitors the POWER_OK signals
originating from all power supply SBBs. The EMU performs the following
actions if less than four power supply SBBs are functioning properly:
–
Turns off the SYSTEM_POWER_OK signal going from the EMU
–
Turns off the System OK (green) LED on the EMU
–
Turns on the Shelf Fault (amber) LED on the EMU
–
Turns off the System OK (green) LED located on the upper right corner
on the front of the SW300
–
Turns on the Fault (amber) LED located on the upper right corner on the
front of the SW300
1–6 Introduction to the SW300 Enclosure
–
Turns off the SHELF_OK signal
–
Activates the audible alarm
–
Resets the host controller(s)
If one power supply SBB fails, but four or more power supply SBBs are still
functioning, the EMU generates a fault condition and performs the following
actions:
•
–
Turns on the Shelf Fault (amber) LED on the front of the EMU
–
Turns on the Fault (amber) LED located on the upper right corner on the
front of the SW300
Senses cabinet temperature—The EMU senses two different temperatures:
warning and reset state. Warnings take place when the temperature is above
35°C (95°F). The EMU generates a fault condition and performs the following
actions:
–
Turns on the Temperature (amber) LED on the EMU
–
Turns on the Fault (amber) LED located on the upper right corner on the
front of the SW300
–
Turns the dual speed blowers up to high speed
The SW300 is held in a reset state when the temperature is above 50°C
(122°F). The EMU performs the following actions:
•
–
Turns off the System OK (green) LED located on the upper right corner
on the front of the SW300
–
Turns off System OK (green) LED on the EMU
–
Turns on the Fault (amber) LED on the EMU
–
Turns off the SYSTEM_POWER_OK signal
Monitors the power supply voltage—The EMU monitors the +12 V dc and +5
V dc cabinet power supplies and if the respective voltage drops below +9.2 V
dc or + 3.9 V dc, the EMU performs the following actions:
–
Turns off the System OK (green) LED located on the upper right corner
on the front of the SW300
–
Turns off the System OK (green) LED on the EMU
–
Turns off the SYSTEM_POWER_OK signal
–
Activates the audible alarm
Introduction to the SW300 Enclosure 1–7
1.3.4 HS Array Controllers
The card cage assembly contains two slots for controller and cache memory
modules. These slots provide the mechanical mounting, power, and signal
interfaces for the units they house. This assembly allows for the mounting of two
controllers to provide redundancy.
Note
This manual covers minimal controller functionality. All other
information on controllers, such as a list of storage devices controlled
by individual controllers, warm swap procedures, and controller-terminal
connections is covered in the specific controller documentation.
The HS-controllers provide a connection between a host computer and an array
of SCSI–2 compatible storage devices. A terminal is plugged into the controller
during subsystem installation to set initial controller parameters. See the
StorageWorks Array Controllers HS Family of Array Controllers User’s Guide for
details.
The SW300 can be configured for controller dual redundancy. See the HS
controller documentation to determine warm swap procedures for each controller.
As shown in Table 1–2, the SW300 enclosure supports the following HS
controllers:
Table 1–2 HS Controllers
Controller
Interface
Storage Device Buses
HSD30
Digital standard system system
interconnect (DSSI)
Six 8-bit single-ended SCSI–2
HSJ30
Computer Interconnect (CI™) bus
Six 8-bit single-ended SCSI–2
HSJ40
CI bus
Six 8-bit single-ended SCSI–2
HSZ10
Fast, wide, differential SCSI
Five 8-bit single-ended SCSI–2
HSZ15
Fast, wide, differential SCSI
Five 8-bit single-ended SCSI–2
HSZ40
Fast, wide, differential SCSI
Six 8-bit single-ended SCSI–2
For a list of the storage devices controlled by individual controllers, see the
StorageWorks Array Controller Operating Firmware Release Notes.
1–8 Introduction to the SW300 Enclosure
1.3.5 Dual Speed Blowers
As shown in Figure 1–4, the SW300 enclosure has eight rear-mounted blowers
that pull air from the front of the cabinet to the rear. Connectors on the
backplane provide the +12 V dc of power to operate the blowers. Logic signals
allow the status of the shelf blowers to be monitored by the EMU. All operational
blowers are turned up to high speed when the following conditions exist:
•
If a high warning temperature condition is detected by the EMU
•
If a blower is defective or removed
•
If a blower’s speed falls below the set point
Figure 1–4 Dual Speed Blowers (Cabinet Removed for Clarity)
BLOWER 5
BLOWER 1
BLOWER 6
BLOWER 2
BLOWER 7
BLOWER 3
BLOWER 8
BLOWER 4
CXO-4269A-MC
Introduction to the SW300 Enclosure 1–9
1.3.6 Power Supply SBBs
Note
The BA35X–HA power supply is not supported in the SW300 enclosure.
The power supply SBB (BA35X–HD), shown in Figure 1–5, converts ac input
from the ac power entry controller to +5 V dc and +12 V dc for use by the SW300
components. The SW300 enclosure provides connections for up to eight power
supply SBBs. A minimum of four operable power supply SBBs is required for
system operation.
The SW300 enclosure is designed for 4+1 redundant power supply. In this
configuration, the four power supply SBBs on power supply bus A are provided
with additional redundancy by the power supply SBB located in the top shelf
of power supply bus B. This power supply SBB is connected to the black power
cord. Power is provided to the SW300 enclosure until such time as there are less
than four operating power supply SBBs. If this condition is reached, the SW300
enclosure will be held in a reset state.
With 4+4 full redundant power supplies, the SW300 enclosure can sustain
multiple power supply faults. When 4+4 full redundant power supplies are
used, input power may be connected to two separate utility power grids. In
this configuration, the power supply SBBs on power supply bus A are connected
to black power cords. The power supply SBBs on power supply bus B are
connected to grey power cords. See Chapter 3 for further discussion of power
configurations.
Figure 1–5 3½-Inch Power Supply SBB
COMMON POWER
SUPPLY STATUS
LED (GREEN)
POWER SUPPLY
STATUS LED
(GREEN)
CXO-4325A-PH
1–10 Introduction to the SW300 Enclosure
1.3.7 Storage Device SBBs
The storage devices come in either a 3½-inch or a 5¼-inch SBB, as shown in
Figures 1–6 and 1–7 respectively. The SW300 enclosure provides space for 24
3½-inch SBBs, 8 5¼-inch SBBs, or combinations of each. A 3½-inch SBB occupies
one slot in a shelf. A 5¼-inch SBB requires three slots in a shelf.
The disk drive SCSI bus address for 5¼-inch SBBs is usually assigned based
upon the shelf backplane connector but also can be assigned manually in some
SBBs. See the StorageWorks Solutions Shelf and SBB User’s Guide.
The disk drive SCSI bus address for 3½-inch SBBs is usually assigned based
upon the shelf backplane connector.
Not all storage devices are supported by each type of HS array controller. See the
current HS array controller model-specific software product descriptions (SPDs)
and release notes for detailed information.
For a list of the various StorageWorks storage devices that can be utilized in the
SW300, see the StorageWorks Solutions Configuration Guide.
Figure 1–6 3½-Inch SBB
DEVICE
ACTIVITY
(GREEN)
DEVICE
FAULT
(AMBER)
CXO-3671A-PH
Introduction to the SW300 Enclosure 1–11
Figure 1–7 5¼-Inch SBB
DEVICE
ACTIVITY
(GREEN)
DEVICE
FAULT
(AMBER)
CXO-4308A-PH
1–12 Introduction to the SW300 Enclosure
1.4 SW300 SCSI Buses
The six single-ended SCSI-2 buses run vertically and attach to four devices per
SCSI bus (IDs 0 through 3). The two HS array controllers device side, SCSI
initiator IDs are preset by slot location to IDs 6 and 7, as shown in Figure 1–8.
Figure 1–8 SW300 SCSI Buses
id 3
id 3
id 3
id 3
id 3
id 3
SHELF 4
id 2
id 2
id 2
id 2
id 2
id 2
SHELF 3
id 1
id 1
id 1
id 1
id 1
id 1
SHELF 2
id 0
id 0
id 0
id 0
id 0
id 0
SHELF 1
id 6
id 6
id 6
id 6
id 6
id 6
CONTROLLER
SLOT 6
id 7
id 7
id 7
id 7
id 7
id 7
CONTROLLER
SLOT 7
PORT 1
PORT 2
PORT 3
PORT 4
PORT 5
PORT 6
CXO-4315A-MC
Introduction to the SW300 Enclosure 1–13
2
Unpacking and Installation Instructions
This chapter describes the site preparation, unpacking, installation, and power-up
procedures for the SW300-series redundant array of independent disks (RAID)
enclosure.
2.1 Site Preparation
SW300-series enclosures are intended for installation in Federal Communications
Commission (FCC) Class A environments. Before installing the SW300 enclosure,
make sure adequate space is provided around the enclosure for opening the front
door and for adequate airflow. See Figure 2–1 for specific space requirements.
Figure 2–1 Minimum Installation Clearance Measurements
476.25 mm
(18.34 in)
SW300
482.60 mm
(19.00 in)
FRONT
DOOR
482.60mm
(19.00 in)
CXO-4316A-MC
2.2 Unpacking the SW300 Enclosure
SW300-series enclosures are packed in a corrugated carton attached to a wooden
shipping pallet, as shown in Figure 2–2. Unpack the SW300 enclosure as follows:
Note
Before unpacking the equipment, inspect the shipping carton for signs
of external damage. Report any damage to the local carrier and to
Multivendor Customer Services or your local Digital sales office.
Unpacking and Installation Instructions 2–1
1. Remove the shipping straps.
2. Remove the top cover.
3. Remove the ramp from the top of the shipping carton and set it aside.
4. Remove the two foam cushions from the top of the SW300 container.
5. Remove the cardboard packaging surrounding the SW300.
6. Remove the plastic barrier bag.
7. Once the SW300 is unpacked, examine the front door, right and left side
panels, top panel, and undercarriage for any apparent damage. Report such
problems immediately to your Digital representative.
Figure 2–2 Unpacking the SW300 Enclosure
TOP
COVER
RAMP
SHIPPING
STRAP
FOAM
CUSHION
SHIPPING
CARTON
PALLET
PLASTIC
BAG
CXO-4317A-MC
2–2 Unpacking and Installation Instructions
2.3 Removing the SW300 Enclosure from the Pallet
Use the following procedure to remove the SW300 enclosure from the shipping
pallet:
WARNING
Serious personnel injury may result if correct safety precautions are not
taken during the removal procedure.
1. Attach the ramp by fitting the ramp lip into the groove on the pallet, as
shown in Figure 2–3.
Figure 2–3 Shipping Pallet Ramp Installation
FRONT
CASTERS
CXO-4318A-MC
2. Lift the lock lever on each front caster to the up position so the SW300
enclosure can be moved.
WARNING
Three people are recommended to unload the SW300 from the shipping
pallet. Failure to use sufficient personnel may result in personnel injury
and equipment damage.
CAUTION
Do not drop the SW300 from a height greater than two inches or serious
structural damage can result.
3. Grasping the sheet metal base assembly, carefully lift the rear of the SW300
enclosure over the ‘‘hump’’ in the middle of the pallet and roll the SW300
enclosure off the pallet and down the ramp to the floor. If any further lifting
Unpacking and Installation Instructions 2–3
of the SW300 enclosure is required, grasp the sheet metal base assembly on
the side and carefully lift it.
4. Retain the shipping container and all packing materials.
2.4 Placing the SW300 Enclosure
Use the following procedure to move the SW300 enclosure to its designated site:
WARNING
To prevent damage to the SW300 enclosure and injury to personnel, make
sure to provide a clear path for the casters.
1. Roll the SW300 enclosure to its installation location.
2. If required, depress the lock on each front caster to prevent the SW300
enclosure from moving.
2.5 Power Cords
Note
The SW300 enclosure is not shipped with power cords.
You need to supply your own power cords. Order country-specific 13-20 amp input
power cords, as listed in Table 2–1.
Table 2–1 Country-Specific Power Cords
Country
Voltage
Amperes
Plug
Meters
(Feet)
Order No.
Australia
250 V ac
16
AS 3112 - 1981
2.5 (8.2)
BN05C–2E
Canada
125 V ac
13
NEMA 5–15
2.4 (8.0)
BN20A–2E
Central Europe
250 V ac
16
CEE 7/7 (Schuko)
2.5 (8.2)
BN03F–2E
Denmark
250 V ac
16
Afsnit 107
2.5 (8.2)
BN27K–2E
Europe–Central
250 V ac
16
CEE 7/7 (Schuko)
2.5 (8.2)
BN03F–2E
India
250 V ac
16
BS 546
2.5 (8.2)
BN27P–2E
Ireland
250 V ac
13
BS 1363
2.5 (8.2)
BN02C–2E
Israel
250 V ac
16
SI 32
2.5 (8.2)
BN24U–2E
Italy
250 V ac
16
CEI 23–16/VII
2.5 (8.2)
BN27J–2E
Japan
125 V ac
13
NEMA 5–15
2.4 (8.0)
BN20A–2E
New Zealand
250 V ac
16
AS 3112—1981
2.5 (8.2)
BN05C–2E
South Africa
250 V ac
16
BS 546
2.5 (8.2)
BN27P–2E
Switzerland
250 V ac
16
SEV 1011
2.5 (8.2)
BN27G–2E
United Kingdom
250 V ac
13
BS 1363
2.5 (8.2)
BN02C–2E
United States
125 V ac
13
NEMA 5–15
3.0 (9.8)
BN20A–2E
2–4 Unpacking and Installation Instructions
2.6 Applying Power
Use the following procedure to apply power:
1. Verify that the on/off switch on each ac power entry controller is set to the off
(0) position.
2. Verify that all power cables are attached to the appropriate power supply
StorageWorks building blocks (SBBs).
3. Verify that all external cables are attached to the controller.
4. Make sure that all SBBs are seated firmly in their shelves.
5. Connect the power cord to an ac power entry controller.
6. Connect each power cord plug to a wall outlet receptacle.
7. Apply power to the enclosure by setting the on/off switch on each ac power
entry controller to the on ( | ) position.
8. Verify the power is on by checking the light emitting diodes (LEDs) on the
power supply SBBs, environmental monitor unit (EMU), and controller.
These LEDs should be displayed as follows:
•
Power supply SBBs—both LEDs (green) are on
•
EMU—SYSTEM OK (green) is on
•
Controller—reset (green) is flashing
•
SW300 cabinet—System OK (green) is on
For further information on SBB LEDs, see Chapter 4.
Note
For further information on controller LEDs and configuration, see the
StorageWorks Array Controllers HS Family of Array Controllers User’s
Guide.
9. Configure the controllers.
Note
For information concerning storage device configuration, see the
StorageWorks Solutions Shelf and SBB User’s Guide.
10. Configure the storage devices.
Unpacking and Installation Instructions 2–5
3
Configuration Rules and Restrictions
This chapter describes configuration rules and restrictions for the SW300-series
redundant array of independent disks (RAID) enclosure. When specific rules and
restrictions are not provided, references are given to the proper StorageWorks
documentation.
3.1 System Configurations
Table 3–1 lists the operating configurations for the SW300 enclosure.
Table 3–1 Configurations
Field Replaceable Unit
Minimum
Maximum
StorageWorks Building Block (SBB) Shelf Power
Supplies (BA35X–HD)
4
8
3½-Inch Storage SBBs (SWXBA–BA (fixed media) or
SWXBA–BB (removable device))
1
24
5¼-Inch Storage SBBs (SWXBB–BA)
0
8
1
2
Environmental Monitor Units (EMUs) (BA35X–EA)
1
2
AC Power Entry Controllers (BA35X–HE)
1
2
Dual Speed Blowers (BA35X–MD)
8
8
HS-series Controllers with Cache Memory
1 Includes
1
HSD30, HSJ30, HSJ40, HSZ10, HSZ15, and HSZ40 controllers.
3.2 Input Power Cord Routing and System Redundancy
The SW300 can be configured with dual ac power redundancy. The optional dual
power redundancy configuration consists of both ac power cords from the ac power
entry controllers being plugged into a primary ac power source (wall outlet) and
an auxiliary ac power source (the same or another wall outlet).
For complete power redundancy, an option is to provide independent, external
power sources. Thus, one ac power entry controller receives ac input power from
one circuit while the second ac power entry controller receives it from a different
circuit.
Configuration Rules and Restrictions 3–1
3.3 Power Configurations
Table 3–2 lists the power configurations for the SW300 enclosure.
Table 3–2 Power Configurations
Power Cords
Input1
Black2
White3
Basic (SBB shelf power supplies in Slot A of each
shelf)4
1
4
0
Redundant (n+1) (SBB shelf power supplies in Slot
A of each shelf and Slot B, top shelf)4
1
5
0
4
4
Single AC Input Assembly (Power Supply Bus A)
Dual AC Power Entry Controller (Power Supply Buses A and B)
SBB shelf power supplies in Slots A and B of each
shelf4
1 From
2 Black
2
the wall outlet to the SW300.
ac power cords are connected to the ac power entry controller A.
3 Grey
ac power cords are connected to the ac power entry controller B.
4 Each
SBB shelf power supply requires a separate ac power cord.
3.4 SW300 SCSI Buses
The six single-ended SCSI–2 buses run vertically and attach to four devices per
SCSI bus (IDs 0 through 3). The two HS array controllers device side, SCSI
initiator IDs are preset by slot location to IDs 6 and 7, as shown in Figure 3–1.
3–2 Configuration Rules and Restrictions
Figure 3–1 SW300 SCSI Buses
id 3
id 3
id 3
id 3
id 3
id 3
SHELF 4
id 2
id 2
id 2
id 2
id 2
id 2
SHELF 3
id 1
id 1
id 1
id 1
id 1
id 1
SHELF 2
id 0
id 0
id 0
id 0
id 0
id 0
SHELF 1
id 6
id 6
id 6
id 6
id 6
id 6
CONTROLLER
SLOT 6
id 7
id 7
id 7
id 7
id 7
id 7
CONTROLLER
SLOT 7
PORT 1
PORT 2
PORT 3
PORT 4
PORT 5
PORT 6
CXO-4315A-MC
3.5 Recommended Loading Sequence
The recommended loading sequence for the SW300 enclosure is as follows:
1. Install a controller in slot 7.
2. Install a controller in slot 6.
3. Install storage device SBBs left to right, bottom to top. Therefore, the first
storage device SBB should be installed in port 1, ID 0, on shelf 1, as shown in
Figure 1–8. The second storage device SBB should be installed in port 2, ID
0, in Shelf 1, and so on with the last SBB installed in port 6, ID 3, in shelf 4.
3.6 HS Array Controller Configurations
For information on redundant array of independent disks (RAID) and other
controller configurations, see the StorageWorks Array Controllers HS Family of
Array Controllers User’s Guide.
Configuration Rules and Restrictions 3–3
4
Error Analysis and Fault Isolation
This chapter describes the errors, faults, and significant events that can
occur during the SW300-series redundant array of independent disks (RAID)
enclosure’s initialization and normal operation. A description of the events and
how to respond to a specific event is provided.
The error and event descriptions isolate failures to the field replaceable unit
(FRU). This information helps increase your knowledge of system functions and
assists you with your report to repair personnel.
4.1 SW300 Front Panel Fault Notification
Figure 4–1 depicts the two light emitting diodes (LEDs) on the SW300 cabinet.
See Table 4–1 to determine the error codes on the SW300 cabinet front panel.
Error Analysis and Fault Isolation 4–1
Figure 4–1 SW300 Light Emitting Diodes
SYSTEM OK
(GREEN)
FAULT
(AMBER)
CXO-4309A-MC
Table 4–1 SW300 Front Panel Fault Notification
When the ...
Is ...
The subsystem ...
System OK (green) LED
Fault (amber) LED
ON
OFF
Is in the normal operating state.
System OK (green) LED
OFF
The subsystem does not have power applied or is in a Reset
state.
1. Check that ac power is applied.
2. Check the EMU control panel LEDs to determine which
FRU has failed.
3. Check the system has at least four operational power
supply SBBs.
4. Check for any error messages on the terminal (if one is
attached)
Fault (amber) LED
ON
4–2 Error Analysis and Fault Isolation
Has a failed FRU. Check the EMU control panel LEDs to
determine which FRU has failed.
4.2 Environmental Monitor Unit (EMU) Functions
Once the SW300 enclosure is powered up, it will operate normally until a fault
condition is detected by the EMU.
In addition to the fault bus functions provided by the fault clock, fault data, and
device swap signals, the EMU performs the following functions during routine
operations:
•
Monitors and controls the cabinet blowers
•
Monitors the power supplies
•
Senses cabinet temperature
•
Monitors the power supply voltage
If the EMU detects a fault condition, it will respond as follows:
•
Turns on the appropriate LED on the EMU panel
•
Turns on the Fault (amber) LED located on the upper right corner on the
front of the SW300
•
Activates the audible alarm
For further discussion on EMU functions, refer to Chapter 1.
4.3 EMU Control Panel LEDs and Fault Notifications
As shown in Figure 4–2, the front panel LEDs display information when the
SW300 enclosure is powered up or encounters a problem. Table 4–2 lists the
EMU control panel buttons and LEDs, their functions, and error code meanings.
Figure 4–2 EMU Control Panel LEDs and Switches
BLOWERS
AUDIBLE
ALARM SWITCH
1
5
SYSTEM OK
2
6
3 4
7
8
TEMPERATURE
SHELF FAULT
BLOWERS
CXO-4310A-MC
Error Analysis and Fault Isolation 4–3
Table 4–2 EMU Control Panel LEDs/Switches and Description of Errors
When the ...
Is ...
The subsystem ...
System OK (green) LED
Shelf Fault (amber) LED
Blower 1 through 8 (amber) LEDs
Temperature (amber) LED
Audible Alarm switch
ON
OFF
OFF
OFF
OFF
Is in the normal operating state.
Audible Alarm
ON
Has a failed FRU. Check the EMU control panel LEDs to
determine which FRU has failed.
System OK (green) LED
OFF
Has a failed FRU and one or more of the following error
conditions exist:
•
The temperature is above the maximum safe operating
level.
•
The +12 V dc power supply output is out of regulation
•
The +5 V dc power supply output is out of regulation
•
Fewer than four power supply SBBs are operational
ANY blower LED
ON
Has an individual blower failure.
Blower 1, 2, 3, and 4 (amber) LEDs
ON
Has one of the four blowers either not installed or not
connected.
Blower 5, 6, 7, and 8 (amber) LEDs
ON
Has one of the four blowers either not installed or not
connected.
Temperature (amber) LED
ON
Operating temperature is too high. The blowers will
operate at high speed to reduce the temperature.
Shelf Fault (amber) LED
ON
Has one or more of the following faults:
4–4 Error Analysis and Fault Isolation
•
A power supply SBB has failed (verify if any individual
power supply SBB LEDs are off to confirm)
•
Fewer than four power supply SBBs are operational.
4.4 HS Array Controller LEDs and Fault Notification
The operator control panel (OCP), normal operation, and fault notification are
discussed using a typical HSZ40 controller for reference.
4.4.1 HSZ40 Operator Control Panel
The HS controller OCP contains the following:
•
One reset button (//) with an embedded green LED
•
One button per SCSI port
•
Six amber LEDs1
Figure 4–3 shows the HSZ40 controller OCP. Buttons and LEDs serve different
functions with respect to controlling the SCSI ports and/or reporting fault and
normal conditions. Button and LED functions are discussed in the following
sections.
Figure 4–3 HS Controller Operator Control Panel
RESET
BUTTON
OCP
PORT
BUTTONS
PORT
LEDS
E1A-423
TERMINAL
PORT
HSZ40
CXO-4311A-MC
4.4.2 HSZ40 Normal Operation
The reset (green) LED (//) reflects the state of the controller and the host
interface. Once controller initialization completes and its firmware is functioning,
the green button constantly flashes. Pressing the green button during this normal
operation resets the controller.
1
The HSJ-series controller has the amber LEDs embedded in the port buttons.
Error Analysis and Fault Isolation 4–5
Under normal operation, the amber LEDs indicate the state of the respective
SCSI–2 buses. When the devices on the buses are functioning correctly, the
amber LEDs will not be lit or flashing.
Pressing one of the port buttons at this time will light its corresponding amber
LED and quiesce its SCSI–2 port. A port must be quiesced to remove or warm
swap a device on the SCSI–2 bus for that port. For further information regarding
StorageWorks building block (SBB) warm swaps, see the StorageWorks Array
Controllers HS Family of Array Controller Service Manual.
4.4.3 HSZ40 Fault Notification
The OCP LEDs display information when the HS controller encounters a problem
with a device configuration, a device, or the controller itself.
For definitions of error codes, see the StorageWorks Array Controllers HS Family
of Array Controller Service Manual.
4.5 Storage Device SBB LEDs and Fault Notification
The storage device SBBs come in either a 3½-inch or a 5¼-inch as shown in
Figures 4–4 and 4–5 respectively. Each storage SBB has two LEDs that display
the SBB’s status. These LEDs have three states: on, off, and flashing.
•
The upper (green) LED is the Device Activity LED and is on or flashing when
the SBB is active.
CAUTION
Removing a storage SBB when the upper LED is on or flashing can cause
the loss or corruption of data.
•
The lower (amber) LED is the Device Fault LED and indicates an error
condition or configuration problem when it is either on or flashing.
4–6 Error Analysis and Fault Isolation
Figure 4–4 3½-Inch Storage SBB
DEVICE
ACTIVITY
(GREEN)
DEVICE
FAULT
(AMBER)
CXO-3671A-PH
Figure 4–5 5¼-Inch SBB
DEVICE
ACTIVITY
(GREEN)
DEVICE
FAULT
(AMBER)
CXO-4308A-PH
4.6 Power Supply SBB LEDs and Fault Notification
Each power supply SBB has two LEDs that display the power supply status,
as shown in Figure 4–6. The upper (green) LED is the Common Power Supply
Status LED. The lower (green) LED is the Power Supply Status LED.
Error Analysis and Fault Isolation 4–7
•
When the upper LED is on, all the power supplies on its power bus are
functioning properly.
•
When the upper LED is off, at least one of the power supply SBBs on its
power bus is not functioning properly.
•
When the lower LED is off, either there is an input power problem or the
power supply is not functioning.
Figure 4–6 3½-Inch Power Supply SBB
COMMON POWER
SUPPLY STATUS
LED (GREEN)
POWER SUPPLY
STATUS LED
(GREEN)
CXO-4325A-PH
4.7 Dual Speed Blower Fault Notification
The SW300 has eight rear-mounted blowers that cool the controllers and storage
devices. Connectors on the backplane provide the +12 V dc power to operate the
blowers. When a blower fails, the appropriate blower LED is illuminated on the
EMU to identify which blower has malfunctioned.
4–8 Error Analysis and Fault Isolation
5
Removal and Installation Procedures
This chapter describes the procedures to remove and install the following field
replaceable units (FRUs) in the SW300-series redundant array of independent
disks (RAID) enclosure:
•
StorageWorks building block (SBB) power supply or storage device
•
Environmental monitor unit (EMU)
•
Controller
•
Dual speed blower
•
AC power entry controller
5.1 Removing a Power Supply SBB
There are two methods for replacing power supply SBBs: the hot-swap method
and the cold-swap method. You must determine the appropriate replacement
method prior to replacing a power supply SBB.
The light emitting diodes (LEDs) on the front of the SBB indicate the status,
either operational or non-operational.
•
For power supply SBBs, the hot-swap method can be used providing that
device is not active (that is, both LEDs are off).
•
The cold-swap method is normally used during initial installation. The power
is removed from the enclosure assembly and all devices are inactive. None of
the devices is operational until the power is restored.
Use the following procedure to replace a power supply SBB:
CAUTION
The power supply SBB can be damaged if dropped. When removing or
replacing a power supply SBB, always use both hands to support its
weight.
To prevent electrostatic discharge (ESD) damage to an SBB, do not
touch the SBB connector.
1. Disconnect the power cord from the front of the power supply SBB.
2. Make sure that both LEDs on the power supply SBB are off.
3. As shown in Figure 5–1, press the two mounting tabs together to release the
power supply SBB from the shelf.
Removal and Installation Procedures 5–1
4. Use both hands and pull the power supply SBB out of the shelf.
Figure 5–1 Removing a Power Supply SBB (Cabinet Removed for Clarity)
CXO-4314A-MC
5.2 Installing a Power Supply SBB
Use the following procedure to install a power supply SBB:
1. Insert the replacement power supply SBB into the guide slots and push it in
until it is fully seated and the mounting tabs engage the shelf.
2. Connect the power cord to the power supply SBB.
3. After input power is applied, observe the power supply SBB LEDs to make
sure the power supply is functioning properly. Both status LEDs should be
on.
5.3 SBB Warm Swap
An SBB warm swap involves quickly removing and replacing a disk drive,
tape drive, or other storage SBB. SBBs can be removed safely without taking
the system or controller off line or adversely affecting activity on the rest of
the system. Using warm swap also preserves data integrity. However, before
removing a device, either the controller or the operator must determine that the
swap is necessary. The SBB warm swap procedure also can be used to add a
device to an empty shelf slot.
•
The controller determines that a device is bad by trying to access the device,
receiving no response from the device, or detecting excessive errors from the
device.
•
The operator decides to remove a device by examining the controller’s
operator control panel (OCP) codes, the SBB LEDs, system messages, or
system error log information.
5–2 Removal and Installation Procedures
5.4 Removing a Storage Device SBB
CAUTION
Warm swap supports removing and replacing only one SBB at a time.
Should another SBB need to be swapped, the entire warm swap procedure
must be repeated.
The steps in this section must be followed in their exact order to be sure
of the following:
•
Preserve data integrity (especially for devices with older SCSI
interface designs).
•
Reduce chances of making a port unusable for a long period, which
can render several devices inaccessible.
•
Prevent the controller from performing unpredictably.
Removing or replacing a storage SBB is reported to the controller or host by
the C_SWAP signal. The transition of this normally high signal to a low signal
indicates that a storage SBB has been removed or inserted. Upon receipt of this
signal, the controller can respond as described in Table 5–1.
Table 5–1 Controller Response to the C_SWAP Signal
Replacement Action
Controller Response
Removing a storage device when data is not
being transferred
None
Removing a storage device during a data
transfer operation
Verify data validity
Installing a storage device
Begin the storage device configuration
process
Use the following procedure to replace a storage device SBB:
CAUTION
Be sure that the replacement device is the same model as the one being
replaced unless the system is reconfigured.
Be sure the Device Activity (green) LED on the SBB is out. Removing a
storage device SBB when the upper LED is on or flashing can cause the
loss or corruption of data.
To prevent electrostatic discharge (ESD) damage to an SBB, do not
touch the SBB connector.
1. The device must be dismounted from the host before proceeding. (For
example, enter the DISMOUNT command if using the Open VMS operating
system.)
See the operating system documentation for procedures necessary for
dismounting a device.
Removal and Installation Procedures 5–3
2. Quiesce the SBB’s port by pressing and holding the controller port button for
the SBB. Continue holding the button until all controller amber OCP LEDs
light.
Note
Only one port can be quiesced at any time.
If the button is not held long enough, or multiple buttons are pushed in
quick succession, all buttons are ignored (no ports are quiesced). The
button must be pressed and held again to quiesce the port.
3. Wait until the chosen controller port LED flashes alternately with the other
port LEDs (this indicates I/O has stopped). The alternating pattern flashes
for approximately 30 seconds, during which time the SBB can be removed.
If the pattern does not appear after a minute or two, another shelf is
asserting a fault signal that prevents any quiesce function on this controller.
To correct the problem, the suspect shelf must be located and all devices must
be removed.
4. To remove the SBB, press its two mounting tabs together to release it from
the shelf, and pull it out using both hands (see Figure 5–2). While the
controller OCP LEDs are flashing, any remaining SBBs on the quiesced port
will flash their status LEDs.
Figure 5–2 Removing a Storage Device SBB (Cabinet Removed for Clarity)
CXO-4312A-MC
Note
The length of time required for I/O to stop can vary from zero seconds to
several minutes, depending on load, device type, and cache status.
5–4 Removal and Installation Procedures
When the SBB is removed, the LED pattern on the controller OCP changes to
solid amber, and normal operation on the ports resume. At this time, the removed
SBB’s port LED on the controller OCP turns on. The LED stays on until the SBB
is returned to its slot or until another SBB is inserted in the slot. The remaining
port LEDs on the controller OCP turn off.
5.5 Installing a Storage Device SBB
Use the following procedure to install a storage device SBB:
CAUTION
Use a replacement device of the same type as the removed device.
Otherwise, subsystem failures such as the establishment of stripesets
can occur.
1. Quiesce the SBB’s port by pressing and holding the port button on the
controller. Continue holding the button until all controller amber OCP LEDs
are on.
Note
Only one port can be quiesced at any time.
If the button is not held long enough, or multiple buttons are pushed in
quick succession, all buttons are ignored (no ports are quiesced). The
button must be pressed and held again to quiesce the port.
2. Wait until the chosen controller port LED flashes alternately with the other
port LEDs (this indicates I/O has stopped). The alternating pattern flashes
for approximately 30 seconds, during which time the SBB can be inserted.
If the pattern does not appear after a minute or two, another shelf is
asserting a fault signal that prevents any quiesce function on this controller.
To correct the problem, the suspect shelf must be located and all devices must
be removed.
While the controller OCP LEDs are flashing, any SBBs on the quiesced port
will flash their status LEDs.
Note
The length of time required for I/O to stop can vary from zero seconds to
several minutes, depending on load, device type, and cache status.
3. Holding the SBB in both hands, insert it into the guide slots and firmly push
it into the shelf until the mounting tabs snap into place.
4. Observe the status LEDs for the following indications: the Device Activity
(green) LED is either on, flashing, or off. The Device Fault (amber) LED is
off.
5. Restore the device to the configuration. See the StorageWorks Array
Controllers HS Family of Array Controllers Service Manual.
Removal and Installation Procedures 5–5
For additional information on storage device replacement, see the StorageWorks
Solutions Shelf and SBB User’s Guide.
5.6 Removing an Environmental Monitor Unit
Use the following procedure to remove an EMU:
Note
This component can be removed and installed while power is on. If the
system contains a redundant EMU, then one EMU can be hot swapped
without affecting system operation.
1. Loosen the two captive retaining screws with a flat-blade screwdriver.
2. Use a gentle back-and-forth rocking motion to loosen the EMU from the
backplane.
3. Pull the EMU straight out to disconnect it from the backplane.
5.7 Installing an Environmental Monitor Unit
Use the following procedure to install an EMU:
Note
This component can be removed and installed while power is on.
1. Insert the replacement EMU into the guide slots and push it in until it is
seated.
2. Use a gentle back-and-forth rocking motion to help seat the EMU into the
backplane. Press firmly on the EMU until it is fully seated.
3. Tighten the two captive retaining screws with a flat-blad screwdriver.
5.8 Removing a Controller
Use the following procedure to remove a controller:
Note
This component can be removed and installed while power is on.
1. Perform necessary procedures to shut down the controller and remove
accessory components. See the StorageWorks Array Controllers HS Family of
Array Controllers Service Manual.
2. Loosen the four captive retaining screws with a 3/32-inch Allen wrench
(HSJ-series controllers) or a flat-blade screwdriver (HSD- and HSZ-series).
3. Use a gentle up-and-down rocking motion to loosen the controller from the
backplane.
4. Pull the controller straight out to disconnect it from the backplane and place
it on an approved ESD work surface or mat.
5–6 Removal and Installation Procedures
5.9 Installing a Controller
Use the following procedure to install a controller:
Note
This component can be removed and installed while power is on.
1. Slide the controller into the slot using its slot’s rightmost rails as guides.
2. Use a gentle up-and-down rocking motion to help seat the controller into the
backplane.
3. Press firmly on the controller until it is seated.
4. Tighten the four captive retaining screws on the front bezel with a 3/32-inch
Allen wrench (HSJ-series controllers) or a flat-blade screwdriver (HSD- and
HSZ-series).
5. Perform necessary procedures to start up the controller and install accessory
components. See the StorageWorks Array Controllers HS Family of Array
Controllers Service Manual.
5.10 Removing a Dual Speed Blower
CAUTION
Do not remove a failed blower until a replacement is available. Removing
a defective blower without a replacement causes cooling air to vent
through blower mounting space.
Use the following procedure to remove a dual speed blower (see Figure 5–3):
Note
This component can be removed and installed while power is on.
1. Press the upper and lower blower mounting tabs together to release the
blower.
2. Pull the blower straight out.
Removal and Installation Procedures 5–7
Figure 5–3 Removing a Dual Speed Blower (Cabinet Removed for Clarity)
CONNECTOR
UPPER
MOUNTING
TAB
BLOWER
GUIDE
LOWER
MOUNTING TAB
(NOT SHOWN)
CXO-4336A-MC
5.11 Installing a Dual Speed Blower
Use the following procedure to install a dual speed blower:
1. Orient the replacement blower so the connector and guide pin line up with
the blower opening on the rear panel.
2. Push the blower straight in, making sure the upper and lower mounting tabs
snap in place.
5–8 Removal and Installation Procedures
5.12 Removing an AC Power Entry Controller
WARNING
The following procedure is to be performed only by qualified service
personnel. Failure to comply may result in personnel injury or death as a
result of electric shock.
Use the following procedure to remove an ac power entry controller:
1. Press the on/off switch on the ac power entry controller to the off (0) position.
2. Disconnect the ac input power cord.
3. Unscrew the two captive retaining screws securing the ac power entry
controller to the SW300 enclosure.
4. Pull the ac power entry controller from the SW300 enclosure.
5.13 Installing an AC Power Entry Controller
Use the following procedure to install an ac power entry controller:
1. Verify the on/off switch on the replacement ac power entry controller is in the
off (0) position.
2. Insert the replacement ac power entry controller into the SW300 enclosure
and secure with the two captive retaining screws.
3. Connect the ac input power cord.
4. Press the on/off switch on the ac power entry controller to the on ( | ) position.
Removal and Installation Procedures 5–9
Glossary
array controller
A device that exercises control over the SCSI bus, for example, an HSZ40 disk
array controller.
CI
A Digital trademark for the Digital Computer Interconnect bus.
cold-swap
A method of device replacement that requires that power be removed from all
shelves in a cabinet. This method is used when conditions preclude the use of a
warm-swap or hot-swap method.
See also warm-swap and hot-swap.
controller
A hardware line device that manages communications over a line. Controllers
can be point-to-point, multipoint, or multiple line controllers.
electrostatic discharge
See ESD.
ESD
Electrostatic discharge. The discharge of a potentially harmful static electric
voltage as a result of improper grounding.
host
The primary or controlling computer in a multiple computer network.
hot-swap
A method of device replacement whereby the complete system remains online and
active during device removal or insertion. The device being removed or inserted
is the only device that cannot perform operations during this process.
See also cold-swap and warm-swap.
quiesce
To make a bus inactive or dormant. The operator must quiesce SCSI bus
operations, for example, during a device warm swap.
RAID
Redundant array of independent disks. A set of storage techniques devised to
increase the performance and availability of a storage subsystem.
Glossary–1
SBB
System building block. A modular carrier plus the individual mechanical and
electromechanical interface required to mount it into a standard shelf. Any
device conforming to shelf mechanical and electrical standards is considered an
SBB.
SCSI
Small Computer System Interface. This interface defines the physical and
electrical parameters of a parallel I/O bus used to connect computers and
a maximum of seven SBBs. The StorageWorks™ modular storage system
implementation uses SCSI–2, which permits the synchronous transfer of 8-bit
data at rates of up to 10 MB/s.
stripesets
In a RAID configuration, a virtual disk drive with its physical data spread across
multiple physical disks. Stripeset configurations do not include a data recovery
mechanism.
warm-swap
A method of device replacement whereby the complete system remains online
during device removal or insertion. The system bus may be halted for a brief
period of time, during device insertion or removal. No booting or loading of code
is permitted except on the device being inserted.
See also cold-swap and hot-swap.
Glossary–2
Index
A
Acoustic noise declaration, xi
AC power entry controller
description, 1–4
installation, 5–9
removal, 5–9
Applying power, 2–5
B
Blowers
See Dual speed blower, 1–9
Bus
high-availability storage subsystem fault, 1–5
C
Components
AC power entry controller, 1–4
controller, 1–8
dual speed blower, 1–9
environmental monitor unit, 1–6
power supply SBBs, 1–10
storage device SBBs, 1–11
Controller
configurations, 3–3
description, 1–8
installation, 5–7
LEDs, 4–5
loading sequence, 3–3
normal operation, 4–5
operator control panel, 4–5
RAID, 3–3
removal, 5–6
reset, 4–5
D
Device compatibility, viii
Dual speed blower
description, 1–9
fault notification, 4–8
installation, 5–8
removal, 5–7
E
Electronic emissions, viii
Electrostatic discharge, viii
Environmental monitor unit
description, 1–6
error codes, 4–3
fault notification, 4–3
installation, 5–6
LEDs, 4–3
operation, 4–3
removal, 5–6
F
Fault notification
dual speed blower, 4–8
environmental monitor unit, 4–3
HSZ40 controller, 4–6
power supply SBBs, 4–7
storage device SBBs, 4–6
SW300 front panel, 4–1
H
High-availability storage subsystem fault bus, 1–5
HSZ40 controller
fault notification, 4–6
I
Input power cord routing, 3–1
Inspection
of ramps, 2–3
of shipped equipment, 2–1
Installation
AC power entry controller, 5–9
controller, 5–7
dual speed blower, 5–8
environmental monitor unit, 5–6
power supply SBBs, 5–2
storage device SBBs, 5–5
Index–1
L
Loading sequence
controller, 3–3
storage device SBBs, 3–3
M
Manufacturer’s Declarations, ix
P
Placing the SW300, 2–4
Power
applying, 2–5
Power configurations, 3–2
Power cords, 2–4
Power supply SBBs
description, 1–10
fault notification, 4–7
installation, 5–2
LEDs, 4–7
redundancy, 1–10
removal, 5–1
R
RAID
controller, 3–3
Recommended environmental limit, 1–3
Redundancy
power supply SBBs, 1–10
system, 3–1
Removal
AC power entry controller, 5–9
controller, 5–6
dual speed blower, 5–7
environmental monitor unit, 5–6
power supply SBBs, 5–1
storage device SBBs, 5–3
SW300 from pallet, 2–3
S
SBB
warm swap, 5–2
SCSI buses, 1–13, 3–2
Site preparation, 2–1
Specifications, 1–3
Storage device SBBs
description, 1–11
fault notification, 4–6
installation, 5–5
LEDs, 4–6
loading sequence, 3–3
removal, 5–3
Index–2
SW300
loading sequence, 3–3
overview, 1–1
placing of, 2–4
recommended environmental limit, 1–3
redundancy, 3–1
removal from pallet, 2–3
SCSI buses, 1–13, 3–2
specifications, 1–3
SW300 front panel
error codes, 4–1
fault notification, 4–1
LEDs, 4–1
System configurations, 3–1
U
Unpacking the SW300, 2–1
W
Warm swap
SBB, 5–2