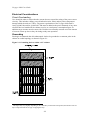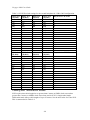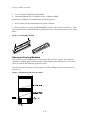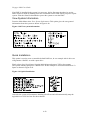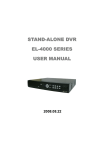
1
Voyager 3000
SCSI RAID Storage Array
User’s Manual
MAN-VRA3000UG-1
Revision A4_1
10-November-1997
Contents
Chapter One ........................................................................................................................... 1-1
Introduction....................................................................................................................... 1-1
Voyager 3000 Family ................................................................................................... 1-1
VRA-3001T-XX-Y ................................................................................................. 1-2
VRA-3002T-XX-Y ................................................................................................. 1-3
VRA-3001R-XX-Y ................................................................................................. 1-5
VRA-3002R-XX-Y ................................................................................................. 1-6
Options.................................................................................................................... 1-7
System Features............................................................................................................ 1-7
Device Carrier ......................................................................................................... 1-7
Cooling.................................................................................................................... 1-7
RAID Controller...................................................................................................... 1-7
Power Supplies ........................................................................................................ 1-8
SCSI Connectors ..................................................................................................... 1-8
RAID Basics................................................................................................................. 1-9
RAID 0 .................................................................................................................... 1-9
RAID 1 / 0+1........................................................................................................... 1-9
RAID 3 .................................................................................................................. 1-10
RAID 5 .................................................................................................................. 1-10
Required Number of Drives and Net Capacity ...................................................... 1-10
Chapter Two........................................................................................................................... 2-1
Installation and Setup........................................................................................................ 2-1
Unpacking and Initial Setup......................................................................................... 2-1
Recommendations for installation of rackmount systems in 19” racks ........................ 2-1
Ambient Temperature.............................................................................................. 2-1
Air Flow .................................................................................................................. 2-1
Mechanical Loading................................................................................................ 2-1
Electrical Considerations......................................................................................... 2-2
Grounding ............................................................................................................... 2-2
Setting the host SCSI Ids.............................................................................................. 2-3
Setting the target SCSI Ids ........................................................................................... 2-3
Setting the target SCSI Ids on a VRA-3001 system................................................. 2-3
Setting the target SCSI Ids on a VRA-3002 system................................................. 2-5
Cabling and Termination Issues ................................................................................... 2-8
Components ................................................................................................................. 2-9
Power Supplies ........................................................................................................ 2-9
Devices.................................................................................................................... 2-9
Power Option Board.............................................................................................. 2-10
Controller .............................................................................................................. 2-10
Advanced Cooling Modules .................................................................................. 2-12
Component Insertion and removal ............................................................................. 2-13
Drive Insertion....................................................................................................... 2-13
Drive Removal ...................................................................................................... 2-13
PSU Insertion and Removal .................................................................................. 2-14
Controller Insertion and Removal.......................................................................... 2-14
Chapter Three......................................................................................................................... 3-1
EMU ................................................................................................................................. 3-1
Environmental Monitoring Unit Configurations .......................................................... 3-1
Introduction ............................................................................................................. 3-1
ii
EMU Features ......................................................................................................... 3-1
System Configurations ................................................................................................. 3-2
Setting up the EMU................................................................................................. 3-3
Available EMU information.................................................................................... 3-5
Interpreting the EMU LED Feedback...................................................................... 3-6
Connecting the EMU ................................................................................................... 3-7
Chapter Four .......................................................................................................................... 4-1
RAID controller configuration .......................................................................................... 4-1
Controller Description.................................................................................................. 4-1
Controller Configuration .............................................................................................. 4-1
Accessing the VOYAGER 3000 Menus....................................................................... 4-2
Connecting a Monitor ............................................................................................. 4-2
Creating a logical volume........................................................................................ 4-6
Creating a Second Logical Volume............................................................................ 4-11
Adding a Global Spare ............................................................................................... 4-12
Partitioning a Logical Volume ................................................................................... 4-13
Mapping Host LUNs .................................................................................................. 4-14
De-assigning LUN Mapping ...................................................................................... 4-16
Scan New SCSI Drives............................................................................................... 4-16
View and Edit logical drives ...................................................................................... 4-17
View and Edit SCSI Drives........................................................................................ 4-17
View and Edit SCSI Channels.................................................................................... 4-18
View and Edit Configuration Parameters................................................................... 4-20
View and Edit Peripheral Devices.............................................................................. 4-21
System Functions ....................................................................................................... 4-21
Down Loading New Firmware ................................................................................... 4-21
View System Information........................................................................................... 4-22
Quick Installation ....................................................................................................... 4-22
Chapter Five........................................................................................................................... 5-1
Front Panel Operation ....................................................................................................... 5-1
Creating a New Logical Drive...................................................................................... 5-1
Viewing Disks Assigned to a Logical Drive................................................................. 5-2
Assigning a Spare Drive............................................................................................... 5-3
Mapping a Logical Drive to a Host Channel and LUN ............................................... 5-3
Deleting a Logical Drive ......................................................................................... 5-4
Setting the SCSI Channels ........................................................................................... 5-4
Channel Terminator Setting ................................................................................... 5-5
SCSI Reset at Power-Up Setting ............................................................................. 5-6
Sequential Drive Spin-Up Setting ........................................................................... 5-6
Data Cache Setting.................................................................................................. 5-6
Viewing Connected Drives........................................................................................... 5-6
Adding New Drives into Current List .......................................................................... 5-7
Issuing a Reset.............................................................................................................. 5-7
Serial Number .............................................................................................................. 5-7
Download Firmware..................................................................................................... 5-7
iii
Figures
Figure 1-1 VRA-3001T-XX-Y Single Tower......................................................................... 1-2
Figure 1-2 Internal bus configuration of VRA-3001T-XX-Y................................................. 1-3
Figure 1-3 VRA-3002T-XX-Y Twin Tower .......................................................................... 1-3
Figure 1-4 VRA-3002T-XX-Y SCSI target interconnects...................................................... 1-4
Figure 1-5 VRA-3001R-FW-Y example configuration.......................................................... 1-5
Figure 1-6 VRA-3002R-FW-Y example configuration.......................................................... 1-6
Figure 1-7 Device Carrier ...................................................................................................... 1-7
Figure 1-8 PSU mounted in removable canister..................................................................... 1-8
Figure 2-1 Grounding shelves within a 19" cabinet ............................................................... 2-2
Figure 2-2 Rear view of rack showing ground point .............................................................. 2-3
Figure 2-3 Rear view of single tower showing host connections............................................ 2-4
Figure 2-4 Rear view showing ACMs, cowl and shield ......................................................... 2-4
Figure 2-5 Setting the Target Bus SCSI IDs........................................................................... 2-5
Figure 2-6 Setting the RAID Target Bus SCSI IDs ................................................................ 2-5
Figure 2-7 Location of DPS1 on VRA-3002 second backplane............................................. 2-6
Figure 2-8 SCSI ID Switch (DPS1)........................................................................................ 2-7
Figure 2-9 Removal and insertion of a Power Supply Unit................................................... 2-9
Figure 2-10 Device carrier ..................................................................................................... 2-9
Figure 2-11 RAID Controller ............................................................................................... 2-11
Figure 2-12 Main board access ............................................................................................ 2-11
Figure 2-13 Installing SIMMs .............................................................................................. 2-12
Figure 2-14 Removing the back face plate........................................................................... 2-12
Figure 2-15 Rear view of ACM assembly ............................................................................ 2-13
Figure 3-1 Single shelf EMU configuration ........................................................................... 3-2
Figure 3-2 Dual shelf EMU configuration ............................................................................. 3-2
Figure 3-3 Location of EMU within the shelf ........................................................................ 3-3
Figure 3-4 EMU PCB layout.................................................................................................. 3-3
Figure 3-5 Connecting the EMUs together ........................................................................... 3-7
Figure 4-1 Front view of controller (within a canister) .......................................................... 4-1
Figure 4-2 Logical View of VOYAGER 3001 ....................................................................... 4-2
Figure 4-3 Windows Program Manager ................................................................................. 4-3
Figure 4-4 Windows Terminal Program (Main Menu)........................................................... 4-3
Figure 4-5 Setting Windows Terminal Emulation.................................................................. 4-4
Figure 4-6 Setting Windows Terminal Preferences ................................................................ 4-4
Figure 4-7 Windows Terminal Preferences Screen ................................................................ 4-5
Figure 4-8 Windows Terminal Communications Settings...................................................... 4-5
Figure 4-9 Windows Terminal Communication Settings ....................................................... 4-6
Figure 4-10 Initial Screen....................................................................................................... 4-7
Figure 4-11 Main Menu Screen ............................................................................................. 4-7
Figure 4-12 Verifying Drive Configuration ........................................................................... 4-8
Figure 4-13 View and edit Logical Drives Screen.................................................................. 4-8
Figure 4-14 Creating a logical drive....................................................................................... 4-9
Figure 4-15 Selecting the logical drive's RAID level ............................................................. 4-9
Figure 4-16 Selecting drives for inclusion in a RAID set..................................................... 4-10
Figure 4-17 Setting the maximum drive capacity. ............................................................... 4-10
Figure 4-18 Logical drive creation confirmation screen....................................................... 4-10
Figure 4-19 Progress of RAID set creation........................................................................... 4-11
Figure 4-20 Creating a RAID 1 volume ............................................................................... 4-11
iv
Figure 4-21 Selecting two drives to form a RAID 1 set ....................................................... 4-11
Figure 4-22 Viewing all Logical Drives .............................................................................. 4-12
Figure 4-23 Adding Global Spare drive .............................................................................. 4-12
Figure 4-24 Allocating Capacities to partitions.................................................................... 4-13
Figure 4-25 Logical Drive Partition Table ........................................................................... 4-13
Figure 4-26 Allocating capacities to partitions .................................................................... 4-13
Figure 4-27 Mapping Host LUNs ....................................................................................... 4-14
Figure 4-28 LUN Partition table ......................................................................................... 4-14
Figure 4-29 Selecting a Volume for LUN mapping ............................................................. 4-15
Figure 4-30 Selecting a partition for LUN mapping ............................................................ 4-15
Figure 4-31 Mapping Logical Volume 0 Partition 1 to Channel 2 LUN 1 ........................... 4-15
Figure 4-32 Logical mapping of all partitions...................................................................... 4-16
Figure 4-33 List and status of drives on system ................................................................... 4-16
Figure 4-34 Scanning SCSI drives ...................................................................................... 4-16
Figure 4-35 View and edit scsi drives .................................................................................. 4-17
Figure 4-36 View and edit SCSI channels............................................................................ 4-18
Figure 4-37 View and edit SCSI target ................................................................................ 4-19
Figure 4-38 View and edit configuration parameters ........................................................... 4-20
Figure 4-39 Uploading the code using ZMODEM protocol................................................. 4-21
Figure 4-40 View system information.................................................................................. 4-22
Figure 4-41 Quick Installation ............................................................................................. 4-22
v
Tables
Table 1-1 Voyager 3000 Tower configurations...................................................................... 1-1
Table 1-2 Voyager 3000 Rackmountable configurations ....................................................... 1-1
Table 1-3 Voyager 3000 Fault Tolerant configurations ......................................................... 1-1
Table 1-4 Host Connection Codes ......................................................................................... 1-2
Table 1-5 RAID 0 layout........................................................................................................ 1-9
Table 1-6 RAID 0+1 layout.................................................................................................... 1-9
Table 1-7 RAID 3 layout...................................................................................................... 1-10
Table 1-8 RAID 5 layout...................................................................................................... 1-10
Table 1-9 Minimum drives necessary for a RAID set .......................................................... 1-10
Table 2-1 SCSI ID switch settings for the second backplane in a VRA-3002 configuration. 2-8
Table 2-2 Cable Lengths Vs Transfer Rates........................................................................... 2-9
Table 2-3 Device carrier Device Part Numbers.................................................................... 2-10
Table 2-4 Power Option Board Switch Definitions.............................................................. 2-10
Table 3-1 EMU Switch Settings............................................................................................. 3-4
Table 3-2 ID settings for the EMU........................................................................................ 3-4
Table 3-3 Power Sequencing Signals ..................................................................................... 3-5
Table 3-4 Read Only Memory locations within the EMU...................................................... 3-5
Table 3-5 Read/Write locations within the EMU................................................................... 3-5
Table 3-6 Devices/events monitored by the EMU.................................................................. 3-6
Table 3-7 Interpreting the EMU LED feedback ..................................................................... 3-6
Table 4-1 RS232 Terminal Settings ....................................................................................... 4-2
vi
Scope
This manual details the installation and configuration of Eurologic’s Voyager 3000 RAID
storage arrays.
vii
Disclaimer
EUROLOGIC reserves the right to make changes to this manual and the equipment described
herein without notice. EUROLOGIC has made all reasonable efforts to insure that the
information in this manual is accurate and complete. However, EUROLOGIC shall not be
liable for any technical or editorial errors or omissions made herein or for incidental, special,
or consequential damage of whatsoever nature resulting from the furnishing of this manual, or
operation and performance of equipment in connection with this manual.
All Trademarks acknowledged.
viii
Warranty
BASIC WARRANTY—In the absence of any optional warranty or continuing provisions by
formal agreement, EUROLOGIC warrants its products in accordance with the schedules listed
below. Purchaser hereafter mentioned refers at all times to the customer who purchased
EUROLOGIC product(s).
VOYAGER WARRANTY—EUROLOGIC warrants Voyager products of its manufacture to
be free from defect in material and workmanship for a period of one year from the date of
shipment. During this period, if the customer experiences difficulties with a EUROLOGIC
Voyager system and is unable to resolve the problem via phone with EUROLOGIC Technical
Support a Return Material Authorization (RMA) will be issued for the faulty component.
Following receipt of an RMA, the Purchaser is responsible for returning the product to
EUROLOGIC, freight prepaid. EUROLOGIC, upon verification of warranty, will repair or
replace at its option the Voyager component in question, and will then return the product to
the Purchaser, freight prepaid.
CABLE WARRANTY—All EUROLOGIC provided cables are warranted for ninety (90)
days from the time of shipment. Questionable cables should be returned to EUROLOGIC,
freight prepaid where they will be repaired or replaced by EUROLOGIC at its option and
returned to the Purchaser, freight prepaid.
GENERAL TERMS—The above warranties shall not apply to expendable components such
as fuses, bulbs, and the like, nor to connectors, adapters, and other items not a part of the
basic product. EUROLOGIC shall have no obligation to make repairs or to cause replacement
required through normal wear and tear or necessitated in whole or in part by catastrophe, fault
or negligence of the user, improper or unauthorized use of the product, or use of the product in
such a manner for which it was not designed, or by causes external to the product, such as, but
not limited to, power failure or air conditioning. EUROLOGIC's sole obligation hereunder
shall be to repair or replace any defective product, and, unless stated, pay return transportation
costs for such replacement. Purchaser shall provide labor for removal of the defective
product, shipping charges for return to EUROLOGIC and installation of its replacement. Onsite services are not a part of this warranty. Above warranties are subject to change without
notice.
RETURNED MATERIAL—Warranty claims must be received by EUROLOGIC within the
applicable warranty period. A replaced product, or part thereof, shall become the property of
EUROLOGIC and shall be returned to EUROLOGIC at Purchaser's expense. All returned
material must be accompanied by a Return Materials Authorization (RMA) number assigned
by EUROLOGIC. For RMA numbers contact EUROLOGIC at :
Telephone
FAX
e-mail
+ 353 -1-2958366
+ 353-1-2958433
[email protected]
ix
THE EXPRESSED WARRANTIES SET FORTH IN THIS AGREEMENT ARE IN LIEU OF
ALL OTHER WARRANTIES, EXPRESSED OR IMPLIED, INCLUDING WITHOUT
LIMITATION, ANY WARRANTIES OF MERCHANTABILITY OR FITNESS FOR A
PARTICULAR PURPOSE, AND ALL SUCH OTHER WARRANTIES ARE HEREBY
DISCLAIMED AND EXCLUDED BY EUROLOGIC. THESE STANDARD EXPRESS
WARRANTIES ARE IN LIEU OF ALL OBLIGATIONS OR LIABILITIES ON THE PART
OF EUROLOGIC FOR DAMAGES, INCLUDING BUT NOT LIMITED TO SPECIAL,
INDIRECT OR CONSEQUENTIAL DAMAGES ARISING OUT OF OR IN CONNECTION
WITH THE USE OR PERFORMANCE OF THE PRODUCT.
x
Chapter One
Introduction
Voyager 3000 Family
The Voyager 3000 is a cost effective open architecture RAID solution. All Voyager 3000
systems include 8MB EDO cache memory, redundant power supplies (PSUs) and dual
advanced cooling modules (ACM’s) per shelf as standard. The Voyager 3000 series is
available in tower, rackmount and fault tolerant solutions1 . The model number and
descriptions are shown in Table 1-1, Table 1-2 and Table 1-3. The XX suffix refers to the host
connection and a key is shown in Table 1-4. The “Y” suffix refers to the power supply voltage
where a value of “1” is the 110V option and a value of “2” is the 220/240V option.
Components such as disk drives, power supplies and controllers are housed in easily
removable canisters which make up the base building blocks of the system. A shelf consists of
nine bays housing nine of these canisters. A shelf is mounted vertically in the single and dual
tower configurations and horizontally in the case of rackmounted systems.
The Voyager 3000 includes an integrated RAID controller which is independent of the host
system and only requires a host SCSI bus for connectivity.
The Voyager 3000 tower configurations are:
Table 1-1 Voyager 3000 Tower configurations
Model Number
VRA-3001T-XX-Y
VRA-3002T-XX-Y
Description
Single tower RAID, 6 storage bays, 1 controller, 1 host
Twin tower RAID, 13 storage bays, 1 controller, 1 host
The Voyager 3000 rackmountable configurations are:
Table 1-2 Voyager 3000 Rackmountable configurations
Model Number
VRA-3001R-XX-Y
VRA-3002R-XX-Y
Description
Single shelf RAID, 6 storage bays, 1 controller, 1 host
Twin shelf RAID, 13 storage bays, 1 controller, 1 host
The Voyager 3000 fault tolerant solutions are:
Table 1-3 Voyager 3000 Fault Tolerant configurations
Model Number
VRA-3002TFT-XX-Y
VRA-3002RFT-XX-Y
1
Description
Twin tower RAID, 12 storage bays, 2 controllers, 1 host
Rackmount shelf RAID, 12 storage bays, 2 controllers, 1 host
This a future option. Contact Eurologic for availability.
Voyager 3000 User Guide
Table 1-4 Host Connection Codes
FW
FWD
UW
UD
Fast Wide single ended
Fast wide differential
Ultra SCSI wide
Ultra SCSI wide differential
VRA-3001T-XX-Y
The VRA-3001T-XX-Y is typically used as an entry level RAID system where a large data
capacity is not required. The RAID controller is separate to the host system and is platform
independent. It is mandatory that a SCSI bus is available at the host side which will connect to
the host interface of the controller. A maximum external cable length between the VRA3001T-XX-Y and the host system is two metres in fast/wide single ended mode. Figure 1-1
shows the VRA-3001T-XX-Y configured as a single tower unit connected to a single host
system.
Figure 1-1 VRA-3001T-XX-Y Single Tower
The drives are connected to the RAID controller via two drive interfaces as shown in Figure 12. The top three drives are connected to the first drive channel and the bottom three drives are
connected to the second drive channel.
1-2
Introduction
Figure 1-2 Internal bus configuration of VRA-3001T-XX-Y
VRA-3002T-XX-Y
This is a twin tower RAID configuration made up of a single controller and 13 drives as
shown in Figure 1-3.
Figure 1-3 VRA-3002T-XX-Y Twin Tower
1-3
Voyager 3000 User Guide
This system will typically be used in similar situations to that described within the VRA3001T-XX-Y section on page 1-2 but with larger capacity requirements.
The VRA-3002T-XX-Y is configured as two SCSI buses. The first SCSI channel is connected
to the top three drives in the first shelf (left hand side) which are set up as SCSI Ids 0à2. The
cable is then routed to the top four drives in the second shelf. These drives are set up as SCSI
Ids 3à6. The second channel is connected to the bottom three drives in the first shelf which
are configured as SCSI Ids 0à2 and looped to the second shelf to connect to the bottom three
drives which are set up at SCSI Ids 3à5. Refer to Figure 1-4 for a schematic view of the
interconnects. Each of the systems described are also available with differential host SCSI
buses giving an overall host cable length of 25 metres.
Figure 1-4 VRA-3002T-XX-Y SCSI target interconnects
1-4
Introduction
VRA-3001R-XX-Y
This system will be used in a rackmount configuration and will normally be part of an
expandable system. Customers can add rackmount systems subject to cabinet limitations.
Figure 1-5 shows three systems mounted in a standard 19” cabinet. Each shelf is similar in
configuration to the VRA-3001T-XX-Y described earlier and is made up of six storage bays, a
single host connection and one RAID controller. The shelves take 3 U of cabinet space. Each
system is connected to a shelf via its own SCSI bus.
Figure 1-5 VRA-3001R-FW-Y example configuration
1-5
Voyager 3000 User Guide
VRA-3002R-XX-Y
This system is similar to the VRA-3002T-XX-Y and is used for expandable storage. Each
shelf has a measurement of 3 U and may easily be integrated into a standard 19” rackmount
system. The system is made up of twin shelves, 13 storage bays, a single host connection and
one RAID controller. Figure 1-6 shows two hosts connected to two VRA-3002R-XX-Y
systems. In this and the previous case the hosts are completely separate entities and do not
share the data in any way.
Figure 1-6 VRA-3002R-FW-Y example configuration
1-6
Introduction
Options
RCM-RC1-CD
Vision Software - Availability to be announced
VSA-401TE-Y
storage bays
VSA-401RE-Y
shelf, 7 storage bays
Single tower expansion kit for VRA-3001T - 1 shelf, 7
MEM-72P016MEDO-60
MEM-72P032MEDO-60
16 MB EDO SIMM module for Voyager 3000 series
32 MB EDO SIMM module for Voyager 3000 series
Single rackmountable expansion kit for VRA-3001R - 1
System Features
Device Carrier
Front loaded components such as the RAID controller and disk drives are housed in easily
removable device carriers. The device carrier is the basic building block of the series. The
device carriers are of high quality anodised metal construction. This allows for rapid heat
dissipation and conforms to the stringent requirements of CE, UL and FCC standards.
Figure 1-7 shows the device carrier.
Figure 1-7 Device Carrier
Cooling
All models feature two Advanced Cooling Modules (ACMs) per shelf. The modules are
mounted at the rear of the unit. One ACM is capable of cooling an entire shelf in the event of
a module failure.
RAID Controller
The VOYAGER 3000 controller’s main features are:
• Five operating modes:
Non-RAIDDisk Spanning
RAID-0
Striping
RAID-1
Mirroring
RAID-3
Block Striping w/ Dedicated Parity
RAID-5
Multiple Block Striping w/ Distributed Parity
1-7
Voyager 3000 User Guide
•
•
•
•
•
•
•
•
•
•
•
•
Comprehensive failure management including:
Automatic bad sector reassignment
Hot-swapping
Global and Local Spare drive operation
Background rebuilding
Works with any operating system without additional software drivers.
Four types of daughter board:
--ELRC-9021WS:
Wide, single-ended, 1 SCSI channel
--ELRC-9021WD:
Wide, differential, 1 SCSI channel
--ELRC-9051UW:
Ultra wide single-ended, 1 SCSI channel
--ELRC-9051UD:
Ultra wide differential, 1 SCSI channel
Up to 8 logical drives, each with independent RAID mode.
Up to 8 partitions per logical drive2.
Compatible and will automatically match any SCSI hard disks with SCSI-1, SCSI-2 or
Fast SCSI specification.
Full SCSI-2 implementation including Tagged Command Queuing and Multi-Threaded
I/O.
Uses 486 CPU with all executable firmware downloaded into high-speed DRAM.
Firmware resides in easy-to-update Flash Memory.
Up to 32 Mbytes of intelligent Read-Ahead/Write-Back cache.
Front panel LCD and push buttons for configuration and message display.
RS-232 interface for monitoring and configuration via a terminal.
Power Supplies
The VOYAGER 3000 uses two high performance power supply units per backplane. A single
power supply is rated at 180 Watts. Each power supply is rated at greater than 500,000 hours
MTBF with a second power supply providing full redundancy capabilities. The Power supply
units are housed in bays 8 through 9 within the cabinet and are mounted in removable shuttles
for ease of maintenance. Figure 1-8 shows a Power Supply Unit housed in the canister.
Figure 1-8 PSU mounted in removable canister
SCSI Connectors
SCSI connectors are of two types 1.
2.
68 Way MicroD High Density connectors for connection to external hosts.
SCA2 for internal peripheral connections.
2
A total maximum of eight logical drives are allowed e.g. 1 logical drive with eight partitions, 2 logical drives
with 4 partitions each etc.
1-8
Introduction
The industry standard SCA2 connector is used to interface between the device and the
backplane. SCA features staggered contact pins and insertion guidance. All signals such as
SCSI, Ids, Power etc. are carried through the SCA. This lowers cost, enhances reliability and
fully conforms to the Ultra SCSI specification.
RAID Basics
RAID stands for Redundant Array of Independent Disks3. Some of the advantages of using a
RAID storage subsystem are:
•
•
•
Provides disk spanning by weaving all connected drives into one single volume.
Increases disk access speed by breaking data into several blocks for reading/writing it to
several drives in parallel. With RAID, storage speed increases as more drives are added.
Without RAID, the speed slows down as more drives are installed.
Provides fault-tolerance by mirroring or parity operation.
RAID 0
Block Striping - Data is broken into logical blocks, the size of a SCSI disk block, and striped
across several drives.
Drive 0
A0
B0
C0
D0
Table 1-5 RAID 0 layout
Drive 1
Drive 2
A1
A2
B1
B2
C1
C2
D1
D2
Drive 3
A3
B3
C3
D3
Drive 4
A4
B4
C4
D4
RAID 1 / 0+1
Mirroring and Striping - Copy of the same data is recorded into sets of striping drives. In the
event of failure, the duplicate set continues operation. Two drives implies a pure RAID 1
solution without the possibility of striping the mirrored drives. The equivalent capacity will be
that of a single drive. Four drives will appear with the layout as shown in Table 1-6 with the
equivalent capacity of two drives. Six drives will have the equivalent capacity of three drives
and so on. An even number of drives is required for this RAID level.
Table 1-6 RAID 0+1 layout
Set 1
Drive 0
Drive 1
A0
A1
A2
A3
A4
B0
B1
B2
3
Set 2
Drive 0
A0
A2
A4
B1
RAID Advisory Board Definition
1-9
Drive 1
A1
A3
B0
B2
Voyager 3000 User Guide
RAID 3
Block Striping with Dedicated Parity - Data is broken into logical blocks, the size of a SCSI
disk block, and striped across several drives. One drive is dedicated to parity. In the event of
failure, original data is re-generated from the parity information.
Table 1-7 RAID 3 layout
Drive 0
A0
A4
B3
C2
Drive 1
A1
B0
B4
C3
Drive 2
A2
B1
C0
C4
Drive 3
A3
B2
C1
D0
Drive 4
P
P
P
P
RAID 5
Multiple Block Striping with Distributed Parity - Sets a given number of logical blocks as a
unit for striping across several drives. For small read/write operations, one drive may be
activated for improved small record access speed. In this case we can process multiple I/O
requests simultaneously. Parity information is interleaved across the drive array. In the event
of failure, original data is regenerated from the parity information.
Table 1-8 RAID 5 layout
Drive 0
A0-A1
B3-B4
D1-D2
E4-F0
Drive 1
A2-A3
C0-C1
D3-D4
p
Drive 2
A4-B0
C2-C3
P
F1-F2
Drive 3
B1-B2
P
E0-E1
F3-F4
Drive 4
P
C4-D0
E2-E3
G0-G1
Required Number of Drives and Net Capacity
The following table gives a summary of the minimum number of drives required and the
capacity available for the different types of RAID operation:
Table 1-9 Minimum drives necessary for a RAID set
OPERATION
RAID 0
RAID 1
RAID 0 + 1
RAID 3
RAID 5
MIN. DRIVES
REQUIRED
2
2
4
3
3
CAPACITY
AVAILABLE
T
T/2
T/2
T x (n - 1) / n
T x (n - 1) / n
T = Sum of the capacity of all connected drives
n = Number of connected drives
1-10
Chapter Two
Installation and Setup
Unpacking and Initial Setup
On receipt of the system visually inspect the exterior of the packaging for any signs of
damage. If any damage is found the carrier and Eurologic must be notified immediately who
will advise you of the appropriate action. The cartons are sealed via packaging tape which
should be cut open in the normal manner. Remove the top foam layer from each box and
exercise caution when lifting out the components. At this point the contents should be verified
against the packing list and Eurologic should again be notified immediately if any
discrepancies exist. The devices and power supply units are packaged in anti-static packaging
and anti-static precautions must be observed prior to removal. The devices and power supply
units can now be inserted into the tower or shelf.
Prior to applying system power verify that the SCSI IDs are set up correctly as described in
Setting the SCSI IDs and that there is no conflict with any other devices on the SCSI bus.
Verify that the external cabling considerations have been met as described in Cabling and
termination issues.
Recommendations for installation of rackmount systems in
19” racks
It is essential that the following guidelines be complied with to ensure the safe and efficient
operation of VOYAGER 3000 rackmount computer equipment. Eurologic’s rackmount
systems may be installed in closed or open rackmount systems by observing the
environmental, electrical and mechanical precautions listed.
Ambient Temperature
Installation of rackmount systems in standard 19” cabinetry may lead to a differential between
the room ambient temperature and the internal ambient temperature of the rack environment.
The maximum operating temperature of the Voyager 3000 is 40 degrees centigrade, however
it is not recommended that the system is continuously run at these elevated temperatures.
Consideration should therefore be given to ensuring that the room ambient is compatible with
these specifications.
Air Flow
To ensure that the internal heat build up is adequately dissipated into the room environment,
air flow should in no way be restricted. It is essential that no vents or ducts are blocked, that
the system is a minimum of 1 metre away from a solid surface such as a wall or partition.
Airflow through the VOYAGER 3000 shelves is from front to rear.
Mechanical Loading
Consideration should be given to the loading of the cabinet. To maintain a low centre of
gravity (thus reducing the likelihood of instability) racks should be installed (where possible)
from the bottom of the cabinet upwards. This is essential to ensure personnel safety.
Voyager 3000 User Guide
Electrical Considerations
Circuit Overloading
Care should be taken to ensure that the current does not exceed the rating of the power source
circuitry. This includes cabling, power distribution units, filters and any other components
through which the main A/C flows. The power requirements of the Voyager 3000 shelf is
1Amp @200Volts and 2A @100Volts4 and must be added to the power demands of any other
electrical devices installed in the cabinet to arrive at a total power consumption figure. In
addition surge currents must be catered for. Disk devices normally consume twice the amount
of current at start up time as they do during steady state operation.
Grounding
Eurologic recommends that all rackmounted shelves be grounded to a common point in the
cabinet in a radial topology as shown in Figure 2-1.
Figure 2-1 Grounding shelves within a 19" cabinet
4
This figure may vary slightly depending on the redundancy mechanisms incorporated, the number of device
bays occupied and the device type occupying the bays.
2-2
Installation and Setup
A ground point for securing the braid is provided at the rear of the rack and is shown in Figure
2-2.
Figure 2-2 Rear view of rack showing ground point
Setting the host SCSI Ids
For information relating to setting up the host ID refer to page 4-18.
Setting the target SCSI Ids
This section refers to configuration of the SCSI target bus IDs on the backplane. These are
factory set when the system is shipped and should not normally be altered.
Setting the target SCSI Ids on a VRA-3001 system
There are two single switches mounted on the backplane and they are used to set the SCSI IDs
of both target buses . The switches which are accessible from the rear of the units sets the base
SCSI ID's for each bus.
To access the switch perform the following sequence of steps:
1. Remove the back face plate by removing the two Philips head screws as shown in Figure
2-3
2-3
Voyager 3000 User Guide
Figure 2-3 Rear view of single tower showing host connections
2. Refer to Figure 2-4 and remove the ACMs by unscrewing the large single screw, swinging
back and unclipping the snap on wiring connector.
Figure 2-4 Rear view showing ACMs, cowl and shield
3. Remove the shield by unscrewing the large flathead screw from the cowl.
2-4
Installation and Setup
The switches are now accessible at the middle of the backplane on the right hand side when
looking at the rear of the system as shown in Figure 2-5.
Figure 2-5 Setting the Target Bus SCSI IDs
The SCSI Ids may be set to have a base address of either 0 or 3. Setting the switch to the left
(when viewed from the rear) will cause the drives associated with that switch to occupy SCSI
Ids 0à 2. Setting the switch to the right will cause the drives to occupy SCSI Ids 3à5. Figure
2-6 shows both target buses set to a base address of 0. This is the factory default setting and
Figure 2-6 Setting the RAID Target Bus SCSI IDs
should not normally be altered.
Setting the target SCSI Ids on a VRA-3002 system
The first shelf (right hand side when viewed from the rear) in the VRA-3002 is configured the
same as the VRA-3001 shelves. The second shelf is configured as two separate busses and
linked externally via the bulkhead connectors. Figure 1-4 gives a schematic view of the
cabling interconnections.
2-5
Voyager 3000 User Guide
Figure 2-7 Location of DPS1 on VRA-3002 second backplane
Switch positions 1-4 are used to set the starting ID for the first device (bay 0) on the bus.
Devices in bays 1,2 and 3 will automatically increment this ID by one in turn5. For example if
the device in bay 0 is set to be at SCSI ID 3 then the device in bay 1 will automatically appear
as ID 4, the device in bay 2 will appear as ID 5 and the device in bay 3 will appear as ID 6.
Since the addresses of the devices in the first backplane is set to occupy SCSI Ids 0à2 for
each bus, the default setting for the devices in the second backplane is set to be at a base
address of 3. As there are four switches the switch positions are arranged to allow 16 possible
Ids from 0 à 15.
Switch positions 5-8 are used to set the starting address of the fifth device on the bus (bay 4)
and in a similar manner devices in bays 6,7 and 8 will also be automatically incremented. The
default setting for the second bus is also to start at a base address of 3. Figure 2-8 shows how
to set up the SCSI IDs using switch DPS1.
5
If the starting address is at 15 then the subsequent Ids will roll over so that the second drive
will take SCSI ID 0, the third drive ID 1 etc.
2-6
Installation and Setup
Figure 2-8 SCSI ID Switch (DPS1)
SW-1 of DPS1 corresponds to the L.S.B. of the ID of the device in bay 0, whilst SW- 4
corresponds to the MSB of the ID of the device in bay 3. SW- 5 of DPS1 corresponds to the
L.S.B. of the device in bay 4, whilst SW- 8 corresponds to the MSB of the ID of the device in
bay five.
Table 2-1 shows the switch settings along with their corresponding Ids, the default6 settings
are shown in bold text.
6
There is normally no need to change the factory default settings.
2-7
Voyager 3000 User Guide
Table 2-1 SCSI ID switch settings for the second backplane in a VRA-3002 configuration.
DPS1 Sw1 DPS1 Sw2
DPS1 Sw3
DPS1 Sw4
Bay 0 Device SCSI ID
(ID Bit0)
(ID Bit1)
(ID Bit2)
(ID Bit3)
Off
Off
Off
Off
0
On
Off
Off
Off
1
Off
On
Off
Off
2
On
On
Off
Off
3
Off
Off
On
Off
4
On
Off
On
Off
5
Off
On
On
Off
6
On
On
On
Off
7
Off
Off
Off
On
8
On
Off
Off
On
9
Off
On
Off
On
10
On
On
Off
On
11
Off
Off
On
On
12
On
Off
On
On
13
Off
On
On
On
14
On
On
On
On
15
DPS1 Sw5
DPS1 Sw6
DPS1 Sw7
DPS1 Sw8
Bay 4 Device SCSI ID
(ID Bit0)
(ID Bit1)
(ID Bit2)
(ID Bit3)
Off
Off
Off
Off
0
On
Off
Off
Off
1
Off
On
Off
Off
2
On
On
Off
Off
3
Off
Off
On
Off
4
On
Off
On
Off
5
Off
On
On
Off
6
On
On
On
Off
7
Off
Off
Off
On
8
On
Off
Off
On
9
Off
On
Off
On
10
On
On
Off
On
11
Off
Off
On
On
12
On
Off
On
On
13
Off
On
On
On
14
On
On
On
On
15
Cabling and Termination Issues
SCSI requires that cable lengths be no greater than 6 metres at 5MHz clock rates and no
greater than 3 metres at 10MHz clock rates when used in SCSI -2 single ended mode.
Differential mode allows cable lengths of up to 25 metres. See the note below for Ultra SCSI.
This is summarised in Table 2-2.
2-8
Installation and Setup
Note Ultra SCSI has very stringent requirements regarding cable length.
Any cables connected to Ultra devices must conform to Ultra SCSI
specifications. When there are excess of 4 devices cable length should be no
greater than 1.8 metres for single ended Ultra SCSI. The implication of this
is that for any Ultra SCSI system the initiator and target will try to transfer data at
Ultra SCSI rates during the initialisation process regardless of the number of devices
and cable length. When Ultra SCSI cable length restrictions can be violated (in the case
of buses with more than 4 devices) the transfer rate must be reduced at the initiator side.
Table 2-2 Cable Lengths Vs Transfer Rates
Length in Metres
Transfer Speed
6 Metres
5 MHz (10 MB/S for wide (16 bit) SCSI-2, 5MB/S for narrow SCSI-2)
3 Metres
10 MHz (20 MB/S for wide (16 bit) SCSI-2, 10MB/S for narrow SCSI-2)
3 Metres
20 MHz (4 devices or less) Ultra SCSI single ended
1.8 Metres
20 MHz (greater than 4 devices) Ultra SCSI single ended
25 Metres
SCSI-2 Differential mode
Components
Power Supplies
The Power Supplies are housed in removal canisters and are supplied as such. To replace a
power supply simply press the button as shown in Figure 2-9 and withdraw the carrier. The
PSU is hot pluggable7. Refer to the heading on page 2-14 for more details.
Figure 2-9 Removal and insertion of a Power Supply Unit
Note: The Power Supplies are not Auto Sensing and there are two different
types depending on the AC Input. Power Supplies for the US market are
clearly marked with a label stating 115V.
Devices
Devices are housed in two types of canisters. The top LED in the device carrier indicates SCSI
activity on the device and is green. The bottom LED is red and indicates a fault condition.8 A
front view of the device carrier is shown in Figure 2-10.
Figure 2-10 Device carrier
7
To allow correct functionality of the power supply circuitry, please ensure that at least one minute has
elapsed between removal and re-insertion of the power supply unit.
2-9
Voyager 3000 User Guide
SCA attachment
To connect an SCA device to a device carrier simply insert the SCA device and connect it via
the 4 screw holes provided on the underside of the device carrier. There are also device
carriers for other devices. Table 2-3 shows the carrier part numbers.
Table 2-3 Device carrier Device Part Numbers
Description
Part Number
Device carrier Standard 3.5” non SCA wide drive
VOY-W-AA
Device carrier Standard 3.5” non SCA narrow drive
VOY-N-AA
Device carrier Standard 3.5” SCA drive
VOY-SCA-AA
Device carrier for Barracuda 4 drive
VOY-SCB-AA
Power Option Board
The Power Option Board provides RS-232 communication between the controller and a
terminal. It also has a four way DIP switch The relevant switch settings are shown in
Table 2-4.
Table 2-4 Power Option Board Switch Definitions
SW1-4
SW1-2 SW1-3
Sync Link
Termination Power enable
(default is off)
(default is on)
SW1-1
Delay Enable
(default is on)
SW1-4 is used to configure the spindle synchronisation line across both SCSI buses. The
default setting is off. SW1-2 and SW1-3 are used to provide Termination Power and will
normally be set to on. SW1-1 is used to delay the spin up cycle and is normally set to on. The
power sequence delay will cause the second group of drives (the bottom 3 drives in each shelf)
to spin up after the first group of drives in the case of a single power supply. In the case of
dual power supply configurations no delay will take place regardless of this setting.
Controller
To remove the controller shut down the system and remove the device immediately under the
controller. This will grant access to the controller removal level attached to the underside of
the controller. Grasp the handle and depress the release button on the right hand side of the
carrier and pull with a steady slow action towards you. This will allow the controller to be
withdrawn in a controlled manner.
The controller may be removed from the carrier by turning the carrier upside down and
removing the eight countersunk screws. This will withdraw the controller complete with the
backplane interface board.
8
Note that the EMU in conjunction with SAFTE or a RAID controller must be installed to convey this fault
information
2-10
Installation and Setup
Figure 2-11 RAID Controller
Access to the controller is obtained by removing the four screws at the side of the top panel.
This will allow access to the main board. Removing the piggy-backed channel cards reveals
Figure 2-12 Main board access
Power
Socket
Channel 0
Simm
Module
CPU
the topography of the main board as shown in Figure 2-12.
SIMM Installation
Note the following guidelines with regards to DRAM:
• Minimum DRAM required is 4 MBytes installed in SIMM socket
• EDO RAM is recommended for enhanced performance.
2-11
Voyager 3000 User Guide
•
•
Use 72-pin 60 Ns DRAM or EDO SIMM.
Maximum DRAM size is 32 MBytes in one 32 MByte SIMM.
Installation of SIMMs is accomplished by the following steps:
1. Power off the system and disconnect the power connector.
2. Refer to Figure 2-13 Insert the DRAM SIMM vertically with the key to the left (1). Then,
push towards the back until the hooks on both sides of the socket snap into place (2) as shown
below.
Figure 2-13 Installing SIMMs
Advanced Cooling Modules
The Advanced Cooling Modules are accessed from the rear of the cabinet. The ACMs are
supplied as complete units. Do not attempt to disassemble beyond the FRU level. To remove
an ACM perform the following sequence of steps:
1.Remove the back face plate by removing the two lower Philips head screws as shown in
Figure 2-14.
Figure 2-14 Removing the back face plate
2-12
Installation and Setup
Refer to Figure 2-15 and remove the ACMs by unscrewing the large single screw, swinging
back and unclipping the snap-on wiring connector.
Figure 2-15 Rear view of ACM assembly
Installation of an ACM is simply a reversal of the above procedure.
Component Insertion and removal
Drive Insertion
Push the device firmly into the device bay slot. Do not attempt to slam it into position. Ensure
that the button at the front of the carrier is fully extended after device insertion. Failure to do
so may result in an incorrectly latched device. In situations where the button is not fully
extended it may be necessary to apply additional pressure.
SCA devices are hot swappable within the system. The only requirement is that there must be
no I/O activity to the device being removed. If the drive has failed and has been dropped by
the controller then no I/O will take place to that unit and swapping is permissible. This
conforms to case 4 of Hot Plugging as defined in the SCSI specification.9
Drive Removal
Prior to complete removal of the carrier from the VOYAGER 3000 system you must ensure
that the drive has fully spun down as centrifugal forces may damage the device. You must
ensure that adequate shock and anti-static precautions are complied with.
9 SPI Rev 14 Annex A
2-13
Voyager 3000 User Guide
PSU Insertion and Removal
The VOYAGER 3000’s power supply is designed for hot pluggable operation. To achieve this
temperature sensitive current limiting is used. As the temperature to the devices increase the
current limiting function decreases. This will prevent undesirable surges. If removing and
replacing the same PSU please ensure that at least one minute has elapsed between removal
and re-insertion which will allow components to cool to ambient temperature.
Controller Insertion and Removal
To insert the controller push the device firmly into the device bay slot. Do not attempt to slam
it into position. To remove refer to the paragraph heading marked
Controller on page 2-10.
2-14
Environmental Monitoring Unit
Chapter Three
EMU
Environmental Monitoring Unit Configurations
Introduction
The Environmental Monitoring Unit ( EMU ) is a multifunction plug-in daughter card that
allows a user to monitor the operational status of a Voyager 3000 system. There is one EMU
per storage shelf. The module provides visual and audible feedback of events to the user. In
addition the EMU provides addressable memory locations which may be read or written to.
This allows more comprehensive monitoring and reporting to intelligent agents such as
Eurologic’s Vision software. The EMU specification is based on the SAFTE ( SCSI Accessed
Fault Tolerant Enclosures ) specification, and contains many of the features detailed there.
EMU Features
•
•
•
•
•
•
•
•
Monitors presence and status of Fans and Power Supply Units ( PSU ) .
Monitors presence of SCSI devices.
Monitor UPS status and presence.
Indicates error conditions visually and audibly.
Adjustable over-temperature warning.
Stores insertion counts for all removable devices - PSU, Fan or SCSI Device
Communication via serial RS232 port or via I2C bus.
Fully compatible with Eurologic’s Vision software.
The EMU is a flexible unit which may be configured in a variety of ways. It connects to a host
system via an RS-232 link. Up to eight EMUs may be cascaded together in a Master/Slave
configuration. Each EMU is set up to have a distinct ID. A device having an ID of 0 will be a
Master, all other devices are designated as Slaves. Multiple EMUs are daisy chained together
via an I2C bus.
The EMU stores data in a non-volatile EEPROM memory so it is possible to track changes in
the system even if power has been removed. On power up the EMU compares the physical
system configuration to that stored in memory and notes any changes. These changes will be
reported to the Host. It is the responsibility of the Host to process this information.
3-1
Voyager 3000 User Guide
System Configurations
Single Shelf configuration
Figure 3-1 shows how a single shelf Voyager 3000 system is configured with an EMU. The
system is set up with a device ID of 0 ensuring that it functions as a master device.
Figure 3-1 Single shelf EMU configuration
Dual shelf configuration
In a dual shelf configuration the Host connects to the I2C Master via RS232 serial link. Data
from the second EMU is requested via the I2C bus and is passed to the Host via the RS232
link. The I2C Master has sufficient memory to store global system information and its own
status information, the slave will store its own status information. An unique I2C address is
assigned to each EMU with the address 0 reserved for the master. The EMU currently has
provision to support up to eight shelves.
Figure 3-2 Dual shelf EMU configuration
3-2
Environmental Monitoring Unit
Setting up the EMU
The EMU is physically located at the rear of the device shelf. A magnified view of the EMU is
shown in Figure 3-3.
Figure 3-3 Location of EMU within the shelf
A view of the PCB layout is shown in Figure 3-4.
Figure 3-4 EMU PCB layout
The switch settings for the Dip. Switches shown in Figure 3-4 above are given in Table 3-1
3-3
Voyager 3000 User Guide
Table 3-1 EMU Switch Settings
Switch
SW1
SW2
SW3
SW4
SW5
SW6
SW7
Signal Name
ID2
ID1
ID0
Sync
DLYSEN
DLYSON
Term Pwr 1
SW8
Term Pwr 1
Description
Address Bit 2
Address Bit 1
Address Bit 0
Spindle Sync
Drive Spinup Enable
Drive Spinup Delay
Termination Power
Enable Bus One
Termination Power
Enable Bus Two
Default Setting
Setting is
position
dependent
Off
On
Off
On
On
SW1àSW3 are used to set the I2C bus ID. A device with address 0 is designated as the
master. Any other ID caused the EMU to appear as a slave device. Table 3-2 lists the ID
setting for the EMU.
Table 3-2 ID settings for the EMU
SW1
SW2
SW3
EMU ID
Off
Off
Off
Off
On
On
On
On
Off
Off
On
On
Off
Off
On
On
Off
On
Off
On
Off
On
Off
On
0 (Master)
1
2
3
4
5
6
7
SW4 is used to enable drive spindle synchronization.
SW5 and SW6 are used to control drive spinup sequencing.
If SW6 is set off then SW5 will control drive sequencing. If SW5 is off then power up
sequencing is disabled. If SW5 is set to on then power up sequencing will be enabled if only
one PSU is available10 otherwise no power sequencing will occur.
If SW6 is on then delayed power sequencing will always occur regardless of the setting of
SW5. Table 3-3 summarizes these signals
10
This situation may occur if a PSU has failed or the system has been set up with only one PSU configured.
3-4
Environmental Monitoring Unit
Table 3-3 Power Sequencing Signals
SW5
SW6
Off
Off
On
Off
X
On
X = Don’t Care
Action
No delayed power sequencing
Power sequencing if only 1 PSU is available
Delayed power sequencing
SW7 enables SCSI Termination power for bus one and SW8 enables SCSI Termination power
for bus two.
Available EMU information
More comprehensive information is provided to intelligent agents such as Eurologic’s Vision
software. Configuration, warning and status Information is available from all EMU’s. The
single EMU Storage System will provide the data shown in Table 3-4 and Table 3-5.
Table 3-4 Read Only Memory locations within the EMU
Data Name
EMU Part No.
EMU Firmware Rev
EMU Serial No.
EMU Power Cycle Count
Status Byte
EMU Available
EMU Attention
Local Temp
EMU Data
Fan Insertion Count
PSU Insertion Count
SCSI Device Insertion Count
Number of Information Bytes
4 bytes
2 bytes
4 bytes
2 bytes
2 bytes
2 bytes
2 bytes
2 bytes
8 bytes
2 bytes per Fan
2 bytes per PSU
2 bytes per SCSI Devices
Table 3-5 Read/Write locations within the EMU
Data Name
Master
Alarm Temperature
Critical Temperature
Action Byte
SCSI Device Status
Power Supply Control & Status
Fan Status
Number of Information Bytes
12 bytes
2 bytes
2 bytes
2 bytes
2 bytes
2 bytes
2 bytes
3-5
Voyager 3000 User Guide
Each slave EMU will have the same data available to the Master and Host as is shown in
Table 3-4 and Table 3-5. Table 3-6 shows a summary of the status that is monitored by the
EMU.
Table 3-6 Devices/events monitored by the EMU
Connection
Status monitored
Method used
FANS
Connected
Speed OK
Connected
Voltage Good
Loopback circuit.
Squarewave proportional to speed.
Loopback circuit.
Valid if both 12V and 5V good
signals are active. Voltages
monitored internally by the PSU.
o
Temperature trip points set in C by
EMU circuitry.
Loopback circuit.
Read ID settings serially from
backplane.
Internal and external logic level
connectors.
PSU
Temperature
Within range
SCSI Devices
Connected
IDs
Battery Backup or
UPS
On Battery Power
2 Minute reserve
warning
Interpreting the EMU LED Feedback
When a failure occurs an audible alarm will sound from the buzzer and the EMU LED will
flash at regular intervals. Table 3-7 shows how to recognize failures.
Table 3-7 Interpreting the EMU LED feedback
No of Flashes
1
2
3
4
5
5
Interpretation
Fan One Failure
Fan Two Failure
Fan Three Failure
Fan Four Failure
Alarm Temperature
Critical Temperature reached or exceeded
If a device failure occurs then the bottom light indicator will display RED indicating which
device has failed. If a Power Supply failure occurs then the indicator will display RED.
The Silence Switch is used only to silence the alarm buzzer - it does not stop the error LED
from flashing. Multiple failures are shown as multiple sequences of LED flashes, for example
if the first two fans fail, then the LED will flash once, followed by two flashes and it will
continue to display this sequence.
3-6
Environmental Monitoring Unit
Connecting the EMU
This section describes the procedure for connecting the EMU to the host system. It is possible
to have up to eight EMUs connected together in a daisy chain configuration. The first EMU
on the chain must be connected to the host system using the serial RS232 cable provided. The
EMU ID for the first shelf in the chain must be set as ID 0 so that the system will see it as the
master. All other EMUs connected on the chain will be seen by the system as slaves.
The EMUs should be daisy chained together using the EMU cable provided (3 connectors).
The top connector of the EMU cable should be attached to the 3-pin connector on the EMU.
The middle connector of the EMU cable should be connected to the next shelf on the chain.
To the bottom connector on the EMU cable connect the second EMU cable provided. Connect
the middle connector of the second EMU cable to the third EMU on the chain. Continue this
procedure until all the EMUs (up to a max. of 8) have been connected together.
Figure 3-5 shows how to connect the EMUs together.
Figure 3-5 Connecting the EMUs together
3-7
Voyager 3000 User Guide
This page is intentionally left blank.
3-8
Chapter Four
RAID controller configuration
Controller Description
The VOYAGER 3000 is a SCSI to SCSI RAID controller specifically designed to provide
RAID 0, 1, 0+1, 3 or 5 capability to any host system equipped with a SCSI interface. It is
totally independent of the host system's operating system with all the RAID functions
performed by the controller hardware. In effect, it endows the host system with the high speed
and fault-tolerant disk storage operation of RAID technology. The VOYAGER 3000 has
comprehensive drive failure management that allows automatic reassignment to reserve blocks
when a bad sector is encountered during a write. Hot-swapping is supported through
automatic disconnection of a failed drive and detection of a fresh drive followed with
background rebuilding of the data. The controller also supports spare drive operation. All
these failure recovery procedures are transparent to the host system.
The controller is housed in a removable device canister which allows for minimum Mean
Time to Repair (MTTR) periods. It is configured as one host bus with up to two target buses
of 3-7 drives on each bus.
Figure 4-1 Front view of controller (within a canister)
The controller hardware is pre-configured when it leaves the factory but it is the responsibility
of the user to configure the logical volumes according to the capacities and RAID levels.
Controller Configuration
This section covers configuration issues involved with the RAID system. Figure 4-2 shows a
logical view of a Voyager 3001 configuration. In this case there are three SCSI buses
connected to the controller across the three channels. Channel 2 makes up the host SCSI bus
with channels 0 and 1 making up the target buses.
Voyager 3000 User Guide
Figure 4-2 Logical View of VOYAGER 3001
Host SCSI
Channel 2
Channel 1
Channel 0
Host
System
Drive SCSI
Top 3 drives on
VRA-3001
Controller
Drive SCSI
Power
Supply
Bottom 3 drives on
VRA-3001
Accessing the VOYAGER 3000 Menus
Connecting a Monitor
The VOYAGER 3000 is shipped with a serial cable for making the connection from the
options board at the rear of the system to an external monitor. To use the monitor utility, run
the cable from the VOYAGER 3000 to your monitor. The terminal should be configured as
shown in Table 4-1 and set up for VT100 emulation.
Table 4-1 RS232 Terminal Settings
Parameter
Baud Rate
Data Bits
Stop Bits
Parity
Value
9600
8
1
None
Emulating a Monitor
If you do not have a dedicated monitor at your disposal, you can still access the VOYAGER
3000 monitor utility by using a PC and communications software to emulate a monitor. In this
example, we will use the Microsoft Windows V3.X11 Terminal program.
11
Windows 95 users can use HyperTerminal
4-2
RAID Controller Configuration
Figure 4-3 Windows Program Manager
First connect the VOYAGER 3000 to the serial port of your PC with the cable supplied. Then
load Windows, open the Accessories window and double-click on the Terminal icon.
Before you can view the monitor utility, you will have to configure the software to emulate a
Figure 4-4 Windows Terminal Program (Main Menu)
monitor. Start by clicking on Settings/Terminal Emulation.
Select the DEC VT-100 emulation.
4-3
Voyager 3000 User Guide
Figure 4-5 Setting Windows Terminal Emulation
The next step is to set up the terminal preferences
Figure 4-6 Setting Windows Terminal Preferences
De-select Use Function, Arrow and Ctrl Keys for Windows check box as shown in Figure 47.
4-4
RAID Controller Configuration
Figure 4-7 Windows Terminal Preferences Screen
and then click on Settings, Communications
Figure 4-8 Windows Terminal Communications Settings
Select the appropriate COM port. In our example we have connected to the second serial port
so we use COM2. Set the baud rate to 9600, data bits to 8, stop bits to 1, parity to none and
flow control to Xon/Xoff.
The VOYAGER 3000 monitor utility provides complete control over the configuration and
operation of the controller. You may also use the utility to view the status of the controller’s
RAID sets and monitor the progress of create operations. It is also possible to use the monitor
utility to view the I/O performance of the system. Use the arrow keys to navigate through the
4-5
Voyager 3000 User Guide
menus and press the v key to back up to previous levels. Entries are selected via the e
key.
Figure 4-9 Windows Terminal Communication Settings
Creating a logical volume
A "Logical Drive" is a set of drives grouped together to operate under a given RAID level and
appears as a single contiguous drive. The VOYAGER 3000 is capable of grouping connected
drives into 8 logical drives, each operating on the same or different RAID levels. The logical
drive can be further divided into a maximum of 8 "Partitions" (using terminal commands).
During operation, the host sees the logical drive or partition as one single drive. A total of 8
logical units is possible.
In this example we will show how to create a RAID level 5 set using a single tower
configuration. The initial screen is shown in Figure 4-10.
4-6
RAID Controller Configuration
Figure 4-10 Initial Screen
Select Terminal (VT100) mode if following the instructions above and press e. This will
display the screen shown in Figure 4-11.
Figure 4-11 Main Menu Screen
In the example shown the physical configuration consists of a single tower with 6 disk drives.
The first task is to create a RAID set which is a logical drive as far as the host is concerned.
This logical drive will appear as a normal disk to the Operating System and will behave
similar to any other disk with the added benefits of enhanced reliability and performance.
Prior to creating the RAID set, verify that the configuration as seen by the RAID controller
4-7
Voyager 3000 User Guide
matches the actual configuration. This is done by selecting view and edit SCSI drives from the
main menu as shown in Figure 4-12.
Figure 4-12 Verifying Drive Configuration
The controller displays six drives. Use the arrow keys to scroll down if necessary. The
information reported by the VOYAGER 3000 includes the Vendor and Product ID of the
drives as well as their capacity and RAID controller status. The example in Figure 4-12 shows
six drives connected to the two target buses. Each target bus is identified by its channel
number as shown in the second column of Figure 4-12.
In our example there are six Seagate drives of 4095 MB capacity. We will create a RAID level
five set on the three drives connected to channel zero and we will create a RAID level one set
on drives 0 and 1 of channel one. In addition we will create a Global Standby disk on drive 2
of channel 1. Enter the View and edit Logical Drives option from the main menu as shown in
Figure 4-13.
Figure 4-13 View and edit Logical Drives Screen
4-8
RAID Controller Configuration
Pressing the e key will commence the operation of building a new logical drive. A
dialogue will appear asking to Create Logical Drive, answering YES to this prompt brings up
the screen shown in Figure 4-14 prompting the user to select the desired RAID level. Select
the RAID 5 option and press the e key.
Figure 4-14 Creating a logical drive
A list of drives which are available for RAID set inclusion appears as shown in Figure 4-15.
The drives can be tagged for inclusion by positioning the cursor on each drive and selecting
Figure 4-15 Selecting the logical drive's RAID level
by pressing the e key. This will mark them by inserting an asterisk (*) character beside
the drive’s entry in the table.
The example shown in Figure 4-16 includes three drives which will participate in a RAID
level 5 configuration.
4-9
Voyager 3000 User Guide
Figure 4-16 Selecting drives for inclusion in a RAID set
After the drives are selected we back up through the menus by pressing the v key. The next
dialogue to appear prompts the user to assign the maximum capacity of the RAID set. In our
example we will use all of the available drive capacity which is 4095MB. To alter the capacity
press the e key and type in the desired value. Figure 4-17 shows the dialogue for
entering the drive capacity.
Figure 4-17 Setting the maximum drive capacity.
Pressing the v key will bring up the dialogue shown in Figure 4-18
Figure 4-18 Logical drive creation confirmation screen
Select Yes and press the e key. The status of the RAID set creation is shown to the user .
4-10
RAID Controller Configuration
Figure 4-19 Progress of RAID set creation
Creating a Second Logical Volume
There are three drives left unassigned and we will use two of them to create a 2 drive RAID 1
set. This will become the second logical drive. To do this we take the View and Edit Logical
Drives option again from the Main Menu and highlight logical drive one position. As with
creating the first logical volume pressing e will bring up a dialogue box asking to Create
logical Drive, answering YES to this prompt brings up a screen similar to that in Figure 4-20.
Figure 4-20 Creating a RAID 1 volume
Select the RAID Level 1 option and press e. A list of the available drives appears as
shown in Figure 4-21.
Figure 4-21 Selecting two drives to form a RAID 1 set
The drives are selected as before, by selecting drive 0 and drive 1 in turn and pressing e
to place an asterix (*) in the “Slot” field in front of each drive.
4-11
Voyager 3000 User Guide
The status of the SCSI drives are shown by selecting the View and Edit SCSI Drives option
from the Main Menu (Figure 4-11). A list of the SCSI drives and their status is shown, as in
Figure 4-22.
Figure 4-22 Viewing all Logical Drives
The status table shows the first three drives as part of logical volume 0. These have a status of
ON-LINE. In this case the available capacity will be 8190MB because the equivalent capacity
of one of the drives is used for parity information.
The capacity of the second logical volume will be 4095MB as the two drives form a mirror set
with the equivalent capacity of a single member.
Adding a Global Spare
A global spare will now be created on the last remaining drive (drive 2 of channel 1). A global
spare is a spare drive that is accessible to all the logical volumes on the Voyager 3000 system.
This means that if a drive fails in either of the two RAID sets created in the examples above
the global spare will take over for the failed drive. In this example a Global Spare will be
created on drive 2 of channel 1. To assign the Global Spare select the View and edit SCSI
drives option and select the drive (drive 2 of channel 1) and press e on it. A dialog like
that in Figure 4-23 appears.
Figure 4-23 Adding Global Spare drive
Select the Add Global Spare Drive option and answer YES to the prompt.
To create Local Spare select Add Local Spare Drive and then select the logical volume to
which you want to assign the local spare drive. Answer yes to the prompt.
It is also possible to assign a local spare drive when the RAID set is being created. This is
done by selecting the Add Spare Drive option as shown in Figure 4-17.
4-12
RAID Controller Configuration
Partitioning a Logical Volume
Now that we have created two RAID sets we will partition them into logical volumes for the
host CPU’s use. This is done by selecting View and Edit Logical Drives, selecting the logical
volume to partition and press e. Select the Partition Logical Drive option from the menu
shown in Figure 4-24.
Figure 4-24 Allocating Capacities to partitions
Answer YES to the dialogue and the logical drive partition table will appear as shown in
Figure 4-25.
Figure 4-25 Logical Drive Partition Table
Press the e key and enter the desired capacity of the first partition. Repeat this for the
remaining partitions. In the example shown in Figure 4-26 the logical volume has been
divided up into five partitions, each having varying capacities.
Figure 4-26 Allocating capacities to partitions
4-13
Voyager 3000 User Guide
When all the available volume capacity has been divided up press the ESC key to exit.
Mapping Host LUNs
The next stage is to map these partitions to Logical Unit Numbers (LUNs) so that they will be
visible from the host system. This is done by selecting View and Edit Host LUNs from the
Main Menu. Answer YES to the prompt. In our case we are using SCSI channel 2 as our host
channel so this appears for mapping as shown in Figure 4-27.
Figure 4-27 Mapping Host LUNs
Pressing e will bring up the LUN partition table as shown in Figure 4-28.
Figure 4-28 LUN Partition table
4-14
RAID Controller Configuration
We are now presented with the choice of logical volumes to map. In this example we will map
our first logical volume by pressing e with the logical volume 0 highlighted as shown in
Figure 4-29.
Figure 4-29 Selecting a Volume for LUN mapping
A choice of logical volumes to map is given. Pressing e with a logical volume highlighted
will bring up the partition table once again, and we then select each partition in turn for
mapping, as in Figure 4-30.
Figure 4-30 Selecting a partition for LUN mapping
Figure 4-31 shows the first partition of logical volume zero being mapped to the host channel
as LUN one. Partitions across LUNs do not have to be contiguous.
Figure 4-31 Mapping Logical Volume 0 Partition 1 to Channel 2 LUN 1
Figure 4-32 shows a mapping table with the first two LUNs assigned to the first two partitions
of logical volume zero and the next two LUNs assigned to the two partitions of logical volume
one. The next three LUNs are assigned to the last three partitions of logical volume 0.
4-15
Voyager 3000 User Guide
Figure 4-32 Logical mapping of all partitions
De-assigning LUN Mapping
To de-assign a LUN mapping scheme, enter the host LUN mapping screen and select the
partition to de-assign. Answer YES to the dialog that appears. This will cause the LUN to
become available for assignment to another partition.
Scan New SCSI Drives
This option is used to cause the system to scan for new SCSI drives. It is normally used when
new drives are inserted via a Hot Swap operation.
From the main menu select View and Edit SCSI Drives and a screen similar to that in Figure
4-33 will be seen.
Figure 4-33 List and status of drives on system
Select the drive to be scanned by using the Up and Down arrows to highlight it and pressing
e. A screen like that in Figure 4-34 will appear.
Figure 4-34 Scanning SCSI drives
4-16
RAID Controller Configuration
Select the Scan SCSI Drive from this menu. Answer YES to the prompt. Select the channel
you require and select the ID for the drive.
Once the scan is completed successfully a conformation will be displayed stating that Scan
SCSI Drive Successful !
View and Edit logical drives
From the Main Menu select the View and edit logical drives option. The logical drive table
will appear as shown in Figure 4-29. Select the logical drive to be viewed and press e. A
dialog appears that gives the following options:
1. View SCSI Drives
2. Delete Logical Drives
3. Partition Logical Drive
4. Logical Drive Name
5. Rebuild Logical Drive
1.
2.
3.
4.
5.
View SCSI Drives: this option displays a list of the drives in the logical volume and the
status of each of the drive within the logical volume.
Delete Logical Drives: this option allows you to delete a logical drive. The drives that
were part of a deleted Logical drive are then available for use again.
Partition Logical Drive: this option allows you to partition the logical volumes for the
host CPU’s use. See page 4-13 for more details on partitioning a logical volume.
Logical Drive Name: this option allows you to enter a name for the Logical Drive or to
change the existing name.
Rebuild Logical Drive: This option is only available when there is a failed drive in the
system. This option allows you to rebuild information onto a failed drive.
View and Edit SCSI Drives
From the Main Menu select the View and Edit SCSI Drives. A screen similar to that in Figure
4-35 will appear.
Figure 4-35 View and edit scsi drives
Select a drive to view and press e. This will bring up the following menu options:
1. View drive information
2. Scan SCSI drive
3. Set slot number
4. Add drive entry12
5. Clear drive status12
6. Toggle failure signal12
12
This option is not currently supported by the Voyager 3000 system
4-17
Voyager 3000 User Guide
1.
2.
3.
4.
5.
6.
View Drive Information: this option gives information relating to the drive selected.
Information about the drive Revision No., Serial No., and Disk Capacity is shown.
Scan SCSI Drive: this option is covered in detail on page 4-16.
Set Slot Number: this option allows you to assign a slot number for each of the drives in
the Voyager 3000 system.
Add Drive Entry: this option allows you to assign a slot number to an empty carrier with
no drive when using the fault bus. In the future if a new drive is added to this slot it is
not necessary to assign the lot number again.
Clear Drive Status: this option allows the user to delete an empty drive entry. If there is a
drive in the slot or if a slot number has been assigned to the empty slot then this option
will not clear the drive entry.
Toggle Failure Signal: this option allows the user to either switch On or Off the failure
LEDS on the front of the carrier for the purpose of testing the failure LED’s.
View and Edit SCSI Channels
From the Main Menu select View and edit SCSI channels. A screen similar to that in Figure 436 will appear.
Figure 4-36 View and edit SCSI channels
Select the channel to be viewed and the following options will be presented:
1. Channel Mode
2. SCSI ID
3. SCSI Terminator
4. Sync Transfer Clock
5. Wide Transfer
6. View and Edit SCSI Targets
1.
2.
3.
13
Channel Mode: this option allows you to select a SCSI channel13 for use as either a host
bus or a target bus. This option acts as a toggle, if the bus is set for host mode then the
user is prompted to select target mode and vice versa.
SCSI ID : this option allows the user to change the SCSI ID of the initiator
SCSI Terminator: this option allows the user to enable or disable on board termination
for the system
Voyager 3000 uses channel 2 in host mode and channels 0 and 1 in drive mode
4-18
RAID Controller Configuration
4.
5.
6.
Sync Transfer Clock: this option allows the user to adjust the transfer rate of
synchronous data transfers along the bus or to select the asynchronous mode of
operation.
Wide Transfer: this option allows the user to enable or disable wide transfer mode.
View and Edit SCSI Target: when this option is selected a screen similar to that in
Figure 4-37 is presented.
Figure 4-37 View and edit SCSI target
By using the Up and Down Arrow keys the user may scroll down to ID 15.
Select an ID to be viewed by highlighting it and pressing e on it. The following options
are presented:
1. Slot number
2. Maximum Sync. Xfer Clock
3. Maximum Xfer Width
4. Parity Check
5. Disconnect Support
6. Maximum Tag Count
7. Resume to Default Settings
1.
2.
3.
4.
5.
6.
7.
Slot Number: this option allows the user to assign a slot number to the drive in the ID
chosen.
Maximum Sync. Xfer Clock: this option allows the user to set the maximum
synchronous transfer speed in 4ns units.
Maximum Xfer Width: this option allows the user to set the maximum transfer width for
data at either narrow or wide.
Parity Check: this option allows the user to enable or disable parity checking.
Disconnect Support: this option allows the user to enable or disable target disconnect
Maximum Tag Count: this option allows the user to set the desired maximum tag count.
Resume to Default Settings: this option allows the user to restore the default settings for
the selected ID. Figure 4-37 shows the default settings for the Voyager 3000 system.
4-19
Voyager 3000 User Guide
View and Edit Configuration Parameters
From the Main Menu select the View and Edit Configuration Parameters option. A screen
similar to that in Figure 4-38 will appear.
Figure 4-38 View and edit configuration parameters
Selecting the Communication Parameters option will present the following options:
1. Communication Status
2. RS-232 Port Configuration
3. PPP Configuration
4. Modem Operation
1.
2.
3.
4.
Communication Status: this option allows the user to view the status of the
communication devices or protocols configured on the system.
RS-232 Port Configuration: this option allows the user to configure each COM port for
Baud Rate, Data Routing Direct to Port, enable / disable Terminal Emulation.
PPP Configuration: this option applies to Unix systems only. It allows the user to Telnet
to the controller for configuring and monitoring the RAID controller from anywhere on
the internet, provided an IP address has been assigned to the controller.
Modem Operation: this option allows the user to set up and configure a modem on the
system.
Selecting the Caching Parameters option allows the user to enable or disable Write-Back
Caching. It also allows the user to set the optimization to either Random or Sequential I/O.
This will enhance the performance of the system.14
Selecting the Drive Side SCSI Parameters allows the user to enable / disable SCSI motor spin
up. Enable / Disable SCSI reset at Power Up. It also allows the user to set the disk access
delay time prior to first disk access during controller initialization to enhance compatibility
with slow init. drives.
Selecting the Disk Array Parameters option allows the user to select the Rebuild Priority as
being either Low, Normal, Improved or High. This option also allows the user to select how
Verification on Writes is set up on the system.
Selecting the Controller Parameters option allows the user to assign a name to the controller
for easy identification.
14
This option changes the chunk size of the RAID set. However, if you change the caching algorithm, it
marks the RAID sets as invalid and you have to create them again.
4-20
RAID Controller Configuration
View and Edit Peripheral Devices
From the Main Menu select the View and Edit Peripheral Devices option. Two options will
be presented as follows:
1. View Peripheral Device Status
2. Set Peripheral Device Entry
1.
2.
View Peripheral Device Status: this option lists the peripheral devices attached to the
system along with the status and location of each of the separate devices.
Set Peripheral Devices Entry: this option allows the user to enable the redundant
controller function in Auto Configure Mode, as Primary or as Secondary.
System Functions
From the Main Menu select the System Functions option. There is four choices presented all
pertaining to the operation of the system as follows:
1. Mute Beeper
2. Change Password
3. Reset Controller
4. Controller Maintenance
1.
2.
3.
4.
Mute Beeper: this option allows the user to silence the alarm which is activated during
fault conditions.
Change Password: this option allows the user to set security options which denies access
to the RS-232 interface. Use the Enter key to select this field. Pressing Enter prompts the
user to enter the old password followed by two prompts to enter the new password.
Reset Controller: this option allows the user to reset the controller.
Controller Maintenance: this option allows the user to don load new firmware to the
controller.
Down Loading New Firmware
To perform a firmware upgrade use a communication program which supports the ZMODEM
protocol . The procedure is as follows:
•
Select Controller Maintenance from the menu.
•
Select Down Load Firmware
•
Answer Yes to the prompt
•
Use the Communication program to upload the code via the ZMODEM
protocol
Figure 4-39 Uploading the code using ZMODEM protocol
Warning: Do not turn off or reset the controller during download. Doing so
can lead to an unrecoverable error that requires the assistance of Eurologic.
4-21
Voyager 3000 User Guide
If an EMU is installed in the system it is necessary, before firmware download, to set the
EMU in passive mode by holding down the reset button on the EMU while you power up the
system. After the firmware download re-power the system to reset the EMU.
View System Information
From the Main Menu select View System Information. This option gives the user general
information about the system as shown in Figure 4-40.
Figure 4-40 View system information
Quick Installation
This option is used to create a controller default RAID set, in our example with 6 drives we
will generate a RAID 5 set with a spare drive.
Firstly select Quick Installation from the Main Menu and answer YES to the prompt.
The system will then prompt for a RAID level. In this example we will select RAID level 5 +
Spare as shown in Figure 4-41.
Figure 4-41 Quick Installation
After this the system will commence building a RAID set and will automatically map the
logical drive to LUN 0 of the first host channel.
4-22
Chapter Five
Front Panel Operation
The VOYAGER 3000 includes default configurations that it proposes based on the number
and location of the drives installed. During first time installation, we advise that you use these
default configurations provided by the Quick Installation function. This will allow you to
immediately verify if the system is working. Further optimisation can then be made later on.
Note: The quick set-up assumes that there is only
one host system and that it is connected to channel
0.
1
Press ENT for two seconds.
2
Press ENT. The LCD will display the number of
drives and the first possible
RAID level
3
Press t or s to select the RAID level then press ENT
for two seconds. The controller
Quick Logical
Drive Install ..
Set TDRV=4 with
LG Level RAID5 ?
Init please wait
controller will then start initialization.
The RAID levels available are as follows:
1 Drive
= NRAID (Disk Spanning)
2 Drives
= RAID0 or RAID1
>2 Drives = RAID0
RAID1 + Spare
RAID3
RAID5
4
The LCD will display the logical drive information
after completing initialization.
LG=0 RAID5 DRV=5
4008M FL=0 SB=0
Press ENT to confirm.
Creating a New Logical Drive
1
Press ENT for two seconds for the Main Menu.
Quick Logical
Drive Install ..
Voyager 3000 User Guide
2
Press t or s to select View and Edit Logical Drives.
and press ENT.
View and Edit
Logical Drives..
3
Press t or s to select logical drive and press ENT for
two seconds.
LG=0
Not defined
4
Press t or s to select the RAID level and press ENT
for two seconds.
TDRV=4 Create
LG Level=RAID5 ?
5
The LCD will display the first available SCSI drive.
C=1 I=0 1002MB
NEW DRV MICROP
?
Press t or s to select the drive then press ENT for
select drive.
6
Repeat step 5 for all the drives to be included in the
current logical drive.
7
Press ENT for 2 seconds to start initialization.
LG=0 4008MB 10%
Init Please Wait
The LCD will display the logical drive information
after completing initialization.
Example showing:
LG=0
Logical drive 0
RAID5
RAID 5 operation
DRV=5
5 physical drives
FL=0
No failed drives
SB=0
No spare drive
Note if NRAID or RAID 0 is selected, then initialization will be finished
almost immediately.
8
Press t or s to select the host channel / LUN to
which you want to map the logical
drive and press ENT.
LG=0 Map to
CHL=0 LUN=0 ?
9 Repeat step 1 to 8 for all the logical drives to be
created.
Viewing Disks Assigned to a Logical Drive
1
Press ENT for two seconds for the Main Menu.
2
Press t or s to select View and Edit Logical Drives
and press ENT.
5-2
View and Edit
Logical Drives..
Front Panel Operation
3
Press t or s to select logical drive and press ENT.
Example showing:
LG=0
RAID5
DRV=5
FL=0
SB=0
4
LG=0 RAID5 DRV=5
4008M FL=0 SB=0
Logical drive 0
RAID 5 operation
Five physical drives
No failed drives
No spare drive
Press t or s to select View LG=x SCSI drives and
press ENT.
Press t or s to scroll through the drives.
View LG=0
SCSI drives ..
Assigning a Spare Drive
1
Press ENT for two seconds for the Main Menu.
2
Press t or s to select View and Edit Logical Drives
and press ENT.
View and Edit
Logical Drives..
3
Press t or s to select logical drive and press ENT.
LG=0 RAID5 DRV=5
4008M FL=0 SB=0
4
Press t or s to select Set LG=x Spare drive then
press ENT.
Press t or s to select the drive and press ENT.
Set LG=0
Spare drive..
Mapping a Logical Drive to a Host Channel and LUN
1
Press ENT for two seconds for the Main Menu.
2
Press t or s to select View and Edit Logical Drives
and press ENT.
View and Edit
Logical Drives..
3
Press t or s to select logical drive and press ENT.
4
Press t or s to select Set LG=x Host SCSI Channel
then press ENT.
Press t or s to select the host channel / LUN and
press ENT.
LG=0 RAID5 DRV=5
4008M FL=0 SB=0
Set LG=0 Host
SCSI Channel ..
5-3
Voyager 3000 User Guide
Deleting a Logical Drive
1
Press ENT for two seconds for the Main Menu.
2
Press t or s to select View and Edit Logical Drives
and press ENT.
View and Edit
Logical Drives..
3
Press t or s to select logical drive and press ENT.
LG=0 RAID5 DRV=5
4008M FL=0 SB=0
4
Press t or s to select Delete? LG=x and press ENT
for two seconds.
Delete? LG=0
Setting the SCSI Channels
This section includes instructions on setting the following parameters:
SCSI ID
Channel mode (host or drive)
Deleting a LUN definition
1
Press ENT for two seconds for the Main Menu.
2
Press t or s to select View and Edit SCSI Channels
and press ENT.
View and Edit
SCSI Channels ..
3
Press t or s to select channel and press ENT.
CHL 0=Host ID=0
SXF=10M
Example showing:
CHL 0
Channel 0
=Host
Set as host interface
SXF=10M
10 MBps transfer rate
4
To set the SCSI channel ID, press t or s to select Set
SCSI Channel ID and
press ENT for 2 seconds
Press t or s to select the ID number and press ENT.
Set SCSI
Channel ID
..
Redefine? CHL=0
ID=0 to ID:0
The controller must be reset (e.g., by powering-off then on again, by executing "Reset This
Controller" via LCD interface, etc.) for this to take effect.
5-4
Front Panel Operation
5
To set the transfer mode, press t or s to select Set
Transfer Mode and press ENT
for 2 seconds
Set Transfer Rate
Mode
..
Press t or s to select the Sync or Async and press
ENT.
CHL=0
TransferMode=Sync
Change to=Async?
The controller must be reset (e.g., by powering-off then on again, by executing "Reset This
Controller" via LCD interface, etc.) for this to take effect.
6
To change the channel interface mode repeat Step 2
and 3, press t or s to select
Redefine Channel Mode and press ENT.
Redefine Channel
Mode
..
Press ENT for two seconds to change from host to
drive channel mode or vice versa.
The controller must be reset (e.g., by powering-off then on again, by executing "Reset This
Controller" via LCD interface, etc.) for this to take effect.
7
To delete a LUN definition repeat Step 2 and 3, press
t or s to select View and
Delete SCSI LUN and press ENT.
Press t or s to select the LUN number to be deleted
and press ENT.
To confirm deletion, press ENT for two seconds. To
cancel, press ESC.
CHL=0 LUN=0
LG=0
Delete this LUN
Definition ?
Channel Terminator Setting
1
Press ENT for two seconds for the Main Menu.
2
Press t or s to select Set SCSI Channel Terminator
and press ENT.
Set SCSI Channel
Terminator ..
3
Press t or s to select channel and press ENT.
CHL=0 Terminator
Enabled
4
Press ENT for two seconds to change from enable to
disable or vice versa.
CHL=0 Disable
Terminator ?
The controller must be reset (e.g., by powering-off then on again, by executing "Reset This
Controller" via LCD interface, etc.) for this to take effect.
5-5
Voyager 3000 User Guide
SCSI Reset at Power-Up Setting
1
Press ENT for two seconds for the Main Menu.
2
Press t or s to select Edit SCSI Reset at Power-up
and press ENT.
Edit SCSI Reset
at Power-up ..
3
Press ENT for two seconds to change from enable to
disable or vice versa.
Disable SCSI Reset
at Power up?
The controller must be reset (e.g., by powering-off then on again, by executing "Reset This
Controller" via LCD interface, etc.) for this to take effect.
Sequential Drive Spin-Up Setting
To prevent overloading the power supply when several drives turn on at the same time, the
VOYAGER 3000 can sequence the drives to start spinning in succession at five seconds
interval. This is not necessary with the VOYAGER 3000 Power Supply Units
To use this option:
1
Press ENT for two seconds for the Main
Menu.
2
ENT.
Press t or s to select Edit Drive Spin-up
and press
Edit
Drive Spin-up ..
3
Press ENT for two seconds to change from enable to
disable or vice versa.
Disable Drive
Disk Spin-up ?
The controller must be reset (e.g., by powering-off then on again, by executing "Reset This
Controller" via LCD interface, etc.) for this to take effect.
Data Cache Setting
1
Press ENT for two seconds for the Main
2
Press t or s to select Edit Data Cache and
press ENT.
Menu.
Edit
Data Cache ..
3
Press ENT for two seconds to change from enable to
disable or vice versa.
Disable
Data Cache
?
The controller must be reset (e.g., by powering-off then on again, by executing Reset This
Controller via LCD interface, etc.) for this to take effect.
Viewing Connected Drives
1
Press ENT for two seconds for the Main
Menu.
2
ENT.
Press t or s to select View SCSI Drives
and press
5-6
View
SCSI Drives ..
Front Panel Operation
3
Press t or s to scroll through the available
SCSI drives.
Adding New Drives into Current List
1
Press ENT for two seconds for the Main
2
Press t or s to select Scan new SCSI Drive
and press ENT.
3
Press t or s to select channel and press
4
Press t or s to select the ID number and
for two seconds.
Menu.
Scan new SCSI
Drive
..
ENT.
Scan Channel=1
..
press ENT
Scan Channel=1
ID=0
?
5
Repeat step 2 to 5 for all the new drives to be
included.
Issuing a Reset
1
Press ENT for two seconds for the Main
Menu.
2
ENT.
Press t or s to select Reset This Controller and press
Reset This
Controller ..
3
Press ENT for two seconds to confirm reset.
Confirm Reset
This controller?
Serial Number
1
Press ENT for two seconds for the Main
Menu.
2
ENT.
Press t or s to select Serial Number and
press
Serial Number:
XXXXXXXX
The serial number of the unit will be displayed on the LCD panel.
Download Firmware
1
Press ENT for two seconds for the Main
2
Press t or s to select Download Firmware
and press ENT.
3
Press ENT for two seconds to confirm
firmware.
4
Menu.
Download
Firmware
download
The controller will display message and await a
response from the host.
5-7
Confirm
Down load?
Download
in Progress..
Voyager 3000 User Guide
Have the host communication program "send" the file containing the data to be downloaded
using ZMODEM protocol. When downloading is complete, the controller will automatically
reset and engage the new firmware.
5-8
Appendix A
Voyager 3000 Specifications
RAID level
Failure management
Host OS compatibility
Cache size
Host interface
Hard disk interface
Hard disk channels
Channel Terminator
SCSI protocol
SCSI transfer rate
Max. SCSI drives
No. of logical drives
Partitions
No. of LUNs
Control
SCSI connectors
SCSI cabling
Controller Voltage
Controller Current
Operating Temperature
Non Operating Temp
Relative Humidity
Operating Altitude
Weight
Height
Width
Depth
0, 1, 3, 5 (or non-RAID disk spanning)
Bad
sector
reassignment,
hot
swapping, spare drive operation,
background rebuilding
OS independent
Up to 32 MBytes
Single interface Ultra SCSI
Fast Wide SCSI2/Ultra
2
Active, software programmable
SCSI-1, SCSI-2, Fast -2,Ultra SCSI
8-bit/Wide: 10/20/40 MBytes/sec
synchronous
8-bit/Wide:
5/10
MBytes/sec
asynchronous
6/13
8 with different RAID operation
8 per logical drive
8 per channel
Front panel or via RS-232 terminal
8-Bit/Wide: 68-pin header (host side)
Single-ended
+5 Volts
1.5 Amp
5 to 40 °C
-40°C to +66°C (Transportation and
short term storage)
10-96%, non-condensing
Sea level to 10,000 ft.
Single tower
(bays empty) 24.8 lbs/11.3Kgs
Twin tower
(bays empty) 41.8lbs/19Kgs
Rack
(bays empty) 13.2 lbs/6Kgs
Empty carrier 2.42lbs/1.1kgs
Single tower
20.24”/51.4cm
Twin tower
20.24”/51.4cm
Rack
5.2”/13.2cm
Single tower
8.66”/22.0cm
Twin tower
13.9”/35.3cm
Rack
18.9”/48.0cm
Single tower
13.98”/35.5cm
Twin tower
13.98”/35.5cm
Rack
11.81”/30.0cm
Voyager 3000 User Guide
Power consumption
Internal host cable length
Power Supply Rating
MTBF for Controller
Single tower
130 Watts
Twin tower
260 Watts
Rack
130 Watts
1 Metre
180W continuous.
500,000 hours
ii