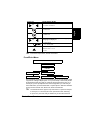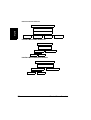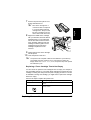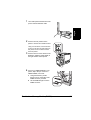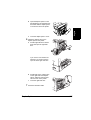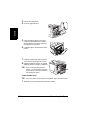
1
®
magicolor 2350
User’s Guide
1800718-001A
Thank You
Thank you for purchasing a magicolor 2350. You have made an excellent choice. Your
magicolor 2350 is specially designed for optimal performance in Windows, Macintosh,
UNIX and other environments.
Trademarks
KONICA MINOLTA and the KONICA MINOLTA logo are trademarks or registered
trademarks of KONICA MINOLTA HOLDINGS, INC.
QCOLOR and magicolor are trademarks or registered trademarks of KONICA
MINOLTA PRINTING SOLUTIONS U.S.A., INC.
This product uses Software Developer Kit of Peerless Systems Corporation.
Copyright © 2001 Peerless Systems Corporation. All Rights Reserved.
This product uses NEST Office SDK of Novell, Inc. Copyright © 1999 Novell, Inc.
NEST is a trademark of Novell, Inc. in the United States and other countries.
Proprietary Statement
The digitally encoded software included with your printer is Copyright © 2003
KONICA MINOLTA BUSINESS TECHNOLOGIES, INC. All Rights Reserved. This
software may not be reproduced, modified, displayed, transferred, or copied in any
form or in any manner or on any media, in whole or in part, without the express
written permission of KONICA MINOLTA BUSINESS TECHNOLOGIES, INC.
Copyright Notice
Copyright © 2003 KONICA MINOLTA BUSINESS TECHNOLOGIES, INC., Marunouchi
Center Building, 1-6-1 Marunouchi, Chiyoda-ku, Tokyo, 100-0005, Japan. All Rights
Reserved. This document may not be copied, in whole or part, nor transferred to any
other media or language, without written permission of KONICA MINOLTA BUSINESS
TECHNOLOGIES, INC.
Manual Notice
KONICA MINOLTA BUSINESS TECHNOLOGIES, INC. reserves the right to make
changes to this manual and to the equipment described herein without notice.
Considerable effort has been made to ensure that this manual is free of inaccuracies
and omissions. However, KONICA MINOLTA BUSINESS TECHNOLOGIES, INC.
makes no warranty of any kind including, but not limited to, any implied warranties of
merchantability and fitness for a particular purpose with regard to this manual.
KONICA MINOLTA BUSINESS TECHNOLOGIES, INC. assumes no responsibility for,
or liability for, errors contained in this manual or for incidental, special, or
consequential damages arising out of the furnishing of this manual, or the use of this
manual in operating the equipment, or in connection with the performance of the
equipment when so operated.
Registering the Printer
Mail (Americas only)—Fill out and send in the registration card enclosed in your
shipment.
Internet—Go to printer.konicaminolta.net/register and follow the instructions given there.
CD-ROM—Follow the instructions on the Software Utilities CD-ROM.
English
Contents
1
Software Installation ........................................................................................ 7
Software Utilities CD-ROM 8
Drivers and Utilities 8
Installing Printer Drivers and Utilities,
Windows Environments—Auto-loading Installation 12
Installing Printer Drivers and Utilities, Windows Environments—Manual
Installation 12
Installing Printer Drivers and Utilities, Macintosh Environments 13
Some Notes to Consider 13
Macintosh OS 9—PPDs and Utilities Installation 13
Macintosh OS X—PPDs and Utilities Installation 15
UNIX, NetWare, and NDPS 17
Linux 17
2
Using Media .................................................................................................... 19
Introduction 20
Media Specifications 21
Media Types 22
General Considerations about Media 22
Plain Paper 23
English
Envelopes 23
Labels 24
Letterhead and Memo Media 26
Postcards 26
Thick Stock 27
Transparencies 27
What Is the guaranteed imageable (printable) area? 28
Page Margins 29
Image Alignment 30
Loading Media 30
Tray 1 (Multipurpose Tray) 31
Tray 2 (Optional Lower Feeder Unit Media Tray) 33
Using Custom-Size Media 35
Duplexing 36
Output Tray 39
Media Storage 39
Accessing Other Printer Features 40
Print Resolution 40
Form Printing 40
Proof-then-Print Printing 41
Additional Assistance 41
3
Working with the Printer ................................................................................ 43
About the Control Panel 44
Control Panel Indicators and Keys 44
Cancelling Print Jobs 45
Printer Menu Overview 46
Menu Overview 46
Main Menu 46
Proof/Print Menu 47
Print Menu 48
Paper Menu 48
Quality Menu 49
Interface Menu 51
System Default Menu 53
Service Menu 57
4
Working with the Printer Driver..................................................................... 59
About Printer Drivers 60
Using PostScript Drivers in Windows
XP/2000 60
Displaying the Tabs 60
Using the Tabs 60
Using PostScript Drivers in Windows NT 62
Displaying the Tabs 62
Using the Tabs 62
ii
Contents
5
Working with Color ........................................................................................ 69
About Color Printing 70
Printer Resolutions 70
Selecting a Resolution 70
Enhanced Automatic Image Density Control (eAIDC) 71
Color Matching 72
Quick Color Configuration 72
Color Options 72
Color Rendering Dictionaries 72
Color Profiles 73
RGB Source Profiles 73
Profiles for Host-based Color Management 74
CMM Test Page 74
K-Preserve 75
RGB Gray Treatment 75
Troubleshooting Color Problems 75
6
Working with the Status Monitor .................................................................. 79
Introduction 80
Environment 80
Recognizing Status Monitor Alerts 80
Recovering from a Status Monitor Alert 80
Closing the Status Monitor 81
7
Replacing Consumables ............................................................................... 83
Consumable Life Expectancies 84
Auto-Image Density Control (AIDC) 84
Toner Cartridge Life 85
Replacing Consumables 86
Refilled Toner Cartridges 86
Replacing a Toner Cartridge 86
Replacing All the Toner Cartridges at Once 91
Replacing the Waste Toner Bottle 92
Replacing the OPC Drum Cartridge 93
Ordering Consumables 96
8
Maintaining the Printer .................................................................................. 99
Maintaining the Printer 100
Cleaning the Printer 102
Contents
iii
English
Using PostScript Drivers in Windows
Me/98 64
Displaying the Tabs 64
Using the Tabs 64
Using Macintosh PPDs 66
Displaying the Printer Options 66
Exterior
102
Interior 103
Media Rollers 103
9
English
Troubleshooting ........................................................................................... 111
Introduction 112
Verifying Printer Configuration Information 112
Preventing Media Jams 113
Understanding the Media Path 114
Tray 1 (Multipurpose Tray) 114
Tray 2 (Optional Lower Feeder Unit with 500-Sheet Media Tray) 114
Duplex Option 115
Clearing Media Jams 116
Handling Media Jams by Location 117
Tray 1 (Multipurpose Tray) 117
Tray 2 (Optional Lower Feeder Unit Media Tray) 117
Inside the Printer 119
Duplex Option 122
Output Tray 122
Solving Problems with Media Jams 123
Solving Other Problems 126
Solving Problems with Printing Quality 133
Status, Error, and Service Messages 140
Standard Status Messages 140
Error Messages 141
Service Messages 145
Additional Assistance 146
10 Installing Accessories ................................................................................. 147
Introduction 148
Antistatic Protection 149
Dual In-Line Memory Module (DIMM) 149
Basic Functionality 150
Installing a DIMM 150
Duplex Option 153
Kit Contents 153
Installing the Duplex Option 153
Optional Lower Feeder Unit and Tray 2 156
Kit Contents 156
Installing the Lower Feeder Unit 157
Installing an Internal Hard Disk 160
11 Repacking the Printer .................................................................................. 163
Storing the Printer 164
Relocating Your Printer 164
Repacking the Printer 165
iv
Contents
English
What’s Involved? 166
A. Turn off the Printer, Unplug the Power Cord, and Remove the Interface
Cables 166
B. Remove the Media and the Tray 1 Media Support 167
C. Remove the Options (if Attached) 167
D. Remove the Waste Toner Bottle, Plug the Openings, and Dispose of It
According to Your Local Regulations 170
E. Remove the OPC Drum Cartridge 170
F. Remove the Transfer Belt 172
G. Repack the Printer for Shipment 173
H. Repack the OPC Drum and Transfer Belt Unit for Shipment 174
Reinstalling the Printer 175
Reinstalling a Transfer Belt Unit 176
A Technical Specifications ............................................................................. 177
Requirements 178
Space Requirements 178
Location Requirements 180
Interface Panel 181
Power Requirements 182
ENERGY STAR Compliance 183
Engine and Controller Specifications 184
Engine 184
Print Speed—Simplex 184
Print Speed—Autoduplex 184
General 185
Controller
185
Electrical 187
Hazardous Chemical Substance Reporting 189
Physical 189
Consumable Life Expectancies 190
Plain Paper 191
Special Media 191
Regulatory Compliance
Safety Information 192
For Norway Users 196
For Finland, Sweden Users 196
Warning and Precaution Symbols 197
Meaning of Symbols 197
Working Safely with Your Laser Printer 200
Index ..................................................................................................................... 203
Contents
v
English
Software
Installation
Software Utilities CD-ROM
English
If you followed all the steps in the Installation Guide that came with your
printer, then the printer is properly set up, connected to your computer,
plugged in, turned on, and ready to receive the system software, drivers, and
utilities on the Software Utilities CD-ROM.
Put the CD-ROM in your computer’s CD-ROM drive and the AutoInstaller
begins the installation process.
Drivers and Utilities
The printer driver and additional software on the Software Utilities CD-ROM
can be installed on PC, Macintosh, and other computers using any of the
following:
Windows Me
Windows 98
Windows XP
Windows 2000
Windows NT4
Macintosh OS 9 or X (version 10.1
or higher)
UNIX/Linux
NetWare (Versions 5 and 6)
NDPS
Drivers and PPDs
Manual installation instructions and additional information are included
in the magicolor 2350 Reference Guide in case you need them.
Drivers
PostScript 2/3
Drivers
Windows XP/
2000
Use/Benefit
These drivers give you
access to all of the
printer features,
including finishing and
advanced layout
Installation Instructions
“Installing Printer Drivers and Utilities,
Windows Environments—Auto-loading
Installation” on page 12.
Windows
Me/98
Windows NT4
PCL6 Drivers
Windows XP
(1200 dpi)
PCL6 allows access to Readme on the Software Utilities CDmost of the features on ROM.
the printer.
Windows 2000
Windows
Me/98
8
Software Utilities CD-ROM
Windows XP
Use/Benefit
PCL5e allows limited
access to features on
the printer.
Windows 2000
Windows
Me/98
Windows NT4
Installation Instructions
Readme on the Software Utilities CDROM.
You cannot install a PCL5e driver for
Windows 9x or Windows NT4 without a
Windows CD-ROM. This CD-ROM is
required so you can supply the
following files when prompted:
For PCL5 9x—ICONLIB.DDL,
UNIDRV.DLL, and UNIDRV.HLP
For PC5 NT4—RASDD.DLL,
RASDDUI.DLL, and RASDDUI.HLP.
If you install the driver and skip these
files, an error message displays at the
end of the process.
Macintosh PPDs PostScript Printer
Readme on the Software Utilities CDDescription (PPD) files ROM.
allow you to configure
options such as
memory and informs
the computer what
options and features
are available.
Windows PPDs These PPD files allow Readme on the Software Utilities CDyou to install the printer ROM; magicolor 2350 Reference
for a variety of
Guide on the Documentation CD-ROM.
platforms, drivers, and
applications.
Linux PPDs
These PPDs can be
Readme on the Software Utilities CDused with third-party
ROM.
Linux print filters that
use PPDs.
Software Utilities CD-ROM
9
English
Drivers
PCL5e Drivers
Utilities
English
Utilities
Use/Benefit
Status Monitor This Windows utility provides
for
information on the status of print jobs
Windows
and alerts you if the printer is not
functioning correctly. It works with
printers connected via TCP/IP or USB.
This Windows utility provides an efficient
Crown Print
method for transporting print jobs
Monitor+ for
Windows
directly to a KONICA MINOLTA printer
via the TCP/IP protocol.
Download
This utility provides the ability to
Manager for
download fonts and overlays to the
Windows
printer’s hard disk. It also allows you to
download fonts to printer memory.
Pantone Tables These tables allow you to match printed
colors to screen colors. Provided for use
with PostScript High resolution printing
(9600 x 600 dpi class).
ICC/ICM
These color profiles provide support for
Profiles
host-based color management systems
including Microsoft ICM 2 for Windows,
Apple ColorSync, CorelDRAW, Kodak
KCMS, Adobe Photoshop 5 and others.
Macintosh
This installer automatically places all
Installer
needed print-related components, such
as a PostScript Printer Description
(PPD) file, color profiles, and screen
fonts, in the correct locations on your
system and allows you to use your
printer with Macintosh OS 9 or X
(version 10.1 or higher).
PageScope Net This utility, designed with administrators
Care
in mind, is a powerful tool allowing
centralized management of network
printers. It is available for Windows and
UNIX platforms. Refer to the
PageScope Net Care chapter in the
Reference Guide or PageScope Net
Care Administrator’s Manual, both in
PDF format on the Documentation CDROM.
10
Installation
Instructions
Readme on the
Software Utilities CDROM.
Readme on the
Software Utilities CDROM.
Readme on the
Software Utilities CDROM.
Readme on the
Software Utilities CDROM.
Readme on the
Software Utilities CDROM.
Readme on the
Software Utilities CDROM.
Readme on the
Software Utilities CDROM; magicolor 2350
Reference Guide on
the Documentation CDROM.
Software Utilities CD-ROM
Use/Benefit
Installation
Instructions
UNIX Host
UNIX Host Software, compatible with a Readme on the
Software
variety of UNIX platforms, allows for the Software Utilities CDcustomization of UNIX-based queues
ROM; magicolor 2350
and filters for the specific features of the Reference Guide on
Crown printer.
the Documentation CDROM.
NDPS Gateway The NetWare interface allows Netware Readme on the
users to manage printers from a central Software Utilities CDlocation.
ROM; magicolor 2350
Reference Guide on
the Documentation CDROM.
PageScope
This utility provides basic configuration Readme on the
Network Setup functions for network printers using
Software Utilities CDUtility
TCP/IP and IPX protocols.
ROM; magicolor 2350
Reference Guide on
the Documentation CDROM.
Software Utilities CD-ROM
11
English
Utilities
English
Installing Printer Drivers and Utilities,
Windows Environments—Auto-loading
Installation
1 Insert the Software Utilities CD-ROM in your CD-ROM drive.
2
3
4
5
In the first window, click Printer Setup.
Choose the method by which the PC and printer are connected.
Follow the instructions on the screen.
On the Printer Options screen, use the check boxes to print a test page,
make the new printer your default, set printer properties and printing
preferences, or update printer firmware (also called printer system
software).
6
7
If the CD-ROM does not start automatically, double-click setup.exe
in the root directory.
Be sure the check the Update Printer Firmware box. It’s very
important to update the printer firmware the first time you install the
printer.
On the last screen, choose Finish.
This returns you to the Main Menu screen where you can register your
printer, review driver or utility documentation, or purchase supplies online.
When you are finished, exit from the Installer.
When the system software installation is complete, remove the CD-ROM
from your CD-ROM drive and store it in a safe place.
Installing Printer Drivers and Utilities,
Windows Environments—Manual
Installation
Manual installation instructions are included in the magicolor 2350 Reference
Guide. Refer to Section 2, “Installing Printer Software, Drivers, and PPDs” for
complete instructions.
12
Arabic and Hebrew versions of the drivers and utilities must be
installed manually.
Installing Printer Drivers and Utilities, Windows
Installing Printer Drivers and Utilities,
Macintosh Environments
In the following sections, we assume that you are installing the software
for the first time.
The current version of Macintosh OS X has limited support for PPD
(PostScript Printer Description) files. Although KONICA MINOLTA printers
can be used with Macintosh OS X, not all advanced printing features are
available. Advanced printing features are still available under Macintosh
OS 9.
You can connect to your printer by
A USB cable
A crossover Ethernet cable
Ethernet patch cables and an Ethernet hub
Macintosh—PPDs
We developed a PostScript Printer Description (PPD) file for the magicolor
2350. This PPD works with the Macintosh Operating System’s PostScript
printer driver (LaserWriter) to provide support for the features on the
magicolor 2350, such as print resolution and media sizes, and optional
features such as duplexing and proof-then-print.
Macintosh OS 9—PPDs and Utilities Installation
OS 9 Step 1. Software Installation
a Insert the Software Utilities CD-ROM in your Macintosh’s CD-ROM
drive.
If necessary, double-click the CD-ROM icon on your Macintosh
desktop.
b Double-click the Install icon.
c Follow the instructions on the screen to install the magicolor 2350
PPD and utilities.
d After the PPD and utilities installation is complete, choose Quit.
e When the system software installation is complete, remove the CDROM from your CD-ROM drive and store it in a safe place.
Installing Printer Drivers and Utilities, Macintosh
13
English
Some Notes to Consider
OS 9 Step 2. Creating a Desktop Printer
USB Connection
English
a Plug one end of the USB cable into the Macintosh and the other into
the printer’s USB port.
b Locate the Desktop Printer Utility.
If you cannot locate it on your Macintosh hard disk, it can be found on
your Macintosh’s system CD-ROM.
c Double-click the Desktop Printer Utility icon to open the application.
The first window prompts you to select the type of desktop printer you
would like to create.
d Select Printer (USB), and select OK.
e Choose the Change button in the PostScript Printer Description section. In the resulting window, select the magicolor 2350 PPD, and
choose Select.
f Choose the Change button in the USB Printer Selection section. In the
resulting window, select the magicolor 2350, and click OK.
EtherTalk Connection
a You can connect via Ethernet in either of two ways:
Plug one end of a crossover Ethernet cable into the Macintosh and
the other into the printer’s Ethernet port.
Use Ethernet patch cables and an Ethernet hub. Plug one end of
each patch cable into the hub, then plug the other end of one into
the Macintosh and the other end of the second into the printer’s
Ethernet port.
b Open the Chooser and select LaserWriter.
c When your printer boots up, it finds a default zone. If your network has
more than one zone and you want to use a different zone, use the
Interface/Ethernet/Ethertalk/Name and Zone menus on the printer
control panel to specify the new zone.
The Name and Zone menus allow you to identify 1 zone with a
name up to 32 characters long. (Up to 16 characters can be
entered in each of the two menus). You cannot use these two
menus to identify two zones. Trailing spaces are not considered
part of the zone name. All standard printable ASCII characters are
valid except the @ and ' symbols. The names are case sensitive.
d Choose Create and then Set-Up.
14
Installing Printer Drivers and Utilities, Macintosh
LPR Connection
a You can connect via Ethernet in either of two ways:
Use Ethernet patch cables and an Ethernet hub. Plug one end of
each patch cable into the hub, then plug the other end of one into
the Macintosh and the other end of the second into the printer’s
Ethernet port.
b Locate the Desktop Printer Utility.
If you cannot locate it on your Macintosh hard disk, it can be found on
your Macintosh’s system CD-ROM.
c Select Printer (LPR), and select OK.
d Type in the IP Address and use the same address for the Queue
name. Click OK.
e Choose Create.
f Name the printer with the IP Address or a descriptive name.
Macintosh OS X—PPDs and Utilities Installation
OS X Step 1. Software Installation—Automatic
a Insert the Software Utilities CD-ROM in your Macintosh’s CD-ROM
drive.
If necessary, double-click the CD-ROM icon on your Macintosh
desktop.
b Double-click the install icon.
The installer uses the path Hard Disk Name/Library/Printers/
PPDs/Contents/Resources/ for PPDs and the path: Hard Disk
Name/Library/Fonts/ for fonts.
c Follow the instructions on the screen to install the magicolor 2350
PPD and utilities.
d After the PPD and utilities installation is complete, choose Quit.
OS X Alternate Step 1. Software Installation—Manual
Manual installation instructions are included in the magicolor 2350 Reference
Guide. Refer to Section 2, “Installing Printer Software, Drivers, and PPDs” for
complete instructions.
Installing Printer Drivers and Utilities, Macintosh
15
English
Plug one end of a crossover Ethernet cable into the Macintosh and
the other into the printer’s Ethernet port.
OS X Step 2. Creating a Printer Queue
a Connect the printer to the computer using a USB or Ethernet
connection.
English
For USB, plug one end of the USB cable into the PC and the other into
the matching printer port.
For Ethernet, you can connect in either of two ways:
Plug one end of a crossover Ethernet cable into the Macintosh and
the other into the printer’s Ethernet port.
Use Ethernet patch cables and an Ethernet hub. Plug one end of
each patch cable into the hub, then plug the other end of one into
the Macintosh and the other end of the second into the printer’s
Ethernet port.
b Locate and double-click the Print Center utility to open it.
c In the Printer List window, choose Add Printer.
d In the resulting window, select from USB, AppleTalk, or LPR to match
your printer connection.
USB—The magicolor 2350 appears in the window.
AppleTalk (for Ethernet connection)—Select the zone and scroll
through printer choices. The magicolor 2350 appears in the choice list.
LPR—Enter the IP Address. If the “Use Default Queue on Server” box
is checked, click it to unselect it. Type in the IP Address again for the
Queue name.
e Choose the Printer Model popup menu to select the magicolor 2350
PPD, and choose Other.
f Browse to Library/Printers/PPDs/Contents/Resources/en.lproj.
The first two letters of the folder name are an abbreviation for
the language. If you prefer another language instead of
English, you can pick a different .lproj folder.
g Select the magicolor 2350 PPD. Click Choose and then click Add.
The Printer List opens again.
h Double-click on the printer you just created to open the Print Queue
window.
16
Installing Printer Drivers and Utilities, Macintosh
For UNIX, NetWare 5, NetWare 6, and NDPS installation, refer to the
magicolor 2350 Reference Guide on the Documentation CD-ROM. Section 2
of the Reference Guide, “Installing Printer Software, Drivers, & PPDs,”
includes basic information about these interfaces as well as instruction for
installation.
For information about connecting using earlier versions of NetWare,
check the Answer Base at printer.konicaminolta.net/support.
Linux
For Linux PPD and PDQ installation, refer to the magicolor 2350 Reference
Guide on the Documentation CD-ROM. Section 2 of the Reference Guide,
“Installing Printer Software, Drivers, & PPDs,” includes basic information
about PDQ, XPDQ, CUPS, and XPP connections and instructions for
installing them.
UNIX, NetWare, and NDPS
17
English
UNIX, NetWare, and NDPS
English
Using Media
Introduction
This chapter provides information on handling, selecting, loading, and storing
media.
English
Getting Started
What types and sizes of media can I load?
page 21
What Is the guaranteed imageable (printable) area?
page 28
Other Information
How do I load media?
page 30
How do I use custom-size media?
page 35
How do I duplex?
page 36
How do I store media?
page 39
Where can I get more information?
page 41
All media is fed short edge first, face up.
There is a 0.157” (4 mm) non-print border for all edges on all media types.
Any paper longer than 13.76” (349.6 mm) has a nonguaranteed area of
0.39” (10 mm) on the bottom of each page.
See your application documentation for specific information on formatting
data and printing.
Try printing your data on a plain sheet of paper first to check placement.
Only plain paper 16-24 lb bond (60-90 g/m2) can be autoduplexed. See
Media Specifications for supported sizes.
Attention
Use only KONICA MINOLTA-approved media. Using unsupported media
such as inkjet paper will result in damaging the printer and in voiding
your warranty.
20
Introduction
Media Specifications
What types and sizes of media can I load?
Media Size
Inches
Tray*
Duplex
Mode
Weight
Millimeters
A4
8.2 x 11.7
210.0 x 297.0
1 or 2
Yes
A5
5.9 x 8.3
148.0 x 210.0
1
No
Plain
Paper
B5 (JIS)
7.2 x 10.1
182.0 x 257.0
1
No
Custom, Minimum
3.6 x 8.3
92.0 x 210.0
1
No
Custom, Maximum
8.5 x 14.0
216.0 x 356.0
1
Yes**
Executive
7.25 x 10.5
184.0 x 267.0
1
No
Folio
8.3 x 13.0
210.0 x 330.0
1
Yes
Foolscap
8.0 x 13.0
203.2 x 330.2
1
Yes
Government Letter
8.0 x 10.5
203.0 x 267.0
1
Yes
Government Legal
8.5 x 13.0
216.0 x 330.0
1
Yes
Kai 16
7.3 x 10.2
185.0 x 260.0
1
No
Kai 32***
5.1 x 7.3
130.0 x 185.0
1
No
Thick
Stock
Plain
Paper
Legal
8.5 x 14.0
215.9 x 355.6
1
Yes
Letter
8.5 x 11.0
215.9 x 279.4
1 or 2
Yes
Letter Plus
8.5 x 12.7
215.9 x 322.3
1
Yes
Statement
5.5 x 8.5
140.0 x 216.0
1
No
UK Quarto
8.0 x 10.0
203.2 x 254.0
1
No
A4 Transparency
8.2 x 11.7
210.0 x 297.0
1
No
Letter Transparency
8.5 x 11.0
215.9 x 279.4
1
No
Japanese Postcard
3.9 x 5.8
100.0 x 148.0
1
No
Envelope B5 (ISO)
6.9 x 9.8
176.0 x 250.0
1
No
Envelope C5
6.4 x 9.0
162.0 x 229.0
1
No
Envelope C6
4.5 x 6.4
114.0 x 162.0
1
No
Envelope Commercial #10 4.1 x 9.5
104.1 x 241.3
1
No
Envelope International
DL
4.3 x 8.7
110.0 x 220.0
1
No
Envelope Monarch
3.9 x 7.5
99.0 x 190.5
1
No
Envelope Chokei #3
4.7 x 9.2
120.0 x 235.0
1
No
Envelope Chokei #4
3.5 x 8.1
90.0 x 205.0
1
No
16–24 lb
bond
(60–90
g/m²)
Transparency
Use only
approved
media
Thick
Stock
Use only
approved
media
Thick
Stock
25–43 lb***
(91–163
g/m²)
Thick Stock — Supported for Letter, A4, and smaller media
Custom, Minimum
3.6 x 5.8
92.0 x 148.0
Custom, Maximum
8.5 x 11.7
216.0 x 297.0
1
No
Notes: * Tray 1 = Multipurpose Tray (MPT)
Tray 2 = Optional Lower Feeder Unit Media Tray (letter or A4 media only)
**Custom media longer than 11” (279 mm) can be duplexed.
***43 lb bond is also referred to as 90 lb index stock
Media Specifications
21
English
Media
Media Types
English
Before purchasing a large quantity of special media, do a trial printing
with the same media and check print quality. Check www.konicaminolta.net/
printer/ for a list of currently approved media.
General Considerations about Media
For best results, use media that is
Suitable for plain-paper laser printers, such as standard or recycled office
paper
Stored on a flat, level surface in its original wrapper
Attention
Do not use the media types listed below. These could cause poor print
quality, media jams, or damage to the printer.
Do not use media that is
Coated with a processed surface (such as carbon paper, digitally glosscoated media, colored paper that has been treated)
Carbon backed
Iron-on transfer media (heat-sensitive paper, heat-pressure paper, heatpress transfer paper)
Cold-water-transfer paper
Pressure sensitive
Designed specifically for inkjet printers (superfine paper, glossy paper,
glossy film, postcards, etc.)
Already printed on by another printer, copier, or fax machine
Dusty
Wet (or damp)
Keep media between 35% to 85% relative humidity. Toner does
not adhere well to moist or wet paper.
Layered
Adhesive
Folded, creased, curled, embossed, warped, or wrinkled
Perforated, three-hole punched, or torn
Too slick, too coarse, too textured
Different in texture (roughness) on the front and back
22
Media Types
Too thin or too thick
Stuck together with static electricity
Composed of foil or gilt; too luminous
Irregularly shaped (not rectangular or not cut at right angles)
Attached with glue, tape, paper clips, staples, ribbons, hooks, or buttons
Acidic
Any other media that is not approved
Plain Paper
Capacity
Tray 1
200 sheets of 22 lb bond (80 g/m2) paper;
(multipurpose capacity for other weights varies accordingly.
tray)
Tray 2
500 sheets of 22 lb bond (80 g/m2) paper
(optional lower (letter/A4); capacity for other weights varies
feeder unit
accordingly.
media tray)
Orientation Face up
Type
Check printer.konicaminolta.net/support (click on Answer
Base) for currently approved media.
Driver Mode Plain paper
Weight
16–24 lb bond (60–90 g/m²)
Duplexing
See page 21 for supported sizes.
Envelopes
Your printer receives the instructions to print on envelopes from your
application. See your application documentation for specific information on
printing envelopes.
Print on the front (address) side only. Some parts of the envelope consist of
three layers of paper—the front, back, and flap. Anything printed in these
layered regions may be lost or faded.
Capacity
Orientation
Type
Media Types
Tray 1 Up to 50 envelopes, depending on their thickness
Tray 2 Not supported
Face up
Check printer.konicaminolta.net/support (click on Answer
Base) for currently approved media.
23
English
Heat sensitive or cannot withstand the fusing temperature (356° F/180° C)
Driver Mode
Weight
Duplexing
Note
Thick Stock
25–43 lb bond (91–163 g/m²)
Not supported
43 lb bond (163 g/m²) is also referred to as 90 lb index stock
English
Use envelopes that are
Common office envelopes approved for laser printing with diagonal joints,
sharp folds and edges, and ordinary gummed flaps
Because the envelopes pass through heated rollers, the gummed
area on the flaps may seal. Using envelopes with emulsion-based
glue avoids this problem.
Approved for laser printing
Dry
Printed on the front (address) side only
Do not use envelopes that have
Sticky flaps
Tape seals, metal clasps, paper clips, fasteners, or peel-off strips for
sealing
Transparent windows
Too rough of a surface
Material that will melt, vaporize, offset discolor, or emit dangerous fumes
Been presealed
Labels
A sheet of labels consists of a face sheet (the printing surface), adhesive, and
a carrier sheet:
The face sheet must follow the plain paper specification.
The face sheet surface must cover the entire carrier sheet, and no
adhesive should come through on the surface.
You can print continuously with label paper. However, this could affect the
media feed, depending on the media quality and printing environment. If
problems occur, print one sheet at a time.
24
Media Types
Capacity
Tray 1
Up to 50 label sheets, depending on their
thickness
Not supported
Tray 2
Face up
Use only labels recommended for laser printers. Check
printer.konicaminolta.net/support (click on Answer Base) for
currently approved media.
Driver Mode Label Stock
Weight
16–90 lb (60–163 g/m²)
Duplexing
Not supported
Orientation
Type
Use label sheets that are
Recommended for laser printers
Letter or A4 size (adhesive label stock)
Do not use label sheets that
Have labels that easily peel off
Have backing sheets that have peeled away or have exposed adhesive
Labels may stick to the fuser unit, causing them to peel off and media
jams to occur.
Are perforated
Do not use
Shiny backed paper
Media Types
OK to use
Full-page labels
(uncut)
25
English
Format label data within your application. Try printing your data on a plain
sheet of paper first to check placement. Check your application
documentation for other information on printing labels.
Letterhead and Memo Media
Format letterhead or memo data within your application. Try printing your
data on a plain sheet of paper first to check placement.
English
Capacity
Tray 1
Tray 2
Up to 200 sheets, depending on their size and
thickness
Up to 500 sheets of 22 lb bond (80 g/m2) paper
(letter/A4 only)
Orientation
Type
Face up
Check printer.konicaminolta.net/support (click on Answer
Base) for currently approved media.
Driver Mode Plain paper
Weight
16–24 lb bond (60–90 g/m²)
Duplexing
See page 21 for supported size. Face up—top of page first
Postcards
Format postcard data within your application. Try printing your data on a plain
sheet of paper first to check placement.
Capacity
Tray 1 Up to 50 postcards, depending on their thickness
Tray 2 Not supported
Orientation Face up
Type
Check printer.konicaminolta.net/support (click on Answer
Base) for currently approved media.
Driver Mode Thick Stock
Weight
16–90 lb (60–163 g/m²)
Duplexing
Not supported
Use postcards that are
Recommended for laser printers
Do not use postcards that are
Coated
Designed for inkjet printers
Perforated
26
Media Types
Warped
If the postcard is warped, press on the warped
area before putting the card in Tray 1.
Thick Stock
Test all thick stock to ensure acceptable performance and to ensure that the
image does not shift.
Capacity
Tray 1
Up to 50 thick stock sheets, depending on their
thickness
Not supported
Tray 2
Face up
Check printer.konicaminolta.net/support (click on Answer
Base) for currently approved media.
Driver Mode Thick stock
Weight
24–43 lb bond (91–163 g/m²)
Duplexing
Not supported
Notes
43 lb (163 g/m²) bond is also referred to as 90 lb index stock.
Orientation
Type
Do not use thick stock that is
Mixed with any other media in the media trays (as this may cause the
printer to jam)
Transparencies
Attention
Use only the KONICA MINOLTA-approved media. Using unapproved
transparencies will result in damaging your printer and in voiding your
warranty. Check www.konicaminolta.net/printer/ for currently approved
media. To order approved media, go to www.q-shop.com.
Do not fan large quantities of transparency media before loading it.
Resulting static electricity may cause printing errors.
Handle transparencies only by the edges and as little as possible. If
you touch the face of transparencies with your bare hands, print
quality may be affected.
Keep the media path clean. Transparencies are especially sensitive to
a dirty media path. If there are shadows on either the top or the bottom
of the sheets, see chapter 7, “Maintaining the Printer.”
Media Types
27
English
Preprinted or multicolored (may result in media jams)
Remove transparencies as soon as possible from the output tray to
avoid static buildup.
You can print continuously with transparencies. However, this could affect the
way media feeds, depending on the media quality, static buildup, and printing
environment.
English
Format the information to be printed on the transparencies within your
application. Try printing your data on a plain sheet of paper first to check
placement.
If you have problems feeding 50 sheets, try loading only 1–10 sheets
at a time. Loading a large number of transparencies at a time may
cause static buildup, thus causing feeding problems.
Capacity
Tray 1
Up to 50 transparencies, depending on their
thickness
Not supported
Tray 2
Orientation Face up
Type
Check printer.konicaminolta.net/support (click on Answer
Base) for currently approved media. To order approved
media, go to www.q-shop.com.
Driver Mode Transparency
Duplexing
Not supported
Use transparencies that
Are approved by KONICA MINOLTA
Have as little static electricity as possible
What Is the guaranteed imageable (printable) area?
Each media size has a specific imageable area, the maximum area on which
the printer can print clearly and without distortion.
This area is subject to both hardware limits (the physical media size and the
margins required by the printer) and software constraints (the amount of
memory available for the full-page frame buffer).
28
Media Types
The guaranteed imageable (printable)
area on all media sizes is up to about
0.157" (4 mm) from the edges of the
media.
a
a
a
English
Printable
Area
a
a = 0.157" (4 mm)
Color printing on legal-size media (8.5 x 14 inches; 215.9 x 355.6 mm)
may appear faded along the last edge to go through the printer. This
faded area may affect 0.39" (10 mm) in addition to the 0.157” (4 mm)
nonimageable area. The fading occurs in four-color printing and
single-color printing with cyan, magenta, or yellow toner. Black printing
on legal-size media is not affected.
Imageable Area—Envelopes
Envelopes have a nonguaranteed flap area that varies with envelope type.
Envelope print orientation is determined by your application.
Nonimageable area 0.157" (4 mm)
Nonguaranteed area
Guaranteed
area
Page Margins
Margins are set through your application. Some applications allow you to set
custom page sizes and margins while others have only standard page sizes
and margins from which to choose. If you choose a standard format, you may
lose part of your image (due to imageable area constraints). If you can
custom-size your page in your application, stay within the sizes given for the
imageable area for optimum results.
Media Types
29
Image Alignment
English
If for any reason you need to change the image alignment, you can do so by
adjusting the margins or page size through your application,
Loading Media
How do I load media?
If you are using paper, remove the top
and bottom sheets from the ream.
Holding a stack of approximately 200
sheets, fan the stack to prevent static
buildup before inserting it in a tray.
Do not fan transparencies.
Attention
Although this printer was designed for printing on a wide range of
media types, it is not intended to print exclusively on a single media
type except plain paper. Continuous printing on media other than plain
paper (such as envelopes, labels, thick stock, or transparencies) may
adversely affect print quality or reduce engine life.
Do not mix media of different sizes, types, or weights, as this will cause
media jams.
When refilling media, first remove any media remaining in the tray. Stack it
with the new media, even the edges, then reload it.
When loading media, make sure the media size and type settings match.
30
Loading Media
Changing the media type through PageScope Light or at the printer
control panel affects all print jobs. Changing the media type in the driver
affects only your print jobs.
Tray 1 (Multipurpose Tray)
All supported media sizes and types can be printed from Tray 1. Letter or A4
plain paper can be printed from Tray 1 or Tray 2.
See “Media Specifications” for more information about media.
Plain Paper
1
2
If you already have media in Tray 1 and want to change it, remove the
media from Tray 1.
Adjust the media guides to fit the
appropriate media sizes.
Squeeze the front media guide to
open the media guides.
3
Load the media face up, short edge
first.
Often, an arrow on the paper package
label indicates the face-up (printing)
side of the paper.
If you are using letterhead paper,
load it face up with the top first.
Loading Media
31
English
For optimum printing results, it’s important to specify the type and size of
media that’s loaded in the multipurpose tray. You can set it at the printer
control panel using the Paper / Input Tray / Tray1 menu, through the
printer driver, or through PageScope Light.
A fill limit mark is provided on the
inside of the media guides on the
Tray 1. Tray 1 holds 200 sheets of
22 lb bond (80 g/m²) paper.
English
4
Slide the media guides up against the
edge of the media.
Attention
Always adjust the media guides after inserting the media. A guide that
is not properly adjusted can cause poor print quality, media jams, or
printer damage.
5
6
7
Set the media size and type at the control panel or in PageScope Light.
In the printer driver, select the appropriate media type and size.
Print the job.
Other Media
When loading media other than Plain Paper, set the media mode (for
example, Thick Stock, Label Stock, or Transparency) in the driver.
32
For optimum printing results it’s important to specify the type and size
of media loaded into Tray 1. You can specify the media type through
your printer driver, through PageScope Light, or at the printer control
panel. Using your printer driver affects only your print jobs, while
PageScope Light and the printer control panel affect all print jobs.
Loading Media
Envelopes
3
4
Flex the envelope stack (including the edges) to remove any stiffness.
Place the envelopes on a flat surface, and flatten them by pressing down
the corners.
Correct any bent corners, and then tap the envelopes on a flat surface to
align them.
Place the envelope stack into Tray 1 with the flap-side underneath. If the
flap is on the short end of the envelope, insert it into the printer first.
Print a single
envelope to check
the orientation
before printing
multiple copies.
5
6
7
Adjust the media
guides to the width of the envelopes.
Make sure the guides are snug enough to keep the envelopes straight,
but not so tight that they buckle the envelopes.
In the printer driver, set the media type to thick stock and select the
appropriate envelope size. Then print the envelope.
Open the flap of each envelope immediately (before it cools) after the
envelope is delivered to the output tray.
Tray 2 (Optional Lower Feeder Unit Media Tray)
Depending on which tray you have purchased, letter or A4 plain paper can be
printed from Tray 2.
1
Slide the media tray open.
Loading Media
33
English
1
2
Push the media pressure plate down
to lock it in position.
English
2
3
Load the paper face-up, short edge
toward the right of the tray.
Often, an arrow on the media
package label indicates the printingside of the media.
Do not overfill the tray.
A fill limit mark is provided on
the inside of the tray. Tray 2
holds 500 sheets of 22 lb bond
(80 g/m²) paper.
Make sure that the paper fits easily
between the guides and the paper
corners are under the left and right
media-separating tabs and are not
bent.
34
Loading Media
Slide the tray back into the printer.
5
6
7
If you have removed the tray from
the printer, tilt the tray slightly to
align it with the rails in the printer.
Using the printer’s control panel or
PageScope Light, set the media size
for letter or A4, whichever matches
your Tray 2.
English
4
In the printer driver, set the media
mode to Plain Paper.
Then print the job.
Using Custom-Size Media
When you use media that is not a standard size (see “What types and sizes
of media can I load?” on page 21), you need to configure the printer for the
custom size. Otherwise, your print job may be cut short or misaligned on the
page.
To make custom page sizes work correctly, you need to change the printer’s
default settings at the control panel or in PageScope Light and also in the
printer driver.
Default page sizes are set in inches on 110V printers and in millimeters on
220V printers.
When you set custom page sizes in inches (110V printers), the two digits on
the right are always decimal places. For example, set 8.5 inches as 850.
When you set custom pages sizes in millimeters (220V printers), there are
no decimal places. For example, set 78.2 millimeters as 78.
The more accurate your measurements, the better your print job is
aligned.
Control Panel
Use the Paper/Input Tray/Custom menu to reach the width and length
settings for custom-size media. Then enter the width and length of the media
you are using.
PageScope Light
Use the web-based utility’s Configuration/Paper Handling options to set the
custom size.
Using Custom-Size Media
35
Printer Driver
On the Paper tab’s Paper Size drop-down list, choose Custom. A Configure
button appears at the right of the drop-down list. Choose Configure and enter
the length and width of your media in the dialog box.
English
1
2
3
Set the option for Tray 1 Media Size to Custom, using either the printer’s
control panel or PageScope Light.
Set the Custom Size Width and Length to match the size of the media in
Tray 1. This option can also be set using either the printer’s control panel
or PageScope Light.
Set the media size in the printer driver.
Sizes set in the driver need to match the sizes set for the printer
through the control panel or PageScope Light.
Duplexing
How do I print on both sides of the paper (duplex)?
Select paper that is opaque enough to block out what’s printed on one side
from being seen on the other side. For best results, print a small quantity to
make sure the paper and print quality are acceptable.
Check your application for margin information.
Duplex (2-sided) printing can be done manually or, if you have the duplex
option installed and selected, it can be done automatically.
Attention
Only plain paper up to 24 lb (90 g/m²) can be duplexed.
Duplexing envelopes, labels, postcards, thick stock over 24 lb (90 g/m²),
or transparencies is not supported.
How do I manually duplex?
36
Media jams may occur if the printed sheet(s) are not reinserted
entirely flat.
Duplexing
Windows
2
3
4
In the printer driver (on the Paper tab, Layout tab, or Page Setup tab,
depending on your operating system) select Simplex or choose No or
None in the duplex option, then double-click OK.
In the application’s print dialog box, select All.
Select and print the Odd-Numbered Pages.
Remove the media, flip it over blank face-side up and top of page toward
printer, and select and print the Even-Numbered Pages.
If you are manually duplexing letterhead in Tray 1, load the media
face-up with the letterhead first. If you are manually duplexing letterhead in Tray 2, load the media face-up with the top toward the right.
Macintosh
You can duplex manually from a Macintosh from some applications that are
generally used for multi-page documents. This feature is controlled by the
application, rather than by the PPDs.
1
2
3
4
When you are ready to print, open the print dialog box by choosing the
Print option within the application you are using.
Find the even/odd page selection. For example, in Quark XPress, use the
Document/Page Sequence option.
Select and print the Odd-Numbered Pages.
Remove the media, flip it over blank face-side up and top of page toward
printer, and select and print the Even-Numbered Pages.
If you are manually duplexing letterhead in Tray 1, load the media
face-up with the letterhead first. If you are manually duplexing letterhead in Tray 2, load the media face-up with the top toward the right.
How do I autoduplex?
To autoduplex, the duplexer must be physically installed on the printer and
identified as an installed option in the printer driver. Otherwise, the print job
will print as simplex even if you select duplex.
Windows—Use the printer driver to configure the printer for duplex printing.
1
In the printer driver’s Settings tab, highlight Optional Duplexer in the Available Options box.
Duplexing
37
English
1
2
Click Add.
The Optional Duplexer appears in the Installed Options box and duplex
printing options are available in the printer driver and in your application’s
print dialog box.
English
Macintosh—You can configure the duplex option when you first set up your
printer, or you can add it later to your desktop printer configuration:
1
2
3
4
5
Select your desktop printer.
From the Printing menu, select Change Setup...
Select the Optional Duplexer from the Change drop-down list.
Select Installed from the To drop-down list.
Select OK
When you select File/Print, the Print on Both Sides option is now available
in the Layout dialog box.
Memory Requirements
Your printer comes configured with 128 MB of RAM. Duplex printing can be
done automatically with a duplex option and enough memory installed, and
with the duplex option selected in the printer. Most print jobs will print with 128
MB of RAM, but may not print at the desired resolution.
You will need at least 192 MB of RAM to print color duplex jobs on letter/
A4-size media at either the PostScript High resolution or the PCL
Enhanced resolution
You will need at least 256 MB of RAM to print color duplex jobs at
PostScript High or PCL Enhanced resolution on legal-size media.
Additional memory can be added up to a total of 384 MB.
Printing Duplex
1
Check your application to determine how to set margins for duplex
printing.
To print duplex (both sides of the sheet), load the media printing-side up.
a
b
For Tray 1, load the media with the top of the media toward the back of
the tray.
For Tray 2, load the media with the top of the media toward the right
side of the tray.
38
In autoduplexing, the back side is printed first and the front side is
printed last.
Duplexing
3
Set the driver for the duplex layout you prefer.
Long Edge creates a document that flips horizontally as in a loose-leaf
notebook; Short Edge creates a document that flips vertically, as on a
clipboard. Simplex prints only on the front face of the page.
Click OK.
English
2
Output Tray
All media is output face-down to the output tray on top of the printer. The
output tray has a capacity of 200 sheets of 22 lb (80 g/m2) bond paper.
If the media is stacked too high, your printer may experience media
jams, excessive media curl, or static buildup.
Remove transparencies as soon as possible from the output tray to
avoid static buildup.
Media Storage
How do I store media?
Keep media on a flat, level surface in its original wrapper until it is time to
load it.
Media that has been stored unwrapped may become too dry or absorb
too much moisture and cause jamming.
If media has been removed from its wrapper, place it in its original
packaging and store in a cool, dark place on a level surface.
Avoid moisture, excess humidity, direct sunlight, excess heat (above
95° F/35° C), and dust.
Avoid leaning media against other objects or storing in an upright position.
Before using stored media, do a trial printing and check print quality.
Output Tray
39
Accessing Other Printer Features
You can set print resolution, form printing, and proof-then-print options in two
ways:
Through the printer driver or through application, which sets the features
English
for the specific job you are sending.
Through the printer control panel or PageScope Light, which sets the
features for all subsequent jobs, until you change the settings.
You can also access many printer features, such as color controls, through
the printer’s control panel and the web-based PageScope Light, as well as
through the application and printer driver. Instructions for using the printer’s
control panel are in Chapter 3 and instructions for using the printer driver are
in Chapter 4. PageScope Light instructions are included in the Reference
Guide.
Print Resolution
Your printer offers a choice of three print resolutions, depending on which
driver you select.
PostScript
High: 9600 x 600 dpi class
Standard: 600 x 600 dpi color
Draft: 600 x 600 dpi monochrome
PCL
Enhanced: 1200 x 1200 dpi
Standard: 600 x 600 dpi color
Draft: 600 x 600 dpi monochrome
Form Printing
You can use overlays to create forms such as stationery, billing, insurance, or
other repetitive formats. You select the overlay and assign it to specific pages
of the print job so that you can use more than one overlay in a job.
40
Accessing Other Printer Features
Proof-then-Print Printing
The printer’s proof-then-print feature gives you several options for multicopy
or secure print jobs:
You can print one copy of a multicopy job and check it before printing the
You can print multiple copies of a job and then store the job in the printer
in case further copies are needed.
You can assign a PIN number to a secure job so that it will not print until
you key in the PIN number at the printer’s control panel.
You can store a print job on the printer’s hard disk and allow it to be
printed later with or without a PIN number.
Proof-then-Print features are available only when there is an optional
hard disk installed on the printer.
Refer to the printer driver’s on-line help for more information about using
proof-then-print features.
Additional Assistance
Where can I get more information?
Check printer.konicaminolta.net/support (click on Answer Base) for currently
approved media.
See the Service & Support Guide for a list of sources of service and support
in many areas of the world. The most up-to-date information can be found at
www.konicaminolta.net/printer/.
Additional Assistance
41
English
rest of the copies.
English
Working with the
Printer
About the Control Panel
English
This chapter explains how to control printer features when you are standing at
the printer, by using the printer’s control panel. In addition, many printer
features can be managed using PageScope Light, a web-based utility that is
embedded in your printer. For information on PageScope Light, see the
magicolor 2350 Reference Guide, in PDF format on the Documentation CDROM that came with your printer.
The control panel, located on the top of the printer, allows you to direct the
printer’s operation. In addition, it displays the current status of the printer,
including any condition that needs your attention.
Two indicators (LEDs) provide printer status information.
The message window displays status and configuration information.
The six keys allow you to control the printer configuration.
4
5
6
1
2
3
7
8
Control Panel Indicators and Keys
No.
Indicator
Off
On
1
The printer is not ready
to accept data.
The printer is ready to
accept data.
2
No problem.
The printer requires
operator attention
(usually accompanied by
a status message in the
message window.)
Error
No.
3
Key
Function
Allows you to cancel one or all print jobs
Cancels the menu choice or selection if the user
is in the menu structure
44
About the Control Panel
No.
Key
4
Function
Initially enters the menu system
If within the menu system and on a selectable
item, selects the displayed choice (no matter
what position the cursor is in)
5
Moves up in the menu structure
If menu choices with character-by-character
selections, scrolls upward through the available
characters
6
Moves right in the menu structure
Moves right through the scrollable menu
selections when selections are whole words,
not characters
Starts the toner replacement sequence, if toner
is out
7
Moves left in the menu structure
Moves left through the scrollable menu
selections when selections are whole words,
not characters
Scrolls through messages
8
Moves down in the menu structure
In menu choices with character-by-character
selections, scrolls downward through the
available characters
Cancelling Print Jobs
You can cancel one or all print jobs that are currently being processed.
1
2
3
While data is being processed or printed (the message window reads
PROCESSING... or PRINTING), press the Cancel key.
By pressing the Right or Left keys, select either CANCELLING JOB/
CURRENT or CANCELLING JOB/ALL.
Press the Menu/Select key.
The print job(s) have now been cancelled. A few pages that have already
been processed may still print.
Cancelling Print Jobs
45
English
If within the menu system and on a menu level,
moves down in the menu structure
Printer Menu Overview
Menu Overview
English
Your printer has a comprehensive but easy-to-use menu system that allows
you to change settings so they meet your print job’s requirements. All routine
printing tasks can be handled at the printer control panel through the printer’s
configuration menu. The printer can also be configured through PageScope,
PageScope Light, SNMP, and PJL.
Complete information on the printer’s configuration menu is included in the
magicolor 2350 Reference Guide on the Documentation CD-ROM.
When the printer is ready to accept print jobs, the control panel message
window shows:
MAGICOLOR 2350
IDLE
Main Menu
The main menu provides access to all the printer’s submenus. Each
submenu is briefly described in the following sections of this manual.
The “Proof/Print” menu appears only when there is a proof and hold
job, a stored job, or a secured job on the optional hard disk.
MAGICOLOR 2350
IDLE
PROOF/
PRINT
MENU
PRINT
MENU
PAPER
MENU
QUALITY
MENU
INTERFACE
MENU
SYSTEM
DEFAULT
SERVICE
MENU
To move through the menu options, use the following control panel
sequences. This example shows how to select the language for the printer
message window.
Press Key
46
(Until) Display Reads
MAGICOLOR 2350/IDLE
(and Ready indicator is not flashing)
PROOF/PRINT MENU
Printer Menu Overview
Press Key
Or
(Until) Display Reads
MENUS
SYSTEM DEFAULT
English
SYSTEM DEFAULT
LANGUAGE
LANGUAGE
*ENGLISH
Or
Menu
Press the Right or Left key until the appropriate
language is displayed.
*LANGUAGE
IS SELECTED
Press the Up arrow twice to return to
MAGICOLOR 2350
IDLE
In the menu maps below, defaults are bolded.
Proof/Print Menu
PROOF/PRINT MENU
USERNAME
JOBTYPE
JOBNAME
COPIES (0-99)
DELETE
1
NO
YES
The Proof/Print menu allows you to hold print jobs so you can check a single
copy before making multiple copies or so you can keep a documents private
by delaying the print time until you reach the printer and enter a PIN. On a
secure job, you are prompted to enter the PIN right after you enter the job
name and before you select the delete or copies options. JOBTYPE includes
choices such as Private Job, Stored Job, and Proof and Hold.
The Proof/Print menu appears only when there is a proof and hold job,
a stored job, or a secured job on the optional hard disk. Selecting
0 copies of a proof and hold job deletes the job from the hard disk.
Printer Menu Overview
47
Print Menu
PRINT MENU
CONFIGURATION
English
MENU MAP
STATISTICS
FONT LIST
DEMO
POSTSCRIPT
DIRECTORY
LIST
PCL
The Print Menu allows you to print information about the printer. For example,
if you select Menu Map and then select Yes, the printer prints an overview of
the entire menu structure. If you select Font List, then either PostScript or
PCL, and then Yes, the printer prints a list of installed fonts with a sample of
each. Each special page has Yes and No options in the menu.
Paper Menu
The Paper Menu allows you to control the media source for your print job.
PAPER MENU
INPUT TRAY
DUPLEX
COPIES
ORIENTATION
1-999
OFF
SHORTEDGE
ON
LONGEDGE
TRAY 1
TRAY 2
TRAY 2
MEDIA TYPE
48
TRAY 1
MEDIA SIZE
NO
LANDSCAPE
CUSTOM
WIDTH
COLLATE
OFF
YES
PORTRAIT
DEFAULT
PAGE
RECOVERY
LENGTH
CHAIN
MAP
ON
OFF
MEDIA SIZE
The Default, Chain, and Map submenus appear only if an optional
lower feeder unit is installed. The Duplex submenu appears only if a
duplex option is installed. The Collate submenu appears only if an
optional hard disk is installed.
Default media sizes are Letter in 110V printers and A4 in 220V
printers.
Printer Menu Overview
Paper Menu/Input Tray/Map Submenu
MAP
PHYSICAL
TRAY 1
LOGICAL
TRAY 1
LOGICAL
TRAY 2
LOGICAL
TRAY 3
LOGICAL
TRAY 4
LOGICAL
TRAY 5
LOGICAL
TRAY 6
LOGICAL
TRAY 7
LOGICAL
TRAY 8
LOGICAL
TRAY 9
English
LOGICAL
TRAY 0
PHYSICAL
TRAY 2
The Map submenu allows you to specify the order in which input trays are
used. See the Reference Guide for more information about logical trays.
Quality Menu
QUALITY MENU
TONER
TONER
ACTION
AIDC
DUPLEX
DENSITY
REGISTRATION
PG
TEST PAGE
1
TEST PAGE
2
OPC
ACTION
The Quality menu gives you access to items affecting print quality.
The Duplex Density submenu is available only when the duplex option
is installed.
Quality Menu/Toner Submenu
QUALITY MENU
TONER
REPLACE
CHANGE SIZE
CYAN
STANDARD
BLACK
YELLOW
HIGH
CAPACITY
CYAN
STANDARD
REPLACE ALL
STANDARD
HIGH
CAPACITY
YELLOW
HIGH
CAPACITY
STANDARD
HIGH
CAPACITY
MAGENTA
STANDARD
HIGH
CAPACITY
MAGENTA
STANDARD
HIGH
CAPACITY
The Quality/Toner menu sequence allows you to change a toner cartridge.
Instructions are included in chapter 7, “Replacing Consumables.”
Printer Menu Overview
49
Quality Menu/Toner Action Submenu
QUALITY MENU
English
TONER ACTION
LOW TONER
STOP
OUT
CONTINUE
STOP
CONTINUE
The Toner Action submenu lets you choose whether the printer will stop or
continue when any of the four toner cartridges is low or out of toner.
Quality Menu/AIDC Submenu
QUALITY MENU
AIDC
CALIBRATION
ON
OFF
DENSITY CONTROL
BLACK
CYAN
REQUEST AIDC
YELLOW
MAGENTA
The Quality/AIDC submenu allows you to adjust the color calibration and
density. Once these adjustments are complete, the printer will automatically
calibrate to the settings you have specified.
Quality Menu/OPC Action Submenu
QUALITY MENU
OPC ACTION
LOW
CONTINUE
OUT
STOP
CONTINUE
STOP
The OPC Action submenu lets you choose whether the printer will stop or
continue when the OPC drum is low or out.
50
Printer Menu Overview
Interface Menu
INTERFACE MENU
USB
PARALLEL
The Interface Menu allows you to configure the printer’s interfaces. Each of
the Interface submenus is shown below.
Interface Menu/Ethernet Submenus
Ethernet TCP/IP Submenu
INTERFACE MENU
ETHERNET
TCPIP
ENABLE
AUTO IP
YES
NO
DHCP
YES
IP
ADDRESS
DEFAULT
ROUTER
NO
SUBNET
MASK
BOOTP
NO
ENABLE
HTTP
YES
YES
NO
Ethernet IPX/SPX Submenu
INTERFACE MENU
ETHERNET
IPX/SPX
FRAME TYPE
AUTO
Printer Menu Overview
802.2
802.3
ETHER II
SNAP
51
English
ETHERNET
Ethernet Ethertalk Submenu
INTERFACE MENU
English
ETHERNET
ETHERTALK
NAME
NAME2
NETZONE
NETZONE2
Interface Menu/USB Submenu
INTERFACE MENU
USB
ENABLE
YES
JOB TIMEOUT
NO
Interface Menu/Parallel Submenu
INTERFACE MENU
PARALLEL
ENABLE
YES
52
JOB TIMEOUT
NO
Printer Menu Overview
System Default Menu
LANGUAGE EMULATION
SYSSTART
STARTUP
OPTIONS
COLOR
SEPARATION
DATE &
TIME
START
PAGE
OPTIMIZE
PDL
OPTIMIZE
MEDIA
ENERGY
SAVER
AUTOCONTINUE
SECURITY
CAPTURE
PRT JOB
FORMAT
RESTORE/
SAVE
ENERGY
SAVER
MGT
RESTORE
FACTORY
SAVE
CUSTOM
RESTORECUSTOM
The System Default menu allows you to control the way in which the
printer responds to various situations. For example, Startup Options/
Start Page allows you to decide whether the printer automatically prints a
start page when you turn it on.
The Date & Time option appears only if an optional hard disk and
daughterboard with time-of-day clock is installed. The Capture Print
Job option appears only if an optional hard disk is installed.
Energy Saver Management appears only on 110V printers. If it is
turned Off, the Energy Saver menu disappears.
If you select Restore Factory or Restore Custom, the printer will turn
off and on again automatically.
System Default/Language Submenu
SYSTEM DEFAULT
LANGUAGE
ENGLISH
FRANÇAIS
ESPAÑOL
DEUTSCH
ITALIANO
CESKY
PORTUGUES
Printer Menu Overview
53
English
SYSTEM DEFAULT
System Default/Emulation Submenu
SYSTEM DEFAULT
English
EMULATION
DEFAULT
AUTOMATIC
AUTO
DEFAULT
POSTSCRIPT
PCL
POSTSCRIPT
PCL
LINE
PRINTER
POSTSCRIPT
PCL
PCL XL
LINE
PRINTER
LINE
PRINTER
HEXDUMP
PDF
The Emulation submenu lets you set the appropriate emulation for the print
job you are sending. You can use the Optimize option to reallocate memory
for Postscript, PCL, or PDF jobs. If you use this option, you may be prompted
to reboot the printer.
PostScript, PCL, and Lineprinter options are shown below.
SYSTEM DEFAULT
EMULATION
POSTSCRIPT
PS WAIT
TIMEOUT
0-999
ERROR
PAGE
OFF
PS
PROTOCOL
ON
PARALLEL
USB
ETHERNET
SYSTEM DEFAULT
EMULATION
PCL
LINE
TERMINATION
CRISCR
LFISLF
54
CRISCRLF
LFISLF
FONT
CRISCR
LFISCRLF
CRISCRLF
LFISCRLF
PITCH
SIZE
COLOR
MATCHING
FONT
NUMBER
FONT
SOURCE
POINT
SIZE
SYMBOL
SET
Printer Menu Overview
SYSTEM DEFAULT
EMULATION
FONT
FONT
SIZE
LAYOUT
MARGINS
TABS
ASCII
ORIENTATION
LEFT
EBCDIC
LINE NUMBERING
LINES PER
PAGE
CRISCRLFISLF
PORTRAIT
AUTOWRAP
MAP
FONT NAME
SPACING
English
LINE PRINTER
LINE
TERMINATION
CRISCRLFLFISLF
CRISCRLFISCRLF
CRISCRLFLFISCRLF
LANDSCAPE
RIGHT
TOP
BOTTOM
System Default/Startup Options Submenu
SYSTEM DEFAULT
STARTUP OPTIONS
SYSSTART
START
PAGE
OPTIMIZE
PDL
FOR PS
FOR PCL
OPTIMIZE
MEDIA
FOR PDF
FOR LETTER/A4
FOR LEGAL
The Optimize Media option optimizes performance for different media sizes.
System Default/Color Separation Submenu
SYSTEM DEFAULT
COLOR SEPARATION
YES
NO
The Color Separation menu turns color separations on or off.
Printer Menu Overview
55
System Default/Energy Saver Submenu
SYSTEM DEFAULT
English
ENERGY SAVER
1 MINUTE
15 MINUTES
30 MINUTES
1 HOUR
2 HOURS
3 HOURS
The Energy Saver submenu allows you to set the time lapse between the end
of a print job and the time the printer returns to Energy Saver status. Energy
Saver mode saves energy because the printer’s heating unit turns off. The
printer may take up to 215 seconds to warm up before it is ready to print
again.
Energy Saver options for 2 and 3 hours are available only on 110V
printers.
System Default/Autocontinue Submenu
SYSTEM DEFAULT
AUTOCONTINUE
ON
OFF
The Autocontinue submenu allows you to continue printing if the media tray
has a different size or media type than what the print job requests.
System Default/Security Submenu
SYSTEM DEFAULT
SECURITY
CONFIG
ENABLE
ON
OFF
INSTALL
SET
PASSWORD
ENABLE
ON
SET
PASSWORD
OFF
The Security submenu enables the security function which requires users to
enter the password to access or change printer information and configuration.
56
Printer Menu Overview
System Default/Format Submenu
SYSTEM DEFAULT
FORMAT FLASH
YES
NO
English
FORMAT
FORMAT DISK
YES
NO
The format submenu allows you to reformat the printer’s flash memory or
internal hard disk, if one is installed.
The Disk portion of the menu is visible only if an optional hard disk is
installed.
System Default/Energy Saver Management Submenu
SYSTEM DEFAULT
ENERGY SAVER
MGT
ON
OFF
The Energy Saver Management submenu is available only on 110V printers.
Service Menu
The Service Menu is password protected. It allows a service technician to
handle maintenance and service procedures.
Printer Menu Overview
57
English
Working with the
Printer Driver
About Printer Drivers
English
The last chapter explained how to control printer features when you are
standing at the printer by using the printer’s control panel. This chapter
explains ways to control the same features without leaving your computer by
using printer drivers.
On Windows PCs, you can access the driver in the Start/Settings/Printers
path and use a series of tabs in the driver to control printer features. The
General and Details tabs are set automatically by your PC’s operating
system. When you load the driver for the magicolor 2350, the settings for its
specific features are displayed on additional tabs in the same series. This
manual tells how to access those tabs and what each tab controls.
On Macintosh, UNIX, and Linux systems, printer features are controlled by
PPDs. The PPDs are integrated seamlessly into the operating system’s own
printer driver. Feature settings are accessed in the same manner, no matter
what printer you use. This manual includes an introduction to the Macintosh
settings. Detailed information for Macintosh, UNIX and Linux systems is
included in the magicolor 2350 Reference Guide, in PDF format on the
Documentation CD-ROM.
In addition to the control panel and printer drivers, you can use
PageScope Light, a web-based utility that is embedded in your printer,
to manage many of the same printer features. For information on
PageScope Light, see the magicolor 2350 Reference Guide, in PDF
format on the Documentation CD-ROM that came with your printer.
Using PostScript Drivers in Windows
XP/2000
Displaying the Tabs
1
2
3
From the Start menu, choose Settings and then Printers to display the
Printers directory.
Click the magicolor 2350 printer icon.
From the File menu choose Properties.
Using the Tabs
General printer controls are located on tabs of the main printer driver dialog
box. The general printer controls let you check the status of consumables and
set access to optional features, including the lower feeder tray, the duplex
option, and the internal hard disk.
60
About Printer Drivers
There are two ways to access the specialized print setting tabs:
Through your application. This selects printer settings for the specific job
you are sending. Choose Print and then choose Properties.
subsequent print jobs until you change the settings again through the
printer driver. Choose Start/Settings/Printers, select the magicolor 2350
icon, and then choose Properties from the File menu. On the General tab,
click the Printing Preferences button.
The tabs that appear in the new dialog box are described on the following
pages.
Refer to the printer driver’s online help for information on all of these
functions.
Layout Tab
This tab allows you to:
Set the orientation for a print job
Set the page order
Set the number of pages per sheet
Choose Simplex or Duplex printing
By clicking the Advanced button, you have access to controls for setting:
Media size
Number of copies
Graphic preferences including color management, scaling, and font
substitution
Advanced printing features
PostScript options
Features such as resolution enhancement, header and trailer pages, and
input tray use
Paper/Quality Tab
This tab allows you to:
Select the paper source (if you have the optional lower feeder unit
installed)
Select the type of media
Select color or black-and-white printing
The Paper/Quality Tab also includes the Advanced button described in the
Layout Tab section above.
Using PostScript Drivers in Windows XP/2000
61
English
Through the printer driver dialog box. This changes printer settings for all
Features Tab
This tab allows you to:
Select print resolution
Set advanced graphic controls, such as rotation and halftone control
English
Set color controls and advanced color options
Set PostScript and PCL features
Using Job Retention options, check a proof before printing multiple copies
or set a password to hold a print job until you are at the printer, if an
optional hard disk is installed
Proof-then-print options are available only if you check the “hold job”
box.
Overlay Tab
This tab allows you to:
Place an overlay on any page or pages, allowing you to reproduce forms,
stationery, and similar repetitive page layouts
Place a watermark on any page or pages
Access the Download Manager
Using PostScript Drivers in Windows NT
Displaying the Tabs
1
2
3
From the Start menu, choose Settings and then Printers to display the
Printers directory.
Right-click the magicolor 2350 printer icon.
Choose Properties.
Using the Tabs
General printer controls are located in tabs of the main printer driver dialog
box. The general printer controls let you check the status of consumables and
set access to optional features including the lower feeder tray, the duplex
option, and the internal hard drive.
There are two ways to access the specialized print setting tabs:
Through your application. This selects printer settings for the specific job
you are sending. Choose Print and then choose Properties.
62
Using PostScript Drivers in Windows NT
Through the printer driver dialog box. This changes printer settings for all
subsequent print jobs until you change the settings again through the
printer driver. Choose Start/Settings/Printers, select the magicolor 2350
icon and then choose the Document Defaults menu.
Refer to the printer driver’s online help for information on all of these
functions.
Page Setup Tab
This tab allows you to:
Set the media size
Select the media source
Set the orientation for a print job
Set the number of copies
Select black-and-white or color printing
Advanced Tab
This tab give you an alternate access to all the choices available on the Page
Setup Tab. It also allows you to:
Select graphic options such as scaling and font substitution
Select document options such as number of pages per sheet, header and
trailer pages, and automatic tray switching
Features Tab
This tab allows you to:
Select print resolution
Configure color controls
Set PostScript options
Check a proof before printing multiple copies or set a password to hold a
print job until you are at the printer, if an optional hard disk is installed
Proof-then-print options are available only if you check the “hold job”
box.
Using PostScript Drivers in Windows NT
63
English
The tabs in the new Document Default dialog box are described here.
Overlay Tab
This tab allows you to:
Place an overlay on any page or pages, allowing you to reproduce forms,
stationery, and similar repetitive page layouts
English
Place a watermark on any page or pages
Access the Download Manager
Using PostScript Drivers in Windows
Me/98
Displaying the Tabs
1
2
3
4
From the Start menu, choose Settings and then Printers to display the
Printers directory.
Click the magicolor 2350 printer icon.
To display the printer driver settings, from the File menu choose
Properties, then choose the Details tab.
Choose the Setup button.
Using the Tabs
General printer controls are located in tabs of the main printer driver dialog
box. The general printer controls let you check the status of consumables and
set access to optional features including the lower feeder tray, the duplex
option, and the internal hard drive.
There are two ways to access the specialized print setting tabs:
Through your application. This selects printer settings for the specific job
you are sending. Choose Print and then choose Properties.
Through the printer driver dialog box. This changes printer settings for all
subsequent print jobs until you change the settings again through the
printer driver. Choose Start/Settings/Printers, select the magicolor 2350
icon and then choose the Properties menu.
The tabs that appear in the new dialog box are described here.
64
Refer to the printer driver’s online help for information on all of these
functions.
Using PostScript Drivers in Windows Me/98
Layout Tab
This tab allows you to:
Set the orientation for a print job
Set duplex options, if the optional duplexer is installed
English
Specify the number of pages per sheet
Paper Tab
This tab allows you to:
Select an original document size
Set up custom paper sizes
Select the type of media
By clicking the Advanced button, select a different paper source for the
first page, header and trailer pages
Features Tab
This tab allows you to:
Select print resolution
Set color control options
Set graphics options such as rotation and halftone handling
Set PostScript
Select collated or uncollated output on multiple multi-page jobs
Set the number of copies
Scale your print job to a specific size
Check a proof before printing multiple copies or set a password to hold a
print job until you are at the printer, if an optional hard disk is installed
Proof-then-print options are available only if you check the “hold job”
box.
Overlay Tab
This tab allows you to:
Place an overlay on any page or pages, allowing you to reproduce forms,
stationery and similar repetitive page layouts
Place a watermark on any page or pages
Access the Download Manager
Using PostScript Drivers in Windows Me/98
65
Fonts Tab
This tab allows you to:
Set handling options for TrueType fonts
Set font substitution standards
English
Access the Download Manager
Consumables Tab
This tab allows you to:
Monitor the status of consumables
Refresh the consumable status display
Link to the Internet-based PageScope Light utility for your printer
Contact www.q-shop.com to order consumables
Settings Tab
This tab allows you to:
Indicate which printer options are installed
Selecting installed options makes the related features available in the
printer driver.
Set accounting information
About Tab
This tab allows you to:
Restore printer driver default settings
Contact www.konicaminolta.net/printer/ for company and product
information
Contact www.q-shop.com to order consumables
Using Macintosh PPDs
Displaying the Printer Options
1
2
66
When you are ready to print, open the print dialog box by choosing the
Print option within the application you are using.
In the Printer drop-down list, select the magicolor 2350.
Using Macintosh PPDs
3
Set your configuration choices by accessing the dialog boxes from the
drop-down list that starts with General. The dialog boxes are different in
different applications.
English
Most printer features are controlled by the Apple LaserWriter driver or
configured within the application you are using. In addition to those
standard choices, the KONICA MINOLTA PPDs also allow you to
configure:
Paper sources
Proof-and-print options
Duplexing options
Watermarks and overlays
Color matching
Color options
Print quality
For detailed information about Macintosh PPDs, see the magicolor 2350
Reference Guide on the Documentation CD-ROM.
Using Macintosh PPDs
67
English
Working with
Color
About Color Printing
English
This chapter introduces the color features available on your printer, including
printer resolutions, Automatic Image Density Control (AIDC), and color
matching. In addition, it includes a brief troubleshooting section to help you
deal with any color problems that might arise.
Color printing is based on the principles of subtractive colors, using pigment
to absorb light and reflect the appropriate colors back to the viewer’s eye. The
magicolor 2350 Reference Guide includes a chapter on color basics, if you
want to learn more about the theory behind color printing. The Reference
Guide also includes a chapter on color profiles, which explains how monitor
colors are translated into printed colors and tells you how to download
specialized color profiles, if you need them.
Printer Resolutions
Your printer offers a choice of three print resolutions, depending on which
driver you select.
PostScript name
PCL name
Description
Fast
Black &
White
Draft
Draft
16-18 page per
minute black only
Standard
Color
Standard
Standard
600 x 600 dpi
color
Best
Color
High
Enhanced
9600 x 600 dpi
class for
PostScript
1200 x 1200
dpi for PCL
Selecting a Resolution
Select the print resolution from your application’s print dialog box or from the
printer driver. The best option depends on what you’re printing.
Draft mode is best for fast printing of review documents.
Standard is the fastest choice for color printing, producing pages at 6
pages per minute. Standard prints crisp type, so it’s also a good choice for
documents that don’t include graphics.
70
About Color Printing
High or Enhanced are the best choices for print jobs with color graphics.
–
High. The PostScript High resolution provides 9600 x 600 dpi class
printing. Contone uses increased bit depth to produce clear images.
Pantone tables, which are included on the Software Utilities CD-ROM,
can help with color matching at this resolution.
–
Enhanced. The PCL Enhanced resolution prints with 1200 x 1200 dpi.
Adding more dots of smaller size is another method of producing clear
images.
Enhanced Automatic Image Density Control
(eAIDC)
The printer’s color calibration procedure, known as the enhanced Automatic
Image Density Control (eAIDC) cycle, is performed automatically based on
the number of pages printed, environmental changes, and consumable
changes. You can perform the eAIDC cycle when you have concerns about
color.
During this cycle, the printer performs an internal check of its color output and
automatically readjusts itself to optimum settings that account for the age of
toner cartridges and changes to the printer’s environment, such as increases
or decreases in humidity or temperature. This cycle checks both the 100%
saturated colors and the half-toned colors.
The length of the eAIDC cycle depends on several factors.
A 170-second eAIDC cycle is performed every time the printer has printed
200 pages.
A 215-second cycle is performed after 1,000 pages.
A 305-second cycle is performed when you replace a toner cartridge or
OPC drum.
A 305-second cycle is performed when you request an eAIDC cycle.
In most cases, it’s best to leave the automatic eAIDC function on all the time,
but you can use the printer’s Quality/AIDC/Calibration menu to turn it off if you
are using linearization or calibration software.
Use the Quality/AIDC/Request AIDC menu to perform an extra calibration
cycle.
In addition, you can override AIDC settings by using the Quality/AIDC/Density
Control menu to adjust the print density of individual toners. The density
controls are set at 5 in a 1-9 scale, and you can adjust any or all to higher or
lower settings.
Enhanced Automatic Image Density Control (eAIDC)
71
English
Pages take slightly longer to print, but produce the best graphics.
Color Matching
English
Your printer’s color management system is adjusted for best results with the
most commonly used application software, including the Microsoft Office
products. If you are using these common applications, you may never need to
adjust the color matching on your printer.
If you do need to make adjustments, however, the printer offers you a wide
variety of color matching options.
Color controls are located in the Features tab of the printer driver and are also
accessible through PageScope Light. If driver settings do not match the
settings chosen in PageScope Light, the driver settings will take precedence.
Quick Color Configuration
The simplest way to control colors is with the Quick Color Configuration
option in the printer driver and in PageScope Light. Quick Color Configuration
offers 11 choices that are applied to the entire print job. You can select the
setting that’s most appropriate for your entire print job and apply it uniformly
to all text and graphics.
Color Options
When your print jobs are more complicated, Color Options is the best choice.
Color Options lets you apply one color matching standard to graphics and
another to images.
The first step in managing color is a choice between color rendering
dictionaries and color profiles. Often, your application will tell you which of
these two options to choose.
Color Rendering Dictionaries
Color rendering dictionaries (CRDs) are based on the additive colors used by
computer monitors (red, green, and blue). They provide a fixed match
between colors so that one monitor color will always be translated to the
same printer color.
Your printer offers a choice of three color-rendering dictionaries:
Business—This CRD mostly closely matches the intensity of the colors
on the monitor. Use it for printing presentation graphics (such as overhead
transparencies), spot color, and text.
Photographic—This CRD was developed to optimize the quality of
photographic images. It adjusts all colors (both in and out of gamut) to
maintain the proportional relationship among the colors.
72
Color Matching
Colorimetric—Use this CRD for printing spot colors, such as logos, and
single solid colors where hue accuracy is crucial. With this CRD, in-gamut
colors are not changed, and out-of-gamut colors are mapped to the
closest in-gamut color.
Color profiles use the International Color Consortium (ICC) standards to
translate monitor colors into printer colors. Color profiles are more flexible
than color rendering dictionaries, so you can make the closest color matches
for your particular job, but they may require more skill to manipulate so that
you get the results you want.
You can set the RGB source profile to match the characteristics of the source
of the print job, the simulation profile to match a specific press, and the output
profile to indicate the characteristics of your printing device. Several source
and simulation profiles are included with your printer or you can download
additional profiles. Instructions for downloading profiles are in “Color Profiles”
in the Reference Guide.
RGB Source Profiles
RGB Source profiles are used for color conversion from RGB devices, such
as monitors, to CMYK devices, such as printers. Use the RGB Source to
indicate the source in which the job was created. Choices are:
Apple RGB—This setting is widely used because it has been the default
setting for Adobe Illustrator and Photoshop. Its range of colors is similar to
sRGB.
Blue Adjust RGB—Provides an alternative blue rendering configuration
with more emphasis on cyan than on magenta (produces lighter blues).
Prepress—This source profile is also known as Adobe RGB and as
SMPTE-240M. It provides a wide range of colors, including almost all
printable process colors.
sRGB—A standard color space based on average performance of PC
monitors. This is the default setting for your printer. It provides a very
good representation of monitor colors and is especially useful if you’re
printing documents from the web or from Microsoft Office applications.
Vivid—This setting provides the most vivid colors possible for business
graphics, by mapping RGB solid colors to the printer’s CMYK solid colors.
It is an excellent choice for transparencies and business graphics.
ColorMatch—This color setting was designed to work with prepress
monitors. It has a wide color range and provides good color consistency.
Color Matching
73
English
Color Profiles
Simulation Profiles
These profiles area used to convert information about one CMYK device into
data for another CMYK device. That is, you can use these profiles to make
your magicolor 2350 printer create colors like those produced on a different
printer or a printing press. The simulation choices are:
English
SWOP—SWOP, an acronym for Specifications for Web Offset Printing,
simulates colors for offset presses.
Eurocolor—This profile simulates Fogra Positive Coated measurement
data.
Commercial—This profile simulates a commercial press.
DIC—This profile simulates Japanese DIC Ink.
Toyo—This profile simulates Japanese Toyo Ink.
Destination Profiles
The printer includes a standard destination profile. However, you can
download additional destination profiles. See “Color Profiles” in the
Reference Guide.
Profiles for Host-based Color Management
Some software applications use host-based color management and work
best with color profiles tailored specifically for that purpose. Two of these
profiles are included on the Software Utilities CD-ROM that came with your
printer:
mc2350s.icm for standard quality
mc2350h.icm for high or enhanced quality
The readme files on the CD-ROM include directions on how to use and where
to load each profile. These specialized profiles are useful for work with
Microsoft ICM2 for Windows, Apple ColorSync, CorelDRAW, Kodak KCMS,
Adobe Photoshop, and others.
CMM Test Page
A utility that allows you to preview color matching choices is included on the
Software Utilities CD-ROM that came with your printer. The file includes a
complete list of available profiles with descriptive information about each. In
addition, it allows you to preview the effect of the color choices you have
selected on a sample picture and graphic.
74
Color Matching
K-Preserve
You can select this option in the printer driver by choosing the Features tab,
clicking the Color Options or Advanced Color Options button (depending on
your operating system), and checking the K-Preserve box.
RGB Gray Treatment
This option, available through the printer driver and PageScope Light, offers
three options for gray/black printing.
Black Only, which prints 100% black with black toner only.
Black and Gray, which prints all 100% black and intermediate grays with
black toner only
Composite Black, which prints 100% black and intermediate grays with a
composite of all four toners.
Troubleshooting Color Problems
The magicolor 2350 color matching system is optimized for the sRGB
Standard, which is the standard used with many common applications such
as Microsoft Office. In most cases, you do not need to make any adjustments
to the default color settings to achieve the best results.
If you have trouble with color, however, there are several things to check.
1
Mechanical Problems—Print quality problems that are caused by
mechanical problems are usually drastic—colors that change from page
to page; colors that are off-register; colors that aren’t anything like you
expect.
Are toner cartridges installed properly?
Do all four toner cartridges have toner?
Are the printer doors closed?
Is the OPC drum installed properly?
Is the laser lens cover dirty?
2
Instructions for checking all these mechanical issues are included in this
manual.
Resolution—If images look grainy or if your page is printed with black
toner only, the resolution may be set wrong.
Troubleshooting Color Problems
75
English
On CMYK printers, black is generally made by mixing all four toner colors. KPreserve lets you maintain the K or black channel for graphics in a CMYK file,
so that blacks are printed with black toner only rather than a combination of
toners.
If the resolution is set to draft, the job prints with black toner only. Draft
is designed to be a very quick proofing mode.
English
If the resolution is set to Standard, text prints well, but images may
look grainy or unclear. It’s a good choice for text documents.
3
4
If the resolution is set to High, images are sharp and clear. Printing
takes somewhat longer at High resolution, but it’s the best choice for
the delivery copy of a document containing images.
Registration Page—Found in the Quality menu, the Registration page
prints color test patterns so you can see whether colors are registered, or
lined up, properly. The Registration page always prints at 600 x 600 dpi
resolution.
Test Pages—Also found in the Quality menu, the test pages let you check
the overall toner coverage for each toner color or for grayscale printing.
Test Page 1 is for checking color. When selected, it prints five
sequential pages — one each of cyan, magenta, yellow, black, and
one with the colors combined.
5
Test Page 2 is for checking grayscale.
Vivid Setting—This setting, found on the Features/Color Options or
Advanced Color Options/Configure tab of the printer driver or in
Configuration/Color Matching & Quality in PageScope Light, is optimized
for transparencies, mapping the monitor’s solid colors to the printer’s solid
colors so the intensity matches.
If graphics don’t match monitor colors, turn Vivid on.
6
This setting may not work well for images, so experiment with it to find
the best setting for your print job.
RGB Source—This setting, which is accessible on the on the Features/
Color Options or Advanced Color Options/Configure tab of the printer
driver or in Configuration/Color Matching & Quality in PageScope Light,
needs to match the profile for the document being printed.
Some applications tell the RGB source. If your document or
application lists the RGB source, set the printer to match. If it does not,
you can experiment with this setting to find the best option for your
print job.
7
76
If dots of cyan or magenta appear in what should be solid yellow
blocks, such as the highlighter feature in Microsoft Word or the table
and spreadsheet cell fills in Microsoft Word or Excel, set the RGB
Source to None.
CMM Test Page—Use this file to see a picture preview of your current
color setup. It also includes a brief description of all the profiles that came
with your printer. The file is on the Software Utilities CD-ROM that came
with your printer.
Troubleshooting Color Problems
9
Color Matching—If you see spots of toner around the edges of text, if
colors are too dark or too saturated, or if toner is so thick that it flakes off
the finished page, check whether Quick Color Configuration (on the
Features tab in your printer driver) is set to Disable Printer Color
Matching. If it is, choose one of the other options from the drop-down list.
All of the other color configuration options regulate the amount of toner
that goes on the page, making sure that the total amount is within the
range that the printer can fuse to the media.
SWOP CMYK—This sophisticated setting is used by graphic artists to
make sure the colors in their proofs match those that will be created by an
offset press.
If you are trying to simulate a SWOP device or the color data in your
file is specified in SWOP CMYK, make sure the simulation profile is
set to SWOP.
10
If you are not trying to simulate SWOP, make sure the simulation
profile is set to None or to whichever of the other choices is
appropriate for your job.
Other Color Problems—Most other color printing problems arise from
color management issues in the application that was used to create the
job or from which you are printing the job.
Check the application documentation for advice on color
management.
Check color notes at printer.konicaminolta.net/support for information
on color issues with popular publishing software.
Troubleshooting Color Problems
77
English
8
English
Working with the
Status Monitor
Introduction
The Status Monitor shows information about the current status of the printer.
English
If you used the CD-ROM Installer to install the printer driver,
the Status Monitor was also installed, and the Status
Monitor’s icon appears in your toolbar.
If you installed your printer by using Add Printer, rather than
the CD-ROM, Status Monitor was not installed, and the icon does not appear.
You can, however, install the Status Monitor manually. Installation instructions
are included in the Reference Manual on the Documentation CD-ROM.
Environment
The Status Monitor can be used with Windows XP, 2000, NT4, Me, and 98,
connected via Ethernet.
To install Status Monitor on Windows NT4 systems, you must first
install Windows Media Player, which is available on the Microsoft
website.
Recognizing Status Monitor Alerts
When the Status Monitor detects a printing problem, several actions occur at
once, depending on your settings. First, the icon changes from green to
yellow, orange, or red, depending on the severity of the printer problem. Next,
the icon flashes, if you have set it to flash in the advanced options. In
addition, the Status Monitor sends you an email to alert you to the problem.
You can set the interval between the time Status Monitor detects a problem
and the time it sends an email.
Refer to online help for further information on these settings.
Recovering from a Status Monitor Alert
When the Status Monitor notifies you of a printing problem, double-click on its
icon to open the Status Monitor. The Status Monitor identifies which printer
has an error and what type of error has occurred.
Finally, the Status Monitor includes Quick Time video clips that illustrate how
to solve the print problem.
Refer to online help for further information on these settings.
80
Introduction
Closing the Status Monitor
When you have completed the actions necessary to correct the printer
problem, the icon turns green again.
Closing the Status Monitor
English
Select Close from the Status or Consumable menu. The Status Monitor
window closes, but the Status Monitor continues to operate in the
background.
81
English
Replacing
Consumables
Consumable Life Expectancies
English
The stated life expectancy of each consumable is based on printing with
specific media type, number of color planes, page size, and page coverage
(normal 5% coverage of letter-/A4-size media). The actual life expectancy will
vary depending on these and other printing variables, including continuous or
intermittent printing, ambient temperature, and humidity.
The following messages indicate that a consumable needs to be replaced.
Item/Message This item needs replacing after...
Display
Comment
REPLACE OPC Up to 45,000 continuous monochrome
or 11,250 continuous four-color
pages, or 10,000 intermittent (onepage jobs) monochrome or 7,500
intermittent color pages.
Replaced by user.
See “Replacing the
OPC Drum
Cartridge” on page
93.
X EMPTY
Toner Cartridges
Standard capacity: Approximately
1,500 single-sided pages per
cartridge—yellow, magenta, cyan at
5% coverage of each color.
Replaced by user.
See “Replacing a
Toner Cartridge” on
page 86.
High capacity: Approximately 4,500
single-sided pages per cartridge—
black, yellow, magenta, cyan at 5%
coverage of each color.
REPLACE
WASTE TONER
Approximately 25,000 continuous
monochrome or 21,600 intermittent
(one-page jobs) monochrome,
or 6,250 continuous or intermittent
color pages (based on the standard
mode with 5% toner coverage or letter
A4 media).
Replaced by user.
See “Replacing the
Waste Toner Bottle”
on page 92.
If multiple toner cartridges or consumables are empty at the same time, the
Error light will flash. You can press the left arrow key to scroll through the
error messages or press the right arrow key to start the toner replacement
sequence.
Auto-Image Density Control (AIDC)
The printer periodically pauses for the color calibration procedure (also
known as the Auto-Image Density Control [AIDC] cycle). This process is
provided to ensure reliable printer operation with optimum output quality.
84
Consumable Life Expectancies
This 305-second calibration cycle automatically occurs after the installation of
a new toner cartridge or OPC drum.
If you open the door before the message window reads MAGICOLOR
2350/IDLE, the printer stops and repeats the calibration cycle.
The printer also pauses to do a 170-second AIDC cycle after 200 1sided pages of a continuous print run, and a 215-second AIDC cycle
when waking up from Energy Saver with more than 1,000 pages since
the last AIDC cycle or when there has been an environmental change
such as in temperature or humidity. You can also use control panel
options or PageScope Light to start a full AIDC cycle.
Toner Cartridge Life
A high-capacity toner cartridge contains enough toner (yellow, magenta,
cyan, or black) to print a maximum of 4,500 (at normal 5% page coverage)
simplex letter/A4-size plain paper pages of continuous print. The standardcapacity toner cartridge contains enough toner to print a maximum of 1,500
(at normal 5% page coverage) simplex letter/A4-size plain paper pages of
continuous print.
With heavier coverages, the approximate maximum capacities will decrease.
To determine your average percent coverage, print a consumables
statistics page (Print Menu/Statistics).
How do I know if I need to replace the toner?
When a toner cartridge runs low, X LOW displays in the message window (X
indicates the toner color). Usually, parts of the page print lighter than
expected. It’s your option whether to continue printing.
The printer, approximately 200 pages after detecting that toner in a cartridge
is low, displays X EMPTY in the message window (X indicates the toner color).
Printing can continue even though the out-of-toner warning appears.
However, the color gradually fades out, so replace the toner cartridge as soon
as possible.
How can I tell if a toner cartridge is
standard or high capacity?
Refer to the label on the toner cartridge. The label
indicates whether the cartridge is standard-capacity
or high-capacity.
Consumable Life Expectancies
85
English
Replacing Consumables
Attention
English
Failure to follow instructions as outlined in this manual could result in
voiding your warranty.
Refilled Toner Cartridges
Attention
Do not use refilled toner cartridges. Any damage to the printer or quality
problems caused by a refilled toner cartridge will void your warranty.
Replacing a Toner Cartridge
Characters and images are created in your laser printer through a
photosensitive process that applies toner to the Optical Photo Conductor
(OPC) drum (which functions like photographic film). Your printer uses four
toner cartridges: black, yellow, magenta, and cyan. Handle the toner
cartridges carefully to avoid spilling toner inside the printer or on yourself.
The toner is nontoxic. If you get toner on your hands, wash them in
cool water or a neutral detergent. If you get toner on your clothes,
lightly dust them off as much as possible. If some toner remains on
your clothes, use cool, not hot water, to rinse the toner off.
WARNING!
If you get toner in your eyes, wash it out immediately and consult a
doctor. Material Safety Data Sheets (MSDS) information can be found at
printer.konicaminolta.net/support (click on the Answer Base).
Attention
Do not hold a toner cartridge vertically.
Do not touch the toner roller surface.
This could lower image quality.
Keep toner cartridges:
In their packaging until you’re ready to install them.
86
Replacing Consumables
In a cool, dry location away from sunlight (due to heat).
Level during storage.
Do not stand or store cartridges on their ends or turn them upside down;
the toner inside the cartridges may become caked or unequally
distributed.
Away from salty air and corrosive gases such as aerosols.
Steps for Replacing a Toner Cartridge
Attention
Be careful not to spill toner while replacing a toner cartridge. If toner
spills, immediately wipe it off with a soft, dry cloth.
When toner is low or out, the printer prompts you to replace the cartridge.
1
2
Check the message window to see which color toner is low or out.
Select the toner color.*
If a toner cartridge is empty, the carousel automatically moves so that the
empty toner cartridge can be removed. If you choose to replace a
cartridge with low toner, the carousel moves when you select the color.
When the cartridge is in position, the message window displays: OPEN
DOOR AND/REMOVE CARTRIDGE.
* At this point, some older magicolor 2350 printers may also require you to select the toner
cartridge size for cyan, yellow, and magenta cartridges. Although the black cartridge that
comes with your printer is standard capacity, replacement black cartridges come only in the
high-capacity size, so you don’t need to select a black cartridge size during the installation
process. If you accidentally select the wrong cartridge size, use the Quality Menu/Toner/
Change Size sequence in the configuration menu to change the setting.
Replacing Consumables
87
English
The maximum storage temperature is 95° F (35° C) and the maximum
storage humidity is 85% (noncondensing). If the toner cartridge is moved
from a cold place to a warm, humid place, condensation may occur,
degrading print quality. Allow the toner to adapt to the environment for
about one hour before use.
3
Open the printer’s front door.
English
When you open the door, the
message window displays: FRONT
DOOR OPEN.
4
5
Insert the thumb and index finger of
your right hand into the two holes in
the front of the toner cartridge, and
then pull the cartridge straight out
about 6" (152 mm).
Support the middle of the cartridge
with your left hand, and then pull out
the cartridge.
WARNING!
Contact [email protected] for toner
recycling availability, or dispose of the used toner cartridge
according to your local regulations. Do not dispose of it by
burning.
6
88
Remove the new toner cartridge from its shipping carton.
Replacing Consumables
Remove the protective yellow cover
clearly marked Remove.
8
9
10
Each toner cartridge has a
colored end that corresponds
to a colored label inside the
cartridge slots. Always install
the toner cartridge in the slot
with a label of the same color.
English
7
Support the middle of the cartridge
with your left hand, insert the thumb
and index finger of your right hand
into the two holes in the front of the
toner cartridge, and then insert the
cartridge so that the guides on the
cartridge fit into the rails in the
cartridge compartment in the
carousel.
Gently push the new toner cartridge
into the printer.
Close the printer’s front door.
The printer must complete a 305-second calibration cycle after any
consumable has been replaced. If you open the door before the
display reads MAGICOLOR 2350/IDLE, the printer stops and repeats
the calibration cycle.
Replacing a Toner Cartridge That Is Not Empty
You can choose to replace a toner cartridge that is not empty. For example, if
the consumable monitor on your printer driver indicates that a particular color
cartridge is running low and you need to print a lengthy job when no one will
be available to change the cartridge, you might want to replace the cartridge
before it is empty.
Here are the steps to replace the yellow toner.
Press Key
(Until) Display Reads
MAGICOLOR 2350
IDLE
MAGICOLOR 2350
PRINT MENU
Replacing Consumables
89
Press Key
(Until) Display Reads
MAGICOLOR 2350
QUALITY MENU
QUALITY MENU
English
TONER
TONER
REPLACE
REPLACE
BLACK
REPLACE
YELLOW*
The printer displays
OPEN DOOR AND
REMOVE CARTRIDGE
You can hear the cartridge carousel rotating
inside the printer. Wait for the sound to stop
before opening the door.
Follow the “Steps for Replacing a Toner Cartridge” on page 87.
Place the removed toner cartridge in a bag if you want to use the remaining
toner when you will be able to monitor it.
* At this point, some older magicolor 2350 printers may also require you to select the
toner cartridge size for cyan, yellow, and magenta cartridges. (Although the black
cartridge that comes with your printer is standard capacity, replacement black
cartridges come only in the high-capacity size, so you don’t need to select a black
cartridge size during the installation process.) If this is required, press the down arrow
key to display COLOR/STANDARD and then, if necessary, press the right arrow key
to display COLOR/HIGH CAPACITY.
90
Replacing Consumables
Replacing All the Toner Cartridges at Once
At some times, such as with a warranty claim, you may need to replace all of
the toner cartridges at the same time. Here are the steps to follow.
In the Quality/Toner submenu, select Replace All.
The carousel rotates.*
2
3
4
5
6
If for some reason that cartridge cannot be rotated, the control
panel displays CANNOT ROTATE CARTRIDGE and the printer
returns to the previous menu. You can try the sequence again or
continue printing without changing cartridges if you have Quality/
Toner Action/Low set to Continue.
When the control panel display reads OPEN DOOR AND/REMOVE
CARTRIDGE, open the door.
Remove the old cartridge and store it in a plastic bag if you plan to use it
again later.
Replace the cartridge. See “Replacing a Toner Cartridge” on page 86.
If you do not replace the cartridge, the control panel displays
X TONER MISSING. After a few seconds, the display reads
REPLACE X TONER > and you must repeat the replacement
cycle for that cartridge.
Close the door.
Repeat steps 2 through 5 until all four cartridges have been replaced.
After you replace the fourth cartridge and close the door, the printer
performs an AIDC calibration cycle and returns to Idle. The AIDC cycle
lasts up to 305 seconds. Do not open the door while the cycle is in
progress, or it will stop and start over.
* At this point, some older magicolor 2350 printers may also require you to select the toner
cartridge size for cyan, yellow, and magenta cartridges. (Although the black cartridge that
comes with your printer is standard capacity, replacement black cartridges come only in the
high-capacity size, so you don’t need to select a black cartridge size during the installation
process.) If this is required, press the down arrow key to display COLOR/STANDARD and
then, if necessary, press the right arrow key to display COLOR/HIGH CAPACITY. Be careful not to skip this step. If you replace the cartridge without indicating a size, the pritner automatically adjusts to a high-capacity toner.
Replacing Consumables
91
English
1
Replacing the Waste Toner Bottle
When the waste toner bottle becomes full, the message REPLACE WASTE
TONER appears. The printer will stop and will not start again until the waste
toner bottle is replaced.
English
Removing the Used Waste Toner Bottle
1
2
Open the printer’s front door.
Grasp the handle of the waste toner
bottle. Lift the waste toner bottle up
and carefully remove it.
Keep the waste toner bottle upright so
the toner does not spill.
3
4
5
92
Remove the two blue caps by turning
them counterclockwise.
Secure the two caps onto the two
holes by turning them clockwise.
Dispose of the used waste toner
bottle.
Replacing Consumables
WARNING!
English
Dispose of the used waste toner bottle properly according to your local
regulations (do not dispose of it by burning).
Installing the New Waste Toner Bottle
1
2
3
4
Remove the new waste toner bottle from its carton.
Insert the bottom of the waste toner
bottle into its installation position in
the printer.
Push the top of the waste toner bottle
into position until it is firmly seated.
Close the printer’s front door.
If the waste toner bottle is not
correctly installed or the transfer belt
release lever is at its top position
(11 o’clock), the front door cannot be
closed.
The printer must complete a 305-second calibration cycle after any
consumable has been replaced. If you open the door before the
display reads MAGICOLOR 2350/IDLE, the printer stops and repeats
the calibration cycle.
Replacing the OPC Drum Cartridge
When the OPC drum is worn out, the message REPLACE OPC DRUM appears.
Printing can continue even after this message appears; however, since print
quality is reduced, the OPC drum cartridge should replaced immediately.
The OPC drum life is directly related to the number of rotations of the
drum. Longest drum life is achieved with continuous printing.
Intermittent printing with small job sizes requires cleaning rotations
before and after each job, and impacts OPC life.
Replacing Consumables
93
Removing the Used OPC Drum Cartridge
English
1
With the front door open, rotate the
transfer belt unit release lever
clockwise to the top (11 o’clock)
position.
This raises the transfer belt unit.
2
3
Grasp the release lever for the OPC
drum cartridge, and then pull the
cartridge straight out about 6 inches
(152 mm).
Support the bottom of the drum with
your hand, then carefully pull the
cartridge toward you and remove it.
94
Dispose of the cartridge
properly according to your
local regulations.
Replacing Consumables
Installing the New OPC Drum Cartridge
The OPC drum is extremely sensitive to bright light and direct sunlight.
Always leave it in its protective bag until you are ready to install it. Any
exposure to light should be avoided, or permanent damage could
result.
Any damage resulting from mishandling of the OPC drum will void the
drum’s warranty. Also, handle the cartridge carefully by its sides so you
don’t touch the surface (the green part) of the drum. The drum is also
extremely sensitive to hand oils and scratches, both of which reduce
print quality.
1
Remove the new OPC drum cartridge
from its carton.
Attention
Keep the protective sheet on the cartridge. Do not touch the
protective sheet on the photosensitive (green) surface or scratch the
surface. This could lower image quality.
2
3
Make sure the transfer belt release lever is still set to its top position
(11 o’clock).
Holding the OPC drum cartridge
level, place the front end of the OPC
drum cartridge installation guide into
the installation rail.
Carefully push the OPC drum
cartridge in.
When installing the OPC drum
cartridge, be sure not to press on the
release lever. If the lever is pressed
Replacing Consumables
95
English
Attention
during installation, the lock is released, and the cartridge is not installed
correctly.
Attention
The cartridge should slide easily into the printer. Don’t force it.
English
4
5
Press on the front handle of the OPC
drum cartridge with one hand and
hold the front handle of the OPC
protective cover with the other hand.
Peel the protective cover off (straight
toward you).
6
Dispose of it properly
according to your local
regulations.
Turn the release lever of the transfer
belt counterclockwise to its correct
position (7 o’clock).
This lowers the transfer belt.
Attention
If the transfer belt release lever is not at its correct position
(7 o’clock), the waste toner bottle cannot be installed.
7
Install a new waste toner bottle (see page 87).
The printer must complete a 305-second calibration cycle after any
consumable has been replaced. If you open the door before the
message window reads MAGICOLOR 2350/IDLE, the printer stops
and repeats the calibration cycle.
Ordering Consumables
Choosing the right consumables for your printer not only increases its
reliability and performance, but also minimizes the risk of damage. For
example, only KONICA MINOLTA toner cartridges are designed to meet the
96
Ordering Consumables
exact specifications of your KONICA MINOLTA printer, giving maximum
performance, efficiency, and long life.
Toner cartridges and other consumables for your printer are available from
your local vendor or Q-SHOP (www.q-shop.com).
Ordering Consumables
English
See the Service & Support Guide for sources of service and support.
The most up-to-date worldwide information can be found at
www.konicaminolta.net/printer/.
97
English
Maintaining the
Printer
Maintaining the Printer
Attention
English
Read all caution and warning labels carefully, making sure to follow any
instructions contained in them. These labels are located on the inside of
the printer’s doors and the interior of the printer body.
Handle the printer with care to preserve its life. Abuse may cause damage
and void your warranty. If dust and paper scraps remain on the inside or
outside of the printer, printer performance and print quality will suffer, so the
printer should be cleaned periodically. Keep the following guidelines in mind.
WARNING!
Turn off the printer, unplug the power cord, and disconnect all interface
cables before cleaning. Do not spill water or detergent into the printer;
otherwise the printer will be damaged and an electric shock may occur.
Either clean the printer before use or allow time after unplugging it to
allow the fuser unit to cool down.
Attention
The fuser unit is hot. When the right door is opened, the
fuser unit temperature drops gradually (one hour wait time).
Be careful when cleaning the inside or removing paper jams, as the fuser
unit and other internal parts may become very hot.
Do not place anything on the top of the printer.
Use a soft cloth to clean the printer.
Never spray cleaning solution directly on the printer’s surface; the spray
could penetrate through the air vents of the printer and damage the
internal circuits. Avoid using abrasive or corrosive solutions or solutions
that contain solvents, (such as alcohol and benzene) to clean the printer.
Always test any cleaning solution (such as mild detergent) on a small area
of your printer to check the solution’s performance.
Never use sharp or rough implements, such as wire or plastic cleaning pads.
Always close the printer doors gently. Never expose the printer to vibrations.
Do not cover the printer immediately after using it. Turn it off and wait until
it cools down.
Do not leave the printer’s covers and doors open for any length of time,
especially in well-lit places; light may damage the OPC.
Do not open the printer during printing.
100
Maintaining the Printer
Do not tap paper stacks on the printer.
Do not tilt, lubricate, or disassemble the printer.
Do not touch the electrical contacts, gears, or laser beam devices. Doing
so may damage the printer and cause the print quality to deteriorate.
high, your printer may experience media jams and excessive media curl.
Make sure two people are available to
lift the printer when moving it.
When moving the printer, keep the
printer level to avoid toner spillage.
When lifting the printer, grasp the
handles at the top of Tray 1 and at the
bottom-right side of the printer (or the
handles at the bottom of the duplex
unit if it is installed).
Front
Even if an optional media tray is
installed, be sure to lift the printer as
described above. Do not grasp the grip of Tray 2 or the cover on its right
side; otherwise, the media tray may be damaged.
WARNING!
If you get toner in your eyes, wash it out immediately with cool water
and consult a doctor. Material Safety Data Sheets (MSDS) information
can be found at printer.konicaminolta.net/support (click on the Answer
Base).
If you get toner on your skin, wash it off with cool water and neutral
detergent.
If you get toner on your clothes, lightly dust them off as much as possible.
If some toner remains on your clothes, use cool — not hot — water to
rinse the toner off, provided your clothing is washable.
Make sure any parts removed during cleaning are replaced before you
plug in the printer.
Maintaining the Printer
101
English
Keep media in the output tray at minimum level. If the media stacks too
Cleaning the Printer
English
Always test any cleaning solution (such as a mild detergent) on a small area
of your printer to check the solution’s performance.
Exterior
This item needs
cleaning...
After...
Use
Avoid
Control panel
As
needed
A soft, dry cloth
Sharp or rough
implements (such as
wire or plastic cleaning
pads)
Exhaust duct
A cotton swab
Any liquid
Printer exterior
A soft, damp cloth
(mild detergent)
Sharp or rough
implements (such as
wire or plastic cleaning
pads)
Abrasive or corrosive
solutions that contain
solvents (such as
alcohol or benzene)
Control Panel
Exhaust Duct
Printer Exterior
102
Cleaning the Printer
Interior
Attention
English
Be sure to turn off the printer and unplug the power cord before
cleaning inside.
This item needs
cleaning...
After...
Use
Duplex option
feed rollers
Media misfeeds occur
frequently or the printout is
dirty.
A damp
Abrasives or
cloth that detergents
has been
wrung out
well
Tray 1 interior feed Every 30,000 single-sided
rollers
pages, every 12 months, or
as needed, whichever
comes first.
A soft, dry Liquids,
cloth
abrasives, or
detergents
Tray 2 media
rollers
Laser lens cover
Removing the waste toner
bottle to clean around it.
Every 30,000 single-sided
pages, every 12 months, or
as needed, whichever
comes first.
Printer interior
(such as the inside
of the door, around
the waste toner
bottle)
Every 30,000 single-sided
pages, every 12 months, or
as needed, whichever
comes first.
Avoid
Media Rollers
The accumulation of paper dust and other debris on the paper transport roller
can cause media-feeding problems.
Tray 1 (Multipurpose Tray) Interior Feed Rollers
1
Remove all media from Tray 1.
Cleaning the Printer
103
Pull the right-side door
release , and then open
the right-side door .
English
2
3
While pressing down the media guide
with one hand, clean the feed roller
by wiping it with a soft, dry cloth.
4
5
6
Media guide
While the door is open, the paper
feed roller inside the right door
can also be cleaned. While pressing the paper guide down with one
hand, clean the paper feed roller
by wiping it with a soft, dry cloth.
Close the media guide.
Close the right cover.
Load the media into the tray again.
Media feed roller
Duplex Option Feed Rollers
1
2
104
Turn off and unplug the printer and disconnect the interface cable.
Open the cover of the duplex option.
Cleaning the Printer
4
5
Clean the feed rollers by wiping them
with a soft, damp cloth that has been
wrung out well.
Close the duplex option cover.
Plug in the printer; reconnect the
interface cable. and turn the printer
on.
English
3
In compliance with UL guidelines, “The appliance inlet is
considered to be the main disconnect device.”
Tray 2 (Optional Lower Feeder Unit) Media Rollers
1
2
3
Turn off and unplug the printer and disconnect the interface cable.
Remove paper from Tray 2.
Remove the brackets (two at the front and one at the back) used to attach
the lower feeder unit to the printer.
Opening the front door and removing the waste toner bottle first
will permit a clearer view of these brackets.
WARNING!
Your printer weighs approximately 62 lbs (28 kg) with consumables
installed. Be sure to have help when lifting and moving it.
Cleaning the Printer
105
Open the right door of the lower
feeder unit.
English
4
5
Lift the printer off of the lower feeder
unit.
The printer must be lifted by two
people grasping the handles
6
7
106
Wipe the paper feed rollers with a
soft, damp cloth.
Wipe the paper feed rollers inside the
right door with a soft, damp cloth.
Cleaning the Printer
With the right door still open, place
the printer on the lower feeder unit.
English
8
9
Install the brackets (two at the front and one at the back), and then close
the right door.
10
11
Reinstall the waste toner bottle if you removed it and close the front
door if you opened it.
Slide the tray back in.
Plug in the printer; reconnect the interface cable and turn the printer on.
In compliance with UL guidelines, “The appliance inlet is considered to
be the main disconnect device.”
Printer Interior and Laser Lens Cover
1
Open the front door.
Cleaning the Printer
107
2
English
3
Remove the waste toner bottle.
Holding the waste toner bottle
vertically, plug the two openings with
the caps.
4
5
6
108
The waste toner bottle
contains waste toner. Be
careful not to tilt the bottle
while removing it.
Place the removed waste toner bottle, with the openings facing up,
on a stable surface (not the printer).
Pull out the laser lens cover.
The laser lens cover cannot
be removed. Do not pull it with
too much force.
Wipe the surface of the laser lens
cover with a soft, dry cloth.
Reinsert the laser lens cover.
Cleaning the Printer
Wipe the inside of the printer with a
soft, dry cloth.
English
7
8
9
10
11
Hold the waste toner bottle, removed
in step 2, vertically, and then remove
the two caps from the openings.
Mount the removed caps onto the cap
holders, and then turn the caps
clockwise to secure them.
Insert the bottom of the waste toner
bottle into its compartment in the
printer, and then install the bottle.
Wipe the inside of the front door with
a soft, dry cloth.
Close the front door.
Cleaning the Printer
109
English
Troubleshooting
Introduction
English
This chapter provides information to aid you in resolving printer problems you
may encounter, or at least guide you to the proper sources for help.
Verifying Printer Configuration Information
There are two ways to get configuration information so you can verify that the
printer is printing correctly:
On the startup page that prints automatically when you turn on the printer.
If you don’t want a startup page to print each time you turn on the
printer, you can turn it off in the System Default/Startup Options/
Start Page menu.
Using PageScope Light.
On a configuration page printed through the printer menu.
Press Key
(Until) Display Reads
MAGICOLOR 2350
IDLE
MAGICOLOR 2350
PRINT MENU
PRINT MENU
MENU MAP
PRINT MENU
CONFIGURATION
CONFIGURATION
*YES
*YES
IS SELECTED
The configuration page prints and the message window reads:
PRINT MENU
CONFIGURATION
MAGICOLOR 2350
IDLE
112
Introduction
Preventing Media Jams
To avoid media jams, make sure that:
Media matches the printer specifications
The printer is on a hard, flat, level surface
You have correct media type selected if you’re printing on envelopes,
labels, thick stock, or transparencies
You store media in a dry location away from moisture and humidity
You always adjust the media width regulation guides in Tray 1 after
inserting the media (a guide that is not properly adjusted can cause poor
print quality, media jams, or printer damage)
Transparencies are removed from the output tray immediately after
printing to avoid static buildup
You load the media for single-sided pages printing-side up in Tray 1 or 2
(Many manufacturers place an arrow on the end of the wrapper to indicate
the printing side.)
Also make sure that the media is not:
Folded, wrinkled, or excessively curled
Double feeding
–
Unless you are using transparencies, remove the media and fan the
sheets
–
If you are using transparencies, make sure they have not been fanned
since fanning causes static
Mixed, with more than one type, size, or weight in a tray at the same time
Filled beyond the media fill marker in input trays
Filled beyond the capacity of the output tray (The face-down output tray
has a 200-sheet capacity—jamming may occur if you allow media to
accumulate more than 200 sheets at a time)
Preventing Media Jams
113
English
Media is flat, especially on the leading edge
Understanding the Media Path
English
Understanding the printer’s media path will help you locate media jams.
1
Media exit unit
2
Output tray
3
Transfer belt
4
Toner cartridge
5
OPC drum
6
Laser
7
Tray 1 (multipurpose tray)
8
Tray 2 (optional lower
feeder unit and 500-sheet
media tray)
9
Fuser unit
10 Duplex option
11 Transfer roller
12 Registration rollers
13 Pickup rollers
Tray 1 (Multipurpose Tray)
The multipurpose tray is located at the left of the printer. The media is picked
up from Tray 1, passed through the registration rollers, between the OPC
drum and the transfer roller, through the fuser unit, and delivered via the
media exit unit to the output tray on top of the printer.
Tray 2 (Optional Lower Feeder Unit with 500-Sheet
Media Tray)
The media tray is located at the bottom front of the printer. The media is
picked up from the tray, passed through the registration rollers, between the
OPC drum and the transfer roller, through the fuser unit, and delivered via the
media exit unit to the output tray on top of the printer.
114
Understanding the Media Path
The media is picked from either media tray, passed through the registration
rollers, between the OPC drum and the transfer roller and through the fuser
unit, moved to the output tray briefly, pulled back into the duplex option where
the media undergoes a change in direction, cycled through the OPC, transfer
and fuser units again, and delivered via the media exit unit to the output tray,
which is the top of the printer.
Since several sheets cycle through the printer/duplex unit at the same
time, recovering from a media jam may require the removal of more
than one sheet.
Understanding the Media Path
115
English
Duplex Option
Clearing Media Jams
English
To avoid damage, always remove jammed media gently, without tearing it.
Any pieces of media left in the printer, whether large or small, can obstruct
the media path and cause further jams. Do not reload media that has
jammed.
Attention
The image is not fixed on the media before the fusing process. If you
touch the printed surface, the toner may stick to your hands, so be
careful not to touch the print face when removing the jammed media.
Make sure not to spill any toner inside the printer.
Unfused toner can dirty your hands, clothes, or anything else it gets
on.
If you accidentally get toner on your clothes, lightly dust them off as
much as possible. If some toner remains on your clothes, use cool,
not hot water, to rinse the toner off, provided your clothing is
washable. If toner gets on your skin, wash it off with water or a neutral
detergent.
WARNING!
If you get toner in your eyes, wash it out immediately and consult a
doctor. Material Safety Data Sheets (MSDS) information can be found at
printer.konicaminolta.net/support (click on the Answer Base).
If, after clearing the media jam, the jam message in the control panel window
persists, open and close any of the printer’s doors. This should clear the jam
message.
116
Clearing Media Jams
Location of Jam
Page Reference
Tray 1
Page 117
Tray 2
Page 117
Inside the printer
Page 119
Near the duplex option
Page 122
In the output tray
Page 122
English
Handling Media Jams by Location
Tray 1 (Multipurpose Tray)
1
2
3
Remove the media from the multipurpose tray.
Carefully remove the jammed media and discard it.
Fan the removed media to prevent static
buildup and even up the front edges.
4
5
Do not reinsert media that has jammed.
Don’t fan transparencies because
fanning increases static in them.
Reinsert the media printing face up.
Make sure the media is lying flat and
doesn’t exceed the media limit mark.
Check to see if the media width guides are correct.
Open the right-side door, then close it.
After the jam is cleared, opening and closing the door removes the media
jam message.
Tray 2 (Optional Lower Feeder Unit Media Tray)
1
Slide Tray 2 open and remove the media from it.
Clearing Media Jams
117
While pressing in the tab on each
side of the media tray, remove the
media tray.
English
2
3
Carefully remove the jammed media
and discard it.
4
5
If media is difficult to remove,
open the right side door of the
lower tray. This releases the
tension on the jammed media.
Do not reinsert media that has
jammed.
Fan the removed media to prevent
static buildup and even up the front
edges.
Reinsert the media printing face up.
Make sure the media is lying flat, is
under the media separating tabs, and
doesn’t exceed the media limit mark.
6
7
Slide the tray back into the printer.
Open the right-side door, then
close it.
After the jam is cleared, opening and
closing the door removes the media
jam message.
118
Clearing Media Jams
Inside the Printer
Media Path Jam
Pull the right door release lever, and
then carefully open the right door.
English
1
If Tray 2 is installed, the lower-right
door opens at the same time that the
right door is opened.
Attention
Do not pull jammed media from the
top of the printer through the fuser
unit; otherwise, unfused toner may
dirty the fuser rollers.
If it is difficult to remove the jammed
media, turn the misfeed-clearing dial
counterclockwise to feed the media
downward.
Clearing Media Jams
119
2
Close the inner media guide.
English
3
If a misfeed occurs in the vertical
transport area, open the inner media
guide, and then pull the misfed media
down to remove it.
Fuser Unit Jams
WARNING!
The fuser unit is hot! Do not remove a jam in this area until the
fuser unit cools.
1
Lift up the two fuser unit levers.
When removing the jammed media,
be careful not to touch the transfer
belt. Touching the transfer belt may
result in decreased print quality.
120
Clearing Media Jams
3
4
Open the misfeed-clearing guide for
the fuser unit, and then, while
checking the misfeed, pull the
jammed media down to remove it.
Close the misfeed-clearing guide for
the fuser unit.
English
2
Lower the two fuser unit levers.
Attention
Be sure to lower the two fuser unit
levers before closing the right
door. If the levers are not lowered,
the right door cannot be closed.
5
Close the right-side door.
If the optional lower feeder unit is installed, close the lower-right door.
Check the release lever to make sure the door is securely closed.
After the jam is cleared, opening and closing the door removes the media
jam message.
Clearing Media Jams
121
Duplex Option
Pull the top of the duplex option to
open the duplex option cover.
English
1
2
Remove the jammed media in the directions shown in the illustrations.
3
Close the duplex option’s cover.
If the optional Tray 2 is installed, close the lower-right door.
Output Tray
Remove jammed media from the output tray by gently pulling it to the left
away from the media exit area.
122
Sometimes media that jams in the output tray is pulled back into the
duplex option, even if the job was not duplexed. If that happens,
remove the media from the duplex option following the instructions in
“Duplex Option” on page 122.
Clearing Media Jams
Solving Problems with Media Jams
Frequent jams in any area indicate that area should be checked,
repaired, or cleaned. Repeated jams may also happen if you’re using
unsupported print media.
Symptom
Cause
Solution
Several
sheets go
through the
printer
together.
The front edges of
the media are not
even.
Remove the media and even up the
front edges, then reload it.
The media is moist
from humidity.
Remove the moist media and replace it
with new, dry media.
Too much static
electricity is present.
If you are using paper, fan it before
putting it in the printer.
If you are using transparencies, do
not fan them before putting them in
the printer.
Media jam
message
stays on.
Right-side door
needs to be opened
and closed again to
reset the printer.
Open and close the right-side door of
the printer again.
Some media remains Recheck the media path and make
jammed in the printer. sure you have removed all of the
media jams.
Solving Problems with Media Jams
123
English
Symptom
Cause
Solution
Duplex
The wrong media is
option jams. being used.
Use only supported media. See “Media
Specifications” on page 21.
English
Only plain paper, 16-24 lb (60-90 g/m²)
can be autoduplexed if the optional
duplex unit is installed and the media
type is set properly in the driver.
Make sure that you have not mixed
media types in your multipurpose tray.
Do not duplex thick stock, envelopes,
labels, or transparencies.
For custom-sized media, see “Media
Specifications” on page 21 to make
sure the size you are using can be
duplexed
Media may still be
jammed.
Recheck the media path inside the
duplex unit and make sure that you
have removed all of the jammed
media.
Media jammed in exit Sometimes when media jams in the
may be caught in
exit path, it is caught in the duplexer,
duplexer.
even if the job is not being duplexed.
Remove it as you would any other
duplex option jam.
124
Solving Problems with Media Jams
Cause
Solution
Media is
jamming.
The media is not
Remove the jammed media and
correctly positioned in reposition the media properly in the
the tray.
tray.
The number of sheets Remove the excess media and reload
in the tray exceeds
the correct number of sheets in the
the maximum
tray.
allowed.
The media guides are Adjust the regulation guides in the tray
not correctly adjusted to match the size of the media.
to the media size.
The media in the
optional tray is not
under the media
separating tabs.
Remove the media and reload it so
that the right-front and right-rear
corners are under the mediaseparating tabs.
Warped or wrinkled Remove the media, smooth it out, and
media is loaded in the reload it. If it still jams, do not use that
tray.
media.
The media is moist
from humidity.
Remove the moist media and replace it
with new, dry media.
Thick stock, labels,
envelopes,
postcards, or
transparencies are
loaded in Tray 2.
Special media must be loaded in Tray
1 only.
The recommended
Load the transparencies or labels
transparency (OHP) according to the manufacturer’s
or label paper is
instructions.
facing the wrong way
in Tray 1.
Envelopes are facing Load the envelopes in Tray 1 so the
the wrong way in
flaps are facing down.
Tray 1.
If the flaps are on the short edge, set
the envelopes in Tray 1 so that the
flaps enter the printer first.
Solving Problems with Media Jams
125
English
Symptom
Cause
Solution
Media is
jamming.
Multiple sheets of
transparency (OHP)
media are collecting
static electricity in the
tray.
Remove the transparencies and load
them in the tray one sheet at a time.
Do not fan large quantities of
transparencies before loading them.
The media is moist
from humidity.
Remove the moist media and replace it
with new, dry media.
English
Symptom
Unsupported media Use media that is covered by the
printer warranty.
(wrong size,
thickness, type, etc.)
is being used.
Media supply roller is Clean the media supply roller.
dirty.
For more details, refer to “Media
Rollers” on page 103.
Solving Other Problems
Symptom
Cause
Solution
Printer power The power cord is not Turn the power switch off (O position),
is not on.
correctly plugged into then remove the power cord from the
the outlet.
outlet and plug it back in.
Something is wrong Plug another electrical appliance into
with the outlet you are the outlet and see whether it operates
using for the printer. properly.
The power switch is
not correctly turned
on (I position).
Set the power switch to the off (O)
position, then set it back to the on (I)
position.
The printer is
Use a power source with the
connected to an outlet specifications listed in appendix A,
with a voltage or
“Technical Specifications.”
frequency that does
not match the printer
specifications.
126
Solving Other Problems
Cause
The wrong
number of
collated
copies of a
document is
printed.
When you are printing Disable the Collate option in the Macinmultiple copies of a 1- tosh driver.
page document and
Collate is selected in
the Macintosh driver,
the number of copies
printed is incorrect.
The control
panel
displays X
LOW/
REPLACE?
much sooner
than
expected.
A high-capacity toner In the Quality/Toner menu, choose
Change Size and then select the
cartridge was
installed, but the toner capacity listed on the cartridge label.
size was set at
standard capacity.
You can’t
print a
configuration
page.
Solution
The toner cartridge is Remove the toner cartridge and check
defective.
for damage. If it is damaged, replace it
(Quality/Toner/Replace).
The printer is not
ready when
Configuration was
selected from the
Print menu.
Make sure that the printer is ready
before trying to print the configuration
page.
The tray does not
have media.
Check that the media trays are loaded
with media, in place and secure.
The printer’s doors
aren’t closed
securely.
Make sure the doors are closed
securely. Close all doors gently to avoid
jarring the printer. Make sure the waste
toner bottle in installed correctly.
There is a media jam. Check for a media jam.
Data was
An error message is
sent to the
displayed in the
printer, but it message window.
doesn’t print.
Solving Other Problems
Handle according to the message
displayed.
127
English
Symptom
Cause
Solution
Printing
takes too
much time.
The printer is set to a
slow printing mode
(for example, for
OHP, thick stock, or
some other special
kind of media).
It takes more time to print with special
media. When using regular paper,
make sure that the media type is set
properly in the driver and the control
panel.
The printer is set to
power saving mode.
It takes a little time for printing to start in
power saving mode.
The job is very
complex.
Wait. No action needed.
English
Symptom
The printer memory is Add more memory.
insufficient.
Blank pages
come out
during a
printing job.
One or more of the
toner cartridges is
defective, empty, or
missing.
Check the toner cartridges. The image
does not print if the cartridges are
empty.
The wrong media is
being used.
Check that the media type and size set
in the driver and the control panel
matches the media loaded in the
printer.
Not all pages The printer has the
print.
wrong kind of cable,
or the printer is not
configured for the
correct cable and
port.
Check your cable.
The Cancel key was
pressed.
Make sure no one pressed the Cancel
key while your job was printing.
The media tray is
empty.
Refill the tray.
A document is printed Print the overlay file using a magicolor
with an overlay file
2350 driver from the Software Utilities
that was created by a CD-ROM.
non-magicolor 2350
driver.
Only one
copy of a
multicopy,
collated job
prints.
128
The printer doesn’t
have a hard disk or
there isn’t enough
space on the hard
disk.
Add a hard disk. If a hard disk is already
installed, clear some unneeded files off
of it or add a larger hard disk.
Solving Other Problems
Symptom
Cause
Solution
A system error
occurred.
You
experience
problems
with
duplexing.
Contact Technical Support with the
error information. See the Service &
Support Guide for a list of sources of
service and support in the Americas.
The most up-to-date worldwide
information can be found at
www.konicaminolta.net/printer/.
Media or settings are For autoduplexing, make sure that you
not correct.
have a duplex option installed.
Make sure you are using correct media.
See table on Page 21 for supported
media for both standard and customsized media.
Do not duplex thick stock,
envelopes, labels, postcards, or
transparencies.
Make sure that you have not mixed
media types in Tray 1.
Make sure that your document has
more than one page.
Use the printer driver to make sure that
the duplex unit is in the Installed
Options list.
In the printer driver (Paper tab, Layout
tab, or Page Setup tab, depending on
your operating system), choose
whether to print duplex documents so
they flip as on a clipboard or as in a
loose-leaf notebook.
For N-up on duplexed pages, choose
Collate only in the printer driver. Do not
set collation in the application.
Solving Other Problems
129
English
Printer resets The power cord is not Turn off the unit, confirm that the power
or turns off
properly connected to cord is properly connected
frequently.
the AC outlet.
to the AC outlet, and turn the unit
back on.
Symptom
Cause
Solution
You hear
unusual
noises.
The printer is not
level.
Put the printer on a flat, hard, level
surface not to exceed ±1° slant in any
direction.
English
The media tray is not Remove the media tray that you are
installed correctly.
printing from and reinsert it completely
into the printer.
There is a foreign
Turn off the printer and remove the
object stuck inside the object. If you cannot remove it, contact
printer.
Service. See the Service & Support
Guide or www.konicaminolta.net/
printer/ for the office closest to you.
The printer
pauses.
The printer pauses for Wait approximately 150 seconds
after rebooting your printer when
the color calibration
there has been an environmental
procedure (also
change such as in temperature or
known as the Autohumidity.
Image Density Control
[AIDC] cycle). The
Wait approximately 170 seconds
length of this
after 200 1-sided pages of a
automatic cycle
continuous print run.
depends on
environmental factors, Wait approximately 215 seconds
number of pages
when the printer is “waking up” from
printed, and whether
ENERGY SAVER and 1,000 or more
a new toner or OPC
pages have been printed since the
drum has been
last AIDC cycle.
installed.
Wait approximately 305 seconds
after the installation of a new toner
This process ensures
cartridge or OPC drum or if you start
reliable printer
an AIDC cycle manually using the
operation with
control panel or PageScope Light.
optimum output
quality. If you open
the door before the
display reads
MAGICOLOR 2350/
IDLE, the printer
stops and repeats the
calibration cycle.
You cannot
access
PageScope
Light.
130
Your printer is not
connected to a
network.
Make sure your printer is connected to
your workstation via TCP/IP and that
you are using a supported Internet
browser.
Solving Other Problems
Cause
Solution
You cannot
change the
options in
PageScope
Light.
The administrator has
set a password in
PageScope Light or at
the printer’s control
panel.
Either obtain the password from your
system administrator or use printer
driver and application print dialog boxes
to set your preferences.
Language
choices
appear
wrong in
PageScope
Light.
The Katakana
characters required
for the last language
choice are not
available in your
system fonts.
The default font needs to be set for MS
Gothic.
You are using an old
version of NetScape
or Internet Explorer.
Make sure you are using Netscape 6.0
or later or Internet Explorer 5.0 or
newer.
Your print job
is not aligned
properly on a
custom-size
page.
Custom media size
doesn’t match the
size identified in the
printer.
Check that the Input Tray is set to
Custom at the control panel and that
the exact dimensions are entered in the
control panel menu, PageScope Light,
or the printer driver.
Media is
wrinkled.
The media is moist
from humidity or
having water spilled
on the paper supply.
Remove the moist media and replace it
with new, dry media.
The transfer roller or
fuser unit may be
defective.
Check them for damage. If necessary,
contact Technical Support with the
error information. Refer to the
Service & Support Guide or
www.konicaminolta.net/printer/ for
support telephone numbers.
Unsupported media is Use KONICA MINOLTA-approved
being used.
media. Refer to chapter 2 for details.
Check www.konicaminolta.net/printer/
for currently approved media.
Solving Other Problems
131
English
Symptom
English
Symptom
132
Cause
Solution
Multi-paged, The printer is not
legal-sized
correctly optimized.
color
documents
print slowly.
In the System Default/Startup Options/
Optimize Media menu, choose For
Legal.
Print Errors
occur when
printing PCL
files.
In the System Default/Startup Options/
Optimize PDL menu, choose For PCL.
Errors occur
when printing
PDF files.
In the System Default/Startup Options/
Optimize PDL menu, choose For PDF.
Solving Other Problems
Symptom
Cause
Solution
Nothing is
printed, or
there are
blank spots
on the
printed page.
One or more of the
toner cartridges is
damaged.
Remove the toner cartridge (Quality/
Toner/Replace) and check for
damage. If necessary, replace it.
Media mode set in
the printer driver does
not match media in
the printer.
Select the proper setting in the printer
driver (plain paper, thick stock, label
stock, or transparency) or change the
media in the printer tray to match the
driver setting.
The OPC drum
Remove the OPC drum cartridge and
cartridge is damaged. check for damage. If it is damaged,
replace the OPC drum cartridge and
waste toner bottle.
The media is moist
from humidity.
Adjust the humidity for paper storage.
Remove the moist media and replace it
with new, dry media.
The power source
Use a power source with the proper
does not match the
specifications.
printer specifications.
Several sheets are
being feed at the
same time.
Remove the media from the tray and
check for static electricity. Fan plain
paper or other media (but not
transparencies), and replace it in the
tray.
Media is not set
Remove the media, tap it to straighten
properly in the media it out, return it to the media tray, and
tray(s).
realign the media guides.
The printer is not on a Relocate the printer on a flat, hard,
level surface.
stable, level surface.
Entire sheet
is printed in
black or
color.
One or more of the
toner cartridges is
defective.
Remove the toner cartridge (Quality/
Toner/Replace) and check for
damage. If necessary, replace it.
The OPC drum
Remove the OPC drum cartridge and
cartridge is damaged. check for damage. If it is damaged,
replace the OPC drum cartridge and
waste toner bottle.
Solving Problems with Printing Quality
133
English
Solving Problems with Printing Quality
Symptom
Cause
Solution
English
Image is too Laser lens cover is
light; there is dirty.
low image
density.
Clean the laser lens cover and perform
an AIDC calibration cycle through the
Quality/AIDC/Request AIDC menu.
Wait until the test is finished and
MAGICOLOR 2350/IDLE is
displayed.
The media is moist
from humidity.
Remove the moist media and replace
with new, dry media.
There is not much
toner left in the
cartridge.
Replace the toner cartridge. (Quality/
Toner/Replace)
One or more of the
toner cartridges is
defective.
Remove the toner cartridges (Quality/
Toner/Replace) and check for
damage. If necessary, replace it.
Media type may be
set incorrectly.
When printing thick stock, envelopes,
labels, and transparencies, specify the
appropriate media type in the printer
driver and at the control panel.
Image is too One or more of the
dark.
toner cartridges is
defective.
Remove the toner cartridge (Quality/
Toner/Replace) and check for
damage. If necessary, replace it.
The OPC drum
Remove the OPC drum cartridge and
cartridge is damaged. check for damage. If it is damaged,
replace the OPC drum cartridge and
waste toner bottle
Image is
blurred;
background is
lightly stained;
there is
insufficient
gloss of the
printed
image.
134
One or more of the
toner cartridges is
defective.
Check the toner cartridges. If
necessary, replace them. (Quality/
Toner/Replace)
The OPC drum may
be misinstalled or
defective.
Reinstall the OPC drum cartridge. If it
is damaged, replace the OPC drum
cartridge and waste toner bottle.
Solving Problems with Printing Quality
Cause
The print or
color density
may be
uneven.
One or more of the
Install new toner cartridges. (Quality/
toner cartridges may Toner/Replace)
be near empty or
damaged.
The OPC drum may
have been installed
improperly or be
defective.
Solution
Reinstall the OPC drum cartridge. If
necessary, replace the OPC drum
cartridge and waste toner bottle.
The printer is not on a Level the printer (not exceeding ±1°
level enough surface. slant at any point around the machine).
Irregular
print or
mottled
image
appears.
The media is moist
from humidity.
Remove the moist media and replace it
with new, dry media.
Humidity may be too Adjust the humidity in the paper
high.
storage area.
Media doesn’t meet Use media that is covered by the
printer specifications. printer warranty. For information
about approved media, go to
www.konicaminolta.net/printer/. After
selecting your country, choose Support
& Drivers, select your printer, and then
choose Media Recommendations.
One or more of the
toner cartridges is
defective.
Remove the toner cartridge (Quality/
Toner/Replace) and check for
damage. If necessary, replace it.
The OPC drum
Remove the OPC drum cartridge and
cartridge is damaged. check for damage. If necessary,
replace the OPC drum cartridge and
waste toner bottle.
There is
insufficient
fusing or the
image comes
off when
rubbed.
The media is moist
from humidity.
Remove the moist media and replace it
with new, dry media.
Media with
specifications not
covered by the printer
warranty is being
used.
For information about approved media,
go to www.konicaminolta.net/printer/.
After selecting your country, choose
Support & Drivers, select your printer,
and then choose Media
Recommendations.
The media type may
be incorrectly set.
When printing envelope, glossy stock,
labels, transfer media, transparencies,
and thick stock, the appropriate media
type must be specified in the printer
driver and the printer control panel.
Solving Problems with Printing Quality
135
English
Symptom
English
Symptom
Cause
Solution
There are
toner
smudges or
residual
images.
One or more of the
toner cartridges is
misinstalled or
defective.
If the toner smudges are on only the
front of the page:
There are
The paper transport
toner
rollers may be dirty.
smudges on
the back side
of the page
(whether or
not it has
been
duplexed).
Remove the toner cartridge and check
for damage. If it is damaged, replace it
(Quality/Toner/Replace menu).
Clean the paper transport and
pressure rollers.
If you think the transport roller should
be replaced, contact Technical
Support with the error information. See
the Service & Support Guide for a list
of sources of service and support. The
most up-to-date information can be
found at www.konicaminolta.net/
printer/.
The media path is
dirty with toner.
Print several blank sheets and the
excess toner should disappear.
One or more of the
toner cartridges is
defective.
Remove the toner cartridge (Quality/
Toner/Replace) and check for
damage. If necessary, replace it.
The OPC drum
Remove the OPC drum cartridge and
cartridge is defective. check for damage. If necessary,
replace the OPC drum cartridge and
waste toner bottle.
136
Solving Problems with Printing Quality
Cause
Solution
Abnormal
areas (white,
black, or
color) appear
in a regular
pattern.
The laser lens cover
may be dirty.
Check to see if the laser lens cover is
dirty. If necessary, clean it with a clean,
soft, dry cloth.
The toner cartridge is Remove the toner cartridge with the
damaged.
color causing the abnormal image.
Replace it with a new toner cartridge.
The OPC drum
Replace the OPC drum cartridge and
cartridge is damaged. waste toner bottle.
Image
defects.
The laser lens cover
may be dirty.
Check to see if the laser lens cover is
dirty. If necessary, clean it with a clean,
soft, dry cloth.
The toner cartridge is Remove the toner cartridge with the
leaking.
color causing the abnormal image.
Replace it with a new toner cartridge
(Quality/Toner/Replace menu).
The OPC drum
Replace the entire OPC drum cartridge
cartridge is damaged and waste toner bottle.
Lateral lines
or bands
appear on
image.
The printer is not on a Level the printer (not exceeding ±1°
level enough surface. slant)
The media path is
dirty with toner.
Print several sheets and the excess
toner should disappear.
One or more of the
toner cartridges are
defective.
Remove the toner cartridge (Quality/
Toner/Replace) and check for
damage. If necessary, replace it.
The OPC drum
surface is scratched
or damaged.
Remove the OPC drum cartridge and
check the green photosensitive
surface for scratches. If necessary,
replace the OPC drum cartridge and
waste toner bottle.
Solving Problems with Printing Quality
137
English
Symptom
Cause
Solution
Colors look
drastically
wrong.
One or more of the
toner cartridges are
malfunctioning or
expired.
Remove the toner cartridges (Quality/
Toner/Replace) and verify that the
toner is distributed evenly on the
cartridge roller, and reinstall the toner
cartridges.
One or more of the
toner cartridges are
low or out.
Check the control panel for a X LOW
REPLACE? > or X EMPTY
REPLACE? > message. If
English
Symptom
necessary, replace the specified toner
cartridge.
Colors are
not
registering
properly;
colors are
mixed or
have pageto-page
variation.
138
The front door may
not be properly
closed.
Make sure that the printer’s front door
is closed.
The OPC drum
cartridge is not
correctly seated.
Remove the OPC drum cartridge and
reinstall it.
One or more of the
toner cartridges are
defective.
Remove the toner cartridge (Quality/
Toner/Replace) and check for
damage. If necessary, replace it.
The media is moist
from humidity.
Remove the moist media and replace it
with new, dry media.
Solving Problems with Printing Quality
Cause
Solution
The color
reproduction
or color
density is
poor.
The paper image
transfer is defective.
Check the OPC drum cartridge. If
necessary, replace the drum cartridge.
The Auto-Image
Density Control
(AIDC) detection
sensor is dirty.
Clean the laser lens cover (See
“Printer Interior and Laser Lens Cover”
on page 107). The AIDC sensor is
cleaned automatically when you open
and close the printer’s front door to
clean the laser lens cover. Then
perform an AIDC calibration cycle
through the Quality/AIDC/Request
AIDC menu or through PageScope
Light. Wait until the test is finished and
MAGICOLOR 2350/IDLE is
displayed.
If the problem persists, contact
Technical Support. See the Service &
Support Guide for a list of sources of
service and support. The most up-todate worldwide information can be
found at www.konicaminolta.net/
printer/.
If the problem is not resolved, even after all of the above have been
performed, contact Technical Support with the error information. Go to
www.konicaminolta.net/printer/ or see the Service & Support Guide for
support telephone numbers.
Solving Problems with Printing Quality
139
English
Symptom
Status, Error, and Service Messages
English
Status, error, and service messages are displayed in the control panel
message window. They provide information about your printer and help you
locate many problems. When the condition associated with a displayed
message has changed, the message is cleared from the window.
Standard Status Messages
140
This message...
means...
CALIBRATING
After 200 1-sided pages of a No action needed.
continuous print run, after
replacing consumables, and
after rebooting your printer
after environmental
changes, your printer
automatically pauses to do
an Auto-Image Density
Control (AIDC) cycle. The
cycle lasts 170 seconds
after a 200-page print run
and 215 or 305 seconds in
other circumstances.This
process ensures reliable
printer operation with
optimum output quality.
do this...
CANCELLING JOB
The job is being cancelled.
COPYING # OF #
The printer is printing a job
in collation copy mode.
ENERGY SAVER
The printer is in energy
saver mode to reduce power
consumption during periods
of inactivity. When a print job
is received, the printer
returns to normal power
within 180 seconds.
FIRMWARE UPDATE
DOWNLOAD IMAGE
The printer is ready for a
firmware update
FIRMWARE UPDATE
FORMATTING
The printer is formatting the No action needed.
flash to accommodate
firmware update.
Begin download
of firmware
update.
Status, Error, and Service Messages
means...
do this...
FIRMWARE UPDATE
READING IMAGE
The printer is reading a new No action needed.
image for the flash firmware.
FIRMWARE UPDATE
SELECTED
Acknowledges that the user
has requested an update.
FIRMWARE UPDATE
WRITING IMAGE
The printer is writing a new
image to the flash firmware.
INITIALIZING
The printer is initializing.
MAGICOLOR 2350
IDLE
The printer is on and ready
to receive data.
PRINTING
The printer is printing.
PROCESSING
The printer is processing
data.
STARTING SYSTEM
The printer is starting the
system firmware image.
WARMING UP
The printer is warming up.
English
This message...
Error Messages
This message...
means...
do this...
AIDC ERROR
AIDC sensor error.
Open and close the front
cover to clean the AIDC
parts.
CANNOT ROTATE
CARTRIDGE
The toner cartridge
carousel cannot turn.
Try again or continue
printing without
changing the cartridge, if
Quality/Toner Action/
Low is set to Continue.
DISK ACCESS
ERROR (FILE TYPE)
The hard disk is full or
broken and
accounting data has
been lost.
Use the Cancel key to
release files temporarily.
Reformat or replace
hard disk.
DISK FULL
The hard disk is full.
Use the Cancel key to
release files temporarily;
reformat or replace the
hard disk.
DISK NEAR FULL
The hard disk is
nearly full.
Delete files or formatting
you no longer need.
Status, Error, and Service Messages
141
English
142
This message...
means...
do this...
DOWNLOAD IMAGE TO
ENET PORT
An error has been
Download the system
detected in the system image to the Ethernet
image.
port via FTP.
EMAIL ERROR
ACC DATA TRANS
Email notification has
been stopped for
some time and data
will be lost soon.
Correct the error if
possible or wait for
server access; the
message clears when
the email has been
transmitted.
EMAIL ERROR
EVENT NOTIFY
Email notification has
stopped because of
server, network
address, or other
errors.
Correct the error if
possible or wait for
server access; the
message clears when
the email has been
transmitted.
ERROR LOADING
IMAGE
Generic message
when the problem
doesn’t match any
other specific error.
Try the download
process again.
EMAIL NOTIFY
ERROR JOB-END
Failure to send email No action needed.
because the server is
down, there is a
configuration or
network connection
error, or the email
address is wrong.
FIRMWARE ERROR
INVALID IMAGE
The download image Begin the download
was the wrong version process again.
or could not be
decompressed.
FIRMWARE UPDATE
FORMAT ERROR
An error occurred
while formatting.
MAIN UNIT
COVER OPEN
The door to the upper Close the door.
media path is open.
MEDIA MISMATCH
The media type set
Check media settings;
with the printer driver load correct media.
is different from the
type of media loaded.
NETWORK CONFIG
ERROR (TYPE)
A network error has
Correct the network
occurred in the speci- error.
fied type of network.
Begin the download
process again.
Status, Error, and Service Messages
means...
do this...
OPC DRUM LOW
The OPC drum will
need to be replaced
soon.
Make sure you have a
new OPC drum on hand.
OPC DRUM MISSING
The OPC drum is not Install the OPC drum.
installed.
OPC OUT
The OPC drum needs Replace OPC drum and
to be replaced.
waste toner bottle.
PAPER JAM
DUPLEX
Media has jammed in Locate and remove the
the optional duplex
jam.
unit.
PAPER JAM
EXIT
Media has jammed
Locate and remove the
between the print
jam.
engine and the output
tray.
PAPER JAM
FUSER
Media has jammed in Locate and remove the
the fuser unit.
jam.
PAPER JAM
TRANSFER
Media has jammed in Locate and remove the
the transfer area.
jam.
PAPER JAM
TRAY 1
Media has jammed
Locate and remove the
while being pulled
jam.
from the multipurpose
tray.
PAPER JAM
TRAY 2
Media has jammed
while being pulled
from the optional
lower feeder unit.
Locate and remove the
jam.
PAPER MISMATCH
The paper size set
with the printer driver
is different from the
size of paper loaded.
Check paper size
settings; load correct
size.
PUT X
IN TRAY Y
The media tray “Y”
Load more media.
(specified tray) is out
of media. Load media
size and type “X.”
REPLACE OPC
The OPC drum needs Replace OPC drum and
to be replaced.
waste toner bottle.
REPLACE OPC DRUM
The OPC drum needs Replace OPC drum and
to be replaced.
waste toner bottle.
Status, Error, and Service Messages
143
English
This message...
English
144
This message...
means...
do this...
REPLACE
WASTE TONER
The waste toner bottle Replace the waste toner
is full.
bottle.
TIME OF DAY
CLOCK FAILURE
The optional time-of- Replace the battery on
day clock has stopped the hard disk
working.
daughterboard with
time-of-day clock.
TRAY # OPEN
The door of the active Close the door.
media tray is open.
TRAY 2 PATH
COVER OPEN
The door to the lower Close the door.
feeder unit is open.
WASTE TONER
MISSING
The waste toner bottle Insert a waste toner
is not installed.
bottle.
WASTE TONER
NEAR FULL
The waste toner bottle Make sure you have a
is almost full.
new waste toner bottle
on hand.
X EMPTY
The “X” (specified
color) toner cartridge
is empty.
Install “X” color toner
cartridge; press the right
arrow to enter the toner
replacement sequence.
X EMPTY
REPLACE? >>
The “X” (specified
color) toner cartridge
is empty.
Install “X” color toner
cartridge; press the right
arrow to enter the toner
replacement sequence.
X LOW
The “X” (specified
color) toner cartridge
is low.
Make sure you have “X”
color toner on hand; or
press the right arrow to
enter the toner
replacement menu.
X LOW
REPLACE? >>
The “X” (specified
color) toner cartridge
is low.
Make sure you have “X”
color toner on hand; or
press the right arrow to
enter the toner
replacement menu.
X TONER
MISSING
The “X” (specified
color) toner cartridge
is missing.
Install “X” color toner
cartridge; press the right
arrow to enter the toner
replacement menu; then
install new a toner
cartridge.
Status, Error, and Service Messages
A service message sometimes occurs as a result of an unusual combination
of events, not because of an actual problem. When the printer stops and a
service message displays in the message window, turn the printer off and
then back on. This often clears the service message indicator, and printer
operation resumes. Always try this before making a service call.
Service calls should be placed to the vendor from whom you purchased the
printer. If you cannot get service from your vendor, see the Service & Support
Guide or www.konicaminolta.net/printer/ for additional contact information.
This service
message...
means...
SERVICE CALL 0B
XFER FAN
The transfer fan is
malfunctioning.
SERVICE CALL 0C
PWR SUPPLY FAN
SERVICE CALL 0E
SUCTION FAN
SERVICE CALL 1A
FUSER UNIT
SERVICE CALL 1B
FUSER UNIT
SERVICE CALL 2A
MEM MALF DATA
do this...
Contact your vendor
with the error information.
The power supply fan is If you cannot get service
from your vendor, see
malfunctioning.
the Service & Support
The suction fan is
Guide or
malfunctioning.
www.konicaminolta.net/
The fuser unit is having printer/ for support
contact information.
temperature control
problems.
The printer memory is
malfunctioning.
SERVICE CALL 2B
MEM MALF ACCESS
SERVICE CALL 04
ENGINE BOARD
The engine board
requires service.
SERVICE CALL 05
FLASH ROM
The flash ROM is
malfunctioning.
Retry loading engine
firmware; then call service
if necessary.
Status, Error, and Service Messages
145
English
Service Messages
English
This service
message...
means...
do this...
SERVICE CALL 08
MAIN MOTOR
The printer motor
requires service.
SERVICE CALL 10
LASER UNIT
The polygon motor
requires service.
SERVICE CALL 12
LASER UNIT
The laser unit requires
service.
SERVICE CALL 14
XFER ROLLER
The transfer roller
requires service.
Contact your vendor
with the error information.
If you cannot get service
from your vendor, see
the Service & Support
Guide or
www.konicaminolta.net/
printer/ for support
contact information.
SERVICE CALL 15
XFER BELT
The transfer belt
requires service.
SERVICE CALL 16
XFER BELT
SERVICE CALL 17
TONER RACK
The toner carousel
requires service.
SERVICE CALL 18
FUSER UNIT
The fuser unit requires
service.
SERVICE CALL 19
FUSER UNIT
SERVICE CALL 21
TRANS DET SENS
The transfer detection
sensor requires service.
SERVICE CALL 29
MEM MALF COUNTER
The engine memory has
malfunctioned.
FIRMWARE UPDATE
WRITING ERROR
The FLASH memory is
malfunctioning and
needs to be replaced.
NETWORK ERROR
(TYPE)
A fatal error has
occurred.
Additional Assistance
If you’ve followed all of the instructions in this guide and still have problems
you can’t solve, check our Answer Base at printer.konicaminolta.net/support
for a solution.
You can also refer to the Service & Support Guide or visit our web site at
www.konicaminolta.net/printer/ for current information on getting help.
146
Additional Assistance
English
Installing
Accessories
Introduction
Attention
English
It’s very important to protect the printer controller board and any
associated daughterboard or module from electrostatic damage while
performing any task involving the controller board.
Attention
Use of accessories not manufactured/supported by KONICA MINOLTA
is not supported by your printer and will void your warranty.
This chapter provides information about the following accessories. Contact
your local vendor or www.konicaminolta.net/printer/ for compatibility and
purchase information.
Dual In-Line Memory
Modules (DIMMs)
64, 128, or 256 MB PC-100- or PC-133-Compliant
SDRAM DIMM, up to a maximum of 384 MB.
Duplex Option
Automatic duplexing
Lower Feeder Unit
500-sheet media tray included
Internal Hard Disk Kit 6 GB or larger hard disk and daughterboard
Internal Hard Disk
Daughterboard Kit
Daughterboard for installing internal hard disk
These accessories are also supported. Check www.konicaminolta.net/printer/
for information about additional accessories.
Buzzbox
Via parallel port (US only)
Wireless Interface
802.11b or Bluetooth via parallel port
Network Option
Token-Ring via external connection
Convenience Copier SC-215 via parallel port
Attention
Installing accessories always requires that the printer and accessories
are turned off and unplugged during installation.
148
Introduction
Antistatic Protection
It’s very important to protect the printer controller board and any
associated daughterboard or module from electrostatic damage
while performing any task involving the controller board.
If an antistatic wrist strap is provided in your printer option kit,
attach one end of it to your wrist and the other end to the bare metal
chassis on the back of your printer. Never attach the wrist strap to
any piece of equipment with an electrical current present. Turn off all
power switches first. Plastic, rubber, wood, painted metal surfaces,
and telephones are not acceptable grounding points.
If you don’t have an antistatic wrist strap, discharge your body’s
static electric charge by touching a grounded surface before you
handle any printer boards or components and before removing the
controller board. Also avoid walking around after grounding
yourself.
Dual In-Line Memory Module (DIMM)
Dual in-line memory modules (or DIMMs) are compact circuit boards with
surface-mount memory chips.
Your printer comes with 128 MB SDRAM printer memory. However, you can
upgrade to a maximum of 384 MB of RAM through the installation of an
additional DIMM. Additional memory must be 64, 128, or 256 MB, PC-100- or
PC-133-Compliant SDRAM DIMM.
You will need additional memory (DIMM) to duplex print at high
resolution or to print legal size pages at high resolution. Additional
memory may also improve printer performance.
How Much Memory Do You Need?
The amount of memory installed in your printer governs which resolutions can
be used with each media size.
If you select a resolution but do not have enough memory installed, the file
will print with the next highest resolution for which there is enough memory.
For example, if you attempt to print a duplex job with 4-color graphics at Post
Script High or PCL Enhanced resolution on legal media, but the printer has
only 128 MB of RAM installed, the file prints at Standard resolution.
Antistatic Protection
149
English
Attention
Your printer will print all print jobs at the highest resolution that the installed
memory will support.
English
Basic Functionality
Print Type
Simplex
Media Size
Standard:
600 x 600
dpi
Duplex
PCL
Enhanced:
1200 x
1200 dpi
PostScript
High:
9600 x 600
dpi class
Standard:
600 x 600
dpi
PCL
Enhanced:
1200 x
1200 dpi
PostScript
High:
9600 x 600
dpi class
Monochrome
Letter/A4 128 MB 128 MB 128 MB 128 MB 128 MB 128 MB
Legal
128 MB 128 MB 128 MB 128 MB 128 MB 128 MB
Color
Letter/A4 128 MB 128 MB 128 MB 128 MB
192 MB 192 MB
Legal
128 MB 192 MB 192 MB 128 MB
256 MB 256 MB
Notes
If you attempt to print a job at PCL Enhanced or PostScript
High resolution and you do not have enough memory installed
to support that resolution, the job prints at Standard resolution.
The printer comes with one DIMM slot.
Standard Memory
Supports up to...
128 MB
4-color simplex printing on letter/A4 media
at all resolutions; 4-color duplex printing on
letter/A4 media at standard resolution; and
4-color simplex and duplex printing on
legal-size media at standard resolutions
Check the configuration page from the control panel (Print Menu/
Configuration Page) or use PageScope Light to make sure the printer has
enough RAM installed.
Installing a DIMM
Attention
It’s very important to protect the printer controller board and any
associated circuit boards from electrostatic damage. Before
performing this procedure, review the antistatic caution on page 149.
In addition, always handle circuit boards by the edges only.
150
Dual In-Line Memory Module (DIMM)
Turn off the printer and disconnect the
power cord and interface cable.
English
1
2
3
4
Remove the rear panel from the
printer to access the controller board.
Using a screw driver, loosen the nine
screws on the top, left and bottom of
the panel, but do not remove them
from the printer.
Remove the two screws shown in the
illustration. Slide the panel slightly to
the right and lift it off the printer.
If there is no DIMM installed in your
printer, skip to Step 5. If there is a
DIMM installed, removed it.
a
Using both thumbs, pull the
latches (one on each side of the
DIMM connector) outward.
b Lift the DIMM straight out of the
DIMM connector.
Dual In-Line Memory Module (DIMM)
151
English
5
6
Insert the new DIMM straight down
into the DIMM connector until the
latches snap into the locked position.
Observe the keyed side of the DIMM
to align it with the connector. If you
cannot snap the DIMM into place, do
not force it. Reposition it, making sure
that the bottom of the DIMM is seated
completely in the connector. When
installed properly, the DIMM stands
upright firmly in place.
Reinstall the rear panel of the printer.
Align the panel and tighten the nine screws that you loosened in Step 2.
Then replace the two screws removed in Step 3.
7
Reconnect all interface cables.
8
Reconnect the power cord, and turn on the printer.
9
In compliance with UL guidelines, “The appliance inlet is considered to
be the main disconnect device.”
Print a configuration page from the printer controller (Print Menu/Configuration Page) or use PageScope Light to verify that the total size of the
RAM installed in your printer is listed.
Installed Memory is included in the Printer Information section of the
Configuration Page and on PageScope Light’s Configuration section.
152
Dual In-Line Memory Module (DIMM)
Duplex Option
English
Duplex (2-sided) printing can be done automatically with a duplex option and
enough memory installed. See “Duplexing” on page 36 and “Basic
Functionality” on page 150.
Kit Contents
Duplex option
Two thumbscrews
Installing the Duplex Option
1
2
Turn off the printer, and unplug the
power cord and interface cable.
Remove the cover from the right side
of the printer. Use a Phillips
screwdriver to remove the two screws
securing the right cover.
Keep the removed cover and
screws in a safe place for
future use.
Duplex Option
153
3
4
Remove the duplex option from the
shipping carton.
Remove any tape from the duplex
unit.
English
5
We strongly suggest that you
save the packing materials in
case you ever need to move or
ship the printer.
Attach the duplex option to the printer.
a
Hook the two tabs at the bottom of
the duplex option onto the
notches on the right side of the
printer.
b
Push the duplex option towards
the printer until it clicks on top.
c
While still supporting the duplex
unit, carefully open the right-side
door and check that the tabs on
the duplex option are correctly
hooked onto the printer.
Attention
If the duplex option is released before
it is secured with the screws, it may
fall and break. Be sure to keep the top
of the duplex option supported until
the screws are tightened.
154
Duplex Option
English
d Open the duplex option’s cover
and tighten the two thumbscrews
that came with the duplex option
to secure the unit to the printer.
6
e
Close the duplex option’s cover.
Attach the support wire for the
duplex option to the printer.
a
Pull the right-side door release
lever and open the right-side
door.
If you have a lower feeder unit
attached, you will first need to
open the lower right-side door.
b Pull the tab for the support wire
on the right side of the duplex
option, and then hook the wire
onto the hook of the printer.
c
7
Close the right-side door.
Reconnect interface cable.
Duplex Option
155
8
Reconnect the power cord, and turn on
the printer.
English
9
10
In compliance with UL guidelines,
“The appliance inlet is considered
to be the main disconnect
device.”
Check the configuration page from the
control panel (Print Menu/Configuration
Page) to verify the duplex option installation.
On the Settings tab of your printer driver, move the Optional Duplexer to
the Installed Features area. (See Chapter 4).
Optional Lower Feeder Unit and Tray 2
The optional lower feeder unit fits under the printer and increases your
printer's media feed capacity by 500 letter/A4 sheets through Tray 2.
Kit Contents
Lower feeder unit with a media tray (500-sheet capacity)
Three metal brackets
–
Two front brackets
–
One rear bracket
Two securing screws
156
Optional Lower Feeder Unit and Tray 2
Installing the Lower Feeder Unit
Attention
1
2
English
Since consumables are installed in the printer, be sure to keep the
printer level when moving it in order to prevent accidental spills.
Turn off the printer, and unplug the
power cord and interface cable.
Remove the media support from
Tray 1.
Lift the support slightly and snap it
gently out of the printer.
3
4
Remove the lower feeder unit from
the shipping carton, and place it on a table or flat surface near the printer.
Remove any tape and packing
material from the lower feeder unit.
We strongly suggest that you
save the packing materials in
case you ever need to move
or ship the printer.
Optional Lower Feeder Unit and Tray 2
157
5
Open the right door of the lower feeder unit.
Attention
English
Be sure that the right door of the lower
feeder unit is open when the lower feeder
unit is attached to the printer; otherwise,
the printer may fall off or the lower feeder
unit may be damaged.
6
With another person’s help, place the printer onto the lower feeder unit.
WARNING!
Your printer weighs approximately 62 lbs (28 kg) fully assembled. Be
sure to have help when lifting and moving it.
7
Align the positioning pins on the lower
feeder unit with the holes in the
bottom of the printer to stack them
correctly.
If the left and back sides of the printer
and the lower feeder unit are aligned,
the positioning pins will correctly fit
into place.
8
158
Attach the rear bracket.
a
Remove the screw on the back of
the printer.
b
Hook the tabs on the bracket into
the mounting holes in the lower
feeder unit, and then align the
screw hole in the bracket with the
screw hole in the printer.
c
Using a screwdriver, tighten the
screw to secure the bracket.
Optional Lower Feeder Unit and Tray 2
9
Attach the front brackets.
a
Pull open the front door of the
printer, and then pull out the lower
tray.
c
10
English
b Hook the tabs on the two brackets
into the mounting holes in the
printer, and then align the screw
holes in the brackets with the
screw holes in the lower feeder
unit.
Using a screwdriver, tighten the
screws enclosed with the lower feeder unit to secure the brackets.
Close the right-side doors.
Attention
If the lower feeder unit is installed, the right-side door of the printer
opens at the same time that the right door of the lower feeder unit is
opened. Be sure to close the right door of the lower feeder unit when
closing the right-side door of the printer.
11
12
13
14
Slide the tray back into the printer.
Reattach the media support.
Reconnect the interface cable.
Reconnect the power cord, and turn
on the printer.
In compliance with UL
guidelines, “The appliance
inlet is considered to be the
main disconnect device.”
Optional Lower Feeder Unit and Tray 2
159
15
English
16
Check the configuration page from the control panel (Print Menu/Configuration Page) to verify that the lower feeder unit is installed.
On the Settings tab of your printer driver, move the Optional Input Bin to
the Installed Features area. (See Chapter 4).
Installing an Internal Hard Disk
Your printer can use an optional internal IDE hard disk to enable features
including proof and hold secure printing, collation, MOPY, PDF direct printing,
font storage, and other tasks.
You have a choice of two internal hard disk options. You can choose a kit that
contains a 2.5-inch, 6 GB or larger hard disk, the daughterboard, time-of-day
clock, and appropriate connectors or a kit with just the daughterboard, timeof-day clock, and appropriate connectors, but no hard disk.
1
160
Turn off the printer, and unplug the
power cord and interface cable.
Installing an Internal Hard Disk
3
4
5
6
7
8
Remove the rear panel from the
printer to access the controller board.
Using a screwdriver, loosen nine
screws on the top, left and bottom of
the panel, but do not remove them
from the printer.
English
2
Remove the two screws shown in the
illustration. Slide the panel slightly to
the right and lift it off the printer.
Next prepare the daughterboard for
installation. If you purchased an internal hard disk kit, skip to Step 6. If you
purchased a hard disk from another
vendor and purchased only the
daughterboard kit, you must now
attach the hard disk to the daughterboard.
Attach the ribbon cable to the hard
disk, aligning Pin 1 on the cable to pin
1 on the hard disk.
With the cable connected, set the
hard disk flat on the daughterboard.
Then, using a screwdriver, insert the
four screws that came with the kit. Be
careful not to overtighten the screws.
Align the daughterboard over its connector, matching Pin 1 on the daughterboard to Pin 1 on the controller
board and matching the two white
nylon standoffs to the holes in the
controller board. Ease the pinned
connectors together and snap the
standoffs into place.
Slip the rear panel over the screws,
then slide it slightly left and tighten
the screws to secure the panel. Also
replace the two screws removed in
Step 3.
Installing an Internal Hard Disk
161
English
9
10
11
162
Reconnect the interface cable.
Reconnect the power cord, and turn on the printer.
In compliance with UL guidelines, “The appliance inlet is considered to be the main disconnect device.”
On the Settings tab of your printer driver, move the Optional Hard Disk to
the Installed Features area. (See Chapter 4).
Installing an Internal Hard Disk
English
Repacking the
Printer
Attention
English
Failure to follow these instructions could result in voiding your
warranty.
Storing the Printer
Unplug the printer if you plan to store it for an extended period. Protect it from
dust and from extremes of temperature and humidity.
Relocating Your Printer
Occasionally, you may have to move your printer to a different location, either
nearby or to a distant location. To avoid damage to your printer, we advise
you to follow the next instructions very carefully.
1
2
3
4
Turn off your printer.
Remove the power cord and all interface cables.
If you are moving to a distant location, follow the instructions for repacking
the printer. (See “Repacking the Printer” on page 165.)
Relocate the printer.
WARNING!
Your printer weighs approximately 62 lbs (28 kg) with consumables
installed. Be sure to have help when lifting and moving it.
5
6
Unpack and set up the printer in its new location.
Use the unpacking and setup instructions in the Installation Guide.
Reconnect the power cord and all interface cables.
We strongly suggest that you save the packaging materials in case
you ever need to move or ship the printer.
You can also refer to the Service & Support Guide for sources of service and
support in many parts of the world. The most up-to-date worldwide
information can be found at www.konicaminolta.net/printer/.
164
Storing the Printer
Repacking the Printer
Attention
If you need to relocate or ship your printer after it’s been installed, follow the
procedures in this chapter to prevent damage to the printer and to keep your
warranty valid.
Attention
KONICA MINOLTA BUSINESS TECHNOLOGIES, INC. cannot be held
responsible for damage to your printer during shipment that results
from the improper packaging of your printer. You must use the
instructions given in this section before repacking the printer in its
original shipping carton with the original packing materials. If you do
not have your original packaging, you must order a magicolor 2300
Series Replacement Packaging Kit 2600723-200.
If you’re relocating or returning the printer, you must also request a
magicolor 2300 Series Repacking Kit 2600733-100. This kit includes
special packaging for the OPC drum cartridge and transfer belt unit.
These supplies must be replaced prior to shipping the printer. If you
need replacement packaging, in the Americas, call the Spares
department at (251) 633-4300 extension 2530 and request the kit(s)
above. For locations outside the Americas, refer to
www.konicaminolta.net/printer/.
If you have been instructed to return the printer to KONICA MINOLTA
PRINTING SOLUTIONS U.S.A., INC. by a customer support
representative in the Americas, be sure to write the RMA (Return
Merchandise Authorization) number you received on the outside of the
carton and on the outside of the consumables box before shipping the
printer. If the RMA number is not prominently visible on the outside of
the return inventory, we will not accept receipt.
You can also have a KONICA MINOLTA authorized service provider
uninstall and repack your printer. For prices and availability, call
1 (877) 778-2687 in the Americas or see www.konicaminolta.net/printer/
worldwide.
Repacking the Printer
165
English
Failure to follow these instructions could result in voiding your
warranty.
What’s Involved?
Repacking your printer for shipment involves the following steps. Each is
described in more detail in the following sections.
Obtain Proper Packaging:
English
Original packaging or replacement packaging (magicolor 2300
Series Replacement Packaging Kit 2600723-200)
page 165
Repacking kit (magicolor 2300 Series Repacking Kit
2600733-100)
Prepare the Printer for Shipment:
A. Turn off the printer, unplug the power cord, and remove
the interface cables.
page 166
B. Remove the media and the tray 1 media support.
page 167
C. Remove the duplex option and lower feeder unit, if
attached, and repack them separately.
page 167
D. Remove the waste toner bottle, plug the openings, and
dispose of it according to your local regulations.
page 170
E. Remove the OPC drum cartridge and repack it.
page 170
F. Remove the transfer belt and repack it.
page 172
G. Repack the printer for shipment.
page 173
H. Repack the OPC drum cartridge and transfer belt
for shipment.
page 174
A. Turn off the Printer, Unplug the Power Cord, and
Remove the Interface Cables
166
Repacking the Printer
B. Remove the Media and the Tray 1 Media Support
2
Remove the media.
Place it in its original packaging and store in a cool, dark place on a level
surface. Avoid moisture, excess humidity, direct sunlight, excess heat
(above 95° F/35° C), and dust.
English
1
Lift the media support from the three
holes in Tray 1 and remove the
media support.
C. Remove the Options (if Attached)
Duplex Option
1
2
If you don’t have a duplex option installed, skip to the next section.
If you have a lower feeder unit
attached, you first need to open the
lower right-side door.
Pull the right-side door release
lever, and open the right-side door.
Repacking the Printer
167
Unhook the support wire.
Close the right-side door.
English
3
4
5
6
7
8
Open the duplex option’s cover and
loosen the two thumbscrews until the
duplex option moves freely away from
the right side of the printer.
Lift duplex option up and away from the
printer.
Install the original right-side cover that
came with the printer with two screws.
Repack the duplex option in its original
shipping carton for storage or shipment.
If you’re returning the printer for
service, you don’t need to return the
duplex option, unless the problem is
with the duplex option.
Lower Feeder Unit
1
168
If you don’t have a lower feeder unit installed, skip to the next section.
Slide tray 2 out of the printer and remove the media.
Repacking the Printer
Remove the brackets (two at the front and one at the back) used to attach
the lower feeder unit to the printer.
English
2
3
4
Slide the tray back into the printer.
With the help of another person, lift
the printer by its carrying grips, and
place it on a flat surface.
WARNING!
Your printer weighs approximately 62 lbs
(28 kg). Be sure to have help when lifting
and moving it.
5
Repack the lower feeder unit in its original shipping carton for storage or
shipment.
If you’re returning the printer for service, you don’t need to return
the lower feeder unit unless instructed to do so.
Repacking the Printer
169
D. Remove the Waste Toner Bottle, Plug the Openings,
and Dispose of It According to Your Local Regulations
1
English
2
3
4
5
6
Open the printer’s front door, grasp the waste toner bottle’s handle, and
pull the waste toner bottle outward and upward.
Carefully remove the waste toner bottle.
Keep the waste toner bottle upright
while the openings are not covered,
so the toner does not spill.
Place the removed waste toner
bottle, with the openings facing up,
on a stable surface (not the printer).
Remove the two caps by turning
them counterclockwise.
Secure the two caps onto the two
openings by turning them clockwise.
Dispose of the used waste toner bottle.
WARNING!
Dispose of the used waste toner bottle properly according to your
local regulations (do not dispose of it by burning).
E. Remove the OPC Drum Cartridge
1
Rotate the transfer belt release lever
clockwise to the top (11 o’clock) position.
170
This releases the pressure on the
transfer belt unit.
Repacking the Printer
Grasp the release lever on the OPC drum
cartridge, and then pull the cartridge
straight out about 6 inches (152 mm).
English
2
Attention
The OPC drum is extremely sensitive to bright light and direct
sunlight. Any exposure to light should be avoided, or permanent
damage could result.
Any damage resulting from mishandling of the OPC drum will void
the warranty of the OPC drum.
Also, handle the cartridge carefully by its sides so you don’t touch
the surface (the green part) of the drum. The drum is also extremely
sensitive to hand oils and scratches, both of which reduce print
quality.
3
4
Support the bottom of the drum with your
hand, then carefully pull the cartridge
toward you and remove it.
Place the OPC drum cartridge in the
protective bag supplied in the repacking
kit (magicolor 2300 Series Repacking Kit
2600733-100).
Repacking the Printer
171
F. Remove the Transfer Belt
With the front door open and transfer belt release lever at its top
(11 o’clock) position, loosen the two thumbscrews.
English
1
2
3
4
172
Grasp the transfer belt and pull
it straight out and then lift it up.
Place the transfer belt and
thumbscrews in the protective
bag supplied in the repacking kit
(magicolor 2300 Series
Repacking Kit 2600733-100).
Replace the packaging and
tape, then close the front door.
Repacking the Printer
G. Repack the Printer for Shipment
Use your own original packaging or order magicolor 2300 Series
Replacement Packaging Kit 2600723-200.
Replace the tape and packaging.
English
1
Repacking the Printer
173
2
3
English
4
5
Place the lower cushions
into the shipping carton.
Place the printer’s plastic
bag over the printer.
Pack the printer for
shipment as shown.
If you’re also shipping the
power cord and any
manuals with the printer,
place them in the shipping
carton.
6
7
Don’t ship these
items if you’re
returning the printer
for service.
Securely tape the top flaps
of the shipping carton
closed.
Ship the printer.
If you return the printer for
service in the Americas, be
sure to write the RMA
(Return Merchandise
Authorization) number you
received from your
customer support
representative on the
outside of the carton before
shipping the printer.
H. Repack the OPC Drum and Transfer Belt Unit for
Shipment
1
174
Order the magicolor 2300 Series Repacking Kit 2600733-100.
Repacking the Printer
3
Place the OPC drum and
transfer belt unit (in their
protective bags) in the
appropriate position in the box
supplied in the repacking kit.
If you return the printer for
service in the Americas, be sure
to also write the RMA (Return
Merchandise Authorization)
number you received from
your customer support
representative on the outside of
the box before shipping the consumables.
English
2
Securely tape the top flaps of the box closed.
Reinstalling the Printer
If you are shipping the printer to another location, follow steps A–I below to
reinstall the printer once received.
A. Unpack the printer carton.
Refer to the magicolor 2350
Installation and User’s Guides.
B. Reinstall the transfer belt unit.
See “Reinstalling a Transfer Belt
Unit” on page 176.
C. Install the OPC drum and return
Refer to the magicolor 2350
the transfer belt release lever to its Installation and User’s Guides.
correct position (7 o’clock).*
D. Install a new waste toner bottle.
E. Replace the toner cartridges.*
F. Install the tray 1 media support
and load the media.
G. Reconnect the power cord and
cables.
H. Install the options.
*The printer must complete a 150second calibration cycle after
a consumable has been replaced.
If you open the door before the
message window reads
MAGICOLOR 2350/IDLE, the
printer stops and repeats the
calibration cycle.
I. Turn the printer on.
Reinstalling the Printer
175
Reinstalling a Transfer Belt Unit
With the front door open,
remove the transfer belt unit
from its protective bag and
reinsert it.
English
1
2
3
4
176
Tighten the two
thumbscrews.
Rotate the transfer belt release
lever counterclockwise to its correct
(7 o’clock) position.
Close the front door.
Reinstalling the Printer
English
Technical
Specifications
Requirements
Space Requirements
English
The illustration below shows the amount of space required for operating the
printer, replacing supplies, and removing media jams.
Allow enough space around the printer to provide adequate ventilation
and easy servicing. For best output quality and longest consumables
life, install the printer on a hard, flat, level (within ±1°slant) surface.
Top View
5.9" (150 mm)
19.7" (500 mm)
27.6" (700 mm)
11.8" (300 mm)
178
Requirements
English
23.2" (590 mm)
16.7" (424 mm)
Front View
13.4" (340 mm)
27.8" (705 mm)
21.5" (546 mm)
28.0" (712 mm)
Printer with Accessories Front View
14.1" (357 mm)
27.8" (705 mm)
If you have added optional media feed unit, the printer’s height will increase
by approximately 5 inches (125.5 mm).
Requirements
179
Location Requirements
On a surface capable of supporting the printer, accessories,
English
consumables, and media.
Component
Weight
Printer
55 lbs (25 kg)
Consumables (such as toner
cartridge, OPC drum cartridge)
6.2 lbs (2.8 kg) (total)
Media
5.2 lbs (1.9 kg) per ream of 20 lb
bond (75 g/m2) paper
Lower feed unit (with Tray 2)
11.2 lbs (5.1 kg)
Duplex unit
3.97 lbs (1.8 kg)
With these characteristics...
On a hard, flat, stable, level (±1° or
less slant at any point around the
machine).
Close to an easily accessible
grounded power supply (on an
exclusively dedicated power outlet)
that meets printer specifications.
Near your computer. At the length
6.5' (2 m) or less for an IEEE 1284
bidirectional parallel connection.
With enough space to allow
adequate ventilation and easy
servicing.
With an ambient temperature range
of 50°–95° F (10°–35° C) and
temperature gradient of 50° F (10°
C) per hour or less.
With relative humidity range of 15%–
85% (noncondensing) and humidity
gradient of 20% per hour or less.
At an altitude of 0–8,202'
(0–2,500m).
180
But away from...
Direct sunlight. Heating and cooling
sources, extreme temperature or
humidity changes, wind, and dust.
Open flames, items that burn easily.
A connection to the same electrical
circuit as high-current machines.
Noise-generating equipment, such
as a copier or air conditioner, and
strong magnetic or electromagnetic
fields, such as a refrigerator.
Water, water pipes, liquid (drink)
containers, and corrosive chemicals
or vapors, such as ammonia.
Small, loose metal parts, such as
paper clips and staples.
Excessive vibration.
A surface can be tested for levelness with a standard round pencil. If
the pencil rolls, the surface is not level. Clear the area of cables or
other obstructions that might prevent the printer from sitting directly on
the flat, level surface.
Requirements
WARNING!
Obstructing the ventilation grilles could present a fire hazard.
If the printer is located in a cold room that is rapidly heated, or if the printer
is moved from a cold place to a warm, humid place, condensation may
occur within the printer, degrading print quality. If this occurs, allow the
printer to adapt to the environment for about one hour before use.
If using a humidifier or water vaporizer in the room with the printer, use
only purified or distilled water. Impurities in the water may be released into
the air, where they can accumulate inside the printer and cause degraded
printer output.
Attention
For products installed outside North America, do not connect the
groundwire to gas or water pipes or grounding for telephones.
Interface Panel
Parallel Port
Use a Centronics IEEE 1284 bidirectional parallel cable when connecting the
parallel port on the printer to the parallel port on your computer.
Ethernet Port
Use a twisted-pair (RJ45) Ethernet cable when connecting the Ethernet port
on the printer to a 10BaseT/100BaseTX network connection.
USB (version 1.1) Port
Use a USB cable (Type B) when connecting the USB port on the printer to the
USB port on your computer.
Interface Panel
181
English
Do not tilt the printer more than ±1° when moving it.
Power Requirements
WARNING!
English
Connect the power plug to an outlet with the same rated voltage as the
printer. No other devices should be connected to this outlet, as
overheating could cause fire or electric shock. The printer draws 13 A at
100V, 11 A at 120 V, or 7 A at 220-240 V. Your printer requires a properly
grounded AC outlet. The grounding terminal on the power cable should
be connected to a good earth ground to prevent electric shock and fire.
In compliance with UL guidelines, “The appliance inlet is considered to
be the main disconnect device.”
Input Power
North America 120 VAC; 50/60 Hz ±3%
Europe
220–240 VAC; 50/60 Hz ±3%
Latin America
115/120 VAC 50/60 Hz ±3%
220–240 VAC 50/60 Hz ±3%
Notes: Amperage capacity at least 1.2 times that used by
the printer.
North America 120 VAC ±10%
Voltage
Fluctuation
Europe
220–240 VAC ±10%
Rate and Rated
Latin America 120 VAC ±10%
Line Voltage
220–240 VAC ±10%
Notes: 10% of the rated line voltage for proper operation.
Frequency
Within 50–60 ±3 Hz
Variation Rate
182
Maximum
Electrical
Current
Required during operation is 13 amps for a 100 V, 11 amps
for a 120 V system and 7 amps for a 220–240 V system.
Noisegenerating
Equipment
Should not be connected to the same electrical outlet as
the printer.
Grounding
Your printer requires a properly grounded AC outlet.
Interface Panel
ENERGY STAR Compliance
Interface Panel
English
The magicolor 2350 basic configuration
is compliant with US Environmental
Protection Agency (EPA) ENERGY
STAR regulations. After a userconfigurable period of inactivity, the
printer changes to a low-power state
(the engine remains on, but the fuser
unit turns off). When a print job is
received, the printer returns to normal
power.
183
Engine and Controller Specifications
Engine
English
Engine
KONICA MINOLTA NC-L6001
Duty cycle
Simplex letter/A4
pages per month
1,000 average prints and up to
35,000 maximum prints per month*
Notes
The duty cycle is affected by the media type and percent
coverage.
*Continued usage at this rate will reduce the life of the
printer.
Print Speed—Simplex
The following table defines the maximum print speed in Pages Per Minute
(ppm).
Page size
Monochrome ppm
4-color ppm
Draft Mode
Other Mode
A4 or smaller
17
16
4
Letter
18
Legal/Folio
—
8
2
Transparency Film (Letter/A4)
—
2.5
1.6
Label/Thick (Letter/A4)
—
3.3
2.0
Notes: Refer to “Printer Resolutions” on page 70 for draft and other
resolution mode definitions.
Print Speed—Autoduplex
The following table defines the maximum print speed in Pages Per Minute
(ppm).
184
Page size
Monochrome ppm
4-color ppm
A4
10
4
Legal
3.24
1
Letter
10
4
Engine and Controller Specifications
General
Printer type
Desktop, non-impact, color printer
Print method
Scanner: Semiconductor laser with rotating mirror
Process: Cyan, magenta, yellow, and black toner image
transfer to print media
Fuser: Heated rollers
Resolution
High: 9600 x 600 dpi class (PostScript) or
Enhanced: 1200 x 1200 dpi (PCL)
Standard: 600 x 600 dpi
Draft: 600 x 600 dpi monochrome
Toner
Type: Dry, single component
Packaging: User-replaceable toner cartridges
Warm-up time
Maximum: 100 V/120 V/220 to 240 V: 180 seconds
Input sources
Standard: 200-sheet multipurpose tray
Optional: 500-sheet media feed unit
Output
200-sheet (Letter/A4) output tray on top of printer
Media sizes
and weights
See “Media Types” on page 22.
Media type
Cut-sheet
Notes
The maximum media weight supported for duplex printing
is 24 lb bond (90 g/m2).
Controller
CPU
Power PC 405 Core (200 MHz)
Resident
emulations
PostScript 3
PCL 5, XL
PDF v. 1.3—Requires optional hard disk
Line printer—simple text data with several control
commands
Hexdump—Hexadecimal print out of data stream for
troubleshooting purposes.
Engine and Controller Specifications
185
English
Recorder: Black writing electrophotographic
Fonts
137 PostScript fonts
(plus 115 of the same fonts re-encoded for use in
Central Europe and 3 re-encoded for ISOLatin1)
(plus 1 Hebrew and 1 Arabic)
English
90 PCL fonts
(80 scalable and 10 bitmap)
Standard
interfaces
Ethernet—10BaseT/100BaseTX
Parallel—Centronics/IEEE 1284 bidirectional
USB—USB (version 1.1) Type B connector
RAM
Type: PC-100- or PC-133-Compliant SDRAM DIMMs
Base system RAM: 128 MB
Total RAM: Upgradable to 384 MB
Optional RAM
128 and 256 MB DIMMs
For information about DIMMs recommended for
your printer, see the magicolor 2350 Answer Base
on our website at printer.konicaminolta.net/support
or contact Technical Support.
Optional Hard
Disk
Type: IDE
Disk Drive Type: PIO Mode 4 compatible
Size: 6 GB or larger
System
software
Upgradable via FLASH.
Check the magicolor 2350 Answer Base on our
website at printer.konicaminolta.net/support for
information about the latest system software
version.
186
Engine and Controller Specifications
Electrical
Voltage and
frequency
US: 120 volts ±10% at 50/60 Hz ±3 Hz
International: 220–240 volts ±10% at 50 Hz ±3 Hz
Phase
Single
Power
consumption
Mode
Average
Black monochrome
printing
600 W or less 1100 W or
less
Color printing
Standby
Power saver
450 W or less
250 W or less
30 W or less
Certification
Maximum
ENERGY STAR compliant
Current
Mode
Maximum
Operation (120 V)
Operation (220–240 V)
11.0A
7.0 A
Rush Current
50 A or less (0-Peak)
Engine and Controller Specifications
187
English
Voltage and Power
Environmental
Acoustic noise Printing: Less than 54 dB (A)
data
Standby: Less than 39 dB (A)
English
Noise
Maschinenlärminformationsverordnung 3. FSGV,
Declaration for 18.01.1991: Der höchste Schalldruckpegel beträgt
Germany
70 dB (A) oder weniger gemäß EN 27779.
Relative
humidity
Operating: 15–85% RH (noncondensing)
Transportation/Storage: 30–85% RH
(noncondensing)
Humidity Gradient: 20% per hour or less
Temperature
range
Operating: 50–95° F (10–35° C)
Transportation/Storage: 32–95° F (0–35° C)
Temperature Gradient: 50° F (10° C) per hour or less
Altitude
Operating: 0–8,202 ft (0–2,500 m)
Limit of Low Pressure: 74.1 kPa
Transportation/Storage: Air pressure: 74.0-101.3 kPa
Inclination
Operating: ±1° or less slant at any point around the
machine
Ambient Humidity (%RH)
Optimal Operating Range
Acceptable Operating Range
90
80
70
60
50
40
30
20
10
0
10
50
15
59
20
68
25
77
30
86
35 Cº
95 Fº
Ambient Temperature
188
Engine and Controller Specifications
Hazardous Chemical Substance Reporting
Material Safety Data Sheets (MSDS)
Title 29 CFR Ch. XVII,
Part 1920.1200
Physical
Dimensions
Weight
Main Body
Main Body with
Lower Feeder
Unit
Main Body with
Lower Feeder
Unit and Duplex
Option
W: 14.02 in.
(356 mm)
W: 14.17 in.
(360 mm)
W: 15.98 in.
(406 mm)
H: 15.43 in.
(392 mm)
H: 20.20 in.
(513 mm)
H: 20.20 in.
(513 mm)
D: 19.69 in.
(500 mm)
D: 19.69 in.
(500 mm)
D: 19.69 in.
(500 mm)
Main Body (including consumables,
excluding media)
62.39 lbs (28.3 kg)
Lower feeder unit
11.24 lbs (5.1 kg)
Duplex option
3.97 lbs (1.8 kg)
Engine and Controller Specifications
189
English
EINECS/ELINCS (EU)
Consumable Life Expectancies
English
The stated life expectancy of each consumable is based on printing under
specific operating conditions, such as media type, page size, content of
material printed, and page coverage (usually 5% coverage of letter/A4-size
media). The actual life expectancy will vary (or be reduced) depending on
these and other printing variables, including continuous (optimal consumable
life) or intermittent (for example, one-page jobs) printing, ambient
temperature, and humidity.
Use of consumables not manufactured by KONICA MINOLTA or use of
nonsupported print media may cause damage to your printer and will void
your warranty. If KONICA MINOLTA printer failure or damage is found to be
directly attributable to the use of non-KONICA MINOLTA consumables and/or
accessories, KONICA MINOLTA will not repair the printer free of charge. In
this case, standard time and material charges will be applied to service your
printer for that particular failure or damage.
190
Consumable Life Expectancies
Consumable
This item needs replacing after...
OPC Drum
Cartridge
Up to 45,000 continuous monochrome or 11,250 continuous
four-color pages, or 10,000 intermittent (one-page jobs)
monochrome or 7,500 intermittent color pages.
Toner
Cartridge
Standard capacity: Approximately 1,500 single-sided pages
per cartridge—yellow, magenta, cyan at 5% coverage of
each color.
High capacity: Approximately 4,500 single-sided pages per
cartridge—black, yellow, magenta, cyan at 5% coverage of
each color.
Waste Toner
Bottle
Approximately 25,000 continuous monochrome or 21,600
intermittent (one-page jobs) monochrome, or 6,250
continuous or intermittent color pages (based on the
standard mode with 5% toner coverage of letter/A4 media).
Special Media
Consumable
OPC Drum
Cartridge
This item needs replacing by user after...
Up to 15,000 continuous monochrome or 7,500 continuous
color pages, or 5,000 intermittent (one-page jobs)
monochrome or 4,100 intermittent color pages.
Toner Cartridge Standard capacity (black): Approximately 1,500 continuous
(pages per
single-sided pages or 1,000 intermittent single-sided pages
cartridge at 5% (if monochrome black printing only).
coverage of
Standard capacity (yellow, magenta, cyan):
each color)
Approximately 1,500 continuous or intermittent single-sided
pages.
High capacity (black): Approximately 4,500 continuous
single-sided pages or 3,200 intermittent single-sided pages
(if monochrome black printing only).
High capacity (yellow, magenta, cyan): Approximately
4,500 continuous or intermittent single-sided pages.
Waste Toner
Approximately 25,000 continuous or 14,400 intermittent
Box
(one-page jobs) monochrome pages or 6,250 continuous or
intermittent color pages.
Contact your local vendor or www.konicaminolta.net/printer/ for
purchase information, part numbers, and pricing. To order approved
media, go to www.q-shop.com. If you have questions, refer to
printer.konicaminolta.net/support and then click on the Answer Base.
Consumable Life Expectancies
191
English
Plain Paper
Regulatory Compliance
English
CE Marking (Declaration of Conformity) For European Users
This product complies with the following EU directives: 89/336/EEC, 73/23/EEC, and 93/68 EEC directives.
This declaration is valid for the areas of the European Union.
This device must be used with shielded interface cables. The use of non-shielded cable is likely to result in
interference with radio communications, and is prohibited under EU directives.
Electro-Magnetic Interference For All Users (Except for American and
Canadian Users) Users
This is a Class B product. In a domestic environment, this product may cause radio
interferences in which case the user may be required to take adequate measures.
Interference-causing Equipment Standard (ICES-003 ISSUE 3) For Canada
Users
This Class B digital apparatus complies with Canadian ICES-003.
Cet appareil numérique de la classe B est conforme à la norme NMB-003 du Canada.
This devise must be used with shielded interface cables. The use of non-shielded cable is likely to result in
interference with radio communications, and is prohibited under ICES-003.
cTick Mark
Electromagnetic
Emissions (EMI)
ACA (Australia)
AS/NZS 3548
Class B ITE
(Radio Communications Act of 1992)
China
GB 9254
FCC (USA)
Title 47 CFR Ch.1, Part 15,
Subpart B
Class B
Class B Digital Device
Industry Canada (Canada)
ICES-003 Issue 3
International (EU)
EU Directive 89/336/EEC
EN 55022 (CISPR Pub. 22)
EN 61000-3-2
EN 61000-3-3
Japan (VCCI)
VCCI V-3/01.04
Harmonic Current Measure
Guideline (2001) of JBMIA
Energy Saver
Immunity
Requirements (EU)
Product Safety
Laser Safety
192
ENERGY STAR (USA, EU, and
Japan)
International (EU)
EN 55024
UL (USA)
cUL (Canada)
International (EU)
China
CDRH (USA) International (EU)
Class B Digital Device
Class B ITE
Harmonic Current Emissions
Voltage Fluctuations and Flicker
Class B ITE
Class A
ENERGY STAR Compliant in basic
configuration
Immunity Characteristics
UL 60950
CAN/CSA C22.2 60950
EU Directive 73/23/EEC,
EN 60950 and IEC 60950
GB 4943
Title 21 CFR Ch. I, Subchapter J
EN 60825-1 and IEC 60825-1
Regulatory Compliance Safety Information
If this equipment does cause harmful interference to radio or television reception, which can be determined
by turning the equipment off and on, the user is encouraged to try to correct the interference by one or more
of the following measures:
Reorient or relocate the receiving antenna.
Increase the separation between the equipment and receiver.
Connect the equipment into an outlet on a circuit different from that to which the receiver is connected.
Consult the dealer or an experienced radio/TV technician for help.
This device must be used with shielded interface cables. The use of non-shielded cable is likely to result in
interference with radio communications, and is prohibited under FCC rules.
Attention
Any modifications or changes to this product not expressly approved in writing
by the manufacturer responsible for compliance to Federal Regulations could
void the user’s authority to operate this product within the Laws and
Regulations of the Federal Communications Commission.
Regulatory Compliance Safety Information
193
English
FCC Compliance Statement For American Users
This equipment has been tested and found to comply with the limits for a Class B digital device, pursuant to
Part 15 of the FCC Rules. These limits are designed to provide reasonable protection against harmful
interference when the equipment is operated in a commercial installation. This equipment generates, uses,
and can radiate radio frequency energy and, if not installed and used in accordance with the instruction
manual, may cause harmful interference to radio communications. However, there is no guarantee that
interference will not occur in a particular installation. Operation of this equipment in a residential area is
likely to cause harmful interference, in which case, the user will be required to correct the interference at his
own expense.
Safety Information
English
Toner
Do not throw the toner cartridge or toner into an open flame. The hot toner may
scatter and cause burns or other damage.
CAUTION: Keep out of reach of children.
Replaceable Battery
Danger of explosion if battery is incorrectly replaced. Replace only with the
same or equivalent type recommended by the manufacturer. Dispose of used
batteries according to the manufacturer’s instructions.
Laser Safety
This printer is a page printer which operates by means of a laser. There is no possibility of danger from the
laser, provided the printer is operated according to the instructions in this manual.
Since radiation emitted by the laser is completely confined within protective housings and external covers,
the laser beam cannot escape from the machine during any phase of user operation.
This printer is certified as a Class 1 laser product under the U.S. Department of Health and Human
Services (DHHS) Radiation Performance Standard according to the Radiation Control for Health and
Safety Act of 1968. This means that the printer does not produce hazardous laser radiation.
194
Regulatory Compliance Safety Information
Internal Laser Radiation
Maximum Average Radiant Power: 4.68 µW at the surface of the OPC drum
The internal components of the print head unit are NOT A FIELD SERVICEABLE ITEM.
Therefore, the print head unit should not be opened under any circumstances.
Print head
unit
Laser
aperture
Laser Caution For United States Users—CDRH Regulations
This printer is certified as a Class I laser product under the Regulation Performance Standard according to
the Food, Drug, and Cosmetic Act of 1990. Compliance is mandatory for laser products marketed in the
United States, and is reported to the Center for Devices and Radiological Health (CDRH) of the U.S. Food
and Drug Administration (FDA) of the Department of Health and Human Services (DHHS). This means that
the product does not produce hazardous laser radiation. The label shown below indicates compliance with
the CDRH regulations and must be attached to laser products marketed in the United States.
Laser Safety Label—CDRH Requirement
CAUTION: Use of controls, adjustments, or performance other than those specified
in this manual may result in hazardous radiation exposure.
This is a semiconductor laser. The maximum power of the laser diode is 5 mW, and the wavelength is
770–795 nm.
Regulatory Compliance Safety Information
195
English
Wavelength: 770–795 nm
This product employs a Class IIIb Laser Diode that has an invisible laser beam. The Laser Diode and
Scanning Polygon Mirror are incorporated in the print head unit. The print head is in the interior of the
printer in front of the toner cartridge. The laser beam is emitted from the print head unit, and then is
radiated through the laser aperture to the interior of the printer.
International Notices—Power Cord
The following power cord requirements are in effect for your 220 V printer.
Minimum: 0.75 mm2
Minimum: H05 VV - F
English
The male plug is certified in the country in which the equipment is to be installed, and the female plug is an
IEC 60320 connector.
International Notices—Voltage
Attention Norwegian users: This equipment is designed to operate within an IT power system where the
line-to-line voltage does not exceed 240 V.
For Norway Users
ADVERSEL
Dersom apparatet brukes på annen måte enn spesifisert i denne bruksanvisning, kan brukeren utsettes for
unsynlig laserstråling som overskrider grensen for laser klass 1.
Dette en halvleder laser. Maksimal effekt till laserdiode er 5 mW og bølgelengde er 770–795 nm.
For Finland, Sweden Users
LOUKAN 1 LASERLAITE
KLASS 1 LASER APPARAT
VAROITUS!
Laitteen käyttäminen muulla kuin tässä käyttöohjeessa mainitulla tavalla saattaa altistaa käyttäjän
turvallisuusluokan 1 ylittävälle näkymättömälle lasersäteilylle.
Tämä on puolijohdelaser. Laserdiodin suurin teho on 5 mW ja aallonpituus on 770–795 nm.
VARNING!
Om apparaten används på annat sätt än i denna bruksanvisning specificerats, kan användaren utsättas
för osynlig laserstrålning, som överskrider gränsen för laserklass 1.
Det här är en halvledarlaser. Den maximala effekten för laserdioden är 5 mW och våglängden är 770–
795 nm.
VARO!
Avattaessa ja suojalukitus ohitettaessa olet alttiina näkymättömälle lasersäteilylle. Älä katso säteeseen.
VARNING!
Osynlig laserstrålning när denna del är öppnad och spärren är urkopplad. Betrakta ej strålen.
Ozone Release
During printer operation, a small quantity of ozone is released. This amount is not large enough to harm
anyone adversely. However, be sure the room where the printer is being used has adequate ventilation,
especially if you are printing a high volume of materials, or if the machine is being used continuously over
a long period.
Dégagement d’ozone
L’imprimante dégage une faible quantité d’ozone durant son utilisation.
Cette quantité n’est pas suffisamment importante pour être dangereuse. Cependant, veillez à ce que la
pièce dans laquelle la machine soit adéquatement ventilée, surtout en cas d’impression de gros volumes
ou en cas d’utilisation continue pendant un laps de temps très long.
This section contains detailed instructions on the operation and maintenance
of this machine. To achieve optimum utility of this device, all operators should
196
Regulatory Compliance Safety Information
carefully read and follow the instructions in this manual. Please keep this
manual in a handy place near the machine.
Please read the next section before using this device. It contains important
information related to user safety and preventing equipment problems.
English
Make sure you observe all of the precautions listed in this manual.
Note that some parts of the contents of this section may not
correspond with the purchased product.
Warning and Precaution Symbols
Ignoring this warning could cause serious injury or
even death.
or
WARNING!!
Ignoring this caution could cause injury or damage to
property.
or
Attention
Meaning of Symbols
A triangle indicates a danger against which you should take precaution.
This symbol warns against burns.
A diagonal line indicates a prohibited course of action.
This symbol warns against dismantling the device.
A black circle indicates an imperative course of action.
This symbol indicates you must unplug the device.
Regulatory Compliance Safety Information
197
English
• Do not modify this product, as a fire, electrical shock, or breakdown could
result. If the product employs a laser, the laser beam source could cause
blindness.
• Do not attempt to remove the covers and panels which have been fixed to
the product. Some products have a high-voltage part or a laser beam
source inside that could cause an electrical shock or blindness.
• Only use the power cord supplied in the package. Failure to use this cord
could result in a fire or electrical shock.
• Use only the specified power source voltage. Failure to do that could result
in a fire or electrical shock.
• Do not use a multiple outlet adapter to connect any other appliances or
machines. Use of a power outlet for more than the marked current value
could result in a fire or electrical shock.
Do not unplug and plug in the power cord with a wet hand, as an electrical
shock could result.
Plug the power cord all the way into the power outlet. Failure to do this could
result in a fire or electrical shock.
• Do not scratch, abrade, place a heavy object on, heat, twist, bend, pull on,
or damage the power cord. Use of a damaged power cord (exposed core
wire, broken wire, etc.) could result in a fire or breakdown.
Should any of these conditions be found, immediately turn OFF the power
switch, unplug the power cord from the power outlet, and then call your
authorized service representative.
• In principle, do not use an extension cord. Use of an extension cord could
cause a fire or electrical shock. Contact your authorized service
representative if an extension cord is required.
Do not place a flower vase or other container that contains water, or metal
clips or other small metallic objects on this product. Spilled water or metallic
objects dropped inside the product could result in a fire, electrical shock, or
breakdown.
Should a piece of metal, water, or any other similar foreign matter get inside
the product, immediately turn OFF the power switch, unplug the power cord
from the power outlet, and then call your authorized service representative.
• If this product becomes inordinately hot or emits smoke, or unusual odor or
noise, immediately turn OFF the power switch, unplug the power cord from
the power outlet, and then call your authorized service representative. If
you keep on using it as is, a fire or electrical shock could result.
• If this product has been dropped or its cover damaged, immediately turn
OFF the power switch, unplug the power cord from the power outlet, and
then call your authorized service representative. If you keep on using it as
is, a fire or electrical shock could result.
Do not throw the toner cartridge or toner into an open flame. The hot toner
may scatter and cause burns or other damage.
Connect the power cord to an electrical outlet that is equipped with a
grounding terminal.
198
Regulatory Compliance Safety Information
The inside of this product has areas subject to high temperature, which may
cause burns. When checking the inside of the unit for malfunctions such as a
paper misfeed, do not touch the locations (around the fuser unit, etc.) which
are indicated by a “Caution! High Temperature!” warning label.
Do not place any objects around the power plug as the power plug may be
difficult to pull out when an emergency occurs.
• The socket-outlet shall be installed near the machine and shall be easily
accessible as the power plug may be difficult to pull out when an
emergency occurs.
• Always use this product in a well ventilated location. Operating the product
in a poorly ventilated room for an extended period of time could injure your
health. Ventilate the room at regular intervals.
• Whenever moving this product, be sure to disconnect the power cord and
other cables. Failure to do this could damage the cord or cable, resulting in
a fire, electrical shock, or breakdown.
• When moving this product, always hold it by the locations specified in the
user manual or other documents. If the unit falls it may cause severe
personal injury. The product may also be damaged or malfunction.
• Remove the power plug from the outlet more than one time a year and
clean the area between the plug terminals. Dust that accumulates between
the plug terminals may cause a fire.
• When unplugging the power cord, be sure to hold onto the plug. Pulling on
the power cord could damage the cord, resulting in a fire or electrical shock.
Regulatory Compliance Safety Information
199
English
• Do not use flammable sprays, liquids, or gases near this product, as a fire
could result.
• Do not leave a toner cartridge or OPC drum cartridge in a place within easy
reach of children.
Licking or ingesting any of these things could injure your health.
• Do not let any object plug the ventilation holes of this product. Heat could
accumulate inside the product, resulting in a fire or malfunction.
• Do not install this product at a site that is exposed to direct sunlight, or near
an air conditioner or heating apparatus. The resultant temperature changes
inside the product could cause a malfunction, fire, or electrical shock.
• Do not place the product in a dusty place, or a site exposed to soot or
steam, near a kitchen table, bath, or a humidifier. A fire, electrical shock, or
breakdown could result.
• Do not place this product on an unstable or tilted bench, or in a location
subject to a lot of vibration and shock. It could drop or fall, causing personal
injury or mechanical breakdown.
• After installing this product, mount it on a secure base. If the unit moves or
falls, it may cause personal injury.
• Do not store toner units and OPC drum units near a floppy disk or watch
that are susceptible to magnetism. They could cause these products to
malfunction.
Working Safely with Your Laser Printer
WARNING!
English
Working improperly with the printer can result in health hazards,
electric shocks, and even fires. Before you unpack the laser printer, you
should make yourself familiar with this information on your safety and
operating safety.
Power Supply/Cord/Plug
Do This...
Make sure that the power supply to the unit has the correct voltage.
Otherwise the result could be a fire or an electric shock.
Make sure that the power cord is:
Switched off immediately and unplugged if the power supply cord is
damaged. Failure to do so could result in a fire or an electric shock.
Correctly plugged into the socket and that the socket is visible at all times
and is readily accessible.
Not underneath the printer or another machine as this can result in damage to that cord. The result could be a fire or improper functioning of the
unit in question.
Removed from the socket if the machine will not be in use for an
extended period of time.
Use only extension cords that are designed for at least the maximum power
rating of the machine. Extension cords with lower ratings can result in the
unit overheating and can even lead to a fire.
DO NOT...
Pull on the cord to pull the power plug out of the socket as this may damage
the cord. The result could be an electric shock or a fire.
Remove from the power cord from the socket with wet hands as this may
result in an electric shock.
Place any heavy objects on the power cord.
Do not pull or kink the cord as this can result in damage to the cord. The
result could be an electric shock or a fire.
Leave the power cord plugged into the socket when you move the printer.
Otherwise you may damage the cord. The result could be a short-circuit
or a fire.
Do not switch off the unit while printing is in progress.
200
Working Safely with Your Laser Printer
Printer Body
Do This...
Notes on your safety and operating safety
Working improperly with the printer can result in health hazards, electric
shocks and even fires. Before you unpack the laser printer, you should make
yourself familiar with this information on your safety and operating safety.
If the machine becomes unusually hot, or if you notice smoke or an unusual
odor coming from the machine, switch it off immediately and remove the
power cord from the socket.
DO NOT...
Do not place:
Heavy objects on the machine.
Magnetic objects near the machine.
Coffee cups, drinks, bottles, or other containers with liquids in them on the
machine. If liquid enters the machine the result could be an electric shock
or a fire. If liquid does get into the machine, switch it off immediately,
disconnect the power cord.
Paper clips, staples, or other small metal objects into openings on the
machine. The result could be an electric shock or a fire. If metal pieces
are fed into the machine, switch it off immediately, disconnect the power
cord.
Do not open any covers on the machine while printing is in progress.
Do not use any flammable sprays, liquids or gases in the vicinity of the
machine.
Do not remove any safety devices and do not alter the construction of the
machine. The unit is equipped with high-voltage components. Using the
machine improperly can result in a fire or an electric shock.
Working Safely with Your Laser Printer
201
English
Perform only the procedures that are described in this manual. Using the
machine improperly can result in a fire or an electric shock.
English
Index
A
Accessories
DIMMs 149
Duplex option 153
Hard disk 160
Specifications 148
Tray 2 and Lower Feeder Unit 156
AIDC 84, 130, 134, 139
Antistatic protection 149
Auto-Image Density Control
See AIDC
C
Calibration
Color 84
Cancel key 45
Cleaning the printer 102
Color
Calibration 84
Color profiles 73
Color rendering dictionaries 72
ICC profiles 73
K-Preserve 75
Matching 72
Troubleshooting 75
Configuration
Checking 152
Configuration page 112
Using Control Panel 44
Using PageScope Light 44
Using printer drivers 60
Connection
Ethernet 181
Parallel 181
USB 181
Consumables
Life Expectancy 84
OPC drum 93
Ordering 96
Toner 85
Waste toner bottle 92
Control panel 44
Language 46
Menus 46
Controller 184
Specifications 185
Custom-size media 35
English
D
DIMMs 149
Document security 41
Drivers 8
Installing for Macintosh 13
Installing for Windows 12
Macintosh 60
Windows 60
Windows Me &98 64
Windows NT 62
Windows XP/2000 60
Dual In-Line Memory Modules
See DIMMs
Duplexing
Autoduplex 37
Duplex option 153
Installing duplex option 153
Manual duplexing 36
E
Electrostatic discharge 149
Energy Star 183
Engine 184
Envelopes 23
Environmental requirements 188
Error messages 140
Ethernet interface 181
F
Forms 40
H
Margins 29
Installation
DIMMs 149
Drivers and Utilities for Macintosh 13
Drivers and Utilities for NDPS 17
Drivers and Utilities for NetWare 17
Drivers and Utilities for UNIX 17
Drivers and Utilities for Windows 12
Duplex option 153
Hard disk 160
Linux 17
Lower Tray 156
Macintosh PPDs 13
NetWare 17
NPDS 17
OPC drum 95
UNIX 17
Interfaces
Ethernet 181
Interface panel 181
Parallel 181
Specifications 186
USB 181
J
Jams 125
Media path 114
Preventing 113
Removing 116
K
K-preserve 75
L
Labels 24
Language
Changing 46
Lower Tray and Feeder 156
Hard disk 160
M
I
Macintosh
Installation 13
PPDs 8, 60, 66
Margins 28, 29
Imageable area
204
Index
O
OPC drum
Installing 95
Replacing 93
OPC drum cartridge 171
P
Page margins 29
PageScope 10
PageScope Light 60
Paper
Clearing jams 116
Jams 125
Loading 30
Margins 28
Path 114
Preventing jams 113, 123
Storage 39
Type 23
Parallel interface 181
Path, media 114
PCL
Index
Drivers 8
Physical specifications 189
PostScript
Drivers 8
Printer definitions 8
Power
Saving 183
Power requirements 182
Energy Star, compliance 183
Specifications 182
Preventing paper jams 113
Print quality
All black sheet 133
Black printing 75
Too dark 134
Too light 134
Troubleshooting 133
Print resolution 40, 70
Print Setting Tabs 60, 62
Printer
Cleaning 102
Configuration 112
Location 178
Moving 164
Repacking 165
See also Specifications
Storing 164
Printer pauses 130
Printing
Method 185
Profile downloader 8
Proof-then-Print 41
English
Media
Clearing media jams 116
Custom 35
Envelopes 23
Labels 24
Letterhead 26
Loading 30
Lower Tray 156
Margins 28, 29
Path 114
Postcards 26
Preventing jams 113, 123
Storage 39
Thick stock 27
Transparancies 27
Media jams 125
Memory
Adding 149
Requirements 149
Menus 46
Messages 140
Moving the printer 164
R
Regulatory information 192
Repacking the printer 165
Resolution 40, 70, 185
S
Safety 194
Security, documents 41
Service messages 140
Space requirements 178
Specifications
Consumables 190
205
English
Controller 184, 185
CPU 185
Emulations 185
Engine 184
Environmental 188
Ethernet 186
Flash ROM 186
Fonts 186
Input sources 185
Interfaces 186
Memory 186
Output 185
Parallel 186
Physical 189
Power 182
Print method 185
Regulatory 192
Resolution 185
System software 186
Temperature 188
Toner 185
Toner cartridges 190
USB 186
Warm-up time 185
Static electricity discharge 149
Status Display
Environment 80
Using 80
using 80
Status Monitor 80
Storing the Printer 164
System software
Specifications 186
Media jams 125
Miscellaneous Problems 126
Nothing is printed 133
Preventing jams 113, 123
Print quality 133
Printer configuration 112
Printer resets 129
Status, service, and error messages
140
Unusual noises 130
U
UNIX host software 8
USB interface 181
Utilities 8
Installing for Macintosh 13
Installing for Windows 12
V
Ventilation grilles 181
W
Warm-up time 185
Waste toner bottle
Replacing 92
Wrist strap for antistatic protection
149
T
Temperature requirements 188
Toner 185
Capacity 85
Cartridge Life 85
Cartridges 190
Replacing 85, 86
Transparencies
Continuous printing 28
Troubleshooting 112
Clearing media jams 116
Duplexing 129
206
Index