1
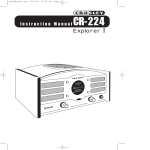
Instruction
Manual
CR3009A
iSOLO
iPhone, iPod, iPod classic, iPod nano, and iPod touch are trademarks of Apple Inc.,
registered in the U.S. and other countries.
Welcome
Thank you for purchasing the Crosley Radio iSOLO Tabletop
Receiver. Before operating this unit, please read this manual
thoroughly and retain it for future reference.
Features
AroundSound™ - Your Crosley iSolo features our exclusive
AroundSound design. Using a single, custom - designed driver, the
iSolo radio simulates surround sound, creating a warm, ambient
tone, regardless of where you may be located with regards to the
radio.
Portable Audio Ready - Your iSolo radio comes ready to play
portable audio products, including mp3 players, satellite radio, gaming
devices, cd players, walkmans, - basically anything with a headphone
jack!
About This Manual
Instructions in this manual describe the controls and functions of the
iSOLO.
Table of Contents
Getting Started
Control Locators
Connector Locators
Unpacking
Set Up
Basic Operation
AM/FM Radio
Portable Audio Ready
Auxillary Output
iPod/iPhone Operation
General
Troubleshooting Guide
Warranty Information
4
5
6
6
7
7
7
8
9
10
Getting Started
4
1
5
2
6
3
Control Locators
1.
2.
3.
4.
5.
6.
Tuner Dial
Function Knob
Power Indicator
Tuning Knob
Volume Knob
Tuning LED
4
Getting Started
1
4
2
3
CONTROL LOCATORS
1.
2.
3.
4.
5
Antenna
Power Jack
Aux IN
Line OUT
Unpacking
Getting Started
1. Remove packing material from unit.
Note: Save all packing materials.
2. Remove plastic bag covering radio.
3. Remove ties from AC to DC power adaptor.
4. Remove supplied audio cable from plastic bag.
Note: Save cable for portable audio component hookup.
Set Up
1. Unwind the AC to DC power adaptor.
2. Plug AC end of the power cord into appropriate outlet.
3. Plug the small end of the power adaptor into
the Power Jack in the back of the unit.
6
Getting Started
AM/FM RADIO
1. Turn the Function Knob to the desired tuning band.
The Power Indicator will turn green to indicate the power
is turned on.
2. Rotate the Tuning Knob to select the desired station.
The Tuning LED will appear brightest when the best signal is
reached. Some weaker but listenable AM stations may not
turn on the Tuning LED.
3. Adjust the volume to the desired level by rotating the Volume Knob.
4. Position the antenna for optimum reception.
PORTABLE AUDIO READY
1. Turn the function knob to “AUX”. Turn the volume to a lower level.
2. Using the supplied male to male mini pin connector, connect
one end to the AUX OUTPUT jack on the back of the unit.
3. Turn on your portable audio device and set the volume
on the device to approximately 10% of full volume.
4. Plug the other end into an output or headphone jack on your
external device.
5. Begin playback on your external device.
Adjust the volume to your desired listening level on your iSOLO.
For more volume, increase the setting on your portable device.
Auxillary OUTPUT
7
The Auxillary Output feature is designed to let you use your iSOLO
as an audio source for other components.
1. Using the supplied mini pin connector, connect one end to the
OUTPUT JACK (auxiliary output), on the back of your iSOLO.
2. Plug the other end into an auxiliary input jack on the desired
component.
Note: If the desired component does not have a mini pin input
jack, a separate cable will be needed.
Auxillary OUTPUT cont.
Getting Started
3. For information on using the auxiliary input feature of a specific
component, refer to the auxiliary input section in the instruction
manual of the desired component.
4. Turn the Function Knob to select the desired output; AM, FM,
or AUX.
Note: You can still listen to your iSOLO while using the aux out
feature.
iPod/iPhone OPERATION
1. Insert the correct dock adapter (suppllied with your iPod or iPhone)
that fits your iPod/iPhone. Your iPod/iPhone should fit snugly into
the correct adapter. Gently press the adapter until it snaps firmly
into place.
2. Place your iPod/iPhone into the dock. Your iPod/iPhone will
begin charging
3. Turn the Function Switch to the iPod position.
4. Browse your iPod/iPhone to select a song or playlist and
press play.
5. Adjust the volume to the desired listening level by turning the
Volume Knob.
6. To remove the dock adapter, push your fingernail into the
slot in the back of the adapter and lift up.
8
Getting Started
Troubleshooting Guide
There is no power
1. Make sure AC to DC power cord is plugged in
at the wall and at the back of the unit.
2. Check that the Function Knob is not in the OFF position.
There is no sound
1. Make sure the Function switch is not in the AUX position.
The sound is distorted.
1. Adjust the tuner and/or antenna to improve the
signal strength. Under certain circumstances, the
reception may be improved by relocating the unit.
2. When using the “Aux in” plug, turn off any EQ settings
on the portable device.
3. Check the volume level of external device if listening to auxiliary input.
It should be set as low as possible.
9
LIMITED MANUFACTURERS WARRANTY
Crosley Radio, Inc. warrants the product to be free from defects in material and
workmanship under normal use for a period of one year from the original date of
purchase. This warranty is not transferable. If the product is determined to be defective
during the warranty period, the unit will be repaired or replaced at Crosley Radio’s sole
discretion. This warranty covers manufacturing defects and normal consumer use and
does NOT cover damage or failure as a result of abuse, accident, alterations, misuse,
neglect, abnormal wear and tear, inadequate maintenance, commercial or unreasonable
use, damage caused by power surges, mishandling, accident, acts of God or attempted
repair by an unauthorized service agent. Also not covered are cosmetic damages, cords
and antennas. Should this product fail to function in a satisfactory manner, it is best to
first return it to the store or retailer where it was originally purchased. If additional service
is still needed, the original purchaser must FIRST contact our offices to obtain an RA
(Return Authorization) Number.
TO OBTAIN AN RA NUMBER
CALL: 1.888.CROSLEY
(1.888.276.7539)
Send the unit prepaid to the address below in the original packaging (or reasonable
substitute to prevent damage). Clearly mark your RA number on the outside packaging
and include the original sales receipt (or a copy) indicating date of purchase, amount
paid, and place of purchase. You must also include your full name, shipping address
and daytime contact number. Please include a check or money order in the amount
of $19.95, made payable to Crosley Radio, to cover handling and return shipping
charges. Returned products will not be shipped to PO Boxes. Crosley Radio will not
be responsible for delays or unprocessed claims resulting from a purchaser’s failure
to provide any or all of the necessary information.
CROSLEY RADIO
ATTN: RETURNS DEPT
2001 PRODUCTION DRIVE
Louisville, KY 40299
For additional support: Crosley Radio Consumer Service Department
24 hours a day / 7 days a week
Telephone: 1.888.CROSLEY (1.888.276.7539)
There are no express warranties except as listed above.
The purchaser’s bill of sale is the only proof of warranty entitlement.
This warranty gives the purchaser specified legal rights in addition to any rights which
may vary from state to state.
In accordance with the “Moss-Magnuson Warranty Act” of July 10, 1975, this is termed
a “limited warranty” which in no way compromises Crosley Radio’s high standards of
quality and workmanship.
10
1220 East Oak Street
Louisville, Kentucky 40204