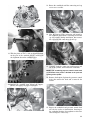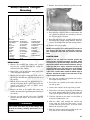
1
ZR 120 2014 SERVICE MANUAL [SNOWMOBILE] FOREWORD This Arctic Cat Service Manual contains service and maintenance information for the 2014 Arctic Cat ZR 120 Snowmobile. The manual is designed to aid service personnel in service-oriented applications. This manual is divided into sections. The sections cover specific snowmobile components or systems and, in addition to the standard service procedures, includes assembling, disassembling, and inspecting instructions. When using this manual as a guide, the technician should use discretion as to how much disassembly is needed to correct any given condition. This service manual is designed primarily for use by an Arctic Cat CatMaster Basic Level technician. The procedures found in this manual are of varying difficulty, and certain service procedures in this manual require one or more special tools to be completed. The technician should use sound judgement when determining which procedures can be completed based on their skill level and access to appropriate special tools. All Arctic Cat publications and snowmobile decals display the words Warning, Caution, and Note to emphasize important information. The symbol ! WARNING identifies personal safety-related information. Be sure to follow the directive because it deals with the possibility of severe personal injury or even death. A CAUTION identifies unsafe practices which may result in snowmobile-related damage. Follow the directive because it deals with the possibility of damaging part or parts of the snowmobile. The symbol NOTE: identifies supplementary information worthy of particular attention. At the time of publication, all information, photographs, and illustrations were technically correct. Some photographs and illustrations used in this manual are used for clarity purposes only and are not designed to depict actual conditions. Because Arctic Cat Inc. constantly refines and improves its products, no retroactive obligation is incurred. All materials and specifications are subject to change without notice. Keep this manual accessible in the shop area for reference. Product Service and Warranty Department Arctic Cat Inc. © 2013 Arctic Cat Inc. ®™ Trademarks of Arctic Cat Inc., Thief River Falls, MN Effective May 2013 TABLE OF CONTENTS General Information ................................................... 2 Snowmobile Identification................................... 2 Recommended Gasoline and Oil ....................... 2 Break-In Procedure ............................................ 2 Genuine Parts .................................................... 3 Drive Chain Lubrication ...................................... 3 Preparation For Storage ..................................... 3 Preparation After Storage................................... 3 Torque Conversions (ft-lb/N-m) .......................... 4 Torque Specifications ......................................... 4 Engine Torque Diagram...................................... 5 Engine Specifications ......................................... 6 Carburetor Specifications ................................... 6 Track Specifications............................................ 6 Ski Shock Spring Specifications......................... 6 Rear Arm Spring Specifications ......................... 6 Ski Shock Absorber Specifications..................... 6 Idler Wheel Dimensions ..................................... 6 Engine ........................................................................ 7 Removing ........................................................... 7 Disassembling .................................................... 8 Servicing Components ..................................... 12 Assembling....................................................... 18 Installing ........................................................... 23 Changing Oil..................................................... 24 Recoil Starter ................................................... 24 Troubleshooting Engine.................................... 26 Fuel System ............................................................. 27 Pre-Maintenance Checks ................................. 27 Carburetor ........................................................ 27 Throttle Cable................................................... 30 Troubleshooting Fuel System ........................... 32 Electrical System...................................................... 33 Transistorized Ignition System.......................... 33 Testing Ignition Switches .................................. 34 Testing Electrical Resistances .......................... 34 Drive Chain and Sprockets....................................... 35 Track and Driveshaft................................................. 36 Brake System ........................................................... 40 Troubleshooting Track............................................... 42 Rear Suspension...................................................... 43 Removing Skid Frame ...................................... 43 End Cap............................................................ 44 Wear Strip......................................................... 44 Rear Suspension Arm/Rear Springs ................ 45 Rear Idler Wheels and Axle .............................. 45 Upper Idler Wheels ........................................... 46 Slide Rail .......................................................... 46 Installing Skid Frame ........................................ 48 Steering and Body.................................................... 49 Steering Post .................................................... 49 Ski .................................................................... 52 Ski Wear Bar..................................................... 52 Tie Rods .......................................................... 52 Spindle ............................................................. 53 Ski Alignment.................................................... 54 Front Suspension A-Arms ............................... 55 Front Suspension (Ski) Shock Absorber........... 55 Belly Pan .......................................................... 56 Seat/Cushion/Taillight Housing ........................ 57 Headlight Assembly ......................................... 58 Wiring Diagram......................................................... 59 1 General Information These numbers are required to complete warranty claims properly. No warranty will be allowed by Arctic Cat Inc. if the engine serial number or VIN is removed or mutilated in any way. NOTE: Whenever a part is worn excessively, cracked, or damaged in any way, replacement is necessary. NOTE: Some illustrations and photographs used in this manual are used for clarity purposes only and are not designed to depict actual conditions. SPECIAL TOOLS A number of special tools must be available to the technician when servicing this snowmobile. Description p/n V Blocks 0644-535 Surface Plate 0644-016 Ball Hone 0644-290 Shock Spring Removal Tool 0644-057 Fluke Model 77 Multimeter 0644-559 Recommended Gasoline and Oil RECOMMENDED GASOLINE CAUTION Do not use white gas or gasolines containing methanol. Only Arctic Cat approved gasoline additives should be used. The recommended gasoline to use in these snowmobiles is 87 octane regular unleaded. NOTE: In many areas, oxygenates are added to the NOTE: Special tools are available from the Arctic Cat Service Parts Department. Snowmobile Identification The Arctic Cat Snowmobile has two important identification numbers. The Vehicle Identification Number (VIN) is stamped into the tunnel near the right-side footrest. The Engine Serial Number (ESN) is stamped into the crankcase of the engine. gasoline. Oxygenated gasolines containing up to 10% ethanol are acceptable gasolines; however, whenever using oxygenated gasolines, the carburetor main jet must be one size larger than the main jet required for regular unleaded gasoline. For example, if a 77.5 main jet is recommended for regular unleaded gasoline, a 78.5 main jet must be installed if using an oxygenated gasoline. When using ethanol blended gasoline, adding a gasoline antifreeze is not necessary since ethanol will prevent the accumulation of moisture in the fuel system. RECOMMENDED OIL The recommended oil to use in the engine is 0W-40 Synthetic oil. See the viscosity chart for details. CAUTION Any oil used in place of the recommended oil may cause serious engine damage. 0726-200 OILCHARTJ Break-In Procedure 0744-926 2 The Arctic Cat engine requires a short break-in period (approximately 10 operating hours) before being subjected to heavy load conditions or full-throttle operation. Strict adherence to the break-in procedure will contribute to optimum performance and longevity of the engine. During break-in, a maximum of 1/2 throttle is recommended; however, brief full-throttle accelerations and variations in driving speeds contribute to good engine break-in. After the 10 hour break-in period, the snowmobile may be taken to an authorized Arctic Cat Snowmobile dealer for a checkup and oil change at the discretion and expense of the snowmobile owner. Genuine Parts When replacement of parts is necessary, use only genuine Arctic Cat parts. They are precision-made to ensure high quality and correct fit. Drive Chain Lubrication The drive chain should be lubricated every 20 operating hours with a dry, graphite-based chain lubricant. By using a dry, graphite-based chain lubricant, dirt buildup on the drive chain will be minimized. Before each lubrication, inspect the drive chain for dirt accumulation. To lubricate the drive chain, shut the engine off and wait for all moving parts to stop, remove the drive chain guard, and lubricate the drive chain. After lubricating the drive chain, install the drive chain guard. If the drive chain is excessively dirty, it should be removed and cleaned prior to being lubricated (see Drive Chain and Sprockets section). NOTE: If a dry, graphite-based chain lubricant is not available, lubricate the drive chain with several drops of petroleum-based oil. If the snowmobile is operated in the summer with the optional wheel kit, the drive chain should be lubricated more frequently. Preparation For Storage Prior to storing the snowmobile, it is extremely important that it be properly serviced to prevent corrosion and component deterioration. Arctic Cat recommends the following procedure to prepare the snowmobile for storage. 1. Clean the seat cushion with Vinyl Protectant and a damp cloth. 2. Clean the snowmobile thoroughly by hosing dirt, oil, grass, and other foreign matter from the undercarriage, tunnel, hood, and belly pan. Allow the snowmobile to dry thoroughly. DO NOT get water into any part of the engine. 3. Drain all gas from the gas tank. Close the gas tank shut-off valve by rotating it clockwise; then drain the gasoline from the carburetor by loosening the drain screw on the carburetor float chamber. 4. Plug the muffler outlet with a clean cloth. A. Disconnect the high tension wire from the spark plug; then remove the spark plug. B. Pour 10 ml (approximately two teaspoons) of petroleum-based oil into the spark plug hole; then pull the recoil starter handle slowly about five times. CAUTION Never crank the engine over without grounding the spark plug. Damage to the transistorized ignition may result. C. Install the spark plug and connect the high tension wire. 6. Remove the drive chain and clean thoroughly in a solvent. Install drive chain and lubricate with a dry, graphite-based chain lubricant. 7. Change the oil; then clean the air filter. 8. Lubricate the spindles and the rear suspension with an all-temperature grease. 9. Tighten all screws, nuts, and cap screws securely. 10. Make sure all rivets holding components together are tight. Replace all loose rivets. 11. Clean and polish the hood, console, and chassis with Cat Cleaner (p/n 4639-371). DO NOT USE SOLVENTS. THE PROPELLANT WILL DAMAGE THE FINISH. 12. If possible, store the snowmobile indoors. Raise the rear of the snowmobile off the floor and block up the rear end. Cover the snowmobile with a snowmobile cover to protect it from dirt and dust. 13. If the snowmobile must be stored outdoors, block the entire snowmobile off the ground and cover it with a snowmobile cover to protect it from dirt, dust, and rain. CAUTION Avoid using a plastic cover as moisture will collect on the snowmobile causing corrosion. Preparation After Storage Taking the snowmobile out of storage and correctly preparing it for operation will assure many miles and hours of trouble-free snowmobiling. Arctic Cat recommends the following procedure to prepare the snowmobile. 1. Clean the snowmobile thoroughly. Polish the exterior of the snowmobile using the cleaner. 2. Clean the engine cooling fins and the recoil starter vents. Remove the cloth from the muffler. 5. With the ignition key in the OFF position: 3 3. Check all control wires and cables for signs of wear or fraying. Replace if necessary. Use cable ties or tape to route wires and cables away from hot or rotating parts. Torque Specifications 4. Inspect the drive chain and drive chain tightener. Replace if necessary. 5. Lubricate the drive chain with a dry, graphitebased chain lubricant. 6. If not done during preparation for storage, lubricate the spindles and the rear suspension with an all-temperature grease. 7. Check brake-lever travel distance, all controls, ski alignment, track tension, track alignment, brake band, and ski wear bars; adjust or replace as necessary. 8. Examine the in-line fuel filter and clean or replace if necessary. 9. Fill the gas tank. 10. Clean the seat cushion with the vinyl protectant. 11. Check the spark plug (clean, gap, and/or replace as necessary); then start the engine and ensure proper carburetor adjustments. Torque Conversions (ft-lb/N-m) ft-lb 1 2 3 4 5 6 7 8 9 10 11 12 13 14 15 16 17 18 19 20 21 22 23 24 25 4 N-m 1.4 2.7 4.1 5.4 6.8 8.2 9.5 10.9 12.2 13.6 15 16.3 17.7 19 20.4 21.8 23.1 24.5 25.8 27.2 28.6 29.9 31.3 32.6 34 ft-lb 26 27 28 29 30 31 32 33 34 35 36 37 38 39 40 41 42 43 44 45 46 47 48 49 50 N-m 35.4 36.7 38.1 39.4 40.8 42.2 43.5 44.9 46.2 47.6 49 50.3 51.7 53 54.4 55.8 57.1 58.5 59.8 61.2 62.6 63.9 65.3 66.6 68 ft-lb 51 52 53 54 55 56 57 58 59 60 61 62 63 64 65 66 67 68 69 70 71 72 73 74 75 N-m 69.4 70.7 72.1 73.4 74.8 76.2 77.5 78.9 80.2 81.6 83 84.3 85.7 87 88.4 89.8 91.1 92.5 93.8 95.2 96.6 97.9 99.3 100.6 102 ft-lb 76 77 78 79 80 81 82 83 84 85 86 87 88 89 90 91 92 93 94 95 96 97 98 99 100 N-m 103.4 104.7 106.1 107.4 108.8 110.2 111.5 112.9 114.2 115.6 117 118.3 119.7 121 122.4 123.8 125.1 126.5 127.8 129.2 130.6 131.9 133.3 134.6 136 Item Torque ft-lb Drive System Centrifugal Clutch 20 Secondary Sprocket*** 20 Drive Sprocket Bearing/Chassis* 15 Rear Suspension End Cap/Rail 78 in.-lb Axle Housing/Rail 20 Rear Arm/Bracket* 20 Rear Idler Wheel/Axle* 20 Cross-Brace Axle/Rail* 20 Idler Axle/Tunnel* 20 Steering/Body Outer Tie Rod End/Spindle** 15 Inner Tie Rod End/Steering Post** 20 Ski Shock/Shock Mount 20 A-Arm/Spindle 30 A-Arm/Chassis 30 Ski/Spindle 16 *w/Blue Loctite #243 ** w/Green Loctite #609 *** w/Red Loctite #271 Engine Torque Diagram NOTE: Before engine assembly, ensure all threaded areas are clean to assure an accurate torque value is achieved. Torque values have a range of ± 20%. = Torque control required = Apply Loctite = Lubricate with Arctic Cat 4-Stroke Engine Oil = Lubricate with Arctic Cat All-Temp Grease 120-ENG10 5 Engine Specifications Engine Model Number 70CL1-030 Displacement 123 cc No. of Cylinders 1 Bore x Stroke 56 x 50 mm Cooling System Air Spark Plug (NGK) BPR4ES Spark Plug Gap 0.028-0.031" Piston Skirt/Cylinder Clearance 0.0006-0.0016" Piston Pin Diameter 0.6297-0.6299" Piston Pin Bore Diameter (max) 0.433" Piston Pin/Connecting Rod Small End Clearance 0.0001-0.0002" Piston Ring End Gap Carburetor Specifications Main Jet Pilot Jet 77.5 37.5 Track Specifications Length 68" (1st/2nd) 0.008-0.016" (oil) 0.0079-0.0157" Piston Ring/Groove Clearance Width 10" 0.058-0.059" Piston Diameter (10 mm from skirt edge) (min) 2.205" Cylinder/Head Distortion (max) 0.004" Connecting Rod Small End Bore Inside Diameter 0.6301-0.6307" Free Length Connecting Rod Big End Inside Diameter 1.1023-1.1029" 6.97” Connecting Rod Big End Side Clearance 0.008-0.024" Cam Lobe Height 1.048-1.052" Crank Pin Diameter (min) 1.102" Crank Pin/Connecting Rod Clearance 0.0002-0.0008" Crankshaft Rod Journal (Out-of-Round/Taper) 0.004" Crankshaft Runout (t.i.r.) 0.0008" Valve Guide Inside Diameter (max) Valve Guide/Stem Clearance (max) Valve Face Width (min) Valve Face Runout (max) 0.22" (Int) 0.0016-0.0020" (Exh) 0.0020-0.0030" Lug Height 0.690" Tension @ 20 lb 1/4-3/8" Ski Shock Spring Specifications (1st) 0.0016-0.0030" (2nd) 0.0008-0.0024" Piston Ring Thickness Idle Fuel Adjuster Screw Float Height (Turns Out) 1 0.63" Wire Diameter 0.235” Rate LB/Inch # of Coils Tab 85 9.0 NO Rear Arm Spring Specifications Wire Diameter 0.406" Angle 6° #of Coils 4.48 Coil Width 2.45" Length Length 6.03" 4.57" 0.030" 0.0012" Valve Clearance - Cold (59°-77° F) (Int/Exh) 0.004" Valve Seat Contact Width (min) (Int/Exh) 0.03" Valve Stem Diameter (min) (Int/Exh) 0.22" Valve Stem Runout (max) 0.0004" Valve Spring Free Length (max) 1.04" Camshaft End Running Surface (max) 0.592” Camshaft End Play (max) 0.002” Ski Shock Absorber Specifications Collapsed Length 7.78” Extended Length Stroke 9.49” 1.71” Piston Depth N/A Idler Wheel Dimensions Location Inside Rails 6 O.D. 5.63" Idler Arm 7.12" Inside Rear Axle 7.12" Bearing I.D. 0.787" 1.181" 0.787" Engine This engine section has been organized into sub-sections showing a progression for the complete servicing of the Arctic Cat 120 cc engine. For consistency purposes, this section shows a complete and thorough progression; however, for efficiency it may be preferable to remove and disassemble only those components needing to be addressed and to service only those components. Also, some components may vary. The technician should use discretion and sound judgment. IO059A Removing 4. Pull the steering post up and back and then out of the lower steering post bearing. NOTE: The drive chain must be removed in order to 5. Remove the two lock nuts and cap screws securing the tie rods to the steering post; then remove the tie rods from the steering post. Place the steering post out of the way on the right-hand side of the engine compartment. remove the engine (see Drive Chain and Sprockets section). 1. Loosen the pinch screw and jam nuts (A) securing the choke cable to the carburetor; then loosen the throttle cable jam nuts (B) and remove the cable from the mounting bracket. Secure the cables out of the way. IO060A 6. Cut the cable tie; then disconnect the coil and two magneto wires at the front of the engine. Route them out of the way. IO057A 2. Turn the gas tank shut-off valve to the CLOSED position; then disconnect the fuel hose from the carburetor. ! WARNING Whenever any maintenance or inspection is made on a fuel system when there may be fuel leakage, there should be no welding, smoking, open flames, etc., in the area. 3. Remove the two cap screws securing the steering post to the steering post support. Account for two bearing halves, two lock nuts, and a bearing retainer. A047 7. Pull the recoil starter rope out for enough to tie a slip-knot in the starter rope below the console and allow the rope to slowly retract against the recoil starter. 8. Remove the knot at the handle and remove the handle; then thread the rope through the bushing in the console. 7 9. At this point, scribe a line at the front of the engine and measure the distance between the crankshaft and the driveshaft. Record the measurement for installing purposes. 13. Remove the engine from the engine compartment. Disassembling 1. Remove the oil drain plug and drain the oil; then install the oil plug and tighten securely. A048 10. Lay the snowmobile on its side. NOTE: A piece of cardboard should be used to protect the finish. IO063 11. Using a flat-blade screwdriver, remove the four belly pan plugs covering the engine mounting cap screws; then remove the cap screws and lock nuts. 2. Remove the cover from the air cleaner case; then disconnect the breather hose and remove the filter and retaining plate. NOTE: The retaining plate is directional. IO061A NOTE: The front center plug is to access the oil drain plug. 12. Place the snowmobile in the upright position; then on the left-hand side of the engine, remove the three cap screws securing the engine and brake bracket to the front end. IO056A 3. Remove the two cap screws securing the air cleaner case to the intake tube; then remove the cap screw and lock nut securing the case to the throttle cable bracket, remove the air cleaner case and account for the intake tube gasket. IO064A IO062A 8 4. Remove the two springs from the governor arm, throttle cable bracket, and retaining bracket. IO068 NOTE: If the cylinder head will be replaced, the carbuIO065A NOTE: For assembling purposes, note the location of the governor arm spring before removing. 5. Remove the throttle cable and retaining brackets from the engine. retor studs may be removed by tightening the two nuts against each other; then using a wrench on the inside nut, remove the stud. 8. Remove the recoil starter/fan housing assembly. 9. Remove the spark plug wire from the spark plug and remove the spark plug; then remove the cap screws securing the ignition coil to the crankcase housing and remove the coil. IO066A 6. Loosen the governor arm cap screw and remove the arm; then disconnect the rod and spring from the carburetor. IO069A 10. Remove the cylinder head cover; then remove the air shroud. IO067A 7. Slide the intake tube and carburetor off the mounting studs. Account for three gaskets and an insulator block. IO070A 11. Remove the air breather body from the cylinder head cover. Account for a gasket. 9 IO071 12. Remove the lock nuts and rocker arm pivots securing the rocker arms to the cylinder head. IO069B 16. Using a flywheel puller, remove the flywheel. 13. Remove the push rods; then remove the push rod guide plate. IO074 IO072A 14. Remove the cap screws securing the head to the cylinder; then remove the head and account for a gasket and the location of the two dowel pins. 17. Remove the cap screws securing the stator to the crankcase; then route the stator harness out through the slot in the crankcase and remove the stator. IO075A IO073 15. Remove the nut securing the flywheel to the crankshaft and starter pulley. 10 18. Remove the cap screws securing the crankcase side cover to the crankcase. Account for dowel pins, gasket, and a crankshaft shim. 21. Rotate the crankshaft until the connecting rod cap screws are accessible. IO094B IO080A 22. Note the relation of the connecting rod journal to the crankshaft and mark the connecting rod and end cap for reference during installation; then remove the cap screws and connecting rod end cap. IO077 19. With the piston at TDC, scribe an alignment mark on the gear of the camshaft directly in-line with the alignment dot on the crankshaft gear. IO081A 23. Carefully work the connecting rod/piston up and out of the cylinder; then remove the crankshaft. NOTE: For assembling purposes, note the arrow mark on the dome of the piston is directed to the push rod opening of the cylinder. IO078A 24. Remove the hairpin clip from the governor control shaft; then remove the shaft and account for the washer. 20. Remove the camshaft; then remove the tappets. Identify the tappets for proper installation. IO082A IO079A 25. Inspect the crankshaft and governor control shaft oil seals for cracks or deterioration; then inspect the crankshaft bearings for roughness or discoloration and replace if necessary. 11 NOTE: If the seals or bearings of the crankshaft need to be replaced, see Crankshaft Bearings in Servicing Components. Servicing Components Thoroughly clean all non-electrical components in partscleaning solvent; then remove any carbon buildup from the cylinder head, piston dome, valves, and valve seats. Visually inspect all engine components for wear or damage. CYLINDER HEAD/VALVE ASSEMBLY NOTE: Remove the valves by pressing down on the spring retainer and removing the valve keeper. Account for valve springs, spring retainers, and valve keepers. Keep all valves and related components as a set. When servicing valves and cylinder head assembly, inspect valve seats, head warpage, valve stems, valve faces, and valve stem ends for pits, burn marks, or other signs of abnormal wear. Never reuse the intake valve seal. Always replace the seal. ATV-1082 2. Maximum runout must not exceed 0.0004" for both valves. Measuring Valve Face Width 1. Using a micrometer, measure the width of the valve face. NOTE: Discard any valve that fails the listed inspections. Do not grind the valves. If a valve or cylinder head is damaged, it must be replaced. Measuring Cylinder Head Distortion 1. Using a non-metallic carbon removal tool, remove any carbon buildup from the combustion chamber being careful not to nick, scrape, or damage the combustion chamber or the sealing surfaces. ATV-1004 2. Inspect the spark-plug hole for any damaged threads. Repair damaged threads using a heli-coil insert. 3. Inspect the cylinder head for flatness using a straightedge and a feeler gauge. Acceptable distortion must not exceed 0.004". 2. Acceptable valve face width must be at least 0.030". Measuring Valve Face Runout 1. Mount a dial indicator on a surface plate; then place the valve stem on a set of V blocks. 2. Position the dial indicator contact point on the outside edge of the valve face; then zero the indicator. IO087 Measuring Valve Stem Runout 1. Support each valve stem end with V Blocks; then check the valve stem runout using a dial indicator. ATV1082A 3. Rotate the valve in the V blocks. 4. Maximum runout must not exceed 0.0012". 12 Measuring Valve Guide/Valve Stem Clearance 1. Using a micrometer and small bore gauge, take diameter readings on the valve stems and inside the guides. 2. The stem clearance inside the guide must be within 0.0016-0.0020" for the intake and 0.00200.0030" for the exhaust. NOTE: Be sure to take readings at more than one place along the length of each stem and guide. 5. Rotate the valve until the valve and seat are evenly polished. 6. Clean all compound residue from the valve and seat. Valve Springs 1. When the valve springs are weak, the valve and valve seat fail to form a good seal, thus allowing gas to leak past the valve seat causing a loss of power. Whether or not a valve spring is weak can be determined by its free length. Lapping Valves NOTE: Ensure that all carbon has been removed from the valves. 1. Using a valve lapper, produce a contact pattern on each valve face by applying a uniform coat of valve lapping compound to the valve seat and by rotating and tapping the valve head. 2. Acceptable width of valve seat contact width (measurement A) must be at least 0.03". GM128D 2. Minimum valve spring free length must not exceed 1.04". NOTE: With the crankshaft at top dead center on the compression stroke, install the valve springs and spring retainers; then compress the valve springs and install the valve keepers. CAM LOBE WEAR GEN-0023 Worn cam lobes result in reduced power output. The limit of cam lobe wear is specified for both intake and exhaust lobes in terms of cam height to be measured with a micrometer. Replace the camshaft if not within 1.0481.052". GEN-0024 NOTE: Do not grind the valves. If a valve is damaged, it must be replaced. GEN0028B 3. Lubricate each valve stem with lightweight oil; then apply a small amount of valve lapping compound to the entire seating face of each valve. 4. Attach the suction cup of a valve lapping tool to the head of the valve. 13 Removing Piston Rings 1. Starting with the top ring, slide one end of the ring out of the ring-groove. 2. Remove each ring by working it toward the dome of the piston while rotating it out of the groove. NOTE: Note the location of each ring for proper installation. When installing new rings, install as a complete set only. Cleaning/Inspecting Piston Rings NOTE: Make a ring-groove cleaning tool by taking an IO088 Measuring Camshaft End Running Surfaces 1. Using an outside micrometer, measure the running surfaces of each end of the camshaft. The measurement should be at least 0.592". old piston ring and snapping it into two pieces; then grind the end of the old ring to a 45° angle and to a sharp edge. Using a ring-groove cleaning tool, clean carbon from the ring-grooves. Be sure to position the ring with its tapered side up. CAUTION Improper cleaning of the ring-grooves by the use of the wrong type of ring-groove cleaner will result in severe damage to the piston. Measuring Piston-Ring End Gap (Installed) 1. Place each piston ring in the wear portion of the cylinder. Use the piston to position each ring squarely in the cylinder. NOTE: When measuring a piston ring, it should be IO089 2. Inspect the camshaft bosses of the crankcase and crankcase cover for cracks, discoloration, and wear. PISTON ASSEMBLY placed into the area of the cylinder where wear is least (the area is about 0.12" from the upper or lower edge of the cylinder). 2. Using a feeler gauge, measure each piston-ring end gap. Acceptable ring end gap must be within 0.008-0.016" (1st and 2nd rings) or within 0.00790.0157" (oil ring). NOTE: Oversized pistons are available allowing the cylinder to be bored oversized. NOTE: Whenever a piston, rings, or pins are out of tolerance, they must be replaced. Cleaning/Inspecting Piston 1. Using a non-metallic carbon removal tool, remove any carbon buildup from the dome of the piston. 2. Inspect the piston for cracks in the piston pin, dome, and skirt areas. 3. Inspect the piston for seizure marks or scuffing. NOTE: If seizure marks or scuffing is detected, the piston must be replaced. 4. Inspect the perimeter of each piston for signs of excessive “blowby.” Excessive “blowby” indicates worn piston rings or an out-of-round cylinder. 14 IO083 3. Piston skirt to cylinder clearance must be within 0.0006-0.0016". 4. If the piston/cylinder clearance exceeds the limit, bore the cylinder and use an oversized piston or replace both cylinder and piston. Installing Piston Rings 1. Place the oil ring expander into the bottom groove of the piston allowing the ends to contact each other. CAUTION IO090 Piston Ring/Groove Clearance 1. Using a thickness gauge, measure the side clearances of the 1st and 2nd rings. 2. If the measurements are not within 0.00160.0030" (1st ring) or 0.0008-0.0024" (2nd ring), replace both piston and piston rings. Measuring Piston Skirt/Cylinder Clearance Never allow the ends of the oil ring expanders to overlap. This allows a loss of oil control and incorrect tension of the ring. 2. Place one end of the thin oil ring between the top of the oil ring expander and the ring groove; then wind the ring around the piston until the ring is properly seated into the ringland of the piston. Repeat this procedure for the lower thin oil ring. 3. Position the thin oil ring gaps 90° from the gap of the oil ring expander and 180° from each other. 1. Measure the cylinder front to back in six places using a cylinder bore gauge. The amount of wear is the difference between the largest and smallest readings. If the determined wear exceeds the limit indicated, bore to the next oversize by using a boring machine or replace the cylinder. 4. Install the middle and top compression ring with the I.D. mark directed toward the dome of the piston. NOTE: The top compression ring can be identified by the chrome (silver) face of the ring. CAUTION Incorrect installation of the piston rings will result in engine damage. Measuring Piston Pin Diameter 1. Measure the piston pin diameter at each end and in the center. If measurement is less than minimum specifications, the piston pin must be replaced. 2. Piston pin diameter must be within 0.6297-0.6299". GEN-0032 2. Measure the corresponding piston diameter at a point 10 mm above the piston skirt at a right angle to the piston-pin bore. Piston diameter must be at least 2.205". IO086 Measuring Piston Pin Bore Diameter 1. Insert an inside dial indicator into the piston-pin bore. Take two measurements to ensure accuracy. IO085 2. Piston pin bore must not exceed 0.433". 15 ATV-1069 IO087 NOTE: If the cylinder/cylinder head assembly cannot 4. Inspect the cylinder for pitting, scoring, scuffing, warpage, and corrosion. If marks are found, repair the surface using the Ball Hone (see Honing Cylinder sub-section). CYLINDER/CYLINDER HEAD be trued, they must be replaced. Cleaning/Inspecting Cylinder Head 1. Using a non-metallic carbon removal tool, remove any carbon buildup from the combustion chamber being careful not to nick, scrape, or damage the combustion chamber or the sealing surface. 2. Inspect the spark plug hole for any damaged threads. Repair damaged threads using a “helicoil” insert. 3. Place the cylinder head on the Surface Plate covered with #400 grit wet-or-dry sandpaper. Using light pressure, move the cylinder head in a figure eight motion. Inspect the sealing surface for any indication of high spots. A high spot can be noted by a bright metallic finish. Correct any high spots before assembly by continuing to move the cylinder head in a figure eight motion until a uniform bright metallic finish is attained. CAUTION Water or parts-cleaning solvent must be used in conjunction with the wet-or-dry sandpaper or damage to the sealing surface may result. Cleaning/Inspecting/Measuring Cylinder Distortion 1. Wash the cylinder in parts-cleaning solvent. 2. Check the gasket surface of the cylinder for distortion with a straightedge and thickness gauge taking a clearance reading at several places. If the largest reading at any position of the straightedge exceeds the limit, replace the cylinder. 3. Maximum cylinder distortion must not exceed 0.004". 5. Place the cylinder on the surface plate covered with #400 grit wet-or-dry sandpaper. Using light pressure, move the cylinder in a figure eight motion. Inspect the sealing surface for any indication of high spots. A high spot can be noted by a bright metallic finish. Correct any high spots before assembly by continuing to move the cylinder in a figure eight motion until a uniform bright metallic finish is attained. CAUTION Water or parts-cleaning solvent must be used in conjunction with the wet-or-dry sandpaper or damage to the sealing surface may result. Honing Cylinder 1. Wash the cylinder in parts-cleaning solvent. 2. Inspect the cylinder for pitting, scoring, scuffing, and corrosion. If marks are found, repair the surface using the Ball Hone. NOTE: To produce the proper 45° crosshatch pattern, maintain a low drill RPM. If honing oil is not available, use a lightweight, petroleum-based oil. Thoroughly clean the cylinders after honing using detergent soap and hot water and dry with compressed air; then immediately apply oil to the cylinder bores. If a bore is severely damaged or gouged, the cylinder must be replaced. 3. If any cylinder bore measurement exceeds the limit, hone the cylinder and install an oversized piston or replace the cylinder. MEASURING CONNECTING ROD SMALL END BORE INSIDE DIAMETER 1. Using a small bore gauge, measure the connecting rod small end bore inside diameter. 2. Measurement must be within 0.6301-0.6307". 16 MEASURING CONNECTING ROD BIG END SIDE CLEARANCE 1. Check the connecting rod side clearance by using a thickness gauge. If the clearance exceeds the limit, replace the connecting rod or crankshaft. 2. Clearance measurement must be within 0.0080.024". GEN-0034 3. If the difference between the connecting rod small end bore inside diameter and the piston pin outside diameter exceeds the limit, replace both connecting rod and piston pin. The measurements must be within 0.0001-0.0002" of each other. GEN-0036 MEASURING CRANK PIN/ CONNECTING ROD CLEARANCE 1. Measure the crank pin diameter. Measurement must be at least 1.102". GEN-0035 CRANKSHAFT RUNOUT 1. Support the crankshaft using a set of V blocks; use a dial indicator to read crankshaft runout. NOTE: The contact point of the dial indicator should be on the seal area of the crankshaft. 2. Total indicator reading must not exceed 0.0008". GEN-0037 2. Measure the connecting rod big end bore inside diameter. Measurement must be within 1.10231.1029". GEN-0031 3. If not within specification, either straighten the crankshaft or replace it. GEN-0038 3. Measure the crank pin/connecting rod clearance. Measurement must be within 0.0002-0.0008". 17 CARBURETOR INSULATOR PLATE 1. Inspect for cracks, scoring, pitting, imperfections, or warping. 2. Inspect the sealing surfaces for trueness by placing each on the surface plate covered with #400 grit wet-or-dry sandpaper. Using light pressure, move both sides in a figure eight motion. Inspect the sealing surfaces for any indication of high spots or warping. Correct highs spots by continuing to move each side in a figure eight motion. Warped components must be replaced. GEN-0039 CRANKSHAFT BEARINGS A932 CAUTION 0744-992 Removing 1. Using a flat-blade screwdriver, carefully work the oil seal from side-to-side out of the crankcase and cover. 2. Using a suitable press and with the crankcase or crankcase cover secured into position, carefully heat the case; then press the bearings out of the case. CAUTION Never reuse the crankshaft bearings. If the bearings have been pressed out of the crankcase or crankcase cover, they must be discarded. NOTE: Thoroughly clean the bearing areas of the crankcase and crankcase cover and inspect for any nicks or imperfections of the bearing bosses of the case. Installing 1. Secure the crankcase and press the new bearing into the boss of the crankcase and crankcase cover. CAUTION When installing the new bearings, always press against the outside race of the bearing. 2. With the bearings installed and using a suitable seal driver, install the oil seals with the spring side of the seal facing the bearing; then coat the wear surfaces of the seals with a film of grease. 18 Water or parts-cleaning solvent must be used in conjunction with the wet-or-dry sandpaper or damage to the sealing surfaces may result. Assembling NOTE: The use of new gaskets and seals is recommended when assembling the engine. NOTE: Prior to assembling the engine, use parts cleaning solvent and compressed air and thoroughly clean the threaded holes of the crankcase and cylinder and head to properly tighten. ! WARNING Always wear safety glasses when drying components with compressed air. NOTE: When the use of a lubrication is indicated, use clean engine oil. 1. Lubricate the piston pin, connecting rod, and piston pin bore with engine oil; then install the piston to the connecting rod and secure the piston pin with the circlips directed either up or down. 4. With the connecting rod, end cap, and crankshaft journal lubricated with engine oil, install the connecting rod and rod end cap to the crankshaft and secure with the cap screws. Tighten evenly to 106 in.-lb. IO091A NOTE: Coat the cylinder wall, connecting rod bearing surface, and the crankshaft with engine oil. 2. Install the crankshaft into the crankcase; then with the piston rings properly oriented (end gap 120° apart), compress the piston rings and install the piston and connecting rod assembly taking care not to damage the crankshaft and connecting rod. IO080A 5. Apply lightweight oil to the tappets; then install the tappets to the proper guides as noted during disassembly. CAUTION The arrow of the piston must be directed towards the push rod opening of the cylinder. IO079A 0745-001 3. Note the marks on the connecting rod and end cap made during disassembly. 6. Apply oil to the camshaft lobes and running surfaces on each end of the shaft; then with the crankshaft/piston rotated to TDC and the timing marks of the crankshaft gear in-line with the camshaft gear, install the camshaft. IO078A IO081A NOTE: When installing the connecting rod to the crankshaft, rotate the crankshaft so the rod journal is in the six o’clock position to allow access for installing the rod end cap. 7. Install the washer onto the governor control shaft and slide the shaft up into position from inside the crankcase far enough to install the hairpin clip. 19 IO101 IO077 NOTE: When installing the governor control shaft, 9. Secure the crankcase side cover to the crankcase with the cap screws. Tighten to 16 ft-lb using the following pattern. position the shaft so the flat end (A) of the shaft is directed to the cylinder (3 o’clock position) and the hairpin clip (B) is in contact with the crankcase. This limits the inward movement of the control shaft. IO094A NOTE: Before installing the side cover, verify the govIO082B ernor gear assembly operates properly. 10. Install the dowel pins and a new gasket; then secure the head to the cylinder with the cap screws. Tighten to 15 ft-lb using a crisscross pattern. IO093A 8. Install the shim washer to the crankshaft and place the dowel pins and a gasket into position. IO073 11. Apply lightweight oil to the ends of the push rods; then install the rods. 12. Loosely secure the rocker arms to the cylinder head with the pivots and lock nuts; then rotate the crankshaft until the piston is at the top of the compression stroke. 20 IO107 IO096A 13. Set the valve clearance to the recommended setting with a feeler gauge, and while holding the adjustment nut, tighten the rocker arm lock nuts to 88 in.-lb. Verify valve clearance is 0.004". NOTE: Adjust spark plug gap to specification; then 14. Install the air shroud to the cylinder head and secure the shroud with cap screw. Tighten to 96 in.-lb. install and tighten the plug to 15 ft-lb. 17. Connect the high tension lead to the spark plug and secure with the two wire forms. 18. Install the stator with the four cap screws (coated with blue Loctite #243) and in a crisscross pattern, tighten to 96 in.-lb. IO098A 15. Place the air breather body assembly with gasket onto the cylinder head cover; then install the valve cover with gasket. Tighten to 96 in.-lb using a crisscross pattern. IO097A NOTE: Route the stator harness through the slot in the crankcase above the flywheel. 19. With the flywheel key in the crankshaft, install the flywheel and starter pulley; then secure with the nut. Tighten to 48 ft-lb. IO070A 16. Install the ignition coil to the mounting location of the crankcase with the cap screws (coated with blue Loctite #243); then adjust the ignition coil to the farthest position from the flywheel and tighten the cap screws until snug. IO069B NOTE: Before installing the flywheel, make sure the taper of the crankshaft and flywheel are clean. 21 20. Rotate the flywheel until the magnet of the flywheel is under the legs of the ignition coil; then insert a flat 0.020" feeler gauge between the lower leg of the coil and the flywheel. IO102A ! WARNING When performing service work on the fuel system, do not smoke or allow open flames near the snowmobile. IO099 21. Loosen the ignition coil mounting cap screws (from step 16) enough to allow the coil to draw against the feeler gauge. Tighten the cap screw enough to hold the position of the coil; then repeat the procedure for the other cap screw when an air gap of 0.015-0.023" is obtained. Tighten the coil cap screws to 120 in.-lb. 25. Install the rod and spring into the governor control arm and install the arm; then install the throttle lever spring into the proper hole of the control arm (as noted during disassembling) and the remaining spring to the retaining bracket. 22. Install the recoil starter/fan housing assembly with cap screws and tighten to 96 in.-lb. IO065A NOTE: When securing the governor control shaft (A), turn it clockwise until it stops; then tighten the control arm cap screw (B) to 72 in.-lb. IO100A 23. Install the throttle cable mounting bracket and secure the bracket with two cap screws to the crankcase. Tighten to 120 in.-lb. IO067B 26. Install the gasket onto the mounting studs; then install the intake tube to the carburetor. Tighten to 96 in.-lb. IO105 24. Install the carburetor (with a gasket, insulator block, and a gasket) onto the mounting studs; then install the rod and spring (A) onto the carburetor. 22 IO104 IO062A 27. With a gasket in place on the intake tube, install the air cleaner case, and with gasket, insulator plate, and cap screws, secure the case to the intake tube and tighten the cap screws to 120 in.-lb. Install the cap screw and lock nut securing the case to the throttle cable bracket and tighten to 12 ft-lb. 3. Align the engine with the scribed line made during removing; then measure the distance between the crankshaft and the driveshaft. Adjust the engine position as necessary. 4. Tighten the three left-hand side mounting cap screws (from step 2) to 20 ft-lb. 5. Lay the snowmobile on its side and install the four lower engine mounting cap screws with washers and lock nuts. Tighten to 20 ft-lb. 6. Install the four mounting cap screw plugs in the belly pan; then place the snowmobile in the upright position. 7. Thread the recoil starter rope through the bushing in the console and the handle; then tie a knot at the end of the rope and pull the handle up and onto the knot. IO064A 28. Install the retaining plate and fitting; then secure the air cleaner cover to the air cleaner case with the two screws. Tighten to 96 in.-lb. 29. Add 20.3 fl oz of the recommended engine oil to the engine. 8. Untie the slip-knot at the starter case and allow it to slowly rewind into the case. 9. Install the tie rods on the steering post; then secure with lock nuts (threads coated with green Loctite #609) and washers. Tighten to 20 ft-lb. 10. Place the steering post in position in the lower steering post bearing and on the steering post support. Installing 1. Place the engine assembly into position in the engine compartment. 2. On the left-hand side of the engine, install the three cap screws (coated with blue Loctite #243) securing the engine and brake bracket to the front end. DO NOT TIGHTEN AT THIS TIME. A025 11. Place the upper steering post bearing into position on the steering post and support; then secure with the bearing retainer, cap screws, and lock nuts. 23 Changing Oil NOTE: The front of the snowmobile must be elevated until the bottom of the front bumper is approximately 18.5" from the floor so the engine is in a level position when checking/changing the oil. Also, assure the engine is “cooled down” to room temperature to allow the oil to drain into the sump. IO060A 12. Position the throttle cable in the bracket; then connect the cable to the throttle lever. Tighten the adjustment jam nuts securely. 0744-920 1. Remove the access plug; then place a drain pan beneath the engine. 2. Using a flat-blade screwdriver, release the hood latch; then release the two hold-down straps and open the hood. IO057B NOTE: At this point, install the drive chain (see Drive Chain and Sprockets section). 13. Install the choke cable into the bracket and carburetor butterfly arm. Adjust the cable and secure with the jam nuts and pinch screw. 3. Loosen the oil level stick; then remove the oil drain plug from the crankcase and allow the oil to drain. 4. Install the drain plug; then tighten to 12 ft-lb. 5. Remove the oil level stick; then pour 600 ml (20.3 fl oz) of recommended oil into the fill hole. 6. Install the oil level stick; then install the access plug. 7. Close the hood and secure with the straps and latch. Recoil Starter IO106A 14. Install the breather tube into the air cleaner case. 15. Connect the engine wiring harness to the main wiring harness; then secure the wiring harnesses with a cable tie. 16. Connect the fuel hose to the carburetor; then turn the gas tank shut-off valve to the OPEN position. KEY A. B. C. D. E. F. G. Cap Screw Reel Shoulder Screw Drive Plate Ratchet Arm Set Friction Spring Spiral Spring 0745-012 24 NOTE: The engine must be removed to access the recoil starter (see Engine section). REMOVING/DISASSEMBLING ! WARNING Always wear safety glasses when servicing the recoil starter. 1. Remove the cap screws (A) securing the recoil starter to the engine cover. INSPECTING 1. Inspect the spring retaining notch in the recoil housing and inspect the loop of the spring for wear or cracking. NOTE: Note the orientation of the spring for assembling purposes. 2. Inspect the flat areas of the reel for wear. ASSEMBLING/INSTALLING 2. Pull the rope out of the housing (noting the direction in which the rope is wound for assembling) and align with the notch in the roller; then release the spring pressure on the reel (B). 1. Install the reel assembly with rope wound in the appropriate direction (noted during disassembling). 3. Remove the knot from the end of the rope; then remove the shoulder screw (C) securing the drive plate (D) to the reel and remove the plate. Exercise extreme caution when installing as the spiral spring may disengage and cause severe injury. 4. Mark the ratchet arms (E) for assembling purposes; then remove the ratchets and account for the friction spring (F). NOTE: The ratchet arms must be installed in their respective positions. 5. Slowly remove the reel. Account for the spiral spring (G). ! WARNING ! WARNING 2. Install the ratchet arms; then install the drive plate and secure it with the shoulder screw. Tighten to 57 in.-lb. 3. Route the recoil rope through the rope guide of the recoil housing and through the recoil handle; then tie a knot in the rope. 4. Wind the rope counterclockwise 3-4 turns around the reel; then secure the recoil starter to the engine cover. Tighten to 96 in.-lb. Exercise extreme caution when removing as the spiral spring may disengage and cause severe injury. 25 Troubleshooting Engine Problem: Engine Does Not Start (No Spark at Spark Plug) Condition Remedy 1. Check all ground connections — clean and tight 1. Ground connections dirty — loose 2. Repair — replace — connect wiring harness 2. Wiring harness shorting — disconnected 3. Emergency stop switch in DOWN position — malfunctioning 3. Move switch to UP position — test/replace key switch/emergency stop switch 4. Tether cord improperly secured to tether switch — malfunc- 4. Properly secure cord to the switch — test/replace switch tioning 5. Clean — replace spark plug 5. Spark plug fouled — damaged Problem: Engine Does Not Start (No Fuel at Cylinders) Condition 1. 2. 3. 4. 5. 6. Gas tank empty Gasoline contaminated Fuel hose broken — pinched Gas-tank vent — hose obstructed Shut-off valve obstructed — damaged Compression absent Problem: Engine Does Not Start (Fuel Does Not Ignite) Condition 1. 2. 3. 4. Valve clearance poor Spark absent Compression low Engine flooded 5. Gasoline contaminated Problem: Engine Does Not Idle Condition 1. 2. 3. 4. Throttle stop screw turned out too far Idle fuel adjuster screw out of adjustment Air silencer obstructed Drive clutch dirty Problem: Engine Loses Power Condition 1. 2. 3. 4. 5. Spark plug fouled External coil faulty Gas tank vent — hose obstructed Compression low Muffler restricted Problem: Engine Overheats Condition 1. 2. 3. 4. 5. Drive system adjusted incorrectly — worn — damaged Rings/grooves carboned Exhaust obstructed Compression low — absent Engine shroud obstructed Problem: Engine Backfires Condition 1. Spark plug fouled — damaged Problem: Engine Stops Suddenly Condition 1. 2. 3. 4. 5. 6. 7. 8. 26 Gas tank empty Spark absent Fuel filter obstructed Gas tank shut-off valve in OFF position Fuel hose obstructed — broken — pinched Ignition coil faulty Engine seized Oil level low Remedy 1. 2. 3. 4. 5. 6. Fill tank Replace gasoline Replace — service hose Remove obstruction — replace vent — hose Remove obstruction — replace shut-off valve Repair — replace damaged — worn engine components Remedy 1. 2. 3. 4. Inspect valves Check for spark — see No Spark at Spark Plug sub-section Service engine Clear engine (using a shielded safety stand, elevate the rear of the snowmobile and hold throttle full-open) 5. Clean tank and entire fuel system Remedy 1. 2. 3. 4. Adjust throttle stop screw Adjust idle fuel adjuster screw Clean air silencer Clean drive clutch Remedy 1. 2. 3. 4. 5. Replace spark plug Service — replace coil Service — replace vent hose Service engine Inspect muffler Remedy 1. 2. 3. 4. 5. Troubleshoot — adjust drive system Clean — replace rings — pistons Remove obstruction Repair — replace damaged — worn engine components Clean shroud Remedy 1. Clean — replace spark plug Remedy 1. 2. 3. 4. 5. 6. 7. 8. Fill tank See No Spark at Spark Plug sub-section Replace filter Turn on valve Remove obstruction — repair — replace fuel hose Replace ignition coil Overhaul engine Add recommended oil REMOVING Fuel System NOTE: Before removing the carburetor, be sure the gas tank shut-off valve is in the OFF position. This section has been organized for servicing the fuel system. The technician should use discretion and sound judgment when removing/disassembling and assembling/ installing components. 1. Remove the screws securing the air cleaner cover to the air cleaner case and account for the filter and retaining plate. ! WARNING 2. Remove the flanged nuts securing the air cleaner assembly to the carburetor and engine. Whenever any maintenance or inspection is made on a fuel system when there may be fuel leakage, there should be no welding, smoking, open flames, etc., in the area. Pre-Maintenance Checks 3. Remove the air cleaner case and intake tube from the carburetor and engine. Account for the gasket. 4. Remove the drain screw w/spring (I) from the float chamber and drain any gasoline from the chamber; then install the drain screw w/spring. 5. Remove the fuel supply hose. Before troubleshooting the fuel system, several simple checks should be performed. Many times what appears to be a serious problem is only a minor one. 6. Disconnect the rod and spring from the carburetor; then loosen the pinch screw and jam nuts securing the choke cable to the carburetor. 1. Make sure the gas tank shut-off valve was in the OPEN position and check for fuel flow from the tank to the carburetor. 7. Slide the carburetor off the mounting studs. Account for a gasket, insulator, and a gasket. DISASSEMBLING 2. Turn the shut-off valve to the CLOSED position; then remove the in-line fuel filter. If the filter is dirty, replace the filter. 3. Install a new filter making sure the arrow on the filter is directed toward the engine. 4. Check the gas tank fuel and vent hoses to ensure that all are correctly connected; then check for cracks. If any cracks are evident in the hoses, replace them making sure none are against any hot or moving parts. Hoses must fit tightly. 5. Check the carburetor float chamber by loosening the drain screw (I) and inspect it for water or debris. If seen, clean by removing the float chamber cap screw and cleaning the float chamber. 6. When ready for operation, turn the shut-off valve to the OPEN position. 744-959A 1. Carefully remove the plastic cap from the idle fuel adjuster screw (A); then rotate the screw clockwise while noting the number of rotations (for assembling purposes) until lightly seated. Remove the screw. Carburetor CAUTION Do not force the idle fuel adjuster screw when rotating it clockwise; damage to the screw taper and carburetor orifice may result. 2. Remove the pilot jet (B) from the carburetor. 3. Remove the cap screw (C) securing the float chamber to the carburetor; then remove the chamber and account for the rubber gasket. 744-908A 27 4. Remove the float pin (D) securing the float (E) to the carburetor body; then remove the float and needle jet assembly (F). 5. Remove the main jet (G) and the nozzle (H) from the carburetor tower. 7. Place the carburetor insulator on a surface plate covered with #400 grit wet-or-dry sandpaper. Move the insulator over the surface plate using a figure eight motion. The motion should produce an even wear pattern over the entire sealing area. CAUTION CLEANING CAUTION DO NOT place any non-metallic components in partscleaning solvent or carburetor cleaner because damage or deterioration will result. Water or parts-cleaning solvent must be used in conjunction with the wet-or-dry sandpaper or damage to the sealing surfaces may result. 1. Place all metallic components in a wire basket and submerge in carburetor cleaner. 2. Soak for approximately 30 minutes; then rinse with fresh parts-cleaning solvent. 3. Wash all non-metallic components with soap and water. Rinse thoroughly. 4. Dry all components with compressed air only making sure all holes, orifices, and channels are unobstructed. 5. Blow compressed air through all hoses to remove any obstructions. ! WARNING Always wear safety glasses when drying components with compressed air. CAUTION DO NOT use wire or small drill bits to clean carburetor orifices, holes, or channels. Distorted or damaged orifices, holes, or channels can result in poor carburetor operation. A739 8. Inspect the condition of the throttle return spring. CHECKING FLOAT HEIGHT 1. Remove the cap screw securing the float chamber; then remove the float chamber from the carburetor and account for the rubber gasket. 2. With the carburetor in an upside-down position, lift the float so the tip of the float lightly contacts the float arm; then measure the float height from the body of the carburetor and under-side of the float. Measurement should be 0.63". INSPECTING 1. Inspect the mixing body and jet orifices for cracks, nicks, stripped threads, and any other imperfections in the casting. 2. Inspect the float for perforations or damage. 3. Inspect the gaskets for distortion, tears, or noticeable damage. 4. When applicable, inspect the idle fuel adjuster screw, needle jet assembly, and pilot jet for wear, damage, or distortion. 5. Inspect the nozzle and main jet for obstructions or damage. 6. Inspect the carburetor insulator for damage, cracks, and tightness. CAUTION An air leak between the carburetor and engine will cause a lean condition and poor engine performance. 28 IO108 CAUTION Do not bend the float in an attempt to adjust the height. Correct float height is obtained by replacing the needle jet assembly and/or the float. ASSEMBLING 2. Install the choke cable and secure the cable with the jam nuts and pinch screw. 3. Install the fuel supply hose on the carburetor. 4. Place the gasket and air cleaner assembly into position on the carburetor; then secure with the flanged nuts and cap screw. 5. Secure the air cleaner cover to the air cleaner with the screws. Tighten to 96 in.-lb. 6. Turn the gas tank shut-off valve to the OPEN position and check the fuel system for leakage. 7. Adjust the carburetor (see ADJUSTING sub-section). ADJUSTING 744-959A 1. Install the nozzle (H) and main jet (G) into the carburetor tower. 2. Place the needle jet assembly (F) and the float (E) into position and secure to the carburetor body with the float pin (D). The carburetor has been calibrated for average riding conditions; however, altitude, temperature, and general wear may necessitate certain carburetor adjustments. Since carburetor adjustments critically affect engine performance, three external adjustments can be made on the carburetor. These are the throttle stop screw, idle fuel adjuster screw, and throttle cable. 3. Secure the float chamber w/rubber gasket to the carburetor with the cap screw (C). 4. Install the pilot jet (B). 5. Install the idle fuel adjuster screw (A) and rotate the screw clockwise until lightly seated; then rotate the screw counterclockwise the proper number of rotations as noted during disassembling. Install the plastic cap. CAUTION Do not force the idle fuel adjuster screw when rotating it clockwise; damage to the screw taper and carburetor orifice may result. INSTALLING 1. Install the gasket, insulator, and a gasket; then with the governor rod and spring installed on the carburetor, place the carburetor into position on the mounting studs. Install the flanged nuts and tighten to 96 in.-lb. 0744-921 Throttle Stop Screw This screw controls the seating position of the throttle valve which in turn determines the proper idle speed. Rotate the screw clockwise to increase engine idle speed and counterclockwise to decrease engine idle speed. Idle Fuel Adjuster Screw This screw determines the fuel/air mixture for idling. To adjust, use the following procedure: 1. Start the engine and allow to run at half throttle 510 minutes to warm up. 2. Place the throttle in the idle position; then rotate the idle fuel adjuster screw/cap in or out within the adjustment range to obtain smooth low speed performance. GF318D 29 Speed Control Screw IO110B Throttle Cable 0744-949 The correct throttle cable adjustment is when (with the engine OFF) the carburetor throttle is completely open (against its limit) while the throttle lever lightly contacts the handlebar grip. The throttle arm on the carburetor should also contact the speed control screw when the throttle lever is released. 1. To adjust the throttle cable, loosen the throttle cable jam nuts. The maximum speed of the snowmobile can be reduced by adjusting the speed control screw. To reduce the maximum speed, rotate the speed control screw clockwise. DO NOT EVER INCREASE THE MAXIMUM SPEED BEYOND THE ORIGINAL 8 MPH MAXIMUM. Throttle Cable ! WARNING Do not attempt to adjust the throttle cable with the engine running. Personal injury could result. REMOVING AND INSPECTING 1. Remove the C-clip securing the lever pin in the throttle lever; then remove the pin and the lever. 0744-922 2. Pull all slack from the throttle cable wire and exert slight tension on the wire. 3. Tighten the throttle cable jam nuts. A979 2. Disconnect the throttle cable from the lever; then slide the cable out of the lever. ! WARNING DO NOT operate the snowmobile when any component in the throttle system is damaged, frayed, kinked, worn, or improperly adjusted. If the snowmobile is operated when the throttle system is not functioning properly, personal injury could result. A980 30 3. Remove the C-clip securing the cable in the throttle control; then remove the cable from the throttle control. 6. Inspect the throttle cable for damage or fraying. INSTALLING 1. Route the cable through the slot in the throttle control and insert the cable into the throttle control. Secure the cable with a C-clip. A981 A981 2. Seat the cable drum into the throttle lever recess; then secure the throttle lever to the throttle control with a pin and C-clip. A982 4. Remove the handlebar pad and cut the cable tie securing the throttle cable to the steering post. NOTE: Note the location of the cable tie for assembly. 5. Rotate the throttle cable lever of the governor control arm to the wide-open position and route the cable end out of the arm; then loosen the throttle cable jam nuts and remove the throttle cable. A980 3. Place the throttle cable into the throttle cable bracket and secure with jam nuts. 4. Slide the end of the throttle cable into the throttle cable lever. 5. Secure the throttle cable to the steering post with a cable tie; then install the handlebar pad. 6. Open and close the throttle lever to make sure of no binding or sticking. NOTE: At this point, adjust the throttle cable (see Throttle Cable in the Carburetor sub-section). ADJUSTING 0744-922 To adjust the throttle cable, see Carburetor – ADJUSTING sub-section. 31 Troubleshooting Fuel System Problem: Carburetor Too Rich (0-1/4 Opening) Condition Remedy 1. 1. Choke valve will not seat 2. 2. Idle fuel adjuster screw out of adjustment 3. Float/needle jet obstructed — damaged — adjusted incor- 3. rectly 4. 4. Pilot jet loose Problem: Carburetor Too Rich (1/4-3/4 Opening) Condition Adjust — service — replace choke cable — assembly Adjust idle fuel adjuster screw Remove obstruction — replace needle jet — float Tighten pilot jet Remedy 1. Replace pilot jet 1. Pilot jet too large 2. Float/needle jet obstructed — damaged — adjusted incor- 2. Remove obstruction — replace needle jet — float rectly 3. Tighten — replace main jet 3. Main jet loose — too large 4. Remove obstruction 4. Primary air passage obstructed Problem: Carburetor Too Rich (3/4-WOT Opening) Condition Remedy 1. Main jet loose — too large 1. Tighten — replace with smaller main jet 2. Float/needle jet obstructed — damaged — adjusted incor- 2. Remove obstruction — replace needle jet — float rectly Problem: Carburetor Too Lean (0-1/4 Opening) Condition Remedy 1. Adjust — service choke cable — valve assembly 1. Choke valve hanging open 2. Remove obstruction 2. Pilot jet — outlet obstructed 3. Float/needle jet obstructed — damaged — adjusted incor- 3. Remove obstruction — replace needle jet — float rectly Problem: Carburetor Too Lean (1/4-3/4 Opening) Condition Remedy 1. Pilot jet — outlet — main jet obstructed 1. Remove obstruction 2. Float/needle jet obstructed — damaged — adjusted incor- 2. Remove obstruction — replace needle jet — float rectly Problem: Carburetor Too Lean (3/4-WOT Opening) Condition Remedy 1. Main jet obstructed — too small 1. Remove obstruction — replace with larger main jet 2. Float/needle jet obstructed — damaged — adjusted incor- 2. Remove obstruction — replace needle jet — float rectly Problem: General Fuel System (Engine Cuts Out at High RPM) Condition Remedy 1. 2. 3. 4. 32 Fuel delivery inadequate In-line fuel filter obstructed — damaged Gasoline contaminated Gas-tank vent — hose obstructed 1. 2. 3. 4. Repair — replace hose Remove obstruction — replace in-line fuel filter Replace gasoline — de-ice — clean carburetor Remove obstruction — replace vent — hose Electrical System TESTING COMPONENTS Following are testing procedures for specific electrical components. All tests of the electrical components should be made using the digital Fluke Model 77 Multimeter. Replace any component that does not have a test value within specifications. NOTE: Whenever using a digital-style tester, “open (infinite resistance)” denotes an overload and the meter reading will be OL since the meter is not calibrated to register resistance values of that magnitude. NOTE: Whenever testing switches, less than 1 ohm is As the flywheel turns faster, the primary current increases, and the terminal voltage of the circuit consisting of the resistor (R) and the transistor (TR1) increases. This increases the working voltage at the connection of the series circuit (r1 + r2) connected in parallel to the primary circuit. As the flywheel turns further, the terminal voltage of the resistor (r2) in the resistor circuit (r1 + r2) rises to the level of working voltage of the transistor (TR2) when the ignition timing approaches the rated RPM, and, thus, the transistor (TR2) is turned on. As a result, the base current of (TR1) flowing through the resistor (R) is by-passed, and the transistor (TR1) is turned off from the conductive state. The current flowing through the primary winding (2) is thus interrupted, and rapid change occurs in the magnetic flux across the ignition coil. The result is a high surge voltage in the secondary winding (3). desirable with the switch in the activated position. SPARK ADVANCE CHARACTERISTIC NOTE: Always check the appropriate fuse before test- As noted above, the unit circuit detects a voltage and makes switching to produce a high voltage required to produce a spark. On the other hand, the wave form of the voltage generated in the primary winding changes as the flywheel turns. ing a component for failure. Transistorized Ignition System The transistorized ignition system has no contact points. Therefore, this ignition system does not require periodic reconditioning of contact point surfaces or point gap adjustment. As a result, a strong spark is produced even at low speeds so maximum reliability can be ensured. The working voltage (VS) of the unit circuit is at level A when the engine is started, but as the engine speed increases, the wave form of the voltage changes and advances to level B. OPERATION GEN-0009 TROUBLESHOOTING GEN-0008 When the recoil starter handle is pulled, the flywheel is turned. An electromotive force generated in the primary winding of the ignition coil makes the transistor (TR1) conduct through the resistor (R) and forms the primary circuit (indicated by dashed lines). 1. Remove the spark plug and visually check its condition. Replace if fouled. Adjust spark plug gap to 0.028-0.031". Attach the high tension lead to the spark plug and ground the plug on the cylinder head. NOTE: Make sure the emergency stop switch is in the ON (UP) position, the ignition switch is in the RUN position, and the tether cord is connected to the tether switch. 2. Crank the engine over and check for a spark. If no spark is present, disconnect the main wiring harness from the engine. Crank the engine over. If spark is now present, the problem is either one or more of the following items. A. Defective ignition switch B. Defective emergency stop switch C. Defective wiring harness 33 3. Connect one tester lead to one end of the cap and the other tester lead to other end of the cap. D. Defective tether Testing Ignition Switches 1. Disconnect the engine wires from the main wiring harness. 2. At the main wiring harness engine connector, connect the red tester lead to the violet wire; then connect the black tester lead to the engine ground (brown wire). 3. With the ignition switch in the RUN position, the emergency stop switch in the ON position, and the tether cord connected, the meter must read no resistance. If the meter reads resistance, disconnect the ignition switch from the main wiring harness. If the meter now reads no resistance, replace the ignition switch. B170 4. Spark plug cap resistance must be between 40006000 ohms. MAGNETO 1. Disconnect the two white wires from the main harness. 2. Set the meter selector to the OHMS position; then connect the red and black tester leads to each of the two white wires. 3. The meter must show less than 1 ohm. EXTERNAL COIL Primary 725-704A 4. If the meter continues to read resistance with the ignition switch disconnected, disconnect the emergency stop switch. If the meter now reads no resistance, replace the emergency stop switch. 5. If the meter continues to read resistance with both the ignition switch and the emergency stop switch disconnected, disconnect the wires to the tether switch. If the meter now reads no resistance, replace the tether switch. 6. If the meter continues to read resistance with all three switches disconnected, replace the main wiring harness. Testing Electrical Resistances NOTE: The following test procedure starts by testing 1. Disconnect the single black/white wire lead of the coil from the main harness. 2. Set the meter selector to the OHMS position; then connect the red tester lead to the black/white wire and the black tester lead to the metal post of the coil. 3. Resistance must be within 11.25-11.75k ohms. Secondary 1. Remove the spark plug end cap from the high tension lead of the coil. 2. Set the meter selector to the OHMS position; then connect the red lead of the tester to the high tension lead fo the coil and the black tester lead to ground. 3. Resistance must be within 6000-7000 ohms. LIGHTING COIL the resistance for the spark plug cap and working back to the stator under the flywheel. Replace any component that does not have a test value within specifications. 1. Disconnect the two yellow wires from the main wiring harness. SPARK PLUG CAP 3. Connect the tester leads to the two yellow leads on the engine-side connectors. 1. Remove the spark plug cap from the high tension lead by rotating it counterclockwise. 2. Set the selector in the OHMS position. 34 2. Set the selector to the OHMS position. 4. Lighting coil resistance must be between 0.460.68 ohm. Drive Chain and Sprockets REMOVING 1. Remove the self-tapping screws securing the front clutch shield and rear sprocket cover; then remove from the engine compartment. Note the position of the hood cable. NOTE: It will be necessary to reinstall the hood cable once the guard is removed. IO112A 2. Remove the muffler hold-down spring from the muffler and support bracket; then remove the two nuts securing the muffler to the engine. 6. Secure the centrifugal clutch with a pair of channel-lock pliers at the outer clutch collar; then remove the cap screw securing the clutch. Account for a lock washer, washer, and a spacer. IO111A A020 3. Press down on the muffler and pull it to the side until the muffler flange clears the engine exhaust studs; then remove the muffler from the engine compartment. Account for the exhaust gasket. 4. Compress and hold the brake lever; then remove the cap screw and washer securing the chain sprocket to the driveshaft. Release the lever. IO113 7. Slide the chain sprocket and clutch (with the drive chain) off the respective shafts and remove from the engine compartment. Account for the rear driveshaft key. CLEANING AND INSPECTING IO118A 5. Remove the retaining ring (A) securing the brake band. Account for a washer; then loosen the rear brake cable adjustment jam nut (B) and slide the cable out of the brake bracket. Set the band assembly aside. 1. Thoroughly wash all metallic components in partscleaning solvent. Dry using compressed air. 2. Wash all non-metallic components with soap and water. 3. Inspect the sprocket driveshaft for damage or for stripped threads. 4. Inspect the keyways in the driveshaft, chain sprocket, and clutch for wear or damage. 35 5. Inspect the chain and chain sprocket for wear or damage. 6. Inspect the driveshaft sprockets for wear or damage. INSTALLING 1. Slide the chain sprocket/clutch/drive chain assembly into position; then install the key into the new sprocket. 4. Compress and hold the brake lever; then install the cap screw (coated with red Loctite #271) and washer securing the chain sprocket. Tighten the cap screw to 20 ft-lb; then release the lever. 5. Place the exhaust gasket into position on the engine exhaust studs. 6. Place the muffler into position in the engine compartment; then press down on the muffler and position the flange onto the engine exhaust studs. Secure with two nuts and the hold-down spring. 7. Place the front clutch shield and rear sprocket cover into position making sure the hood cable is properly positioned. Tighten the self-tapping screws securely. Track and Driveshaft NOTE: The skid frame must be removed for this proIO114A 2. Secure the clutch with a pair of channel-lock pliers at the outer clutch collar; then install the cap screw with lock washer, washer, and spacer. Tighten to 20 ft-lb. cedure (see Rear Suspension section). REMOVING 1. Remove the self-tapping screws securing the rear sprocket cover; then remove the cover. 2. Compress and hold the brake lever; then remove the cap screw and washer securing the chain sprocket to the driveshaft. Release the lever. A020 3. Slide the brake band over the clutch and secure the brake band with a washer and retaining ring (A); then with the brake cable installed in the bracket, tighten the rear brake cable adjustment jam nut (B) securely. IO118A 3. Slide the chain sprocket off the driveshaft and set aside. Account for the key. IO112A IO114A 36 4. Remove the cap screws securing the upper idler wheel assembly to the tunnel; then remove the assembly from the tunnel. 4. Inspect the keyways in the driveshaft and in the chain sprocket for wear or damage. 5. Inspect the chain and chain sprocket for damage or wear. 6. Inspect the track drive sprockets for wear or damage. INSTALLING KEY 1. 2. 3. 4. IO115A 5. Remove the four lock nuts securing the drive sprocket bearings to the tunnel; then remove the four carriage bolts from the tunnel. 5. 6. 7. 8. 9. 10. 11. 12. Spacer Carriage Bolt Bearing Track Drive Assy Drive Sprockets Driveshaft Key Chain Sprocket Lock Nut Cap Screw Washer Chain 742-425A 1. Tip the snowmobile on its side; then place the track into position in the tunnel. A021 6. Position the bearing flanges so they are directed towards the rear; then spread the tunnel slightly and slide the driveshaft assembly out of the tunnel. A022 CAUTION A piece of cardboard should be used to protect the finish on the hood. 2. Slide the driveshaft assembly into position in the tunnel; then secure the drive sprocket bearings with carriage bolts and lock nuts. Tighten lock nuts to 15 ft-lb. A022 7. Remove the track from the tunnel. INSPECTING 1. Inspect the driveshaft for damage and for stripped threads. 2. Inspect the bearings for roughness or damage. 3. Inspect the track for cuts, gouges, or wear. A021 37 3. Place the upper idler wheel assembly into position in the tunnel; then secure with cap screws. Tighten securely. 4. Install the skid frame (see Rear Suspension section). 5. Place the snowmobile in the upright position. 6. Place the key on the driveshaft; then slide the chain sprocket w/chain onto the driveshaft. Secure with a cap screw (coated with red Loctite #271) and washer. Tighten to 20 ft-lb. 7. Inspect the chain for proper engagement with the clutch sprocket and the chain sprocket. 8. Inspect that the chain tensioner assembly is in place and functioning properly. 9. Install the rear sprocket cover and secure with the self-tapping screws. Tighten securely. 0744-945 Adjusting 1. Loosen the idler wheel cap screws. 2. Loosen the rear idler wheel adjusting bolt jam nuts. NOTE: At this point, proceed to TRACK TENSION subsection. TRACK TENSION NOTE: Track tension and track alignment are interrelated; therefore, always check both, even if only one adjustment seems necessary. Track tension is directly related to the overall performance of the snowmobile. If the track is too loose, it may slap against the tunnel causing wear, or it may ratchet on the track drive sprockets. Arctic Cat recommends that the track tension be checked once a month and adjusted accordingly. ! WARNING Track tension must be properly maintained. Personal injury could result if a track is allowed to become excessively loose. Checking ! WARNING DO NOT attempt to check or adjust track tension with engine running. Turn ignition key to the OFF position. Personal injury could result from contact with a rotating track. 1. Remove excess ice and snow buildup from the track, track drive sprockets, and the inside of the skid frame. 2. Place the rear of the snowmobile up on a safety stand high enough so the track is free of the floor. 3. Without exerting any pressure on the track, measure the distance between the bottom of the wear strip and the inside surface of the track. The measurement must be within specifications. If the measurement is not within 1/4-3/8 in., an adjustment is necessary. 38 0744-947 NOTE: To ensure proper track tension adjustment, perform all adjustments on both sides of the snowmobile. 3. If the deflection (distance between the bottom of the wear strip and the inside of the track) exceeds specifications, tighten the adjusting bolts to take up excessive slack in the track. 4. If the distance between the bottom of the wear strip and the inside surface of the track is less than specified, loosen the adjusting bolts to increase the slack in the track. 5. Check track alignment (see TRACK ALIGNMENT sub-section). 6. When proper track tension is obtained, tighten the adjusting bolt jam nuts against the axle housings. 7. Tighten the idler wheel cap screws securely. NOTE: Since track tension and track alignment are interrelated, always check both even if only one adjustment seems necessary. ! WARNING If jam nuts are not tightened properly, the adjusting bolts could loosen causing the track to become extremely loose and, under some operating conditions, allow the idler wheels to climb over the track lugs forcing the track against the tunnel causing the track to “lock.” If a track “locks” during operation, severe personal injury could result. TRACK ALIGNMENT Proper track alignment is obtained when the rear idler wheels are equal distance from the inner track drive lugs. Excessive wear to the idler wheels, drive lugs, and track will occur if the track is improperly aligned. Arctic Cat recommends that the track alignment be checked once a week or whenever the track tension is adjusted. 727-729A 5. If the distances from the rear idler wheels to the inner track drive lugs are not the same on both sides, an adjustment is necessary. Adjusting Checking ! WARNING Make sure the ignition key is in the OFF position and the track is not rotating before checking or adjusting track alignment. Personal injury could result if contact is made with a rotating track. 1. On the side of the track which has the inner track drive lugs closer to the rear idler wheel, loosen the idler wheel cap screw and the adjusting bolt jam nut; then rotate the adjusting bolt clockwise 1 to 1 1/2 turns. 1. Remove excess ice and snow buildup from the track, track drive sprockets, and the inside of the skid frame. 2. Position the tips of the skis against a wall; then using a shielded safety stand, raise the rear of the snowmobile off the floor making sure the track is free to rotate. ! WARNING The tips of the skis must be positioned against a wall or similar object for safety. 0744-947 3. Start the engine and accelerate slightly. Use only enough throttle to turn the track several revolutions. SHUT ENGINE OFF. 2. Check track alignment and continue adjustment until proper alignment is obtained. NOTE: Allow the track to coast to a stop. DO NOT NOTE: Make sure correct track tension is maintained apply the brake because it could produce an inaccurate alignment condition. after adjusting track alignment (see TRACK TENSION sub-section). 4. When the track stops rotating, check the relationship of the rear idler wheels and the inner track drive lugs. If the distance from the rear idler wheels to the inner track drive lugs is the same on both sides, no adjustment is necessary. 3. After proper track alignment is obtained, tighten both the adjusting bolt jam nut and the idler wheel cap screw securely. ! WARNING If a jam nut is not tightened properly, the adjusting bolt could loosen causing the track to become dangerously loose. 4. Field test the track under actual conditions; then make additional adjustments as necessary. 39 Brake System REMOVING AND INSPECTING A998 6. Disconnect the brake cable from the lever; then slide the brake cable out of the lever. KEY 1. 2. 3. 4. 5. 6. 7. Lock Nut Bushing Rivet Chain Tensioner Spring Tab Roller 8. 9. 10. 11. 12. 13. 14. Washer Cap Screw Bracket Cap Screw Spacer Clutch Brake Band 15. 16. 17. 18. 19. 20. Retainer Pin Washer Retaining Ring Spacer Washer Lock Washer 742-425B 1. Remove the front clutch shield and hood cable. NOTE: It will be necessary to reinstall the hood cable once the shield is removed. 2. Loosen the Allen-head retainer pin (A) securing the brake cable to the brake band; then remove the retaining ring (B) securing the brake band to the mounting bracket. A999 7. Remove the handlebar pad and cut the cable tie securing the brake cable to the steering post. NOTE: Note the location of the cable tie for assembly. 8. Inspect the brake band for cracks and/or wear. NOTE: The brake band pad material thickness must be at least 1/16" or replacement is necessary. 9. Inspect the brake cable for damage or fraying. INSTALLING 1. Route the cable through the slot in the brake housing and insert the cable end into the housing. 2. Seat the cable drum into the brake lever recess; then secure the brake lever with a pin and C-clip. IO116A 3. Loosen the rear jam nut securing the brake cable to the brake bracket; then remove the brake cable from the bracket and brake band. Account for a spring. 4. Remove the brake band from the engine compartment. 5. Remove the C-clip securing the brake lever pin in the brake housing; then remove the pin and lever. A999 40 6. Secure the brake cable to the steering post with a cable tie; then install the handlebar pad. 7. Install the hood cable and the front clutch shield. CHECKING BRAKE LEVER TRAVEL 1. Compress the brake lever fully. 2. Check the distance between the brake lever and the lever stop. The distance must be within a range of 1/4-1/2". A998 3. Place the brake band into position on the bracket and secure with a washer and retaining ring. 0725-565 3. If travel distance is not as specified, adjust the brake. ADJUSTING BRAKE LEVER TRAVEL IO117A 4. Slide the spring onto the brake cable; then insert the cable end into the brake band. Tighten securely. 735-457A 1. Remove the clutch shield. A004 5. Secure the brake cable to the bracket with the jam nuts. 2. Loosen the rearward jam nut on the brake cable; then tighten the forward jam nut to set up the brake. 3. Check the brake lever travel distance periodically while tightening the forward jam nut. When the distance is within the specified range of 1/4-1/2", tighten the rearward jam nut to secure the adjustment. 4. Install the clutch shield. A005 41 Troubleshooting Track Problem: Track Edge Frayed — Drive Lugs Worn Condition 1. Track alignment adjusted incorrectly Remedy 1. Align — replace track Problem: Track Worn Adjacent to Outer Drive Lugs Condition 1. Track tension adjusted incorrectly 2. Rear idler wheels dirty — damaged Remedy 1. Adjust track tension 2. Clean — replace idler wheels Problem: Track Ratchets — Slaps Tunnel Condition 1. Track tension adjusted incorrectly (too loose) 2. Drive sprockets misaligned — damaged Remedy 1. Adjust track tension (tighten) 2. Align — replace sprockets Problem: Wear-Strip Wear Excessive Condition 1. Slide rail bent — broken — damaged 2. Track alignment adjusted incorrectly 42 Remedy 1. Repair — replace slide rail 2. Adjust track alignment This section has been organized so each procedure can be completed individually and efficiently. The technician should use discretion and sound judgment when removing and installing components. Rear Suspension GENERAL INFORMATION Quick acceleration and the ability to go through the turns with power are the most important handling qualities. This section explains how the skid frame functions to provide these two important handling qualities. Good weight transfer characteristics are needed for fast acceleration (shift of weight from skis to track) and for cornering (shift of weight back to skis to hold the front end in turns). Effective weight transfer depends on suspension tension, position of rider, and the position of the front arm limiter. To understand how the suspension system works, think of the entire system in terms of three points; the skid frame rear axle center, the skid frame front arm, and the ski saddle center. Removing Skid Frame NOTE: Many service procedures can be performed without removing the skid frame. Closely observe the note introducing each subsequent sub-section for this important information. 1. Loosen the jam nuts and the two track tension adjusting cap screws. Assume that the front arm functions as a stationary pivot point between the rear axle center and the ski saddle center. Also assume that the ski saddle center is the same height off the ground as the rear axle center. This produces the standard position arrangement. 744-947A 2. Place a support stand under the rear bumper; then remove the two cap screws securing the upper idler wheel assembly to the tunnel. NOTE: The support stand should hold the snowmobile level and not raised off the floor. 0728-180 3. Remove the cap screws securing the front axle, idler axle, and rear suspension arm to the tunnel. Under acceleration when the center of gravity is transferred to the rear of the machine, the rear suspension collapses slightly. This brings the rear arm point downward and with the front arm stationary, the teeter-totter effect reduces the pressure on the skis, position A. However, for controlled cornering, more pressure is needed on the skis. So when the driver decelerates coming into a corner, the center of gravity is transferred forward, putting the required pressure onto the skis and reducing the pressure on the rear suspension, position C. This is essentially what weight transfer is all about — the shift of weight to the rear of the machine for positive traction and good acceleration or to the front of the machine for positive handling and cornering control. REAR ARM SPRING TENSION The rear spring tension is adjusted for the weight of the driver. Three possible adjustments exist. IO115B 4. Remove the support stand; then tip the snowmobile onto one side using a piece of cardboard to protect against scratching. Remove the skid frame assembly. 1st block position - light operator 2nd block position - medium operator 3rd block position - heavy operator 43 End Cap REMOVING 1. Remove the lock nut, washers, and cap screw securing the end cap. 0743-189 NOTE: A wear strip can be removed and installed AG297D 2. Using a hammer, tap the end cap off the rail. CLEANING AND INSPECTING 1. Inspect the end cap area of the slide rail for cracks and wear. 2. Inspect the end cap for any signs of cracking or wear. without removing the skid frame. To do this, remove the machine screw and lock nut securing the wear strip at the front of the slide rail; then align the wear strip with openings (windows) in the track and drive it rearward off the slide rail. Apply an all-temperature grease to the new wear strip and slide rail; then align the wear strip with openings (windows) in the track and drive it forward onto the slide rail. Secure with the machine screw and lock nut. 1. With the skid frame removed, remove the machine screw and lock nut securing the wear strip to the front of the slide rail. 3. Clean both the slide rail area and the end cap. Using compressed air, clean the areas of dirt and gravel. ! WARNING Always wear safety glasses when using compressed air. 4. Inspect the cap screw for cracked, stretched, or damaged threads. Use a new lock nut when assembling. INSTALLING 1. Position the end cap on the slide rail; then align the hole in the end cap with the hole in the slide rail. 2. Secure with a cap screws, washers, and new lock nut. Tighten to 78 in.-lb. Wear Strip REMOVING NOTE: Prior to removing the wear strips, inspect each wear strip for wear. The wear strip must be 0.42" thick or thicker. If the wear strip measurement is less than specified, replacement of both wear strips is necessary. AG298D 2. Using a pipe wrench and starting from either end, hook the edge of the wear strip with the pipe wrench jaw and twist the wear strip off the slide rail. Move the pipe wrench 3" and again twist the wear strip off the rail. Repeat this procedure until the wear strip is free of the rail. NOTE: The wear strip can also be driven off the slide rail; however, using a pipe wrench is quicker. CLEANING AND INSPECTING 1. Clean the slide rail using parts-cleaning solvent and compressed air. ! WARNING Always wear safety glasses while using compressed air. 2. Inspect the slide rail for cracks. If any cracks are found, replace the slide rail. 44 3. Using a straightedge, inspect the slide rail for any unusual bends. Place the straightedge along the bottom surface of the slide rail. If the rail is found to be bent, it must be replaced. 4. Place the straightedge along the side of the slide rail. If rail is found to be bent, it must be replaced. INSTALLING NOTE: Apply a light coat of grease to the slide rail surface to aid in installing new wear strips. Use a file to remove any sharp edges on the lower portion of the rail. AO159 2. Remove the rear springs and sleeves from the rear arm. INSPECTING 1. Inspect all rear arm weldments for cracks or unusual bends. 2. Inspect all tubing for cracks or unusual bends. 3. Inspect the axles for wear or damage. AG534D 1. Starting from the back, start the wear strip onto the rail; then using a block of wood and a hammer, drive the wear strip forward into position. 4. Inspect the upper and lower bearings for wear or damage. 5. Inspect the two spring adjuster blocks for damage. 6. Inspect the springs for excessive wear, cracks, or imperfections. ASSEMBLING 1. Apply a light coat of grease to the axles and the bushing areas. 2. Place the rear arm into position on the support bracket and rail; then secure with cap screws (threads coated with blue Loctite #243). Tighten to 20 ft-lb. AG535D Rear Idler Wheels and Axle 2. Secure with a machine screw and lock nut. Tighten securely. Rear Suspension Arm/ Rear Springs DISASSEMBLING 1. With the skid frame removed, remove the cap screws securing the rear arm to the support bracket and rail; then remove the rear arm. Account for and note the location of all hardware. 744-844A 45 DISASSEMBLING INSPECTING 1. With the skid frame removed, remove the cap screws and flat washers securing the outer idler wheels. Remove the idler wheels from the axle and account for the adjuster bushings. 1. Inspect each idler wheel for cracks or damage. 2. Slide the axle out of the rear axle housing and the rear spacer. 3. Inspect the axle and spacers for cracks or bends. CLEANING AND INSPECTING 2. Rotate the idler wheel bearing (by hand) and inspect for binding or roughness. INSTALLING 1. Lightly grease the axle; then slide the inner spacer onto the axle. 1. Clean the bearings with a clean cloth. 2. Inspect all idler wheel bearings. Rotate each bearing (by hand) and if any roughness or binding is noted, replace the idler wheel assembly. 2. Place the upper idler wheels into position, place the spacers into position, and secure with cap screws (coated with blue Loctite #243). Tighten to 20 ft-lb. 3. Inspect the outer rubber portion of the idler wheels for cracks and poor bonding. Slide Rail 4. Inspect the plastic hub of each idler wheel for cracking. 5. Inspect the axle for wear and damaged threads. Damaged threads may be repaired with a 3/8 x 16 tap. ASSEMBLING 1. In order, slide the axle through the rear axle housing; then place a spacer on the axle. Slide the axle through the opposite axle housing. 2. Place the adjuster bushings on the axle (on the outside of each axle housing). Make sure the adjuster bushing is positioned properly towards the adjusting cap screw. 744-844A 3. Place the rear idler wheels on the axle and secure with two cap screws (coated with blue Loctite #243) and washers. Tighten to 20 ft-lb. Upper Idler Wheels REMOVING 1. Remove the two cap screws securing the upper idler wheels to the tunnel; then remove the wheels. 744-844B REMOVING NOTE: When replacing one or both slide rails is necessary, remove one slide rail at a time. The remaining slide rail will then hold the crossbraces and brackets in their correct assembly order which is much quicker than to completely disassemble the entire skid frame. IO115A 2. Account for and note the location of all spacers. 46 1. With the skid frame removed, remove the cap screw, washers, and lock nut securing the end cap to the slide rail. Remove the end cap from the slide rail. AG297D 2. Remove the cap screw securing the cross-brace axle to the slide rail. AO161 8. Remove the slide rail from the skid frame. INSPECTING 1. Inspect the slide rail for cracks or unusual bends. 2. Inspect the wear strip for wear. The wear strip must be 0.42'' thick or thicker. If the wear strip measurement is less than specified, replacement of both wear strips is necessary. AO160 3. Remove the cap screw securing the rear suspension arm to the support bracket. 4. Remove the cap screws and lock nuts securing the rear suspension arm support bracket. 0743-189 INSTALLING 1. Install the rear axle housing and adjuster bushing; then secure with cap screws and lock nuts. Tighten to 20 ft-lb. 2. Install the rear idler wheel and secure the rear idler wheel with a cap screw (coated with blue Loctite #243) and washer. Tighten to 20 ft-lb. AO162 3. Secure the rear suspension arm support bracket to the slide rail with cap screws and lock nuts. Tighten securely. 5. Remove the cap screw and washer securing the rear idler wheel to the axle. Slide the wheel off the axle and account for the adjuster bushing. 6. Remove the two cap screws and lock nuts securing the rear axle housing; then remove the housing. 7. Remove the push nut and solid rivet securing the shock pad to the slide rail. Remove the shock pad. 47 AO162 AO161 4. Secure the rear arm to the support bracket with the cap screw. Tighten securely. 7. Place the end cap onto the rail and secure with the cap screw, washers, and lock nut. Tighten to 78 in.lb. Installing Skid Frame 1. Place a piece of cardboard on the floor to protect against scratching and tip the snowmobile onto one side. 2. Pull the track away from the tunnel and spread open; then place the skid frame into the track. AO159 5. Secure the cross-brace axle to the slide rail with the cap screw (threads coated with blue Loctite #243). Tighten to 20 ft-lb. 3. Position the front of the skid frame into the tunnel and align the front axle with the appropriate mounting holes in the tunnel. Secure the axle to the tunnel with the cap screws (coated with blue Loctite #243). Thread the cap screws in only half way. DO NOT TIGHTEN AT THIS TIME. NOTE: To aid in centering the rear arm with the holes in the tunnel, position the skid frame and track at a 45° angle to the bottom of the tunnel. 4. Align the rear idler axle with the appropriate mounting holes in the tunnel. Secure the axle to the tunnel with the cap screws (coated with blue Loctite #243). Thread the cap screws in only half way. DO NOT TIGHTEN AT THIS TIME. AO160 6. Place the shock pad into position and secure with a solid rivet and push nut. 5. Align the rear arm with the holes in the arm support bracket. Secure the arm to the bracket with the cap screws (threads coated with blue Loctite #243). Tighten to 20 ft-lb. 6. Place the snowmobile in the upright position. 7. Securely tighten all mounting hardware (from steps 3 and 4) to 20 ft-lb. 8. Check track tension; adjust as necessary (see Track and Driveshaft section). 48 Steering and Body Steering Post REMOVING NOTE: Perform steps 1-8 for both the brake and throttle cables. 1. Remove the handlebar pad. A980 2. Remove the C-clips securing the brake and throttle lever pins in the brake housing and throttle control; then remove the pins and levers. 4. Remove the C-clip securing the throttle cable in the throttle control; then remove the cable from the throttle control. A979 A981 A998 A982 3. Disconnect the brake and throttle cables from the levers; then slide the cables out of the levers. 5. Cut the cable ties securing the cables to the steering post. 6. Using a sharp knife, cut the grip off the handlebar. 7. Using a solvent, clean the old adhesive from the handlebar. 8. Loosen the screw securing the emergency stop switch to the handlebar; then remove the stop switch. 9. Remove the two cap screws and lock nuts securing the upper steering post bearing retainer; then remove the retainer and bearing. A999 49 INSTALLING IO059A 10. Pull the steering post up and out of the lower bearing. 11. Remove the lock nuts and cap screws securing the tie rods to the steering post. KEY 1. 2. 3. 4. 5. 6. 7. Steering Post Handlebar Grip Throttle Control Pin Spring Pin Decal Throttle/Brake Lever 8. Retaining Ring 9. Brake Housing 10. Engine Stop Switch 11. 12. 13. 14. 15. 16. 17. 18. 19. 20. 21. Pad Cover Pad Cap Screw Clamp Bearing Retainer Bearing Lock Nut Lock Nut Washer Cap Screw Tie Rod Assembly 22. 23. 24. 25. 26. 27. 28. 29. 30. 31. 32. Hex Nut Hex Nut Rivet Support Tether Switch Assy Tether Cord Brake Cable Spring Cable Tie Throttle Cable Lock Washer 0746-737 1. Place the lower steering post bearing and retainer into position on the front end; then loosely secure with cap screws and lock nuts. IO060A NOTE: Use an additional wrench to keep the tie rod end shaft from turning while removing the tie rod lock nut. 12. Remove the steering post from the engine compartment. 13. Remove the two cap screws and lock nuts securing the lower steering post bearing retainer; then remove the retainer and bearing. INSPECTING 2. Place the steering post into position in the engine compartment and secure the inner tie rods to the steering post with washers and lock nuts (coated with green Loctite #609). Tighten to 20 ft-lb. NOTE: Use an additional wrench to keep the tie rod end shaft from turning while tightening the tie rod lock nut. 3. Slide the end of the steering post into the lower steering post bearing and place the upper end of the steering post on the support. 1. Inspect all welded areas for cracks or deterioration. 2. Inspect the steering post and bearing retainers for cracks, bends, or wear. 3. Inspect the steering post bearings for wear, cracks, or deterioration. 4. Inspect the tie rod ends for wear or damage. A025 4. Place the upper steering post bearing into position on the steering post and secure the steering post/ bearing assembly to the support with the bearing retainer, cap screws, and lock nuts. 50 5. Tighten the upper and lower retainer cap screws securely. A982 A026 9. Seat each cable drum into its lever recess; then secure each with a pin and C-clip. NOTE: Check all fasteners to ensure they are tight. Turn the handlebar full-left and full-right several times to ensure free movement. 6. Apply Handlebar Adhesive to the bore of the handlebar grip; then using a rubber hammer, drive the grip into position. ! WARNING The handlebar adhesive is extremely flammable. This product contains acetone. The vapors released can be easily ignited. Keep away from heat, sparks, and open flame. Use only in a well ventilated area. Avoid prolonged breathing of vapor. Avoid eye and skin contact. Keep container closed when not in use. A980 7. Place the emergency stop switch onto the right handlebar and secure with the screw. 8. Route the throttle cable through the slot in the throttle control and insert the cable end into the throttle control. Secure the cable with a C-clip. A999 A981 A979 51 REMOVING Ski 1. Using a suitable stand or lift, raise the front of the snowmobile off the floor; then remove the lock nuts securing the wear bar to the ski. REMOVING 1. Remove the cap screw and lock nut securing the ski to the spindle. 2. Remove the ski and account for two washers. INSPECTING 3. Remove the wear bar. 1. Inspect all hardware and spindle axles for any signs of damage. 2. Inspect the welded areas for cracks or deterioration. 3. Inspect the ski for abnormal bends or cracks. INSTALLING KEY 1. 2. 3. 4. 5. 6. 7. 8. 9. 10. 11. 12. 13. 14. 15. 16. 17. 18. 2. Pry the rear of the wear bar down until the wear bar studs are clear of the ski; then slide the wear bar rearward until the front of the wear bar is free from the ski. INSTALLING 1. Insert the front of the wear bar into the hole at the front of the ski and swing the wear bar upward; then insert the wear bar studs into the holes in the ski. ! WARNING DO NOT bend the ski wear bar excessively when installing. Excessive bending of the ski wear bar may cause premature wear, breakage, and possible injury. Ski Wear Bar Lock Nut Saddle Lock Nut Machine Screw Cap Screw Washer Lock Nut Axle Spindle Grease Fitting Insert Spindle Cap Handle Machine Screw Washer Cap Screw 2. Center the wear bar studs in the holes and install the lock nuts. Tighten lock nuts securely. Tie Rods REMOVING AND DISASSEMBLING 1. Remove the tie rod from the spindle. 0747-296 1. Place the ski into position on the spindle; then secure with a cap screw, two washers, and a lock nut. CAUTION Do not over-tighten the ski lock nut or binding will occur. 2. Tighten the lock nut to 16 ft-lb making sure the ski is free to pivot. Ski Wear Bar The ski wear bar is a replaceable bar attached to the underside of the ski. The purpose of the wear bar is to assist in turning the snowmobile, to minimize ski wear, and to maintain good steering control. If the snowmobile is operated primarily in deep snow, ski wear bar wear will be minimal; however, if the snowmobile is operated on terrain where the snow cover is minimal, the ski wear bar will wear faster. Arctic Cat recommends that the ski wear bars be checked once a week and replaced if worn to 1/2 of original diameter. 52 ZJ296A 2. Remove the tie rod from the steering post (see steps 9-12 of Steering Post - Removing sub-section). 3. Loosen the jam nuts securing the tie rod; then remove the ball joints from the tie rod. Slide the tie rod from the steering boot. CLEANING AND INSPECTING 1. Inspect the ball joints and tie rods for damaged threads or wear. 2. Inspect the ball joints and tie rods for cracks or unusual bends. 3. Wash the ball joint in parts-cleaning solvent. Dry with compressed air. Inspect the ball joint pivot area for wear. Apply an all-temperature grease to the ball joint. 3. Remove the lock nut securing the tie-rod ball joint to the spindle (account for the washer); then remove the ball joint from the spindle. ! WARNING Always wear safety glasses when using compressed air. ASSEMBLING AND INSTALLING 1. Slide the tie rod through the steering boot; then install the jam nuts and thread the ball joints onto the tie rod. NOTE: Each jam nut and ball joint is either a righthand or left-hand thread; therefore, each can only be installed on one end of the tie rod. The right-hand thread is the inside ball joint and jam nut. 2. Secure the inner tie rod to the steering post with washers and lock nuts (coated with green Loctite #609). Tighten to 20 ft-lb. ZJ296A 4. Remove the cap screw and lock nut securing the shock to the spindle. Account for two shock bushings. 3. Secure the steering post to the front end (see steps 3-5 of Steering Post - Installing sub-section). 4. Secure the outer tie rod to the spindle with a washer and lock nut (coated with green Loctite #609). Tighten to 15 ft-lb. IO119A 5. Remove the two cap screws and lock nuts securing the spindle to the suspension arms. Account for all mounting hardware. ZJ296A NOTE: The ball joint must be installed on the bottom side of the spindle arm. 5. Lock the jam nuts against the tie rod; then adjust ski alignment (see Ski Alignment sub-section). ! WARNING Neglecting to lock the jam nuts against the tie rod may cause loss of snowmobile control and possible personal injury. Spindle REMOVING 1. Position the front of the snowmobile up onto a safety stand. 2. Remove the ski. IO119B 6. Inspect the tie-rod ball joint in place. If damage, wear, or unusual bends are noted, loosen the jam nut; then remove the ball joint from the tie rod. INSPECTING 1. Inspect the spindle for excessive wear, cracks, bends, or imperfections. 2. Inspect all welds for cracking. 53 3. Inspect the suspension arm axle area for wear. 4. Secure the spindle in a vise. Rotate the spindle clockwise and counterclockwise. The movement should be smooth and free. If the spindle movement is rough or binding, grease the spindle with an alltemperature grease. Rotate the spindle. If the movement remains rough, replace the spindle. NOTE: When greasing the spindle, use enough so it can be seen coming out at both the top and bottom of the spindle. 5. Inspect the spindle axle for wear, damage, or loose fit. INSTALLING IO119A 4. Install the ski. 1. Place the shock mounting bracket into position on the spindle; then place the arms into the spindle. Secure with cap screws and lock nuts. Tighten securely. 5. Remove the safety stand from beneath the front frame assembly. Ski Alignment CHECKING 1. Turn the handlebar to the straight-ahead position. 2. Measure the distances to the inside edges of the skis in two places. Make sure the measurements are taken behind the spindle mount and ahead of the spindle mount. IO119B 2. Place the tie-rod ball joint into position on the bottom side of the spindle arm and secure with a lock nut (threads coated with green Loctite #609) tightened to 15 ft-lb. 0735-446 NOTE: Ski alignment is correct when the skis are parallel to each other (equal measurements front and rear) or when the skis have up to a maximum of 1/4" toe out (front measurement 1/4" more than rear measurement). ZJ296A 3. Place the lower shock eyelet w/shock bushings into the shock mounting bracket. Secure with the cap screw and lock nut. Tighten to 20 ft-lb. 3. If ski alignment is not as specified, the snowmobile will have a tendency to wander and may be difficult to control; therefore, an adjustment is necessary. ADJUSTING 1. Make sure the ignition key is in the OFF position. 2. Visually examine the skis to determine which ski is out of alignment with respect to the handlebar. 3. Open the hood and loosen the jam nut on each end of the tie rod. 54 4. While holding the straight ski in position, rotate the tie rod until the measurement between the skis is within specifications. 5. When the ski alignment is correct, apply blue Loctite #243 to the jam nut threaded areas and tighten each jam nut securely against the tie rod. ! WARNING Neglecting to lock the tie rod by tightening the jam nuts may cause loss of snowmobile control and possible personal injury. Front Suspension A-Arms A033 NOTE: If the cap screw must be removed, it will be necessary to remove the belly pan (see Belly Pan subsection). REMOVING 1. Position the front of the snowmobile up onto a safety stand. 2. Remove the spindle (see Spindle sub-section). INSPECTING 1. Inspect the A-arm welded areas for cracks or any signs of deterioration. NOTE: The ski does not have to be removed from the 2. Inspect the axles for wear or damage. spindle for this procedure. 3. Inspect the tubing for signs of being twisted or bent. 3. Remove the cap screw and lock nut securing the upper shock eyelet to the upper A-arm; then remove the shock. Account for two shock bushings. INSTALLING KEY 1. 2. 3. 4. 5. 6. 7. 8. 9. 10. Upper A-Arm Lower A-Arm Axle Axle Axle Cap Screw Cap Screw Lock Nut Shock Mounting Bracket Washer 0741-771 AO167 4. Remove the lock nuts securing the A-arms to the chassis; then push the cap screws as far forward as possible. 1. Slide the A-arms onto the cap screws and swing them up into position on the front end; then secure with lock nuts. Tighten to 30 ft-lb. 2. Install the spindle (see Spindle sub-section). Front Suspension (Ski) Shock Absorber REMOVING 1. Position the front of the snowmobile up onto a safety stand taking all pressure off the skis. AO169A 5. Angle the rear of each A-arm downward and slide them off the cap screws. Account for two outer axles and an inner axle for each arm. 2. Remove the cap screws securing the shock absorber to the front end assembly and spindle; then remove the shock absorber. Account for all mounting hardware. 55 3. Using the Shock Spring Removal Tool, remove the spring from the shock body by compressing the spring; then remove the spring retainer from the top of the spring. Inspect the shock absorber by quickly compressing and extending the shock plunger while firmly holding the shock body. Resistance must be felt in both directions. CLEANING AND INSPECTING 1. Inspect the shock absorber seal area for signs of excessive oil leakage. 2. Inspect the shock absorber mounting eyelet, bushings, and body for wear or damage. INSTALLING 1. Using the shock spring tool, place the spring on the shock absorber and secure with the retainer. A040 4. Using a piece of cardboard to protect the finish, tip the snowmobile on the right side and using a #20 drill bit, drill out the belly pan rivets. 2. Install the bushings, sleeves, and spacers into each shock end; then place the shock absorber into position. Install both cap screws from the front. Tighten the lock nuts to 20 ft-lb. Belly Pan REMOVING 1. Remove the hood. 2. Remove the two cap screws securing the belly pan to the front end; then account for washers and lock washers. AL174D NOTE: The tie rod boots do not need to be removed. 5. Using a piece of cardboard to protect the finish, tip the snowmobile on the left side and using a #20 drill bit, drill out the belly pan rivets. 6. With all belly pan rivets removed, return the snowmobile to the upright position; then slide the belly pan forward and up until it clears the front end. INSPECTING 1. Inspect for gouges, cuts, and tears. 2. Inspect the two belly pan threaded bosses and ensure they are in good shape. A039A 3. Remove the two Phillips-head screws securing the belly pan to the footrest supports. INSTALLING 1. Slide the belly pan into position on the front end; then secure with cap screws, lock washers, and washers (forward) and Phillips-head screws (rearward). 2. Install the three belly pan rivets in each ski-well. 3. Using a piece of cardboard to protect the finish, tip the snowmobile on its side and install the remaining belly pan rivets; then return the snowmobile to the upright position. 4. Install the hood. 56 Seat/Cushion/Taillight Housing 7. Remove the vent hose from the top of the gas tank. A044 8. Raise the flap at the rear of the seat and remove the two cap nuts securing the seat assembly to the tunnel. Account for two washers. KEY 1. Seat Assy 2. Gas Tank/Seat-Base 3. Cap w/Gauge 4. Seal 5. Seat Cover 6. Seat Wire 7. Foam 8. Seat Wire 9. Staple 10. Clip 11. Vent Hose 12. Bushing 13. Push Nut 14. Decal 15. Teflon Tape 16. Shut-Off Valve 17. Hose Clamp 18. Fuel Hose 19. Fuel Filter 20. Hose Clamp 21. Fuel Hose 22. Hose Clamp 23. Cable Tie 24. Spring 25. Choke Cable 26. Nut 27. Decal 28. Ignition Switch 29. Retaining Nut 30. Ignition Switch Key 31. Cap Screw 32. Lock Nut 33. Washer 34. Cap Nut 35. Taillight Assy 36. Washer 37. Nut w/Washer 9. Raise the rear of the seat assembly high enough to disconnect the taillight wiring harness; then disconnect the taillight from the main wiring harness. 10. Remove the seat assembly. NOTE: If necessary, use a sharp tool to pry out all staples securing the seat cover to the plastic seat base; then remove the cover from the seat base and seat foam. INSTALLING 0747-299 REMOVING 1. Remove the retaining nut securing the ignition switch to the console; then slide the switch forward and out of the console. 2. Remove the screw securing the choke knob to the cable; then remove the knob. 3. Remove the two nuts securing the choke cable to the console; then slide the cable forward and out of the console. NOTE: If the seat cover was removed, position the cover over the seat foam and plastic seat base. Check to make sure it is positioned straight; then fold the rear edge of the cushion down and around the base. Using a staple gun and 1/4-in. staples, staple the rear flap of the cushion to the base in the same areas as the original staples were located. Position staples 1" apart. Fold the sides of the cushion down around the bottom edge of the base. Position the staples in the same areas as the original staples were located. 1. Place the seat assembly into position and connect the taillight wiring harness. 4. Pull the recoil starter rope out approximately 24"; then tie a slip-knot in the starter rope below the console and allow the rope to slowly retract against the starter case. 2. Secure the seat assembly to the tunnel with washers and cap nuts. 5. Remove the knot at the handle and remove the handle; then thread the rope through the bushing in the console. 4. Thread the recoil starter rope through the bushing in the console and the handle; then tie a knot at the end of the rope and pull the handle up and onto the knot. 6. Turn the gas tank shut-off valve to the CLOSED position; then disconnect the fuel hose from the carburetor. 5. Untie the slip-knot at the starter case and allow it to slowly rewind into the case. ! WARNING Whenever any maintenance or inspection is made on a fuel system when there may be fuel leakage, there should be no welding, smoking, open flames, etc., in the area. 3. Connect the vent hose to the top of the gas tank. 6. Slide the choke cable through the console and secure with two lock nuts; then using a screw (coated with blue Loctite #243), secure the choke knob to the end of the cable. 7. Slide the ignition switch into position on the console; then secure with the retaining nut. 57 8. Connect the fuel hose to the carburetor and turn the gas tank shut-off valve to the OPEN position. Headlight Assembly REMOVING NOTE: The bulb portion of the headlight is fragile. HANDLE WITH CARE. When replacing the headlight bulb, the bulb assembly must first be removed from the housing. Do not touch the glass portion of the bulb. If the glass is touched, it must be cleaned with a dry cloth before installing. 1. Peel back the rubber headlight socket cap; then push in and turn the headlight socket counterclockwise and remove it from the headlight housing. 2. Remove the caps covering the four headlight adjustment screws; then remove the adjustment screws. Remove the headlight from the hood. IO120A INSTALLING 1. Secure the headlight housing to the hood with the four adjustment screws; then snap the caps on the screws. NOTE: The hood cable is secured with the lower righthand adjustment screw. 2. Insert the headlight bulb socket into the headlight housing; then rotate the socket clockwise to lock it into the housing. 3. Place the rubber headlight socket cap over the headlight housing bead around the socket. NOTE: To adjust headlight aim, adjust the four adjustment screws until maximum illumination for the operator is apparent. 58 Wiring Diagram 0744-204 59 NOTES 60 Printed in U.S.A. Trademarks of Arctic Cat Inc., Thief River Falls, MN 56701 p/n 2259-960