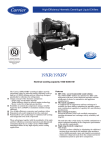
1
OWNER’S MANUAL
Installation and
Operating
Instructions for
Models:
IM-90, IM-130,
IM-220, IM-330
WinterGreen Wood Furnaces have been
tested and are certified to meet UL standard
391 for safety for Solid Fuel Burning Indoor
Heating Appliances
IMPORTANT. KEEP THESE INSTRUCTIONS. DO NOT THROW AWAY.
BE SURE TO READ THIS MANUAL AND KEEP FOR FUTURE REFERENCE.
WinterGreen Wood Furnaces
3015 West Main Street, Parish, NY 13131
Email us: [email protected]
Visit us at: www.homegrownheat.com
Version: 8/09
TABLE OF CONTENTS
Section
Furnace Serial Number – Recording Information
Warnings and Safety – Installation
Warnings and Safety – Operation
Risk of Fire - Explosion
Safety Label Locations 8
Furnace Introduction
Firebox technology
Combustion chamber
Heat exchanger 9
Water tube design
Wood gasification & Combustion Chamber
Furnace Unloading and Moving
Safety
Unloading furnace from pallet
Lifting the furnace from the Bottom
Lifting the furnace from the top with a spreader bar
Lifting the furnace from the top with slings
Floor requirements
Furnace Specifications
Furnace Component List
Furnace Installation – Location
Mounting on a cement or masonry base
Clearances to combustible surfaces
Connecting to existing ductwork
Chimney Installation
Chimney Regulations
Furnace connection to a factory built chimney
Furnace connection to a Masonry Chimney
General Rules for chimneys
Digital Temperature Controller
Feature description
Operation & setting temperature
Error messages, settings & alarms
Furnace Startup
Cold startup – checking the furnace
Cold startup fire
Factory setting for damper
Runaway Fire
Furnace – Primary Fire
Determining the appropriate fire size
Normal operating temperature
Furnace - Ash Disposal
Disposal of ashes
Access to ash pan
Loading the Furnace
Warnings
Wood loading procedure
Proper wood loading height in the furnace
Loading wood into the furnace
Furnace burning tips
Wood Selection
Efficiency
Best wood to burn
Harvesting
Wood selection chart
Page
4
5
6
7
9
9
9
10
11
11
12
13
13
14
15
16
17
18
18
19
20
21
22
23
24
25
26
26
27
27
28
28
29
29
30
31
32
33
33
34
34
34
35
TABLE OF CONTENTS
Section
Draft Inducer and Barometric Damper
Draft Inducer location and installation
Draft Inducer-installation on stove pipe
Draft Inducer-Electrical outlet on furnace
Barometric Damper location and Installation
Maintenance
Draft Setup
What is draft
What is the Draft Inducer and Barometric Damper
Manometer and where to test
Barometric Damper setup
Draft Inducer setup
Measuring and adjusting the flue draft
Maximum draft setting
Negative Air – Make-up Air
Negative air problems
Supplying Make-up air
Determining the volume of fresh air
Confined and unconfined space
Plumbing Installation
System configurations
Filling the system
Closed System – basic plumbing configuration to furnace
Open System – basic plumbing configuration to furnace
Closed System – basic plumbing configuration to boiler
Side Arm Heat Exchanger (Hot water tank)
Furnace Plenum Heat Exchanger
Plumbing components and functions
Wiring and Controls
Basic wiring and controls
Wiring schematic
Furnace control panel
Power Failures – System Backup
Overheat protection during a power failure
Power outage instructions
Battery Backup power supply (Schematic)
Installing a back-up generator
System backup – Heat from main furnace or boiler
Thermal Spike Protection
Why have thermal spike protection
Thermal spike protection methods
Maintenance – Furnace
End of season and general maintenance
Flushing the system
Firebox refractory cracks
Maintenance – Chimney
Chimney inspection and cleaning
Creosote
Chimney Fire
Troubleshooting Guide
Warranty
Page
36
37
38
39
40
41
41
42
42
43
44
45
46
46
46
47
48
48
49
50
51
52
53
54
55
56
57
58
58
59
60
60
61
61
62
62
62
63
63
64
65
66
FURNACE SERIAL NUMBER
Locate the serial number and model number of your WinterGreen Furnace on the unit and record
them in the space provided in the label below. (See section: “Safety Label Locations”) for the
location of the Manufacturer’s Decal on the furnace.
Have this information available when contacting your WinterGreen Dealer for warranty, service
or technical information.
WinterGreen
Manufactured for WinterGreen Wood Furnaces by SJV Inc. Fort Kent, Maine, USA
WARNINGS & SAFETY
INSTALLATION
Read and understand all warnings, safety instructions and information provided in this
manual. If your Furnace is not installed properly a house or building fire may occur.
Furnace installation must conform to National Fire Protection Association (NFPA) installation standards No.89M, 90B, 211, 70 (National Electrical Code) and local building and fire code standards.
Check with local authorities for the code requirements in your area.
Chimney installation must conform to National Fire Protection Association (NFPA) Standard 211
and local building and fire code requirements. Check with local authorities for the code requirements
in your area.
DO NOT CONNECT furnace to an aluminum “Type B” gas vent. This is unsafe. Use an approved
masonry or CSA/UL approved, "Class A" Residential Type Building Heating Appliance Chimney.
DO NOT USE A CHIMNEY CAP.
DO NOT connect furnace to a chimney flue shared with another appliance.
Ensure your chimney is safely constructed and in good repair. Have the chimney inspected by a
qualified technician.
Installation should be made by a qualified heating equipment installer (one who is engaged in and is
responsible for, or is thoroughly familiar with the installation and operation gas, oil and solid fuel
burning heating appliances; that is experienced in such work and familiar with all building requirements and/or fire codes of the authority having local jurisdiction.
DO NOT INSTALL THIS FURNACE IN A MOBILE HOME. Install the Furnace outside in a covered
building and pipe the hot water heat into the home.
Always connect this furnace to an approved chimney and vent to the outside, never vent to another
room or inside a building.
Observe all clearances as specified in this manual, especially those for combustibles materials.
DO NOT operate the furnace while under the influence of alcohol or drugs.
The furnace has stainless steel and painted surfaces which are very durable, although rough handling or abuse will cause premature failure of their protective qualities. To maintain a long lasting
finish, handle with reasonable care. Clean surfaces regularly with soap and water or stainless steel
cleaner. ONLY WHEN THE FURNACE IS COOL! Paint discoloration will occur if the furnace is overfired.
While in operation, keep the feed door, ash tray door closed and secured at all times, except when
tending the fire.
Operate the furnace draft with no less than 0.005” WC or no more than 0.07” WC
FURNACES ARE HEAVY!
Models can be from 2400 lbs. to 3800 lbs. Check specifications and know the weight of your unit. In order to prevent personal injury, make sure you have the proper equipment and manpower to unload,
move and position your boiler safely.
Continued on next page…
WARNINGS & SAFETY
OPERATION
To prevent injury, always wear protective clothing, leather hearth
gloves and eye protection while tending the furnace fire. NEVER
TOUCH THE FURNACE WITH BARE SKIN
Do not over-fire the furnace. Over firing will occur if the feed door or
ash door is left open during furnace operation. A dangerous fire hazard condition may result!
Keep the furnace area clear and free from all combustible materials,
wood chips, gasoline and all other flammable vapors and liquids.
DO NOT any use chemicals, charcoal lighter fluid, gasoline or any
other type of flammable liquids to start the fire.
Do not burn coal, use only solid seasoned whole wood.
Do not allow ashes to accumulate higher than the bottom of the
draft holes in the firebox.
Open firebox door slowly when loading the furnace.
Do not install the warm air supply outlet (Heat Exchanger) of the furnace to the cold air return inlet of the central home furnace because
a possibility exists of components of the central furnace overheating and causing the central furnace to operate other than intended.
While the furnace is in operation, extreme care should be taken to
avoid contact with the unit as high surface temperatures may result
in a burn injury. Special care should be taken if children are present
in the area of the furnace, they should be kept a safe distance away
from the unit and supervised at all times. IT IS RECOMMENDED
THAT A CHILD PROOF BARRIER BE INSTALLED AROUND THE PERIMETER OF THE UNIT AT A SUITABLE DISTANCE TO ENSURE
THERE IS NO POSSIBILITY OF CONTACT OR POTENTIAL INJURY.
Continued on next page…
WARNINGS & SAFETY
Continued:
RISK OF FIRE
NEVER OPERATE THE FURNACE WITH THE DRAFT DOOR
BLOCKED OPEN!
DO NOT OPERATE WITH THE FUEL LOADING OR ASH REMOVAL DOORS OPEN!
DO NOT STORE FUEL OR OTHER COMBUSTIBLE MATERIAL
WITHIN THE MARKED INSTALLATION CLEARANCES OF
FURNANCE.
INSPECT AND CLEAN FLUE AND CHIMNEY REGULARLY.
DO NOT OPERATE WITH FLUE DRAFT EXCEEDING .07” WATER
COLUMN.
RISK OF FIRE OR EXPLOSION
DO NOT BURN GARBAGE, GASOLINE, DRAIN OIL OR ANY
OTHER FLAMMABLE FLUIDS.
HOT SURFACES
KEEP CHILDREN AWAY FROM FURNACE.
DO NOT TOUCH HOT SURFACES DURING FURNACE OPERATION. MAXIMUM DRAFT OF FURNACE IS MARKED ON MANUFACTURER’S NAMEPLATE.
WARNINGS & SAFETY
SAFETY LABEL LOCATIONS:
FURNACE INTRODUCTION
Congratulations on your purchase of a new WinterGreen Hydronic Wood Furnace. The WinterGreen Furnace when properly installed and maintained will give you many years of dependable
wood burning service.
To ensure a safe and proper installation of your WinterGreen Hydronic Furnace, you should:
1) Have your furnace installed by a reputable contractor that has experience with the installation of this
type equipment, has knowledge with Solid Fuel Heating Appliances and be familiar with all local fire
and building codes.
2) Read carefully and use the information that is provided in this manual.
How the WinterGreen Hydronic Wood Furnace Works
Firebox Technology:
As wood burns, it begins boiling out moisture at 100˚C/212˚F. The wood starts to change its chemistry at
400-600˚F and begins releasing volatile gases as it breaks down. Those gases contain 50-70% of available energy from the wood. Most furnace designs allow those gases to escape out of the stack, wasting
energy. Our Wood Furnaces are manufactured with a refractory fire chamber surrounded by three
inches of high temperature insulation and an airtight stainless steel “skin”. The fire box temperature exceeds 1500˚F and “skin” temperature is less than 100˚F. The water tube pressure vessel removes both
radiant and convective heat. The heat must travel down past the vessel to the exhaust port, heating the
incoming combustion air on the way. The exhaust temperature is below 300˚F. Once the fluid reaches
the set temperature, the draft is closed and the fire is completely extinguished; it does not smolder. Because the thermal mass in the refractory stays above the flash point the fire always re-ignites when the
furnace calls for heat again.
Combustion Chamber:
These Wood Furnaces have several unique features that enable them to achieve higher efficiency and
cleaner burns than other wood Furnaces. The refractory combustion chamber ensures a very high combustion temperature and a long flame path with enough turbulence to complete the burning of all gases.
Once the wood gases are completely burned, the hot gases enter the heat exchange area.
Heat Exchanger:
The heat exchanger is a down draft system where the exhaust exits the unit below the entrances of the
cold water and the draft air supply. Because of the differential between the incoming cold water temperature and the exhaust temperature, thermal transfer is increased. The heat in the exhaust is transferred to the water and warms it as it enters the unit, while also decreasing the exhaust temperature. As
the exhaust continues downward, the I coming draft air is also heated after all the available heat has
already been put into the water. The heate draft air increases the combustion temperature in the refractory chamber without taking heat from the combustion process.
Water Tube Design:
The Furnaces have a water tube design (Pressure Vessel) which absorbs much more heat per square
inch than fire tube furnaces, withstands much more pressure, and also holds much less water so it responds more quickly. Because of limited water storage, water tube furnaces are much safer than fire
tube furnaces.
Continued on next page…
FURNACE - INTRODUCTION
Continued:
Wood Gasification
Wood gasification is the process of heating wood in an oxygen-limited chamber until volatile gases
(carbon monoxide, hydrogen, and oxygen) are released from the wood and combusted. Heating the
wood to the temperature range of 400-600 degrees releases most of the gases. The emitted wood
gases are then superheated and mixed with air for complete combustion, leaving little or no ash, and the
heat produced is transferred to the boiler for heating.
This process takes place in two stages, through the cross draft combined with the very high temperatures of the refractory (1500-2000 degrees). The extreme radiant energy from the refractory raises the
wood temperature for gasification, while limiting the oxygen in the primary zone. As the gases rise, the
preheated draft air combines with them and completes the combustion. The long flame path combined
with the turbulence and reverse flow assures complete combustion. During each off-cycle the radiant
heat from the refractory combined with the lack of oxygen prepares the wood for the next cycle.
FURNACE – UNLOADING & MOVING
To Prevent Personal Injury, WinterGreen Recommends:
The use of a suitable Forklift Truck with a capacity rating of at least 5000lb with 5-6 ft forks and is
capable of unloading, lifting and transporting the furnace unit to the determined installation location
safely.
That you have sufficient manpower and proper equipment available to assist in moving and installation of the furnace.
The WinterGreen Furnace comes mounted on a wooden pallet to protect it during shipping. To detach
the furnace from the pallet, remove the 4 (four) anchoring screws located on each corner of the base of
the unit that secure it to the pallet.
WinterGreen Furnaces are heavy, be sure you know the weight your going lift.
WinterGreen recommends that the furnace be moved by a professional equipment mover who is knowledgeable and experienced in
the rigging and moving of heavy equipment. Damage can occur to
the furnace refractory if the unit is dropped. An experienced professional can ensure the installation will be safe and damage free.
Continued on next page…
FURNACE – UNLOADING & MOVING
Continued:
Methods of moving the Furnace
The furnace has been designed it to be lifted and transported using a fork lift truck utilizing 2 (two) different methods.
Method 1: Lifting the furnace from the bottom
When moving the furnace from the bottom it is important that the forks be spread as wide as possible to
fit between the base plates .The unit should be centered on the forks so as the load is safely distributed
and the furnace is stable. To prevent damage to the piping and components mounted on the back of the
furnace, the front of the furnace (Loading door side) should face the lift truck. (See figure 1) This is important should the furnace contact the lift truck during the installation. Keep the load level while lifting
and only raise the unit as high as necessary to allow safe movement. Avoid any sudden jerky movements and maneuvers, drive slowly and make any turns with caution.
Never stand under or in the path of the load while moving the furnace!
The operation of a fork lift truck should be performed by a professional
driver who has been trained in the safety and handling of this type of
vehicle.
Continued on next page…
FURNACE – UNLOADING & MOVING
Continued:
Method 2: Lifting the furnace from the top
Spreader Bar:
The WinterGreen furnace comes with 2 (two) lifting eyelets located on opposing top corners of the unit.
One method of lifting the unit can be the use of a spreader bar. The spreader bar can have either lifting
slings or chains. Place the bar diagonally across the forks of the lift truck and attach the chains or lifting
slings so as they are directly in line with eye hooks. (See figure 2) It is important that when the unit is
lifted there s no side pull on the eyelets as this will cause damage to the unit and possible personal injury.
Slings:
To use just nylon lifting slings to lift the furnace, first slide one end of the sling through an eyelet until
both end sare of equal length. Do the same with the other eyelet. Both slings should be equal in length.
Adjust both forks on the lift truck so the center of each fork is directly centered to each eyelet. Slide each
sling over a separate fork. One sling will be to the back of one fork and the other sling will be to front of
opposite fork. Slowly lift the forks until there is tension. Check to see if there is any side pull on the eyelets. Several re-adjustments may have to be made before the sling position is correct. (See figure 3) Be
sure not to lift if there is any side pull, damage to the furnace will occur.
Continued on next page…
FURNACE – UNLOADING & MOVING
Continued:
Note: The furnace should be placed on a non-combustible floor made of concrete or masonry. Consideration should be made when deciding a location for the furnace, it should be close to a chimney, a
power source and have easy accessibility to your wood supply. If your WinterGreen furnace is to be located in a garage, National Codes require that the lowest point of ignition be at least 46cm/18” from the
floor. If the furnace is to be installed in a separate enclosed space where combustion air is taken from
outside the garage, this rule does not apply.(See Page 17 – Mounting on a Cement or Masonry Base)
Although Your WinterGreen furnace is certified for minimal clearance from combustible surfaces, it is
advisable to verify local authorities for all clearances before the installation begins.
READ THE SECTION “FURNACE INSTALLATION –LOCATION” in the Owner’s Manual.
The installation location must have provisions to shelter the furnace from weather and protect it
from freezing intake air.
DO NOT INSTALL THIS FURNACE IN A MOBILE HOME OR TRAILER.
INSTALL A CARBON MONOXIDE DETECTOR AND SMOKE ALARM IF
THE NSTALLATION IS IN A HOME, GARAGE OR AN ENCLOSED AREA.
FURNACE - SPECIFICATIONS
General Furnace Specifications:
Note that many factors must be considered to determine “Heating Capacity” including the design of your home, how well your home is built, construction quality, insulation properties, climate in your area and what type of wood you are burning.
FURNACE – COMPONENT LIST
FURNACE INSTALLATION - LOCATION
It is very important to adhere to the installation clearances and restrictions stated in this
manual.
WinterGreen Furnaces are certified to be installed in most indoor applications, garage, and basements or out buildings that are sheltered.
DO NOT INSTALL FURNACE INSIDE A MOBILE HOME OR TRAILER! The furnace must be installed outside in a suitable sheltered building such as a shed or garage and pipe the hot water into
the mobile home.
The clearances provided are minimum dimensions determined by the manufacturer’s testing facility.
Installation of this furnace must comply with either the following Canadian or U.S. applicable regulations:
Installation is to be in accordance with National Fire Protection Association installation standards 90, 211, 70 (National Electrical Code) and Uniform Mechanical Code 913, 6-4 in applicable
states. Check with local building and fire code officials for regulations required for your area.
Provisions should be made for accessible power for the furnace.( See: ”Furnace Wiring” section )
WARNING: Wood storage must be kept a minimum of 1.5m (5 ft) from the furnace.
BEFORE installing the WinterGreen Furnace as an “add on to any existing installation, a thorough inspection and approval must be made of the existing systems by a qualified inspector. Any additional procedures shown in the installation instructions provided with the unit must be followed.
Top View
Cement or Masonry Base Clearances for the WinterGreen Furnace
The WinterGreen Furnace must be installed on a solid concrete floor or 3 ½” thick masonry base.
See the above diagram showing minimum distance requirements that the floor must extend past
the furnace, flue and chimney pipe. DO NOT INSTALL THE WINTERGREEN FURNACE ON A
COMBUSTIBLE FLOOR
Continued on next page…
FURNACE INSTALLATION – LOCATION
Continued:
When installing your WinterGreen Furnace it is important to adhere to the clearance dimensions
to combustible surfaces as shown below. Note that these are minimum clearances and your furnace should never be located any closer than the dimensions stated.
Top View
IMPORTANT:
The installation of this furnace must comply with the latest edition of NFPA 211 for Reduced
Clearances and/or your local building codes, whichever minimum clearances are greater.
Installation should be made by a qualified heating equipment installer (one who is engaged and
is responsible for, or is thoroughly familiar with the installation and operation of gas, oil and
solid fuel burning appliances; who is experienced in this type of work and familiar with all the
building code requirements and/or fire codes of the authority having local jurisdiction.)
NOTE: Any connections to an existing ductwork system of a forced air heating system must
comply with NFPA 90B, 2-1.1 and have plenums constructed of metal in accordance with NFPA
90B, 2-1.3. Contact your local H.V.A.C. professional for determining compatibility of the
WinterGreen Furnace to your existing heating system prior to installation.
NOTE: The furnace should be placed on a non-combustible floor made of concrete or masonry.
Consideration should be made when deciding a location for the furnace; it should be close to a
chimney, a power source and have easy accessibility to your wood supply. If your WinterGreen
furnace is to be located in a garage, National Codes require that the lowest point of ignition be at
least 18” from the floor. If the furnace is to be installed in a separate enclosed space where combustion air is taken from outside the garage, this rule does not apply.
CHIMNEY - INSTALLATION
IMPORTANT: The following chimney instructions are for reference and guideline purposes only.
Chimney installation should be performed by a qualified chimney installer.
Be sure to read, understand and adhere to the installation clearances and restrictions stated in
this manual.
Masonry Chimneys: The use of an existing masonry chimney should only be considered if it has been
thoroughly inspected and approved for use with this furnace. The chimney must conform to State or National Building Codes. Consult local building code and fire code authorities for the proper requirements
in your area.
NOTE: WinterGreen does not recommend using a masonry chimney.
Factory Built Chimneys: New factory built chimneys must conform to type HT (High Temperature) requirements of UL-103 for factory built chimneys and comply with the requirements of Chapter 11 of
NFPA 211 Standard for Chimneys, Fireplaces, Vents and Solid Fuel-Burning Appliances. Consult local
building code and fire code authorities for the proper requirements in your area.
Never connect to an aluminum Type B gas vent. As this is not approved
for the WinterGreen Furnace and is dangerous.
DO NOT USE A CHIMNEY CAP!
Do not connect furnace to a chimney flue serving any other appliance.
DO NOT SIDE VENT A SOLID WOOD BURNING FURNACE
Stove Pipe: The stove pipe and elbows used to connect from the WinterGreen Furnace to either a factory chimney or a masonry chimney must be black, heavy wall (24 gauge) thickness with a melting point
of not less than 2000˚F and conform to UL Standard S641 for flue pipes.
IMPORTANT: The flue connection between the furnace and chimney cannot have more than a
combined total of 180˚ in elbow connectors. (Example: 2 x 90˚ elbows or 1 x 90˚ and 2 x 45˚ elbows) The maximum straight length of flue pipe is 3 m (10 ft.) total and have an upwards slope
toward the chimney of 1/4” per foot to allow condensation to drain towards the furnace. All connections must have at least 1 3/16” overlap and a minimum of 3 fastening screws to prevent
separation. Provisions must be for visual inspection and cleaning either by cleanouts in the fluepipe or by removal of the flue pipe. Longitudinal seams of the pipe are to be located on the underside in horizontal runs.
Continued on next page… 19
CHIMNEY – INSTALLATION
Continued:
Factory Built Chimneys:
Note: The top of the chimney must extend at least 0.9 m (3 ft) above the highest point where it exits the
roof and be at least 0.6 m (2 ft) higher than any other point of the roof within 3.1 m (10 ft).
For draft proper operation, the chimney should be at least 3.6 m (12 ft) to 4.6 (15 ft) in tall.
When installing the new chimney, observe all building code requirements. Be sure to carefully
follow all the manufacturers installation instructions supplied with your chimney.
Continued on next page…
CHIMNEY – INSTALLATION
Continued:
Connection to an Existing Masonry Chimney
NOTE: When inserting the stove pipe into the masonry chimney, be careful not to push it into the chimney to far. If the stove pipe is in to far it will restrict the proper draft required for the furnace. See figure 2
for the proper stovepipe position.
The connection between the WinterGreen Furnace and the chimney must be completed using a minimum of 24 gauge UL Standard S-641 stovepipe and elbows. A clearance of at least 18 inches must be
maintained from all combustible surfaces. (See figures 1 & 3)
Continued on next page…
CHIMNEY - INSTALLATION
Continued:
General Rules:
Although WinterGreen does not recommend using a masonry chimney for use with our furnaces,
you may connect to an existing flue or chimney subject to the following conditions:
1) The chimney has been thoroughly inspected by a qualified professional and deemed compatible with
a residential solid fuel burning appliance such as the WinterGreen Furnace.
2) Any necessary repairs and cleaning have been completed by a professional.
3) The chimney or flue should be at least 15 ft tall.
4) The furnace chimney is not shared with any other fireplace or appliance.
5) It does not share a flue that is being used to provide make-up air to the basement.
6) Have installation thoroughly inspected before operating the furnace.
Connector Pipe Installation Rules:
1) Use only corrugated (non-adjustable) elbows whenever possible as they provide better performance
with being more airtight and less likely to fail.
2) If the connector pipe must travel through a combustible wall, consult a masonry professional or chimney dealer for the proper transition components. The installation must conform to all local fire and building codes, NAPA -211.
3) Insert the crimped end of the stovepipe into the inside of the furnace collar. Install additional stove
pipe and elbows with the crimped end towards the WinterGreen Furnace.
4) The flue must be supported from the structure by means of metal or other non-combustible supports;
horizontal pipes must be supported at intervals not exceeding a span of 3 ft.
5) The flue pipe must have a sealed connection with the chimney flue.
6) Do not use galvanized steel stove pipe.
7) Each stove pipe connection must have at least 3 securing screws.
DIGITAL TEMPERATURE CONTROL
Overview:
The WinterGreen Digital Temperature Control eliminates the need for older style aquastats and combines all the necessary furnace control functions into one “Easy to Use” unit.
The full function controller provides a Real Time Temperature Readout, preprogrammed operating furnace temperature range limit and a Thermal Spike Protection control with an audible over temperature
alarm.
Feature Description:
1. Digital Display: (Indicates one of the following as selected)
Real Time Furnace Temperature
Thermal Spike Protection Set Point. (SP1)
Operating Temperature Set Point (SP2)
2. Set:
Each time the set button is pressed the display will indicate the current value of one of
the above 3 operating modes.
Also used to move the Operating Temperature Set Point up or down. (See “Setting SP2” later in this section)
3. Down Button:
Pressing the Down button will lower the temperature for SP-2 when the display is indicating this temperature. (See “Setting SP-2” later in this section)
4. Up Button:
Pressing the Up button will raise the temperature for SP-2 when the display is indicating this temperature. (See “Setting SP-2” later in this section)
5. Output 1 – Thermal Spike Protection (TSP) Indicator Light:
Light is ON when TSP is activated. Light is OFF when the temperature is normal.
6. Output 2 – Draft Damper Indicator Light:
Light is ON when the Draft Damper is OPEN. Light is OFF when it is CLOSED.
Continued on next page…
DIGITAL TEMPERATURE CONTROL
Continued:
Setting Set Point 2 (SP2) – Furnace Operating Temperature: (See Fig. 2)
Operation:
Note: The temperature controller has a fixed operating range that is factory set from 160 to 170˚.
It will not allow a setting outside this range. The recommended setting is 165˚. The controller displays
the low temperature setting has a preset differential of 15˚ which is an added value to the selected operating temperature. This added value is the high limit of the temperature range.
Example1: Temperature Selected = 165 (Opening of Draft Damper – Fire Start)
Plus Differential
15
High Limit will be: 180 (Closing of Draft Damper – Fire Out)
Example 2: Temperature Selected = 160 (Opening of Draft Damper – Fire Start)
Plus Differential
15
High Limit will be: 175 (Closing of Draft Damper – Fire Out)
It must be kept in mind that if the temperature setting is raised or lowered, the high limit temperature setting will follow by 15˚ accordingly.
Setting the Temperature:
1. With the display screen showing the operating temperature, press and release the SET (2) button
twice. A value between 160 and 170 will appear on the display; this is the current operating range of the
furnace. (If the temperature has not been changed from the factory value, the display should indicate
165).
2. Press the DOWN (3) or UP (4) buttons to select the desired new temperature setting.
3. Press the SET (2) button to confirm the new setting. The OUTPUT 2 Indicator Light (6) will blink.
The new value is now set.
Continued on next page…
DIGITAL TEMPERATURE CONTROL
Continued:
Errors:
Under normal circumstances the Digital Controller should
provide trouble free operation, but should a problem ever
* Contact your WinterGreen Representative
occur the controller will display a coded
error message. (See Fig. 3) The chart on the right
indicates messages that may appear and what is causing the
error and what steps to take to remedy the problem.
Settings:
SP-1 (Set Point 1)
Thermal Spike Protection
(TSP)
Activates TSP on Temperature Setting
190˚F Factory Set Not
Adjustable
SP-2 (Set Point 2)
Operating Temperature
Set Point
Alarm Setting
High Temperature Alarm
Furnace Operating
Range
Audible Alarm on High
Temperature
160˚F to 170˚F Adjustable Range
200˚F Factory Set
Not Adjustable
Alarm:
The Temperature Controller is equipped with an audible alarm which is activated if the furnace temperature should reach 200+˚F. The alarm is a loud pulsating beep which will remain on until the temperature
drops below 185˚F. This alarm is intended to signal that the furnace is beginning to overheat and action
should be taken to correct the problem (See the “Furnace-Startup/ Runaway Fire” section of this manual).
To silence the alarm, Press “SET & DOWN” simultaneously. The alarm will be silenced, but the alarm
message will continue to be displayed on the screen until the temperature drops to 185˚F.
FURNACE - STARTUP
COLD START UP
Read the following instructions prior to startup of the furnace. Review and understand the warnings in
this manual and if you are unsure of any instruction, contact your Authorized WinterGreen Dealer.
A proper startup of the WinterGreen Furnace is essential to ensure that any moisture is removed from
the firebox refractory before any regular operation is attempted. It is advisable to put a heat lamp or similar device in the firebox of the furnace several days prior to startup to help warm the refractory and remove excess moisture. It is most common to see creosote bleed from the furnace onto the floor for several days after start up, this is caused by moisture that has been trapped in the furnace body and insulation. When all moisture has been dissipated, there should be no more creosote bleeding.
IMPORTANT: Check that all the installation connections, both electrical and mechanical have
been completed before proceeding with the following steps.
First Step: Checking the Furnace
1) Connect the furnace to a 115 volt power supply and confirm that the circulating pump is now active
and water is circulating throughout the circuit loop. Check to ensure there are no leaking joints etc. If you
are unsure of water or glycol circulation, contact your installer or an Authorized WinterGreen Dealer for
information to help you determine the correct water flow.
2) Check the air damper on back of the furnace; it should be open when the furnace is first powered up.
Second Step: Cold Startup Fire
Building the cold startup fire process should take approximately two (2) hours. This process consists of
making four (4) fires. The first three (3) fires are to slowly bring the firebox up to temperature and eliminate moisture in the refractory. The fourth (4th) fire is the final startup fire.
Preparation: Make three (3) equal size piles (12 to 18 pieces) of split kindling
(Approximately 3 - 4 lbs).
Make one pile of 8 to 12 pieces of split firewood.
ENSURE DRAFT INDUCER IS TURNED ON.
FIRE 1: Crumble up several pieces of newspaper and place them against the back wall of the firebox.
Roll up two (2) pieces of newspaper and place them on top of the crumbled newspaper in the
firebox. Place one pile of kindling on the newspaper that was put at the back of the firebox. Light
the newspaper and close the firebox door.
FIRE 2: In approximately 20 minutes, open the firebox door and check the fire. If the fire has no visible
flame and is just red embers, load the second pile of kindling against the back wall of the firebox
on the embers, adding paper if required. Be careful not to smother the fire. Close the firebox
door.
FIRE 3: In approximately 20 minutes, open the firebox door and check the second fire. If the fire has no
visible flames and is burned down to orange-red embers, load the third pile of kindling on the embers
against the back wall of the firebox, adding newspaper if needed. Do not smother the
fire. Close the firebox door.
Continued on next page…
FURNACE - STARTUP
Continued:
FIRE 4: In approximately 20 minutes, open the firebox door and observe the fire. If the fire has no visible
flame and burned down to orange–red embers load the split firewood on the embers against the back
wall of the firebox. Close the firebox door. In approximately 10 to 15 minutes, open the firebox door and
observe the fire. If the fire is fully ignited and burning well, load in 2-3 pieces of un-split firewood.
Refer to “Loading the Furnace” section of this manual.
The WinterGreen Furnace is now been properly pre-heated and is ready for normal
operation.
NOTE: If for any reason the startup sequence is interrupted or the furnace has not been
operated for an extended period of time and the fire box is allowed to cool, then the
sequence must be started from the beginning and all four (4) fires must be used. This is
important, especially when beginning a new heating season, as the refractory has
absorbed moisture over the warmer humid months.
IN CASE OF A RUNAWAY FIRE:
1) ENSURE THE FIREBOX DOOR IS CLOSED TIGHTLY.
2) TURN OFF THE FURNACE DAMPER SWITCH ON THE CONTROL
PANEL.
3) TURN OFF THE DRAFT INDUCER SWITCH ON THE CONTROL PANEL.
4) TURN UP ALL SYSTEM THERMOSTATS TO THEIR HIGHEST SETTINGS.
5) DO NOT ATTEMPT TO REMOVE BURNING WOOD FROM THE
FURNACE.
THE FURNACE DAMPER HAS BEEN FACTORY SET FOR
OPTIMAL PERFORMANCE. DO NOT ALTER THIS SETTING
FOR INCREASED FIRING FOR ANY REASON.
THE FURNACE IS HOT DURING OPERATION. SKIN CONTACT MAY CAUSE SERIOUS BURNS. WEAR PROTECTIVE
CLOTHING, GLOVES AND SAFETY GLASSES WHEN
LOADING THE FURNACE.
DO NOT TOUCH HOT SURFACES DURING FURNACE OPERATION.
KEEP CHILDREN CLEAR OF FURNACE WHEN IN OPERATION.
THIS FURNACE IS INTENDED TO BE OPERATED ONLY IN
THE PRESENCE OF A COMPETENT PERSON.
FURNACE - PRIMARY FIRE
DETERMINING THE APPROPIATE FIRE SIZE
NOTE: DO NOT completely fill the firebox as this may cause an over-firing situation if there is not
enough heat demand in the areas being serviced by the furnace.
The WinterGreen Furnace uses less wood than a normal wood burning appliance. It in turn needs less
wood to produce a similar heat output. A medium intense fire is preferable to a large smoldering
one to reduce the amount of creosote disposition.
ENSURE DRAFT INDUCER IS TURNED ON.
After the furnace has completed its start-up fire and burned the initial logs that were placed inside the firebox, then proceed as follows:
1. Partially open the firebox door, wait a few seconds then open it completely. Add 2 – 3 medium
pieces of wood to the fire.
2. Wait approximately 10 – 15 minutes and periodically check the furnace. Watch how quickly the temperature rises on Digital Temperature Controller. Check to see if the air intake damper is OPEN or
CLOSED.
Damper closes – and the digital readout indicates approximately 180˚F, then the furnace does not require any more wood.
Damper is remaining open and the digital readout is below 180˚F and the controlling (House) thermostat is not reaching temperature, add another small quantity of wood.
Repeat step 2 until the furnace reaches 180˚F and the air intake damper closes.
Observations:
The furnace temperature will continue to rise after the air intake damper closes and the fire is extinguished. The rise should be to between 180˚F and 185˚F. Stabilization will occur at approximately 185˚F
and temperature will begin to fall. The air intake damper will open and close regularly as the furnace
modulates its internal temperature.
Normal Operating Temperature
Normal operating temperature can be verified by observing the Digital Readout on the Temperature
Controller. It should read greater than 155˚F. The ideal temperature range is between 165˚ and 180˚F.
Or
There will be very little opaque smoke coming from the chimney while the furnace is operating. The
smoke will become clear as the fire gets hotter.
Or
Yellow and bright yellow flames can be observed through the intake damper or by looking inside the firebox.
Observe the furnace temperature of the unit relative to the quantity of wood that is loaded into
the firebox. Understanding the relationship between this temperature and wood is important as
to the proper loading of the furnace.
FURNACE – ASH DISPOSAL
Disposal of Ashes:
When:
When ash accumulation inside the furnace begins to impede the operation of the air inlet tubes at back
of the firebox, it is time to remove them. Do not allow blockage of the air inlet tubes.
Method:
Ashes should be placed in a metal container with a tight fitting lid. The closed container of ashes should
be placed on a non-combustible floor or on the ground, well away from all combustible materials. If the
ashes are disposed of by burial in soil or otherwise locally dispersed, they should be retained in the
closed container until all cinders have thoroughly cooled. Do not put any other waste in the ash container.
How:
For routine ash removal, slide out the ash pan on the bottom of the furnace and remove ashes and
place them in a container as described above. (See Figure 1 on how to open Ash Pan)
For general firebox cleanout, allow the fire to die out and cool down, and then remove the ashes in the
firebox with a small metal shovel. Place ashes in a container as described above.
THE FURNACE IS VERY HOT, USE PROTECTIVE GLOVES AND EYE
PROTECTION WHEN EMPTYING ASHES FROM THE FURNACE.
LOADING THE FURNACE
NEVER LOAD THE FURNACE ABOVE THE FIREBOX DOOR MAXIMUM HEIGHT ARROW.
DO NOT BURN GARBAGE, GASOLINE, NAPTHA, ENGINE OIL OR
OTHER INAPPROPRIATE MATERIALS.
DO NOT BURN WOOD CHIPS, DURA FLAME LOGS, MILLENDS,
PALLETS OR RAILROAD TIES.
USE ONLY WHOLE SMALL LOGS OR LARGE SPLIT FIREWOOD.
NEVER OPERATE THE FURNACE WITH THE ASH DOOR REMOVED OR OPEN.
NEVER OPERATE THE FURNACE WITH THE DAMPER DOOR
BLOCKED OPEN.
NEVER OPERATE THE FURNACE WITH THE LOAD DOOR OPEN.
(KEEP DOOR SEALS IN GOOD CONDITION)
DO NOT OVER-FIRE THE FURNACE. OVER-FIRING WILL OCCUR
IF THE LOAD DOOR IS LEFT OPEN OR THE DAMPER DOOR IS
BLOCKED OPEN DURING OPERATION. SUCH ACTIONS CAN RESULT IN A DANGEROUS OPERATING CONDITION.
WHEN LOADING WOOD INTO THE FURNACE, MAKE SURE THE
AIR INTAKE DAMPER IS OPEN AND THE DRAFT INDUCER IS ON.
IMPROPER OPERATION OF THE WINTERGREEN FURNACE MAY
RESULT IN A HOUSE OR BUILDING FIRE.
LOADING THE FURNACE
WOOD LOADING PROCEDURE
Figure 1: Wood should be loaded into the furnace in the direction shown in this figure. This is the proper
loading configuration which will not damage the refractory and produces the most efficient burning results.
Figure 2: Loading the wood as shown in this figure can cause a “wedge effect” and will produce
stress on the back section of refractory which may result in cracking. Loading the wood
end first also causes the wood to burn unevenly resulting in a fire that is harder to
control, less efficient and produces more smoke.
Figure 3: Loading the wood as shown in this figure will cause stress on the door refractory and cause it
to crack. Always stack the wood so it lays flat on the underlying log. (See page 32)
Figure 4: The maximum height of the loaded wood should not rise above the Maximum Height Safety
Indication Arrow that states “UNSAFE TO LOAD PAST THIS LEVEL” (See page 32)
Continued on next page…
LOADING THE FURNACE
Continued:
FUSE
The use of 12” and larger diameter un-split blocks of seasoned hardwood is recommended for use in the
WinterGreen Furnace. The largest diameter that fits through the loading door works the best. See
the Furnace Specification Section that states the door size of your furnace. In testing we have found that
this size of hardwood greatly increases the efficiency of the furnace, gives the longest, cleanest burn
and has the least creosote buildup. Do not THROW wood into the firebox as this may damage the
refractory, set wood on the door lip and gently roll it into the firebox.
WinterGreen does not recommend burning smaller pieces of dry split wood. This type of wood fuel
is consumed too rapidly which greatly reduces the furnace efficiency and results in an uneven, uncontrolled rate of burn. See the section “Wood Selection” in this manual.
DO NOT BURN GARBAGE, GASOLINE, NAPTHA, ENGINE OIL OR
OTHER INAPPROPRIATE MATERIALS
DO NOT BURN TIRES, TREATED WOOD OR RAILROAD TIES.
FOR SAFE AND EFFIENT OPERATION, WOOD MUST BE LOADED
PROPERLY INTO THE FURNACE AS SPECIFIED IN THIS MANUAL. DO
NOT EXCEED THE RECOMMENDED MAXIMUM
LOADING HEIGHT.
Continued on next page…
LOADING THE FURNACE
Continued:
Loading the wood into the furnace
1. Refer to the section “Furnace Startup” if there is not already a fire burning in the furnace.
2. If there is a fire burning, open the firebox loading door slowly. Use a furnace poker, shovel or similar
implement with a suitable length and carefully move the embers to the back of the firebox. It is important not to block off the air intake tubes.
3. Select an appropriate log and place it on the bottom lip of the door opening, then using a poker,
push the log carefully into the firebox.
The furnace is hot during operation, KEEP CHILDREN AWAY FROM THE
UNIT. Use protective gloves, clothing and safety glasses when loading
the furnace. Take special care near the loading door refractory and steel
door frame as they are extremely hot.
Furnace burning tips:
Avoid blocking the air intake tube at the back of the firebox.
Use the firebox door as a “Log length guide”. The door width is the maximum length for a log being
loaded into the furnace. Do not load anything longer as refractory damage may occur.
Roll logs into the fire; do not throw them into the firebox. This can result in refractory damage or
cause ashes or cinders to fly back into the room.
Allow the wood to burn down before reloading as this will reduce smoke spillage when opening the
door.
Do not load past the Maximum Load Height Safety Label.
RISK OF FIRE
Keep all combustible materials clear of the furnace. Do not store fuel
or other combustibles within marked installation clearances of
furnace. (Keep a minimum of 5ft. from the furnace.)
Do not store wood within 5 ft. of the furnace.
Do not operate with ash tray or fuel loading doors open.
Inspect and clean chimney flues regularly. (Refer to Chimney
Maintenance section in this manual.)
WOOD SELECTION
Efficiency:
The WinterGreen Furnace is most efficient when large un-split seasoned hardwood logs are used. The
largest logs that can fit through the loading door tend to burn the best. Avoid the use of small logs and
smaller split wood as they tend to burn fast, reduce the burn time of the load and the overall efficiency of
the furnace.
Do not burn pallets, wood scraps, coal, corn, pellets, garbage, tires,
gasoline or any other combustible materials other than whole wood.
Do not use gasoline, naphtha, charcoal lighter, gasoline or any other
flammable chemicals to start or re-ignite the fire.
Seasoned Hardwood is Best to Burn:
Although the WinterGreen Furnace is capable of burning “green” hardwood”, it is NOT recommended
as it promotes Creosote buildup and condensation in the furnace and chimney. Unseasoned hardwood
will also reduce furnace heat output as well. Recently cut “green” hardwood may contain up to approximately 50% moisture content. It would require nearly 1000 BTUs for every pound of wood to evaporate
this moisture content. Seasoned hardwood only contains approximately 20% moisture content. On average, this lower moisture content results in approximately 10 to 30% more useable heat than the “green”
hardwood.
There are many wood species locally available to burn in your WinterGreen Furnace with some being
better than others. The majority of hardwoods will produce much more heat than soft woods.
Wood Storage:
To maintain low moisture content, wood to be used for burning in the WinterGreen furnace should be
kept in a dry environment sheltered from the weather. If wood storage is be in the same building as the
furnace, ensure there is a minimum of 5 ft. clearance from the unit.
Harvesting Wood for the WinterGreen Furnace:
If you harvest your own wood consider the following:
After being cut, wood takes approximately 18 months to properly season and be suitable to burn.
Wood should be cut into larger sizes that will just fit into the firebox.
Stack the wood to allow proper ventilation to assist in the drying process.
Do not remove the limbs immediately after cutting the tree. Allow the leaves to wither on the limbs
as this helps in removing moisture from the tree.
Refer to Page 35 for a helpful chart showing various wood species and their available heat content.
Continued on next page…
WOOD SELECTION - CHART
The Weights and Measure Act states that a cord of wood is: 4 ft. x 8 ft. x 4ft. (128 cu.ft.)
DRAFT INDUCER–BAROMETRIC DAMPER
DRAFT INDUCER:
The WinterGreen High Efficiency Furnace uses an air moving device in the stove pipe called a Draft Inducer. The draft inducer provides a regulated air flow (No less than 450 CFM) which results improved
burning and reduced smoke spillage while loading the furnace. (See “Mounting the Draft Inducer” in this
section)
BAROMETRIC DAMPER:
The Barometric Damper acts as a draft regulator and must be used in conjunction with the draft inducer. It automatically regulates the draft by way of a manually adjusted counter balance pivoting flap.
There are two styles of damper that WinterGreen uses, one is an insert which is installed into a “tee connector” and the other is a complete assembly. Both units are covered in the section “Installing the Barometric Damper”.
NOTE: All furnace stove pipe and connectors must be black heavy wall (24 gauge thickness) with
a melting point of not less than 2000˚F and conform to UL Standard S641 for flue pipes.
Draft Inducer Location:
The draft inducer must be installed vertically on a straight length of pipe on the uppermost section of the
stove pipe stack.
For a through wall configuration, the unit must be located 12” from the bottom of the elbow leading
into the wall. (See figure 1 – Through Wall Configuration)
For a through ceiling configuration, the unit must be located 18” from the ceiling. (See figure 2 –
Through Ceiling Configuration)
DRAFT INDUCER - INSTALLATION
Continued:
Draft Inducer Installation onto the stove pipe.
Use the manufacturer’s template and instructions that come with the Draft Inducer.
See Figures 1 and 2 on previous page for Proper Location of the Draft Inducer.
It is recommended to perform the following instructions with the stove pipe removed.
As Per the Draft Inducer’s Manufacturer’s Instructions:
Drill four (4) 7/32” holes for speed nuts.
Cut out the rectangular hole for the Draft Inducer as per template. (See Figure “A”)
Install speed nut clips over each of the four drilled holes.
Insert curved edge of the fan housing into the pipe in the direction of airflow and secure unit to pipe
with screws. (See Figure “B”)
Important: All stove pipe connections must have at least 30mm (1 3/16”) overlap when joined together and a minimum of 3 fastening screws per joint to prevent separation of the connector
pipes.
Continued on next page…
DRAFT INDUCER – INSTALLATION
Continued:
Draft Inducer Electrical Outlet:
The WinterGreen Furnace has a pre wired electrical outlet dedicated for the Draft Inducer and is located
on the back of the furnace. (See the drawing below) The bottom outlet of the receptacle box is solely for
the draft inducer and is controlled by the ON/OFF switch on the Control Panel. (See the Control Panel
section of this manual)
A suitable 3 prong electrical plug for the Draft Inducer that is rated for 15 amps is required for use with
this outlet. The Draft Inducer does not come pre wired. Wiring must be in accordance with the Draft Inducer’s Manufacturer’s specifications and performed by a qualified person.
It is recommended that this procedure be performed by a qualified electrician.
Continued on next page…
BAROMETRIC DAMPER – INSTALLATION
Continued:
Barometric Damper Location and Installation:
The Barometric Damper must be located near the base of the stove pipe as close as possible to the first
elbow leading from the furnace. (See figure 5) for proper installation location)
Figure 3: shows a “insert” style barometric damper. This unit is friction fitted into a tee connector and
secured with a minimum of 3 (three) screws. The “tee” is then connected to the elbow.
Figure 4: shows a “complete assembly” style barometric damper which is simply installed on the elbow
which is connected at the bottom of the furnace.
Continued on next page…
DRAFT INDUCER-BAROMETRIC DAMPER
Continued:
Maintenance:
The Draft Inducer and Barometric Damper will continue to operate efficiently on the WinterGreen Furnace as long as periodic maintenance is performed. Depending on the wood being burned, the draft inducer fan must be inspected at least twice monthly during the heating season and removed from the
stove pipe and cleaned at least twice a year, preferably several times a year, more so during the heating
season. The Barometric Damper should be cleaned at the same intervals as the Draft Inducer. Observing the damper’s movement to see if operates sluggish or if there is a reduced performance of the Draft
Inducer is a clear sign that the damper requires cleaning. Cleaning of these components can be accomplished with a small fine wire brush.
BURNING OF RESINOUS WOODS SUCH AS PINE AND FIR ETC. PRODUCE AN ABUNDANCE OF CREOSOTE WHICH CAN COAT THE INSIDE OF THE CHIMNEY DRAFT INDUCER AND BAROMETRIC
DAMPER. STACK TEMPERATURES MAY BECOME HIGH ENOUGH TO
IGNITE THE DEPOSITS AND CAUSE A CHIMNEY FIRE.
THE DRAFT INDUCER, FLUE PIPE AND CHIMNEY MUST BE KEPT
CLEAN AND IN GOOD CONDITION.
EXTREME CAUTION MUST BE EXCERCISED TO ENSURE THE RADIANT HEAT GENERATED BY THE FURNACE AND STOVE PIPES DO
NOT DAMAGE THE ELECTRICAL WIRING OF THE DRAFT INDUCER.
DRAFT – SETUP
WHAT IS DRAFT
Chimneys operate on the principle that hot air rises above cold air – thus, the hot gas in a chimney rises
because it is less dense than the air outside the house. The rising gas creates a pressure difference
called draft, which draws combustion air into the furnace and expels the exhaust gas outside through the
chimney. The hotter the gas compared with the air outside, the stronger the draft.
Draft is a function of the chimney flue, not the furnace. Many factors including chimney height, cross
sectional area of the chimney, flue gas temperature, insulation value of the chimney wall, dilution air and
total volume of flue gases determine natural chimney draft.
Typical symptoms of an inadequate or poorly functioning flue include:
Smoke spillage into the room or visible smoke out the chimney.
Excessive buildup of condensation or soot in the chimney.
Creosote buildup in the flue.
Poor heating performance.
Improved Draft:
NOTE: The WinterGreen Furnace requires the use of a Draft Inducer which must be used in conjunction with a Barometric Damper. Both these components must be installed on the furnace
stovepipe prior to furnace operation.
DO NOT OPERATE THE FURNACE WITHOUT THESE 2 (TWO) KEY COMPONENTS INSTALLED.
What is the Draft Inducer:
A Draft Inducer is basically a fan that is installed inline on a stove pipe to improve draft flow up a chimney. This unit is installed on the WinterGreen Furnace to improve wood burning efficiency and to reduce
smoke spillage when opening the loading door to re-fuel.
The WinterGreen Furnace is designed to operate with the draft inducer running when draft boost is required. The Draft Inducer can be turned off when the furnace is not in use by manual switch located on
the Control panel at the front of the furnace.
Be sure to have the draft inducer switch turned on during re-fueling to prevent smoke spillage
into the room.
What is the Barometric Damper:
The Barometric Damper acts as a draft regulator and must be used in conjunction with the draft inducer. It automatically regulates the draft by way of a manually adjusted counter balance pivoting gate.
This unit can be either an insert which is installed into a “tee connector” or as complete assembly.
WinterGreen recommends that you have a qualified Technician or Chimney Specialist perform
the installation of the Draft Inducer and Barometric Damper.
Continued on next page…
DRAFT – SETUP
Continued:
Manometer:
To set up the draft properly you will require a testing device called a Manometer. This device can be purchased from a local H.V.A.C. supply store. To facilitate the Manometer, a testing hole must be drilled
into stove pipe midway between the Barometric Damper and the Draft Inducer. (See “Figure 5” on
Page 45 in this section) This hole will be used to insert a Manometer probe to measure the draft in the
stove pipe. Drill a hole in the stove pipe just large enough for the Manometer tube to be inserted. Using
the manometer will be covered later in this section. Drill hole when furnace and pipes are cold.
Barometric Damper Setup:
The Barometric Damper must be level horizontally and plumb vertically before proceeding with
any adjustments.
The damper (See “Figure 1”) has a moveable gate which opens and closes as the air flow (draft) fluctuates. The gate is equipped with a manually adjusted weight which when turned in either direction will
control the movement of the gate in relationship to the air flow. The weight adjustment should set so as
the gate will move swing easily if gently pushed by a finger. This will be the base setting for the damper.
Note: Due to the various manufacturers’ designs, the illustration depicted in this manual is for reference
only. Always refer to the manufacturer’s instructions when installing this type of device.
Continued on next page…
DRAFT – SETUP
Continued:
Draft Inducer Setup
Note: The draft inducer and barometric damper must be installed, operating properly and
thoroughly checked before proceeding with the following setup procedure. (See “Draft Inducer –
Barometric Damper” section for the proper installation procedure)
Start a fire in the furnace and turn on the Draft Inducer. (See “Furnace - Primary Fire”
and “Furnace Startup” section of this manual)
Before performing the following draft setup, close all doors and windows in the building the furnace is located in. Turn on all appliances that remove air from the building (e.g. exhaust fans,
clothes dryer, air conditioner, fireplaces etc.)
If the furnace is located in an outside outbuilding with sufficient open spaces for air to pass
through, disregard the previous statement.
WinterGreen recommends that this test be performed by a HVAC professional, certified technician.
Continued on next page… 43
DRAFT – SETUP
Continued:
Draft Inducer: Measuring and Adjusting the Flue Draft
The Draft Inducer has a manually operated Adjustable Draft Vane that when moved Up or Down controls the amount of draft in the chimney. By setting this vane in the proper position the optimal draft setting can be achieved. (See “Figure 4”)
1) Allow the furnace fire to settle into stable state of operation (approx. 25 min.)
2) Insert the Manometer into the hole that was previously drilled in the stove pipe and observe the measurement of flue draft. (See “Figure 5”) The WinterGreen Furnace requires a draft of .05” to .07” Water Column (WC) measured with a Manometer.
3) If the measurement is below 05” WC then there is not enough draft and it must be increased to avoid
air starvation of the furnace. Move the Adjustable Draft Vane on the Draft Inducer (See Fig.4) “UP” and
increase the draft until a reading is achieved between .05” - .07” WC.
4) If the reading is above .07 WC then there is too much draft and it must be reduced to prevent over
firing of the furnace. Move the Adjustable Draft Vane on the Draft Inducer (See Fig.4) “DOWN” and decrease the draft until a reading is achieved between .05”- .07” WC.
5) When the desired WC reading is obtained the hole in the chimney should be plugged with furnace
putty.
6) Observe the barometric damper and see if it is operating smoothly. There should be some movement
of the gate but it should not be operating erratically. If the gate movement is erratic, make an adjustment
to the draft weight by turning the adjuster “in” or “out” until the gate stabilizes. (See “Figure 1”)
Continued on next page…
DRAFT – SETUP
Continued:
The WinterGreen furnace has a maximum draft setting of .07”WC as
measured with a manometer. Exceeding this draft setting could cause
the furnace to over fire. DO NOT OPERATE THE FURNACE OVER THIS
SETTING.
FURNACE STOVE PIPES ARE VERY HOT! To avoid skin burns, wear
gloves and use extreme caution while taking manometer measurements of the draft.
The Draft Inducer must be running at all times during furnace operation
when draft boost is required and when opening the loading door for
refueling.
Continued on next page… 45
NEGATIVE AIR – MAKEUP AIR
NEGATIVE AIR PRESSURE
When more air is found to be leaving a home than what is coming in, a partial vacuum effect occurs. We
call this effect, Negative Air Pressure. In winter, heated indoor air rises up through the home and escapes from upper level leaks such as windows and poor insulation etc. At the same time, we force air
out of the house with exhausting appliances such as bath fans, clothes dryers, kitchen exhaust fans, and
furnaces. All of these appliances are contributing factors to a negative air pressure problem, which is
basically a lack of “make-up air”.
Sometimes negative air pressure can lead to annoying situations such as a fireplace or stove that leaks
smoke or will not draw air at all. At other times a more serious and dangerous situation can occur, such
as an air flow reversal that draws carbon monoxide from a furnace chimney into the house. Negative air
pressure also contributes to house condensation, mould and mildew and a general unhealthy environment for the house occupants.
Most heated homes will leak some air due to pressure differences and the natural “stack effect” of the
house. Stack Effect means your entire house works like a chimney, an example being heated air rising
up the stairways. If you crack open a window, you will usually feel air coming into the house rather than
blowing out. Without planned ventilation, this negative air pressure will draw air in at uncontrolled points.
When you control ventilation, YOU determine when and where air enters your home, getting the maximum benefit from the least amount of air.
One example of addressing this problem would be the use of an “Air Supply Ventilator” or similar unit.
There are many manufacturers of this type of product.
If you encounter a negative air pressure problem, WinterGreen recommends you contact a local HVAC
specialist to determine the best solution to your needs.
Supplying Make-up Air
Furnaces, fireplaces, clothes dryers, exhaust fans and most other air moving appliances all draw air
from the particular room they are located in. The WinterGreen Furnace also draws air and should also
be taken into consideration when determining if there is enough fresh air to satisfy the needs of all your
appliances. An insufficient supply of fresh air will create a negative pressure in the room and potentially
starve the furnace of the necessary combustion air it requires to function properly. The following procedure will help to determine the air requirements for the room that your WinterGreen Furnace is to be
located in.
Determining the Volume of Fresh Air:
1) Determine the volume of space (cu. ft.) in the room. Include all adjacent rooms in the calculation that
are not closed off by doors.
Volume (cu. Ft.) = length (ft.) x Width (ft.) x Height (ft.)
2) Determine the air input requirements of all the appliances located in the calculated room space.
(See: Manufacturer’s Plate on each appliance) Take the sum of all the appliances and round it off
to the nearest 1000. This sum will become “BTUs per hour”.
Continued on next page…
NEGATIVE AIR – MAKEUP AIR
Continued:
3) Determine if the space is “confined” or “unconfined”. Do this by dividing the total volume of the room
(cu. Ft.) by the total input requirements of the room (BTUs per hour)
cu. ft. ÷ BTUs/hr
a: If the result is greater than or equal to 50 cu.ft. / 1000BTU per hour, then the space is
considered to be “Unconfined.”
b: If the result is less than 50 cu.ft. / BTU per hour, then the space is to be considered
“Confined”
4) For an “unconfined” space in a conventionally constructed building, the fresh air filtration through
gaps in doors and windows would NORMALLY provide adequate air for combustion and ventilation. No
additional make-up air should be required.
5) For a “confined” space or an “unconfined” space in a building with unusually tight construction, an
additional source of make-up air is required. In this case please consult an HVAC professional to determine the best way to supply make-up air requirements for your furnace installation.
Note: If the furnace and wood storage area are in the same or adjacent rooms and fans are to used in
these areas, ensure the fans do not create a negative air pressure that will affect the furnace operation.
WinterGreen recommends that you contact a qualified HVAC specialist to determine the air
requirements for your home.
DO NOT OPERATE THE WINTERGREEN FURNACE IN A CONFINED
AREA WITHOUT PROPER VENTILATION.
PLUMBING - INSTALLATION
SYSTEM CONFIGURATIONS
The WinterGreen High Efficiency Hydronic Furnace can be plumbed to accommodate a variety of applications. The high temperature fluid transfer of the furnace can supply heating to all types of fluid based
systems for your home, outbuildings, swimming pools and spas etc. There are many different applications that can applied to your furnace, this manual shows only 2 basic configurations of many available.
See your WinterGreen representative for information regarding your specific application.
There are 2 (two) basic system configurations that the furnace can be setup for: An “Open System” or a
“Closed System”.
An “Open System” configuration is when the circulating system is open to the atmospheric pressure.
WinterGreen does not recommend “Open Systems” for indoor use.
A “Closed System” configuration is when the circulating system is closed and sealed from atmospheric
pressure.
WinterGreen recommends that it better to use a closed loop system when setting up the furnace. The
advantages with a closed loop system are:
Reduced Iron-Oxidization caused by air in the system. Iron – oxide leaves deposits that clog metal
components such as valves and heat exchangers.
When pressurized – produces higher boiling points.
A healthier environment.
It is best to check with local authorities before installing a Closed System, as some local codes require
ASME certification for closed pressurizes systems. The WinterGreen furnace is not ASME (American
Society of Mechanical Engineers) rated. If local codes restrict this configuration, the furnace can setup
for an Open System.
Filling the System:
The WinterGreen Furnace uses Propylene Glycol (Safe for humans) mixed with water as a heat
transfer fluid. Do not confuse this with Ethylene Glycol (Highly toxic) which is commonly used in automotive applications. DO NOT USE ETHYLENE GLYCOL IN THE FURNACE. Fill the system using a fluid
transfer pump connected to the “System Fill/Drain valve located below the circulation pump which has
connection threads to accommodate a fill hose from the pump. (See Plumbing Installation “Closed &
Open System Configuration” drawings on the following pages).
NOTE: The WinterGreen Hydronic Furnace can be installed to operate as an independent heat source
or be used as an add-on to the homes existing heating system. If the furnace is to be used in combination with an existing system, the system must be thoroughly inspected prior to installation and meet all
local codes and safety standards. The installation must have any required controls which are in accordance with the appropriate specified standards of NFPA (National Fire Protection Association).
NOTE: Installation of The WinterGreen Hydronic Furnace must comply with all regulations,
codes and minimum installation clearances that have been stated in this manual and by authorities having jurisdiction over this type of appliance.
RISK OF HOT FLUID BURNS
The WinterGreen Hydronic Furnace can produce very hot fluid
(185˚F+). Extreme care should be taken not to come in contact with
the system fluids while the furnace is in operation.
DO NOT WORK ON THE FURNACE OR COMPONENTS WHILE THE FURNACE IS IN OPERATION.
PLUMBING - INSTALLATION
NOTE: All plumbing configuration drawings depicted in the “Plumbing Installation” section of
this manual are for illustration purposes. Due to the various safety and control devices that may
be required for individual applications, it is recommended that you consult your WinterGreen
representative for the design configuration that meets your needs.
CLOSED SYSTEM – BASIC CONFIGURATION With a Heat Exchanger in Home Heating Furnace
The “Closed System” is a circulation system that is closed and sealed to atmospheric pressure. This
type of configuration can slightly pressurize the system therefore requires the use of a 30 PSI Pressure
Relief Valve. The WinterGreen Hydronic Furnace must operate below 15 PSI. This configuration
also shows a heat exchanger mounted in the ductwork of an existing home heating furnace. The use of
an Auto fill and Backflow Preventer keeps the system filled should there be a fluid drop. To protect
against freezing and corrosion a propylene glycol fluid mixture should be used to circulate through the
system. To protect the furnace from condensation and creosote buildup a mixing valve is used to keep
return fluid temperatures above 150˚F. The use of a combination heat exchanger/fan and a solenoid
valve to control the fluid provides Thermal Protection for over heating.
NOTE: The furnace heat exchanger must be mounted on the hot air side of the plenum. DO NOT
install the heat exchanger in the cold-air return inlet of the central furnace. Before installing this
unit as an add on to the existing furnace, a thorough inspection and approval must be made of
the existing systems by a qualified inspector. Any connections to existing ductwork of a forced
air system must comply with NFPA 90B & 2-1.1 and have plenums constructed of metal in accordance with NFPA 90B & 2-1.3. Contact your local H.V.A.C. professional for determining compatibility of the WinterGreen Furnace to your existing heating system prior to installation.
PLUMBING - INSTALLATION
OPEN SYSTEM – BASIC CONFIGURATION With a Heat Exchanger in Home Heating Furnace
The “Open System” is a circulation system that is open to atmospheric pressure (non-pressurized). The
recommended water and propylene glycol mixture in the system is circulated through the loop from the
furnace to the heat exchanger in the home heating system. Installed above the furnace is a hot fluid circulation loop for high temperature heat dissipation in the event of power failure. For Thermal Protection
overheated fluid is allowed to flow to the storage tank if the temperature exceeds 200˚F. To protect the
furnace from possible condensation and creosote buildup, a mixing valve is used on the return side to
keep the incoming fluid above 150˚F.
Note: WinterGreen does not recommend “Open Systems”.
NOTE: The furnace heat exchanger must be mounted on the hot air side of the plenum. DO NOT
install the heat exchanger in the cold-air return inlet of the central furnace. Before installing this
unit as an add on to the existing furnace, a thorough inspection and approval must be made of
the existing systems by a qualified inspector. Any connections to existing ductwork of a forced
air system must comply with NFPA 90B & 2-1.1 and have plenums constructed of metal in accordance with NFPA 90B & 2-1.3.
Contact your local H.V.A.C. professional for determining compatibility of the WinterGreen Furnace to your existing heating system prior to installation.
All plumbing configuration drawings depicted in the “Plumbing Installation” section of this manual are for illustration purposes.
Due to the various safety and control devices that may be required for individual applications, it is recommended that you consult
your WinterGreen representative for the design configuration that meets your needs.
PLUMBING - INSTALLATION
CLOSED SYSTEM – BASIC CONFIGURATION With Connection to an Existing Boiler System
This configuration shows the furnace connected to an existing boiler system with radiant heat. The systems are separated by a plate heat exchanger to prevent mixing of the heating fluids. Both systems
have combination heat exchanger/fan units and isolating solenoid valves which provide Thermal Protection Zones for over heat situations, where the fluids exceed 200˚F.The Furnace side is operated by the
temperature controller and the boiler side is operated by an aquastat. Both systems have auto fill and
backflow preventer devices for maintaining the fluid levels in the lines. To protect the furnace from possible condensation and creosote buildup, a mixing valve is used on the return side to keep the incoming
fluid above 150˚ F.
NOTE: Any installation requiring the connection of the WinterGreen Furnace to an existing boiler
system must comply with local building codes. Contact your local plumbing professional for expert advice prior to your installation.
All plumbing configuration drawings depicted in the “Plumbing Installation” section of this manual are for illustration purposes.
Due to the various safety and control devices that may be required for individual applications, it is recommended that you consult
your WinterGreen representative for the design configuration that meets your needs.
PLUMBING - INSTALLATION
Side Arm Heat Exchanger:
This drawing shows a typical Side Arm Heat Exchanger installation on a hot water tank. Note that it is
very important to keep the Heat exchanger slightly lower than the bottom inlet to the water tank.
All plumbing configuration drawings depicted in the “Plumbing Installation” section of this manual are for illustration purposes.
Due to the various safety and control devices that may be required for individual applications, it is recommended that you consult
your WinterGreen representative for the design configuration that meets your needs.
PLUMBING - INSTALLATION
Furnace Plenum Heat Exchanger Installation:
This drawing shows a typical Heat exchanger installation into a furnace plenum. It is important to install
the unit into the hot air plenum, do not install on the cold air return side. Ensure there is sufficient space
between the heat exchanger and the furnace firebox to eliminate the possibility of a high temperature
cutout of the furnace.
WinterGreen recommends a qualified H.V.A.C. technician perform this installation.
All plumbing configuration drawings depicted in the “Plumbing Installation” section of this manual are for illustration purposes.
Due to the various safety and control devices that may be required for individual applications, it is recommended that you consult
your WinterGreen representative for the design configuration that meets your needs.
PLUMBING INSTALLATION
WIRING & CONTROLS
BASIC WIRING AND CONTROLS:
The WinterGreen Furnace has been pre-wired at the factory for 115 volt, 60-cycle operation. The unit
comes equipped with a power cord that just needs to be plugged into a receptacle. We recommend that
you use 20 amp receptacle dedicated only to the furnace. This receptacle should have a circuit protection device.
The furnace has several basic operating components:
Temperature
Controller
Displays the operating temperature of the furnace, controls the furnace temperature
and Thermal Spike Protection circuit.
Temperature
Probe
Senses the operating temperature of the furnace and sends to Temperature
Controller.
Detects a “no fluid flow” condition in the system and closes the furnace damper. A
“System Alert” indicator light will glow on the control panel (See Figure 2 – Control Panel) indicating a problem has occurred. After the problem has been corrected the light will go out.
If so equipped) The solenoid controls fluid flow to a “Thermal Protection” zone. This
device should be connected to Terminal “1” on the terminal block inside the control
panel. (See Figure 1 – WinterGreen Furnace Electrical Schematic
Flow Switch
Solenoid Valve
(Zone Valve)
Circulating
Pump
Continuously runs as long as the furnace is plugged into a receptacle. The pump
circulates fluid from the furnace throughout the system.
Draft Inducer
Should operate continuously (If required) as long as there is a fire in the furnace or
when the loading door is opened for refueling to reduce smoke spillage into the
room. It is controlled by the on/off switch located on the operator’s panel. (See Figure 2 – Control Panel) The Draft Inducer is mounted remote from the furnace on
the chimney flue. (See the “Draft Inducer” section in this manual for proper location.)
Damper
Actuator
(Draft Door)
Operates fully open when there is a call for heat or fully closed to extinguish the fire.
It is controlled by the temperature controller. The actuator can be turned off in
cases of a Runaway Fire by a switch on the control panel, in all other operating conditions the actuator should always be left in the “ON” position.
DO NOT PLUG THE FURNACE IN BEFORE INSTALLATION IS
COMPLETE.
MODIFICATIONS TO FURNACE WIRING WITHOUT THE EXPRESS
WRITTEN PERMISSION OF WINTERGREEN WILL VOID THE WARRANTY. USE A QUALIFIED ELECTRICIAN TO PERFORM ANY
TROUBLESHOOTING OR REPAIRS O THE ELECTRICAL CIRCUIT.
ANY EXTERNAL WIRING FOR THE FURNACE MUST BE 16 GAUGE,
AWG COPPER, 105˚ DEGREE CELCIUS METAL CABLE.
NEVER UNPLUG THE FURNACE DURING NORMAL OPERATION,
AN OVERFIRING AND UNSAFE CONDITION WILL RESULT.
Continued on next page…
WIRING & CONTROLS – SCHEMATIC
WinterGreen
Figure 1 – WinterGreen Furnace Electrical Schematic
NOTE: CONNECTION FOR THERMAL PROTECTION SUCH AS A SOLENOID VALVE OR HEAT
EXCHANGER FAN MUST BE PLUGGED INTO THE UPPER, NO: 1 OUTLET ON THE RECEPTACLE
LOCATED ON THE BACK OF THE FURNACE.
CONNECTION FOR THE DRAFT INDUCER MUST BE PLUGGED INTO THE LOWER, NO; 2 OUTLET ON THE RECEPTACLE LOCATED ON THE BACK OF THE FURNACE.
DO NOT PLUG IN ANY OTHER DEVICE OR APPLIANCE INTO THESE
DEDICATED OUTLETS.
Continued on next page…
WIRING & CONTROLS
Control Panel Components:
Figure 2 – Control Panel
FUSE
POWER FAILURES – SYSTEM BACKUP
Over Heat Protection During a Power Failure:
The WinterGreen furnace is a wood fired appliance that still generates heat even if a power failure
should occur. To prevent a boil over situation with the transfer fluid, a provision must be made to dissipate heat during the power outage. Failure to address this situation could result in fluid spillage and
damage to the furnace components.
During a power failure the furnace damper closes automatically and the fire becomes dormant. All systems and components that would normally provide “Thermal Spike Protection” require power and are
now rendered inoperative. The system now requires a means of dissipating residual heat; therefore a
way to resolve this situation needs to be included in the furnace installation.
Note: The WinterGreen Furnace requires the use of a Back-up Power System to provide safe operation during a power outage. See the section: Battery Backup – Page 59
Power Outage Instructions:
1. Ensure furnace loading door and draft damper are tightly closed.
2. Ensure backup there is a backup power supply capable of sustaining the operation
of the circulation pump for several hours or operating generator is connected to the furnace.
3. Check that the circulation pump is operating by feeling the pump for vibration. (Make
sure to wear heat protective gloves).
4. Do not load any additional wood into the furnace until the power is resumed.
Continued on next page…
POWER FAILURE - SYSTEM BACKUP
Battery Backup:
The installation of a battery with an inverter and float charger is a good system backup as it can supply
the power needed to operate the circulation pump during a power failure. The added relay will disconnect all other components and isolate and power just the circulation pump and the digital temperature
controller.
WinterGreen recommends that a qualified Electrician perform the necessary wiring hookup for
the backup circuit.
Back Up Power Supply Wiring Schematic
POWER FAILURES – SYSTEM BACKUP
Continued:
Backup Generator:
The installation of a Home Standby Generator System is the most beneficial resolve if you frequently
encounter prolonged power outages. The generator can supply sufficient power to operate all components of the heating system and home needs automatically if an outage should occur. Installation of the
Home Standby Generator System should be performed by a licensed electrician.
A Portable Generator can be used to power your WinterGreen Furnace during a power outage providing it is of sufficient size to handle the load. We suggest a minimum of 3000 watts capacity. It is very
important that if you are using a portable generator as a backup, it must be connected to the furnace as
soon as possible after a power outage occurs. The circulation pump must be operating as quickly as
possible to avoid overheating and damage to the furnace components.
Never operate a Gas operated generator in confined or closed areas.
Place outdoors and use a 14 gauge extension cord of no more than 50 ft.
in length to connect to the furnace.
System Back Up - Heat from Main Furnace or Boiler:
Whenever there is insufficient heat from the WinterGreen furnace due to a lack of fuel (i.e., no one is
available to reload the furnace), the main furnace can be fired as a backup protection. The installation of
an additional thermostat to control the heat from The WinterGreen Furnace allows the normal house
thermostat to be set several degrees below the WinterGreen Furnace. Should the WinterGreen Furnace
not produce the required heat to maintain the desired house temperature, the home furnace will “Kick in”
and supply the necessary heat to meet the demand.
Consult a Plumbing and Heating Contractor. An experienced H.V.A.C. or plumbing contractor can
advise you as to alternatives and solutions that would suit your installation.
Note: This backup system should be installed by a qualified H.V.A.C. professional.
THERMAL SPIKE PROTECTION
Why have Thermal Spike Protection:
When the desired temperature of the area heated is reached, the heating cycle of the furnace ends and
the intake damper closes. The fire dies down and becomes dormant due to a lack of oxygen and remains in this state until there is a demand for more heat. This process does not occur immediately, so a
way to expend some of the additional heat produced during this transition state must be present to avoid
over heating of the furnace and boiling of the transfer fluid.
Thermal Spike Protection Methods:
The WinterGreen Furnace has High Temperature Setting in the Temperature Controller which is pre-set
at 190˚F and is designed to control an over heat condition. The Temperature Controller can operate a
solenoid valve which will allow the fluid to pass through a cooling unit to off-load the additional heat or
operate a fan on heater unit. (See the “Plumbing Installation” section for Thermal Spike Protection
zone configurations. There are many methods of off loading excess heat; your WinterGreen representative can recommend the best configuration for your specific needs.
The most common method of a Thermal spike Protection is to install a Heater Unit with an attached fan.
The Heater unit is generally located in an area where some residual heat is needed. The heated fluid
from the furnace is allowed to circulate through the Heater Unit constantly and when there is a Thermal
Spike the Temperature Controller activates the fan which quickly dissipates the temperature spike.
Thermal Spike Protection Outlet:
The WinterGreen Furnace comes equipped with an outlet on the back of the unit which is dedicated for
the activation of a Thermal Protection Device. This outlet is controlled by the Temperature Controller
and will only be energized should a Thermal Spike of 190˚F occur.
DO NOT PLUG ANY OTHER DEVICE OR APPLIANCE WHICH IS FOR
THERMAL SPIKE PROTECTION INTO THIS OUTLET.
MAINTENANCE – FURNACE
General Maintenance:
Your WinterGreen furnace requires some periodic maintenance to keep it good working order. You
should establish a routine that would cover the following items on a regular basis. It is especially important to maintain loading door and ash removal tray seals in good condition to prevent smoke spillage
and proper furnace operating efficiency.
Heating Season:
Check for creosote buildup in the furnace, especially around the water vessel tubes in the firebox.
Creosote buildup on the tubes will greatly affect the efficiency of the furnace.
Check for creosote buildup in the chimney. (See “Chimney Maintenance” section in this manual)
Clean out ashes from the fire box; do not allow them to block the draft tubes in back of the firebox.
(See “Furnace-Primary Fire” section in this manual for ash disposal).
Check the transfer fluid level weekly in the fluid reservoir (Open System only) to avoid oxygen
buildup in the system. Oxygen buildup promotes corrosion of system components.
Clean the damper lid frequently to avoid creosote buildup. Improper sealing of the damper will result
in poor performance and possibly cause the damper to seize.
Clean creosote from the Draft Inducer and Barometric Damper. Frequent checks and observation
will help establish the cleaning intervals that your system requires.
Check all chimney components, connections and seals to ensure there is no smoke spillage. Repair
or replace if necessary.
End of Season Shut Down Maintenance:
Check and top off transfer fluid.
Clean all ashes from firebox and empty the ash pan.
Clean chimney, flue, draft inducer, barometric damper.
Clean creosote from boiler tubes.
Inspect chimney components and replace any rusted pipes.
Cover chimney top to prevent any debris or animals from entering.
Clean furnace with soap and water.
Test safety relief valve.
Disconnect power from furnace.
Cracks in the Firebox refractory:
Small fractures, spalling and chips in the refractory are considered to be normal wear on the furnace.
These conditions do not affect the operation, safety or performance of the unit. Cracking that progresses
across the face of the refractory sides are not considered to be a structural problem and do not affect
the performance or life of the furnace. Should severe cracking occur and gaps progressively widen, contact your local WinterGreen representative.
CLEANOUT OF THE HEAT EXCHANGER, FLUE PIPE, CHIMNEY, DRAFT INDUCER AND
BAROMETRIC DAMPER IS ESPECIALLY IMPORTANT AT THE END OF THE HEATING SEASON
TO MINIMIZE CORROSION DURING THE SUMMER MONTHS, CAUSED BY ACCUMULATED ASH.
NOTE: It is recommended that the chimney be cleaned and inspected by a professional Chimney
Sweep.
Flushing the System:
WinterGreen recommends that at least every year the heat transfer or fluid or water be drained and the
system flushed with a boiler treatment additive. This will remove any scale buildup and clean the system. The boiler treatment additive can be purchased at most H.V.A.C. suppliers.
MAINTENANCE – CHIMNEY
For furnaces installed in houses, inspect flue pipes, flue pipe joints and
flue joint seals regularly to ensure that smoke and flue gases are not
drawn into and distributed by the air circulation system.
Chimney Inspection:
All chimney components should be checked for tight connections with all securing screws in place, no
rust and no smoke leakage. If any of these conditions are present, they should be repaired or replaced.
Creosote:
When wood is burning slowly, it produces tar and other organic vapors which combine with expelled
moisture to form creosote. The creosote vapors condense in the relatively cool chimney flue of a slow
burning fire. As a result, creosote residue accumulates on the flue lining. If ignited, this creosote creates
an extremely hot fire which may ignite surrounding materials resulting in a building fire.
Creosote can appear as:
A sooty powder
A gummy mess
A hard glaze
A deposit that resembles burned marshmallows
Note: The burning of unseasoned “green” wood greatly increases the buildup of creosote.
WinterGreen does not recommend the burning of green wood.
Cleaning the Chimney:
The chimney connector and chimney should be inspected at twice a month during the heating season to
determine if a creosote buildup has occurred. Be aware that the hotter the fire, the less creosote is
deposited and that weekly cleanings may be necessary in mild weather, even though monthly
cleanings may be enough in the coldest months. WinterGreen recommends daily checks for
creosote buildup until experience shows how often cleaning is necessary. If creosote has accumulated it should be removed to reduce the risk of a chimney fire.
Chimney inspection can be done by removing the inspection/cleanout cap at the base of the chimney
and viewing the flue condition or by checking the chimney from the top using a strong flashlight. Creosote can be removed by using a chimney brush which is specific to the chimney size. Read and follow
the manufacturer’s instructions on proper use. Chimney brushes can be obtained at most local hardware
retailers or chimney stores.
THE HEAT EXCHANGER (BOILER TUBES), FLUE PIPE AND CHIMNEY MUST BE CLEANED REGULARLY TO REMOVE ACCUMULATED CREOSOTE AND ASH. ENSURE THAT THE HEAT
EXCHANGER (BOILER TUBES), FLUE PIPE AND CHIMNEY ARE
CLEANED AT THE END OF THE HEATING SEASON TO MINIMIZE
CORROSION DURING THE SUMMER MONTHS. THE APPLIANCE,
FLUE PIPE AND CHIMNEY MUST BE IN GOOD CONDITION.
THESE INSTRUCTIONS ALSO APPLY TO THE DRAFT INDUCER
AND BAROMETRIC DAMPER.
Continued on next page…
MAINTENANCE - CHIMNEY
Chimney Fire:
Chimney fires burn very hot. If the stove pipe should begin to glow red and a chimney fire is
suspected:
Ensure the “Furnace Damper” switch on furnace Control panel is OFF. (See “Wiring and Controls - Control Panel section of this manual)
Ensure the “Draft Inducer” switch on furnace Control Panel is OFF. (See “Wiring and Control
- Control Panel section of this manual)
Call the Fire Department immediately and leave the house or outbuilding where the furnace is
located.
Chimneys should be thoroughly inspected by a qualified Chimney
Inspector after chimney fire has occurred. Do not use the chimney
after a fire until it is approved by a Chimney Inspector.
Note: WinterGreen recommends having chimney cleaned annually by a qualified professional.
TROUBLESHOOTING GUIDE
WARRANTY
WinterGreen® Hydronic Wood Furnace 20 Year Limited Warranty
Our WinterGreen Hydronic Wood Furnaces are warranted by SJV Inc. to the original user in the original location
against defects in workmanship under non-commercial household use for 20 years. This warranty is subject to the
condition that the WinterGreen Hydronic Wood Furnaces must have been installed in accordance with manufacturer's instructions. Any warrantee claims on "WinterGreen Hydronic Wood Furnaces" or supplied component parts
should be reported to the dealer from whom the product(s) were purchased.
Any "WinterGreen Hydronic Wood Furnace" which is determined to be defective in material or workmanship within
three (3) years, will be repaired or replaced at SJV Inc.'s option at no charge to you. You only pay freight on replacement parts. From the fourth year on, SJV Inc. will pay a pro-rated share of any repair or replacement cost. The
proportionate charge will be equal to the appropriate percentage of the original list price of the product at the time
the warranty claim is made, and will be determined as follows: 4th through 7th year - 50%; 8th through 12th year 30%; 12th through 20th year - 10%. The door warranty is limited to three (3) years.
All components not manufactured by SJV Inc. are limited to the original manufacturer's warranty which is customarily one (1) year. These items include but are not limited to: electronics, fans, baffles, pumps, Aqua-stats, relays,
gauges, relief valves, expansion tanks, heat exchangers, etc. These are subject to warranty by their manufacturers.
In addition to the warranty above, the "WinterGreen Hydronic Wood Furnace" warranty does not cover:
1. Components that are part of heating system (products) but were not furnished or manufactured by SJV Inc. as
part of the heating system (products).
2. The workmanship and/or the affect of any installer. Using an unlicensed or unapproved installer. In addition, this
warranty does not assume any liability of any nature for unsatisfactory performance caused by improper installation
or assembly.
3. Any labor costs for removal and reinstallation of the alleged defective "WinterGreen Hydronic Wood Furnaces" or
part, transportation to SJV Inc., if necessary, and any other materials necessary to perform the exchange.
4. Any products that fail or malfunction as a result of improper or negligent operation, accident, abuse, freezing,
over temperature operation, poor water quality, misuse, unauthorized alteration or improper repair or maintenance.
5. Improper adjustments, control settings, water return temperatures, chimney types, care or maintenance. Information is in the installation manual and other printed/technical information provided with product or direct from SJV Inc.
6. Improper placement and or treatment of the unit causing undue rusting. All units are to be thoroughly cleaned
annually to prevent rusting of the interior or exterior. Any warranted rust must be complete rust through in order to
be considered, and expected to cause a malfunction of the unit. All units must have a sufficient rust inhibitor installed in the boiler pressure vessel semi-annually by the owner.
7. Failure to reasonably protect the "WinterGreen Hydronic Wood Furnace" product from harm, man made or acts of
God.
8. Any legal action against SJV Inc. will suspend your warranty until such actions and/or accusations are suspended. Fraudulent warranty accusations against SJV Inc. will render the "WinterGreen Hydronic Wood Furnace"
warranty permanently void.
NOTE: All warrantees are subject to investigation at SJV Inc.'s expense.
Returns are allowed for unused "WinterGreen Hydronic Wood Furnaces". Terms of return are as follows: All freight
charges to and from the point of origin is at customer's expense. If the "WinterGreen Furnace" is not used, a 15%
restocking fee will be assessed subject to inspection.
We do not offer returns on used "WinterGreen Hydronic Wood Furnaces". "Trade- ins" from other manufacturers'
units are not accepted.
Manufactured for WinterGreen Furnaces by:
SJV Inc.
P.O. Box 405 Fort Kent, ME 04743