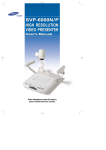
Download Samsung SVP-6000N User manual
Transcript
WHAT IS BGVu ?............................................................ 1
APPLICATION.............................................................. 26
ABOUT THIS MANUAL ................................................. 2
SAVE IMAGE .........................................................................................27
PRINT IMAGE .........................................................................................29
USING Twain Driver................................................................................31
INSTALLING DEVICE DRIVER .................................................................... 2
BASIC ..................................................................................................... 2
APPLICATION .......................................................................................... 2
INSTALLING DEVICE DRIVER................................... 3
INSTALLATION ....................................................................................... 4
PROPERTY............................................................................................... 7
UPDATING .............................................................................................. 9
Q & A.................................................................................................. 10
BASIC............................................................................. 11
INSTALLING PROGRAM.......................................................................... 12
HOW TO CONNECT................................................................................ 14
USER INTERFACE................................................................................... 15
View Window.......................................................................................................................15
Control Window .................................................................................................................17
Save Dialog Box .................................................................................................................21
Page Setup Dialog Box .....................................................................................................23
Print Setup Dialog Box .....................................................................................................24
Twain Driver Dialog Box..................................................................................................25
TROUBLE SHOOTING................................................ 33
WHEN ERROR MESSAGE APPEARS..........................................................34
WHEN PROGRAM SEEMS TO BE OUT OF ORDER .......................................39
What is B GVu ?
About This Manual
BGVu is the program which transfers images from computer to
Samsung Video Presenter SVP-6000.
Beginners should carefully read and be familiar with the BGVu
program manual which is specifically designed for the users of
Windows 98 or higher version.
SVP-6000 can receive images through USB port alone, therefore
computer must be equipped with USB port. And it is required to
install the operating system which supports USB to use the program.
It is possible to capture specific screen while images are being
transferred, and to save it in the computer or auxiliary storage. It is
useful to produce various CD-ROM titles, documents and albums.
Installing Device Driver
This chapter introduces how to install the USB device driver which is
required to use BGVu, how to confirm the system property, and how
to update the device driver.
Basic
As it supports Twain Driver, it can be called to receive the captured
image by Windows application programs which handle graphics.
You can learn how to install BGVu program in the “Installing
Program” section.
Also it is possible to control the Video Presenter remotely through
USB, and it is useful in the video conference system.
You can learn how to connect SVP-6000 to PC in the “How to
Connect” section.
These kinds of different functions are very useful for the schools and
companies which intend to construct the multimedia systems.
“User Interface” introduces concepts and terms of basic interface
including View window, Control window, and various dialog boxes.
Application
Examples of BGVu usage are presented to explain how to use
BGVu.
1
2
Installation
Installing Device Driver
1. Connect PC to SVP-6000 with given USB cable.
(Refer to SVP-6000 user manual.)
2. When turning on SVP-6000, “Add New Hardware Wizard” appears in the
PC. Find the required software in the newly retrieved SVP-6000. Wait a
just moment.
3. If the following Dialog Box is displayed by the “Add New Hardware
Wizard”, Select ‘Next’.
4. Select the “Search for a best driver for your device (recommended)”.
3
4
5. Insert the provided diskette into the floppy disk driver, and designate
the route as follows to retrieve the SVP-6000 USB driver.
7. If the following Dialog Box appears, click ‘Finish’.
Now the USB driver is appropriately installed for SVP-6000.
6. When the driver location is found as follows, click ‘Next’. Then
the file is duplicated at the corresponding location. And driver
information database is constructed. Wait a just moment.
Note) Make it sure to install USB device driver in the first place before running
SVP-6000 BGVu program.
5
6
Property
It is possible to appropriately update and remove the USB driver for SVP6000.
1. Press ‘Start’ button on Task Bar, and choose ‘Setting’.
2. Select ‘System’ in the control panel.
3. When the USB driver is appropriately installed for SVP-6000, you can
see “Samsung Video Presenter 6000” in the Universal Serial Bus(USB)
controller of the device manager.
7
Update
4. If you click the “Samsung Video Presenter 6000” properties, you can
see details about the driver files loaded for SVP-6000.
Updating to a newer version of a USB device driver may add functionality to
or improve the performance of SVP-6000.
If you want to upgrade the USB device driver, follow the steps as below.
1. Select the “Driver” tap from “Samsung Video Presenter 6000” properties,
and click “Update Driver” button for updating the driver file.
2. Insert the newly provided SVP-6000 USB driver diskette into the floppy
disk driver, and follow the instruction given by the “Update Device Driver
Wizard”.
5. If you intend to remove SVP-6000 USB driver, select “Samsung Video
Presenter 6000” in the Dialog Box in step 3, then click ‘Remove’ button.
When you select “OK” button in the “Confirm Device Removal” Dialog
Box, “Samsung Video Presenter 6000” is uninstalled from your system.
9
10
Q&A
Q1. How do I know if my system has USB installed properly ?
A1. Check the "Device Manager" on your system and
locate an entry heading
for Universal Serial Bus Controller. Beneath this heading should be two
entries, one for a Host Controller and one for a Root Hub. In general, if
you see these two entries, USB should be properly installed.
Q2. Is SVP-6000 available in Windows 95 OSR2?
A2. No, SVP-6000 is available in Windows 98.
Q3. Can I plug multiple SVP-6000s into PCs?
A3. Although the driver supports multiple
SVP-6000s, the application shipped
with the SVP-6000 does not. You can install multiple SVP-6000s, but you
can use only one at a time.
Installing Program
Basic
• Insert disk into 3.5” floppy disk driver.
• Press “START” button on Task bar.
• Choose “Settings”, “Control Panel” as below.
11
12
• Double click “Add/Remove Program” icon.
How to Connect
• Connect SVP-6000 USB port to PC’s USB port with given USB
cable.
• Turn on SVP-6000.
• Press “Start” button on Task bar.
• Press “Install” button on “Install/Uninstall” tab.
• Choose “Program” item.
• Select “SVP-6000 Windows Application Program” item.
• Click “BGVu” item.
• Follow “Install Wizard” instructions.
Note 1) If you don’ t connect SVP-6000 to PC or forget to turn on SVP-6000,
the program will close itself.
<Required System Specification>
1.
2.
3.
4.
Windows 98 or higher
PC with USB ports.
Graphic card having ability of 65536Colors and 800*600mode or higher
16MB memory minimum (24MB recommended)
13
Note 2) Before starting the program, you must install USB device driver.
Otherwise error message appears and the program closes itself. (Please refer
to “ Installing Device Driver” part for more information.)
14
User Interface
Control Window button
View Window
Twain Driver button : It
: It calls Control Window. If Control
Window has been displayed yet, clicking it does nothing.
is used to transfer image using Twain
driver. Refer to the “Using Twain Driver” in Application
chapter for details.
Save/Capture/Print buttons
: Save the image captured.
Save button
Capture button
: Capture the image in View Window.
Print button
: Print the image captured.
Note) You must capture the image before saving or printing.
1/4 button : It
shows such an image as corresponding to the 1/4
camera resolution, i.e 1/2 length and 1/2 width.
When you select 1/4 button, the front circle colors red.
1/16 button : It
Exit button : Exit
shows such an image as corresponding to the
1/16 camera resolution, i.e 1/4 length and 1/4 width.
When you select 1/16 button, the front circle colors red.
the program.
15
16
Control Window
It displays the value of the currently
selected command. Yellow indicates that
the value of the command is low, whereas
red indicates that the value of the
command is high.
Note) Neither ‘ Focus’ nor ‘ Zoom’ indicates the value.
It displays the command selected currently. The
selected command is displayed in bright color, and a
small red circle appears in front of the command.
The other commands are displayed in dark color. It is possible to
change the command with the mouse. Locate the mouse cursor on
the command you want to select, and click the left button.
Control Window enables you to control the functions of SVP-6000.
Control Window Exit button
Move up button
Decrease button
Increase button
Lamp buttons
Lower Lamp button
: Turns on the lower lamp.
Move down button
Lamp Off button
·
·
: Exits Control Window.
: Changes the selected command to another in order
as follow : Red →Volume →Zoom→Focus→Iris→Blue →Red
· Move down button : Changes the selected command to another in
order as follow : Red →Blue →Iris→Focus→Zoom→Volume →Red
· Increase button : Increases the value of the selected command.
· Decrease button : Decreases the value of the selected command.
Control Window Exit button
: Turns off the upper or the lower lamp.
Upper Lamp button
: Turns on the upper lamp.
Move up button
17
It displays the lamp state
The upper lamp On.
The lower lamp On.
Lamp Off.
18
Freeze/Normal button : It freezes the image or releases the freezed
image. As a toggle button, it freezes and releases in turn.
When the image is freezed,
is displayed, when the image is
released,
is displayed.
Tone button : It converts the image into Image or Text mode.
is displayed in the Image mode, whereas
is displayed in the Text mode.
AWC button : It adjusts color automatically.
Note 1) When you intend to move Control Window, you locate the mouse cursor
on all part except for the commands and modes surrounded rectangle, and
buttons. And then move the mouse while the left button of the mouse is pressed.
Positive/Negative switching button : It switches the image to negative
or positive image.
When
Note 2) In SXGA mode, you can set only Full mode.
is pressed, the image is switched to negative, and
is displayed, when
positive, and
Note 3) Please refer to the SVP-6000 user manual for the information of
Full/Scroll mode, and Image/Text mode.
is pressed, the image is switched to
is displayed.
Internal/External switching button : It switches the source of the
image displayed on the monitor to internal or external signal.
When
is pressed, the source is switched to internal, and
is displayed, when
to external, and
is pressed, the source is switched
is displayed.
It indicates the mode set currently. It is possible to select
SXGA, XGA, SVGA, and VGA mode by locating the
mouse cursor on the desired mode and clicking.
It indicates whether the Scroll mode is set or the Full
mode is set. It is impossible to control these modes in
Control Window.
19
20
Save Dialog Box
Save Proceeding Dialog Box
It shows the proceeding rate how much the image is transferred
from SVP-6000.
Saves the image with maximum resolution.
Saves the image with 1/4 resolution.
Saves the image with 1/16 resolution.
21
22
Page Setup Dialog Box
Print Setup Dialog Box
Printer setting
Number of copies setting
Print Proceeding Dialog Box
Buttons set the image size transferred to printer
Maintain the aspect ratio of the image.
Set the image to the same size as the page.
Move the center of the image to that of the page .
It shows the proceeding rate how much the image is transferred to
the printer from SVP-6000.
23
24
Application
Twain Driver Dialog Box
Buttons set the size of the image transferred
Transfer button : Transfers the captured image
to the Windows graphic application.
Cancel button : Exits Twain Driver dialog box.
Twain Driver Proceeding Dialog Box
It shows the proceeding rate how much the image is transferred
to the Windows graphic application via Twain Driver.
25
26
Save Image
Picture size buttons on the bottom of Save Dialog Box is set to the same
value as that of the current screen size initially.
‘Save’ button is on the right side of View Window, when it is clicked,
the image is saved in hard disk or floppy disk. Make it sure to capture
the image by pressing ‘Capture’ button before saving the image.
When you click ‘Capture’ button to capture the image, the following
message is displayed on the screen.
It changes the picture size. The larger the picture size is, the longer it
takes to save the image. After the picture size is selected, you click the
‘Save’ button. Then Save Proceeding Dialog Box appears, it shows the
proceeding rate of save. When the save is over, Save Proceeding Dialog
Box disappears automatically. If you want to release the capturing, you
click ‘Capture’ button again .
When capturing is over, the message is disappears, the color in the
center of the icon changes to red from blue.
è
Then you click ‘Save’ button, Save Dialog Box appears. The method
of save is the same as the general method of save. You select the
directory and type the name of the file to save the image in.
(Refer to the Windows user manual for details.)
Only two formats, bitmap(bmp) and jpeg(jpg), are available for save.
You can select the desired format in the ‘Save as type’.
27
28
Print Image
It is required to capture the image in advance in order to print the image.
You can capture the image in the same manner as what has been
described in “Save Image”.
When you click ‘Print’ button after the image is captured, Page Setup
Dialog Box appears. You can set the type and orientation of paper as
well as the size and the margins of the picture in the same manner as you
do with other Windows program.
(Refer to the Windows user manual for details.)
It is possible to choose the option to adjust the picture size conveniently if
necessary. When you select ‘Maintain aspect ratio’ button on the top of
buttons, you can adjust the picture size while keeping the length-width
ratio of the picture. If you change the picture size without selecting this
button, you might not get your desired color when it is printed. In this
case, selecting ‘Maintain aspect ratio’ button avoids this trouble.
After page setting is over, you click the ‘OK’ button and the Print Setup
Dialog box appears. If you click ‘Cancel’ button, the print command is
cancelled.
You select the printer in the Print Setup Dialog Box.
You can set the properties of the printer by clicking ‘Properties’ button in
the right side. (Refer to the Windows user manual for details.)
When you click the ‘OK’ button after setting the printer and the number
of copies, Print Proceeding Dialog Box appears. It shows the proceeding
rate how much the image is being transferred to the printer.
When the image transfer is over, Print Proceeding Dialog box disappears
automatically.
If you want to cancel the print command, you click ‘Cancel’ button.
When you select the ‘Use full page’ button below ‘Maintain aspect ratio’
button , the picture size is set the same as the paper size. In this case, the
right size boxes – ‘Image size’ and ‘Margins’ - and ‘Center on page’
button turn gray and are set to be disable.
When you select the ‘Center on page’ button, the center of the picture
moves to the center of the page, so you don’t need to adjust the margins
of the picture. Therefore ‘Margins’ boxes turn gray and are set to be
disabled.
29
30
Using Twain Driver
Proceeding Dialog Box appears and shows the proceeding rate how
much the image is being transferred to the windows application program
via Twain Driver. When the image transfer is over, Twain Driver
Proceeding Dialog Box disappears itself, the Twain Driver command
ends or Twain Driver Dialog box appears again depending on the
windows application programs. If you want to close Twain Driver
program when Twain Driver Dialog Box appears again, you click
‘Cancel’ button in Twain Driver Dialog Box, and then click ‘Exit’ button
in View Window.
Twain Driver is the standard communication method between Windows
application programs and image acquisition devices. Scanner programs
necessitate Twain Driver, and recently digital camera programs support
it. Since SVP-6000 enable you to transfer the image to PC, Twain Driver
is supported for more customer’s convenience.
It is impossible to call the Twain Driver in this program. It is required to
use a Windows application program other than this program. If you click
‘Twain Driver’ button in this program, Twain Driver isn’t called and the
following message appears.
Note 1) The menu items relative to Twain Driver have different names other than
‘Select Source...’ and ‘Acquire’ depending on the application programs. Please
refer to the Wi ndows application program user manual for more information.
Note 2) Please refer to theWindows application program user manual for
information on whether the application supports the Twain Driver.
In windows application program supports the Twain Driver, you select
‘Select Source...’ item below the ‘File’ menu, choose ‘BGVu SVP-6000
Twain Driver’ of the different Twain Driver programs installed the
windows system, and select ‘Acquire’ item below the ‘File’ menu. Then
View Windows is displayed as running this program. At this time, you
click ‘Twain Driver’ button, Twain Driver Dialog Box appears. When
you choose the picture size, and click ‘Transfer’ button, Twain Driver
31
32
Trouble Shooting
When Error Message Appears
f
When Program Starts
1 Device Driver Error
i It is impossible to find USB device driver currently.
b
b
b
Checking if USB cable is connected properly.
Checking if SVP-6000 power on.
Checking if USB device driver is installed correctly.
(Refer to “Installing Device Driver” part.)
1 USB Communication Error
i USB communication is not available as the system has trouble.
b
b
Turn off SVP-6000, and then on.
Pull out of USB cable and connect it again.
i Following the above procedures, restart the program.
33
34
1 Memory/Resource Error
1 Memory/Resource Error
i You take action following what has been described before
f
When Save Image
1 Save Format Error
i Check whether PC runs too many programs.
b
b
If so, exit the unnecessary programs.
Otherwise, reboot the system.
i Following the above procedure, restart the program.
f
When Program Runs
i The extension of file is not ‘bmp’ or ‘ jpg’.
i Change the extension to ‘bmp’ or ‘jpg’.
1 USB Communication Trouble Information
1 Image Transfer Error
i As it happened to be trouble in USB communication,
the program is trying to recover from it currently.
i The image transfer fails due to USB communication trouble.
i Retry to save the image.
i If the program recovers from trouble, message disappears.
i If the program fails to recover, one of the following
i If the image transfer fail repeatedly, exit the program,
and then restart the program after implementing one of
the following procedures.
b Turn off SVP-6000, and then on.
b Pull out of USB cable, and then connect it again.
messages appears.
Device Driver Error
USB Communication Error
i You take action following what has been described before.
b
b
35
36
1 Library Error
1 Library Error
i You take action following what has been described before.
1 Memory/Resource Error
i You take action following what has been described before.
f
i The library used to save has trouble.
i Retry to save again.
i If the error occurs repeatedly, reinstall the program.
When Using Twain Driver
1 Device Driver Error
i You take action following what has been described before.
1 Memory/Resource Error
1 Memory/Resource Error
i You take action following what has been described before.
i You take action following what has been described before.
f
When Print Image
1 Image Transfer Error
1 Image Transfer Error
i You take action following what has been described before.
i You take action following what has been described before.
1 Library Error
1 Windows API Error
i You take action following what has been described before.
1 Other Errors
i Check whether or not the following files are in the directory
‘twain_32\BGVuTW’ under the Windows directory.
b
b
b
b
i It happens to be trouble in the Windows printing function.
i Check whether the printer is implementing another printing work.
i Retry to print the image when another printing work is over.
BGVuTW.ds
BGVu.dll
BGVuTW.ini
Default.src
i If any one of the files is not in this directory, reinstall the program.
37
38
When Program Seems to be Out Of
Order
• It seems that the program temporarily stops running when the trouble
occurs in the communication between PC and SVP-6000. If this
trouble occurs repeatedly, exit the program and follow the procedures
below and then restart the program.
b Exit the unnecessary programs - especially the programs relative to
USB communication.
b Turn off SVP-6000 and then on or pull out of USB cable and then
connect it again.
• When USB Communication Trouble Information message appears, the
program tries to recover from the trouble. But if the trouble keeps to
be unresolved, and message doesn’t disappear, follow the procedures
below.
b Turn
b Turn
off SVP-6000 to exit the program.
on SVP-6000 and restart the program.
39
40
SVP-6000
BGVu
Software User Manual
Office : CCD & SVP Sales Unit
Optics & Digital Imaging Division
P.O.Box 70, Sungnam, Korea 461-600
TEL : +82-31-740-8137 ~ 8141
Plant :
Plant #1, SAMSUNG TECHWIN
42, Sungju-dong, Changwon-city,
Kyungsangnam-do, Korea.
TEL : +82-55-282-1181


