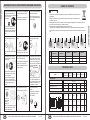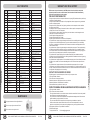
1
YMGI, A COMFORT MAKER, A JOY COMPANION, A SATISFACTION GUARANTOR...
INSTALLER'S INSTRUCTION & USER'S MANUAL
DC INVERTER MULTIPLE ZONE (59) (2)
SYMPHONY CHOIR
OUTDOOR UNIT (CH)
YMGI Group, POB 1559
YMGI Group New Energy, POB 1668
O'Fallon, MO 63366, USA
Tel:(866)833-3138 Fax:(866)377-3355
Web Site: www.ymgigroup.com
Email: [email protected]
Literature Part No: LIT-WMMS-(59)-DC IVTR-AM-II-20121027
Subject to Continuous Engineering Change and Product Improvement without Prior Notice.
This product is designed and manufactured free from defects in material and workmanship for normal use and maintenance.
Installation, operation, maintenance and service shall follow professional practices for regular cooling and heating equipment,
NEC, State, City or Local Codes and related manuals from YMGI. Otherwise, damage to equipment or property and even
injury to people may occur.
Installer: Currently licensed HVAC technician only. Read manual before installation. Fully fill in warranty registration card.
User: Keep this manual for future maintenance and service use.
Servicer: Use this manual for service reference.
YMGI is the Trademark and Property of YMGI Group New Energy. Copyright of YMGI Group Energy.
LITERATURE: LIT-WMMS-(59)-DC IVTR-AM-II-20121027
CONTENTS
LIMITED PRODUCT WARRANTY POLICIES
6
IMPORTANT NOTES
WARNINGS FOR INSTALLATION, OPERATION, MAINTAINING AND SERVICE
7
9
10
10
11
12
13
13
13
14
14
15
15
16
20
22
23
24
25
25
26
27
27
28
29
30
NAMES OF THE PARTS
TECHNICAL DATA
OUTDOOR UNIT WORKING TEMPERATURE RANGE
RECOMMENDED TOOLS FOR INSTALLATION
HANDLING
INSTALLING OUTDOOR UNIT
INSTALLATION CLEARANCE
INSTALLATION POSITIONS FOR OUTDOOR UNIT
HEIGHT LIMITS OF INDOOR AND OUTDOOR UNITS
INSTALLATION-OUTDOOR UNIT
WIRING OUTDOOR UNIT
ELECTRICAL CONNECTIONS
WIRING DIAGRAMS
NOT TO CROSS-WIRING & NOT TO CROSS-PIPING
INSTALLATION OF ACCESSORIES
VACUUM AND LEAKAGE CHECK
RELEASE REFRIGERANT FROM OUTDOOR TO THE INDOOR UNIT
SYSTEM INSPECTION AND TRIAL RUNNING
CHECK AFTER INSTALLATION
FAULT INDICATION
MAINTENANCE
WARRANTY AND TECH. SUPPORT
USER NOTES AND SERVICE LOG
MEMO
YMGI Group (YMGI) products are designed and manufactured free from defects in workmanship and
materials for normal use and maintenance. YMGI products are designed and manufactured to the qualities
to keep installer(s) and user(s) from any trouble and to bring total comfort to unit(s) owner(s) and end user(s).
YMGI warrants its products against any unexpected issues occurred to product itself, though designed and
manufactured and expected to work much longer than the warranted period, as follows:
1. Five-year compressor and sealed system
2. One-year other parts
3. Ground shipping only
Above warranties valid only if all the following are satisfied:
1. The unit was fully installed by currently licensed HVAC technician(s), from beginning to completion.
2. The unit is installed per NEC codes and local codes.
3. The unit is installed following installation instructions coming with YMGI products, and/or provided by YMGI Group.
4. The unit is fully checked and tested by installer(s) to make sure installed unit functions as designed.
5. Correct operation of the unit is explained clearly to the owner(s) by installer(s).
6. All fields are filled or checked, signed and dated by both installer(s) and owner(s) on the LIMITED PRODUCT WARRANTY
REGISTRATION CARD.
7. Warranty Registration Card must be mailed, along with an Original Copy of Full System Installation Service Charge Invoice
from the Currently Validly Licensed HVAC Technician Company, within 7 calendar days after the original installation is finished or
your NEW home (unit is not checked or used yet) is closed, whichever comes later, by the owner(s) to Warranty Department, YMGI
Group, POB 1559, O'Fallon, MO 63366, USA.
A full copy of Warranty Registration Card and Original Copy of Full System Installation Service Charge Invoice
must be kept by owner(s) safely along with other documents that come with the product.
No warranty may be valid if any one of above 7 conditions is not fulfilled. Warranty begins on the date of the
original installation or the date of NEW home (unit is not checked or used yet) is closed, whichever comes later.
As its only responsibility, and your only remedy, YMGI will furnish replacement part only (no labor), without charge for the
PART(S) and Ground Shipping ONLY, to replace any part found to be defective due to manufacturer’s workmanship or
materials under normal use and maintenance. Any part replaced pursuant to this warranty is warranted only for the
unexpired portion of the warranty term applying to the original part.
This warranty does not apply to nor cover any other cost associated with the service, repair or operation of the product or
the like.
Defective product(s) or part(s) must be identified by your installer, along with YMGI Group-approved Service Center(s)
or Technical Support., whichever is available in the area where unit is installed. Final decision is made by YMGI Group.
An “YMGI Group Customer Service/Technical Support Form Daily Log Sheet” must be filed properly for effective
communication and/or file management purpose.
All Units Shall Be Installed by Experienced or Licensed Contractor Or
Technician. Read Manuals before Installation.
Following NEC, State and Local Codes and Installation Instructions of All
Units, Otherwise Unit Warranty Will Be Void and Serious Damage To People Or Property May Be
Caused.
YMGI Group Will NOT Take Any Responsibilities for Any Damage or
Loss Due to Do-It-Yourself(DIY) self-installation and other Improper Installation or Operation or
Natural Disaster.
Warranty policy herein DOESN'T cover:
1. Any damage or repairs to properties and injuries to person(s) as an incident or consequence of faulty or improper transportation,
installation, operation, maintenance, or service that ISN'T physically performed by YMGI Group.
2. Any damage caused by frozen or broken water pipes in the event of equipment failure, any damage or injury as a result of floods, fires,
winds, lightning, accidents, corrosive atmosphere or other conditions beyond the control of YMGI Group.
3. Any damage resulted from use of components or accessories not specified, supplied or designated by YMGI Group.
4. Any damage because of failure to start due to interruption and/or inadequate electrical service.
5. Any products sold or installed outside the United States or Canada.
6. Any labor charge from your technician company during any stage of the installation or service, for any reasons.
Any damage due to service performed by third parties, it is the product receivers(s) or owner(s)'s responsibility
to claim such damage resulted from these activities to the responsible party:
Don't Supply Power until All Wiring and Tubing and Checking is
Completed. Ground the Unit Following Instructions and NEC, State and Local Codes.
Connect All Wiring Securely. Loose Wire or Other Bad Contact May Cause
Arc or Overheating and Fire Hazard.
Installation or Service Technician to Contact Manufacturer Technical Support
Toll Free Number: 1-866-833-3138 x 703
Email: [email protected]
(For any abnormal or unit issues, end user needs to contact installation or service contractor
to check the unit, before having them contact manufacturer technical support for technical
diagnosis or trouble shooting help.)
YMGI, A COMFORT MAKER, A JOY COMPANION, A SATISFACTION GUARANTOR...
LIMITED PRODUCT WARRANTY
-STANDARD POLICIES
P1 OF 30
1. Transportation, installation and operation.
2. Normal maintenance and service as described in the installation and operating manual, such as cleaning of the coils, filter, cleaning
and/or replacement and lubrication.
YMGI keeps on product improvement and such improvement is purposed to further benefit installers, owners, users and
others. Such improvement or changes, even without notice, including but not limited to specifications, functions,
appearance, sizes, packages or others, of the products are YMGI's sole right(s). These improvement or changes will not
invalidate the limited warranty stated herein.
For further information about this warranty, contact Warranty Department, YMGI Group either by
faxing to (866) 377-3355 or by mailing to Warranty Department, YMGI Group, POB 1559, O'Fallon, MO 63366, USA
YMGI, A COMFORT MAKER, A JOY COMPANION, A SATISFACTION GUARANTOR...
P2 OF 30
MUST READ
2
3
4
5
LIMITED PRODUCT WARRANTY POLICIES
LIMITED PRODUCT WARRANTY REGISTRATION CARD
OPERATING TEMPERATURE RANGES
TO END USERS- MUST READ PRIOR TO HIRING A CONTRACTOR TO INSTALL
VERY IMPORTANT NOTES TO DEAR CUSTOMERS FOR
REFRIGERANT RELATED HVAC PRODUCTS, ESPECIALLY THE SPLIT TYPE
LIMITED PRODUCT WARRANTY REGISTRATION CARD
OPERATING TEMPERATURE RANGES
Operate the unit in the temperature ranges shown below. It is not recommended
to operate the unit out of these ranges, otherwise warranty will be voided.
YMGI to Fill Top Portion, at Shipping, and Keep Copy A; Center Copy B for Installer to Fill and Mail back to YMGI; Bottom Copy C for Customer to Fill and Keep
Registration Card
Serial No.
Did the Company
Pay to YMGI:
HVAC Contractor/
Technician--Name
Date the Filled Registration
Card YMGI Received:
Installation Invoice Attached
to the Registration Card
Hired YMGI-Recommended
HVAC Contractor/Technician?
Unit(s) Work
Successfully (Yes/No):
Outdoor Serial Number (One Outdoor
Unit, One Registration Card/Form):
For Multi
Zone Units
Shipping Packing
List Number:
Indoor
Serial
Number:
For
YMGI
Use
Only
The Company the
Unit Was Sold Though:
Unit #1
Unit #2
Unit #3
Unit #4
Contact Where the Units are Installed:
Name:
Address:
City:
State (Province):
Contact of the Installing HVAC Contractor/Technician:
Technician Full Name (Print):
HVAC Technician's Company Name:
Address:
Currently Licensed or Certified HVAC Technician License or Certification Number:
Official Phone # to Check the License Validity:
Recommended Temperature
Ranges-Indoor Side (Capacity
& Efficiency Varies)
Temperature
Ranges of
Remote/Line Control
Mode
Dry Bulb-Low Dry Bulb-High
Mode
Dry Bulb
o
Warranty
Approved
Warranty
Denied
Unit #5
Unit #6
Unit #7
Unit #8
Cooling
61oF
86 oF
Heating
61oF
86 oF
61 F to 105 F
(16oC to 40.5 oC)
47oF to 86oF
Heating
(8.3oC to 30oC)
Cooling
Wet Bulb
o
Recommended Temperature
Ranges-Outdoor Side (Capacity
& Efficiency Varies)
Mode
Dry Bulb
o
NA
NA
Wet Bulb
o
20 F to 115 F
(-6oC to 46oC)
5oF to 75oF
Heating
(-15oC to 24oC)
Cooling
NA
NA
IMPORTANT NOTES FOR INSTALLING CONTRACTOR / TECHNICIAN, AND UNIT OWNER / USERS:
Load Calculation, Unit Sizing and Selection, Capacity and Efficiency, Heat Pump:
Phone:
Email:
Country:
Fax:
1) It is the validly licensed installing HVAC contractor/technician who needs to calculate the cooling load and/or heating load of the room
to be conditioned, by using commercially available cooling and heating load program and finding out the room structure details, design
cooling temperatures-indoor and outdoor, design heating temperatures-indoor and outdoor, yearly cooling hours, yearly heating hours,
highest ambient temperature in summer, lowest ambient temperature in winter, timeframe units are to be used in summer and winter, if units
need to cool in cold ambient temperatures, or heat in mild or high ambient temperatures, if the room needs ventilation, if the room needs
back-up heater, and so on.
YMGI-Recommended Contractor/Technician:
Phone:Fax:
Email:
City:State (Province):
License Approved or Certified by:
2) Load calculation must be done carefully and correctly by experienced technician, for each room that needs to be conditioned, before
sizing unit and selecting correct model. Not to undersize or oversize the unit.
List for Installating HVAC Technician to Double Check Installation Quality, and Warranty Processing Purpose (if not filled by technician, or not filled fully, warranty will void)
3) It is strongly recommended to have the units work within the recommended temperature ranges.
1) Are you the only one to install whole system?
If not,
% of installation done by you (HVAC technician).
2) What had been done, prior to your arrival?
4) Units may still work fine, even if the outdoor temperatures go out of the recommended ranges shown above. But, this is not guaranteed
and performance varies upon many different factors such as unit type, model, size, location, installation, unit conditions and weather, etc.
3) Did you read the User Manual and Installation Instruction, before you
started the installation?
4) Who unpacked the unit and accessory boxes to check for damage?
5) Unit performance and its lifetime count on unit installation quality and maintenance level.
5) Supply electrical power V/Ph/Hz measured at wiring terminal block of
Indoor unit:
outdoor unit:
6) Incoming electrical power V/Ph/Hz measured at terminal blocks of
indoor unit:
outdoor unit:
6) Standard capacity and efficiency are rated at AHRI 210/240 standard indoor and outdoor unit temperatures, indoor unit is hung 7 feet
above outdoor unit with 25' linear interconnection copper tubes being well instated and nameplate refrigerant charge. If any of these
conditions change, capacity or efficiency will change too.
7) Wire gauge, length and terminal colors between circuit breaker/
disconnect switch to outdoor unit:
8) Wire gauge, length and terminal colors between each indoor and
outdoor unit: Unit A
Unit B
Unit C
Unit D...
9) The size of HVAC circuit breaker/fuse or disconnect switch to the
outdoor unit:
10) Are the inter-connecting wires and copper lines between indoor and outdoor
units installed/covered/protected by line set covers, or anything else?
11) What is the refrigerant pipe length between each indoor unit and the
outdoor unit? Unit A
Unit B
Unit C
Unit D...
12) Where is/are the indoor unit(s) located?
Unit A
Unit B
Unit C
13) What is the elevation difference between each indoor unit and the
outdoor unit? Unit A
Unit B
Unit C
Unit D...
(indoor unit above outdoor unit +, below -)
14) Did you check the indoor unit for condensate leakage and refrigerant
leakage, before and after connecting them?
15) Where is the outdoor unit located?
Ground wall balcony roof other
location or pad
Is the outdoor unit anchored to
ground or secured onto wall
bracket?
Unit D...
16) Have you checked to make sure there is no cross-piping and no
cross-wiring between any two indoor units (zones)? How did you do it,
who was with you?
7) When outdoor temperature is too high in cooling mode, or too low in heating mode, system capacity and efficiency will decrease (this is
true for all brands of similar product).
8) Units (13SEER) built with fixed speed of compressor are designed for cooling applications in high & mild ambient temperatures. If you
want to use these units to cool spaces such as server rooms or interior rooms, even when outdoor temperatures go to low ranges (such as
lower than 45F) at night time or winter time, need to install a Low Ambient Control kit at outdoor unit to control fan speed and/or its cycling.
You need to tell your application and related requirements to the installer, before the unit is selected or installed, so that this kit can be
installed very beginning. This will help avoid the frustration to the point when the unit has to shut off or the coil gets frozen. Need to follow the
Low Ambient Control manufacturer's instructions for proper wiring and set-up. Recommended model is ICM 326HN. These units are built
with ball bearing, if not otherwise stated.
9) Heat pump systems are not supposed to be used as the only source of heating, especially for where ambient temperatures
drop below 35F in most time of heating season.
17) Were the refrigerant pipe ends capped or taped seal, prior to running
them through structures to keep debris from entering the copper lines?
18) Have you checked and run cooling or heating, one unit by one unit, all
working fine?
19) Did you charge the inter-connection copper pipes and indoor unit with
nitrogen to check for positive leakage (pressures 150-200PSI), before
conducting vacuuming leakage check?
20) Did you vacuum correctly to check the connecting pipes and indoor unit for
leakage, what was the micron gauge reading, for how many minutes?
21) Did you check if the compressor can be started and stopped in a
correct (design) manner?
22) If copper length were not made to the supplied or recommended
refrigerant pipe length, how much refrigerant added or deducted?
23) Measured refrigerant pressures at outdoor service suction valve, when unit
was st.
Heat pump (PSI):
Cooling (PSI):
Outdoor Ambient Temp. (OF):
24) What were the measured temperatures (probe not touching any metal):
O
O
At cooling: indoor return air
F, discharge air
F, and outdoor
O
O
At heating: indoor return air
F, discharge air
F, and outdoor
25) Have you checked all unit functions, with customer's witness, and all
functions are correct?
26) Did you show the user how to operate the unit? Did he/she understand you?
11) In heat pump mode, the suction (bigger) valve/pipe at the condensing unit should be hot. The discharge (smaller) valve/pipe should be
also hot or at least warm. The higher ambient temperature is, the hotter the valve/pipes will be.
27) Do you provide regular one-year free technical service for this
installation?
28) Do you list the working details in the invoice and leave a copy to the
customer?
12) In heat pump mode, if the refrigerant leaks or pipe kinks or there is other type of restriction somewhere in the pipe, the valve/pipes are
not as hot as it should be. Must avoid any of these installation problems.
Installation Finished and Unit Works Successfully.
Print Name of Installation HVAC Technician:
Signature:
Installation Finished and Unit Works Successfully.
Print Name of Owner:
Signature:
Date and time:
Date and time:
O
F
F
O
13) In cooling mode, if the refrigerant leaks or pipe kinks or there is other type of restriction somewhere, the valve/pipes could be either too
cold (frost or even ice up) or too warm. It varies upon the level of refrigerant left in the system. Must avoid any of these installation problems.
By signing above, I acknowledge the liability and responsibility for any false statement or not telling all the facts, and I authorize YMGI to check the details of the filled above, and make its
decision on warranty. I understand our filing or filling the warranty card/form DOESN'T mean automatic warranty approval, because warranty is approved only to those qualified and successful
installations by qualified HVAC technician. I know the warranty, if approved, is a standard 5-year compressor and 1-year other parts only, without any labor coverage. I agree to and will follow
all the contents contained in the Limited Product Warranty Policy that YMGI, not other entity, stated in public, including but not limited to manuals, web site, email, etc.
Important Note: A copy of the installing HVAC company's invoice to show all their work details, your payment proof, center copy B of this registration card filled after a successful
installation, all three (3) MUST be mailed together to Warranty Dept., YMGI Group, POB 1559, O'Fallon, MO 63366, for warranty processing. Customer keeps bottom copy C. YMGI
will check against copy A that was kept at YMGI.
YMGI, A COMFORT MAKER, A JOY COMPANION, A SATISFACTION GUARANTOR...
10) 13SEER units are built with fixed speed of compressor, unlike DC inverter type, and are only designed for heating applications in mild
ambient temperatures. The lowest temperatures for 13SEER units have been tested are 17F. But, the units can still generate petty good
amount of heat, even ambient temperatures go to lower ranges. When ambient temperatures drop to lower ranges, heat pump units
generate less capacity at lower efficiency. If you want to use these units to heat spaces in northern regions where yearly heating hours are
more than yearly cooling hours, back-up heater along should be installed along with these heat pump units. This way, the back-up heater can
make up heat when the heat pump unit doesn't generate enough heat, or take its place to heat up your space when the heat pump efficiency
HSPF drops close to or below 1.0. You can ask the installer to set up the control or switch to be either manual, or automatic.
P3 OF 30
14) To protect against unit/part damage due to many reasons, including too high or low ambient temperatures, too hot or cold indoor coil,
refrigerant leakage, mixed with air, etc., system may stop to work and show error codes. Need to call your installer/technician check the
system, before resuming units back to normal work.
15) Suggest your HVAC contractor/technician to check for leakage and refrigerant leakage and refrigerant level, before cooling or heating
season comes.
16) Optional component Wind Baffle can be added/installed at the fan discharge side on the heat pump outdoor condensing unit cabinet,
to keep from cold wind blowing against air discharge (headwind will drop heating capacity and efficiency at same ambient temperatures).
YMGI, A COMFORT MAKER, A JOY COMPANION, A SATISFACTION GUARANTOR...
P4 OF 30
MUST READ
MUST READ
LIMITED PRODUCT WARRANTY
REGISTRATION CARD / FORM
VERY IMPORTANT NOTES TO DEAR CUSTOMERS FOR
REFRIGERANT RELATED HVAC PRODUCTS, ESPECIALLY THE SPLIT TYPE
1. GOOD UNITS CAN MALFUNCTION, MAY NOT WORK CORRECTLY OR PROPERLY, AS DESIGNED AND
MANUFACTURED, IF NOT INSTALLED CORRECTLY OR PROPERLY. MUST DO IT RIGHT ALL THE TIME,
ESPECIALLY FROM THE VERY BEGINNING.
2. CUSTOMER DO-IT-YOURSELF (DIY) INSTALLATION CAUSED AND/OR MAY CAUSE TROUBLE, IN
DIFFERENT FORMATS, TO THE UNIT, YOUR COMFORT EXPECTATION, YOUR HEALTH.
3. HANDY MAN OR SMART PEOPLE OR EVEN SOME PROFESSIONALS MAKE MISTAKES SOMEWHERE
OR SOMETIMES. DON'T TRY TO SAVE MONEY BY DIY, HAND OVER THE INSTALLATION TO THE
CURRENTLY LICENSED PROFESSIONALS, SINCE THEY WILL TAKE CARE OF YOUR UNITS AND YOUR
COMFORT.
4. DIY INSTALLATION MAY SAVE YOU SOME MONEY UP FRONT, BUT WILL COST YOU MORE AND
BRING HEADACHE, DOWN THE ROAD.
5. YMGI DOESN'T AGREE, DOESN'T ALLOW, DOESN'T WARRANT, DOESN'T ENSURE, DOESN'T
ENCOURAGE, DOESN'T RECOMMEND DIY INSTALLATION, UNLESS YMGI STATES DIY
INSTALLATION IS ALLOWED, IN WRITING.
6. CUSTOMERS WILL LOSE FACTORY WARRANTY ON DIY INSTALLED HVAC PRODUCTS AND TAKE
THEIR RISKS FOR DIY INSTALLATION.
7. DON'T PAY THE CONTRACTOR IN FULL, UNTIL ALL FUNCTIONS OF THE SYSTEM HAVE BEEN
CHECKED AND YOU ARE SATISFIED.
8. IT IS THE INSTALLATION CONTRACTOR'S RESPONSIBILITY TO INSTALL AND SERVICE THE SYSTEM
TO MAKE SURE THE UNIT WORKS CORRECTLY AND PROPERLY OVER TIME. YMGI DOESN'T INSTALL
NOR SERVICE YOUR UNITS ON BEHALF OF THE INSTALLER. YMGI WILL HELP THE INSTALLER OR
SERVICE PROVIDER BY ANSWERING QUESTIONS AND PROVIDING TECHNICAL SUPPORT.
9. IT IS THE CUSTOMER'S RESPONSIBILITY TO SELECT THE UNIT CORRECTLY (UNIT SIZE, SEER,
ELECTRIC POWER, CONTROL, REFRIGERANT, DC OR FIXED SPEED, LOOKING AND OTHERS).
10. IT IS THE CUSTOMER'S DECISION WHAT UNIT TO BUY AND TO INSTALL. PUT DOWN ALL
REQUIREMENTS IN WRITING, BEFORE ORDERING.
11. WHO CAN INSTALL THE HAVC PRODUCTS HEREOF:
* ONLY LICENSED HVAC CONTRACTOR(S)/TECHNIICIAN(S), WHO KEEPS A CURRENT VALID LICENSE
FOR HEATING AND COOLING EQUIPMENT, SUCH AS AIR CONDITIONER AND HEAT PUMP.
* DON'T DO-IT-YOURSELF (DIY) HVAC EQUIPMENT, WHICH IS NOT ALLOWED BY THE LAWS, NOR
WARRANTED BY YMGI.
12. IMPORTANT NOTES FOR INSTALLATION
* SIZE WIRES AND CIRCUIT BREAKERS CORRECTLY, PER NEC CODES.
By Placing Your Order and Purchasing Our Products from an Authorized Distributor, or by Opening the
Carton Box, You Shall Have Read All Manuals and Instructions and Understood and Accepted and
Agreed to All the Following:
Decision Maker's Own Risks and Is NOT Guaranteed and
What You Will Need to Do When Receiving the
Endorsed by the Manufacturer.
Products
* READ SPECIFICATION SHEETS OR OTHER MANTERIALS FOR LIMITS OF OPERATING TEMPERATURE
RANAGES, PIPING LENGTH, AND PERFORMANCE AT DIFFERENT AMBIENT TEMPERATURES.
* READ MANUALS AND CHECK TO MAKE SURE ALL ARE CLEAR BEFORE INSTALLING THE UNITS.
* WATCH INSTALLATION AND MAKE SURE THERE ARE NO BUGS LEFT IN YOUR HAVC SYSTEMS.
* COVER THE ENDS OF THE INTER-CONNECTING COPPER TUBES BEFORE PULLING THROUGH
STRUCTURES TO KEEP DEBRIS OR OTHER FOREIGN SUBSTANCES FROM ENTERING THE
REFRIGERATION SYSTEM AS IT WILL CONTAMINATE THE SYSTEM AND DAMAGE THE SYSTEM,
DOWN THE ROAD.
* VACUUM THE INTERCONNECTING TUBES AND INDOOR UNITS AND CHECK FOR LEAKAGE,
BEFORE RELEASING REFRIGERANT FROM OUTDOOR UNIT TO INDOOR UNIT.
* TRIAL RUNNING SYSTEMS AND CHECK ALL FUNCTIONS, BEFORE PAYING OR LETTING THE
INSTALLER LEAVE THE JOB SITE.
* JOT DOWN INSTALLER'S CONTACT INFORMATION AND SERVICE INVOICE/RECIEPT FOR FUTURE
QUESTIONS OR CUSTOMER SERVICE.
YMGI, A COMFORT MAKER, A JOY COMPANION, A SATISFACTION GUARANTOR...
P5 OF 30
Shall Check the Delivery Against the Order and Packing
List to Make Sure There is No Unit/Part/Accessory Missing
or Damage.
Shall Mark Any Unit and Part and Accessory Missing on
the Delivery Confirmation Paperwork.
Shall Report Any Freight Damage to the Carrier within 24
Hours as of Delivery.
Shall Report Any Unit and Part and Accessory Missing or
Damage to Sales/Customer Service within 24 hours as of
Delivery.
No Report after 24 Hours as of Delivery, Meaning
Units/Parts/Accessories Have Been Delivered Completely
and No Damage is Found.
What You Will Accept before Breaking the Box
Seal and Opening the Box
Due to Continuous Product/Engineering Improvement, as
Well as Viewing Angles and Background Affects, the
Contained Unit May Look Slightly Different from What is
Shown on the Carton Box or Spec. Brochures.
The Units Were Manufactured Some Time Prior to the
Shipping Date. Normally The Box is Sealed and The
Units/Parts Contained Are New and Have not Been Used.
From Time to Time, Shipper Does Select Boxes Randomly
to Check the Contained Units/Parts to Make Sure
Everything is All Right, before Shipping. But, All Units/Parts
Have not Been Used.
The Product is Designed and Manufactured and Tested to
Be Free of Defects at Manufacturer Plants, but if the Unit
Will Work Properly or Not, Only Depends upon Many other
Factors, Especially the Quality of Installation. Anything Not
Working May Not be the Product Itself. Which Could be
Power Failure, Insufficient or Wrong Wiring, Not Vacuuming,
Pipe Bending or Kinking or Leaking, Unit/Parts Dropping,
Water Damage, and So on.
If the product, for Some Uncontrolled Factors During
Transportation and Installation, Doesn't Function Properly
or Timely Due to Unexpected Failure, You Agree to Have
the Licensed Installer (HVAC or Electrician), instead of
Yourself, Call the Manufacturer Technical Support and/or
Customer Service to Walk through Some Technical Steps
Together, In Order to Find Out the Failure Reason and
What Parts Are Needed. All the Effort is To Limit the
Problems and Make the Unit Work for You As Soon As
Possible and There Will Be No Extra Charge.
What You Need to Pay Attention to at Installation
Understand to Save on Somethings but Not Everything.
In Order to Ensure Installation Quality and Validate the
Factory Warranty, You Must Hire a Currently Validly
Licensed HVAC Technician to Conduct Electricity and
Refrigerant-Related Installation and Trouble-Shooting Work
and Follow Related Local/DOE/EPA Codes and Laws.
Contact Your Licensed HVAC Technician to Determine
What Portion Can be Done Do-it-Yourself (DIY) and Save
Some Money. DIY Installation Varies Upon Many Factors.
DIY Installation May Succeed, but May Be Taking Chance
and/or Running Risks.
Do Not Pay your Technician in Full, Until at Least 30 Days
after All Installation is Finished and Unit(s) Work Properly.
What You Need to Know During Installation or
Operation
Cover the Interconnecting Pipes Before Pulling through
Structures, to Keep Dust, Debris and Other Foreign
Substances from Entering and Damaging the Refrigeration
System.
Vacuum and Conduct Leakage Check for the
Interconnecting Pipes and Indoor Unit. If There is Any
Leakage, Need to Find it and Fix It.
Must Make Sure the System is Sealed Tight without Any
Leakage Potential, before Releasing Refrigerant from the
Condensing Unit to the Interconnecting Pipes and Indoor
Unit.
For Technical Questions, In Order to Help You in a timely
manner, You Shall Have the Licensed Technician/Installer,
Instead of Yourself, Check What is Going on before Talking
to the Sales Distributor and/or Manufacturer Technical
Support from Your Job Site.
For Product Pricing and Product Availability, You Shall Talk
with Sales.
For How to Use the Unit or if You Need Any Parts, You Shall
Read the Manuals or Go Online or Contact Your
Sales/Customer Service at Distributor, if Not Available, then
Contact Customer Service/Support at Manufacturer, via the
Contact Information Printed in the Manual and/or Unit.
What You Need to Know Before Your Contractor/
Technician Finishes the Installation
Witness the Contractor/Technician Checking the System
Thoroughly and All Functions and Make Sure All Are Good.
Have the Contractor/Technician Sign on the Paperwork.
Don't Pay to the Contractor/Technician in Full Until the
Whole System Works Smoothly without Any Problem for at
Least 30 Days.
Tell the Contractor/Technician that They Need to Come to
the Job Site to Check the System, if There is Anything Not
Right, Since You Pay to Get Their Service.
Tell the Contractor/Technician that They, not the
Customer/End User, Will be the One to Talk to the Factory
Technical Support, Technically, if There is Anything Wrong
or Abnormal, In Order to Communicate Efficiently and
Productively.
What You Need to Know about Warranty
If the Units are Installed Properly, Following Manufacturer
Instructions, by Licensed HVAC Technician, the Units are
Covered with a Standard Warranty which Covers 5-year
Compressor and 1-year Other Parts Only.
In Standard Factory Warranty, NO LABOR IS INCLUDED.
Extended Warranty shall be Purchased at Original Unit
Ordering, at Extra Cost to Cover More Years of Parts
and/or Labor.
Units/Parts Shipping is Ground Only. Expedited Express
Shipping Shall be Requested in Writing at Extra Cost.
YMGI, A COMFORT MAKER, A JOY COMPANION, A SATISFACTION GUARANTOR...
P6 OF 30
MUST READ
MUST READ
TO END USERS- MUST READ PRIOR TO HIRING A CONTRACTOR TO INSTALL
IMPORTANT NOTES
IMPORTANT NOTES
YMGI is NOT and shall NOT be responsible for any problems due to customer do it yourself(DIY) installation,
non-licensed installation, and other unprofessional, incorrect, incomplete installation, abuse to the unit, or
abnormal usage which would be considered outside normal constraints, or recommended ranges, and natural
disasters such as fire, flood, earthquake, lighting, or others similar.
SAFETY CAUTIONS AND ALERTS
YMGI IS NOT AND SHALL NOT BE RESPONSIBLE FOR:
Installation, Operation, Maintenance, and Service shall follow professional standards and practices for
conventional cooling and heating equipment, under International, National, State, City or Local Codes, and follow
guidelines listed in all related manuals and associated product information provided directly, from YMGI. Failure
to adhere to proper Installation, Operation, Maintenance, and Service could result in unit malfunction damage to
equipment, personal property, or physical injury, or even death, which YMGI is not responsible for.
Damage to the units or property or person due to
careless, or incautious, or rough handling at job site,
such as pulling wires or pipes or plastic parts too hard,
dropping units, robbing unit surfaces, and etc.
Installation must be performed following the
YMGI Installation/Maintenance Manuals.
Installation must be performed by a certified
technical installer only. DO NOT attempt to install
the unit by yourself trying to save money. Do-ItYourself (DIY) installation will void YMGI provided
warranty and could result in injury or death, or
property damage due to fire, electrical shock, leaking,
collapsing, which YMGI is not responsible for.
Install the unit onto a strong load bearing
structure. The location must be capable of handling
the weight load of the unit to prevent the unit from
falling or causing injury. Attach both the indoor and
outdoor units to the brackets that are fixed to the
right position securely.
Only use manufacturer specified and codes
allowed wires and conduits to connect to the
units so the stress is not applied to the sections.
Incomplete connecting and insecure fixing could
cause fire or damage.
Wiring must conform to national regulations.
Failure to adhere to these standards could result in
personal injury or death or property damage due to
fire, electrical shock, falling units, or leaking.
Connect the power cord directly to a designated
and exclusive AC Power Circuit Breaker and or
Disconnect Switch. The circuit must exceed
permissible currents and is free of insulation and
contact defects. Shall refrain from intermediate or
multiple connections to avoid fire or electric shock.
DO NOT supply power until all wiring and tubing
is checked completely.
Double check for gas leaks during or after
installation. The refrigerant gas may cause harmful
substances when subjected to heat or fire.
Refrigerant leakage will cause unit not to generate
enough cooling or heating and even damage
compressors and other parts.
Shut off the main power prior to and during
installation to avoid electrical shock. Make sure
that the electrical power is disconnected from the
unit by making a notice or put a sign at the power
switch panel, to keep other people from setting the
power back during installation.
Connect all wiring securely. Any loose wire or other
bad contact may cause an electrical arc, overheating,
or fire hazard. Make sure that the unit is grounded
following YMGI Instructions and NEC, International,
State, City, and Local Codes. Electrical cover shall be
securely attached to the indoor and outdoor unit
service panels, otherwise, could result in fire or
electric shock due to accumulation of dust, sediments,
water, moisture, etc.
Only use authorized YMGI parts in the
installation, maintenance, service, and repair of
YMGI units. The use of non-authorized or
defective parts will void the warranty and could
cause injury or death or property damage due to
water leakage, falling units, fire, electric shock, etc.
Pay extreme caution to interconnecting
refrigerant copper tubing, when installing or
relocating the unit. Make sure that no other
substance than the specified refrigerant enters the
refrigeration circuit. Any presence of foreign
substances such as air or water or moisture can
cause an abnormal pressure rise or overheat, which
will result in an inefficient unit performance or unit
malfunctions, and will shorten unit lifetime.
Pay extreme caution to interconnecting
refrigerant copper tubing when installing or
relocating split system, as applicable.
1) Make sure that no substance other than the
specified refrigerant enters the refrigeration circuit.
Any presence of foreign substances such as air or
water or moisture can cause an abnormal
pressure or overheat which will result in an
inefficient unit performance or unit malfunction and
will shorten the longevity of the unit.
2) Tape two ends of the copper tubing, tape the
wires for the corresponding indoor
unit to the copper tubing, and mark well with either
A, B, C or D to identify each copper tubing/wiring
bundle. Do not cross wire or mismatch tubing
among indoor units of the multiple zone systems.
Connect the electrical wiring and copper tubing
from each zone of indoor unit to the corresponding
wiring and copper tubing connections of the
corresponding outdoor section (at outdoor
condensing unit). Failure to do so will cause unit
malfunctions, or damages to the compressors and
other parts in the unit and even property or
personal injuries.
YMGI, A COMFORT MAKER, A JOY COMPANION, A SATISFACTION GUARANTOR...
P7 OF 30
YMGI LIABILITY DISCLAIMER
Damage to the units or property or person due to
unprofessional or incorrect or incomplete mechanical
installation of units. Examples, not limited to, are:
sharp bending, not finding kinks, cracking or
deterioration of connecting pipes, unevenly sitting
units, not securing the units, not cleaning or leaving
debris inside of or not tightening interconnecting pipes,
not finding refrigerant or water leakage, not
vacuuming, not opening refrigerant stopping valves at
condensing units, not checking pressures, not
covering bared refrigerant pipes and connections, not
taping wire connections, not sealing drain pipe
connections, incorrect piping such as crossing piping
among multiple zones, and etc.
Accumulated costs, services, or disasters due to
unprofessional or incorrect or incomplete installation,
or abnormal usage of the units.
Under performance or damage to the unit, property
or person, at low vacuum level due to unprofessional
or incautious or bad installation, or damage to the
unit or interconnecting pipes after installation and
during usage.
Under performance or damage due to exceeding
the recommended distances or elevation levels
between indoor and outdoor units.
Under performance or damage due to the presence
of any foreign substances left inside refrigeration pipes.
Under performance or damage due to the materials
left in the air-conditioner during installation.
Under performance due to poor installation or
abnormal usage in other formats.
Water leakage problems due to incorrect or poor
installation or unsealed drain hoses.
Damage due to refrigerant or oil leakage as a result
of unsuccessful pipe installation or damage to the
unit and or pipes during or after installation.
Damage due to supplying power before all wiring
and tubing is completely finished and checked.
Damage due to not keeping units in the right
positions during handling, installation or operation.
Damage to the units or property or person due to any
other Improper Usage not conforming to YMGI
user regulations, user operation manuals and factory
recommendations.
Under performance or damage due to operating the
air conditioning system under poor physical
conditions such as anywhere there is airflow
blockage, too much sunshine, too much corrosive
gas or the sort.
Under performance or damage due to the Usage
outside the YMGI recommended operation
ambient conditions including proper temperature and
humidity ranges.
Under performance or damage due to the undersized
or oversized unit selection, improper design, incorrect
unit anticipation, and the sort.
Damage due to not grounding or poorly grounding
unit, incorrectly wiring units, loose or unsecured
wiring, or other bad contact which may cause an
electrical arc, overheating, or fire hazard.
Damage or repairs required as a consequence of
faulty installation or application.
Damage due to failure to start as a consequence of
exceeding recommended voltage ranges (too low or
too high), blown fuses, open circuit breakers.
Damage due to the inadequacy or interruption of
electrical service.
Damage or repairs needed as a consequence of
any misapplication, abuse, improper servicing,
unauthorized alteration, or improper operation.
Damage due to the usage of parts not supplied or
designated by YMGI Group.
Damage to the unit, property, and/or person of
whatever kind, direct or indirect, special or
consequential, resulting from the improper
installation or usage of such products.
Damage from the units installed and operated
outside USA or Canada.
Damage as a result of floods, winds, fires, lightening,
accidents, corrosive atmosphere, or other conditions
beyond the control of YMGI Group.
YMGI, A COMFORT MAKER, A JOY COMPANION, A SATISFACTION GUARANTOR...
P8 OF 30
MUST READ
MUST READ
* A Good unit may not work properly or correctly. as designed or manufactured, if not installed properly or correctly.
* Customer do-it-yourself (DIY) installation caused and/or will cause trouble to the unit and your property and
yourself.
* YMGI doesn’t allow nor recommend nor honor warranty for DIY installation. Customers take full responsibility
for DIY installation.
* DIY installation may save money up front, but will cost you more money and headaches down the road.
WARNINGS FOR INSTALLATION, OPERATION, MAINTAINING AND SERVICE
MUST READ
When smelling a burning or smoke,
turn off unit and disconnect the
power and contact your installation
or service technician
without delay.
Must connect the unit to dedicated
HVAC circuit breaker of proper
size.
Shall not turn on and then off the
unit back and forth frequently.
Must not cut off or damage power
cables and control wires.
In case of any damage found on
wires, must replace with good one
without any delay.
Don't entangle electrical wires or
leave extra length of wire in the
unit.
* Be sure to cut off the power supply before cleaning the air conditioner; otherwise electric shock
might happen.
* Wetting of air conditioner may cause the risk of electric shock. Make sure not to wash your air
conditioner in any case.
* Volatile liquids such as thinner or gasoline will cause damage to the appearance of air conditioner. (Only use
soft dry cloth moist cloth clean the air conditioner cabinet).
* This product must not be disposed together with the domestic waste.
This product has to be disposed at an authorized place for recycling of electrical and electronic appliances.
* The temperature of refrigerant circuit will be high, please keep the interconnection cable away from the copper
tube.
1
1
Not to connect unit to the wall
switch.
Never drag wires too hard, or use
wire to hang or band or fasten
anything.
1
2
1
2
3
Never use indoor wires for outdoor
use.
Disconnect the power supply, if
not using the unit for quite a while.
Before cleaning, it is necessary
to stop unit operation and off the
power supply.
Only apply correct electrical power
to the unit (208-230/1/60).
The compressor will vibrate if the
voltage is too low or too high.
Electrical components may fail, if
voltage is too high.
Must turn off unit and disconnect
electrical power, before cleaning
or servicing the unit.
Suggest to put a warning sign at
the switch, to avoid accidental
turning on the power by somebody
who doesn't know service is in
process.
Mounting bracket must be sturdy
and secured.
Don't attempt to install or repair the
unit by yourself. Saving on these
work is not worthy, since you miss
chance to have the professional
look into the unit for a full diagnosis
and complete repair. Also,
factory warranty will be lost.
Handy man may
successfully conduct some work.
But, it is about responsibility and
liability. Customer will have to take
responsibility and liability for the
DIY installation or or repair.
Don't step onto the top of unit.
Don't place anything atop of it.
The unit must be securely
grounded.
The cable shall be connected to
the grounding device in the
home or building.
YMGI, A COMFORT MAKER, A JOY COMPANION, A SATISFACTION GUARANTOR...
3
3
3
3
WMMS-21CH
WMMS-30CH
WMMS-24CH
WMMS-36CH
WMMS-42CH
WMMS-48CH
WMMS-60CH
1
Air Discharge grille
Air Discharge grille
Air Discharge grille
Air Discharge grille
Air Discharge grille
2
Wiring Panel/Handle
Front side panel/handle
Front side panel/handle
Front side panel/handle
Front side panel/handle
3
Valves
Valves
Valves
Valves
Valves
TECHNICAL DATA
WMMS-21CH WMMS-24CH
WMMS-42CH WMMS-48CH WMMS-60CH UNIT
WMMS-30CH WMMS-36CH
MOD
Electricity data
Electricity supply
208-230/1/60
HVAC type fuse or circuit breaker
30
30
30/40
40
50
AMP
Minimum power cord size
10
10
8
8
8
AWG
Refrigerant charge (R410A)
56
88
88
88
169
OZ
W1
33.3
35.25
35.25
37.4
40.25
Inch
H
23.5
27.6
27.6
27.5
43.5
Inch
D0
15.0
15.75
15.75
15.75
17.5
Inch
Size
D0
H
P9 OF 30
2
NO.
W1
Outdoor unit,
especially the
heatpump
outdoor unit, must be installed at
least 3-5 inches above the ground,
to keep from possible ice being
built up in cold weather.
1
2
2
YMGI, A COMFORT MAKER, A JOY COMPANION, A SATISFACTION GUARANTOR...
P10 OF 30
BRIEF UNIT INFORMATION
If the abnormal or danger is not
found and removed, keeping on
operating the unit will damage the
unit or even cause electric shock
or fire.
NAMES OF THE PARTS
OUTDOOR
WORKING
RANGE
USERUNIT
NOTES
ANDTEMPERATURE
SERVICE LOG
RECOMMENDED TOOLS FOR INSTALLATION
1) Mounting Indoor & Outdoor
Units and Running
Piping/Wiring
Outdoor side DB(oF)
Maximum cooling
115(T1)
Minimum cooling
20
Maximum heating
75
Minimum heating
5
SPECIFICATION
BRIEF UNIT INFORMATION
WMMS-21CH-V2B(59)(2) (1 to 2) WMMS-24CH-V2B(59)(2) (1 to 3)
WMMS-42CH-V2B(59)(2) (1 to 4) WMMS-48CH-V2B(59)(2) (1 to 4) WMMS-60CH-V2B(59)(2) (1 to 5)
WMMS-30CH-V2B(59)(2) (1 to 2) WMMS-36CH-V2B(59)(2) (1 to 3)
Outdoor Unit Models
Power Supply
208-230/1/60
21,000
28,000
42,000
48,000
60,000
Rated
18,000
24,000
28,000
30,000
42,000
Min.
7,200
10,000
10,000
10,000
12,000
Max.
2300
3300
4500
4500
5100
Rated
1550
2250
2600
2600
3950
Min.
650
800
900
1000
1200
SEER
16.0
16.0
16.0
16.0
16.0
HSPF
8.2
8.2
8.2
8.2
8.2
Max.
22,000
33,000
47,000
49,000
62,000
Rated
19,000
29,500
31,000
33,000
46,000
Min.
6,500
9,000
9,000
9,000
10,000
Max.
2400
3000
3500
3500
4800
Rated
1750
2500
2920
2920
4400
Min.
650
800
900
1000
1200
Liquid Valve Size
2 x 1/4"
3 x 1/4"
4 x 1/4"
4 x 1/4"
4 x 1/4" + 3/8"
Gas Valve Size
2 x 3/8"
3 x 3/8"
4 x 3/8"
4 x 3/8"
2 x 3/8" + 2 x 1/2" + 5/8"
Compressor Manufacturer/trademark
Sanyo / Mitsubishi / Others
Sanyo / Mitsubishi / Others
Sanyo / Mitsubishi / Others
Sanyo / Mitsubishi / Others
Sanyo / Mitsubishi / Others
Compressor Oil
/ FV50S /
/ FV50S /
/ FV50S /
/ FV50S /
/ FV50S /
L.R.A. (A)
27
45
45
45
55
Compressor RLA (A)
8.4
9.7
9.7
10
13
Compressor Power Input (W)
1245
2200
2200
2200
3000
50
Cooling Capacity*
(Btu/h)
Total Power Input in
Cooling Mode* (W)
Heating Capacity*
(Btu/h)
Total Power Input in
Heating Mode*
MCA (A)
15
20
20/30
30
Fuse or Circuit Breaker (HVAC Type)
30
30
30/40
40
50
Throttling Method
Electronic Expansion Valve
Electronic Expansion Valve
Electronic Expansion Valve
Electronic Expansion Valve
Electronic Expansion Valve
Starting Method
Transducer starting
Transducer starting
Transducer starting
Transducer starting
Transducer starting
Recommended Working Ambient Temp Ranges (F)
AC: 20 to 115 HP: 5 to 75
AC: 20 to 115 HP: 5 to 75
AC: 20 to 115 HP: 5 to 75
AC: 20 to 115 HP: 5 to 75
AC: 20 to 115 HP: 5 to 75
Condenser
Aluminum fin-copper tube
Aluminum fin-copper tube
Aluminum fin-copper tube
Aluminum fin-copper tube
Aluminum fin-copper tube
Output of Fan Motor (W)
60
60
60
60
140
Fan Motor RLA (A)
0.65
0.65
0.65
0.65
1.1
Fan Motor Capacitor (uF)
3
3.5
3.5
3.5
6
Air Flow Rate of Outdoor Unit
/
/
/
/
/
Fan Type-Piece
Axial fan 1
Axial fan 1
Axial fan 1
Axial fan 1
Axial fan 1
Fan Diameter (Inches)
18.1
18.1
18.1
18.1
22.5
Defrosting Method
Auto Defrost
Auto Defrost
Auto Defrost
Auto Defrost
Auto Defrost
Climate Type
T1
T1
T1
T1
T1
Isolation
I
I
I
I
I
Moisture Protection
IP24
IP24
IP24
IP24
IP24
Max. Operating Pressure at High Side (PSI)
550
550
550
550
550
Max. Operating Pressure at Low Side (PSI)
175
175
175
175
175
Sound Pressure Level dB (A) (H/L)
56/54
56/54
56/54
56/54
56/54
Sound Power Level dB (A) (H/L)
66/64
66/64
66/64
66/64
66/64
Dimensions of Outdoor Unit (W x H x D) (Inches)
33.3 x 27.0 x 11.8
37.4 X 27.5 X 15.5
37.2 X 27.6 X 15.75
37.4 X 27.5 X 15.5
42.25 X 43.5 X 17.5
Dimensions of Package (W x H x D) (Inches)
39.1 x 29.5 x 16.9
40.6 X 29.5 X 16.5
40.5 X 29.5 X 18.0
40.6 X 29.5 X 16.5
46.0 X 48.6 X 19.4
Net Weight /Gross Weight (LBs)
115 / 126
150 / 161
165 / 176
165 / 176
225 / 248
Refrigerant /Factory Pre-Charge for 25' (LBs)
R410A / 2.97
R410A / 4.84
R410A / 4.84
R410A / 4.84
R410A / 10.6
Loading
Quantity
20' Container
87
80
80
80
50
40' Container
183
170
170
170
100
40' High Cube Container
183
170
170
170
100
YMGI, A COMFORT MAKER, A JOY COMPANION, A SATISFACTION GUARANTOR...
P11 OF 30
2) Refrigeration Related Work
Individual Wrentch Set (Use Two at
One Time)
Flare-Nut Tool Set (Not Shown)
Hex Head Allen Wrentch Sets (Metric
and Imperial)
Brazing Rods and Brazing Torch
Outfit for AC Application (Not Shown)
Brazing Flux
Nitrogen Cylinder for Positive
Pressure Leakage Check (Not Shown)
Soap Bubble for Positive Pressure
Leakage Check (Not Shown)
Vacuum Pump for Negative Pressure
Leakage Check
Helium Refrigerant Minor Leakage
Check (Not Shown)
Manifold
3) Electrical Related Installation
Wire Cutter
Wire Stripper
Sharp Plier
Cable Ties
Black Tape for Electrical Use
lectrical Meter
4) Trial Running Units and
Inspection
Clamp Meter (Not Shown)
Manifold
Infra Thermometer (Not Shown)
YMGI, A COMFORT MAKER, A JOY COMPANION, A SATISFACTION GUARANTOR...
P12 OF 30
INSTALLATION
INSTUCTIONS
Max.
Ruler (Not Shown)
Stud-Finder
Dry-Wall Saw
Electric Drill
3" Hole Saw
Drill Extension
Hammer Drill and Bit (Not Shown)
Measuring Tape
Level
Flash Light
Screw Driver (Phillps and Flat)
Hammer
Knife
Scissors
Goggled Glass
Mask
Gloves
Ladder
HANDLING
After having removed the packaging, check
that the contents are intact and complete.
The outdoor unit must always be kept upright.
INSTALLATION CLEARANCE
Handling must be done by suitably equipped
qualified technical personnel using equipment
that is suitable for the weight of the appliance.
Model
WMMS-21CH-V2B(59)(2) (1 to 2)
WMMS-30CH-V2B(59)(2) (1 to 2)
WMMS-24CH-V2B(59)(2) (1 to 3)
WMMS-36CH-V2B(59)(2) (1 to 3)
WMMS-42CH-V2B(59)(2) (1 to 4)
WMMS-48CH-V2B(59)(2) (1 to 4)
WMMS-60CH-V2B(59)(2) (1 to 5)
B
Inch
21.7
22.75
22.75
22.5
24.75
E
Inch
13.5
13.5
13.5
13.5
16.9
INSTALLING OUTDOOR UNIT
LOCATION
* Do not install the outdoor unit in pits or air vents.
Use bolts to secure the unit to a flat, solid floor.
When mounting the unit on a wall or the roof,
make sure the support is firmly secured so that
it cannot move in the event of intense
vibrations or a strong wind.
* Do not install the outdoor unit where it is exposed
to direct sunlight.
INSTALLING THE PIPES
The installation must be done by trained and
qualified service personnel with reliability
according to this manual.
Picking up and moving the units, you must be
guided by trained and qualified personal, with
proper tool.
Contact service center if you have any
questions, be for or during or after installation,
in order to avoid the malfunction or failure due
to unprofessional installation.
Ensure that the recommended clearance is left
around the unit, for proper installation,
operation and service in the future..
Use suitable connecting pipes and equipment
for the refrigerant R410A.
INSTALLATION POSITIONS FOR OUTDOOR UNIT
The refrigerant pipes must not exceed the maximum
lengths given in the technical data table.
Lag all the refrigerant pipes and joints.
Tighten the connections using two wrenches working in opposite directions.
INSTALLATION CLEARANCE
HEIGHT LIMITS OF INDOOR AND OUTDOOR UNITS
* Either the indoor unit or the outdoor unit can be higher, but the height difference must comply the stated r
equirements.
* Try to reduce the bending of the piping line as much as possible so as to avoid possible negative impacts upon
the performances of the units.
* Make P-trap if elevation drop difference is more than 25", as illustrated below.
20" or above
Space to the wall
6" or above
(Air inlet side)
Indoor unit
Outdoor unit
8" or above
Space to the cover
Drop
Oil-Trap
Lift
18 ft
Outdoor unit
78" or above
(Air outlet side)
Indoor unit
10" or above
Space to the wall
W
Refrigerant Pipe Min/Max. Length, Rise and Drop Height
H
YMGI, A COMFORT MAKER, A JOY COMPANION, A SATISFACTION GUARANTOR...
P13 OF 30
1,000 Btu/h
Min. Length (Ft.)
Max. Length (Ft.)
Max. Rise Height (Ft.)
Max. Drop Height (Ft.)
09-12
15
50
20
28
18-24
15
75
25
35
30-36
15
100
35
50
YMGI, A COMFORT MAKER, A JOY COMPANION, A SATISFACTION GUARANTOR...
P14 OF 30
INSTALLATION
INSTUCTIONS
INSTALLATION
INSTUCTIONS
Install the drain fitting and the drain hose (for model with heat pump only)
Condensation is produced and flows from the outdoor unit when the appliance is operating in the heating mode.
In order not to disturb neighbors and to respect the environment, install a drain fitting and a drain hose to
channel the condensate water. Install the drain fitting and rubber washer on the outdoor unit chassis and connect
a drain hose to it as shown in the figure.
* To be installed at the position where the air delivered from the unit can reach every comer of the room.
* To avoid being affected by the outdoor air.
* To avoid blockage to the air inlet or outlet of the unit.
* To avoid too much oil smoke or steam.
* To avoid possible generation, inflow, lingering or leakage of flammable gases.
* To avoid high-frequency facilities (such as high frequency arc welders, etc.).
* To avoid the places where acid solutions are frequently used.
* To avoid the places where some special sprayers (sulfides) are frequently used.
* Not to install on top of the musical instruments, TV, computer etc. valuable appliance.
* Not to install a fire alarming device near the air outlet of the unit (during operation, the fire alarm device might
be erroneously triggered by the warm air from the unit).
WIRING OUTDOOR UNIT
INSTALLATION-OUTDOOR UNIT
INSTALL OUTDOOR UNIT
Strongly suggest to install the outdoor unit above the ground either on platform or brackets as shown below.
Heat pump unit must be lift up from ground level, since condensate must be drained out of the drain pan of the
condensing unit; othewise, condensate may be iced and built up to damage the condensing unit.
Suggest to use YMGI-provided brackets and condensate drainage fitting accessories.
Strictly follow NEC or state or local
codes to select wires, circuit breaker,
conduits and to perform installation
work.
Bring in line-voltage power input
wires from circuit breaker to linevoltage wire terminal block at outdoor
unit. Pass through certified wire pipes,
harnesses and knockouts. Enough
length shall be left for future service.
Only copper wire is allowed.
Disconnect switch box for outdoor unit
>18"
>18"
PIPING AND WIRING SIZES-UNITS MADE AFTER 09/2012
Other Brackets
Heavy-Duty PVC Riser
for Ground Mounting
Non-Metalic Power Whip
for Outdoor Use
(Field-Supplied, Not Spliced
and Not Knotted,
Water-Proof Sealed Tight,
UL Approved)
Unit
Connection Copper
Pipe Sizes
Min/Max.Length
+/- Elevation
Wires from Outdoor
to Each Indoor Unit
Mini. Wire Size
Outdoor-Each Indoor Unit
HVAC Type
Circuit Breaker
21/30CH
2*(1/4+3/8")
15/30/30/15
N(1)/2/3/G
16AWG
30AMP
24/36CH
3*(1/4+3/8")
15/75/30/15
N(1)/2/3/G
16AWG
30AMP
42CH
4*(1/4+3/8")
4*(1/4+3/8")
2*(1/4+3/8")+2*(1/4+1/2")
+(1/4+5/8")
15/30/30/15
N(1)/2/3/G
N(1)/2/3/G
N(1)/2/3/G
16AWG
40AMP
16AWG
16AWG
40AMP
50AMP
48CH
60CH
15/30/30/15
15/30/30/15
ELECTRICAL CONNECTIONS
Bracket Accessories
(Actual unit/parts or installation may look differently from the illustrated)
INSTALLATION & PICTURES-WALL MOUNT BRACKET FOR OUTDOOR UNIT(S)
(PART VARIES UPON MODELS/AVAILABILITY)
Select a secured location where the outdoor unit will be installed properly.
Orient the unit rear side (intake grill) towards wall and front side (discharge grill) away from wall.
For ground installation, use factory-provided riser and accessories. Not to bolt unit feet directly onto ground.
Riser or brackets shall be levelled at outdoor unit foot surfaces. Secure unit foot by tightening bolts, nuts and
anti-vibration pads.
For wall mount installation, use factory-provided brackets, anchors and accessories.
WMMS-21CH-V2B(59)(2) (1 to 2) / WMMS-30CH-V2B(59)(2) (1 to 2)
1) Remove the handle at the right side plate of the outdoor unit (one screw).
2) Remove the cable clamp, connect the power connection cable with the terminal at the row of connection and
fix the connection. The fitting line distributing must be consistent with the indoor unit.
terminal of line bank. Wiring should meet that of indoor unit.
3) Fix power connection wire by wire clamp.
An all-pole disconnection switch having a
4) Ensure wire has been fastened well.
contact separation of at least 1/10" all poles
should be connected in with wires that are
5) Replace handle when done.
secured to the unit meta structure.
Wrong wire connection may cause malfunction
of some electric components. After fixing cable,
ensure that leads between connection to fixed
point are well separated..
WIRING OUTDOOR UNIT
Handle
CONNECT WIRING BETWEEN OUTDOOR UNIT AND INDOOR UNIT
The system shall be installed in accordance
with NEC.
* Check the nameplate for rated electrical data. Connect unit to the correct electrical power source.
* Select power wire of proper type and size. Suggest to use UL approved 105OC/221OF multi-strand copper wire
for outdoor use. Refer to the following tables, for proper selection of wire gauge, size and circuit breaker.
OUTDOOR WIRING: OUTDOOR-INDOOR UNIT & DISCONNECT SWITCH
BOX/CIRCUIT BREAKER/FUSE
* Remove the wiring diagram cover where also the
handle for moving unit is located.
* Follow the wiring diagrams on the unit or the wiring
diagram manual that comes with the indoor unit to
get familiar with wiring and make sure nothing is
made wrong. If there is any discrepancy, always use
the one put in the units.
* Connect wires between indoor unit and outdoor
unit-power wire from outdoor to Indoor, control wires
from Indoor unit to outdoor unit. Pass wire through
certified wire pipes, harnesses and knockouts.
Enough length shall be left for future service. Only
copper wire is allowed.
YMGI, A COMFORT MAKER, A JOY COMPANION, A SATISFACTION GUARANTOR...
P15 OF 30
The connection pipes and the connectiong
wiring of the unit A and unit B must be
corresponding to each other respectively.
N(1) 2 3
N(1) 2 3
(Left)
B
L1 L2
A
Outdoor unit
N(1) 2 3
N(1) 2 3
Indoor unit
N(1) 2 3
N(1) 2 3
(Right)
Interconnection
cable
Indoor Unit B
Interconnection
cable
Indoor Unit A
Power cord
Incoming Power
208~230/1/60
B
A
YMGI, A COMFORT MAKER, A JOY COMPANION, A SATISFACTION GUARANTOR...
P16 OF 30
INSTALLATION
INSTUCTIONS
INSTALLATION
INSTUCTIONS
Coated Brackets
W A ccessories
ELECTRICAL CONNECTIONS
ELECTRICAL CONNECTIONS
WMMS-24CH-V2B(59)(2) (1 to 3) / WMMS-36CH-V2B(59)(2) (1 to 3)
WMMS-42CH-V2B(59)(2) (1 to 4) / WMMS-48CH-V2B(59)(2) (1 to 4)
1) Disassemble the front side plate on the outdoor unit front side plate.(4pc screw).
1) Remove the handle at the right side plate of the outdoor unit (one screw).
2) Remove the cable clamp, connect the power connection cable with the terminal at the row of connection and
fix the connection. The fitting line distributing must be consistent with the indoor unit. terminal of line bank.
wiring should meet that of indoor unit.
2) Remove the cable clamp, connect the power connection cable with the terminal at the row of connection and
fix the connection. The fitting line distributing must be consistent with the indoor unit. terminal of line bank.
Wiring should meet that of indoor unit.
3) Fix power connection wire by wire clamp.
3) Fix power connection wire by wire clamp.
4) Ensure wire has been fixed well.
4) Ensure wire has been fixed well.
5) Install the front side plate.
5) Install the handle.
An all-pole disconnection switch having a contact separation of at least 0.12" in all pole should be
connected in fixed wiring.
An all-pole disconnection switch having a contact separation of at least 0.12" in all pole should be
connected in fixed wiring.
Wrong wire connection may cause malfunction of some electric components. After fixing cable, ensure that
leads between connection to fixed point have some space.
Wrong wire connection may cause malfunction of some electric components. After fixing cable, ensure that
leads between connection to fixed point have some space.
The connection pipes and the connectiong wirings of the unit A and unit B must be corresponding to each
other respective.
The appliance shall be installed in accordance
with national wiring regulations.
The connection pipes and the connectiong wiring of the unit A ,unit B and unit C must be corresponding to
eachother respective.
The appliance shall be installed in accordance with national wiring regulations.
Do not install the outdoor unit where it is exposed to sunlight.
Do not install the outdoor unit where it is exposed to the sunlight.
INSTALLATION
INSTUCTIONS
INSTALLATION
INSTUCTIONS
Back side panel
Front side panel
Front side plate
Wiring hole of the outdoor unit
N(1) 2 3
N(1) 2 3
N(1) 2 3
N(1) 2 3
L1 L2
(Left)
(Right)
Interconnection
cable
Interconnection
cable
Interconnection
cable
Indoor Unit B
Indoor Unit C
C
B
A
Outdoor unit
N(1) 2 3
N(1) 2 3
Indoor unit
N(1) 2 3
N(1) 2 3
N(1) 2 3
B
A
C
YMGI, A COMFORT MAKER, A JOY COMPANION, A SATISFACTION GUARANTOR...
N(1) 2 3
L1 L2
(Right)
Interconnection
cable
Incoming Power
208~230/1/60
N(1) 2 3
N(1) 2 3
(Left)
Power cord
Indoor Unit A
N(1) 2 3
Indoor Unit D
D
Indoor Unit C
Interconnection
cable
Indoor Unit B
Interconnection
cable
Power cord
Incoming Power
208~230/1/60
Indoor Unit A
C
B
A
Outdoor unit
N(1) 2 3
N(1) 2 3
N(1) 2 3
N(1) 2 3
Indoor unit
N(1) 2 3
N(1) 2 3
N(1) 2 3
N(1) 2 3
C
B
A
D
P17 OF 30
Interconnection
cable
YMGI, A COMFORT MAKER, A JOY COMPANION, A SATISFACTION GUARANTOR...
P18 OF 30
ELECTRICAL CONNECTIONS
WIRING DIAGRAMS
WMMS-21CH-V2B(59)(2) (1 to 2) / WMMS-30CH-V2B(59)(2) (1 to 2)
WMMS-60CH-V2B(59)(2) (1 to 5)
1) Remove the handle at the right side plate of the outdoor unit (one screw).
WARNING
2) Remove the cable clamp, connect the power connection cable with the terminal at the row of connection and
fix the connection. The fitting line distributing must be consistent with the indoor unit. terminal of line bank.
Wiring should meet that of indoor unit.
WHEN THE UNIT IS RUNNING OR STOPED WITHIN 2
MINUTES, OR THE VOLTAGE LESS THAN 30V BETWEEN
P AND N OF IPM, DON'T TOUCH ANY TERMINAL, IN
ORDER TO AVOID ANY ELECTRICAL SHOCK HAZARD.
L1
14YEGN
BN
WH
E
BU
YE
15BN
3) Fix power connection wire by wire clamp.
XTB
INDOOR UNIT B
4) Ensure wire has been fixed well.
5) Install the handle.
10GY
2
3
5BN
9BN
E
FU1
1BN
2BN
X18(COM-A)
PR
W35
6BU
FA
FB
Val.
MOTOR
Val.
MOTOR
X5
X12
X3
W33
4V
U
The appliance shall be installed in accordance with national wiring regulations.
TUBE
AP1
E
X25
L1 L2
23WH
C(T)
S
24YEGN
S1
20WH
X28
FAN-H FAN-L
M2
R
19WH
ROOM EXHAUST
COMP.
C1
POWER
Do not install the outdoor unit where it is exposed to the sunlight.
CN102
FB
W
22BU
21YE
OVERLOAD
V
X25 4V
CN101
FA
N
X4
AP3
E
XT1
L1
L2
18RD
P
X101
13YEGN
12YEGN
N
17BK
W34
AC-N
3
E
1
3
E
AP2
AC-L
4
FILTER
2
The connection pipes and the connectiong wiring of the unit A, unit B, unit C and unit D must be
corresponding to eachother respective.
AC-N1
4BN
2
3BU
N(1)
NAC
X13(COM-B)
XH-3
11BK
XTA
INDOOR UNIT A
Wrong wire connection may cause malfunction of some electric components. After fixing cable, ensure that
leads between connection to fixed point have some space.
16BN
8BU
An all-pole disconnection switch having a contact separation of at least 0.12" in all pole should be
connected in fixed wiring.
AC-L1 AC-L1 AC-N1 AC-N3 AC-L3
LAC
X14
7BU
N(1)
WH
ELECTRICAL BOX
RT5
C
E
C
FILTER
BN: BROWN
BU: BLUE
BK: BLACK
AP1
XTB XTA XT1
FU1
C1
INSTALLATION
INSTUCTIONS
INSTALLATION
INSTUCTIONS
FAN MOTOR
B
AP2
AP3
RT3
RT4
OUT TUBE
OUT TUBE
OUT TUBE
TEM. SENSOR TEM. SENSOR TEM. SENSOR
YEGN
M1
B
A
BK
BU
BN
BK
BN
WH
A
OUTDOOR UNIT
WH: WHITE
YE: YELLOW
RD: RED
GY: GRAY
YEGN: YELLOW GREEN
WMMS-24CH-V2B(59)(2) (1 to 3) / WMMS-36CH-V2B(59)(2) (1 to 3)
Front side plate
POWER
L1
L2
E
N(1) 2 3
N(1) 2 3
N(1) 2 3
N(1) 2 3
INDOOR UNIT A INDOOR UNIT B INDOOR UNIT C
N(1) 2 3
L1 L2
(Left)
(Right)
Interconnection
cable
Indoor Unit E
Interconnection
cable
Indoor Unit D
Interconnection
cable
Indoor Unit C
Interconnection
cable
Indoor Unit B
Interconnection
cable
Indoor Unit A
L
XT1
L1
L2
14BN
15BN
FU
28BN
E
N(1)
2
3
XTA
Outdoor unit
N(1) 2 3
N(1) 2 3
C
N(1) 2 3
B
N(1) 2 3
11GY
2
3
XTB
E
N(1) 2 3
D
C
B
A
YMGI, A COMFORT MAKER, A JOY COMPANION, A SATISFACTION GUARANTOR...
X101
X5
X12
AP3
X3
AP1
FB
FC
Val.
MOTOR
Val.
MOTOR
2V
4V
BU BU
VT VT
N
X4
W37
FA
36RD
P
U
V
W
31YE 32BU
33WH
OVERLOAD
S(W) C(T)
29WH
30WH
R
M2
34YEGN
S1
FB
FAN-M
X8 X2
B
40YE 41WH 42BN
X5
2V
FC
X3
4V
HEAT-C X4
OVC AC-N
X20 X29
FAN-H FAN-L
X7 X11
C1
X25
25BU
24YE
43BN 44BK 45BU
TUBE
X2
X28
ROOM EXHAUST
WH
5
A
P19 OF 30
3 4 0
1
2
RT5
B
AP2
FU
C1
FILTER
M1
S2
E
YEGN
FAN MOTOR
AP2: PFC Module;
AP3: Drive Board;
AP4: Power Module;
BN: BROWN
BU: BLUE
BK: BLACK
GY: GRAY
COMP.
COMP
HEATER
RT4
RT3
OUTDOOR UNIT
OUT TUBE
OUT TUBE
OUT TUBE
TEM. SENSOR TEM. SENSOR TEM. SENSOR
XTC XTB XTA XT1
AP1: Main Board;
22RD
23WH
BK
X1
AP1
N(1) 2 3
W38
C(WH)
Val.
MOTOR
27RD
35BK
CN2
2
3
XTC
N
AP4
PR N
B(GY)
Incoming Power
208~230/1/60
N(1) 2 3
N(1) 2 3
XH-3
W39
7BU 3BN
N(1)
A
N(1) 2 3
AC-L3
AP2
AC-N1
26BK
12WH
Power cord
L
N(1) 2 3
AC-L1 AC-N1 AC-N3
AC-L1
21BU
A(BK)
6BU 2BN
N(1)
AP4 AP3
Indoor unit
X1
X9(AC-N)
YE
PR
ELECTRICAL BOX
A
D
17BU
10BK
FA
E
20BN
X6
X14
X10(AC-L)
WH
BL
E
16BN
E
P(1) P'(3)
FILTER
N(2) N'(4)
5BU 1BN
9YEGN
BN
19YEGN
18YEGN
WH: WHITE
YE: YELLOW
RD: RED
YEGN: YELLOW GREEN
WARNING
WHEN THE UNIT IS RUNNING OR STOPED WITHIN 2
MINUTES, OR THE VOLTAGE LESS THAN 30V BETWEEN
P AND N OF IPM, DON'T TOUCH ANY TERMINAL, IN
ORDER TO AVOID ANY ELECTRICAL SHOCK HAZARD.
YMGI, A COMFORT MAKER, A JOY COMPANION, A SATISFACTION GUARANTOR...
P20 OF 30
NOT TO CROSS-WIRING & NOT TO CROSS-PIPING
WIRING DIAGRAMS
WMMS-42CH-V2B(59)(2) (1 to 4) / WMMS-48CH-V2B(59)(2) (1 to 4)
POWER
L
XT1
L1
L2
L1
L2
E
14BN
15BN
FU
28BN
18YEGN
E
INDOOR UNIT A INDOOR UNIT B INDOOR UNIT C INDOOR UNIT D
N(1)
2
3
XTA
17BU
X1
X9(AC-N)
YE
AC-L1 AC-N1 AC-N3
AC-L1
20BN
X6
X14
X10(AC-L)
WH
BL
E
16BN
E
P(1) P'(3)
FILTER
N(2) N'(4)
5BU 1BN
9YEGN
BN
19YEGN
AC-L3
AP2
21BU
XH-3
AC-N1
PR
10BK
N(1)
11GY
2
3
XTB
CN2
W38
X5
N(1)
FB
FC
AP3
2V
4V
BU BU
VT VT
Val.
Val.
Val.
Val.
MOTOR MOTOR MOTOR MOTOR
2
3
XTD
X3
U
AP1
FD
N
X4
W37
X12
FA
36RD
P
X101
D(RD)
2
3
XTC
8BU 4BN
PR N
35BK
C(WH)
13RD
7BU 3BN
N(1)
27RD
AP4
W39
B(GY)
12WH
N
26BK
A(BK)
6BU 2BN
V
W
31YE 32BU
33WH
OVERLOAD
S(W) C(T)
29WH
30WH
34YEGN
M2
R
S1
E
FA
FB
FC
B
40YE 41WH 42BN
C1
X3
4V
X25
HEAT-C X4
25BU
24YE
43BN 44BK 45BU
X2
X28
ROOM EXHAUST
TUBE
OVC AC-N
X20 X29
FAN-H FAN-L
X7 X11
FAN-M
X8 X2
ELECTRICAL BOX
A
X5
2V
FD
WH
22RD
COMP.
COMP
HEATER
23WH
BK
X1
5
A
AP2
L
3 4 0
1
2
RT5
FU
E
M1
FILTER
C1
S2
OUTDOOR UNIT
RT3
YEGN
WARNING
XTD XTC XTB XTA XT1
FAN MOTOR
AP1: Main Board;
AP2: PFC Module;
AP3: Drive Board;
AP4: Power Module;
BN: BROWN
BU: BLUE
BK: BLACK
GY: GRAY
INSTALLATION
INSTUCTIONS
INSTALLATION
INSTUCTIONS
AP1
AP4 AP3
RT4
OUT TUBE
OUT TUBE
OUT TUBE
TEM. SENSOR TEM. SENSOR TEM. SENSOR
B
WHEN THE UNIT IS RUNNING OR STOPED WITHIN 2
MINUTES, OR THE VOLTAGE LESS THAN 30V BETWEEN
P AND N OF IPM, DON'T TOUCH ANY TERMINAL, IN
ORDER TO AVOID ANY ELECTRICAL SHOCK HAZARD.
WH: WHITE
YE: YELLOW
RD: RED
YEGN: YELLOW GREEN
WMMS-60CH-V2B(59)(2) (1 to 5)
POWER
L1
L2
E
L
XT1
L1
L2
14BN
15BN
FU
28BN
18YEGN
E
INDOOR UNIT A
N(1)
2
3
XTA
20BN
X6
X14
X10(AC-L)
17BU
X1
X9(AC-N)
XH-3
INDOOR UNIT B
PR N
CN2
W38
X101
INDOOR UNIT C
E(BR)
8BU 4BN
INDOOR UNIT D
2
3
XTD
FA
FB
FC
X5
Val.
Val.
Val.
Val.
MOTOR MOTOR MOTOR MOTOR
2V
4V
BU BU
VT VT
N
X4
AP3
X3
AP1
FD
P
W37
X12
N(1)
36RD
35BK
D(RD)
14BR
27RD
AP4
W39
C(WH)
13RD
7BU 3BN
N
26BK
B(GY)
2
3
XTC
U
V
W
31YE 32BU
33WH
OVERLOAD
S(W) C(T)
9BU 5BN
INDOOR UNIT E
N(1)
29WH
30WH
R
M2
34YEGN
S1
2
3
XTD
FA
E
FAN-M
X8 X2
FB
40YE 41WH 42BN
FC
FD
X5
2V
X3
4V
HEAT-C X4
OVC AC-N
X20 X29
FAN-H FAN-L
X7 X11
C1
X25
25BU
24YE
43BN 44BK 45BU
TUBE
X2
X28
ROOM EXHAUST
WH
B
A
5
B
FU
C1
3 4 0
1
2
M1
AP1: Main Board;
AP2: PFC Module;
AP3: Drive Board;
AP4: Power Module;
E
FAN MOTOR
BN: BROWN
BU: BLUE
BK: BLACK
GY: GRAY
COMP.
COMP
HEATER
23WH
RT4
RT3
OUTDOOR UNIT
OUT TUBE
OUT TUBE
OUT TUBE
TEM. SENSOR TEM. SENSOR TEM. SENSOR
YEGN
FILTER
XTD XTC XTB XTA XT1
RT5
S2
22RD
BK
X1
AP4 AP3
AC-L3
AP2
AC-N1
A(BK)
12WH
N(1)
AP1
AC-L1 AC-N1 AC-N3
AC-L1
21BU
11GY
2
3
XTB
AP2
YE
PR
10BK
6BU 2BN
N(1)
ELECTRICAL BOX
A
L
WH
BL
E
16BN
E
P(1) P'(3)
FILTER
N(2) N'(4)
5BU 1BN
9YEGN
BN
19YEGN
WH: WHITE
YE: YELLOW
RD: RED
YEGN: YELLOW GREEN
WARNING
WHEN THE UNIT IS RUNNING OR STOPED WITHIN 2
MINUTES, OR THE VOLTAGE LESS THAN 30V BETWEEN
P AND N OF IPM, DON'T TOUCH ANY TERMINAL, IN
ORDER TO AVOID ANY ELECTRICAL SHOCK HAZARD.
YMGI, A COMFORT MAKER, A JOY COMPANION, A SATISFACTION GUARANTOR...
P21 OF 30
YMGI, A COMFORT MAKER, A JOY COMPANION, A SATISFACTION GUARANTOR...
P22 OF 30
NOT TO CROSS-WIRING & NOT TO CROSS-PIPING
VACUUM AND LEAKAGE CHECK
VACUUM REFRIGERANT PIPES
Indoor Unit E
1/4" 3/8"
Indoor Unit D
1/4" 3/8"
Service Valves
for All
Indoor Units
Indoor Unit C
1/4" 1/2"
Indoor Unit B
1/4" 1/2"
Adaptors for
outdoor valve
or indoor
connections,
if needed.
Indoor Unit A
1/4" 5/8"
Not to cross-wiring, Not to
cross-wiring between any 2+ zones.
CONNECT REFRIGERANT PIPES
Evacuate the pipes between indoor and outdoor units, using vacuum pump and manifold/gauge set, to a
minimum of 500 microns (service valves remain front seated). Hold for 30 minutes to check if the vacuum level is
maintained. Using dry nitrogen or other leakage detection tool for leak checking. Be certain there is no pressure
in the system when repairing a leak.
Vacuum and Check Leakage before Releasing Refrigerant from Outdoor Unit to Indoor Unit
Seal Copper Line Set/Wire Cable/Drain
Hose Line Combination:
* Use factory-recommended components, as briefly
illustrated below.
* Cover line set in a sequence, either from indoor to
outdoor, or the other way.
* Secure line set covers onto the wall using factoryrecommended accessories.
Compound pressure gauge
Refrigerant pipe
Gauge manifold
-100 kPa
-76cm.Hg
-1 bar
Blank cap
Outdoor unit
High pressure
side valve
(closed)
Low pressure
side valve
3-way valve
INSTALLATION OF ACCESSORIES
Hexagon
Allen wrench
Service hose
Service hose
Service valve
LINE SET COVERS
Pressure gauge
Service hose
with valve core
(For a description of how to use the
gauge manifold, refer to the gauge
manifold operation manual.)
Cap
Not to damage line sets.
Vacuum pump
INSTALLATION
INSTUCTIONS
INSTALLATION
INSTUCTIONS
VACUUM
INLTS
STRT
COUP
COUP-H
OFST
ELBF90 O
ELBF45 O
TEE ENDF
SOFT
RDER
OUTDOOR UNIT FOOT RISER OR BRACKETS
BRKT-XXXX-SC1
* Made of steel.
* Coated with weatherproof polyester powder.
Size(Inch)
Model
A
17.7
21.7
BRKT-0918-SC1
BRKT-1860-SC1
B
15.4
18.3
1) Unscrew and remove the caps from the
2-way and 3-way valves.
B
Capacity
LBs
320
360
2) Unscrew and remove the cap from the
service valve.
A
Btu/h
09K-18K
18K-60K
3) Connect the vacuum pump hose to the
service valve.
BRKT-XXXX-ST1
* Made of stainless steel.
Size(Inch)
Model
A
17.7
21.7
BRKT-0918-ST1
BRKT-1860-ST1
B
15.4
18.3
Capacity
LBs
320
360
Btu/h
09K-18K
18K-60K
4) Operate the vacuum pump for 10-15
minutes until an absolute vacuum of 500
micron has been reached.
B
A
Size(Inch)
Model
RIST-0918-PVC
RIST-1860-PVC
A
14.2
17.7
B
3.7
3.7
C
3.1
3.1
C
B
A
D
LBs
220
260
Btu/h
09K-18K
18K-60K
YMGI, A COMFORT MAKER, A JOY COMPANION, A SATISFACTION GUARANTOR...
6) Open the 2-way valve by 1/4 turn and then
close it after 10 seconds. Check all the
joints for leaks using liquid soap or an
electronic leak device.
7) Turn the body of the 2-way and 3-way
valves. Disconnect the vacuum pump hose.
Capacity
D
4.1
4.1
Vacuum pump
5) With the vacuum pump still in operation,
close the low-pressure knob on the vacuum
pump coupling.
Stop the vacuum pump.
RIST-XXXX-PVC
Foot Riser
Accessories: End Caps (Optional)
* Shock-proof PVC, Weatherproof & UV resistant.
* Supplied with fastening screws and anchor bolts.
* Easy to install.
* The "honeycomb" structure acts as an anti-vibration
& humming absorption for a quite operation.
Humid air left inside the refrigerant circuit can
cause compressor malfunction and failure.
After having connected the indoor and outdoor
units, the air and humidity from the refrigerant
circuit using a vacuum pump.
8) Replace and tighten all the caps on the
valves.
P23 OF 30
INDOOR UNIT
Refrigerant fluid direction of flow
2-way valve
3-way valve
(6) Open by 1/4 turn
Service
inlet
(7) Turn to open fully
(2) Turn
(8) Secure
(8) Secure
Connect to the
indoor unit
(2) Turn
(2) Turn
(8) Secure
(7) Turn to open
fully
Valve cap
Valve cap
YMGI, A COMFORT MAKER, A JOY COMPANION, A SATISFACTION GUARANTOR...
P24 OF 30
RELEASE REFRIGERANT FROM OUTDOOR TO THE INDOOR UNIT
Unit is pre-charged with refrigerant good for 25' of
connection tubes. If vacuum is held for about 30
minutes and no leak is found, first back-seat the
liquid (smaller) service valve by Allen Wrench (hex
head) slowly to release pre-charged refrigerant from
the condensing unit into the connection pipes and
indoor unit. If no abnormal things are found, fully
open liquid (smaller) and gas (bigger) service
valves. Always replace and tighten the caps onto
service valves.
liquid closing valve
CHECK AFTER INSTALLATION AND TEST OPERATION
CHECK AFTER INSTALLATION
allen wrench
gas connecting pipe
Items to be checked
Possible Problems or Consequences
gas
charging
hole
screw cap
Has the been unit positioned firmly?
The unit may drop, shake or emit noise.
Have you done the refrigerant leakage test?
It may cause insufficient cooling(heating)
capacity.
Is heat insulation sufficient?
It may cause unexpected condensate and
dripping.
Is drainage pipe tested ?
It may cause leakage or unexpect dripping.
CHECK SYSTEM THOROUGHLY
Is the voltage in accordance with the rated
voltage marked on the nameplate?
It may cause electric malfunction
or damage to the part/unit.
Check system thoroughly to make sure the unit is ready for trial running: check wires and pipes and air intake and discharge
and power and thermostat and others necessary components.
Is the electric wiring and piping
connection installed correctly and securely?
It may cause electric malfunction
or damage to the part/unit.
ADJUST REFRIGERANT-GUIDELINE
Has the unit been connected to a secure
earth connection?
It may cause electrical leakage.
Is the power cord specified properly per
NEC codes ?
It may cause electric malfunction
or damage to the part/unit.
Is the air inlet and outlet been cleared?
It may cause insufficient cooling(heating)
capacity, and unexpected noise.
Has the refrigerant pressure been checked or refrigerant
been adjusted accordingly?
It may generate unexpected noise, freezing pipe, capacity
issues, compressor or system damage or even worse.
Has the installing technician filled all the fields in the
checklist inside the warranty registration card?
If not filed or not filled completely or correctly, your factory
warranty may not be qualified.
screw cap
Releasing Refrigerant from Outdoor Unit to Connected
Pipes and Indoor Unit
SYSTEM INSPECTION AND TRIAL RUNNING
INSTALLATION
INSTUCTIONS
Right amount of refrigerant is very important. It is one of the basics to ensure unit a safe operation over time.
Normally single zone outdoor unit is pre-charged with refrigerant for 25ft inter-connecting copper (liquid) line. Multiple zone outdoor unit is
pre-charged for various length of copper (liquid) lines of allowed quantity of indoor units, following specs. or engineering submittal.
For single zone unit or multiple zone multiple compressor unit, normally the outdoor unit is pre-charged for 25ft line sets. If the copper line is
longer or shorter than 25ft, need to add or deduct refrigerant, following general rule of thumb for rough adjustment:
1/4" liquid line unit: 0.3 Oz/ft; 3/8" liquid line unit: 0.4 OZ/ft; 1/2" liquid line unit: 1.2 OZ/ft.
For multiple zone one compressor unit, if the copper line is longer or shorter than the length at which pre-charged refrigerant is good for, as
listed in the engineering submittal or related labels or tables, need to add or deduct refrigerant, following 0.23 OZ/ft rule of thumb for rough
adjustment.
In all situations, the minimum copper line (liquid or gas) length for each indoor unit is 15ft.
For a better adjustment, may combine above guideline with the indoor or outdoor (ambient) temperature-refrigerant pressure chart, or
generally 8-12F super-heat method.
PRESSURE CHECKING
System pressure checking should be a must-do job during trial running of initial installation, and compressor/refrigerant-related troubleshooting. It is a more accurate refrigerant adjusting method than rough refrigerant addition or deduction guideline shown above.
In some cases, if the service valve on unit is 5/16 and your service valve connection is 1/4 , need to use a 5/16 -1/4 adaptor so that
you can connect to your manifold. Need to pay attention to use the right manifold that is rated for the refrigerant in the unit, and pay attention
to connect to the right hose (blue hose for low pressure, red hose for high pressure, yellow hose for vacuum or charging or deduction). Not
recommend to put hose onto service valve while compressor is running. Remove hose quickly and carefully to avoid air suck-in, refrigerant
leakage, or any refrigerant-freezing burn.
The following curves are only reference for system pressure checking. Actual pressures may vary upon many factors such as inter-connecting
pipe length, refrigerant charge / leakage level, elevation difference between indoor unit and outdoor unit, tool calibration, reading error, and so
on.
Reference Temperature-Pressure Table (Split Condensing Unit-R410A AC)
Product Series: YMGI Group-Mini Split Version: 01/11/2010
Outdoor Dry-Bulb (F)
Outdoor Dry-Bulb (C)
Outdoor Wet-Bulb (F)
Outdoor Wet-Bulb (C)
Indoor Dry-Bulb
Indoor Wet-Bulb
Discharge-PSI/F
Suction-PSI/F
15
-9.4
13.6
-10.2
25
-3.9
23.0
-5
35
1.7
30.2
-1.0
50
10.0
42.8
6.0
55
12.8
46.9
8.3
60
15.6
51.1
10.6
67
19.4
59.5
15.3
75
23.9
66.6
19.2
80F (26.7C)
67F (19.4C)
82
27.8
64.9
18.3
90
32.2
71.2
21.8
95
35.0
75.0
23.9
100
37.8
79.0
26.1
105
40.6
82.9
28.3
110
43.3
86.9
30.5
115
46.1
90.7
32.6
74/21.2 84/27.1 105/35.1 115/38.5 125/42.8 130/45.5 140/48.2 146/51.2 156/54.3 166/57.5 175/61.2 180/62.5 186/63.7 189/64.5 191/64.9
60/46.2 70/53.5 85/55.2 92/55.7 98/56.1 103/56.7 110/56.9 115/57.1 120/57.5 128/57.8 135/57.9 136/58.6 137/59.1 139/59.3 140/59.5
Suggest to Add on Low Ambient Control, If Still
Warning: R410A refrigerant bears higher pressures than R22.
in Need of AC for Long Time In Cold Weather.
Closely Check/Watch Refrigerant Charge Level.
Only handled by Licensed HVAC technician.
Reference Temperature-Pressure Table (Split Condensing Unit, R410A-Heat Pump)
Product Series: YMGI Group-Mini Split System Version: 01/11/2010
Outdoor Dry-Bulb (F)
Outdoor Dry-Bulb (C)
Outdoor Wet-Bulb (F)
Outdoor Wet-Bulb (C)
Indoor Dry-Bulb
Indoor Wet-Bulb
Discharge-PSI/F
Suction-PSI/F
0
-17.8
-0.8
-18.2
5
-15
4.1
-15.5
260/84
246/72
269/90
255/78
10
-12.2
8.8
-12.9
17
-8.3
15
-9.4
284.5/95 290/102
270/86
278/89
25
-3.9
22.8
-5.1
30
35
-1.1
1.7
27.5
28.9
-1.7
-2.5
70F (21.1C)
60F (15.6C)
296/111 304/128
285/92
290/95
304/133
310/98
40
4.4
36.3
2.4
45
7.2
41.0
5
47
8.3
43.0
6.1
55
12.8
50.4
10.2
62
16.7
56.5
13.6
330/138
318/100
345/142
330/102
354/149
340/104
400/149
380/107
440/176
425/113
YMGI, A COMFORT MAKER, A JOY COMPANION, A SATISFACTION GUARANTOR...
P25 OF 30
TEST OPERATION
1. Before test operation
(1) Do not turn on power before installation is finished completely.
(2) Electric wires must be connected correctly and securely.
(3) Cut-off valves of the connection pipes should be back seated/tunned on.
(4) All the impurities such as scraps and thrums must be cleared out of the unit.
2. Test operation method
(1) Switch on power, press "ON/OFF" button on the wireless remote control to start the operation
(2) Press MODE button, to select the COOL, HEAT (not available for cooling only unit is ), FAN and so on to check :
* All the functions (to make sure the unit functions correctly and poroenty).
* Refrigerant (pressures/temperatures at sericea values/pipes should be good).
* Drainage (condensate/water flow should be dripping out of drainage pipe ONLY).
* Noise (there should be no abnormal symbol)
FINISH INSTALLATION
1) Put back all covers, screws removed during
installation and start-up.
2) Properly note, mark, organize and secure wires.
3) Caulk the opening to weatherproof level at
opening frame both inside and outside.
4) Do a final visual inspection.
5) Teach or instruct owner or users how to correctly
operate the system and answer their questions.
6) Check against all items in Product/Warranty
Registration Card and sign it for the owner.
gas pipe
liquid piep
adiabatic underlay
drain hose
felt
YMGI, A COMFORT MAKER, A JOY COMPANION, A SATISFACTION GUARANTOR...
P26 OF 30
INSTALLATION
INSTUCTIONS
liquid
connecting
pipe
WARRANTY AND TECH. SUPPORT
FAULT INDICATION
Meaning
D102
Meaning
D103
Meaning
Blink
once
Compressor operates
Blink
once
Air exhaust protection frequncy limit
Blink
once
Air exhaust protection frequency limit
Twice
Compressor high pressure protection
unit stop
Twice
Cooling overload frequncy reducing
Twice
Cooling overload frequncy limit
Three
times
Four
times
Five
times
Six
times
Seven
times
Eight
times
Nine
times
Over current protection frequency
reducing
Phase current protection frequncy
reducing
Heating A unit anti-high temperature
frequncy reducing
Heating B unit anti-high temperature
frequncy reducing
Heating C unit anti-high temperature
frequncy reducing
Heating D unit anti-high temperature
frequncy reducing
Three
times
Four
times
Five
times
Six
times
Seven
times
Eight
times
Nine
times
Over current protection frequency limit
D101
Three
times
Four
times
Five
times
Six
times
Seven
times
Eight
times
Nine
times
Ten
times
Eleven
times
Twelve
times
Thirteen
times
Fourteen
times
Fifteen
times
Air exhaust protection unit stop
Communication malfunction unit stop
(Include indoor unit and driver)
IPM modular protection unit stop
Over current protection unit stop
Cooling overload unit stop
Each indoor unit starts heating at same time
anti-high temperature protection unit stop
Each indoor unit anti-freezing protection
at same time unit stop
Defrosting
Phase current protection frequncy limit
Heating A unit anti-high temperature
frequncy limit
Heating B unit anti-high temperature
frequncy limit
Heating C unit anti-high temperature
frequncy limit
Heating D unit anti-high temperature
frequncy limit
Oil return
Outdoor unit temp. sensor malfunction or each
indoor unit temp. sensor malfunction unit stop
Compressor overload protection unit
stop
Compressor low-pressure protection
unit stop (preserved)
Phase current protection unit stop
E2 PROM Error unit stop
DC power supply short circuit
D104
Meaning
D105
Meaning
D106
Meaning
Blink
once
Outdoor ambient temp. sensor
malfunction
Blink
once
A unit communication malfunction
(cannot receive correct data within 3mins.)
Blink
once
B unit communication malfunction
(cannot receive correct data within 3mins.)
Twice
Outdoor tube temp. sensor malfunction
Twice
Three
times
Four
times
Outdoor air exhaust temp. sensor
malfunction
Three
times
Four
times
Five
times
Six
times
Seven
times
Eight
times
Communication malfunction with driver (cannot
receive correct data from driver within 10s)
A unit indoor middle temp. sensor
malfunction
A unit indoor outlet pipe temp. sensor
malfunction
A unit indoor inlet pipe temp.
sensor malfunction
A unit indoor ambient temp.
sensor malfunction
A unit modes conflict
A unit anti-freezing protection
A unit anti-high temp. protection
Twice
Three
times
Four
times
Five
times
Six
times
Seven
times
Eight
times
B unit indoor middle temp. sensor
malfunction
B unit indoor outlet pipe temp. sensor
malfunction
B unit indoor inlet pipe temp.
sensor malfunction
B unit indoor ambient temp.
sensor malfunction
B unit modes conflict
B unit anti-freezing protection
B unit anti-high temp. protection
Meaning
D108
Meaning
D109
Meaning
C unit communication malfunction
(cannot receive correct data within 3mins.)
Blink
once
D unit communication malfunction
(cannot receive correct data within 3mins.)
Blink
once
Received communication data proof
test correct will flash once
Twice
Three
times
Four
times
Five
times
Six
times
Seven
times
Eight
times
C unit indoor middle temp. sensor
malfunction
C unit indoor outlet pipe temp. sensor
malfunction
C unit indoor inlet pipe temp.
sensor malfunction
C unit indoor ambient temp.
sensor malfunction
C unit modes conflict
C unit anti-freezing protection
C unit anti-high temp. protection
Twice
Three
times
Four
times
Five
times
Six
times
Seven
times
Eight
times
D unit indoor middle temp. sensor
malfunction
D unit indoor outlet pipe temp. sensor
malfunction
D unit indoor inlet pipe temp.
sensor malfunction
D unit indoor ambient temp.
sensor malfunction
YMGI IS NOT RESPONSIBLE FOR
* Damage or repairs required as a consequence Customer do-it-yoursely(DIY) installation and/or any other faulty
installation or improper application.
* Damage or repairs needed as a consequence of any misapplication, abuse, improper servicing, unauthorized
alteration, or improper operation.
* Damage as a result of floods, winds, fires, lightening, accidents, corrosive atmosphere, or other conditions
beyond the control of YMGI.
* Any damages to person or property of whatever kind, direct or indirect, special or consequential, whether
resulting from use or loss of use of the product.
* Failure to start due to voltage conditions, blown fuses, open circuit breakers, or other damages due to the
inadequacy or interruption of electrical service.
* Parts not supplied or designated by YMGI.
* Products installed outside USA or Canada.
* Regular equipment maintenance or field service or field inspection.
* Any problems due to improper cooling and heating load calcuation of the room/building the air conditioner/heat
pump system is to be installed. Equipment users can get the calculation schedule from your room/building
architect or your installation or related service HVAC contractor, who should have knowledge and tools to do
these calculation correctly.
* Any problems due to improper sizing and selecting air conditioner/heat pump system. These equipment sizing
and selection work should be conducted by either your room/building architect or your installation or related
service HVAC contractor, who should have knowledge and tools to do these calculation correctly, and get your
approval, before your purchasing these air conditioner or heat pump equipment.
* Any problems due to improper installing of the air conditioner/heat pump system. Installation should be
conducted by currently licensed HVAC technician, following manufacturer installation instructions, all governing
safety codes, with care and professionalism.
* Any problems due to improper operation of the air conditioner/heat pump system. Users shall keep the manual
and look up in the manuals for the correct understanding how the unit will work and how to operate the unit
correctly.
* Any problems due to improper maintenance of the air conditioner/heat pump system. Like a car, regular
maintenance or yearly checking is necessary for the unit to work properly for you, before the season comes. For
example, air filter shall be checked for cleaness from time to time. Remote control batteries shall be checked for
enough power, before judging the unit is not working...
CONTACT FOR FIELD SERVICE OR REPAIR
The following people, in a prioritized sequence, will take care of your request or issue:
1) The original installer; otherwise,
2) Your current service contractor; otherwise,
3) Authorized contractor in YMGI list that is close to you; otherwise,
4) Authorized Distributor in YMGI Distributor list; otherwise,
5) Contractor/Distributor you prefer who is close to you.
D unit modes conflict
CONTACT FOR GENERAL TECHNICAL QUESTIONS OR SUPPORT, IN A SEQUENCE:
D unit anti-freezing protection
1) The original installer; otherwise,
2) The current service contractor; otherwise,
The original licensed installer or current service contractor should be contacted first of all, since they installed
the unit and/or know more details than anybody else.
They will check the unit and find out the problems with the professional knowledge about HVAC and electric
product installation by using special tools or instrument.
They can contact YMGI technical support for technical help during unit installation or inspection.
Product model and serial numbers needed, which can be found on unit nameplate sticker, so that our
technician can quickly identify the unit, parts and wiring diagrams, among our many products and models.
3) The distributor; where the unit is purchased from otherwise,
4) YMGI Technical Support:
Tel: (866) 833-3138*703
Email: [email protected]
D unit anti-high temp. protection
MAINTENANCE
Use proper instruments for the refrigerant R410A.
Do not use any refrigerant other than R410A.
Do not clean the unit using mineral oil.
YMGI, A COMFORT MAKER, A JOY COMPANION, A SATISFACTION GUARANTOR...
P27 OF 30
YMGI, A COMFORT MAKER, A JOY COMPANION, A SATISFACTION GUARANTOR...
P28 OF 30
MAINTENANCE &
TROUBLE-SHOOTING
MAINTENANCE &
TROUBLE-SHOOTING
D107
Blink
once
YMGI warrants to the purchaser/owner(s) that YMGI products be free from defects in material and
workmanship under the normal use and maintenance, with the standard Limited Product Warranty
Policies that comes with the unit or sales package.
USER NOTES AND SERVICE LOG
MEMO
USER NOTES
Put down whatever questions you have or problems you have seen as a unit history:
No.
Date
Questions or Problems
Remarks
SERVICE/MAINTENANCE LOG
Put down whatever questions you have or problems you have seen as a unit history:
No.
Date
Service/Maintenance Conducted
Person/Phone
WARRANTY INFO. &
CUSTOMER SUPPORT
WARRANTY INFO. &
CUSTOMER SUPPORT
YMGI, A COMFORT MAKER, A JOY COMPANION, A SATISFACTION GUARANTOR...
P29 OF 30
YMGI, A COMFORT MAKER, A JOY COMPANION, A SATISFACTION GUARANTOR...
P30 OF 30