1
Systems Manual PC Development System for the Sega Saturn Psy-QTM from Psygnosis Ltd PSY-Q TOOLS END USER LICENSE AGREEMENT BETWEEN THE “LICENSEE” AND SN SYSTEMS LTD AND PSYGNOSIS LTD “LICENSOR” LICENSE: SN Systems Ltd (SN Systems) and Psygnosis Ltd (Psygnosis) hereby grant the Licensee a non-transferable, non-exclusive right to use the Licensor’s software product known as Psy-Q Tools on any single computer, provided that the Software is in use on only one computer at a time in return for the license fee. USE OF THE SYSTEM: You may use the Software and associated User Documentation on any single computer fitted with Psy-Q Cartridge Hardware or Sony Hardware provided by Sony Computer Entertainment. You may also copy the Software for archival purposes, provided that any copy contains all the proprietary notices for the original Software. You may not: Permit other individuals to use the Software except under the terms listed above; Modify, translate, reverse engineer, decompile, disassemble (except to the extent applicable laws specifically prohibit such restriction) or create derivative works based on the Software; Copy the Software (except for backup purposes); Rent, lease, transfer or otherwise transfer rights to the Software; Remove any proprietary notices or labels on the Software TITLE: Title, ownership rights and intellectual property rights in and to the software shall remain in SN Systems Ltd and Psygnosis Ltd. COPYRIGHT: The Software is owned by the Licensor. The Licensee may not copy the manual (s) or any other written materials accompanying the Software. LIMITED WARRANTY: The Licensor warrants that the Software will perform substantially in accordance with the accompanying manual (s) for a period of 30 days from the date of receipt PROVIDED that the failure of the Software has not resulted from accident, abuse or misapplication. CUSTOMER REMEDIES: The Licensor’s entire liability and the Licensee’s exclusive remedy shall at the Licensor’s option, either be: (1) return of the license fee paid or (2) repair or replacement of the Software that does not meet the Licensor’s Limited Warranty outlined above. DISCLAIMER OF WARRANTY: THE SOFTWARE, ACCOMPANYING MANUAL (S) AND ANY SUPPORT FROM SN SYSTEMS ARE PROVIDED “AS IS” AND WITHOUT ANY OTHER EXPRESSED OR IMPLIED WARRANTY, INCLUDING BUT NOT LIMITED TO ANY IMPLIED WARRANTIES OF MERCHANTABILITY AND FITNESS FOR A PARTICULAR PURPOSE. IN NO EVENT WILL SN SYSTEMS BE LIABLE FOR ANY DAMAGES, INCLUDING LOST PROFITS, LOST SAVINGS OR OTHER INCIDENTAL OR CONSEQUENTIAL DAMAGES, EVEN IF SN SYSTEMS IS ADVISED OF THE POSSIBILITY OF SUCH DAMAGES OR FOR ANY CLAIM BY YOU OR ANY THIRD PARTY. THIS DISCLAIMER OF WARRANTY CONSTITUTES AN ESSENTIAL PART OF THE AGREEMENT. SN Systems’ liability under this Agreement whether in contract, tort (including negligence) or otherwise shall be limited to the Fee paid by the Licensee. TERMINATION: This license will terminate automatically if you fail to comply with the limitations described above or if after thirty (30) days written notice to SN Systems, you terminate it. On termination you must destroy all copies of the Software, in whole or in part, in any form and cease all use of the Software. Please note that as the Psy-Q System software is constantly being updated, it is quite likely that this manual may contain some inaccurate or out-of-date references and some features of newly updated software may not be fully covered. For this reason, if you experience any difficulties with this documentation, updates are available for download via the SN Systems BBS. We recommend that you make regular use of this service and quickly take advantage of any new features added to the Psy-Q System software, report or download ‘bug’ reports, gain answers to questions that may be causing you difficulty and keep up-to-date on news concerning the development industry. If you experience any difficulties, please do not hesitate to contact our Technical Support at SN Systems: Tel: Fax: +44 (0)117 929 9733 +44 (0)117 929 9251 This device complies with part 15 of FCC Rules. Operation is subject to the following two conditions: 1) This device may not cause harmful interference 2) This device must accept any interference that may be received, including interference that may cause undesired operation. 1996 SN Systems Software Ltd. All rights reserved. PC Saturn Contents Introduction ...................................................................................................................................i About Psy-Q ........................................................................................................................ ii Psy-Q for Sega Saturn......................................................................................................... iii Psy-Q Issue Information...................................................................................................... iv Acknowledgements ............................................................................................................. vi Psy-Q Installation ......................................................................................................................1-1 Installation Check List.......................................................................................................1-2 Installing the PC Interface .................................................................................................1-3 Installing the PC Software.................................................................................................1-7 PSYBIOS.COM................................................................................................................1-8 Installing the Target Interface..........................................................................................1-10 RUN.EXE - program downloader ...................................................................................1-14 Running with Brief ..........................................................................................................1-15 Installing the Windows ’95 Debugger..............................................................................1-18 The ASM68K and ASMSH Assemblers....................................................................................2-1 Assembler Command Line.................................................................................................2-2 Assembly Errors................................................................................................................2-5 The ASSH Assembler........................................................................................................2-6 Assembler Command Line.................................................................................................2-7 ASMSH Specific Features .................................................................................................2-8 Syntax of Assembler Statements................................................................................................3-1 Format of Statements ........................................................................................................3-2 Format of Names and Labels .............................................................................................3-3 Format of Constants..........................................................................................................3-4 Special Constants ..............................................................................................................3-5 Assembler Functions .........................................................................................................3-7 Special Functions ..............................................................................................................3-8 Assembler Operators .........................................................................................................3-9 RADIX ...........................................................................................................................3-11 ALIAS and DISABLE ....................................................................................................3-12 General Assembler Directives....................................................................................................4-1 Assignment Directives................................................................................................................4-2 EQU .................................................................................................................................4-3 SET ..................................................................................................................................4-4 EQUS ...............................................................................................................................4-5 EQUR...............................................................................................................................4-7 REG..................................................................................................................................4-8 RS.....................................................................................................................................4-9 RSSET............................................................................................................................4-10 RSRESET.......................................................................................................................4-11 Psy-Q Development System Data Definition.........................................................................................................................4-12 DC..................................................................................................................................4-13 DCB ...............................................................................................................................4-14 DS ..................................................................................................................................4-15 HEX ...............................................................................................................................4-16 DATASIZE and DATA...................................................................................................4-17 IEEE32 and IEEE64 .......................................................................................................4-17 Controlling Program Execution ..............................................................................................4-18 ORG ...............................................................................................................................4-19 EVEN .............................................................................................................................4-20 CNOP .............................................................................................................................4-21 OBJ and OBJEND ..........................................................................................................4-22 Include Files .............................................................................................................................4-23 INCLUDE ......................................................................................................................4-24 INCBIN ..........................................................................................................................4-26 REF ................................................................................................................................4-27 DEF ................................................................................................................................4-28 Controlling Assembly...............................................................................................................4-29 END ...............................................................................................................................4-30 IF, ELSE, ELSEIF, ENDIF, ENDC ................................................................................4-30 CASE and ENDCASE ....................................................................................................4-32 REPT, ENDR .................................................................................................................4-33 WHILE, ENDW .............................................................................................................4-34 DO, UNTIL ....................................................................................................................4-35 Target-related Directives .........................................................................................................4-36 REGS .............................................................................................................................4-37 UNIT ..............................................................................................................................4-37 Macros........................................................................................................................................5-1 MACRO, ENDM, MEXIT................................................................................................5-2 Macro Parameters .............................................................................................................5-3 Special Parameters ............................................................................................................5-5 SHIFT, NARG..................................................................................................................5-7 MACROS .........................................................................................................................5-8 PUSHP, POPP ..................................................................................................................5-9 PURGE...........................................................................................................................5-10 TYPE..............................................................................................................................5-11 String Manipulation Functions .................................................................................................6-1 STRLEN...........................................................................................................................6-2 STRCMP ..........................................................................................................................6-3 INSTR ..............................................................................................................................6-4 SUBSTR...........................................................................................................................6-5 Psy-Q Development System Local Labels ...............................................................................................................................7-1 Syntax and Scope..............................................................................................................7-2 MODULE and MODEND.................................................................................................7-4 LOCAL.............................................................................................................................7-5 Structuring the Program ...........................................................................................................8-1 GROUP ............................................................................................................................8-2 SECTION .........................................................................................................................8-4 PUSHS and POPS.............................................................................................................8-6 SECT and OFFSET ..........................................................................................................8-7 Options, Listings and Errors .....................................................................................................9-1 OPT ..................................................................................................................................9-2 Assembler Options ............................................................................................................9-3 Option Descriptions ..........................................................................................................9-4 PUSHO and POPO ...........................................................................................................9-6 LIST and NOLIST ............................................................................................................9-6 INFORM and FAIL...........................................................................................................9-8 XDEF, XREF and PUBLIC ..............................................................................................9-9 GLOBAL........................................................................................................................9-10 Adapter Firmware ...................................................................................................................10-1 The ‘C’ Library Functions ...............................................................................................10-2 The Pollhost Macro.........................................................................................................10-3 The PCinit Function ........................................................................................................10-4 The PCopen Function......................................................................................................10-5 The PClseek Function .....................................................................................................10-6 The PCread Function.......................................................................................................10-7 The PCwrite Function .....................................................................................................10-8 The PCclose Function .....................................................................................................10-9 The PCcreat Function....................................................................................................10-10 Assembly Language Facilities ........................................................................................10-11 Fileserver Functions ......................................................................................................10-12 The DBUGSAT Debugger ......................................................................................................11-1 Debugger Command Line................................................................................................11-2 Configuration Files..........................................................................................................11-4 Activity Windows............................................................................................................11-5 Additional Debugger Features .......................................................................................11-11 Using Debugger Windows.............................................................................................11-12 Keyboard Options .........................................................................................................11-15 Menu Options ...............................................................................................................11-20 Multiple Units ...............................................................................................................11-21 The Link Software ........................................................................................................11-22 Debugging Your Program Using Psy-Q.........................................................................11-23 Psy-Q Development System The PSYLINK Linker..............................................................................................................12-1 PSYLINK Command Line...............................................................................................12-2 Linker Command Files ....................................................................................................12-4 GLOBAL........................................................................................................................12-5 XDEF, XREF and PUBLIC ............................................................................................12-6 The PSYLIB Librarian............................................................................................................13-1 PSYLIB Command Line..................................................................................................13-2 The CCSH Build Utility...........................................................................................................14-1 CCSH Command Line.....................................................................................................14-2 Source Files ....................................................................................................................14-4 The PSYMAKE Utility ............................................................................................................15-1 PSYMAKE Command Line.............................................................................................15-2 Contents of the Makefile .................................................................................................15-3 The PSY-Q DEBUGGER for WINDOWS 95.........................................................................16-1 Introduction ......................................................................................................................16-1 On-line Help Available For The Debugger .........................................................................16-3 Installing The Debugger ....................................................................................................16-4 Directory Structure............................................................................................................16-4 Obtaining Releases And Patches ........................................................................................16-5 Mailing Lists......................................................................................................................16-5 Beta Test Scheme..............................................................................................................16-6 Installing A Full Release ....................................................................................................16-7 Upgrading Your System ....................................................................................................16-8 Configuring Your Dex Boards...........................................................................................16-9 Configuring Your SCSI Card...........................................................................................16-10 Testing The Installation ...................................................................................................16-11 Launching The Debugger ................................................................................................16-13 The Psy-Q File Server .....................................................................................................16-14 Launching The File Server Without The Debugger ..........................................................16-16 Connecting The Target and Unit......................................................................................16-17 Psy-Q Projects.................................................................................................................16-19 Adding Files To The List Of Project Files ........................................................................16-20 Changing The Order Of Files In The File List ..................................................................16-21 Saving Your Project ........................................................................................................16-25 Re-opening A Project ......................................................................................................16-25 Saving A Project Under A New Name .............................................................................16-26 Restoring A Project .........................................................................................................16-26 Opening An Existing Project............................................................................................16-27 Manually Loading Files Into A Project.............................................................................16-28 The Psy-Q Debugger Productivity Features .....................................................................16-29 Psy-Q Views ...................................................................................................................16-31 Creating A Psy-Q View ...................................................................................................16-32 Cycling between Views....................................................................................................16-33 Saving Your Views .........................................................................................................16-34 Psy-Q Development System Naming A View...............................................................................................................16-34 Changing Colour Schemes In Views ................................................................................16-35 Working With Panes........................................................................................................16-37 Splitting Panes.................................................................................................................16-37 Changing Pane Sizes........................................................................................................16-38 Deleting A Pane ..............................................................................................................16-38 Changing Fonts In Panes .................................................................................................16-39 Scrolling Within A Pane ..................................................................................................16-40 Selecting A Pane Type.....................................................................................................16-41 Memory Pane ..................................................................................................................16-42 Registers Pane.................................................................................................................16-44 Disassembly Pane ............................................................................................................16-45 Source Pane ....................................................................................................................16-47 Local Pane ......................................................................................................................16-49 Watch Pane .....................................................................................................................16-51 C Type Expressions In Watch Pane .................................................................................16-53 Assigning Variables .........................................................................................................16-54 Expanding Or Collapsing A Variable ...............................................................................16-55 Traversing An Index........................................................................................................16-56 Adding A Watch..............................................................................................................16-57 Additional Features When Entering Expressions ..............................................................16-58 Editing A Watch..............................................................................................................16-61 Deleting A Watch............................................................................................................16-62 Clearing All Watches .......................................................................................................16-62 Debugging Your Program ...............................................................................................16-63 Specifying The Continual Update Rate ............................................................................16-63 Setting Breakpoints .........................................................................................................16-64 Editing Breakpoints .........................................................................................................16-65 Stepping Into A Subroutine .............................................................................................16-67 Stepping Over A Subroutine............................................................................................16-68 Running To The Current Cursor Position.........................................................................16-69 Running Programs...........................................................................................................16-70 Stopping A Program Running..........................................................................................16-70 Moving The Program Counter.........................................................................................16-71 Moving The Caret To The PC .........................................................................................16-72 Moving To A Known Address Or Label ..........................................................................16-73 Expression Evaluation Features .......................................................................................16-75 Anchoring Panes To The PC............................................................................................16-77 Anchoring Memory Panes................................................................................................16-78 Identifying Changed Information .....................................................................................16-79 Closing The Debugger Without Saving Your Changes.....................................................16-79 Closing The Debugger And Saving Your Changes ...........................................................16-80 APPENDICES Appendix A - Error Messages ..................................................................................................A-1 Assembler Error Messages ............................................................................................... A-2 Psylink Error Messages .................................................................................................. A-14 Psylib Error Messages .................................................................................................... A-19 Psy-Q Development System Introduction Psy-Q for the Sega Saturn is a fast PC based cross development system for producing and testing mixed C and/or assembler programs for the Sega Saturn games console. This version of Psy-Q features: • High performance Psy-Q SCSI interface card for host PC. • Compact Saturn adapter cartridge, including extensive firmware stored in battery backed SRAM. • All the software you need:• Two RISC SH2 assemblers compatible with standard C compilers including the popular Freeware Gnu-C. • Fast 68000 assembler with numerous directives. • High Speed Linker and Librarian, with extensive link-time options. • Powerful Source Level Debugger, allowing the programmer to step, trace and set breakpoints directly in the source code. Additional hardware required: • Host 386/486/Pentium PC with hard disk drive, at least 1 Megabyte of memory and 1 free 16 bit ISA slot. • Sega Saturn. This can be either a ‘Small Programming Box’ or an ordinary production Saturn from your local retailer. Psy-Q Development System About Psy-Q • Psy-Q has been developed by Psygnosis and SN Systems, with many years of experience of development software and developers' needs. Psy-Q represents the next generation of development systems, backed up by a commitment to continual enhancement, development and technical support. • Psy-Q includes 3 industry-standard Assemblers, a Linker and a Debugger. The Assembler are extremely fast, and fully compatible with other popular development systems. The Debugger offers an additional easy-to-use interface, with full support for mouse and pop-down menus, and works in any DOS text screen resolution or Windows. • Psy-Q offers Source Level Debugging. This allows you to step, trace, set breakpoints, etc. in your original C or Assembler source code. The system automatically, and invisibly, handles multiple text files. • Psy-Q has 'C' compiler support built in. The Linker can link directly to standard COFF object files, as produced by the popular Sierra C compiler and many others. • Psy-Q provides a high-speed genuine SCSI parallel link between Host PC and target system, with a data transfer rate of over 1 Megabytes per second. The system supports up to 7 connected target devices, and cable lengths of over 6 metres. • Psy-Q's Assemblers and Linker make full use of extended or expanded memory, on PC compatibles with more than 640K of RAM. Psy-Q Development System Psy-Q for Sega Saturn The target interface is a very compact cartridge, that plugs into the cartridge slot of any ordinary, unmodified Sega Saturn, or ‘Small Programming Box’. Adapter firmware provides diagnostics and self-test facilities, and is stored on battery-backed SRAM to allow for future firmware updates. Also included are assorted functions for useful run-time control of the development environment, as well as extensive fileserver facilities, to allow the target to manipulate files on the host PC. Psy-Q Development System Psy-Q Issue Information Psy-Q development systems are available for a variety of other platforms: • • • • • • SEGA 32X SONY Playstation SEGA MegaDrive/Genesis SEGA Mega-CD Nintendo Super NES Commodore Amiga 1200 and 600 Saturn Development Software The software for the Saturn comes on three 3½“ HD disks. Disk 1 contains all the Psy-Q System software, including the SH2 and 68000 Assemblers, Debugger etc. Disk 2 contains an archive of the ‘Freeware’ SH GNU C compiler. Please note that a number of Saturn specific Libraries are provided by Sega and can be found on the Sega DTS CD and other Sega sources. Disk 3 contains the accompanying Documentation for the compiler. Contents of Disk 1: PSYBIOS.COM SAT2xx.CPE ASMSH.EXE ASSH.EXE ASM68K.EXE AS68K.EXE RUN.EXE INITSERV.COM DBUGSAT.EXE CCSH.EXE CC68K.EXE KANJI.COM PSYLINK.EXE PSYLIB.EXE PSYMAKE.COM BV.EXE PSYQ.CB PSYQ.CM PSYQ.INI TSR BIOS extensions for PC host for use with Psy-Q Downloader v2.xx software for Adapter Interface Hitachi SH series assembler for assembly programmers Hitachi SH series assembler for C compiler output 68000 assembler for assembly programmers 68000 assembler for C compiler output Standalone Executable/Binary downloader Re-initialises PSYBIOS file server functions SH2 and 68000 Debugger for Saturn system Psy-Q Build Utility for SH2 C Psy-Q Build Utility for 68000 C Used by CCSH and CC68K when source contains kanji text Psy-Q Linker Psy-Q Librarian Psy-Q Make Utility Program to set VGA text screen to display more lines Source for Brief Macro extensions Compiled Brief Macro extensions Path details for compiler installation Psy-Q Development System Contents of Disk 2: GNUSH.ZIP COPYING ZIP Archive of GNU’s C Compiler ‘GNU General Public Licence Terms and Conditions’ Contents of Disk 3: README.TX1 README.TXT RUNME.BAT COPYING COPYING.LIB GZIP.EXE GCC. CPP. INFO.EXE Text file on getting pre-processor version number Text file on installing GNU Documentation GNU Documentation installation batch file ‘GNU Public Licence Terms and Conditions’ ‘GNU General Public Licence Terms and Conditions’ GNU ZIP Decompressor program for GNUSH.ZIP file GNU Documentation files GNU Documentation files GNU Info program Psy-Q Development System Acknowledgements Psy-Q The Psy-Q Development platform has been designed and produced by SN Systems Limited, on behalf of Psygnosis Limited. 'Psy-Q' is a trademark of Psygnosis Ltd DOS and Windows Microsoft, MS, MS-DOS are registered trademarks of Microsoft Corporation; Windows is a trademark of Microsoft Corporation. IBM IBM is a trademark of International Business Machines Brief Brief is a trademark of Borland International. Sega Sega Saturn, Sega 32X, Sega Genesis/MegaDrive, Sega-CD, Mega-CD, are all trademarks of Sega Enterprises Ltd. Psy-Q Development System CHAPTER 1 Psy-Q Installation The Psy-Q development system consists of the following physical components:• • • • • PC Board Target Interface Connecting Cable PC driver and Bios extensions Psy-Q executable files Installation is, therefore, a relatively straightforward procedure, and is described in this chapter under the following headings: • • • • • • Installation Check List Installing the PC Interface Installing the PC Software PSYBIOS Installing the Target Interface Firmware Diagnostics Psy-Q Development System Installation Check List • Check the configuration of the Psy-Q PC board and install in the host PC - see later in this chapter for full installation details. • Check configuration of the Psy-Q Target Adapter and install in the target console or machine - see later in this chapter for full installation details. • Connect the supplied cable from the PC to the target machine. • Load the PC board driver by typing, typically: PSYBIOS /a308 /d7 /i15 See later in this chapter for full details of PSYBIOS.COM. • Copy the runtime Psy-Q executable files to a directory on your PC - see the Issue List, in the Introduction, for the programs supplied with this version of Psy-Q. Also edit the PATH variable in autoexec.bat. • Switch on the target console. • Run the program RUN.EXE, without parameters, to verify the link to the target adapter - see chapter 2 for details of the RUN downloader program. • If RUN correctly identifies the target, the Psy-Q system is now ready to be used, to assemble, download and debug programs. Psy-Q Development System Installing the PC Interface The Psy-Q PC Interface board should be fitted in to an empty 16 bit slot in the host PC. The host must be an IBM PC-AT or compatible, running under MSDOS 3.1 or better. If no 16 bit slot is available, the board will also fit into an 8 bit slot. However, this causes some degradation in speed. Prior to fitting, the 3 banks of dip switches should be checked and configured as required. It is likely, however, that the factory setting will suffice. They are described below. 50 Pin High Density SCSI Connector SCSI Controll On Dip 12345678 On Dip 12345678 On Dip 12345678 2 Active Termination Resistors The Psy-Q PC Interface Board CAUTION: This board is sensitive to static electricity; hold by the metal support bracket when handling. Psy-Q Development System DIP SWITCHES The PC card is configured by altering the three dip switch banks on the card. These switches alter: DMA IRQ SCSI Termination Power IO Address SCSI ID for the card (normally on ID 7) FUNCTION DMA 7 DMA 6 DMA 5 IRQ 15 IRQ 12 IRQ 11 IRQ 10 IRQ 7 IRQ 5 Not Used SCSI Termination Power IO Address - A3 - A8 Card SCSI ID DMA DEFAULT On, On Off, Off Off, Off On Off Off Off Off Off Off, Off On Off, On, On, On, On, Off On, On, On DMA channels 5, 6, and 7 are available on the PC card. They are selected by switching the pairs of dip switches adjacent to DMA request (DRQ) and DMA acknowledge (DACK). Both switches must be set to the same channel. All DMA dip switches set to off will turn off DMA. The default setting is 7. Psy-Q Development System IRQ The PC card offers the following IRQ levels: 15, 12, 11, 10, 7, 5. Select the required level by switching the adjacent dip switch. You must only select one IRQ level. The default setting is 15. SCSI Termination Power The SCSI Termination Power switch determines whether SCSI termination is supplied on the card. The default setting is On. This must not be changed. IO Address The card offers a very large range of IO addresses from 20016 to 3f816 in increments of 8. The address is changed by altering the 6 dip switches labelled A3 to A8. A8 is the most significant bit, and A3 is the least. An address line is selected by switching it to Off. The default setting is 308. Psy-Q Development System Some examples are shown in the following table: 240 2A0 300 308 310 318 380 388 390 3E0 A8 On On Off Off Off Off Off Off Off Off A7 On Off On On On On Off Off Off Off A6 Off On On On On On On On On Off A5 On Off On On On On On On On Off A4 On On On On Off Off On On Off On A3 On On On Off On Off On Off On On Note: The following addresses must not be used: 2F8 COM2, 378 Printer, 3F8 COM1, 3F0 Various. SCSI ID The last three switches alter the SCSI ID of the card. The default setting is 7. Do not change this setting. The default settings have been chosen so that the possibility of contention with other internal boards is minimised. Nevertheless, care should be taken that settings on the Psy-Q board do not conflict with any other card in the system. Psy-Q Development System Installing the PC Software The Psy-Q issue Disk 1 contains programs to perform the following functions: • • • • • • Assembling Linking Debugging PC Driving Other target specific Bios Extensions Windows accessories Installing Development Software To install the Psy-Q development programs onto the host PC, carry out the following procedure: • • • • • create a new directory on the hard disk i.e. C:\PSYQ; copy the contents of the issue disk to the new directory; add the Psy-Q directory to the PATH variable in the AUTOEXEC.BAT; add a line in the AUTOEXEC.BAT to automatically load PSYBIOS.COM; add a line in the AUTOEXEC.BAT to create an environment variable "PSYQ_PATH", specifying the directory for Psy-Q files, e.g.: set PSYQ_PATH = C:\PSYQ Note: After you have made changes to your AUTOEXEC.BAT file you will need to re-boot your PC to enable these changes to take effect. Psy-Q Development System PSYBIOS.COM Description PSYBIOS.COM is a TSR program, which acts as a driver for the Psy-Q interface board, installed in the host PC. Syntax PSYBIOS [switches] where each switch is preceded by a forward slash ( / ) and separated by spaces. Switches /a card address /b buffer size /c window n /d channel /i intnum /l filename /s id /8 Set card address: 200 - 3f8 Specify file transfer buffer size: 2 to 32 (in kilobytes) Report all CD access to debugger message window n Specify DMA channel: 5, 6, 7; 0 = off Specify IRQ number: 5, 7, 10, 11, 12, 15; 0 = off Specify Fileserver log file; All fileserver functions will be recorded in the specified file. Overide PC Interface SCSI ID jumper setting: 0 to 7 Run in 8 bit slot mode Psy-Q Development System Remarks • • • • • Examples Normally, PSYBIOS.COM is loaded in the AUTOEXEC.BAT; it can safely be loaded high to free conventional memory. If PSYBIOS is run again, with no options, the current image will be removed from memory. This is useful if you wish to change the options without rebooting the PC. If the DMA number is not specified, the BIOS will work without DMA; however, it will be slower. The BIOS can drive the interface in 8 bit mode; however, this is the slowest mode of operating the interface. The buffer size option (/b) sets the size of the buffer used when the target machine accesses files on PC. A larger buffer will increase the speed of these accesses; however, more PC memory will be consumed. The default is a 1 K buffer. PSYBIOS /a308 /d7 /i15 Start the driver using the typical settings of: Card address 308 DMA channel 7 Interrupt vector 15 Note: If you are using Windows ‘95, DO NOT install PSYBIOS from your AUTOEXEC.BAT. Only install it from DOS. Psy-Q Development System Installing the Target Interface WARNING: Never insert or remove the Psy-Q Target Interface when the target is switched on. Doing so can permanently damage the Interface. Installation The Target Interface may be used with either in a retail Sega Saturn, or in a ‘Small Programming Box’. Installation should be as follows: In the case where you are using a retail Saturn, the Interface should be inserted into the cartridge slot in exactly the same way as a game cartridge would be. The curved side of the Interface displaying the Psy-Q logo should be facing the front of the Saturn. Psy-Q Development System If you are using a ‘Programming Box’, then you should install the Interface in a similar manner, with the curved side facing the front of the unit. The SCSI cable should be plugged into the Target Interface and also the host PC SCSI Interface. You are now ready to turn the target on and test the Target Interface. Firmware Select The ROM on the target interface only contains a simple downloader which is not suitable for developing programs. Its only purpose is to install new versions of the downloader software into the battery backed RAM of the interface. When a new version of the downloader is installed, a checksum is calculated and stored for future reference. As the system starts up it will calculate the checksum from the installed downloader. If this new checksum matches the old checksum stored, it will use the installed downloader. If the checksum does not match, if the downloader has become corrupt for instance, then the simple downloader in the ROM used. This will enable you to download the latest version of the downloader. It is possible that the downloader stored in the battery backed RAM may be corrupted in such a way that the checksum matches the new calculated value. This could cause the downloader to crash, preventing a new downloader being installed over it. In the unlikely event of this happening you should: Power up your Sega Saturn. Wait till after both the Sega Saturn and Segas logo have gone. As the Psy-Q logo ‘mosaic effect’ starts, press RESET on the Saturn. This will flush the corrupted downloader, allowing a new downloader to be installed. Psy-Q Development System Downloader Installation If you have correctly connected the target interface to your Psy-Q PC SCSI card, once you have installed the Psy-Q software you should be able to confirm communication with the PC by executing the Psy-Q RUN program (with no parameters). You must also have installed PSYBIOS correctly before you can execute the RUN program. RUN will establish a connection to the target system and display the ID code of the interface firmware. If no downloaders have been installed, a message should appear something like:RUN.EXE Executable/Binary file downloader version 2.30 Copyright (c) 1992,93,94 S N Systems Ltd. Target 0 is SH2 - SATMSTR1.01 No file to process Before you start development, you will need to install the full downloader provided on the Issue Diskette. This file is called SATxxx.cpe, where the xxx denotes the current version number. This downloader is installed into the adapter by using the RUN command. For example: RUN SAT201.CPE The downloader will be kept battery backed in memory until another version of the downloader is installed. To check everything worked properly, just execute RUN again. It should report the correct version of the new downloader just installed. Assuming this all works correctly then your installation is complete and you can proceed to experiment with Sega Saturn software development... Psy-Q Development System Firmware Diagnostics The adapter always performs a few simple diagnostic checks at power up and if any problems are detected it will print the result to the console’s screen. If the console is reset (or switched on) with the joypad START button held down then the adapter firmware will print to the screen to report on it's current configuration and the results of some more extensive self-tests. Psy-Q Development System RUN.EXE - program downloader Description This program downloads runnable object code to the target machine. SyntaxRUN [switches] file name [[switches] filename...] where switches are preceded by a minus sign (-). Switches -h -t# -u# -w## halt target - that is, download but do not run. use target SCSI ID number # - always 0 for the Saturn. use target unit number # (0 - Master SH2, 1 - Slave SH2, 2 - 68000). retry for ## seconds if target does not respond. Remarks • If run is executed without any runtime parameters, the program will simply attempt to communicate with the target adapter hardware. If successful, run displays the target identification; if the attempt fails, an appropriate error message is displayed. • • The file to be downloaded may contain: an executable image, output by the development system, in .cpe format. Up to 8 cpe files may be specified; a raw binary image of a cartridge. • • For an executable file, execution will begin as indicated in the source code; for a binary ROM image, execution will begin as if the target machine had been reset with a cartridge in place. • Multiple executable files may be specified. However, only the last executable address will apply - specified files are read from left to right. Psy-Q Development System Running with Brief Most programmers prefer to develop programs completely within a single, enabling environment. Future versions of Psy-Q will provide a self-contained superstructure with a built-in editor, tailored to the requirements of the assembly and debug subsystems. For the time being however, it is recommended that programmers seeking such facilities should use Borland's Brief text editor, which is already supported by Psy-Q. Installation in Brief In order to use Brief with Psy-Q, you will need to make a few changes to your AUTOEXEC.BAT file after you have installed Brief: Set the BCxxx environment variables. These variables take the file extension of a source file to tell Brief how to Assemble or Compile the file. For example: set bc68k="asm68k /i /w /d /zd %%s,t0:,%%s,," set bcs="asmsh /i /w /d /zd %%s,t0:,%%s,," set bcc="ccsh -v -g -Xo$80010000 %%s.c -o%%s.cpe,%%s.sym" ** These will Assemble .68k source file with ASM68k, .S source files with the ASM68k assembler (see chapter 2), and Compile .C source files with CCSH (see The Build Utility chapter). Set the BFLAGS environment variable, with -mPSYQ appended, to force the Psy-Q macro file to be loaded on start-up. For example: set bflags=-ai60Mk2u300p -mrestore -Dega -D101key -mPSQ The variable may look different depending on how Brief was set up. Finally, copy the file PSYQ.CM, containing macros, into the \BRIEF\MACROS directory, or create it from source file PSYQ.CB; Psy-Q Development System Note: The standard Brief feature of using Alt-F10 to compile the current file as instructed by the BCxxx environment variable still works as normal. However, if you take the time to write a simple make file for each of your projects you will find the additional Psy-Q keystrokes much more convenient and powerful. The Psy-Q brief macros: Ctrl-G Ctrl-F Ctrl-W Ctrl-V Ctrl-F9 Ctrl-F10 Alt-F9 F9 Goto label (locate definition of label under the cursor in loaded source files) Return from label (undo the above operation) Write out all changed files Evaluate expression under cursor using values from symbol file(s) Select make file for current project Make program and enter debugger Make program and start it running Enter the Debugger If you wish to change any of these key assignments then change to your \BRIEF\MACROS directory and edit the file PSYQ.CB. Near the top of this file you will see where the keys are assigned to the various functions and it should be easy to change the key names and re-compile the macro by pressing Alt-F10. Note: If you re-assign any of the Brief standard key assignments then you may lose access to that original Brief function. Ctrl-F9 allows you to select which make file you wish to use. By default, Psy-Q will use the file in your current directory called MAKEFILE.MAK. If you do not wish to use this file then use Ctrl-F9 to select the preferred make file. Ctrl-F10, Alt-F9 and F9 work by calling the PSYMAKE program with a suitable parameter to select which operation to perform. Your Psy-Q disk includes a simple make file called MAKEFILE.MAK as an example. If you edit this file you will see that it defines how to do one of three operations:• • • Assemble and Run. Assemble but don't Run. Enter Debugger. Psy-Q Development System It should be easy for you to adapt this file to your needs. If you are doing one simple assembly then all you will have to change is the name of the file that is assembled and add any other command line options you require. It does not matter which of your source files you are in when you press one of the make/debug keys - the make file will specify the commands to the assembler and debugger. Psy-Q Development System Installing the Windows ’95 Debugger Installation Instructions Note: You will need to know your Psy-Q SCSI card hardware resource settings to complete installation. Note: The Compiler, Assemblers and Linkers must have been previously installed within DOS. Note: Do not install PSYBIOS.COM as this and RUN will not be needed with the Windows ‘95 Debugger. Installing Automatically from Floppy Disk Ensure there is at least 1.5mb free on your C drive and in addition, 2.5Mb free on the drive where you will be installing your software. 1. 2. 3. 4. 5. 6. 7. 8. Read setup.txt. Run the program setup.exe by double-clicking on it using an explorer window. Select ‘Yes’ to start the installation. Setup will unzip and launch the Psy-Q for Windows ’95 setup program (pqsetup.exe). On-line help is available throughout the installation process. If this is the first installation of the Debugger, confirm the specified licence conditions. Specify or confirm the directory in which you wish to install the Debugger. Depending on the type of installation, specify the settings for the DE Board or SCSI card. After installation is complete, close pqsetup and setup will delete the temporary files it installed on your hard disk. Installing Manually 1. Unzip the file pp100zip into a temporary directory. 2. Run the program pqsetup.exe. 3. Select psxp_1.pqp and continue with the installation. Psy-Q Development System Additional Notes for Beta Testers • If you are a beta tester of the Windows ’95 software, you do not need to install this version of the Debugger. Instead, use the latest version available from SN Systems. Contact [email protected] for more information. • If you have installed a beta version of the Debugger prior to Release 6 and wish to install this version, you must run the program PsyClean.exe to remove unused DLLs from your System directory. Psy-Q Development System CHAPTER 2 The ASM68K and ASMSH Assemblers The ASM68K and ASMSH assemblers can assemble source code at over 1 million lines per minute. Executable image or binary object code can be downloaded by the Assembler itself, to run in the target machine immediately, or later, by the RUN utility. This chapter discusses how to run an assembly session, under the following headings: • • Assembler Command Line Assembler and Target Errors Psy-Q Development System Assembler Command Line During the normal development cycle, ASM68K and ASMSH may be: • • • run in stand alone mode launched from an editing environment such as Brief - see later in this chapter invoked as part of the Make utility - see The Psymake Utility chapter. When the Assemblers are run independently, the command line takes the following form; each component of the line is then described: Syntax ASM68K or ASMSH /switchlist source,object,symbols,listings,tempdata or ASM68K or ASMSH @commandfile If the first character on the command line is an @ sign, the string following it signifies a Psy-Q command file containing a list of Assembler commands. Switches The assembly is controlled by inclusion of a set of switches, each preceded by a forward slash (/). The /o switch introduces a string of assembler options; these can also be defined in the source code, using an OPT directive. Assembler options are described in detail in chapter 9, the available switches are listed below: /c Produce list of code in unsuccessful conditions /d Set Debug mode - if the object code is sent to the target machine, do not start it. /e /g n=x Assigns the value x to the symbol n. Non-global symbols will be output directly to the linker object file. Psy-Q Development System /j pathname Nominate a search path for INCLUDE files. /k Permits the inclusion of pre-defined foreign conditionals, such as IFND - see also MACROS, chapter 5. /l Output a file for the Psylink Linker. /m Expand all macros encountered. /o options Specify Assembler options - see chapter 9 for a full description of the available options. /p Output pure binary object code, instead of an executable image in .cpe format - see also RUN.EXE, chapter 2. /ps Output ASCII representation of binary file in Motorola s-record format /w Output EQUATE statements to the Psylink file. /z Output line numbers to the Psylink file. /zd Generate source level Debug information. Source The file containing the source code; if an extension is not specified, the default is .68k or .s. If this parameter is omitted, the Assembler outputs help in the form of a list of switches. Object The destination to which object code is written, either a file or target machine. If the object code is to be sent directly to the target machine, specify a name of Tn:, where n signifies the SCSI device number of the target . If this parameter is omitted, object code will not be produced. Symbols The file to which symbol information is written, for use by the Debugger. Listings The file to contain listings generated by assembly. Tempdata This parameter nominates a file to be placed on the RAM disk for faster access. If the name is omitted, the default is asm.tmp; note that the temporary file is always deleted after assembly is complete. Psy-Q Development System Remarks • If any of the above parameters are omitted, the dividing comma must still be included on the command line, unless it follows the last parameter. • The Assembler run may be prematurely terminated by any of the following methods: Pressing Control-C Pressing Control-Break (recognised more quickly because it does not require a DOS operation to spot it) Pressing Esc • Examples The Assembler checks for an environment variable called ASM68K or ASMSH. This can contain default options, switches and file specifications, (in the form of a command line), including terminating commas for unspecified parameters. Defaults can be overridden in the runtime command line. asmsh /zd /o ae+,w- scode,t0:,scode.sym This command will initiate the assembly of the SH2 source code contained in a file called scode.s, with the following active options: • • • • • • source level debug information to be generated automatic even enabled warning messages to be suppressed the resultant object code to be transferred directly to the target machine, SCSI device 0 symbol information to be output to a file called scode.sym assembly listing to be suppressed ASMSH @game.pcf will recognise the preceding @ sign and take its command line from a Psy-Q command file called GAME.PCF. Psy-Q Development System Assembly Errors During the assembly process, errors may be generated as follows: By the assembler itself, as it encounters error conditions in the source code. Remarks Appendix A gives a full list of Assembler error messages. plus Abort, Retry or Bus Reset Psy-Q Development System The ASSH Assembler ASSH is not intended for assembling hand-written assembly code but ASMSH was written for this purpose and provides a number of powerful macro facilities for convenient assembly programming. It is intended for developing assembly language modules or complete projects in assembly language. For small amounts of assembly language within your C program you can use the C inline function asm("") which will pass its parameters directly into the output file for ASSH to assemble. ASSH is an SH2 assembler and primarily used for processing the assembly syntax produced by 'C' compilers; this assembler is constrained by C compiler output syntax and so supports only those features it requires. Psy-Q Development System Assembler Command Line Syntax ASMSH /switchlist source,object,symbols,listings,tempdata or ASMSH @commandfile If the first character on the command line is an @ sign, the string following it signifies a Psy-Q command file containing a list of Assembler commands. Switches See the ASM68K assembler (above) for a full list of the available command line switches. Note: The ASSH assembler is invoked primarily by the CCSH build utility, and will not usually be called from the command line. Psy-Q Development System ASMSH Specific Features For details of SH series assembler opcodes you should refer to the official Sega documentation. These Psy-Q assemblers have pseudo-ops which are largely similar to those of the Psy-Q 68000 assembler. All Data definition directives are the same as for the 68000 (e.g. DC.size, DS.size, DCB.size, RS.size; where size is either .b, .w, or .l). Additional features of ASMSH which are specific to this version include:• Default data size of an instruction is longword (32 bits). So beware:mov @r1+,r2 ; this instruction moves a longword into r2, ; not a word. • The SH does not have an op-code for immediate subtraction. However the ASMSH assembler will allow you to use such an instruction and will instead generate and immediate add with a negative quantity:sub #1,r1 ;generates opcode for add #-1,r1 • Instructions that have only one legal size may have that size specified:add.l r1,r2 • Immediate operands in the range 128 to 255 are allowed with a warning since these will be sign extended when loaded. e.g. mov #200,r1 ;will give a warning. This could be changed so that if you use .b or .w as the instruction size, then you will only get an error if the operand doesn’t fit in the specified size. • You can use the following pseudo-ops from the Hitachi assembler:.equ .org .align .arepeat .aendr .end • Instructions with PC relative operands check the alignment of their operands. • The assembler checks that you do not put an illegal instruction in a delay slot. Psy-Q Development System • The assembler correctly calculates the relative value when an instruction with a PC relative operand is used in a delay slot, e.g. bra fred mova z1,r0 The offset in the MOVA instruction is not the same when it is in a delay slot. This value cannot be calculated for indirect jumps through registers since the assembler does not know the destination of the jump. e.g. the following instruction sequence will cause an error : jmp @r0 mova z1,r0 • The assembler allows the index address mode operands to appear in either order, eg:and #15,@(r0,gbr) and #15,@(gbr,r0) This also works for pc relative, with displacement, etc. • Since the SH cpu cannot reference immediate data bigger than 1 byte, the assembler supports ‘literal pooling’ so you can access 16 and 32 bit constants. This is usually indicated by the ‘=‘ prefix on a constant. If the data is greater than 1 byte it will be put in a literal table further on in the code. Otherwise it will be incorporated in the instruction as an immediate value. For compatibility, the prefix ‘##’ can also be used to indicate a literal pool entry. If you want to specify that the value must only be an immediate, then you can use the ‘#’ prefix. If the data is larger than 1 byte, then an error will occur during assembly. Also for compatibility, if the #+ assembler option is specified in an OPT statement on the command line (with the /o command line switch), then the functions of the ‘#’ and ‘##’ prefixes are reversed. So that a ‘#’ is used to signify a literal, and ‘##’ is used to indicate an immediate value. Literal constants are collected into a number of literal tables, and the assembler generates PC relative load instructions to fetch the data from these tables. To allow this you need to use the LITTAB pseudo-op to insert a literal pool at various points in your code. The best place for this is after an unconditional branch or jump. Note that this table must come after the constant reference because the offset on PC relative instructions are unsigned. e.g:- Psy-Q Development System clearscr module mov.l =AutoFill,r1 mov.l =FBcont,r2 mov.l =$100,r8 mov.l =$ff,r4 mov.l mov mov.l =$ff00/$100,r7 r8,r3 =$8000,r5 mov mov.w mov mov.w mov mov.w add.l r4,r0 r0,@(0,r1) r3,r0 r0,@(2,r1) r5,r0 r0,@(4,r1) r8,r3 mov.w tst bf dt bf rts nop littab @r2,r0 #2,r0 @1 r7 @0 ;all these literals ;be pooled ;and this code will ;generate ;pc rel load instructions ;to reference the literal table will @0 @1 ;Size ;Address ;Data ;literal table will be built here modend You can also use the keyword LITS as an alternative to LITTAB. • You can write most addressing modes in a 68000 style, eg:mov r0,@r1 → mov @(8,r1),r0 → mov r0,(r1) mov 8(r1),r0 etc. • You can use MOVE as an alternative to MOV, e.g:mov.w r1,@r2 • → move.w r1,@r2 You can omit the ‘/’ in the compare instructions, e.g.:cmp/eq r1,r2 → cmpeq r1,r2 Psy-Q Development System CHAPTER 3 Syntax of Assembler Statements In order to control the running of an Assembler, source code traditionally contains a number of additional statements and functions. These allow the programmer to direct the flow and operation of the Assembler as each section of code is analysed and translated into a machine-readable format. Normally, the format of Assembler statements will mirror the format of the host language, and the Assemblers follow this convention. This chapter discusses the presentation and syntax of Assembler statements, as follows: • • • • • • • Format of Statements Format of Names and Labels Constants Functions Operators RADIX ALIAS and DISABLE Psy-Q Development System Format of Statements Assembler statements are formatted as follows: Name or Label Directive Operand The following syntactical rules apply: • Individual fields are delimited by spaces or tabs. • Overlong lines can be split by adding an ampersand (&); the next line is then taken as a continuation. • Lines with an equals (=) sign as the first character are considered to be the case options of a CASE statement - see Flow Control, chapter 4. • Comment Lines: • comments normally follow the operand, and start with a semicolon (;). • lines which consist of space or tab characters are treated as comments. • a complete line containing characters other than space or tabs is treated as a comment, if it starts with a semicolon or asterisk. Psy-Q Development System Format of Names and Labels Names and Labels consist of standard alpha-numeric symbols, including upper-case letters, lower-case letters and numeric digits: A to Z, a to z, 0 to 9 In addition, the following characters can occur: Colon (:) Can be used at the end of a name or label when defined, but not when referenced. Question Mark (?), Underscore (_), Dot (.) These three characters are often used to improve the overall readability AT sign @ Indicates the start of a local label - see chapter 7. Note that, by using the Assembler option /ln, the local label symbol can be changed to a character other than @. The following usage rules apply throughout: • Numeric digits and Question Marks must not be the first character of a name. • Labels normally start in column 1. However, if they start elsewhere, there must be no characters preceding the name, except space or tab, and the last character must be a colon. • If a problem in interpretation is caused by the inclusion of a non-alphanumeric character in a Name or Label, that character can be replaced by a backslash, or the entire Name or Label surrounded by brackets. Psy-Q Development System Format of Constants The Assemblers support the following constant types: Character Constants A character string enclosed in quote marks is a character constant and is evaluated as its ASCII value. Character constants may contain up to 4 characters, to give a 32 bit value. Thus: "A" = 65 "AB" = (65*256) + 66 "ABC" = (65*65536) + (66*256) + 67 "ABCD" = (65*16777216)+ (66*65536) + (67*256) + 68 = 65 = 16706 = 4276803 = 1094861636 Integer Constants Integer constants are normally evaluated as decimal, the default base, unless one of the following pertains: • the RADIX directive changes the base - see chapter 3. • $, as the first character of an integer, signifies a Hex number; % signifies a Binary number. • If a character is preceded by a backslash and up arrow (\^), the corresponding control character is substituted. • The AN Assembler option allows numbers to be defined as Intel and Zilog integers. That is, the number must start with a numeric character and end with one of: D for Decimal; H for Hexadecimal; B for Binary Psy-Q Development System Special Constants The following pre-defined constants are available in the Assemblers. Remarks _year _month _day _weekday _hours _minutes _seconds As a two digit number, e.g. 95 1 = January; 12 = December 1 = 1st day of month 0 = Sunday; 6 = Saturday 00 - 23 00 - 59 00 - 59 * @ Contains the current value of the Location Counter. Contains the actual PC value at which the current value will be stored - see below. narg Contains the number of parameters in the current macro argument see chapter 5 for further details. __rs Contains the current value of RS Counter - see chapter 4 for further details. _filename A pre-defined string containing the name of the primary file undergoing assembly. Time and Date Constants: Time and Date constants are set to the start of assembly; they are not updated during the assembly process. Example RunTime dc.b "\#_hours:\#_minutes:& \#_seconds" this expands to the form hh:mm:ss, as follows RunTime Note dc.b "21:08:49" This example uses the special macro parameter, \#, which is described in chapter 5. Psy-Q Development System Location Counter constants: The current value of the program pointer can be used as a constant. To substitute the value of the location counter at the current position, an asterisk (*) is used: Firstbss section equ Bss,g_bss * Since * gives the address of the start of the line, org dc.l $100 *,*,* defines $100 three times. An @, when used on its own as a constant, substitutes the value of the location counter, pointing to an address at which the current value will be stored. org dc.l $100 @,@,@ defines $100,$104,$108. Psy-Q Development System Assembler Functions The Assemblers offer many functions to ease the programmer's task. These are listed below, together with the page number for a more detailed explanation of their usage. In addition, there is a group of specialised functions, which are described on the following pages. Name Action Page def(a) ref(a) Returns true if a has been defined Returns true if a has been referenced 4-28 4-27 type(a) Returns the data type of a 5-11 sqrt(a) Returns the square root of a strlen(text) strcmp(texta,textb) instr([start,]txa,txb) Returns the length of string in characters Returns true if strings match Locate substring a in string b 6-2 6-3 6-4 sect(a) offset(a) sectoff(a) group(a) groupoff(a) Returns the base address of section a Returns the offset into section a Equivalent to offset Returns the base address of group a Returns the offset into group a 8-7 8-7 8-7 8-2 8-2 Psy-Q Development System Special Functions filesize("filename") Returns the length of a specified file, or -1 if it does not exist. groupsize(X) Returns the current (not final) size of group X. grouporg(X) returns the ORG address of group X or the group in which X is defined if X is a symbol or section name. groupend(X) Returns the end address of group X. sectend(X) Returns the end address of section X. sectsize(X) Returns the current (not final) size of section X. alignment(X) Gives the alignment of previously defined symbol X. This value depends upon the base alignment of the section in which X is defined, as follows: Word aligned - value in range 0 -3 Halford aligned- value in range 0 -1 Byte aligned - value always 0 Psy-Q Development System Assembler Operators The Assemblers make use of the following expression operators: Symbol Type Usage Action () + - Primary Unary Unary (a) +a -a Brackets of Parenthesis a is positive a is negative (see Note1) = + * / % Binary Binary Binary Binary Binary Binary a=b a+b a-b a*b a/b a%b Assign or equate b to a Increment a by b Decrement a by b Multiply a by b Divide a by b, giving the quotient Divide a by b, giving the modulus << >> Binary Binary a<<b a>>b Shift a to the left, b times Shift a to the right, b times ~ & ^ ! | Unary Binary Binary Binary Binary ~a a&b a^b a!b a|b Logical compliment or NOT a a is logically ANDed by b a is exclusively ORed by b a is inclusively ORed by b Acts the same as a!b <> < > <= >= Binary Binary Binary Binary Binary a<>b a<b a>b a<=b a>=b a is unequal to b a is less than b a is greater than b a is less than or equals b a is greater than or equals b Note1 Since the Assemblers will evaluate 32-bit expressions, the negation bit is Bit 31. Therefore, $FFFFFF and $FFFFFFF are positive hex numbers; $FFFFFFFF is a negative number Note2 If a comparison evaluates as true, the result is returned as -1; if it evaluates as false, the result is returned as 0. Psy-Q Development System Hierarchy of Operators Expressions in the Assemblers are evaluated using the following precedence rules: • Parentheses form the primary level of hierarchy and force precedence - their contents are performed first; Without the aid of parentheses, operators are performed in the order dictated by the hierarchy table; Operators with similar precedence are performed in the direction of their associativity - normally, from left to right, except unary operators. • • Operator () + , -, ~ <<, >> &, !, ^ *, /, % +, >, <, <=, >= =, <> Direction ← → → → → → → → Description Primary Unary Shift Logical Multiplicative Additive Relational Equality Psy-Q Development System 11 RADIX Description The Assemblers default to a base of 10 for integers. This may be changed by preceding individual numbers with the characters % or $, to change the base for that integer to binary or hex. Alternatively, the RADIX directive can be used to change the default base. Syntax RADIX newbase Remarks Examples • Acceptable values for the new base are in the range of 2 to 16. • Whatever the current default, the operand of the RADIX directive is evaluated to a decimal base. • The AN assembler option (see chapter 9) will not be put into effect if the default RADIX is greater than 10, since the signifiers B and D are used as digits in hexadecimal notation. radix 8 sets the default base to OCTAL. Psy-Q Development System ALIAS and DISABLE Description These directives allow the programmer to avoid a conflict between the reserved system names of constants and functions and the programmer's own symbols. Symbols can be renamed by the ALIAS directive and the original names DISABLE'd, rendering them usable by the programmer. Syntax newname Remarks Symbolic names currently known to the Assemblers may be ALIASed and DISABLEd. However, these directives must not be used to disable Assembler directives. Examples _Offset _Offset offset ALIAS DISABLE alias disable ... dc.w dc.w name name offset offset _Offset(Lab) *-pointer Psy-Q Development System CHAPTER 4 General Assembler Directives The Assemblers provide a variety of functions and directives to control assembly of the source code and its layout in the target machine. This chapter documents the Assembler directives which allow the programmer to control the processes of assembly, grouped as follows: • • • • • • Assignment Directives Data Definition Controlling Program Execution Include Files Controlling Assembly Target-related Directives Psy-Q Development System Assignment Directives The directives in this section are used to assign a value to a symbolic name. The value may be a constant, variable or string. • • • • • • • • EQU SET (and =) EQUS EQUR REG RS RSSET RSRESET Psy-Q Development System EQU Description Assigns the result of the expression, as a constant value, to the preceding symbolic name. Syntax symbol name EQU expression See Also SET, EQUS Remarks • The Assembler allows the assigned expression to contain forward references. If an EQU cannot be evaluated as it is currently defined, the expression will be saved and substituted in any future references to the equate (see Note below). • It is possible to include an equate at assembly time, on the Assembler command line. This is useful for specifying major options of conditional assembly, such as test mode - see Assembler switches, chapter 2. • Assigning a value to a symbol with EQU is absolute; an attempt at secondary assignment will produce an error. However, it is permissible to re-assign the current value to an existing symbol; typically, this occurs when subsidiary code redefines constants already used by the master segment. Examples Length Width Depth Volume DmaHigh DmaMid equ equ equ equ equ equ 4 8 12 Length*Width*Depth $ffff8609 DmaHigh+2 Note List equ Lastentry-Firstentry if Firstentry, Lastentry not yet defined, then: dc.l List+2 will be treated as dc.l (Lastentry-Firstentry)+2 the equated expression is implicitly bracketed. Psy-Q Development System SET Description Assigns the result of the expression, as a variable, to the preceding symbolic name. Syntax symbol name SET symbol name = See Also EQU expression expression Remarks Examples • SET and equals (=) are interchangeable • Values assigned by a SET directive may be re-assigned at any time. • The Assembler does not allow the assigned expression in a SET directive to contain forward references. If a SET cannot be evaluated as it is currently defined, an error is generated. • If the symbol itself is used before it is defined, a warning is generated, and it is assigned the value determined by the preliminary pass of the Assembler. • The symbol in a SET directive does not assume the type of the operand. It is, therefore, better suited to setting local values, such as in macros, rather than in code with a relative start position, such as a SECTION construct, which may cause an error - see Examples. Loopcount GrandTotal xdim set = set 0 SubTotalA+SubTotalB Bsize<<SC cbb lc macro = rept substr dc.b = endr endm string 0 strlen(\string) lc+1,lc+1,\string '\cc'^($A5+lc) lc+1 cc lc Psy-Q Development System EQUS Description Assigns a text or string variable to a symbol. Syntax symbol name EQUS "text" symbol name EQUS 'text' symbol name EQUS symbol name See Also EQU, SET Remarks Examples • Textual operands are delimited by double or single quotes. If it is required to include a double quote in the text string, delimit with single quotes or two double quotes; similarly, to include a single quote in the text, delimit with double quotes or two single quotes - see examples below. • If delimiters are omitted, the Assembler assumes the operand to be the symbol name of a previously defined string variable, the value of which is assigned to the new symbol name. • Point brackets, { and }, are special delimiters used in Macros - see MACRO directive specification, chapter 5. • Symbols equated with the EQUS directive can appear at any point in the code, including as part of another text string. If there is the possibility of confusion with the surrounding text, a backslash (\) may be used before the symbol name, and, if necessary, after it, to ensure the expression is expanded correctly - see examples below. Program equs "Psy-Q v 1.2" Qtex equs "What's the score?" dc.b "Remember to assemble & \_filename",0 Psy-Q Development System z equs "123" ... dc.l z+4 converts to dc.l 123+4 whereas the following expression needs backslashes to be expanded correctly: dc.l number\z\a converts to dc.l number123a SA equs 'StartAddress' ... dc.l \SA\4 converts to dc.l StartAddress4 Note To include single quotes in a string delimited by single quotes, either change the delimiters to double quotes, or double-up the internal single quote. Similarly, this syntax applies to double quotes, as follows: Sinquote Sinquot2 equs 'What''s the point?' equs "What's the point?" Doubquote equs "Say ""Hello"" and go" Doubquote equs 'Say "Hello" and go' Psy-Q Development System EQUR Description Defines a symbol as an alternative for a data register or an address register. Syntax symbol name EQUR register name See Also REG Remarks • The major use of the EQUR directive is to improve the overall readability of the source code. • In order that the Assembler can evaluate the expression correctly, dots are not allowed as part of the symbol name of a EQUR (see example below). Examples cmp.b RGBinds(a2,d1.w),d0 This could be re-written using EQUR's, as follows: Red Green Blue equr equr equr ... cmp.b a2 d1 d0 RGBinds(Red,Green.w),Blue Since dots are not allowed in EQUR names, the Assembler can correctly interpret Green.w as the low word of (d1). Psy-Q Development System REG Description Defines a symbol as an alternative for a list of data registers or address registers. Syntax symbol name REG list See Also EQUR Remarks Examples • As with EQUR, the main purpose of the REG directive is to improve the overall readability of the code. • Likewise, dots are not permitted in the symbol name of a REG. Windset reg ... d0-d7/a1-a2 lea movem.w movem.w lea bsr camwind\w,a0 (a0),Windset Windset,minx\w camcliplist,a3 setcliplist Psy-Q Development System RS Description Assigns the value of the __RS variable to the symbol, and advances the rs counter by the number of bytes, words or long words, specified in count. Syntax symbol name RS.size where .size is .b .w .l count byte word long word (if .size is not specified, .w is assumed) See Also RSSET, RSRESET Remarks • This directive, together with the following two associated directives, operate on or with the Assembler variable, __RS, which contains the current offset. • When the Automatic Even assembler option (/AE) is in force, RS directives for word and long word ensure that the __RS variable is aligned to the next word boundary. Examples rsreset Icon_no Dropcode Actcode Actname Objpos rs.b rs.w rs.w rs.b rs.l 1 1 1 10 1 Artlen rs.b 0 After each of the first five RS equates, the __RS pointer is advanced; the values for each equate are as follows: Psy-Q Development System Icon_no Dropcode Actcode Actname Objpos Artlen 0 1 4 6 16 20 (set to zero by RSRESET) (Automatic Even set, advances the pointer to even boundary) The last rs.b does not advance the __RS pointer, since a count of zero is equivalent to an EQUATE to the __RS variable. RSSET Description Syntax Assigns the specified value to __RS variable. RSSET value See Also RS, RSRESET Remarks This directive is normally used when the offsets are to start at a value other than zero. Examples See the RS directive Psy-Q Development System RSRESET Description Sets the __RS variable to zero. Syntax See Also RSRESET [value] RS, RSSET Remarks Examples • Using this directive is the normal way to initialise the __RS counter at the start of a new data structure. • The optional parameter is provided for compatibility with other assemblers; if present, RSRESET behaves like the RESET directive. See the RS directive Psy-Q Development System Data Definition The directives in this section are used to define data and reserve space. • • • • • • • • DC DCB DS HEX DATA DATASIZE IEEE32 IEEE64 Psy-Q Development System DC Description This directive evaluates the expressions in the operand field, and assigns the results to the preceding symbol, in the format specified by the .size parameter. Argument expressions may be numeric values, strings or symbols. Syntax symbol name DC.size expression,..,expression where .size is .b .w .l byte word long word (if .size is not specified, .w is assumed) See Also DCB Remarks • Textual operands are delimited by double or single quotes. If it is required to include a double quote in the text string, delimit with single quotes or two double quotes; similarly, to include a single quote in the text, delimit with double quotes or two single quotes - see examples below. If delimiters are omitted, the Assembler assumes the operand to be the symbol name of a previously defined string variable, the value of which is assigned to the new symbol name. • When the Automatic Even assembler option (/AE) is in force, DC directives for word and long word ensure that the program counter is aligned to the next word boundary. Examples Hexvals Coords Pointers ErrorMes Notes If the Assembler encounters a parameter that is out-of-range, an error is flagged; the following statements will produce errors: dc.w dc.w dc.l dc.b dc.b dc.b dc.w dc.w $80d,$a08,0,$80d,0 -15,46 StartMarker,EndMarker "File Error",0 257 -129 66000 -33000 Psy-Q Development System DCB Description This directive generates a block of memory, of the specified length, containing the specified value. Syntax DCB.size where .size is .b .w .l length,value byte word long word (if .size is not specified, .w is assumed) See Also DC Remarks When the Automatic Even assembler option (/AE) is in force, DCB directives for word and long word ensure that the program counter is aligned to the next word boundary. Examples dcb.b 256,$7F generates 256 bytes containing $7F. dcb.w 64,$FF generates 64 words containing $FF. Psy-Q Development System DS Description Allocates memory to the symbol, of the specified length, and initialises it to zero. Syntax symbol name DS.size where .size is .b .w .l length byte word long word (if .size is not specified, .w is assumed) See Also DC, DCB Remarks Examples • When the Automatic Even assembler option (/AE) is in force, DS directives for word and long word ensure that the program counter is aligned to the next word boundary. • If this directive is used to allocate memory in a Group/Section with the BSS attribute, the reserved area will not be initialised - see Groups and Sections, chapter 8. List ds.w 64 reserves an area 64 words long, and sets it to zero. Buffer ds.b 1024 reserves a 1k bytes area, and sets it to zero. Psy-Q Development System HEX Description This directive takes a list of unsigned hex nibble pairs as an argument, which are concatenated to give bytes. It is intended as a quick way of inputting small hex expressions. Syntax symbol name HEX hexlist See Also INCBIN Remarks Data stored as HEX is difficult to read, less memory-efficient and causes more work for the Assembler. Therefore, it is suggested that the HEX statement is used for comparatively minor data definitions only. To load larger quantities of data, it is recommended that the data is stored in a file, to be INCLUDEd as a binary file at runtime - see Include Files, chapter 5. Examples HexStr hex 100204FF0128 is another way of writing HexStr dc.b $10,$02,$04,$FF,$01,$28 Psy-Q Development System DATASIZE and DATA Description Syntax Together, these directives allow the programmer to define values between 1 and 256 bytes long (8 to 2048 bits). The size of the DATA items must first be defined by a DATASIZE directive. DATASIZE size DATA value, value where value is a numeric string, in hex or decimal, optionally preceded by a minus sign. See Also IEEE32, IEEE64 Remarks If a value specified in the DATA directive converts to a value greater than can be held in size specified by DATASIZE, the Assembler flags an error. Examples datasize ... data data 8 $123456789ABCDEF0 -1,$FFFFFFFFFFFF IEEE32 and IEEE64 Description Syntax See Also Examples These directives allow 32 and 64 bit floating point numbers to be defined in IEEE format. IEEE32 IEEE64 fp.value fp.value DATA, DATASIZE ieee32 1.23,34e10 ieee64 123456.7654321e-2 Psy-Q Development System Controlling Program Execution The directives in this section are used to alter the state of the program counter and control the execution of the Assembler. • • • • • ORG EVEN CNOP OBJ OBJEND Psy-Q Development System ORG Description The ORG directive informs the Assembler of the location of the code in the target machine. Syntax ORG address[,parameter] where address is a previously-defined symbol, or a hex or decimal value, optionally preceded by a question mark (?) and followed by a (target-specific) numeric parameter. See Also OBJ, OBJEND, GROUP, SECTION Remarks • If a link file is output, the ORG directive must not be used - see Groups and Sections, chapter 8. • If the program contains SECTIONs, a single ORG is allowed, and it must precede all SECTION directives. If the program does not utilise the SECTION construct, it may contain multiple ORG's. • The ORG operand can be preceded by a question mark, to indicates the amount of RAM required by the program. However, the ORG ? function only works on machines with operating systems to allocate the memory; for instance, it will work on the Amiga but not the Sega Mega Drive. Examples Begin Program org move.w $100 sr,-(A7) equ ... org $4000 Program Psy-Q Development System EVEN Description This directive aligns the program counter to the next word boundary. Syntax See Also EVEN CNOP Remarks Examples • There is a related assembler option, AE - Automatic Even. If set, the word and long word forms of several directives, such as DC, DCB, DS, and _RS, will force the program counter onto the next word boundary before they are executed. • In code containing SECTIONs, the Assembler does not allow the program counter to be reset to a size boundary greater than the alignment already set for that section. Therefore, a EVEN statement, is not allowed in a section that is byte-aligned. Ind1 Ind2 Ind3 InArea dc.b dc.b dc.b even ds.b 0 0 0 Inlength forces InArea onto a word boundary. Psy-Q Development System CNOP Description Resets the program counter to a specified offset from the specified size boundary. Syntax CNOP offset,size boundary See Also EVEN Remarks As with the EVEN directive, in code containing SECTIONs, the Assembler does not allow the program counter to be reset to a size boundary greater than the alignment already set for that section. Therefore, a CNOP statement, with a size boundary of 2, is not allowed in a section that is byte-aligned. Examples section.l Firstoff = Firstsize = ... cnop prime 512 2 Firstoff,Firstsize sets the program counter to 512 bytes above the next word boundary. Note that: cnop 0,2 performs as an EVEN statement. Psy-Q Development System OBJ and OBJEND Description OBJ forces the code following it to be assembled as if it were at the specified address, although it will still appear following on from the previous code. OBJEND terminates this process and returns to the ORG'd address value. Syntax OBJ address OBJEND See Also ORG Remarks Examples • The OBJ - OBJEND construct is useful for code that must be assembled at one address (for instance, in a ROM cartridge), but will be run at a different address, after being copied there. • Code blocks delimited by OBJ - OBJEND cannot be nested. org dc.l dc.l $100 * * obj dc.l dc.l $200 * * objend dc.l dc.l * * The above code will generate the following sequence of longwords, starting at address $100: $100 $104 $200 $204 $110 $114 Psy-Q Development System Include Files The source code for most non-trivial programs is too large to be handled as a single file. It is normal for a program to be constructed of subsidiary files, which are called together during the assembly process. The directives in this section are used to collect together the separate source files and control their usage; also discussed are operators to aid the control of code to be assembled from INCLUDEd files. • • • • INCLUDE INCBIN DEF REF Psy-Q Development System INCLUDE Description Informs the Assembler to draw in and process another source file, before resuming the processing of the current file. Syntax INCLUDE filename where filename is the name of the source file to be processed, including drive and path identifiers - see Note. The filename may be surrounded by quotes, but they will be ignored. See Also INCBIN Remarks Traditionally, there will be one main file of source code, which contains INCLUDE's for all the other files. INCLUDEd files can be nested. The /j switch can be used to specify a search path for INCLUDEd files - see Assembler Options, chapter 10. Examples A typical start to a program may be: section codestart jmp short1 entrypoint dc.b dc.b dc.w _hours,_minutes _day,_month _year include vars1.68k section short2 include vars2.68k section code include include graph1.68k graph2.68k Psy-Q Development System include include include maths.68k trees.68k tactics.68k entrypoint move.w #$2700,sr lea stacktop,sp or include d:/source/levels.asm Note: Since a path name contains backslashes, the text in the operand of an INCLUDE statement may be confused with the usage of text previously defined by an EQUS directive. To avoid this, a second backslash may be used or the backslash may be replaced by a forward slash (solidus). Thus, include d:\source\levels.asm may be re-written as: include d:\\source\levels.asm or: include d:/source/levels.asm Psy-Q Development System INCBIN Description Informs the Assembler to draw in and process binary data held in another source file, before resuming the processing of the current file. Syntax symbol • • See Also INCBIN filename[,start,length] filename is the name of the source file to be processed, including drive and path identifiers - see Note1. Optionally, the filename may be surrounded by quotes, which will be ignored; start, length are optional values, allowing selected portions of the specified file to be included - see Note2. INCLUDE, HEX Remarks • This directive allows quantities of binary data to be maintained in a separate file and pulled into the main program at assembly time; typically, such data might be character movement strings, or location co-ordinates. The Assembler is passed no information concerning the type and layout of the incoming data. Therefore, labelling and modifying the INCBINed data are the responsibility by the programmer. • The /j switch can be used to specify a search path for INCLUDEd files - see Assembler Options, chapter 3. Examples Charmove Note1 Since a path name contains backslashes, the text in the operand of an INCBIN statement may be confused with the usage of text previously defined by an EQUS directive. To avoid this, a second backslash may be used, or the backslash may be replaced by a forward slash (solidus). incbin "d:\source\charmov.bin" Thus, include d:\source\charmov.bin may be re-written as include d:\\source\\charmov.bin include d:/source/charmov.bin or Psy-Q Development System Note2 The nominated file may be accessed selectively, by specifying a position in the file, from which to start reading, and a length. Note that: • • • if start is omitted, the INCBIN commences at the beginning of the file; if the length is omitted, the INCBIN continues to the end of the file; if both start and length are omitted, the entire file is INCBINed. REF Description REF is a special operator, to allow the programmer to determine which segments of code are to be INCLUDEd. Syntax [~]REF(symbol) The optional preceding tilde (~) is synonymous with NOT. Remarks REF is true if a reference has previously been encountered for the symbol in the brackets. Examples Links if move.w ... rts endif ref(Links) d0,-2(a0) The Links routine will be assembled if a reference to it has already been encountered. Psy-Q Development System DEF Description Like the REF operator, DEF is a special function. It allows the programmer to determine which segments of code have already been INCLUDEd. Syntax [~]DEF(symbol) The optional preceding tilde (~) is synonymous with NOT. Remarks DEF is true if the symbol in the brackets has previously been defined. Examples loadadr execadr relocadr if equ equ equ endc ~def(loadadr) $1000 $1000 $80000-$300 The address equates will be assembled if load_addr has not already been defined. Psy-Q Development System Controlling Assembly The following directives give instructions to the Assemblers, during the assembly process. They allow the programmer to select and repeat sections of code: • • • • • • • • • • • • • END IF ELSE ELSEIF ENDIF CASE ENDCASE REPT ENDR WHILE ENDW DO UNTIL Psy-Q Development System END Description The END directive informs the Assembler to cease its assembly of the source code. Syntax See Also END [address] REGS Remarks Example • The inclusion of this directive is mostly cosmetic, since the Assembler will cease processing when the input source code is exhausted. • The optional parameter specifies an initial address for the program. See also the REGS statement, in the section - Target-Related Directives, chapter 5. startrel move.w lea ... jmp end #$2700,sr $100000-4,sp progad\w IF, ELSE, ELSEIF, ENDIF, ENDC Description These conditional directives allow the programmer to select code for assembly. Syntax See Also IF ELSE ELSEIF ENDIF ENDC [~]expression [~]expression CASE Psy-Q Development System Remarks • The ENDC and ENDIF directives are interchangeable. • If the ELSEIF directive is used without a following expression, it acts the same as an ELSE directive. • The optional tilde, preceding the operand expression, is synonymous with NOT. Its use normally necessitates the prudent use of brackets to preserve the sense of expression. Examples sec_dir if equ Sega-MD 2 sec_dir elseif equ Sega-CD 1 else equ endif 3 sec_dir round round movopt tempstr num if macro add.l endm ~usesquare \1,\2 elseif macro endm endc macro substr if substr if moveq else move.w endif else fail endif endm parm,dest 1,1,'\parm' strcmp('#','\tempstr') 2,,'\parm' ((\num)>-127)&((\num)<128) #(\num),\dest #(\num),\dest Psy-Q Development System CASE and ENDCASE Description The CASE directive is used to select code in a multiple-choice situation. The CASE argument defines the expression to be evaluated; if the argument(s) after the equals sign are true, the code that follows is assembled. The equals-question mark case is selected if no previous case is true. Syntax CASE =expression[,expression] =? ENDCASE See Also IF conditionals Remarks In the absence of a equals-question mark (=?) case, if the existing cases are unsuccessful, the case-defined code is not assembled. Examples The following is an alternative for the example listed under the IF directive - see chapter 5. Target equ ... expression Sega-MD case Target =Sega-MD sec_dir equ 2 =Sega-CD sec_dir equ 1 =? sec_dir dc.b "New Version",0 equ 3 endcase Psy-Q Development System REPT, ENDR Description These directives allow the programmer to repeat the code between the REPT and ENDR statements. The number of repetitions is determined by the value of count. Syntax REPT ... ENDR See Also DO, WHILE Remarks When used in a Macro, REPT is frequently associated with the NARG function. Examples cbb lc cc lc count rept dc.w endr 12 0,0,0,0 macro = rept substr dc.b = endr endm string 0 strlen(\string) lc+1,lc+1,\string "\cc"^($A5+lc) lc+1 Psy-Q Development System WHILE, ENDW Description These directives allow the programmer to repeat the code between the WHILE and ENDW statements, as long as the expression in the operand holds true. Syntax WHILE ... ENDW expression See Also REPT, DO Remarks Currently, any string equate substitutions in the WHILE expression take place once only, when the WHILE loop is first encountered - see Note below for the ramifications of this. Examples MultP Indic Indic Note equ ... = while move.w ... = endw 16 MultP Indic>1 term(a0),d0 Indic-1 Because string equates are only evaluated at the start of the WHILE loop, the following will not work: s s equs while dc.b equs endw "x" strlen("\s") < 4 "\s",0 "\s\x" Psy-Q Development System To avoid this, set a variable each time round the loop to indicate that looping should continue: s looping s looping equs = while dc.b equs = endw "x" -1 looping "\s",0 "\s\x" strlen("\s") < 4 DO, UNTIL Description These directives allow the programmer to repeat the code between the DO and UNTIL statements, until the specified expression becomes true. Syntax DO ... UNTIL expression See Also REPT, WHILE Remarks Unlike the WHILE directive, string equates in an UNTIL expression will be reevaluated each time round the loop. Examples MultP Indic Indic equ ... = do move.w ... = until 16 MultP term(a0),d0 Indic-1 Indic<=1 Psy-Q Development System Target-related Directives The following directives allow the programmer to specify certain initial parameters in the target machine: • • REGS UNIT Psy-Q Development System REGS Description If a CPE file is produced, or object code output is directed to the target, the REGS directive specifies the contents of the registers, at the start of code execution. Syntax REGS regcode=expression[,regcode=expression] where regcode is the mnemonic name of a register, such as SR, PC. Remarks Example For relocatable code, which is specific to the target, or pure binary code, this directive is not available. regs pc=__SN_ENTRY_POINT Register assigns can be declared on one line, separated by commas. Remember to use specific mnemonics for registers, e.g. for the 68000, USP for the user stack and SSP for the supervisor stack. UNIT Description Syntax Remarks Examples The UNIT directive allows the destination unit in a multi-processor target to be specified, such as the Main CPU and Sub-CPU in Sega Mega-CD. UNIT unitnumber Only one UNIT directive may be included; if there is no UNIT directive, a unit number of 0 is assumed. unit 1 Psy-Q Development System CHAPTER 5 Macros The Assemblers provide extensive macro facilities; these allow the programmer to assign names to complete code sequences. They may then be used in the main program like existing assembler directives. This chapter discusses the following topics, directives and functions: • • • • • • • • MACRO, ENDM MEXIT Macro Parameters SHIFT, NARG MACROS PUSHP, POPP PURGE TYPE Psy-Q Development System MACRO, ENDM, MEXIT Description A macro consists of the source lines and parameter place markers between the MACRO directive and the ENDM. The label field is the symbolic name by which the macro is invoked; the operand allows the entry of a string of parameter data names. When the assembler encounters a directive consisting of the label and optional parameters, the source lines are pulled into the main program and expanded by substituting the place markers with the invocation parameters. The expansion of the macro is stopped immediately if the assembler encounters a MEXIT directive. Syntax Label See Also MACROS MACRO ... MEXIT ... ENDM [symbol,..symbol] Remarks Examples • Note that the invocation parameter string effectively starts at the character after the macro name, that is, the dot (.) character. Text strings, as well as .b, .w and .l are permissible parameters - see Parameters below. • Control structures within macros must be complete. Structures started in the macro must finish before the ENDM; similarly, a structure started externally must not be terminated within the macro. To imitate a simple control structure from another assembler, a short macro might be used - see MACROS below. remove Form macro dc.w endm macro if dc.w else dc.w endif endm -2,0,0 strcmp('\1','0') 0 \1-FormBase Psy-Q Development System Macro Parameters Parameters Example Macro parameters obey the following rules: • The parameters listed on the macro invocation line may appear at any point in the code declared between the MACRO and ENDM statements. Each parameter is introduced by a backslash (\); where this may be confused with text from an EQUS, a backslash may also follow the parameter. • Up to thirty two different parameters are allowed, numbered \0 to \31. \0 is a special parameter which gives the contents of the size field of the macro directive when it was invoked, that is, the text after the point symbol (.) This includes not only .b, .h or .w, but also any text: zed macro \0 endm ... zed.nop will generate a NOP instruction. Instead of the \0 to \31 format, parameters can be given symbolic names, by their inclusion as operands to the MACRO directive. The preceding backslash (\) is not mandatory; however, if there is the possibility of confusion with the surrounding text, a backslash may be used before and after the symbol name to ensure the expression is expanded correctly: Example Position macro dc.w endm A,B,C,Pos,Time \Time*(\A*\Pos+\B*\Pos+\C*\Pos) Surrounding the operand of an invoked macro with greater than and less than signs (<...>), allows the use of comma and space characters. This does not apply to Assemblers which use angle brackets as address mode specifiers; in these instances, backward single quote is used. Psy-Q Development System Example Credits • Example macro dc.w dc.b dc.b even endm ... Credits \1,\2 \3 0 11,10,<Psy-Q, from Psygnosis> Continuation Lines - when invoking a macro, it is possible that the parameter list will become overlong. As with any directive statement, the line can be terminated by an ampersand (&) and continued on the next line to improve readability. chstr cheatstr macro rept dc.b shift endr dc.b even endm ... chstr narg k_\1 0 i,c,a,n,b,a,r,e,l,y,& s,t,a,n,d,i,t Psy-Q Development System Special Parameters There are a number of special parameter formats available in macros, as follows: Converting Integers to Text The parameters \# and \$ replace the decimal (#) or hex ($) value of the symbol following them, with their character representation. Commonly, this technique is used to access Run Date and Time: Example RunTime org dc.b $1006 "\#_hours:\#_minutes:& \#_seconds" this expands to the form hh:mm:ss, as follows RunTime dc.b "21:08:49" Generating Unique Labels The parameter \@ can be used as the last characters of a label name in a macro. When the macro is invoked, this will be expanded to an underscore followed by a decimal number; this number is increased on each subsequent invocation to give a unique label. Example Slots next\@ dun\@ macro moveq move.1 beq.s addq.w bgt.s move.w endm ... Slots #0,d0 r1,\1 dun@ #1, d0 d0,2 freeob1,numslot1w Each time the Slots macro is used, new labels in the form next_001 and dun_001 will be generated. Psy-Q Development System Entire Parameter If the special parameter \_ (backslash underscore) is encountered in a macro, it is expanded to the complete argument specified on the macro invocation statement. Examples All macro dc.b endm ... All \_ 1,2,3,4 will generate db 1,2,3,4 Control Characters The parameter \^x, where x denotes a control character, will generate the specified control character. Using the Macro Label The label heading the invocation line can be used in the macro, by specifying the first name in the symbol list of the MACRO directive to be an asterisk (*), and substituting \* for the label itself. However, the resultant label is not defined at the current program location. Therefore, the label remains undefined unless the programmer gives it a value. Extended Parameters The Assembler accepts a set of elements, enclosed in curly brackets ({}), to be passed to a macro parameter. The NARG function and SHIFT directive can then be used to handle the list: Example cmd cc macro equs rept \cc shift endr endm {\1} narg(cc) cc Psy-Q Development System SHIFT, NARG Description These directives cater for a macro having a variable parameter list as its operand. The NARG symbol is the number of arguments on the macro invocation line; the SHIFT directive shifts all the arguments one place to the left, losing the leftmost argument. Syntax directive NARG ... SHIFT where NARG is a reserved, predefined symbol. See Also Extended Parameters Examples routes macro rept if dc.w else dc.w endif shift endr endm ... routes narg strcmp('\1','0') 0 \1-routebase 0,gosouth_1 This example goes through the list of parameters given to the macro and defines a half word of $0000 if the argument is zero or a 16 bit offset into the ‘routebase’ table of the given label. Psy-Q Development System MACROS Description The MACROS directive allows the entry of a single line of code as a macro, with no associated ENDM directive. The single line of code can be a control structure directive. Syntax Label See Also MACRO Remarks The MACROS directive may be used to stand in for a single, complex code line. Often, the short macro allows the programmer to synthesise a directive from another assembler. Including the /k option on the command line will cause several macros emulating foreign directives to be generated. MACROS [symbol,..symbol] Examples if 0 macros bsr boom1 else boom macros move.w #blowup-tactbase, &slot_tactic(1) endif boom Psy-Q Development System PUSHP, POPP Description These directives allow text to be pushed into, and then popped from, a string variable. Syntax PUSHP POPP string string Remarks There is no requirement for the PUSH and corresponding POPP directives to appear in the same macro. Examples ifhid ifnot macro dc.w dc.w pushp dc.w endm ... macro popp goto pushp ibvis 1 @ @-2-* lab @ @ lab endm This means the user does not have to specify stksize when using freeframe. The user must ensure that calls to makeframe and freeframe are balanced. Psy-Q Development System PURGE Description The PURGE directive removes an expanded macro from the internal tables and releases the memory it occupied. Syntax PURGE macroname Remarks It you need to redefine a macro, it is not necessary to purge it first as this is done by the Assembler. Examples HugeM macro dc.w dc.w ... dc.w endm HugeM ... \1 \2 \31 para1,103,faultlevel,& 40,50,para31 purge HugeM Psy-Q Development System TYPE Description TYPE is a function used to provide information about a symbol. It is frequently used with a macro to determine the nature of its parameters. The value is returned as a word; the meanings of the bit settings are given below. Syntax TYPE(symbol) The reply word can be interpreted as follows: Bit 0 Bit 1 Bit 2 Bit 3 Bit 4 Bit 5 Bit 6 Bit 7 Bit 8 Bit 9 Bit 10 Bit 11 Bit 12 Bit 13 Bit 14 Bit 15 Symbol has an absolute value Symbol is relative to the start of the Section Symbol was defined using SET Symbol is a Macro Symbol is a String Equate (EQUS) Symbol was defined using EQU Symbol appeared in an XREF statement Symbol appeared in an XDEF statement Symbol is a Function Symbol is a Group Name Symbol is a Macro parameter Symbol is a short Macro (MACROS) Symbol is a Section Name Symbol is Absolute Word Addressable Symbol is a Register Equate (EQUR) Symbol is a Register List Equate (REG) Psy-Q Development System CHAPTER 6 String Manipulation Functions To enhance the Macro structure, the Assemblers include powerful functions for string manipulation. These enable the programmer to compare strings, examine text and prepare subsets. This chapter covers the following string handling functions and directive: • • • • STRLEN STRCMP INSTR SUBSTR Psy-Q Development System STRLEN Description A function which returns the length of the text specified in the brackets. Syntax STRLEN(string) See Also STRCMP Remarks The STRLEN function is available at any point in the operand. Examples Nummov macro rept move.1 endr endm ... Nummov strlen(\1) (a1)+, (a0)+ 12345 The number of characters in the string is used as the extent of the loop. Psy-Q Development System STRCMP Description A function which compares two text strings in the brackets, and returns true if they match, otherwise it returns false. Syntax STRCMP(string1,string2) See Also STRLEN Remarks When comparing two text strings, the STRCMP function starts numbering the characters in the target texts from one. Examples Vers equ ... if move.w else if move.w else if move.w endif endif endif "Acs" strcmp("\Vers","Sales") Sa1ind, d0 strcmp("\Vers","Acs") AcInd,d0 strcmp("\Vers","Test") TstInd, d0 Psy-Q Development System INSTR Description This function searches a text string for a specified sub-string. If the string does not contain the sub-string, the result of zero is returned; if the sub-string is present, the result is the location of the sub-string from the start of the target text. It is also possible to specify an alternate start point within the string via an optional parameter. Syntax See Also SUBSTR Examples Mess Note INSTR ([start,]string, sub-string) equs ... if move.w else move.w endif "Demo for Sales Dept" instr("\Mess","Sales") Sa1Ind, d0 AcInd, d0 When returning the offset of a located sub-string, the INSTR function starts numbering the characters in the target text from one. Psy-Q Development System SUBSTR Description This directive assigns a value to a symbol; the value is a sub-string of a previously specified text string, defined by the start and end parameters. The start and end parameters will default to the start and end of the string, if omitted. Syntax symbol See Also INSTR, EQUS Remarks When assigning a sub-string to a symbol, the SUBSTR directive starts numbering the characters in the source text from one. Examples Message Part1 Part2 Part3 Part4 SUBSTR equs substr substr substr substr [start],[end],string "A short Sample String" 9,14,"\Message" 16,,"\Message" ,7,"\Message" ,,"\Message" where Part1 equals Sample Part2 equals String Part3 equals A short The last statement is equivalent to an EQUS assigning the whole of the original string to Part4. Psy-Q Development System Psy-Q Development System CHAPTER 7 Local Labels As a program develops, finding label names that are both unique and definitive becomes increasingly difficult. Local Labels ease this situation by allowing meaningful label names to be re-used. This chapter covers the following topics and directives: • • • Local Label Syntax and Scope MODULE and MODEND LOCAL Psy-Q Development System Syntax and Scope Syntax Scope Examples • Local Labels are preceded by a local label signifier. By default, this is an @ sign; however, any other character may declared by using the l option in an OPT directive or on the Assembler command line - see Assembler Options chapter 3. • Local label names follow the general label rules, as specified in chapter 4. • Local labels are not de-scoped by the expansion of a macro. The region of code within which a Local Label is effective is called its Scope. Outside this area, the label name can be re-used. There are three methods of defining the scope of a Local Label: • The scope of a local label is implicitly defined between two non-local labels. Setting a variable, defining an equate or RS value does not de-scope current local labels, unless the d option has been used in an OPT directive or on the Assembler command line - see Assembler Options, chapter 10. • The scope of a Local Label can also, and more normally, be defined by the directives MODULE and MODEND - see chapter 8. • To define labels (or any other symbol type) for local use in a macro, the LOCAL directive can be used - see chapter 8. plot2 @chk1 SetX @ret plot3 @ret move.b ... cmp.w bge.s comp\w,d3 add.w bra.s cmp.w ... jsr move.w set rts movem.w ... rts #168,d3 @ret #83,d3 #-84,d3 @chk1 lcolour d3,d0 x+1 d6-d7,-(sp) Psy-Q Development System The code above shows a typical use for Local Labels, as "place markers" within a self-contained sub-routine. The scope is defined by the non-local labels, Plot2 and Plot3; the SET statement does not de-scope the routine. The labels @chk1 and @ret are re-usable. plot2 move.b moveq cmp.w bge.s comp\w,d3 chrbit-1,d2 #-84,d3 @chk1 add.w bra.s #168,d3 setplot @chk1 cmp.w move.w #83,d3 d3,d0 setplot set ... dbra x+1 d2,@chk1 In the example, the final branch will cause an error, since it is outside the scope of @chk1. Psy-Q Development System MODULE and MODEND Description Code occurring after a MODULE statement, and up to and including the MODEND statement, is considered to be a module. Local labels defined in a module can be reused, but cannot be referenced outside the module's scope. A Local label defined elsewhere cannot be referenced within the current module. Syntax See Also MODULE ... ... MODEND LOCAL Remarks Examples • Modules can be nested. • The MODULE statement itself is effectively a non-local label and will de-scope any currently active default scoping. • Macros can contain modules or be contained in a module. A local label occurring in a module, can be referred to by a macro residing anywhere within the module. A module contained within a macro can effectively provide labels local to that macro. Strat @Lab1 @SetTact @Lab1 module moveq bra ... subq.w beq.s ... rts module move.w ... move.l ... move.l bgt.s rts modend modend #1,d0 @Lab1 #1,count(a0) @SetTact #Tactic2(a0) a1,-(sp) (a1),d0 @Lab1 Psy-Q Development System LOCAL Description The LOCAL directive is used to declare a set of macro-specific labels. Syntax See Also LOCAL symbol,..,symbol MODULE Remarks Examples • The scope of symbols declared using the LOCAL directive is restricted to the host macro. • The LOCAL directive does not force a type on the symbol set that makes up its operand. In practice, therefore, such symbols can be used as equates, string equates or any other type, as well as labels. doorpos macro local bsr.s bsr m_door1,m_door2,doorw doorw doorw m_door1 m_door2 equ equ door_start*\1 door_fin*\2 doorw movem.w move.w move.w move.w (a3)+,d0-d2 (a4),d3 6(a4),d4 12(a4),d5 endm Psy-Q Development System CHAPTER 8 Structuring the Program Normally, the organisation of the memory of the target machine does not match the layout of the source files. The Assemblers however, use Groups and Sections to create a structured target memory and relocatable program sections. This chapter covers the following topics and directives: • • • • SECTION GROUP PUSHS and POPS SECT and OFFSET Psy-Q Development System GROUP Description This directive declares a group with up to seven group attributes. Syntax GroupName GROUP [Attribute,..Attribute] where an attribute is one of the following - see below for descriptions: WORD BSS ORG(address) FILE(filename) OBJ(address) SIZE(size) OVER(GroupName) See Also SECTION Remarks Group Attributes are interpreted as follows: WORD - the group may be accessed using absolute word addressing. Note that this will only have an effect if the ow+ parameter has been used to allow optimisation to occur. Example Group1 group word BSS - no initialised data to be declared in this group. Example Group1 group bss ORG - sets the ORG address of the group, without reference to the other group addresses. If this attribute is omitted, the group will be placed in memory, following on from the end of the previous group. Psy-Q Development System Example G1 G2 G3 org group group group $100 org($400) will place the groups in the sequence G1,G2,G3 FILE - outputs a group, such as an overlay, to a its own binary file; other groups will be output to the declared file. Example Group1 group org($400),file("charov.bin") OBJ - sets the group's OBJ address. Code is assembled as if it is running at the OBJ address but is placed at the group's ORG address. If no address is specified then the OBJ value is the same as the group's ORG address. Examples Group1 group org($400),obj($1000) Group2 group org($800),obj() SIZE - specifies the maximum allowable size of the group. If the size exceeds the specified size, the assembler reports an error. Example Group1 group size(32768) OVER - overlays this group on the specified group. Code at the start of the second group is assembled at the same address as the start of the first group. The largest of the overlayed groups' sizes is used as the size of each group. Note: It is necessary to use the FILE attribute to force different overlays to be written to different output files. Example Group2 group over(Group1) Psy-Q Development System SECTION Description This directive declares a logical code section. Syntax SECTION.size SectionName[,Group] SectionName SECTION.size [Attribute,..Attribute] The second format is a special case, designed to allow definition of a section with group attributes - see below for a description. See Also GROUP Remarks Example • Unless the section has been previously assigned, the section will be placed in an unnamed default group, if the GROUP name is omitted • It is possible to define a section with group attributes. The assembler will automatically create a group with the section name preceded by a tilde (~) and place the section in it. Sect1 section bss defines Sect1, with the BSS attribute, in a group called ~Sect1. • The size parameter can be .b, .w or .l; if the parameter is omitted, the default size is word. When a size is specified on a section directive, alignment to that size is forced at that point. The start of the section is aligned on a boundary based on the largest size on any of the entries to that section - in all modules in the case of linked code. Note: If a section is sized as byte, the EVEN directive is not allowed in the section. Furthermore, the CNOP directive cannot be used to re-align the Program Counter to a value greater than the alignment of the host section - see chapter 5. Psy-Q Development System • If sections are used to structure application code, only a single ORG directive can be used; this must precede all section definitions. Groups and Sections may have ORG attributes to position them. No ORG directives or attributes are permitted when producing linkable output. Within a group, sections are ordered in the sequence that the Linker encounters the section definitions. Examples The following example shows the use of Groups and Sections to impose a structure on the target memory: • • • • • preliminary version checks and includes; group declarations; a section of variables, at the start of the program, to take advantage of absolute addressing modes; a section of application code; a section of unitialised data. opt c-,ow+,oz+,v+ equ 0 include include include "miscmac.obj" "rooms.obj" "output.obj" numvecs org equ regs $100 $100>>2 pc=progstart amiga if equ endif ~def(amiga) 1 ntsc if equ endif ~def(ntsc) 1 version ; 0 => full version ; 1 => demo version ; 2 => test version Psy-Q Development System g_short g_code g_bss firstbss group group group word section section section section section short1,g_short short2,g_short shortcode,g_short code,g_code bss,g_bss equ * bss PUSHS and POPS Description These directives allow the programmer to open a new, temporary section, then return to the original section. PUSHS saves the current section, POPS restores it. Syntax PUSHS POPS Examples plotcomp passdl move.w move.w bsr.s move.w move.w addq.w ... equ pushs d0,-(sp) d2,-(sp) pcomp (sp)+,d2 (sp)+,d0 #1,d2 section dc.l lea cmp.w blo.s ... pops dolight passdl nrg_len(a2),a2 #endnrg,a2 @1 * This example shows PUSHS and POPS being used to pass system information between sections, in the form of the location counter. Psy-Q Development System SECT and OFFSET Description The SECT function returns the address of the section in which the symbol in the brackets is defined. The OFFSET function returns the offset value from the beginning of the section. Syntax SECT (expression) OFFSET (expression) Remarks Examples • If a link is being performed, the SECT function is evaluated when it is linked; if there is no link, it will be evaluated when the second pass has finished. • Likewise, if a link is being performed, the OFFSET function is evaluated when it is linked; however, if there is no link, the OFFSET will be evaluated during the first pass. dc.w dc.w dc.w sect(Table1) sect(Table2) offset(*) Psy-Q Development System CHAPTER 9 Options, Listings and Errors This chapter completes the discussion of the Assemblers and their facilities. It covers methods of determining run-time Assembler options, producing listings and errorhandling, as well as passing information to the Linker: • • • • • • • • OPT Assembler Options PUSHO and POPO LIST and NOLIST INFORM FAIL XREF, XDEF and PUBLIC GLOBAL Psy-Q Development System OPT Description This directive allows Assembler options to be enabled or disabled in the application code. See ‘Assembler Options’ below for a full listing. Syntax See Also OPT option,..option PUSHO, POPO Remarks • An option is turned on and off by the character following the option code: + (plus sign) = ON - (minus sign) = OFF • Examples Options may also be enabled or disabled by using the /O switch on the Assembler command line - see Command Line Syntax, chapter 2. opt an+,l:+,e- opt oaq+,osq+,ow+ Psy-Q Development System Assembler Options The following reference list shows the default settings for the various options and optimisations available during assembly. More detailed descriptions are given below. Option Description Default AE AN C D E Lx S V W WS X # Enable Automatic Even Mode Enable Alternate Numeric mode Activate/ Suppress Case sensitivity Allow EQU or SET to descope local labels Print lines containing errors Substitute x for Local Label signifier Handle equated names as labels Write Local Labels to symbol file Print warning messages Operands may contain white space Assume XREFs in defined section Use # for literals and ## for immediates (SH2 only) On Off Off Off On Off Off Off On Off Off Off Optimise to PC relative addressing Optimise short branches Optimise absolute long addressing Optimise zero displacements Optimise adds to quick form Optimise subtract to quick form Optimise move to quick form Off Off Off Off Off Off Off 68000 only: OP OS OW OZ OAQ OSQ OMQ Note: 68000 Assembler optimisation options are not valid for forward references. Psy-Q Development System Option Descriptions AE - Automatic Even When using the word and long word forms of DC, DCB, DS and RS, enabling this option forces the program counter to the following word boundary prior to execution. The default setting for this option is AE+. AN - Alternate Numeric The default setting for this option is AN- but setting it to AN+ allows the inclusion of numeric constants in Zilog or lntel format, i.e. followed by H, D or B to signify Hex, Decimal or Binary. See also the section on the RADIX directive - chapter 3. C - Case Sensitivity When this option is set to C+, the case of the letters in a label's name is significant; for instance, SHOWSTATS, ShowStats and showstats would all be legal. The default setting is C-. D - Descope Local Labels The default setting for this option is D- but if it is set to D+, local labels will be descoped if an EQU or SET directive is encountered. E - Error Text Printing If this option is enabled, the text of the line which caused an Assembler error will be printed together with the host file name and line number. The default setting for this option is E+. L- Local Label Signifier Local labels are signified by a preceding AT sign ( @ ). This option allows the use of the character following the option letter as the signifier. Thus, L: would change the local label character to a colon (:). L+ and L- are special formats that toggle the character between a dot (+) and an @ sign (-). The default setting is L-. W - Print warning messages When this option is set to the default setting of W+, the Assembler will identify various instances where a warning message would be printed but assembly will continue. Disabling the W option will suppress the reporting of warning messages. WS - Allow white spaces The default setting for this option is WS- but if it is set to WS+, operands may contain white spaces. Thus, the statement: dc.l 1 + 2 defines a longword of value 1 with WS set Off, and a longword of value 3 with WS set to On. Psy-Q Development System X - XREFs in defined section The default setting for this option is X- but if it is set to X+, XREFs are assumed to be in the section in which they are defined. This allows optimisation to absolute word addressing to be performed provided that the section is defined with the WORD attribute or is in a Group with the WORD attribute. # - Use # for literals (SH2 only) The default setting for this option is #- but if it is set to #+, # is used to indicate a literal pool instead of the default = with the SH2 Assembler. As a result, the ## characters have to be used in front of immediate values. OP - Optimise PC Relative Switches to PC relative addressing from absolute long addressing if this is permissible in the current code context. OS - Optimise Short Branch Optimisation Backwards relative branches will use the short form if this is permissible in the current code context. OW - Optimise Absolute Long Addressing If the absolute long addressing mode is used but the address will only occupy a word, the Assembler will switch to the short form. If a size is specified no optimisation will take place, thus: move.w d0(fred) .1 will be left as absolute long. OZ - Optimise Zero Displacements If the address register is used with a zero displacement, the Assembler will switch to the address register indirect mode. OAQ, OSQ and OMQ - Optimise to Quick Forms When these options are enabled, provided that it is permissible in the current code context, all ADD, SUB and MOVE instructions are coded as quick forms. Psy-Q Development System PUSHO and POPO Description The PUSHO directive saves the current state of all the assembler options; POPO restores the options to their previous state. They are used to make a temporary alteration to the state of one or more options. Syntax PUSHO POPO See Also OPT Examples SetAlts SETALTS pusho opt ws+, c+ = dc.w height * time 256 * SetAlts popo LIST and NOLIST Description Syntax The NOLIST directive turns off listing generation; the LIST directive turns on the listing. NOLIST LIST indicator where indicator is a plus sign (+) or a minus sign (-). Psy-Q Development System Remarks • If a list file is nominated, either by its inclusion on the Assembler command line, or in the Assembler’s environment variable, a listing will be produced during the first pass. • The Assembler maintains a current listing status variable, which is originally set to zero. List output is only generated when this variable is zero or positive. The listing directives affect the listing variable as follows: • • • • Examples Note NOLIST sets it to -1; LIST, with no parameter, zeroises it; LIST + adds 1; LIST - subtracts 1. Directive Status Listing produced? nolist list list list list list + list + -1 -2 0 -1 -2 -1 0 no no yes no no no yes In the following circumstances, the Assembler automatically suppresses production of listings: • during macro expansion; • for unassembled code because of a failed conditional. These actions can be overridden by: • including the /M option on the Assembler command line to list expanding macros; • including the /C option on the Assembler command line to list conditionally ignored code - see Command Line Syntax, chapter 2. Psy-Q Development System INFORM and FAIL Description The INFORM directive displays an error message contained in text which may optionally contain parameters to be substituted by the contents of expressions after evaluation. Further Assembler action is based upon the state of severity. The FAIL directive is a pre-defined statement, included for compatibility with other Assemblers. It generates an “Assembly Failed” message and halts assembly. Syntax INFORM severity,text[,expressions] FAIL Remarks • These directives allow the programmer to display an appropriate message if an error condition is encountered which the Assembler does not recognise. • Severity is in the range 0 to 3, with the following effects: 0 : the Assembler simply displays the text; 1 : the Assembler displays the text and issues a warning; 2 : the Assembler displays the text and raises an error; 3 : the Assembler displays the text, raises a fatal error and halts the assembly. • Examples Text may contain the parameters %d, %h and %s. They will be substituted by the decimal, hex or string values of the following expressions. TableSize equ MaxTable equ if inform inform endif TableEnd-TableStart 512 TableSize>MaxTable 0,"Table starts at %h and& is %h bytes long",& TableStart,TableSize 3,"Table Limit Violation" Psy-Q Development System XDEF, XREF and PUBLIC Description If several sub-programs are being linked, use XDEF, XREF and PUBLIC to refer to symbols in a sub-program which are defined in another sub-program. Syntax XDEF XREF.size symbol[,symbol] symbol[,symbol] PUBLIC PUBLIC on off Remarks Examples • In the sub-program where symbols are initially defined, the XDEF directive is used to declare them as externals. • In the sub-program which refers the symbols, the XREF directive is used to indicate that the symbols are in a another sub-program. • The Assembler does not completely evaluate an expression containing an XREFed symbol; however, resolution will be effected by the linker. • The PUBLIC directive allows the programmer to declare a number of symbols as externals. With a parameter of on, it tells the Assembler that all further symbols should be automatically XDEFed, until a PUBLIC off is encountered. Specifying a size of .w on the XREF directive indicates that the symbol can be accessed using absolute word addressing. Sub-program A contains the following declarations : xdef Scores,Scorers ... The corresponding declarations in sub-program B are: Origin Force Rebound xdef xref ... PointsTable Scores,Scorers public = dh dh public on MainChar speed*origin 45*angle off Psy-Q Development System GLOBAL Description Syntax The GLOBAL directive allows a symbol to be defined which will be treated as either an XDEF or an XREF. If a symbol is defined as GLOBAL and is later defined as a label, it will be treated as an XDEF. If the symbol is never defined, it will be treated as an XREF. GLOBAL symbol[,symbol] See Also XREF, XDEF, PUBLIC Remarks This is useful in header files because it allows all separately assembled sub-programs to share one header file, defining all global symbols. Any of these symbols later defined in a sub-program will be XDEFed, the others will be treated as XREFs. Psy-Q Development System Psy-Q Development System C H A P T E R 10 Adapter Firmware Debugger stub services include fileserver functions which allow the Saturn to access files on the host machine’s hard disk as well as some specific Debugger functions. These fileserver functions are also accessible as ‘C’ callable functions and the pollhost function as a ‘C’ macro, provided by the default library LIBSN.LIB. These facilities are discussed in the following two sections: • • ‘C’ Library Functions Assembly Language Facilities Psy-Q Development System The ‘C’ Library Functions The following are provided by LIBSN.LIB and declared in LIBSN.H. The majority are fileserver functions but there is also one macro to provide feedback for the Debugger. pollhost PCinit PCopen PClseek PCread PCwrite PCclose Psy-Q Development System The Pollhost Macro Description This causes the target box to poll the host PC, allowing access to the target memory when it is running, i.e. not single stepping. These periodic calls enable the Debugger to display and edit memory and allow intervention to stop/step/trace the target program. Syntax pollhost is defined as a macro: #define pollhost() asm(“trapa #33”)/* Ox0400 */ so its syntax is obvious: pollhost() Remarks A macro is used so the call is inline; this preserves the variable scope. This macro should be included in the user source code for the Debugger to operate correctly. It is responsible for transferring data to the host Debugger, so should be put in the main loop or the vertical blank interrupt of the program to be debugged. This call takes time to transfer the data; if however, updates are turned off or the Debugger is exited, the call will return immediately. A suitable Poll rate would be 25 to 100 times a second. The poll call may sensibly be placed in the program's main loop or in the VBL interrupt handler. The Poll call takes very little time if the host is not requesting or sending any data. If the host requests access to the target memory then the call will take a little longer. Note: Poll host is not necessary for NMI modified Saturns, including Saturn CDEmulators. Psy-Q Development System The PCinit Function Description This function re-initialises the host filing system, closes open files etc… Prototype int PCinit (void) passed: return: void error code (0 if no error) Psy-Q Development System The PCopen Function Description This function opens a file on the host machine. Prototype int PCopen (char *name, int flags, int perms) passed: PC file pathname open mode (0=read access, 1=write access, 2=read/write access) permission flags this should be set to 0 return: file-handle or -1 if error Psy-Q Development System The PClseek Function Description This function seeks the file pointer to the specified position in the file. Prototype int PClseek (int fd, int offset, int mode) passed: file-handle seek offset seek mode (mode 0=rel to start, mode 1=rel to current fp, mode 2=rel to end) return: absolute value of new file pointer position Remarks To find the length of a file which is to be read into memory, perform: Len = PClseek( fd, 0, 2); This will set Len to the length of the file and can then be passed to PCread(). Psy-Q Development System The PCread Function Description This function reads a specified number of bytes from a file on the host machine. Prototype int PCread (int fd, char *buff, int len) passed: file-handle buffer address count return: count of number of bytes actually read Remarks Unlike the assembler function this returns a full 32 bit count. PCread should not be passed extreme values of count, as could be achieved on a UNIX system, as this will cause the full amount specified to be transferred i.e. not just to the end of the file. To find the length of a file and read it into memory, perform: Len = PClseek( fd, 0,2); PClseek( fd, 0,0); Num = PCread( fd, buff, Len); Note: You must PClseek back to the beginning of the file before you try to read from it. Psy-Q Development System The PCwrite Function Description This function writes the specified number of bytes to a file on the host. Prototype int PCwrite (int fd, char *buff, int len) passed: file-handle buffer address count return: count of number of bytes actually written Remarks Unlike the assembler function this provides for a full 32 bit count. Psy-Q Development System The PCclose Function Description This function closes an open file on the host. Prototype int PCclose (int fd) passed: file-handle return: negative if error Psy-Q Development System The PCcreat Function Description This function creates a new file on the host. Prototype int PCcreat (char *name, int perms) passed: PC file pathname, permission flags return: file-handle or -1 if error Psy-Q Development System Assembly Language Facilities The adapter firmware provides some useful functions which can be accessed from the SH2 cpus via TrapA calls. These functions allow user software to interact with the adapter downloader firmware and to change the configuration of the adapter firmware. Also, there are a few duplicate functions accessed via the 68000 LineA interface, that is, 68000 instructions with opcodes $Axxx. In most cases, the default configuration is adequate and programmers will mainly be interested in the Poll Host calls (TrapA #$21 and dc.w $A000). TrapA calls The following functions are currently supported on the SH2s:- TrapA #$21 - Poll the Host PC. TrapA #$22 - Soft Re-Entry to firmware downloader program. This has the effect of stopping execution of the user program at the next instruction after the TrapA. Control is returned to the adapter downloader firmware which will sit idle, awaiting commands from the host. This allows insertion of temporary pause points so that results can be examined in the Debugger; simply pressing the run button allows the program to continue from that point. Opcodes The following functions are currently supported on the 68000:- Opcode $A000 - Poll the Host PC. Opcode $A003 - Soft Re-Entry to firmware downloader program. Psy-Q Development System Fileserver Functions The target adapter also contains software to provide fileserver functions. These are accessed via TrapA #$23 on the Master SH2. Note that most functions return -1 in r0 when a failure occurs. A standard error code can be fetched by calling TrapA #$23 with r0 still containing -1. The file error code will be returned in r0. TrapA #$23 calls The following functions are supported on the Master SH2:- Initialise remote filing system: This function resets the disk system of the host ready for a new session. All remoteopened files are closed. Passed: r0.l 0 Passed: r0.l r4.l r5.l 1 Pointer to filename string (null terminated) File mode (0=Normal) Returns: r0.l File handle (-1 if failure) Passed: r0.l r4.l r5.l 2 Pointer to filename string (null terminated) File mode (0=ReadOnly, 1=WriteOnly, 2=Read/Write) Returns: r0.l File handle (-1 if failure) Passed: r0.l r4.l 3 File handle Returns: r0.l -1 if failure Create file: Open file: Close File: Psy-Q Development System Read bytes from file to memory: Passed: r0.l r4.l r5.l r6.l 4 File handle Address of memory buffer No of bytes to be read from file Returns: r0.l No of bytes actually read (-1=failure, 0=end of file) Write bytes from memory to file: Passed: r0.l r4.l r5.l r6.l 5 File handle Address of memory buffer No of bytes to written from buffer Returns: r0.l No of bytes actually written (-1 if failure) Move File Pointer (seek): Passed: r0.l r4.l r5.l r6.l 6 File Handle Offset Seek Mode Returns: r0.l New Absolute File Position (-1 if failure) If r6.l =0 then seek is relative to start of file; If r6.l =1 then seek is relative to current file pointer; If r6.l =2 then seek is backwards from the end of the file. Get File Error Code: Passed: r0.l -1 Returns: r0.l File Error Code The file error codes returned match the C standard error codes defined in the <errno.h> header. Psy-Q Development System C H A P T E R 11 The DBUGSAT Debugger DBUGSAT is a full source level Debugger, as well as a traditional symbolic Debugger. This allows source code to be viewed, run and traced, stepped-over, breakpoints set and cleared. The original symbolic debug facilities are all still available. A source level display will revert to a symbolic disassembly, when no source level information is available. The following Debugger topics are discussed in this chapter: • • • • • Command Line Syntax Configuration Activity Windows Debugger Options Menu and Keyboard Usage At the end of the chapter a short ‘tour’ of the Debugger provides a guide to its most important features; use this in conjunction with the included sample C program. Psy-Q Development System Debugger Command Line Syntax DBUGSAT [switches] [filename [filename...]] DBUGSAT ? displays a help message. Remarks Filename specifies the name of a file containing symbols, produced by using the /zd option during assembly. If no extension is shown, a default extension of .SYM will be added. Multiple filenames are allowed and must be separated by a space - the symbol files will then be loaded in the order specified. Switches /c- Turn case sensitivity OFF (+ for ON) /d Disable automatic run-to-main at C program start-up. /efile[,file,file] Load target machine with CPE file(s). /f$xxxxxxxx Find line number and file for address $xxxxxxxx. /h Halt target machine when Debugger starts. /i### Specify update interval (in 1/18ths sec). /m# Sets the Debugger mouse sensitivity; # is a number between 1 to 4 - default is 3. DBUGSAT drives the mouse itself. This overcomes some shortcomings exhibited by the Microsoft Mouse driver, particularly in 132 column mode. /m+ Use the current system mouse driver; later versions of the Microsoft drivers (8 upwards) allow the mouse to be used in a DOS window. /m- Revert to DBUGSAT mouse driver. Psy-Q Development System /r## Specify data screen rows in video bios. /R Use alternative mnemonics in register window. /sfile Override default configuration filename. /t# Set target SCSI device number (override default setting). /u- Turn continual update mode OFF (+ for ON). /vexprtext Evaluate expression text and put result to standard output device. /&expr,.. expr List of parameter expressions, separated by commas. Remarks • Source level mode can be used if a suitable Symbol File is specified on the command line. This file contains symbols and additional source level information produced by the /zd option in the Assembler - see chapter 2.. See chapter 11 - for more about source level debugging. • Expressions passed to the Debugger using the /& switch can be referred to from inside the Debugger in the form &0, &1, etc., where 0 means the first expression on the command line, 1 means the second etc. Psy-Q Development System Configuration Files When DBUGSAT is loaded, it accesses a Configuration File, containing information about the current Debugger environment. The current configuration can be saved at any time during an active Debugger session. The default filename can be overridden with an option on the command line (/s) or at run-time, so that the most frequently used configurations are always readily available. Configuration File Names • The normal Configuration File name is DBUGSAT.C##, where the first number is the target SCSI ID number, and the second number is the virtual screen. Typically, therefore, the configuration loaded at start-up is DBUGSAT.C00. • If that file is not located the Debugger will look for a suitable defaults file; the current directory will be searched for a default filename built from the target name string. This will typically be DBUGSAT.CFG. Contents of Configuration File A Configuration File can include the following information: • • • • • • • • • Read Memory Ranges; Write Memory Ranges; Video type and usage; Label Level; Colour and Mono attributes; Default Tab Settings for various filetypes; Window Type and Display position; Breakpoints; History details. Psy-Q Development System Activity Windows The Debugger display consists of one or more activity windows. The number of windows, the contents of each window and the window size, can all be specified at run-time. The default display consists of two windows; the upper one normally contains a display of the registers, the lower window shows the disassembly of the target program code. The Debugger can run up to 10 virtual screens; each screen has its own configuration file - see chapter 11. Alternate screens can be accessed by pressing Alt-n, where n is the screen number 0 - 9 and 0 means screen 10. The Debugger Display, with Register and Disassembly Windows Psy-Q Development System Window Types The Register window provides a complete view of the selected processor's registers. Register contents can be changed by: • • Typing directly at the current cursor location or Entering an expression by pressing the ENTER key to display an Expression Input window. The Disassembly window shows the contents of the target memory as disassembled code. If a Symbol File has been loaded into the Debugger, symbol names are substituted as appropriate. Breakpoints (optionally with conditions and counts) can be added to any line and the code run, traced or stepped. The Debugger, with display in Register and Hex Mode Psy-Q Development System If the PC of the target machine is pointing at a line in the current disassembly display, it is indicated by a greater than sign (>). If a line contains a breakpoint, that line is displayed in a different colour; the breakpoint count and expression details are shown at the end of the line. The Hex window displays memory in hexadecimal, either in byte, word or long word form. Like the Register window, the contents can be changed by any of the following methods: • • • Typing directly at the current cursor location Entering an expression for evaluation by pressing the ENTER key to display an Expression Input window Pressing + or - to increment or decrement the value at the cursor position The Debugger, with Source, Variable and Watch display Psy-Q Development System The Watch and Variable windows allow variables, tables and code locations to be monitored as your program is running. The Variable window automatically tracks the scope of your C program. As you trace though your program and the variable scope changes, this window will always display the current local variables. The up and down arrow keys and pg-up and pgdown allow you to scroll the window to see all your variables. The Watch window performs a similar function for user specified expressions and is typically used to display global variable data. You can enter all your global variables in this window by pressing Alt-G. Specific C or Assembler expressions (global and local) can be entered at the cursor position by pressing INSert. Conversely, entries can be deleted using DELete. All entries in a Watch window are saved when you exit and restored the next time you run the Debugger. In both the Var and Watch windows pointers and arrays can be de-referenced and structures, unions and enums can be opened up for closer examination, by placing the cursor over the relevant entry and pressing '+' from the numeric keypad. They can be subsequently closed by pressing '-'. This will even work for local register structures within unions within structures etc. The Text or File window allows a text file to be viewed directly. Within a File window you can change to a different text file by pressing ENTER. The Debugger will then request the name of the new file to load. The Source Level window is an extension of the File window. Most source level key commands are the same as for a Disassembly window. To enter source mode, tell the File window to display program source at a particular address. The easiest way to do this is to hit the TAB key. As in a Disassembly window this causes the window to locate to the current program counter address; if the Debugger has source level information for that part of your program it will display corresponding source code. Alternatively you can enter source mode by typing Alt-G (for Goto location) and then entering the address you wish to locate to (any expression or Assembly language label name or a C function name - such as main will do fine). Note that in Source mode, line numbers are added to the left side of the window display and the PC line is indicated with a '>' after the line number, similar to a Disassembly window. If you wish to view text which is truncated off the right side of the window then the window can be scrolled to the left and right using the left and right cursor keys. Psy-Q Development System You can step, trace, run to cursor and set breakpoints in the source code in much the same way as a for Disassembly window. The cursor in the currently active text window will track the PC during a trace. Note, however, that unlike tracing in a Disassembly window, a trace at Source Level may trace more than one instruction as it will trace the entire source line, which, if it is a macro or a 'C' source line, may correspond to the execution of one or more instructions. Similarly F8 (Stepover) will step-over the entire source line, which could be equivalent to stepping over several subroutine calls. If you are unsure of how a Source Level operation will behave, a Disassembly window can be viewed at the same time to determine how the operations correspond to actual processor instructions. If you attempt to step into a C function or Assembly language subroutine for which the Debugger does not have any source level information then the Debugger will attempt to perform a step-over operation instead. If this is not possible (e.g. if the code without source level information is jumped to rather than called), then the window display will switch to Disassembly mode. The trace can be continued and when the PC returns to a region for which there is Source information, the window will switch back to the Text display. In order to use any of the Source Level features you must have the necessary extra debugging information in your Symbol File(s). If it is not present then the Debugger will be unable to switch to Source mode and Source Level operations will produce appropriate error messages. This information is added to the Symbol Files by the C compiler if you add the -g switch to your CCSAT command line or by the Assembler if you specify the /zd switch on the ASMSAT command line. The Symbol File normally contains the full original pathnames of all files used to build your project. When Source Level debugging the Debugger will attempt to load those files from the same locations. In some cases this may not be convenient e.g. if part of the project was built by another developer on a different PC or on a network drive; even if you have a copy of the appropriate Source Files you may not have them at the same location. To get around this you can provide the Debugger with a search patch for Source Files. To do this just select a Source File window and type Alt-P. You will be prompted to enter a normal DOS search path. This search path can contain many entries and be as long as you wish. e.g. c:\;c:\temp\myfiles;c:\gnumips\src\common Psy-Q Development System The Debugger will first look for the file in the directory specified in the Symbol File (determined when the project was built). If it cannot locate the file at the original location then it will search for it by name at the following locations:c:\filename.sym c:\temp\myfiles\filename.sym c:\gnumips\src\common\filename.sym The first filename match located will be assumed to be the correct Source File. The search path will be saved in the Debugger Configuration File when you exit the Debugger. To remove an existing search path just specify a blank search path string. Psy-Q Development System Additional Debugger Features Automatic Overlay Support allows the Debugger to dynamically track overlays as they are loaded into your program and work with the Source Files and variables specific to that overlay. This requires no modification to your Source Code at all. You only need to tell the Linker which files will overlay in memory. Any number of concurrent overlays are supported over multiple memory areas. A simple overlay is included with the Psy-Q software. Big Text Screens allow you to view as much information as possible by working in a higher text resolution. This is achieved by putting the text screen in the required resolution before running the Debugger. At least 80x50 is recommended but the Debugger will happily work in higher text resolutions up to 132x66. Most modern VGA cards are capable of 132 column text modes and come with a utility to set such resolutions. Psy-Q also includes the BV.EXE program which will take any screen mode and adapt it to 30, 32, 60 or 64 lines. Use the /r50 debugger command line switch if you prefer to edit at 80-25 but debug at 80x50. Multiple Text Screens are available when a single 132x64 screen is not enough to display all your debug information. Up to 10 virtual screens can be used; switch between them by pressing Alt-n (where n is a digit 1,2,3,4,..0). The configuration at each screen is saved when you switch and restored when you switch back; these configurations are also saved when you exit the Debugger. Name Completion is provided by all prompts where C or Assembler labels are entered. Type the first few letters of the name and press Ctrl-N. If the required label does not appear, repeat Ctrl-N to ‘toggle’ through the alternatives. This facility also works for a name in the middle of an expression. Prompt Histories are provided to allow you to select from your history of prior entries. This information is saved when you exit the Debugger and restored for your next debugging session. CPU Hardware Breaks can be used to cause the CPU to stop when a specific memory location is read from or written to. Hardware breaks can be accessed by typing Alt-B. Note that C or Assembler syntax can be used with this facility. In Assembler mode you will be prompted for a mask value. This mask has 1 bit to enable, therefore a mask value of -1 ($FFFFFFFF) will be the usual value to trap one particular address. In C mode you only need to enter the name of your C variable; the Debugger will automatically calculate the correct address and mask value. Psy-Q Development System Using Debugger Windows The following key strokes and mouse actions allow the programmer to exercise control over the Debugger display - note that a complete list of all key options is given later in the chapter. Moving Between Windows Use one of the following methods to move between Debugger windows: • • • Press F1, followed by an up or down cursor key to point to the required window Press Shift, plus up or down cursor key Point and click at the required window Selecting The Window Type Use one of the following methods to change the type of the current window: • • Use the mouse to select the SET TYPE option from the WINDOW menu Press Shift and F1 In each case a selection window is presented. To choose the new type - use the mouse, type the initial letter or press the TAB key then ENTER. Re-Sizing Windows To change the size of a Debugger window: 1. Position the cursor in the required window 2. Press F2 3. Use the up or down cursor key to move the selected window edge to the desired size 4. Press ENTER to confirm Press Ctrl-Z to re-present the original display. Psy-Q Development System Splitting An Existing Window To add another window to the display: 1. Position the cursor in the required window 2. Press F3 3. Press a cursor key to specify the location of the new window Note that the new window is the same type as the source window. Joining Two Windows To remove a Debugger window: 1. 2. 3. 4. Position the cursor in the required window Press F4 Use the up or down cursor key to select the window edge to be removed Press ENTER to confirm Moving The Cursor Within A Window You can position the cursor by clicking at the new location with the left mouse button. The cursor control keys also allow the re-positioning of the cursor in the selected window, as follows: • Register Window - Use the four arrow keys to move between register values; the HOME key positions the cursor in the top left register field. • Watch and Register Windows - Use the four arrow keys to move between adjacent lines and characters; the HOME key positions the cursor in the top left character position. • Disassembly and Text Window - Use the up and down arrows to move the highlight bar; the HOME key moves the line under the cursor to the top of the window. • Hex Window - Use the four arrow keys to move between adjacent lines and bytes/words; the HOME key moves the byte/word under the cursor to the top left of the window. Psy-Q Development System Locking A Window A window can be locked to dynamically display a specific memory region, by: • Pressing Alt-L and entering an address or an expression which evaluates to an address in the input box; • Selecting the LOCK option from the WINDOW menu; • Pressing Ctrl-L to turn the lock on and off. • Locking a display to the expression &0; this allows the Debugger to be started with a window pointing to an address or label specified on the command line - see chapter 11. If a lock expression is set, but de-activated by Ctrl-L, the Debugger will start-up with the display initially positioned at the lock address, but the window start can subsequently be changed with the cursor keys etc. as normal. General Mouse Usage • Clicking the left mouse button re-positions the cursor at the site of the click. If the new position is in another window, this will become the active window. • Clicking the right mouse button on a register in the Register window will open an Expression Input box. • Clicking the right mouse button on a memory field in the Hex window will open an Expression Input box. • Clicking the right mouse button on a line in the Disassembly window toggles a breakpoint. • A window can be re-sized by clicking the left mouse button on a window edge and dragging it to the new position. • Dragging a window border to the edge of the window deletes the window. Psy-Q Development System Keyboard Options The following table is a complete list of keyboard options, categorised by function. Many of these functions are duplicated by Menu options. Expressions At many points in the session, the Debugger will prompt for input - this can often take the form of an expression for evaluation. Expressions in the Debugger follow the same rules as the Assembler (see chapter 3), with the following exceptions: • • • • Prompts Assembly language expressions may contain processor registers. The Debugger assumes a default radix of hexadecimal, therefore, decimal numbers must be preceded by a # sign. Indirect addresses are indicated by square brackets [ ]. When the Debugger gets an indirect datum, it assumes a (32 bit) long word; this can be overridden by using the @ sign together with b or w following the square bracket. Each time that the Debugger requests input the reply is stored. These stored prompts form a history which can be accessed (and then edited) at data entry time via the up and down arrow keys. Note that, when the Debugger closes, the last ten historic entries in each class are stored in the Configuration File, and restored the next time that the Debugger is executed. Leaving The Debugger Ctrl-X Alt-X Alt-Z Exit Debugger, without saving the current configuration Exit the Debugger and save the current configuration Exit to DOS shell; type EXIT to return to the Debugger Window Handling F1 F2 F3 F4 Shift-Arrows Ctrl-Z Shift-F1 Move to next window Re-size Window Divide Window into two Delete Window Move to selected Window Zoom current Window; again to restore original display Select Window Type Psy-Q Development System Debug Control Ctrl-F2 Esc Shift-Esc Alt-R Alt-I Alt-U F6 F7 F8 F9 Shift-F9 Re-download your CPE file to target and re-set PC Halt the target, at first opportunity Halt the target, turning off interrupts Restore Registers from previous Save Set the update interval; the interval is input in 18ths of a second, therefore, 18 means once a second, 9 means twice a second, etc Toggle auto-update mode on or off Run Target code until the instruction under the cursor is reached Trace current instruction (or source line if in text display window) Step-over current instruction; (as F7 but call instructions are stepped over) Run target code from current program location Set temporary breakpoint at user specified address and run from current location File Accessing < > Shift-F10 Upload memory from the target to a named file on the PC Download a file from the PC to the target memory Load a new configuration file Miscellaneous F10 Alt-H Alt-D Alt-n Alt-N Select a Menu Option Hex Calculator; enter an expression to be evaluated Display the amount of free memory Switch to Virtual Screen n (1 - 9 plus 0= 10). Label Continuation; enter first few letters from a label and press Alt-N to find first match. Repeated Alt-N cycles through all matches. Psy-Q Development System Disassembly Window Up/Down Left/Right PgUP/Dn Home Alt-G Tab Shift-Tab Alt-L Ctrl-L Ctrl-D Ctrl-S Ctrl-N Move highlight bar Move display by one word Move display by a page Move display so that the highlighted line is at the top Go to address specified in input window Move the highlight bar to the Program Counter address Make the Program Counter the same as the currently highlighted address Lock the display to a specified address Toggle Lock on or off Disassembly memory to a PC text file Search for a particular instruction fragment (as text, space as separator) Continue search File and Source Windows Tab Alt-G Alt-T Ctrl-S Ctrl-N Alt-P Locate address of current PC and display corresponding source code Locate source display to specified address Override default tab settings for this window (prompts for a list of tab positions) Search for a text string Continue search Specify source-file search path Breakpoints Alt-C Ctrl-C F5 Shift-F5 Shift-F6 Enter condition for the highlighted breakpoint Enter count for the highlighted breakpoint Turn highlighted breakpoint on or off Clear all current breakpoints Reset all current breakpoint counts Psy-Q Development System Hex Window Arrows PgUp/Dn Home Alt-W ENTER 0-9, A-F + Alt-G Alt-F Ctrl-S Ctrl-N Move to adjacent byte/word/long word Move display by one page Move display so that currently highlighted byte/word/long word is at the top Switch display between byte, word and long word Change contents of current location to the result of an expression; entered in an input window Directly change contents of highlighted location Increment contents of highlighted location Decrement contents of highlighted location Go to address specified in input window Move display to address contained in highlighted location Search for a hex (or text if started with “ character) string (prompts for a space separated list of bytes/words/longs) Continue search Register Window Arrows Home ENTER 0-9, A-F Move to next register Move to top left register Change contents of current register to the result of an expression; entered in an input window Directly change contents of highlighted register Watch Window Up/Down Home Ins Del + Tab Right/Left Move to next watch expression Move to top watch expression Add a new watch expression Delete the highlighted watch expression Opens information on the data under the cursor (structure, array etc.) or de-references the data if it is a pointer Closes expanded information Changes the result display format of a C expression under the cursor Increments/Decrements array index under the cursor (currently only if not expanded with +) Psy-Q Development System Var Window Up/Down Home Ins Del + Tab Right/Left <> Move to next watch expression Move to top watch expression Add a new watch expression Delete the highlighted watch expression Opens information on the data under the cursor (structure, array etc.) or de-references the data if it is a pointer Closes expanded information Changes the result display format of a C expression under the cursor Increments/Decrements array index under the cursor (currently only if not expanded with +) (Also comma and dot) Crawls up and down the stack, adjusting the scope of current debugger display to that of calling functions. Top level is a ‘C’ callstack display. ‘C’ Callstack Display > Enter (Also dot) Return to current scope Display the variables of the scope under the cursor. Psy-Q Development System Menu Options The DBUGSAT menu affords easy mouse access to some of the commonest Debugger functions. Note that if no mouse is available, the Menu can still be accessed by pressing F10. FILE Reload Down Upload Disassemble Exit to DOS Exit Debugger Reload the last executable file Download Load a file to the Target Upload specified data from the Target to a named file on the PC Send specified section of Disassembly to a named PC file Exit to DOS shell; type EXIT to return to the Debugger Exit the Debugger and save the current configuration RUN Go Stop To Address Backtrace Run Target code from the current Program Counter Halt the Target machine, turning off all interrupts Run to address specified in input window This function provides an UNDO of the updates effected by the latest trace (the Debugger keeps a record of about 200 instructions, depending on their content). Notes: Updates to certain write Registers in the target machine and memory areas designated as write only, cannot be undone. WINDOW Set Type Lock Print Set Tabs Select Window Type Lock the display to the address entered in an input window Output screen to system printer Enter up to 8 tab positions - in decimal separated by spaces Note: The Set Tabs function is only relevant to File and Source Disassembly windows. CONFIG Load Save Load a new configuration file Save the current configuration to the specified file Psy-Q Development System CPU Save Regs Reset Regs Reset Save the current state of the registers Reload the previously saved register state Reset the Target Processor STEP Trace Mode; traps and Line A calls are stepped over STEPOVER Stepover Mode; subroutine calls and DBRA instructions are stepped over. Multiple Units Description The Saturn has a number of different CPUs. These are accessible as different unit numbers on the same SCSI target ID. In the Sega Saturn, the Master SH2 is Unit 2, the Slave SH2 is Unit 1 and the 68000 is Unit 2. While running the Debugger, press Alt-T to cycle between the different CPUs. While connected to one unit, all Debugger processing of the other units is suspended. The other units can run but interaction with the host PC is not possible until that unit is selected. Switching units in this way saves the current Debugger settings for that unit, i.e. windows set-up, breakpoints and Symbol Files. To aid readability of the displays when viewing multiple units, the Debugger supports up to 10 virtual screens; each screen has its own configuration file. At start-up, all Symbol Files will be loaded and correctly referenced depending on the unit number being viewed. To effect this, the Assembler writes the unit number into the Symbol File. Psy-Q Development System The Link Software The adapter hardware contains software in ROM to enable it to communicate with the host PC. In addition, this ROM contains code to perform some functions which maybe useful in the development stages of a product. The Target interface software hooks the following 68000 exception vectors by default: 68000 Vector 2 3 4 5 6 7 8 9 10 Location $0008 $000C $0010 $0014 $0018 $001C $0020 $0024 $0028 Meaning Bus Error has occurred Error in Address found Illegal Instruction found Divide by Zero CHK exception TRAPV exception Privilege violation Trace exception Line-A Vector In particular, the Illegal Instruction and Trace Vectors are necessary for the correct function of the Debugger; the Line-A Vector is used to provide various user functions. The Target interface software also hooks the following SH2 exception vectors by default: SH2 Vector 32 33 34 35 Location VBR+32 VBR+33 VBR+34 VBR+35 Type Trap Instruction Trap Instruction Trap Instruction Trap Instruction VBR is the Vector Base Register. The application software should not attempt to modify any of these vectors. Psy-Q Development System Debugging Your Program Using Psy-Q To get you started with the Psy-Q DOS Debugger, this section provides a quick guide to some of its most important features. Follow this on-line with the simple C program SAMPLE.C (included with the software) and experiment with the Debugger commands. Due to the confidential nature of the information subject to a Sega developer’s license, we cannot provide example Saturn source code. This sample program does not refer to confidential Saturn hardware details; the intention is merely to demonstrate some of the Debugger features. To build the demo, change into the SAMPLE directory and compile the program SAMPLE.C by entering the following command line: ccsh -g -O0 -Xo$6010000 sample.c -osample.cpe,sample.sym This calls the CCSH program to compile the C source. The -g switch tells CCSH to produce full debugging information (necessary for Source Level debugging). The -o switch specifies the output filenames. This example will output the executable file SAMPLE.CPE and the Symbol File SAMPLE.SYM. At this stage you could execute the .CPE File by entering: RUN SAMPLE This would not be very useful however, as this example does not produce any Saturn display; therefore, in order to examine the code you must debug the sample using DBUGSH. Start the Debugger by entering the following command line: DBUGSH sample /e In this case, ‘sample’ specifies the name of the Symbol File. The /e switch causes the Debugger to also load the .CPE File (default = same name as the Symbol File but with a .SYM extension). Psy-Q Development System The Debugger will now start up and present the default layout. This is divided into two windows; the top will show the CPU Registers whilst the second will be a Disassembly display. If however, the Debugger finds a standard Psy-Q C start-up, it will automatically run the program to the start of the C function main( ) and switch to C source mode; the lower window will then display this source code. CPU Register and Source Windows If the Source window is not already displayed, select it by: • • Clicking the lower window with the mouse or Pressing Shift and a cursor key to change to an adjoining window From this window you can single step and set breakpoints in your source code. Psy-Q Development System To View Local Variables Split the current window by pressing F3 and down arrow. Change to the lower window (by Shift-arrow or clicking on it with the mouse) and then make this a VARiable window (Shift-F1, V). Now return to the Source window and press F7 several times until you trace into another function. As you trace through the program, notice that the variable scope changes and that the Var window always displays the current local variables. Source Window and Var Window showing Local Variables Psy-Q Development System To View Global Variables Create another window and set its type to Watch; now press Alt-G to enter all your global variables in this window. You can also enter specific C or Assembler expressions (global and local) at the cursor position by pressing INSert. Entries can be deleted using DELete. In both the Var and Watch windows, you can de-reference pointers and arrays or open up structures, unions and enums by placing the cursor over the relevant entry and pressing ‘+’ on the numeric keypad. Close them again by pressing ‘-’. Opened Up Structures In Watch Window Psy-Q Development System Useful Debugging Commands F5 - Toggle breakpoint at cursor (Source or Disassembly) F6 - Run to current cursor location (Source or Disassembly) F7 - Single step (Source or Disassembly) F8 - Step-over (i.e. break on next instruction or source line) F9 - Run ESC - Stop If your program is running around an endless loop and you have hardware interrupt support enabled (this requires an appropriate downloader version on the target), you can press ESC at any time to stop the target. If you do not have hardware interrupt support enabled, you can still stop the target if you have a pollhost ( ) call in a suitable location, for example your program main loop or a regular interrupt handler. For further details of the Debugger please refer to the earlier part of this chapter and keep an eye on the Psy-Q BBS for further updates. Psy-Q Development System C H A P T E R 12 The PSYLINK Linker The Psy-Q Linker PSYLINK is a fully-featured linker which works with all processor types. It facilitates the splitting of complex programs into separate, manageable sub-programs which can be recombined by PSYLINK into a final, single application. This chapter discusses the linker together with the Librarian utility, under the following headings: • • • • Command Line Syntax Linker Command Files XDEF, XREF and PUBLIC GLOBAL The Linker-associated Assembler directives are repeated here for ease of reference. Psy-Q Development System PSYLINK Command Line Description The PSYLINK link process is controlled by a series of parameters on the command line, and by the contents of a Linker command file. The syntax for the command line is as follows: Syntax PSYLINK [switches] objectfile(s),output,symbolfile,mapfile,libraries If a parameter is omitted, the separating comma must still appear unless it is the last parameter of the line. Switches Switches are preceded by a forward slash (/), and are as follows: /b Specifies that the linker should run in 'big' mode. This allows the linker to link larger programs but with a link-time penalty. /c Tells the linker to link case sensitive; if it is omitted, all names are converted to upper case. /d Debug Mode - perform link only. /e symb=value Assigns value to symbol. /i Invokes a window containing Link details. /m Output all external symbols to the map file. /n maximum Set the maximum number of object files, or library modules, that can be linked, 1 to 32768; default = 256 Higher values require larger amounts of memory. /o address Set an address for an ORG statement. /o ? address Request to Target to assign memory for ORG. /p Output padded pure binary object code; ORGed sections of code are separated with random data. (equivalent of /pb switch on assembler) /ps Output ASCII representation of binary file in Motorola s-record format. Psy-Q Development System /p20 and /p21 Output pure binary file in SNES mode 20 or 21. /r format Create operating specific output (am = Amiga). /u number Specify the unit number in a multi-processor target. /x address Set address for the program to commence execution. /z Clear all requested BSS memory sections. Objectfile(s) A list of object files, output by the Assembler using the /l option. File names are separated by spaces or plus (+) signs; if the file starts with an @ sign, it signifies the name of a Linker command file - See below for a description of the format. Output The destination file for the linked code; if omitted no output code is produced. If the output file name is in the format Tn:, the linked code is directly sent to the target machine - n specifies the SCSI device number. Symbolfile The destination file for the symbol table information used by the Debugger. Mapfile The destination file for map information. Libraryfiles Library files available - see The PSYLIB Librarian chapter for further information. Psy-Q Development System Linker Command Files Command files contain instructions for the Linker, about source files and how to organise them. The Linker command file syntax is much like the Assembler syntax, with the following commands available: Commands INCLUDE filename INCLIB filename ORG address WORKSPACE address name EQU value REGS pc=address name GROUP attributes name SECTION attributes SECTION name[,group] name ALIAS UNIT oldname unitnum Group attributes: BSS ORG(address) OBJ(address) OBJ( ) OVER(group) WORD FILE("filename") SIZE(maxsize) Specify name of object file to be read. Specify library file to use Specify ORG address for output Specify new target workspace address Equate name to value Set initial PC value Declare group Declare section with attributes Declare section, and optionally specify its group Specify an ALIAS for a symbol name Specify destination unit number group is unitialised data specify group's org address specify group's obj address group's obj address follows on from previous group overlay specified group (68000 only) group is absolute word addressable write group's contents to specified file specify maximum allowable size Remarks • Sections within a group are in the order that section definitions are encountered in the command file or object/library files. • Any sections that are not placed in a specified group will be grouped together at the beginning of the output. • Groups are output in the order in which they are declared in the Linker command file or the order in which they are encountered in the object and library files. • Sections which are declared with attributes, (i.e. not in a group) in either the object or library files, may be put into a specified group by the appropriate declaration in the Linker command file. Psy-Q Development System Examples comdata code bssdata include include include "inp.obj" "sort.obj " "out.obj" org regs 1024 pc=progstart group group group word section section datal,comdata data2,comdata section section codel,code code2,code section section tables,bssdata buffers,bssdata bss GLOBAL Description Syntax See Also The GLOBAL directive allows a symbol to be defined which will be treated as either an XDEF or an XREF. If a symbol is defined as GLOBAL and is later defined as a label, it will be treated as an XDEF. If the symbol is never defined, it will be treated as an XREF. GLOBAL symbol[,symbol] XREF, XDEF, PUBLIC Remarks This is useful in header files because it allows all separately assembled modules to share one header file, defining all global symbols. Any of these symbols later defined in a module will be XDEFed, the others will be treated as XREFs. Psy-Q Development System XDEF, XREF and PUBLIC Description If several sub-programs are being linked, to refer to symbols in a sub-program which are defined in another sub-program, use XDEF, XREF and PUBLIC. Syntax Remarks Examples XDEF XREF symbol[,symbol] symbol[,symbol] PUBLIC PUBLIC on off • In the sub-program where symbols are initially defined, the XDEF directive is used to declare them as externals. • In the sub-program which refers the symbols, the XREF directive is used to indicate that the symbols are in a another sub-program. • The Assembler does not completely evaluate an expression containing an XREFed symbol; however, resolution will be effected by the linker. • Specifying a size of .w on the XREF directive indicates that the symbol can be accessed using absolute word addressing. • The PUBLIC directive allows the programmer to declare a number of symbols as externals. With a parameter of on, it tells the Assembler that all further symbols should be automatically XDEFed, until a PUBLIC off is encountered. Sub-program A contains the following declarations : xdef xref.w ... Scores,Scorers PointsTable The corresponding declarations in sub-program B are: Origin Force Rebound xdef xref ... PointsTable Scores,Scorers public = dc.w dc.w public on MainChar speed*origin 45*angle off Psy-Q Development System C H A P T E R 13 The PSYLIB Librarian If the Linker cannot find a symbol in the files produced by the Assembler, it can be instructed by a Linker command line option to search one or more object module Library files. This chapter discusses Library usage and the PSYLIB library maintenance program: • • PSYLIB Command Line Syntax Using the Library feature Psy-Q Development System PSYLIB Command Line Description The Library program, PSYLIB.EXE, adds to, deletes from, lists and updates libraries of object modules. Syntax PSYLIB [switches] library module...module where switches are preceded by a forward slash ( / ), and separated by commas. See Also PSYLINK Switches /a Add the specified modules to the library /d Delete the specified module from the library /l List the modules contained in the library /u Update the specified modules in the library /x Extract the specified modules from the library Library The name of the file to contain the object module library. Module list The object modules involved in the library maintenance. Using the Library feature • To incorporate a Library at link time, specify a library file on the Linker command line - see chapter 12. • If the Linker locates the required external symbol in a nominated library file, the module is extracted and linked with the object code output by the Assembler. Psy-Q Development System C H A P T E R 14 The CCSH Build Utility CCSH is a build utility to execute the C Compiler, Assembler and Linker. CCSH makes use of the ASSH Assembler to process the assembly syntax produced by the GNU C Compiler. It is discussed in the following sections: • CCSH Command Line • Source Files Psy-Q Development System CCSH Command Line Description CCSH.EXE is a utility that simplifies the process of running the separate 'C' compiler passes and then assembling and linking the compiler output. Using CCSH you need only specify the input files and what output format you require, and then CCSH itself will execute the tools required to generate the output. Syntax CCSH [options / filename[,filename...]] The command line consists of a sequence of control options and source file names. Options are preceded by a minus sign (-), and filenames are separated by commas. Long command lines can be stored in separate control files. These can then be used on the command line by using a ‘@’ sign in front of the control file name. Options Control -E -S -c Debug -g... Pre-process only. If no output file is specified output is send to the screen. Compile to assembler source Compile to object file. If an output file is specified, then all output is sent to this file. Otherwise it saved as the source file name with an .OBJ extension. Generate debug information for source level debugging Optimisation -O0 No optimisation (default) -O or -O1 Standard level of optimisation -O2 Full optimisation General -W... Suppress all warnings -Dname=val Define pre-processor symbol name, and optionally to the value specified. -Uname Undefine the pre-defined symbol name before pre-processing starts -v Print all commands before execution -f... Compiler option -m... Machine specific option Psy-Q Development System Linker -llibname -X... -odestin Include specified library libname when linking Specify linker option Specify the destination. Either a file (e.g. prog.cpe), or target (e.g. t0:) can be specified See GNU C documentation for full description Example CCSH -v -g -Xo$6010000 main.c -omain.cpe,main.sym This example will execute the compiler to compile the source file MAIN.C ,then run ASSH to produce the object file and finally will run PSYLINK to produce an executable and symbol file (MAIN.CPE and MAIN.SYM respectively) ORGd to the specified address. The -v switch will cause CCSH to echo all commands it executes to stdout. The -g switch will request full debug info in the symbol file. CCSH @main.cf -omain This will force CCSH to use the contents of the MAIN.CF file on the command line, before the -o option. Psy-Q Development System Source Files The specified source files can be either C or assembler source files, or object files. CCSH decides how to deal with a source file based on the files extension. The following table describes how each file extension is processed: .C .I .CC .CPP .II .IPP .ASM .S .other Remarks Passed through C pre-processor, C compiler, Assembler, Linker Passed through C compiler, Assembler, Linker Passed through C pre-processor, C++ compiler, Assembler, Linker Passed through C pre-processor, C++ compiler, Assembler, Linker Passed through C++ compiler, Assembler, Linker Passed through C++ compiler, Assembler, Linker Passed through C compiler, Assembler, Linker Passed through Assembler, Linker Passed through Linker • The PC file system is not case sensitive and so the case of the extension has no effect. • Various command line switches can stop processing at any stage, eliminating linking, assembling or compiling. • The -x option can be used to override the automatic selection of action based on file extension. • Files with extensions that are not recognised are treated as object files and passed to the linker. This includes .OBJ files, the standard object file extension. • Several different source files, which may have different file extensions, may be placed on the command line. Psy-Q Development System C H A P T E R 15 The PSYMAKE Utility PSYMAKE is a make utility for MS-DOS which automates the building and rebuilding of computer programs. It is general purpose and not limited to use with the Psy-Q system. The utility is discussed under the following headings: • • Command Line Syntax Format of the Makefile Psy-Q Development System PSYMAKE Command Line Description PSYMAKE only rebuilds the components of a system that need rebuilding. Whether a program needs rebuilding is determined by the file date stamps of the target file and the source files that it depends on. Generally, if any of the source files are newer than the target file, the target file will be rebuilt. Syntax PSYMAKE [switches] [target file] or PSYMAKE @makefile.mak Switches Valid switch options are : /b /d name=string /f filename /i /q /x Build all, ignoring dates Define name as string Specify the MAKE file Always ignore error status Quiet mode; do not print commands before executing them Do not execute commands - just print them If no /f option is specified, the default makefile is MAKEFILE.MAK; if no extension is specified on the makefile name .MAK will be assumed. If no target is specified, the first target defined in the makefile will be built. Psy-Q Development System Contents of the Makefile The Makefile consists of a series of commands governed by explicit rules (dependencies) and implicit rules. When a target file needs to be built, PSYMAKE will first search for a dependency rule for that specific file. If none can be found PSYMAKE will use an implicit rule to build the target file. Dependencies: A dependency is constructed as follows : targetfile : [sourcefiles] [command ... command ] • The first line instructs PSYMAKE that the file "targetfile" depends on the files listed as "sourcefiles". • If any of the source files are dated later than the target file or the target file does not exist, PSYMAKE will issue the commands that follow in order to rebuild the target file. • If no source files are specified the target file will always be rebuilt. • If any of the source files do not exist, PSYMAKE will attempt to build them first before issuing the commands to build the current target file. If PSYMAKE cannot find any rules defining how to build a required file, it will stop and report an error. The target file name must start in the left hand column. The commands to be executed in order to build the target must all be preceded by white space (either space or tab characters). The list of commands ends at the next line encountered with a character in the leftmost column. Psy-Q Development System Examples main.cpe: main.68K inc1.h inc2.h ASM68K main,main This tells PSYMAKE that main.cpe depends on the files main.68K, inc1.h and inc2.h. If any of these files are dated later than main.cpe, or main.cpe does not exist, the command "ASM68K main,main" will be executed in order to create or update main.cpe. main.cpe: main.68K inc1.h inc2.h ASM68K /l main,main,main psylink main,main Here, two commands are required in order to rebuild main.cpe. Implicit Rules If no commands are specified, PSYMAKE will search for an implicit rule to determine how to build the target file. An implicit rule is a general rule stating how to derive files of one type from another type; for instance, how to convert .ASM files into .EXE files. Implicit rules take the form: .<source extension>.<target extension>: command [... command ] Each <extension> is a 1, 2 or 3 character sequence specifying the DOS file extension for a particular class of files. At least one command must be specified. Examples .s.bin: asm68K /p $*,$* This states that to create a file of type .bin from a file of type .S, the ASM68K command should be executed. (See below for an explanation of the $* substitutions.) Psy-Q Development System Executing commands: Once the commands to execute have been determined, PSYMAKE will search for and invoke the command. Search order is: • • current directory; directories in the path. If the command cannot be found as A.EXE or A.COM file or the command is A.BAT file, PSYMAKE will invoke COMMAND.COM to execute the command/batch file. This enables commands like CD and DEL to be used. Command prefixes: The commands in a dependency or implicit rule command list, may optionally be prefixed with the following qualifiers : @ - number - - suppress printing of command before execution - abort if exit status exceeds specified level - (without number) ignore exit status (never abort) • Normally, unless /q is specified on the command line, PSYMAKE will print a command before executing it. If the command is prefixed by @, it will not be printed. • If a command is prefixed with a hyphen followed by a number, PSYMAKE will abort if the command returns an error code greater than the specified number. • If a command is prefixed with a hyphen without a number, PSYMAKE will not abort if the command returns an error code. • If neither a hyphen or a hyphen+number is specified, and /i is not specified on the command line, PSYMAKE will abort if the command returns an error code other than 0. Psy-Q Development System Macros A macro is a symbolic name which is equated to a piece of text. A reference to that name can then be made and will be expanded to the assigned text. Macros take the form: name = text Examples • The text of the macro starts at the first non-blank character after the equals sign ( = ), and ends at the end of the line. • Case is significant in macro names. • Macro names may be redefined at any point. • If a macro definition refers to another macro, expansion takes place at time of usage. • A macro used in a rule is expanded immediately. FLAGS = /p /s ... .68K.bin: ASM68K $(FLAGS) /p $*,$* The $(FLAGS) in the ASM68K command will be replaced with /p /s. Pre-defined macros: The following pre-defined macros all begin with a dollar sign and are intended to aid file usage: $d Defined Test Macro, e.g.: !if $d(MODEL) # if MODEL is defined ... $* Base file name with path, e.g. C:\PSYQ\TEST $< full file name with path, e.g. C:\PSYQ\TEST.S $: path only, e.g. C:\PSYQ $. full file name, no path, e.g. TEST.S $& base file name, no path, e.g. TEST The filename pre-defined macros can only be used in command lists of dependency and implicit rules. Psy-Q Development System Directives: The following directives are available: !if expression !elseif expression !else !endif These directives allow conditional processing of the text between the if, elseif, else and endif. Any non-zero expression is true; zero is false. !error message Print the message and stop. !undef macroname Undefines a macro name. Expressions: Expressions are evaluated to 32 bits, and consist of the following components : Decimal Constants Hexadecimal Monadics Dyadics e.g. 1 10 1234 e.g. $FF00 $123abc -~! +-*/%><& | ^ && || > < >= <= == (or = ) != (or <> ) The operators have the same meanings as they do in the C language, except for = and <> ,which have been added for convenience. Value assignment: Macro names can be assigned a calculated value; for instance: NUMFILES == $(NUMFILES)+1 ( Note two equals signs in value assignment) This evaluates the right hand side, converts it to a decimal ascii string and assigns the result to the name on the left. In the above example, if NUMFILES was currently "42", it will now be "43". Note NUMFILE = $(NUMFILES)+1 would have resulted in NUMFILES becoming "42+1". Undefined macro names convert to '0' in expressions and null string elsewhere. Psy-Q Development System Comments: Comments are introduced by a hash mark (#): main.exe: main.s # main.exe only depends # on main.s # whole line comment Line continuation: A command too long to fit on one line may be continued on the next by making '\' the last character on the line, with no following spaces/tabs: main.exe : main.s i1.h i2.h \ i3.h i4.h Psy-Q Development System C H A P T E R 16 Psy-Q Debugger for Windows 95 Introduction The Psy-Q Debugger for Windows ‘95 takes advantage of the new range of 32-bit operating systems available for PCs; it provides full source level as well as traditional symbolic debugging and supports and enhances all the power of the DOS-based version plus the advantages of a multi-tasking GUI environment. It helps you to detect, diagnose and correct errors in your programs via the step and trace facilities, with which you can examine local and global variables, registers and memory. Breakpoints can be set wherever you need them at C and Assembler level and if required, these breaks can be made conditional on an expression. Additionally, selected breakpoints can be disabled for particular runs. The Debugger employs drop-down menus, tool buttons, keyboard shortcuts and popup menus to help you debug quickly and intuitively. Projects The Debugger uses Projects to group together details of Files, Targets, Units, Views and other settings and preferences. All this information is saved and made available for your next debugging session. Views The Debugger offers the functionality of splitting the screen into a number of Panes, each displaying discreet or linked information. This information is available within a View, or document window (MDI Child). Each View can be split horizontally or vertically into the number of Panes you require and each Pane can be set to show a specific type of information. You can have as many combinations of either tiled Panes or overlapping Views as you choose. Your choice of Views depends on the level at which you are debugging. For example, it is appropriate to use a Register Pane for assembler debugging and a Local Pane when debugging in C. Psy-Q Development System Individual Views can be saved on disk for subsequent use in other Projects. However, when you close the Debugger and then re-start a session, your previous screen set-up will initially be displayed automatically. Colour Schemes To aid identification, a separate colour scheme can be allocated to the Views used by each Unit that you reference. Alternatively, the same colour can be allocated to all Views. Files The Symbol Files you require are located and loaded by the Debugger and the relevant CPE and Binary Files are downloaded to the Target. Where a multi-unit system is in use you must also specify the Unit where Symbol and Binary Files are to be loaded. Dynamic Update Changes in memory are highlighted on each display update, showing which areas of memory are being altered as the Target is being run and you are stepping and tracing your code. The following topics are discussed in this chapter: On-line Help Installing the Debugger Launching the Debugger The Psy-Q File Server Connecting the Target and Unit Project Management Psy-Q Debugger Productivity Features Views Panes Debugging Options Closing the Debugger Psy-Q Development System On-line Help Available For The Debugger Help text describing the features covered in this chapter, can also be accessed on-line via the Help menu on the main menu. Selecting these options will result in the following: • Contents will display the Contents page of the help system in the left-hand side of the screen. Clicking any of the underlined topics will provide further information about the relevant subject. • Pane Types and the required Pane will directly access relevant text for the chosen Pane. • Installation will display installation procedures. • About will provide the Version Number. Within the on-line help system, clicking text with a dotted underline will display a pop-up description but double-clicking text with a solid underline will display another (linked) help page. The buttons at the top of the help text window can be used to facilitate the following: • Search and/or Find to locate a particular word or topic. • Back to re-display the previous page. • << and >> to display the previous and next page in the browse sequence, as outlined in the Table Of Contents. (See below). • Glossary to display an alphabetic listing of terms found in the help system. Click on any topic to obtain a pop-up definition. As well as accessing information via the Contents page, on-line help can also be located via the Table Of Contents in the right-hand area of the screen. This represents the subject areas of the help system as book icons. Double-click any icon to display titles of the individual pages which compose each ‘book’. Double-click any of these pages and the text will be displayed in the left-hand side of the screen. Psy-Q Development System Installing The Debugger A Set-up program is used to install the Debugger; this is distributed via either of the following methods: • Full Release Files • Maintenance Patch Files Both methods are described in more detail below the Directory Structure. Directory Structure All the Files relating to the Windows software live in one directory tree. This tree can reside anywhere but it is probably easier to locate it on the root of a local drive. The default directory name is: ‘C:\PsyQ_Win\’ and it is recommended that you follow this convention. Set-up also installs several Files in the Windows System directory and adds two keys to the Registry. These keys are: [HKEY_LOCAL_MACHINE\SOFTWARE\SN Systems] (hardware settings) [HKEY_CURRENT_USER\Software\SN Systems] (configuration information) Set-up also registers the File types .psy (Psy-Q Project), .pqp (Psy-Q patch) and .cpe and adds some programs to the Start menu. IMPORTANT: Do not install the program on a server and execute it across a network. For un-installation advice, please contact SN Systems. Psy-Q Development System Obtaining Releases And Patches Releases and patches are available directly from SN Systems’ BBS and ftp sites. In order to access these sites you will need an account with the necessary permissions. To apply for an account telephone SN Systems or contact them via [email protected]. Patches and releases can also be obtained via email in MIME, provided that you are a member of the Windows-Users mailing list. (See below). Note: Members of the Windows-Users mailing list will be notified of releases and patches as they become available. Determining The Latest Releases And Patches This is achieved via any of the following methods: • Contact [email protected] • Look in one of the File sites for the latest Files and information • Send mail to the auto-responder maildrop - [email protected]. Mailing Lists SN Systems maintain the following mailing lists: • [email protected] - For all announcements regarding Psy-Q • [email protected] - For up-to-date information • [email protected] - For all Debugger users (discussion) The first two are read-only and provide details about revisions and other information. The third is an open read/write list which hosts any Debugger related discussions, problems, suggestions or comments. For more information on these lists, send a HELP message to [email protected] (the Robot List Manager) or [email protected]. Psy-Q Development System Addresses for SN Systems’ ftp, web and BBS sites • ftp://ftp.snsys.com • http://www.snsys.com • BBS - +44 (0)117 9299 796 and +44 (0)117 9299 798 Beta Test Scheme SN Systems maintain a separate scheme for beta testing new versions of the Debugger. The benefits of this are as follows: • You will receive new versions of the Debugger before any other user • You will have a prioritorised chance to supply feedback to the Debugger’s authors If you are a member of this scheme, you don’t need to install release versions of the Debugger. For more information, contact [email protected]. Psy-Q Development System Installing A Full Release A Full Release File contains an archive of several Files and a Set-up program that can be used to install the Debugger automatically. 4 To install the release: 1. Obtain the latest full release from SN Systems. 2. Read Readme.txt which contains last-minute installation instructions. 3. If the release is on a floppy, launch Setup.exe straight-away. If however, the release is in a zip File, you must unzip the File into a temporary directory and then launch Setup from that temporary directory. 4. If this is the first full installation of the Debugger, confirm the displayed license conditions. 5. Specify or confirm the directory in which you wish to install the Debugger. 6. The Files will be installed and the Registry will be updated. 7. Depending on the type of installation, specify the settings for the DEX Board or SCSI Card. (See Configuring Your Dex Board/SCSI Card below). 8. Once the dialogue has been completed the installation is complete. Note: This method can be used for the first installation of the Debugger and also for subsequent upgrades if you do not wish to use Maintenance Patches. See Upgrading Your System below. Psy-Q Development System Upgrading Your System From time to time, SN Systems will provide updates to the Debugger that introduce bug fixes and new features. For your convenience, updates are supplied as full installations and as maintenance patches. A Maintenance Patch contains only the difference between Files so it is much smaller. This makes it quicker to download and apply. However, patches can only be applied over certain previous versions. 4 To apply a Maintenance Patch: 1. Determine your current release by reading the About box for the Debugger. 2. Obtain the Maintenance Patch from SN Systems. Instructions will be provided so you can determine which patch must be applied. 3. Apply the patch by using the PQSetup program. This is available on the Start menu or by double-clicking a patch file (.pqp). Follow the on-line instructions. Psy-Q Development System Configuring Your Dex Boards If you are installing a Full Release for the Sony PlayStation (DEX only), you must specify the settings for these DEX Boards. 4 Enter appropriate values to the dialogue box displayed during the Set-up program. DEX Board Settings Dialogue Box 1. Enter a 3 or 4-digit hexadecimal number to the Port Address and Parallel boxes and specify an IRQ value by clicking on the down arrow and selecting as appropriate. 2. Click 3. The installation is now complete. . IMPORTANT: Port Address and IRQ values must be correct for the Debugger to work. If they are incorrect or another device is configured to use similar settings, the programs will not work. Note: The Parallel setting should be set to the I/O address of the port to which your dongle is connected. Most PCs use 378 for 1pt1:. If your dongle is on a different parallel port or your PC uses a non-standard port address, change this value. See FAQ.DOC for more information. Psy-Q Development System Configuring Your SCSI Card If you are installing a Full Release for a SCSI Target, you must specify the settings for the SCSI Card. 4 Enter appropriate values to the dialogue box displayed during the Set-up program. SCSI Card Settings Dialogue Box 1. Specify a Port Address and IRQ value by clicking on the down arrows and selecting as appropriate. 2. Click . The installation is now complete. IMPORTANT: Port Address and IRQ values must be correct for the Debugger to work. If they are incorrect or another device is configured to use similar settings, the programs will not work. Note: The IRQ value can be set to 0 to run without interrupts. However, this is only recommended for troubleshooting since running without interrupts will seriously impair the performance of the system. Psy-Q Development System Testing The Installation Once the Debugger has been installed, you should now run PsyServe.exe in order to test that the configuration is working correctly. A similar message to the following should be displayed: Psy-Q File and Message Server, Copyright 1995, SN Systems Ltd, Version: 1.00 (December 1995) Target: Sony Playstation Plug-In Resources: Port=0x390, Interrupt=12 Loading SCSI Drivers... Connected to SONY_PSX5.15 Ready to Serve If no message appears at all, your Port and IRQ settings may be incorrect or there may be a resource conflict with some other device. 4 However, you can change the Port/IRQ settings by re-running the Set-up program as follows: 1. Click on the Open File dialogue box. 2. Select the appropriate Card from the Cards menu. You will then be presented with the same dialogue box as was displayed during installation. See FAQ.DOC if you continue to have problems. Psy-Q Development System Documentation If you experience problems during installation, the following documents provide useful information: • README.DOC details how to obtain and apply maintenance releases • FAQ.DOC contains Frequently Asked Questions and should be consulted if you experience any problems • BUG.TXT describes how to report bugs • TODO.TXT lists known bugs, problems and features that are not yet incorporated into the Debugger Psy-Q Development System Launching The Debugger There are several ways of launching the Psy-Q Debugger under Windows ‘95. 4 A simple way is as follows: 1. Select the Start menu from Windows 95. 2. Choose the Programs option from the list displayed. 3. Select the Psy-Q folder from the list of programs. 4. Select Psy-Q Debugger from the folder. You can also launch the Psy-Q Debugger from the desktop or folders or through Explorer in Windows ‘95. With the drag and drop facility you can drop a Psy-Q Debugger Project File (extension .PSY) onto the icon of the Debugger and the selected Project is launched. Alternatively, as file type .PSY has been registered with the Windows ‘95 shell, you can right-click on a Project File, select Debug from the menu and the Debugger will be launched with the selected Project. Note: While the Debugger is still running, you can open a new Project by following the procedure described in the previous paragraph. When you launch the Psy-Q Debugger it scans for recognised Units and if none are found a dialogue box prompts you to either Repoll or Quit. If the latest downloader has not been installed you are prompted to download this. The Psy-Q File server is automatically launched with the Debugger. See Also: Launching PsyServe without the Debugger Psy-Q Development System The Psy-Q File Server The primary function of the Psy-Q File Server is to provide the PC Open and PC Read functions for your program. It is always launched when the Debugger is launched and must always be running in the background while the Debugger is being used, both file serving and collecting messages. When the File Server is running, the icon and name of the application appear on the Task bar of Windows ‘95. You can view the messages appended into the message window of the File Server during debugging by clicking on this icon. File Server Message Window If you wish the message window to be permanently displayed on top of other windows, select Always on Top from the View menu. Psy-Q Development System When the Debugger or File server experiences a communication error, a dialogue box will display a relevant error code and a Retry and Cancel button. Communication Error Dialogue Box Press Retry and the attempted connection will be repeated; press Cancel and the system will try to carry on and will attempt to recover from the error. Note: If the Debugger comes up with this message, the File Server can still be used to reset the Target. File Server Menu Commands In addition, seven menu commands can be used with the File server: • Run Project loads all Files (except Symbol Files) that are set to ‘download on project startup’ and runs the Project without loading the Debugger • Download CPE File to the Target. • Run CPE runs the Target after the CPE File has been downloaded. • Ping determines the current status of the Target • Halt provides the option to stop the Target if it is running. • Clear Window removes any File Server messages. • Reset Target Psy-Q Development System Note: Resetting the Target while the Debugger is running may cause unpredictable results. Note: The Reset option is also available from the System menu of the File server. IMPORTANT: The Psy-Q File Server must always be running when the Debugger is running. You will not be permitted to stop the server until you close the Debugger; however, the File Server can be run without the Debugger . Launching The File Server Without The Debugger 4 If you wish to launch the File Server independently of the Debugger, for example, to run your Project without loading the Debugger: 1. Select the Start menu of Windows ‘95. 2. Choose the Programs option from the list displayed. 3. Select the Psy-Q folder from the list of programs. 4. Choose the Psy-Q File Server option from the folder. Note: When you launch the File server the Target is automatically reset, whether the Debugger is running or not. See Also: Launching the Debugger Psy-Q Development System Connecting The Target and Unit The Psy-Q Debugger automatically checks your system when you launch it, identifies any Targets that are connected and according to whether you are running a single or multi-Unit system, automatically connects to the relevant Unit(s). The Unit toolbar appears at the bottom of the Debugger window directly above the Status line. The first icon in the toolbar has a pictogram of the Target known as the Unit button. Unit Button There will be a Unit toolbar and unique button for each Unit identified. Click on the button to display the Unit menu. This menu allows you to download and load (as relevant) foreign CPE and foreign Symbol Files and download non-foreign CPE and Binary Files. The menu also allows you to see and edit breakpoints. The menu options are: • Download CPE • Download Binary • Load Symbols • Breakpoints Each toolbar contains a set of debugging icons which represent: • Starting programs • Stopping a program running • Stepping into a subroutine • Stepping over a subroutine Psy-Q Development System Note: Note that these actions operate only in respect of the relevant Unit; therefore, where a multi-Unit system is in use they will not necessarily operate in respect of the Active View. Note: The Psy-Q File server is automatically launched when the Psy-Q Debugger is started. The Server window displays any output from the Target while it is running. Psy-Q Development System Psy-Q Projects A Psy-Q Project is a combination of the elements and settings associated with a specific development project. It consists of any or all of the following: • Units to be debugged • Screen layout • CPE Files • Symbol Files • Binary Files • Breakpoints • Other settings and preferences. This set of information is used by the Debugger to track the debugging process. When you save a Project this includes all the Views, colour schemes and breakpoints already specified for it. These settings are reinstated when the Project is next opened. Setting Up And Managing Projects 4 To create a new Project you can either: 1. Open the default Psy-Q Project by selecting New from the Project menu. 2. Save and name the Project. or 1. As 1) above. 2. Select files for the Project and add them to the file list. 3. Set file properties for executable files. 4. Save and name the Project 5. Re-open the Project with the files in the file list. Psy-Q Development System Selecting Files For Your Project The Psy-Q Debugger uses files that are output from the build process. Three types of file may be included in the Project; these are: • CPE Executable Files • Symbol Files • Binary Files Adding Files To The List Of Project Files 4 This is achieved as follows: 1. Select the Project menu from the Menu bar. 2. Choose Files from the menu; the Files dialog appears. 3. Click 4. Select CPE, Binary or Symbol Files from the ‘Files of Type’ drop-down list. 5. Locate the file and click 6. When you add a file to the file list a relevant dialog box requests you to set the file properties. For CPE and Binary Files these will determine the downloading of files to the Target. Additionally, for Binary and Symbol Files, they determine the Unit to which they will be loaded. See the ‘Understanding File Properties’ sections below. to insert them into your file list. . Note: It is not necessary to specify the Unit to which a CPE File should be loaded as this information is held within the file itself. 7. Repeat the operation until all the files you require appear in the list. To remove a file from the list, highlight it and click 8. Click . when you have added all the files you require. The CPE and Binary Files will be downloaded in the order shown in the file list. Psy-Q Development System Note: As file type .CPE has been registered with the Windows ‘95 shell, you can run a program directly from the shell by double-clicking on the relevant CPE File. Alternatively, if you wish to download the file to the Target without running it, right-click the relevant file and select Download from the menu. Note: When you add Binary and Symbol Files to a Project they are not loaded until the Project is saved and re-opened. Changing The Order Of Files In The File List If you have multiple CPE and Binary Files within your Project, the order in which they are loaded during debugging is determined by the position you placed them in the File list. 4 To change the file sequence: 1. Select the Project menu from the Menu bar. 2. Choose Files from the menu. 3. Highlight a file. 4. Use or to alter the position of the file in the list. Repeat the process until the files are in the required order. Note: This option is only useful if you have multiple CPE and Binary Files in your Project and the load order is important. Psy-Q Development System Specifying CPE File Properties When you select a CPE File to include in your Project, a dialogue box requests that you set the properties for this file. These properties allow you to control the downloading of files to the Target. The options are: • Download when Project starts - This causes the CPE File to be downloaded when the Project is opened or reopened. • Run after CPE has been downloaded - This causes the Unit to start running the code after downloading the file. You may select either or both of these properties for any CPE File in the Project. If you do not set the properties of at least one CPE File, the Debugger will not download any files to the Target when the Project is opened. 4 To change CPE File properties: 1. Select the Project menu from the Menu bar. 2. Choose Files from the menu. 3. Select the CPE File to change. 4. Click 5. Use the check boxes to apply the properties. 6. Click . . Psy-Q Development System Specifying Symbol File Properties When you select a Symbol File to include in your Project, a dialogue box requests that you confirm or specify the Unit to which the file should be loaded. 4 To change Symbol File properties: 1. If the required Unit is not already displayed, click the down arrow until it appears. 2. Highlight the required Unit. 3. Click 4. Click . . Psy-Q Development System Specifying Binary File Properties When you select a Binary File to include in your Project, you must complete the following dialogue box: Binary File Properties Dialogue Box These properties allow you to control the downloading of files to the Target: • Download when Project starts - If this is selected the Binary File will be downloaded when the Project is opened or reopened. • Downloaded to a specified address - The files will be downloaded to the address specified. This should be in OX notation for hexadecimal numbers. The default address will be zero. • Specify the Unit where the File is to be loaded - Click on the down arrow to display further Units. If you do not set the first option for at least one Binary File, the File Server will not download any Binary Files to the Target when the Project is opened. However, all Binary Files in the Project will be available on the relevant Unit menu. 4 To change Binary File properties: 1. Select the Project menu from the Menu bar. 2. Choose Files from the menu. 3. Select the Binary File to change and click 4. Select the Download when Project starts option if required and/or enter a relevant address. 5. Confirm or specify the Unit where the File is to be loaded. 6. Click . Psy-Q Development System . Saving Your Project Once the files have been selected, the new Project must be saved and re-loaded before debugging can begin. 4 This is achieved as follows: 1. Select the Project menu from the Menu bar. 2. Choose the Save option from the menu. 3. Give a name and path to your Project. File names in Windows ‘95 are up to 250 characters long and can contain spaces. Psy-Q Debugger Project Files must be saved with the default File extension of .PSY. 4. Click . Note: For a new Project you can choose the Restore rather than the Save option. Restore prompts you to save the Project before reloading it. Note: The Save or Save As options can be used to save an existing Project. Re-opening A Project After saving a new Project you must re-open it before working with the files which have been added to the file list. 4 This is achieved as follows: 1. Select the Project menu from the Menu bar. 2. Choose the Re-open option from the menu. Note: The Re-open icon on the toolbar can also be used to re-open a Project. Psy-Q Development System Saving A Project Under A New Name The Save As option on the Project menu is used to save changes made to an existing Project, under a new name. The default File extension for a Psy-Q Debugger Project is .PSY. When you save Project Files you must use this extension. 4 To save a Project under a new name: 1. Select the Project menu from the Menu bar. 2. Choose the Save As option from the menu. 3. Give a name and path to the renamed Project. 4. Click . Restoring A Project The Restore option on the Project menu is used to re-load a Project in the state in which it was last saved, abandoning any changes made since the last save. 4 To restore a Project: 1. Select the Project menu from the Menu bar. 2. Choose the Restore option from the menu. Psy-Q Development System Opening An Existing Project When you launch the Psy-Q Debugger, the last Project you worked on will be loaded automatically. 4 To open a different Project: 1. Select the Project menu from the Menu bar. 2. Choose the Open option from the menu. 3. Select the Project (.PSY) you require. 4. Click . Note: An existing Project can also be opened via the Open Project icon on the toolbar. found Note: As File type .PSY has been registered with the Windows ‘95 shell, you can run a Project by double-clicking on the relevant .PSY File within the shell. Alternatively, if you only wish to load the Project into the Debugger, rightclick the relevant file and select Debug from the menu. Psy-Q Development System Manually Loading Files Into A Project External Files can be downloaded at any time; they are not saved with the Project. 4 External CPE Files are downloaded to the Target as follows: 1. Click on the Unit menu at the base of the Debugger screen. 2. Choose the Download CPE option from the menu. 3. Choose the External File option. 4. Browse and select the required CPE File. 5. Click . Note: You can also download a CPE File by double/clicking it within the shell. 4 Symbol Files can be loaded into the Debugger as follows: 1. Click on the relevant Unit menu at the base of the Debugger window. 2. Choose the Load Symbols option from the menu. 3. Browse and select the required Symbol File. 4. Click . Psy-Q Development System The Psy-Q Debugger Productivity Features To enable you to work faster and more efficiently when using the Psy-Q Debugger, the following two features speed up your control of the debugging runs. • Toolbar Icons • Hot Keys Toolbar Icons The toolbar contains the group of icons shown above. Icons provide a quicker means of activating commands and setting properties. From left to right they represent the following actions: Open a Project File Save and then reopen the current Project Open a new View Switch to the next View Split the Active Pane horizontally Split the Active Pane vertically Delete the Active Pane Set the default colour scheme The Show Toolbar option on the Project menu is used to toggle the menu bar on and off. When the option is ticked the toolbar is displayed. 4 To toggle the toolbar: 1. Select the Project menu from the Menu bar. 2. Choose the Show Toolbar / Hide Toolbar option from the menu. Note: Every Pane type has its own, additional toolbar which is appended to the main toolbar when that Pane is made Active. Psy-Q Development System Hot Keys The following Hot Keys can be used instead of the Debugger menu options: F2 F3 F4 F5 F6 F7 F8 F9 Esc Ctrl + Shift + D Ctrl + Shift + L Ctrl + Shift + M Ctrl + Shift + R Ctrl + Shift + S Ctrl + Shift + W Shift + Arrow Keys Ins Split Horizontal Split Vertical Delete current Pane Toggle breakpoint on and off Run to cursor Step into a subroutine Step over a subroutine Run a program Stop a program running Change Pane to Disassembly Pane Change Pane to Local Pane Change Pane to Memory Pane Change Pane to Register Pane Change Pane to Source Pane Change Pane to Watch Pane Activates adjacent Pane in the specified direction. Where more than one, the current caret position determines the Pane to be made Active New View Note: These keys will all operate in respect of the Active Pane. Psy-Q Development System Psy-Q Views A View appears in the main window of the Psy-Q Debugger; it is used to display debugging information according to your requirements and to control step and trace actions during debugging. When a Psy-Q Project is first created it has a default Pane layout. Views can be split into as many Panes as you wish. These can be of the same or different types. Only one is Active at any time; it will be displayed in a different colour scheme to the others. Notes: Having created a View of different Panes you can save this as a View File either in, or independent of, the Project. Further information about Panes can be found in Working With Panes and Selecting A Pane Type. Psy-Q Development System Creating A Psy-Q View Within a Psy-Q Project you can create as many Views as required; in turn, each View can be split into as many Panes as you need. When you open a new Project, one View is displayed for each Unit connected. Default View 4 To create a new View: 1. Select the View menu from the Menu bar. 2. Choose the New option from the menu. 3. From the Choose Unit box specify the Unit for which you wish to create a new View. Note: The Choose Unit box will not appear when you are connected to a single Unit. Psy-Q Development System You can also use the New View icon on the toolbar use the Hot Key Insert. to create a new View or Alternatively, you can open a new View from the relevant Unit button, in which case you won’t be prompted for the required Unit. Note: A new View is supplied with the title ‘Default View’. The View Name option in the View menu should be used to give it a title. Note: Views can be saved either inside or outside of Psy-Q Projects. Cycling between Views 4 If you have more than one View open within a Project you can cycle between them as follows: 1. Select the View menu from the Menu bar. 2. Choose the Next View option. The Views are cycled around until you see the one you require. All Views appear on the View list regardless of the Unit for which they have been specified. Alternatively, the Next View icon on the toolbar Ctrl + TAB can be used to cycle between Views. Psy-Q Development System , the Hot Keys Ctrl + F6 or Saving Your Views Any number of Views can be saved within a Project. All open Views will automatically be saved when you save the Project and will be opened when the Project is re-opened. View Files can also be saved independently of Projects using the Save As command on the View menu. 4 This is achieved as follows: 1. Arrange the Panes as you require. 2. Select the View menu from the Menu bar. 3. Choose the Save As option from the menu. 4. Give the View a name and path. 5. Click . Note: The name you give the View File is not displayed on the View. To give a View a title use the View Name option on the View menu. Naming A View 4 Because you can use many Views within a Project, it is helpful to give each View an individual title. 1. Select the View menu from the Menu bar. 2. Choose the View Name option from the menu. 3. Enter the View name in the edit box. 4. Click . The name appears at the top of the View. Note: This is not the name of the File. See the note in Saving Your Views above for further details. Psy-Q Development System Changing Colour Schemes In Views 4 To change the colours for a particular Unit: 1. Activate a View/Pane on the Unit that you wish to set colours for. 2. Select the View menu from the Menu bar. 3. Choose Set Default Colours... from the menu. The following areas may be changed for the Active Unit: Inactive Pane background colour Inactive Pane text colour Active Pane background colour Active Pane text colour PC text colour Changed information colour Breakpoint background colour Breakpoint text colour 4. Click on the box representing the area you wish to amend. A standard Windows dialogue box allows you to choose from a range of standard or customised colours. Set Default Colours Dialogue Box Psy-Q Development System 5. Select the required colour(s). 6. The selected colour scheme will be displayed for all visible Views. 7. Select to retain the revised colours or revert to the original scheme. Unit colours can also be amended by clicking on the Set Colour icon toolbar. Psy-Q Development System to on the Working With Panes When a Psy-Q Project is first set up, the default View contains a default Pane layout for each Unit connected. However, this View can be split into as many Panes as you wish. These can be of the same or different types. Only one of the Panes is Active; it will be displayed in a different colour scheme to the others. 4 A Pane can be made Active via any of the following methods: • Clicking on it • Changing the Active View and the first Pane created for that View will become Active • Using Shift and the appropriate arrow key to Activate the Pane in the specified direction • Clicking the right mouse button on the required Pane and selecting from the displayed menu Splitting Panes 4 A View can be divided into as many Panes as you wish. Click on the one you wish to split to make it Active, then: 1. Select the View menu from the Menu bar. 2. Choose either Split Vertical or Split Horizontal from the menu. The Active Pane is split in half, either vertically or horizontally, depending on your choice. You can also split a Pane horizontally or vertically via the icons on the toolbar or by using the hot keys F2 to split horizontally or F3 to split vertically. Note: When you split a Pane the two halves will both be of the same type as the original. The font for the new Pane will also match that of the original. Psy-Q Development System Changing Pane Sizes 4 To change the size of Panes: Drag the splitter bar between the Panes with the mouse. The size and position of the Panes is saved when you save the View or the Project. Note: Splitter bars only control the areas between the Panes. If you wish to change the size of the Debugger window you have to use the borders of the window itself. Deleting A Pane 4 The Delete Pane option on the View menu is used to delete a Pane within a View, as follows: 1. Click on the required Pane to make it Active. 2. Select the View menu from the Menu bar. 3. Choose Delete Pane from the menu. Alternatively, the Delete Pane icon on the toolbar to delete the Active Pane. Psy-Q Development System or the hot key F4 can be used Changing Fonts In Panes 4 If required, the Set Font command can be used to change the display of text within a Pane, as follows: 1. Make the required Pane Active. 2. Select the View menu from the menu bar. 3. Choose Set Font from the menu. A standard Windows dialogue box allows you to select from the available fonts. Note: When you split a Pane, the new Pane will be displayed in the same font as the original one. IMPORTANT: You will only be able to use non proportional fonts, e.g. Courier, New Courier, Fixed Sys, Terminal.. See Also: Changing Colour Schemes In Views Psy-Q Development System Scrolling Within A Pane Many Panes are unable to display the full set of information that is available to the Debugger in the small screen area shown. Therefore, the Debugger puts scroll bars onto Panes where there is more information than can be displayed on that part of the screen. To see this additional information drag the thumb within the scroll bar or click on the arrows at either end of the scroll bar. You can also scroll to the region you want by clicking on the required Pane to make it Active and then clicking and holding the left mouse button before dragging it to the top or bottom of the Pane. See Also: Changing Pane Sizes Psy-Q Development System Selecting A Pane Type There are six types of Pane and you may display any number and combination. A menu that allows you to change Pane properties is accessed via the Pane menu on the Menu bar or by right clicking the mouse on a relevant Pane. These menus are unique to the type of Pane that is Active but all the menus have the option Change Pane that allows you to switch between the different types. Additionally, icons representing each type of Pane appear adjacent to the main toolbar. Registers Pane - Displays the registers of the relevant CPU Memory Pane - Displays areas of memory within the Target Source Pane - Displays Source Files associated with program that CPU is running Disassembly Pane - Displays the code that the CPU is running Watch Pane - Displays ‘watches’ or expressions Local Pane - Displays local variables Click on the relevant icon to change the Active Pane. Note: You can also use the Hot Keys to switch between Pane types. Psy-Q Development System Icons representing menu options for the selected Pane are dynamically appended to the far right of the main tool bar. For example, if a Disassembly Pane is Active, Disassembly Pane options will be displayed. Further details about the options for each type of Pane can be found below. Memory Pane There are three areas displayed on the Memory Pane: to the left is the memory address; in the middle is the value at the displayed memory address; and to the right is an optional ASCII display of the values which can be toggled on or off. Memory Pane Display You can goto an area of memory by typing the required address over the memory address or by selecting Goto from the Pane menu and entering a known address or label name to the dialogue box displayed. See Also: Moving To A Known Address Or Label Use the scroll bars or the goto functions described above to move around the display. The default setting for the Pane is in bytes with the ASCII display set. Psy-Q Development System Change this default by selecting the Pane menu and choosing from the options: • Bytes • Words (bytes x 2) • Double words (bytes x 4) • ASCII (Toggle ASCII display on and off) • Set Width (Changes the number of bytes displayed on a line) Alternatively, clicking on these icons will activate the options listed above. You can overtype the hexadecimal or ASCII displays to alter the content of the memory. A change to the hexadecimal display will be reflected in the ASCII display and visa versa. When you move the mouse pointer over the values, the Status line displays the Memory Address and one of the following Memory Types: • RAM • ROM • Invalid. Invalid memory is displayed as question marks instead of hexadecimal values and full stops instead of ASCII. The Set Width icon can be used to change the width of the display; click on the icon and type in the number of bytes to be shown on each line. The Active Pane can be made a Memory Pane via any one of the following methods: Clicking on the Memory Pane icon on the toolbar Using the Pane Type option from the Pane Menu Using the Hot Key Ctrl+Shift+M. Psy-Q Development System Registers Pane The Registers Pane shows the registers of the central processing Unit. These can be overtyped if required. If the CPU has a Status Register, you can overwrite the individual bits by typing 0 or ‘R’ to reset the bit or 1 or ‘S’ to set it. The display also shows the disassembled instruction at the Program Counter (PC) and the address of the instruction which will be executed next. It also shows the current status and (if relevant) exception of the CPU on the bottom line of the Pane. Registers Pane Display When you click the right hand mouse button over a Registers Pane or select the Pane menu on the menu bar, you will see the Change Pane Type or Pane Operations options. Note that these are the only menu options for this type of Pane. The Active Pane can be made a Registers Pane via any of the following methods: Clicking on the Registers Pane icon on the toolbar Using the Pane Type option from the Pane menu Using the Hot Key Ctrl+Shift+R Psy-Q Development System Disassembly Pane The Disassembly Pane shows the disassembled code from an area of memory. Four columns are displayed; the first shows the address or label; the second displays the values at that location in hexadecimal; the disassembled op code is shown in the third column and the fourth contains the op code parameters. Disassembly Pane Display When the cursor is positioned on a particular label on the Disassembly Pane, the relevant label name and value will be displayed on the Status line. The Program Counter (PC) is shown on the screen preceded by the marker ‘>‘. When you click the right hand mouse button over a Disassembly Pane or select from the Pane menu on the menu bar you see the following options: • Follow PC to anchor the Pane to the Program Counter • Goto to put the cursor at a known address or label name • Toggle breakpoint to set and remove breakpoints • Edit breakpoint to disable a breakpoint or make it conditional • Run to cursor to run the Unit to the cursor position. Psy-Q Development System These options can also be activated by: • Using the appropriate Hot Keys • Clicking on these icons The Active Pane can become a Disassembly Pane via any one of the following methods: Clicking on the Disassembly Pane icon on the toolbar Using the Pane Type option from the Pane menu Using the Hot Key Ctrl+Shift+D See Also: Anchoring Panes To The PC Moving To A Known Address Or Label Setting Breakpoints Editing Breakpoints Psy-Q Development System Source Pane A Source Pane displays one of the Source Files included in your Project. Source Pane Display When you click the right hand mouse button over a Source Pane or select from the Pane menu on the Menu bar you see the following options: • Follow PC to anchor the Pane to the Program Counter • Goto PC (space) • Goto to put the cursor at a known address or label name • Source Files to swap between the Source Files in the Project • Toggle breakpoint to set and remove breakpoints • Run to cursor to run the Unit to the cursor position. Note: If the Program Counter (PC) is at a line displayed on the Pane it will be preceded by the PC point line marker ‘>‘ and the line will be displayed in a different colour. Note: If a breakpoint exists within the Pane it will display in a contrasting colour. Psy-Q Development System The options listed above can also be accessed: • By using the appropriate Hot Keys • By clicking on these icons Note: If the display is not set to follow the Program Counter (PC), the file displayed may not be the one executing at the PC. The Active Pane can be made a Source Pane via any one of the following methods: Clicking on the Source Pane icon on the toolbar Using the Pane Type option from the Pane menu Using the Hot Key Ctrl+Shift+S See Also: Anchoring Panes To The PC Moving To A Known Address Or Label Setting Breakpoints Editing Breakpoints Changing Source Files In The Source Pane By default, the Source Pane displays the Source File which contains the PC or is blank if the PC is out of range of your source. 4 Any of the Project Source Files can be examined in this Pane by using the Source Files option from the Source Pane menu, as follows: 1. Select the Source Pane menu from the Menu bar. 2. Choose the Source Files option from the menu. 3. Select a Source File from the list displayed. 4. Click . Psy-Q Development System Local Pane The Local Pane is used to display all variables in the current local scope when you are debugging in C. As you step and trace, the contents of this Pane will change to display the variables in the new scope. You can expand or collapse variables and traverse array indices. Local Pane Display Variables can be viewed in hexadecimal or decimal modes by right-clicking within the Pane and ‘toggling’ between Hexadecimal/Decimal (on the displayed menu) as required. A tick will appear alongside Hexadecimal when this mode is selected. Any Local variable that evaluates to a ‘C’, l-type expression, can be assigned a new value. When you select the Local Pane menu or click the right hand mouse button over a Local Pane you see the following menu: • Expand/Collapse - when the cursor is over a pointer, a structure or an array • Increase Index - when the cursor is over an array element • Decrease Index - when the cursor is over an array element. Psy-Q Development System These options can also be activated by: • Using the appropriate Hot Keys • Clicking on these icons Note: Use of the Local Pane is restricted to debugging in C. The Active Pane can be made a Local Pane via any of the following methods: Clicking on the Local Pane icon on the toolbar Using the Pane Type option from the Pane menu Using the Hot Key Ctrl+Shift+L See Also: Watch Pane Expanding Or Collapsing A Variable Traversing An Index Psy-Q Development System Watch Pane The Watch Pane is used to evaluate and browse C type expressions. Watch Pane Display When you select the Watch Pane menu or click the right hand mouse button over a Watch Pane, the following menu is displayed: • Add Watch • Edit Watch • Delete Watch • Clear All Watches • Expand/Collapse - to view/hide the components of a structure or an array • Increase Index - to view higher indexed values within an array • Decrease Index - to view lower indexed values within an array These options can also be activated by the following methods: • Using the appropriate Hot Keys • Clicking on the appropriate icons Structures, pointers and arrays can be opened in a Watch Pane. Psy-Q Development System • If you open a structure the members of that structure are displayed. • If you open a pointer it is dereferenced. • If you open an array the first element of the array is displayed. The contents of the Watch Pane are saved within the View when the Project is saved. Variables can be viewed in hexadecimal or decimal modes by right-clicking within the Pane and ‘toggling’ between Hexadecimal/Decimal (on the displayed menu) as required. A tick will appear alongside Hexadecimal when this mode is selected. Any Watch variable that evaluates to a ‘C’, l-type expression, can be assigned a new value. Note: The options Expand/Collapse and Increase Index ‘+’ and Decrease Index ‘-’ are only available for arrays, pointers and structures. See Also: Assigning Variables Expanding Or Collapsing A Variable The Active Pane can be made a Watch Pane via any one of the following methods: Clicking on the Watch Pane icon on the toolbar Using the Pane Type option from the Pane menu Using the Hot Key Ctrl+Shift+W Psy-Q Development System C Type Expressions In Watch Pane The following ‘C’ type expressions, shown in order of precedence, may be used to evaluate expressions within the Watch View of a Project: [] array subscript -> record lookup ~-*& unary prefix */% multiplicative +- additive << >> bitwise shifting <> <= >= comparatives == != equalities & bitwise and ^ bitwise xor | bitwise or Note: As in C, parenthesis can be used to override precedence. Psy-Q Development System Assigning Variables Any variable that evaluates to a ‘C’, l-type expression can be assigned a new value. For example, in the case of a de-referenced pointer, a new value can be assigned to the pointer or the de-referenced expression. 4 Variables are assigned as follows: 1. Place the caret over the required expression to make it Active. 2. Press ‘=‘. 3. Enter the new value to the displayed dialogue box; this can be another expression if required. 4. Click . In the example below, this facility was used to assign a new value of 0x80002000 to the specified pointer. The de-referenced structure changes to reflect the amended value. Displayed Structures For Pointer Address Psy-Q Development System Amended Structures After Pointer Assigned New Variable IMPORTANT: The expression that you are assigning and the new value, must have compatible types. Note: Variables can be assigned whilst the Target is running. Expanding Or Collapsing A Variable Pointers, structures and arrays are variables which can be expanded or collapsed in the Local or Watch Panes when you place the caret over them. If you expand a pointer a line will be added below for the dereferenced pointer. For example if the pointer is to an integer, the dereferenced pointer will display that integer. An expanded structure will display all the elements of that structure below it. For an expanded array the second line of the display will display the first element of the array. 4 To expand or collapse a variable: 1. Select the Pane menu for the Local or Watch Panes. 2. Choose the Expand or Collapse option from the menu. Psy-Q Development System When shown in the Watch Pane, expressions which can be expanded or collapsed will be prefixed as follows: + this indicates an expression that can be expanded - this indicates that the expression is expanded and can be closed. This is followed by the expression’s type and value. 4 To edit an expression highlight it and press Return. Note: It is also possible to expand or collapse an expression by using the expand or collapse icons on the Pane toolbar or pressing SPACE. Traversing An Index You can traverse an index if the caret is on an array element in the Local or Watch Panes. If an index is increased, the array will display the next array element. Decreasing an index causes the previous array element to be displayed. 4 To increase or decrease an index: 1. Select the Pane menu for the Local or Watch Panes. 2. Choose the Increase Index or Decrease index option from the menu. Note: It is also possible to expand or collapse a variable by using the increase index or decrease index icons on the Pane toolbar. Psy-Q Development System Adding A Watch The Watch Pane is used to evaluate and browse C type expressions. 4 To add a watch or expression : 1. Make the Watch Pane the Active Pane. 2. Select the Watch Pane menu from the Menu bar. 3. Choose the Add Watch option from the menu. 4. Type the required expression directly into this box or click the down arrow to display expressions which have been used previously. Add Watch Dialogue Box 5. Enter or click the required expression and select The Debugger also offers various ‘matching’ facilities whereby you can enter a partial value and the program will search the current and global scopes for those matching the specified criteria. These are described below in Additional Features When Entering Expressions. Note: It is also possible to add a watch by clicking on the add watch icon the Watch Pane toolbar. See Also: Expression Evaluation Features Psy-Q Development System on Additional Features When Entering Expressions Simple Name Completion 4 With this facility, the program will attempt to complete the symbol to the right of the specified expression, as follows: 1. Enter a partial expression to the Add Watch dialogue box. 2. Click or press Alt-M. If you had specified: attr_ The Debugger will search for all symbols beginning with ‘attr’, first in the current scope and then in the global scope. If a single match is found, the specified expression will be completed automatically. If more than one is located a dialogue box will list all matching symbols. Symbol Selection Dialogue Box 3. Highlight (select) the required symbol and click . See Multiple Selection below for further details. The status line will display ‘no matches found’ where relevant. Psy-Q Development System Advanced Symbol Matching 4 In addition to basic name completion which always completes the symbol at the end of the specified expression, extended name completion can be used to complete a symbol anywhere in the expression, as follows: 1. Enter a partial expression. 2. Place the caret (insertion point) on or at the end of the symbol you wish to complete and according to the group you wish to search, press one of the following key combinations: Alt-N - All symbols (Normal) Alt-G - Global (Static & external variables) Alt-L - Local (Automatic variables in scope) Alt-F - Functions (Static & external) Alt - T - Types (Typedef & structure tag). Matching expressions will be displayed as described above. 3. Highlight (select) the required symbol(s) and click . Note: This advanced matching facility is only available from the keyboard. Note: You cannot symbol match on register or label names. Wild-Card Matching 4 It is also possible to locate a particular symbol via the entry of a wild-card expression. This can include ‘*’s (to match any number of characters) and ‘?’s (to match any single character) and is used as follows: 1. Enter a wild-card expression, for example *tion. 2. Select it via Shift+Left Arrow or by double-clicking. 3. Press Alt-N. The Debugger will continue as described for Extended Name Completion. In the example specified above it will search for all symbols ending in ‘tion’, first in the current scope and then in the global. Psy-Q Development System Multiple Selection 4 If you are name completing or wild-card matching a single symbol and more than one match is found, you can select all or some of the matches and add them to the Watch Pane at the same time. Where several matches are found, they will be presented in an ‘extended selection’ list box. 1. Select symbols as required; use the mouse and Ctrl and/or shift keys to make a specific selection or click to highlight all the matched symbols. Multiple Symbol Selection Dialogue Box Use the mouse and Ctrl key to de-select a particular symbol from your list or click to de-select all the symbols 2. When your selection is complete, click ; the value in the dialogue entry box will change to <multiple selection>. Note that this value cannot be edited. 3. Click to add your selection to the Watch Pane. Note: To browse all symbols, click with no value in the dialogue box or wild-card match using ‘*’ as the wild-card. Psy-Q Development System Editing A Watch 4 Any of the C type expressions that you can enter into the Watch Pane can be edited as follows: 1. Make the Watch Pane the Active Pane. 2. Select the Watch Pane menu from the Menu bar. 3. Choose the Edit Watch option from the menu. 4. Select the watch to edit. 5. Amend as necessary and click available via this dialogue box. . History and matching facilities are Note: It is also possible to edit a watch by clicking on the Edit Watch icon the Watch Pane toolbar. Note: To view variables in hexadecimal, right-click within the Pane and ‘toggle’ ‘Hexadecimal/Decimal’ as necessary. A tick will appear alongside Hexadecimal when this option has been selected. See Also: Additional Features When Entering Expressions Previously Entered Expressions History List Psy-Q Development System on Deleting A Watch 4 Any of the C type expressions entered into the Watch Pane can be deleted as follows: 1. Make the Watch Pane the Active Pane. 2. Select the Watch Pane menu from the Menu bar. 3. Choose the Delete Watch option from the menu. 4. Select the watch and press Enter. Note: It is also possible to delete a watch by clicking on the Delete Watch icon on the Watch Pane toolbar or pressing DEL. Note: You can only delete a Watch at the root of the expression, not on any expanded part of it. Clearing All Watches 4 All of the C type expressions entered into the Watch Pane can be removed in one action, as follows: 1. Make the Watch Pane the Active Pane. 2. Select the Watch Pane menu from the menu bar. 3. Choose the Clear All Watches option from the menu. Note: You can also clear all watches by clicking on the Clear All Watches icon on the Watch Pane toolbar. Psy-Q Development System Debugging Your Program The Psy-Q Debugger helps you to detect, diagnose and correct errors in your programs. This is achieved via facilities which enable you to step and trace through your code in order to examine local and global variables, registers and memory. Breakpoints can be set wherever you need them at C and Assembler level and if required, these breaks can be made conditional on an expression. Additionally, selected breakpoints can be disabled for particular runs. Your choice of Views depends on the level at which you are debugging. For example it is appropriate to use a Register Pane for assembler debugging and a Local Pane when debugging in C. Specifying The Continual Update Rate 4 It is possible to adjust the rate at which the Debugger updates information while the Target is running. This is particularly important for Targets which connect independently of a pollhost( ) since rapid connection rates may cripple the Target. It is achieved as follows: 1. Select Continual Update Rate from the Project option on the main menu or press Ctrl+I. A dialogue box displays the current rate in milliseconds: Update Rate Dialogue Box 2. Enter a new value and select sessions and not as part of a Project. . The rate is saved between all debugging Psy-Q Development System Forcing An Update During continual update, the information you see in the Debugger windows won’t be updated until the next connection; therefore, the slower the update rate, the longer it will be before exceptions can be spotted. However, it is possible to force an update by pressing Ctrl+U or selecting the Update option from Debug on the main menu. Setting Breakpoints Breakpoints can be set in the Source and Disassembly Panes. They can be absolute (i.e. always break) or conditional upon an expression. They are displayed in the Pane as a different coloured bar. 4 To set a breakpoint: 1. Make a Source or Disassembly Pane Active. 2. Click on the instruction or line at which you want to set the break. 3. Select the Debug menu from the Menu bar. 4. Choose the Toggle breakpoints option from the menu. Breakpoints can be made conditional upon an expression that you set, by using the Edit Breakpoint dialogue box found via the Breakpoints List on the Unit Menu. A Project can have many breakpoints set and they are saved when the Project is saved. They are restored relative to Assembler labels wherever possible; this ensures they are preserved even when you alter the source code and rebuild. Breakpoints can be removed by clicking on the colour bar and reversing the toggle options taken to create it. Note: Breakpoints can also be set and removed via the F5 key or the set / unset breakpoint icons on the Pane toolbar. Psy-Q Development System Editing Breakpoints The Breakpoints option on the Unit menu can be used to enable or disable breakpoints for a particular debugging run or to make the breakpoints conditional on an expression that you set. The Breakpoints option on the Unit menu shows you a pop-up list of all the breakpoints currently set in the Project, the address where they are located and the label (if one exists). Enabled breakpoints will have a tick beside them. 4 To edit breakpoints: 1. Select the Unit menu by clicking on the Unit button. 2. Choose the Breakpoints option from the menu. 3. Select the breakpoint you wish to edit. Edit Breakpoint Dialogue Box When you select a breakpoint from the list displayed on the Unit menu, the Edit Breakpoint dialogue box shown above appears. The enabled check box allows you to enable and disable breakpoints. When the check box is set the breakpoint is enabled and only these will be included in a debugging run. Psy-Q Development System There are two types of break: • Break at Point is a standard break. • Break if expression is true is a conditional break. 4. Select the type of break you require from the Type box pull-down list. Both options display the breakpoint address in the Location box. The location can be overtyped to move a break. When the Break if expression is true option is enabled to create a conditional breakpoint, enter a C like expression or a label in the Expression box. 5. Use made. to leave the dialogue box without saving the changes you have Use to delete the selected breakpoint. Click when you have made all your changes. Note: A quick way to make a breakpoint conditional is to place the cursor over a breakpoint and use the Hot Keys Shift F5. Any of the following methods can be used to create, remove and edit breakpoints: The F5 key The Breakpoint options from the Source or Disassembly Pane menus The Breakpoint icons from the Pane toolbars Psy-Q Development System Stepping Into A Subroutine The Step Into command allows you to trace the execution of the program one step at a time and so isolate any bugs that might be present. When you Step Into a subroutine call, the Program Counter moves to the start of the subroutine and displays the relevant code. At the end of the subroutine you will be returned to where it was called from. At Assembler level a debugging step is the execution of a single instruction. If you wish to use the Step Into command at Source level you must make the Source Pane Active. In this case, one line at a time will be executed in each step and any subroutines or calls within that line will be stepped into. 4 To Step Into a subroutine during debugging: 1. Select the Debug menu from the Menu bar. 2. Choose the Step Into option from the menu. Note: Alternative ways of Stepping Into a subroutine are to use the Step Into icon on the Unit toolbar (at the bottom of the Debugger window) or to press F7. Note that it is possible to use the Step Into icon for a non-Active View. Psy-Q Development System Stepping Over A Subroutine When you use the Step Over command, the subroutine is executed but not displayed and the Program Counter moves to the next line of calling routine code. At Assembler level a debugging step is the execution of a single instruction. If you wish to use the Step Over command at Source level, you must first make the Source Pane Active. In this case, one line at a time will be executed in each step and any subroutines or calls within that line will be performed. 4 To Step Over a subroutine: 1. Select the Debug menu from the Menu bar. 2. Choose the Step Over option from the menu. Note: Alternative ways of Stepping Over a subroutine are to use the Step Over icon by the Unit menu or to press F8. Note that you can use the Step Over icon for a non-Active View. Psy-Q Development System Running To The Current Cursor Position The Run to Cursor command can be used during debugging within the Source and Disassembly Panes. 4 To run to the current cursor position: 1. Make a Source or Disassembly Pane active. 2. Click on the displayed code at the point you want to run to. 3. Select the Source or Disassembly menu from the Menu bar. 4. Choose the Run To Cursor option from the menu. If the Unit does not reach the cursor position it will continue running. Note: Alternative methods of running to the cursor are to click on the Run To Cursor icon on the Pane toolbar or to use the Hot Key F6. Note: You can use Run To Cursor while the Unit is running to make it stop at the cursor position. Psy-Q Development System Running Programs The Run command causes the CPU of the specified Unit to start running. It will continue until it meets a breakpoint, a processor exception or is stopped by the Stop or Run To Cursor commands. During a debugging run the various Panes will show the progress of the run. 4 To start the program running: 1. Select the Debug menu from the menu bar. 2. Choose the Go option from the menu. Note: Alternative ways to start the run are to click the Start button on the relevant Unit toolbar or to press F9. Stopping A Program Running The Stop command halts the CPU of the specified Unit as soon as possible. 4 It is specified as follows: 1. Select the Debug menu from the Menu bar. 2. Choose the Stop option from the menu. Note: Alternative ways to stop the run are to click the Stop button on the relevant Unit toolbar or to press Esc. Psy-Q Development System Moving The Program Counter The program counter (PC) can be set via the Set PC command. This command moves the program counter to the current cursor position. 4 It is found on the Pane menus for Source and Disassembly Panes and is set as follows: 1. Make a Source or Disassembly Pane Active. 2. Place the caret where you wish the PC to move to. 3. Click the right hand mouse button to call the Pane menu. 4. Select the Set PC option from the menu. With this command, no instructions are executed between the previous and new PC position. The opposite command to Set PC is Goto PC which takes the cursor to the position of the Program Counter. Note: An alternative way to activate the Set PC command is by using the Hot Key Shift+Tab. Psy-Q Development System Moving The Caret To The PC The caret point can be placed at the program counter address via the Goto PC command. This is found on the Pane menus for Source and Disassembly Panes. 4 To Set The PC: 1. Make a Source or Disassembly Pane Active. 2. Click the right hand mouse button to call the Pane menu. 3. Select the Goto PC option from the menu. Goto PC is the opposite command to Set PC which sets the Program Counter to the value at the current caret position. Note: Alternatively, pressing the ‘space’ bar will directly place the caret point at the program counter address. Psy-Q Development System Moving To A Known Address Or Label 4 The Goto command is available on the Source, Disassembly and Memory Pane menus. It is used to put the caret and PC at a known address, label name, register name or value of a specified C expression as described below: 1. Make the Source, Disassembly or Memory Pane Active. 2. Click the right hand mouse button to call the Pane menu. 3. Select the Goto option from the menu. 4. A dialogue box appears in which you enter the memory address, symbol name, register name or C expression. 5. Click to place the cursor at the entry point. Go To Expression Dialogue Box 6. Type the required expression directly in this box or click the down arrow to display expressions which have been entered previously. 7. Enter or select the required expression and click . Note that a hexadecimal address must be prefixed with the string ‘0x’ As the Goto action will take you to the value of the specified expression, note the consequences when you enter a name containing C debug information as well as an Assembler label. For example, if ‘_ramsize’ is specified you will be taken to the value of _ramsize, not to where it is defined. This is because the C expression evaluator sees the C definition of _ramsize first and then evaluates it. To Goto this address, you must enter either ‘&_ramsize’ or ‘:_ramsize’. Psy-Q Development System Alternatively, you could Goto ‘main’ (as functions evaluate to their address); to Goto an offset from main, enter: ‘:main+offset’, ‘&main+offset’ or ‘(int)main+offset’. This is because ‘main’ by itself has the type int ( ) which cannot be added. Note: When you have successfully ‘gone to’ an expression in a Memory Pane, the ‘pointed to’ word is enclosed in a box. This will remain until you Goto something else or anchor the Pane to an expression. See Also: Anchoring Memory Panes Expression Evaluation Features Previously Entered Expressions History List Note: Alternatively, you can activate the Goto command via the Goto icon on the toolbar or the Hot Key Ctrl G. Psy-Q Development System Expression Evaluation Features Register Names Register names can be specified in any dialogue box where expressions can be entered. By default, the evaluator looks for C symbols first, so any variables which are the same as register names will be shown instead. If a name is being interpreted as a register it will be prefixed by a ‘$’. It is recommended that you use this ‘$’ prefix when entering register names to explicitly tell the evaluator that it is looking at a register. Note: Registers have a C type of ‘int’. Typecasts and Typedefs Typecasts can be entered to an expression via the usual C syntax. If you entered ‘(int*)$fp’ to a Watch Pane you would see the following: +int*(int*)$fp = 0x8000ff00 Typecasting also works for structure tags; however, you are not required to enter the keyword ‘struct’ when csting to a structure tag. You would expect to see the following when typecasting to a structure (or class): -Tester* (Tester*)$fp = 0x807ff88 -Tester +unsigned char* m_pName = 0x00000645 +unsigned char* mpLongName = 0xFFFFFFFF You can also cast to typedefs; for example, entering ‘(daddr_t)p’ will produce: long (daddr_t)p = 0x00003024 Psy-Q Development System Labels Labels can also be included in a C expression. The evaluator looks for C level information first and then label information. If it finds a label it will prefix it with a ‘:’. It is recommended that you use this prefix when entering labels to explicitly tell the evaluator that it is looking at a label. Note: Labels have a C type of ‘int’. Functions If you include a function name in an expression, its value will be the same as its address. It will appear in a Watch window as follows: int ( ) main = (...) (0x80010BFC) Note: This is contrary to C where the value of a function, is what is returned from the function when it is executed. Note: It is recommended that you access the address of a function via the ‘&’ operator or the Assembler label. Expression Evaluation Name Resolution In summary, the search order for a name in an expression is as follows: 1. Escaped Register Names (prefix ‘$’) 2. Escaped Label Names (prefix ‘:’) 3. C Names 4. Register Names 5. Label Names Psy-Q Development System Previously Entered Expressions History List Once an expression has been specified via a Goto or Add/Edit Watch dialogue box, it will be stored in a history buffer. When you next access one of these dialogue boxes, click the down arrow to display a listing of these values. At this point you can enter a new expression to the dialogue box or select one from the list and click . The selected expression can also be edited at this point. Note: The most recent expressions used are held at the top of the list. Anchoring Panes To The PC By default the Source and Disassembly Panes are anchored to the Program Counter (PC). This means that whenever possible the instruction or line at the PC is always displayed in the Pane. 4 The Follow PC property is toggled as follows: 1. Make a Source or Disassembly Pane Active. 2. Click the right hand mouse button to call the Pane menu. 3. Select the Follow PC option from the menu. Note: This option is also available from the Source and Disassembly Pane toolbar or from the Source or Disassembly menus on the Menu bar. Psy-Q Development System Anchoring Memory Panes Anchoring a Pane has the same function as using Goto on every Debugger update. 4 To anchor the Pane: 1. Select Anchor... from the Pane menu or press Ctrl+A when a Memory Pane is active. 2. Enter an expression. 3. Select . The specified expression will appear in an indicator bar on the Pane. If this goes red, the expression cannot be evaluated in the current scope. Otherwise, the Pane will be ‘anchored’ to the value of the expression and a box will be drawn around the anchor point. You can edit the expression by clicking the indicator. 4 To turn off anchoring: 1. Call up the Anchor dialogue box. 2. Clear the box. 3. Select . Psy-Q Development System Identifying Changed Information Any changes to variables since the last debugging step are displayed in a colour of your choice on all Panes except for Disassembly and Source. This colour is set via the Set Default Colour option from the View menu. See Also: Changing colour schemes in Views Closing The Debugger Without Saving Your Changes The Quit option on the Project menu stops the Psy-Q Debugger running but does NOT save the current Project. 4 To close the Debugger without saving your changes: 1. Select the Project menu from the Menu bar. 2. Choose the Quit option from the menu. Psy-Q Development System Closing The Debugger And Saving Your Changes The Exit option on the Project menu saves the current Project at the latest state and stops the Psy-Q Debugger running. 4 To close the Debugger and save your changes: 1. Select the Project menu from the Menu bar. 2. Choose the Exit option from the menu. Note: It is also possible to close the Project by clicking on the X icon on the system menu shown in the top right corner of the Debugger window. Note: Next time you open the Debugger the last Project you saved will be launched automatically. See Also: Saving Your Project Psy-Q Development System Psy-Q Development System APPENDICES • Appendix A - Error Messages Psy-Q Development System -1 Appendix A - Error Messages This Appendix documents Psy-Q error messages, and is divided into the following sections: • Assembler Error Messages • PSYLINK Error Messages • PSYLIB Error Messages Format: In the list below, %x represents the variable part of the error message, as follows: %s %c %d %l %h %n %t is replaced by a string is replaced by a single character is replaced by a 16 bit decimal number is replaced by a 32 bit decimal number is replaced by a 16 bit hexadecimal number is replaced by a symbol name is replaced by a symbol type, e.g. section, symbol or group. Psy-Q Development System Assembler Error Messages Assembler Messages: '%n' cannot be used in an expression %n will be the name of something like a macro or register '%n' is not a group Group name required '%n' is not a section Section name expected but name %n was found Alignment cannot be guaranteed Warning of attempt to align that cannot be guaranteed due to the base alignment of the current section Alignment's parameter must be a defined name In call to alignment( ) function Assembly failed Text of the FAIL statement Bad size on opcode E.g. attempt to use .b when only .w is allowed Branch (%l bytes) is out of range Branch too far Branch to odd address Warning of branch to an odd address Cannot POPP to a local label E.g. POPP @x Cannot purge - name was never defined Case choice expression cannot be evaluated On case statement Code generated before first section directive Code generating statements appeared before first section directive Could not evaluate XDEF'd symbol XDEF'd symbol was equated to something that could not be evaluated Psy-Q Development System -3 Could not open file '%s' Datasize has not been specified Must have a DATASIZE before DATA statement Datasize value must be in range 1 to 256 DATASIZE statement Decimal number illegal in this radix Specified decimal digit not legal in current radix DEF's parameter must be a name Error in DEF( ) function reference Division by zero End of file reached without completion of %s construct E.g. REPT with no ENDR ENDM is illegal outside a macro definition Error closing file DOS close file call returned an error status Error creating output file Could not open the output file Error creating temporary file Could not create specified temporary file Error in assembler options Error in expression Similar to syntax error Error in floating point number In IEEE32 / IEEE64 statement Error in register list Error in specification of register list for MOVEM / REG Error opening list file DOS open returned an error status Error reading file DOS read call returned an error status Psy-Q Development System Error writing list file DOS write returned an error status or disk full Error writing object file DOS write call returned an error or disk is full Error writing temporary file Disk write error, probably disk full Errors during pass 1 - pass 2 aborted If pass 1 has errors then pass 2 is not performed Expanded input line too long After string equate replacement, etc. line must be <= 1024 chars Expected comma after < > <...> bracketed parameter in MACRO call parameter list Expected comma after operand Expected comma between operands Expected comma between options In an OPT statement Expecting '%s' at this point Expecting one of ENDIF/ENDCASE etc. but found another directive Expecting '+' or '-' after list command In a LIST statement Expecting '+' or '-' after option In an OPT statement Expecting a number after /b option On Command line Expecting comma between operands in INSTR Expecting comma between operands in SUBSTR Expecting comma or end of line after list In { ... } list Expecting ON or OFF after directive In PUBLIC statement Psy-Q Development System -5 Expecting options after /O On Command line Expecting quoted string as operand Expression must evaluate Must be evaluated now, not on pass 2 Fatal error - macro exited with unterminated %s loop End of macro with unterminated WHILE/REPT/DO loop. Due to the way the assembler works, this must be treated as a fatal error Fatal error - stack underflow - PANIC Assembler internal error - should never occur! File name must be quoted Files may only be specified when producing CPE or pure binary output In FILE attribute of group Forward reference to redefinable symbol Warning that a forward reference was made to a symbol that was given a number of values in SET or = statements. The value used in the forward reference was the last value the symbol was set to. Function only available when using sections Group '%n' is too large (%l bytes) Group exceeds value in SIZE attribute GROUP's parameter must be a defined name In GROUP( ) function call GROUPEND's parameter must be a group name Error in call to GROUPEND( ) function GROUPORG's parameter must be a group In call to GROUPORG( ) function GROUPSIZE's parameter must be a group name Error in call to GROUPSIZE( ) function IF does not have matching ENDIF/ENDC Illegal addressing mode Addressing mode not allowed for current op code Psy-Q Development System Illegal character '%c' (%d) in input Strange (e.g. control) character in input file Illegal character '%c' in opcode field Illegal digit in suffixed binary number In alternate number form 101b Illegal digit in suffixed decimal number In alternate number form 123d Illegal digit in suffixed hexadecimal number In alternate number form 1abh Illegal group name Illegal index value in SUBSTR Illegal label Label in left hand column starts with illegal character Illegal name for macro parameter In macro definition Illegal name in command Target name in ALIAS statement Illegal name in locals list In LOCAL statement Illegal name in XDEF/XREF list Illegal parameter number Maximum of 32 parameters Illegal section name Illegal size specifier for absolute address Can only use .w and .l on absolute addressing Illegal start position/length in INCBIN Illegal use of register equate E.g. using a register equate in an expression Illegal value (%l) Illegal value (%l) for boundary in CNOP Psy-Q Development System -7 Illegal value (%l) for offset in CNOP Illegal value for base in INSTR Initialised data in BSS section BSS sections must be uninitialised Instruction moved to even address Warning that a padding byte was inserted Label '%n' multiply defined LOCAL can only be used inside a macro LOCAL statement found outside macro Local labels may not be strings @x EQUS ... is illegal Local symbols cannot be XDEF'd/XREF'd MEXIT illegal outside of macros Missing '(' in function call Missing ')' after function parameter(s) Missing ')' after file name In FILE attribute Missing closing bracket in expression Missing comma in list of case options In =... case selector Missing comma in XDEF/XREF list MODULE has no corresponding MODEND Module may not end until macro/loop expansion is complete If a loop / macro call starts inside a module then there must not be a MODEND until the loop / macro call finishes Module must end before end of macro/loop expansion - MODEND inserted A module started inside a loop / macro call must end before the loop / macro call does Psy-Q Development System More than one label specified Only one label per line (can occur when second label does not start in left column but ends in ':' ) Move workspace command can only be used when downloading In WORKSPACE statement Names declared with local must not start with '%c' In LOCAL statement NARG can only be used inside a macro Use of NARG outside macro NARG's parameter must be a number or a macro parameter name Illegal operand for NARG( ) function No closing quote on string No corresponding IF ENDIF/ELSE without IF No corresponding DO UNTIL without DO No corresponding REPT ENDR without REPT No corresponding WHILE ENDW without WHILE No matching CASE statement for ENDCASE ENDCASE without CASE No source file specified No source file on command line Non-binary character following % Non-hexadecimal character '%c' encountered In HEX statement Non-hexadecimal character starting number Expecting 0-9 or A-F after $ Non-numeric value in DATA statement OBJ cannot be specified when producing linkable output OBJ attribute on group Psy-Q Development System -9 Odd number of nibbles specified In HEX statement OFFSET's parameter must be a defined name Error in OFFSET( ) function call Old version of %n cannot be purged Only macros can be purged One string equate can only be equated to another Attempt to equate to expression, etc. Only one of /p and /l may be specified On Command line Only one ORG may be specified before SECTION directive Op-code not recognised Option stack is empty POPO without PUSHO Options /l and /p not available when downloading to target On Command line ORG ? can only be used when downloading output ORG address cannot be specified when producing linkable output No ORG group attributes when producing linkable output ORG cannot be used after SECTION directive ORG cannot be used when producing linkable output ORG must be specified before first section directive When using sections only one ORG statement may appear before all section statements (other than as group attributes) Out of memory, Assembler aborting Out of stack space, possibly due to recursive equates Assemblers stack is full, possible cause is recursive equates, e.g. x equ y+1 , y equ x*2 Overflow in DATA value DATA value too big Psy-Q Development System Overlay cannot be specified when producing linkable output No OVER group attributes when producing linkable output Overlay must specify a previously defined group name Error in OVER group attribute Parameter stack is empty POPP encountered but nothing to pop POPP must specify a string or undefined name Possible infinite loop in string substitution E.g. reference to x where x is defined as x equs x+1 Previous group was not OBJ'd OBJ( ) attribute specified but previous group had no obj attribute to follow on from Psy-Q needs DOS version 3.1 or later Purge must specify a macro name Radix must be in range 2 to 16 REF's parameter must be a name Error in REF( ) function reference Register not recognised Expecting a register name but did not recognise Remainder by zero As for division by 0 but for % (remainder) Repeat count must not be negative REPT statement error Replicated text too big Text being replicated in a loop must be buffered in memory but this loop was too big to fit Resident SCSI drivers not present PSYBIOS does not appear to be loaded SCSI card not present - assembly aborted SECT's parameter must be a defined name Error in SECT( ) function call SECTEND's parameter must be a section name Error in call to SECTEND( ) function Psy-Q Development System -11 Section stack is empty POPS without PUSHS Section was previously in a different group Section assigned to a different group on second invocation SECTSIZE's parameter must be a section name Error in call to SECTSIZE( ) function Seek in output file failed DOS seek call returned error status Severity value must be in range 0 to 3 In INFORM statement SHIFT can only be used inside a macro SHIFT statement outside macro Short macro calls in loops/macros must be defined before loop/macro Short macros may not contain labels Size cannot be specified when producing linkable output SIZE attribute on group Size specified in /b option must be in range 2 to 64 On command line Square root of negative number Statement must have a label No label on, for example, EQU op STRCMP requires constant strings as parameters String '%n' cannot be shifted String specified in SHIFT statement is not a multi-element string (i.e. {...} bracketed) and so cannot be shifted. STRLEN's operand must be a quoted string Symbol '%n' cannot be XDEF'd/XREF'd Symbol '%n' is already XDEF'd/XREF'd Symbol '%n' not defined in this module Undefined name encountered Psy-Q Development System Syntax error in expression Timed out sending data to target Target did not respond Too many characters in character constant Character constants can be from 1 to 4 characters Too many different sections There is a maximum of 256 sections Too many file names specified On command line Too many INCLUDE files Limit of 512 INCLUDE files Too many INCLUDE paths specified Too many INCLUDE paths in /j options on command line Too many output files specified Maximum of 256 output files Too many parameters in macro call Maximum number of parameters (32) exceeded Too much temporary data Assembler limit of 16m bytes of temporary data reached TYPE's parameter must be a name Call of TYPE( ) function Unable to open command file From Command line Undefined name in command Target name in ALIAS statement Unexpected case option outside CASE statement Found =... statement outside CASE/ENDCASE block Unexpected characters at end of Command line Unexpected characters at end of line End of line expected but there were more characters encountered (other than comments) Unexpected end of line Psy-Q Development System -13 Unexpected end of line in macro parameter Unexpected end of line in list parameter In { ... } list Unexpected MODEND encountered MODEND without preceding MODULE UNIT can only be specified once In UNIT statement UNIT cannot be used when producing linkable output In UNIT statement Unknown option In OPT statement Unknown option /%c Unknown option on Command line Unrecognised attribute in GROUP directive Unrecognised optimisation switch '%c' In OPT statement or Command line User pressed Break/Ctrl-C Assembly aborted by user XDEF'd symbol %n not defined Symbol was XDEF'd but never defined XDEF/XREF can only be used when producing linkable output Zero length INCBIN - Warning of zero length INCBIN statement Psy-Q Development System Psylink Error Messages Linker Messages: %t %n redefined as section New definition of previously defined symbol %t '%n' redefined as group New definition of previously defined symbol %t '%n' redefined as XDEF symbol New definition of previously defined symbol Attempt to switch section to %t '%n' Non-section type symbol referenced in section switch Attempt to use %t '%n' as a section in expression Section type symbol required Code in BSS section '%n' BSS type sections should not contain initialised data COFF file has incorrect format COFF format files are those produced by Sierra C cross compiler, etc. Different processor type specified Object code is for different processor type than target or attempt was made to link code for different processor types Division by zero Error closing file DOS close file call returned error status Error in /e option On Command line Error in /o option On Command line Error in /x option On Command line Error in command file Error in Linker options On Command line Psy-Q Development System -15 Error in REGS expression Error reading file %f DOS read file call returned error status Error writing object file DOS write file call returned error status - probably disk full Errors during pass 1 - pass 2 aborted Pass 2 does not take place if there were errors on Pass 1 Expecting a decimal or hex number /o option on Command line File %f is in out-of-date format File should be re-built be re-assembling File %f is not a valid library file File %f is not in PsyLink file format Group '%n' is too large (%l bytes) Group is larger than its size attribute allows Group '%n' specified with different attributes Different definitions of a group specify different attributes Illegal XREF reference to %t '%n' Object file defines xref to symbol which cannot be xref'd, e.g. a Section name Multiple run addresses specified More than one run address specified No source files specified No source file on Command line Object file made with out-of-date assembler File should be re-built before re-assembling Only built in groups can be used when making relocatable output When /r command line option is used, only the built in groups can be used, i.e. no new groups may be defined Option /p not available when downloading to target Options /p and /r cannot be used together On Command line Psy-Q Development System ORG ? can only be used when downloading output Out of memory, Linker aborting Previous group was not OBJ'd Cannot specify OBJ() attribute if previous group did not have obj attribute Reference to %t '%n' in expression Use of, e.g. a section name in an expression Reference to undefined symbol #%h There is an internal error in the object file Relocatable output cannot be ORG'd Remainder by zero Run-time patch to odd address Warning that a run-time longword patch to an odd address will occur which may cause some Amiga systems to crash SCSI card not present - linking aborted Could not find SCSI card SCSI drivers not loaded PSYBIOS does not appear to be present Section '%n' must be in one of groups code, data or BSS When producing Amiga format code Section '%n' placed in non-group symbol #%h There is an internal error in the object file Section '%n' placed in non-group symbol '%n' An attempt was made to place a section in a non-group type symbol Section '%n' placed in two different groups Section is placed in different groups Section '%n' placed in unknown group symbol #%h There is an internal error in the object file Section '%n' must be in one of groups text, data or BSS When producing ST format code Symbol '%n' multiply defined New definition of previously defined symbol Psy-Q Development System -17 Symbol '%n' not defined Undefined symbol Symbol '%n' placed in non-section symbol #%h There is an internal error in the object file Symbol '%n' placed in unknown section symbol #%h There is an internal error in the object file Symbol in COFF format file has unrecognised class COFF format files are those produced by Sierra C cross compiler, etc. Timed out sending data to target Target not responding or offline Too many file names specified Too many parameters on command line Too many modules to link Maximum of 256 modules may be linked Too many symbols in COFF format file COFF format files are those produced by Sierra C cross compiler, etc. Unable to open output file Could not open specified output file Undefined symbol in COFF file patch record COFF format files are those produced by Sierra C cross compiler, etc. Unit number must be in range 0-127 Unknown option /%c On Command line Unknown processor type '%s' Could not recognise target processor type Unrecognised relocatable output format /r option on command line User pressed Break/Ctrl-C Linking aborted by user Psy-Q Development System Value (%l) out of range in instruction patch Value to be patched in is out of range WORKSPACE command can only be used when downloading output Psy-Q Development System -19 Psylib Error Messages Librarian Messages: Cannot add module : it already exists Module may only appear in a library once Could not create object file Error creating object file when extracting Could not create temporary file Error creating temporary file Could not open/create DOS error opening file Error reading library file DOS error reading file Error writing library file DOS error writing file, probably disk full Incorrect format in object file Error in object file format - re-build it No files matching No object files matching the specifications were found No library file specified No object files specified No option specified An action option must be specified on the command line Unknown option / On Command line, option not recognised Psy-Q Development System Psy-Q Development System Symbols - ....................................................3-9, 14-2 ! ............................................................. 3-9 !x ........................................................... 15-7 # .........................................5-5, 11-15, 15-8 $ .............................................3-4, 3-11, 5-5 $x ........................................................... 15-6 % ......................................................3-4, 3-9 %d, %h, %s .............................................. 9-8 & ...............................................3-2, 3-9, 5-4 &0 ........................................................ 11-14 ' ............................................................. 4-6 ( ) ............................................................. 3-9 * ...............................................3-5, 3-9, 5-6 + ............................................................. 3-9 . ............................................................. 3-3 / . 1-8, 1-14, 2-2, 3-9, 11-2, 12-2, 13-2, 15-2 /&n ......................................................... 11-3 : ............................................................. 3-3 ; ............................................................. 3-2 < ............................................................. 3-9 < >............................................................ 5-3 <<............................................................. 3-9 <=............................................................. 3-9 <>............................................................. 3-9 = .............................................3-9, 4-4, 4-32 =? ........................................................... 4-32 > ....................................................3-9, 11-7 >=............................................................. 3-9 >>............................................................. 3-9 ? ....................................................3-3, 4-19 @ .2- 2,7, 3-3,5,6, 7-2, 9-4, 11-15, 12-3, 15-2 \ ...............................................3-4, 5-5, 5-6 ^ ............................................................. 3-9 _ ............................................................. 3-3 __RS..................................................3-5, 4-9 _filename .................................................. 3-5 { ......................................................4-5, 5-6 | ............................................................. 3-9 ~ ............................................................. 3-9 A Activity Windows.................................... 11-5 Adding A Watch ................................... 16-57 ALIAS .................................................... 3-12 Alignment ........................3-8, 4-20, 4-21, 8-4 Alternate Numeric..................................... 9-4 Anchoring a Pane ..................................16-78 array......................................................16-52 ASM68K...................................................2-1 Command Line ......................................2-2 Environment Variable ............................2-4 ASMSH Command Line .............................. 2-6, 2-7 Specific Features ...................................2-8 Assembler Command File ............................... 2-2, 2-7 Comment Lines .....................................3-2 Constants ...................................... 3-4, 3-5 Continuation Lines.................................3-2 Error Messages.............................2-5, 16-2 Functions....................................... 3-7, 3-8 Operators ..............................................3-9 Options.......................................... 9-3, 9-4 Running with Brief ..............................1-15 User Termination...................................2-4 Warning Messages.................................9-4 Assembler, White Space ............................9-4 Assigning Variables ...............................16-54 Assignment Directives ...............................4-2 AUTOEXEC.BAT ............................ 1-2, 1-7 Automatic Even.... 4-9, 4-13, 4-14, 4-15, 4-20 B Beta Test Scheme....................................16-6 Break at Point .......................................16-66 Break if expression is true......................16-66 Breakpoints ................................11-17, 16-64 Brief........................................................1-15 Macros ................................................1-16 BSS..................................................4-15, 8-2 Buffer Size ................................................1-8 C CASE......................................................4-32 Case Sensitivity .........................................9-4 CCSH .....................................................14-1 Command Line ....................................14-2 Character Constants ..................................3-4 CNOP ..............................................4-21, 8-4 Command Files Assembler...................................... 2-2, 2-7 PSYLINK ...........................................12-4 Command Lines ASMSH ........................................ 2-6, 2-7 Assembler..............................................2-2 Psy-Q Development System CCSH ................................................. 14-2 Debugger ............................................ 11-2 PSYBIOS ............................................. 1-8 PSYLIB .............................................. 13-2 PSYLINK ........................................... 12-2 PSYMAKE ......................................... 15-2 RUN ................................................... 1-14 COMMAND.COM ................................. 15-5 completion ............................................ 16-59 Configuration Files.................................. 11-4 Configuring Your Dex Boards................. 16-9 Configuring Your SCSI Card ................ 16-10 Constants Character .............................................. 3-4 Integer .................................................. 3-4 Location Counter .................................. 3-6 Special .................................................. 3-5 Time and Date....................................... 3-5 Continual Update Rate .......................... 16-63 Continuation Lines Assembler ............................................. 3-2 Makros.................................................. 5-4 CPE File Properties............................... 16-22 CPE Files ............1-14, 2-3, 4-37, 11-2, 11-16 D DATA..................................................... 4-17 DATASIZE ............................................ 4-17 Date Constants.......................................... 3-5 DBUGSAT ...............................See Debugger DC.......................................................... 4-13 DCB ....................................................... 4-14 Debugger Activity Windows................................ 11-5 Breakpoints....................................... 11-17 Command Line.................................... 11-2 Configuration Files .............................. 11-4 Cursor Movement ............................. 11-13 Debugging Control............................ 11-16 Disassembly Window ...... 11-6, 11-9, 11-17 Exiting .............................................. 11-15 Expressions ....................................... 11-15 File Accessing ................................... 11-16 File Window...................................... 11-17 Hex Window ............................ 11-7, 11-18 Keyboard Options ..........11-15,20,21,22,23 Mouse Usage .................................... 11-14 Moving Between Windows................ 11-12 Prompts ............................................ 11-15 Register Window...................... 11-6, 11-18 Selecting Window Type..................... 11-12 Source Level Window .........................11-8 Source Window.................................11-17 Var Window.............................11-8, 11-19 Watch Window.........................11-8, 11-18 Window Handling..............................11-15 Window Joining.................................11-13 Window Locking ...............................11-14 Window Re-sizing .............................11-12 Window Splitting...............................11-13 Decrease Index......................................16-49 DEF ........................................................4-28 Deleting A Watch..................................16-62 Diagnostics, Target Interface ...................1-13 DISABLE ...............................................3-12 Disassembly Window...........11-6, 11-9, 11-17 DMA Channel ...........................................1-8 DO..........................................................4-35 Documentation ......................................16-12 DS...........................................................4-15 E Edit breakpoint......................................16-45 Editing A Watch....................................16-61 ELSE ......................................................4-30 ELSEIF...................................................4-30 END........................................................4-30 ENDC .....................................................4-30 ENDCASE..............................................4-32 ENDIF ....................................................4-30 ENDM ......................................................5-2 ENDR .....................................................4-33 ENDW ....................................................4-34 Environment Variables ...... 1-7, 1-15, 2-4, 9-7 EQU..........................................................4-3 See also ........................................2-3, 5-11 EQUR .......................................................4-7 See also ...............................................5-11 EQUS .......................................................4-5 See also ...............................................5-11 Error Messages .......................................16-1 Assembler.....................................2-5, 16-2 PSYLIB ............................................16-19 PSYLINK .........................................16-14 EVEN ..............................................4-20, 8-4 Expand/Collapse....................................16-49 Expanding Or Collapsing A Variable .....16-55 Expressions Constants ..............................................3-4 Debugger...........................................11-15 Functions...............................................3-7 Makefiles.............................................15-7 Psy-Q Development System Operators .............................................. 3-9 Extended Name Completion.................. 16-59 F FAIL......................................................... 9-8 FILE ......................................................... 8-3 File Window.......................................... 11-17 Fileserver Functions .....10-3,4,5,6,7,8,9,10,12 Firmware Functions...................... 10-2, 10-11 Follow PC............................................. 16-45 Functions .............................................. 16-76 Alignment ............................................. 3-8 Fileserver .................10-3,4,5,6,7,8,9,10,12 FileSize ................................................. 3-8 Firmware.................................. 10-2, 10-11 GroupEnd ............................................. 3-8 GroupOrg ............................................. 3-8 GroupSize............................................. 3-8 SectEnd ................................................ 3-8 SectSize ................................................ 3-8 G GLOBAL....................................... 9-10, 12-5 Goto ..................................................... 16-45 GROUP .................................................... 8-2 See also................................................. 9-5 Group Attributes BSS .............................................4-15, 8-2 FILE ..................................................... 8-3 OBJ....................................................... 8-3 ORG ..................................................... 8-2 OVER................................................... 8-3 SIZE ..................................................... 8-3 with Sections......................................... 8-4 WORD.................................................. 8-2 H HEX ....................................................... 4-16 Hex Window................................ 11-7, 11-18 I IEEE32................................................... 4-17 IEEE64................................................... 4-17 IF 4-30 INCBIN .................................................. 4-26 INCLUDE .............................................. 4-24 See also................................................. 2-3 Increase Index....................................... 16-49 INFORM .................................................. 9-8 Installation Check List............................................. 1-2 PC Interface ..........................................1-3 PC Software ..........................................1-7 Target Interface..........................1-10, 1-18 Installing The Debugger ..........................16-4 INSTR ......................................................6-4 IRQ Number .............................................1-8 L Labels....................................................16-76 Format...................................................3-3 Local .....................................................7-1 Symbols.................................................3-3 Launching The Debugger ......................16-13 Librarian..................................... See PSYLIB Linker ..................................... See PSYLINK LIST .........................................................9-6 LOCAL.....................................................7-5 Local Labels Descope ................................................9-4 Signifier.................................................9-4 Within Modules .....................................7-4 Location Counter ......................................3-6 Locking Window, Debugger..................11-14 M MACRO....................................................5-2 See also .................................................5-6 Macros......................................................5-8 Continuation Lines.................................5-4 Control Characters ................................5-6 Entire Parameter....................................5-6 Extended Parameters .............................5-6 Integers to Text .....................................5-5 Parameter Type ...................................5-11 Parameters.............................................5-3 See also ...............................................5-11 Unique Labels........................................5-5 MAKEFILE.MAK ..................................15-2 Makefiles.................................................15-3 Command prefixes...............................15-5 Comments ...........................................15-8 Dependencies ......................................15-3 Directives ............................................15-7 Executing Commands ..........................15-5 Expressions .........................................15-7 Implicit Rules ......................................15-4 Line Continuation ................................15-8 Macros ................................................15-6 Pre-defined Macros .............................15-6 Value Assignment................................15-7 MEXIT .....................................................5-2 Psy-Q Development System MODEND ................................................ 7-4 MODULE................................................. 7-4 N NARG ...................................................... 5-7 See also................................................. 3-5 NOLIST ................................................... 9-6 O OBJ .................................................4-22, 8-3 OBJEND ................................................ 4-22 Obtaining Releases And Patches .............. 16-5 OFFSET ................................................... 8-7 On-line Help Available For The Debugger16-3 Operator Precedence ............................... 3-10 Operators.................................................. 3-9 OPT.......................................................... 9-2 See also................................................. 2-2 ORG ................................................4-19, 8-2 OVER....................................................... 8-3 P Pane Type ............................................. 16-41 PC Interface Installation ............................................ 1-3 PC Software Installation ............................................ 1-7 pointer .................................................. 16-52 Poll Host, Firmware Function................ 10-11 POPO ....................................................... 9-6 POPP ........................................................ 5-9 POPS ........................................................ 8-6 Project .................................................. 16-19 PSYBIOS ................................................. 1-8 Command Line...................................... 1-8 PSYLIB.................................................. 13-1 Command Line.................................... 13-2 Error Messages ................................. 16-19 PSYLINK ............................................... 12-1 Command File ..................................... 12-4 Command Line.................................... 12-2 Error Messages ................................. 16-14 PSYMAKE............................................. 15-1 Command Line.................................... 15-2 Makefile.............................................. 15-3 PsyServe.exe......................................... 16-11 PUBLIC...........................................9-9, 12-6 PURGE................................................... 5-10 PUSHO..................................................... 9-6 PUSHP ..................................................... 5-9 PUSHS ..................................................... 8-6 R RADIX ...................................................3-11 REF ........................................................4-27 REG..........................................................4-8 see also................................................5-11 Register Names .....................................16-75 Register Window..........................11-6, 11-18 REGS......................................................4-37 REPT ......................................................4-33 RS.............................................................4-9 RSRESET ...............................................4-11 RSSET....................................................4-10 RUN .......................................................1-14 Command Line ....................................1-14 Run to cursor ........................................16-45 S SCSI Id .................... 1-6, 1-8, 1-14, 2-3, 11-4 SCSI Interface Bus................................16-19 SECT ........................................................8-7 SECTION .................................................8-4 See also .................................................4-4 SET...........................................................4-4 See also ...............................................5-11 SHIFT.......................................................5-7 Simple Name Completion ......................16-58 SIZE .........................................................8-3 Source Level Window ..................11-8, 11-17 Specifying Binary File Properties ...........16-24 Specifying Symbol File Properties..........16-23 Step Into command ...............................16-67 Step Over command ..............................16-68 STRCMP ..................................................6-3 STRLEN...................................................6-2 structure................................................16-52 SUBSTR...................................................6-5 T Target Interface Firmware Diagnostics ..........................1-13 Firmware Functions ..................10-2, 10-11 Installation..................................1-10, 1-18 Text Window ..........................................11-8 Time Constants .........................................3-5 Toggle breakpoint .................................16-45 Toolbar Icons ........................................16-29 Traversing An Index..............................16-56 TYPE......................................................5-11 Typecasts and Typedefs.........................16-75 Psy-Q Development System U UNIT ...................................................... 4-37 Unit toolbar........................................... 16-17 UNTIL.................................................... 4-35 V Var Window ................................ 11-8, 11-19 W Warnings, Assembler Messages................. 9-4 Watch Window ............................ 11-8, 11-18 WHILE................................................... 4-34 White Space, Assembler............................ 9-4 wild-card expression..............................16-59 WORD......................................................8-2 See also .................................................9-5 X XDEF ..............................................9-9, 12-6 See also ...............................................5-11 XREF....................................... 9-5, 9-9, 12-6 See also ...............................................5-11 Z Zilog Numbers................................... 3-4, 9-4 Psy-Q Development System


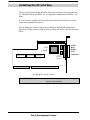
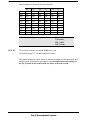
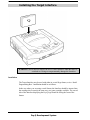
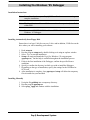

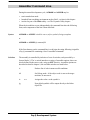
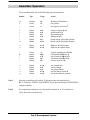
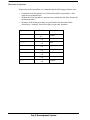


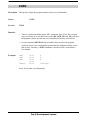
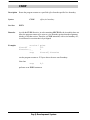
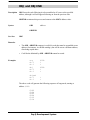
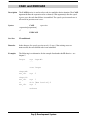
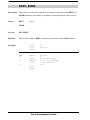
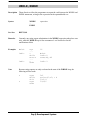
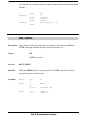


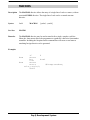
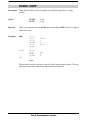

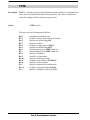


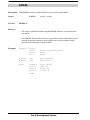

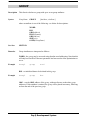
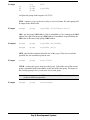


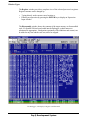
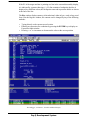


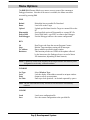
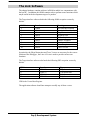
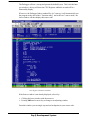
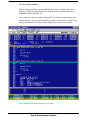
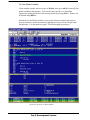


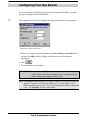
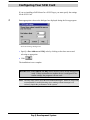

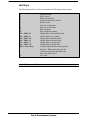
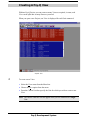
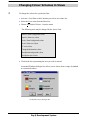
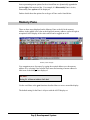
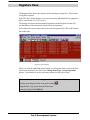
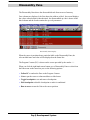
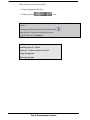
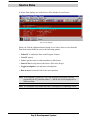
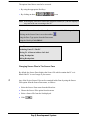
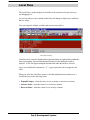
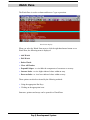
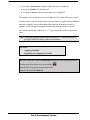
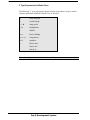
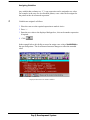
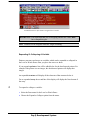
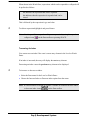
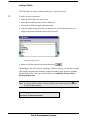
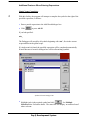
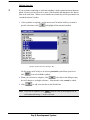
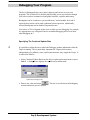

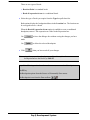

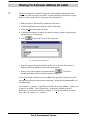

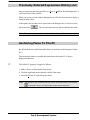
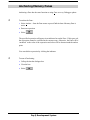


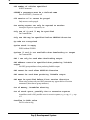
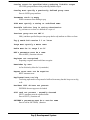
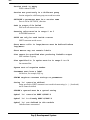
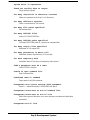
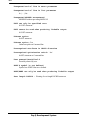
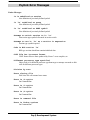
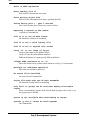
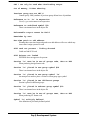


![HiSoft Devpac 3 (text version) [1992] [Manual: PDF]](http://vs1.manualzilla.com/store/data/005668901_1-67cf8256fc448cd2edf58a11a6ec729e-150x150.png)