1
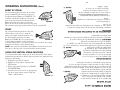
FER À REPASSER À
MULTIPLES FONCTIONS
OWNER’S MANUAL
MODEL WST5001ZE
MODÈLE WST5001ZE
MANUEL D’UTILISATION
IRON FULLY FEATURED
IMPORTANTES CONSIGNES DE
SÉCURITÉ
Au moment d’utiliser ce fer à repasser, on doit toujours respecter les
règles de sécurité élémentaires, notamment celles qui suivent :
1. Lire toutes les instructions
2. Ne jamais utiliser le fer pour un usage auquel il n’est pas destiné.
3. Pour prévenir les risques de décharge électrique, ne pas mettre
l’appareil dans l’eau ou dans tout autre liquide.
4. Toujours régler la commande à la position OFF avant de brancher
ou de débrancher l’appareil. Toujours retirer de la prise en tirant
sur la fiche et non sur le cordon.
5. Éviter tout contact entre le cordon et les surfaces chaudes. Pour le
rangement, laisser l’appareil refroidir complètement et enrouler le
cordon lâchement autour du fer.
6. Toujours débrancher le fer avant de le remplir d’eau ou de le
vider, ou lorsqu’il n’est pas utilisé.
7. Ne pas utiliser l’appareil s’il a été échappé ou endommagé de
quelque façon que ce soit, ou si son cordon est abîmé. Pour
prévenir les risques de décharge électrique, ne pas démonter le
fer. Communiquer avec le service à la clientèle pour faire
examiner et réparer le fer.
8. L’utilisation de tout appareil par ou près des enfants requiert une
surveillance accrue. Ne pas laisser l’appareil branché ou sur la
planche à repasser lorsqu’il n’est pas utilisé.
9. Pour prévenir les risques de brûlure résultant du contact avec des
pièces métalliques chaudes, de l’eau chaude ou de la vapeur, faire
preuve de prudence en retournant le fer à l’envers car le réservoir
pourrait contenir de l’eau chaude.
INSTRUCTIONS SPÉCIALES
1. Pour prévenir toute surcharge électrique, ne pas faire fonctionner
un autre appareil puissant sur le même circuit.
2. Si une rallonge est absolument nécessaire, utiliser un cordon de 15
ampères. Un cordon de moindre puissance pourrait surchauffer. Si
on utilise une rallonge, faire en sorte que le cordon ne puisse pas
être accroché accidentellement.
CONSERVER CES INSTRUCTIONS
Cet appareil est réservé à une utilisation domestique.
2
For Household Use Only
SAVE THESE INSTRUCTIONS
SPECIAL INSTRUCTIONS
1. To avoid a circuit overload, do not operate another high wattage
appliance on the same circuit.
2. If an extension cord is absolutely necessary, a 15-ampere cord
should be used. Cords rated for less amperage may overheat.
Care should be taken to arrange the cord so that it cannot be
pulled or tripped over.
When using your flat iron, basic safety precautions should always be
followed including the following:
1. Read all instructions.
2. Use iron only for its intended use.
3. To protect against a risk of electric shock, do not immerse the iron
in water or other liquids.
4. The iron should always be turned to off before plugging or
unplugging from outlet. Never yank cord to disconnect from
outlet; instead, grasp plug and pull to disconnect.
5. Do not allow cord to touch hot surfaces. Let iron cool completely
before putting away. Loop cord loosely around iron when storing.
6. Always disconnect iron from electrical outlet when filling with water
or emptying and when not in use.
7. Do not operate iron with a damaged cord or if the iron has been
dropped or damaged. To avoid the risk of electric shock, do not
disassemble the iron. Incorrect reassembly can cause a risk of electric shock when the iron is used. Contact Consumer Service for
examination and repair.
8. Close supervision is necessary for any appliance being used by or
near children. Do not leave iron unattended while connected or on
an ironing board.
9. Burns can occur from touching hot metal parts, hot water, or
steam. Use caution when you turn a steam iron upside down--there may be hot water in the reservoir.
IMPORTANT SAFEGUARDS
2
3
AUTRES CONSIGNES DE SÉCURITÉ
MISE EN GARDE : Cet appareil produit de la chaleur et de la vapeur
lorsqu’il est en marche. Il est important de prendre les précautions
appropriées pour prévenir les risques de brûlures, d’incendies ou
d’autres dommages corporels ou matériels.
1. Tous les utilisateurs doivent lire attentivement le présent manuel avant de
faire fonctionner cet appareil ou de le nettoyer.
2. Brancher le cordon de cet appareil uniquement sur une prise électrique
c.a. 120 V.
3. Si l’appareil présente des signes de défectuosité durant l’utilisation,
l’éteindre immédiatement et le débrancher. Ne pas utiliser ni tenter de
réparer un appareil défectueux.
4. Ne pas laisser l’appareil sans surveillance durant l’utilisation.
FICHE POLARISÉE
If the electrical circuit is overloaded with other appliances, your appliance may not operate properly. It should be operated on a separate
electrical circuit from other appliances.
ELECTRIC POWER
This appliance has a polarized plug (one blade is wider than the other).
To reduce the risk of electric shock, this plug is intended to fit into a
polarized outlet only one way. If the plug does not fit fully in the outlet,
reverse the plug. If it still does not fit, contact a qualified electrician. Do
not attempt to modify the plug in any way.
Par mesure de sécurité, cet appareil est muni d’une fiche électrique
polarisée (l’une des lames est plus large que l’autre). Pour réduire les
risques de décharges électriques, ce type de fiche ne peut être inséré
dans une prise murale polarisée que dans un seul sens. Si la fiche ne
rentre pas entièrement dans la prise, essayer dans l’autre sens. Si elle
ne rentre toujours pas, faire appel à un électricien professionnel. Ne
pas tenter de modifier ou de contourner ce dispositif de sécurité.
ALIMENTATION ÉLECTRIQUE
Si le circuit électrique est surchargé, l’appareil pourrait ne pas
fonctionner de façon adéquate. Il faut alors le brancher sur un autre
circuit électrique.
POLARIZED PLUG
CAUTION HOT SURFACES: This appliance generates heat and escaping steam during use. Proper precautions must be taken to prevent
the risk of burns, fires or other damage to persons or property.
1. All users of this appliance must read and understand this Owner’s Manual
before operating or cleaning this appliance.
2. The cord to this appliance should be plugged into a 120V AC electrical
outlet only.
3. If this appliance begins to malfunction during use, immediately unplug the
cord. Do not use or attempt to repair the malfunctioning appliance.
4. Do not leave this appliance unattended during use.
ADDITIONAL IMPORTANT
SAFEGUARDS
3
4
APPRENDRE À CONNAÎTRE LE FER À
REPASSER À FONCTIONS MULTIPLES
WESTINGHOUSE WST5001ZE
LE PRODUIT PEUT DIFFÉRER LÉGÈREMENT DE L’ILLUSTRATION.
13
2
1
Maximum Water Level
Temperature Control
Green Auto Shut-Off Light
Red Power On/Heating Light
Iron Base
Pivot Cord
Filler Cup (P/N 50317)
3
8.
9.
10.
11.
12.
13.
14.
14
Burst of Steam Button
Spray Button
Variable Steam
Water Fill Cover
Water Fill Opening
(not shown)
6. Spray Nozzle
7. Stainless Steel Soleplate
1.
2.
3.
4.
5.
12
4
FIGURE 1
FIGURE 1
5
8
7
9
6
10
11
11
10
6
9
7
8
5
4
12
1. Bouton jet de vapeur
2. Bouton de vaporisation
3. Bouton de réglage de la
vapeur
4. Couvercle du réservoir d’eau
5. Ouverture du réservoir d’eau
(non illustré)
6. Vaporisateur
7. Semelle en acier inoxydable
3
8. Niveau d’eau maximal
9. Sélecteur de température
10. Voyant vert d’arrêt
automatique
11. Voyant rouge de
marche/chauffe
12. Base du fer
13. Cordon pivotant
14. Tasse de remplissage
(N° 50317)
14
2
1
13
PRODUCT MAY VARY SLIGHTLY FROM ILLUSTRATION.
GETTING TO KNOW YOUR
WESTINGHOUSE WST5001ZE
IRON - FULLY FEATURED
4
5
APPRENDRE À CONNAÎTRE LE FER À
REPASSER À FONCTIONS MULTIPLES
WESTINGHOUSE WST5001ZE (SUITE)
FIGURE 4
For best results, check garment labels for the temperature and steam
setting recommended by the fabric manufacturer, or consult the
enclosed garment care tips pamphlet for additional information. To
prevent damaging garments from too hot of an iron; it is best to first
iron garments that require a low temperature. If you should need to
switch from a high setting to a lower temperature, for example Cotton
to Nylon, allow the iron to cool down for about 5 minutes to reach the
lower temperature.
Tips: If you are unsure of a garment’s fabric content, start on a low
setting and test the iron on an area of the garment that does not show,
such as a seam. Gradually increase the heat setting until wrinkles
remove without damaging the fabric. To freshen up
garments made of velvet, felt, suede or velour, hold
the steaming iron horizontally 2 inches above the
fabric for a gentle steaming. Make sure the iron
does not come in contact with the fabric. To prevent shine, iron dark garments or those made of
silk, acetate or rayon inside out.
FIGURE 2
Spray
Button
Burst
of Steam
Button
Fabric
Synthetic
Nylon/Silk/
Polyester
Wool/Cotton
Linen
Medium High
High
Temperature
Low
Medium
FIGURE 3
No Steam
Spray Nozzle
Max Steam
Water
Fill
Cover
GETTING TO KNOW YOUR
WESTINGHOUSE WST5001ZE
IRON - FULLY FEATURED (Cont.)
Vaporisateur
Réglage
sans vapeur
Bouton de
vaporisation
Couvercle
du réservoir
d’eau
Vapeur max.
Bouton jet
de vapeur
Tissu
Synthétique
Nylon/soie/
polyester
Laine/coton
Lin
FIGURE 2
FIGURE 3
Température
Basse
Moyenne
Moyennement
élevée
Elevée
Pour obtenir de meilleurs résultats, vérifiez les étiquettes d’entretien pour
connaître les recommandations du fabricant relativement à la
température de repassage et à l’utilisation de vapeur. Vous pouvez
également vous reporter aux conseils du présent manuel pour de plus
amples renseignements. Pour prévenir les dommages causés par un fer
trop chaud, il est préférable de repasser d’abord les vêtements qui
nécessitent une température moins élevée. Pour passer d’un réglage
plus élevé à un réglage plus bas, par exemple de coton à nylon,
attendez environ cinq minutes avant que le fer n’atteigne le niveau plus
bas.
Conseils : Dans le doute sur la teneur en fibres d’un tissu, commencez
le repassage à un réglage plus bas et faites un essai sur une partie
dissimulée du vêtement, comme une couture.
Augmentez graduellement la chaleur jusqu’à ce
que les faux plis disparaissent sans que le tissu ne
soit endommagé. Pour rafraîchir les vêtements faits
de velours, de feutre, ou de suède, tenez le fer à
l’horizontale à une distance d’environ 5 cm du tissu
pour un défroissage à la vapeur. Assurez-vous que
le fer n’entre pas en contact avec le tissu. Pour
éviter de lustrer les tissus, repassez les vêtements
foncés ou en soie, en acétate ou en rayonne à
l’envers.
FIGURE 4
5
6
APPRENDRE À CONNAÎTRE LE FER À
REPASSER À FONCTIONS MULTIPLES
WESTINGHOUSE WST5001ZE (SUITE)
ARRÊT AUTOMATIQUE DE SÉCURITÉ BREVETÉ
Ce fer dispose de deux types d’arrêt automatique. Le premier est un
capteur tactile situé dans la poignée qui allume et éteint le fer lorsqu’il
est en position horizontale. L’autre est une minuterie qui arrête
automatiquement le fer s’il est laissé en position verticale pendant plus
de 15 minutes.
Position horizontale : Lorsque le fer est branché et laissé en position
horizontale, il reste allumé tant que votre main est sur la poignée. Dès
que vous retirez votre main de la poignée, le fer s’éteint
automatiquement. Le voyant vert d’arrêt automatique et le voyant rouge
de marche/chauffe s’éteignent. Par exemple, si vous êtes en train de
repasser et que vous laissez le fer sur sa semelle en acier inoxydable
sur la planche à repasser pour répondre au téléphone, le fer va
automatiquement se mettre hors tension. Bien que le fer soit hors
tension et qu’il ait commencé à refroidir, il est toujours chaud. Faites
preuve de prudence de manière à éviter de vous brûler ou de brûler
des objets en laissant la semelle du fer reposer à plat. Le fer se
remettra à chauffer dès que vous saisirez la poignée et recommencerez
à repasser. IMPORTANT : Pour atteindre à nouveau la bonne
température, laissez le fer en position verticale jusqu’à ce que le voyant
rouge de marche/chauffe s’éteigne.
Position verticale : Lorsque le fer est branché et posé sur son talon, il
restera allumé pendant 15 minutes, un délai suffisant pour mettre en
place les vêtements pendant le repassage. Si le fer est laissé pendant
plus de 15 minutes, il s’éteint automatiquement. Pour reprendre le
repassage après l’arrêt automatique, saisissez le fer par la poignée. Les
voyants vert et rouge s’allument. Placer le sélecteur de température au
réglage désiré et remettez le fer en position verticale. Une fois la
température désirée atteinte, le voyant rouge de marche/chauffe s’éteint
et vous pouvez repasser.
MARCHE/CHAUFFE
Lorsque le fer chauffe ou que la température a été modifiée, le voyant
rouge de marche/chauffe s’allume. Lorsque la température est atteinte,
le voyant s’éteint.
When the iron is heating up or the temperature setting has been adjusted, the red Power On/Heating Light will come on. When the temperature setting has been reached, the red Power On/Heating Light will go
off.
POWER ON/HEATING
This iron has two kinds of safety shut-off mechanisms. One is a patented, touch-sensitive “brain” in the handle which turns the iron on or off
when it is in the horizontal position. The other is a timer that automatically shuts the iron off if it is left resting in the upright vertical position
for more than 15 minutes.
Horizontal Position: When the iron is plugged in and resting in the
horizontal position, it will remain on as long as your hand is making
contact with the handle. Once you take your hand off the handle, the
iron automatically turns itself off. The green Auto Shut-Off Light and red
Power On/Heating Light will both turn off. For example, if you are ironing and leave the iron with the Stainless Steel Soleplate down on the
ironing board to answer the phone, the iron will automatically begin to
de-energize. Although de-energized and starting to cool, the iron still
remains hot. Use caution to prevent burning or scorching when leaving
the iron with the soleplate in the down position. The iron will turn back
on as soon as you grip the handle and resume ironing. Important: To
return the iron to the desired temperature, allow it to rest in the upright
position until the red Power On/Heating Light goes off.
Vertical Position: When the iron is plugged in and resting on its heel,
it will remain on for 15 minutes, allowing ample time to reposition garments during the ironing process. If the iron is left resting for more than
15 minutes, it will automatically shut-off. To begin ironing again after
the timer has shut off the iron, pick it up by the handle. The green and
red lights will come on. Move the Temperature Control to desired setting and return it to its upright position. When the temperature setting
has been reached, the red Power On/Heating Light will go out and you
are ready to iron.
PATENTED AUTOMATIC SAFETY SHUT-OFF
GETTING TO KNOW YOUR
WESTINGHOUSE WST5001ZE
IRON - FULLY FEATURED (Cont.)
6
7
APPRENDRE À CONNAÎTRE LE FER À
REPASSER À FONCTIONS MULTIPLES
WESTINGHOUSE WST5001ZE (SUITE)
VOYANT D’ARRÊT AUTOMATIQUE
NOTE: When the iron is plugged in for use, the iron must first be
placed in the horizontal position with your hand making contact with
the handle (see Figure 5). The iron can then be placed in the vertical
position (see Figure 6) and the desired temperature selected. If the iron
is not first placed in the horizontal position, the iron will not heat-up.
This is an additional safety feature.
Lorsque le fer est allumé, le voyant vert d’arrêt automatique s’allume.
Lorsque le fer est éteint, le voyant vert d’arrêt automatique s’éteint.
3. Flush the Stainless Steel Soleplate steam vents to ensure that no
stain is transferred onto the fabric from residue possibly left in the
vents from the manufacturing process. To do that, see Flushing.
2. Unwind and straighten the power cord.
FIGURE 5
1. Remove any protective coverings from the Stainless Steel Soleplate
and the body of the iron.
BEFORE USING FOR THE FIRST TIME
FIGURE 6
AVANT LA PREMIÈRE UTILISATION
1. Enlevez tous les emballages de protection de la semelle
antiadhésive et du fer.
FIGURE 6
FIGURE 5
2. Déroulez et étirez le cordon d’alimentation.
3. Effectuez la vidange des orifices de vapeur de la semelle en inox de
façon que les tissus ne se retrouvent pas tachés à cause d’éventuels
résidus de fabrication. Pour ce faire, reportez-vous à la section
AUTONETTOYAGE/VIDANGE.
When the iron is on, the green Auto Shut-Off Light will come on. When
the iron is off, the green Auto Shut-Off Light will go off.
REMARQUE : Lorsque le fer est branché, il doit être d’abord posé en
position horizontale et votre main doit être en contact avec la poignée
(voir la figure 5). Le fer peut ensuite être posé en position verticale (voir
la figure 6) et vous pouvez régler la température. Si le fer n’est pas tout
d’abord posé en position horizontale, il ne chauffera pas. Il s’agit d’un
dispositif de sécurité supplémentaire.
AUTO OFF/ON
GETTING TO KNOW YOUR
WESTINGHOUSE WST5001ZE
IRON - FULLY FEATURED (Cont.)
7
8
MODE D’EMPLOI
UTILISATION DU FER À SEC
Le fer peut être utilisé à sec avec ou sans eau dans le réservoir.
Néanmoins, mieux vaut ne pas trop remplir le réservoir pour repasser à
sec.
1. Placez le sélecteur de température à la position d’arrêt (OFF reportez-vous à la figure 7).
2. Placez le bouton de réglage de la vapeur à la position sans vapeur
(reportez-vous à la figure 2)
FIGURE 7
3. Posez le fer sur son talon à la verticale sur une surface résistante à
la chaleur. Branchez l’appareil dans une prise 120 V ~ 60 Hz.
4. Tournez le sélecteur de température au réglage désiré.
5. Inclinez le fer à l’horizontale pour l’allumer (reportez-vous à la
figure 5). Remettez-le ensuite en position verticale pour qu’il
chauffe (reportez-vous à la figure 6).
OFF Position
CAUTION: IF THE IRON IS HOT, DO NOT FILL WITH WATER.
6. When the red Power On/Heating Light goes off, the iron has
reached the desired temperature. The light will continue to turn off
and on during use to maintain the proper temperature.
7. Lorsque le repassage est terminé, placez le sélecteur de
température à la position d’arrêt, puis débranchez le fer. Laissez-le
refroidir complètement avant d’en nettoyer l’extérieur ou de le
ranger.
7. When finished using, move the Temperature Control to the OFF
position and unplug. Allow the iron to cool before cleaning the
exterior or storing.
6. Le voyant rouge de marche/chauffe s’éteint lorsque la température
désirée est atteinte. Le voyant s’éteint et s’allume en alternance
pendant l’utilisation pour maintenir la bonne température.
ATTENTION : SI LE FER EST CHAUD, NE LE REMPLISSEZ PAS D’EAU.
5. Tilt the iron to the horizontal position (see Figure 5) to turn the iron
on. It may then be returned to the vertical position (see Figure 6) to
preheat the iron.
4. Move the Temperature Control to the desired setting.
Position d’arrêt (OFF)
3. Stand the iron, on its heel, in an upright position on a heat resistant
surface. Plug into a 120 V ~ 60 Hz outlet.
2. Move the Variable Steam to the no steam position (see Figure 2).
FIGURE 7
1. Position the Temperature Control to the OFF position
(see Figure 7).
The iron can be used on the dry setting with or without water in the
Water Tank. However, it is best to avoid having the Water Tank too full
of water while dry ironing.
USING AS A DRY IRON
OPERATING INSTRUCTIONS
8
9
MODE D’EMPLOI
See Before Using For The First Time.
1. Position the Temperature Control to the OFF position (see Figure 7).
2. Unplug the iron from the outlet.
3. Fill the Water Tank with water; see FILLING THE WATER TANK.
4. Stand the iron on its heel in an upright position on a heat resistant
surface. Plug into a 120 V ~ 60 Hz outlet.
5. Turn the Temperature Control to the wool setting or higher. Do not
use the steam function with the Temperature Control selected below
the wool setting.
6. Tilt the iron to the horizontal position (see Figure 5) to turn the iron
on. It may then be returned to the vertical position (see Figure 6) to
preheat the iron.
7. Allow approximately 45 seconds for the iron to reach the desired
temperature. The red Power On/Heating Light will turn off. The light
will continue to turn off and on during use to maintain the proper
temperature.
8. Move the Variable Steam for more steam.
9. When finished, turn the Temperature Control to the OFF position,
turn Variable Steam to the no steam position and unplug iron. Allow
iron to cool before cleaning the exterior of the iron for storing.
CAUTION: AVOID COMING IN CONTACT WITH ESCAPING STEAM.
USING AS A STEAM IRON
FIGURE 8
Fill the water tank with tap water or distilled water. Do not use chemically descaled water or any other liquids.
1. Unplug and allow the iron to cool before filling.
2. Move the Variable Steam to no steam setting.
3. Slide the Water Fill Cover away from
the iron handle to open.
4. Fill water through the Water Tank
Opening (see FIGURE 8).
5. Fill to the MAX level as marked on the
Water Tank (see FIGURE 1).
6. Slide the Water Fill Cover toward the
iron handle.
FILLING THE WATER TANK
OPERATING INSTRUCTIONS
(Cont.)
(SUITE)
REMPLISSAGE DU RÉSERVOIR D’EAU
Remplissez le réservoir amovible avec de l’eau du robinet ou de l’eau
distillée. N’utilisez pas d'eau détartrée avec un produit chimique, ni tout
autre liquide.
1. Débranchez l’appareil et laissez-le
refroidir complètement avant de le
remplir.
2. Placez le bouton de réglage de la
vapeur au réglage sans vapeur.
3. Faites glisser le couvercle du réservoir
d’eau dans la direction opposée à la
poignée du fer, afin de l’ouvrir.
4. Versez l’eau par l’ouverture du réservoir
FIGURE 8
(figure 8).
5. Remplissez jusqu’au niveau maximal indiqué sur le réservoir ( figure 1).
6. Faites glisser le couvercle du réservoir d’eau vers la poignée du fer.
UTILISATION DU FER À VAPEUR
À lire avant la première utilisation
1. Placez le sélecteur de température sur la position d’arrêt (figure 7).
2. Débranchez le fer de la prise électrique.
3. Remplissez le réservoir d’eau. Consultez la section intitulée
REMPLISSAGE DU RÉSERVOIR D’EAU.
4. Déposer le fer sur son talon d’appui à la verticale, sur une surface
résistant à la chaleur. Brancher le fer sur une prise 120 V ~ 60 Hz.
5. Tournez le sélecteur de température au réglage laine ou à un réglage
plus élevé. N’utilisez pas la fonction vapeur lorsque le sélecteur de
température est placé à un réglage plus bas que le réglage laine.
6. Inclinez le fer à l’horizontale pour l’allumer (figure 5). Remettez-le
ensuite en position verticale pour qu’il chauffe (figure 6).
7. Attendez environ 45 secondes que le fer atteigne la température
désirée. Le voyant rouge s’éteint. Le voyant s’éteint et s’allume en
alternance pendant l’utilisation pour maintenir la bonne température.
8. Déplacez le bouton de réglage de la vapeur afin d’obtenir davantage
de vapeur.
9. Lorsque le repassage est terminé, tournez le sélecteur de température à
position d’arrêt, puis tournez le bouton de réglage de la vapeur au
réglage sans vapeur et débranchez le fer. Laissez-le refroidir
complètement avant d’en nettoyer l’extérieur et de le ranger.
ATTENTION : ÉVITER TOUT CONTACT AVEC LA VAPEUR QUI
S’ÉCHAPPE.
9
MODE D’EMPLOI
10
(SUITE)
JET DE VAPEUR
Pour obtenir un jet de vapeur puissant afin de
repasser plus rapidement et de lisser les plis
difficiles, appuyez fermement sur le bouton jet
de vapeur (figure 9). Pour obtenir de meilleurs
résultats, le voyant rouge de marche/chauffe
FIGURE 9
doit être allumé. N’appuyez pas plus de trois
fois de suite sur le bouton jet de vapeur. Attendez au moins 5 secondes
pour permettre au fer de chauffer à nouveau et de diffuser davantage
de vapeur. Pour un débit de vapeur maximal, veillez à ce que le
réservoir d’eau soit toujours au moins à moitié plein.
VAPORISATION
Pour vaporiser de l’eau sur les tissus secs et
difficiles tels que le lin, le coton ou la laine,
ou pour venir à bout des plis récalcitrants,
dirigez l’orifice de vaporisation et appuyez
sur le bouton (figure 10). La fonction de
FIGURE 10
vaporisation est également utile pour
humidifier les faux-plis accidentellement formés en repassant le tissu. La
fonction de vaporisation peut être utilisée avec tous les réglages et
n’affecte en rien la température de repassage.
REMARQUE : En début d'utilisation lors de chaque séance de
repassage, il peut être nécessaire d'appuyer plusieurs fois sur le bouton
pour amorcer la vaporisation.
UTILISATION DE LA FONCTION DÉFROISSAGE
VERTICAL
(Cont.)
La fonction défroissage vertical vous permet d’éliminer les plis des
rideaux sans les décrocher ou de défroisser des vêtements suspendus
sur un cintre.
1. Débranchez le fer.
2. Placez le sélecteur de température à la position
d’arrêt.
3. Remplissez le réservoir d’eau; consultez la
section REMPLISSAGE DU RÉSERVOIR D’EAU.
4. Posez le fer sur son talon en position verticale
sur une surface résistante à la chaleur.
Branchez la fiche sur une prise de
FIGURE 11
120 V ~ 60 Hz.
The vertical steam feature allows you to eliminate wrinkles from drapes
without having to take them off the rod or to freshen the appearance of
clothing on the hanger.
1. Unplug the iron from the outlet.
2. Position the Temperature Control to the
OFF position.
3. Fill the water tank with water, see FILLING
THE WATER TANK.
4. Stand the iron on its heel in an upright position on a heat-resistant surface. Plug into
120 V ~ 60 Hz outlet.
FIGURE 11
USING THE VERTICAL STEAM FUNCTION
For a mist of water to moisten the dry and
difficult fabrics such as linen, cotton or
wool, or to handle stubborn wrinkles, aim
the Spray Nozzle and press the Spray
Button (see FIGURE 10). The spray function
FIGURE 10
is also handy to moisten creases accidentally ironed into the fabric. The spray function can be used on any setting
and does not affect the ironing temperature.
NOTE: You may have to pump the Spray Button several times the first
time you use the iron each session to start the spraying action.
SPRAY
For a penetrating burst of steam to iron faster
and to smooth difficult wrinkles, firmly press
the Burst of Steam Button (see FIGURE 9). The
red Power On/Heating Light must be on for
best results. Do not press the Burst of Steam
FIGURE 9
Button more than three times successively.
Pause for at least 5 seconds to let the iron reheat for additional steam.
For maximum steaming, keep the Water Tank at least half full.
BURST OF STEAM
OPERATING INSTRUCTIONS
10
11
MODE D’EMPLOI
(SUITE)
UTILISATION DE LA FONCTION DÉFROISSAGE
Flushing the iron is advised after every 5 uses or more regularly to
prevent harmful mineral build-up that can clog the iron and prevent it
from heating and steaming properly.
1. Fill the Water Tank half full; see FILLING THE WATER TANK.
2. Stand the iron on its heel in an upright position on an iron-safe,
heat resistant surface. Plug into a 120 V ~ 60 Hz outlet.
3. Move the Temperature Control to the maximum setting.
FLUSHING
The Water Tank should be emptied after each use.
1. When finished, move Temperature Control to the OFF position and
turn the Variable Steam to no steam position and unplug the iron
from the electrical outlet.
2. Hold the Iron upside down and gently shake it to remove the
remaining water in the tank.
3. Press the Burst of Steam and Spray Buttons to release any
remaining water.
EMPTYING THE WATER TANK
5. Move the Temperature Control and Variable Steam to desired
setting.
6. Allow approximately 45 seconds for the iron to reach the desired
temperature. The red Power On/Heating Light will turn off.
7. Hold the iron 7-15 inches away from the garment and press the
burst of steam button once.
8. Wait a few seconds before pressing the Burst of Steam Button
again. The red Power On/Heating Light will cycle on and then off
during this process. Do not press the burst of steam button more
than three times successively when the red Power On/Heating Light
is ON. For best results, keep Water Tank at least half full.
9. When finished, move Temperature Control to the OFF position and
Variable Steam to no steam position and unplug the iron. Allow
iron to cool before cleaning the exterior of the iron for storing.
CAUTION: AVOID COMING IN CONTACT WITH ESCAPING STEAM.
USING THE VERTICAL STEAM FUNCTION
OPERATING INSTRUCTIONS
(Cont.)
(Cont.)
VERTICAL (SUITE)
5. Placez le sélecteur de température et de la vapeur au réglage désiré.
6. Attendez environ 45 secondes que le fer atteigne la température
désirée. Le voyant rouge s’éteint.
7. Maintenez le fer à environ 18 à 38 cm du vêtement et appuyez une
fois sur le bouton jet de vapeur.
8. Attendez quelques secondes avant d’appuyer à nouveau sur le bouton
jet de vapeur. Le voyant rouge de marche/chauffe s’allume et s’éteint
en alternance pendant le processus. N’appuyez pas plus de trois fois
sur le bouton jet de vapeur lorsque le voyant rouge de marche/chauffe
est allumé. Pour de meilleurs résultats, veillez à ce que le réservoir
d’eau soit toujours au moins à moitié plein.
9. Une fois le défroissage terminé, placez le sélecteur de température à la
position d’arrêt et le bouton de réglage de la vapeur au réglage sans
vapeur, puis débranchez le fer. Laissez le fer refroidir avant d’en
nettoyer l’extérieur et de le ranger.
ATTENTION : ÉVITEZ TOUT CONTACT AVEC LA VAPEUR QUI
S’ÉCHAPPE.
VIDER LE RÉSERVOIR D’EAU
Le réservoir d’eau doit être vidé après chaque utilisation.
1. Une fois le repassage terminé, placez le sélecteur de température à la
position d’arrêt et tournez le bouton de réglage de la vapeur au
réglage sans vapeur, puis débranchez l’appareil.
2. Retournez le fer et secouez-le légèrement de façon à vider
complètement le réservoir d’eau.
3. Appuyez sur les boutons jet de vapeur et vaporisation afin d’éliminer
l’eau restante.
VIDANGE
Il est recommandé de faire la vidange du fer toutes les cinq utilisations ou
plus régulièrement pour éviter une accumulation de minéraux nocifs qui
pourraient obstruer le fer et l’empêcher de chauffer et de produire de la
vapeur correctement.
1. Remplissez le réservoir d’eau à moitié; consultez la section
REMPLISSAGE DU RÉSERVOIR D’EAU.
2. Posez le fer sur son talon, en position verticale, sur une surface
résistante à la chaleur. Branchez l’appareil sur une prise
120 V ~ 60 Hz.
3. Placez le sélecteur de température sur le réglage le plus chaud.
11
MODE D’EMPLOI
(SUITE)
VIDANGE (SUITE)
4. Le voyant rouge de marche/chauffe s’éteint lorsque le fer atteint la
température désirée.
5. Attendez un nouveau cycle, le voyant rouge de marche/chauffe
s’allume et s’éteint en alternance.
6. Tournez le sélecteur de température à la position d’arrêt.
7. Débranchez le cordon de la prise.
8. La vapeur d'eau et l'eau chaude qui s'échappent des orifices de
diffusion de la semelle en acier inoxydable permettent d'éliminer le
tartre et les minéraux qui se sont accumulés.
9. Déplacez légèrement le fer vers l’avant ou l’arrière, jusqu’à ce que le
réservoir d’eau soit vide.
10. Appuyez sur le bouton de réglage de la vapeur et placez-le au réglage
sans vapeur.
CONSEILS D’ENTRETIEN
Cet appareil nécessite peu d’entretien. Il ne contient aucune pièce pouvant
être réparée par l’utilisateur. Toute réparation doit être effectuée par un
réparateur qualifié.
NETTOYAGE
ATTENTION : Débranchez le fer et laissez-le refroidir avant d’en nettoyer
l’extérieur et de le ranger. N’immergez jamais le fer dans l’eau.
REMARQUE : N’ajoutez aucun nettoyant chimique ni solvant dans le
réservoir d’eau.
Pour éviter de rayer la semelle en acier inoxydable, évitez de passer le fer
sur les boutons-pression, les glissières, les boutons en métal, etc. Veillez
également à ne pas placer le fer sur des surfaces métalliques.
Si de l’empois ou d’autres résidus adhèrent à la semelle en acier
inoxydable, utilisez un nettoyant pour fer à repasser en suivant les
instructions. Les nettoyants pour fer à repasser sont disponibles dans les
grandes surfaces ou les quincailleries.
RANGEMENT
(Cont.)
(Cont.)
Débranchez le cordon de la prise en saisissant la fiche et non le cordon.
Vider le réservoir d’eau après chaque utilisation (consultez la section VIDER
LE RÉSERVOIR D’EAU. Laissez le fer REFROIDIR COMPLETEMENT avant de
le ranger. Pour protéger la semelle en acier inoxydable, posez le fer en
position verticale, sur son talon. Enroulez le cordon autour de la base du
fer.
12
Remove the cord from the outlet by grasping the plug rather than
pulling the cord. Empty the Water Tank after each use, see EMPTYING
THE WATER TANK. Allow the iron to COOL COMPLETELY before
putting away. To protect the Stainless Steel Soleplate, place the iron in
an upright position on its heel. Wrap cord around iron base.
STORAGE
CAUTION: Unplug the iron from the electrical outlet and allow to cool
before cleaning the exterior of the iron and storing. Never immerse the
iron in water.
NOTE: Do not put any chemical cleaning agents or solvents in the
water tank.
To protect the Stainless Steel Soleplate from scratching, avoid ironing
over snaps, zippers, metal buttons, etc. Also, do not place the iron on
metal surfaces.
If starch or other residues cling to the Stainless Steel Soleplate, use a
hot iron cleaner according to directions. Hot iron cleaner is available at
mass merchandise, discount or hardware stores.
CARE AND CLEANING
This appliance requires little maintenance. It contains no user serviceable parts. Do not try to repair it yourself. Refer it to a qualified appliance repair technician if servicing is needed.
USER MAINTENANCE INSTRUCTIONS
4. The red Power On/Heating Light will turn off when the iron has
reached the desired setting.
5. Wait for one more cycle, the red Power On/Heating Light will cycle
on and back off again.
6. Move the Temperature Control to the OFF position.
7. Unplug cord from outlet.
8. Steam and hot water will flow through the vents on the Stainless
Steel Soleplate, washing away the scales and minerals that have
built-up in the iron.
9. Gently move the iron back and forth until the Water Tank is empty.
10. Press the Variable Steam Button and turn the Variable Steam to the
no steam position.
FLUSHING
OPERATING INSTRUCTIONS
12
13
NOTES
NOTES
13
GARANTIE LIMITÉE D’UN AN
Garantie : Ce produit est garanti contre tout vice de fabrication ou de matériaux
pour une période d’un an à compter de la date d’achat. Cette garantie ne
s’applique qu’à l’acheteur initial.
Étendue de la garantie : La garantie est annulée si le produit a été endommagé
par accident au cours du transport, ou suite à un usage inadéquat ou abusif, une
négligence, un entretien inapproprié, un usage à but commercial, une réparation
effectuée par des personnes non autorisées, une usure normale, une installation ou
un assemblage inapproprié, un entretien abusif ou à toute autre cause ne
découlant pas d’un défaut de fabrication ou de matériaux. Cette garantie ne
s’applique qu’aux produits achetés et utilisés aux États-Unis ou au Canada et ne
couvre pas les produits dont l’utilisation n’est pas conforme aux instructions du
fabricant, les produits qui ont subi des modifications ou des transformations, ni les
produits ou pièces dont le numéro de série a été effacé, modifié ou rendu illisible.
Garanties implicites : TOUTE GARANTIE IMPLICITE DONT L’ACHETEUR
POURRAIT BÉNÉFICIER EST LIMITÉE À UN AN DE LA DATE D’ACHAT. Certains
états et certaines provinces ne permettent pas de limitation aux garanties implicites;
la limitation ci-dessus peut donc ne pas s’appliquer à ce produit.
Exercice de la garantie : Durant la période de garantie d’un an, tout produit
défectueux retourné au magasin Zellers sera soit réparé, soit remplacé par un
modèle comparable. Le produit réparé ou de remplacement sera couvert pour le
restant de la période de validité de la garantie, assorti d’un mois de garantie
supplémentaire. Aucun paiement ne sera exigé.
Note importante : Si une pièce est manquante ou défectueuse, veuillez rapporter
ce produit au magasin où vous l’avez acheté.
Adresser questions et commentaires à au Service à la clientèle de Salton :
Service à la clientèle
P.O. Box 6916
Columbia, MO 65205-6916
1 (800) 233-9054
Renonciation de la garantie : Aucune société ou personne n’est autorisée à
assumer d’autres responsabilités en rapport avec la vente de ce produit. Il ne sera
accepté aucune réclamation pour défectuosité ou mauvais fonctionnement du
produit en vertu d’aucune théorie de responsabilité civile, d’aucun contrat ou de loi
commerciale invoquant, sans s’y limiter, la négligence, la négligence grave, la
responsabilité absolue, la rupture de garantie et la rupture de contrat. La
réparation, l’échange ou le remboursement constituent les seuls recours auxquels
l’acheteur aura droit dans le cadre de cette garantie. Certains états et certaines
provinces ne permettent pas de limitation aux garanties implicites; la limitation
ci-dessus peut donc ne pas s’appliquer à ce produit.
Droits juridiques : Cette garantie vous confère des droits juridiques précis et
d’autres droits qui peuvent varier selon votre lieu de résidence.
WESTINGHOUSE™, et «AYEZ CONFIANCE... SI C’EST WESTINGHOUSEMD»
sont des marques de commerce de WESTINGHOUSE ELECTRIC CORPORATION
et sont utilisées en vertu d’une licence par Salton, Inc. En aucun cas Salton ne
pourra être tenue responsable de dommages, pertes ou coûts découlant
directement ou indirectement de ces recours.
Fabriqué en Chine
N° 61268
Imprimé en Chine
P/N 61268
Printed in China
© 2003
Tous droits réservés
“© 2003
All Rights Reserved”
Made in China
WESTINGHOUSE™, and “YOU CAN BE SURE...IF IT’S WESTINGHOUSE™”
are trademarks of WESTINGHOUSE ELECTRIC CORPORATION and used under
license by Salton, Inc. In no event shall Salton be liable for any incidental
or consequential damages, losses or expenses.
Legal Rights: This warranty gives you specific legal rights, and you may also have
other rights which vary from state to state/province.
Limitation of Remedies: No representative or person is authorized to assume for
us any other liability in connection with the sale of our products. There shall be no
claims for defects or failure of performance or product failure under any theory of
tort, contract or commercial law including, but not limited to negligence, gross negligence, strict liability, breach of warranty, and breach of contract. Repair, replacement or refund shall be the sole remedy of the purchaser under this warranty. Some
states and provinces do not allow the exclusion or limitation of incidental or consequential damages, so the above limitation or exclusion may not apply to you.
Consumer Relations Dept.
P.O. Box 6916
Columbia, MO 65205-6916
1(800) 233-9054
Any questions or comments can be directed to the Consumer Relations Department.
Please write to or call:
Important Notice: If any parts are missing or defective, return this product to the
place of purchase.
Warranty Performance: During the above one-year warranty period, a product
with a defect will be either repaired or replaced with a comparable model when the
product is returned to Zellers. The repaired or replacement product will be in warranty for the balance of the one-year warranty period and an additional one-month
period. No charge will be made for such repair or replacement within the warranty
period.
Implied Warranties: ANY WARRANTIES IMPLIED WHICH THE PURCHASER MAY
HAVE ARE LIMITED IN DURATION TO ONE (1) YEAR FROM THE DATE OF PURCHASE. Some states and provinces do not allow limitations on how long an implied
warranty lasts, so the above limitation may not apply to you.
Warranty Coverage: This warranty is void if the product has been damaged by
accident in shipment, unreasonable use, misuse, neglect, improper service, commercial use, repairs by unauthorized personnel, normal wear and tear, improper
assembly, installation or maintenance abuse or other causes not arising out of
defects in materials or workmanship. This warranty is effective only if the product is
purchased and operated in the USA or Canada, and does not extend to any units
which have been used in violation of written instructions furnished with the product
or to units which have been altered or modified or to damage to products or parts
thereof which have had the serial number removed, altered, defaced or rendered
illegible.
Warranty: This product is warranted to be free from defects in materials and
workmanship for a period of one (1) year from the original purchase date. This
product warranty covers only the original consumer purchaser of the product.
LIMITED ONE YEAR PRODUCT WARRANTY