1
Mikrotik - Part5
Consol and other
PDF generated using the open source mwlib toolkit. See http://code.pediapress.com/ for more information.
PDF generated at: Thu, 19 Dec 2013 19:28:43 CET
Contents
Articles
Manual:Port
1
Manual:Console
3
Manual:Console login process
11
Manual:Special Login
16
Manual:System/Serial Console
18
Manual:Scripting
22
Manual:Scripting-examples
37
Manual:Lua
47
Manual:System/SSH client
49
Manual:IP/SSH
50
Manual:System/Log
51
Manual:System/UPS
58
Manual:System/LCD
62
Manual:System/GPS
65
Manual:IP/Traffic Flow
67
Manual:SNMP
70
Manual:Tools/Graphing
75
Manual:Tools/Profiler
79
Manual:Tools/Packet Sniffer
83
Manual:Troubleshooting tools
90
Manual:Grounding
100
Manual:Wireless card diagnostics
103
Manual:RouterBOARD bad blocks
109
Manual:Password reset
110
Manual:Flashfig
113
Manual:Bootloader upgrade
118
Manual:System/Certificates
119
Manual:Create Certificates
123
Manual:Tools/Traffic Generator
125
Manual:Tools/Bandwidth Test
135
Manual:System/Note
138
Manual:System/File
140
Manual:System/Resource
142
Manual:System/Health
146
Manual:Store
147
Manual:System/Watchdog
149
Manual:System/Scheduler
151
Manual:System/Time
154
Manual:API
157
Manual:IP/Proxy
172
Manual:Tools/Fetch
183
References
Article Sources and Contributors
185
Image Sources, Licenses and Contributors
186
Manual:Port
1
Manual:Port
Applies to RouterOS: v5+
Summary
There are many ways how to use ports on the routers. Most obvious one is to use serial port for initial
RouterOS configuration after installation(by default serial0 is used by serial-terminal).
Serial and USB ports can also be used to:
• connect 3G modems;
• connect to another device through a serial cable
• access device connected to serial cable remotely.
General
Sub-menu: /port
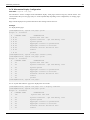
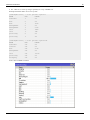
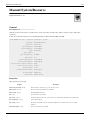
Menu lists all available serial, usb, ... ports on the router and allows to configure port parameters, like baud-rate,
flow-control, etc.
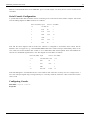
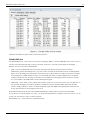
Below you can see default port configuration on RB493.
[admin@RB493G] /port> print
Flags: I - inactive
#
NAME
0
serial0
CHANNELS USED-BY
1 serial-terminal
BAUD-RATE
115200
Note: List of the ports are maintained automatically by the RouterOS.
Properties
Property
Description
baud-rate (integer | auto; Default:
auto)
Baud rate (speed) used by the port. If set to auto, then RouterOS tries to detect baud rate automatically.
data-bits (7 | 8; Default: )
The number of data bits in each character.
•
•
7 - true ASCII
8 - any data (matches the size of a byte)
dtr (on | off; Default: )
Whether to enable RS-232 DTR signal circuit used by flow control.
flow-control (hardware | none |
xon-xoff; Default: )
method of flow control to pause and resume the transmission of data.
name (string; Default: )
Name of the port.
parity (even | none | odd; Default: )
Error detection method. If enabled, extra bit is sent to detect the communication errors. In most cases
parity is set to none and errors are handled by the communication protocol.
rts (on | off; Default: )
Whether to enable RS-232 RTS signal circuit used by flow control.
stop-bits (1 | 2; Default: )
Stop bits sent after each character. Electronic devices usually uses 1 stop bit.
Read-only properties
Manual:Port
2
Property
Description
channels (integer) Number of channels supported by the port.
inactive (yes | no)
line-state ()
used-by (string)
Shows what is using current port. For example, by default Serial0 is used by serial-console.
Firmware
Sub-menu: /port firmware
This submenu allows to specify directory where drivers for 3g modems can be uploaded and used.
Remote Access
Sub-menu: /port remote-access
If you want to access serial device that can only talk to COM ports and is located somewhere else behind router, then
you can use remote-access.
As defined in RFC 2217 RouterOS can transfer data from/to a serial device over TCP connection.
Enabling remote access on RouterOS is very easy:
/port remote-access add port=serial0 protocol=rfc2217 tcp-port=9999
Note: By default serial0 is used by serial-terminal. Without releasing the port, it cannot be used by
remote-access or other services
Properties
Property
Description
allowed-addresses (IP address range;
Default: 0.0.0.0/0)
Range of IP addresses allowed to access port remotely.
channel (integer [0..4294967295]; Default: 0)
Port channel that will be used. If port has only one channel then channel number should
always be 0.
disabled (yes | no; Default: no)
local-address (IP address; Default: )
IP address used as source address.
log-file (string; Default: "")
Name of the file, where communication will be logged. By default logging is disabled.
port (string; Default: )
Name of the port from Port list.
protocol (raw | rfc2217; Default: rfc2217)
RFC 2217 defines a protocol to transfer data from/to a serial device over TCP. If set to raw,
then data is sent to serial as is.
tcp-port (integer [1..65535]; Default: 0)
TCP port on which to listen for incoming connections.
Read-only properties
Manual:Port
3
Property
Description
active (yes | no)
Whether remote access is active and ready to accept connection.
busy (yes | no)
Whether port is currently busy.
inactive (yes | no)
logging-active (yes | no)
Whether logging to file is currently running
remote-address (IP address) IP address of remote location that is currently connected.
See More
• Special Login
• Serial Console
• Serial Port Usage
[ Top | Back to Content ]
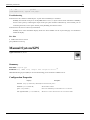
Manual:Console
Applies to RouterOS: 2.9, v3, v4
Overview
The console is used for accessing the MikroTik Router's configuration and management features using text
terminals, either remotely using serial port, telnet, SSH or console screen within Winbox, or directly using monitor
and keyboard. The console is also used for writing scripts. This manual describes the general console operation
principles. Please consult the Scripting Manual on some advanced console commands and on how to write scripts.
Hierarchy
The console allows configuration of the router's settings using text commands. Since there is a lot of available
commands, they are split into groups organized in a way of hierarchical menu levels. The name of a menu level
reflects the configuration information accessible in the relevant section, eg. /ip hotspot.
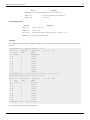
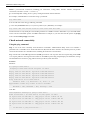
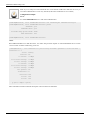
Example
For example, you can issue the /ip route print command:
[admin@MikroTik] > ip route print
Flags: X - disabled, A - active, D - dynamic,
C - connect, S - static, r - rip, b - bgp, o - ospf, m - mme,
B - blackhole, U - unreachable, P - prohibit
#
DST-ADDRESS
PREF-SRC
G GATEWAY
DIS INTE...
0 A S 0.0.0.0/0
r 10.0.3.1
1
bridge1
1 ADC 1.0.1.0/24
1.0.1.1
0
bridge1
2 ADC 1.0.2.0/24
1.0.2.1
0
ether3
3 ADC 10.0.3.0/24
10.0.3.144
0
bridge1
Manual:Console
4 ADC 10.10.10.0/24
[admin@MikroTik] >
4
10.10.10.1
0
wlan1
Instead of typing ip route path before each command, the path can be typed only once to move into this particular
branch of menu hierarchy. Thus, the example above could also be executed like this:
[admin@MikroTik] > ip route
[admin@MikroTik] ip route> print
Flags: X - disabled, A - active, D - dynamic,
C - connect, S - static, r - rip, b - bgp, o - ospf, m - mme,
B - blackhole, U - unreachable, P - prohibit
#
DST-ADDRESS
PREF-SRC
G GATEWAY
DIS INTE...
0 A S 0.0.0.0/0
r 10.0.3.1
1
bridge1
1 ADC 1.0.1.0/24
1.0.1.1
0
bridge1
2 ADC 1.0.2.0/24
1.0.2.1
0
ether3
3 ADC 10.0.3.0/24
10.0.3.144
0
bridge1
4 ADC 10.10.10.0/24
10.10.10.1
0
wlan1
[admin@MikroTik] ip route>
Notice that the prompt changes in order to reflect where you are located in the menu hierarchy at the moment. To
move to the top level again, type " / "
[admin@MikroTik] > ip route
[admin@MikroTik] ip route> /
[admin@MikroTik] >
To move up one command level, type " .. "
[admin@MikroTik] ip route> ..
[admin@MikroTik] ip>
You can also use / and .. to execute commands from other menu levels without changing the current level:
[admin@MikroTik] ip route> /ping 10.0.0.1
10.0.0.1 ping timeout
2 packets transmitted, 0 packets received, 100% packet loss
[admin@MikroTik] ip firewall nat> .. service-port print
Flags: X - disabled, I - invalid
#
NAME
0
ftp
1
tftp
2
irc
3
h323
4
sip
5
pptp
[admin@MikroTik] ip firewall nat>
PORTS
21
69
6667
Manual:Console
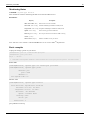
Item Names and Numbers
Many of the command levels operate with arrays of items: interfaces, routes, users etc. Such arrays are displayed in
similarly looking lists. All items in the list have an item number followed by flags and parameter values.
To change properties of an item, you have to use set command and specify name or number of the item.
Item Names
Some lists have items with specific names assigned to each of them. Examples are interface or user levels. There
you can use item names instead of item numbers.
You do not have to use the print command before accessing items by their names, which, as opposed to numbers,
are not assigned by the console internally, but are properties of the items. Thus, they would not change on their own.
However, there are all kinds of obscure situations possible when several users are changing router's configuration at
the same time. Generally, item names are more "stable" than the numbers, and also more informative, so you should
prefer them to numbers when writing console scripts.
Item Numbers
Item numbers are assigned by the print command and are not constant - it is possible that two successive print
commands will order items differently. But the results of last print commands are memorized and, thus, once
assigned, item numbers can be used even after add, remove and move operations (since version 3, move operation
does not renumber items). Item numbers are assigned on a per session basis, they will remain the same until you quit
the console or until the next print command is executed. Also, numbers are assigned separately for every item list, so
ip address print will not change numbering of the interface list.
Since version 3 it is possible to use item numbers without running print command. Numbers will be assigned just as
if the print command was executed.
You can specify multiple items as targets to some commands. Almost everywhere, where you can write the number
of item, you can also write a list of numbers.
[admin@MikroTik] > interface print
Flags: X - disabled, D - dynamic, R - running
#
NAME
TYPE
MTU
0 R ether1
ether
1500
1 R ether2
ether
1500
2 R ether3
ether
1500
3 R ether4
ether
1500
[admin@MikroTik] > interface set 0,1,2 mtu=1460
[admin@MikroTik] > interface print
Flags: X - disabled, D - dynamic, R - running
#
NAME
TYPE
MTU
0 R ether1
ether
1460
1 R ether2
ether
1460
2 R ether3
ether
1460
3 R ether4
ether
1500
[admin@MikroTik] >
5
Manual:Console
6
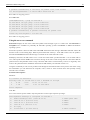
Quick Typing
There are two features in the console that help entering commands much quicker and easier - the [Tab] key
completions, and abbreviations of command names. Completions work similarly to the bash shell in UNIX. If you
press the [Tab] key after a part of a word, console tries to find the command within the current context that begins
with this word. If there is only one match, it is automatically appended, followed by a space:
/inte[Tab]_ becomes /interface _
If there is more than one match, but they all have a common beginning, which is longer than that what you have
typed, then the word is completed to this common part, and no space is appended:
/interface set e[Tab]_ becomes /interface set ether_
If you've typed just the common part, pressing the tab key once has no effect. However, pressing it for the second
time shows all possible completions in compact form:
[admin@MikroTik]
[admin@MikroTik]
[admin@MikroTik]
ether1 ether5
[admin@MikroTik]
> interface set e[Tab]_
> interface set ether[Tab]_
> interface set ether[Tab]_
> interface set ether_
The [Tab] key can be used almost in any context where the console might have a clue about possible values command names, argument names, arguments that have only several possible values (like names of items in some
lists or name of protocol in firewall and NAT rules). You cannot complete numbers, IP addresses and similar values.
Another way to press fewer keys while typing is to abbreviate command and argument names. You can type only
beginning of command name, and, if it is not ambiguous, console will accept it as a full name. So typing:
[admin@MikroTik] > pi 10.1 c 3 si 100
equals to:
[admin@MikroTik] > ping 10.0.0.1 count 3 size 100
It is possible to complete not only beginning, but also any distinctive substring of a name: if there is no exact match,
console starts looking for words that have string being completed as first letters of a multiple word name, or that
simply contain letters of this string in the same order. If single such word is found, it is completed at cursor position.
For example:
[admin@MikroTik] > interface x[TAB]_
[admin@MikroTik] > interface export _
[admin@MikroTik] > interface mt[TAB]_
[admin@MikroTik] > interface monitor-traffic _
General Commands
There are some commands that are common to nearly all menu levels, namely: print, set, remove, add, find, get,
export, enable, disable, comment, move. These commands have similar behavior throughout different menu levels.
• add - this command usually has all the same arguments as set, except the item number argument. It adds a new
item with the values you have specified, usually at the end of the item list, in places where the order of items is
relevant. There are some required properties that you have to supply, such as the interface for a new address,
while other properties are set to defaults unless you explicitly specify them.
Manual:Console
• Common Parameters
• copy-from - Copies an existing item. It takes default values of new item's properties from another item. If
you do not want to make exact copy, you can specify new values for some properties. When copying items
that have names, you will usually have to give a new name to a copy
• place-before - places a new item before an existing item with specified position. Thus, you do not need to
use the move command after adding an item to the list
• disabled - controls disabled/enabled state of the newly added item(-s)
• comment - holds the description of a newly created item
• Return Values
• add command returns internal number of item it has added
• edit - this command is associated with the set command. It can be used to edit values of properties that contain
large amount of text, such as scripts, but it works with all editable properties. Depending on the capabilities of the
terminal, either a fullscreen editor, or a single line editor is launched to edit the value of the specified property.
• find - The find command has the same arguments as set, plus the flag arguments like disabled or active that take
values yes or no depending on the value of respective flag. To see all flags and their names, look at the top of
print command's output. The find command returns internal numbers of all items that have the same values of
arguments as specified.
• move - changes the order of items in list.
• Parameters
• first argument specifies the item(-s) being moved.
• second argument specifies the item before which to place all items being moved (they are placed at the end
of the list if the second argument is omitted).
• print - shows all information that's accessible from particular command level. Thus, /system clock print shows
system date and time, /ip route print shows all routes etc. If there's a list of items in current level and they are not
read-only, i.e. you can change/remove them (example of read-only item list is /system history, which shows
history of executed actions), then print command also assigns numbers that are used by all commands that operate
with items in this list.
• Common Parameters
• from - show only specified items, in the same order in which they are given.
• where - show only items that match specified criteria. The syntax of where property is similar to the find
command.
• brief - forces the print command to use tabular output form
• detail - forces the print command to use property=value output form
• count-only - shows the number of items
• file - prints the contents of the specific submenu into a file on the router.
• interval - updates the output from the print command for every interval seconds.
• oid - prints the OID value for properties that are accessible from SNMP
• without-paging - prints the output without stopping after each screenful.
• remove - removes specified item(-s) from a list.
• set - allows you to change values of general parameters or item parameters. The set command has arguments with
names corresponding to values you can change. Use ? or double [Tab] to see list of all arguments. If there is a list
of items in this command level, then set has one action argument that accepts the number of item (or list of
numbers) you wish to set up. This command does not return anything.
7
Manual:Console
Modes
Console line editor works either in multiline mode or in single line mode. In multiline mode line editor displays
complete input line, even if it is longer than single terminal line. It also uses full screen editor for editing large text
values, such as scripts. In single line mode only one terminal line is used for line editing, and long lines are shown
truncated around the cursor. Full screen editor is not used in this mode.
Choice of modes depends on detected terminal capabilities.
List of keys
Control-C
keyboard interrupt.
Control-D
log out (if input line is empty)
Control-K
clear from cursor to the end of line
Control-X
toggle safe mode
Control-V
toggle hotlock mode mode
F6
toggle cellar
F1 or ?
show context sensitive help. If the previous character is \, then inserts literal ?.
Tab
perform line completion. When pressed second time, show possible completions.
Delete
remove character at cursor
Control-H or Backspace
remove character before cursor and move cursor back one position.
Control-\
split line at cursor. Insert newline at cursor position. Display second of the two resulting lines.
Control-B or Left
move cursor backwards one character
Control-F or Right
move cursor forward one character
Control-P or Up
go to previous line. If this is the first line of input then recall previous input from history.
Control-N or Down
go to next line. If this is the last line of input then recall next input from history.
Control-A or Home
8
Manual:Console
move cursor to the beginning of the line. If cursor is already at the beginning of the line, then go to the
beginning of the first line of current input.
Control-E or End
move cursor to the end of line. If cursor is already at the end of line, then move it to the end of the last line of
current input.
Control-L or F5
reset terminal and repaint screen.
up, down and split keys leave cursor at the end of line.
Built-in Help
The console has a built-in help, which can be accessed by typing ?. General rule is that help shows what you can
type in position where the ? was pressed (similarly to pressing [Tab] key twice, but in verbose form and with
explanations).
Safe Mode
It is sometimes possible to change router configuration in a way that will make the router inaccessible (except from
local console). Usually this is done by accident, but there is no way to undo last change when connection to router is
already cut. Safe mode can be used to minimize such risk.
Safe mode is entered by pressing [CTRL]+[X]. To save changes and quit safe mode, press [CTRL]+[X] again. To
exit without saving the made changes, hit [CTRL]+[D]
[admin@MikroTik] ip route>[CTRL]+[X]
[Safe Mode taken]
[admin@MikroTik] ip route<SAFE>
9
Manual:Console
10
Message Safe Mode taken is displayed and prompt changes to reflect that session is now in safe mode. All
configuration changes that are made (also from other login sessions), while router is in safe mode, are automatically
undone if safe mode session terminates abnormally. You can see all such changes that will be automatically undone
tagged with an F flag in system history:
[admin@MikroTik] ip route>
[Safe Mode taken]
[admin@MikroTik] ip route<SAFE> add
[admin@MikroTik] ip route<SAFE> /system history print
Flags: U - undoable, R - redoable, F - floating-undo
ACTION
BY
F route added
admin
POLICY
write
Now, if telnet connection (or winbox terminal) is cut, then after a while (TCP timeout is 9 minutes) all changes that
were made while in safe mode will be undone. Exiting session by [Ctrl]+[D] also undoes all safe mode changes,
while /quit does not.
If another user tries to enter safe mode, he's given following message:
[admin@MikroTik] >
Hijacking Safe Mode from someone - unroll/release/don't take it [u/r/d]:
• [u] - undoes all safe mode changes, and puts the current session in safe mode.
• [r] - keeps all current safe mode changes, and puts current session in a safe mode. Previous owner of safe mode is
notified about this:
[admin@MikroTik] ip firewall rule input
[Safe mode released by another user]
Manual:Console
• [d] - leaves everything as-is.
If too many changes are made while in safe mode, and there's no room in history to hold them all (currently history
keeps up to 100 most recent actions), then session is automatically put out of the safe mode, no changes are
automatically undone. Thus, it is best to change configuration in small steps, while in safe mode. Pressing [Ctrl]+[X]
twice is an easy way to empty safe mode action list.
HotLock Mode
When HotLock mode is enabled commands will be auto completed.
To enter/exit HotLock mode press [CTRL]+[V].
[admin@MikroTik] /ip address> [CTRL]+[V]
[admin@MikroTik] /ip address>>
Double >> is indication that HotLock mode is enabled. For example if you type /in e, it will be auto completed
to
[admin@MikroTik] /ip address>> /interface ethernet
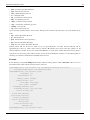
Quick Help menu
F6 key enables menu at the bottom of the terminal which shows common key combinations and their usage.
[admin@RB493G] >
tab compl ? F1 help ^V hotlk ^X safe ^C brk ^D quit
Manual:Console login process
Applies to RouterOS: 2.9, v3, v4
Description
There are different ways to log into console:
•
•
•
•
•
•
serial port
console (screen and keyboard)
telnet
ssh
mac-telnet
winbox terminal
Input and validation of user name and password is done by login process. Login process can also show different
informative screens (license, demo version upgrade reminder, software key information, default configuration).
At the end of successful login sequence login process prints banner and hands over control to the console process.
Console process displays system note, last critical log entries, auto-detects terminal size and capabilities and then
displays command prompt]. After that you can start writing commands.
11
Manual:Console login process
12
Use up arrow to recall previous commands from command history, TAB key to automatically complete words in the
command you are typing, ENTER key to execute command, and Control-C to interrupt currently running command
and return to prompt.
Easiest way to log out of console is to press Control-D at the command prompt while command line is empty (You
can cancel current command and get an empty line with Control-C, so Control-C followed by Control-D will log you
out in most cases).
Console login options
Starting from v3.14 it is possible to specify console options during login process. These options enables or disables
various console features like color, terminal detection and many other.
Additional login parameters can be appended to login name after '+' sign.
login_name ::= user_name [ '+' parameters ]
parameters ::= parameter [ parameters ]
parameter ::= [ number ] 'a'..'z'
number ::= '0'..'9' [ number ]
If parameter is not present, then default value is used. If number is not present then implicit value of parameter is
used.
example: admin+c80w - will disable console colors and set terminal width to 80.
Param Default Implicit
Description
"w"
auto
auto
Set terminal width
"h"
auto
auto
Set terminal height
"c"
on
off
disable/enable console colors
"t"
on
off
Do auto detection of terminal capabilities
"e"
on
off
Enables "dumb" terminal mode
Different information shown by login process
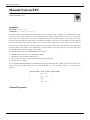
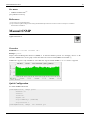
Banner
Login process will display MikroTik banner after validating user name and password.
MMM
MMM
MMMM
MMMM
MMM MMMM MMM
MMM MM MMM
MMM
MMM
MMM
MMM
III
III
III
III
KKK
KKK
KKK KKK
KKKKK
KKK KKK
KKK KKK
RRRRRR
RRR RRR
RRRRRR
RRR RRR
MikroTik RouterOS 3.0rc (c) 1999-2007
TTTTTTTTTTT
TTTTTTTTTTT
OOOOOO
TTT
OOO OOO
TTT
OOO OOO
TTT
OOOOOO
TTT
III
III
III
III
KKK
KKK
KKK KKK
KKKKK
KKK KKK
KKK KKK
http://www.mikrotik.com/
Actual banner can be different from the one shown here if it is replaced by distributor. See also: branding.
Manual:Console login process
License
After logging in for the first time after installation you are asked to read software licenses.
Do you want to see the software license? [Y/n]:
Answer y to read licenses, n if you do not wish to read licenses (question will not be shown again). Pressing SPACE
will skip this step and the same question will be asked after next login.
Demo version upgrade reminder
After logging into router that has demo key, following remonder is shown:
UPGRADE NOW FOR FULL SUPPORT
---------------------------FULL SUPPORT benefits:
- receive technical support
- one year feature support
- one year online upgrades
(avoid re-installation and re-configuring your router)
To upgrade, register your license "software ID"
on our account server www.mikrotik.com
Current installation "software ID": ABCD-456
Please press "Enter" to continue!
Software key information
If router does not have software key, it is running in the time limited trial mode. After logging in following
information is shown:
ROUTER HAS NO SOFTWARE KEY
---------------------------You have 16h58m to configure the router to be remotely accessible,
and to enter the key by pasting it in a Telnet window or in Winbox.
See www.mikrotik.com/key for more details.
Current installation "software ID": ABCD-456
Please press "Enter" to continue!
After entering valid software key, following information is shown after login:
ROUTER HAS NEW SOFTWARE KEY
---------------------------Your router has a valid key, but it will become active
only after reboot. Router will automatically reboot in a day.
=== Automatic configuration ===
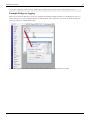
Usually after [[netinstall|installation]] or configuration [[reset]] RouterOS will apply [[default
settings]], such as an IP address.
First login into will show summary of these settings and offer to undo them.
13
Manual:Console login process
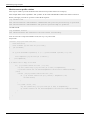
This is an example:
<pre>
The following default configuration has been installed on your router:
------------------------------------------------------------------------------IP address 192.168.88.1/24 is on ether1
ether1 is enabled
------------------------------------------------------------------------------You can type "v" to see the exact commands that are used to add and remove
this default configuration, or you can view them later with
'/system default-configuration print' command.
To remove this default configuration type "r" or hit any other key to continue.
If you are connected using the above IP and you remove it, you will be disconnected.
Applying and removing of the default configuration is done using console script (you can press 'v' to review it).
Different information shown by console process after logging in
System Note
It is possible to always display some fixed text message after logging into console.
Critical log messages
Console will display last critical error messages that this user has not seen yet. See log for more details on
configuration. During console session these messages are printed on screen.
dec/10/2007 10:40:06 system,error,critical login failure for user root from 10.0.0.1 via telnet
dec/10/2007 10:40:07 system,error,critical login failure for user root from 10.0.0.1 via telnet
dec/10/2007 10:40:09 system,error,critical login failure for user test from 10.0.0.1 via telnet
Prompt
• [admin@MikroTik] /interface> - Default command prompt, shows user name, system identity, and
current command path.
• [admin@MikroTik] /interface<SAFE> - Prompt indicates that console session is in Safe Mode.
• [admin@MikroTik] >> - Prompt indicates that HotLock is turned on.
• {(\... - While entering multiple line command continuation prompt shows open parentheses.
• line 2 of 3> - While editing multiple line command prompt shows current line number and line count.
• address: - Command requests additional input. Prompt shows name of requested value.
Console can show different prompts depending on enabled modes and data that is being edited. Default command
prompt looks like this:
[admin@MikroTik] /interface>
Default command prompt shows name of user, '@' sign and system name in brackets, followed by space, followed
by current command path (if it is not '/'), followed by '>' and space. When console is in safe mode, it shows word
SAFE in the command prompt.
[admin@MikroTik] /interface<SAFE>
Hotlock mode is indicated by an additional yellow '>' character at the end of the prompt.
14
Manual:Console login process
[admin@MikroTik] >>
It is possible to write commands that consist of multiple lines. When entered line is not a complete command and
more input is expected, console shows continuation prompt that lists all open parentheses, braces, brackets and
quotes, and also trailing backslash if previous line ended with backslash-whitespace.
[admin@MikroTik] > {
{... :put (\
{(\... 1+2)}
3
When you are editing such multiple line entry, prompt shows number of current line and total line count instead of
usual username and system name.
line 2 of 3> :put (\
Sometimes commands ask for additional input from user. For example, command '/password' asks for old and new
passwords. In such cases prompt shows name of requested value, followed by colon and space.
[admin@MikroTik] > /password
old password: ******
new password: **********
retype new password: **********
FAQ
Q: How do I turn off colors in console?
A: Add '+c' after login name.
Q: After logging in console prints rubbish on the screen, what to do?
Q: My expect script does not work with newer 3.0 releases, it receives some strange characters. What are those?
A: These sequences are used to automatically detect terminal size and capabilities. Add '+t' after login name to turn
them off.
Q: Thank you, now terminal width is not right. How do I set terminal width?
A: Add '+t80w' after login name, where 80 is your terminal width.
[ Top | Back to Content ]
15
Manual:Special Login
16
Manual:Special Login
Applies to RouterOS: v3, v4, v5
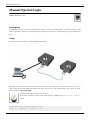
Description
Special login can be used to access another device (like a switch, for example) that is connected through a serial
cable by opening a telnet/ssh session that will get you directly on this device (without having to login to RouterOS
first).
Setup
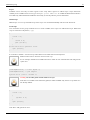
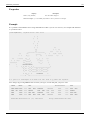
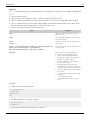
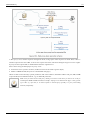
For demonstration we will use two RouterBoards and one PC.
Routers R1 and R2 are connected with serial cable and PC is connected to R1 via ethernet. Lets say we want to
access router R2 via serial cable from our PC. To do this you have to set up serial interface proxy on R1. It can be
done by feature called special-login.
Note: that by default console is bound to serial port.
First task is to unbind console from serial simply by disabling entry in /system console
menu:
[admin@MikroTik] /system console> print
Flags: X - disabled, U - used, F - free
Manual:Special Login
#
17
PORT
TERM
0 X serial0
vt102
Next step is to add new user, in this case serial, and bind it to the serial port
[admin@MikroTik] > /user add name=serial group=full
[admin@MikroTik] > /special-login add user=serial port=serial0 disabled=no
[admin@MikroTik] > /special-login print
Flags: X - disabled
#
USER
PORT
0
serial
serial0
Now we are ready to access R2 from our PC.
maris@bumba:/$ ssh [email protected]
[Ctrl-A is the prefix key]
R2 4.0beta4
R2 Login:
[admin@R2] >
To exit special login mode press Ctrl+A and Q
[admin@MikroTik] >
[Q - quit connection]
[A - send Ctrl-A prefix]
[B - send break]
[R - autoconfigure rate]
Connection to 10.1.101.146 closed.
Warning: After router reboot and serial cable attached router may stuck at Bootloader main menu
To fix this problem you need to allow access bootloader main menu from <any> key to <delete>:
• enter bootloader menu
• press 'k' for boot key options
• press '2' to change key to <delete>
What do you want to configure?
d - boot delay
k - boot key
s - serial console
n - silent boot
o - boot device
u - cpu mode
f - cpu frequency
r - reset booter configuration
e - format nand
g - upgrade firmware
i - board info
p - boot protocol
Manual:Special Login
b - booter options
t - call debug code
l - erase license
x - exit setup
your choice: k - boot key
Select key which will enter setup on boot:
* 1 - any key
2 - <Delete> key only
your chaoice: 2
See More
• Serial Console
• Sigwatch
[ Top | Back to Content ]
Manual:System/Serial Console
Applies to RouterOS: v3, v4, v5+
Overview
Sub-menu: /system console, /system serial-terminal
Standards: RS-232
The Serial Console and Terminal are tools, used to communicate with devices and other systems that are
interconnected via serial port. The serial terminal may be used to monitor and configure many devices - including
modems, network devices (including MikroTik routers), and any device that can be connected to a serial
(asynchronous) port.
The Serial Console feature is for configuring direct-access configuration facilities (monitor/keyboard and serial port)
that are mostly used for initial or recovery configuration.
If you do not plan to use a serial port for accessing another device or for data connection through a modem, you can
configure it as a serial console. The first serial port is configured as a serial console, but you can choose to
unconfigure it to free it for other applications. A free serial port can also be used to access other routers' (or other
equipment, like switches) serial consoles from a MikroTik RouterOS router. A special null-modem cable is needed
to connect two hosts (like, two PCs, or two routers; not modems). Note that a terminal emulation program (e.g.,
HyperTerminal on Windows or minicom on linux) is required to access the serial console from another computer.
Several customers have described situations where the Serial Terminal (managing side) feature would be useful:
• on a mountaintop, where a MikroTik wireless installation sits next to equipment (including switches and Cisco
routers) that can not be managed in-band (by telnet through an IP network)
• monitoring weather-reporting equipment through a serial port
• connection to a high-speed microwave modem that needed to be monitored and managed by a serial connection
18
Manual:System/Serial Console
19
With the serial-terminal feature of the MikroTik, up to 132 (and, maybe, even more) devices can be monitored and
controlled.
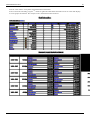
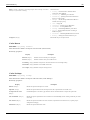
Serial Console Configuration
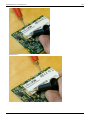
A special null-modem cable should be used for connecting to the serial console from another computer. The Serial
Console cabling diagram for DB9 connectors is as follows:
Router Side (DB9f) Signal
Direction Side (DB9f)
1, 6
CD, DSR IN
4
2
RxD
IN
3
3
TxD
OUT
2
4
DTR
OUT
1, 6
5
GND
-
5
7
RTS
OUT
8
8
CTS
IN
7
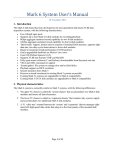
Note that the above diagram will not work if the software is configured to do hardware flow control, but the
hardware does not support it (e.g., some RouterBOARD models have reduced seral port functionality). If this is the
case, either turn off the hardware flow control or use a null-modem cable with loopback, which will simulate the
other device's handshake signals with it's own. The diagram for such cable is as follows:
Router Side (DB9f) Signal
Direction Side (DB9f)
1, 4, 6
CD, DTR, DSR LOOP
1, 4, 6
2
RxD
IN
3
3
TxD
OUT
2
5
GND
-
5
7, 8
RTS, CTS
LOOP
7, 8
Note that although it is recommended to have 5-wire cable for this connection, in many cases it is enough to have 3
wires (for unlooped signals only), leaving both loops to exist only inside the connectors. Other connection schemes
exist as well.
Configuring Console
Sub-menu: /system console
Properties
Manual:System/Serial Console
20
Property
Description
disabled (yes | no; Default: no) Whether serial console is enabled or not.
port (string)
Which port should the serial terminal listen to
term (string)
Terminal type
Read-only properties
Property
Description
free (yes | no)
Console is ready for use.
used (yes | no)
Console is in use.
vcno (integer)
number of virtual console - [Alt]+[F1] represents '1', [Alt]+[F2] - '2', etc..
wedged (yes | no) Console is currently not available
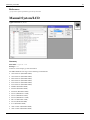
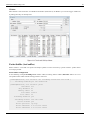
Example
To disable all virtual consoles (available through the direct connection with keyboard and monitor) extept for the
first one:
[admin@MikroTik] system console> print
Flags: X - disabled, W - wedged, U - used, F - free
#
PORT
VCNO
TERM
0 F serial0
MyConsole
1 U
1
linux
2 F
2
linux
3 F
3
linux
4 F
4
linux
5 F
5
linux
6 F
6
linux
7 F
7
linux
8 F
8
linux
[admin@MikroTik] system console> disable 2,3,4,5,6,7,8
[admin@MikroTik] system console> print
Flags: X - disabled, W - wedged, U - used, F - free
#
PORT
VCNO
TERM
0 F serial0
MyConsole
1 U
1
linux
2 X
2
linux
3 X
3
linux
4 X
4
linux
5 X
5
linux
6 X
6
linux
7 X
7
linux
8 X
8
linux
[admin@MikroTik] system console>
To check if the configuration of the serial port:
Manual:System/Serial Console
21
[admin@MikroTik] system serial-console> /port print detail
0 name=serial0 used-by=Serial Console baud-rate=9600 data-bits=8 parity=none
stop-bits=1 flow-control=none
1 name=serial1 used-by="" baud-rate=9600 data-bits=8 parity=none stop-bits=1
flow-control=none
[admin@MikroTik] system serial-console>
Using Serial Terminal
Command: /system serial-terminal
The command is used to communicate with devices and other systems that are connected to the router via serial port.
All keyboard input is forwarded to the serial port and all data from the port is output to the connected device. Ctrl-A
is the prefix key, which means that you will enter a small "menu" by pressing this combination of keys. The Ctrl-A
character will not be sent to your device! If you need to send Ctrl-A character to remote device, press Ctrl-A twice.
After exiting with Ctrl-A and then Q, the control signals of the port are lowered. The speed and other parameters of
serial port may be configured in the /port directory of router console. No terminal translation on printed data is
performed. It is possible to get the terminal in an unusable state by outputting sequences of inappropriate control
characters or random data. Do not connect to devices at an incorrect speed and avoid dumping binary data.
Property
Description
port (string; Default: ) Port name to use
The serial port to be used as a serial terminal needs to be free (e.g., there should not be any serial consoles, LCD or
other configuration). Chack the previous chapter to see how to disable serial console on a particular port. Use /port
print command to see if some other application is still using the port.
Ctrl-A have special meaning and is used to provide a possibility of exiting from nested serial-terminal sessions:
To send Ctrl-A to to serial port, press Ctrl-A Ctrl-A
Note: When rebooting a RouterBoard the bootloader (RouterBOOT) will always use the serial console
(serial0 on RouterBoards) to send out some startup messages and offer access to the RouterBOOT menu.
Having text coming out of the serial port to the connected device might confuse your attached device and get
stuck on boot loader. To avoid this you can reconfigure RouterBOOT to enter the RouterBOOT menu only
when a DEL character is received.
Example
To connect to a device connected to the serial1 port:
[admin@dzeltenais_burkaans] > /system serial-terminal serial0
[Ctrl-A is the prefix key]
[admin@R2] /ip address>
Manual:System/Serial Console
22
Console Screen
Sub-menu: /system console screen
This facility is created to change line number per screen if you have a monitor connected to router.
Property
Description
line count (25|40|50; Default: 25) Number of lines on monitor
This parameter is applied only to a monitor, connected to the router.
Example
To set monitor's resolution from 80x25 to 80x40:
[admin@MikroTik] system console screen> set line-count=40
[admin@MikroTik] system console screen> print
line-count: 40
[admin@MikroTik] system console screen>
See More
• Special Login
• Sigwatch
[ Top | Back to Content ]
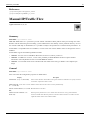
Manual:Scripting
Applies to RouterOS: v3, v4
Scripting language manual
This manual provides introduction to RouterOS built-in powerful scripting language.
Scripting host provides a way to automate some router maintenance tasks by means of executing user-defined scripts
bounded to some event occurrence.
Scripts can be stored in Script repository or can be written directly to console. The events used to trigger script
execution include, but are not limited to the System Scheduler, the Traffic Monitoring Tool, and the Netwatch Tool
generated events.
Manual:Scripting
Line structure
RouterOS script is divided into number of command lines. Command lines are executed one by one until the end of
script or until runtime error occur.
Command line
RouterOS console uses following command syntax:
[prefix] [path] command [uparam] [param=[value]] .. [param=[value]]
•
•
•
•
•
[prefix] - ":" or "/" character which indicates if command is ICE or path. May or may not be required.
[path] - relative path to the desired menu level. May or may not be required.
command - one of the commands available at the specified menu level.
[uparam] - unnamed parameter, must be specified if command requires it.
[params] - sequence of named parameters followed by respective values
The end of command line is represented by the token “;” or NEWLINE. Sometimes “;” or NEWLINE is not required to
end the command line.
Single command inside (), [] or {} does not require any end of command character. End of command is
determined by content of whole script
:if ( true ) do={ :put "lala" }
Each command line inside another command line starts and ends with square brackets "[ ]" (command
concatenation).
:put [/ip route get [find gateway=1.1.1.1]];
Notice that code above contains three command lines:
• :put
• /ip route get
• find gateway=1.1.1.1
Command line can be constructed from more than one physical line by following line joining rules.
Physical Line
A physical line is a sequence of characters terminated by an end-of-line (EOL) sequence. Any of the standard
platform line termination sequences can be used:
• unix – ASCII LF;
• windows – ASCII CR LF;
• mac – ASCII CR;
Standard C conventions for new line characters can be used ( the \n character).
Comments
A comment starts with a hash character (#) and ends at the end of the physical line. Whitespace or any other symbols
are not allowed before hash symbol. Comments are ignored by syntax. If (#) character appear inside string it is not
considered a comment.
# this is a comment
# bad comment
:global a; # bad comment
:global myStr "lala # this is not a comment"
23
Manual:Scripting
24
Line joining
Two or more physical lines may be joined into logical lines using backslash character (\). A line ending in a
backslash cannot carry a comment. A backslash does not continue a comment. A backslash does not continue a token
except for string literals. A backslash is illegal elsewhere on a line outside a string literal.
:if ($a = true \
and $b=false) do={ :put “$a $b”; }
:if ($a = true \
# bad comment
and $b=false) do={ :put “$a $b”; }
# comment \
continued – invalid
(syntax error)
Whitespace between tokens
Whitespace can be used to separate tokens. Whitespace is necessary between two tokens only if their concatenation
could be interpreted as a different token. Example:
{
:local a true; :local b false;
# whitespace is not required
:put (a&&b);
# whitespace is required
:put (a and b);
}
Whitespace are not allowed
• between '<parameter>='
• between 'from=' 'to=' 'step=' 'in=' 'do=' 'else='
Example:
#incorrect:
:for i from = 1 to = 2 do = { :put $i }
#correct syntax:
:for i from=1 to=2 do={ :put $i }
:for i from= 1 to= 2 do={ :put $i }
#incorrect
/ip route add gateway = 3.3.3.3
#correct
/ip route add gateway=3.3.3.3
Manual:Scripting
25
Scopes
Variables can be used only in certain regions of the script. These regions are called scopes. Scope determines
visibility of the variable. There are two types of scopes - global and local. A variable declared within a block is
accessible only within that block and blocks enclosed by it, and only after the point of declaration.
Global scope
Global scope or root scope is default scope of the script. It is created automatically and can not be turned off.
Local scope
User can define its own groups to block access to certain variables, these scopes are called local scopes. Each local
scope is enclosed in curly braces ("{ }").
{
:local a 3;
{
:local b 4;
:put ($a+$b);
}
#line below will generate error
:put ($a+$b);
}
In code above variable b has local scope and will not be accessible after closed curly brace.
Note: Each line written in terminal is treated as local scope
So for example, defined local variable will not be visible in next command line and will generate
syntax error
[admin@MikroTik] > :local myVar a;
[admin@MikroTik] > :put $myVar
syntax error (line 1 column 7)
Warning: Do not define global variables inside local scopes.
Note that even variable can be defined as global, it will be available only from its scope unless it is
not already defined.
{
:local a 3;
{
:global b 4;
}
:put ($a+$b);
}
Code above will generate an error.
Manual:Scripting
26
Keywords
The following words are keywords and cannot be used as variable and function names:
and
or
not
in
Delimiters
The following tokens serve as delimiters in the grammar:
()
[]
{}
:
;
$
/
Data types
RouterOS scripting language has following data types:
Type
Description
number
- 64bit signed integer, possible hexadecimal input;
boolean
- values can bee true or false;
string
- character sequence;
IP
- IP address;
internal ID - hexadecimal value prefixed by '*' sign. Each menu item has assigned unique number - internal ID;
time
- date and time value;
array
- sequence of values organized in an array;
nil
- default variable type if no value is assigned;
Constant Escape Sequences
Following escape sequences can be used to define certain special character within string:
\"
Insert double quote
\\
Insert backslash
\n
Insert newline
\r
Insert carriage return
\t
Insert horizontal tab
\$
Output $ character. Otherwise $ is used to link variable.
\?
Output ? character. Otherwise ? is used to print "help" in console.
\_
- space
\a
- BEL (0x07)
\b
- backspace (0x08)
\f
- form feed (0xFF)
\v
Insert vertical tab
\xx Print character from hex value. Hex number should use capital letters.
:put "\48\45\4C\4C\4F\r\nThis\r\nis\r\na\r\ntest";
which will show on display
HELLO
Manual:Scripting
27
This
is
a
test
Operators
Arithmetic Operators
Usual arithmetic operators are supported in RouterOS scripting language
Opearator
Description
Example
"+"
binary addition
:put (3+4);
"-"
binary subtraction
:put (1-6);
"*"
binary multiplication :put (4*5);
"/"
binary division
:put (10 / 2); :put ((10)/2)
"-"
unary negation
{ :local a 1; :put (-a); }
Note: for division to work you have to use braces or spaces around dividend so it is not mistaken as IP
address
Relational Operators
Opearator
Logical Operators
Description
Example
"<"
less
:put (3<4);
">"
greater
:put (3>4);
"="
equal
:put (2=2);
"<="
less or equal
">="
greater or equal
"!="
not equal
Manual:Scripting
28
Opearator
Description
“!” , “not”
Example
logical NOT :put (!true);
“&&” , “and” logical AND :put (true&&true)
“||” , “or”
logical OR
“in”
:put (true||false);
:put (1.1.1.1/32 in 1.0.0.0/8);
Bitwise Operators
Bitwise operators are working on number and ip address data types.
Opearator Description
Example
“~”
bit inversion
:put
(~0.0.0.0)
“|”
bitwise OR. Performs logical OR operation on each pair of corresponding bits. In each pair the result is “1” if one
of bits or both bits are “1”, otherwise the result is “0”.
“^”
bitwise XOR. The same as OR, but the result in each position is “1” if two bits are not equal, and “0” if bits are
equal.
“&”
bitwise AND. In each pair the result is “1” if first and second bit is “1”. Otherwise the result is “0”.
“<<”
left shift by given amount of bits
“>>”
right shift by given amount of bits
Concatenation Operators
Opearator
Description
Example
“.”
concatenates two strings
:put (“concatenate” . “ “ . “string”);
“,”
concatenates two arrays or adds element to array :put ({1;2;3} , 5 );
It is possible to add variable values to strings without concatenation operator:
:global myVar "world";
:put ("Hello " . $myVar);
# next line does the same as above
:put "Hello $myVar";
By using $[] and $() in string it is possible to add expressions inside strings:
:local a 5;
:local b 6;
:put " 5x6 = $($a * $b)";
:put " We have $[ :len [/ip route find] ] routes";
Manual:Scripting
29
Other Operators
Opearator
Description
Example
“[]”
command substitution. Can contain only single command line
:put [ :len "my test string"; ];
“()”
sub expression or grouping operator
:put ( "value is " . (4+5));
“$”
substitution operator
:global a 5; :put $a;
“~”
binary operator that matches value against POSIX extended regular Print all routes which gateway ends with 202
expression
/ip route print where gateway~"^[0-9
\\.]*202"
“->”
Get an array element by key
[admin@x86] >:global aaa {a=1;b=2}
[admin@x86] > :put ($aaa->"a")
1
[admin@x86] > :put ($aaa->"b")
2
Variables
Scripting language has two types of variables:
• global - accessible from all scripts created by current user, defined by global keyword;
• local - accessible only within the current scope, defined by local keyword.
Note: Starting from v6.2 there can be undefined variables. When variable is undefined parser will try to look
for variables set, for example, by DHCP lease-script or Hotspot on-login
Every variable, except for built in RouterOS variables, must be declared before usage by local or
global keywords. Undefined variables will be marked as undefined and will result in compilation
error. Example:
# following code will result in compilation error, because myVar is used without declaration
:set myVar "my value";
:put $myVar
Correct code:
:local myVar;
:set myVar "my value";
:put $myVar;
Exception is when using variables set, for example, by DHCP lease-script
/system script
add name=myLeaseScript policy=\
ftp,reboot,read,write,policy,test,winbox,password,sniff,sensitive,api \
source=":log info \$leaseActIP\r\
\n:log info \$leaseActMAC\r\
\n:log info \$leaseServerName\r\
\n:log info \$leaseBound"
/ip dhcp-server set
myServer lease-script=myLeaseScript
Valid characters in variable names are letters and digits. If variable name contains any other character, then variable
name should be put in double quotes. Example:
Manual:Scripting
30
#valid variable name
:local myVar;
#invalid variable name
:local my-var;
#valid because double quoted
:global "my-var";
If variable is initially defined without value then variable data type is set to nil, otherwise data type is determined
automatically by scripting engine. Sometimes conversion from one data type to another is required. It can be
achieved using data conversion commands. Example:
#convert string to array
:local myStr "1,2,3,4,5";
:put [:typeof $myStr];
:local myArr [:toarray $myStr];
:put [:typeof $myArr]
Variable names are case sensitive.
:local myVar "hello"
# following line will generate error, because variable myVAr is not defined
:put $myVAr
# correct code
:put $myVar
Set command without value will un-define the variable (remove from environment, new in v6.2)
#remove variable from environment
:global myVar "myValue"
:set myVar;
Commands
Every global command should start with ":" token, otherwise it will be treated as variable.
Command
Syntax
Description
/
go to root menu
..
go back by one menu level
?
list all available menu commands and brief
descriptions
Example
global
:global <var>
[<value>]
define global variable
:global myVar "something"; :put
$myVar;
local
:local <var>
[<value>]
define local variable
{ :local myLocalVar "I am
local"; :put $myVar; }
beep
:beep <freq>
<length>
beep built in speaker
delay
:delay <time>
do nothing for a given period of time
put
:put <expression>
put supplied argument to console
len
:len <expression>
return string length or array element count
:put [:len "length=8"];
typeof
:typeof <var>
return data type of variable
:put [:typeof 4];
Manual:Scripting
31
pick
:pick <var>
<start>[<end>]
return range of elements or substring. If end
position is not specified, will return only one
element from an array.
:put [:pick "abcde" 1 3]
log
:log <topic>
<message>
write message to system log. Available topics are :log info "Hello from script";
"debug, error, info and warning"
time
:time <expression>
return interval of time needed to execute
command
:put [:time {:for i from=1 to=10
do={ :delay 100ms }}];
set
:set <var>
[<value>]
assign value to declared variable.
:global a; :set a true;
find
:find <arg> <arg>
<start>
return position of substring or array element
:put [:find "abc" "a" -1];
environment :environment print
<start>
print initialized variable information
:global myVar true; :environment
print;
terminal
terminal related commands
error
:error <output>
Generate console error and stop executing the
script
parse
:parse
<expression>
parse string and return parsed console
commands. Can be used as function.
:global myFunc [:parse ":put
hello!"];
$myFunc;
resolve
:resolve <arg>
return IP address of given DNS name
:put [:resolve
"www.mikrotik.com"];
toarray
:toarray <var>
convert variable to array
tobool
:tobool <var>
convert variable to boolean
toid
:toid <var>
convert variable to internal ID
toip
:toip <var>
convert variable to IP address
toip6
:toip6 <var>
convert variable to IPv6 address
tonum
:tonum <var>
convert variable to integer
tostr
:tostr <var>
convert variable to string
totime
:totime <var>
convert variable to time
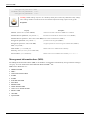
Menu specific commands
Following commands available from most sub-menus:
Command
Syntax
Description
add
add
<param>=<value>..<param>=<value>
add new item
remove
remove <id>
remove selected item
enable
enable <id>
enable selected item
disable
disable <id>
disable selected item
set
set <id>
<param>=<value>..<param>=<value>
change selected items parameter, more than one parameter can be specified at the
time. Parameter can be unset by specifying '!' before parameter.
Example:
/ip firewall filter add chain=blah action=accept
protocol=tcp port=123 nth=4,2
print
set 0 !port chain=blah2 !nth protocol=udp
Manual:Scripting
32
get
get <id> <param>=<value>
get selected items parameter value
print
print <param><param>=[<value>]
print menu items. Output depends on print parameters specified. Most common
print parameters are described here
export
export [file=<value>]
export configuration from current menu and its sub-menus (if present). If file
parameter is specified output will be written to file with extension '.rsc', otherwise
output will be printed to console. Exported commands can be imported by import
command
edit
edit <id> <param>
edit selected items property in built-in text editor
find
find <expression>
find items by given expression.
import
Import command is available from root menu and is used to import configuration from files created by export
command or written manually by hand.
print parameters
Several parameters are available for print command:
Parameter
Description
Example
append
as-value
print output as array of parameters and its values
:put [/ip address print
as-value]
brief
print brief description
detail
print detailed description, output is not as readable as brief output, but may
be useful to view all parameters
count-only
print only count of menu items
file
print output to file
follow
print all current entries and track new entries until ctrl-c is pressed, very
useful when viewing log entries
/log print follow
follow-only
print and track only new entries until ctrl-c is pressed, very useful when
viewing log entries
/log print follow-only
from
print parameters only from specified item
/user print from=admin
interval
continuously print output in selected time interval, useful to track down
changes where follow is not acceptable
/interface print interval=2
terse
show details in compact and machine friendly format
value-list
show values one per line (good for parsing purposes)
without-paging If output do not fit in console screen then do not stop, print all information
in one piece
where
expressions followed by where parameter can be used to filter out matched
entries
/ip route print where
interface="ether1"
More than one parameter can be specified at a time, for example, /ip route print count-only
interval=1 where interface="ether1"
Manual:Scripting
33
Loops and conditional statements
Command
Syntax
Description
do..while :do { <commands> } while=( <conditions> ); :while (
<conditions> ) do={ <commands> };
execute commands until given
condition is met.
for
:for <var> from=<int> to=<int> step=<int> do={ <commands> }
execute commands over a given
number of iterations
foreach
:foreach <var> in=<array> do={ <commands> };
execute commands for each elements
in list
Command
if
Syntax
:if(<condition>) do={<commands>}
else={<commands>} <expression>
Description
If a given condition is true then execute commands in the do block,
otherwise execute commands in the else block if specified.
Example:
{
:local myBool true;
:if ($myBool = false) do={ :put "value is false" } else={ :put "value is true" }
}
Functions
Scripting language does not allow to create functions directly, however you could use :parse command as a
workaround.
Starting from v6.2 new syntax is added to easier define such functions and even pass parameters. It is also possible
to return function value with :return command.
See examples below:
#define function and run it
:global myFunc do={:put "hello from function"}
$myFunc
output:
hello from function
#pass arguments to the function
:global myFunc do={:put "arg a=$a"; :put "arg '1'=$1"}
$myFunc a="this is arg a value" "this is arg1 value"
output:
arg a=this is arg a value
arg '1'=this is arg1 value
Notice that there are two ways how to pass arguments:
• pass arg with specific name ("a" in our example)
• pass value without arg name, in such case arg "1", "2" .. "n" are used.
Return example
Manual:Scripting
34
:global myFunc do={ :return ($a + $b)}
:put [$myFunc a=6 b=2]
output:
8
You can even clone existing script from script environment and use it as function.
#add script
/system script add name=myScript source=":put \"Hello $myVar !\""
:global myFunc [:parse [/system script get myScript source]]
$myFunc myVar=world
output:
Hello world !
Warning: If function contains defined global variable which name matches the name of passed parameter,
then globally defined variable is ignored, for compatibility with scripts written for older versions. This feature
can change in future versions. Avoid using parameters with same name as global variables.
For example:
:global my2 "123"
:global myFunc do={ :global my2; :put $my2; :set my2 "lala"; :put $my2 }
$myFunc my2=1234
:put "global value $my2"
Output will be:
1234
lala
global value 123
Catch run-time errors
Starting from v6.2 scripting has ability to catch run-time errors.
For example, [code]:reslove[/code] command if failed will throw an error and break the script.
[admin@MikroTik] > { :put [:resolve www.example.com]; :put "lala";}
failure: dns name does not exist
Now we want to catch this error and proceed with our script:
:do {
:put [:resolve www.example.com];
} on-error={ :put "resolver failed"};
:put "lala"
output:
Manual:Scripting
35
resolver failed
lala
Operations with Arrays
Warning: Key name in array contains any character other than lowercase character, it should be put in quotes
For example:
[admin@ce0] > {:local a { "aX"=1 ; ay=2 }; :put ($a->"aX")}
2
Loop through keys and values
foreach command can be used to loop through keys and elements:
[admin@ce0] > :foreach k,v in={2; "aX"=1 ; y=2; 5} do={:put ("$k=$v")}
0=2
1=5
aX=1
y=2
Note: If array element has key then these elements are sorted in alphabetical order, elements without keys are
moved before elements with keys and their order is not changed (see example above).
Script repository
Sub-menu level: /system script
Contains all user created scripts. Scripts can be executed in several different ways:
• on event - scripts are executed automatically on some facility events ( scheduler, netwatch, VRRP)
• by another script - running script within script is allowed
• manually - from console executing run command or in winbox
Property
name (string; Default: "Script[num]") name of the script
Description
Manual:Scripting
36
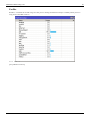
policy (string; Default: )
list of applicable policies:
•
•
•
•
•
•
•
•
•
•
•
•
•
•
•
api - api permissions
ftp - can log on remotely via ftp and send and retrieve files from the router
local - can log on locally via console
password - change passwords
policy - manage user policies, add and remove user
read - can retrieve the configuration
reboot - can reboot the router
sensitive - see passwords and other sensitive information
sniff - can run sniffer, torch etc
ssh - can log on remotely via secure shell
telnet - can log on remotely via telnet
test - can run ping, traceroute, bandwidth test
web - can log on remotely via http
winbox - winbox permissions
write - can retrieve and change the configuration
Read more detailed policy descriptions here
source (string;)
Script source code
Read only status properties:
Property
Description
last-started (date) Date and time when the script was last invoked.
owner (string)
User who created the script
run-count (integer)
Counter that counts how many times script has been executed
Menu specific commands
Command
Description
run (run [id|name]) Execute specified script by ID or name
Environment
Sub-menu level:
• /system script environment
• /environment
Contains all user defined variables and their assigned values.
[admin@MikroTik] > :global example;
[admin@MikroTik] > :set example 123
[admin@MikroTik] > /environment print
"example"=123
Read only status properties:
Manual:Scripting
37
Property
Description
name (string) Variable name
user (string) User who defined variable
value ()
Value assigned to variable
Job
Sub-menu level: /system script job
Contains list of all currently running scripts.
Read only status properties:
Property
Description
owner (string) User who is running script
policy (array) List of all policies applied to script
started (date) Local date and time when script was started
Manual:Scripting-examples
CMD Scripting examples
This section contains some useful scripts and shows all available scripting features. Script examples used in this
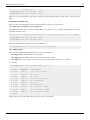
section were tested with the latest 3.x version.
Create a file
In v3.x it is not possible to create file directly, however there is a workaround
/file print file=myFile
/file set myFile.txt contents=""
Check if IP on interface have changed
Sometimes provider gives dynamic IP addresses. This script will compare if dynamic IP address is changed.
:global currentIP;
:local newIP [/ip address get [find interface="ether1"] address];
:if ($newIP != $currentIP) do={
:put "ip address $currentIP changed to $newIP";
:set currentIP $newIP;
}
Manual:Scripting-examples
Strip netmask
This script is useful if you need ip address without netmask (for example to use it in firewall), but "/ip address
get [id] address" returns ip address and netmask.
Code:
:global ipaddress 10.1.101.1/24
:for i from=( [:len $ipaddress] - 1) to=0 do={
:if ( [:pick $ipaddress $i] = "/") do={
:put [:pick $ipaddress 0 $i]
}
}
Another much more simple way:
:global ipaddress 10.1.101.1/24
:put [:pick $ipaddress 0 [:find $ipaddress "/"]]
Resolve host-name
Many users are asking feature to use dns names instead of IP address for radius servers, firewall rules, etc.
So here is an example how to resolve RADIUS server's IP.
Lets say we have radius server configured:
/radius
add address=3.4.5.6 comment=myRad
And here is a script that will resolve ip address, compare resolved ip with configured one and replace if not equal:
/system script add name="resolver" source= {
:local resolvedIP [:resolve "server.example.com"];
:local radiusID [/radius find comment="myRad"];
:local currentIP [/radius get $radiusID address];
:if ($resolvedIP != $currentIP) do={
/radius set $radiusID address=$resolvedIP;
/log info "radius ip updated";
}
}
Add this script to scheduler to run for example every 5 minutes
/system scheduler add name=resolveRadiusIP on-event="resolver" interval=5m
38
Manual:Scripting-examples
Write simple queue stats in multiple files
Lets consider queue namings are "some text.1" so we can search queues by last number right after the dot.
:local entriesPerFile 10;
:local currentQueue 0;
:local queuesInFile 0;
:local fileContent "";
#determine needed file count
:local numQueues [/queue simple print count-only] ;
:local fileCount ($numQueues / $entriesPerFile);
:if ( ($fileCount * $entriesPerFile) != $numQueues) do={
:set fileCount ($fileCount + 1);
}
#remove old files
/file remove [find name~"stats"];
:put "fileCount=$fileCount";
:for i from=1 to=$fileCount do={
#create file
/file print file="stats$i.txt";
#clear content
/file set [find name="stats$i.txt"] contents="";
:while ($queuesInFile < $entriesPerFile) do={
:if ($currentQueue < $numQueues) do={
:set currentQueue ($currentQueue +1);
:put $currentQueue ;
/queue simple
:local internalID [find name~"\\.$currentQueue\$"];
:put "internalID=$internalID";
:set fileContent ($fileContent . [get $internalID target-address] . \
" " . [get $internalID total-bytes] . "\r\n");
}
:set queuesInFile ($queuesInFile +1);
}
/file set "stats$i.txt" contents=$fileContent;
:set fileContent "";
:set queuesInFile 0;
}
39
Manual:Scripting-examples
Generate backup and send it by e-mail
This script generates backup file and sends it to specified e-mail address. Mail subject contains router's name, current
date and time.
Note that smtp server must be configured before this script can be used. See /tool e-mail for configuration
options.
Script:
/system backup save name=email_backup
/tool e-mail send file=email_backup.backup to="[email protected]" body="See attached file" \
subject="$[/system identity get name] $[/system clock get time] $[/system clock get date] Backup")
Note: backup file contains sensitive information like passwords. So to get access to generated backup file,
script or scheduler must have 'sensitive' policy.
Use string as function
Code:
:global printA [:parse ":local A; :put \$A;" ];
$printA
Check bandwidth and add limitations
This script checks if download on interface is more than 512kbps, if true then queue is added to limit speed to
256kbps.
Code:
:foreach i in=[/interface find] do={
/interface monitor-traffic $i once do={
:if ($"received-bits-per-second" > 0 ) do={
:local tmpIP [/ip address get [/ip address find interface=$i] address] ;
#
:log warning $tmpIP ;
:for j from=( [:len $tmpIP] - 1) to=0 do={
:if ( [:pick $tmpIP $j] = "/") do={
/queue simple add name=$i max-limit=256000/256000 dst-address=[:pick $tmpIP 0 $j] ;
}
}
}
}
}
40
Manual:Scripting-examples
Block access to specific websites
This script is useful if you want to block certain web sites but you don't want to use web proxy.
This example looks entries "rapidshare" and "youtube" in dns cache and adds IPs to address list named "restricted".
Before you begin, you must set up router to catch all dns requests:
/ip firewall nat
add action=redirect chain=dstnat comment=DNS dst-port=53 protocol=tcp to-ports=53
add action=redirect chain=dstnat dst-port=53 protocol=udp to-ports=53
and add firewall
/ip firewall filter
add chain=forward dst-address-list=restricted action=drop
Now we can write a script and schedule it to run, lets say, every 30 seconds.
Script Code:
:foreach i in=[/ip dns cache find] do={
:local bNew "true";
:local cacheName [/ip dns cache all get $i name] ;
#
:put $cacheName;
:if (([:find $cacheName "rapidshare"] != 0) || ([:find $cacheName "youtube"] != 0)) do={
:local tmpAddress [/ip dns cache get $i address] ;
#
:put $tmpAddress;
# if address list is empty do not check
:if ( [/ip firewall address-list find ] = "") do={
:log info ("added entry: $[/ip dns cache get $i name] IP $tmpAddress");
/ip firewall address-list add address=$tmpAddress list=restricted comment=$cacheName;
} else={
:foreach j in=[/ip firewall address-list find ] do={
:if ( [/ip firewall address-list get $j address] = $tmpAddress ) do={
:set bNew "false";
}
}
:if ( $bNew = "true" ) do={
:log info ("added entry: $[/ip dns cache get $i name] IP $tmpAddress");
/ip firewall address-list add address=$tmpAddress list=restricted comment=$cacheName;
}
}
}
}
41
Manual:Scripting-examples
Parse file to add ppp secrets
This script requires that entries inside the file is in following format:
username,password,local_address,remote_address,profile,service
For example:
janis,123,1.1.1.1,2.2.2.1,ppp_profile,myService
juris,456,1.1.1.1,2.2.2.2,ppp_profile,myService
aija,678,1.1.1.1,2.2.2.3,ppp_profile,myService
Code:
:global content [/file get [/file find name=test.txt] contents] ;
:global contentLen [ :len $content ] ;
:global lineEnd 0;
:global line "";
:global lastEnd 0;
:do {
:set lineEnd [:find $content "\r\n" $lastEnd ] ;
:set line [:pick $content $lastEnd $lineEnd] ;
:set lastEnd ( $lineEnd + 2 ) ;
:local tmpArray [:toarray $line] ;
:if ( [:pick $tmpArray 0] != "" ) do={
:put $tmpArray;
/ppp secret add name=[:pick $tmpArray 0] password=[:pick $tmpArray 1] \
local-address=[:pick $tmpArray 2] remote-address=[:pick $tmpArray 3] \
profile=[:pick $tmpArray 4] service=[:pick $tmpArray 5];
}
} while ($lineEnd < $contentLen)
Detect new log entry
This script is checking if new log entry is added to particular buffer.
In this example we will use pppoe logs:
/system logging action
add name="pppoe"
/system logging
add action=pppoe topics=pppoe,info,!ppp,!debug
Log buffer will look similar to this one:
[admin@mainGW] > /log print where buffer=pppoe
13:11:08 pppoe,info PPPoE connection established from 00:0C:42:04:4C:EE
Now we can write a script to detect if new entry is added.
Code:
42
Manual:Scripting-examples
43
:global lastTime;
:global currentBuf [ :toarray [ /log find buffer=pppoe
] ] ;
:global currentLineCount [ :len $currentBuf ] ;
:global currentTime [ :totime [/log get [ :pick $currentBuf ($currentLineCount -1) ] time
] ];
:global message "";
:if ( $lastTime = "" ) do={
:set lastTime $currentTime ;
:set message [/log get [ :pick $currentBuf ($currentLineCount-1) ] message];
} else={
:if ( $lastTime < $currentTime ) do={
:set lastTime $currentTime ;
:set message [/log get [ :pick $currentBuf ($currentLineCount-1) ] message];
}
}
After new entry is detected, it is saved in "message" variable, which you can use later to parse log message, for
example, to get pppoe clients mac address.
Allow use of ntp.org pool service for NTP
This script resolves the hostnames of two NTP servers, compares the result with the current NTP settings and
changes the addresses if they're different. This script is required as RouterOS does not allow hostnames to be used in
the NTP configuration. Two scripts are used. The first defines some system variables which are used in other scripts
and the second does the grunt work:
# System configuration script - "GlobalVars"
:put "Setting system globals";
# System name
:global SYSname [/system identity get name];
# E-mail address to send notifications to
:global SYSsendemail "[email protected]";
# E-mail address to send notifications from
:global SYSmyemail "[email protected]";
# Mail server to use
:global SYSemailserver "1.2.3.4";
# NTP pools to use (check www.pool.ntp.org)
:global SYSntpa "0.uk.pool.ntp.org";
:global SYSntpb "1.uk.pool.ntp.org";
Manual:Scripting-examples
# Check and set NTP servers - "setntppool"
# We need to use the following globals which must be defined here even
# though they are also defined in the script we call to set them.
:global SYSname;
:global SYSsendemail;
:global SYSmyemail;
:global SYSmyname;
:global SYSemailserver;
:global SYSntpa;
:global SYSntpb;
# Load the global variables with the system defaults
/system script run GlobalVars
# Resolve the two ntp pool hostnames
:local ntpipa [:resolve $SYSntpa];
:local ntpipb [:resolve $SYSntpb];
# Get the current settings
:local ntpcura [/system ntp client get primary-ntp];
:local ntpcurb [/system ntp client get secondary-ntp];
# Define a variable so we know if anything's changed.
:local changea 0;
:local changeb 0;
# Debug output
:put ("Old: " . $ntpcura . " New: " . $ntpipa);
:put ("Old: " . $ntpcurb . " New: " . $ntpipb);
# Change primary if required
:if ($ntpipa != $ntpcura) do={
:put "Changing primary NTP";
/system ntp client set primary-ntp="$ntpipa";
:set changea 1;
}
# Change secondary if required
:if ($ntpipb != $ntpcurb) do={
:put "Changing secondary NTP";
/system ntp client set secondary-ntp="$ntpipb";
:set changeb 1;
}
# If we've made a change, send an e-mail to say so.
:if (($changea = 1) || ($changeb = 1)) do={
44
Manual:Scripting-examples
:put "Sending e-mail.";
/tool e-mail send \
to=$SYSsendemail \
subject=($SYSname . " NTP change") \
from=$SYSmyemail \
server=$SYSemailserver \
body=("Your NTP servers have just been changed:\n\nPrimary:\nOld: " . $ntpcura . "\nNew: " \
. $ntpipa . "\n\nSecondary\nOld: " . $ntpcurb . "\nNew: " . $ntpipb);
}
Scheduler entry:
/system scheduler add \
comment="Check and set NTP servers" \
disabled=no \
interval=12h \
name=CheckNTPServers \
on-event=setntppool \
policy=read,write,test \
start-date=jan/01/1970 \
start-time=16:00:00
Auto upgrade script
• Auto_upgrade_script_V3.x
Other scripts known to work with latest v3.x
• Dynamic_DNS_Update_Script_for_EveryDNS
• Dynamic_DNS_Update_Script_for_ChangeIP.com
• UPS Script
LUA Scripting examples
NOTE!
After RouterOS v4.0beta4, Lua support is removed until further notice
In v4.0beta3 Lua scripting language is integrated in console. This integration allows users to create their own
functions and bypass several command line scripting limitations.
All examples below require at least basic knowledge of Lua scripting language. Good tutorials can be found here [1]
as a starting point.
Print function
As stated in Lua documentation, 'print' command is not available in RouterOS compared to standard Lua release.
This example will show you how to get back 'print' command
-- ------------------------------------------------------------------------- Print function
-- -----------------------------------------------------------------------function print (...)
local strPrintResult = ""
45
Manual:Scripting-examples
if ... then
local targs = {...}
for i,v in ipairs(targs) do
strPrintResult = strPrintResult .. tostring(v) .. "
end
strPrintResult = strPrintResult .. "\r\n"
io.write(strPrintResult)
end
46
"
end
Now you can include this custom function to other scripts and use this cool custom print function :)
You can also modify this function to write messages in RouterOS log.
Read and write large files
Many users requested ability to work with files. Now you can do it without limitations.
Create and write to file:
:global newContent "new file content\r\nanother line\r\n";
[/lua "local f=assert(io.open('/test.txt', 'w+')); f:write(newContent); f:close()" ];
Read file content to variable:
:global cnt ""
[/lua "local f=assert(io.open('/test.txt', 'r')); cnt=f:read('*all'); f:close()" ];
:put $cnt
Include custom function in another script
This example will show where to store and how to include your cool custom created functions into another scripts
• In router's file root directory create subdirectory named 'lua'
• On your PC create new file named customprint.lua and write this function in it.
• Upload newly created file in router's 'lua' directory that we made in first step
• Now you can test your custom lua function
[:lua "require 'customprint'\n print('hello from custom print function')"]
References
[1] http:/ / lua-users. org/ wiki/ TutorialDirectory
Manual:Lua
Manual:Lua
Summary
• Version 4.0beta3 introduces preliminary support for Lua scripting language [1]. Integration with console is still in
progress.
• RouterOS v4 RC1 removes Lua support indefinetly
Changes in console
• ':' and '/' namespaces are merged. Lookup rules have been changed so as not to affect existing scripts:
•
•
•
•
Without leading ':' or '/' names are looked up starting from the current path.
With leading ':' and '/' names are looked up starting from the root of the hierarchy.
With leading '/' current path of all subcommands is set to the path of command.
With leading ':' current path of subcommands is kept the same as the current path of command.
Example:
/ip address { #changes current path
print
#/ip address print
:queue simple print where interface=[get 0 interface]
#this 'get' is '/ip address get', because
#leading ':' does not change current path
#for subcommands
}
• Value of type 'nothing' is gone.
• Command 'nothing' returns same value as the empty command '[]'. It is kept for compatibility with earlier
versions.
• Value of type 'error' is gone, console error handling is unified with the Lua error hadling.
• 'error' command now immedeately raises an exception.
• New value type 'lua', holds arbitrary Lua values.
• New command 'lua' that returns lua function created from the given source string.
• Command can now also be a variable substitution, an expression or a command substitution. Result is evaluated.
Example:
global a [parse "/interface print"]; $a
($a)
[parse "/interface print"]
[lua "io.write 'this works\\n'"]
• Global variables are shared between Lua and console scripts.
• There is no ':log' command anymore, it is replace by four commands 'log info', 'log error', 'log warning', 'log
debug'. This change was necessary because of the root namespace merge. It preserves compatibility with previous
scripts, but note that name of log topic cannot be a result of an expression.
• '/system script' items has new property 'language' that can be either 'cmd' or 'lua'. 'cmd' is for console scripts, 'lua'
is for Lua scripts.
• New operator '%' that computes remainder.
• Logical operators now treat all values except nil and 'false' as 'true'. Note that empty string, empty array, number
0, IP address 0.0.0.0 and similar values are treated as a 'true', this is consistent with the Lua behaviour. Previously
47
Manual:Lua
values of non-boolean type were causing an error.
• Logical 'and' and 'or' operators ('&&' and '||') now use shortcut evaluation. If left hand value is sufficient for
computing the operation, it is returned and the right hand value is not computed. Otherwise, operation returns the
right hand value. Example:
put (9 or (1 / 0)) #prints 9, division is not computed
Changes in Lua compared to the standard release
• Lua base version is 5.1.4
• Number type is 64 bit signed integer. Floating point constants are not supported. Exponentiation does not work
with negative exponents.
• Following patches are applied:
• Byte swapping for loading bytecode [2].
• Patch by Thierry Grellier that adds '&' '|' '^^' '<<' '>>' '~' bitwise operators. Integer division operator is not
included. [3]
• Following libraries are included:
• bitlib [4], adapted for 64 bit integer numbers.
• md5 1.1.2 [5]
• lpeg 0.9 [6]
• Following features of standard libraries are not available:
•
•
•
•
'io.popen', 'io.pclose', 'io.tmpfile'.
'os.execute', 'os.tmpname', 'os.getenv', 'os.setlocale', 'os.exit'.
'debug' library.
All functions and constants from 'math', except 'math.abs', 'math.ceil', 'math.floor', 'math.max', 'math.min' and
'math.random'.
• 'print'
• Following changes are made to standard functions:
• 'pairs' now calls "__pairs" metamethod of it's argument, and falls back to 'rawpairs' call. Original 'pairs' is now
renamed to 'rawpairs'. These changes allow simple way of implementing default iteration behaviour for
objects, by providing "__pairs" metamethod.
• math.random without arguments can return any 64 bit integer number. All bits of the result are random.
• "/LIB" is a virtual path that contains additional libraries. This path is not accessible for file operations.
References
[1]
[2]
[3]
[4]
[5]
[6]
http:/ / www. lua. org/
http:/ / lua-users. org/ lists/ lua-l/ 2006-02/ msg00507. html
http:/ / lua-users. org/ wiki/ LuaPowerPatches
http:/ / luaforge. net/ projects/ bitlib
http:/ / www. keplerproject. org/ md5
http:/ / www. inf. puc-rio. br/ ~roberto/ lpeg/ lpeg. html
48
Manual:System/SSH client
Manual:System/SSH client
Overview
RouterOS provides SSH client that supports SSHv2 logins to SSH servers reachable from the router.
Requirements
For this command to be available router has to have system and security packages installed.
Available features
Simple log-in to remote host
It is able to connect to remote host and initiate ssh session. IP address supports both IPv4 and IPv6.
/system ssh 192.168.88.1
/system ssh 2001:db8:add:1337::beef
In this case user name provided to remote host is one that has logged into the router. If other value is required, then
user=<username> has to be used.
/system ssh 192.168.88.1 user=lala
/system ssh 2001:db8:add:1337::beef user=lala
Log-in from certain IP address of the router
For testing or security reasons it may be required to log-in to other host using certain source address of the
connection. In this case src-address=<ip address> argument has to be used. Note that IP address in this case
supports both, IPv4 and IPv6.
/system ssh 192.168.88.1 src-address=192.168.89.2
/system ssh 2001:db8:add:1337::beef src-address=2001:db8:bad:1000::2
in this case, ssh client will try to bind to address specified and then initiate ssh connection to remote host.
Log-in using certificate
For this to work user has to set up public key on remote end where ssh will connect to. How to do that on RouterOS
you can read here. On local end router, public and private keys have to be uploaded to be used in /user ssh-keys
private when adding private key and user name that will be able to use this key.
Warning: User with full rights on the router can change 'user' attribute value under /user ssh-keys privte
Here private key is created for use for user lala
/user ssh-keys private import private-key-file=id_dsa public-key-file=id_dsa.pub user=lala
49
Manual:System/SSH client
50
Executing remote commands
To execute remote command it has to be supplied at the end of log-in line
/system
/system
/system
/system
ssh
ssh
ssh
ssh
192.168.88.1 "/ip address print"
192.168.88.1 command="/ip address print"
2001:db8:add:1337::beef "/ip address print"
2001:db8:add:1337::beef command="/ip address print"
Warning: If server does not support pseudo-tty (ssh -T or ssh host command), like mikrotik ssh server, then
it is not possible to send multiline commands via SSH
For example, sending command "/ip address \n add address=1.1.1.1/24" to
Mikrotik router will fail.
[ Top | Back to Content ]
Manual:IP/SSH
Applies to RouterOS: v5
Summary
This menu controls if ssh server behaviour regarding port forward and authentication methods.
Settings
Property
Desciption
forwarding-enabled (no|yes default:no)
controls ssh port forwarding
always-allow-password-login (no|yes
default:no)
controls ssh authentication methods, if set to yes, does not remove form allowed methods
password_login
Example
To use this feature from Linux host using OpenSSH client this command can be used:
ssh reamoteuser@remotehost -L port:remotehost:remoteport
where:
•
•
•
•
remoteuser - user of router
remotehost - router address (if host name is used in -L settings, router should be able to resolve this name)
port - local port that your host will listen on
remoteport - port on the router
If user requires telnet to router, but you do not want to allow it to be plain text, Following can be done:
ssh [email protected] -L 3000:192.168.88.1:23
Manual:IP/SSH
51
now when user uses telnet localhost 3000" it will log in the router using telnet over encrypted tcp connection.
Note: we fully support SFTP v3 as described in draft-ietf-secsh-filexfer-02.txt
[1]
other versions can cause
problems
References
[1] http:/ / tools. ietf. org/ wg/ secsh/ draft-ietf-secsh-filexfer/ draft-ietf-secsh-filexfer-02. txt
Manual:System/Log
Applies to RouterOS: v3, v4 +
Summary
RouterOS is capable of logging various system events and status information. Logs can be saved in routers memory
(RAM), disk, file, sent by email or even sent to remote syslog server (RFC 3164).
Log messages
Sub-menu level: /log
All messages stored in routers local memory can be printed from /log menu. Each entry contains time and date
when event occurred, topics that this message belongs to and message itself.
[admin@ZalaisKapots] /log> print
jan/02/1970 02:00:09 system,info router rebooted
sep/15 09:54:33 system,info,account user admin logged in from 10.1.101.212 via winbox
sep/15 12:33:18 system,info item added by admin
sep/15 12:34:26 system,info mangle rule added by admin
sep/15 12:34:29 system,info mangle rule moved by admin
sep/15 12:35:34 system,info mangle rule changed by admin
sep/15 12:42:14 system,info,account user admin logged in from 10.1.101.212 via telnet
sep/15 12:42:55 system,info,account user admin logged out from 10.1.101.212 via telnet
01:01:58 firewall,info input: in:ether1 out:(none), src-mac 00:21:29:6d:82:07, proto UDP,
10.1.101.1:520->10.1.101.255:520, len 452
If logs are printed at the same date when log entry was added, then only time will be shown. In example above you
can see that second message was added on sep/15 current year (year is not added) and the last message was added
today so only the time is displayed.
Manual:System/Log
52
Note: print command accepts several parameters that allows to detect new log entries, print only necessary
messages and so on. For more information about parameters refer to scripting manual
For example following command will print all log messages where one of the topics is info and
will detect new log entries until Ctrl+C is pressed
[admin@ZalaisKapots] /log > print follow where topics~".info"
12:52:24 script,info hello from script
-- Ctrl-C to quit.
If print is in follow mode you can hit 'space' on keyboard to insert separator:
[admin@ZalaisKapots] /log > print follow where topics~".info"
12:52:24 script,info hello from script
= = =
= = =
= = =
= = =
= = =
= = =
= = =
= = =
= = =
-- Ctrl-C to quit.
Logging configuration
Sub-menu level: /system logging
Property
Description
action (name; Default: memory)
specifies one of the system default actions or user
specified action listed in actions menu
prefix (string; Default: )
prefix added at the beginning of log messages
topics (account, async, backup, bgp, calc, critical, ddns, debug, dhcp, e-mail, error,
event, firewall, gsm, hotspot, igmp-proxy, info, ipsec, iscsi, isdn, l2tp, ldp, manager,
mme, mpls, ntp, ospf, ovpn, packet, pim, ppp, pppoe, pptp, radius, radvd, raw, read,
rip, route, rsvp, script, sertcp, state, store, system, telephony, tftp, timer, ups, warning,
watchdog, web-proxy, wireless, write; Default: info)
log all messages that falls into specified topic or list of
topics.
'!' character can be used before topic to exclude messages
falling under this topic. For example, we want to log NTP
debug info without too much details:
/system logging add
topics=ntp,debug,!packet
Actions
Sub-menu level: /system logging action
Property
Description
bsd-syslog (yes|no; Default: )
whether to use bsd-syslog as defined in RFC 3164
disk-file-count (integer [1..65535]; Default: 2)
specifies number of files used to store log messages, applicable
only if action=disk
disk-file-name (string; Default: log)
name of the file used to store log messages, applicable only if
action=disk
disk-lines-per-file (integer [1..65535]; Default: 100)
specifies maximum size of file in lines, applicable only if
action=disk
disk-stop-on-full (yes|no; Default: no)
whether to stop to save log messages to disk after the specified
disk-lines-per-file and disk-file-count number is reached,
applicable only if action=disk
Manual:System/Log
53
email-to (string; Default: )
email address where logs are sent, applicable only if
action=email
memory-lines (integer [1..65535]; Default: 100)
number of records in local memory buffer, applicable only if
action=memory
memory-stop-on-full (yes|no; Default: no)
whether to stop to save log messages in local buffer after the
specified memory-lines number is reached
name (string; Default: )
name of an action
remember (yes|no; Default: )
whether to keep log messages, which have not yet been
displayed in console, applicable if action=echo
remote (IP/IPv6 Address[:Port]; Default: 0.0.0.0:514)
remote logging server's IP/IPv6 address and UDP port,
applicable if action=remote
src-address (IP address; Default: 0.0.0.0)
source address used when sending packets to remote server
syslog-facility (auth, authpriv, cron, daemon, ftp, kern, local0, local1,
local2, local3, local4, local5, local6, local7, lpr, mail, news, ntp, syslog, user,
uucp; Default: daemon)
syslog-severity (alert, auto, critical, debug, emergency, error, info, notice, Severity level indicator defined in RFC 3164:
warning; Default: auto)
• Emergency: system is unusable
• Alert: action must be taken immediately
• Critical: critical conditions
• Error: error conditions
• Warning: warning conditions
• Notice: normal but significant condition
• Informational: informational messages
• Debug: debug-level messages
target (disk, echo, email, memory, remote; Default: memory)
storage facility or target of log messages
•
•
•
•
•
disk - logs are saved to the hard drive more>>
echo - logs are displayed on the console screen
email - logs are sent by email
memory - logs are stored in local memory buffer
remote - logs are sent to remote host
Note: default actions can not be deleted or renamed.
Topics
Each log entry have topic which describes the origin of log message. There can be more than one
topic assigned to log message. For example, OSPF debug logs have four different topics: route,
ospf, debug and raw.
11:11:43 route,ospf,debug SEND: Hello Packet 10.255.255.1 -> 224.0.0.5 on lo0
11:11:43 route,ospf,debug,raw PACKET:
11:11:43 route,ospf,debug,raw
02 01 00 2C 0A FF FF 03 00 00 00 00 E7 9B 00 00
11:11:43 route,ospf,debug,raw
00 00 00 00 00 00 00 00 FF FF FF FF 00 0A 02 01
11:11:43 route,ospf,debug,raw
00 00 00 28 0A FF FF 01 00 00 00 00
List of Facility independent topics
Manual:System/Log
54
Topic
Description
critical Log entries marked as critical, these log entries are printed to console each time you log in.
debug
Debug log entries
error
Error messages
info
Informative log entry
packet
Log entry that shows contents from received/sent packet
raw
Log entry that shows raw contents of received/sent packet
warning
Warning message.
Topics used by various RouterOS facilities
Topic
Description
account
Log messages generated by accounting facility.
async
Log messages generated by asynchronous devices
backup
Log messages generated by backup creation facility.
bfd
Log messages generated by Manual:Routing/BFD protocol
bgp
Log messages generated by Manual:Routing/BGP protocol
calc
Routing calculation log messages.
ddns
Log messages generated by Manual:Tools/Dynamic DNS tool
dhcp
DHCP client, server and relay log messages
e-mail
Messages generated by Manual:Tools/email tool.
event
Log message generated at routing event. For example, new route have been installed in routing table.
firewall
Firewall log messages generated when action=log is set in firewall rule
gsm
Log messages generated by GSM devices
hotspot
Hotspot related log entries
igmp-proxy IGMP Proxy related log entries
ipsec
IpSec log entries
iscsi
isdn
l2tp
Log entries generated by Manual:Interface/L2TP client and server
ldp
Manual:MPLS/LDP protocol related messages
manager
User manager log messages.
mme
MME routing protocol messages
mpls
MPLS messages
ntp
sNTP client generated log entries
ospf
Manual:Routing/OSPF routing protocol messages
ovpn
OpenVPN tunnel messages
pim
Multicast PIM-SM related messages
ppp
ppp facility messages
pppoe
PPPoE server/client related messages
Manual:System/Log
55
pptp
PPTP server/client related messages
radius
Log entries generated by RADIUS Client
radvd
IPv6 radv deamon log messages.
read
SMS tool messages
rip
RIP routing protocol messages
route
Routing facility log entries
rsvp
Resource Reservation Protocol generated messages.
script
Log entries generated from scripts
sertcp
Log messages related to facility responsible for "/ports remote-access"
simulator
state
DHCP Client and routing state messages.
store
Log entries generated by Store facility
system
Generic system messages
telephony
tftp
TFTP server generated messages
timer
Log messages that are related to timers used in RouterOS. For example bgp keepalive logs
12:41:40 route,bgp,debug,timer KeepaliveTimer expired
12:41:40 route,bgp,debug,timer
RemoteAddress=2001:470:1f09:131::1
ups
Messages generated by UPS monitoring tool
watchdog
Watchdog generated log entries
web-proxy
Log messages generated by web proxy
wireless
M:Interface/Wireless log entries.
write
SMS tool messages.
Logging to file
To log everything to file, add new log action:
/system logging action add name=file target=disk disk-file-name=log
and then make everything log using this new action:
/system logging action=file
You can log only errors there by issuing command:
/system logging topics=error action=file
This will log into files log.0.txt and log.1.txt.
You can specify maximum size of file in lines by specifying disk-lines-per-file. <file>.0.txt is active file were new
logs are going to be appended and once it size will reach maximum it will become <file>.1.txt, and new empty
<file>.0.txt will be created.
You can log into USB flashes or into MicroSD/CF (on Routerboards) by specifying it's directory name before file
name. For example, if you have accessible usb flash as usb1 directory under /files, you should issue following
command:
Manual:System/Log
/system logging action add name=usb target=disk disk-file-name=usb1/log
Example:Webproxy logging
These two screenshots will show you how to configure the RouterOS logging facility to send Webrpoxy logs to a
remote syslog server, in this example, located at 192.168.100.12. The syslog server can be any software that supports
receiving syslogs, for example Kiwi syslog.
•
Add a new logging action, with "remote" and the IP of the remote server. Call it whatever you like
56
Manual:System/Log
•
Then add a new logging rule with the topic "webproxy" and then newly created action. Note that you must have
webproxy running on this router already, for this to work. To test, you can temporary change the action to "memory"
and see the "log" window if the webproxy visited websites are logged. If it works, change it back to your new remote
action
Note: it's a good idea to add another topic in the same rule: !debug. This would be to ensure you don't get any debug
stuff, only the visited sites.
57
Manual:System/UPS
58
Manual:System/UPS
Applies to RouterOS: v3, v4 +
Summary
Sub-menu: /system ups
Standards: APC Smart Protocol [1]
The UPS monitor feature works with APC UPS units that support “smart” signaling over serial RS232 or USB
connection. This feature enables the network administrator to monitor the UPS and set the router to ‘gracefully’
handle any power outage with no corruption or damage to the router. The basic purpose of this feature is to ensure
that the router will come back online after an extended power failure. To do this, the router will monitor the UPS and
set itself to hibernate mode when the utility power is down and the UPS battery is has less than 10% of its battery
power left. The router will then continue to monitor the UPS (while in hibernate mode) and then restart itself after
when the utility power returns. If the UPS battery is drained and the router loses all power, the router will power
back to full operation when the ‘utility’ power returns.
The UPS monitor feature on the MikroTik RouterOS supports
•
•
•
•
hibernate and safe reboot on power and battery failure
UPS battery test and run time calibration test
monitoring of all "smart" mode status information supported by UPS
logging of power changes
The serial APC UPS (BackUPS Pro or SmartUPS) requires a special serial cable (unless connected with USB). If no
cable came with the UPS, a cable may be ordered from APC or one can be made "in-house". Use the following
diagram:
General Properties
Router Side (DB9f)
Signal
Direction UPS Side (DB9m)
2
Receive IN
2
3
Send
1
5
Ground
7
CTS
OUT
4
IN
6
Manual:System/UPS
59
Property
Description
alarm-setting (delayed | immediate |
low-battery | none; Default: immediate)
UPS sound alarm setting:
min-runtime (time; Default: 5m)
Minimal run time remaining. After a 'utility' failure, the router will monitor the runtime-left value.
When the value reaches the min-runtime value, the router will go to hibernate mode.
•
•
•
•
•
offline-time (time; Default: 5m)
delayed - alarm is delayed to the on-battery event
immediate - alarm immediately after the on-battery event
low-battery - alarm only when the battery is low
none - do not alarm
0 - the router will go to hibernate mode when the "battery low" signal is sent indicating that the
battery power is below 10%
How long to work on batteries. The router waits that amount of time and then goes into hibernate
mode until the UPS reports that the 'utility' power is back
•
port (string; Default: )
0 - the router will go into hibernate mode according the min-runtime setting and 10% of battery
power event. In this case, the router will wait until the UPS reports that the battery power is
below 10%
Communication port of the router.
Read-only properties:
Property
Description
load (percent)
The UPS's output load as a percentage of full rated load in Watts. The typical accuracy of this
measurement is ±3% of the maximum of 105%
manufacture-date (string)
UPS's date of manufacture in the format "mm/dd/yy" (month, day, year).
model (string)
Less than 32 ASCII character string consisting of the UPS model name (the words on the front of the UPS
itself)
nominal-battery-voltage
(integer)
UPS's nominal battery voltage rating (this is not the UPS's actual battery voltage)
offline-after (time)
When will the router go offline
serial (string)
A string of at least 8 characters directly representing the UPS's serial number as set at the factory. Newer
SmartUPS models have 12-character serial numbers
version (string)
UPS version, consists of three fields: SKU number, firmware revision, country code. The county code
may be one of the following:
•
•
•
•
•
I - 220/230/240 Vac
D - 115/120 Vac
A - 100 Vac
M - 208 Vac
J - 200 Vac
Note: In order to enable UPS monitor, the serial port should be available.
Example
To enable the UPS monitor for port serial1:
[admin@MikroTik] system ups> add port=serial1 disabled=no
[admin@MikroTik] system ups> print
Flags: X - disabled, I - invalid
0
name="ups" port=serial1 offline-time=5m min-runtime=5m
alarm-setting=immediate model="SMART-UPS 1000" version="60.11.I"
Manual:System/UPS
60
serial="QS0030311640" manufacture-date="07/18/00"
nominal-battery-voltage=24V
[admin@MikroTik] system ups>
Runtime Calibration
Command: /system ups rtc <id>
The rtc command causes the UPS to start a run time calibration until less than 25% of full battery capacity is
reached. This command calibrates the returned run time value.
Note: The test begins only if the battery capacity is 100%.
Monitoring
Command: /system ups monitor <id>
Property
Description
battery-charge ()
the UPS's remaining battery capacity as a percent of the fully charged condition
battery-voltage ()
the UPS's present battery voltage. The typical accuracy of this measurement is ±5% of the maximum
value (depending on the UPS's nominal battery voltage)
frequency ()
when operating on-line, the UPS's internal operating frequency is synchronized to the line within
variations within 3 Hz of the nominal 50 or 60 Hz. The typical accuracy of this measurement is ±1%
of the full scale value of 63 Hz
line-voltage ()
the in-line utility power voltage
load ()
the UPS's output load as a percentage of full rated load in Watts. The typical accuracy of this
measurement is ±3% of the maximum of 105%
low-battery (yes | no)
only shown when the UPS reports this status
on-battery (yes | no)
Whether UPS battery is supplying power
on-line (yes | no)
whether power is being provided by the external utility (power company)
output-voltage ()
the UPS's output voltage
overloaded-output (yes | no)
only shown when the UPS reports this status
replace-battery (yes | no)
only shown when the UPS reports this status
runtime-calibration-running
(yes | no)
only shown when the UPS reports this status
runtime-left (time)
the UPS's estimated remaining run time in minutes. You can query the UPS when it is operating in the
on-line, bypass, or on-battery modes of operation. The UPS's remaining run time reply is based on
available battery capacity and output load
smart-boost-mode (yes | no)
only shown when the UPS reports this status
smart-ssdd-mode ()
only shown when the UPS reports this status
transfer-cause (string)
the reason for the most recent transfer to on-battery operation (only shown when the unit is
on-battery)
Manual:System/UPS
Example
When running on utility power:
[admin@MikroTik] system ups> monitor 0
on-line: yes
on-battery: no
RTC-running: no
runtime-left: 20m
battery-charge: 100%
battery-voltage: 27V
line-voltage: 226V
output-voltage: 226V
load: 45%
temperature: 39C
frequency: 50Hz
replace-battery: no
smart-boost: no
smart-trim: no
overload: no
low-battery: no
[admin@MikroTik] system ups>
When running on battery:
[admin@MikroTik] system ups> monitor 0
on-line: no
on-battery: yes
transfer-cause: "Line voltage notch or spike"
RTC-running: no
runtime-left: 19m
offline-after: 4m46s
battery-charge: 94%
battery-voltage: 24V
line-voltage: 0V
output-voltage: 228V
load: 42%
temperature: 39C
frequency: 50Hz
replace-battery: no
smart-boost: no
smart-trim: no
overload: no
low-battery: no
[admin@MikroTik] system ups>
[ Top | Back to Content ]
61
Manual:System/UPS
References
[1] http:/ / www. exploits. org/ nut/ library/ protocols/ apcsmart. html
Manual:System/LCD
Applies to RouterOS: v3, v4, v5+
Summary
Sub-menu: /system lcd
Package: lcd
LCDs are used to display system information.
The MikroTik RouterOS supports the following LCD hardware.
•
•
•
•
•
•
•
•
•
•
•
•
•
•
16x2 characters (Baud Rate:9600)
16x4 characters (Baud Rate:9600)
20x2 characters (Baud Rate:9600)
20x4 characters (Baud Rate:9600)
24x2 characters (Baud Rate:9600)
24x4 characters (Baud Rate:9600)
ax89063 (Baud Rate:9600)
ax93304 (Baud Rate:9600)
ax93304n (Baud Rate:9600)
cfa-631 (Baud Rate:115200)
cfa-633 (Baud Rate:19200)
cfa-635 (Baud Rate:115200)
mtb-134 (Baud Rate:2400)
nexcom (Baud Rate:9600)
• tw-rc (Baud Rate:9600)
• vitek-vc2025-1 (Baud Rate:9600)
• vitek-vc2025-2 (Baud Rate:9600)
62
Manual:System/LCD
63
• Crystalfontz (http://www.crystalfontz.com) Intelligent Serial LCD Module 632 (16x2 characters) and 634
(20x4 characters)
• Powertip (http://www.powertip.com.tw) PC1602 (16x2 characters), PC1604 (16x4 characters), PC2002 (20x2
characters), PC2004 (20x4 characters), PC2402 (24x2 characters) and PC2404 (24x4 characters)
• Portwell (http://www.portwell.com.tw) EZIO-100 (16x2 characters)
• Townet (http://www.townet.it/prodotti/remote-control/tw-rc.html) TW-RC REMOTE CONTROL (16x2)
• ax93304n (serial port) new ax93304 model with smaller screen buffer (since v5.8)
• nexcom (parallel port) (since v5.8)
Properties
Property
Description
contrast (integer [0..255]; Default: 0)
Contrast setting, sent to the LCD, if it contrast regulation is
supported
enabled (yes | no; Default: no)
Turn the LCD on/off
port (string | parallel; Default: parallel)
Name of the port where the LCD is connected. May be either
one of the serial ports, or the first parallel port
type (16x2 | 16x4 | 20x2 | 20x4 | 24x2 | 24x4 | ax89063 | ax93304 | ax93304n |
cfa-631 | cfa-633 | cfa-635 | mtb-134 | tw-rc | vitek-vc2025-1 | vitek-vc2025-2;
Default: 24x4)
Sets the type of the LCD
•
•
•
•
•
Example
To enable Powertip parallel port LCD:
[admin@MikroTik] system
enabled: no
type: 24x4
port: parallel
contrast: 0
[admin@MikroTik] system
[admin@MikroTik] system
enabled: yes
type: 24x4
port: parallel
contrast: 0
[admin@MikroTik] system
lcd> print
lcd> set enabled=yes
lcd> print
lcd>
To enable Crystalfontz serial LCD on serial1:
[admin@MikroTik] system lcd> set port=serial1
[admin@MikroTik] system lcd> print
enabled: yes
type: 24x4
port: serial1
contrast: 0
[admin@MikroTik] system lcd>
cfa-631/633/635 - Crystalfontz
mtb-134 - Portwell EZIO-100
tw-rc - TowNet TW-RC
vitek-vc2025-1/2 - Vitek parallel port LCDs
ax89063/ax93304/ax93304n - Axiomtek LCDs
Manual:System/LCD
LCD Information Display Configuration
Sub-menu: /system lcd page
The submenu is used to configure LCD information display: what pages and how long they will be shown. You
cannot neither add your own pages (they are created dynamically depending on the configuration) nor change pages'
description.
Pages will be displayed for specified amount of time starting from the first one.
Example
To display all the pages:
[admin@MikroTik] system lcd page> print
Flags: X - disabled
#
DISPLAY-TIME
DESCRIPTION
0 X 5s
System date and time
1 X 5s
System resources - cpu and memory load
2 X 5s
System uptime
3 X 5s
Aggregate traffic in packets/sec
4 X 5s
Aggregate traffic in bits/sec
5 X 5s
Software version and build info
6 X 5s
ether1
7 X 5s
prism1
[admin@MikroTik] system lcd page> enable [find]
[admin@MikroTik] system lcd page> print
Flags: X - disabled
#
DISPLAY-TIME
DESCRIPTION
0
5s
System date and time
1
5s
System resources - cpu and memory load
2
5s
System uptime
3
5s
Aggregate traffic in packets/sec
4
5s
Aggregate traffic in bits/sec
5
5s
Software version and build info
6
5s
ether1
7
5s
prism1
[admin@MikroTik] system lcd page>
To set "System date and time" page to be displayed for 10 seconds:
[admin@MikroTik] system lcd page> set 0 display-time=10s
[admin@MikroTik] system lcd page> print
Flags: X - disabled
#
DISPLAY-TIME
DESCRIPTION
0
10s
System date and time
1
5s
System resources - cpu and memory load
2
5s
System uptime
3
5s
Aggregate traffic in packets/sec
4
5s
Aggregate traffic in bits/sec
5
5s
Software version and build info
6
5s
ether1
64
Manual:System/LCD
65
7
5s
prism1
[admin@MikroTik] system lcd page>
Troubleshooting
LCD doesn't work, cannot be enabled by the '/system lcd set enabled=yes' command.
Probably the selected serial port is used by PPP client or server, or by the serial console. Check the availability
and use of the ports by examining the output of the /port print command. Alternatively, select another port for
connecting the LCD, or free up the desired port by disabling the related resource
LCD doesn't work, does not show any information.
Probably none of the information display items have been enabled. Use the /system lcd page set command to
enable the display.
See Also
• LCD Touch Screen control
[ Top | Back to Content ]
Manual:System/GPS
Applies to RouterOS: v3, v4, v5 +
Summary
Sub-menu: /system gps
Standards: GPS, NMEA 0183, Simple Text Output Protocol [1]
Global Positioning System (GPS) is used for determining precise location of a GPS receiver.
Configuration Properties
Property
Description
channel (integer [0..4294967295]; Default: 0) Port channel used by device
enabled (yes | no; Default: no)
Whether GPS is enabled
port (string; Default: )
Name of the USB/Serial port where GPS receiver is connected
set-system-time (yes | no; Default: no)
Whether to set router's date and time to one received from GPS.
Manual:System/GPS
66
Monitoring Status
Command: /system gps monitor
This command is used for monitoring the data received from a GPS receiver
Parameters:
Property
Description
date-and-time (date)
Date and time received from GPS
latitude (none | string)
Latitude in DM (Degrees Minute decimal) format
longitude (none | string) Longitude in DM (Degrees Minute decimal) format
speed (none | string)
Current moving speed of the GPS unit
bearing (none | string)
The compass direction toward which a GPS is moving
valid (yes | no)
satellites (integer)
Number of satellites seen by the device.
Note: The time is not stratum 1 as RouterBOARD devices do not have PPS [2] implemented
Basic examples
Adjust port settings specific for your device
[admin@MikroTik] /port> set 0 baud-rate=4800 parity=odd
[admin@MikroTik] /port> print detail
Flags: I - inactive
0
name="usb1" used-by="GPS" channels=1 baud-rate=4800 data-bits=8 parity=odd stop-bits=1 flow-control=none
Enable GPS
[admin@MikroTik] /system gps> set enable=yes port=usb1
[admin@MikroTik] /system gps> print
enabled: yes
port: usb1
channel: 0
set-system-time: no
Monitor status
[admin@MikroTik]
date-and-time:
latitude:
longitude:
altitude:
speed:
bearing:
valid:
satellites:
[ Top | Back to Content ]
/system gps> monitor
sep/05/2011 07:28:54
N 56 57' 32.568''
E 24 9' 11.568''
-23.600000m
0.000000 km/h
none
yes
3
Manual:System/GPS
67
References
[1] http:/ / www8. garmin. com/ support/ text_out. html
[2] http:/ / en. wikipedia. org/ wiki/ Pulse_per_second
Manual:IP/Traffic Flow
Applies to RouterOS: 2.9, v3, v4 +
Summary
Sub-menu: /ip traffic-flow
MikroTik Traffic-Flow is a system that provides statistic information about packets which pass through the router.
Besides network monitoring and accounting, system administrators can identify various problems that may occur in
the network. With help of Traffic-Flow, it is possible to analyze and optimize the overall network performance. As
Traffic-Flow is compatible with Cisco NetFlow, it can be used with various utilities which are designed for Cisco's
NetFlow.
Traffic-Flow supports the following NetFlow formats:
• version 1 - the first version of NetFlow data format, do not use it, unless you have to
• version 5 - in addition to version 1, version 5 has possibility to inlude BGP AS and flow sequence number
information. Currently RouterOS does not include BGP AS numbers.
• version 9 - a new format which can be extended with new fields and record types thank's to its template-style
design
General
Sub-menu: /ip traffic-flow
This section lists the configuration properties of Traffic-Flow.
Property
interfaces (string | all; Default: all)
Description
Names of those interfaces which will be used to gather statistics for traffic-flow. To specify more than
one interface, separate them with a comma.
cache-entries (128k | 16k | 1k | 256k | Number of flows which can be in router's memory simultaneously.
2k | ... ; Default: 4k)
active-flow-timeout (time; Default: Maximum life-time of a flow.
30m)
inactive-flow-timeout (time;
Default: 15s)
How long to keep the flow active, if it is idle. If connection does not see any packet within this
timeout, then traffic-flow will send packet out as new flow. If this timeout is too small it can create
significant amount of flows and overflow the buffer.
Manual:IP/Traffic Flow
68
Note: Starting 6.0rc14 release setting interface will show RX and TX for the interface. Previously traffic-flow
reported only RX fraffic for the interface and to see bidirecional data it was required to set up more interfaces.
Targets
Sub-menu: /ip traffic-flow target
With Traffic-Flow targets we specify those hosts which will gather the Traffic-Flow information from router.
Property
Description
address (IP:port; Default: )
IP address and port (UDP) of the host which receives Traffic-Flow statistic packets from the
router.
v9-template-refresh (integer; Default:
20)
Number of packets after which the template is sent to the receiving host (only for NetFlow
version 9)
v9-template-timeout (time; Default: )
After how long to send the template, if it has not been sent.
version (1 | 5 | 9; Default: )
Which version format of NetFlow to use
Notes
By looking at packet flow diagram you can see that traffic flow is at the end of input, forward and output chain stack.
It means that traffic flow will count only traffic that reaches one of those chains.
For example, you set up mirror port on switch, connect mirror port to router and set traffic flow to count mirrored
packets. Unfortunately such setup will not work, because mirrored packets are dropped before they reach input
chain.
Other interfaces will appear in report if traffic is passing thorugh them and monitored interface.
Examples
This example shows how to configure Traffic-Flow on a router
Enable Traffic-Flow on the router:
[admin@MikroTik] ip traffic-flow> set enabled=yes
[admin@MikroTik] ip traffic-flow> print
enabled: yes
interfaces: all
cache-entries: 1k
active-flow-timeout: 30m
inactive-flow-timeout: 15s
[admin@MikroTik] ip traffic-flow>
Specify IP address and port of the host, which will receive Traffic-Flow packets:
[admin@MikroTik] ip traffic-flow target> add address=192.168.0.2:2055 \
\... version=9
[admin@MikroTik] ip traffic-flow target> print
Flags: X - disabled
#
ADDRESS
VERSION
0
192.168.0.2:2055
9
[admin@MikroTik] ip traffic-flow target>
Manual:IP/Traffic Flow
Now the router starts to send packets with Traffic-Flow information.
Some screenshots from NTop program [1], which has gathered Traffic-Flow information from our router and displays
it in nice graphs and statistics. For example, where what kind of traffic has flown:
69
Manual:IP/Traffic Flow
See more
• NetFlow Fundamentals [2]
[ Top | Back to Content ]
References
[1] http:/ / www. ntop. org/ download. html
[2] http:/ / etutorials. org/ Networking/ network+ management/ Part+ II+ Implementations+ on+ the+ Cisco+ Devices/ Chapter+ 7. + NetFlow/
Fundamentals+ of+ NetFlow/
Manual:SNMP
Applies to RouterOS: v5
Overview
Standards: RFC 1157 RFC 3414 RFC 3416
Package: system
Simple Network Management Protocol (SNMP) is an Internet-standard protocol for managing devices on IP
networks. SNMP can be used to graph various data with tools such as CACTI, MRTG or The Dude [1]
SNMP write support is only available for some OIDs. For supported OIDs SNMP v1, v2 or v3 write is supported
Quick Configuration
To enable SNMP in RouterOS:
[admin@MikroTik] /snmp> print
enabled: no
contact:
location:
engine-id:
trap-community: (unknown)
trap-version: 1
[admin@MikroTik] /snmp> set enabled yes
70
Manual:SNMP
71
You can also specify administrative contact information in the above settings. All SNMP data will be available to
communities configured in community menu.
General Properties
Sub-menu: /snmp
This sub menu allows to enable SNMP and to configure general settings.
Property
Description
contact (string; Default: "")
Contact information
enabled (yes | no; Default: no)
Used to disable/enable SNMP service
engine-id (string; Default: "")
for SNMP v3, used as part of identifier. You can configure suffix part of engine id using this argument. If
SNMP client is not capable to detect set engine-id value then this prefix hex have to be used 0x80003a8c04
location (string; Default: "")
Location information
trap-community (string; Default: Which communities configured in community menu to use when sending out the trap.
public)
trap-generators (interfaces |
start-trap; Default: )
What action will generate traps:
trap-interfaces (string | all;
Default: )
List of interfaces that traps are going to be sent out.
trap-target (list of IP/IPv6;
Default: 0.0.0.0)
IP (IPv4 or IPv6) addresses of SNMP data collectors that have to receive the trap
trap-version (1|2|3; Default: 1)
Version of SNMP protocol to use for trap
•
•
interfaces - interface changes;
start-trap - snmp server starting on the router
Note: engine-id field holds the suffix value of engine-id, usually SNMP clients should be able to detect the
value, as SNMP values, as read from the router. However there is a possibility that this is not the case. In
which case, the engine-ID value has to be set according to this rule: <engine-id prefix> + <hex-dump suffix>,
so as an example, if you have set 1234 as suffix value you have to provide 80003a8c04 + 31323334,
combined hex (the result) is 80003a8c0431323334
Community
Sub-menu: /snmp community
This sub-menu allows to set up access rights for the SNMP data.
There is little security in v1 and v2c, just Clear text community string („username“) and ability for Limiting access
by IP adress.
Since SNMP v3, better options have been introduced - Authorisation (User + Pass) with MD5/SHA1, Encryption
with DES.
[admin@MikroTik] /snmp community> print value-list
name: public
address: 0.0.0.0/0
security: none
read-access: yes
write-access: no
authentication-protocol: MD5
Manual:SNMP
72
encryption-protocol: DES
authentication-password: *****
encryption-password: *****
Warning: Default settings only have one community named public without any additional security settings.
These settings should be considered insecure and should be adjusted according required security profile.
Properties
Property
Description
address (IP/IPv6 address; Default: 0.0.0.0/0)
Addresses from which connections to SNMP server is allowed
authentication-password (string; Default: "")
Password used to authenticate connection to the server (SNMPv3)
authentication-protocol (MD5 | SHA1; Default: MD5) Protocol used for authentication (SNMPv3)
encryption-password (string; Default: "")
password used for encryption (SNMPv3)
encryption-protocol (DES; Default: DES)
encryption protocol to be used to encrypt the communication (SNMPv3)
name (string; Default: )
read-access (yes | no; Default: yes)
Whether read access is enabled for this community
security (authorized | none | private; Default: none)
write-access (yes | no; Default: no)
Whether write access is enabled for this community. Read more >>
Management information base (MIB)
The Management Information Base (MIB) is the database of information maintained by the agent that the manager
can query. You can download the latest MikroTik RouterOS MIB [2] file.
MIBs used in RouterOS v5.x:
•
•
•
•
•
•
•
•
•
•
•
•
•
MIKROTIK-MIB
MIB-2
HOST-RESOURCES-MIB
IF-MIB
IP-MIB
IP-FORWARD-MIB
IPV6-MIB
BRIDGE-MIB
DHCP-SERVER-MIB
CISCO-AAA-SESSION-MIB
ENTITY-MIB
UPS-MIB
SQUID-MIB
Manual:SNMP
73
Object identifiers (OID)
Each OID identifies a variable that can be read via SNMP. Although the MIB file contains all the needed OID
values, you can also print individual OID information in the console with the print oid command at any menu level:
[admin@MikroTik] /interface> print oid
Flags: D - dynamic, X - disabled, R - running, S - slave
0 R name=.1.3.6.1.2.1.2.2.1.2.1 mtu=.1.3.6.1.2.1.2.2.1.4.1
mac-address=.1.3.6.1.2.1.2.2.1.6.1 admin-status=.1.3.6.1.2.1.2.2.1.7.1
oper-status=.1.3.6.1.2.1.2.2.1.8.1 bytes-in=.1.3.6.1.2.1.2.2.1.10.1
packets-in=.1.3.6.1.2.1.2.2.1.11.1 discards-in=.1.3.6.1.2.1.2.2.1.13.1
errors-in=.1.3.6.1.2.1.2.2.1.14.1 bytes-out=.1.3.6.1.2.1.2.2.1.16.1
packets-out=.1.3.6.1.2.1.2.2.1.17.1 discards-out=.1.3.6.1.2.1.2.2.1.19.1
errors-out=.1.3.6.1.2.1.2.2.1.20.1
Traps
SNMP traps enable router to notify data collector of interface changes and SNMP service status changes by sending
traps. It is possible to send out traps with security features to support SNMPv1 (no security). SNMPv2 and variants
and SNMPv3 with encryption and authorization.
For SNMPv2 and v3 you have to set up appropriately configured community as a trap-community to enable required
features (password or encryption/authorization)
SNMP write
Since RouterOS v3, SNMP write is supported for some functions. SNMP write allows to change router configuration
with SNMP requests. Consider to secure access to router or to router's SNMP, when SNMP and write-access are
enabled.
To change settings by SNMP requests, use the command below to allow SNMP write for the selected community,
Write-access option for SNMP is available from v3.14,
/snmp community set <number> write-access=yes
System Identity
It's possible to change router system identity by SNMP set command,
snmpset -c public -v 1 192.168.0.0 1.3.6.1.2.1.1.5.0
•
•
•
•
s New_Identity
snmpset - SNMP application used for SNMP SET requests to set information on a network entity;
public - router's community name;
192.168.0.0 - IP address of the router;
1.3.6.1.2.1.1.5.0 - SNMP value for router's identity;
SNMPset command above is equal to the RouterOS command,
/system identity set identity=New_Identity
Manual:SNMP
Reboot
It's possible to reboot the router with SNMP set commamd, you need to set value for reboot SNMP settings, which is
not equal to 0,
snmpset -c public -v 1 192.168.0.0 1.3.6.1.4.1.14988.1.1.7.1.0 s 1
• 1.3.6.1.4.1.14988.1.1.7.1.0, SNMP value for the router reboot;
• s 1, snmpset command to set value, value should not be equal to 0;
Reboot snmpset command is equal to the RouterOS command,
/system reboot
Run Script
SNMP write allows to run scripts on the router from system script menu, when you need to set value for SNMP
setting of the script,
snmpset -c public -v 1 192.168.0.0 1.3.6.1.4.1.14988.1.1.8.1.1.3.X s 1
• X, script number, numeration starts from 1;
• s 1, snmpset command to set value, value should not be equal to 0;
The same command on RouterOS,
/system script> print
Flags: I - invalid
0
name="kaka" owner="admin" policy=ftp,reboot,read,write,policy,
test,winbox,password,sniff last-started=jan/01/1970
01:31:57 run-count=23 source=:beep
/system script run 0
See Also
• SNMP MRTG
[ Top | Back to Content ]
References
[1] http:/ / www. mikrotik. com/ thedude. php
[2] http:/ / mikrotik. com/ download/ Mikrotik. mib
74
Manual:Tools/Graphing
75
Manual:Tools/Graphing
Applies to RouterOS: v3, v4, v5 +
Summary
Graphing is a tool to monitor various RouterOS parameters over time and put collected data in nice graphs.
The Graphing tool can display graphics for:
•
•
•
•
Routerboard health (voltage and temperature)
Resource usage (CPU, Memory and Disk usage)
Traffic which is passed through interfaces
Traffic which is passed through simple queues
Graphing consists of two parts - first part collects information and other part displays data in a Web page. To access
the graphics, type http://[Router_IP_address]/graphs/ and choose a graphic to display in your Web browser.
Example
of
memory
graphs:
Manual:Tools/Graphing
76
General
Sub-menu /tool graphing
Common graphing configuration can be set in this submenu.
Properties
Property
Description
store-every (24hours | 5min | hour; Default: 5min) How often to write collected data to system drive.
page-refresh (integer | never; Default: 300)
How often graph page is refreshed
Interface graphing
Sub-menu /tool graphing interface
Sub-menu allows to configure on which interfaces graphing will collect bandwidth usage data.
Properties
Property
Description
allow-address (IP/IPv6 prefix; Default:
0.0.0.0/0)
IP address range from which is allowed to access graphing information
comment (string; Default: )
Description of current entry
disabled (yes | no; Default: no)
Defines whether item is used
interface (all | interface name; Default: all)
Defines which interface will be monitored. all means that all interfaces on router will be
monitored.
store-on-disk (yes | no; Default: yes)
Defines whether to store collected information on system drive.
Queue graphing
Sub-menu /tool graphing queue
Sub-menu allows to configure about which simple queues graphing will collect bandwidth usage data.
Properties
Property
Description
allow-address (IP/IPv6 prefix; Default:
0.0.0.0/0)
IP address range from which is allowed to access graphing information
allow-target (yes | no; Default: yes)
Whether to allow access to graphs from queue's target-address
comment (string; Default: )
Description of current entry
disabled (yes | no; Default: no)
Defines whether item is used
simple-queue (all | queue name; Default: all)
Defines which queues will be monitored. all means that all queues on router will be
monitored.
store-on-disk (yes | no; Default: yes)
Defines whether to store collected information on system drive.
Manual:Tools/Graphing
77
Note: If simple queue has target-address set to 0.0.0.0/0 everyone will be able to access queue graphs even if
allow address is set to specific address. This happens because by default queue graphs are accessible also
from target address.
Resource graphing
Sub-menu /tool graphing resource
Sub-menu allows to enable graphing of system resources. Graphing collects data of:
• CPU usage
• Memory usage
• Disk usage
Properties
Property
Description
allow-address (IP/IPv6 prefix; Default: 0.0.0.0/0) IP address range from which is allowed to access graphing information
comment (string; Default: )
Description of current entry
disabled (yes | no; Default: no)
Defines whether item is used
store-on-disk (yes | no; Default: yes)
Defines whether to store collected information on system drive.
Manual:Tools/Graphing
Graphing graphics in WinBox
Winbox allows to view the same collected information as in web page. Open Tools->Graphing window. Double
click on entry of which you want to see graphs.
Image below shows winbox graphs of memory usage:
[ Top | Back to Content ]
78
Manual:Tools/Profiler
79
Manual:Tools/Profiler
Applies to RouterOS: v5beta7 +
Summary
Command: /tool profile
Standards:
Profiler tool shows CPU usage for each process running in RouterOS. It helps to identify which process is using
most of the CPU resources.
[admin@dzeltenais_burkaans] > /tool profile
NAME
USAGE
sstp
9%
ppp
0.5%
ethernet
0%
queue-mgmt
0%
console
0.5%
dns
0%
winbox
0%
logging
0%
management
1.5%
ospf
0%
idle
87.5%
profiling
0.5%
queuing
0%
routing
0%
bridging
0%
unclassified
0.5%
CPU usage on multi-core systems
On multi-core systems tool allows to specify per core CPU usage. For example, to view CPU usage on second core
use following command:
[admin@x86-test]
NAME
ethernet
kvm
management
idle
profiling
unclassified
> /tool profile cpu=2
CPU
USAGE
1
0%
1
2.5%
1
0.5%
1
96.5%
1
0%
1
0.5%
"cpu" parameter allows to specify integer number which represents a core or two of predefined values all and total
• total - this value sets to show sum of all core usages;
Manual:Tools/Profiler
80
• all - value sets to show cpu usages separately for every available core
Example with both values on two core system:
[admin@x86-test]
NAME
ethernet
kvm
kvm
management
management
idle
idle
profiling
profiling
> /tool profile cpu=all
CPU
USAGE
1
0%
0
0%
1
4.5%
0
0%
1
0.5%
0
100%
1
93%
0
0%
1
2%
[admin@x86-test]
NAME
ethernet
console
kvm
management
idle
profiling
bridging
> /tool profile cpu=total
CPU
USAGE
all
0%
all
0%
all
2.7%
all
0%
all
97.2%
all
0%
all
0%
Tool is also available in winbox:
Manual:Tools/Profiler
Classifiers
Profile classifies processes in several classifiers. Most of them are self explanatory and does not require detailed
explanation.
•
•
•
•
•
•
•
•
•
•
•
•
•
•
idle - shows unused CPU. Typically idle=100%-(sum of all process cpu usages).
ppp
pppoe
ppp-compression
ppp-mppe
ethernet - cpu used by ethernets when sending/receiving packets
bridging
encrypting - cpu used by packet encryption
ipsec - IP security
queuing - packet queuing
firewall - packet processing in Ip firewall
l7-matcher - cpu used by Layer7 matcher.
p2p-matcher - Peer-to-peer traffic matcher in ip firewall
gre - Gre tunnels
•
•
•
•
•
•
•
•
•
•
•
•
•
•
•
•
•
•
•
•
•
•
•
•
•
•
•
eoip - EoIP tunnels
m3p - MikroTik Packet Packer Protocol
radius
ip-pool
routing
sniffing
traffic-accounting
traffic-flow
console
telnet
ssh
ftp
tfpt
www
dns
snmp
socks
web-proxy
winbox
metarouter-fs
metarouter-net
kvm
profiling - cpu used by Profiler tool itself
btest - bandwidth test tool
logging
flash - cpu usage when writing to NAND
disk - cpu usage when wiring to Disk
• serial
• usb
• firewall-mgmt
81
Manual:Tools/Profiler
•
•
•
•
•
•
•
•
•
•
•
•
•
•
•
•
•
queue-mgmt
e-mail
fetcher
backup
graphing
health
isdn
dhcp
hotspot
radv - IPv6 route advertisement
ntp - NTP server/client
ldp
mpls
pim - Multicast routing protocol
igmp-proxy
bgp
ospf
•
•
•
•
•
•
•
•
•
rip
mme
synchronous - cpu usage by synchronous cards
gps
user-manager
wireless
dude
supout.rif - cpu used by supout.rif file creator.
management - RouterOS management processes that do not fall into any other classifier. For example, when
routes added to kernel, internal messaging exchange between RouterOS applications, etc.
• unclassified - any other processes that were not classified.
[ Top | Back to Content ]
82
Manual:Tools/Packet Sniffer
Manual:Tools/Packet Sniffer
Applies to RouterOS: v5.8+
Summary
Sub-menu: /tool sniffer
Packages required: system
Packet sniffer is a tool that can capture and analyze packets that are going to, leaving or going through the router
(except the traffic that passes only through the switch chip).
Packet Sniffer Configuration
Sub-menu: /tool sniffer
Propertyfile-limit (integer 10..4294967295[KiB]; Default: 1000KiB)file-name (string; Default:
)filter-ip-address
(ip/mask[,ip/mask] (max 16 items); Default: )filter-mac-address
(mac/mask[,mac/mask] (max 16 items); Default: )filter-port ([!]port[,port] (max 16 items); Default:
)filter-ip-protocol ([!]protocol[,protocol] (max 16 items); Default: )filter-mac-protocol
([!]protocol[,protocol]
(max
16
items);
Default:
)filter-stream
(yes
|
no;
Default:
yes)filter-direction (any | rx | tx; Default: )interface (all | name; Default: all)memory-limit
(integer 10..4294967295[KiB]; Default: 100KiB)memory-scroll (yes | no; Default: yes)only-headers (yes
| no; Default: no)streaming-enabled (yes | no; Default: no)streaming-server (IP; Default:
0.0.0.0)DescriptionFile size limit. Sniffer will stop when limit is reached.Name of the file where sniffed packets will
be saved.Up to 16 ip addresses used as a filterUp to 16 MAC addresses and MAC address masks used as a filterUp
to 16 comma separated entries used as a filterUp to 16 comma separated entries used as a filter IP protocols (instead
of protocol names, protocol number can be used)
•
•
•
•
•
•
•
•
•
•
•
•
•
•
•
•
•
ipsec-ah - IPsec AH protocol
ipsec-esp - IPsec ESP protocol
ddp - datagram delivery protocol
egp - exterior gateway protocol
ggp - gateway-gateway protocol
gre - general routing encapsulation
hmp - host monitoring protocol
idpr-cmtp - idpr control message transport
icmp - internet control message protocol
icmpv6 - internet control message protocol v6
igmp - internet group management protocol
ipencap - ip encapsulated in ip
ipip - ip encapsulation
encap - ip encapsulation
iso-tp4 - iso transport protocol class 4
ospf - open shortest path first
pup - parc universal packet protocol
83
Manual:Tools/Packet Sniffer
•
•
•
•
•
•
•
•
•
•
pim - protocol independent multicast
rspf - radio shortest path first
rdp - reliable datagram protocol
st - st datagram mode
tcp - transmission control protocol
udp - user datagram protocol
vmtp - versatile message transport
vrrp - virtual router redundancy protocol
xns-idp - xerox xns idp
xtp - xpress transfer protocol
Up to 16 comma separated entries used as a filter. Mac protocols (instead of protocol names, protocol number can be
used):
•
•
•
•
•
arp - Address Resolution Protocol
ip - Internet Protocol
ipv6 - Internet Protocol next generation
ipx - Internetwork Packet Exchange
rarp - Reverse Address Resolution Protocol
Sniffed packets that are devised for sniffer server are ignoredSpecifies om which direction filtering will be
applied.Interface name on which sniffer will be running. all indicates that sniffer will sniff packets on all
interfaces.Memory amount used to store sniffed data.Whether to rewrite older sniffed data when memory limit is
reached.Save in the memory only packet's headers not the whole packet.Defines whether to send sniffed packets to
streaming serverTazmen Sniffer Protocol (TZSP) stream receiver
Example
In the following example streaming-server will be added, streaming will be enabled, file-name will be set to test
and packet sniffer will be started and stopped after some time:
[admin@MikroTik] tool sniffer> set streaming-server=192.168.0.240 \
\... streaming-enabled=yes file-name=test.pcap
[admin@MikroTik] tool sniffer> print
interface: all
only-headers: no
memory-limit: 100KiB
memory-scroll: yes
file-name: test.pcap
file-limit: 1000KiB
streaming-enabled: yes
streaming-server: 192.168.0.240
filter-stream: yes
filter-mac-address:
filter-mac-protocol:
filter-ip-address:
filter-ip-protocol:
filter-port:
filter-direction: any
running: no
[admin@MikroTik] tool sniffer> start
84
Manual:Tools/Packet Sniffer
85
[admin@MikroTik] tool sniffer> stop
Running Packet Sniffer
Commands: /tool sniffer start, /tool sniffer stop, /tool sniffer save
The commands are used to control runtime operation of the packet sniffer. The start command is used to start/reset
sniffering, stop - stops sniffering. To save currently sniffed packets in a specific file save command is used.
It is also possible to use quick mode.
Example
In the following example the packet sniffer will be started and after some time - stopped:
[admin@MikroTik] tool sniffer> start
[admin@MikroTik] tool sniffer> stop
Below the sniffed packets will be saved in the file named test:
[admin@MikroTik] tool sniffer> save file-name=test
[admin@MikroTik] tool sniffer> /file print
# NAME
TYPE
SIZE
0 test
unknown
1350
[admin@MikroTik] tool sniffer>
CREATION-TIME
apr/07/2003 16:01:52
Sniffed Packets
Sub-menu: /tool sniffer packet
This sub-menu allows to see the list of sniffed packets.
[admin@SXT test] /tool sniffer packet> print
#
TIME INTERFACE SRC-ADDRESS
DST-ADDRESS
120
1.993 ether1
10.5.101.1:646
224.0.0.2:646
>
121
2.045 ether1
10.5.101.15:8291 (winbox)
10.5.101.10:36771
>
122
2.046 ether1
10.5.101.15:8291 (winbox)
10.5.101.10:36771
>
123
2.255 ether1
fe80::20c:42ff:fe49:fcec
ff02::5
>
Property
Description
data (read-only: text)
Specified data inclusion in packets
direction (read-only: in | out)
Indicates whether packet is entering
(in) or leaving (out) the router
dscp (read-only: integer)
IP DSCP field value
dst-address (read-only: IP address)
Destination IP address
fragment-offset (read-only: integer)
IP fragment offset
identification (read-only: integer)
IP identification
interface (read-only: name)
Name of the interface the packet has
been captured on
ip-header-size (read-only: integer)
The size of IP header
ip-packet-size (read-only: integer)
The size of IP packet
Manual:Tools/Packet Sniffer
86
ip-protocol (read-only: ddp | egp | encap | ggp | gre | hmp | icmp | icmpv6 | dpr-cmt | igmp | ip |
ipencap | ipip | ipsec-ah | ipsec-esp | iso-tp4 | ospf | pim | pup | rdp | rspft | st | tcp | udp | vmtp | vrrp |
xns-idp | xtp)
The name/number of IP protocol
protocol (read-only: ip | arp | rarp | ipx | ipv6)
The name/number of ethernet
protocol
size (read-only: integer)
Size of packet
src-address (read-only: IP address)
Source IP address
src-mac (read-only: MAC address)
Source MAC address
data (read-only: string)
IP data
tcp-flags (read-only: ack | cwr | ece | fin | psh | rst | syn | urg)
TCP flags
time (read-only: time)
Time when packet arrived
ttl (read-only: integer)
IP Time To Live
vlan-id (read-only: integer)
VLAN-ID of the packet
vlan-priority (read-only: integer)
VLAN-Priority of the packet
Packet Sniffer Protocols
Sub-menu: /tool sniffer protocol
In this submenu you can see all sniffed protocols and their share of the whole sniffed amount.
[admin@SXT test] /tool sniffer protocol> print
# PROTOCOL IP-PROTOCOL PORT
PACKETS
0 802.2
1 ip
BYTES
SHARE
1
60
0.05%
215
100377
99.04%
2 arp
2
120
0.11%
3 ipv6
6
788
0.77%
4 ip
tcp
210
99981
98.65%
5 ip
udp
3
228
0.22%
6 ip
ospf
2
168
0.16%
7 ip
tcp
8291 (winbox)
210
99981
98.65%
8 ip
tcp
36771
210
99981
98.65%
9 ip
udp
646
3
228
0.22%
Property
Description
bytes (read-only: integer)
Total number of data bytes
ip-protocol (read-only: ddp | egp | encap | ggp | gre | hmp | icmp | icmpv6 | dpr-cmt | igmp | ip | ipencap |
ipip | ipsec-ah | ipsec-esp | iso-tp4 | ospf | pim | pup | rdp | rspft | st | tcp | udp | vmtp | vrrp | xns-idp | xtp)
IP protocol
packets (read-only: integer)
The number of packets
port (read-only: integer)
The port of TCP/UDP protocol
protocol (read-only: ip | arp | rarp | ipx | ipv6)
The name/number of the
protocol
share (read-only: decimal)
Specific type of traffic compared
to all traffic in bytes
Manual:Tools/Packet Sniffer
87
Packet Sniffer Host
Sub-menu: /tool sniffer host
The submenu shows the list of hosts that were participating in data excange you've sniffed.
[admin@SXT test] /tool sniffer host> print
# ADDRESS
RATE
PEEK-RATE
0 10.5.101.3
0bps/0bps
0bps/720bps
1 10.5.101.10
0bps/0bps
175.0kbps/19.7kbps
2 10.5.101.13
0bps/0bps
0bps/608bps
3 10.5.101.14
0bps/0bps
0bps/976bps
4 10.5.101.15
0bps/0bps
19.7kbps/175.0kbps
5 224.0.0.2
0bps/0bps
608bps/0bps
6 224.0.0.5
0bps/0bps
1440bps/0bps
[admin@SXT test] /tool sniffer host>
Property
address (read-only: IP address)
TOTAL
0/90
61231/7011
0/76
0/212
7011/61231
76/0
302/0
Description
IP address of the host
peek-rate (read-only: integer/integer) The maximum data-rate received/transmitted
rate (read-only: integer/integer)
Current data-rate received/transmitted
total (read-only: integer/integer)
Total packets received/transmitted
Packet Sniffer Connections
Sub-menu: /tool sniffer connection
Here you can get a list of the connections that have been watched during the sniffing time.
[admin@MikroTik] tool sniffer connection> print
Flags: A - active
#
SRC-ADDRESS
DST-ADDRESS
BYTES
0 A 10.0.0.241:1839
10.0.0.181:23 (telnet) 6/42
1 A 10.0.0.144:2265
10.0.0.181:22 (ssh)
504/252
[admin@MikroTik] tool sniffer connection>
Property
RESENDS
60/0
504/0
Description
active (read-only: yes | no)
Indicates whether connection is active or not
bytes (read-only: integer/integer)
Bytes in the current connection
dst-address (read-only: IP address:port) Destination address
mss (read-only: integer/integer)
Maximum segment size
resends (read-only: integer/integer)
The number of packets resends in the current connection
src-address (read-only: IP address:port) Source address
MSS
0/0
0/0
Manual:Tools/Packet Sniffer
88
Quick mode
Quick mode will display results as they are filtered out with limited size buffer for packets. There are several
attributes that can be set up filtering. If no attributes are set current configuration will be used.
Propertydurationfreeze-frame-intervalinterfaceip-addressip-protocolmac-addressmac-protocolpo
of the test in secondstime between data printoutintarface name or allup to 16 addresses to filter one of listed
protocols, up to 16 entries
•
•
•
•
•
•
•
•
•
•
ipsec-ah - IPsec AH protocol *ipsec-esp - IPsec ESP protocol
ddp - datagram delivery protocol
egp - exterior gateway protocol
ggp - gateway-gateway protocol
gre - general routing encapsulation
hmp - host monitoring protocol
idpr-cmtp - idpr control message transport
icmp - internet control message protocol
icmpv6 - internet control message protocol v6
igmp - internet group management protocol
•
•
•
•
•
•
•
•
•
•
•
•
•
•
•
•
ipencap - ip encapsulated in ip
ipip - ip encapsulation
encap - ip encapsulation
iso-tp4 - iso transport protocol class 4
ospf - open shortest path first
pup - parc universal packet protocol
pim - protocol independent multicast
rspf - radio shortest path first
rdp - reliable datagram protocol
st - st datagram mode
tcp - transmission control protocol
udp - user datagram protocol
vmtp - versatile message transport
vrrp - virtual router redundancy protocol
xns-idp - xerox xns idp
xtp - xpress transfer protocol
up to 16 MAC addresses to filterup 16 entries
•
•
•
•
•
arp - Address Resolution Protocol
ip - Internet Protocol
ipv6 - Internet Protocol next generation
ipx - Internetwork Packet Exchange
rarp - Reverse Address Resolution Protocol
up to 16 entries to filter by
[admin@SXT test] /tool sniffer> quick interface=ether1
INTERFACE
TIME
NUM DI SRC-MAC
DST-MAC
VLAN SRC-ADDRESS
ether1
3.145
210 <- 00:24:1D:17:81:F7 00:0C:42:CB:DE:62
10.5.101.10:36771
ether1
3.145
211 -> 00:0C:42:CB:DE:62 00:24:1D:17:81:F7
10.5.101.15:8291 (winbox)
ether1
3.183
212 <- 00:24:1D:17:81:F7 00:0C:42:CB:DE:62
10.5.101.10:36771
ether1
3.184
213 -> 00:0C:42:CB:DE:62 00:24:1D:17:81:F7
10.5.101.15:8291 (winbox)
Manual:Tools/Packet Sniffer
89
ether1
3.195
214 -> 00:0C:42:CB:DE:62 00:24:1D:17:81:F7
10.5.101.15:8291 (winbox)
ether1
3.195
215 -> 00:0C:42:CB:DE:62 00:24:1D:17:81:F7
10.5.101.15:8291 (winbox)
ether1
3.195
216 <- 00:24:1D:17:81:F7 00:0C:42:CB:DE:62
10.5.101.10:36771
ether1
3.217
217 <- 00:24:1D:17:81:F7 00:0C:42:CB:DE:62
10.5.101.10:36771
ether1
3.218
218 -> 00:0C:42:CB:DE:62 00:24:1D:17:81:F7
10.5.101.15:8291 (winbox)
ether1
3.22
219 <- 00:0C:42:49:FC:EC 33:33:00:00:00:05
fe80::20c:42ff:fe49:fcec
ether1
3.255
220 <- 00:0C:42:A1:6E:47 01:00:5E:00:00:05
192.168.15.6
ether1
3.256
221 <- 00:24:1D:17:81:F7 00:0C:42:CB:DE:62
10.5.101.10:36771
ether1
3.259
222 <- 00:24:1D:17:81:F7 00:0C:42:CB:DE:62
10.5.101.10:36771
ether1
3.294
223 -> 00:0C:42:CB:DE:62 00:24:1D:17:81:F7
10.5.101.15:8291 (winbox)
ether1
3.325
224 -> 00:0C:42:CB:DE:62 00:24:1D:17:81:F7
10.5.101.15:8291 (winbox)
ether1
3.325
225 -> 00:0C:42:CB:DE:62 00:24:1D:17:81:F7
10.5.101.15:8291 (winbox)
ether1
3.326
226 <- 00:24:1D:17:81:F7 00:0C:42:CB:DE:62
10.5.101.10:36771
ether1
3.35
227 <- 00:0C:42:A8:ED:C2 33:33:00:00:00:01
fe80::20c:42ff:fea8:edc2
ether1
3.391
228 <- 00:24:1D:17:81:F7 00:0C:42:CB:DE:62
10.5.101.10:36771
ether1
3.392
229 -> 00:0C:42:CB:DE:62 00:24:1D:17:81:F7
10.5.101.15:8291 (winbox)
Download Sniffer Results
Sub-menu: /tool sniffer
Packet Sniffer results could be downloaded and viewed as file by specific program (for example Wireshark [1]).
Property
Description
file-name (string; Default: "") The name of the file where the sniffed packets will be saved to
To save sniffed result to file set,
[admin@MikroTik] /tool sniffer set file-name=example
Run sniffer with required settings,
[admin@MikroTik] /tool sniffer start
Do not forget to stop sniffer after sniffing is done,
[admin@MikroTik] /tool sniffer stop
Sniffed results could be downloaded from /file by FTP client or Windows Drag-n-Drop (do not forget to use binary
mode, when file is downloaded by FTP).
[admin@MikroTik] /file print
# NAME
TYPE
0 example
file
[ Top | Back to Content ]
SIZE
44092
CREATION-TIME
jan/02/2010 01:11:59
Manual:Tools/Packet Sniffer
References
[1] http:/ / www. wireshark. org/
Manual:Troubleshooting tools
Troubleshooting tools
Before, we look at the most significant commands for connectivity checking and troubleshooting, here is little
reminder on how to check host computer's network interface parameters on .
The Microsoft windows have a whole set of helpful command line tools that helps testing and configuring
LAN/WAN interfaces. We will look only at commonly used Windows networking tools and commands.
All of the tools are being ran from windows terminal. Go to Start/Run and enter "cmd" to open a Command window.
Some of commands on windows are:
ipconfig – used to display the TCP/IP network configuration values. To open it, enter "ipconfig" in the command
prompt.
C:\>ipconfig
Windows IP Configuration
Ethernet adapter Local Area Connection:
Connection-specific DNS Suffix . : mshome.net
Link-local IPv6 Address . . . . . : fe80::58ad:cd3f:f3df:bf18%8
IPv4 Address. . . . . . . . . . . : 173.16.16.243
Subnet Mask . . . . . . . . . . . : 255.255.255.0
Default Gateway . . . . . . . . . : 173.16.16.1
There are also a variety of additional functions for ipconfig. To obtain a list of additional options, enter
"ipconfig /?" or “ipconfig -?”.
netstat – displays the active TCP connections and ports on which the computer is listening, Ethernet statistics, the IP
routing table, statistics for the IP, ICMP, TCP, and UDP protocols. It comes with a number of options for displaying
a variety of properties of the network and TCP connections “netstat –?”.
nslookup – is a command-line administrative tool for testing and troubleshooting DNS servers. For example, if you
want to know what IP address is "www.google.com", enter "nslookup www.google.com" and you will find that there
are more addresses 74.125.77.99, 74.125.77.104, 74.125.77.147.
netsh – is a tool an administrator can use to configure and monitor Windows-based computers at a command
prompt. It allows configure interfaces, routing protocols, routes, routing filters and display currently running
configuration.
Very similar commands are available also on unix-like machines. Today in most of Linux distributions network
settings can be managed via GUI, but it is always good to be familiar with the command-line tools. Here is the list of
basic networking commands and tools on Linux:
ifconfig – it is similar like ipconfig commands on windows. It lets enable/disable network adapters, assigned IP
address and netmask details as well as show currently network interface configuration.
iwconfig - iwconfig tool is like ifconfig and ethtool for wireless cards. That also view and set the basic Wi-Fi
network details.
nslookup – give a host name and the command will return IP address.
90
Manual:Troubleshooting tools
91
netstat – print network connections, including port connections, routing tables, interface statistics, masquerade
connections, and more. (netstat – r, netstat - a)
ip – show/manipulate routing, devices, policy routing and tunnels on linux-machine.
For example, check IP address on interface using ip command:
$ip addr show
You can add static route using ip following command:
ip route add {NETWORK address} via {next hop address} dev {DEVICE}, for example:
$ip route add 192.168.55.0/24 via 192.168.1.254 dev eth1
mentioned tools are only small part of networking tools that is available on Linux. Remember if you want full details
on the tools and commands options use man command. For example, if you want to know all options on ifconfig
write command man ifconfig in terminal.
Check network connectivity
Using the ping command
Ping is one of the most commonly used and known commands. Administration utility used to test whether a
particular host is reachable across an Internet Protocol (IP) network and to measure the round-trip time for packets
sent from the local host to a destination host, including the local host's own interfaces.
Ping uses Internet Control Message Protocol (ICMP) protocol for echo response and echo request. Ping sends ICMP
echo request packets to the target host and waits for an ICMP response. Ping output displays the minimum, average
and maximum times used for a ping packet to find a specified system and return.
From PC:
Windows:
C:\>ping 10.255.255.4
Pinging 10.255.255.4 with 32 bytes of data:
Reply from 10.255.255.4: bytes=32 time=1ms TTL=61
Reply from 10.255.255.4: bytes=32 time<1ms TTL=61
Reply from 10.255.255.4: bytes=32 time<1ms TTL=61
Reply from 10.255.255.4: bytes=32 time<1ms TTL=61
Ping statistics for 10.255.255.4:
Packets: Sent = 4, Received = 4, Lost = 0 (0%
Approximate round trip times in milli-seconds:
Minimum = 0ms, Maximum = 1ms, Average = 0ms
Unix-like:
andris@andris-desktop:/$ ping 10.255.255.6
PING 10.255.255.6 (10.255.255.6) 56(84) bytes
64 bytes from 10.255.255.6: icmp_seq=1 ttl=61
64 bytes from 10.255.255.6: icmp_seq=2 ttl=61
64 bytes from 10.255.255.6: icmp_seq=3 ttl=61
64 bytes from 10.255.255.6: icmp_seq=4 ttl=61
^C
--- 10.255.255.6 ping statistics ---
of data.
time=1.23 ms
time=0.904 ms
time=0.780 ms
time=0.879 ms
Manual:Troubleshooting tools
92
4 packets transmitted, 4 received, 0% packet loss, time 2999ms
rtt min/avg/max/mdev = 0.780/0.948/1.232/0.174 ms
Press Ctrl-C to stop ping process.
From MikroTik:
[admin@MikroTik] > ping 10.255.255.4
10.255.255.4 64 byte ping: ttl=62 time=2 ms
10.255.255.4 64 byte ping: ttl=62 time=8 ms
10.255.255.4 64 byte ping: ttl=62 time=1 ms
10.255.255.4 64 byte ping: ttl=62 time=10 ms
4 packets transmitted, 4 packets received, 0% packet loss
round-trip min/avg/max = 1/5.2/10 ms
Press Ctrl-C to stop ping process.
Using the traceroute command
Traceroute displays the list of the routers that packet travels through to get to a remote host. The traceroute or
tracepath tool is available on practically all Unix-like operating systems and tracert on Microsoft Windows
operating systems.
Traceroute operation is based on TTL value and ICMP “Time Exceeded” massage. Remember that TTL value in IP
header is used to avoid routing loops. Each hop decrements TTL value by 1. If the TTL reaches zero, the packet is
discarded and ICMP Time Exceeded message is sent back to the sender when this occurs.
Initially by traceroute, the TTL value is set to 1 when next router finds a packet with TTL = 1 it sets TTL value to
zero, and responds with an ICMP "time exceeded" message to the source. This message lets the source know that the
packet traverses that particular router as a hop. Next time TTL value is incremented by 1 and so on. Typically, each
router in the path towards the destination decrements the TTL field by one unit TTL reaches zero.
Using this command you can see how packets travel through the network and where it may fail or slow down. Using
this information you can determine the computer, router, switch or other network device that possibly causing
network issues or failures.
From Personal computer:
Windows:
C:\>tracert 10.255.255.2
Tracing route to 10.255.255.2 over a maximum of 30 hops
1
<1 ms
<1 ms
<1 ms 10.13.13.1
2
1 ms
1 ms
1 ms 10.255.255.2
Trace complete.
Unix-like:
Traceroute and tracepath is similar, only tracepath does not not require superuser privileges.
andris@andris-desktop:~$ tracepath 10.255.255.6
1: andris-desktop.local (192.168.10.4)
1: 192.168.10.1 (192.168.10.1)
1: 192.168.10.1 (192.168.10.1)
2: 192.168.1.2 (192.168.1.2)
3: no reply
4: 10.255.255.6 (10.255.255.6)
0.123ms pmtu 1500
0.542ms
0.557ms
1.213ms
2.301ms reached
Manual:Troubleshooting tools
93
Resume: pmtu 1500 hops 4 back 61
From MikroTik:
[admin@MikroTik] > tool traceroute 10.255.255.1
ADDRESS
STATUS
1
10.0.1.17 2ms 1ms 1ms
2
10.255.255.1 5ms 1ms 1ms
[admin@MikroTik] >
Log Files
System event monitoring facility allows to debug different problems using Logs. Log file is a text file created in the
server/router/host capturing different kind of activity on the device. This file is the primary data analysis source.
RouterOS is capable of logging various system events and status information. Logs can be saved in routers memory
(RAM), disk, file, sent by email or even sent to remote syslog server.
All messages stored in routers local memory can be printed from /log menu. Each entry contains time and date
when event occurred, topics that this message belongs to and message itself.
[admin@MikroTik] /log> print
15:22:52 system,info device changed by admin
16:16:29 system,info,account user admin logged out from 10.13.13.14 via winbox
16:16:29 system,info,account user admin logged out from 10.13.13.14 via telnet
16:17:16 system,info filter rule added by admin
16:17:34 system,info mangle rule added by admin
16:17:52 system,info simple queue removed by admin
16:18:15 system,info OSPFv2 network added by admin
Read more about logging on RouterOS here>>
Torch (/tool torch)
Torch is realtime traffic monitoring tool that can be used to monitor the traffic flow through an interface.
You can monitor traffic classified by protocol name, source address, destination address, port. Torch shows the
protocols you have chosen and tx/rx data rate for each of them.
Example:
The following example monitor the traffic generated by the telnet protocol, which passes through the interface
ether1.
[admin@MikroTik] tool> torch ether1 port=telnet
SRC-PORT
DST-PORT
1439
23 (telnet)
[admin@MikroTik] tool>
To see what IP protocols are sent via ether1:
[admin@MikroTik]
PRO.. TX
tcp
1.06kbps
udp
896bps
tool> torch ether1 protocol=any-ip
RX
608bps
3.7kbps
TX
1.7kbps
RX
368bps
Manual:Troubleshooting tools
icmp
ospf
480bps
0bps
94
480bps
192bps
[admin@MikroTik] tool>
In order to see what protocols are linked to a host connected to interface 10.0.0.144/32 ether1:
[admin@MikroTik] tool> torch ether1 src-address=10.0.0.144/32 protocol=any
PRO.. SRC-ADDRESS
TX
tcp
10.0.0.144
1.01kbps
icmp 10.0.0.144
480bps
[admin@MikroTik] tool>
RX
608bps
480bps
IPv6
Starting from v5RC6 torch is capable of showing IPv6 traffic. Two new parameters are introduced src-address6 and
dst-address6. Example:
admin@RB1100test] > /tool torch interface=bypass-bridge src-address6=::/0 ip-protocol=any sr
c-address=0.0.0.0/0
MAC-PROTOCOL
IP-PROT... SRC-ADDRESS
TX
RX
ipv6
tcp
2001:111:2222:2::1
60.1kbps
1005.4kbps
ip
tcp
10.5.101.38
18.0kbps
3.5kbps
ip
vrrp
10.5.101.34
0bps
288bps
ip
udp
10.5.101.1
0bps
304bps
ip
tcp
10.0.0.176
0bps
416bps
ip
ospf
224.0.0.5
544bps
0bps
78.7kbps
1010.0kbps
To make /ping tool to work with domain name that resolves IPv6 address use the following:
/ping [:resolve ipv6.google.com]
By default ping tool will take IPv4 address.
Manual:Troubleshooting tools
Winbox
More attractive Torch interface is available from Winbox (Tool>Torch). In Winbox you can also trigger a Filter bar
by hitting the F key on the keyboard.
Packet Sniffer (/tool sniffer)
Packet sniffer is a tool that can capture and analyze packets sent and received by specific interface. packet sniffer
uses libpcap format.
Packet Sniffer Configuration
In the following example streaming-server will be added, streaming will be enabled, file-name will be set to test
and packet sniffer will be started and stopped after some time:
[admin@MikroTik] tool sniffer> set streaming-server=192.168.0.240 \
\... streaming-enabled=yes file-name=test
[admin@MikroTik] tool sniffer> print
interface: all
only-headers: no
memory-limit: 10
file-name: "test"
file-limit: 10
streaming-enabled: yes
streaming-server: 192.168.0.240
filter-stream: yes
filter-protocol: ip-only
filter-address1: 0.0.0.0/0:0-65535
filter-address2: 0.0.0.0/0:0-65535
95
Manual:Troubleshooting tools
96
running: no
[admin@MikroTik] tool sniffer> start
[admin@MikroTik] tool sniffer> stop
Here you can specify different packet sniffer parameters, like maximum amount of used memory, file size limit in
KBs.
Running Packet Sniffer Tool
There are three commands that are used to control runtime operation of the packet sniffer:
/tool sniffer start, /tool sniffer stop, /tool sniffer save.
The start command is used to start/reset sniffing, stop - stops sniffing. To save currently sniffed packets in a specific
file save command is used.
In the following example the packet sniffer will be started and after some time - stopped:
[admin@MikroTik] tool sniffer> start
[admin@MikroTik] tool sniffer> stop
Below the sniffed packets will be saved in the file named test:
[admin@MikroTik] tool sniffer> save file-name=test
View sniffed packets
There are also available different submenus for viewing sniffed packets.
• /tool sniffer packet – show the list of sniffed packets
• /tool sniffer protocol – show all kind of protocols that have been sniffed
• /tool sniffer host – shows the list of hosts that were participating in data exchange you've sniffed
For example:
[admin@MikroTik] tool sniffer packet> print
#
0
1
2
3
4
5
6
7
8
9
--
TIME
1.697
1.82
2.007
2.616
2.616
5.99
6.057
7.067
8.087
9.977
more
INTERFACE
ether1
ether1
ether1
ether1
ether1
ether1
ether1
ether1
ether1
ether1
SRC-ADDRESS
0.0.0.0:68 (bootpc)
10.0.1.17
10.0.1.18
0.0.0.0:68 (bootpc)
10.0.1.18:45630
10.0.1.18
159.148.42.138
10.0.1.5:1701 (l2tp)
10.0.1.18:1701 (l2tp)
10.0.1.18:1701 (l2tp)
Figure below shows sniffer GUI in Winbox, which is more user-friendly.
Manual:Troubleshooting tools
Detailed commands description can be found in the manual >>
Bandwidth test
The Bandwidth Tester can be used to measure the throughput (Mbps) to another MikroTik router (either wired or
wireless network) and thereby help to discover network "bottlenecks"- network point with lowest throughput.
BW test uses two protocols to test bandwidth:
• TCP – uses the standard TCP protocol operation principles with all main components like connection
initialization, packets acknowledgments, congestion window mechanism and all other features of TCP algorithm.
Please review the TCP protocol for details on its internal speed settings and how to analyze its behavior. Statistics
for throughput are calculated using the entire size of the TCP data stream. As acknowledgments are an internal
working of TCP, their size and usage of the link are not included in the throughput statistics. Therefore statistics
are not as reliable as the UDP statistics when estimating throughput.
• UDP traffic – sends 110% or more packets than currently reported as received on the other side of the link. To see
the maximum throughput of a link, the packet size should be set for the maximum MTU allowed by the links
which is usually 1500 bytes. There is no acknowledgment required by UDP; this implementation means that the
closest approximation of the throughput can be seen.
Remember that Bandwidth Test uses all available bandwidth (by default) and may impact network usability.
If you want to test real throughput of a router, you should run bandwidth test through the router not from or to it. To
do this you need at least 3 routers connected in chain:
Bandwidth Server – router under test – Bandwidth Client.
97
Manual:Troubleshooting tools
Note: If you use UDP protocol then Bandwidth Test counts IP header+UDP header+UDP data. In case if you
use TCP then Bandwidth Test counts only TCP data (TCP header and IP header are not included).
Configuration example:
Server
To enable bandwidth-test server with client authentication:
[admin@MikroTik] /tool bandwidth-server> set enabled=yes authenticate=yes
[admin@MikroTik] /tool bandwidth-server> print
enabled: yes
authenticate: yes
allocate-udp-ports-from: 2000
max-sessions: 100
[admin@MikroTik] /tool bandwidth-server>
Client
Run UDP bandwidth test in both directions, user name and password depends on remote Bandwidth Server. In this
case user name is ‘admin’ without any password.
[admin@MikroTik] > tool bandwidth-test protocol=udp user=admin password="" direction=both \
address=10.0.1.5
status: running
duration: 22s
tx-current: 97.0Mbps
tx-10-second-average: 97.1Mbps
tx-total-average: 75.2Mbps
rx-current: 91.7Mbps
rx-10-second-average: 91.8Mbps
rx-total-average: 72.4Mbps
lost-packets: 294
random-data: no
direction: both
tx-size: 1500
rx-size: 1500
-- [Q quit|D dump|C-z pause]
More information and all commands description can be found in the manual>>
98
Manual:Troubleshooting tools
Profiler
Profiler is a tool that shows CPU usage for each process running on RouterOS. It helps to identify which process is
using most of the CPU resources.
Read more >>
[ Top | Back to Content ]
99
Manual:Grounding
100
Manual:Grounding
Introduction
The installation infrastructure (towers and masts), as well as antennas and
the router itself must be properly grounded, and lightning arrestors must
be installed on all external antenna cables (near the antennas or on the
antennas themselves) to prevent equipment damage and human injury.
Note that lightning arrestors will not have any effect if not grounded.
Use 1 AWG (7mm in diameter) wire with corrosion-resistant connectors
for grounding. Be sure to check that the grounding infrastructure you use
is indeed functional (as opposed to decorative-only grounding present on
some sites). For smaller devices you can use thinner wire.
1. Only shielded and outdoor usage Ethernet cables should be used,
magnetic shield should be grounded via shielded RJ-45 connector or
via additional wire that is soldered to RJ45 or ground wire.
2. Grounding wire should be connected to RouterBOARD (to the
mounting point where board is fastened to the outdoor box), this wire
is connected to bottom of the tower and connection to the tower is
according to the standards. Antenna grounding wire is connected near
RouterBOARD Outdoor case, this wire could be connected to the same
RouterBOARD grounding wire.
3. Ethernet port ligthing protectors are not recommended, as most of
them are not intended to use for PoE (they are shortening PoE supply).
If protectors are used, they could be placed at the outdoor case, where
RouterBOARD and grounding pads are connected.
Example grounding wire attachment screw on an outdoor case:
Shielded cable
Manual:Grounding
101
ESD Protection on RouterBOARD devices
1. Three arrows mark the grounding inside the ethernet port, the shielded cable connects it's shield to these two
grounding pins via the metallic ethernet connector.
2. The middle arrow points to the metal plate inside the port, which connects the grounding pins to the board. The
board needs to be grounded at the mounting hole (put grounding wire on the screw when you mount the board
inside a case). Any surges will go from the grounding pins, to the grounding plate, to the board, and then to the
grounding installation.
3. The two separate arrows show the ESD protection chips on the board - in case there was no shielded cable, to
protect the CPU and other parts of the board.
The protection is not too effective if you only use shielded cable, and don't ground the board itself. You need to do
both things to be successful. See below for possible methods, option 1 is recommended.
Grounding RouterBOARD installations
There are two methods, one of them more effective than the other.
1. Using a Shielded cable + Board is grounded: If you connect
grounding to the mounting point of the RB711 (or the mounting
loop inside SXT door), you don't necessary need to ground the
device at other end of the shielded cable. Just using a shielded cable
is enough. Special PoE is also not needed. This is the best option to
protect against all ESD damage.
2. Using only shielded cable: If you can't ground the
RB711/SXT/other device itself, you can ground the device on the
other end of your shielded cable (switch, router, etc). If you need to
use PoE, the injector with a metal shielding around connectors will
be required, because it allows shielded cable to be used. This
method is not recommended, better ground the board itself also
(option 1).
PoE with shielded connectors
Manual:Grounding
Illustrations of the above methods
Method #1 (shielded cable + grounding of the device):
Method #2 (only shielded cable):
102
Manual:Grounding
Note! Even if you don't ground the outdoor wireless device, and only use a shielded cable, you should still ground
the device it's connected to (indoors). Ie. the switch, routerboard or PC.
Manual:Wireless card diagnostics
R52, R52Hn and R52H Power Amplifier damage
If the cards are becoming too hot to touch, when inserted in a RouterBOARD, but are disabled - the PA might be
damaged. This could be caused by user, or by manufacturing problem. To determine, must return to RMA for close
inspection.
R52, R52Hn and R52H ESD damage
Improper grounding can cause ESD damage to wireless cards during storms or other ESD situations. To test if your
R52 or R52H card is malfunctioning due to lightning/storm electrostatic damage, use a multimeter. In case the test
fails with this method, the warranty doesn't cover it:
Damaged card:
Normal card:
103
Manual:Wireless card diagnostics
Testing area close-up:
R52Hn card chain 0:
104
Manual:Wireless card diagnostics
R52Hn chain 1:
105
Manual:Wireless card diagnostics
R52n antenna circuit damage test
These images show how to test for antenna circuit damage. If the resistance between shown points is lower than
infinity (shown as OL on multimeter), the card is damaged by lightning, and the damage will not be repaired by
warranty (don't send to RMA).
This chain is damaged:
This chain is OK:
106
Manual:Wireless card diagnostics
Close-up of testing area:
107
Manual:Wireless card diagnostics
DC shorted antennas
Also make sure that your antenna is DC shorted:
DC shorted antenna. This antenna doesn't need a Coax lightning arrestor:
NOT DC shorted antenna. This antenna needs a Coax lightning arrestor to avoid sudden wireless card damage. Note
the OL (Open Loop) in the multimeter:
108
Manual:Wireless card diagnostics
Manual:RouterBOARD bad blocks
Every once in a while, one can notice a number of bad blocks
appearing in the RouterBOARD resource page. A bad block indicates a
problem to write in one part of the NAND storage device, but it doesn't
affect the performance of your router, and it doesn't give any indication
of quality. According to the manufacturer of NAND chips, up to 5
blocks can be bad when NAND is manufactured, and up to 80 bad
blocks could develop during operation, but it will not disturb the
operation of your router, because complex workaround mechanisms
are in place, that will copy the data to another block and attempt to fix
the bad block.
• Note! If more than a 100 bad blocks (more than 5% in new
versions) should develop in the NAND chip of a RouterBOARD
device, you should try to reinstall RouterOS with Netinstall, and it will reduce the number of bad blocks
Since RouterOS v5.18, NAND is refreshed every few minutes which increases sector writes by ~32 per refresh. This
is to ensure evenly distributed NAND wear, to increase protection against data loss as compared to previous
versions. As the manufacturer of the NAND chip guarantees 100'000 write cycles to the NAND sectors, 32 sector
writes per refresh would mean NAND life is about 100'000 weeks.
If you are planning to use the RouterBOARD as an active caching or logging server, an external drive or a
replaceable memory card could be a better alternative than keeping them on the NAND chip. Note that several
RouterBOARD models support USB external drives and different types of memory cards.
109
Manual:RouterBOARD bad blocks
Important! As you can see in the screenshot above, RouterOS shows you writes per NAND TOTAL, not writes per
sector. This is different than the given 100'000 write guarantee per sector.
Manual:Password reset
RouterOS password can only be reset by reinstalling the router, or using the reset button (or jumper hole) in case the
hardware is RouterBOARD.
For X86 devices, only complete reinstall will clear the password, along with other configuration. For RouterBOARD
devices, several methods exist, depending on our model.
Button reset
Most RouterBOARD devices are fitted with a reset button.
Using: unplug the device power, hold the button, apply power and wait until the USER LED starts flashing. Now
release the button to clear configuration.
Note: If you wait until LED stops flashing, and only then release the button - this will instead launch Netinstall
mode, to reinstall RouterOS.
110
Manual:Password reset
Jumper hole reset
All RouterBOARD current models are also fitted with a reset jumper hole. Some devices might need opening of the
enclosure, RB750/RB951/RB751 have the jumper hole under one of the rubber feet of the enclosure.
Using: Close the jumper with a metal screwdriver, and boot the board until the configuration is cleared.
111
Manual:Password reset
Jumper reset for older models
The below image shows the location of the Reset Jumper on older RouterBOARDs like RB133C:
Note: Don't forget to remove the jumper after configuration has been reset, or it will be reset every time you reboot.
112
Manual:Flashfig
Manual:Flashfig
Applies to RouterOS: v4
Description
Flashfig is an application for mass router configuration. It can be used by MikroTik distributors, ISPs or any other
companies who need to apply RouterOS configuration to many routers in shortest possible time.
Flashfig applies MikroTik RouterOS configuration to any RouterBOARD within 3 seconds. You can "flashfig"
batch of routers, the only thing you need - connect RouterBOARD to network and power it.
Flashfig runs on a Windows computer, Flashfig is available within Netinstall [1].
Flashfig is supported by all RouterBOARDs [2]. It works between computer with Flashfig and RouterBOARD in the
same broadcast domain (direct Ethernet network connection is required).
Flashfig support is enabled on every new RouterBOARD by default from factory (RouterBOARDs manufactured
after March 2010). For older models, Flashfig can be enabled via RouterBOOT or from MikroTik RouterOS console.
After Flashfig is used once on a brand new RouterBOARD, it is disabled to avoid unwanted reconfiguation at later
time. To use Flashfig a second time on the same router, you need to enable it in Bootloader settings.
If RouterOS reset-configuration command is used later, Flashfig configuration is not loaded, but RouterOS default
configuration.
Flashfig diagram shows the procedure of Flashfig,
113
Manual:Flashfig
Flashfig Example
This is a step by step example of how to use Flashfig to set typical MikroTik RouterOS configuration to
RouterBOARD.
Introduction
Flashfig is available from Netinstall,
Requirements
The Windows computer must be equipped with the following ports and contain the following files:
• Ethernet port;
• The .rsc file(s) with MikroTik RouterOS configuration (the same as export/import file);
• The latest NetInstall/Flashfig program available from the downloads [3] page;
The RouterBOARD:
• Flashfig is supported by first boot of RouterBOARD;
114
Manual:Flashfig
Pre-Configuration
Windows Computer
• Run Flashfig;
• Prepare .rsc file, .rsc file is regular/import file, it accepts valid MikroTik RouterOS CLI commands. You can
create .rsc file by any text-editor program (Notepad, Texteditor, TextEdit, Microsoft Word, OpenOffice Writer);
• Assign Boot Client Address, which should be address from the same subnet as configured on laptop Ethernet
interface,
• Browse for .rsc MikroTik RouterOS configuration file to apply to RouterBOARD, highlight the file and Select to
approve it,
115
Manual:Flashfig
• Activate Flashfig server, now it is ready to Flashfig. Note, any RouterBOARD will be flashfiged within the
network, which is powered on with boot-device configured to flash-boot or flash-boot-once-then-nand,
116
Manual:Flashfig
RouterBOARD
• Flashfig mode is enabled on every RouterBOARD from factory by default, which means no configuration is
required on RouterBOARD.
• If Flashfig is not enabled on your router, access the RouterBOARD with Winbox/Console and set the
configuration,
/system routerboard settings set boot-device=flash-boot
or use more preferable option,
/system routerboard settigs set boot-device=flash-boot-once-then-nand
Your router is now ready for Flashfig.
Connect
Connect RouterBOARD and Flashfig computer to the same Local Area Network.
Run Flashfig
• Plug power for RouterBOARD
• Check the status on Flashfig program,
Log shows "RouterBOARD Flashfigged" and RouterBOARD should make sound/LED signal, now it is safe to
unplug the router.
• Flashig configuration was applied to the RouterBOARD and it is ready to be used in production.
117
Manual:Flashfig
References
[1] http:/ / www. mikrotik. com/ download/ netinstall-4. 5b. zip
[2] http:/ / www. routerboard. com
[3] http:/ / www. mikrotik. com/ download. html
Manual:Bootloader upgrade
This page shows how to upgrade the Bootloader firmware of a RouterBOARD device.
Simple Upgrade
• Run command /system routerboard upgrade
• Reboot your router to apply the upgrade (/system reboot)]
Note! If you need to install a different version than included in your "routerboard.npk - Upload the latest
RouterBOOT firmware to your router's FTP, the latest firmware is available on routerboard.com [2] and then follow
above steps.
Checking RouterBOOT version
This command shows the current RouterBOOT version of your device, and available upgrade which is either
included in routerboard.npk package, or if you uploaded a FWF file corresponding to device model:
[admin@MikroTik] > system routerboard print
routerboard: yes
model: "750"
serial-number: "1FC201DD513B"
current-firmware: "2.18"
upgrade-firmware: "2.20"
[admin@MikroTik] >
In this case you see, that there is a newer version of the Bootloader firmware available already inside your current
RouterOS version.
Xmodem Method
If there is no IP connectivity with your RouterBOARD, you can also use the Serial Console XMODEM transfer to
send the FWF file to the router, while connected via Serial Console. From the Bootloader menu it's possible to
upgrade the firmware with this method. This method is the last resort, and should be used only if the first two
methods are not available.
118
Manual:System/Certificates
Manual:System/Certificates
Applies to RouterOS: v6.0 +
Summary
Sub-menu: /certificate
Package required: security
Standards: RFC 5280, draft-nourse-scep-22
Certificate manager is used to collect all certificates inside router, to manage and create serlf-signed certificates and
to control and set SCEP related configuration.
Note: Starting from v6 certificate validity is shown using local time zone offset. In previous versions it was
UTF.
Warning: RSA Key length must be at least 472 bits if certificate is used by SSTP. Shorter keys are
considered as security threats.
Starting from v6rc10, CRL will be automatically renewed every hour for certificates which have
"trusted=yes" using http protocol (ldap and ftp is currently unsupported). Segmented CRL is also
currently unsupported.
RouterOS allows to manage and create self-signed CAs. Implementation was made based on RFC 5280 and all
certificates are X.509 v3.
All certificate fingerprints are SHA1. All private keys and CA export passphrase are stored encrypted with hardware
ID. CA CRL renewal happens at every certificate revocation and after 24hours.
Note: Time and date on routers MUST be correct
General Menu
Sub-menu: /certificate
General menu is used to manage certificates, add templates, issue certificates and manage SCEP Clients.
Note: Certificate templates are deleted right after certificate issue or certificate request command is executed
119
Manual:System/Certificates
120
Note: If CA certificate is removed then all issued certificates in chain are also removed
Properties
Property
Description
common-name (string; Default: )
country (string; Default: )
days-valid (integer [0..4294967295]; Default: )
email (string; Default: )
key-size (1024 | 1536 | 2048 | 4096 | 8192; Default: )
key-usage (list of [digital-signature | content-commitment | key-encipherment | data-encipherment |
key-agreement | key-cert-sign | crl-sign | encipher-only | decipher-only]; Default: )
locality (string; Default: )
name (string; Default: )
Name of the certificate. Name can be
edited.
organization (string; Default: )
state (string; Default: )
trusted (yes | no; Default: )
If set to yes certificate is included "in
trusted certificate chain"
unit (string; Default: )
Read-only Properties
Property
Description
authority ()
ca ()
ca-crl-host ()
ca-fingerprint ()
crl ()
dsa (yes | no)
expired (yes | no)
Set to true if certificate is expired
fingerprint ()
invalid-after (date)
The date after which certificate wil be invalid.
invalid-before (date)
The date before which certificate is invalid.
issued ()
issuer (string)
private-key (yes | no)
req-fingerprint ()
revoked ()
scep-url (string)
Manual:System/Certificates
121
serial-number (string)
smart-card-key (string)
status ()
Commands
Command
Description
add ()
Adds new certificate template.
add-scep (name on-smart-card scep-url template)
Add scep client. Command takes four parameters:
•
•
•
•
name - display name of scep client
on-smart-card - whether to use smart card
scep-url template - which template to use from template list
ca-set-passphrase ()
card-reinstall ()
card-verify ()
create-certificate-request ()
Create certificate request from specified template.
export ()
Export certificate to file. When export-passphrase is specified, certificate will
be exported with encrypted key.
import (file-name)
File name of certificate or key to be imported.
issued-revoke ()
Revoke issued certificate
scep-renew ()
sign-ca ()
Sign CA certificate from created template. When signing CA you can specify
ca-crl-host if crl should be used.
sign-certificate-request (ca, days-valid,
file-name, key-bits)
Generates certificate and key, except that standard parameters are taken from certificate
request. Command takes four parameters:
•
•
•
•
sign-issued ()
ca - name of the CA certificate
days-valid - validity period
file-name - certificate request filename
key-bits - RSA key bits
Sign issued certificate (client, server..etc) from CA and template
SCEP
Sub-menu: /certificate
Standards: draft-nourse-scep-22
Simple Certificate Enrollment protocol (SCEP) was developed based on draft-nourse-scep-22.
The protocol is designed so that any user can request certificate as simple as possible. The protocol allows to issue
and revoke certificates.
How SCEP works
Topology: CL ---- RA ---- CA
• CL - client
• RA - registration authority (proxy)
• CA - certification authority (server)
Manual:System/Certificates
122
SCEP is using HTTP protocol and base64 encoded GET requests. Most of requests are without authentication and
cipher, however important ones can be protected if necessary (ciphered or signed using received public key).
SCEP client in RouterOS will:
•
•
•
•
•
get CA certificate from CA server or RA (if used);
user should compare fingerprint of the CA certificate or if it comes from the right server;
generate self-signed certificate with temporary key;
sends certificate request to the server;
if server respond with status x, then client keeps requesting until server sends an error or approval.
SCEP server supports issue of one certificate only. RouterOS supports also renew and next-ca options:
• renew - possibility to renew old certificate automatically with the same CA.
• next-ca - possibility to change current CA certificate to the new one. Client polls the server for any changes, if
server advertise that next-ca is available, then client may request next CA or wait until CA almost expires and
then request next-ca.
RouterOS Server also supports POST' operation, 3DES cipher and SHA1 hashing. If client does not support these
features then http GET, DES cipher and MD5 hashing is used.
RouterOS client by default will try to use POST, 3DES and SHA1 if server advertises that.
Client
Sub-menu: /certificate scep client
Properties
Property
Description
ca-identity (string; Default:
DummyCAIdentity)
challenge-password (string; Default: "") OTP password on the server used to grant certificate automatically after request.
common-name (string; Default: )
country (string; Default: )
disabled (yes | no; Default: no)
email (string; Default: )
fingerprint-algorithm (md5 | sha1;
Default: sha1)
key-bits (1024 | 2048 | 4096; Default: 1024)
locality (string; Default: )
name (string; Default: )
Short descriptive name of an item
organziation (string; Default: )
path (string; Default: )
Path of certificate located on the server. If server is RouterOS then you should add "scep/"+path
since certificates on server are stored in "scep" dir.
serial-number (string; Default: )
server (IP | IPv6; Default: )
IP or IPv6 address of the SCEP server
state (string; Default: )
store-name (string; Default: )
unit (string; Default: )
Name of the certificate which will be used after importing into certificate store.
Manual:System/Certificates
123
Status Properties
Property
Description
ca-fingerprint (string)
req-fingerprint (string)
status (string)
Shows the current status of the client. Idle, pending, requesting etc.
Commands
Command
Description
renew (ca_client_name) Renew Ca certificate of specified CA client Name.
Server
Sub-menu: /certificate scep server
OTP
Sub-menu: /certificate scep server otp
Transactions
Sub-menu: /certificate scep server transactions
[ Top | Back to Content ]
Manual:Create Certificates
Following is a step-by-step guide to creating your own CA (Certificate Authority) with openssl on Linux.
Generate certificates
Note: Starting from v5.15 RouterOS supports pkcs8 key format. If you are using older versions, to import
keys in pkcs8 format run command:
openssl rsa -in myKey.key -text and write key output to new file. Upload new file to RouterOS
and import
• First step is to build the CA private key and CA certificate pair.
openssl genrsa -des3 -out ca.key 4096
openssl req -new -x509 -days 3650 -key ca.key -out ca.crt
During the process you will have to fill few entries (Common Name (CN), Organization, State or province .. etc).
Created CA certificate/key pair will be valid for 10 years (3650 days).
• Now create private-key/certificate pair for the server
openssl genrsa -des3 -out server.key 4096
openssl req -new -key server.key -out server.csr
openssl x509 -req -days 3650 -in server.csr -CA ca.crt -CAkey ca.key -set_serial 01 -out server.crt
Manual:Create Certificates
124
Warning: RSA Key length must be at least 472 bits if certificate is used by SSTP. Shorter keys
are considered as security threats.
And again during the process you will have to fill some entries. When filling CN remember that
it must not match on CA and server certificate otherwise later naming collision will occur.
Note: Common Name (CN) in server certificate should match the the IP address of your server
otherwise you will get "domain mismatch" message and for example Windows SSTP client will
not be able to connect to the server. If clients are only Windows machines then CN can be a DNS
name, too.
Note: If you are using "My ID user FQDN" in IpSec config then "subjectaltname" extension
should be set on certificate, and must match the value set on remote peers "My ID user FQDN".
• Client key/certificate pair creation steps are very similar to server. Remember to Specify unique
CN.
openssl genrsa -des3 -out client.key 4096
openssl req -new -key client.key -out client.csr
openssl x509 -req -days 3650 -in client.csr -CA ca.crt -CAkey ca.key -set_serial 01 -out client.crt
To examine certificate run following command:
openssl x509 -noout -text -in server.crt -purpose
Import certificates
To import newly created certificates to your router, first you have to upload server.crt and server.key files to the
router via FTP. Now go to /certificate submenu and run following commands:
[admin@test_host] /certificate> import file-name=server.crt
passphrase:
certificates-imported: 1
private-keys-imported: 0
files-imported: 1
decryption-failures: 0
keys-with-no-certificate: 0
[admin@test_host] /certificate> import file-name=server.key
passphrase:
certificates-imported: 0
private-keys-imported: 1
files-imported: 1
decryption-failures: 0
keys-with-no-certificate: 0
If everything is imported properly then certificate should show up with KR flag.
[admin@test_host] /certificate> print
Flags: K - decrypted-private-key, Q - private-key, R - rsa, D - dsa
Manual:Create Certificates
125
0 KR name="cert1" subject=C=LV,ST=RI,L=Riga,O=MT,CN=server,[email protected]
issuer=C=LV,ST=RI,L=Riga,O=MT,CN=MT CA,[email protected] serial-number="01"
[email protected] invalid-before=jun/25/2008 07:24:33
invalid-after=jun/23/2018 07:24:33 ca=yes
Note: If you want to use server certificates for OVPN or SSTP and use client certificate verification, then CA
certificate must be imported, too.
[ Top | Back to Content ]
Manual:Tools/Traffic Generator
Applies to RouterOS: v5 +
Summary
Traffic Generator is a tool that allows to evaluate performance of DUT (Device Under Test) or SUT (System Under
Test).
Tool can generate and send RAW packets over specific ports. It also collects latency and jitter values, tx/rx rates,
counts lost packets and detects Out-of-Order (OOO) packets.
Traffic Generator can be used similar to bandwidth test tool as well as generate packets that will be routed back to
packet generator for advanced status collection.
General
Sub-menu /tool traffic-generator
This menu allows to set general traffic generator properties and contains commands to quickly start and stop the tool.
Properties
Property
latency-distribution-scale (integer [0..28]; Default: 10)
test-id (integer [0..255]; Default: 0)
Read-Only Properties
Description
Manual:Tools/Traffic Generator
126
Property
Description
latency-distribution-samples (integer)
latency-distribution-measure-interval (time)
running (yes | no)
Shows whether traffic generator tool is started.
Commands
Property
quick
()
Description
This command allows to quickly start packet generator and print the stats output to the terminal. Command also accept several
parameters that overrides settings in packet template and stream settings. Accepted parameters are duration, entries-to-show,
freeze-frame-interval, mbps, num, packet-size, port, pps, stream, test-id, tx-template
•
•
•
duration - how long to run the test
entries-to-show - how many status lines print to the terminal
freeze-frame-interval - how often to update status to the terminal
The rest of the parameters are not command specific and are described elsewhere. Parameters specified when running quick command
overrides configured values. In case if parameter is specified only for one header then value is multiplied for all the other headers (if
required).
start
()
Commands starts the traffic generator tool in the background. It accepts one parameter test-id
stop () Command stops the started traffic generator tool by start command.
Packet Template
Sub-menu /tool traffic-generator packet-template
This sub menu allows to build packet based on provided parameters. Based on parameters you can build ip packet
with vlan tags and set udp ports. Raw packet template is generated based on provided parameters.
If you require more low level packet or take full advantage of traffic generator, then please use raw-packet-template
builder to build the packet.
If same type of header is present in packet more than once then header field values are passed as comma separated
list. (For example if there are two ip headers then source addresses are given like "ip-src=1.1.1.1,2.2.2.2").
For quicker header construction many of the header field values are assumed. For example if header stack is
"mac,ip" then traffic generator can assume that mac-protocol value is "ip". Or if "port" or "interface" setting is
specified traffic generator can assume "mac-src" to be MAC address of interface). Assumed values have distinct
names that start with "assumed-" and are read only. Manually specified values override assumed ones.
Note: Assumed values are not automatically updated. New values are assumed after template edit.
"packet-template set 0" is enough to trigger new assumed values
Properties
Manual:Tools/Traffic Generator
127
Property
Description
comment (string; Default: )
Short description of packet you are building.
data (incrementing | random |
specific-byte | uninitialized; Default:
uninitialized)
Specifies how packet payload will be filled:
data-byte (hex [0..FF]]; Default:
0)
Byte that will be used to fill packet payload.
interface (string; Default: )
Optional parameter of packet template. This is mutually exclusive with "port" setting. Specifying
"interface" allows user not to create a port entry for interface in port menu. In fact a port entry is created
dynamically. This is useful for running quick tests.
ip-dscp (list of integer[0..255]
(max 16 times); Default: )
Single DSCP or list of DSCP values that will be set in IP header
ip-dst (list of IP/Netmask (max 16
times); Default: )
List of destination IP addresses that will be used when generating IP headers.
ip-frag-off (list of
integer[0..65535] (max 16 times);
Default: )
List of fragmentation offsets in IP header.
ip-gateway (IP; Default: )
In situations when sender and receiver is the same device, it is impossible to determine nexthop
automatically from ip-dst. If ip-gateway is specified packet template will assume destination mac address
based on resolved ip-gateway.
•
•
•
•
uninitialized - packets data (after header) is uninitialized, but not zero. Fastest.
specific-byte - works together with setting data-byte
incrementing - packets data filled with "00 01 02 03" and so on
random - packets data filled with random bytes. Slowest.
ip-id (list of integer [0..65535];
Default: )
ip-protocol (list of IP protocols
(max 16 times); Default: )
ip-src (list of IP/Mask (max 16
times); Default: )
ip-ttl (list of integer [0..255] (max
16 times); Default: )
mac-dst (list of MAC/MASK (max
16 times); Default: )
mac-protocol (list of mac
protocols (max 16 times); Default: )
mac-src (list of MAC/MASK (max
16 times); Default: )
name (string; Default: )
Descriptive name of the template.
port (string; Default: )
Optional parameter of packet template. This suggests a port through which packets generated using this
template should be sent out. Port can also be specified in other places such as in stream settings. This is
mutually exclusive with interface setting.
raw-header (string (max 16 times); Raw packet header as string in hexadecimal format.
Default: )
udp-dst-port (list of port
[0..65535]/mask [0..FFFF] (max 16
times); Default: )
udp-src-port (list of port
[0..65535]/mask [0..FFFF] (max 16
times); Default: )
Manual:Tools/Traffic Generator
128
vlan-id (; Default: )
vlan-priority (; Default: )
vlan-protocol (; Default: )
header-stack (list of ip | mac |
raw | udp | vlan (max 16 times);
Default: ip)
Sequence of headers that a generated packet should have.
Currently supports:
•
•
•
•
•
mac - Ethernet header (14 bytes)
vlan - Ethernet VLAN tag (4 bytes)
ip - IPv4 header (20 bytes)
udp - UDP header (8 bytes)
raw - arbitrary bytes specified as hex string
Most header types can be present in header multiple times. There can be only 2 ip headers and 1 udp header
per packet. Some limitations are imposed on possible sequences of headers based on our practical
experience with network protocols (for example vlan header can follow only a mac header or other vlan
header).
Traffic generator suggests first header for a packet template (in port menu). But it is not enforced.
Port Configuration
Sub-menu /tool packet-generator port
This menu allows to configure ports that will be associated to specific interface and will be used to receive/send
generated packets.
Properties
Property
Description
disabled (yes | no; Default: no) Whether port is disabled and does not participate in receiving/sending of the packets
name (string; Default: )
Descriptive name of the port
interface (string; Default: )
Name of the interface associated with the port.
Read-Only Properties
Property
Description
dynamic (yes | no)
Whether port configuration is generated automatically.
first-header (ip | mac | raw |
udp | vlan)
Shows suggested first header for packets to be sent out of specified interface. This is information can be
used when creating packet templates.
inactive (yes | no)
Whether port is inactive and can't participate in tx/rx of the packets.
Stats
Sub-menu /tool traffic-generator stats
If traffic generator is not running in quick mode then all statistics about the test is stored in this menu.
Latency Distribution
Sub-menu /tool traffic-generator stats latency-distribution
This sub-menu shows how many packets are received in specific latency range. Latency range can be viewed by
streams or by sequences (for example, print stream-num=3, print seq=10)
Here is an example output of the latency graph:
Manual:Tools/Traffic Generator
129
[admin@test-host] /tool traffic-generator stats latency-distribution> print
# LATENCY
COUNT
SHARE GRAPH
0 0-15.5us
0
0%
1 15.5us-31us
0
0%
2 31us-46.5us
0
0%
3 46.5us-62.1us
0
0%
4 62.1us-77.6us
0
0%
5 77.6us-93.1us
0
0%
6 93.1us-109us
0
0%
7 109us-124us
0
0%
8 124us-140us
0
0%
9 140us-155us
0
0%
10 155us-171us
0
0%
11 171us-186us
4
0% *
12 186us-202us
29
0% *
13 202us-217us
90
0.001% *
14 217us-233us
302
0.004% *
15 233us-248us
630
0.009% *
16 248us-264us
789
0.011% *
17 264us-279us
1 384
18 279us-295us
1 990
0.03% --*
19 295us-310us
2 966
0.045% ---*
20 310us-326us
4 089
0.062% -----*
21 326us-341us
4 958
0.075% ------*
22 341us-357us
6 059
0.091% -------*
23 357us-372us
6 660
0.101% --------*
24 372us-388us
8 320
0.126% ----------*
25 388us-403us
9 988
0.151% -------------*
26 403us-419us
11 781
0.178% ---------------*
27 419us-434us
12 512
0.189% ----------------*
28 434us-450us
13 836
29 450us-465us
15 681
0.238% --------------------*
30 465us-481us
17 740
0.269% ----------------------*
31 481us-496us
19 913
0.302% --------------------------*
32 496us-512us
21 106
0.32% ---------------------------*
33 512us-528us
22 848
0.346% -----------------------------*
34 528us-543us
25 059
0.38% --------------------------------*
35 543us-559us
26 593
0.403% ----------------------------------*
36 559us-574us
27 663
0.419% -----------------------------------*
37 574us-590us
29 351
0.445% -------------------------------------*
38 590us-605us
31 265
0.474% ----------------------------------------*
39 605us-621us
33 224
0.504% -------------------------------------------*
40 621us-636us
34 464
0.523% --------------------------------------------*
41 636us-652us
35 630
0.54% ----------------------------------------------*
42 652us-667us
37 245
0.565% ------------------------------------------------*
43 667us-683us
38 158
0.579% -------------------------------------------------*
44 683us-698us
38 626
0.586% --------------------------------------------------*
0.021% -*
0.21% -----------------*
Manual:Tools/Traffic Generator
130
45 698us-714us
38 985
0.591% --------------------------------------------------*
46 714us-729us
39 061
0.592% --------------------------------------------------*
47 729us-745us
39 750
0.603% ---------------------------------------------------*
48 745us-760us
39 145
0.594% --------------------------------------------------*
49 760us-776us
39 162
0.594% --------------------------------------------------*
50 776us-791us
38 197
0.579% -------------------------------------------------*
51 791us-807us
37 811
0.573% -------------------------------------------------*
52 807us-822us
37 364
0.567% ------------------------------------------------*
53 822us-838us
36 770
0.558% -----------------------------------------------*
54 838us-853us
35 831
0.543% ----------------------------------------------*
55 853us-869us
35 380
0.536% ----------------------------------------------*
56 869us-884us
34 472
0.523% --------------------------------------------*
57 884us-900us
33 672
0.511% -------------------------------------------*
58 900us-915us
33 799
0.513% --------------------------------------------*
59 915us-931us
32 754
0.497% ------------------------------------------*
60 931us-946us
32 339
0.49% ------------------------------------------*
61 946us-962us
32 419
0.492% ------------------------------------------*
62 962us-977us
32 107
0.487% -----------------------------------------*
63 977us-993us
31 552
0.478% -----------------------------------------*
64 0-993us
1 221 523
18.54%
Properties
Property
Description
count (integer)
Number of packets in current latency range
graph (string)
graphical representation of share
latency (string) latency range
share (precent) Percentage of packets falling in this latency range.
Stream Stats
Sub-menu /tool traffic-generator stats stream
This sub-menu stores statistics sorted by streams. Output is the same as in quick mode.
[admin@test-host] /tool traffic-generator stats stream> print
# SEQ
NUM
0 1
3
1 1
2 1
TX-PACKET
TX-RATE
RX-PACKET
RX-RATE
LOST-PACKET LOST-RATE
43 064 499.5Mbps
25 180 292.0Mbps
17 884 207.4Mbps
4
43 062 499.5Mbps
39 946 463.3Mbps
TOT
86 126 999.0Mbps
65 126 755.4Mbps
21 000 243.6Mbps
3 2
3
43 544 505.1Mbps
30 449 353.2Mbps
13 095 151.9Mbps
4 2
4
43 543 505.0Mbps
42 982 498.5Mbps
5 2
TOT
87 087 1010.2...
73 431 851.7Mbps
13 656 158.4Mbps
59 20
TOT
87 277 1012.4...
73 755 855.5Mbps
13 522 156.8Mbps
60 21
3
43 546 505.1Mbps
30 605 355.0Mbps
12 941 150.1Mbps
61 21
4
43 546 505.1Mbps
42 682 495.1Mbps
3 116
561
36.1Mbps
6.5Mbps
...
864
10.0Mbps
Manual:Tools/Traffic Generator
62 21
TOT
63 TOT
64 TOT
65 TOT
TOT
131
87 092 1010.2...
73 287 850.1Mbps
13 805 160.1Mbps
3
913 942 504.8Mbps
629 210 347.5Mbps
284 732 157.2Mbps
4
913 939 504.8Mbps
898 374 496.2Mbps
1 827 881 1009.6...
1 527 584 843.8Mbps
15 565
8.5Mbps
300 297 165.8Mbps
[admin@test-host] /tool traffic-generator stats stre
Port Stats
Sub-menu /tool traffic-generator stats port
This sub-menu stores statistics sorted by rx/tx ports.
[admin@test-host] /tool traffic-generator stats port> print
# SEQ
PORT
RX-UNK-PACKET
RX-UNK-BYTE RX-UNK...
0 1
port0:et...
0
0
1 1
port1:et...
0
2 1
TOT
3 2
port0:et...
4 2
TX-PACKET
TX-RATE
RX-PACKET
0bps
43 064 499.5Mbps
39 946
0
0bps
43 062 499.5Mbps
25 180
0
0
0bps
86 126 999.0Mbps
65 126
0
0
0bps
43 544 505.1Mbps
42 982
port1:et...
0
0
0bps
43 543 505.0Mbps
30 449
5 2
TOT
0
0
0bps
87 087 1010.2...
73 431
6 3
port0:et...
0
0
0bps
43 540 505.0Mbps
42 615
7 3
port1:et...
0
0
0bps
43 540 505.0Mbps
30 191
8 3
TOT
0
0
0bps
87 080 1010.1...
72 806
Raw Stats
Sub-menu /tool traffic-generator stats raw
This sub-menu stores raw statistics data.
[admin@test-host] /tool traffic-generator stats raw> print
# SEQ
PORT
0 1
port0:e... 3
1 1
port1:e... 3
2 1
TOT
3 1
port0:e... 4
4 1
port1:e... 4
43 062 499.5Mbps
5 1
TOT
43 062 499.5Mbps
39 946 463.3Mbps
3 116
36.1Mbps
6 1
port0:e... TOT
43 064 499.5Mbps
39 946 463.3Mbps
3 118
36.1Mbps
7 1
port1:e... TOT
43 062 499.5Mbps
25 180 292.0Mbps
8 2
port0:e... 3
43 544 505.1Mbps
9 2
port1:e... 3
10 2
TOT
NUM
3
4
3
TX-PACKET
TX-RATE
43 064 499.5Mbps
RX-PACKET
RX-RATE
0
LOST-PACKET LOST-RATE
0bps
43 064 499.5Mbps
0bps
25 180 292.0Mbps
-25 180 292.0Mbps
43 064 499.5Mbps
25 180 292.0Mbps
17 884 207.4Mbps
39 946 463.3Mbps
-39 946 463.3Mbps
0
0
0bps
0
43 062 499.5Mbps
17 882 207.4Mbps
0bps
43 544 505.1Mbps
0bps
30 449 353.2Mbps
-30 449 353.2Mbps
43 544 505.1Mbps
30 449 353.2Mbps
13 095 151.9Mbps
0
0
0bps
Manual:Tools/Traffic Generator
132
Streams
Properties
Property
Description
disabled (yes | no; Default: no)
Whether stream is disabled
mbps (integer [0..4294967295]; Default: 0)
Value in Mega bits per second that stream will try to generate.
name (string; Default: )
Descriptive name of the stream.
num (integer [0..15]; Default: 0)
packet-size (integer[1..65535]
[-integer[1..65535]]; Default: 0)
Generated size of the packets in bytes. Can be set as the range for random packet size
generation.
port (string; Default: )
Name of the port from Port menu that will be used to transmit packets.
pps (integer [0..4294967295]; Default: 0)
Packets per second that stream will try to generate.
tx-template (string; Default: )
Name of the packet template from packet-template or raw-packet-template menus used as
the packet content source.
Configuration Examples
IpSec tunnel performance test
Consider following test setup
System Under Test (SUT) consists of two routers connected to traffic generator server. Connection between both
SUT routers are IPSec encrypted.
Traffic generator will run two streams:
• in direction from 1.1.1.0/24 network to 2.2.2.0/24 network
• in direction from 2.2.2.0/24 network to 1.1.1.0/24 network.
Manual:Tools/Traffic Generator
R1 routing and ipsec setup
/ip address
add address=192.168.33.1/30 interface=ether1
add address=1.1.1.2/24 interface=ether2
/ip route
add dst-address=2.2.2.0/24 gateway=192.168.33.2
/ip ipsec proposal
set default enc-algorithms=aes-128
/ip ipsec peer
add address=192.168.33.2 secret=123
/ip ipsec policy
add sa-src-address=192.168.33.1 sa-dst-address=192.168.33.2 \
src-address=1.1.1.0/24 dst-address=2.2.2.0/24 tunnel=yes
R2 routing and ipsec setup
/ip address
add address=192.168.33.2/30 interface=ether1
add address=2.2.2.2/24 interface=ether2
/ip route
add dst-address=1.1.1.0/24 gateway=192.168.33.1
/ip ipsec proposal
set default enc-algorithms=aes-128
/ip ipsec peer
add address=192.168.33.1 secret=123
/ip ipsec policy
add sa-src-address=192.168.33.2 sa-dst-address=192.168.33.1 \
src-address=2.2.2.0/24 dst-address=1.1.1.0/24 tunnel=yes
Traffig generator server setup
/ip address
add address=1.1.1.1/24 interface=ether2
add address=2.2.2.1/24 interface=ether3
First we will define which ports will be used as traffic generator tx/rx ports
/tool traffic-generator port
add disabled=no interface=ether2 name=port0
add disabled=no interface=ether3 name=port1
To construct actual packet that will be generated, packet-template is used.
133
Manual:Tools/Traffic Generator
134
/tool traffic-generator packet-template
add header-stack=mac,ip,udp ip-dst=2.2.2.1/32 ip-gateway=1.1.1.2 ip-src=1.1.1.1/32 \
name=routing-1 port=port0
add header-stack=mac,ip,udp ip-dst=1.1.1.1/25 ip-gateway=2.2.2.2 ip-src=2.2.2.1/32 \
name=routing-2 port=port1
Notice that mac addresses was not specified since template generator can assume next-hop mac address
automatically by sending ARP messages. Since we are doing routing and destination IP is not directly reachable, we
have set ip-gateway parameter to determine next-hop mac-address.
When running print you can see all assumed (detected) values including mac addresses.
[admin@test-host] /tool traffic-generator packet-template> print
0 name="routing-1" header-stack=mac,ip,udp port=port0
assumed-mac-dst=00:0C:42:00:38:9D assumed-mac-src=00:0C:42:40:94:25
assumed-mac-protocol=ip assumed-ip-dscp=0 assumed-ip-id=0
assumed-ip-frag-off=0 assumed-ip-ttl=64 assumed-ip-protocol=udp
ip-src=1.1.1.1/32 ip-dst=2.2.2.1/32 assumed-udp-src-port=100
assumed-udp-dst-port=200 ip-gateway=1.1.1.2 data=uninitialized data-byte=0
1 name="routing-2" header-stack=mac,ip,udp port=port1
assumed-mac-dst=00:0C:42:00:38:D1 assumed-mac-src=00:0C:42:40:94:26
assumed-mac-protocol=ip assumed-ip-dscp=0 assumed-ip-id=0
assumed-ip-frag-off=0 assumed-ip-ttl=64 assumed-ip-protocol=udp
ip-src=2.2.2.1/32 ip-dst=1.1.1.1/32 assumed-udp-src-port=100
assumed-udp-dst-port=200 ip-gateway=2.2.2.2 data=uninitialized data-byte=0
For example if any router in SUT change, assumed mac-addresses will not be updated automatically. To update
packet templates simply issue command :
/tool traffic-generator packet-template set [find]
Last part is to configure streams
/tool traffic-generator stream
add disabled=no mbps=500 name=str1 num=3 packet-size=1450 port=port0 pps=0 \
tx-template=routing-1
add disabled=no mbps=500 name=str3 num=4 packet-size=1450 port=port1 pps=0 \
tx-template=routing-2
Notice that each stream has unique num value. This value identifies stream packets, otherwise traffic generator will
not work.
Now we are ready to run the test. In this case quick mode will be used:
[admin@test-host] /tool traffic-generator> quick mbps=450
SEQ
NUM
37
4
37
38
TX-PACKET
TX-RATE
RX-PACKET
RX-RATE
RX-OOO
LOST-PACKET LOST-RATE
39 488 458.0Mbps
39 270 455.5Mbps
15 509
218
2.5Mbps
TOT
78 976 916.1Mbps
76 485 887.2Mbps
22 529
2 491
28.8Mbps
3
38 957 451.9Mbps
37 657 436.8Mbps
7 078
1 300
15.0Mbps
38
4
38 958 451.9Mbps
38 402 445.4Mbps
14 763
556
6.4Mbps
38
TOT
77 915 903.8Mbps
76 059 882.2Mbps
21 841
1 856
21.5Mbps
39
3
38 816 450.2Mbps
37 893 439.5Mbps
7 307
923
10.7Mbps
Manual:Tools/Traffic Generator
135
39
4
38 815 450.2Mbps
38 642 448.2Mbps
15 110
173
2.0Mbps
39
TOT
77 631 900.5Mbps
76 535 887.8Mbps
22 417
1 096
12.7Mbps
40
3
39 779 461.4Mbps
37 415 434.0Mbps
7 136
2 364
27.4Mbps
40
4
39 780 461.4Mbps
39 567 458.9Mbps
15 908
213
2.4Mbps
40
TOT
79 559 922.8Mbps
76 982 892.9Mbps
23 044
2 577
29.8Mbps
41
3
39 218 454.9Mbps
37 089 430.2Mbps
7 075
2 129
24.6Mbps
41
4
39 218 454.9Mbps
38 663 448.4Mbps
15 752
555
6.4Mbps
41
TOT
78 436 909.8Mbps
75 752 878.7Mbps
22 827
2 684
31.1Mbps
42
3
39 188 454.5Mbps
37 906 439.7Mbps
6 729
1 282
14.8Mbps
42
4
39 187 454.5Mbps
38 954 451.8Mbps
15 565
233
2.7Mbps
42
TOT
78 375 909.1Mbps
76 860 891.5Mbps
22 294
1 515
17.5Mbps
TOT
3
1 645 468 454.4Mbps
1 568 201 433.1Mbps
280 174
77 267
21.3Mbps
TOT
4
1 645 464 454.4Mbps
1 626 896 449.3Mbps
627 480
18 568
5.1Mbps
TOT
TOT
3 290 932 908.9Mbps
3 195 097 882.4Mbps
907 654
95 835
26.4Mbps
Stats shows throughput of each stream and total throughput of both streams, Out-of-order packet count, Lost rate,
latency and jitter.
[ Top | Back to Content ]
Manual:Tools/Bandwidth Test
Applies to RouterOS: v2.9, v3, v4+
Summary
Sub-menu: /tool
Packages required: system
The Bandwidth Tester can be used to measure the throughput to another MikroTik router (either wired or wireless)
and thereby help to discover network "bottlenecks".
The TCP test uses the standard TCP protocol with acknowledgments and follows the TCP algorithm on how many
packets to send according to latency, dropped packets, and other features in the TCP algorithm. Please review the
TCP protocol for details on its internal speed settings and how to analyze its behavior. Statistics for throughput are
calculated using the entire size of the TCP data stream. As acknowledgments are an internal working of TCP, their
size and usage of the link are not included in the throughput statistics. Therefore this statistic is not as reliable as the
UDP statistic when estimating throughput.
The UDP tester sends 110% or more packets than currently reported as received on the other side of the link. To see
the maximum throughput of a link, the packet size should be set for the maximum MTU allowed by the links which
is usually 1500 bytes. There is no acknowledgment required by UDP; this implementation means that the closest
approximation of the throughput can be seen.
Manual:Tools/Bandwidth Test
136
Warning: Bandwidth Test uses all available bandwidth (by default) and may impact network usability.
Note: Bandwidth Test uses a lot of resources. If you want to test real throughput of a router, you should run
bandwidth test through the tested router not from or to it. To do this you need at least 3 routers connected in
chain: the Bandwidth Server, the router being tested and the Bandwidth Client.
Note: If you use UDP protocol then Bandwidth Test counts IP header+UDP header+UDP data. In case if you
use TCP then Bandwidth Test counts only TCP data (TCP header and IP header are not included).
Bandwidth Test Server
Sub-menu: /tool bandwidth-server
Property
Description
allocate-udp-ports-from (integer 1000..64000; Default: 2000) Beginning of UDP port range
authenticate (yes | no; Default: yes)
Communicate only with authenticated clients
enabled (yes | no; Default: yes)
Defines whether bandwidth server is enabled or not
max-sessions (integer 1..1000; Default: 100)
Maximal simultaneous test count
Bandwidth Server:
[admin@MikroTik] /tool bandwidth-server> print
enabled: yes
authenticate: yes
allocate-udp-ports-from: 2000
max-sessions: 100
[admin@MikroTik] /tool bandwidth-server>
Active sessions:
[admin@MikroTik] /tool bandwidth-server session> print
# CLIENT
PROTOCOL DIRECTION USER
0 35.35.35.1
udp
send
admin
1 25.25.25.1
udp
send
admin
2 36.36.36.1
udp
send
admin
[admin@MikroTik] /tool bandwidth-server session>
To enable bandwidth-test server without client authentication:
[admin@MikroTik] /tool bandwidth-server> set enabled=yes authenticate=no
[admin@MikroTik] /tool bandwidth-server> print
enabled: yes
authenticate: no
allocate-udp-ports-from: 2000
Manual:Tools/Bandwidth Test
137
max-sessions: 100
[admin@MikroTik] /tool bandwidth-server>
Bandwidth Test Client
Command name: /tool bandwidth-test
Property
address (IP address | IPv6
prefix[%interface]; Default:)
Description
IP address of host
direction (both | receive | transmit; Direction of data flow
Default: receive)
duration (time; Default: )
Duration of the test
interval (time: 20ms..5s; Default:
1s)
Delay between reports (in seconds)
local-tx-speed (integer
0..4294967295; Default: )
Transfer test maximum speed (bits per second)
local-udp-tx-size (integer:
28..64000)
Local transmit packet size in bytes
password (string; Default: "")
Password for the remote user
protocol (udp | tcp; Default: udp)
Protocol to use
random-data (yes | no; Default: no)
If random-data is set to yes, the payload of the bandwidth test packets will have incompressible random
data stream so that links that use data compression will not distort the results (this is CPU intensive and
random-data should be set to no for low speed CPUs)
remote-tx-speed (integer
0..4294967295; Default: )
Receive test maximum speed (bits per second)
remote-udp-tx-size (integer:
28..64000)
Remote transmit packet size in bytes
tcp-connection-count (integer
1..100; Default: 20)
Number of TCP connections to use
user (string; Default: "")
Remote user
Example
To run 15-second long bandwidth-test to the 10.0.0.32 host sending and receiving 1000-byte UDP packets and using
username admin to connect:
[admin@MikroTik] /tool> bandwidth-test 10.0.0.32 duration=15s \
\... direction=both local-udp-tx-size=1000 protocol=udp \
\... remote-udp-tx-size=1000 user=admin
status: done testing
duration: 15s
tx-current: 272.8Mbps
tx-10-second-average: 200.3Mbps
tx-total-average: 139.5Mbps
rx-current: 169.6Mbps
rx-10-second-average: 164.8Mbps
rx-total-average: 117.0Mbps
Manual:Tools/Bandwidth Test
lost-packets:
random-data:
direction:
tx-size:
rx-size:
[admin@MikroTik] /tool>
138
373
no
both
1000
1000
Link-local IPv6 example:
[admin@dzeltenais_burkaans] > /tool bandwidth-test fe80::34:23ff:fe6a:570c%local
status:
duration:
rx-current:
rx-10-second-average:
rx-total-average:
lost-packets:
random-data:
direction:
rx-size:
running
5s
23.9Mbps
15.1Mbps
15.1Mbps
0
no
receive
1500
[ Top | Back to Content ]
Manual:System/Note
Applies to RouterOS: v3, v4, v5
Summary
Sub-menu level: /system note
System note feature allows you to assign arbitrary text notes or messages that will be displayed on each login right
after banner. For example, you may distribute warnings between system administrators this way, or describe what
does that particular router actually do. To configure system note, you may upload a plain text file named sys-note.txt
on the router's FTP server, or, additionally, edit the settings in this menu
Manual:System/Note
139
Properties
Property
Description
note (string; Default: )
Note that will be displayed.
show-at-login (yes | no; Default: yes) whether to show system note on each login
Example
It is possible to add multi-line notes using embedded text editor ( /system note edit note), for example add ASCII art
to your home router:
[admin@RB493G] /system note> edit note
(
)
)
(
(
)
(
)
)
)
(
(
/\
(_)
/ \ /\
________[_]________
/\/
\/ \
/\
/\
______
\
/
/\/\ /\/\
/ \
//_\
\
/\
\ /\/\/
\/
\
/\
/ /\/\ //___\
\__/ \
\/
/ \ /\/
\//_____\
\ |[]|
\
/\/\/\/
//_______\
\|__|
\
/
\
/XXXXXXXXXX\
\
\
/_I_II I__I_\__________________\
I_I| I__I_____[]_|_[]_____I
I_II I__I_____[]_|_[]_____I
I II__I I
XXXXXXX
I
~~~~~"
"~~~~~~~~~~~~~~~~~~~~~~~~
C-c quit C-o save&quit C-u undo C-k cut line C-y paste F5 repaint
Save changes by pressing Ctrl+o. Now next time you log in, console will print your piece of art:
MMMM
MMMM
MMM MMMM MMM
MMM MM MMM
MMM
MMM
MMM
MMM
III
III
III
III
KKK
KKK KKK
KKKKK
KKK KKK
KKK KKK
RRRRRR
RRR RRR
RRRRRR
RRR RRR
MikroTik RouterOS 5.3 (c) 1999-2011
TTTTTTTTTTT
OOOOOO
TTT
OOO OOO
TTT
OOO OOO
TTT
OOOOOO
TTT
III
III
III
III
KKK
KKK KKK
KKKKK
KKK KKK
KKK KKK
http://www.mikrotik.com/
Manual:System/Note
140
(
)
)
(
(
)
(
)
)
)
(
(
/\
(_)
/ \ /\
________[_]________
/\/
\/ \
/\
/\
______
\
/
/\/\ /\/\
/ \
//_\
\
/\
\ /\/\/
\/
\
/\
/ /\/\ //___\
\__/ \
\/
/ \ /\/
\//_____\
\ |[]|
\
/\/\/\/
//_______\
\|__|
\
/
\
/XXXXXXXXXX\
\
\
/_I_II I__I_\__________________\
I_I| I__I_____[]_|_[]_____I
I_II I__I_____[]_|_[]_____I
I II__I I
XXXXXXX
I
~~~~~"
"~~~~~~~~~~~~~~~~~~~~~~~~
[admin@RB493G] >
[ Top | Back to Content ]
Manual:System/File
Applies to RouterOS: v3, v4 +
Summary
Sub-menu level: /file
File menu shows all user space files on the router. It is possible to see and edit file content or delete file. file creation
is not possible from this menu, to create files see scripting examples for workaround.
If RouterOS ".npk" package is uploaded, file menu will also show package specific information, like architecture,
build date and time, etc.
File content example:
[admin@dzeltenais_burkaans] /file> print
# NAME
TYPE
SIZE
CREATION-TIME
0 autosupout.rif
.rif file
357368
oct/05/2010 09:47:01
1 sample.txt
.txt file
230
oct/11/2010 12:14:43
[admin@dzeltenais_burkaans] /file> set 1 contents=Hello
[admin@dzeltenais_burkaans] /file> print detail where name~"sample"
Manual:System/File
141
1 name="sample.txt" type=".txt file" size=5 creation-time=oct/11/2010 12:15:38 contents=Hello
[admin@dzeltenais_burkaans] /file>
Package example:
[admin@493G] /file> print detail
0 name="multicast-5.0rc2-mipsbe.npk" type="package" size=245643 creation-time=jan/05/1970 21:44:25
package-name="multicast" package-version="5.0rc2" package-build-time=oct/11/2010 06:34:02
package-architecture="mips"
Properties
Property
Description
contents (string; Default: ) Actual content of the file.
Read-only properties
Property
Description
creation-time (time)
Time when file was created
name (string)
Name of the file
package-architecture (string) Architecture that package is built for. Applies only to RouterOS ".npk" files.
package-built-time (string)
Time when package was built. Applies only to RouterOS ".npk" files.
package-name (string)
Name of the installable package that. Applies only to RouterOS ".npk" files.
package-version (string)
version of the installable package that. Applies only to RouterOS ".npk" files.
size (integer)
File size in bytes
file type (string)
Type of the file. For folders file type is directory
read more
• Scripting examples
• RouterOS upgrade
Manual:System/Resource
142
Manual:System/Resource
Applies to RouterOS: v3, v4 +
General
Sub-menu level: /system resource
General resource menu shows overall resource usage and router statistics like uptime, memory usage, disk usage,
version etc.
It also has several sub-menus for more detailed hardware statistics like PCI, IRQ and USB.
[admin@RB1100test] /system
uptime:
version:
free-memory:
total-memory:
cpu:
cpu-count:
cpu-frequency:
cpu-load:
free-hdd-space:
total-hdd-space:
write-sect-since-reboot:
write-sect-total:
bad-blocks:
architecture-name:
board-name:
platform:
resource> print
2w1d23h34m57s
"5.0rc1"
385272KiB
516708KiB
"e500v2"
1
799MHz
9%
466328KiB
520192KiB
1411
70625
0.2%
"powerpc"
"RB1100"
"MikroTik"
Properties
All properties are read-only
Property
Description
architecture-name (string)
CPU architecture. Can be powerpc, x86, mipsbe or mipsle.
bad-blocks (percent)
Shows percentage of bad blocks on the NAND.
board-name (string)
RouterBOARD model name
cpu (string)
Cpu model that is on the board.
cpu-count (integer)
Number of CPUs present on the system. Each core is separate CPU, Intel HT is also separate CPU.
cpu-frequency (string)
Current CPU frequency.
cpu-load (percent)
Percentage of used CPU resources. Combines all CPUs. Per-core CPU usage can be see in CPU
submenu
free-hdd-space (string)
Free space on hard drive or NAND
Manual:System/Resource
143
free-memory (string)
Unused amount of RAM
platform (string)
Platform name, usually it is "MikroTik"
total-hdd-space (string)
Size of the hard drive or NAND
total-memory (string)
Amount of installed RAM
uptime (time)
Time interval passed since boot-up.
version (string)
Installed RouterOS version number.
write-sect-since-reboot
(integer)
Number of sector writes in HDD or nand since router was last time rebooted.
write-sect-total (integer)
Number of sector writes in total.
CPU
Sub-menu level: /system resource cpu
This submenu shows per-cpu usage, as long as IRQ and Disk usage.
[admin@RB1100test] /system resource cpu> print
CPU LOAD
IRQ
DISK
0
5%
0%
0%
[admin@RB1100test] /system resource cpu>
(needs editing)
Properties
Read-only properties
Property
Description
cpu (integer)
Identification number of CPU which usage is shown.
load (percent) CPU usage in percents
irq (percent)
IRQ usage in percents
disk (percent) Disk usage in percents
IRQ
Sub-menu level: /system resource irq
Menu shows all used IRQs on the router. It is possible to set up IRQ load balancing on mulicore systems by
assigning IRQ to specific core. IRQ assignments are done by hardware and cannot be changed from RouterOS. For
example, if all Ethernets are assigned to one IRQ, then you have to deal with hardware: upgrade motherboards BIOS,
reassign IRQs manually in BIOS, if none of above helps then change the hardware.
Manual:System/Resource
144
Properties
Property
Description
cpu (auto | integer; Default: ) Specifies which CPU is assigned to the IRQ.
•
auto - pick CPU based on number of interrupts. Uses NAPI
[1]
to optimize interrupts.
Read-only properties
Property
Description
active-cpu (integer) Shows active CPU in multicore systems.
count (integer)
Number of interrupts. On ethernet interfaces interrupt=packet.
irq (integer)
IRQ identification number
users (string)
Process assigned to IRQ
RPS
Sub-menu level: /system resource rps
This menu allows to enable Receive Packet Steering (RPS) to reduce single core usage.
NAPI [1] can become a bottleneck under high packet load, because of serialization per device queue. RPS distributes
the load of received packet processing across multiple cores.
USB
Sub-menu level: /system resource usb
This menu displays all available USB controllers on the board. Menu is available only if at least one USB controller
is present.
[admin@MikroTik] /system resource usb> print detail
0 device="2:1" name="RB400 EHCI" serial-number="rb400_usb" vendor-id="0x1d6b"
device-id="0x0002" speed="480 Mbps" ports=2 usb-version="2.00"
1 device="1:1" name="RB400 OHCI" serial-number="rb400_usb" vendor-id="0x1d6b"
device-id="0x0001" speed="12 Mbps" ports=2 usb-version="1.10"
Properties
Property
Description
device (string)
device-id (hex)
Hexadecimal device ID
name (string)
Descriptive name of the device retrieved from driver
ports (integer)
How many ports are supported by usb controller
serial-number (string)
speed (string)
Max USB speed that can be used (480Mbps for USBv2 and 12Mbps for USBv1)
usb-version (string)
Identifies max spported USB version
vendor (string)
Device manufacturer's name.
Manual:System/Resource
145
vendor-id (hex)
Hexadecimal vendor ID
PCI
Sub-menu level: /system resource pci
PCI submenu shows the information about all PCI devices on the board
[admin@RB1100test] /system resource pci> print
# DEVICE
VENDOR
NAME
0 06:00.0 Attansic Technology Corp.
unknown
1 05:00.0 Freescale Semiconductor Inc
MPC8544
2 04:00.0 Attansic Technology Corp.
unknown
3 03:00.0 Freescale Semiconductor Inc
MPC8544
4 02:00.0 Attansic Technology Corp.
unknown
5 01:00.0 Freescale Semiconductor Inc
MPC8544
6 00:00.0 Freescale Semiconductor Inc
MPC8544
device (rev: 192)
(rev: 17)
device (rev: 192)
(rev: 17)
device (rev: 192)
(rev: 17)
(rev: 17)
Properties
All properties are read-only
Property
Description
category (string) PCI device type, for example ethernet controller
device (string)
device-id (hex) Hexadecimal device ID
io (hex-hex)
I/O memory range
irq (integer)
IRQ asigned to the device
memory (hex-hex) Memory range
name (string)
Descriptive name of the device retrieved from driver
vendor (string)
Device manufacturer's name.
vendor-id (hex) Hexadecimal vendor ID
References
[1] http:/ / www. linuxfoundation. org/ collaborate/ workgroups/ networking/ napi
IRQ
18
0
17
0
16
0
0
Manual:System/Health
146
Manual:System/Health
Summary
Hardware that supports monitoring will display different information about hardware status, like temperature,
voltage.
Warning: For feature availablity on RouterBOARD products check routerboard.com
[1]
Voltage
Routers that support voltage monitoring will display supplied voltage value. In CLI/Winbox it will
display volts. In scripts/API/SNMP this will be dV or value showed in CLI/Winbox multiplied by
10
Note: Routers that have PEXT and PoE power input are calibrated using PEXT, as result value showed over
PoE can be lower than input voltage due to additional ethernet protection chains.
Temperature
Routers that support temperature monitoring will display temperature reading. In CLI/Winbox it
will display degrees Celsius. In scripts/API/SNMP this will be value showed in CLI/Winbox multiplied by 10
Fan control
Using this menu users will be able to control fan behaviour on the router.
Warning: for auto mode to work you have to use fans that support monitoring (it will have 3 wires) If you
have fan with only 2 wires (V+,GND) then you have to set fan-mode to manual. If control pulse cannot be
detected, then router will switch between main and auxiliary fan and stop only when it detects fan with
control
References
[1] http:/ / routerboard. com
Manual:Store
147
Manual:Store
Applies to RouterOS: v3, v4+
Store manages storage devices used by RouterOS various facilities.
Currently Store can be used for:
• Webproxy
• User Manager
• the Dude
This is especially useful for
RouterBOARD devices with SD/CF
slots - as the built-in storage is quite
small, an external drive comes in very
handy when you want a big User
Manager database.
You can add as many external or
secondary drives as you want, and
select any number of them for each of
the mentioned feature use. For
example User Manager could be used
on 3 disks, one of them would be the
active database, and the rest would be
backups. You can then add a fourth
disk, copy the active data to it - unplug
it - and move to another server, to keep
using the actual database.
This means migration and backup made easy!
Note: For proper operation router needs to be rebooted after adding or removing external storage.
Creating a Store instance
[[email protected]] /store> print
Flags: X - disabled, A - active
#
NAME
DISK
STATUS
web-proxy
system
active
0 A web-proxy1
TYPE
[[email protected]] /store> add
activate
comment
copy-from
disabled
name
disk
type
[[email protected]] /store> add name=webproxy_backup disk=disk1 type=web-proxy activate=no
Manual:Store
148
This will add a new storage place for Webproxy on disk1, and will set it as inactive.
Activate new store instance to save proxy cache on secondary disk (other proxy settings configured separately from
/ip proxy menu),
[[email protected]] > store activate webproxy-backup
E.g. RB1000 with populated CF Card slot and User Manager, one can add the CF card for use by User manager to
store all it's data as follows
/store add disk=CF1 type=user-manager activate=yes
Store management
Sub-menu: /store
Properties
Property
Description
activate (yes | no; Default: no)
Whether to activate this store as primary.
comment (string; Default: )
Short description of an item.
disabled (yes | no; Default: no)
Whether to disable store.
disk (string; Default: )
Name of the disk (from /store disk menu) used by this store.
name (string; Default: )
Descriptive name of the store
type (user-manager | web-proxy;
Default: )
Configured type of the store. Two options are available, either store is used by web-proxy or by
user-manager.
Read-only Properties
Property
Description
status (backup | active | invalid) Current status of the store. Shows whether store is used as backup,active or some of the config is invalid.
Menu specific commands
Property
Description
activate (<store_name>) Makes specified store as active if previously was in backup state.
Disk management
Sub-menu: /store disk
Read-only Properties
Manual:Store
149
Property
Description
free-space (integer [KiB])
Shows the free space left on the disk.
name (string)
Name of the disk
status (strung)
Shows the current status of the disk, can be ready, formating etc.
system (yes | no)
Shows whether disk is used as system drive
total-space (integer [KiB]) Shows total available disk space
Menu specific commands
Property
Description
check-drive (<drive_name>)
Check the drive for errors.
clean-drive (<drive_name>)
Clean the drive
format-drive (<drive_name>) Format the file system in usable by RouterOS file system.
Note: Before using drive as a storage device it must be formatted. Before doing so, make sure that all
sensitive data is backed up.
Manual:System/Watchdog
Applies to RouterOS: v3, v4 +
Summary
This menu allows to configure system to reboot on kernel panic, when an IP address does not respond, or in case the
system has locked up. Software watchdog timer is used to provide the last option, so in very rare cases (caused by
hardware malfunction) it can lock up by itself. There is a hardware watchdog device available in all RouterBOARD
PowerPC and Mipsbe models, which can reboot the system in any case.
Properties
Sub-menu: /system watchdog
Manual:System/Watchdog
150
Property
Description
watch-address (IP; Default:
none)
The system will reboot in case 6 sequental pings to the given IP address (sent once per 10 seconds) will fail.
If set to none this feature is disabled.
watchdog-timer (yes | no;
Default: yes)
Whether to reboot if system is unresponsive for a minute
no-ping-delay (time; Default:
5m)
Specifies how long after reboot not to test and ping watch-address. The default setting means that if
watch-address is set and is not reachable, the router will reboot about every 6 minutes.
automatic-supout (yes | no;
Default: yes)
When software failure happens, a file named "autosupout.rif" is generated automatically. The previous
"autosupout.rif" file is renamed to "autosupout.old.rif"
auto-send-supout (yes | no;
Default: no)
After the support output file is automatically generated, it can be sent by email
send-email-from (string;
Default: )
e-mail address to send the support output file from. If not set, the value set in /tool e-mail is used
send-email-to (string; Default: e-mail address to send the support output file to.
)
send-smtp-server (string;
Default: )
SMTP server address to send the support output file through. If not set, the value set in /tool e-mail is used.
Basic examples
To make system generate a support output file and sent it automatically to [email protected] throught the
192.0.2.1in case of a software crash:
[admin@MikroTik] system watchdog> set auto-send-supout=yes \
\... [email protected] send-smtp-server=192.0.2.1
[admin@MikroTik] system watchdog> print
watch-address: none
watchdog-timer: yes
no-ping-delay: 5m
automatic-supout: yes
auto-send-supout: yes
send-smtp-server: 192.0.2.1
send-email-to: [email protected]
[admin@MikroTik] system watchdog>
[ Top | Back to Content ]
Manual:System/Scheduler
Manual:System/Scheduler
Applies to RouterOS: 2.9, v3, v4
Summary
The scheduler can trigger script execution at a particular time moment, after a specified time interval, or both.
Properties
• interval (time; default: 0s) - interval between two script executions, if time interval is set to zero, the script is
only executed at its start time, otherwise it is executed repeatedly at the time interval is specified
• name name) - name of the task
• on-event (name) - name of the script to execute. It must be presented at /system script
• run-count (read-only: integer) - to monitor script usage, this counter is incremented each time the script is
executed
• start-date (date) - date of the first script execution
• start-time (time) - time of the first script execution
• startup - execute the script 3 seconds after the system startup.
Notes
Rebooting the router will reset run-count counter.
If more than one script has to be executed simultaneously, they are executed in the order they appear in the scheduler
configuration. This can be important if one scheduled script is used to disable another one. The order of scripts can
be changed with the move command.
If a more complex execution pattern is needed, it can usually be done by scheduling several scripts, and making them
enable and disable each other.
if scheduler item has start-time set to startup, it behaves as if start-time and start-date were set to time 3 seconds after
console starts up. It means that all scripts having start-time=startup and interval=0 will be executed once each time
router boots.
Examples
We will add a task that executes the script log-test every hour:
[admin@MikroTik] system script> add name=log-test source=:log message=test
[admin@MikroTik] system script> print
0 name="log-test" source=":log messgae=test" owner=admin run-count=0
[admin@MikroTik] system script> .. scheduler
[admin@MikroTik] system scheduler> add name=run-1h interval=1h
on-event=log-test
[admin@MikroTik] system scheduler> print
Flags: X - disabled
151
Manual:System/Scheduler
#
NAME
ON-EVENT START-DATE START-TIME INTERVAL
0
run-1h
log-test mar/30/2004 06:11:35
1h
[admin@MikroTik] system scheduler>
152
RUN-COUNT
0
In another example there will be two scripts added that will change the bandwidth setting of a queue rule "Cust0".
Every day at 9AM the queue will be set to 64Kb/s and at 5PM the queue will be set to 128Kb/s. The queue rule, the
scripts, and the scheduler tasks are below:
[admin@MikroTik] queue simple> add name=Cust0 interface=ether1 \
\... dst-address=192.168.0.0/24 limit-at=64000
[admin@MikroTik] queue simple> print
Flags: X - disabled, I - invalid
0
name="Cust0" target-address=0.0.0.0/0 dst-address=192.168.0.0/24
interface=ether1 limit-at=64000 queue=default priority=8 bounded=yes
[admin@MikroTik] queue simple> /system script
[admin@MikroTik] system script> add name=start_limit source={/queue simple set \
\... Cust0 limit-at=64000}
[admin@MikroTik] system script> add name=stop_limit source={/queue simple set \
\... Cust0 limit-at=128000}
[admin@MikroTik] system script> print
0 name="start_limit" source="/queue simple set Cust0 limit-at=64000"
owner=admin run-count=0
1 name="stop_limit" source="/queue simple set Cust0 limit-at=128000"
owner=admin run-count=0
[admin@MikroTik] system script> .. scheduler
[admin@MikroTik] system scheduler> add interval=24h name="set-64k" \
\... start-time=9:00:00 on-event=start_limit
[admin@MikroTik] system scheduler> add interval=24h name="set-128k" \
\... start-time=17:00:00 on-event=stop_limit
[admin@MikroTik] system scheduler> print
Flags: X - disabled
#
NAME
ON-EVENT START-DATE START-TIME INTERVAL
RUN-COUNT
0
set-64k
start... oct/30/2008 09:00:00
1d
0
1
set-128k stop_... oct/30/2008 17:00:00
1d
0
[admin@MikroTik] system scheduler>
The following example schedules a script that sends each week a backup of router configuration by e-mail.
[admin@MikroTik] system script> add name=e-backup source={/system backup
{... save name=email; /tool e-mail send to="[email protected]" subject=([/system
{... identity get name] . " Backup") file=email.backup}
[admin@MikroTik] system script> print
0 name="e-backup" source="/system backup save name=ema... owner=admin
run-count=0
[admin@MikroTik] system script> .. scheduler
Manual:System/Scheduler
[admin@MikroTik] system scheduler> add interval=7d name="email-backup" \
\... on-event=e-backup
[admin@MikroTik] system scheduler> print
Flags: X - disabled
#
NAME
ON-EVENT START-DATE START-TIME INTERVAL
RUN-COUNT
0
email-... e-backup oct/30/2008 15:19:28
7d
1
[admin@MikroTik] system scheduler>
Do not forget to set the e-mail settings, i.e., the SMTP server and From: address under /tool e-mail. For example:
[admin@MikroTik] tool e-mail> set server=159.148.147.198 [email protected]
[admin@MikroTik] tool e-mail> print
server: 159.148.147.198
from: [email protected]
[admin@MikroTik] tool e-mail>
Example below will put 'x' in logs each hour from midnight till noon:
[admin@MikroTik] system script> add name=enable-x source={/system scheduler
{... enable x}
[admin@MikroTik] system script> add name=disable-x source={/system scheduler
{... disable x}
[admin@MikroTik] system script> add name=log-x source={:log message=x}
[admin@MikroTik] system script> .. scheduler
[admin@MikroTik] system scheduler> add name=x-up start-time=00:00:00 \
\... interval=24h on-event=enable-x
[admin@MikroTik] system scheduler> add name=x-down start-time=12:00:00
\... interval=24h on-event=disable-x
[admin@MikroTik] system scheduler> add name=x start-time=00:00:00 interval=1h \
\... on-event=log-x
[admin@MikroTik] system scheduler> print
Flags: X - disabled
#
NAME
ON-EVENT START-DATE START-TIME INTERVAL
RUN-COUNT
0
x-up
enable-x oct/30/2008 00:00:00
1d
0
1
x-down
disab... oct/30/2008 12:00:00
1d
0
2
x
log-x
oct/30/2008 00:00:00
1h
0
[admin@MikroTik] system scheduler>
153
Manual:System/Time
Manual:System/Time
Applies to RouterOS: v3, v4
Clock and Time zone configuration
RouterOS uses data from the tz database [1], Most of the time zones from this database are included, and have the
same names. Because local time on the router is used mostly for timestamping and time-dependant configuration,
and not for historical date calculations, time zone information about past years is not included. Currently only
information starting from 2005 is included.
Following settings are available in the /system clock console path, and in the "Time" tab of the "System > Clock"
WinBox window:
• time (HH:MM:SS, where HH - hour 00..24, MM - minutes 00..59, SS - seconds 00..59)
• date (mmm/DD/YYYY, where mmm - month, one of jan, feb, mar, apr, may, jun, jul, aug, sep, oct, nov, dec, DD date, 00..31, YYYY - year, 1970..2037) : date and time show current local time on the router. These values can be
adjusted using the set command. Local time cannot, however, be exported, and is not stored with the rest of the
configuration.
• time-zone-name (manual, or name of time zone; default value: manual) : Name of time zone. Like most of the
text values in RouterOS, this value is case sensitive. Special value manual applies manually configured GMT
offset, which by default is 00:00 with no daylight saving time.
Startup date and time is jan/02/1970 00:00:00 [+|-]gmt-offset. If router has a battery (for example RB230), then
BIOS stored time is used as a startup time.
Active time zone information
• dst-active (yes or no>; read-only property) : This property has value yes while daylight saving time of the current
time zone is active.
• gmt-offset ([+|-]HH:MM - offset in hours and minutes; read-only property) : This is the current value of GMT
offset used by the system, after applying base time zone offset and active daylight saving time offset.
Manual time zone configuration
These settings are available in /system clock manual console path, and in the "Manual Time Zone" tab of the
"System > Clock" WinBox window. These settings have effect only when time-zone-name=manual. It is only
possible to manually configure single daylight saving time period.
• time-zone, dst-delta ([+|-]HH:MM - time offset in hours and minutes, leading plus sign is optional; default value:
+00:00) : While DST is not active use GMT offset time-zone. While DST is active use GMT offset time-zone +
dst-delta.
• dst-start, dst-end (mmm/DD/YYYY HH:MM:SS - date and time, either date or time can be ommited in the set
command; default value: jan/01/1970 00:00:00) : Local time when DST starts and ends.
154
Manual:System/Time
SNTP client
SNTP client is included in the system package. RouterOS implements SNTP protocol defined in RFC4330. Manycast
mode is not supported. NTP server and a NTP client is included in the separate ntp package, that is not installed by
default.
Client configuration is located in the /system ntp client console path, and the "System > NTP Client" WinBox
window. This configuration is shared by the SNTP client implementation in the system package and the NTP client
implementation in the ntp package. When ntp package is installed and enabled, the SNTP client is disabled
automatically.
• enabled (yes or no; default value: no)
• mode (One of broadcast or unicast; default value: broadcast) : In broadcast mode, client does not send any
requests, and listens for the broadcast messages sent by the NTP server. In unicast mode client periodically sends
requests to the currently selected active server, and waits for a reply message from that server.
• primary-ntp, secondary-ntp (IP address) : IP addresses of the NTP servers. These properties have effect only
when mode=unicast. Value 0.0.0.0 is ignored. If both values are zero and mode is unicast then SNTP client is
disabled. If both values are non-zero, then SNTP client will alternate between the two server addresses, switching
to the other when request to the current server times out or when the "KoD" packet is received, indicating that
server is not willing to respond to requiests from this client.
Status
• active-server (IP address; read-only property) : Currently selected NTP server address. This value is equal to
primary-ntp or secondary-ntp.
• poll-interval (Time interval; read-only property) : Current iterval between requests sent to the active server.
Initial value is 16 seconds, and it is increased by doubling to 15 minutes.
Last received packet information
Values of the following properties are reset when the SNTP client is stopped or restarted, either because of a
configuration change, or because of a network error.
• last-update-from (IP address; read-only property) : Source IP address of the last received NTP server packed that
was successfully processed.
• last-update-before (Time interval; read-only property) : Time since the last successfully received server
message.
• last-adjustment (Time interval; read-only property) : Amount of clock adjustment that was calculated from the
last successfully received NTP server message.
• last-bad-packet-from (IP address; read-only property) : Source IP address of last received SNTP packed that was
not successfully processed. Reason of the failure and time since this packet was received is available in the next
two properties.
• last-bad-packet-before (Time interval; read-only property) : Time since the last receive failure.
• last-bad-packet-reason (Text; read-only property) : Text that describes reason of the last receive failure. Possible
values are:
• bad-packet-length - Packet length is not in the acceptable range.
• server-not-synchronized - Leap Indicator field is set to "alarm condition" value, which means that clock on the
server has not been synchronized yet.
• zero-transmit-timestamp - Transmit Timestamp field value is 0.
• bad-mode - Value of the Mode field is neither 'server' nor 'broadcast'.
155
Manual:System/Time
• kod-ABCD - Received "KoD" (Kiss-o'-Death) response. ABCD is the short "kiss code" text from the Reference
Identifier field.
• broadcast - Received proadcast message, but mode=unicast.
• non-broadcast - Received packed was server reply, but mode=broadcast.
• server-ip-mismatch - Received response from address that is not active-server.
• originate-timestamp-mismatch - Originate Timestamp field in the server response message is not the same as
the one included in the last request.
• roundtrip-too-long - request/response roundtrip exceeded 1 second.
Log messages
SNTP client can produce the following log messages. See article "log" on how to set up logging and how to inspect
logs.
•
•
•
•
•
ntp,debug gradually adjust by OFFS
ntp,debug instantly adjust by OFFS
ntp,debug Wait for N seconds before sending next message
ntp,debug Wait for N seconds before restarting
ntp,debug,packet packet receive error, restarting
•
•
•
•
ntp,debug,packet received PKT
ntp,debug,packet ignoring received PKT
ntp,debug,packet error sending to IP, restarting
ntp,debug,packet sending to IP PKT
Explanation of log message fields
• OFFS - difference of two NTP timestamp values, in hexadecimal.
• PKT - dump of NTP packet. If packet is shorter than the minimum 48 bytes, it is dumped as a hexadecimal string.
Otherwise, packet is dumped as a list of field names and values, one per log line. Names of fields follow
RFC4330.
• IP - remote IP address.
NOTE: the above logging rules work only with the built-in SNTP client, the separate NTP package doesn't have any
logging facilities.
NTP client and server
To use NTP client and server, ntp package must be installed and enabled.
Client settings
Client configuration is located in /system ntp client.
• enabled (yes or no; default value: no)
• mode (One of broadcast, unicast, multicast or manycast.)
• primary-ntp, secondary-ntp (IP address)
156
Manual:System/Time
157
References
[1] http:/ / www. twinsun. com/ tz/ tz-link. htm
Manual:API
Summary
Application Programmable Interface (API) allows users to create custom software solutions to communicate with
RouterOS to gather information, adjust configuration and manage router. API closely follows syntax from command
line interface (CLI). It can be used to create translated or custom configuration tools to aid ease of use running and
managing routers with RouterOS.
To use API RouterOS version 3.x or newer is required.
By default API uses port #8728 and service is disabled. More on service management see in corresponding manual
section. Corresponding service name is api
Protocol
Communication with router is done by sending sentences to the router and receiving one or more sentences in return.
Sentence is sequence of words terminated by zero length word. Word is part of sentence encoded in certain way encoded length and data. Communication happen by sending sentences to the router and receiving replies to sent
sentences. Each sentence sent to router using API should contain command as a first word followed by words in no
particular order, end of sentence is marked by zero length word. When router receives full sentence (command word,
no or more attribute words and zero length word) it is evaluated and executed, then reply is formed and returned.
API words
Words are part of sentence. Each word has to be encoded in certain way - length of the word followed by word
content. Length of the word should be given as count of bytes that are going to be sent.
Length of the word is encoded as follows:
Value of length
# of bytes
Encoding
0 <= len <= 0x7F
1
len, lowest byte
0x80 <= len <= 0x3FFF
2
len | 0x8000, two lower bytes
0x4000 <= len <= 0x1FFFFF
3
len | 0xC00000, three lower bytes
0x200000 <= len <= 0xFFFFFFF 4
len | 0xE0000000
len >= 0x10000000
0xF0 and len as four bytes
5
•
•
•
•
•
Each word is encoded as length, followed by that many bytes of content;
Words are grouped into sentences. End of sentence is terminated by zero length word;
Scheme allows encoding of length up to 0x7FFFFFFFFF, only four byte length is supported;
Bytes of len are sent most significant first (network order);
If first byte of word is >= 0xF8, then it is a reserved control byte. After receiving unknown control byte API
client cannot proceed, because it cannot know how to interpret following bytes;
• Currently control bytes are not used;
In general words can be described like this <<encoded word length><word content>>. Word content can be
separated in 5 parts: command word, attribute word, API attribute word. query word and reply word
Manual:API
158
Command word
First word in sentence has to be command followed by attribute words and zero length word or terminating word.
Name of command word should begin with '/'. Names of commands closely follow CLI, with spaces replaced with '/'.
There are commands that are specific to API;
Command word structure in strict order:
• encoded length
• content prefix /
• CLI converted command
API specific commands:
getall
login
cancel
Command word concent examples:
/login
/ip/address/getall
/user/active/listen
/interface/vlan/remove
/system/reboot
Attribute word
Each command wordhave its own list of attribute words depending on content.
Atribute word structure consists of 5 parts in this order:
•
•
•
•
•
encoded length
content prefix equals sigh - =
attribute name
separating equals sign - =
value of attribute if there is one. It is possible that attribute does not have a value
Note: Value can hold multiple equal signs in the value of attribute word since the way word is encoded
Note: Value can be empty
Examples without encoded length prefix:
=address=10.0.0.1
=name=iu=c3Eeg
Manual:API
159
=disable-running-check=yes
Warning: Order of attribute words and API parameters is not important and should not be relied on
API attribute word
API attribute word structure is in strict order:
• encoded length
•
•
•
•
content prefix with dot .
attribute name
name postfixed with equals =sign
attribute value
Currently the only such API attribute is tag.
Note: If sentence contain API attribute word tag then each returned sentence in reply from router to that
tagged sentence will be tagged with same tag.
Query word
Senteces can have additional query paramteres that restrict their scope. They are explained in
detail in separate section.
Example of sentence using query word attributes:
/interface/print
?type=ether
?type=vlan
?#|!
• Query words begin with '?'.
• Currently only print command handles query words.
Warning: Order of query words is significant
Reply word
It is sent only by the router. It is only sent in response to full sentence send by the client.
• First word of reply begins with '!';
•
•
•
•
•
Each sentence sent generates at least one reply (if connection does not get terminated);
Last reply for every sentence is reply that has first word !done;
Errors and exceptional conditions begin with !trap;
Data replies begin with !re
If API connection is closed, RouterOS sends !fatal with reason as reply and then closes the connection;
Manual:API
160
API sentences
API sentence is main object of communication using API.
•
•
•
•
•
Empty sentences are ignored.
Sentence is processed after receiving zero length word.
There is a limit on number and size of sentences client can send before it has logged in.
Order of attribute words should not be relied on. As order and count is changeable by .proplist attribute.
Sentence structure is as follows:
• First word should contain command word;
• Should contain zero length word to terminate the sentence;
• Can contain none or several attribute words. There is no particular order at what attribute words has to be sent
in the sentence, order is not important for attribute words;
• Can contain none or several query words. Order of query words in the sentence is important.
Note: Zero length word terminates the sentence. If it is not provided router will not start to evaluate sent
words and will consider all the input as part of the same sentence.
Initial login
/login
!done
=ret=ebddd18303a54111e2dea05a92ab46b4
/login
=name=admin
=response=001ea726ed53ae38520c8334f82d44c9f2
!done
Note: that each command and response ends with an empty word.
• First, clients sends /login command.
• Reply contains =ret=challenge argument.
• Client sends second /login command, with =name=username and
=response=response.
• In case of error, reply contains =ret=error message.
• In case of successful login client can start to issue commands.
Manual:API
161
Tags
• It is possible to run several commands simultaneously, without waiting for previous one to complete. If API client
is doing this and needs to differentiate command responses, it can use 'tag' API parameter in command sentences.
• If you include 'tag' parameter with non-empty value in command sentence, then 'tag' parameter with exactly the
same value will be included in all responses generated by this command.
• If you do not include 'tag' parameter or it's value is empty, then all responses for this command will not have 'tag'
parameter.
Command description
• /cancel
•
•
•
•
optional argument: =tag=tag of command to cancel, without it cancels all running commands
does not cancel itself
all canceled commands are interruped and in the usual case generate '!trap' and '!done' responses
please note that /cancel is separate command and can have it's own unique '.tag' parameter, that is not
related to '=tag' argument of this command
• listen
• listen command is avaliable where console print command is available, but it does not have expected effect
everywhere (i.e. may not work)
• !re sentences are generated as something changes in particular item list
• when item is deleted or dissapears in any other way, the '!re' sentence includes value '=.dead=yes'
• This command does not terminate. To terminate it use /cancel command.
• getall
• getall command is available where console print command is available. Since version 3.21 getall is an
alias for print.
• replies contain =.id=Item internal number property.
• print
• API print command differs from the console counterpart in the following ways:
• where argument is not supported. Items can be filtered using query words (see below).
• .proplist argument is a comma separated list of property names that should be included for the returned
items.
•
•
•
•
returned items may have additional properties.
order of returned properties is not defined.
if list contains duplicate entries, handling of such entries is not defined.
if propery is present in .proplist, but absent from the item, then that item does not have this property
value (?name will evaluate to false for that item).
• if .proplist is absent, all properties are included as requested by print command, even those that
have slow access time (such as file contents and perfomance counters). Thus use of .proplist is
encouraged. Omission of .proplist may have high perfomance penalty if =detail= argument is set.
Manual:API
162
Queries
print command accepts query words that limit set of returned sentences. This feature is available since RouterOS
3.21.
•
•
•
•
Query words begin with '?'.
Order of query words is significant. Query is evaluated starting from the first word.
Query is evaluated for each item in the list. If query succeeds, item is processed, if query fails, item is ignored.
Query is evaluated using a stack of boolean values. Initially stack contains infinite amount of 'true' values. At the
end of evaluation, if stack contains at least one 'false' value, query fails.
• Query words operate according to the following rules:
Query
Desciption
?name
pushes 'true' if item has value of property name,
'false' if it does not.
?-name
pushes 'true' if item does not have value of property
name, 'false' otherwise.
?name=x
?=name=x
pushes 'true' if property name has value equal to x,
'false' otherwise.
?<name=''x''''' |style="border-bottom:1px solid gray;" valign="top"| pushes 'true' if
property ''name'' has value less than ''x'', 'false' otherwise. ||style="border-bottom:1px solid gray;" valign="top"|'''?>name=x
pushes 'true' if property name has value greater than
x, 'false' otherwise.
?#operations
applies operations to the values in the stack.
•
•
•
•
•
•
•
•
•
Examples:
• Get all ethernet and VLAN interfaces:
/interface/print
?type=ether
?type=vlan
?#|
• Get all routes that have non-empty comment:
/ip/route/print
?>comment=
• Forum thread with detailed explanation of use of queries [1]
operation string is evaluated left to right.
sequence of decimal digits followed by any
other character or end of word is interpreted as a
stack index. top value has index 0.
index that is followed by a character pushes
copy of value at that index.
index that is followed by the end of word
replaces all values with the value at that index.
! character replaces top value with the opposite.
& pops two values and pushes result of logical
'and' operation.
| pops two values and pushes result of logical
'or' operation.
. after an index does nothing.
. after another character pushes copy of top
value.
Manual:API
163
OID
print command can return OID values for properties that are available in SNMP. This feature appeared in 3.23
version.
In console, OID values can be seen by running 'print oid' command. In API, these properties have name that ends
with ".oid", and can be retrieved by adding their name to the value of '.proplist'. An example:
/system/resource/print
=.proplist=uptime,cpu-load,uptime.oid,cpu-load.oid
!re
=uptime=01:22:53
=cpu-load=0
=uptime.oid=.1.3.6.1.2.1.1.3.0
=cpu-load.oid=.1.3.6.1.2.1.25.3.3.1.2.1
!done
!trap
When for some reason API sentence fails trap is sent in return accompanied with message attribute and on some
occasions category argument.
message
When API sentence fails some generic message or message from used internal process is return to give more details
about failure
<<<
<<<
<<<
<<<
>>>
>>>
>>>
/ip/address/add
=address=192.168.88.1
=interface=asdf
!trap
=category=1
=message=input does not match any value of interface
category
if it is a general error, it is categorized and error category is returned. possible values for this attribute are
•
•
•
•
•
•
•
•
0 - missing item or command
1 - argument value failure
2 - execution of command interrupted
3 - scripting related failure
4 - general failure
5 - API related failure
6 - TTY related failure
7 - value generated with :return command
Manual:API
164
Command examples
/system/package/getall
/system/package/getall
!re
=.id=*5802
=disabled=no
=name=routeros-x86
=version=3.0beta2
=build-time=oct/18/2006 16:24:41
=scheduled=
!re
=.id=*5805
=disabled=no
=name=system
=version=3.0beta2
=build-time=oct/18/2006 17:20:46
=scheduled=
... more !re sentences ...
!re
=.id=*5902
=disabled=no
=name=advanced-tools
=version=3.0beta2
=build-time=oct/18/2006 17:20:49
=scheduled=
!done
/user/active/listen
Manual:API
165
/user/active/listen
!re
=.id=*68
=radius=no
=when=oct/24/2006 08:40:42
=name=admin
=address=0.0.0.0
=via=console
!re
=.id=*68
=.dead=yes
... more !re sentences ...
/cancel, simultaneous commands
/login
!done
=ret=856780b7411eefd3abadee2058c149a3
/login
=name=admin
=response=005062f7a5ef124d34675bf3e81f56c556
!done
-- first start listening for interface changes (tag is 2)
/interface/listen
.tag=2
-- disable interface (tag is 3)
/interface/set
=disabled=yes
=.id=ether1
.tag=3
-- this is done for disable command (tag 3)
!done
.tag=3
-- enable interface (tag is 4)
/interface/set
=disabled=no
Manual:API
166
=.id=ether1
.tag=4
-- this update is generated by change made by first set command (tag 3)
!re
=.id=*1
=disabled=yes
=dynamic=no
=running=no
=name=ether1
=mtu=1500
=type=ether
.tag=2
-- this is done for enable command (tag 4)
!done
.tag=4
-- get interface list (tag is 5)
/interface/getall
.tag=5
-- this update is generated by change made by second set command (tag 4)
!re
=.id=*1
=disabled=no
=dynamic=no
=running=yes
=name=ether1
=mtu=1500
=type=ether
.tag=2
-- these are replies to getall command (tag 5)
!re
=.id=*1
=disabled=no
=dynamic=no
=running=yes
=name=ether1
=mtu=1500
=type=ether
.tag=5
Manual:API
167
!re
=.id=*2
=disabled=no
=dynamic=no
=running=yes
=name=ether2
=mtu=1500
=type=ether
.tag=5
-- here interface getall ends (tag 5)
!done
.tag=5
-- stop listening - request to cancel command with tag 2, cancel itself uses tag 7
/cancel
=tag=2
.tag=7
-- listen command is interrupted (tag 2)
!trap
=category=2
=message=interrupted
.tag=2
-- cancel command is finished (tag 7)
!done
.tag=7
-- listen command is finished (tag 2)
!done
.tag=2
Example client
•
•
•
•
•
this is simple API client in Python2
example for Python3
usage: api.py ip-address username password
after that type words from keyboard, terminating them with newline
Since empty word terminates sentence, you should press enter twice after last word before sentence will be sent to
router.
#!/usr/bin/python
import sys, posix, time, md5, binascii, socket, select
Manual:API
class ApiRos:
"Routeros api"
def __init__(self, sk):
self.sk = sk
self.currenttag = 0
def login(self, username, pwd):
for repl, attrs in self.talk(["/login"]):
chal = binascii.unhexlify(attrs['=ret'])
md = md5.new()
md.update('\x00')
md.update(pwd)
md.update(chal)
self.talk(["/login", "=name=" + username,
"=response=00" + binascii.hexlify(md.digest())])
def talk(self, words):
if self.writeSentence(words) == 0: return
r = []
while 1:
i = self.readSentence();
if len(i) == 0: continue
reply = i[0]
attrs = {}
for w in i[1:]:
j = w.find('=', 1)
if (j == -1):
attrs[w] = ''
else:
attrs[w[:j]] = w[j+1:]
r.append((reply, attrs))
if reply == '!done': return r
def writeSentence(self, words):
ret = 0
for w in words:
self.writeWord(w)
ret += 1
self.writeWord('')
return ret
def readSentence(self):
r = []
while 1:
w = self.readWord()
if w == '': return r
168
Manual:API
169
r.append(w)
def writeWord(self, w):
print "<<< " + w
self.writeLen(len(w))
self.writeStr(w)
def readWord(self):
ret = self.readStr(self.readLen())
print ">>> " + ret
return ret
def writeLen(self, l):
if l < 0x80:
self.writeStr(chr(l))
elif l < 0x4000:
l |= 0x8000
self.writeStr(chr((l >> 8) & 0xFF))
self.writeStr(chr(l & 0xFF))
elif l < 0x200000:
l |= 0xC00000
self.writeStr(chr((l >> 16) & 0xFF))
self.writeStr(chr((l >> 8) & 0xFF))
self.writeStr(chr(l & 0xFF))
elif l < 0x10000000:
l |= 0xE0000000
self.writeStr(chr((l >> 24) & 0xFF))
self.writeStr(chr((l >> 16) & 0xFF))
self.writeStr(chr((l >> 8) & 0xFF))
self.writeStr(chr(l & 0xFF))
else:
self.writeStr(chr(0xF0))
self.writeStr(chr((l >> 24) & 0xFF))
self.writeStr(chr((l >> 16) & 0xFF))
self.writeStr(chr((l >> 8) & 0xFF))
self.writeStr(chr(l & 0xFF))
def readLen(self):
c = ord(self.readStr(1))
if (c & 0x80) == 0x00:
pass
elif (c & 0xC0) == 0x80:
c &= ~0xC0
c <<= 8
c += ord(self.readStr(1))
elif (c & 0xE0) == 0xC0:
c &= ~0xE0
Manual:API
170
c
c
c
c
<<= 8
+= ord(self.readStr(1))
<<= 8
+= ord(self.readStr(1))
elif (c & 0xF0) == 0xE0:
c &= ~0xF0
c <<= 8
c += ord(self.readStr(1))
c <<= 8
c += ord(self.readStr(1))
c <<= 8
c += ord(self.readStr(1))
elif (c & 0xF8) == 0xF0:
c = ord(self.readStr(1))
c <<= 8
c += ord(self.readStr(1))
c <<= 8
c += ord(self.readStr(1))
c <<= 8
c += ord(self.readStr(1))
return c
def writeStr(self, str):
n = 0;
while n < len(str):
r = self.sk.send(str[n:])
if r == 0: raise RuntimeError, "connection closed by remote end"
n += r
def readStr(self, length):
ret = ''
while len(ret) < length:
s = self.sk.recv(length - len(ret))
if s == '': raise RuntimeError, "connection closed by remote end"
ret += s
return ret
def main():
s = socket.socket(socket.AF_INET, socket.SOCK_STREAM)
s.connect((sys.argv[1], 8728))
apiros = ApiRos(s);
apiros.login(sys.argv[2], sys.argv[3]);
inputsentence = []
while 1:
r = select.select([s, sys.stdin], [], [], None)
Manual:API
171
if s in r[0]:
# something to read in socket, read sentence
x = apiros.readSentence()
if sys.stdin in r[0]:
# read line from input and strip off newline
l = sys.stdin.readline()
l = l[:-1]
# if empty line, send sentence and start with new
# otherwise append to input sentence
if l == '':
apiros.writeSentence(inputsentence)
inputsentence = []
else:
inputsentence.append(l)
if __name__ == '__main__':
main()
Example run:
debian@localhost:~/api-test$ ./api.py 10.0.0.1 admin ''
<<< /login
<<<
>>> !done
>>> =ret=93b438ec9b80057c06dd9fe67d56aa9a
>>>
<<< /login
<<< =name=admin
<<< =response=00e134102a9d330dd7b1849fedfea3cb57
<<<
>>> !done
>>>
/user/getall
<<<
<<<
>>>
>>>
>>>
>>>
>>>
>>>
>>>
>>>
>>>
>>>
/user/getall
!re
=.id=*1
=disabled=no
=name=admin
=group=full
=address=0.0.0.0/0
=netmask=0.0.0.0
!done
Manual:API
References
[1] http:/ / forum. mikrotik. com/ viewtopic. php?f=2& t=72298
Manual:IP/Proxy
Applies to RouterOS: v3, v4
Summary
Sub-menu: /ip proxy
Standards: RFC 1945, RFC 2616
MikroTik RouterOS performs proxying of HTTP and HTTP-proxy (for FTP, HTTP and HTTPS protocols) requests.
Proxy server performs Internet object cache function by storing requested Internet objects, i.e., data available via
HTTP and FTP protocols on a system positioned closer to the recipient in the form of speeding up customer
browsing by delivering them requested file copies from proxy cache at local network speed. MikroTik RouterOS
implements the following proxy server features:
• Regular HTTP proxy – customer (itself) specify what is proxy server for him
• Transparent proxy – customer does not know about the proxy being enabled and there isn’t need any additional
configuration for web browser of client.
• Access list by source, destination, URL and requested method (HTTP firewall)
• Cache access list to specify which objects to cache, and which not.
• Direct Access List – to specify which resources should be accessed directly, and which - through another proxy
server
• Logging facility – allows to get and to store information about proxy operation
• Parent proxy support – allows to specify other proxy server, ('if they don’t have the requested object ask their
parents, or to the original server.)
A proxy server usually is placed at various points between users and the destination server (also known as origin
server) on the Internet. (see Figure 10.1).
172
Manual:IP/Proxy
173
A Web proxy (cache) watches requests coming from client, saving copies of the responses for itself. Then, if there is
another request for the same URL, it can use the response that it has, instead of asking the origin server for it again.
If proxy has not requested file, it downloads that from the original server.
There can be many potential purpose of proxy server:
• To decrease access speed to resources (it takes less time for the client to get the object).
• Works as HTTP firewall (deny access to undesirable web pages),
Allows to filter web content (by specific parameters, like source address, destination address and port, URL, HTTP
request method) scan outbound content, e.g., for data leak protection.
Note: it may be useful to have Web proxy running even with no cache when you want to use it only as
something like HTTP and FTP firewall (for example, denying access undesired web pages or deny specific
type of files e.g. .mp3 files) or to redirect requests to external proxy (possibly, to a proxy with caching
functions) transparently.
Manual:IP/Proxy
174
Proxy configuration example
In MikroTik RouterOS proxy configuration is performed in /ip proxy menu. See below how to enable the proxy on
port 8080 and set up 195.10.10.1 as proxy source address:
[admin@MikroTik] ip proxy> set enabled=yes port=8080 src-address=195.10.10.1
[admin@MikroTik] ip proxy> print
enabled: yes
src-address: 195.10.10.1
port: 8080
parent-proxy: 0.0.0.0:0
cache-drive: system
cache-administrator: "[email protected]"
max-disk-cache-size: none
max-ram-cache-size: 100000KiB
cache-only-on-disk: yes
maximal-client-connections: 1000
maximal-server-connections: 1000
max-fresh-time: 3d
When setting up regular proxy service, make sure it serves only your clients and prevent unauthorised access to it by
creating firewall that allow only your clients to use proxy, otherwise it may be used as an open proxy.
Remember that regular proxy require also client’s web browser configuration.
For example:
Explorer 8.x
Firefox 3.x
Opera 10.x
Select Tools>Internet options.
Select Tools>Options.
Select Tool>Preferences.
Click the Connections tab.
Click the Advanced tab.
Open the Advanced tab/Network.
Select the necessary connection and choose Settings button. Open the Network tab.
Click the Proxy servers.
Configure proxy address and port.
Enter proxy address and port.
Click the Connection/Settings
Select Manual proxy configuration'
Transparent proxy configuration example
RouterOS can also act as a Transparent Caching server, with no configuration required in the customer’s web
browser. Transparent proxy does not modify requested URL or response. RouterOS will take all HTTP requests and
redirect them to the local proxy service. This process will be entirely transparent to the user (users may not know
anything about proxy server that is located between them and original server), and the only difference to them will
be the increased browsing speed.
To enable the transparent mode, firewall rule in destination NAT has to be added, specifying which connections (to
which ports) should be transparently redirected to the proxy. Check proxy settings above and redirect us users
(192.168.1.0/24) to proxy server.
[admin@MikroTik] ip firewall nat> add chain=dstnat protocol=tcp src-address=192.168.1.0/24 \
dst-port=80 action=redirect to-ports=8080
[admin@MikroTik] ip firewall nat> print
Flags: X - disabled, I - invalid, D - dynamic
Manual:IP/Proxy
0
175
chain=dstnat protocol=tcp dst-port=80 action=redirect to-ports=8000
[admin@MikroTik] ip firewall nat>
The web proxy can be used as transparent and normal web proxy at the same time. In transparent mode it is possible
to use it as standard web proxy, too. However, in this case, proxy users may have trouble to reach web pages which
are accessed transparently.
Proxy based firewall – Access List
Access list is implemented in the same way as MikroTik firewall rules processed from the top to the bottom. First
matching rule specifies decision of what to do with this connection. Connections can be matched by its source
address, destination address, destination port, sub-string of requested URL (Uniform Resource Locator) or request
method. If none of these parameters is specified, every connection will match this rule.
If connection is matched by a rule, action property of this rule specifies whether connection will be allowed or not
(deny). If connection does not match any rule, it will be allowed.
In this example assume that we have configured transparent proxy server as given in example above.
Block particular Websites.
/ip proxy access add dst-host=www.facebook.com action=deny
It will block website http:/ / www. facebook. com [1], we can always block the same for different networks by giving
src-address.
/ip proxy access add src-address=192.168.1.0/24 dst-host=www.facebook.com action=deny
Users from network 192.168.1.0/24 will not be able to access website www.facebook.com [1].
You can block also websites that contain specific words in URL:
/ip proxy access add dst-host=:mail action=deny
This statement will block all websites which contain word “mail” in URL. Like www.mail.com
www.hotmail.com [3], mail.yahoo.com etc.
[2]
,
We can also stop downloading specific types of files like .flv, .avi, .mp4, .mp3, .exe, .dat, …etc.
/ip
add
add
add
add
add
add
proxy access
path=*.flv action=deny
path=*.avi action=deny
path=*.mp4 action=deny
path=*.mp3 action=deny
path=*.zip action=deny
path=*.rar action=deny.
Here are available also different wildcard characters, to creating specific conditions and to match it by proxy access
list.
Wildcard properties (dst-host and dst-path) match a complete string (i.e., they will not match "example.com" if they
are set to "example"). Available wildcards are '*' (match any number of any characters) and '?' (match any one
character).
Regular expressions are also accepted here, but if the property should be treated as a regular expression, it should
start with a colon (':').
To show that no symbols are allowed before the given pattern, we use ^ symbol at the beginning of the pattern.
To specify that no symbols are allowed after the given pattern, we use $ symbol at the end of the pattern.
Manual:IP/Proxy
176
Reference
List of all available parameters and commands per menu.
General
Sub-menu: /ip proxy
Property
Description
always-from-cache (yes | no; Default:
no)
cache-administrator (string; Default:
webmaster)
Administrator's e-mail displayed on proxy error page
cache-hit-dscp (integer: 0..63; Default:
4)
cache-on-disk (yes | no; Default: no)
max-cache-size (none | unlimited |
integer: 0..4294967295; Default: none)
Specifies the maximal cache size, measured in kibibytes
max-client-connections (integer:
1..5000; Default: 600)
Maximal number of connections accepted from clients (any further connections will be rejected)
max-fresh-time (time; Default: 3d)
Maximal time to store a cached object. The validity period of an object is is usually defined by the
object itself, but in case it is set too high, you can override the maximal value
max-server-connections (integer:
1..5000; Default: 600)
Maximal number of connections made to servers (any further connections from clients will be put
on hold until some server connections will terminate)
parent-proxy (Ip4 | ip6; Default: 0.0.0.0) IP address and port of another HTTP proxy to redirect all requests to. If set to 0.0.0.0 parent proxy
is not used.
parent-proxy-port (integer: 0..65535;
Default: 0)
Port that parent proxy is listening on.
port (integer: 0..65535; Default: 8080)
TCP port the proxy server will be listening on. This port have to be specified on all clients that
want to use the server as HTTP proxy. Transparent (with zero configuration for clients) proxy
setup can be made by redirecting HTTP requests to this port in IP firewall using destination NAT
feature
serialize-connections (yes | no;
Default: no)
src-address (Ip4 | Ip6; Default: 0.0.0.0)
Proxy will use specified address when connecting to parent proxy or web site. If set to 0.0.0.0 then
appropriate IP address will be taken from routing table.
Access List
Sub-menu: /ip proxy access
Access list is configured like a regular firewall rules. Rules are processed from the top to the bottom. First matching
rule specifies decision of what to do with this connection. There is a total of 6 classifiers that specify matching
constraints. If none of these classifiers is specified, the particular rule will match every connection.
If connection is matched by a rule, action property of this rule specifies whether connection will be allowed or not. If
the particular connection does not match any rule, it will be allowed.
Manual:IP/Proxy
177
Property
Description
action (allow | deny; Default: allow)
Specifies whether to pass or deny matched packets
dst-address (Ip4[-Ip4 | /0..32] | Ip6/0..128; Default: Destination address of the target server.
)
dst-host (string; Default: )
IP address or DNS name used to make connection the target server (this is the string user
wrote in browser before specifying port and path to a particular web page
dst-port (integer[-integer[,integer[,...]]]: 0..65535;
Default: )
List or range of ports the packet is destined to
local-port (integer: 0..65535; Default: )
Specifies the port of the web proxy via which the packet was received. This value should
match one of the ports web proxy is listening on.
method (any | connect | delete | get | head | options |
post | put | trace; Default: )
HTTP method used in the request (see HTTP Methods section in the end of this
document)
path (string; Default: )
Name of the requested page within the target server (i.e. the name of a particular web
page or document without the name of the server it resides on)
redirect-to (string; Default: )
In case access is denied by this rule, the user shall be redirected to the URL specified
here
src-address (Ip4[-Ip4 | /0..32] | Ip6/0..128; Default: Source address of the connection originator.
)
Read only properties:
Property
Description
hits (integer) Count of requests that were matched by this rule
Wildcard properties (dst-host and dst-path) match a complete string (i.e., they will not match "example.com" if they
are set to "example"). Available wildcards are '*' (match any number of any characters) and '?' (match any one
character). Regular expressions are also accepted here, but if the property should be treated as a regular expression, it
should start with a colon (':').
Small hints in using regular expressions:
•
•
•
•
•
\\ symbol sequence is used to enter \ character in console
\. pattern means . only (in regular expressions single dot in pattern means any symbol)
to show that no symbols are allowed before the given pattern, we use ^ symbol at the beginning of the pattern
to specify that no symbols are allowed after the given pattern, we use $ symbol at the end of the pattern
to enter [ or ] symbols, you should escape them with backslash \.
It is strongly recommended to deny all IP addresses except those behind the router as the proxy still may be used to
access your internal-use-only (intranet) web servers. Also, consult examples in Firewall Manual on how to protect
your router.
Manual:IP/Proxy
178
Direct Access
Sub-menu: /ip proxy direct
If parent-proxy property is specified, it is possible to tell proxy server whether to try to pass the request to the
parent proxy or to resolve it connecting to the requested server directly. Direct Access List is managed just like
Proxy Access List described in the previous chapter except the action argument.
Unlike the access list, the direct proxy access list has default action equal to deny. It takes place when no rules are
specified or a particular request did not match any rule.
Property
Description
action (allow | deny; Default: allow)
Specifies the action to perform on matched packets:
•
•
allow - always resolve matched requests directly bypassing the parent router
deny - resolve matched requests through the parent proxy. If no one is specified this
has the same effect as allow.
dst-address (Ip4[-Ip4 | /0..32] | Ip6/0..128; Default: Destination address of the target server.
)
dst-host (string; Default: )
IP address or DNS name used to make connection the target server (this is the string user
wrote in browser before specifying port and path to a particular web page
dst-port (integer[-integer[,integer[,...]]]: 0..65535;
Default: )
List or range of ports used by connection to target server.
local-port (integer: 0..65535; Default: )
Specifies the port of the web proxy via which the packet was received. This value should
match one of the ports web proxy is listening on.
method (any | connect | delete | get | head | options |
post | put | trace; Default: )
HTTP method used in the request (see HTTP Methods section in the end of this
document)
path (string; Default: )
Name of the requested page within the target server (i.e. the name of a particular web
page or document without the name of the server it resides on)
src-address (Ip4[-Ip4 | /0..32] | Ip6/0..128; Default: Source address of the connection originator.
)
Read only properties:
Property
Description
hits (integer) Count of requests that were matched by this rule
Cache Management
Sub-menu: /ip proxy cache
Cache access list specifies, which requests (domains, servers, pages) have to be cached locally by web proxy, and
which not. This list is implemented exactly the same way as web proxy access list. Default action is to cache object
(if no matching rule is found).
Manual:IP/Proxy
179
Property
Description
action (allow | deny; Default: allow)
Specifies the action to perform on matched packets:
•
•
allow - cache objects from matched request
deny - do not cache objects from matched request
dst-address (Ip4[-Ip4 | /0..32] | Ip6/0..128; Default: Destination address of the target server
)
dst-host (string; Default: )
IP address or DNS name used to make connection the target server (this is the string user
wrote in browser before specifying port and path to a particular web page
dst-port (integer[-integer[,integer[,...]]]: 0..65535;
Default: )
List or range of ports the packet is destined to.
local-port (integer: 0..65535; Default: )
Specifies the port of the web proxy via which the packet was received. This value should
match one of the ports web proxy is listening on.
method (any | connect | delete | get | head | options |
post | put | trace; Default: )
HTTP method used in the request (see HTTP Methods section in the end of this
document)
path (string; Default: )
Name of the requested page within the target server (i.e. the name of a particular web
page or document without the name of the server it resides on)
src-address (Ip4[-Ip4 | /0..32] | Ip6/0..128; Default: Source address of the connection originator
)
Read only properties:
Property
Description
hits (integer) Count of requests that were matched by this rule
Connections
Sub-menu: /ip proxy connections
This menu conntains the list of current connections the proxy is serving.
Read only properties:
Property
Description
client ()
dst-address (Ip4 | Ip6)
IPv4/Ipv6 destination address of the connection
protocol (string)
Protocol name
rx-bytes (integer)
The amount of bytes received by the client
server ()
src-address (Ip4 | Ip6)
Ipv4/ipv6 address of the connection originator
Manual:IP/Proxy
180
state (closing | connecting | converting | hotspot | idle | resolving | rx-header |
tx-body | tx-eof | tx-header | waiting)
Connection state:
•
•
•
•
•
•
•
•
•
•
•
tx-bytes (integer)
closing - the data transfer is finished, and the
connection is being finalized
connecting - establishing toe connection
converting - replacing header and footer fields in
response or request paket
hotspot - check if hotspot authentication allows to
continue (for hotspot proxy)
idle - staying idle
resolving - resolving server's DNS name
rx-header - receiving HTTP header
tx-body - transmitting HTTP body to the client
tx-eof - writing chunk-end (when converting to
chunked response)
tx-header - transmitting HTTP header to the client
waiting - waiting for transmission form a peer
The amount of bytes sent by the client
Cache Inserts
Sub-menu: /ip proxy inserts
This menu shows statistics on objects stored in cache (cache inserts).
Read only properties:
Property
Description
denied (integer)
Number of inserts denied by the caching list.
errors (integer)
Number of disk or other system-related errors
no-memory (integer) Number of objects not stored because there was not enough memory
successes (integer) Number of successfull cache inserts.
too-large (integer) Number of objects too large to store
Cache Lookups
Sub-menu: /ip proxy lookup
This menu shows statistics on objects read from cache (cache lookups).
Read only properties:
Property
Description
denied (integer)
Number of requests denied by the access list.
expired (integer)
Number of requests found in cache, but expired, and, thus, requested from an external server
no-expiration-info
(integer)
Conditional request received for a page that does not have the information to compare the request with
non-cacheable (integer)
Number of requests requested from the external servers unconditionally (as their caching is denied by the cache
access list)
not-found (integer)
Number of requests not found in the cache, and, thus, requested from an external server (or parent proxy if
configured accordingly)
successes (integer)
Number of requests found in the cache.
Manual:IP/Proxy
181
Cache Contents
Sub-menu: /ip proxy cache-contents
This menu shows cached contents.
Read only properties:
Property
file-size (integer)
Description
Cached object size
last-accessed (time)
last-accessed-time (time)
last-modified (time)
last-modified-time (time)
uri (string)
HTTP Methods
Options
This method is a request of information about the communication options available on the chain between the client
and the server identified by the Request-URI. The method allows the client to determine the options and (or) the
requirements associated with a resource without initiating any resource retrieval
GET
This method retrieves whatever information identified by the Request-URI. If the Request-URI refers to a data
processing process than the response to the GET method should contain data produced by the process, not the source
code of the process procedure(-s), unless the source is the result of the process.
The GET method can become a conditional GET if the request message includes an If-Modified-Since,
If-Unmodified-Since, If-Match, If-None-Match, or If-Range header field. The conditional GET method is used to
reduce the network traffic specifying that the transfer of the entity should occur only under circumstances described
by conditional header field(-s).
The GET method can become a partial GET if the request message includes a Range header field. The partial GET
method intends to reduce unnecessary network usage by requesting only parts of entities without transferring data
already held by client.
The response to a GET request is cacheable if and only if it meets the requirements for HTTP caching.
HEAD
This method shares all features of GET method except that the server must not return a message-body in the
response. This retrieves the metainformation of the entity implied by the request which leads to a wide usage of it for
testing hypertext links for validity, accessibility, and recent modification.
The response to a HEAD request may be cacheable in the way that the information contained in the response may be
used to update previously cached entity identified by that Request-URI.
Manual:IP/Proxy
POST
This method requests that the origin server accept the entity enclosed in the request as a new subordinate of the
resource identified by the Request-URI.
The actual action performed by the POST method is determined by the origin server and usually is Request-URI
dependent.
Responses to POST method are not cacheable, unless the response includes appropriate Cache-Control or Expires
header fields.
PUT
This method requests that the enclosed entity be stored under the supplied Request-URI. If another entity exists
under specified Request-URI, the enclosed entity should be considered as updated (newer) version of that residing on
the origin server. If the Request-URI is not pointing to an existing resource, the origin server should create a resource
with that URI.
If the request passes through a cache and the Request-URI identifies one or more currently cached entities, those
entries should be treated as stale. Responses to this method are not cacheable.
TRACE
This method invokes a remote, application-layer loop-back of the request message. The final recipient of the request
should reflect the message received back to the client as the entity-body of a 200 (OK) response. The final recipient
is either the origin server or the first proxy or gateway to receive a Max-Forwards value of 0 in the request. A
TRACE request must not include an entity.
Responses to this method MUST NOT be cached.
[ Top | Back to Content ]
References
[1] http:/ / www. facebook. com
[2] http:/ / www. mail. com
[3] http:/ / www. hotmail. com
182
Manual:Tools/Fetch
183
Manual:Tools/Fetch
Applies to RouterOS: v3, v4 +
Summary
Sub-menu: /tool fetch
Standards:
Fetch is one of the console tools in Mikrotik RouterOS. It is used to copy files from any network device to a
Mikrotik router via HTTP or FTP.
In latest v5 versions it is possible also to upload files to remote locations.
Fetch now supports HTTPS protocol. By default no certificate checks are made, but setting check-certificate to yes
enables trust chain validation from local certificate store. CRL checking is never done.
Properties
Property
address (string; Default: )
Description
IP address of the device to copy file from.
ascii (yes | no; Default: no)
check-certificate (yes | no;
Default: no)
Enables trust chain validation from local certificate store.
dst-path (string; Default: )
Destination filename and path
host (string; Default: )
Domain name or virtual domain name (if used on web-site, from which you want to copy information).
For example,
address=wiki.mikrotik.com host=forum.mikrotik.com
In this example the resolved ip address is the same (66.228.113.27), but hosts are different.
keep-result (yes | no; Default: yes)
If yes, creates an input file.
mode (ftp|http|tftp {!} https; Default:
http)
Choose the protocol of connection - http, https , ftp or tftp.
password (string; Default:
anonymous)
Password, which is needed for authentication to the remote device.
port (integer; Default: )
Connection port.
src-path (string; Default: )
Title of the remote file you need to copy.
upload (yes | no; Default: no)
If enabled then fetch will be used to upload file to remote server. Requires src-path and dst-path
parameters to be set.
url (string; Default: )
URL pointing to file. Can be used instead of address and src-path parameters.
user (string; Default: anonymous)
User name, which is needed for authentication to the remote device.
Manual:Tools/Fetch
184
Examples
The following example shows how to copy the file with filename "conf.rsc" from device with ip address
192.168.88.2 by FTP protocol and save it as file with filename "123.rsc". User and password are needed to login into
the device.
[admin@mt-test] /tool> fetch address=192.168.88.2 src-path=conf.rsc \
user=admin mode=ftp password=123 dst-path=123.rsc port=21 \
host="" keep-result=yes
Example to upload file to other router:
[admin@mt-test] /tool> fetch address=192.168.88.2 src-path=conf.rsc \
user=admin mode=ftp password=123 dst-path=123.rsc upload=yes
Another example that demonstrates the usage of url property.
[admin@test_host] /> /tool fetch url="http://www.mikrotik.com/img/netaddresses2.pdf" mode=http
status: finished
[admin@test_host] /> /file print
# NAME
TYPE
SIZE
CREATION-TIME
.pdf file
11547
jun/01/2010 11:59:51
...
5 netaddresses2.pdf
[ Top | Back to Content ]
Article Sources and Contributors
Article Sources and Contributors
Manual:Port Source: http://wiki.mikrotik.com/index.php?oldid=25747 Contributors: Becs, Marisb
Manual:Console Source: http://wiki.mikrotik.com/index.php?oldid=22857 Contributors: Eep, Janisk, Marisb, Normis
Manual:Console login process Source: http://wiki.mikrotik.com/index.php?oldid=21955 Contributors: Eep, Janisk, Marisb, Normis
Manual:Special Login Source: http://wiki.mikrotik.com/index.php?oldid=25027 Contributors: Janisk, Marisb, Normis
Manual:System/Serial Console Source: http://wiki.mikrotik.com/index.php?oldid=20488 Contributors: Marisb, MarkSorensen, Normis
Manual:Scripting Source: http://wiki.mikrotik.com/index.php?oldid=25924 Contributors: Burek, Janisk, Marisb, Normis, Proofreader
Manual:Scripting-examples Source: http://wiki.mikrotik.com/index.php?oldid=25690 Contributors: Janisk, Marisb, Normis, Vitell
Manual:Lua Source: http://wiki.mikrotik.com/index.php?oldid=20164 Contributors: Eep, Janisk, Marisb, Normis
Manual:System/SSH client Source: http://wiki.mikrotik.com/index.php?oldid=23804 Contributors: Janisk, Marisb, Normis
Manual:IP/SSH Source: http://wiki.mikrotik.com/index.php?oldid=24660 Contributors: Janisk, Marisb, Normis
Manual:System/Log Source: http://wiki.mikrotik.com/index.php?oldid=19957 Contributors: Janisk, Marisb, Normis
Manual:System/UPS Source: http://wiki.mikrotik.com/index.php?oldid=17453 Contributors: Marisb
Manual:System/LCD Source: http://wiki.mikrotik.com/index.php?oldid=25259 Contributors: Becs, Marisb, Normis
Manual:System/GPS Source: http://wiki.mikrotik.com/index.php?oldid=21760 Contributors: Marisb, Normis
Manual:IP/Traffic Flow Source: http://wiki.mikrotik.com/index.php?oldid=25247 Contributors: Janisk, Marisb, Normis
Manual:SNMP Source: http://wiki.mikrotik.com/index.php?oldid=25273 Contributors: Janisk, Marisb, Normis, Uldis
Manual:Tools/Graphing Source: http://wiki.mikrotik.com/index.php?oldid=21173 Contributors: Marisb
Manual:Tools/Profiler Source: http://wiki.mikrotik.com/index.php?oldid=20847 Contributors: Marisb
Manual:Tools/Packet Sniffer Source: http://wiki.mikrotik.com/index.php?oldid=23105 Contributors: Janisk, Kirshteins, Marisb, SergejsB
Manual:Troubleshooting tools Source: http://wiki.mikrotik.com/index.php?oldid=22862 Contributors: Andriss, Janisk, Marisb, Normis
Manual:Grounding Source: http://wiki.mikrotik.com/index.php?oldid=25535 Contributors: Becs, Marisb, Normis
Manual:Wireless card diagnostics Source: http://wiki.mikrotik.com/index.php?oldid=21093 Contributors: Janisk, Marisb, Normis
Manual:RouterBOARD bad blocks Source: http://wiki.mikrotik.com/index.php?oldid=24124 Contributors: Becs, Janisk, Marisb, Normis
Manual:Password reset Source: http://wiki.mikrotik.com/index.php?oldid=24165 Contributors: Fbsd, Golden, Janisk, Marisb, Normis, Sizwan
Manual:Flashfig Source: http://wiki.mikrotik.com/index.php?oldid=20470 Contributors: Janisk, Maximan, Normis, SergejsB
Manual:Bootloader upgrade Source: http://wiki.mikrotik.com/index.php?oldid=23708 Contributors: Cmit, Eep, Girts, Janisk, Marisb, Normis, SergejsB, XlnEax
Manual:System/Certificates Source: http://wiki.mikrotik.com/index.php?oldid=25851 Contributors: Marisb
Manual:Create Certificates Source: http://wiki.mikrotik.com/index.php?oldid=24785 Contributors: Becs, Marisb
Manual:Tools/Traffic Generator Source: http://wiki.mikrotik.com/index.php?oldid=23242 Contributors: Marisb
Manual:Tools/Bandwidth Test Source: http://wiki.mikrotik.com/index.php?oldid=19919 Contributors: Kirshteins, Marisb
Manual:System/Note Source: http://wiki.mikrotik.com/index.php?oldid=21032 Contributors: Marisb
Manual:System/File Source: http://wiki.mikrotik.com/index.php?oldid=19362 Contributors: Marisb
Manual:System/Resource Source: http://wiki.mikrotik.com/index.php?oldid=19354 Contributors: Marisb
Manual:System/Health Source: http://wiki.mikrotik.com/index.php?oldid=21436 Contributors: Janisk, Normis
Manual:Store Source: http://wiki.mikrotik.com/index.php?oldid=23424 Contributors: Becs, Janisk, Marisb, Nest, Normis, SergejsB
Manual:System/Watchdog Source: http://wiki.mikrotik.com/index.php?oldid=23340 Contributors: Janisk, Marisb
Manual:System/Scheduler Source: http://wiki.mikrotik.com/index.php?oldid=23832 Contributors: Janisk, Marisb, Normis
Manual:System/Time Source: http://wiki.mikrotik.com/index.php?oldid=20110 Contributors: Eep, Janisk, Marisb, Normis
Manual:API Source: http://wiki.mikrotik.com/index.php?oldid=25640 Contributors: AlbertStrasheim, Eep, Janisk, Jk, Juris, Karlis, Marisb, Normis, Yangsenyu
Manual:IP/Proxy Source: http://wiki.mikrotik.com/index.php?oldid=23946 Contributors: Janisk, Marisb, Normis
Manual:Tools/Fetch Source: http://wiki.mikrotik.com/index.php?oldid=25030 Contributors: Cmarzotta, Enk, Janisk, Marisb, Mmv, Nest, Normis, Route, Rus123
185
Image Sources, Licenses and Contributors
Image Sources, Licenses and Contributors
Image:Version.png Source: http://wiki.mikrotik.com/index.php?title=File:Version.png License: unknown Contributors: Normis
Image:Icon-note.png Source: http://wiki.mikrotik.com/index.php?title=File:Icon-note.png License: unknown Contributors: Marisb, Route
Image:2009-04-06 1317.png Source: http://wiki.mikrotik.com/index.php?title=File:2009-04-06_1317.png License: unknown Contributors: Normis
Image:special-login-setup.png Source: http://wiki.mikrotik.com/index.php?title=File:Special-login-setup.png License: unknown Contributors: Marisb
Image:Icon-warn.png Source: http://wiki.mikrotik.com/index.php?title=File:Icon-warn.png License: unknown Contributors: Marisb, Route
Image:Logging2.png Source: http://wiki.mikrotik.com/index.php?title=File:Logging2.png License: unknown Contributors: Normis
Image:Logging1.png Source: http://wiki.mikrotik.com/index.php?title=File:Logging1.png License: unknown Contributors: Normis
File:Lcd.png Source: http://wiki.mikrotik.com/index.php?title=File:Lcd.png License: unknown Contributors: Normis
Image:traffic-flow-1.png Source: http://wiki.mikrotik.com/index.php?title=File:Traffic-flow-1.png License: unknown Contributors: Marisb
Image:traffic-flow-2.png Source: http://wiki.mikrotik.com/index.php?title=File:Traffic-flow-2.png License: unknown Contributors: Marisb
Image:traffic-flow-4.png Source: http://wiki.mikrotik.com/index.php?title=File:Traffic-flow-4.png License: unknown Contributors: Marisb
File:Total-download-cacti.png Source: http://wiki.mikrotik.com/index.php?title=File:Total-download-cacti.png License: unknown Contributors: Normis
file: graphing-mem.png Source: http://wiki.mikrotik.com/index.php?title=File:Graphing-mem.png License: unknown Contributors: Marisb
file: graphing-mem-winbox.png Source: http://wiki.mikrotik.com/index.php?title=File:Graphing-mem-winbox.png License: unknown Contributors: Marisb
File:profiler.png Source: http://wiki.mikrotik.com/index.php?title=File:Profiler.png License: unknown Contributors: Marisb
Image:image11001.gif Source: http://wiki.mikrotik.com/index.php?title=File:Image11001.gif License: unknown Contributors: Andriss
Image:image11002.gif Source: http://wiki.mikrotik.com/index.php?title=File:Image11002.gif License: unknown Contributors: Andriss
File:WiringT568B.png Source: http://wiki.mikrotik.com/index.php?title=File:WiringT568B.png License: unknown Contributors: Normis
Image:Screw.jpg Source: http://wiki.mikrotik.com/index.php?title=File:Screw.jpg License: unknown Contributors: Normis
File:DSC1557.jpg Source: http://wiki.mikrotik.com/index.php?title=File:DSC1557.jpg License: unknown Contributors: Normis
File:Poe shielded.jpg Source: http://wiki.mikrotik.com/index.php?title=File:Poe_shielded.jpg License: unknown Contributors: Normis
File:Option-1.jpg Source: http://wiki.mikrotik.com/index.php?title=File:Option-1.jpg License: unknown Contributors: Normis
File:Option-2.jpg Source: http://wiki.mikrotik.com/index.php?title=File:Option-2.jpg License: unknown Contributors: Normis
File:Storm1.jpg Source: http://wiki.mikrotik.com/index.php?title=File:Storm1.jpg License: unknown Contributors: Normis
File:Storm2.jpg Source: http://wiki.mikrotik.com/index.php?title=File:Storm2.jpg License: unknown Contributors: Normis
Image:Storm3.jpg Source: http://wiki.mikrotik.com/index.php?title=File:Storm3.jpg License: unknown Contributors: Normis
File:DSC0634.jpg Source: http://wiki.mikrotik.com/index.php?title=File:DSC0634.jpg License: unknown Contributors: Normis
File:DSC0633.jpg Source: http://wiki.mikrotik.com/index.php?title=File:DSC0633.jpg License: unknown Contributors: Normis
File:Dz1.jpg Source: http://wiki.mikrotik.com/index.php?title=File:Dz1.jpg License: unknown Contributors: Normis
File:Dz2.jpg Source: http://wiki.mikrotik.com/index.php?title=File:Dz2.jpg License: unknown Contributors: Normis
File:Dz3.jpg Source: http://wiki.mikrotik.com/index.php?title=File:Dz3.jpg License: unknown Contributors: Normis
File:Dc grounded.jpg Source: http://wiki.mikrotik.com/index.php?title=File:Dc_grounded.jpg License: unknown Contributors: Normis
File:Dc notgrounded.jpg Source: http://wiki.mikrotik.com/index.php?title=File:Dc_notgrounded.jpg License: unknown Contributors: Normis
Image:Block.png Source: http://wiki.mikrotik.com/index.php?title=File:Block.png License: unknown Contributors: Normis
File:262 hi res.png Source: http://wiki.mikrotik.com/index.php?title=File:262_hi_res.png License: unknown Contributors: Normis
Image:Resethole.jpg Source: http://wiki.mikrotik.com/index.php?title=File:Resethole.jpg License: unknown Contributors: Normis
File:Passw.jpg Source: http://wiki.mikrotik.com/index.php?title=File:Passw.jpg License: unknown Contributors: Normis
Image:CRW 5184.jpg Source: http://wiki.mikrotik.com/index.php?title=File:CRW_5184.jpg License: unknown Contributors: Normis
File:Flashfigdiagramm.png Source: http://wiki.mikrotik.com/index.php?title=File:Flashfigdiagramm.png License: unknown Contributors: SergejsB
File:Flashfig.png Source: http://wiki.mikrotik.com/index.php?title=File:Flashfig.png License: unknown Contributors: SergejsB
File:Flashfig2.png Source: http://wiki.mikrotik.com/index.php?title=File:Flashfig2.png License: unknown Contributors: SergejsB
File:Flashfig3.png Source: http://wiki.mikrotik.com/index.php?title=File:Flashfig3.png License: unknown Contributors: SergejsB
File:Flashfig4.png Source: http://wiki.mikrotik.com/index.php?title=File:Flashfig4.png License: unknown Contributors: SergejsB
File:Flashfig5.png Source: http://wiki.mikrotik.com/index.php?title=File:Flashfig5.png License: unknown Contributors: SergejsB
File:Flashfig6.png Source: http://wiki.mikrotik.com/index.php?title=File:Flashfig6.png License: unknown Contributors: SergejsB
File:traffic-gen-routing-ipsec.png Source: http://wiki.mikrotik.com/index.php?title=File:Traffic-gen-routing-ipsec.png License: unknown Contributors: Marisb
Image:Store.png Source: http://wiki.mikrotik.com/index.php?title=File:Store.png License: unknown Contributors: Normis
Image:image10001.gif Source: http://wiki.mikrotik.com/index.php?title=File:Image10001.gif License: unknown Contributors: Andriss
186