1
SafeNet Authentication Client (Mac) Version 8.2 Revision B User’s Guide 1 Copyright © 2012 SafeNet, Inc. All rights reserved. All attempts have been made to make the information in this document complete and accurate. SafeNet, Inc. is not responsible for any direct or indirect damages or loss of business resulting from inaccuracies or omissions. The specifications contained in this document are subject to change without notice. SafeNet and SafeNet Authentication Manager are either registered with the U.S. Patent and Trademark Office or are trademarks of SafeNet, Inc., and its subsidiaries and affiliates, in the United States and other countries. All other trademarks referenced in this Manual are trademarks of their respective owners. SafeNet Hardware and/or Software products described in this document may be protected by one or more U.S. Patents, foreign patents, or pending patent applications. Please contact SafeNet Support for details of FCC Compliance, CE Compliance, and UL Notification. Date of publication: July 2012 Last update: Monday, July 16, 2012 6:53 pm 2 Support We work closely with our reseller partners to offer the best worldwide technical support services. Your reseller is the first line of support when you have questions about products and services. However, if you require additional assistance you can contact us directly at: Telephone You can call our help-desk 24 hours a day, seven days a week: USA: 1-800-545-6608 International: +1-410-931-7520 Email You can send a question to the technical support team at the following email address: [email protected] Website You can submit a question through the SafeNet Support portal: http://c3.safenet-inc.com/secure.asp Additional Documentation The following SafeNet publications are available: SafeNet Authentication Client (Mac) 8.2 Administrator’s Guide SafeNet Authentication Client (Mac) 8.2 ReadMe 3 Table of Contents Chapter 1: Introduction . . . . . . . . . . . . . . . . . . . . . . . . . . . . . . . . . . . . . . . . . . . . 8 Overview. . . . . . . . . . . . . . . . . . . . . . . . . . . . . . . . . . . . . . . . . . . . . . . . . . . . . . . . . . . . . . . . . . . . . . . . 9 New Features . . . . . . . . . . . . . . . . . . . . . . . . . . . . . . . . . . . . . . . . . . . . . . . . . . . . . . . . . . . . . . . . . . . 10 Chapter 2: SafeNet Authentication Client User Interface . . . . . . . . . . . . . . . . . . . . 11 Overview of SafeNet Authentication Client User Interface. . . . . . . . . . . . . . . . . . . . . . . . . . . . . . . . . . . . . 12 SafeNet Authentication Client Tray Icon . . . . . . . . . . . . . . . . . . . . . . . . . . . . . . . . . . . . . . . . . . . . . . . . . 14 Launching the Tray Menu . . . . . . . . . . . . . . . . . . . . . . . . . . . . . . . . . . . . . . . . . . . . . . . . . . . . . . . . . . . . . . . . 14 Tray Icon Menu . . . . . . . . . . . . . . . . . . . . . . . . . . . . . . . . . . . . . . . . . . . . . . . . . . . . . . . . . . . . . . . . . . . . . . . 14 Hiding and Unhiding the Tray Icon . . . . . . . . . . . . . . . . . . . . . . . . . . . . . . . . . . . . . . . . . . . . . . . . . . . . . . . . . . 15 SafeNet Authentication Client Tools Main Screen . . . . . . . . . . . . . . . . . . . . . . . . . . . . . . . . . . . . . . . . . . . 16 SafeNet Authentication Client Tools Main Screen Simple View . . . . . . . . . . . . . . . . . . . . . . . . . . Authenticator Icons . . . . . . . . . . . . . . . . . . Advanced View. . . . . . . . . . . . . . . . . . . . . . . . Advanced View Functions . . . . . . . . . . . . . . Toolbar . . . . . . . . . . . . . . . . . . . . . . . . . . . . . . . . . . . . . ........................................... ........................................... ........................................... ........................................... . . . . . . . . . . . . . . . . . . . . . . . . . 17 19 21 24 26 Chapter 3: Token Initialization . . . . . . . . . . . . . . . . . . . . . . . . . . . . . . . . . . . . . . 37 Overview of Token Initialization. . . . . . . . . . . . . . . . . . . . . . . . . . . . . . . . . . . . . . . . . . . . . . . . . . . . . . . 38 Initializing a Token . . . . . . . . . . . . . . . . . . . . . . . . . . . . . . . . . . . . . . . . . . . . . . . . . . . . . . . . . . . . . . . . 39 SafeNet Authentication Client (Mac) User’s Guide, Rev. Revision B, ©2012 SafeNet, Inc. 4 Configuring Advanced Initialization Settings . . . . . . . . . . . . . . . . . . . . . . . . . . . . . . . . . . . . . . . . . . . . . . 42 Changing the Token Initialization Key. . . . . . . . . . . . . . . . . . . . . . . . . . . . . . . . . . . . . . . . . . . . . . . . . . . 46 Configuring Common Criteria Settings . . . . . . . . . . . . . . . . . . . . . . . . . . . . . . . . . . . . . . . . . . . . . . . . . . 49 Chapter 4: Token Management . . . . . . . . . . . . . . . . . . . . . . . . . . . . . . . . . . . . . . 53 Selecting the Active Token . . . . . . . . . . . . . . . . . . . . . . . . . . . . . . . . . . . . . . . . . . . . . . . . . . . . . . . . . . 55 Logging On to a Token . . . . . . . . . . . . . . . . . . . . . . . . . . . . . . . . . . . . . . . . . . . . . . . . . . . . . . . . . . . . . 56 Logging On to a Token as a User. . . . . . . . . . . . . . . . . . . . . . . . . . . . . . . . . . . . . . . . . . . . . . . . . . . . . . . . . 56 Logging On to a Token as an Administrator . . . . . . . . . . . . . . . . . . . . . . . . . . . . . . . . . . . . . . . . . . . . . . . . . 58 Importing a Certificate onto a Token . . . . . . . . . . . . . . . . . . . . . . . . . . . . . . . . . . . . . . . . . . . . . . . . . . . 59 Exporting a Certificate from a Token . . . . . . . . . . . . . . . . . . . . . . . . . . . . . . . . . . . . . . . . . . . . . . . . . . . 64 Deleting a Certificate . . . . . . . . . . . . . . . . . . . . . . . . . . . . . . . . . . . . . . . . . . . . . . . . . . . . . . . . . . . . . . 66 Changing the Token Password. . . . . . . . . . . . . . . . . . . . . . . . . . . . . . . . . . . . . . . . . . . . . . . . . . . . . . . . 68 Renaming a Token . . . . . . . . . . . . . . . . . . . . . . . . . . . . . . . . . . . . . . . . . . . . . . . . . . . . . . . . . . . . . . . . 70 Copying Token Information to the Clipboard . . . . . . . . . . . . . . . . . . . . . . . . . . . . . . . . . . . . . . . . . . . . . . 71 Changing the Administrator Password . . . . . . . . . . . . . . . . . . . . . . . . . . . . . . . . . . . . . . . . . . . . . . . . . . 72 Unlocking a Token . . . . . . . . . . . . . . . . . . . . . . . . . . . . . . . . . . . . . . . . . . . . . . . . . . . . . . . . . . . . . . . . 75 Unlocking a Token Using Set Token Password . . . . . . . . . . . . . . . . . . . . . . . . . . . . . . . . . . . . . . . . . . . . . . . . . . 76 Unlocking a Token using Challenge - Response . . . . . . . . . . . . . . . . . . . . . . . . . . . . . . . . . . . . . . . . . . . . . . . . . 77 Deleting Token Content . . . . . . . . . . . . . . . . . . . . . . . . . . . . . . . . . . . . . . . . . . . . . . . . . . . . . . . . . . . . 80 Viewing Token Information . . . . . . . . . . . . . . . . . . . . . . . . . . . . . . . . . . . . . . . . . . . . . . . . . . . . . . . . . . 82 Reader Settings . . . . . . . . . . . . . . . . . . . . . . . . . . . . . . . . . . . . . . . . . . . . . . . . . . . . . . . . . . . . . . . . . . 84 SafeNet Authentication Client (Mac) User’s Guide, Rev. Revision B, ©2012 SafeNet, Inc. 5 Chapter 5: SafeNet eToken Virtual. . . . . . . . . . . . . . . . . . . . . . . . . . . . . . . . . . . . 86 Overview of SafeNet eToken Virtual and SafeNet eToken Rescue . . . . . . . . . . . . . . . . . . . . . . . . . . . . . . . 87 Using SafeNet eToken Virtual/SafeNet eToken Rescue to Replace a Lost Token . . . . . . . . . . . . . . . . . . . . . 88 Connecting SafeNet eToken Virtual or SafeNet eToken Rescue . . . . . . . . . . . . . . . . . . . . . . . . . . . . . . . . . 89 Disconnecting SafeNet eToken Virtual or SafeNet eToken Rescue . . . . . . . . . . . . . . . . . . . . . . . . . . . . . . . 90 Unlocking SafeNet eToken Virtual . . . . . . . . . . . . . . . . . . . . . . . . . . . . . . . . . . . . . . . . . . . . . . . . . . . . . 92 Generating a One Time Password (OTP). . . . . . . . . . . . . . . . . . . . . . . . . . . . . . . . . . . . . . . . . . . . . . . . . 93 Autoconnecting SafeNet eToken Virtual . . . . . . . . . . . . . . . . . . . . . . . . . . . . . . . . . . . . . . . . . . . . . . . . . 94 Chapter 6: Token Settings . . . . . . . . . . . . . . . . . . . . . . . . . . . . . . . . . . . . . . . . . 95 Setting Password Quality . . . . . . . . . . . . . . . . . . . . . . . . . . . . . . . . . . . . . . . . . . . . . . . . . . . . . . . . . . . 96 Setting Private Data Caching . . . . . . . . . . . . . . . . . . . . . . . . . . . . . . . . . . . . . . . . . . . . . . . . . . . . . . . . 101 Setting RSA Key Secondary Authentication . . . . . . . . . . . . . . . . . . . . . . . . . . . . . . . . . . . . . . . . . . . . . . 103 Chapter 7: SafeNet Authentication Client Settings . . . . . . . . . . . . . . . . . . . . . . . . 105 Opening SafeNet Authentication Client Settings. . . . . . . . . . . . . . . . . . . . . . . . . . . . . . . . . . . . . . . . . . . 106 Client Settings Password Quality . . . . . . . . . . . . . . . . . . . . . . . . . . . . . . . . . . . . . . . . . . . . . . . . . . . . . 108 Copying User Certificates to a Local Store. . . . . . . . . . . . . . . . . . . . . . . . . . . . . . . . . . . . . . . . . . . . . . . 109 Copying CA Certificates to a Local Store . . . . . . . . . . . . . . . . . . . . . . . . . . . . . . . . . . . . . . . . . . . . . . . . 112 Enabling Single Logon . . . . . . . . . . . . . . . . . . . . . . . . . . . . . . . . . . . . . . . . . . . . . . . . . . . . . . . . . . . . 115 Allowing password quality configuration on token after initialization . . . . . . . . . . . . . . . . . . . . . . . . . . . . 116 SafeNet Authentication Client (Mac) User’s Guide, Rev. Revision B, ©2012 SafeNet, Inc. 6 Allowing only an administrator to configure password quality on token . . . . . . . . . . . . . . . . . . . . . . . . . . 117 Showing SafeNet Authentication Client Tray Icon . . . . . . . . . . . . . . . . . . . . . . . . . . . . . . . . . . . . . . . . . 118 Defining Automatic Logoff. . . . . . . . . . . . . . . . . . . . . . . . . . . . . . . . . . . . . . . . . . . . . . . . . . . . . . . . . . 119 Enabling Logging . . . . . . . . . . . . . . . . . . . . . . . . . . . . . . . . . . . . . . . . . . . . . . . . . . . . . . . . . . . . . . . . 121 Chapter 8: Licensing . . . . . . . . . . . . . . . . . . . . . . . . . . . . . . . . . . . . . . . . . . . . 122 Viewing and Importing Licenses . . . . . . . . . . . . . . . . . . . . . . . . . . . . . . . . . . . . . . . . . . . . . . . . . . . . . 123 SafeNet Authentication Client (Mac) User’s Guide, Rev. Revision B, ©2012 SafeNet, Inc. 7 1 Introduction SafeNet Authentication Client enables token operations and the implementation of token based PKI solutions. In this chapter: Overview New Features 1. Introduction / SafeNet Authentication Client (Mac) User’s Guide, Revision B, ©2012 SafeNet, Inc. 8 Overview Public Key Infrastructure (PKI) is a framework for creating a secure method for exchanging information based on public key cryptography, providing for trusted third-party vetting of, and vouching for, user identities. It is an arrangement that consists of a system of digital certificates, Certificate Authorities, and other registration authorities that verify and authenticate the validity of each party involved in an internet transaction. SafeNet’s Authentication Client enables integration with various security applications. It enables token security applications and third party applications to communicate with the token. These include token PKI solutions using PKCS#11 or proprietary token applications. SafeNet Authentication Client enables the implementation of strong two-factor authentication using standard certificates as well as encryption and digital signing of data. Generic integration with PKCS#11 security interfaces enables out-of-the-box interoperability with a variety of security applications offering secure web access, PC and data security, secure email, and more. PKI keys and certificates can be created, stored, and used securely from within token hardware or software devices. SafeNet Authentication Client can be deployed and updated using any standard software distribution system. The SafeNet Authentication Client Tools application is installed by the SafeNet Authentication Client, providing easy-to-use configuration tools for users and administrators. 1. Introduction / Overview SafeNet Authentication Client (Mac) User’s Guide, Rev. Revision B, ©2012 SafeNet, Inc. 9 New Features The following features were introduced in SafeNet Authentication Client 8.2 (Mac): Support for OS x 10.8 (Mountain Lion) Support for Common Criteria (CC) certified devices and CC digital signatures. Support for following SHA2 algorithms: SHA256, SHA384, SHA512 Support for onboard hashing: SHA1, SHA256 Licensing Activation function Certificate Expiry Alert function (For details on how to configure the Certification Expiry Alert, see SafeNet Authentication Client (Mac) 8.2 Administrator’s Guide). Support for additional tokens: SafeNet eToken Pro CC SafeNet eToken 5100/5105 SafeNet eToken 5200/5205 SafeNet eToken 7300 SafeNet iKey 2032 SafeNet iKey 4000 1. Introduction / New Features SafeNet Authentication Client (Mac) User’s Guide, Rev. Revision B, ©2012 SafeNet, Inc. 10 2 SafeNet Authentication Client User Interface This section describes how to find your way around the SafeNet Authentication Client user interface. In this chapter: Overview of SafeNet Authentication Client User Interface SafeNet Authentication Client Tray Icon SafeNet Authentication Client Tools Main Screen 2. SafeNet Authentication Client User Interface / SafeNet Authentication Client (Mac) User’s Guide, Revision B, ©2012 SafeNet, Inc. 11 Overview of SafeNet Authentication Client User Interface Administrators use SafeNet Authentication Client Tools to set token policies. Users use Tools to perform basic token management functions, such as changing passwords and viewing certificates on the tokens. In addition, Tools provides users and administrators with a quick and easy way to transfer digital certificates and keys between a computer and a token. Tools includes an initialization feature allowing administrators to initialize tokens according to specific organizational requirements or security modes, and a password quality feature which sets parameters to calculate a token password quality rating. Tools provides information about the token, including its identification and capabilities. It has access to information stored on the token such as keys and certificates, and enables management of content, such as password profiles. NOTE Do not remove the token from the USB port during an operation. This may cause corruption of data on the token. To launch the application, do one of the following: 1 Click the application tray icon and select Tools from the menu. 2 From Mac desktop select Go > Applications > SafeNet > SafeNet Authentication Client > SafeNet Authentication Client Tools. 2. SafeNet Authentication Client User Interface / Overview of SafeNet Authentication Client User Interface SafeNet Authentication Client (Mac) User’s Guide, Rev. Revision B, ©2012 SafeNet, Inc. 12 The SafeNet Authentication Client Tools window opens. 2. SafeNet Authentication Client User Interface / Overview of SafeNet Authentication Client User Interface SafeNet Authentication Client (Mac) User’s Guide, Rev. Revision B, ©2012 SafeNet, Inc. 13 SafeNet Authentication Client Tray Icon The SafeNet Authentication Client tray icon gives you quick access to many of the functions in the application. Launching the Tray Menu To access the tray menu: Click the application tray icon. The tray menu opens. Tray Icon Menu The following functions can be accessed quickly from the tray icon menu: Tools: launches SafeNet Authentication Client Tools. Generate OTP: generates OTP for SafeNet eToken Virtual. This function is available only if SafeNet eToken Virtual is configured to support this function. 2. SafeNet Authentication Client User Interface / SafeNet Authentication Client Tray Icon SafeNet Authentication Client (Mac) User’s Guide, Rev. Revision B, ©2012 SafeNet, Inc. 14 Delete Token Content: removes the deletable data from the token. (This is disabled by default. For details on how to activate this feature, see SafeNet Authentication Client (Mac) 8.2 Administrator’s Guide) Change Token Password: changes the token password. Tokens: provides the option to select the active token when more than one is inserted. About: displays product information Hide: hides the icon Hiding and Unhiding the Tray Icon To hide the tray Icon: Click the application tray icon and select Hide. To unhide the tray Menu: Do one of the following: Remove and re-insert the token Re-boot the computer 2. SafeNet Authentication Client User Interface / SafeNet Authentication Client Tray Icon SafeNet Authentication Client (Mac) User’s Guide, Rev. Revision B, ©2012 SafeNet, Inc. 15 SafeNet Authentication Client Tools Main Screen Tools includes two viewing options: Simple view: to perform basic and common tasks. See Simple View on page 19. Advanced view: for complete control over the SafeNet Authentication Client and the inserted tokens. See Advanced View on page 24. Each view displays two panes: The left pane indicates which token (Simple view) or which object (Advanced view) is to be managed. The right pane enables the user to perform specific actions to the selected token or object. A toolbar at the top of the window enables certain actions to be initiated in both views. 2. SafeNet Authentication Client User Interface / SafeNet Authentication Client Tools Main Screen SafeNet Authentication Client (Mac) User’s Guide, Rev. Revision B, ©2012 SafeNet, Inc. 16 SafeNet Authentication Client Tools Main Screen Toolbar The main screen toolbar is displayed in both simple and advanced view. The toolbar contains the following icons: Icon Action Advanced View – switches from the simple to the advanced view Simple View - switches from the advanced to the simple view Refresh – refreshes the data for all connected tokens About – displays product version information 2. SafeNet Authentication Client User Interface / SafeNet Authentication Client Tools Main Screen SafeNet Authentication Client (Mac) User’s Guide, Rev. Revision B, ©2012 SafeNet, Inc. 17 Icon (Cont.) Action (Cont.) Help – launches the help SafeNet Home - opens the SafeNet’s website 2. SafeNet Authentication Client User Interface / SafeNet Authentication Client Tools Main Screen SafeNet Authentication Client (Mac) User’s Guide, Rev. Revision B, ©2012 SafeNet, Inc. 18 Simple View The SafeNet Authentication Client Tools is launched in simple view. 2. SafeNet Authentication Client User Interface / SafeNet Authentication Client Tools Main Screen SafeNet Authentication Client (Mac) User’s Guide, Rev. Revision B, ©2012 SafeNet, Inc. 19 When a token is inserted or SafeNet eToken Virtual is present, a specific icon representing the inserted token is displayed in the left pane. Each token has a name displayed to the right of the icon. My Token is the default name if no name has been assigned to the token. The selected token is marked by a shaded rectangle in the left pane. 2. SafeNet Authentication Client User Interface / SafeNet Authentication Client Tools Main Screen SafeNet Authentication Client (Mac) User’s Guide, Rev. Revision B, ©2012 SafeNet, Inc. 20 Authenticator Icons The icon indicates the type of authenticator attached.Simple View Functions Icon Type eToken PRO, SafeNet eToken Virtual, eToken NG Flash, eToken NG Flash Anywhere eToken PRO Anywhere SafeNet eToken Rescue eToken NG-OTP Reader 2. SafeNet Authentication Client User Interface / SafeNet Authentication Client Tools Main Screen SafeNet Authentication Client (Mac) User’s Guide, Rev. Revision B, ©2012 SafeNet, Inc. 21 Icon (Cont.) Type (Cont.) eToken PRO Smartcard Broken token Unknown token In the right pane, you can select any of the enabled buttons to perform the action described. Function Button Rename Token - sets the token name. 2. SafeNet Authentication Client User Interface / SafeNet Authentication Client Tools Main Screen SafeNet Authentication Client (Mac) User’s Guide, Rev. Revision B, ©2012 SafeNet, Inc. 22 Function (Cont.) Button (Cont.) Change Token Password – changes the token password. Unlock Token – resets the user password via a challenge response mechanism. Enabled only when an administrator password has been initialized on the token. Delete Token Content removes deletable data from the token. View Token Information – provides detailed information about the token. 2. SafeNet Authentication Client User Interface / SafeNet Authentication Client Tools Main Screen SafeNet Authentication Client (Mac) User’s Guide, Rev. Revision B, ©2012 SafeNet, Inc. 23 Function (Cont.) Button (Cont.) Disconnect SafeNet eToken Virtual – disconnects the SafeNet eToken Virtual or SafeNet eToken Rescue, with an option for deleting it. Advanced View The Advanced View provides additional token management functions. To see the advanced view, click the Advanced View icon in the Simple view. 2. SafeNet Authentication Client User Interface / SafeNet Authentication Client Tools Main Screen SafeNet Authentication Client (Mac) User’s Guide, Rev. Revision B, ©2012 SafeNet, Inc. 24 The left pane provides a tree view of the different objects to be managed. The tree expands to show objects of inserted tokens. 2. SafeNet Authentication Client User Interface / SafeNet Authentication Client Tools Main Screen SafeNet Authentication Client (Mac) User’s Guide, Rev. Revision B, ©2012 SafeNet, Inc. 25 When you select an object, the relevant functions are available by clicking on the icons in the right pane, or by right clicking on the object and selecting the required function from the menu. Advanced View Functions You can access the advanced functions by selecting the required object from the left pane in the Tools Advanced View window. 2. SafeNet Authentication Client User Interface / SafeNet Authentication Client Tools Main Screen SafeNet Authentication Client (Mac) User’s Guide, Rev. Revision B, ©2012 SafeNet, Inc. 26 Tokens Node When you select the Tokens node, the list of attached tokens is displayed in the right pane. 2. SafeNet Authentication Client User Interface / SafeNet Authentication Client Tools Main Screen SafeNet Authentication Client (Mac) User’s Guide, Rev. Revision B, ©2012 SafeNet, Inc. 27 The following functions are available. Function Icon Right-Click Menu Item Reader Settings See Reader Settingson page 84 Reader Settings Connect SafeNet eToken Virtual See Overview of SafeNet eToken Virtual and SafeNet eToken Rescueon page 87 Connect SafeNet eToken Virtual 2. SafeNet Authentication Client User Interface / SafeNet Authentication Client Tools Main Screen SafeNet Authentication Client (Mac) User’s Guide, Rev. Revision B, ©2012 SafeNet, Inc. 28 Attached Tokens The names of the tokens are displayed in the left pane. When you select a token, information about the token is displayed in the right pane and the name of the token reader is displayed in the tool-tip. 2. SafeNet Authentication Client User Interface / SafeNet Authentication Client Tools Main Screen SafeNet Authentication Client (Mac) User’s Guide, Rev. Revision B, ©2012 SafeNet, Inc. 29 The following user functions are available. User Function Icon Right-Click Menu Item Initialize Token See Token Initializationon page 37 Initialize User Logon to Token See Logging On to a Token as a Useron page 56 Log on Import Certificate See Importing a Certificate onto a Tokenon page 59 Import Certificate Change Password See Changing the Token Password on on page 68. Change Password Rename Token See Renaming a Token on on page 70. Rename 2. SafeNet Authentication Client User Interface / SafeNet Authentication Client Tools Main Screen SafeNet Authentication Client (Mac) User’s Guide, Rev. Revision B, ©2012 SafeNet, Inc. 30 User Function (Cont.) Icon (Cont.) Right-Click Menu Item (Cont.) Disconnect SafeNet eToken Virtual. See Disconnecting SafeNet eToken Virtual or SafeNet eToken Rescue on on page 90 Disconnect Copy to Clipboard See Copying Token Information to the Clipboardon page 71 Not available Some functions are available only if an administrator password has been set for the token. The administrator icons are located on the right of the window, enclosed within a border: Administrator Function Log on as Administrator See Logging On to a Token as an Administratoron page 58. Icon Right-Click Menu Item Log on as Administrator 2. SafeNet Authentication Client User Interface / SafeNet Authentication Client Tools Main Screen SafeNet Authentication Client (Mac) User’s Guide, Rev. Revision B, ©2012 SafeNet, Inc. 31 Administrator Function Icon (Cont.) Right-Click Menu Item (Cont.) Change Administrator Password See Changing the Administrator Password on on page 72. Change Administrator Password Unlock Token See Unlocking a Token using Challenge Responseon page 77. Unlock Set Token Password (is activated only when you have logged on to the Token with an administrator password) See Unlocking a Token Using Set Token Passwordon page 76. Set Token Password 2. SafeNet Authentication Client User Interface / SafeNet Authentication Client Tools Main Screen SafeNet Authentication Client (Mac) User’s Guide, Rev. Revision B, ©2012 SafeNet, Inc. 32 User Certificates If the token contains certificates, a User Certificates node is displayed in the left pane under the token. Information about the certificates on the token is displayed in the right pane. 2. SafeNet Authentication Client User Interface / SafeNet Authentication Client Tools Main Screen SafeNet Authentication Client (Mac) User’s Guide, Rev. Revision B, ©2012 SafeNet, Inc. 33 The following functions are available: User Function Icon Right-Click Menu Item Import Certificate See Importing a Certificate onto a Tokenon page 59 Import Certificate Export Certificate See Exporting a Certificate from a Tokenon page 64 Export Certificate Delete Certificate See Deleting a Certificateon page 66 Delete Certificate 2. SafeNet Authentication Client User Interface / SafeNet Authentication Client Tools Main Screen SafeNet Authentication Client (Mac) User’s Guide, Rev. Revision B, ©2012 SafeNet, Inc. 34 Settings Each attached token has a Settings window. The settings window contains two tabs: 2. SafeNet Authentication Client User Interface / SafeNet Authentication Client Tools Main Screen SafeNet Authentication Client (Mac) User’s Guide, Rev. Revision B, ©2012 SafeNet, Inc. 35 Password Quality (See Setting Password Quality on page 96) Advanced (See Setting Private Data Caching on page 101 and Setting RSA Key Secondary Authentication on page 103) SafeNet Authentication Client Settings The Client Settings will affect all tokens that will be initialized after the settings have been configured. The SafeNet Authentication Client Settings window contains two tabs, as in the Settings window: Password Quality Advanced See SafeNet Authentication Client Settings on page 105. 2. SafeNet Authentication Client User Interface / SafeNet Authentication Client Tools Main Screen SafeNet Authentication Client (Mac) User’s Guide, Rev. Revision B, ©2012 SafeNet, Inc. 36 3 Token Initialization Token initialization restores a token to its initial state, removing all objects stored on the token since manufacture, frees up memory, and resets the token password. Typically, initialization is carried out on a token when an employee leaves the company, enabling the token to be issued to another employee. NOTE You cannot initialize SafeNet eToken Virtual with SafeNet Authentication Client. In this chapter: Overview of Token Initialization Initializing a Token Configuring Advanced Initialization Settings Changing the Token Initialization Key Configuring Common Criteria Settings 3. Token Initialization / SafeNet Authentication Client (Mac) User’s Guide, Revision B, ©2012 SafeNet, Inc. 37 Overview of Token Initialization The token initialization option restores a token to its initial state. It removes all objects stored on the token since manufacture, frees up memory, and resets the token password, allowing administrators to initialize the token according to specific organizational requirements or security modes. Initializing a token is useful, for example, after an employee has left a company. It completely removes the employee’s individual certificates and other personal data from the token, preparing it to be used by another employee. The following data is initialized: Token Name Token Password Administrator Password (optional) Login retries before token is locked (for token and administrator passwords) Token Password must be changed on first logon Initialization key Using customizable parameters, you can select specific parameters that will apply to certain tokens. These parameters may be necessary if you wish to use the token for specific applications or if you require a specific user or administrator password on all the tokens in the organization. 3. Token Initialization / Overview of Token Initialization SafeNet Authentication Client (Mac) User’s Guide, Rev. Revision B, ©2012 SafeNet, Inc. 38 Initializing a Token To initialize a token: 1 Click Initialize Token on the toolbar, or right-click the token name in the left pane and select Initialize from the shortcut menu. The Initialize Token window opens. 3. Token Initialization / Initializing a Token SafeNet Authentication Client (Mac) User’s Guide, Rev. Revision B, ©2012 SafeNet, Inc. 39 2 Enter a name for the token in the Token Name field. If no name is entered, the default name, My Token, is applied. 3 Select Set Token Password to initialize the token with a token password. Otherwise, the token is initialized without a token password, and it will not be usable for SafeNet (eToken) applications. 4 If Set Token Password is selected, enter a new token password in the Set Token Password and Confirm fields. NOTE The default password for a new token is 1234567890. If the user uses the default password during initialization, and default password quality requirements are used, the user must select the Token Password must be changed at first logon option. Otherwise the initialization will fail, as the default password will not meet default password quality requirements (See Setting Password Quality on page 99). If the Token Password must be changed at first logon field is selected, the initialization will succeed and the user will be prompted to set a new token password when next logging on with the token. The user will then be required to set a password meeting password quality requirements, as configured in the settings window. See Setting Password Quality on page 96. 5 To initialize an administrator password, select Set Administrator Password and enter a password in the Set Administrator Password and Confirm fields. (Minimum password length is 4 characters.) NOTE The user cannot set the Administrator Password for SafeNet iKey 2032 or SafeNet iKey 4000. 6 In the Logon retries before token is locked field, enter a value between 1 and 15. This counter specifies the number of times the user or administrator can attempt to log on to the token with an incorrect password before the token is locked. The default number of incorrect logon attempts is 15. 3. Token Initialization / Initializing a Token SafeNet Authentication Client (Mac) User’s Guide, Rev. Revision B, ©2012 SafeNet, Inc. 40 7 If required, select Token Password must be changed on first logon. This is selected by default. 8 If you want to configure advanced settings, continue from the next section (see Configuring Advanced Initialization Settings ). 9 Click Start. When the initialization process is complete, a confirmation message is displayed. 3. Token Initialization / Initializing a Token SafeNet Authentication Client (Mac) User’s Guide, Rev. Revision B, ©2012 SafeNet, Inc. 41 Configuring Advanced Initialization Settings To configure advanced settings: 1 In the Initialize Token window click Advanced. The Advanced Token Initialization Settings window opens. 3. Token Initialization / Configuring Advanced Initialization Settings SafeNet Authentication Client (Mac) User’s Guide, Rev. Revision B, ©2012 SafeNet, Inc. 42 2 Complete the fields as follows: Field Description One-factor logon Default: disabled. When one factor logon is enabled, only the presence of the token is required to log on to applications. A password is not required. Note: For security reasons, one-factor logon is not applied to SafeNet Authentication Client Tools. Token settings control password policy Default: enabled OTP support Select to enable OTP support (on compatible token). 2048-bit RSA key support Select to keep password quality requirements on the token device. Default: enabled Select to enable 2048-bit RSA key support (on compatible tokens). Private data caching In SafeNet Authentication Client, public information stored on the token is cached to enhance performance. This option defines when private information (excluding private keys on the physical token) can be cached outside the token. Select one of the following options: Always (fastest): always caches private information in the application memory. This enables fast performance, as certain information is cached on the host machine. However, this option is less secure than if no cache is allowed. While user is logged on: caches private data outside the token as long as the user is logged on to the token. Once the user logs out, all the private data in the cache is erased. Never: does not cache private data. 3. Token Initialization / Configuring Advanced Initialization Settings SafeNet Authentication Client (Mac) User’s Guide, Rev. Revision B, ©2012 SafeNet, Inc. 43 Field (Cont.) Description (Cont.) RSA key secondary authentication An authentication password may be set for an RSA key. If this option is used, then in addition to having the token and knowing the token's password, accessing the RSA key requires knowing the password set for that particular key. This option defines the policy for using this secondary authentication of RSA keys. Always: every time an RSA key is generated, you are prompted to enter a secondary password for accessing this key. Clicking OK generates the key and uses the entered password as the secondary RSA password for that key. Clicking Cancel causes key generation to fail. Always prompt user: every time an RSA key is generated, a secondary password for accessing this key is requested. However, the user can choose to dismiss the prompt (by clicking Cancel), and key generation will continue without using a secondary password for the generated RSA key. Prompt on application request: this enables applications that use secondary authentication for RSA keys to make use of this feature on the token (when creating the key in Crypto API with a user protected flag). Never: secondary passwords are not created for any RSA key and the authentication method uses only the token password to access the key. If the token was initialized as Common Criteria and the secondary authentication Always, Always prompt user or Prompt upon application request, then the secondary authentication setting cannot be changed to Never or Token authentication on application request. This limitation applies to Common Criteria certificates only. Manually set the number of reserved RSA keys Set the number of reserved RSA keys. This ensures that there will always be memory available for this number of keys. 3. Token Initialization / Configuring Advanced Initialization Settings SafeNet Authentication Client (Mac) User’s Guide, Rev. Revision B, ©2012 SafeNet, Inc. 44 Field (Cont.) Description (Cont.) Certification Default: N/A Select the certification type for formatting the token. Select one of the following options: N/A: None FIPS: Federal Information Processing Standards is a US government approved set of standards designed to improve the utilization and management of computer and related telecommunication systems Common Criteria: an international standard for computer security certification Change Initialization Key (link) The initialization key protects against accidental initialization and requires a separate password to be entered before initialization can occur. Common Criteria Settings (link) If Certification is set to Common Criteria, click this button to set the certificate import PIN and the maximum number of certificates for which to reserve space on the token. 3 If you want to change the token initialization key continue from the next section (see Changing the Token Initialization Key on page 46), else, click OK to return to the Initialize Token window. 4 Click Start. When the initialization process is complete, a confirmation message is displayed. 3. Token Initialization / Configuring Advanced Initialization Settings SafeNet Authentication Client (Mac) User’s Guide, Rev. Revision B, ©2012 SafeNet, Inc. 45 Changing the Token Initialization Key Two initialization keys can be provided during the initialization process. One is the current initialization key, it is required so the initialization can be done. The Default Initialization and Specified Initialization Key refer to current initialization key. Second is the Change Initialization key which is the new value of the initialization key that can be set during the initialization. To change the Token Initialization Key: 1 In the Advanced Token Initialization Settings window, click Change Initialization Key. The Token Initialization Key window opens. 3. Token Initialization / Changing the Token Initialization Key SafeNet Authentication Client (Mac) User’s Guide, Rev. Revision B, ©2012 SafeNet, Inc. 46 2 Complete the fields as follows: Field Description Use the default initialization Key Select to use factory-set default. Use this value Enter the initialization key to be used. 3. Token Initialization / Changing the Token Initialization Key SafeNet Authentication Client (Mac) User’s Guide, Rev. Revision B, ©2012 SafeNet, Inc. 47 Field (Cont.) Description (Cont.) Change the key for the next initialization to: Set the new value of the 2nd initialization key for any of the 3 options specified. Default: Revert to default. Random: If selected, it will never be possible to re-initialize the token. This Value: Enter and confirm a value for initialization key. 3 Click OK to return to the Advanced Token Initialization Settings window, then click OK again to return to the Initialize Token window. 4 Click Start. When the initialization process is complete, a confirmation message is displayed. 3. Token Initialization / Changing the Token Initialization Key SafeNet Authentication Client (Mac) User’s Guide, Rev. Revision B, ©2012 SafeNet, Inc. 48 Configuring Common Criteria Settings When the selected certification type is Common Criteria, set the certificate import PIN and the maximum number of certificates for which to reserve space on the token. To define the Common Criteria settings: 1 Open the Advanced Settings window. See Configuring Advanced Initialization Settings on page 42. 3. Token Initialization / Configuring Common Criteria Settings SafeNet Authentication Client (Mac) User’s Guide, Rev. Revision B, ©2012 SafeNet, Inc. 49 2 In the Certification field, select Common Criteria. 3 Click the Common Criteria Settings link. The Common Criteria Settings window opens. 3. Token Initialization / Configuring Common Criteria Settings SafeNet Authentication Client (Mac) User’s Guide, Rev. Revision B, ©2012 SafeNet, Inc. 50 4 Complete the fields as follows: Field Description Import PIN, Define and confirm a PIN that must be entered when a Common Criteria certificate is imported to the token. Confirm PIN The minimum PIN length is 4 characters. The default value is 1234567890. Certificates with 1024-bit keys To reserve adequate space on the token, set the maximum number of Common Criteria certificates with 1024-bit keys that will be imported to the token. Select a number within the range 0 -16. 3. Token Initialization / Configuring Common Criteria Settings SafeNet Authentication Client (Mac) User’s Guide, Rev. Revision B, ©2012 SafeNet, Inc. 51 Certificates with 2048-bit keys To reserve adequate space on the token, set the maximum number of Common Criteria certificates with 2048-bit keys that will be imported to the token. Select a number within the range 1- 16. 5 Click OK to return to the Configuring Advanced Initialization Settingss window. 3. Token Initialization / Configuring Common Criteria Settings SafeNet Authentication Client (Mac) User’s Guide, Rev. Revision B, ©2012 SafeNet, Inc. 52 4 Token Management The SafeNet Authentication Client Tools application and the SafeNet Authentication Client tray menu enable you to configure the options that control the use of token devices. In this chapter: Selecting the Active Token Logging On to a Token Importing a Certificate onto a Token Exporting a Certificate from a Token Deleting a Certificate Changing the Token Password Renaming a Token Copying Token Information to the Clipboard Changing the Administrator Password Unlocking a Token 4. Token Management / SafeNet Authentication Client (Mac) User’s Guide, Revision B, ©2012 SafeNet, Inc. 53 Deleting Token Content Viewing Token Information Reader Settings 4. Token Management / SafeNet Authentication Client (Mac) User’s Guide, Rev. Revision B, ©2012 SafeNet, Inc. 54 Selecting the Active Token If more than one token is attached, you must select which device you want to work with. NOTE The token selected here is relevant only for tray menu functions. To select the active token: 1 Click the application tray icon 2 Select Tokens. A list of inserted tokens is displayed. 3 Select the required token. 4. Token Management / Selecting the Active Token SafeNet Authentication Client (Mac) User’s Guide, Rev. Revision B, ©2012 SafeNet, Inc. 55 Logging On to a Token You can log on to a token as a user or as an administrator. An administrator has limited permissions on a token. No changes to any user information may be made, nor may the user’s security be affected. The administrator’s functions are restricted to Change Administrator Password, Set Token Password, Unlocking Token using Challenge-Response and Change Password Quality Settings that are stored on the token. Logging On to a Token as a User To log on as a user: 1 Open SafeNet Authentication Client Tools. 2 Click the Advanced View icon . The Advanced View window opens. 3 Do one of the following: Select the required token in the left pane and click the Log On to Token icon: 4. Token Management / Logging On to a Token SafeNet Authentication Client (Mac) User’s Guide, Rev. Revision B, ©2012 SafeNet, Inc. 56 Right-click the required token in the left pane and select Log On from the shortcut menu. The Log on window opens. 4 Enter the token password in the Password field and click OK. The user is logged on. 4. Token Management / Logging On to a Token SafeNet Authentication Client (Mac) User’s Guide, Rev. Revision B, ©2012 SafeNet, Inc. 57 Logging On to a Token as an Administrator To log on as an administrator: 1 Open SafeNet Authentication Client Tools. 2 Click the Advanced View icon. 3 Do one of the following: Select the required token in the left pane and click the Log on as Administrator icon: Right-click the required token in the left pane and select Log on as Administrator from the shortcut menu. The Log on dialog box opens. 4 Enter the administrator password in the Password field and click OK. The user is logged on as the Administrator. 4. Token Management / Logging On to a Token SafeNet Authentication Client (Mac) User’s Guide, Rev. Revision B, ©2012 SafeNet, Inc. 58 Importing a Certificate onto a Token The following certificate types are supported in SafeNet Authentication Client (Mac): .pfx .p12 .cer If you select a PFX file, the private key and corresponding certificate chain will be imported to the token. You will be prompted to enter the password (if it exists) protecting the PFX file. If you select a CER file (which contains only X.509 certificates), the program checks if a private key exists on the token. If the private key is found, the certificate is stored with it. NOTE It is not possible to import a certificate onto SafeNet eToken Rescue. To import a certificate: 1 Open SafeNet Authentication Client Tools. 2 Click the Advanced View icon. 3 In the left pane of the Advanced View window, select the required token. 4 Do one of the following: In the left pane of the Advanced View window, select the required token and click the Import Certificate icon 4. Token Management / Importing a Certificate onto a Token SafeNet Authentication Client (Mac) User’s Guide, Rev. Revision B, ©2012 SafeNet, Inc. 59 In the left pane of the Advanced View window, right click the required token and select Import Certificate from the menu. The Import Certificate window opens. 5 6 Select one of the following: Import a certificate from my personal certificate store Import a certificate from a file If you select Import a certificate from my personal certificate store, a list of available certificates is displayed. 4. Token Management / Importing a Certificate onto a Token SafeNet Authentication Client (Mac) User’s Guide, Rev. Revision B, ©2012 SafeNet, Inc. 60 Only certificates that can be imported on to the token are listed. These are: Certificates with a private key already on the token Certificates that may be imported from the computer together with their private key 7 If you select Import a certificate from a file, the Certificate Selection window opens. 8 Select Import a certificate from a file and click Open. The Certificate Selection window opens. 4. Token Management / Importing a Certificate onto a Token SafeNet Authentication Client (Mac) User’s Guide, Rev. Revision B, ©2012 SafeNet, Inc. 61 9 Select the certificate file to import and click Open. If the certificate requires a password, the Password dialog box opens. 10 Enter the certificate password. 4. Token Management / Importing a Certificate onto a Token SafeNet Authentication Client (Mac) User’s Guide, Rev. Revision B, ©2012 SafeNet, Inc. 62 A window opens asking if you want to store the CA certificates on the token. 11 Select Yes or No. All requested certificates are imported, and a confirmation message opens. 4. Token Management / Importing a Certificate onto a Token SafeNet Authentication Client (Mac) User’s Guide, Rev. Revision B, ©2012 SafeNet, Inc. 63 Exporting a Certificate from a Token A physical token or SafeNet eToken Virtual exports the certificate only, without its key. NOTE Mac OS x supports the export of the *.cer format only. To export a certificate: 1 Open SafeNet Authentication Client Tools. 2 Click the Advanced View icon. 3 In the left pane of the Advanced View window, select the required certificate and click the Export Certificate icon. The Save As window opens. 4. Token Management / Exporting a Certificate from a Token SafeNet Authentication Client (Mac) User’s Guide, Rev. Revision B, ©2012 SafeNet, Inc. 64 4 Select the location to store the certificate, enter a file name and click Save. NOTE The certificate file must be DER encoded or Base64 (not PKCS #7). 4. Token Management / Exporting a Certificate from a Token SafeNet Authentication Client (Mac) User’s Guide, Rev. Revision B, ©2012 SafeNet, Inc. 65 Deleting a Certificate You can remove a certificate from a token. To delete a certificate from a Token: 1 Open SafeNet Authentication Client Tools. 2 Click the Advanced View icon. 3 Do one of the following: In the left pane of the Advanced View window, expand the required token, select the required certificate and click the Delete Certificate icon. In the left pane of the Advanced View window, expand the required token, right-click the required certificate and select Delete Certificate from the shortcut menu. The Delete Certificate window opens. 4. Token Management / Deleting a Certificate SafeNet Authentication Client (Mac) User’s Guide, Rev. Revision B, ©2012 SafeNet, Inc. 66 4 Do one of the following: To cancel the deletion click No. To delete the certificate click Yes. 4. Token Management / Deleting a Certificate SafeNet Authentication Client (Mac) User’s Guide, Rev. Revision B, ©2012 SafeNet, Inc. 67 Changing the Token Password All the manufactured token devices are configured with the factory initial password, 1234567890. To ensure strong, two factor security, it is important for the user to change the token password to a private user password as soon as the new token is received. When a token password has been changed, the new password is used for all token applications involving the token. It is the user’s responsibility to remember the token password. Without it, the user cannot use the token. NOTE The token password is an important security measure in safeguarding your company’s private information. The best passwords are at least eight characters long and include upper and lower case letters, punctuation marks and numbers created in a random order. We recommend against using passwords that can be easily discovered, such as names or birth dates of family members. To change the token password: 1 Open SafeNet Authentication Client Tools. 2 In the left pane of the Tools window, select the token to which the new password will be assigned. 3 Click Change Password in the right pane. TIP You can change the token Password also by clicking on the application tray icon and selecting Change Token Password. The Change Password window is displayed. 4. Token Management / Changing the Token Password SafeNet Authentication Client (Mac) User’s Guide, Rev. Revision B, ©2012 SafeNet, Inc. 68 4 Enter the current token password in the Current Token Password field. 5 Enter the new token password in the New Token Password and Confirm New Token Password fields. NOTE As you type a new password, the password quality indicator on the right displays a percentage score of how well the new password matches the password quality policy. 6 Click OK. The token password is changed. 4. Token Management / Changing the Token Password SafeNet Authentication Client (Mac) User’s Guide, Rev. Revision B, ©2012 SafeNet, Inc. 69 Renaming a Token You can change the token name. To rename a token: 1 Open SafeNet Authentication Client Tools. 2 In the left pane of the Tools window, select the token to be renamed. 3 Click Rename Token in the right pane. 4 If prompted, enter the token password. The Rename Token window opens. 5 Enter the new name in the New Token Name field and click OK. The new token name is displayed in the Tools window. 4. Token Management / Renaming a Token SafeNet Authentication Client (Mac) User’s Guide, Rev. Revision B, ©2012 SafeNet, Inc. 70 Copying Token Information to the Clipboard To copy and paste token information: 1 2 Do one of the following: In the Token Info window click Copy. In Advanced view, select the required token in the left pane and click the Copy to Clipboard icon: Place the cursor in the target application and paste the information. 4. Token Management / Copying Token Information to the Clipboard SafeNet Authentication Client (Mac) User’s Guide, Rev. Revision B, ©2012 SafeNet, Inc. 71 Changing the Administrator Password Setting an administrator password on the token enables the administrator to unlock a locked token by resetting a new token password if it is forgotten. We recommend initializing all tokens with an administrator password. Password Quality feature enables the administrator to set certain complexity and usage requirements for the password. See Setting Password Quality on page 96. NOTE Password is an important security measure in safeguarding your company’s private information. The best passwords are at least eight characters long and include upper and lower case letters, punctuation marks and numbers created in a random order. We recommend against using passwords that can be easily discovered, such as names or birth dates of family members. To change the Administrator Password: 1 Open SafeNet Authentication Client Tools in the advanced view. 2 To change the administrator password, do one of the following: In the left pane of the Tools window, select the required token and click the Change Administrator Password icon: 4. Token Management / Changing the Administrator Password SafeNet Authentication Client (Mac) User’s Guide, Rev. Revision B, ©2012 SafeNet, Inc. 72 The Change Administrator Password icon is located at the right of the window, enclosed within a border: In the left pane of the Tools window, right-click the required token and select Change Administrator Password from the menu. The Change Administrator Password window opens. Enter the current administrator password in the Current Password field. NOTE If an incorrect password is entered more than a specified number of times, the token will be locked. 3 Enter the new administrator password in the New Password and Confirm Password fields. 4. Token Management / Changing the Administrator Password SafeNet Authentication Client (Mac) User’s Guide, Rev. Revision B, ©2012 SafeNet, Inc. 73 4 Click OK. The token’s administrator password is changed. 4. Token Management / Changing the Administrator Password SafeNet Authentication Client (Mac) User’s Guide, Rev. Revision B, ©2012 SafeNet, Inc. 74 Unlocking a Token If you enter an incorrect password more than a specified number of times, the token hardware device, SafeNet eToken Virtual or SafeNet eToken Rescue will be locked. You can unlock the token only if an administrator password was set during initialization. The unlock feature is available for token hardware devices, and SafeNet eToken Virtual. This feature is not available for SafeNet eToken Rescue. CAUTION The number of times that SafeNet eToken Virtual can be unlocked can be limited to a specified number. If this number is exceeded, the SafeNet eToken Virtual becomes unusable and must be replaced. If the administrator has access to the user’s computer, the token may be unlocked using the Set Token Password feature (see Unlocking a Token Using Set Token Passwordon page 76). NOTE iKey tokens cannot be unlocked by the Administrator, as no Administrator Password is set for iKey tokens. When the administrator is located remotely, for example when an employee is out of the office, a Challenge – Response authentication method can be employed to unlock the token (see Unlocking a Token using Challenge - Responseon page 77). With this method, the user sends the administrator the Challenge Code supplied by Tools, and then enters the Response Code provided by the administrator. The user then enters a new password and the token is unlocked. 4. Token Management / Unlocking a Token SafeNet Authentication Client (Mac) User’s Guide, Rev. Revision B, ©2012 SafeNet, Inc. 75 Unlocking a Token Using Set Token Password To unlock a token using Set Token Password: 1 Log on to the token as an administrator (see Logging On to a Token as an Administratoron page 58). 2 Do one of the following: Click the Set Token Password icon: Right-click the token in the left pane and select Set Token Password from the shortcut menu. The Set Password window opens. 3 Enter a new password in the New Password and Confirm Password fields. The Set maximum number of logon failures displays the maximum login failures set by the administrator during initialization. 4 Click OK. The token is unlocked. You can now log on as a user with the new password. 4. Token Management / Unlocking a Token SafeNet Authentication Client (Mac) User’s Guide, Rev. Revision B, ©2012 SafeNet, Inc. 76 Unlocking a Token using Challenge - Response To unlock a token using Challenge – Response: 1 Open SafeNet Authentication Client Tools. 2 In the left pane of the Tools window, select the token to be unlocked. 3 Click Unlock Token in the right pane. The Unlock Token window is displayed. 4. Token Management / Unlocking a Token SafeNet Authentication Client (Mac) User’s Guide, Rev. Revision B, ©2012 SafeNet, Inc. 77 4 Contact the administrator and provide the Challenge Code. NOTE To copy the challenge code to the clipboard, click on the Copy challenge code to clipboard icon: 4. Token Management / Unlocking a Token SafeNet Authentication Client (Mac) User’s Guide, Rev. Revision B, ©2012 SafeNet, Inc. 78 CAUTION After providing the Challenge Code to the administrator, do not undertake any activities that use the token until after receiving the Response Code and completing the unlocking procedure. If any other token activity occurs during this process, it will affect the context of the Challenge – Response process and invalidate the procedure. The administrator provides the Response Code to be entered. NOTE The creation of response code depends on the backend application being used by the organization. System administrators should refer to the relevant documentation for details on how to generate the response code. 5 Enter a new token password in the Password and Confirm fields. 6 Select Token Password must change on first logon if the new password is known to others and must be changed. 7 Click OK. The token is unlocked and a confirmation message is displayed. 4. Token Management / Unlocking a Token SafeNet Authentication Client (Mac) User’s Guide, Rev. Revision B, ©2012 SafeNet, Inc. 79 Deleting Token Content The Delete Token Content function enables you to delete all deletable objects on your token. Objects types include data objects (profiles), keys and certificates (CA or user). Non-deletable objects will not be removed. Non-deletable objects are created when the administrator configures the object attributes. The Delete Token Content function leaves the data structure on your token intact. It is less widereaching than the Initialize function which restores a token to its initial state, removing all objects stored on the token since manufacture and resets the token password (See Chapter 3 Token Initializationon page 37). To Delete Token Content: 1 Click the application tray icon 2 Select Delete Token Content from the menu. The Delete Token Content window opens, prompting you to confirm the delete action. 4. Token Management / Deleting Token Content SafeNet Authentication Client (Mac) User’s Guide, Rev. Revision B, ©2012 SafeNet, Inc. 80 3 To continue with the delete process, click OK, else click Cancel. The Log On window opens. 4 Enter the token password and click OK. The Delete Token Content window opens, confirming that the delete process has been successful. 5 Click OK to finish. 4. Token Management / Deleting Token Content SafeNet Authentication Client (Mac) User’s Guide, Rev. Revision B, ©2012 SafeNet, Inc. 81 Viewing Token Information To view token information: 1 Open SafeNet Authentication Client Tools. 2 In the left pane of the Tools window, select the required token. 3 Click View Token Information in the right pane. The Token Information window opens. 4. Token Management / Viewing Token Information SafeNet Authentication Client (Mac) User’s Guide, Rev. Revision B, ©2012 SafeNet, Inc. 82 4. Token Management / Viewing Token Information SafeNet Authentication Client (Mac) User’s Guide, Rev. Revision B, ©2012 SafeNet, Inc. 83 Reader Settings During SafeNet Authentication Client installation, three virtual smart card and two SafeNet eToken Virtual readers are installed. The number of available hardware and software readers is configured by your system administrator. When a token is inserted into a USB port, or SafeNet eToken Virtual is added, the effect is the same as inserting a smart card into one of the readers. To display the number of readers: 1 Open SafeNet Authentication Client Tools. 2 Click the Advanced View icon. 3 Do one of the following: Click the Reader Settings icon Right-click the Tokens node and select Reader Settings from the shortcut menu The Managing Readers window opens. 4. Token Management / Reader Settings SafeNet Authentication Client (Mac) User’s Guide, Rev. Revision B, ©2012 SafeNet, Inc. 84 4 The default number of available readers is: Hardware readers: 3 (The number is determined by the pcscslots property value.) Software readers: 2 NOTE In SafeNet Authentication Client (Mac) the number of available readers is set by your system administrator. They cannot be configured in the Managing Readers window. 5 Click OK to close the window. 4. Token Management / Reader Settings SafeNet Authentication Client (Mac) User’s Guide, Rev. Revision B, ©2012 SafeNet, Inc. 85 5 SafeNet eToken Virtual SafeNet Authentication Client supports the SafeNet eToken Virtual line of products. This includes SafeNet eToken Virtual and SafeNet eToken Rescue. These are stored as files on your computer or on a mass storage device. In this chapter: TIP To obtain SafeNet eToken Rescue or SafeNet eToken Virtual, contact your system administrator. Overview of SafeNet eToken Virtual and SafeNet eToken Rescue Using SafeNet eToken Virtual/SafeNet eToken Rescue to Replace a Lost Token Connecting SafeNet eToken Virtual or SafeNet eToken Rescue Disconnecting SafeNet eToken Virtual or SafeNet eToken Rescue Unlocking SafeNet eToken Virtual Generating a One Time Password (OTP) Autoconnecting SafeNet eToken Virtual 5. SafeNet eToken Virtual / SafeNet Authentication Client (Mac) User’s Guide, Revision B, ©2012 SafeNet, Inc. 86 Overview of SafeNet eToken Virtual and SafeNet eToken Rescue SafeNet Authentication Client supports software tokens. The following types of software tokens are available: SafeNet eToken Rescue: provides a solution when a staff member loses or damages a token when away from the office. SafeNet eToken Rescue is a read-only token. You cannot import certificates. It operates for a limited period of time. NOTE SafeNet eToken Rescue must be run from a folder where the user has read-write permissions. If not, it will not be recognized by Mac Keychain Access. SafeNet eToken Virtual: performs all the functions of an eToken NG-OTP. It supports OTP generation (if so configured). In Mac OS, SafeNet eToken Virtual is locked to a particular flash drive. This means that it can be used only on the flash drive where it was enrolled. 5. SafeNet eToken Virtual / Overview of SafeNet eToken Virtual and SafeNet eToken Rescue SafeNet Authentication Client (Mac) User’s Guide, Rev. Revision B, ©2012 SafeNet, Inc. 87 Using SafeNet eToken Virtual/SafeNet eToken Rescue to Replace a Lost Token To use SafeNet eToken Virtual/SafeNet eToken Rescue to replace a lost token, the SafeNet eToken Virtual/SafeNet eToken Rescue must be enrolled using the SafeNet Authentication Manager. For more details, refer to the SafeNet Authentication Manager Client documentation. 5. SafeNet eToken Virtual / Using SafeNet eToken Virtual/SafeNet eToken Rescue to Replace a Lost Token SafeNet Authentication Client (Mac) User’s Guide, Rev. Revision B, ©2012 SafeNet, Inc. 88 Connecting SafeNet eToken Virtual or SafeNet eToken Rescue To connect SafeNet eToken Virtual or SafeNet eToken Rescue: 1 Open SafeNet Authentication Client Tools. 2 Click the Advanced View icon. 3 Select Tokens in the left pane. 4 Click the Connect SafeNet eToken Virtual icon or right-click Tokens and select Connect SafeNet eToken Virtual from the shortcut menu. 5 Navigate to the SafeNet eToken Virtual file (*.etvp) or SafeNet eToken Rescue file (*.etv) and click it. The SafeNet eToken Virtual/SafeNet eToken Rescue file is added. 6 Click OK. 5. SafeNet eToken Virtual / Connecting SafeNet eToken Virtual or SafeNet eToken Rescue SafeNet Authentication Client (Mac) User’s Guide, Rev. Revision B, ©2012 SafeNet, Inc. 89 Disconnecting SafeNet eToken Virtual or SafeNet eToken Rescue When the SafeNet eToken Virtual is no longer necessary, disconnect it from its attached reader. To disconnect SafeNet eToken Virtual or SafeNet eToken Rescue: 1 Open SafeNet Authentication Client Tools. 2 Click the Advanced View icon. 3 Select the SafeNet eToken Virtual or SafeNet eToken Rescue to be disconnected and do one of the following: 4 In the left pane, right-click and select Disconnect. In the right pane, click Disconnect SafeNet eToken Virtual (or Disconnect SafeNet eToken Rescue) icon. The Disconnect SafeNet eToken Virtual message is displayed. Do one of the following: To keep the SafeNet eToken Virtual/SafeNet eToken Rescue file on the computer, click Disconnect; only the connection from the SafeNet eToken Virtual to the SafeNet Authentication Client is disconnected. To remove the SafeNet eToken Virtual/SafeNet eToken Rescue file from the computer, click Delete. 5. SafeNet eToken Virtual / Disconnecting SafeNet eToken Virtual or SafeNet eToken Rescue SafeNet Authentication Client (Mac) User’s Guide, Rev. Revision B, ©2012 SafeNet, Inc. 90 NOTE Disconnecting the SafeNet eToken Virtual/SafeNet eToken Rescue is applicable when the user is out of the office and may need to use the SafeNet eToken Virtual/SafeNet eToken Rescue on the road later. When the lost token is replaced, the SafeNet eToken Virtual/SafeNet eToken Rescue should be deleted from the computer. After the SafeNet eToken Virtual/SafeNet eToken Rescue is deleted, it can be recreated only by reinstalling it. 5. SafeNet eToken Virtual / Disconnecting SafeNet eToken Virtual or SafeNet eToken Rescue SafeNet Authentication Client (Mac) User’s Guide, Rev. Revision B, ©2012 SafeNet, Inc. 91 Unlocking SafeNet eToken Virtual NOTE The unlock function is supported only by SafeNet eToken Virtual (not SafeNet eToken Rescue). If you enter an incorrect password more than a specified number of times, the SafeNet eToken Virtual will be locked. See Unlocking a Token using Challenge - Response on page 77 or Unlocking a Token Using Set Token Password on page 76. CAUTION The number of times that SafeNet eToken Virtual can be unlocked can be limited to a specified number. If this number is exceeded, the SafeNet eToken Virtual becomes unusable. 5. SafeNet eToken Virtual / Unlocking SafeNet eToken Virtual SafeNet Authentication Client (Mac) User’s Guide, Rev. Revision B, ©2012 SafeNet, Inc. 92 Generating a One Time Password (OTP) The Generate OTP function is available only if SafeNet eToken Virtual or SafeNet eToken Rescue, with the OTP feature activated, is stored on your computer. To generate an OTP: 1 Click the application tray icon . The SafeNet Authentication Client tray menu opens. 2 Select Generate OTP. The Generate OTP window opens. 3 Click Generate OTP. The Log on window opens. 4 Enter the token password. The generated OTP is displayed in the Generate OTP window. 5. SafeNet eToken Virtual / Generating a One Time Password (OTP) SafeNet Authentication Client (Mac) User’s Guide, Rev. Revision B, ©2012 SafeNet, Inc. 93 Autoconnecting SafeNet eToken Virtual If SafeNet eToken Virtual is locked to a flash drive, and SafeNet eToken Virtual file is located in the eTokenVirtual folder, when the drive is connected, SafeNet Authentication Client automatically recognizes the insertion of the SafeNet eToken Virtual. Also, when the device is removed, SafeNet Authentication Client recognizes the removal of the SafeNet eToken Virtual. NOTE If the SafeNet eToken Virtual is located on the mass storage device in a location other than the eTokenVirtual folder, you will need to connect the eToken manually in Tools. If the mass storage device is removed, without the SafeNet eToken Virtual being disconnected in Tools, the SafeNet eToken Virtual will be displayed as an eToken with corrupted data (See Authenticator Icons on page 21). TIP Before removing the flash drive from a Mac computer, we recommend using the Mac OS Eject procedure (Right-click on the authenticator icon on the Mac desktop and select Eject). 5. SafeNet eToken Virtual / Autoconnecting SafeNet eToken Virtual SafeNet Authentication Client (Mac) User’s Guide, Rev. Revision B, ©2012 SafeNet, Inc. 94 6 Token Settings Configurations set in token settings determine behavior that applies to the specific token. In this chapter: Setting Password Quality Setting Private Data Caching Setting RSA Key Secondary Authentication 6. Token Settings / SafeNet Authentication Client (Mac) User’s Guide, Revision B, ©2012 SafeNet, Inc. 95 Setting Password Quality Once password quality parameters are set, any future passwords are automatically checked against these parameters to determine the password’s level of acceptability. If the token was initialized in early PKI Client versions (RTE), no password policy is stored on the token. To set password quality: 1 Open SafeNet Authentication Client Tools. 2 Click the Advanced View icon. 3 In the left pane of the Advanced View window, expand the required token and select Settings. 4 In the right pane select the Password Quality tab. 6. Token Settings / Setting Password Quality SafeNet Authentication Client (Mac) User’s Guide, Rev. Revision B, ©2012 SafeNet, Inc. 96 6. Token Settings / Setting Password Quality SafeNet Authentication Client (Mac) User’s Guide, Rev. Revision B, ©2012 SafeNet, Inc. 97 5 Enter the password quality parameters as follows: Password Quality Parameter Description Minimum password length (characters) Default: 6 characters Maximum password usage period (days) The maximum period before which the password must be changed. Default: 0 (none) Minimum password usage period (days) The minimum period before the password can be changed Default: 0 (none) Password expiration warning period (days) Defines the number of days before the password expires that a warning message is shown. Default: 0 (none) Password history size Defines how many previous passwords should not be repeated. Default: 10 Maximum character repetitions in a password Defines number of times a character can be repeated in the password. Default: 3 6. Token Settings / Setting Password Quality SafeNet Authentication Client (Mac) User’s Guide, Rev. Revision B, ©2012 SafeNet, Inc. 98 Password Quality Parameter Description (Cont.) The password must comply with the complexity rules Determines if the complexity requirements are required in the token password. At least 3 rules: Complexity requirements are enforced None: Complexity requirements are not enforced Manual: Complexity requirements, as set manually in the Manual Complexity settings, are enforced (Default) Manual Complexity Rules For each of the character types (Numerals, Upper-case letters, Lower-case letters and Special Characters) select one of the following options: Permitted - Can be included in the password, but is not mandatory (Default). Mandatory - Must be included in the password. Forbidden - Must not be included in the password. 6 Do one of the following: To save your changes click Save. To ignore your changes click Discard. To return to default settings click Set to Default. 6. Token Settings / Setting Password Quality SafeNet Authentication Client (Mac) User’s Guide, Rev. Revision B, ©2012 SafeNet, Inc. 99 Setting Private Data Caching In SafeNet Authentication Client, public information stored on the token is cached to enhance performance. This option defines when private information (excluding private keys on the physical token) can be cached outside the token. To set private data caching: 1 Open SafeNet Authentication Client Tools. 2 Click the Advanced View icon. 3 In the left pane of the Advanced View window, expand the required token and select Settings. 4 In the right pane select the Advanced tab. 5 In the Private data caching field select one of the following options: Option Description Always (fastest) Always caches private information in the application memory. This enables fast performance, as certain information is cached on the host machine. However, this option is less secure than if no cache is allowed. 6. Token Settings / Setting Private Data Caching SafeNet Authentication Client (Mac) User’s Guide, Rev. Revision B, ©2012 SafeNet, Inc. 100 6 Option (Cont.) Description (Cont.) While user is logged on Caches private data outside the token as long as the user is logged on to the token. Once the user logs out, all the private data in the cache is erased. Never Does not cache private data. Do one of the following: To save your changes click Save. To ignore your changes click Discard. 6. Token Settings / Setting Private Data Caching SafeNet Authentication Client (Mac) User’s Guide, Rev. Revision B, ©2012 SafeNet, Inc. 101 Setting RSA Key Secondary Authentication An authentication password may be set for an RSA key. If this option is used, then in addition to having the token and knowing the token's password, accessing the RSA key requires knowing the password set for that particular key. This option defines the policy for using this secondary authentication of RSA keys. To set RSA key secondary authentication: 1 Open SafeNet Authentication Client Tools. 2 Click the Advanced View icon. 3 In the left pane of the Advanced View window, expand the required token and select Settings. 4 In the right pane select the Advanced tab. 5 In the RSA key secondary authentication field, select one of the following options: Option Description Always Every time an RSA key is generated, you are prompted to enter a secondary password for accessing this key. Clicking OK generates the key and uses the entered password as the secondary RSA password for that key. Clicking Cancel causes key generation to fail. 6. Token Settings / Setting RSA Key Secondary Authentication SafeNet Authentication Client (Mac) User’s Guide, Rev. Revision B, ©2012 SafeNet, Inc. 102 Option (Cont.) Description (Cont.) Always prompt user Every time an RSA key is generated, a secondary password for accessing this key is requested. However, the user can choose to dismiss the prompt (by clicking Cancel), and key generation will continue without using a secondary password for the generated RSA key. Prompt on application request Never 6 This enables applications that use secondary authentication for RSA keys to make use of this feature on the token (when creating the key in Crypto API with a user protected flag). Secondary passwords are not created for any RSA key and the authentication method uses only the token password to access the key. Do one of the following: To save your changes click Save. To ignore your changes click Discard. 6. Token Settings / Setting RSA Key Secondary Authentication SafeNet Authentication Client (Mac) User’s Guide, Rev. Revision B, ©2012 SafeNet, Inc. 103 6. Token Settings / Setting RSA Key Secondary Authentication SafeNet Authentication Client (Mac) User’s Guide, Rev. Revision B, ©2012 SafeNet, Inc. 104 7 SafeNet Authentication Client Settings The SafeNet Authentication Client Settings set the parameters that apply to all tokens that are initialized after the settings have been configured. In this chapter: Opening SafeNet Authentication Client Settings Client Settings Password Quality Copying User Certificates to a Local Store Copying CA Certificates to a Local Store Enabling Single Logon Allowing password quality configuration on token after initialization Allowing only an administrator to configure password quality on token Showing SafeNet Authentication Client Tray Icon Defining Automatic Logoff Enabling Logging 7. SafeNet Authentication Client Settings / SafeNet Authentication Client (Mac) User’s Guide, Revision B, ©2012 SafeNet, Inc. 105 Opening SafeNet Authentication Client Settings To open SafeNet Authentication Client Settings: 1 Open SafeNet Authentication Client Tools. 2 Click the Advanced View icon. 3 In the left pane of the Advanced View window, select Client Settings. 7. SafeNet Authentication Client Settings / Opening SafeNet Authentication Client Settings SafeNet Authentication Client (Mac) User’s Guide, Rev. Revision B, ©2012 SafeNet, Inc. 106 7. SafeNet Authentication Client Settings / Opening SafeNet Authentication Client Settings SafeNet Authentication Client (Mac) User’s Guide, Rev. Revision B, ©2012 SafeNet, Inc. 107 Client Settings Password Quality To set the Client Settings Password Quality: 1 Open SafeNet Authentication Client Tools. 2 Select Client Settings in Advance View (See See "Opening SafeNet Authentication Client Settings" on page 106on page 106). 3 Select the Password Quality tab. 4 Change the password quality settings. TIP The SafeNet Authentication Client Settings password quality is configured in the same way as the token password quality settings. See Setting Password Qualityon page 96) 5 Do one of the following: To save your changes click Save. To ignore your changes click Discard. To return to default settings click Set to Default. 7. SafeNet Authentication Client Settings / Client Settings Password Quality SafeNet Authentication Client (Mac) User’s Guide, Rev. Revision B, ©2012 SafeNet, Inc. 108 Copying User Certificates to a Local Store SafeNet Authentication Client operations often require certificates, private keys, and public keys. Private keys should always be stored securely on the token. Certificates should also be stored on the token as this enables mobility, ensuring that the certificate will be readily available when using the token on a different computer. Use SafeNet Authentication Client settings to control the action of automatically copying all user certificates to the certificate store upon token connection. This option is selected by default. To copy user certificates to a local store: 1 Open SafeNet Authentication Client Tools Advanced View. See "Opening the Advanced View" on page 21. 2 In the left pane, select Client Settings. 3 In the right pane, select the Advanced tab. 7. SafeNet Authentication Client Settings / Copying User Certificates to a Local Store SafeNet Authentication Client (Mac) User’s Guide, Rev. Revision B, ©2012 SafeNet, Inc. 109 The Advanced tab opens. 4 Select Copy user certificates to a local store. 7. SafeNet Authentication Client Settings / Copying User Certificates to a Local Store SafeNet Authentication Client (Mac) User’s Guide, Rev. Revision B, ©2012 SafeNet, Inc. 110 5 Do one of the following: To save your changes, click Save. To ignore your changes, click Discard. 7. SafeNet Authentication Client Settings / Copying User Certificates to a Local Store SafeNet Authentication Client (Mac) User’s Guide, Rev. Revision B, ©2012 SafeNet, Inc. 111 Copying CA Certificates to a Local Store CA certificates can be downloaded onto a token. When the token is inserted into the computer, one or more of these CA certificates may not be on the computer. In such a case, the CA certificate may be loaded onto the computer. This option is selected by default. To open CA certificate management: 1 Open SafeNet Authentication Client Tools. 2 Select Client Settings in Advance View (See See "Opening SafeNet Authentication Client Settings" on page 106on page 106). 3 Select the Advanced tab. 7. SafeNet Authentication Client Settings / Copying CA Certificates to a Local Store SafeNet Authentication Client (Mac) User’s Guide, Rev. Revision B, ©2012 SafeNet, Inc. 112 4 Select Copy CA certificates to a local store. 5 Do one of the following: To save your changes click Save. 7. SafeNet Authentication Client Settings / Copying CA Certificates to a Local Store SafeNet Authentication Client (Mac) User’s Guide, Rev. Revision B, ©2012 SafeNet, Inc. 113 To ignore your changes click Discard. 7. SafeNet Authentication Client Settings / Copying CA Certificates to a Local Store SafeNet Authentication Client (Mac) User’s Guide, Rev. Revision B, ©2012 SafeNet, Inc. 114 Enabling Single Logon When single logon is enabled, users can access multiple applications with only one request for the Token Password during each computer session. This alleviates the need for the user to log on to each application separately. NOTE Setting the single logon using SAC Tools will not include a Windows Logon on the single logon process. This must be configured by the system administrator. This option is disabled by default. To enable single logon: 1 Open SafeNet Authentication Client Tools Advanced View. See "Opening the Advanced View" on page 21. 2 In the left pane, select Client Settings. 3 In the right pane, select the Advanced tab. 4 Select Enable Single Logon. 5 Do one of the following: To save your changes, click Save. To ignore your changes click, Discard. To activate the single logon feature, log off from the computer and log on again. 7. SafeNet Authentication Client Settings / Enabling Single Logon SafeNet Authentication Client (Mac) User’s Guide, Rev. Revision B, ©2012 SafeNet, Inc. 115 Allowing password quality configuration on token after initialization The Allow password quality configuration on token after initialization option defines whether the password quality parameters may be changed after initialization. This option is selected by default. To allow password quality configuration on token after initialization: 1 Open SafeNet Authentication Client Tools. 2 Select Client Settings in Advance View (See See "Opening SafeNet Authentication Client Settings" on page 106). 3 Select the Advanced tab. 4 Select Allow password quality configuration on token after initialization. 5 Do one of the following: To save your changes click Save. To ignore your changes click Discard. 7. SafeNet Authentication Client Settings / Allowing password quality configuration on token after initialization SafeNet Authentication Client (Mac) User’s Guide, Rev. Revision B, ©2012 SafeNet, Inc. 116 Allowing only an administrator to configure password quality on token The Allow only an administrator to configure password quality on token option defines whether the password quality parameters may be changed after initialization by the administrator, or, if unchecked, by the user. This option is selected by default. To allow only an administrator to configure password quality on token: 1 Open SafeNet Authentication Client Tools. 2 Select Client Settings in Advance View (See Opening SafeNet Authentication Client SettingsSee "Opening SafeNet Authentication Client Settings" on page 106). 3 Select the Advanced tab. 4 Do one of the following: To enable configuration by administrator, check Allow only an administrator to configure password quality on token. To enable configuration by user, uncheck Allow only an administrator to configure password quality on token. 5 Do one of the following: To save your changes click Save. To ignore your changes click Discard. 7. SafeNet Authentication Client Settings / Allowing only an administrator to configure password quality on token SafeNet Authentication Client (Mac) User’s Guide, Rev. Revision B, ©2012 SafeNet, Inc. 117 Showing SafeNet Authentication Client Tray Icon You can determine whether the SafeNet Authentication Client tray icon is displayed. To show the SafeNet Authentication Client tray icon: 1 Open SafeNet Authentication Client Tools Advanced View. See "Opening the Advanced View" on page 21. 2 In the left pane, select Client Settings. 3 In the right pane, select the Advanced tab. 4 In the Show application tray icon drop-down list, select one of the following: 5 Never: The tray icon is never displayed Always: The tray icon is always displayed Do one of the following: To save your changes, click Save. To ignore your changes, click Discard. 7. SafeNet Authentication Client Settings / Showing SafeNet Authentication Client Tray Icon SafeNet Authentication Client (Mac) User’s Guide, Rev. Revision B, ©2012 SafeNet, Inc. 118 Defining Automatic Logoff You can determine whether tokens are automatically logged off following a period of token inactivity, even if the tokens are not disconnected. After a token is logged off, the user must enter the Token Password again before the token contents can be accessed. To define the automatic logoff setting: 1 Open SafeNet Authentication Client Tools Advanced View. See "Opening the Advanced View" on page 21. 2 In the left pane, select Client Settings. 3 In the right pane, select the Advanced tab. 4 In the Automatic logoff after token inactivity drop-down list, select one of the following: Never: The Token Password must be entered once, and the token remains logged on as long as it remains connected. Always: The Token Password must be entered each time the token contents are accessed. After: The Token Password must be entered if the number of minutes set in the text box has passed since the last token activity. Set the number of minutes in the text box (1 - 254). 7. SafeNet Authentication Client Settings / Defining Automatic Logoff SafeNet Authentication Client (Mac) User’s Guide, Rev. Revision B, ©2012 SafeNet, Inc. 119 5 Do one of the following: To save your changes, click Save. To ignore your changes, click Discard. 7. SafeNet Authentication Client Settings / Defining Automatic Logoff SafeNet Authentication Client (Mac) User’s Guide, Rev. Revision B, ©2012 SafeNet, Inc. 120 Enabling Logging The logging feature creates a log of SafeNet Authentication Client activities. NOTE You must have administrator privileges to use the logging feature. To activate the logging feature: 1 Open SafeNet Authentication Client Tools Advanced View. See "Opening the Advanced View" on page 21. 2 In the left pane, select Client Settings. 3 In the right pane, select the Advanced tab, and click Enable Logging. To disable the logging feature: 1 Open SafeNet Authentication Client Tools Advanced View. See "Opening the Advanced View" on page 21. 2 In the left pane, select Client Settings. 3 In the right pane, select the Advanced tab, and click Disable Logging. 7. SafeNet Authentication Client Settings / Enabling Logging SafeNet Authentication Client (Mac) User’s Guide, Rev. Revision B, ©2012 SafeNet, Inc. 121 8 Licensing Import a SafeNet license for your SafeNet Authentication Client installation. In this chapter: Viewing and Importing Licenses 8. Licensing / SafeNet Authentication Client (Mac) User’s Guide, Revision B, ©2012 SafeNet, Inc. 122 Viewing and Importing Licenses SafeNet Authentication Client installations that do not have a SafeNet license can be used for evaluation only, and a message is displayed on all logon windows. You can view your licenses and import new ones using the SafeNet Authentication Client About window. To view and import licenses: 1 Do one of the following: Right-click the SafeNet Authentication Client tray icon, and from the shortcut menu, select About. Open SafeNet Authentication Client Tools. See Simple View on page 19 or See Advanced View on page 24. On the toolbar, click the About icon. The About window opens, displaying your license information in the License Information box. 8. Licensing / Viewing and Importing Licenses SafeNet Authentication Client (Mac) User’s Guide, Revision B, ©2012 SafeNet, Inc. 123 2 To import a new license, select Import New License. The Import License window opens. 3 Do one of the following: 8. Licensing / Viewing and Importing Licenses SafeNet Authentication Client (Mac) User’s Guide, Revision B, ©2012 SafeNet, Inc. 124 If the SafeNet license box is automatically filled, click OK. Copy your new SafeNet license string to the license box, and click OK. Click Import from File, browse to the file containing your license, open it to copy its contents to the license box, and click OK. The About window opens, displaying your updated license information in the License Information box. 8. Licensing / Viewing and Importing Licenses SafeNet Authentication Client (Mac) User’s Guide, Revision B, ©2012 SafeNet, Inc. 125

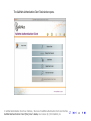
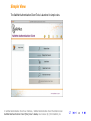
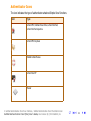
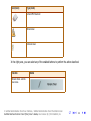
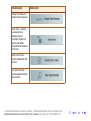
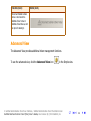
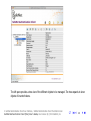
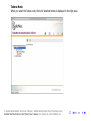
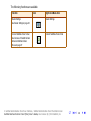
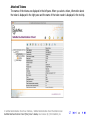

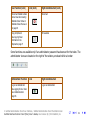
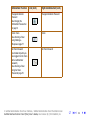
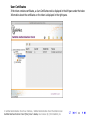
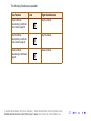
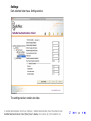

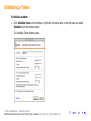
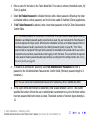
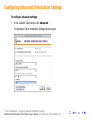
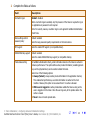
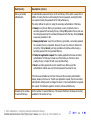
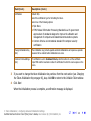

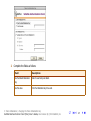
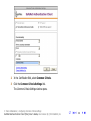
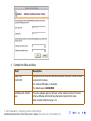
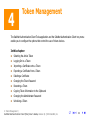

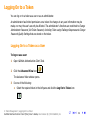
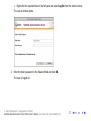
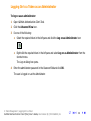
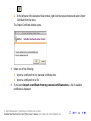
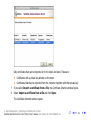
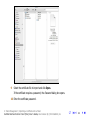
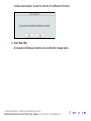
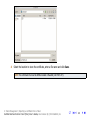
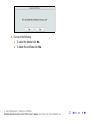
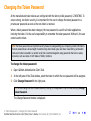
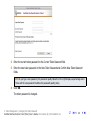
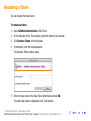


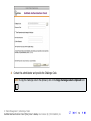
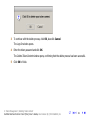
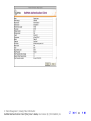
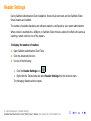
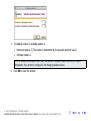

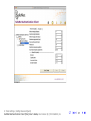
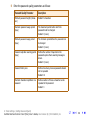
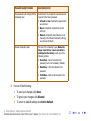
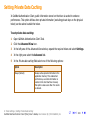
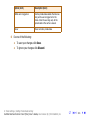
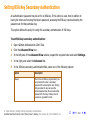

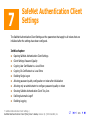
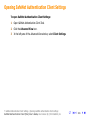
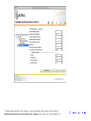
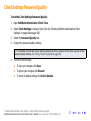
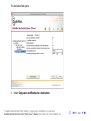


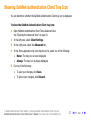
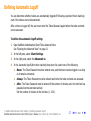
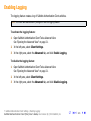
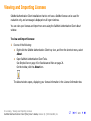
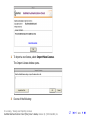

![PLAS A O ]-OR](http://vs1.manualzilla.com/store/data/005852706_1-5db0b7ed584537f0e62af161fb124638-150x150.png)