1
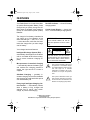
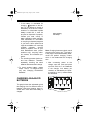
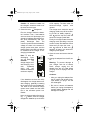
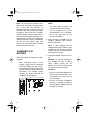
23-410.fm Page 1 Friday, August 6, 1999 2:54 PM
Cat. No. 23-410
OWNER’S MANUAL
Please read before using this equipment.
Ni-Cd and Nickel Metal Hydride/
Rechargeable Battery
Pulse Charger
23-410.fm Page 2 Friday, August 6, 1999 2:54 PM
FEATURES
Your RadioShack Ni-Cd and Nickel Metal Hydride Rechargeable Battery Pulse
Charger lets you quickly charge five different sizes of standard nickel-cadmium
(Ni-Cd) or nickel-metal hydride (Ni-MH)
batteries.
The charger’s four battery chambers let
you charge up to four batteries of the
same size and type — AAA, AA, C, or D
— at the same time, while the connector
inside the charger lets you also charge
one 9V battery.
Red LED Indicator — shows 9V battery
charging status.
Liquid Crystal Display — shows AAA,
AA, C, or D-size battery charging status.
WARNING: To reduce the risk of
fire or shock hazard, do not expose this product to rain or moisture.
CAUTION
Your charger has these features:
Intelligent Discharge System (IDS) —
automatically discharges and conditions
cells to a suitable level before recharging, to ensure maximum charging capacity.
RISK OF ELECTRIC SHOCK.
DO NOT OPEN.
CAUTION : TO REDUCE THE RISK OF
ELECTRIC SHOCK, DO NOT REMOVE
COVER OR BACK. NO USER-SERVICEABLE PARTS INSIDE. REFER SERVICING TO QUALIFIED PERSONNEL.
Microprocessor Controlled Charging
— automatically detects the battery type
and monitors the charging process to
ensure the right amount of current is
supplied.
Soft-Start Charging — gradually increases charging current when batteries
start charging to avoid heat build-up that
can reduce battery life.
This symbol is intended to alert you to
the presence of uninsulated dangerous voltage within the product’s enclosure that might be of sufficient
magnitude to constitute a risk of electric shock. Do not open the product’s
case.
!
This symbol is intended to inform you
that important operating and maintenance instructions are included in the
literature accompanying this product.
Fuzzy Logic Intelligent Charging Current Control — automatically senses
when a battery is fully charged and
switches first to top-off, then tricklecharge, to prevent overcharging.
© 1998 Tandy Corporation.
All Rights Reserved.
RadioShack is a registered trademark used by Tandy Corporation.
2
!
23-410.fm Page 3 Friday, August 6, 1999 2:54 PM
SAFETY INSTRUCTIONS
SAVE THESE
INSTRUCTIONS
This manual contains important safety
and operating instructions for your
charger.
Before you use the battery charger, read
all instructions and cautionary markings
on the charger, the batteries to be
charged, and the products that use the
batteries.
Warnings:
• To reduce the risk of injury, charge
only nickel-cadmium or nickel-metal
hydride batteries with this charger.
Other types of batteries might burst,
causing personal injury and damage
to the charger.
• To prevent damage to your charger
and risk of electric shock, always
unplug the AC adapter from the AC
outlet before you plug it into or
unplug it from the charger.
• Do not expose the charger to rain or
excessive moisture.
• Use of any attachments not
intended for use with this battery
charger can result in a risk of fire,
electric shock, or personal injury.
• Do not disassemble the charger.
Have it serviced or repaired by qualified service personnel only. Incorrect assembly can result in a risk of
electric shock or fire.
• To reduce the risk of electric shock,
unplug the charger from the outlet
before attempting any maintenance
or cleaning.
• To reduce the risk of damage to the
AC adapter, disconnect the charger
by pulling the plug rather than the
cord.
• Do not use an extension cord. Its
use could result in fire or electric
shock.
• Do not operate the charger if the AC
adapter is damaged. Have the
charger repaired by qualified service
personnel.
• Never alter the provided AC
adapter. If it does not fit in the AC
outlet, have a qualified technician
install the proper outlet. Improper
connection can result in an electric
shock.
• Never use the charger as a DC
power source for any electrical
equipment.
• Never operate the charger if it has
received a sharp blow or been
dropped or damaged in any way.
Have it repaired by qualified service
personnel.
3
23-410.fm Page 4 Friday, August 6, 1999 2:54 PM
OPERATION
CHARGING HINTS
Amount of
Charge
To see what is happening while your
charger is charging AAA, AA, C, or Dsize batteries, watch for these symbols
to appear on the charger’s display.
Load
Numeric
Digits show battery voltage.
Bad Battery
If a battery is bad
or should not be
charged, both
and
appear.
Power
Appears during
trickle charging
when batteries are
almost fully
charged.
Intelligent
Discharge
System (IDS)
During battery discharge,
appears steadily
with
blinking.
Soft-Start
During soft-start,
appears
steadily and
blinks.
Fast Charge
During fast charging,
appears
steadily and
blinks.
Top-off/
Trickle
4
Reminds you to
load batteries.
During top-off or
trickle charging,
appears
steadily with
and
alternately
blinking.
The
bars illustrate the charging
process and scan
inside the amountof-charge symbol
(except during topoff/trickle charging). The more
bars that appear
while a battery is
being analyzed, the
more charge there
is in the battery.
Cautions:
• Remove all batteries from the
charger at least 3 seconds before
connecting the charger to AC power.
Failure to do so might cause the
charger to lock up during the power
up cycle. If this happens, disconnect
power, remove the batteries, then
reconnect power.
• All batteries loaded into the
charger’s chambers must be of the
same size and type.
• Do not try to charge a battery of a
size other than those listed in this
manual. Doing so could damage the
batteries and charger.
• Before unplugging the adapter from
the AC outlet, remove the batteries
to prevent leakage that will damage
the charger.
23-410.fm Page 5 Friday, August 6, 1999 2:54 PM
CONNECTING POWER
Before connecting power, remove all
batteries from the charger. Insert the
supplied adapter’s barrel plug into the
DC 12V 500 mA jack on the back of the
charger. Then plug the other end of the
adapter into a standard AC outlet. 00
appears and
flashes on the display.
OPENING THE COVER
To open the cover, press the tab below
the cover and lift up the cover.
CHECKING 1.2V
BATTERIES
You can use this charger to check the
charge in a 1.2V Ni-Cd/Ni-MH battery.
(You cannot use this function to check
the voltage of a 9V battery.)
1. With the charger connected to AC
power, place a single battery into
any chamber. Do not close the
cover yet (this starts the charging
process).
ANALYZE.
2. Press
The charger displays the estimated
charge level, with
the
amount-ofcharge symbol and
the numeric characters showing the
voltage.
Notes:
• The amount-of-charge shown is
based on the normal discharging
curve of a fully charged battery. It
might be inaccurate if the battery
being checked was not fully
charged before it was last used.
5
23-410.fm Page 6 Friday, August 6, 1999 2:54 PM
• If the battery is unsuitable for
charging,
appears on the display. Do not attempt to charge a
bad battery. At the end of a nickelcadmium or nickel-metal hydride
battery’s useful life, it must be
recycled or disposed of properly.
Contact your local, county, or
state hazardous waste management authorities for information
on recycling or disposal programs
in your area. Some options that
might be available are: municipal
curbside
collection,
drop-off
boxes at retailers such as your
local RadioShack store (nickelcadmium only), recycling collection centers, and mail-back programs.
• The checking process drains current from batteries. Therefore,
repeatedly checking the same
batteries decreases their voltage.
3. To check another battery, repeat
Steps 1 and 2. To charge the battery, see “Charging AA/AAA/C/D
Batteries.”
CHARGING AA/AAA/C/D
BATTERIES
This graph shows the estimated typical
fast-charging time for different sizes of
batteries. Note that charging times increase when more than one battery is
charged.
6
Insert Charging
Time Graph
Note: Charging times are typical; actual
charging times might vary. The built-in
Fuzzy Logic Control automatically determines the optimal charging current,
which in turn determines the charging
time.
1. After connecting power to the
charger, open the cover and place
up to four AAA, AA, C, or D batteries
in the charger, one battery per
chamber, as indicated by the polarity symbols (+ and –) marked inside
the chambers.
23-410.fm Page 7 Friday, August 6, 1999 2:54 PM
Caution: All batteries loaded into
the charger’s chambers must be of
the same size and type.
2. Close the cover.
disappears.
First, the charger checks the batteries’ condition. Then, if the batteries
are more than 60% discharged, the
charger’s Intelligent Discharge System (IDS) automatically and completely discharges them. The
numeric symbol shows the batteries’
voltage, the bars in the amount-ofcharge symbol scan down, and the
black triangle in the IDS icon flashes
to indicate that the charger is discharging the batteries.
Note: To stop the
discharging cycle,
you can press DISCHARGE.
The
charger begins softstart charging. However,
repeatedly
doing
this
can
reduce the batteries’
maximum capacity.
of full capacity. The bars inside the
amount-of-charge symbol scan
upward.
The charger then enters the top-off
charging mode to top off the remaining 10–20% of battery capacity.
and
and the top bar inside the
amount-of-charge symbol flash.
Finally, the charger enters the trickle
charging mode, providing a very low
current to keep the batteries at their
fullest until you open the cover.
and
continue to flash and
appears. All bars in the amount-ofcharge symbol appear.
3. Open the cover and remove the batteries.
4. Unplug the adapter from the AC outlet.
Warning: To prevent damage to
your charger and risk of electric
shock, always unplug the AC
adapter from the AC outlet before
you plug it into or unplug it from the
charger.
Cautions:
If the batteries are less than 60%
discharged, the charger starts softstart charging, gradually increasing
the charging current to the batteries.
The bars in the amount-of-charge
symbol scan inward and the black
bar in the soft-start symbol icon
flashes.
• After you unplug the adapter from
the AC outlet, wait at least 3 seconds before you plug it into the
AC outlet again.
• Be sure to remove all batteries
before you unplug the adapter to
prevent battery leakage that will
damage the charger.
Next, the charger begins fast charging.
flashes, and the charger
charges the batteries up to 80–90%
7
23-410.fm Page 8 Friday, August 6, 1999 2:54 PM
Note: The charger can activate or revitalize some chemically dormant batteries. If you have new batteries (or
batteries that have not been used for a
long time) that cannot be fully charged
(charged to more than 60% of battery
capacity) singly, recharge them three or
four at a time, then discharge them completely through normal use. Repeat this
process five times. Then, if the batteries
will still not fully charge singly, this
means you will always have to charge
them three or four at a time.
CHARGING A 9V
BATTERY
Refer to the graph on Page 6 for charging times.
1. After connecting power to the
charger, simply push the terminals
of the 9V battery onto the connectors inside the charger, matching the
polarity symbols marked next to the
connectors. The charger begins
charging the battery and the 9V
charging indicator flashes.
Notes:
• The cover does not need to be
closed to charge the 9V battery.
• You can charge up to 4 AA or
AAA batteries, or 2 C or D batteries at the same time as you
charge a 9V battery.
2. When charging is complete, the 9V
charging indicator lights steadily.
Remove the battery.
Note: If other batteries are still
charging after the 9V battery is fully
charged, the 9V charging indicator
continues to flash until the other batteries are fully charged.
3. Unplug the adapter from the AC outlet.
Warning: To prevent damage to
your charger and risk of electric
shock, always unplug the AC
adapter from the AC outlet before
you unplug it from the charger.
Cautions:
• After you unplug the adapter from
the AC outlet, wait at least 3 seconds before you plug it into the
AC outlet again.
• Be sure to remove all batteries
before you unplug the adapter to
prevent battery leakage that will
damage the charger.
8
23-410.fm Page 9 Friday, August 6, 1999 2:54 PM
CARE AND MAINTENANCE
Your RadioShack Ni-Cd and Nickel Metal Hydride Rechargeable Battery Pulse
Charger is an example of superior design and craftsmanship. The following suggestions will help you care for your charger so you can enjoy it for years.
Keep the charger dry. If it gets wet, wipe it dry immediately. Liquids can
contain minerals that corrode electronic circuits.
Use and store the charger only in normal temperature environments.
Temperature extremes can shorten the life of electronic devices, damage batteries, and distort or melt plastic parts.
Handle the charger gently and carefully. Dropping it can damage circuit
boards and cases and can cause the charger to work improperly.
Keep the charger away from dust and dirt, which can cause premature
wear of parts.
Wipe the charger with a damp cloth occasionally to keep it looking new.
Do not use harsh chemicals, cleaning solvents, or strong detergents to
clean your charger.
Modifying or tampering with the charger’s internal components can cause a malfunction and invalidate your charger’s warranty. If your charger is not performing as it
should, take it to your local RadioShack store for assistance.
9
23-410.fm Page 10 Friday, August 6, 1999 2:54 PM
SPECIFICATIONS
Number of Channels for 1.2V Ni-Cd/Ni-MH Batteries ............................................... 4
Number of Channels for a 9V Ni-Cd/Ni-MH Battery .................................................. 1
Input Power Rating ............................................................. DC 12 V, 500 mA, 6.0 VA
Output Power Rating ...................................................... DC 2.0 V, 2.0 A max. 4.0 VA
DC 10.5 V, 25.0mA max. 0.3 VA
1.2V Ni-Cd/Ni-MH Battery Charging Current ............................................. 2.0 A max.
9V Ni-Cd/Ni-MH Battery Charging Current .......................................... 17.5–22.5 mA
Discharging/Negative Pulse Loading ............................................................. 0.5 ohm
Discharging Current Rating ......................................................................... 2.5A max.
Battery Sizes ................................................................................ AAA, AA, C, D, 9 V
1.2V Ni-Cd/Ni-MH Battery Rated Capacity ........................................... 180 mAh min.
9V Ni-Cd/Ni-MH Battery Rated Capacity ....................... 65 mAh min./120 mAh max.
Operating Temperature ................................................ 32×F to 104×F (0×C to 40×C)
Recommended Charging Temperature
for Optimum Charging Performance ............................ 68×F to 86×F (20×C to 30×C)
Storage Temperature ............................................... –4×F to 158×F (–20×C to 70×C)
Specifications are typical; individual units might vary. Specifications are subject to
change and improvement without notice.
10
23-410.fm Page 11 Friday, August 6, 1999 2:54 PM
NOTES
11
23-410.fm Page 12 Friday, August 6, 1999 2:54 PM
Limited Ninety-Day Warranty
This product is warranted by RadioShack against manufacturing defects in material and workmanship under normal use for ninety (90) days from the date of purchase from RadioShack companyowned stores and authorized RadioShack franchisees and dealers. EXCEPT AS PROVIDED
HEREIN, RadioShack MAKES NO EXPRESS WARRANTIES AND ANY IMPLIED WARRANTIES,
INCLUDING THOSE OF MERCHANTABILITY AND FITNESS FOR A PARTICULAR PURPOSE,
ARE LIMITED IN DURATION TO THE DURATION OF THE WRITTEN LIMITED WARRANTIES
CONTAINED HEREIN. EXCEPT AS PROVIDED HEREIN, RadioShack SHALL HAVE NO LIABILITY OR RESPONSIBILITY TO CUSTOMER OR ANY OTHER PERSON OR ENTITY WITH RESPECT TO ANY LIABILITY, LOSS OR DAMAGE CAUSED DIRECTLY OR INDIRECTLY BY USE
OR PERFORMANCE OF THE PRODUCT OR ARISING OUT OF ANY BREACH OF THIS WARRANTY, INCLUDING, BUT NOT LIMITED TO, ANY DAMAGES RESULTING FROM INCONVENIENCE, LOSS OF TIME, DATA, PROPERTY, REVENUE, OR PROFIT OR ANY INDIRECT,
SPECIAL, INCIDENTAL, OR CONSEQUENTIAL DAMAGES, EVEN IF RadioShack HAS BEEN ADVISED OF THE POSSIBILITY OF SUCH DAMAGES.
Some states do not allow the limitations on how long an implied warranty lasts or the exclusion of incidental or consequential damages, so the above limitations or exclusions may not apply to you.
In the event of a product defect during the warranty period, take the product and the RadioShack
sales receipt as proof of purchase date to any RadioShack store. RadioShack will, at its option, unless otherwise provided by law: (a) correct the defect by product repair without charge for parts and
labor; (b) replace the product with one of the same or similar design; or (c) refund the purchase
price. All replaced parts and products, and products on which a refund is made, become the property of RadioShack. New or reconditioned parts and products may be used in the performance of
warranty service. Repaired or replaced parts and products are warranted for the remainder of the
original warranty period. You will be charged for repair or replacement of the product made after the
expiration of the warranty period.
This warranty does not cover: (a) damage or failure caused by or attributable to acts of God, abuse,
accident, misuse, improper or abnormal usage, failure to follow instructions, improper installation or
maintenance, alteration, lightning or other incidence of excess voltage or current; (b) any repairs
other than those provided by a RadioShack Authorized Service Facility; (c) consumables such as
fuses or batteries; (d) cosmetic damage; (e) transportation, shipping or insurance costs; or (f) costs
of product removal, installation, set-up service adjustment or reinstallation.
This warranty gives you specific legal rights, and you may also have other rights which vary from
state to state.
RadioShack Customer Relations, Dept. W, 100 Throckmorton St., Suite 600, Fort Worth, TX 76102
We Service What We Sell
3/97
RadioShack
A Division of Tandy Corporation
Fort Worth, Texas 76102
3A8
P/N: 41A040-01000
Printed in China